Transcripts
1. Introduction: Are you ready to get crafty? I'm going to show
you how to make the perfect little
accordion book to use as a sketchbook
or as a journal. Welcome to this class
where we're going to make these little beauties in
probably less than an hour. I love to use these little
sketchbooks for travel, but there are so many
possibilities for how to use them. You can use them as journals, as sketchbooks, as storybooks, or you can use it
to write a letter. You can make them any size, and they're completely
customizable down to mixing and matching
paper that goes inside and how many pages
you'd like it to have. This is a bite size class that is a project that comes
together quickly, and it's a project
for everybody. So if you're looking for a quick project to
keep your hands busy, keep your kids' hands busy, or if you just need to whip up a couple of little gifts for somebody, this is
the class for you. I got you. So let's just
go ahead and get started.
2. Materials: For this project, you'll need two pieces of cardboard
that are the same size. Any kind of cardboard will work. I really like using
something nice and thick, so it gets a little bit
of a book likeg feel, but you can definitely use a thinner cardboard if that's
what you have on hand. And it doesn't matter if
there are any imperfections, because we can definitely
cover those up. You'll also want two
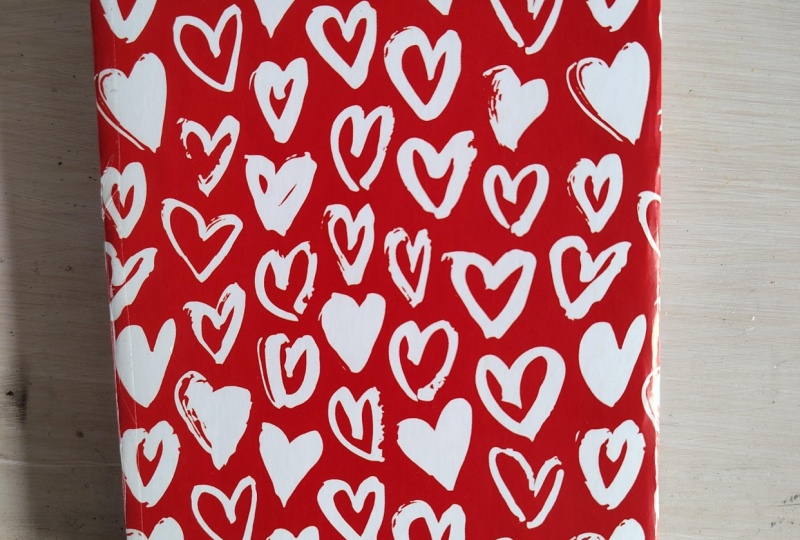
pieces of colored paper, wallpaper, peel and
stick wallpaper. I'm actually going
to use this peel and stick wallpaper I
designed because it's just going to be
easier than applying glue and a little bit more
wear and tear resistant. You'll want each size of that
color paper to be about 1 " wider on each side than
your cardboard cover. You'll also need a
pair of scissors. A paper cutter is optional, but it can be helpful
if you have one. A ruler, some glue and a
pen to mark things out. And then whatever paper you'll
be using for the interior. I'm going to use my favorite watercolor paper
for the interior. And for your interior paper, you just want to make
sure that the width of the paper is about twice
the width of your cover. The inside of the
book is going to be slightly narrower
than the cover. So yeah, as you're
preparing this, having it be double size
is going to be just right before we start kind of folding and
gluing pieces together. So that's 6 ". The paper's 12 ", it's going to be perfect.
3. Sketchbook covers: Okay, first things first,
we're going to make the cover. If there are any imperfections
in the cardboard, like here, that's gonna go on the inside of the cover,
so don't worry about it. I'm going to go
ahead and peel off the cover of this contact paper or peel and stick wallpaper. If you're just using
regular paper and glue, just cover the
cardboard and glue and glue it down onto the paper. You'll want to place it
roughly in the middle, but don't worry about
it being perfect. A lot of these
edges are going to be covered up by the
paper in the end, so you won't be able to see any imperfections. Just
don't overthink it. I'm going to go
ahead and just cut some darts right here
at every corner. And if you have a thick piece
of cardboard like I do, you don't want to cut it
entirely to the edge because you need to be able to still pull the paper up and
over a little bit. So I am going to go ahead and just do this for
every single corner. And you can see it's taking
a little bit longer with the contact paper
because it's pretty sticky and getting
stuck on the scissors. Okay. I'm going to go ahead and just glue down these corners first. And then the long side of
where these corners touch. So I'm just going
to pull the paper up and over and glue it down. Again, if you're using glue, just add glue to these
tabs and glue them down. Simple as that. This works
really beautifully with this peel and stick
wall paper because it is really not sensitive at all. It won't tear easily, and it's already sticky for you, so you just kind of get to
stick it down like it's a sticker and don't need
to use any glue at all. Okay. And that's
already one down. I'm just going to
check these corners, and these all look pretty good. So we have our first
cover done already. I'm going to go ahead and do exactly the same thing
for the second one. Okay, now we have both
covers ready to go. So we'll be gluing the paper
right on the inside here. Any imperfections that might
exist around these corners, don't worry about
them whatsoever. They will not be visible to
anybody when we're done. So we're gonna set
these aside and get started on the
paper for the interior.
4. Interior pages: Okay, I'm going to take about five sheets
from here, I think. You could do more
or less depending on how much space you
want in your book. Just keep in mind that
the thicker the paper, the more quickly the
thickness of your book is going to add up just because
we'll be folding this paper. I think I want to have a total
of about half an inch of a margin when we add
this paper to the cover. So this cover is about 7 " tall, so I'm going to
measure out 6.5 " in height and just mark that
on this paper on each side. Okay, so this is where
we're going to cut. I'm actually going to
use my paper cutter here just because that's a
little bit more efficient, but scissors will
work just as fine. Okay, so that's approximately how it's going to fit
in here with the cover. And the first thing
we're going to do is fold a little tab. So we're going to mark about half an inch
just on one side. And that's where
we're going to fold. This is a little harder with thicker paper like this thick watercolor of paper I'm using. So I think I'm just going
to use my ruler as an edge here so I can fold the paper up and over
and get a clean crease. And then I'm just
going to use my ruler to smooth out that
crease and flatten it. You can see with a
watercolor paper that it makes a little
bit of a fuzzy edge. And that's just
because this paper is so thick and textured. I don't really mind
it, but if you do, maybe use a slightly
thinner paper or a less textured
piece of paper. Okay, and then the other thing we're going to do is fold in the opposite direction at what is now the halfway point
of this sheet of paper. And again, we're just
going to make that crease as smooth as we can. It's going to reduce the bulk
of the paper in the book. Now I'm just gonna check to make sure it actually fits
within the cover, and yep, it fits beautifully. So this is our first sheet, and now we're just gonna go ahead and do the same thing
with all the other sheets. So now we have our
stack of folded papers, and all we need to do
for each one is to just slide it right there underneath that tab and then
glue this tab down. So if you look at it from above, this is just how they
all slot together. You want to make sure
that they're all facing in exactly the same orientation. And then they just
come together like an accordion. So let's
glue these down. I'm just gonna slide this in and be really careful to
make sure it's lined up as much as possible so
that the stack of paper is going to be aligned as well so we don't have a
crooked stack in the end. B. Okay, we're just gonna wait for that to dry. And then the last
thing we're going to do is actually cut off this extra tab because that's really just there for us
to add additional paper. And otherwise, it'll stick
out from inside the cover. So I'm just going to stick
that in my paper cutter and trim off that little tab at the very end
on the last page. You can make this as long
or as short as you want. You can mix and match papers. You can maybe use
some sketch paper or toned paper or watercolor, multimedia paper, or maybe just some pretty
pattern paper in between. So now that that's ready,
we're just going to go ahead and assemble our book.
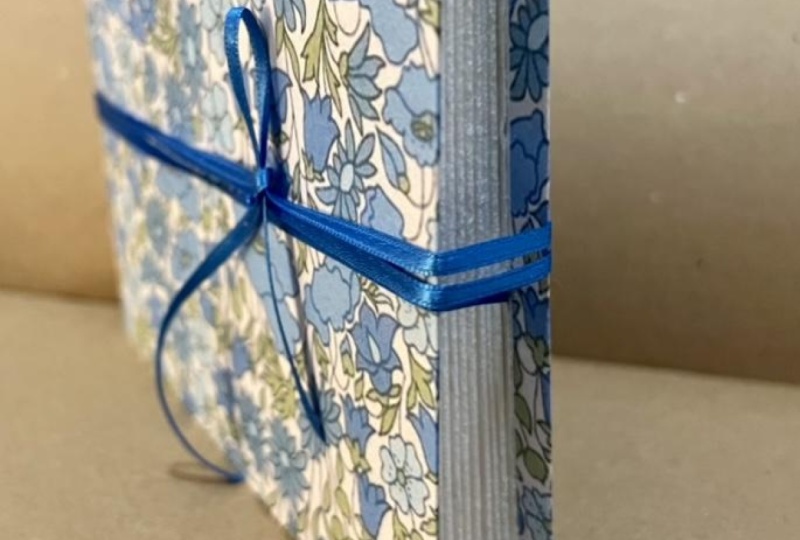
5. Final assembly: We're almost done,
you guys. We have our assembled paper and
our two beautiful covers. So now we're just going to glue these to the
front and back. The one thing that I
want to make sure of is if I have a directional
pattern on the covers, I just want to make sure
that they're going in the same direction and I don't
glue one on upside down. But all we really have to do is add glue to the
front and back of this paper stock and then glue it to the
covers, and we'll be done. Sometimes when you put
all these folds together, the stack can get a
little bit uneven. So make sure as you're
gluing on the covers that this doesn't somehow end up jutting out from
between the covers. But that's really the only thing you need to pay attention to and try to center the
stack as much as you can. I think that looks pretty good. I'm just going to
keep that there and glue on the back cover. Just double checking the covers. That's right. Okay, great. Now, all we have to
do is let it dry. You can either put it under
a big stack of books, or the other thing that I
sometimes like to do is to use binder clips to hold them
together while it dries. Okay, now, it's all
dried, it's all done. And if you open it up,
we can see on one side, we have all of those
tabs that we glue down. I don't mind those
at all when I'm drawing or painting in here. And then if you
just keep flipping it over, on the other side, you have a whole other
side that you can paint in and you
can draw completely unobstructed and just pull it apart for whatever
format you want to use.
6. Next steps: Thanks so much for taking
this class with me. I hope you had as
much fun as I did. I'd love for you to share a
picture of your finished book in the class project section so we can all admire
your amazing work. And if you came up
with any new ways that you are intending
to use this book, would love to hear
about that as well. If you have any questions
about the class, you can reach out to me
here on Skill Share or through Instagram where
I'm at Plant Lady Dress. Until next time, thank
you so much. Bye.
 Freya Riedlin, Designer, Illustrator, Plant Lady