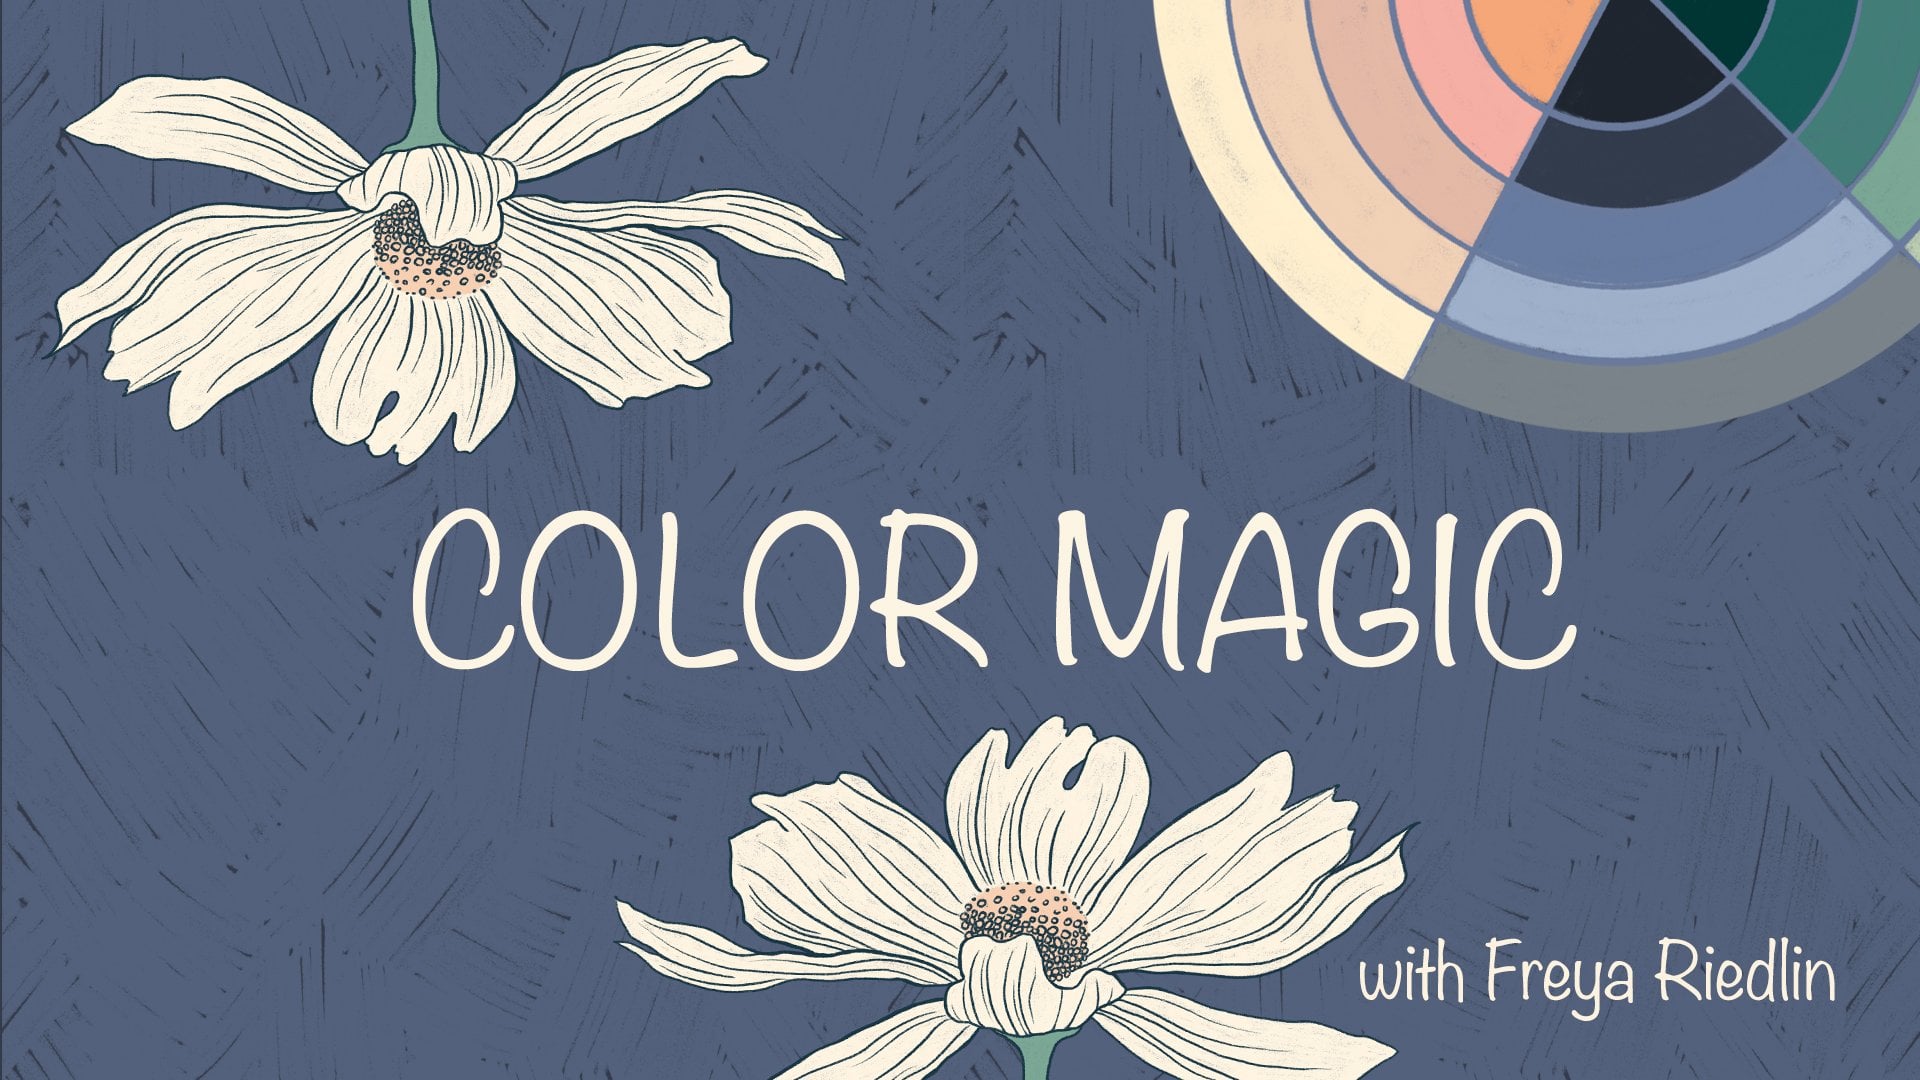
Transcripts
1. Class Introduction: Hi, I'm Freya. I'm an artist and surface pattern designer. And in this class I want to show you three styles for
how you can bring your artwork from
sketchbook to screen. If you're a traditional
artist and you tend to get stuck on how exactly to
digitize your artwork. This is the class for you. First, I'm going
to show you how you can recreate your artwork in Procreate or any other
drawing app that uses layers. This is going to give you the greatest amount
of flexibility moving forward
because you can go back and you can
change the colors. You can tweak any of the line work and really perfect it for whatever project you want
to use it moving forward. Then I'm going to
show you how you can vectorize your drawing. Vectorizing creates really
smooth and elegant lines and a modern look that I
think you're going to love. It's also the quickest
and easiest way to digitize your drawing. And finally, I'm going
to show you how to scan and edit your drawing in Adobe Photoshop so that it stays true to the
original drawing, but you still have the option
of changing colors and adjusting it so that it works perfectly for your
surface pattern. So grab your sketchbook
and let's get started.
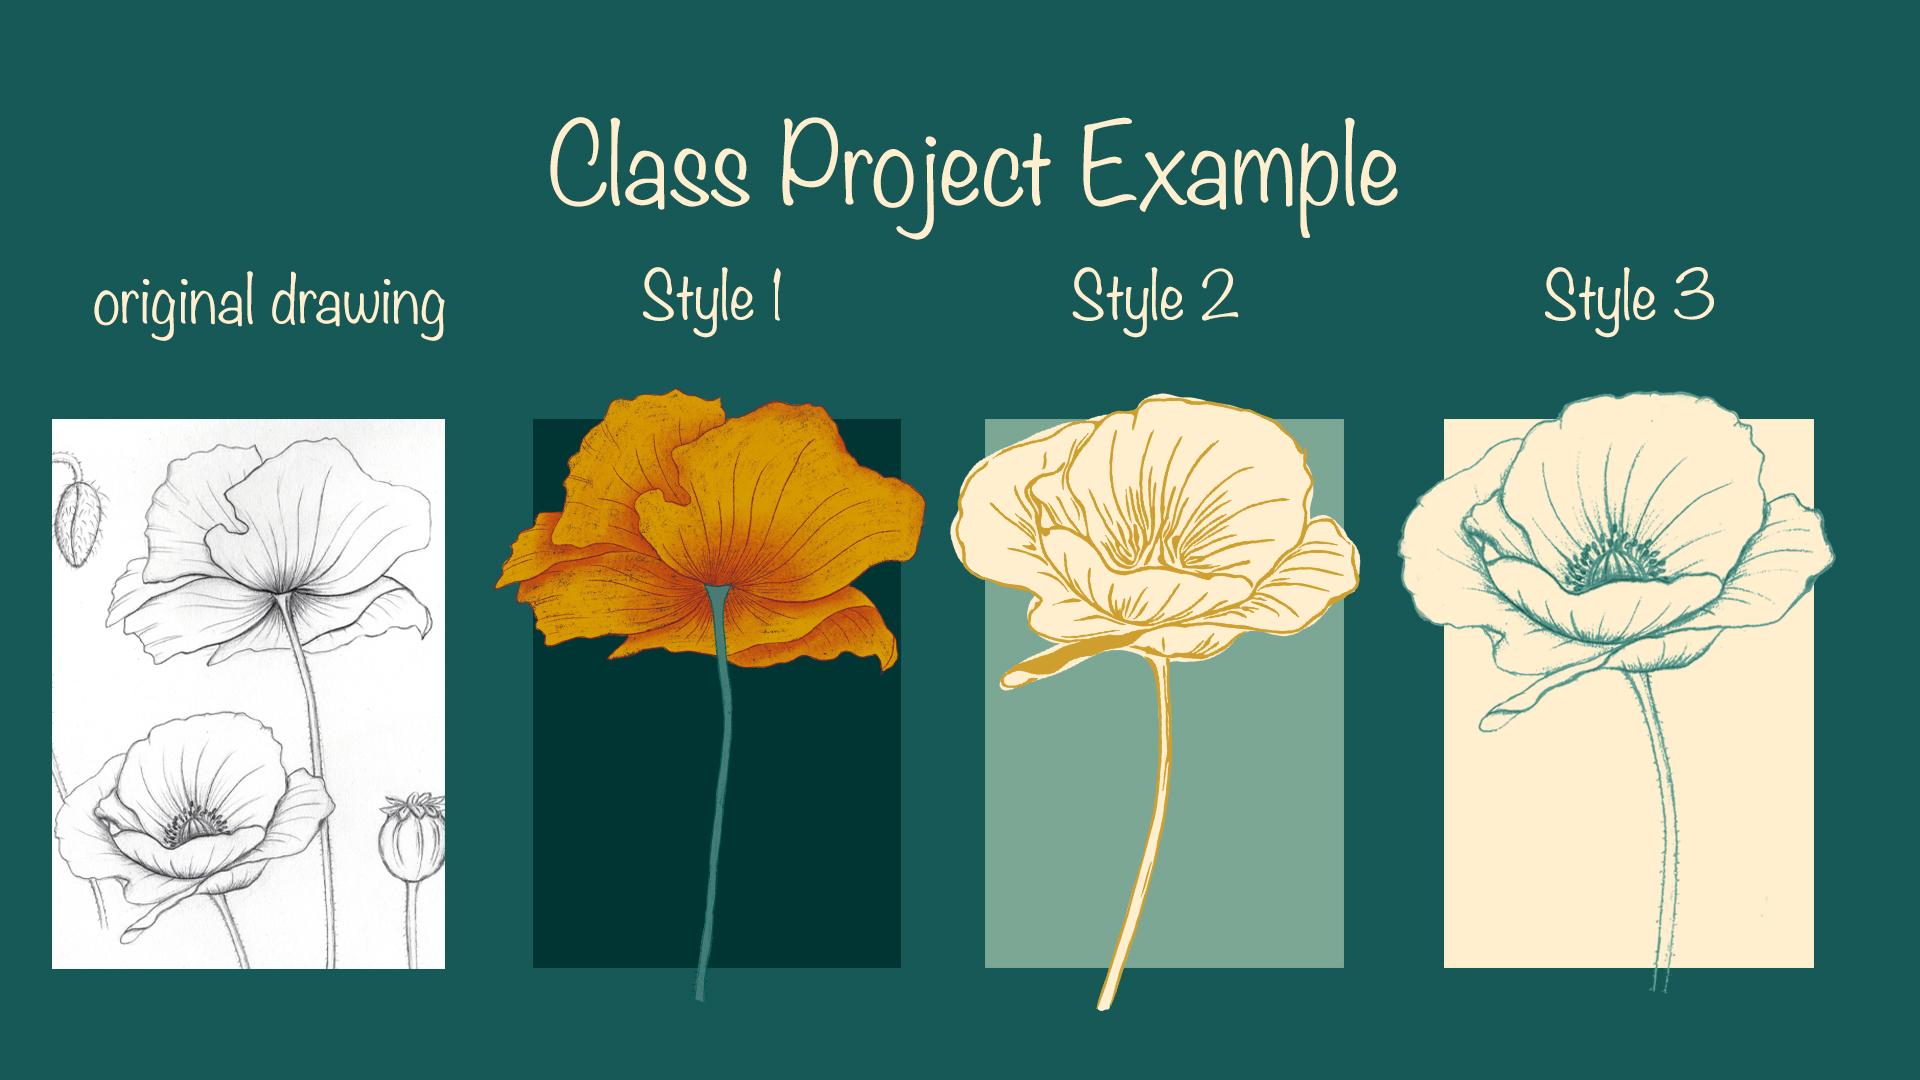
2. Class Project: For your class project, I'd like you to take an
original sketch or drawing and digitize it in the three styles that we're going to learn today. The first thing we want
to do here is take a really nice clear
high resolution picture of the sketch. So I'm going to grab my iPad and it just
take a picture with it. Now that we have a
picture of the sketch, we can put this away for now
and we're going to go into our iPad and just start
sketching. I'll meet you there.
3. Style 1: Recreate and Colorize in Procreate: We'll start by opening Procreate and creating
a new canvas. I like to use a
very large canvas with pretty high resolution. So here I have 4,000 by
5,000 pixels at 600 DPI. You can definitely go
smaller than that. I just like to keep it large because if you're dealing
with raster based programs, you want to be
able to size down, but you are not able to size up. So better larger than smaller
is always my approach. And then you'll also have motifs that are large enough
for a wallpaper. So the next thing we're
gonna do is tap on this wrench and then
tap Insert a photo. And I'm just going to
grab one of these photos. And with two fingers
on the screen, I'm just going to
tap and pull them apart so that we can re-size this photo
and get it pretty large on this canvas. I'm just going to tap
right here to release it. Then I'm going to go right
here and tap on these layers. The first thing I want to do is reduce the opacity
so that we don't get distracted by what is
already on the canvas. So I'm going to tap and
then drag this slider down to about 35% or so. And then I'm going to tap the
plus sign for a new layer because we want whatever we
draw it to be on a new layer. The next thing I'm gonna do is make sure that the color we've selected has a
sufficient contrast. I'm just gonna go with black. We can recolor anything
later and find a brush. So I'm gonna go to the sketching brushes and
select the 6B pencil, which is one of my favorite
built in Procreate brushes Just checking that
we're on a new layer. And then here we can
change the size. I'm probably going to
keep it around 30% or so. I'm just gonna make
sure it's roughly the same size as
the pencil strokes. We're going to be
working in layers. That is the easiest way to make sure that
you have lots of different options once
you import this into whatever pattern-making
program you'll be using. So the first thing we want to do is do the outline of the petals. So we have this new layer, and I'm just going to outline
each and every one of these petals just following along. And don't worry, if
you aren't completely, perfectly following every line, it doesn't have to be perfect. We're human, not AI. And our drawings can show it. In fact, I believe they
look better for it. Just go ahead and
do that and then we will move on to
the next layer. If you make a mistake, you can always tap
this eraser here. And I would hold
it the first time. You'll get a little pop-up that says erase with current brush. So it will mimic the
brush that you are using. So you'll have the
same texture and then just tapping
back into the brush. And I'm going to keep on going. Because we are
working in layers. I'm not going to
skip this stem here. I'm just going to
pull this right across because we're going to be adding a layer for the stem
over the flower at the end. So you actually won't even
notice that I've done that. And we're ready to move
on to the next layer. In this layer, I'm
going to go ahead and take any of these big veins. I'm going to skip the little
ones for now because I want those on a separate layer. I'm putting it on a
separate layer because it is a lot like shading
and it's possible that I might want to
use a different color for it than for the veins. So we'll just keep our
options open here. One thing I'm just going
to do is actually move this layer below the layer of the outline because we don't, if we change colors later, want these veins anywhere where they overlap
here to be showing, there'll be hidden behind this. If we do it right I think I'm going to include
these folds here as well. So not veins per se, but they do indicate
some shading. Okay. Then we're going to tap into the
layers panel again. We're going to add
one new layer. And this time we're
going to go in for all of these
tiny little shading lines. So I'm actually going
to make this brush a little bit smaller, about 11%. Let's see how that looks. I'm just gonna do lots of these fine lines that are
just a flick of the wrist. So go ahead and do that. And then we're going to do the stem before we
move on to color. Again, I'll probably want these little lines to be
below the veins as well. So I'm just going to tap that
and drag this layer down. The next thing we want
to do is draw the stems. I'm going to create
a new layer and I'm actually going to put
it on top of because we know that the
stem is going to go on top of all of these petals. I'm going to just hide all
of these petals because it's going to make it easier for us to see what we're doing. I'm just going to again
make the pencil bigger. We had it at around 30%. And then just outline. Make any corrections you
need to make as you go. Nothing is permanent
in Procreate. And then the final
thing I'm going to do and I'm going to
make it in the layer underneath is add these tiny little spikes that
I have in here. Poppies have these
very fine light hairs that are on the stem. And I wanted to make sure
that I can make them in a different color than the stem itself because that's how
they appear in nature. I might change my mind about it. And I might even want to use this flower without any of
this little fine hair on it. So that's why I'm putting
it on a separate layer. Okay. We're just focusing on
this layer for now, so I'm just going to unhide everything and
you can see that we already have a beautiful
outline of a flower. And I'm also going to hide the photo because we
don't need it anymore. Now we have the flower
itself for reference. Now we're ready to
add some color. We're going to be using a
lot more layers for color. We want to make sure that each of these petals and shades of petals is on a separate layer so that we can easily
change the color. And then we'll also add
additional layers for shading. So we're going to tap onto this layer of the photo and then add a new layer
right above that. I want to start with
this red orange. We're going to start with
a layer that is lowest. And I want to keep using
the 6B pencil because I feel like it gives a really
nice kind of ragged texture, but I'm going to
make it very large. And then zoom in. I'm going
to add in that new layer. And then I think this
is the lowest petals, so I'm just going
to fill this in. It can be a little bit
messy and scratchy. That's okay. Don't
worry about coloring outside the lines because
we can clean all that up. Once we're done. I'm going to grab my eraser and
just touch that up. Great. And then we're just going
to tap into the next layer. And I think that's going to
be this petal right here. We're just going to be drawing right through the stem
and I'm going to turn off this layer underneath
just so we can see if we're going beyond
the lines are not. And we're just
going to keep doing that for every single layer. So I'm going to speed this up. And then we'll
talk about shading Okay, let's add the stem. Then we can talk about shading. I'm just going to grab
this turquoise green and literally just fill this in. You can see here that
you can still see the outline of the
flower petals. That's my mistake. This color needs to go
all the way up above those and right underneath
the stem outline itself. Here we have the stem outline
and the little hairs. Alright, so the next
step is shading just to give it a little
bit of dimension. And for this, we're going to add clipping masks to each
of the layers of color. I'm going to go back down
here, add a new layer, tap on it, and then
tap Clipping Mask. And this makes sure
that no color is going to end up anywhere besides the area that
we've already colored in on the layer the clipping
mask is applied to. Let you, let me show
you what I mean. I'm going to select
this dark red. And then I'm going to take
a brush that is really good for blending and shading. And for me it, my favorite
is the vine charcoal. But you can play around really, any of these are
going to be lovely. I think they provide
some texture, but they also aren't
so overwhelming that they can't be blended out. And then I'm going to
make this a bit larger. And we're just going
to go in here. And you see how it provides that beautiful bit of shading. I'm going to pull that
out a little bit. Then I'm going to add that shadow for each
of these petals. Maybe make this a
little bit smaller, but you can see where it
overlaps with other petals. That's where a shadow will usually be cast
and it'll give it a little bit more dimension
to just make it a little darker right there. And then if there
are any other pieces you want to emphasize, maybe there's a little bit
of a rounding in the petal. You can add a little
shadow there. Let me just check
which petal this is. Yes. That's right. Okay. Towards the center it'll be
darker because that's where the stem is coming in and
pushing it up a little bit. I think I made it
a little too dark, so I'm just tapping
the eraser again, holding to erase
with current brush, going in gently to remove
a little bit of it and then can kind of
find that balance. I like to add a
little bit darker on the edges as well just to make it feel a
little bit less flat. Light is refracting in a
certain way around it. I'm just going to go back and do that for some of the others. Sweet. Alright. The last thing I'm
gonna do is add a little bit of
shadow to the stem. So we'll go up here to the
color of a stem as well. Add a new layer, tap on clipping mask. Then I'm going to
grab a light green and make this just a little smaller because the
stem is so narrow. Then we can go in and
add just a hint of light to the stem. This is already ready
for you to import into whatever pattern-making
program you use, whether that's Photoshop or Illustrator or
Affinity Designer, if you want to vectorize it, it's already in separate layers. So you can just
vectorize each layer. And then you're good to go. I'm actually going to play around with color while
we have this here. So let me see. I'm
just going to add, change the background color. Say we want it to
be a dark green. Then I'll play as well with
the color of the petals. And the way that I
changed the colors of any of these layers is first, we're going to tap on it. And I'm going to
select Alpha Lock. Alpha lock ensures
that nothing draws outside of the lines of
what we've already drawn. And then I'm going to grab This mustard yellow tap
on it and say Fill layer. Again, Alpha Lock. And then because this
is the darker shading, I'm actually going
to go for this brown and see what it does. I'm going to try this one. Now. I'm just gonna do this
for every single layer. I'm just going to lock them all first because
that's a little bit easier to work in batches. Can see here in history, this is the color
that I newly created. It's not in my color
palette down here, but it will show
up under History. So I'm just going
to tap that again. I accidentally fill this
petal with the wrong color. And to undo something
like that in procreate, all you have to do is tap with two fingers it and
does your mistake. I like this one quite a lot. And the other thing
that I want to do now, if you want a more
subtle effect, is you can play with changing
the color of these lines. So I am going to see
what it looks like. If I'm changing all these
outlines to more subtle color. So I'm just going to hit alpha lock on all
of these again. Starting with a stem. I am going to make that
this darker green. And these little hairs in here, I think I'm going to make a really light green
because that is how they show up in
real life. We'll see. I like that. I do like that. Let's turn to the
outline of this flower. So I'm going to
see if this color that I've created as dark
enough or an outline. So it's a little bit
difficult to see. So I'm going to try this dark
brown and see what happens. Then. I'm just going to
do that as well for the large veins and
for these fine veins. And it gives us a
nice subtle effect. So this is already ready for you to import into
whatever you want. You can continue
changing colors here, or you can take it into
a different program like Adobe Photoshop or Illustrator or affinity designer and
make color changes there. The other trick I
want to show you is that as you can see
with a dark background, you can see a lot
of this texture, a lot more than if it
is a light background. Let me just show
you what I mean. You can still see it, but it isn't quite as obtrusive. So if that bothers you, one trick that you
can do is just to duplicate the layer
that's underneath. And it'll still have
some nice texture. But the color will be a
little bit more intense. And it'll cover up just a
little bit of that texture. The only drawback here is that in Procreate you might
run out of layers. So Photoshop, you have unlimited layers
and you can just continue doing that forever. The last thing I
want to show you is how you can export this file. So you'll tap on the
wrench tool and tap Share. And then it gives you a
wide array of options of different types of
files that you can use. If you're just going
to use this on another iPad and Procreate, or you want to save this
as a Procreate file, you can go ahead and do that. I like to export
this as a PSD file. That is a Photoshop file, which means that it is going
to keep every single layer as it is and you can continue manipulating it in Photoshop. Or you can import it into Adobe Illustrator if you want to use image
trace and vectorize it.
4. Style 2: Vectorize Your Drawing: Next, we're going
to take a look at how we can vectorize this image. I like to use this app
called a vector Q. It's a free app, or you can get the full version for just
a couple of dollars. And it does some beautiful
work vectorizing. So let's get started. Going to go into vector q
and tap vectorize photo. Then I'm going to grab
one of these images. And you see it automatically
already has vectorized this. It is using lots of different
colors though and ends. If we take this back
into Photoshop, it's going to be a
little bit difficult. But you can play around here and see if any of these
strike your fancy. I really like to
use plotter or ink. And you can see
this is generating a really beautiful flower. There are a couple
of ways that you can also play around with the level of detail that this is providing and
the line thickness. So let's go up here. Global detail. You can make this a little
bit more rudimentary. Make this smaller. Or were you can go into
a lot more detail. You see it keeps adding lines. We can change the
stroke right up here. We can play with the
threshold as well. I think I like this
one for this flower. You can also go into the editor. And then the other thing
that I want to do is make sure that we get a
transparent background. So I'm going to make sure to tap this red square right here. Then tap on this
background layer and just untapped this I. And we have a beautiful
background that's transparent, that we don't have to take
care of in Photoshop anymore. So now I am going to tap Share. Here you can decide what size
you want this to output. If you have PNG selected, you'll see you can also
export this as a JPEG, but it won't have the
transparent background. Or if you want it as a vector to take into
Adobe Illustrator, you can use SVG, roughly
1,500 by 2000 pixels. Plenty. So I'm just going to
take that and export it. And I'm going to say Open in, and I'm just going to AirDrop this straight to my computer. The other thing you
can do is just open it straight into Procreate. If you wanted to manipulate
it and procreate some more. Let's do that.
Procreate automatically adds a separate
background layer. The first thing we
want to deal with, separate these flowers
out from each other. So I'm going to tap
the selection tool. Just go in doing this kind of roughly because
I'm just going to copy and paste this
into a new layer. I'm gonna do the
same for this flower and for this bud right here. Then we're just going to
clean it up separately. I'm going to do each
of these individually. So I'm going to go in here. I have my eraser and I'm just going to clean
this up a little bit. This is where it overlapped with the other flower.
Looks pretty good. Just going to go in here. I'm going to clean
this up and then I'm just going to fix these lines. I'm going to grab a
brush, calligraphy brush. I think. I might just use
the script brush. And very lightly. Just make that connection
again blended in a little bit. We can always go back in
and just erase it out. If there was any overlap
that we don't want. Okay. That looks good. I think I'm going to also
delete this right here. Let's take a closer
look at the flower. It looks good. It's going to move
this one a little bit so that it doesn't overlap
with the other flower. Then we can try some things out. For example, I'm going to
change the background color and make it a dark green. And then going to lock each of these
layers so that we can easily change the color. So let's see maybe
L2, light green. See how that looks. This provides a completely
different style. And then of course
underneath these, you can always add
a different color. So if we wanted to do a
fill of these flowers, for example, we can just
go in, fill these in. I might even do it just
a little bit rough. Little bit of a
loosey-goosey style here. We're going to drag and drop. That already has a completely
different vibe as well. I'm going to pull that
down through the stem. You'll notice that I put all
these white on one layer. I'm actually going to
separate that out again so that will be able to
move each flower, end the color behind
it individually. So again, I'm just
going to tap select. Gonna go in here. And this time I'm going
to drag three fingers down and do cut and paste. Then leave. Yes, these two belong together. So I'm going to
select by pulling over and then hit group. And it has gripped
the flower together. Gonna do the same thing
for the other to select. Make sure I don't accidentally grab anything from the
other flower cut and paste. These belong together. Then these two belong together. Then that's it. There are endless
variations on what you can do once you have vectorized. It is one of the
quickest way to get motifs ready to go because you don't have to
redraw everything that you did. But it does, of course, significantly change
what the style of the drawing was, right? Because the lines get a very different quality once
you have vectorized them
5. Style 3: Scan & Edit in Adobe Photoshop: The first thing we
want to do is get a really nice high resolution
scan of our drawing. My scanner is a little
Epson Perfection B39, and it has worked beautifully
for me for years. I like to do a
preview scan first. I'm going to change the
resolution to 600 dpi. That'll give us a lot
more to work with in terms of size once we
get it into Photoshop. And then I also like to go under advanced settings and
just see if playing with the brightness and contrast helps in any way to eliminate some of the gray shading that happens when
you're scanning. Want to eliminate as much
of that as possible, but without it becoming
too faded out. So I think this looks good. So I'm just gonna go
ahead and scan this. Okay, Let's bring our
scan into Photoshop. I'm just going to open that. The first thing I'm gonna
do is rotate the image, that it is a bright image, image rotation counterclockwise. And then I'm going
to crop this image just to get some of the
unnecessary stuff out of the way. I'm going to focus on
these two flowers. Are these three flowers. So I am just going to crop everything else
out of the way, especially because it's a
little darker on this side and we don't want that
to throw anything off. Then the other
thing I want to do is just get rid of these flowers so that
they're out of the way. I'm going to tap L for the lasso tool and
then just draw along these lines here and hit the backspace button and
it's going to cut it out. Will be out of the way. Don't have to worry about it. Okay. Good to get rid
of some of this dark, darker, white and
gray up here as well. Alright, then I'm going to add a new layer by clicking
the plus sign down here, drag it below that, and fill it with a
different color. I'm just going to pick
this green and then tap G on my keyboard
and click on. This is going to help us to
see if there is like stray white that remains once
we're removing this white. So the first thing
I want to do is tap W. That is going to
bring up the Magic Wand. Then I'm going to set the
tolerance up here to about 60. We might play with that, but 60 is usually pretty
good for drawings like this. And then I'm going to
click on the white. So it has selected everything that is white in this image. Then I'm going to
invert that selection. So I go up here under
select inversed. So now at a selecting
all this black and gray. And then I want to
copy and paste it into a new layer so that we can
preserve this original. So I'm going to tap Control C on my keyboard and then
Control Shift B, which places it exactly
in the same spot. And then I'm going to hide the bottom layer by clicking
the I on the original layer. Now we have something that
looks kind of like this. You can see that it is very
much a shades of gray. There's some lighter
spots in here. Let me just change the
background color so you can see that it actually looks pretty
nice on a light background. So now I'm going to hit this circle that is
half-filled on the bottom. Just tap it a solid color. And then I'm going to select a light background and hit Okay, and this looks quite a lot like the drawing we had before. So this is already
something that you can work with if you so choose. First thing I'm going to do now is clean this
up a little bit. I have this layer selected and I'm going to tap
E on my keyboard. And this is going to
bring up the eraser. So I just, I'm
very distracted by these random spots
and things that I'm seeing here that
have translated in. So to change the color
of this is a little bit complicated because we
have gray tones in here. What I want to do is add a color above this layer
as a clipping mask. Then I'm going to
also add a hue and saturation layer to it. And so we're just
going to play with this to see if we can recreate a color that fits
within the color palette. It takes a little bit
of playing to get this, get the shades in here. So let's start. We're going to do a
solid color layer. Again. Don't worry. It's coming back I'm going to tap this
beautiful maroon and hit Okay, and then tap the Alt button on your keyboard to bring
up this little arrow. And we just click the layer and it's going to make
it a clipping mask. So already you can see all
of the shading is gone. And if this is something
that you want to work with, this is probably the easiest way to recolor your drawings. But it is of course a little bit cruder because the
shading is gone. So you can either stop
here and work with these and you'll have a lot more contrast to
work with, which is great. Or we're going to keep going and just take it a
couple of steps further. So one thing I want to
do is lower the opacity. Going to lower it to about 65%. And you can see it kind of
made the color darker, right? Because the layer below is black and gray and so
those colors are mixing. Now, what I wanna do next
is clicked back into this layer and go down here again where
we had the solid color. But this time we're going to add a hue and saturation layer. And we're also going to add a brightness and contrast layer. Actually, we're going to put the brightness and contrast layer immediately above that,
the drawing layer. So we are in the brightness
and contrast layer. And I'm just going to up the
brightness of this a bit. You can see it's
getting lighter. Hue and saturation
layer needs to be above the color layer. And then we can play with
different color tones here. We can also change
the saturation a bit. If we need it to be brighter
or a little more muted. We can always go
into the brightness, take us down a notch, go back into the hue and saturation and just play
with this a little bit. And it just has a little bit more I'm a little
bit more nuance to it because it isn't
an absolute color. It has a little more
of that shading in it. And I'm actually going to
take down the opacity, just a little bit
more. Play with that. Up the brightness. Contrast doesn't
really make much of a difference here,
so we'll just leave it. I can up the saturation. Just keep playing
with these colors. You could get a
vintage style luck with your drawing as well. Make this kind of a sepia tone. You can achieve entirely
different looks because you are, have a base color and
then you are changing the hue and saturation
along with it. I really do like this green, so I'm just going to
leave this for now. And then I think what I'm
going to do is actually just merge all of these layers because I know I
want this color. I'm just going to keep it. But let me first copy the original drawing layer and hide it so that
we haven't preserved. And then I'm going to
merge all of these layers by selecting them all. Again. Tap shift on your keyboard and then click
on the bottom to the top and then Control or Command and
E will merge all the layers. Then the last thing I want
to do is just separate these flowers out so that you
can use them individually. So I'm going to use
the lasso tool again. I'm pressing L on my keyboard. And I'm just going
to cut this out. The nice thing about this
is that it also gets rid of any stray pixels that
are around here. I just Control X, got it, And then control the, pasted it again into place. And I'm going to hide it so that we can see what we've done. This is technically
on its own layer now, but I'm going to cut
it out again too, because I know there
are some stray pixels here that came in with a scan and we just
don't want to risk having stray pixels in here. One fun trick is if you need a break from clicking
down like this, or if you need to get in closer, just tap and hold the
space bar and this hand will come up so you can
move this document around. You can zoom in. And when you're ready,
you just click back down again and you keep going
where you left off. Okay, and then I'm just going
to delete that old layer. Because that is deleting all of those extra pixels
that we don't want. Now, we have all of these as individual motifs and you can just select them and
move them around however
6. Thank you!: I hope you enjoyed this class and I can't wait to
see what you create. Please share your class project below and leave me a review. If you share your
project on Instagram, give me a shout so I can
admire and share your work. This is just one class and
any series to show you how you can level up your game when it comes to pattern design. Now that I have motifs on hand, make sure to check out
my class on how to create a simple pattern
in Adobe Photoshop. As always, if you have any
questions about the process, please feel free to
reach out to me. Thanks so much for watching
and I'll see you again soon.
 Freya Riedlin, Designer, Illustrator, Plant Lady