Transcripts
1. Welcome to the Class!: Christmas is one of the most
beautiful times of the year. It is a season of
joyous moments, happiness, and cute
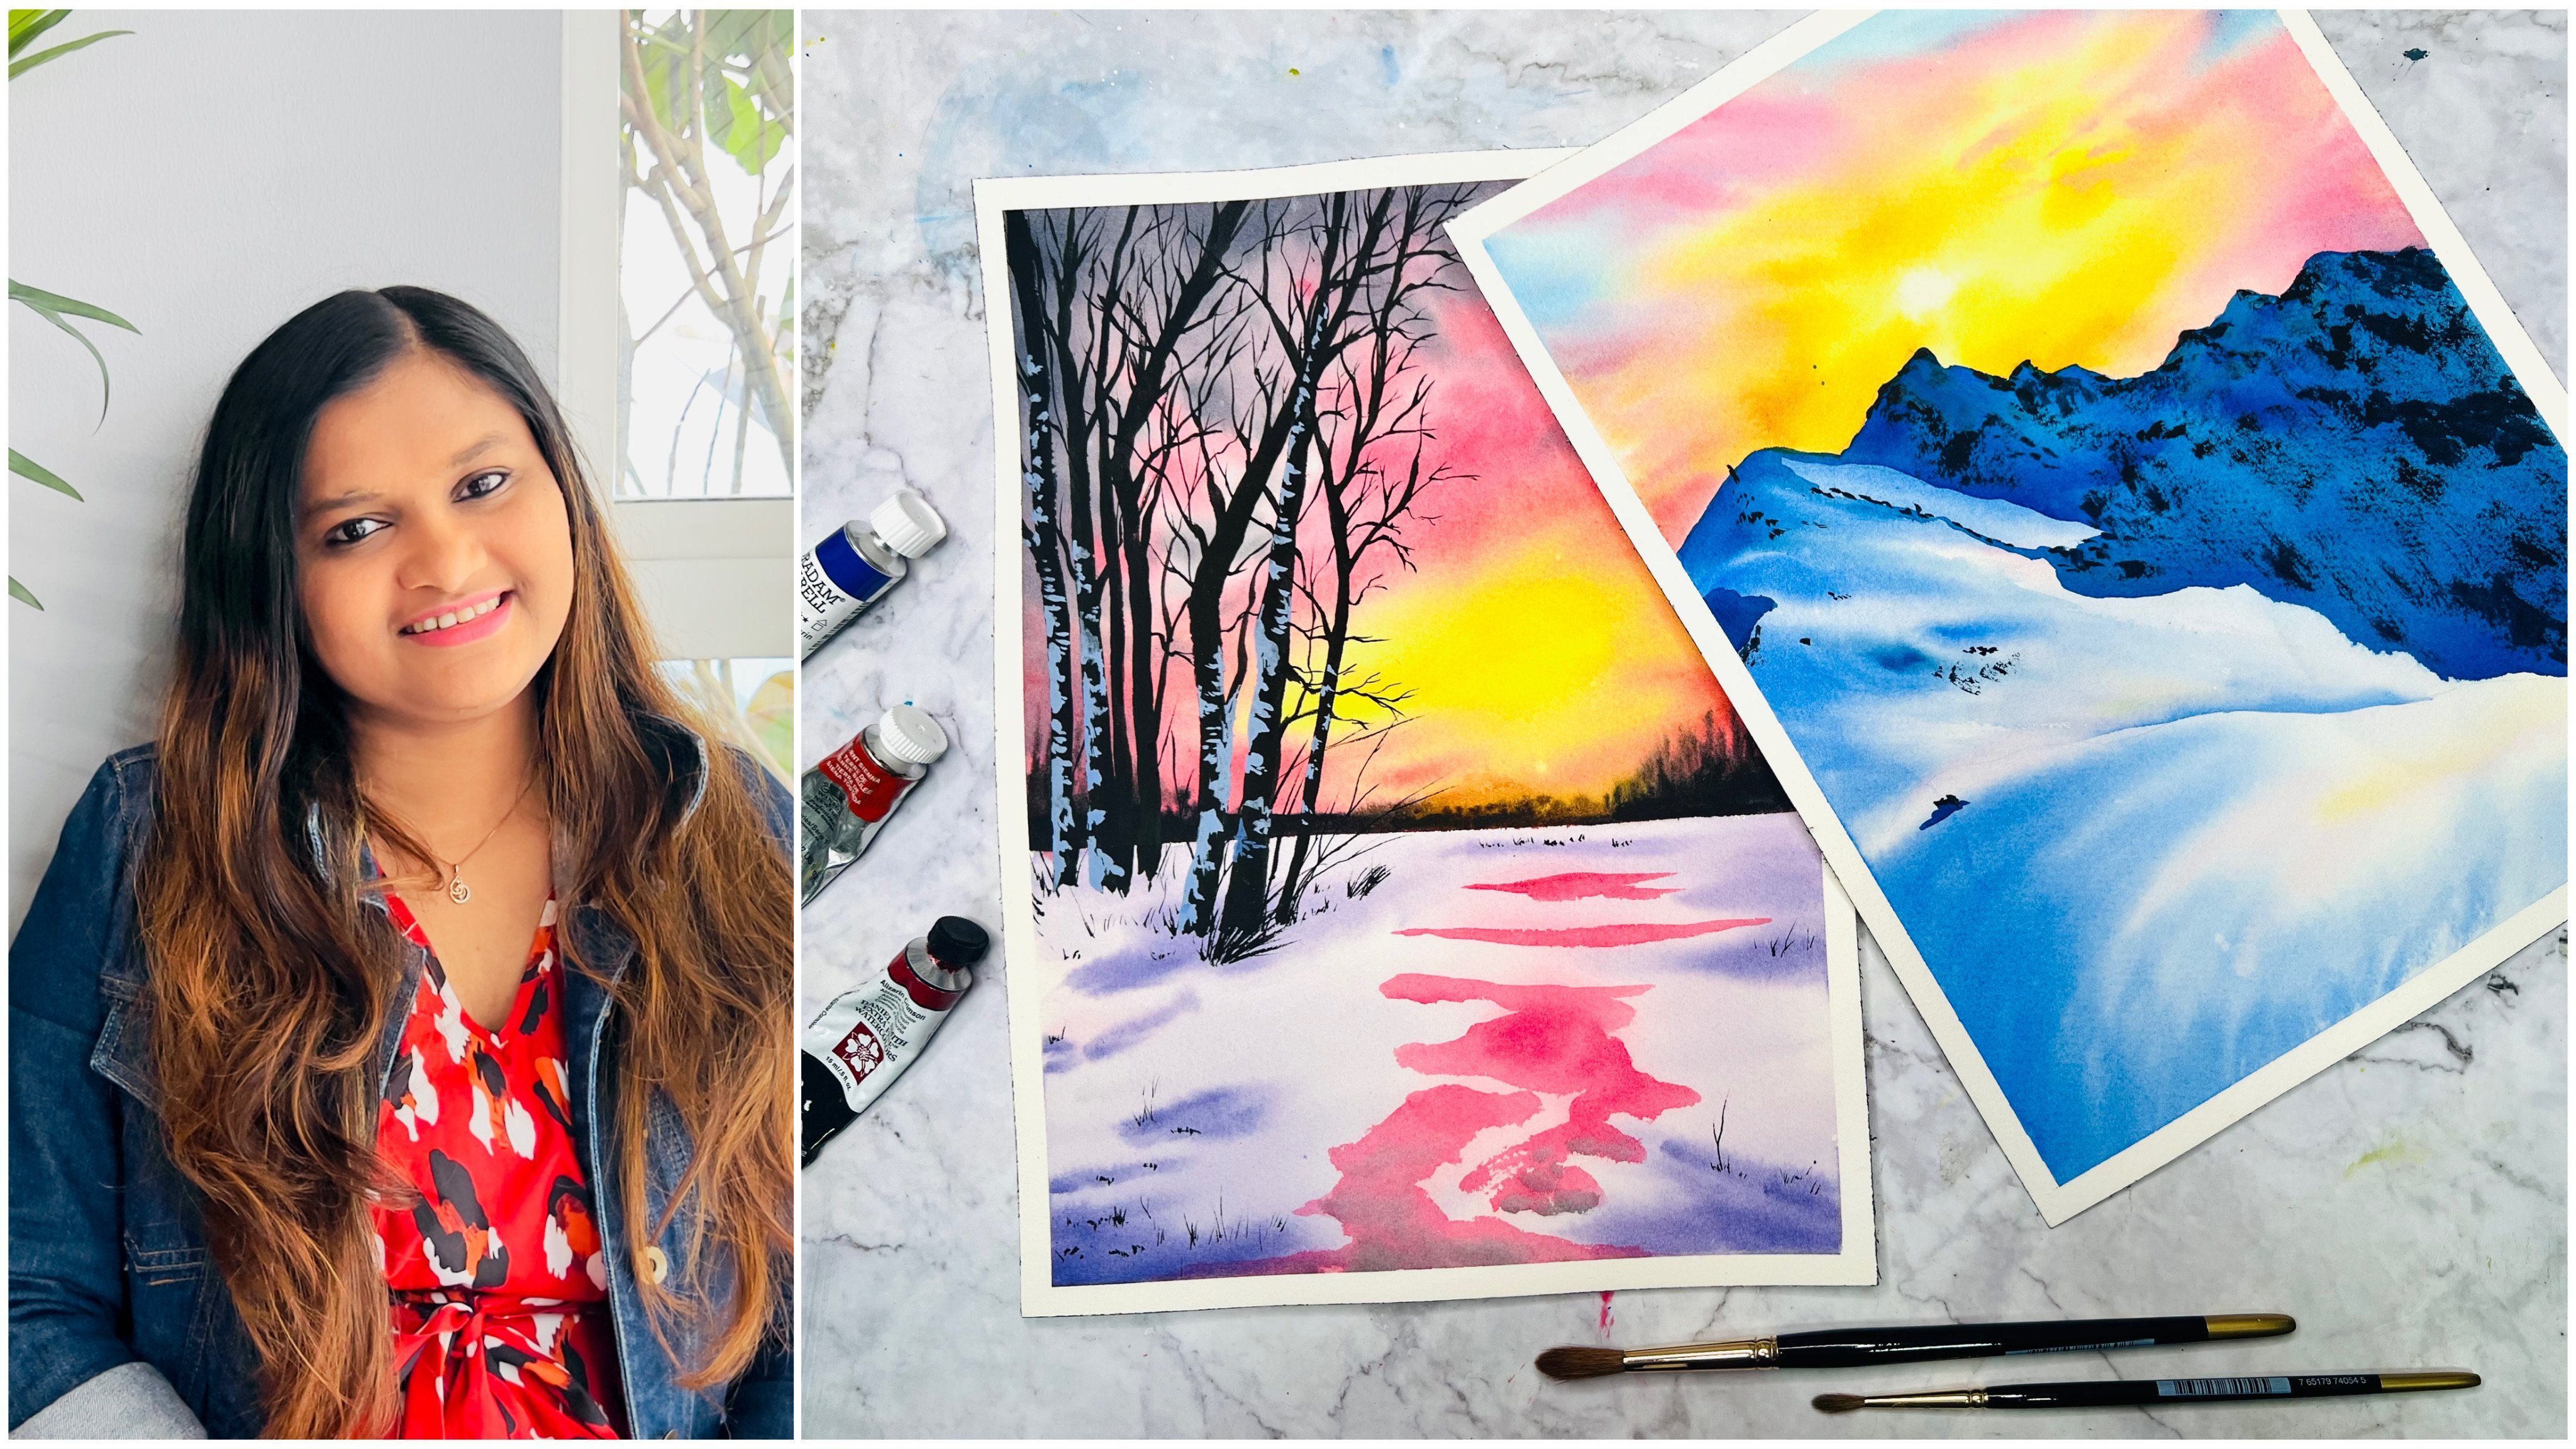
declarations all around. Hello everyone, I am Geethu an aerospace engineer
by profession, a watercolor artist
on the creative side, an art instructor, and a silver brush educator. I have been teaching online
for more than three years now and also conduct
in-person workshops. You can find all
about me, my work, and my happy moments in my Instagram page
@colorfulmystique. The festive mood and the beautiful Christmas
decorations changes the color palette
around you into beautiful vibrant shades and
before you even realize, inspiration strikes from within. To help you get into
the mood for Christmas, I have created a beautiful Christmas-themed class for you. We will be painting 21 different A5-size winter-themed lights and Christmas decor things with
watercolors to bring out the vibrant colors from your
color palette on the paper. This course is for
both beginners and experienced watercolor
artists because the projects are ideal for you to relax indoors with a
cup of hot chocolate before the holidays begin regardless
of your skill level. Along with the materials
needed for the class, I will be explaining each
project step-by-step so that you can get inspired and paint it in your own style. As the holidays approach, you will end up with 21 gorgeous
Christmas-themed paintings. You can gift it to someone
as a Christmas card or decorate your ball along
with the Christmas decor, or have it hung on
the Christmas tree. You will never know
the way through which ideas pop into your mind. Are you ready to get into
this beautiful festive mood? Grab your watercolor supplies, and let us begin.
2. Class Overview: First of all, thank you
for joining the class. I would like to
quickly brief you about the class projects. There are 21 painting projects which would be
uploaded each day. You will find all the 21
projects of this class after 21 days of the
class publish date. We will be painting
all the paintings in the portrait mode on
an A5 size sheet. But you're of course open
to your own innovation, such as painting on a
different size paper or even a sketchbook. If you are an ultimate
beginner to watercolors, I request you to brush through my ultimate guide to
watercolors class. Where you will learn basic
techniques such as wet on wet, wet on dry, splattering, or the
blending technique, which would be highly useful to follow along the
projects of this class. If you're painting along
every single project, or is trying out a specific
project of your choice, I request you to
upload your projects here to the project section
here in Skillshare. I will be personally reviewing every class project and
giving feedback for the same. Lastly, if you come across any problems
during the class, don't forget to ask
me for support. Leave a question
in the discussion section here in Skillshare, and I'll be happy to help you.
3. Art Supplies You Need: Let us have a look at
all the art supplies that we need for this class. First of all, we need paper. I will be using Arches
300 GSM or 140 pounds, 100 percent cotton paper
in cold pressed texture. I've cut this paper
into two halves. We'll be using an A5 size. This is almost like an A4 size, and I'll be using half
of this for the class. You can see here, this is the paper that
I've cut into two. This is typically the A5 size that we'll be painting on all of the 21
different projects. Next, we need watercolors. I'll be painting with two different palettes
for this class. For the first few days, I'll be using this palette, which consist of paints from the professional
brand PWC Shin Han. I have my usual palette, which I use for almost
all of my paintings. But for this class, I wanted to try and experiment and push out of my comfort zone. That is why for the
first few paintings, I'm using this palette, which is basically
all the colors from the professional brand Shin Han as I've already mentioned. As we advance through the class, I have used my usual palette
consisting of colors from various brands such as Winsor & Newton,
Daniel Smith, and Schmincke because as we move on to the further projects, I felt that we need
watercolors that are more transparent to achieve certain
effects in our painting. But you're welcome to use any watercolors that you want because from the
first few projects, you'll understand
that the colors that you use are not
at all important. It is always the tonal value in a painting that is
very important. Next, we need
watercolor brushes. All the brushes that
I'll be using for this class are from
the brand Silver. You need a large brush to
apply flat washes on the paper and to wet your paper
at the beginning or at any stage
during your painting. Then you'll need a
size 8 or size 10, typically a medium size brush so that you can put down
most of your strokes. Then smaller size
brush for the details, so a size 2 or 4, or maybe even a smaller
size than that, such as a size 0 or size 1. Lastly, you'll need a
liner brush that comes to very thin point
and has long bristles so that you can use it to
make the tiny details such as the branches and
long lines with it. Also don't forget about palette
for mixing your colors. You can either use a
plastic palette like this one or metal palette
or a ceramic palette, or you can even use a glass
palette if you want one. You'll also need some masking fluid to mask certain areas of your painting so that
you can paint over it. Once it has dried up, you can peel off that
masking fluid and that area would remain as it is which can be later
painted on if you want. Also remember to use
very old brush to use with your masking
fluid because masking fluid is brush killer. Do not use your new and good
brushes for this purpose. You can also use other objects, such as toothpick or even the back of your brush
to apply the masking fluid. You can use a masking
fluid hard eraser or a brick eraser for erasing the masking fluid
from the paper. But if you don't have that, you can just use a normal ruler or eraser for that purpose. You'll also need a pencil eraser and ruler for making
your initial sketches. Some paper towels or
a cotton cloth to absorb extra water from
your brushes and paper. Any board to tape
your paper onto. Of course, masking
tape to tape the paper on and get clean edges
for your painting. Two jars of water for
your watercolor painting. Over the course of
your painting process, one of the jars will turn
muddy because you keep washing your brushes and
your colors into it. If you have another extra
jar with clear water, you can use that for taking up fresh paint and also applying
water onto the paper. Lastly, some white gouache
for some white accents, highlights, stars, or the snowy effect. I'm using this Winsor
& Newton designers gouache permanent white color. Wait, don't forget to
grab a cup of coffee or a hot chocolate before you proceed to paint
the class projects.
4. My Colour Palette: Let us have a look at the
colors in my palette so that you know which colors I'm using for each of
the class projects. But let me tell you
the exact colors that I'm using are not at all important because I myself are using two different
palettes in this class. You can clearly understand
that you can go with any color of your choice, for each of the class projects. You know you can make
it innovative and fun and explore
yourself with colors. For example, if you look at
the first-class project, I've used a lot of
blues in this one. You can totally change it. You don't have to paint
with the exact same sheet. Maybe you can change this
whole bubble into a red sheet. The only thing that
you need to remember is that to add in
the highlights, the shadows and everything. Tonal value, and I will
stress on that a lot because tonal value is the most important
thing in any painting. You can even go for a
monochromatic touch and use one single color. As long as you put
in the tonal value, that is the correct
tones in your painting. I'll just briefly go through all the colors in my
palette so that you know. This is lemon yellow,
permanent yellow light, permanent yellow deep, cadmium yellow orange, permanent yellow
orange, Vermilion, permanent red, rose madder, permanent rose, crimson lake, permanent green Number
1, greenish yellow, olive green, sap green, hookers green, viridian, yellow ocher, raw sienna, burnt sienna, light red, burnt umber, Van **** brown, sepia, brown red, indigo, Prussian
blue, cobalt blue, cerulean blue, peacock blue, ultramarine blue, and
permanent violet. As I've already mentioned, these are the colors
that are available in this watercolor
set from PWC Xin Han. It's the professional
set of watercolors. The reason why I
actually decided to use this is because
I had this lying around in my studio
for a long time and I wanted to get out of my
comfort zone and use this, and also to stress
on the fact that the colors that you
use are not important. But of course, after
a few projects, I decided to go back
to my usual palette. The colors in this one are; Naples yellow, lemon yellow, cadmium yellow, Indian yellow or transparent yellow PY150, Indian gold, cadmium orange, cadmium red, alizarin crimson, quinacridone, violet rose, transparent orange,
ultramarine, cerulean blue, bright blue, Indian green blue, indigo, cobalt blue, dequan green, aqua green, cobalt turquoise,
tailored green, sap green, dark
green, olive green, perylene green, cobalt green, horizon blue, yellow
ocher, lavender, violet, berlin violate, raw
sienna, burnt sienna, transparent brown, Payne's gray, lamp black, and Amazon genuine. This is my personal palette that I have curated
after several tries. You don't need all
of these colors and we will also not be
using all of these colors. You can find a
detailed photograph of this palette in the resources
section here in Skillshare, if you would like to know the exact colors and then
give numbers in each one. Now that you know the colors
that I'm going to be using, let's get to the
first class project.
5. Day 1 Colour Palette: Welcome to Day 1. This is the painting that
we are going to do today. The colors we need today are cobalt blue, ultramarine blue, Prussian blue, Phthalo blue, or yellow blue,
indigo, and viridian. I know it's a lot
of blues and hence, if you don't have
different blues and you probably using
a very basic palette, what you can do is
you can slightly vary the mixes of
your blues by trying and adding a bit of
black or indigo to your blue and maybe
a bit of green. You try to create
different variations of the blue that you already
have to make this painting.
6. Day 1 - The Christmas Bauble: Let us start with our
first Christmas bubble. For that, we need to first sketch out that
little bubble there and use any circular object that you have to
draw the circle. This is just a candle I have and I'm going to
use the bottom of that. We need that bubble to be
somewhere at the bottom part, that is the focus in our painting thing and that's where we're
going to add it. I'm going to quickly
sketch out using the bottom part of that
candle and make a circle. You can use a compass or any circular object that
you have for this purpose. There, that is my circle. Now, we need to
just go ahead and add in the snow
on the top of it. I'm going to take
out the top part because that top part is going
to be covered in the snow. Here, let's assume that this is how it's going to
be covered in snow and there's that large
snowflake on the top and then it got to have that little ribbon
that it's tied to. That is the circle, then we have the ribbon
coming around here again. Try and capture the
movement of the river. It's folded onto the
branch in which it is hanging and then the
other side of the ribbon see how I've made the sketch, then it's the branch in
which it is hanging. The branch of the
fur tree and you can just gradually sketch
it, just to fit. You don't have to
do any retailing. That's basically the
sketch but if you want, we can go ahead and let's
put in a large amount of snow covering on the
top of the tree as well, and some areas. But now when you are marking out the positions of the snow, make sure that you do it as lightly as possible because one, the snow is supposed to be
in a white color and two, we don't want the pencil sketch to be reflecting at the
end of our painting. That is the reason, if you can just draw as
lightly as possible, just so that you can see
it when you're painting. I'm going to assume that
I have a branch there at the back and that branch is
covered in snow right there. That branch comes here like that and I have other branches there, some
other branches there. All of these other
branches are going to be really softer because we want
to bring the foreground, which is this right
here to the front. That is the reason why we'll
be painting in that way. Then let's assume
another branch, little bit on there, and a lot of snow elements. I'll show you the pencil sketch closely so that you can observe. There you go. This is just the pencil sketch
that I have made. Mainly the Christmas bubble is what is the most
important one. Let's get to painting this. I'll be using a large flat
brush to apply the water onto my paper but you can also
go ahead and use in large, round size brush if
that is what you have. I'm just loading
up my brush with the water and I'm just
going to apply it. Don't apply to the
whole of the paper. We're going to skip the
area of the bubble and the snowy region at the top while we're
doing this process. If you avoid all of that, go around with your brush. The ribbon is absolutely fine. It's okay to apply
water on the ribbon, but just a bubble and
the snow on the top, try and avoid that
at the moment. I know that it can be hard to go around with a larger brush. This is why I will
also probably use a point size crush to apply
water closer to the bubble. First, I'm just putting in my first wash there onto
the paper so that I can easily apply and cover a larger surface area
as quickly as possible. I have now covered almost
entirely the rest of the areas. Now, I'm just going
to go closer to my Christmas bubble and add. That will make sure that I have enough water along the edge as well because it's
very hard for us to apply water using a
very large flat brush, especially when it's
a circular area. If it was a flatter area then it would have been much
easier, don't you suppose? Got my water in. Now that you've
got your water in, we're now going to add in lots
of snow and the fur trees. For adding the fur trees, I am going to pick up
one of my dark blue. That is my Prussian blue
and I'm going to use that. I'm going to mix it up
with amount of dark green so it's basically my Prussian blue mixed
with my viridian. Let's take more of my Prussian
blue and you can see it creates a nice dark
green mixture. You can also perhaps add
in a little bit of indigo to the mixture so that it
turns slightly darker. This is what we're going to add. This is basically the
background so remember that. Here I'm going to use a slightly watery
mixture towards this end here and this is
what I'm going to add towards the base regions. Just going to make
some nice strokes. Let's make some nice
strokes and I guess I'd put in some
extra strokes here. This is where the tree
basically starts. You can go ahead
and add in a lot of strokes at that point
and here we go. I'll continue on
along this side. These are going in
the background. That's why it's in
a softer manner. I guess, I'll add some along there then we shall
move on to the top now. Remember the positions
where we marked out some large snow elements, try and see if you can
preserve those areas. We have one fur tree branch right here that goes
through the background. Then I have another one
that goes inwards there. Then I guess I'll put in some
color here along the top, maybe a little at the top right. Now that we've added
many of the branches, now we need to go
ahead and start adding a little bit more
details into our painting. So we need to add darker colors. Here I'm going to
pick my indigo. I'm going to mix it up into that same mixture
so that now we have a darker amount of paint and we're going to add
in a shadow element. It's just basically on
the top. Can you see? Just added on the top of
the color that we just applied and applied
in strokes like that. Use the pointed
tip of your brush. I'm using a Size 6
brush and we start. We'll add in lot of lines, maybe you also use it to draw the middle line
of the fig tree. Like for example, this one was the ball that we're supposed to be adding the main one. You can try it to add branch and there's another one
going in the back there. Towards this region, I guess
I'll just add very little. Now we placed a lot of
snow elements in there. So now we need to add in
many of the snow regions. For that, I'm going to pick up a nice amount of my cobalt blue. Just a tiny amount
of my cobalt blue. Use a very watery mixture. You can see the watery
mixture right here, and using this watery
mixture, I'm going to add. We're going to add
them to the base of many of our snowy regions. Like for example, this one
was a large snowy region, let's apply a bit there and
start adding to some regions. You can have completely
going random so we assume that there
is a larger drop there, so you can go ahead and
apply maybe a little. Leave a lot of
whitespace as well. Let's say that this region, this one has got some snow, and then go with a
further darker color. The same color tone, but in a little bit more dense will apply towards the bottom. Just trying to give different color appearance
and little snow elements. When we add it to this one, we will especially
understand that process. I recommend that you watch the video at least once before, so that you know the
entire process of what is going to come
and what is going on, and that will really help you
in mastering this painting. This is the background done, so we're absolutely done
with the background. Now we can do is we can
wait for this to dry out. I'll be using my hairdryer
to quickly dry this up so that I can continue on
the recording process. See you after drying
the painting. Here you go, I've
completely dried this up so we can now go ahead and
paint Christmas bubble, and snow elements
on the top of it. Now to paint along
the Christmas bubble, we're now going to apply
water onto the top of it. Just use your brush that you're going to be using and
apply water to the top. It doesn't have to be larger
brush at this moment, you can see that I'm just
using my normal brush and one coat of water onto the
inside part of the bubble. That should be enough. Then I'm going to be using Taylor blue. In China, that is known
as the sertraline blue. It's Pb 15, and that is the blue that
I'm going to be using. It's a very, very bright beautiful staining blue pigment. In case you don't
have the same blue, you can go ahead and use
any blue that you have. It's absolutely fine. I'm going to put
that into my paper and you can see the
gorgeous color shade. Just observe closely how
I'm going to be painting because I'm going to have a
large highlight right there. In order for me to
have that highlight, I'll make sure that
I leave that area as bright white color, and rest of the areas, I'll apply with this
Taylor blue color. Go ahead and apply the paint. Do the bubble, but make
sure that you skip the area of the snow at the top. Remember that. Along the edges you can use the pointed tip of your brush so that you get
a perfect round shape. I wanted to get a perfect
round shape so this is why I decided to go for a pencil
sketch at the beginning. Now I'm getting towards the
top region, as you can see, and that's the region that I
wanted to add a highlight. I'm going to wash
my brush and I'm going to take my paint from
the existing region already and I'll draw a line along the edge because I do
want it to have an edge, and then going to create a
circular shape of paint. Then begin my rest
of the paint again and make sure that I
go along that circle. Can you see now we've left a nice gap of white right there? The rest of the areas you can go ahead and fill up
with your paint. But obviously we
need to add in a lot of dark details
onto our painting, so make sure to go ahead and create that nice round
highlight there, and obviously go
ahead and soften out. Taylor blue is a very,
very staining pigment, so make sure that you're very careful when you are applying. No stroke for creating
that highlight. That highlight there. Now
I'm going to pick up now. The next color that I'll
pick up is peacock blue, which is a slightly darker blue. You can use Prussian
blue instead, and now we're going
to add this onto the top and give it some
nice shadow elements. Here, I'll take my peacock blue. I'm going to add it,
and as you can see, I added mostly also towards the edge of my Christmas bubble, and this is wet-on-wet
because I just painted my bubble using the wet-on-wet
method and it's still wet. We have to make sure that
our bubble remains wet. Why we do this process? So that the paint, can you see, it blends in nicely. Go ahead, pick up the
nice dark blue shade, we add in some darker
spots right there, and nice and dark
towards the bottom. Then now we've got
to add some shadow. The shadow of the snowflake also sitting on the top casts
a shadow at the bottom. So for that also, I'll use the same color slightly and I'm going
to place it right there at the bottom
where my snowflake is. Right there. At the
bottom can you see, just adding a slight
nice darker tone, and if like my paper
which has already started to dry because
of the dry weather here, you can go ahead
and soften them. Just use the softening technique
to soften out the edge, which would then make
sure that you do have softer flow of the paint. Darker paint all around. I'll pick up now a
little bit of indigo. I'll add it to that mixture, and I'm just going
to add it along the free bottom edge to get
some more darker color. That is how I've
added my bubble, but you can always go ahead and keep softening
out the white region. Just be careful that you
don't get rid of it. We just need that little
highlight on the doll. Now that we have added that, let's go ahead and
add in the ribbon. For adding the ribbon, I will pick up ultramarine blue. Taking ultramarine
blue, we'll just add some nice lines alone. Join it towards the top. Because all of the
other colors that we applied are in
the background, it's okay to paint over the top. Now you've got the ribbon shape, but you can add in
and out of details on do it like the
lines of the fold. For that, I have picked up a little bit of
my darker indigo, and I'm just going
to use that to create some lines in the middle, and I guess darker color
there along that edge, which will show that
it's turned inwards. I guess that's that.
Now let's go ahead and add in that foreground fig tree. So we'll use the same mixture that we used for the background, which was the mix of viridian
and our Prussian blue. Viridian and the
Prussian blue mixture. Using that, you can
go ahead and start making the leaves
of the fig tree. It doesn't have to be perfect, we just add some random
strokes like that into the ribbon so
that it shows that the ribbon is passing
through that. Can you see? If you
add it like that way, can see now the ribbon
wrapping around it? Towards the top you don't need to add many
because it's got a nice amount of snow
covering on top of it. I'm just going to add some. Now observe what
I am going to do. I'm going to take
my large brush, you can take any
brush that you want. Let's go ahead and just
little apply water there right at the base where that fig tree is
going to be joining. Any edges where the water is, just go ahead and
try absorb some of the water so that it doesn't show the edge of the watermark. Then pick up the same color, go ahead add it. Can you see? I'm taking a darker indigo
right now and I put that in. Then that means the end of that is now going to
be in a softer manner. It just shows as if it's
blending into that background, and that's exactly what we
want to achieve. That's why. Either you can do it this way or you can go ahead and use
the softening method. See? Now, I've got a
nice dark edge there and here add a line
in the middle. I really love the way
that has turned out. Now the only last
things left to do are adding the
snowbird at the top. But I guess before that, we can add in little drops of beating at random places like, for example, if you take that,
go ahead and add just some branches
at random places, maybe a little here. They are in the background, but just popping out
a little like here. This is again the background. But if you just
make some strokes, when they dry up, they
will be more beautiful. Just a little, some one or two. Now let's go ahead and paint the snowy
region in the front. For that, I'm going to apply
water on the top of it. I have applied the water. Now we go ahead with a nice
amount of cobalt blue. It's the same shape that we
applied in for the shadow. Let's add. As you can see, taking this little
amount of ultramarine blue and take that in
a very lighter tone, we'll apply that
towards the base. This is the area where you want to actually show the depth and the shadow area, even though the snow
is absolutely quiet, but then you need to
add the shadow element, which will make it
look more real. If you add some bluish
tone onto that, can you see how it
looks as though it's sitting on top of that
bubble like that? You can add some darker shades on the top of it,
some gray tones. For making that gray tone, go ahead and make your burnt sienna and
ultramarine blue together. That would create
a nice gray tone. Here, I'm taking my burnt sienna and
ultramarine blue together. I've created a nice gray tone, and I'm going to use
that now at the base. Some gray tones also
towards the base. I guess a better gray would
be if I have more blue in it. There. Here, let's create darker
strokes there as well. Now, all you got to
do is go ahead and blend all of those strokes. Can you see how now it will flex like a snowy element on the top? Do the same, let's pick
up the ultramarine blue and start adding for
this snowy element here. As I have not applied water, you can go ahead and wet
it and it'll be the same. Here, ultramarine
blue at the bottom and the dark shadow
color at the top of it. That'll give the element a
nice looking snowy effect. Now, in order to add a
more snow at the top, what we can do is
if you water down a little area right there where we've made
the pencil sketch, and then go ahead, pick up the ultramarine blue, add it towards the very base. Can you see the little
gap of white there? That shows the top part
of that snow element. Then pick up a gray
tone and add it. Now you can see how we've
created nice gluey snow effect. We've created some
nice snow element, and we've added a nice
reflection and everything. Now the last part left
is to add in the white. Let's go ahead and
pick up a white paint. Make sure that you pick up some nice dry amount of white paint. In order to make sure
that your brush is dry, all you have to do is wipe out the entire hairs of the brush, then pick up the white paint. This is the bowl that I use for storing all of my white
paint, and can you see? My brush is dry. Using this dry paint, we can go ahead and apply a lot of dry
strokes on the top. This dry stroke that I
apply on the top just implies that it's got some snow sticking on the top of it. That is why I'm applying
the dry stroke. It gives the effect of little snow elements sticking on the top of it
because it's snowing. See how our bubble has
got like a snow element. Do the same to
some of the areas. Taking that white paint and
adding some dry strokes, you can have that dry strokes
among the shadow as well. That'll give the effect of
the shape of this gnome. Once you've done that, I guess we can go ahead and add a teeny tiny amount to
the top portion as well. Once you've added that,
let's go ahead and add a lot of snow
in our painting. For that, take a nice
watery consistency. Can you see it's now
a watery consistency? I've picked up a lot of water. We're going to pick up
the white paint and we're going to add in a
lot of splatters. Go ahead and add in the
splatters onto your painting, lots and lots of them
wherever you want. It's still snowing. Now that you have
applied the splatters, go ahead and apply few splatters with your
phthalo blue also. This is because the
phthalo blue is going to show as some of the shadow
elements of the snow falling. This is a new trick
that you can use. Just go ahead, pick up a little amount of
the phthalo blue. It doesn't have to be dense. You can see it's a watery
mixture that I use, and I'll use that to splatter. Especially if you splatter to some of the white
areas, can you see? Because most of our painting
area has got a lot of white, it's not going to be entirely just covered in white splatters. If you add those blue
splatters as well, can you see some areas
has got the darker spots? It shows how the shadow
element of the snow part. Now the last part is, don't forget to sign
your painting ever. I am now going to
sign my painting. I'm going to use a
bright red shade into my painting and I'm going to sign my painting
right at the bottom. It is a masterpiece
that you have created no matter where
you painted it from, so don't forget to
sign your painting. We are ready to remove the tape. Here's the finished piece. There you go, I hope you like it and thank you for
joining me today.
7. Day 2 Colour Palette: Welcome to Day 2, and this is the painting that
we are going to do today. The colors we need to
do are Prussian blue, indigo, cadmium red
or permanent red, reddish brown, dark brown, burnt sienna, ultramarine blue, and a little bit of whitewash.
8. Day 2 - The Telephone Booth: Let us go ahead and add in the telephone booth
and do our picture. You can use a ruler
for that purpose. I'm going to place it somewhere here towards the left side, I don't want it to be
right at the center. So just along the side. Just need to add three lines, so one line then lets make the next line and
then another one. Three parallel lines
then let's trace out the top portion where it's
going to be covered in snow. Make a curve like that
towards the top and the same curve is at an angle
towards the right side, then make a small dome like
structure for covering up the region where the
snow is going to be at the top and then have the base. Let's assume that
it's covered in snow, so it's not going
to be an even level then along the side, it's going to be at this
angle towards the top. I think that's too
much of an angle, maybe I slightly reduce it. Yeah, and remove the extra line and the front portion also, you can assume that it's
covered in snow right there. I've made a slight difference
in the levels there. Now, we've got to add in what makes it
the telephone box, here is the front line. So all of these lines in order to give it the nice effect, it has to follow perspective. Let's assume that
all of it is going to be in perspective
so it's going to slightly bent out that way then we'll have our next lines. We'll have our box in it,
the box-like structure. Go ahead and add in
further some lines into your telephone box and make it like a box
so there is the box. Now inside it is where the
railings are going to be. Let me add the
first railing there , another railing there. I'll show you the entire
pencil sketch so you don't have to worry you can just do the same thing here
on the railings. That's the railing on that side. Now we have to make
towards the other side. Let's sketch out the same thing. Now the inside lines of that. Make it along the same level. Trace that line there but then remember to follow
perspective line. Can you see how all of those lines are as
if converging to one point? That is the vanishing point where it's going to converge to. That is basically our sketch. It's just as simple as that. Maybe if you want, you can sketch out the
ultimate background part. Let's also just sketch out the ocean and along the door side where
it's written telephone. There you go. That is
basically the pencil sketch. Now let's get to painting this. While we're painting this, we're going to apply water
all around our telephone box. The area of the telephone box, we're going to
completely skip it so everything else go ahead
and apply the water. You can also see I skipped the area of the curve
around the top, which is basically where the shadow of our
snow is going to be. So that part is the snow which obviously we
have to add in shadow, we can't just leave
it absolutely white but the rest of
the areas go ahead and apply water even
along the backside. Once you have applied the water, you can go ahead and pick up your smaller size brush to
refine adding the water along the edge very carefully because it's obviously hard to achieve this with a flat brush. There you go. So I have
applied that you can see, now we'll go ahead and
paint the background. For painting the background, I am going to be picking
up a very dark blue. You can go ahead with Prussian
blue if you have that. Here, I will take my
Prussian blue back to that, I'm going to mix in
a little amount of my indigo so that
it becomes more darker and you can see the nice milky mixture of the paint that I will be adding. What I'll be basically adding is I'm going to be adding a lot of bushy effects
to the background. You can create in the shape of fig trees in the background, pine trees basically
but make sure that you leave out the telephone box. Careful as you reach
towards the edge of the telephone box but
go ahead and apply some nice fig tree pined shapes and also to be
careful along the line there. We don't need us a definite line so that is why we applied
water to the whole but go ahead and apply on your paint only up to
where you've added that line. Same here at the
top, you can see. So let me get my paint along the back side because
that back side, even though I'm
adding it in a line, we should definitely add in more darker effects onto the top because we don't want
it to be seen as a line if you understand
what I'm saying. Apply some towards the
back side as well, then go ahead add
it in the shape of fig trees, pine trees. It's always better to add along the surrounding area of
the dome-like structure. Because when we
add in the shadow, it's going to shine through
and look more beautiful. There. I've added the shape, like some fruit trees. Now I'm going to further
darken up my strokes. I've mixed in a little
bit more of my indigo. But before that,
maybe you can pick up another brush that you have. Go ahead and soften
out the base. Just because you've
applied the water, you'll observe that your paint starts to spread
towards the bottom. Just go ahead,
absorb that region, and make it slightly flatter, and you get a smooth
edge like that. Now, we're going to add in
more of our fir tree details. I guess you can go ahead and add more darker elements because it's too in a single
color at the moment, and I wanted to create
some darker effects. That's why I've mixed in with
a little amount of indigo, and we're going to apply
that in the background. It doesn't have to be one
color all throughout. The same here. If you look, I'm just going to drop
my color at random. I just need to have some
color along the outside. Seeing here, now, as I've already applied
the base color, I'll go ahead and create
some random bushy shapes. Maybe a bit more darker color. Wherever you can, pick up darker color and start
adding towards the top. That is only going to add
more bushy effects to your painting because
it's the background, and once we add the
snow on the top, it will look
absolutely beautiful. Occasionally, go ahead
and soften out the base. If you see it's
forming like hairs, it's good to soften out. Darker colors. You can see how I'm applying the
nice dark colors. I think I'll apply
some more here at the base and some to the tip and the
edge right there. Maybe some here. A
nice background touch. That's what we've added. Now, before the
bottom part dries, which I think already
has, but it's okay. You can just go ahead and
reapply some of the water. What a harsh edge here, which I can achieve
by softening it. Remove it by softening. Then let's go ahead and apply water to the base again because I can see
that it started to dry off, but I think I'll stop from not touching
towards that point because I don't want my paint
to seep into the bottom. Now I'll apply the water. We'll add in some nice shadows. For adding in the shadows, let's pick up a nice amount of cobalt blue or
ultramarine blue. Whichever you prefer,
it's absolutely fine. Just a bit of blue, and we're going to add that. If you look at your painting, just go ahead and randomly
add them at certain places. Very lighter tone. Don't
even use a darker tone. Leave in all the white spaces. That can act as
the proper shadow. I guess I'll mix
in a little bit of ultramarine blue
as well because I liked the look of ultramarine
blue in shadow effects. See, it creates a
nice darker effect. I guess paint along the top. Some nice dark elements. We're not just going
to leave it white, we just add some shadow
elements basically. The rest of the areas
can be absolutely white. Now, once you've added this, let's wait for it to
completely dry so that we can add in the snow
and the telephone box. Here, I've completely
dried mine. Now, before we proceed on
to painting the box itself, we have to paint the
inside part of it. For painting the inside, what I'll do is we're going to water down the whole thing. I guess it's better
not to bother about the railings right now. But if you do not have cadmium red or if you do
not have an opaque red, check that the red color, red pigment that you
have is opaque or not. If it's not opaque, then go ahead and paint each of the little
squares individually. Another option that you can use obviously is gouache paint. If you have gouache paint, gouache is basically
opaque watercolor pigment. The one that I used for the
white is basically gouache. It's permanent white
from Winsor & Newton. That's why it's so vibrant and opaque rather than
using just watercolors. If you have red gouache, you can also use
that on the top. If you don't have
either of these, that is an opaque pigment, red pigment, or the gouache, you just need either. You don't need both of them. If you don't have, then go ahead and paint these individual squares and leave the space
for the railings. But it is easier this way, so that is why I'm
going for this method. I'm going to start with a little amount of
burnt sienna at first, and I'm going to put that
burnt sienna into my paper. Nice burnt sienna
along the base. Then, now I'll go with
further darker tones, so I'll take in light red. This is like a
reddish brown shade. You can just mix your brown and red together to
create this shade. I've just added that
in random places. Then we go with a
further dark brown. This dark brown is like Van
**** brown or burnt umber, and as you can see,
it's really dark. You can use this now, and I'm going to use
this along the edge. This edge here, I will
use this dark paint, and I'm going to apply that
in random at some places. Possibly a bit there. Then let me go for some
of the edge again here. Just creating some
variety of shades into the inside part of our box. Let me pick up some
more dark shades, I want this top
corner to be slightly dark and maybe a little bit
of darkness here as well. Then while that is drying, let's paint the other part, that is, the other inside part. I guess for this one, I will have a slightly
lighter shade into it. That is because I
want to depict that the inside part is actually showing the other side
into the snowy area. We'll just give it a slight
blueish touch, I guess. I'm just applying water to the inside part of
my little rectangle. I will probably take a watery mixture of the paint that we use for
the background. Here it is. I'm going to add
that right there. Go ahead and add that slightly watery mixture. Once you've added that, you can pick up a random
darker shade from the same mixture and
apply in some corners, some edges, maybe a
bit in this corner. I've washed off the pigment, now I'm just going
to spread it around. I don't want it to be too dark. Just in some areas. See, some darker
paint. That's it. Now, there's one thing
that we need to do although we didn't add a
pencil sketch for that. That is basically to add in the lines that go
into the other wall. It's like a rectangular box. It's like, what do you say? A cuboid, I guess. In that rectangular box, we're seeing two sides of it, but there is a third side
towards the other side, this is glass basically, so we are seeing through that. We need to depict the
other side there. You don't need to add a
typically red shade itself, so I'm going to go
with a reddish brown. It's the same reddish
brown that we just applied and maybe apply
a little darker brown. If you're mixing up
your reddish brown, just go ahead and mix
red and brown together. I've shifted to my Size 2 brush, and we're going to be using
a nice dry-on-wet method. This means that your brush
needs to be absolutely dry; the paint on your brush
needs to be absolutely dry. How you can achieve that is
to make sure that you dry your brush completely and then when you pick
up the pigment, your brush is going to be dry. See how my consistency is and running on my palette here, it's because it's dry. That is the consistency
that we need, and using that,
we're going to add. Go ahead, add a
darker shade inside. This darker shade inside is the inside part seen through
the glass basically. I've done that. Now, take each of these lines, so you see one line there. If you can go ahead and add
another line like that. Going and joining each of
these lines at an angle. That's the inside bar. When we add the detail in the
front, it will make sense. Here, I'm going to add
the center line for it. This is wet-on-wet, so it's depicting that it's in the background as
seen through the glass. We are just seeing part of the other wall
through the glass. When we add in the
red spots on this, it'll make more sense. Once now we've added that, before we paint the red part, let's go ahead and
paint the snow here. I'm going to apply water to
that dome-like region so that we can apply the
shadow of the snow. Then go ahead and pick up ultramarine blue or cobalt blue, either, whichever you're using for the shadow of your snow, and go ahead and apply
it right at the base, just on top of the curved line. Can you see already it's
forming as though it's covered in a layer of snow with the highlight
and with the dark spots? You can even further dark spot
by picking up a little bit of the darker color or you can use Payne's gray
at this moment, or you can mix
your gray as well, just like we did in
the first-day lesson. You can add that
at the very base. Can you see how we've given that a nice touch of the
shadow of the snow? I guess this region is
now completely dry. If you're afraid
that it's not dry, you can go ahead and try
and dry your painting. Let's now proceed
to the last step, which is basically going to be to add in the telephone box. I am going to take in
a nice amount of red. This is permanent
red from ShinHan. I'm going to be using
that, so I'm going to apply it right below the snowy regions and go around the box where I
want to write telephone. Also, notice one thing, you can have gaps in between,
it's absolutely fine. The main reason being
if it's the gap, it's just going to be looked
as though it is the snow. Here, another line. Go ahead, take your time, and fill up all the areas
now with the red paint. I'm just going to tilt my paper because
that's convenient for me to add strokes
that are inclined. This is the reason
why I said that we have to use cadmium red. Because if you have cadmium red or any read that's opaque, so this is permanent red. So any red that is opaque, even if you add it on a
darker color like brown, for example, it will
still come on the top. So that's the reason why
I recommend using that. Otherwise, it's going to be
hard for us to make this. If you don't have
either of this, then I guess you would
have painted the brown by going inside
the boxes I suppose. There proud of that. There are
just two more slides left. I guess now is the point. Can you see those
lines that we added inside looks as though
it's the other side. This is how I said that we can achieve that in our painting. Now that you've put
all your red shade, go ahead and add in some
nice shadow elements. In order to add a
nice shadow elements, we need to add a dark
color on the top. You can either go with
a brown or maybe, go with the same dark brown
that we've been using. Here's my dark brown. And I'm going to be using that. We need to create a
lot of shadow effects. One would be like light below. What you can do is
you can take that brown and you can mix it up with the same red that
we have been using so that it creates a
slightly darker red. Or you can use the
red brown mixture. Here I've added to the top. Can you see? You can go ahead and create a softer
mixture if you would like, but it's absolutely optional. I like to create softer strokes, that's why I do it. Brown and a bit of red together. Again, and now we have to create the separation
between the boxes. Just a line right
there in the middle. Then I guess lines there. But those separations are going to be using
our white paint. Now we've already done
all of our strokes. The only thing left is now
to add in snow element. So let's see how you're
going to do that. Make sure you dry your brush. I've dried my brush completely and I want to
pick up my white paint, and as you can see, it's going
to come off nice and dry. Taking up my white paint
in a dry consistency, we're going to add
that onto the doll. I guess my red has dried, and go ahead and place it on to your telephone box at
random places on the top. The horizontal radius are where it's likely for
the snow to settle in. For example here, the
horizontal surfaces. All of the areas on the
top of those railings. They don't have to be even
or uniform because it's just snow and they're never going to set
it down perfectly. Here along the angle, the one inside, we don't have to add
that because it's like the other side and nobody's
going to see that. We can see through that much. Then I guess we can add
another layer of line there. Shows more of the
telephone box details. Now before we add in the snow, let's just write the
telephoned card. I'm just going to cover that
up with a nice darker shade. Maybe I'll cover it
up with a gray shade. I'm just going to take my brown, and mix it up with my ultramarine
blue and cover that up. Again, don't have to
cover it up perfectly. I did make an
almost dry strokes, so I'm just going
to write on the top with my dark brown paint. I will write telephone, I guess we'll do that one first. It doesn't have to be detailed. Just roughly as much as you can. I think this one, it's better to write it properly
because you can read it. It's like on the good
face of a telephone box. There, telephone. Now, we can finish off with
a nice amount of splatters. Let's go pick up
the white paint, load our brush with a lot of white paint to add
in the splatters. I love adding snow, it's just as so pleasing part of the painting where you cover up your entire
painting in snow. You're like, what? Why did we add all
of these details? But then because it can
be seen through the snow. That's the fun part. I'm using my larger size
brush to add each of these. Then I'm going to do the same thing that we
did for the other painting. That is to add some
blue splatters. So we can go ahead, pick up any blue
that you want here. I'm picking up the peacock blue. I'm going to add
peacock blue splatters, especially some at
the bottom there and maybe a little
towards the top as well. I guess that you do.
Once everything is dry, go ahead and sign your painting and then
you can remove the tape. Let's remove the tape. Here is the finished painting. I hope you like it, and thank
you for joining me today.
9. Day 3 Colours Palette: Welcome to day 3, and this is the painting that
we are going to do today. Isn't it gorgeous? We'll be able to
capture the light, the lamp, and all of these Bokeh effects in
our painting today. The colors we need
today are lemon yellow, sap green, hookers green
or a darker green, Indigo, burnt umber or Vandyke
brown or reddish brown, permanent yellow
light, cadmium orange, cadmium red or permanent red, yellow ocher, and burnt sienna.
10. Day 3 - The Candle: Let's sketch out
the candle first. I guess we can make the candle
to be alone on one side. Maybe you can add some
hangings on the candle, doesn't have to be perfect
where the box has melted. This is like the candle
stand at the bottom. I guess I will have a stand that's like
hanged-appeared shape. You can go for any
shape that you want. I'm just adopting this shade. Then obviously,
we are covered in the fig tree branches all around and a lot
of bouquet lights. Then obviously, we have
the top of the candle to make. That's the burning part. Then for the burning part, make sure that you add
a nice burning area. There. Now, the best
thing to do would be to cover this up
in masking fluid, but I won't do it today because it's just a
small surface area. There might be other
times when we want to apply masking fluid,
we can do it then. Now, let's go ahead
and paint everything. What I'm going to do is I'm
going to apply my water all around and avoiding the area of the candle and its holder. I guess covering the bottom
part of the holder is okay. We'll apply water to
the rest of the areas. Again, see here, going below. Take it up to the
point of the candle. The same on this side. There. I've applied
the water. Now, let's go ahead and start painting. I'll switch back to
my size 8 brush. I'm going to start with
nice lemon yellow color. Taking that, I'm going to be
applying that lemon yellow. Let's apply it closer
to where the candle is, and we'll make a lot of
bouquet light effects. Let's say we create
some circles. Basically, it's wet on wet, so that's why we
make larger circles because it's eventually
going to make it come into smaller ones. Go ahead and make a lot of
circles as many as you can. Then going to go painting
towards the bottom, and maybe a little towards
the left side as well. The lemon yellow closer to
the lamp, be very careful. Then the next color I would
take is my sap green. Picking up a nice
amount of sap green, you're going to go add. Add it along the inside, around the edges of the lemon
yellow that we've added, then you can see
it blend together. Let that blend together. In fact, the reason for adding that lemon yellow
on the top was that because it would just blend
with our sap green and form a slightly lighter
shade at the places where the lemon yellow exist. For example, this is
the original sap green. But can you see it's
a lighter shade there to work the top? That's because of the lemon
yellow that we've added. Here, let me pick up, and we have to work quickly, and also to blend in. Here, now, I'll just
try and blend in my lemon yellow and my
sap green together, and creates a nice
bouquet lights. Picking up a watery
consistency of my paint, and I'm going on adding. Observe, let me add now
to the edge of my candle. It's covered up all the areas. As we approach towards
the edge, very careful. Here again, blend
that on the top. Take extra caution
while painting right next to the
edge of the candle. We're trying to fill in the entire background here
with this green color, and then we'll add the
darker color on the top. Here, I filled the entire there. You can see some
bouquet effects, and now we're going to create
further darker shades. Here, I'm moving
to my dark green, which is basically
my hooker's green. In order to make
my green darker, I'm going to mix in
a slight amount of indigo or you can even add
in a little amount of brown. I'm going to add in
a little amount of indigo to my hooker's green. You can see immediately how it's turned into a
nice darker shade, and I'm going to add this
now towards the top. My hooker's green plus my
indigo going over to the top. As I approach closer
to the candle, I try and make my strokes
slightly blend in and lighter, so we need an aura of
green around there. There it goes green and indigo, and we apply that along the top. Here, as I start coming down, now here along, I'll start making some
nice round shapes. Again, washing my brush and going around the area where I want to create
those bouquet lights. Another one right there. Let me just re-apply
water to some of the regions here because
it started to dry out. We just have to go ahead and re-apply your strokes if
they start to dry out, and make sure that you
make the consistency of the water on your paper even. That's it. Now, when I re-applied the water, can you see how it's turned out? Taking my paint and
mixing my indigo, I get a very nice dark green. I think I will mix in
more of my indigo and try to make the top
portion nice and dark, not before I add in
some bouquet effects. Just making some round shapes. Going towards the edge, you can see me adding
nice dark depth, but closer to the candle. Just like I said, let's
create an aura of dark paint. Here, we start to come down. Let's create more
of bouquet effects. Then another bouquet
effect there, another bouquet there, and the rest of the regions, I'm just going to fill it up. You can see what happens when
I'm filling up the regions. I've washed off the paint
in my brush because I'm coming down closer to where
our bouquet lights are. I guess you can also create your bouquet lights
using the lifting method. Here, I'm just swirling
my brush in around stroke to get back that region
that had gone blended out. I think the same
can be done here. I'm covering it up because my paper has started to dry up. But then I'll do
the lifting method and get that right
back onto my paper. Here I lifted out some paint. Here was the other one, and that was the other one. Then here, another
one right there, another one there,
another one there. Now we blend in the colors. I can add another one there. You can see how it
turns out when you add paint around lifted-off
areas that you've added. Lifting off paint,
just using my brush. Here I lift off something there, here, another one from there, and then let's blend along. Going back to my darker shades. As you can see here, my bottom part has now
started to dry out, but I will show you what happens and how you can solve the areas where
it's dried out. As I come towards the bottom, see, it's all dried out. But if you go
keeping your stroke going and going all the way
up to the end of the paper, then it's almost equivalent
to re-wetting your stroke. Here I apply my water and my paint and I
go all the way down. Let me pick up some sap green, going back with my
sap green and adding. If you re-add your
strokes on the paper, it's equivalent to
re-wetting your paper. See, I've re-wet
the bottom part. Now we'll go with darker paint. Here I take my Hooker's green. I want it to be a nice mixture. Then let me pick my
dark indigo paint and I mix it into my green
and you can see how I've got a nice dark green color. Now we're going to use this on the top to create
the fir tree shapes. Just go ahead and add in some nice grunge
effects on the paper. I guess you can have
some along there, go ahead and create. This one can extend
towards this side, and maybe another
one right there. Let's add some more. I want these to be like
in the background. That's the reason
why I'm adding. I guess I'll go with a nice darker shade here
towards the bottom. I've picked up my dark
indigo color and I'm adding. We can have some shapes
from this side as well. See how it's turning out. I guess it's better to
add with dark indigo. Here I'm using my dark indigo and I've made my shade there. Let me make another
one right here. Make another one
right along here. See, it's nice shapes in
the background basically. You don't have to go
with a lot of detailing. I want to add in some darker
strokes towards the top. I'm filling it darker
towards the top. Then I've washed off my stroke and I'm going
to pick up my dark green and go ahead and
blend that region. As you can see, if
you don't blend it, then you're going to end up with a nice darker stroke there,
which we don't want. Go ahead, use your dark paint, and blend it into
the background. Wash your brush, and just use your water to
blend it as well. See a nice dark effect. Let me pick up some
more dark shade and try adding more shapes. Here I've added some nice dark shapes, I guess, nice fir tree shape. Now we'll go ahead and I know that the edges don't
dry but that's okay. First, I'm going to
take in a bit of my yellow ocher and go
along the edge there. That depicts the light
there at the top. There, taking my yellow ocher. Then I will go with my
darker brown shade. We're going to blend that in right below the yellow ocher. Obviously, this
shape is going to slightly leak out
into your green. That's absolutely fine and
that's the reason why I'm not waiting for it to dry because
it's okay if it leaks out. That's the main thing. That's because we want to
create an even background. Here now I've taken my
brown and we're going to create a nice base and try and blend in the base of the stand and everything
into that background. Can you see? I've just made that background
blended into that. Now you can see there is
no clear distinction, but yet there is a
little distinction. It's slightly weird, but you
can see how it's affected. Then let's go ahead and
paint with dark portion. That I'm going to
use my yellow ocher. Paint the inside part
with yellow ocher. I've added that
with yellow ocher. Now we'll add darker
color on the top. For that, first I'll go
with a reddish-brown color. Reddish brown color, apply that on top, just at random, on the yellow ocher. It's going to be harder to mix, but that's all right,
that's the whole aim. Then green with a
dark brown shade, like a Van **** brown. You can go ahead and
add along the edges. Now it's a further
darker color on the top. Don't paint that bottom part where we added the
yellow coat first, that is like the edge of the
base that it's sitting on. But can you see how the darker color that we
just applied is looking? Go ahead and add
more yellow ocher if you want to blend
in those areas. The red-brown mixture. I've added a bit
more yellow ocher, taking a bit more of
my red and added that. Can you see how
it's looking now? I guess we've added
a lot of details. Now all we need
to do is wait for our whole thing to dry out so that we can
paint the candle. Everything is now
completely dry. Now the next step I'm going
to do is I'm going to try and soften now the edge of this green stroke
surrounding that light there. For that I'm going
to use a flat brush. Use any flat brush
that's nice and hard. It should not be too soft. Using that flat brush we
can soften out the edge. Let me show you how.
Dip your flat brush in water and then wash
it off completely. Drain it so that it's just damp. Then using this damp brush, go over the edge, running it all along like that. Then go ahead, absorb
it with your clothes, and then you'll see that
the edge has been softened. Let me show that to you. Can you see the
difference between that edge and this
hard line there? That hard line is what
we're trying to get rid of. Basically go ahead, dampen your brush, then
run along like that. Then absorb that water out, and you'll see that your
stroke has been softened. You can repeat this
process for all of the areas around the lamp. The light, basically, and we'll get the
edges softened. I'm going to do that for all the areas around
my lamp region. There, you can see how
the soft edge is looking. Now let's get down to painting. The center part is going
to be white itself. But you can add a glow of
yellow to the edge of it. For that, here I'm picking up
my permanent yellow light. I'm going to add
that glow round. But again, don't
create a harsh edge. Now I'm going to soften
out the edge of that yellow immediately,
using my brush. You can see it flowing inwards. But if you go ahead
and absorb it out, it should be a lighter
yellow stroke. This is why you always
need like a cloth in hand ready to absorb anything. Can you see now we've got
that nice glow all around? Then we start
painting the bottom. For painting the bottom pick up a very subtle and lighter
tone of ultramarine blue. Go ahead and put it at that base of where
the fire is burning. Then immediately soften it out towards the top and absorb
all that softening. Can you see now the glow has got like a bluish
tint at the bottom? If you look at the fire closely you will definitely
see this bluish tint. That's what we've
added right now. Now let's go ahead
and paint the candle. For painting the candle,
we're going to go with our gradual tone and depict
the light tone on it. Here I'm going with
cadmium yellow-orange, and I'm going to add it
right towards the top. That is what is going to give us the nice glow of the candle. A bit of cadmium yellow-orange. You can also add it for
depicting the shape of where the wax has fallen off. Now as I approach
towards the bottom, I'm going to add it
with the red shade. We're going to use
the same red shade, which is basically
the permanent red. We can add the entire length of the candle with the
permanent red shade. Now let's blend that along
using the red shade. Some darker shapes along. Lighter towards the top. See? How we've created
that nice candle effect. There. Then we can go ahead with a little bit of
the permanent yellow deep, or even the cadmium orange. Go ahead and create
like a surface there, at the back, because the candle,
it's got to have like a round surface at the top. Create an edge around it. Edge. Can you see how it's turned up? We're almost done. We just need to add in the
shadows to the candle now. If you go ahead and pick up that guide shade and mix in
a dark brown color to it. This is just like the
shadow that we added for our telephone box in day 2. Add that to the very base. Always remember, shadow
has to be added. Here, this bottom part is the furthest point from
where the light is burning. That's why you need
to add the shadow. You can blend it
along your red shade. Picking up the dark brown, making sure that extreme
bottom part is nice and dark. I'm adding on to the top. See how we've made a
nice shadow element. Now we can finish off by adding
some nice bouquet lights and maybe a little
[inaudible] tree effect. How about that? Here I take in my
dark indigo color. I'm going to use that
to generate a lot of [inaudible] tree effect. Basically you just go and add some nice branches, like that. You can put that in
various directions, doesn't have to be in the same. You see how I'm just randomly creating some structures
there at the bottom? Can use the same colors. You can go to a
different direction than the one that is
there in your background. I think that gives a
better appearance as well. Also, if you want, try putting some yellow
strokes in-between, on to the top. That'll give like a mixture. It'll mix up with
the indigo to form a slightly lighter
tone at random places. Now let's go ahead and add
in the bouquet lights. For adding in the
bouquet lights, I am going to take
my red shade itself, and we're going to
add in a lot of them. This is why you need
a red that's opaque. Make sure it's like
a cadmium red, or permanent red, scarlet. Anything that's opaque, just take your tube and
you will find out. Make round shapes like that. I guess I want to make
some nice ones there. I'm going to make
it in like a chain. Another one there perhaps. Then we can also add a
lot of them with yellow. Basically onto the right side we'll add the ones
with the yellow paint, especially closer to
the bouquet lights that we added in the background. You can see the lighter
shapes that we've created. I didn't focus much on those. If we were to focus and paint each of those
bouquet lights, then it would be more
than half an hour, so that's why I didn't put a lot of attention
into that one. I knew that I'd be adding a
lot of these in the front, so I just thought, well
why not, do this way. A lot of yellow ones, and let's just add a lot
of white ones as well. Quick white ones. Various circles, basically that's what
we're trying to add. But remember to preserve
those background ones, we took a lot of effort to
do the lifting and do those. That is why it remember
to preserve them. You can have overlapping one, so maybe another white
one overlapping this one. I want to add some lighter ones. For that I am going
to pick up my white, but in a very
watery consistency. When you add it in a
watery consistency, after it dries up you'll see
that they're very lighter. Let me just show you. Add few of them and when it dries out it
will be very light. Make sure to make
nice round shapes. Some of these are looking
like stones to me. Another smaller one
right next to it. As you can see, I'm not
taking any more fresh paint, but rather just adding a lot with whatever is
there left in my brush. We're done. Let's go ahead
and dry this up and you'll see the magic. Here it is. It is completely dried up, and you can see those
lighter ones that I did, it's very faded into
the background. This is the reason why
I said if you apply those with very less
pigment and a lot of water, then those look faded
into the background. Now let's finish off by
signing the painting. I'm going to be using my
permanent yellow light. It's almost like cadmium yellow. Let's remove the tape. Here is the finished painting, I hope you like it. Thank you for joining me today.
11. Day 4 Colour Palette: Welcome to Day 4 and it's
just 21 days to Christmas. The colors we need today
are permanent yellow light, permanent yellow
deep, cadmium red, dark green, sap green, indigo, raw sienna,
and burnt sienna.
12. Day 4 - The Window Scene: Let's go ahead and start. We'll trace out a
little window now. It's basically going
to be very simple. We just have to draw
our rectangle at first to trace out
the window obviously. It's better if you
don't use a ruler. That's because it's good
to have that window in a slightly bent or
having uneven edges, mainly because you want to
depict the brick structure. Here, I take it like that. Here it comes down again. I guess it doesn't have
to be that perfect. Come down and finish
the rectangle. That is basically the
structure of the window. Now, we put in more
structure inside. This is the outer frame, so we need to add in the
inner frame as well. That is quite simple. We just have to add
the line inside. It's like adding a
panel line inside. Another rectangle inside,
concentric rectangle. I don't know if you
do say concentric. That's what cell goes,
isn't it anyway? Two rectangles inside. Now we have the outer frame. Next we need the window, which means we need to add
another small rectangle. But the window is going
to be slightly smaller. You don't have to
make it as thick as the one that we
added at first. There you go. That's the
window. We are done. The window bars, I guess, you can split into three
for the vertical lines. That's better there. For
the horizontal lines, I guess I'll split into four. One there, one there, and one there. That's right. I like it. Now, we'll have the Christmas tree
somewhere on the left side, inside, of course, but it, as you can see,
goes and extends. That's how they've made
their Christmas tree. Possibly some
presents underneath. Just adding some
boxes underneath, obviously, masked out
by the floor area. Then behind that, let's
put in a fireplace. There is the fireplace. I guess, that can come out there and come up to that point. That is the fireplace. On top of the fireplace
is the mantle, the fireplace top side. Obviously, you can have for the Christmas
decorations on the top, maybe another candle
or something. Just add two candles. Then it's the floor. This is the flow region. That's pretty much it. Then
we have the outer region. Obviously, the window sill. That's something very important. I forgot about that. We've
made the outside sketch. Then the window
sill is, I think, maybe at a slight height. Then making that and making another angle
shape like that. If we shine that along
and give it a height. That's basically
the window sill. The rest of it is house spark. That's the pencil sketch. There you go closely
if you want to have a look at it
nice and close. Can you see that? Now, let's get to painting. These paintings, obviously, you cannot paint it
without the pencil sketch, unless you perfectly know where to place on
these segments. But I prefer to have
a pencil sketch for shot paintings like these. That's why I go for
a pencil sketch. Now, shall we go ahead and paint the inside part of the
window first? Let's start. What I'm basically going to do is I am probably going to paint it with the wet on wet
method, the inside part. I'll just go ahead and apply
water towards the inside. I'm just using my
smaller sized brush itself to apply water. I don't need to apply
a lot of water. It's such a small
surface area that we can cover it ourselves. I'm just using my size A brush. I'll apply water to
that whole region. That's it. Now, I've
applied the water. Let's go ahead and start. I guess I'll start with
permanent yellow light shade. I'm going to use that. I'm going to start
along the top side. I have the shape. Don't mind the window walls
for now, let it be. Here I go. I'm trying to create a white space
around the candle. If it's possible,
let it be there, otherwise you can
totally skip it. I've managed to do that, but maybe my paint will
spread and get rid of all those shapes. Let's see how much I can retain. Here, going with a
nice yellow shade. I'm going around the
fireplace as well. Obviously, it'll spread into the fireplace
and absolutely fine. Again, it's better to create
a nice effect of a fire. Let me try and create
a nice fire effect. Here, again, I've tried to create a
nice shape like that. Can you see it's just made
around a teeny-tiny shape. I'm trying to retain that
white obviously. Here I go. Now, the rest of the areas, I'll put in my yellow. Only that white region
that I've tried to leave is the fire
region, I guess. Now, I'll try and add the
further darker colors. I think I'll go with permanent
yellow deep right now. That's permanent yellow deep. If you have white span it, I guess this would
be Indian gold. Adding that onto the
top, as you can see, just adding there and
maybe a little to the top. I am trying mainly to avoid that area
where the candle is. I won't go any
closer to it because that might just
push my pigments. I'm trying to keep
away from as close as possible to the
candle region, where I've tried to
leave the white so that it shows that the
candle is glowing. Again, permanent yellow deep. Here, now I'll go around. Now, the next step is to leave a little bit of yellow behind. We've tried to keep a
little bit of white, now we'll try and keep
a little bit of yellow. That's the region that
I've left out my yellow. The rest of the regions, I will paint with my
permanent yellow brown. I guess I'll leave that
right side as it is. I like a nice yellow
shade or maybe not. Let's actually paint with yellow deep and give
it a nice color. Now, we need to give
darker shade for the inside part there of the fireplace to give
it a little bit of depth. I guess I'll go with a nice
burnt sienna right now. A burnt sienna or
reddish brown color, and use that to create further
depth in your painting. Now, next time you're
doing it, obviously, you have to go ahead and leave more of your permanent yellow. Create a nice fire shape. Because I take it towards
the edges or you can already see as it's a fire
that is glowing inside. That's the aim. So that's burnt sienna. I guess that's burnt sienna. Probably not, to give
the effect of fire, you can also take in a
little amount of red, possibly like cadmium red, and it'll give some area a nice reddish glow
into your painting. Here, I've added some red shade into
that fire in, I guess. Here towards the right side, see a little reddish
to the fire. Now I love the way that fire has turned out, it's glowing. So the fireplace and the
rest of the details, I think I'll add it after
the wet-on-wet has dried. So let's go paint
the floor right now. So that floor, I guess I want to go with a
nice brown sheet. So I think I'll
take my raw sienna. So taking my raw sienna, and that's what I'll
add to the floor. So there's the floor
and obviously, as you can see, I'm trying to avoid the areas of the
tree and everything. But if it's spread, I'm
absolutely not tensed. I'm fine with it, let it spread. But obviously try to
keep your strokes within the window itself. I guess these paintings
are actually very easy because there
are a lot of details, but the end process is actually very simple and very enjoyable because you see how things come alive in your
Christmas paintings. So that's the floral area done. Now we've got to make the tree, the Christmas tree.
Let's do that. Before I make the
Christmas tree, I think I'll add the
Christmas bubbles into my tree so that we
can paint around it. Does that make any sense? Yeah. So let's do that. So here I pick my raw red and I'm going to add in a lot of Christmas
bubbles again, so we will get
another in one there. Nice red Christmas bubble, one right there, maybe another one there. So obviously that's half
of it is going to be on top or behind the window bar. Then I don't want too many reds, so I'll add another one there and another
one there perhaps. Nicely drawn. Shall we add
some with yellow as well? That will look good.
So maybe I'll take my permanent yellow
deep and add a few. So here is one, another one there,
another one there. You know what, maybe we'll
add some white as well. So for the ones with white, I guess we just have
to paint around it. So let's go ahead. So we'll start our
tree right now. So I'm going with sap green. Nice amount of sap green here. Taking my sap green
and I'm going to start right at the top and we're going to make the
shape of some footrest. Use the pointed
tip of your brush. And basically all you have
to do is hit along and try and do some shaky
shapes, exact shapes. So here you can see me doing. I try and go around
the shape right now, shape of that bubble. First of all, because
the whole part of the left anywhere is going to be covered
with the tree part. Let's go ahead and cover it up. So see, you can draw a definite line and cover it up because that's
in many ways, the left part of the tree which is ending
is going to be there. Then the right side is what
we have to be careful. I guess this brush is a
little bit too large, so I think I'm going to
switch to a smaller size. So I'll get my size 2 brush for that purpose and then
go with my sap green. Yeah, and that's much better. Here we go round. Didn't we say we light
some white ones? Yeah, I'll add to that. I
actually could have forgotten. That was just at the last moment I just remembered that we have to
leave some white spaces. So maybe that'll be one
white bubble there. So I'll go around. All you have to do is
just with your brush, make some round shapes
and then try and get it. So yes, when you do make the yellows and
if they're still wet, they might spread a little. But I'm okay with it spreading
because it just implies that it's behind one
of those branches. See for example, I deliberately add a little bit on the top. So it just means that
there is a fir tree, the part of the Christmas
tree like hanging on top of that branch there. That's just how it's
going to look like. So that's actually
good, isn't it? So that's the reason why I like my strokes when
they're spreading out. I guess we got the Christmas
presents at the bottom. We got to be careful with those. If you've forgotten,
you just added the whole thing with the sap green, that's
absolutely fine. There's no necessity that you have to paint the
Christmas presents. So it's totally up to you. Why is my tree shape weird? That's because it's going
like that and like that, so I guess I have to add a bit more here
on my tree shape. We want a nice tree. I still feel that my tree
shape is weird, so I'm just going to go ahead
and keep adjusting that. This right here,
that's actually weird. Yeah, that's actually
much better right now. So here, a little part
of White Christmas. Well, but I think
I only added one. That's absolutely fine.
We'll do it later on. So here, taking my sap green and it fills
the entire part. Now we need to add some
darker colors on the top. For that, I'm going
with my darker green. So this darker green
is basically Hooker's green and I'm going
to add that on top. You can also mix in some
darker green viridian or maybe a little bit of indigo if you would like to
further darken the tree. If you will have the dark
green from White Nights, you can also use that. You know how much I
loved that green. So this time I've been
using a separate palette, mainly because I wanted to push my limits and try out
different things. Because I got so comfortable
with my other palette that I wanted to push myself out of my comfort zone and
try out new stuff. So that's the reason
why I decided to go with this one this time. I love to do such
things, that is, push myself from out of my comfort zone and
try out new things. Do you like that as well? So I know that
following my class, some things might
be new to you and I wanted something that
is new for me as well, so that's the reason why I chose to go with a different
palette this time. Because the other palette
is so natural to me, I've gotten so used to it. So I've added some
nice shapes there. Let's go ahead and paint
that mantle right now, the top of the fireplace. I guess I'll go with
raw sienna for that, so I'm going to
pick up raw sienna. There is the raw sienna and
let's just cover up the top. The reason why we painted
on the top is so that color will come forward and
anything that's sit outside, that is, no matter
yellow or any color, will look inside
that fire place. That's the reason why we paint this after it has dried up. Also adding that separate line along the edge of the floor, but also make sure that
it shows that it's a separate thing.
That is a fireplace. Obviously. There, a
nice fire place at it. But always don't forget shadows. Here I'm going to take in a
little bit of darker brown. I guess I'll go with
a darker brown. I'm going to mix in with
that raw sienna again. I'm going to add
there at the top. Why? Because we are
now going to add in a little greenish tone right there for the decoration
on top of the fireplace. That has to have a shadow. Don't forget shadow ever. That's the most important thing. Also maybe let's use the
same brown in order to create some lines on the floor. What do you think? Doesn't
have to be detailed. I've just put in some lines, maybe you can mark
tiles along the floor. That's much better. Now let's go back with
our green shade to add the decor on top
of the fireplace. Let's see just some
normal green strokes. It's okay if you're brown and your raw sienna
hasn't dried. It will just try
and spread out a little and give a nice
cubed shape I guess. Because some of it will blend, and some green will
flow downwards. That's absolutely fine. Here, up until along there. Maybe let's make this green like something hanging
down like that. See how it's hanging down, then go in with the
dark green now. Always remember to
add in some details. I like that. I'm
going to go with the same brown and
raw sienna mixture. I'm going to create a
little candle holder. Most of it is going to be
masked out by the window, so it's absolutely fine if
you don't add it as well. Now, the candle,
let's take red shade and put in that
nice candle there, another candlelight
on the left side. Two candles, and you can see how it's
creating the glow, so I've managed to
create the glow. Thank goodness. Now the presents at the bottom. I guess I'll make a new
different colors and everything. Here I'll add a present. That's red, maybe
another yellow box. You could go with any
color box you want. You don't have to
go with the same color tone that I'm using. I am just adding on my own. I'm happy with all of
these as it's done now, I'll add the Christmas
bubbles onto the adaptation of the top
of the mantle later on. I think for now it's time
for us to paint the outside. Painting the outside,
let's just go ahead and do it with
our larger size brush. I'm going to go apply water
along the outside, there. All along the edge. This is why we created actually a perfect rectangular shape. It's okay to go ahead and apply water to all
the areas around. Use the larger size brush
that you have and do it. Yes, I know that some
of your green or your red or anything might just
spread out onto the paper. That's absolutely fine. The reason being the
color that we're going to be applying is so dark, so that it's absolutely going to be fine.
Trust me on that. It's easier to paint
with a flat brush, so that's why I do it. I have now applied the water. Let's go ahead and use a large flat brush and
try and apply the shades. I'm using my black velvet three-quarter
inch flat brush for this purpose and I'm going
to go with a nice dark, but I shade in blue
color at the moment. You can see me loading
my Prussian blue. Let's load up nicely, the Prussian blue on my palette. Just go ahead and apply. The reason now we're going
for a Prussian blue is that we've already added a lot of warm tones
in our painting. Isn't it time to add
some cool tones? That's why we'll
paint the rest of the areas with blue
so that there's like a even balance
in our painting. Using a lot of blue, and maybe I shouldn't
do mixture. Go ahead, apply it. Yes, it's okay to have some edges like you can
see some edges of white. I'm absolutely fine with
that because that areas are all going to probably just depict the snow in our painting. Yes. It would've been great if I could have left white
spaces for my snow. But I think I'll just add
them with white later on. I prefer that way because it's easier to paint
the window in this way. That's why I going to
add the snow later on. Here, cover the whole
part of the window. But now we need to
add the details. Now, I'm going to take indigo. Can you see it's a nice
dark mixture and I will add that on the top
now, so that's indigo. But now when you are
applying it onto to the top, make sure that you apply to the outer side of the
rectangle that's outside. That's the outer rectangle. Make sure you add it there. This is just going to be the base layer of
that outer part, just adding some darker colors. Here I can see that
it's spreading inside, so let me flatten it out. It's absolutely fine
the way it spreading because we'll be adding darker
colors on the top anyways. Now we wait for this
whole thing to dry. All right, here, it's
completely dried up now. Let's go ahead and make the
outside part of the window. Here again, I'm going to
use the same mixture, but now because we are going
to be adding another layer on the top that will
come nicely on the top. But can you see it's a
nice and watery mixture and I'm going to be
adding that on the top. Can you see right
on the top and use that outside line of your
rectangle to make that stroke, and also don't forget this edge here for the
edge of the window. Yes, let's apply
right at the base. Go ahead and fill
up those areas. Then again, go up to the top at an angle
there. Adding paint again, and at the top. You can clearly see how
now we've distinguished the window out from
the rest of the areas. There you go. Now, we've
taken out the window. You just applied paint there, so now there are some areas
that you have to darken up. Just to give it a
better appearance, so here I've switched to my size 8 and I'm loading my brush, and we're going to darken out the area underneath
the windows lab. That's because that is like
an area that's under shadow. Can you think of it, how the windows lab extends outside, and so the area, why do I say behind, the area
below it should be darker. That area below the window still that needs to
be slightly darker. I guess, you can go all the way towards the bottom
and make it darker, I guess. Then I just want to put
in darker strokes at some other random places just so that when we add in the bricks, it'll be slightly darker. Maybe a little around the edge. This is all just so that
our colors are not in a completely perfectly
uniform manner. Do you understand that? Here, maybe draw some lines. These lines obviously
has no relevance. I am just trying to put in a different shade of color into my painting,
that's what I'm trying to do. Like here you see just
added a dark tone, maybe here a bit of darkness, some dark tone there,
no relevance at all. Now that our inside part is dry, you can go ahead and add
in the Christmas bubbles, again so onto that
mantle piece over here, just picking up a little
amount of red and adding a lot of small red dots onto it. I don't know if
any of you can see clearly but small dots. You can do the same with maybe
a bit of yellow as well. I missed a little bit of yellow there, so I'm just
going to go with it. I guess maybe a little
ribbon for my box. I can see some of my
blue spread into that, but it's looking
beautiful there. I actually like the
way it stand out. Now for that box, let's have
a wrap around that box. I will go with a
different green shade. It's like the gift wrap. Now, we'll wait for this
to completely dry out. There you go. It's
completely dried now. Now let's go ahead and add
some nice shadow elements. I'm going to add in a shadow to the inside
part of my window. For that, I am just basically applying a
little bit of water, so that my paint will spread. But note, I'm applying the water towards
the inside only, just to the inside part. We're trying to
create depth effect. If you take your indigo shade and add it to that dark region, and let it flow in the water. Let it flow. You can see that that edge gets a darker
shade. Can you see? And you can use
that to just spread it and give it a nice edge. You don't want any
hairy structures, so that's why I'm just trying and then we spreading it out. Same around here. Then I guess now it's time for us to add
in the different regions, different window areas again. Here I'll go with
my indigo paint, and I'm just going to draw a line there for the
edge of my window, and I guess another line along here for the edge of my window. Then this part here again is
the next edge of my window. That was the bottom part and
we have another part there. We have a lot of
areas that we're going to be covering
in the snow. These areas, as you can see, it's wet because
we've just applied the paint and I'm okay
being it slightly wet, actually, it's just
better that way. All right, now let's
add the window bars. For adding the window bars, I'll go with the
same indigo color. Again, make sure that everything
on your window is dry. That's absolutely essential, and use a nice watery
mixture. Let's add. I'm just going to turn
my paper because that's comfortable for me when I'm
adding lines like that. Here you go, add it on the top. The horizontal ones. Observe one thing, they
don't need to be perfect. The reason being, they are
going to be covered in snow, so then even if your
lines are not perfect, you can just mask out
all of them in the snow. That's why I'm just
randomly adding with my brush without looking
for any perfect edges. Let's create an edge line
there with my indigo. Another one down here, because we need to have
a wooden structure, or a metallic
structure or anything. That way those
bars are attached. There's something there
at the bottom as well , and at the top. Now let's go over the
top of the frame. There you go. Now I guess the next step is to
add in the brick effect. For that, I'll go with
my flat brush, again. Going to pick up
my indigo shade. I'm going to add
brick structure. The brick structure,
I'm going to just add it around the windows, the rest of the areas
we leave it as it is. It's basically going
to use my whole of my flat brush and using that. If you don't have a
flat brush and you're not comfortable in
doing it this way, you can just use
your normal brush, and just draw a lot of
rectangles towards the top side. Remember, they don't
have to be perfect, as you can see evidently
from my strokes. I don't try to get them perfect. I just try to capture
whatever I can. You see? I'll go all around the edge. I try to create some
smaller ones as well. See, Just so to give
it the brick effect. I guess I'll leave
out the bottom. But here we need to
make some more, there. Now, let me go over to the side. There, covered that. I guess we should do a little
towards the bottom as well. Make sure you do it in a
slightly zigzag manner. Now that you've done that, I've switched to
my size 2 brush, and we're going to add in
larger bricks possibly. Just go ahead and use your brush to create some
lines and some effect. See, I'm just adding
some horizontal lines, and I'm going to add zigzag lines to depict the
effect of brick lines. I guess that's it. Now we can finish off by
adding in the snow element. Here, we're going to
use my white paint. Again, a nice amount
of my white paint, I'm going to add in the snow. On these windows in here, it should have a lot of snow. Keep most of this region, it's going to be
covered in snow. Go ahead and paint
the whole of it, and you can create random edges. Doesn't have to be perfect. That's the whole point of it. Here again, so any surface that's got a
horizontal edge to it, you can add in the snow effect. There's the snow
there. Then, now to this window soap that
I've already added, I'm going to add
in another drop of white just to the top region, so that the bottom part has a little thinned-off indigo from the color that I
had already applied. Can you see there's a
little dwell tone there? All of the horizontal bars, and towards the edges try
to accumulate your snow. You can have some
dry strokes as well , a bit there. See how it's all
covered in snow? Now, obviously, we'll add it to all the other horizontal bars. Because these bars,
as you may know, are places where the snow
can actually collect in. Don't make them
as perfect lines, go ahead and create unevenness. But obviously, along the
flat horizontal line, the unevenness should be
towards the top, I guess, because most of it is going
to be towards the top. It settles as a flat line. Go ahead, create a flat line, then the unevenness
towards the top, so there. A flat line, then the
uneven way the snow that settled is towards the top. I guess we've got quite
a lot of those regions, where the red ones
can be fit in. There, let me add some white. Can you see what I was talking? What can you see now here we've got a little edge
of indigo there which will act like the
shadow bit of the snow. Here again, I'm going
to add my snowy bit, but I'm only adding it
to the very top region, so that some of the bottom
region remains lighter, so that it gives a dwell tone. Do you understand that? Now, we can finish off
with the splatters. Obviously, this is
the most fun part trying to add in splatters, and give the whole
painting a snowy effect. I love this process, trust me. The only thing is that I always worry that my tableless
is going to get ruined. That's why I prefer the
one-hand method for this splattering always
because it's so convenient, and I'm able to control it to some extent to stay where it is, like the splatters, although some of it
goes into my table. Such a bright snowy day. This is why I said, you don't
have to perfectly paint all the details because you
are going to cover it in snow anyways. Then
what's the point? There you go. We're
absolutely done. Let's just wait for
this whole thing to dry out so that we
can remove the tape. Let's remove the tape. Here is the finished painting. Hope you like it. Thank
you for joining me today.
13. Day 5 Colour Palette: Welcome to Day 5 and it's just
20 days left to Christmas. This is the painting that
we are going to do today. The colors we need today are
sap green, hookers green, viridian, Russian blue, indigo, ultramarine blue, and some
white gouache of course
14. Day 5 - The Snow on Fir Branches: Let us start. I
guess today this is going to be quiet easier. We'll sketch out the place where branch of the full
tree is going to be. Branch of the tree that we have. It's just some branches
that are visible, but I'd like to show how we can paint such a
beautiful background. That's the purpose of this one. Also placing the snow and then the shadow of the
snow and all of that. Let's have a branch
like that there and maybe another branch crossing
over behind that one. Comes around there. Then
let's have some there and I guess another one
that goes up to here. Maybe another one, maybe this one can have
a small extra branch here for the branch and
another one right there. We'll have a lot of
smaller ones here. Maybe this one can have
another one behind like that, and another one there. Another one there. Just adding a lot of branches. This one I'm going to
have a larger one, basically the largest
one that we are going to have all the way down there. This one can have further
some extra branch. Another, and this one
can have another bunch. This is just all the branches
that I have just added. Maybe another one there. There you go. This is the pencil sketch that
we're going to add. Now for painting this, we have to paint the
background first, but we've got to leave
the snow behind. How do we do that? by
leaving a lot of white gaps. Here I have just my
size paint brush, which is basically a
larger size brush. Go with a larger size brush and you're going to apply water. But observe closely now. When you're applying the water, we're going to leave a
lot of white spaces. Let me just go ahead and apply water to all
the areas that are literally outside of my region. If you know, I don't want to be using any masking
fluid for this one. I'm just going to go ahead
and show you how it's done. Here, I've applied a lot
of the outside regions. Now I'm going to come closer to my trees. The tree branches. Here along the branch I leave a slight gap and then go and I guess towards the bottom part of the branch I can get
as close as I want. Towards the bottom
side of a branch. I guess this one I don't want
to add in a lot of snow, but I guess I want
to add snow to that one so I stay
away from that one. Then the bottom part
of that is okay. Then we have the
next larger one. I want a large chunk
of snow there, a large chunk of snow here, some large chunk there,
then staying away. There. We've got to
cover up that bits. I'll come below it is
fine for me again. Then you're taking
around to the edge, coming closer to this one. Staying away from the top bits. Then here I come again. I want my water to go there. Here again, water there, and here again at the base, nice amount of water but staying away from the top
most part of my line. That's basically what I'm doing. I guess here I'd like to
have a lot of snow and the same for this large branch will have a lot of snow admins, I guess the rest of the
areas I'll apply water. For this one here again, there'll be a large chunk
of snow there and then columns a large chunk of snow but here what's the immediate bottom
side should be okay. Here again, a large
chunk of snowy region. Another large chunk there. I've applied the
water. You obviously know applying this
water process was like a tedious task because obviously you can't see where
the water is on my paper. Let me see if I can show
you in a specific angle. It's way tough to show you
where the water is about. Can you see the areas that
I've applied the water? We're going to go ahead
and I'm just going to re-apply water to
some of the areas. When I hold my paper
like that at an angle, I can actually see the areas where I have applied the water. I'm going to use that
and re-apply my water. Make sure that my
paper is nice and wet. There. Now let's go ahead
and add in the colors. The color that I'm going to
add is I'm going to make a nice dark washy color
for the background. Here, I'm taking my viridian and I'm going to
mix it up with my indigo, gets a bit more indigo. I guess I'll go
with a little bit of Prussian blue as well. Gives a nice bluish appearance. That's my Prussian blue, my viridian, and my
indigo mixed together. Can you see the color
that I've created? I want it to be more bluish, so I take more of
my Prussian blue. I think just a teeny tiny pinch of the viridian should do. That's the background. If I put that onto my paper,
can you see the color? That is my background color. Here I go. I'm
going to apply onto my paper and I'm going to tilt my paper and look at where are the areas
that got my water. I guess I have a
little bit there. I have my water area there, my water area there. The point of applying
paint like this is your paint is going to only flow to those areas where
there is water. In fact, the areas that doesn't have water will
not get the paint. Also, make sure that you put your stroke only to those
areas where there is water. Because if you put
it to other areas, then it'll create harsh edges. Yes, it's going to create
a harsh edge where the paint ends and the
water ends, that's fine. But we're going to
create a background. Here there's a little bit of water and I can hold
it like that also. I'm just holding it in
various angles so that the areas where there is water my paint is
just going to flow. I guess I need to
mix more paint now. The important thing
about mixing is that when you mix
sometimes you're going to get different shades and that's absolutely
fine because you don't have to have the exact same shade that
you're using throughout. For example, if you look
at this color right now it's slightly different from
the first one and it's fine. Because then you
get varying shades on your paper and that's
beautiful, isn't it? To get all those
different colors into your painting
rather than looking one single flat wash.
That's what I like. Here I'm just adding and I've
put that color in there. I guess adding to
this region now. A little bit on that region. I guess I had a
little bit there. Which just started to dry
because I didn't re-apply my water and I guess I
had a little bit there, but my water region has dried. Probably maybe I'll just
re-apply a bit into some stage in their,
literally there. You can use another brush. As you can see, I'm just using another brush to apply
a little bit of water. Yeah, as you can see
I've applied the paint. I love the way it
has turned out. Now, let me just pick
up a hold of that paint and I'm just going
to put it at random. I don't need an even wash. I'm trying to get
as different stroke as possible so somewhere
whenever [inaudible] touching, I get these dark marks
and it's absolutely fine. Here I can touch a bit. Here. I'm going to use all of that pain
that I have mixed it. Let's make use of it.
Let's not waste paint. We've put all of that into
that background there. Now the next step
would be to add some, let's put in some splatters
that is deliberately, let's put in some blooms
into a painting again. Here I'm just going to switch to my smaller size 4 brush because I guess the blooms with the size they would be
like literally big. We generally want it to be. Just using my size 4, I'm just going to drop
in blooms on my paper. Can you see it better
but it's falling. It creates the
spread of the paint. Go ahead, add some blooms. Now literally, let's go ahead and add in some
white paint as well. This white paint that
we add right now, is going to act like
the background snow. That means it gives a
direct effect to the snow. If you observe the paintings
that we've done till now, it looks as though the snow is like in the foreground only. We want it to be
nice and snowy day. Make sure to take
the white paint and add a splatter effect with
the white paint as well. Because when you
add the splatters, you'll notice they go
into wet-on-wet mood. Can you see that.
Those snow particles are now in the wet-on-wet mood. Then, once the paper has dried and we add in
more snow on the top, you will see that these are
in the background and it has like a nice depth effect. It gives a view of the
atrial perspective effect. You can already see
how some of the white splatters that I have
added has spread out. Can you see it's all spread out. That's because there's water on the paper and it's
wet-on-wet splatters. That's exactly what we
want because it gives the way how it appears
to be in the background, goes towards the background. Now the next thing
we'll do is we'll wait for this whole thing
to dry out so that we can add in all the folder
elements. There you go. It's completely dried up
and you can see clearly how the splatters and all
those white spots are looking. They like embedded
into the background. When we add more white
spot on the top, this is going to look
completely different. Now we'll go ahead and paint
many of our fig trees. For that, I am
going to first use a dark brown paint
because we're going to add in teeny-tiny
branches at first. Here, loading up my size 4 brush with a
little bit of brown. I'm going to use
that to draw a line. We're going to follow along with pencil sketch that we've done. We can easily spot our pencil
sketch. It's right there. Let me see. I guess
I'm going to skip that part because I want
it to be covered in snow. That part. Also don't
draw a continuous line. Try and see if you can
break up your lines. It will depict as though
it's covered in snow. Another one right there. Then I've got here. Make sure that you do add as many
breaks as possible. Doesn't have to be continuous. Remember, thickness
at the end there, it should go tapering
towards the right side. This one is quite long, so I guess I'll have
it a bit more thick and thinner as I go
towards the right. This one's got branch.
Finally this one. I'm going to leave a huge gap
there because I guess I'll depict more snowy effects. Added the branches. I guess we can go ahead and
add in the leaves right now. Here I'll take my
sap green again. We're going to go with
sap green shades first. Here, I'll take my sap green and I'm going to
start right at the top. At the top portion, wherever you want
your snow to be. Because we said the snow is going to be at
the top portion. Go ahead and towards the top, only make smaller,
smaller strokes. But at the bottom, you can go ahead and
add larger strokes, especially it's extending on top of your background as well. Anyways, the bottom part doesn't have a lot of snowy effect. Only the top portion is
going to have a lot. Go ahead and add,
missed a branch here. But I'm sure, it's fine because when you add your branches it should be fine. Towards the top, just
some like one or two. Can you see this one or two? Show that you previously once more so that you
know what to do. If I were to add for this one, but I want a lot of snow
effects to be there for. Here also at the bottom, just do one or two. Again it's just a little visible through
the snow. That's it. Now as I come here, I guess I'll add a
bit more I guess. Now here let me show you the top portion here
what I'm doing. I'll just basically not
just one or two branches like that towards the top
and also smaller effect. Because you're trying to make it look as though it's
covered in snow. But at the end, let's add some nice strokes. I guess you can add a lot more towards the bottom as well. Go for a smaller size brush, which is more
convenient with you. I think I'm going to take my size 2 brush
for this purpose. My size 2 is considerably small and it's got a nice pointed
tip, so I'll use that. Using that, I'm going to
make some nice branches. Can you see on towards
the bottom they don't have to extend
in the same direction. Make them in different
different directions. Now let's keep going,
so I'll add more here. I guess this is the step that's going to take
a long, long time. You've got to go and sit and add all of those
teeny-tiny branches. But trust me, it's going to
look beautiful in the end. It's worth the
process, I believe. I said towards the top, just some teeny-tiny lines. Now, let me show you something. You see this large area there. Towards that region,
I want to do something different as in I
want to add some branches, but like make it
towards the background. But how do we do that without
disturbing the whole thing? What I'm going to do is
I have my brush here, which I've just wet again. It's wet and I'm
basically going to roll my brush and putting a little amount of
water in that region. When you roll your brush, your water doesn't go
into all of the places but just in some areas. Then if you go and pick
up your pigment and start adding in those areas where
you literally put the water, you'll see that it goes to only those areas are where
there is water and it is so random that it's such a
good technique because you'll see that it doesn't get into the areas just
like you want. It gives the effect of like a little random snow effect which you cannot
otherwise create. Basically it's just using
a brush, rolling it, a wet brush so that the water gets attached to
only some of the places. Let's continue. As you can see, I've just used the rolling
brush method in that region. I'm going to keep adding
my stroke. That's better. I guess to the ones
like literally on top of my dark color, I will mix in a little
bit of my lemon yellow into my sap
green mixture. That'll make it a little bit lighter and I'll use
that on the top. If you look closely, see a little bit of
lighter color added on the top because that will make it light nice and
visible on the top. Just go with your
instincts and add in a lot of these nice strokes. Let me add some to the top. In some areas you can go for the usual dark sap
green as well. Let me take that as well. Here's my sap green. I think I put that in some areas
in between here. If you look at the way
that I pick up my strokes, you'll see that it's
completely random. I don't take sap green then perfectly the lemon yellow
next, something like that. I just go and randomly pick up the colors and
that's what creates the beautiful effect
on your painting. Because it's totally random and there is no control
over how you've done it. Maybe a little towards the
top and maybe some showing up through the snow because this
here is now the dense snow. You got to add some showing
up through the snow as well. I guess at times you can pick
up the darker shade also. Can just go with
different greens. I mean, if you have a basic palette and if you
don't have fresh dark green, go ahead and mix your
indigo or your dark blue with your green and you'll be able to
create beautiful greens. I'm going to pick up a little
bit of my background color. Again, that's there
and I'm just going to glide right there at the base a little bit because I felt that there's a
lot of white gap there, and then I'll go with my green. Obviously, yes, my
green is going to slightly mix it on
there and I don't mind, I don't want it to be like a steady background right there. See just adding some
nice strokes there. I guess it is one more region where I have to add
in my background, and that's like right
here in between. If you look, there's a little
gap for my background. Filled in the
background stroke, then just filling in a
little heavy strokes there so that it
doesn't look detailed, and now you can pick
up a darker shade, probably mix in with
indigo if you want, and try adding darker shades. Now okay remember perspective,
either perspective. Just adding some darker
shades on the top. I missed out this branch here. You can see there is
a gap in the snow, which means you need to have
branches poking out there. You can already see how this whole thing is
coming into picture. It's looking beautiful. Once you've done that, the next thing for us to do
is to add in the snow itself. I mean, if you ask me the snow is already there why to add it? But we need always add shadow. For adding in the
shadow of the snow, basically what I'm going
to do is wet those region. But how I'm I going make
it to embed it completely? Just use the rolling
brush method again. Randomly wet the regions. Go ahead and use the rolling crush method
for the areas of the snow. You don't need to wet all of it just a bit here and there. The rolling rush method. Then, now we're going to use the ultramarine blue for
creating the shadows. Very subtle amount, you can see how watery mixture here I'm using and it's a
very light mixture, and use that and add it to the areas that
you've added the water. Again, like I said, look into your
paper while adding. This will show you where
are the areas that you've actually put in the water using
the rolling brush method. I can see on mine. Here, see. Just adding and some of those strokes are
going to be wet on dry as well. That's okay. That will give the effect of a better rounded
element for the snow. Just randomly adding a
teeny-tiny amount of the snow. This is the shadow of
the snow, basically. That's what we're
trying to add here. If you look again,
see now how it already looks beautiful
with the shadow. Always remember shadow guys. That's very important when we're doing any
painting in fact, because the shadow is what
makes you picture as a whole and gives it the natural
beauty that we're looking for. There was a branch here
that I was supposed to add. I forgot about that
and I have like, can you see a snowball
effect there? That means I need
to have a branch. Now, that's better key. You can also use this
method where you apply some ultramarine and then go ahead and soft and
only some edges, not all of the edges. Now, look at your painting. You see the difference
that it makes while adding that shadow bit to go snow. We're done, the only step left is to add in
the snow itself. I mean, you can make it snowy if you like it just like that, you can leave it
as that as well. But my whole point of
having that background was to add in a little bit
more snowy element. That diagram looks like
in the background. I'm going to make
this interesting. I'm just going to add in
a lot more snow to this. Let me take out my white paint and I'm going to drop in a
lot of smalls splatters. I'm using my larger size
brush for the splatters. I don't mind. I guess that's it. I don't want to add a lot
today because if we add a lot, then all those
background splatters that we added will be gone. Look at your painting right now, so have and observe it. You see those
background splatters, there is splatters
in the front and then there's those
backgrounds splatters. They also look like snow but
giving the effect of depth. This is what is known
as aerial perspective. Aerial perspective is creating the illusion of depth
in your painting using your watercolors by giving such effects that goes into the background
and the foreground. We're done. Let's go ahead and dry this up so that we
can remove the tape. I forgot to sign my painting, so let's go ahead and sign it. Let's remove the tape. Here you go. Here is the finished painting. I hope you like it, and thank
you for joining me today.
15. Day 6 Colour Palette: Welcome to day 6, and it's just 19 days
left to Christmas. This is the painting that
we are going to do today and the colors we
need today are; violet, permanent yellow light, permanent yellow deep, burnt sienna, sepia or Van
**** brown, sap green, a dark green, indigo, cadmium red, and lavender.
16. Day 6 - The Snowy Street Light: Let us start. We'll do a
quick pencil sketch of the lamb so that we know
where it's in place. I guess I'll put it somewhere
towards the left side. The Lamb is basically
going to be, let's see we draw a
structure like that, quadrilateral and
there's the base. For the top, I guess
I'm going to go for a slightly curved shape, there. Now extending a bit
towards the door. Another bit more
towards the door. The point is to make it
as complex as possible. I mean not making it too
simple that's what I mean. Here. Like a dome shape
at the top of it. Let's say this dome, it's got like three different
layers or lines again. The top there's like a small thing and possibly
like a hook at the top. I like the way it's turned out. Then now we add in
base, that's the base. Then obviously we have to
add in the inside part. The inside it's, that's the center part inside. Then let's make the base
now where it's attached. The pole around which
it is attached, again, let's say it goes like
that towards the bottom. There it goes. Then
I'm just going to add some extra bits. Then maybe another
extra layer here. That's basically, the lamp. Now we have like a little Christmasy right lead that's hanging on the pole. That's the outside
part of the sketch. How is it hanging? I want to make another
extension here for the lamb. Basically, something like this then a rounded edge there. Make sure that you make it
evenly on both the sides, symmetrical on both
sides because it's a lamb but has to follow
the symmetry line. I like that. Here in the
front is where the lamb is, where the lid is attached. Then we have like a
bowl here on the lid. Let me drop that off so that you can
make it more clearly. Here again and the
ribbon of the bowl. At the bottom, obviously, it's going to be covered in the Christmas tree
branches of the lid. I guess that's it going to
be for the pencil sketch. I'll show this to you closely. Here you go. That's
basically the pencil sketch. It's very simple, isn't it? All right. Now let's go ahead
and paint everything else. For painting the background, I'm going to use my
flat brush and apply water to everything
in the background. Here I'll apply water. I'm going to skip applying
water all towards the bottom, but I'll stay around somewhere there and I want to
apply all round. Don't touch the lamp
region remember it needs to be lighter,
dark green light. I've applied just the
outside areas now I need to go ahead and apply
all towards the exact lines.Taking your paint and go ahead and apply
nicely over the top and the left side
as well. There you go. We're now going to add in a nice amount of background. Let's make it like a
different scene so I'm going to start
with a little amount of yellow but a very, very subtle lighter
tone of yellow. I'm going to place that
into my sky region, but basically only
like next to the lamp, closer area to the lamb. It's not a lamp light it's actually the
sunlight or the glue of the painting
at the back here. But that's why I
wanted to be a very subtle yellow and I'm going to apply it at the back
so also closer to the land. That's permanent yellow
light you can use Indian yellow or any
yellow that you have. Then the next color I'm
going to be using is violet. Here I'll take my violet
and as you can see, I'm taking a nice and
watery consistency of my violet and I'm going
to be applying that. If you observe closely again, you can see that I'm
applying my violet to watch the backside and closer
to the yellow of course, so that areas just adding a little bit of violet don't have too much
towards the top. The reason why we're going with this color scheme is
if we want to show the lamb has been
lit then it needs to be at least a night scene
or an evening scene. I'm going for an
evening scene here, which means that the
colors of the sunset down into the yellow and
violet kind of shapes. This violet is the older
version of the yellow part. That is the complementary
color of the yellow. That despite the
background trees or the background effect, we're trying to create
that with violet. Usually, we do that
with a dark blue, that's when it is daytime. Now it's sunset time so the background goes
into violet hue. I'm applying my
violet tone again. I'm going to stop
somewhere there don't come all the way down to where you've applied the
water. I guess I'll stop. You don't want to cause
somewhere right there and the same on the left side. We stop there and we
paint along that area. That's an out here, okay? Under there. Now that we've applied the
violet we need to give it more background effects. Now I'll go with a
dense amount of violet. Can you see it's a
bit more denser, but make sure that your brush doesn't have a lot of
water because now we're approaching towards more
of wet on wet itself, but needs to be very careful because it's going
to be the background. I'm going to use that
violet shade and making a lot of
not-exactly-perfect trees. Just a lot of branches, if you can add
towards the top side, and as you will see, I'm
just using my same brush, it's my size 10 brush in fact and I'm using
that to create these upward strokes and
adding a lot of flanges. Add another one
one the left side. I guess we can wash that
off and add some more. I'm going to go
over to the yellow. It's absolutely fine to
go over to the yellow. Just some nice branches, and let's create the effect
of some nice foliage. I'm just taking my
violet itself and we'll add some nice
wet-on-wet strokes. But now towards the
top using the violet. Let it go over to the top. And also, we can go over
to some of the yellow, it's going to turn into a
slightly brownish shade, absolutely fine. It'll show some of that violet
through the brown shade. Don't apply it all
round, just a little. And I guess that I'll also
apply a bit of darker tones towards the bottom to
show a bushy effect. See a bit here, just shows a bit bushy effect. I like the way it
has turned out. Now what I'm going to do is let's apply water to the bottom. I stopped somewhere there
because that will give me a reference point where
to add in my snow region. Now, I'll go ahead apply
water to the bottom. Can you see it's already
spreading out so I need to prevent the
spreading and stop it there. I'm just using my brush to stop my paints
somewhere there. Then picking up my violet again, now we're going to add in
a lot of snow details. Go ahead, put in some
random strokes on the snow. These are now completely
random. You can see. Just some absolutely
random strokes on the snow with some lighter tone. Once you've done that, we'll go ahead and pick up a little bit
more of our violet. But for that, let me
switch to my Size 2 brush, which is actually smaller size. Loading my brush with violet, and we make sure that my
brush is not too wet. We're going to add a pathway. Let's see. Taking my violet. But make sure that it's
thicker here at the bottom, and as you go further away, it gets thinner and
thinner perspective there. I made it thinner and thinner. Here, you can see
the thickness right here is more thicker, and as it goes there, it gets thinner and thinner. Let's make it dwell.
It's not a pathway. Maybe it's something like a sledge has been pulled
along on the road. That could be this. Another one but obviously
respective going to take this and join
the top right there. I like that. That's
a nice pathway. Now, random dots and
detailing onto the snow. Just completely random put
in random dots details. We make sure that I
get that end nicely. See some nice details, some random dots or anything
you want, you can put in. Just blending it around. Now, can you see the pathway disappearing into
the forest behind? Now, all we got to do is to paint the light
in the foreground. So for that, let's try
the background first. Wait, I actually got something that's very important here in the middle is supposed to
be the snow region itself. Let's add that have just
basically added water to that. It shouldn't look
as flat like that, without any paint or anything. First of all, we've got to add the violet for the
region behind. That's up to there. I don't mind maybe going in front of the
ribbon, so that's why. I guess I need to take
it a bit more downwards. I think up to that point should be enough
for the background. Up to that point. If I were
to dig my violet and add. A good background. Now, just in the other places, I'm just going to put in some random violet just to depict the exact thing that
we did at the back like some random
dots on the snow, so that's what it's going to be. Now that looks much much better. Now, we're going to dry this up. By the way, before
this dries out, let's try splattering
some water so that we create the effect of
some background snow. But I guess my paper
has already dried. I'm pretty sure let me
see if it actually works. I got some blooms there.
Please, some blooms. I hope my paper is not too dry. Wanted some blooms there it's
not working, it's just dry. Anyways, that's all right. Let's go ahead and dry this up. All right, here, my painting
is now completely dry, I only managed to create
very little blooms. I didn't get any
blooms here because I guess it just dried up. Now, let's go ahead
and apply water to the inside part of the lamp. Here, I'm loading my
lamp with clean water. Just the inside part. Then I'm going to go with
my permanent yellow light. I need to create a very
light, glowy shape inside. Here, I'll just go around
and add my yellow. You can see I've created
a nice white gap, and the rest of it, obviously, I'll paint with my yellow. Now we go with the next
shade, which is going to be, for my case, permanent
yellow light. If you have Indian
gold, you can use that. Digging it around to the edges leaving a lot of
yellow bits right now. Then the next shade, I guess I'll pick up a
little bit of brown. This is the red brown shade. I'm going to be using
that and I'll add that. Obviously, adding
that to the top, a bit to the bottom. Added that. Now I need to depict a little bit
of violet as well. I guess the violet we'll
just mix in there. This is because I wanted to pick the colder side where we
see through the lamp. The lamp is like a transplant structure,
so that is the light. But then you're seeing the
other side of the lamp through the glass in there. That's why. I know it's probably
not going to work, but can still do it. Let me try like taking
off some pigment there. I just need to give it a nice darker glow
towards this left side. The violet will mix in with the brown to create a
nice dark color. You can use that to create
the other line on the left, for example, there you go I've added like a line there
that's wet on wet, but that's inside part. And here again using my
violet to create depth. You don't have to necessarily go with your brown paint itself, you can go with
violet on the top. That's the good
thing about colors, always mixing creates
beautiful shades. I've managed to capture that. Now, I guess I'll have to
wait for this to dry out. While it dries out, why
not paint the top part? For painting the top part, I'm going to take
that red brown shade mix up my violet so that it turns into a
nice darker shade. Can you see? It's a
nice darker shade. This is what I'm going to
paint with on the top. Now, observe closely what
I'm going to be doing. This top part, obviously the top portion is going
to be covered in snow. So we need to add, but you can leave some gaps. It's good to leave
the gaps itself, let it be there. Let's assume that
this region has like a surface where the paint
can accumulate onto. You can go ahead and
paint the bottom part of that region and here it's
going to be covered in snow. Then again, the bottom
part of that line. Guess the rest of it at the top is going to
be covered in snow. Here, just creating some
random shapes again. Then again, this region
can be covered in snow. A better way the ink can be covered in snow,
leave them white. It's easier to leave them white. You can also use
your white paint and lavender at the end
to add your strokes. I like that. Now I guess I'm going to use
a different brown. That's going to be
my van **** brown, which is like a
darker brown shade. Using my van **** brown. Added that. Now, let's see if it's dry. It might not be dry yet
so let's go ahead and paint the bottom
bars now quickly. Here, taking my brown and adding. I guess that will be
an element of snow on that art surface so I've
left a small gap of white. Then bringing that down again, another bit of snow region
there where it can accumulate. Then here comes the lamp
towards the bottom, the lamp wall, basically. Here now I'll go by
trying and filling out. But I guess I'm going to
create like a light shade. Here I'll go with my red brown and I'm going to put
that onto my paper. Obviously leave a little gap there because that's
where the rip goes. Going with my brown now, I will add my brown on the top, so gives the effect of
a multi-color there. A slight multi-color, rather than going
for a single color. These kinds of effects create a beautiful look in our
painting basically. Add that. Now we have one side to do so
here, along this side. But again, we need to
add that rounded shape. But as you can see, I've left a slight gap of white
there at the top so that it can show that
it's the snow accumulated. I mean, yes, you can add
more white to your lavender, but it's good to
have them at first. Digging in a little bit
of my yellow I'm going to add a little
to the top there, gives the glow from the
lamp on to the lamp wall. Then going with my van
**** brown towards the bottom gives a
nice color tone. Can you see how the
yellow is mixed on the top and gives
a nice glow there. I guess while we're
painting the rest, the center portion has dried so we can go ahead and
paint the center right now. For that, here I
load my brush with a very lighter consistency
of that red brown shade. I just need it to be very light and I'm going
to be using that. Here comes red brown
shade at the bottom. Now towards the center, you need to make it nice and light so I'm going to go with my dominant yellow deep instead, so if you take your
permanent yellow deep, go ahead and add that to the top because it gets like literally lighter where
the white glow is. Towards the extreme edge you all fiercely can use a
darker pigment there. That's basically my
van **** brown again, you can also use sepia, I guess. Let's go ahead and create
a nice edge of our lamp. Here, my lamp's got a nice edge. That's the base part. Another edge here. You can see how I've connected
the black part in there. Can you see how it's now
looking amazing and glowing? Let's go ahead, take
the same brown, I'm mixing my Van
**** brown into my red brown paint and
let's paint the top part. That top part again, I guess a lot of it's going
to be covered in snow. But that we can add properly later on because it's
got some white there. Because it's got some yellow there so I'll add it later on. I'm just going to cover up
the whole thing at the top. I like the way it's turned out. Now we'll paint the reeds. For painting the
light, let me go with my nice cadmium red shade. Again, towards the top, I will leave some gaps. Of course, when
you're painting this, you don't have to paint
it all perfectly. You can leave a lot of
white gaps in-between. That'll be just the snowy part. It's absolutely fine. Here I'll take my red and add. Added my ribbon, but remember
shadow, very important. Here I'll take my
Van **** brown, going to mix it out with a
little bit of the cadmium red. The nice Van **** brown
with the cadmium red, gives a darker mixture like that and that is what we're
going to add on the top. Add that to, for example, one
side of the ribbon. You could also just
go ahead and use your brown directly and add it. Here I pick up my brown
and if I were to add it to one side like that. Can you see how it
looks as though the ribbon is not twisted? Same for the top part. Always remember shadow. Can you see how I have added little amount of
brown stroke there? Now, let's create the twig
shape for the lit at the top. For that, I will
use my raw sienna. I'm going to take my raw
sienna and I'm going to add. It's just basically
a lot of lines. You can start those
lines from where your ribbon starts and make
lots of lines like that. Use the pointed tip of your
brush and lots of lines. Obviously those lines
are not going to be in the same length or direction. See what's the back? Lots of crisscrossing
lines basically. Added a lot of crisscross lines. Now, let's go ahead and
add the far tree one. For that here I
take my sap green. I guess we stopped at sap green, but we need to add darker tones. With the sap green let
me go ahead and add in a lot of filtering
branch on to my light. First, just creating
the branch structure. Here you can see I'm just using my size 2 brush and creating
these outward strokes. Let's go. At the moment there
will be lot of gaps, but we'll be filling
it up shortly. Added with the green. Now we need to add darker green. Here I'll take my dark green. I guess I'd want to
mix it up with indigo, that creates a much
better dark green. Gives darker effect. I think that mixing a bit more of my sap green
into that mixture. That's a better dark green. That is what I'll add on the top and you can see as
soon as I added, I start getting darker effects. But let me try in adding it to most of the areas where
there is white gaps. If I try and fill up the white gaps in my painting
now with this mixture. Added that. We're not done yet because now that you've
added the raw sienna marks, which might be dry now, I'm going with my burnt sienna and I'm going to add
some ice twig shapes. On the top with my burnt sienna, I'm going to add some
nice twisted twig shapes. Can you see how now that gives the effect of a nice twig shape. Still, we need to go
one shade darker. Always remember shadows. Going with next shade, which is going to be the
sepia or a [inaudible] brown, again, whichever you want and fill up the white
gaps with that. No white gaps in those regions
where it's like the hay. It's not hay
exactly. What is it? I don't know the exact term, but let's just fill up all
those white gaps there. Yes. That's how it is, just filling up white
gap right there with my brown paint and I really
love the way it's turned out. Now let's dry this
up completely. Once it's completely dry, you can go ahead and add some Christmas bubbles
in your painting. So for that, you could use your cadmium red
or any other red. Either Christmas
bubbles or maybe this is filled with berries. I guess I'll go for berries
and maybe you could use it to cover up the white
spaces, not all of them. It would be impossible to
cover up all the white spaces. But if you do add in a lot. Maybe how about
some yellow ones? Let me try that. But the yellow ones
cannot be berries, so I'm going for the
Christmas bubbles. Let's see. I have a large
Christmas bubble there, another large one there,
another one there. That is much better. Once you've added that, now let's go ahead and
finish up with the shadows. So for finishing up
with the shadows, here I take my violet paint, but we're going to use
a very watery mixture. Using that, we're going
to add in some strokes of violet onto the
extremely white areas, because we do need to
put in the shadows. Always remember that. Then we'll finish off
with some lavender. So here is my lavender paint, and I'm going to
use this to create the nice shadow effects. But this lavender,
I'm going to mix it up with my white so that I get a slightly
light violet shade. So here's my white paint. We will mix them up together, a bit of lavender and a
bit of white together, creating a nice mixture, and I'm going to use that. Let's apply in lots
of areas like, for example, here at the top. The reason why we mixed
with white is it gives a slightly much better look. We don't want it to be entirely white because it's
a sunset scene, so you need to actually
depict how it's the snowy effect with a
little amount of shadow. There, you could put in
your violet a bit there. You can see how it's
all turning out. Then I guess I'll go over
some areas at the top a bit. The snow can settle there. Then obviously, yes, it
can fall onto the wreath, but I didn't want to show it's completely fallen on the wreath. Yes, on top of the ribbon
because that's a fixed area, maybe a little at the top there, just mixing a teeny-tiny
amount of my lavender. Little on that portion. We had somewhere here as well. I guess we are good to go. So now we'll go ahead and add in the splatters
like we usually do. So for adding the splatters, I'll switch to my size 4
brush and take my white. So I'll take that
same mixture of white and add my splatters. So careful where you
add the splatters. It's a watery mixture, so then when it dries up, it's actually going
to be very light. Now let me take a
proper white paint and we'll add some
nice shimmy splatters. So if you don't have lavender, you can actually mix in your
white and violet together. You just need a
teeny tiny amount of violet into your
lavender, that's it. So here, we're not done
with the splatters, let's add few splatters
with the lavender itself. Remember, a shadow box. You can see how you
get that effect. Then also add some splatters
with your violet as well. See, it gets one shade darker. Can you see how now we've got
a nice lots of splatters? We add some more with my white. There you go. Let's go ahead
and sign the painting. Now let's completely dry this up so that you
can remove the tape. Here you go, it's
completely dry, so let's remove the tape. Here is the finished painting. Hope you like it, and thank
you for joining me today.
17. Day 7 Colour Palette: Welcome to Day 7, and this is the painting that
we are going to do today. The colors we need today are cobalt blue, ultramarine blue, indigo, permanent Rose, and sepia, or burnt umber.
18. Day 7 - The Little Snowman: Alright, let us start. So for that here is a base
on which he's resting. Then we're going
to have its body. It's a nice rounded
shape for the body. Cute little ball
there, and then, it's wrapped around with a
nice shole or a scarf okay? There is the front
portion of the scar. Then let's see. Then another little
ball for the head. That's basically how
snowmen are, right? There you go. I
think I should make the base a little bit bigger
so I'm going to do that. Okay? There, let
me get that thing, the base of my snowman. If I make a slightly
bigger circle. I think that's much better. There's the shole scarf
wrapped around it. And there's the front part and it has to be sitting inside. Let me get that. The rounded shape should
actually be going inward like that along
the shole, there. That is where the hands
are going to be coming. We've got some nice bold, snow again for the hands. That's it. How about a hat? Yes, I'll add a hat as well, instead of a perfect round shape that will look more cuter. For adding the hat, I take off a little portion
from the top side and take the hat like that. And, the hat goes and
comes around the head. A little round shape at the end. I guess that's it. So that's our pencil sketch. Let me show this to you closely. There you go. A cute
little snowman. Now let's quickly get
to the painting part. Here I'm going to be using my
flat brush to apply water. So I'm going to take my
flat brush and I'm going to apply water to all of the areas, but I'm going to be
going around again. So we're going to skip
the area of the snowman. So, very carefully going around. I guess this portion where it's supposed to be the
twigs. That's fine. So just go around
that circle there. This little circle. Just
go around that one. And around the bigger one. So, here I applied the water. You can see that now we go
ahead and start painting. I'm going to be using
my size ten brush. Literally, the brush size doesn't matter
because I just picked up one from my
table right right. It could have been a size
eight or a size ten also. I got both of them here. We are going to start
with cobalt blue. Here, I pick up a nice
amount of my cobalt blue. I'm going to start. I'm going to put that into the sky region. As you see, I have no specific format am just
adding some random strokes. But there's one
thing that I'll do. I'll try to make sure
that most of my stroke stay away from my snowman. But some places, obviously you
can have it close as well. I guess you can stay away
from the head portion, but let's go closer to the body and leave some
random white gaps in between. Here I'll go as close
as possible to the body and maybe also as close as
possible to this round hand. But staying away from the head. The reason why I do
this is the head is a vibrant red color. It's okay to have
a white gap there, but the rest of the
snowman is going to be in white color to
bring in the contrast. That's why we go and paint
closer to it as well. If we pick up more
darker shades, darker shades can go to the top. Always make sure that my
darker areas at the top. Here, I've picked
up a bit more of my cobalt blue and am
adding towards the top. You can see the arches paper forming small
bubbles on my paper. Then I'm just going to pick up my liner brush so this is
a long liner brush you can paint with just any brush that has a pointed
tip. That's it. Okay? Here, what we are
now going to do is, I'm going to load my
brush with indigo. Okay? Load your brush with
a nice amount of indigo. I just mix it on top of the
cobalt blue itself because this indigo is such
vibrant color. And now using that, I'm going to make
some small trees and be adding that small triangle so I've added
a small triangle there. I'm going to do the next one. I guess the next one and have
around that much height. See just a bit. I guess I can do nothing there. At an angle. Then I'll do another one right behind but somewhere up there but
make that one taller. Don't make it like an
exact triangular shape. Try and define it to give
some detailing okay? I love the way it turned out. Okay, it's gone above. Okay, that's it. I don't want
to add any more detailing. Just want to keep
it simple enough. Okay? Because I promised I
would make this in blue. I guess that's it. Let's just go ahead and
absorb something from the base because you
can see it's spreading so let's not make
it spread too much. That's it for the background. Let's now wait for this
whole thing to dry out. Here you go, everything is
now completely dried up now let's go ahead and
add the snowy region. So I'm applying some of the
water towards the bottom, just at the bottom where the
snowman is actually resting. I'm going to be using
ultramarine blue here. Okay? Loading my brush with
ultramarine blue, I will add that. And you can go ahead and add
in some random direction, doesn't have to be even. Keep the base of
where the snowman is resting nice and whiter. Maybe more of the ultramarine
blue you can apply towards the other places. If you look at the top region, I'm adding some nice
bluish shades and apply water there so
that we can go ahead and quickly soften that out. So, added some nice blue shades. You can go ahead and add some
more bluish tones, okay? I've tried to keep the base of the snowman as
white as possible. Let's now add the snowman itself because I
know it's white, but you've already known
what we're going to do it. We're going to add
in a lot of shadows. Shadows are what
make our object more visibly attractive and gives
it form and dimension. So I'm switching to
my size 8 brush, and we're going to add it now. The first place, let's start
at the right top side, so there's that
little round shape that needs to have a shadow. Starting with that, I'm
going to add ultramarine blue to its base,
little around base. You can already see how it's
got a nice round shape. Then more at the bottom. See how it's got a rounded shape right now as you
add into shadow. Now, the next plane that you
need to add in the shadow is this, the hat part. Let's see, the hat
part again going with ultramarine blue and
add that to the center. I guess the rest of
the areas are bright. The area underneath obviously needs to go into
shadow, I guess. Here I take more of my blue, raise amount of the
ultramarine blue and we add it to the bottom. Let's make the top more natural. Added that part, now we have the face to add. The face, observe closely, I am going to apply water
to the whole of the face. I'll try and make
sure to keep away from my ultramarine
blue for a little bit. I know that it still might
flow in parts I guess. I have applied
water to the face, now we have to add. Here, taking nice amount
of ultramarine blue. Let us determine where the
highlight is going to be. I guess in my painting I want to make it as all the light
is from the left side. So then I'll have
large highlight here, a nice white area that is
going to be my highlight. The rest of it, let's add, so here I add in
ultramarine blue, then we have to add the
dark portion as well. As you can see, my paint
is definitely spreading, but I'm just going to soften it. Yes, the water just spread
to the top as well, but you can always go ahead and soften things up. Can you see? I've created a nice highlight. Create a nice
highlight of white, then let's apply the
darkest shade on the top. Here now I'll go with
the dense amount of ultramarine blue. Away from the highlight, I need to have nice
shadow effect, that would be here
at the bottom. Then we need to have a nice shadow right there
at the top as well. That's the position where
there is the shadow underneath the hat. Again, I can see my round
shape already going, so I need to go ahead and
soften that bit again. Now, let's paint
the bottom part. Again, we're painting
the bottom part. Here I go and apply
water to that. Again, part of obviously skip
the region of the scarf. There you go. Then making
my ultramarine blue, I will add. As you can see, I go over
and add to the right base. Like I said, let's have a
nice lighter region there, but right underneath the scar, we need to have
shadows. So there. Now let me pick up a dense
pigment and start adding. Nice and dense right
underneath the scarf as well. Then let's blend
all of it together. I like the way it's turned out. Now I guess just do
more of those things. I guess those should be easier. You see, a little
white space around? Accidentally did that,
a bit too much color, so I just need to take it
off. I guess that's it. Let's now wait for this
whole thing to dry out and then we can add in
the rest of the things. It's completely dried out, so let's go ahead and
paint that hat region. For painting that, I'll go with a nice permanent red shade
or a permanent rose. This is rose madder, the name from ShinHan, so you can use any
color basically. That is what I'm going to use. Observe closely what we're
going to do right now. Because now along the top, I want to depict that it has some fur kind of
shape of the hat. That's why I've added my
paint in a zigzag line. Not zigzag, but if you
can just move your brush along and keep creates
some white gaps like that, that would be great, isn't it? That is how we would add. Fill up now. There you go. Added the gap. We need to
add depth and details. I've washed my brush, I'm going to pick up a
nice dark brown shade. I'm going to put it
at that end there, and let that spread
onto my paper, and another line there. Then, now maybe use that to
create some design or detail. Like here, just added some lines and these
are our on wet lines, so it's going to spread. I'm fine with it and I like
the way it's done out. We use it both for the shadows
as well as for the design. This is rose madder, I don't know why I say permanent rose, because it's in my head. [LAUGHTER] There again,
back with my rose madder. I guess a point what I'm
trying to say is you can go ahead and use
any color you like. You could actually
change the color of the scarf to a green if
that's what you like. Just imagine, maybe that will be a unique
different painting. Why does the scarf has to be
exactly the same as mine? Use your imagination
and turn it into a wider reality. Go ahead. Using that added, now, let me add bottom scarf. There, added the scarf, now we'll go ahead and
add in the deck again. Here, let me load up my
brown and obviously right below there where
the other scarf is joining you would need to have a nice dark area, right and then I'll use
this to create the design and maybe like the fold, see, used it for the
design and the fold. Then I guess we could
do the same thing. Let's see, I need to
have a little bit of dark area there at the
top because it's bend and now the design part of it I guess I'll go for some
nice lines on the top. I like the way
that's turned out. Maybe like another line at
the bottom for the design. That region doesn't have to go, the same can go spread. See how we've made the
nice scarf region and also marked out the way it's
like a fatty end at the top. Can you see how it now
turned out nicely? Now we go ahead and
add in the tweak, for that I switch
to my size eight and going to use the
same dark brown, so any dark brown,
transparent brown, burnt umber, sepia, anything, make sure it's dry. This one, I guess I will start
the air and at the moment it's going to be made of little different tweaks so
that's how it's formed. Can you see? I added
a little tweak there, let's do the same here. For this one, start a
little towards the front, that's where it joins. Now where it's joining I guess we need to add in
a little bit of shadow. Here I'll take my
ultramarine blue, I love my ultramarine blue to put it right
there at the bottom. Just a little amount of paint
and then I'll soften out, soften out the base. Make sure that your brown
doesn't spread too much into the snowman. That's fine. Go ahead and use an
ultramarine blue. Can you see how it's
turned out right now? Let me reapply the water a
little so that I can go ahead and add in the ultramarine blue. See how it's turned out. Now I guess it's time to add in the eyes, the button eyes. Here I stick in a nice amount of brown paint and
everything is dry there. Yes, so let's put
in two large eyes. Just a round shape, then something I guess. Let's put orange for the
nose maybe like a carrot, so there and I'll make it like a small triangular shape
towards the right side. Did you see that? That's
using cadmium orange, then let's use another
twig to draw the mouth. See, that's another twig again, but like with the
little branch head, that's how we paint the smile. How about we add
two more buttons. Let's make different
colored buttons so I'm just going with my brownish shade and one of the buttons is there and the other one is
going to be right below but I guess
it's masked out. see, it's not possible to add another button
towards the base. Maybe one right there
so that it shows up. See, I guess that's
much better, isn't it? Lost the round shape
so let me adjust that. Then maybe I'll add some dark bits on the
top of those buttons. We were just using
my dark brown paint and going over the top. I like it and we're almost done. Now the only bit left is to add the snow and the far
portion at the top. For that here I take
my white paint and now using that we're going to do just what we did
for the top portion. But like if you can just
randomly do some lines like that towards the head it'll show up as having
the nice furry edge, then obviously finish
up with the snow. Here let me load my brush with the white paint forehead and load the whole of your brush with nice
amount of white paint. We're going to add in snow, I love adding snow for
my Christmas paintings, you know it's just beautiful. Although there would be
some paintings where we literally can't add the
snow, you'll see in a while. But wherever we can
add why don't we add, so I wouldn't stop. You can see it snowing. I guess for today's one I don't want to add any darker snow, I'll just leave it as
light as possible, let's make it just glow bright. Since we didn't paint
anything towards the edges let's go ahead and
sign the painting. Let's now remove the tape. Here is the finished painting, I hope you like it. Thank you for joining me today.
19. Day 8 Colour Palette: Welcome to Day 8. It's 17 days left to Christmas and this is the painting that we
are going to do today. The colors we need to
do are, prussian blue, cadmium red, sap green, indigo, van **** brown or sepia, ultramarine blue, burnt sienna, and a bit of white gouache.
20. Day 8 - Snow on Winter Berries: Then let's start. We'll have that branch of the winter berries
somewhere here in the center and a lot
of it covered in snow. Here, that is the main branch and a
branch extends until there. Let's see that one of the
branch goes like that. Then we have a small branch here and this small branch there and here a small branch,
another branch there. Now we need to mark out
the positions of the snow. That's very important,
so let's see. We have the snowy element here. I guess painting this
with masking fluid is the best option
because if you want to keep those areas where
it's covered in snow, you know what I mean,
so that is why. A bit of snow element there. Then, let's see,
another large chunk of snow element here. Just adding that shape in there. Another large chunk there and that is obviously a
branch that goes like that. A large junk there on
one of the berries. Then on this main branch here, let's have another large
chunk of the snow sitting. Another large chunk there. Another chunk here
in this corner. As you can see, I'm just
making large blobs. I'll show you how
to paint this with the masking fluid
option and if you don't have masking fluid and you're like an
ultimate beginner, then go ahead and paint it using the other method where we went around each of
these large blobs. That would be the
other way to paint it, so don't worry if you
don't have masking fluid. I mean, there's always
solutions and there is ways that you can avoid that. This one, there is
a plant extending and put in another large
blob of white there. I guess that's all
I can think of. The rest of it is all going
to be covered in berries, so these are the large blobs that we need to worry
about right now. Let us go ahead and
apply masking fluid. I'm going to be using this masking fluid which is a old drawing
gum. It's the same. It's masking fluid and
one of my old brushes, so this brush is what I
keep for masking fluid. Always remember to
wash your brush immediately after applying
the masking fluid. Do not use your new brush, the brush that you want to use for long with
the masking fluid, use something that's very old. Maybe if you haven't
got an old brush, then maybe you could apply
it using any other things, for example, toothpick or
something that's got an edge. Most people prefer to
apply using the backside of the brush so that the
bristles won't be hard. I'm going to use this old brush and start applying
masking fluid, so all around those
little bubbles or the shape that we add it. That's where we are going
to add the masking fluid because it's best
to preserve them white and then add in
the shadows onto it. That's the reason why
we do this method. Plus another thing is you don't have to have the edges perfect, so I guess it would
be best if you also apply with the edge of a
toothpick or something, then you won't have
such strong flat edge like the one that I get
when I'm using my brush. Because the edge of the
snow that settles on top of trees or plants doesn't
have like a very flattened, it's actually a
little perforated. I'm trying to achieve that
perforation with my brush, that is by going
unevenly like that. There you go. I've applied
the masking fluid. Now we really have to wait for this whole thing to dry out. We have no other option, we have to wait for it to dry out. Do not use a
hairdryer to dry off the masking fluid
because then it becomes very difficult to be read off from the surface of the paper. Let us start. It's been around one hour and all
of the masking fluid, it's now going to
be dry so I'm going to apply water to the
whole of my paper. If you are following along and you do not want to use
the masking fluid method, then at this moment you would
have to apply the water all around those little shapes
that we have created. This is why the pencil
sketches also very important. If you don't have masking fluid, just go ahead and
paint it that way. Yes, it's going to be slightly different because
you would have to go around each of those places and apply the water and
apply your paint. But then, trust me, it's still going to be different unique thing
that you have created, so not to worry if you don't
have the masking fluid. There, I have applied the water. Now let's get to painting. I'm going to use my
size 8 brush and I'm going to start with a
nice Prussian blue color. It's flashing blue, which
is a nice dark blue color. You can also use indigo in case you don't have Prussian
blue or even just mix a little bit of black with your blue to get
these darker sheets, and this is what I'm
going to be using. Basically I'm going to put
this at the background, so this is what my
background is going to be. Observe closely, I'm
trying to stay away from my tree portion as much as possible and also to put in lesser colors so lighter
shade will suffice. This is why I'm just moving the already existing pigment and applying that. Can you see? The already existing pigment, move that around so that it's a very lighter
shade and gives you freedom to apply your
berries on the top. Then a little bit of
blue and maybe you can create some shapes in the background and
slowly as I come down, I decrease the
amount of the blue. I didn't want to go around, so that is the specific
reason why I have used this. Let me take a bit more
of my Prussian blue and I will apply darker
tones towards the edges so we can make it totally random where we
apply those darker strokes, for example, I will apply
some here, some apply here. Maybe a little nice dark
edge around this corner, so some dark places and
leave it like that. Then we've got to add some details here
towards the bottom. I guess it's still wet. Yes, it's still
wet so we need to create a darker green
color for that. I'm going to mix my sap green
and my indigo together. This mixture here is
actually the same. This is the reason why I
didn't actually clean it up. A bit of indigo to my sap green that
creates very dark green. Can you see it? It's
a very dark green. I'm going to try and
desaturate it a little. In order to desaturate
it I'll add in a little amount of red to it. The more red I add, the more it's going to
desaturate and turn into a slightly more
desaturated green color and this desaturated green
color is what we need. I'm going to pick up that paint and I'm going to use the pointed tip of my brush. We're going to add in a
lot of branches here, the same like the one
that we have at the top. Here, just adding
a lot of branches. Again, make sure to add
in different directions. It's absolutely fine, you don't have to
follow along the same. See some nice branches. This is what goes
towards the back. Now we'll create a little
bit of gray color. For creating the gray color, I am going to take
my ultramarine blue, this my ultramarine
blue and I'm going to mix it up with a little
amount of brown. More blue into my mixture, which will create a nice gray. This gray now I'm going
to add a watery mixture. That's still a lot of paint
so we're just going to add in a watery
mixture all around. The reason being,
I don't want to leave it completely white. I would like to add some amount of pigment and
paint at random places. This is the reason why
I'm applying this. Yes, we've added that. Let me pick up that
green again and go over on the top once more. As you can see, there's
a lot of spreading and it's absolutely fine
for it to spread. This is not dry on wet, this is wet on wet itself. Let it spread freely. Then, once you've got that, let's go ahead and
add in some berries. That's again, berries
with the wet on wet. Here I'm taking my cadmium red and I'm going to add
some random berries. You can put them over to the point where you've
added those bunches, but go ahead and put the berries at random
places completely. Maybe we'll have a nice
bunch of berries there. What I'm doing is
I'm just touching my beaver and wherever I touch, my paint spreads because it's got obviously a lot
of water there. See, let me apply there. I guess I will apply
some more here. A lot of places, just go ahead add in
nice bunch together. Try to keep them
together as a bunch. That's what I'm trying to do, keeping together as a bunch. All of that goes
into the background. Now once you've done that, let's create a nice
background snow effect. You remember how we
used to create that by adding some splatters and then some white
paint on the top. We've done that before.
Here I've switched to my Size 4 brush and I'm
just going to put all of these some splatters
into my paper, anywhere and everywhere
doesn't matter where it goes. Just randomly add
in the splatters and you can see the
blooms forming. Now the next step is let's
add in some white also. For one of the last ones, we did not add white, but we have done a class
where we've added the white. Today we'll add in the white. Randomly go ahead and put in those nice splatters
and you can see how it glows on the top. See, it's going to spread
out and mix together, but it's going to create
a very nice background when we add in the
proper snow splatters. Now all we got to do is wait for this whole
thing to dry out. Here you go, it's
almost dried up. Let's go ahead and
start painting. We're going to start with
a nice dark brown color. Any dark color like the
naked brown or sepia, any such dark color would do. Taking that dark color,
we're going to start. Here is where my branch starts and we're going to keep
adding but like before, I don't want to completely add every place with
a thick branch. I'll just add some broken lines. Again, a branch there, there is the branch,
broken line there. I guess I could properly
add this branch, another one there. There's a branch. Anywhere that you want to add, we'll add broken bits
and bits here and there. There. Now, let's go ahead
and start adding the leaves. For that here I start
with my sap green again, but we are going to convert
it into a darker color. Here, taking my sap green, I'll mix it up with
a nice amount of indigo so it's now a
very nice dark green, but I'm going to desaturate
it a little bit. Then in order to
desaturate it I'll pick up a little amount of red
and add to my mixture. That turns into a slightly more darker green
but in a desaturate. Desaturation basically
means I'm trying to decrease the vibrancy
of that green right there. I've decreased it by
adding that red shade. Let's go ahead and add
in a lot of leaves. It gets one here. Let me show you how we
can make those leaves. Here I have my Size 4 brush. Using my Size 4, I'm going to place
so many leaves like that by using the
entire length of my brush. It's just basically starting at the tip and then pressing
my brush down so that I get a shape like that and that's what I'm
going to be doing entire place for
adding the leaves. Here I add so many, let's say I add so many there. Obviously you can have them attached together and
add some on top of the masking fluid area as
well so that it looks as though it's a leaf that's
gone behind the snowy region. Let's see, one
there, some there, or basically don't make all of the leaves in the
same direction. Try and mix up the direction
of the leaves as well. Again, it's really important
that we capture like that. I guess some leaves there. Many of it is going
to be captured covered in the berries so
that's why you don't need to cover up the entire
thing with leaves and also it's okay to have a
lot of gaps in between. I guess another leaf there. I guess here. I believe there may be a part
of a leaf there and there. Another little bit leaf
there, another there. Just adding at random
places, lots and lots. Take you down to do it. It's absolutely fine. There, added the leaves. Now we'll go ahead and add
in the berries, of course. Here we'll start with my
nice gorgeous red shade. We're going to be using
this to first add the berries and then we'll
add in the details later on. We'll stop right there and we're going to
add some round berry. Berries usually
exist in bunches. That's why go ahead and
add in a lot of berries. One there, there's another one and maybe this one is
covered on the top. I think I need to
add a branch there, which I'll do later on. Another berry there
and one there. Make sure you cover it with
a lot of berries here. Obviously when you're
adding the berries, it's okay to have them all up
clustered together as well. It's very important actually that we make it
clustered together. I guess this one can
be this leaf I'll add a lot of berries
on this end here. It's basically just
creating a round shape using the tip of my
brush. That's it. How about another little bunch. There and also possibly a
lot along the tip here. Whoops. I touched
somewhere and then I went and hit but I guess
when we cover up with snow, it shouldn't be a problem. This is something that I always used to do in my
hundred day project. If you've been following along my hundred day class,
you will understand. I always end up doing
that mistake somehow. A lot of berries on that one. Then where else? We said we'd leave that, but I'd like to add actually a lot of berries closer
to that area there. Yes, if your green is still wet it might
actually spread out. But I'm not worried about the spreading because I
actually like when my paints spread and create
a random beauty there. Here is another bunch. Got another bunch there. Then I guess I'll have
another bunch here. Must out obviously by again the snowy bits here that is one, again, masked out by the snow. On this tip as well
some nice berries. What else? Let's say here. I already covered that part. I already covered
here on this end. I guess I've covered
most of the places. I see some areas
where I could do with a little bit of my green leaf, maybe I'll add someone
there a little there, and a little there. Some nicely use
their bond heart. Then finish off with a
little bit of a branch. Going back with my
brown paint and adding a little branch
there. Now observe. There are many cases
where we should actually connect the berries together
for example this one here, see it's separated
from the others. If I add a small branch or something where
it's connected and also use that brown paint to
add a lot of the berries. Somewhere along the berry, just go ahead and add
in a little brown spot. That'll serve as the shadow
so you don't have to add on in one single
direction or anything. This is just a small painting. Just go ahead, put it in
some random direction. It's just that we
don't want it to be in a single red color. It should always reflect some shadow element,
your berries. That's why you'll
see me adding the brown to some shape
somewhere along. That's it. Now, all we have to do is we wait for this to
completely dry out. Then we can remove the
masking fluid and just add the snowy bits. Here you go. It's
all completely dry. Let's go ahead and remove
the masking fluid now. Take your time and remove
the masking fluid. I'm just going to speed
up this process because it's absolutely useless to
just watch me doing this. There you go. As you can see, I've removed all
the masking fluid. Now we'll go ahead
and start adding some darker shadows
for the snow. I'll be doing that
with ultramarine blue. Well, you know the color choice that we've been following along. You might be pretty
sure you knew it. Just some blue spots at random. Also, you can either do it wet-on-wet or you could do
the rolling brush method. I roll my brush, I pick up a little bit of
ultramarine and start applying. Mostly and apply to
the areas towards the bottom side
where it's actually resting on the surface. You can see clearly
as soon as we start adding a nice shadow, see how it looks
and gets the shape. We've been seeing it so
many times in the class. I like the rolling brush method because you get
these random spots and random hard edge,
soft edge strokes. That's why I mostly go
for that for example so here I've just
applied a little bit. Here I take my ultramarine
blue and I'm going to add it right at the bottom. Just in a little bit
of blue at random. My pink wasn't completely dry when I remove
the masking fluid. Actually, it's from my hand, it's gone onto my paper. But I don't mind
because anyways, a lot of this is going
to be covered in snow, so I actually don't
mind. That's the reason. You will see how we create a nice blended ice or
snow effect on the top. Here, there is an edge. Taking my ultramarine blue. Then you can also do this method where you apply the
ultramarine blue. Then your strokes
will be wet on dry. Then go ahead and just
soften some edge. That's another method to do it. Actually let's try
that for some, again, I'll show it
to you once again. I will show you how to do on
this bigger surface here. Here I put in my ultramarine
blue and as you can see, it's a big, huge
wet on dry stroke. Then I wash off the paint. Then I'm just going
to run around and see soft and just some areas, not the entire thing. Let some areas that
dry white look. You see how it's created a nice a soft fuzzy
here to the snow. I love how it creates that. Then another one. That one is a bigger one. Here I take my brush, dry my brush, remove
all the excess water, and then I go ahead
and soften some edge. Here that is a hot edge, then some edges soft, dark and you see how
that creates this one. Another is this one
and those ones, immediately, let me go ahead
and soften out my strokes. One, that one, and that one along the top. Then another one is
here or this one. Again, that one, if I go and soften it out, see how this looks like
two different ones. That's why I didn't paint
these simultaneously. Because once I had painted
this and softened it out, there was a lot of water that might have seeped into this one. That's why I painted the
other ones first and then came back to this one. Just this one left
and a bit on that. Added a lot of snow effect
and we're basically done. The only thing left to do is to add the snow
bits on the top. By now you know how to do it. Just I thought I'll add
a little darker tone to this one because this is like a considerably larger
bit of snow, isn't it? Just giving a bit of nice shadow towards the
bottom and softened it out. I want a little thought of the branch of
that one to be seen. Here I'm taking my dark brown. What I'm basically
doing is here, I've got my branch, maybe I'll add the
edge of the branch there and edge there and there. Now you can see how it's sitting on top of the branch, that's it. Then I guess we've
covered most areas, if you see that any of the
berries are looking odd, just go ahead and add in a little branch to
it, but we're done. Let's not waste our time. It's time for starters. Time, do row in our
table are decor pieces, are pallets with white paint. Here, I've loaded up my
brush and I'm just going to put in those
splatters lots and lots in various places in more watery
pigment and paint. Remember to apply the splashes onto areas where you
feel that you ruined, covering them up with splatters. That's one good way
for example here, I believe I can go ahead
and add the splatters. That is another good thing
about adding those splatters. When you add in those
splatters while the ultramarine
blue is still wet, can you see it falls onto that area and
creates some shades. It again, further adds to the highlights of the snow that we're trying to add
in our painting. Everything is now completely dry and we're going
to finish up by signing my painting. Let's remove the tape. Here is the finished painting. I hope you like it. Thank you for joining me today.
21. Day 9 Colour Palette: Welcome to Day 9, and this is the painting that
we are going to do today. The colors we need today
are permanent yellow light, permanent yellow deep, cadmium red, permanent
rose, sap green, viridian, yellow
ocher, burnt sienna, Van **** brown or sepia, burnt umber, indigo, and violet.
22. Day 9 - The Giftbox: Let's go ahead and add in
the Christmas present. It's going to be a
simple one without too many elements
in our painting. Let's see, that's
how the present is and the other side of it. There. Then obviously this side is going to be covered
in the ribbon part. Let's say that is that
ribbon on this side. I know the pencil sketch
might look tough, but trust me, it is not once
you get the exact shade. I'll show you the picture
at the end so that you can make it for yourself. See, that's the present. Yes, this side needs to
have the roughing. Then I think towards
this side of the present it's brought in a nice large Christmas bubble. Its head towards this side. It's just resting on the floor. That's it. Let's not
add too many elements. Then obviously this whole
thing is sitting on a table. That's it. That's
the pencil sketch. I'll show it to you closely. There you go. You
can trace this out. Let me erase the
unnecessary lines, for example these lines toward
the inside of the bubble. Now we'll go ahead
and start painting. To paint this is again, we have to paint the
background first. Let's paint the background
in a blurred method so that we bring our elements that is in the
foreground forward. Here, I'm applying water to
the area of the background. Anything other than
the two elements in a painting we'll
apply the water. For example, here alone, you have to apply
water carefully to the edge and avoid any
parts of the ribbon. Around the bubble that's
round very carefully. I'm just going to go over one more time over the top
of the areas that I had already applied so that
my paper stays wet. Here I've managed
to apply the water. Now we'll go ahead and
start painting all around. We'll probably start with
the background there. I'm going to start
with a nice amount of my permanent yellow. I'm going to place
my permanent yellow in various circles at the back. These could be some lights or whatever. We just don't know. It's just some random detailing that goes toward the back area. Then let's cover up the entire surface with
a nice brown shade. I'm going for a nice
burnt sienna shade. I'm going around my
little light shapes. I'm just going around
each of my light shapes. As long as you do it quickly as you've applied the
water, it should be fine. The paint before it dries out, just go ahead and
add in a lot of nice bright colors all around. I can see some of those
ones are spreading. I don't mind. Because I don't want my lights to
look perfect also. It's okay that however, my color spreads because
literally I don't want my colors to look
the best or perfect. My intention is just to
capture a random background. Here I've got the
paint and now I have to be careful
around the area of the ribbon because we definitely
need to apply around. Taking my paint around. Nice slides and some
nice colors around. I guess we can add some
darker spots on the top. I've washed my brush and
I'm going to take in a nice burnt umber. That's not burnt umber. Taking a nice amount
of burnt umber. There, and I guess I'll add in the burnt umber towards the
top just in some areas. Here, I see my yellow and
brown is spreading a lot. Maybe I'll apply to that region. A bit of burnt
umber here perhaps. See it's completely random. I am not trying to place them in the perfect position that is
what you need to understand. Just putting my color at
completely random locations. Can you see it's like a little
blended background there? I don't want even to get a
perfect yellow shapes there. No we don't want that at all. Then as we come downward, maybe there is a little element of a far tree or
something there. I've taken my sap green and I'm adding
that to the background. Adding that to the background, make sure you avoid empty part of the
bubble very careful. Here you can see
me I've tried to manage to create a shape. I guess until that
point is fine. The remaining area,
I have to apply my burnt sienna
alongside the green. There Montana there, Montana there so that I get
in the shape correctly. Applied my burnt sienna. Now, as we come
towards the bottom, I guess it's time to add the surface of the
table, perhaps. Yes so for that, because we are going to be adding the surface of the table, go back with my burnt sienna, and I'm going to
fill it up. There, here as well. Now this is bad. Actually, that the two things are resting itself
is up-to-date, that's what we're trying to add. Here again, I've tried to mimic the shape of the
fir tree a little. I'll fill the rest of the
place with my burnt sienna. I think I'll add a slight
darker color for my fig tree. Here I'm taking my hookers green and maybe a little
bit of viridian mixing, a little amount of
indigo to make it darker and I'll add
that on the top. Some amount of
darkness is required. Whoops, careful
around the shape. Put the green color there. Now, for adding some
details of the table first, we'll do with the wet-on-wet
then after that we'll go around adding details
on indigo foreground. Let's see where is
the line that I traced, that's somewhere there. Then I guess I'll
make another one, parallel to that
some right along there and now you can go
ahead and make other marks, which would be obviously
the marks on the board. Here I'm just moving my brush along in a random
direction like that. Just running my brush long. See that? Once you
have done that, go ahead and use a
nice flat brush. Make sure it says in
the big flat brush because it should
have harder brustles, it's not soft bristles. Hard as in not extremely soft
that's what I just mean. I wash my brush and
remove all excess water. What you will do is
choose any side of the separation between the two
plans of the wooden board. I'm going to choose
my bottom side. What I'm going to do
is I am going to run my brush along and
absorb a little paint. Just absorb a little paint in a straight line all
the way to the bottom. Take up a while to cover
entire bottom bar, and do the bottom
part because you're effectively moving the pigment. That's done then the
other side as well. See how it's taking
time gradually, from the top towards the bottom. Obviously you might have
to do it multiple times. There I've done that
you can go back, you're burnt umber, and
add that line property. Just make sure
that it doesn't go over the area that
you've just lifted off. We just need a lighter spot right next to the darker spot. You'll understand why
in a while it will look like the surface
of a wooden table. You just quickly absorve
a bit more from this one. Already I can see how it
looks like the effect of the wooden table and we've got something
in the background. Now what we have to
do is let's wait for this to completely
dry so that we can paint in the
gift and the bubble. That it's completely
dry and can you see how those yellow
spots have turned out? This is why I said I don't
mind the way that it spreads, I just want some random
yellow spots there, so it's like in the background not affecting our
foreground. See that? The only thing left
for me to do right now before we start
with the foreground is I'd like to
soften the edges of the elements that we
have in our painting. That is because I
don't want to have a harsh edge to any of these where we haven't
applied the paint. Basically, go ahead, use the flat brush, then run your brush along
the edge like that. Absorb it with a
cloth or a tissue, whichever you are using. Here, turning over the edge like that and I absorb
it so then I get a slightly softer
edge don't want a hard edge or a hard
line of separation. Can you see? I've just made a slightly softer
edge along there, running my brush along and
then absorbing with my paint. Same thing we will do
for the bubble as well. I just don't want to have
a harsh edge to any of my objects. That's the reason. The same along here. I'm only doing this for the green part. I don't mind it having a harsh side along the bottom there that's
absolutely fine. I guess I've soften that out now let's get back to painting. What shall we begin First? Let's paint the
gift part at first. What color should we take? I think I'll go for
my yellow ocher. Yes, I will take my yellow ocher and taking my yellow ocher, I'm going to add that to the surface. Basically skip the area
of the ribbon very carefully because we'd like
to leave that ribbon there. Paint it with some other color. I'm going back over that doll. Then adding more now
towards the right side. Obviously, always remember, we need to choose a side and
add in the shadows as well. First of all, before we do that, let's just go ahead and add in the colors right now then we'll go ahead and
add in shadows. There, I've added the box. Now, I'll pick in a little
amount of burnt sienna. I'm going to mix that in there and I'm going to add
towards the top one. A bit more. A bit along the top and separate
out the lid of the box. It's in wet-on-wet,
it's absolutely fine. There. The lid of the
box is now separated. Now the next thing
is, obviously, we do need to add
for the left part, but for that, let's
make that in shadow. Since we're going to
add that in shadow, here I'll mix it up with, I don't want to mix
it up with this. Maybe I'll mix it up
with a different color. For example, let me take
up my yellow ocher. There's already a mixture
of burnt sienna in there. That's because otherwise, our whole painting
is going to be a dull yellow-brown
color, so that's why. Maybe a little bit of
Prussian blue into that. That'll make it
into a slight taint of green in that
mixture, I like it. It's basically yellow ocher, burnt sienna, and a little
bit of Prussian blue. That is what we can add
to this side, basically. It will depict that this
side is in the shadow, giving it a slightly different
taint of different color. Mind you, we're
adding this on top of the yellow ocher
that we already had, so it will have more
yellow or green mixture, exactly like we want. Go over the edge. Also, make sure to keep it along the edge, perfect line along the
edge because we are adding color here only
because it's under shadow. That's what it is, the two different colors. Next thing now, we need to add the differentiating
line there. I'm mixing a little bit of indigo to that
mixture, just a touch. Did you see I just touched the tip of my brush
there? That's it. Then we use that to
create the dark edge. I guess I could pick
up a little bit more of my yellow ocher. Using that along the edge. You can see it's still not much. Maybe it got to have
some more indigo in. Not bad. Now let's actually
paint the Christmas bubble. For that, I guess I
am going to go with a bright red shade and I'm going to add it to the
whole of the bubble, except for a large round here, which is where my
highlight is going to be. As you can see, I'm
adding to the whole. Add it to the whole. Now, I'm going to soften out
the edge of my highlight just using my water
and my brush. Washing my brush each
time I pick up paint, which is very important process. You can see, as I go
away from the highlight, I try and lift off
some more paints so that we get a gradual
highlight. Can you see that? Keep going away from the highlight area and
picking up the paint. See, I've created a
nice round shape there. Now we'll add some of
the darker colors. For that, here I pick up my burnt amber and
I'm going to go add that on the top of
my red. Can you see? Add a little bit of burnt
amber on the top of my red so that it creates
a nice shadow effect. That is basically right here, away from the highlight point. Some more red, now mix that along. Can you see now it's looking
like a nice ball shape? I need more depth, so taking more of my dark brown. That's what we add to the extreme bottom and obviously a bit to the top
region here and spread it out. Let that blend in nicely. Now we have managed to
capture a nice dark shape. Also remember, the nice
dark shape should be there towards the
extreme bottom. The light is now from here. We assume that the
light is from there, so that's why we've got
a dark base here and also the light from
the ball right there. Also, because we've got it
right next to the gift and there's got to be a darker area right there with the light
coming from the right side, so that's why it's
almost as dark there. Then let's paint the top part. I guess the top part, I'll make it with a
nice orange shade. Not orange, but this is
cadmium yellow deep. Let's add that. See, I've Just added a nice
cadmium yellow deep color. I guess along the top, that as well, just
adding the edge. Always remember shadows. Here, this side needs to
have nice dark spot so that's why we need to
add in darker spot to that, just only a little bit
along the right side. Now what we have to
add is the top part, so let's go back with
the yellow ocher. We have some gaps
between the ribbon to add before we add in
the ribbon itself. Fill in the gaps between the ribbons. Then taking a little
bit of brown, I'm going to add to these areas because those areas need
to be in the shadow. Let's now paint the ribbon. For painting the
ribbon, I'm going with my permanent rose shade. Taking my permanent rose, just going to add on to
the top of my ribbon. Let's cover the entire thing up for now and then
you'll see what we can do to add in nice
shadows and effects. Make sure that you can
see your pencil sketch. Just a little bit more. As you can see, I filled up all of the areas
with the ribbon. Can you see how to raw it is? We need to add in
a lot of shadow, lot of effects to it,
so let's do that. I am going to switch to my
smaller size four brush. First of all, a bit
of yellow ocher towards the edge to
prevent all the seeping. Then, let me go back, and now, I'm going to pick up a dark Vandyke brown color. Here is my Vandyke brown, and I'm going to use that
to paint the shadows. This edge is
supposed to be dark. Then we've got an edge here
that is supposed to be dark. Then this edge is
supposed to be dark. Then it is not the entire
part of that edge, but something like that will
add the dark edge in it. A little dark edge there, and obviously, a nice dark
edge there in the middle. But that middle portion,
we need to spread it. Here, I take my pink
and I'm going to apply that on the top. We're going to blend
that dark potion in towards the other
areas. You see? That there is that nice blend, but it's slightly inside. Now, we're not done
yet, obviously, because there are several dark
areas that we need to add. For example, can
you see this tape, this part of the ribbon
coming from inside? That area needs to be slightly darker because it's coming
from an inside area, so it's blocking the light. Just blend that along. Here, little dark area there. Same goes for this region. Digging the pink shade,
blending along there. You can go with a yellow ocher to stop the seeping
of the paint. Can you see how orderly, when you've added all
of those shadow bits, is looking so positive, so different, how it looks. Now, I'm going to add
another exciting feature. I'm going to take a little
bit of my violet right now. We're going to give this
ribbon a nice touch. Just one half of my ribbon, I'm going to fill
up with violet. Let me take a nice tie. You did violet color, just one half of the
ribbon, basically. There, this half. Let me fill up
some areas nicely. Taking some more violet. Now, let's add. One-half of the ribbon added. Then, let me see what
else can be done. I want to cover up
the edge nicely. Shadows. Now, that's
the important thing. Here, I'll take my
nice dark brown color, and we're going to add
in a lot of shadows. The ribbon is slightly elevated
surface on the gift box. If you add in slight
amount of shadow, that gives it a
slight elevation. How do I explain this? I think you can probably see it right after I've
added in my shadow. Can you see once I've
added that shadow, it looks as though the
ribbon is slightly lifted off from that box area. I guess we do the
same on this side. Whoops, I got a little
extra brown watery on, and hence it spread. See how we add that. Then obviously, you can add the
slight darker color. For that here, I take my burnt sienna and
I'm going to add some nice dark shades along the bits because we definitely need to add
shadow everywhere. Such elements or such
paintings has a lot of shadow, especially when there
are lots of elements. See that edge where
the ribbon is resting is now covered in a
nice shadow. So it's here. Yeah, I like how
it's turned out now. Now, we have to add the
shadow of the object. A little shadow here
on to the gift. That's basically the shadow
of this ball onto the gift. Just adding a little drowned
shape there. Can you see? Then let's add a shadow of
the ball onto the surface. Something of that sort. Go ahead and paint
the bottom part. Make sure you fill the nice bottom part
with a darker tone and get slightly watery and lighter as you move further
away from the board. See that? Now what you can see is a little part of
the shadow of the ball is actually on the gift
box itself, can you see? Let's define that
shape a bit more. See that? I really love
the way it's turned out. Nice and dark towards the
bottom where it's resting. Also, let's make it dark where actually
the ball is touching. There. I've added
the dark color. Now I've got to spread it
out and soften it inwards. Just using my brush and a bit
of water and softening it. Yeah. I really like the
way it's turned out. Now let's finish off
by making the marks on the wooden table. Taking some nice round shapes, let's add in, that is just some
nice random lines. Some round shapes like that. But don't make it very dark, so use your cloth and absorb. Some shapes, some lines. There. I really like how the brown surface
has turned out. Now we'll completely
dry this up. It's completely dried up. Now we'll just
finish off by adding some teeny tiny details
onto the Christmas ball. I'm just going to make
some designs on the top. Like, let's make
some little stars. I guess it's better
to add those stars with yellow paint,
don't you think so? Because then it wouldn't
disturb our highlights. Yes, I think that
would be better. So I'm actually going to go and use my cadmium yellow deep. or my permanent
yellow deep and add that to the stars that I've just added so that my
highlight remains intact. See, that's my highlight. It's just some random
brush strokes. Obviously, you can have
some stars towards the end. Incomplete star,
like you can see, I've just added a dot
there so that it looks as though it's wrapping around. We are almost done. Can you see how that features
of the table is looking? All we need to do now is to add in the shadow
of the box itself. Let's just put in
a darker amount of color towards that side and try and soften out
the edge a little bit. Obviously a nice darker color closer to where the
gift actually is. Dark spots right next to it on the gradual color, there. Now you can see how it's
resting on the table. Today there is no splatters. Let's go ahead and quickly dry this up and
sign the painting. I'm going to use permanent
yellow light today, it's almost like
cadmium yellow and I'm going to use that to
sign my painting. There. We're done. Let's remove the tape. Here is the finished painting. I hope you like it. Thank you for joining me today.
23. Day 10 Colour Palette: Welcome to Day 10 and this is the painting that
we are going to do today. So the colors we need
today are burnt sienna, burnt umber, ultramarine blue, indigo, sap green, cadmium red, and a little bit
of white gouache.
24. Day 10 - The Boots: Let's make the
pencil sketch first. So our boots are
going to be hanging. They are at the
tip of the bench. Let's have that bench right now. That bench is at an angle like that and that
is the side of the bench. Here the wooden plants attached
to the bench, obviously. It could be a fence also, I don't want to think about
what it is in detail. Then here along the edge is
where the shoes are hanging. Now we'll trace out the shoes. Here is the boot shape. Here is the ribbon or the lace. That is where the
boat is going to be. Let's make the
shape of the shoe. I know it can be quite tough
to get the shape correctly, but don't worry, you just need to get it roughly, you don't need to
paint the exact thing. Here I've made the
shape of one if it and it goes towards
the back like that. Then we've got the foot area. There are little side of the boot and
obviously the blades. It's not the blades,
it's these boots are snow boots, and there. It's like the little
part of it is masked out and there it goes at
the bottom like that. Then obviously the other shoes. I guess this one has to be through the string that's
hanging from this side. Let's make the other shoe slightly behind
and hanging there. We won't be able to see
much of the backside, but only the front side of it, and there it goes. You just have to mark out little portion along
the front of it. There, see? That's
how the shoes are. Now for the lace, so let's say there is
a tying part there, and here goes the
front of the shoes. That's how the lace
goes, crisscross. Then the string a
attached there. The same for this one. Let's assume that
here we have that split alone where
it's been tied. Here are the crisscross
and a nice tying here. That's how it's hanging on that. We don't need to have the top portion of the
string to be seen. Let's add a hat on something along the
edge of the chair there. Let's assume that it's a hat, so something like that so that the string goes
behind and then there's the part of the chair. That's that then should we add a tree or something
in close vicinity? Maybe we'll add something like a fir tree at the
background here. A fir tree in the background, then we can have how
about a scarf hanging? We could have a scarf hanging on the bench right there
next to the hat. Obviously, it's got
a nice elevation. That's the scarf lying there. I guess you can have
a side of the bench. Under that is this region here at the bottom is
all covered in snow. We've added the tree
in the background. Anything that goes
in the background is something that we
can add with our brush. There you go so that's
our pencil sketch. Here, let me show
it to you closely. That's the pencil sketch. Now let's get to painting this. Let's get to painting
the background first. I'm going to be using my flat
brush and applying water. Make sure you apply water to the background along the edge of our fins or chair or
whatever that is. Here, I take it
along the edge of my hat and also careful along. Then along the edge
of the shoes as well. Here, so I'm applying
[NOISE] water. Make sure to apply a nice
and even coat of water. Once you have
applied an even coat of water, let's get
to paint a thing. First of all, I'm going to
create a nice gray color. In order to create
that gray color, here I'll take my ultramarine blue and I'm going to mix
it up with my burnt sienna. Here I take my burnt
sienna mix it up nicely and a bit more
ultramarine blue. I'd like it to be on the
bluish side so that's why I always create
my grays like that. We're going to add that
in the background. Wrong blue, more
ultramarine blue, a bit of burnt sienna, that's the color and let's use a watery mixture and add that. Here you'll see me adding that towards the
background region. Guess you can add
a bit more blue and add that all
around the background. Then as I come downwards and add more brown into the mixture
so that it's brownish. This is the reason
why I mix my paint, because it gives me a
uniformity with my colors. Here now I'll carefully go along the edge with my
brush. Can you see? To create the paint along the
areas where I have added. Here you can see how the ultramarine
separates out on the paper. I like that. There are some artists
obviously who wouldn't like this separation.
But it's okay. It's everyone's personal choice. Now I've got to add in some
details at the background. For that what I'm
going to do is I am going to pick up a
nice brown sheet. This is burnt amber and you can see now it's
a more premium mixture, not as watery as this paint. This premium mixture
I'm going to use to create something
at the background. Maybe this is
actually the fence. I'll put a fence there. Something like that at the back. You can see something and maybe I'll mask
out those regions at the base of it by adding
some more brownish strokes, maybe a bit of burnt
sienna strokes as well. Just masking out those regions. Because I don't want
the base of it to be like perfectly seen. We can cover up the base by
adding some random colors. Then obviously, we need to go ahead and add
that tree shade. Here I'll take my sap green and I'm going to put
that into my background. We are trying to add
it like a fir tree. Try and make it like in a small triangular
shape along the edge. Then we need to add depth. Here I take my indigo, mix it in to my green, and we add that on the top. We can see some
nice dark colors, more indigo towards the base. Some nice green strokes
at the background. Maybe you can put some more
greenish strokes. Why not? It's still the backside. It could be grass or some
random stuff in the background. You don't have to add it. I've just added
some green strokes. That's it. Very, very roughly. You can clearly see that how
roughly I have added that. Pretty much that's it
for the background. But I'd like to give it the snow effect and you
know well how I do it. I'm just going to take my brush
and I'm going to splatter some water so that it
creates a nice blooms. Then I'll do that with
my white paint as well. Here's my white
paint, I'm going to load it up in my brush. Nice amount of white
paint in my brush and I'll do some nice splatters with my white paint as well. Those go into the background
and we'll add on the top. I guess we don't have
to wait for it to dry and meanwhile it dries out, we can possibly paint the other regions
like for example, let's paint the snowy
region, the front here. I'm just going to
apply my water. Now you've got to be careful. Go around the shoes very, very carefully, around the shoe area careful and apply. Also note here I'm not going to touch the edge where there is my brown because
if I touch that edge, then it's going to be really
difficult for me to apply the paint and also I guess
the bottom part of the shoe, but it's supposed to
be the sharp edge I can apply water there because we paint that with a gray color. It's absolutely fine to
have some color over there. Then going with my ultramarine blue I'm going to add
some random strokes, give it some random detailing. Basically the shadow of the
snow. You know that by now. Don't go over to the edge, stay along right where you are. Don't go over to the edge. Let's see if it is white. It's absolutely fine. It's a nice shadow effects. Now I guess it's possibly time for us to actually wait
for the painting to dry out so that we
can paint the rest of the stuff. Here you go. I've completely dried up
everything so now let's go ahead and add in the details. I guess we can paint
the bench at first, and I'm going to be
painting that with a nice dark brown so you can go ahead and use
your burnt amber. This is my burnt amber shade. I'm going to use that.
As you will notice, I'm going to paint the bench. But if at all it creates some white
gaps, I'm not bothered. The separation at
the top I'll let it just be the snow on the top. Let it leave white random gaps. Here again, I've created
a slight separation and when I'm painting the wet-on-dry and it
creates gaps like that, I'm absolutely not bothered. I'm not going to
be filling it up. Let's see now towards the base. Leaving some slight gaps
filling up the base. I guess now when you're doing, let's go ahead and create a slightly zigzag shape to where the cloth is going to
be again, that scarf. Here I've marked
some things with my pencil so I'm just going to try and get
it along in that shape. Like I said, again,
leaving whitespaces or white dots or lines
is absolutely fine. There. That's how I've
marked and I guess now there is a large
gap there, I suppose. We need to follow along and create the gap
of white as well. This line and this line comes
and follow along there. It's okay to go over the list. We'll add that with
a darker color so it's absolutely fine. Here I'll add paint over the top and you can see
there's a lot of whitespaces, white gaps, and I'm
least bothered. I guess I could go a
little bit more downward. Now that sums up
the angle nicely. Then we're going to take in a little bit of my brown
now. Now very careful. We're going to add it on to the top along the edge there, so just add some part of
the binge or the fence that's seen through the
snow, so that's fine. Just some tiny amount
like a line or perhaps. Leave gaps. Let it show through. Now that we've done that, let's go ahead and make the grade that we made. I
have that mixture here. Remember I added more
brown to it so if I add more of my ultramarine blue,
it should turn into gray. There I've made that nice
gray shade and that's what we're going to use for
the bottom part of that shoe. Here, just covering that
region up with my gray shade. Yes, we could go into
various lengths to create the perfect
silvery shade. But that would be way beyond the scope of this class
because we had to have to add in a lot of detailing. For now, I'm just
going to resort to just adding a gray
color on the top. Made it like a nice such gray. But don't worry, we'll still add in a lot of shadow effects. Here mixing up the
same gray color but in a little bit
more darker one. I'm going to put it
slightly darker towards this edge and it's
slightly lighter here. Can you see? Let's leave
that one lighter itself. Then there's the shoe. I want my shoe to
be nice and white itself so we've got the
center portion to add now. Let's take the brown
and we're going to fill in the center
portion of the shoe. Here, the same, this goes for this one. Like I said, don't
fill it up entirely. If you use a lot of water, then it's going to come in
without such white spot. But if you look at my stroke, there are a lot
of white spots in between and it's
completely okay. I'm least bothered about
those white spots. Then here I take my
brown paint again now. Maybe not. Let's go
for burnt sienna. If I take my burnt sienna, I'm going to paint the
bottom part of my shoe, just want it to be a
different color so that's why I decided to
go for burnt sienna. That's the one behind. Let's paint the
one in the front. There it goes. Then the
heels on this side. Now observe closely. This is the heels on this side, but I have added an
edge and another side towards that side because we're seeing it in a slightly
rotated angle. In order to paint that, pick up a nice dark brown, either Van ****
brown or burnt umber and put that along that edge. Can you see now how
we've got a darker edge right there? Then what? Now we've got to
add in some colors to the shoe because it
cannot be purely white. We need to give it
some shadow effect. In order to give it
the shadow effect, we're going to use the
same gray that we mixed, but let's make it
nice and watery. Here, I've mixed in
a nice amount of water into that and we're going to use that to be in the shoe. Here I will use that and I'm going to add it
at the top and you'll see that some of my brown spreads into the shoe region as
I do this and it's okay. I'm fine with it
spreading because I like that element with
my watercolor paintings. See, a little
spread right there. Yes, it's not possible in
reality but then I love the way how my paint spreads to create the effect that
watercolors have. Here, cover it up with gray. I know that you're
going to say that it doesn't look nice but
wait, we'll make it nice. Here, mixing more blue and more brown and I guess more blue because I want
it to be grayish. There, now it's a
very dark gray color. I'm going to switch
my brush also to my size 2 brush because
it's a smaller brush. Then picking up this gray color, we're going to be
adding nice shadows. Let's see darker tone towards the bottom where the shoe is. A nice dark tone there, dark tone along
this edge as well. Then where else? I guess some folds in the shoe. Then I just added two lines. That's how I created the
folds and we'll also add in some lines on the top. Here, I guess, some darker
tone towards the back. Now the rest of it is going to be after
it's completely dried up so let's get back to
adding the hat and the scarf. The scarf, obviously going to
start with my red shade so that's my red and I'm going
to add with my red shade. I'm going to follow
the same principle. It's okay for it to have
white gaps in between. See, as I add, it's having a lot of
white gaps in-between and fill up these ones where I had added the
hanging part of the scarf. See the hanging part of the
scarf and here as well. My strokes are not entirely dry. It's just that because
there is no lot of water in my brush when I do that and because of the
texture of the paper, it gives me a slight areas
where there are white spots. Can you see, a lot
of white spots? It's not get carried
away and are too much. Here I've reduced the
number of white spots because I didn't want
to get carried away and have a lot of it. Now obviously, let's
add in details. I guess I'll make the gap
also in bright red color. Here taking my red and I'm
going to add to the cap. Obviously, there are
a lot of detailing to be added in order
to make it proper. There, cover data. But it's just now both
of them just look raw, so we always need
to add in shadows. Let's get to the shadow bit. How do we add shadow? By mixing a little bit of
brown to our read there. Here taken my red, I've mixed it with
an equal amount of brown so then it
slightly darker shade. Now I'm going to add it into the areas where
there are folds. There's a big fold there. Here let me take my red
and blend it along. Added nice fold. Then let's see where
else taking a bit. Just some lines on the top. Random details. I guess you could add a
little along the edge. That was a lot. Let me dig in a bit of my red and I'm just
going to blend it. Maybe a little of darker
lines at the base. See how we've added a
nice folding effect. That's the scarf half done, but we need to add
in for the hat. Here going back with my
brown and red mixture, it gets a bit more darker. I need to create a
darker shape inside to depict how the hat is folded. Can you see immediately
as I've added, it shows as if there is a fold? Then obviously shadow bits. I'll make this portion darker
to blend along with my red. Here is my red, let's just blend it. Taking my dark brown
again and I'll make that color towards
the extreme base. That's where all
my dark is going. Can clearly see how
with each stroke that I add and each shadow
bit that I add, I get the shape of my hat. This hat is not the normal hat. It's like the window
hat that's got a bobble headed top.
Can you see that? Little more and add to
the center portion there, so it shows the bend
and there as well. It shows how it's
folded inwards. I guess I'm really happy with
the way this is turned out. Now I got to see whether
this one's dry yet. It's not, so I'm just
going to wait for this to completely dry out and then we can add in and finish with
our status. There you go. I've dried it up, so now let's go ahead
and add in the lays. For adding lays, obviously, we need a nice
amount of red shade. I've switched to my
Size 2 to give me a nice detail as the lays. If you use cadmium red, then it should be able
to come on the top. If you don't have cadmium red, go ahead and use a
gouache paint maybe. There it goes under and there's the other one and there's
a little tone there. Obviously, the lace part. Little excess on the shoe. This lace is obviously what extends and somebody's
tired it through. Can you see? The same this side. Along the top it's one flatline. Then little excess. The excess needs to come out from the center
point of the brown. I'll show it too closely, there. Let me show this too closed. If you look at the excess, they shouldn't stay inside
of the black region, which will slightly come out. There we've added shoes. But now some are
teeny-tiny detailing. Here I'm going to pick up my white paint for
some detailing, little amount of white
paint and observe here, I'm using my Size 1
brush we just got a nice point while I do this. Just lying on the shoe, like a shape 9
there then weirdos. We can possibly add in some
white spots in between. That will be the highlight
because don't make it just perfectly red, always think of highlights. We just added some white spots
there. Can you see that? We've done enough, so now
we can go ahead and add in the snow and finish off. Here's my white paint, my back to my Size
8 brush because I'd like to add a nice
amount of snow. Let's add in the
splatters and see how I get such beautiful,
gorgeous splatters. Take some more. I'm being careful and adding as close as possible
towards the paper. This is because I don't want the rest of my
table to get dirty. Is already as dirty
as it can be. There I've covered it up with a lot of snow, so let's quickly dry this up then we can sign the
painting and we're done. Let me sign my painting. There you go. Let's
remove the tape now. Here's the finished painting. I hope you like it. Thank you for joining me today.
25. Day 11 Colour Palette: Welcome to Day 11. It's just 14 days left
to Christmas from today and this is the painting
that we are going to do. The colors we need
today are sap green, indigo, cadmium red or
permanent red, raw sienna, burnt sienna, burnt umber, Vandyke brown, yellow ocher, ultramarine blue, and a
little bit of violet.
26. Day 11 - The Bicycle: Let us start. We're going to add the pencil sketch of
the necessary elements at first which is
basically going to be the little part of the cycle that's
actually seen through. I know it can be really tough
but you don't have to go and think of making a
perfect shape. Let me see. If I read to make the wheel of the circle
and as you can see, I don't get a perfect circle and I'm not trying to get
that perfect circle either. Just need something there. I think that's good, then
add an inside bar to it. The main reason being most of these elements are going
to be covered in snow, so then you could actually cover important part with a snow and get away with
it, that's my point. If that is the center and there add the connection
of the circle then here it's going at a slight angle like that
and bends and joined there. This is what goes over to the
top to create the handle. The same along the other
side but we don't see entirely because we get masked
off in the front there. Then obviously that is what
comes and joins sticker, then you can have possibly
a little light there, then it's time for us to
add the handle again. The handle is again
attached from here, bends like that and that
is the main handle. The other handle, let's actually mask it off
with the basket. Obviously we need to add the place where the
handle is. There you go. The other part of the handle
is masked with the basket, so let's put in
the basket first. There is my basket and in front that, and we see some
of the other side of the basket as well and obviously now entire
part of our basket is covered in some nice
Christmasy stuff. Yes, there is some things
here but we need to add part of a handle like that. Then let's make the other area. This goes like that and creates a bend right there and goes over
to the right side. The same and I guess
another one along the same but this is
going to go slightly upward and there is a connection like
that and obviously the chain part is in a circle
there and it goes towards the back then attached to
this area here is the pedal. You don't have to add too much. Here, that's the pedal and there
the portion goes behind. Let's join some areas
together. I guess that's it. That's the pencil sketch then
obviously towards the base, don't draw it in a very dark angle because
we need to make the snow. Here, it's covered in snow, that region then
obviously we have the the bars on the cycle. The bars you have to understand. It's like a two-way bar. We've got to add a lot of bars on this one using
this as the center. You don't have to
add with the pencil. Let's not add with the pencil actually because I don't want to waste pencil stroke because at the end when we
start painting, it's not going to
be seen at all. Here, the guard extending up under
there, I guess. Wait I forgot to
attach the basket on. How is that basket attached? There it's attached to the side. Good, it's something like that. Now, we have filled everything. The backside is
basically at this level. It's completely
straight line that's the back level and let me show you
the pencil sketch fearlessly now so
you can have a look. Should we add a bell here? Where are breaks? I know
I haven't added it, but I don't want to
complicate stuff. This part could
be the brakes and obviously you need to add
the lines for the break. That we'll add with our brush. Here you go. That's the pencil sketch
that you have to make. Once you've done that, we don't have to worry about any part of the cycle
because I'm going to be painting that with
cadmium red which is obviously a very
vibrant opaque red. I am going to go ahead and apply water to the whole of my paper. Don't worry about
anything for now, I don't think there
are any areas that I want to leave white, I'll do that with my
brush stroke itself. Right now I'm just going
to go ahead and apply water to the whole of my paper. Now, that you've
applied the water, go ahead and we're going to paint the
background at first. For the background,
I'm going to mix up my sap green and
indigo together. This mixture here was already
the sap green and indigo, I just added more
sap green into it. I think a bit more indigo so that it
turns slightly darker. If you had the dark
green from White Nights, I guess that's a
very good color to use since this is a
different palette of mine, that's why I'm trying
to mix that color in. Sap green and a bit of
indigo, there you go. We're going to put that color in but make sure when
we're adding this, let's go ahead and leave a
lot of white gaps in between and those white gaps are going
to be like the snow areas. Careful when you're
painting next to the cycle because obviously you
want to add cadmium red, but let's not make it too difficult to have
the cadmium red. That's also there. Adding
a lot of paint and I guess more along here and also this area
where the basket is. Let's try not to paint too
much inside that region. You can see some of it does go into my
cycle and the dark parts, but I'm not I'm okay with that. You're taking light green and you'll see me add in
literally lots of gaps. See, a lot of gaps. Then here taking my green
again, make sure to add. Now let me add some
darker shades in-between. For that I will further
mixing my dark green, make my dark green by
adding more indigo to that. I will add that to the
top of my strokes. Not all the areas, but and also remember this
is now on top of the green, not on the white areas. We're trying to create like
a further darker area. This would be on some
of the sap green areas. I guess now we can go ahead and paint actually the bottom part, fill up the snow region. I know that my paper is probably dried out while I was
painting the top part. I'm going to go ahead and
reapply some of the water, but make sure you don't touch
any part of the top part, because then the green
can all flow down, which we don't
want it to happen. Want to prevent any hairs forming by just going
around like that. Then, now at the base, let's add in the reflection. Now at the base, let's go ahead and add in some nice shadow. Here I'm going to start with my ultramarine blue
and put that in. Just nice amount of ultramarine
blue into my snow region. See lots at the back. I guess you can go over cycle. It's absolutely fine because
the color that we are applying right now is like
really subtle, so it's okay. Then now to create the whiteness of the snow
right below the cycle. I'll show that to you. I've wet the whole region
but then I want my paint, to not flow down to the area underneath that
line that I've added. Here I take my cloth, and I've absorbed the water
from that bottom region. Then using a very diluted
amount of ultramarine blue, I'm going to add my paint
to the top portion of that. Can you see? We leave the paint
there at the top portion. Let's not make it flow down. That is the reason why I've absorbed everything
from that region. Then any paint that you pick up, leave a gap always
when you're adding. Because the color
that we want to add, we want to leave
that region white. I guess then you can go ahead
and add more bluish paint. Maybe let's try a little
bit of violet as well. Just in some random areas. Put in a little
amount of violet. Make sure nothing towards that region where we
want to depict the snow, right below the cycle. As you can see, I'm
just using my hand also to absorb and create a
little white cap there. Can also use the
lifting method to create some nice white shapes. Got a nice white. Think I ought to to
add a little bit more ultramarine towards
the backside there. Now I'm happy. Now I actually forgot to
add in the splatters. Let me see if it works. I'm pretty sure
it's not going to, so I'll just try and
drop in some splatters. Maybe it'll create some blooms. Not really, so let's add
some white on the top. Here's my white paint. The white paint still splatters
around because it's still got a little wet edge to it. I'll use that to my advantage. I've put some nice white
splatters at the back. Now we got to do is wait for
this whole thing to dry out. There you go. It's
completely dried out. Let's go ahead and paint that part of the
foreground right now. For that here, I pick up my sap green and we're going to add it
into the foreground. Here, and maybe a
little bit of indigo to create a slightly
darker green mixture. Basically it's nothing. We're going to add in a
lot of random shapes. But using the tip
of our brush is a nice shapes and
some random shapes. I guess you can go with
a lighter green as well. I like to give it a nice edge. Here first I'll do a little
bit of lighter green. That's basically my sap green. Basically some nice
green sticking out right at the top of the basket. Then going with my dark green, let me fill up. There. We don't want that to be
like extremely detailed, so it's absolutely fine
than taking my red, just going to add
in some red dots. Yes my red is going to
spread when it touches some areas of the green
and it's absolutely fine. Just some green
strokes right there. We'll add some white
on the top later on. For now, let's leave it at that. Then here I take
my burnt sienna. We're going to add the basket. That's my burnt sienna and
let's bring the basket. I see that my green paint and my red paint spreads
in and least bothered. As I've mentioned
before in this class, I like to have such
teeny-tiny randomness in my painting because
I like to create that effect that the
flowing paint creates. Then for the shadow edge, a little bit of burnt umber, and that would be this side. Some more, you can see. Nice dark edge there. Now what else should we paint? Let's paint the wheel. So for painting the wheel, I'm going to take my raw sienna and I'm going to be adding that. So as you'll see,
I don't need to add perfect strokes
because we're going to cover the top
ocean with a lot of snow. So it needn't be that
detailed as you'd expect. Just the bottom part, make it nice and symmetrical. All right, that's done. Then I'm going to
pick up a gray shade. So this gray shade
is the mixture of ultramarine and burnt sienna. I guess I can do that later
on because otherwise, the whole thing is just
going to spread out. Let's make the cycle first. Here I take my red shade, and that's my permanent red or cadmium red,
whichever you like. Right there is where the
red shade actually starts. I'm going to stop right there because it might flow
to those regions. So let me paint the other
areas at first now, for example this one. So this is why the pencil
sketch is important. The correct pencil sketch means easier to
paint it at the end. I can see how already
everything is coming so gorgeous in this area. Then the guard on the top. So you can see how we've
added those spots, but can you see clearly
somehow it's still very raw? Lots of shadowing
that needs to be added. So let's do that. So red and my burnt
umber mixed together. Well, maybe even
darker brown also. Any dark brown and
red mixed together. That's what's going
to give our shadow. I'm going to add
that to one side. So for example here, I'm choosing the left side, there, and here along I'm
going to choose the top side. It's not exactly the top side, I'm going around one
of the middle regions. Now let's get back
to that gray shade that I was talking about, the mixture of ultramarine
and my burnt sienna. I'm going to paint
another inside part of my cycle with that. There. Now, lots of other
detailing to do. So here I take my
dark brown color, and I'm going to go
underneath the mudguard. That's because the shadow, it's acting upon
the wheel itself. The wheel cannot
be this perfect, so let's take that brown
and I'm going to add in a little drop of that dark
color onto my raw sienna, and let's mix it up. I've blended it slightly.
Then where else? Let me go with my
little gray shade and paint along
that handle region. There's the handle, let's make it nice. A vibrant brown color. There was the little part of the handle that's seen
on the other side. Just going to give a lighter
color to the handle now. So for that, I'll
take my yellow ocher, I'm going to place
that slide along the top and blend that in. There, I guess that's great. Then I'll just use my brush and I'm going
to lift some paint off from the handle so that there is a little
silvery touch to it. It's not going to be
perfectly silver, it's very tough to get that, and like I've said, it's possibly beyond the
scope of this class. It'll take a lot
of time for us to capture each part of the shadow and everything.
So that's why. I'm not adding it in
perfect detailing. As you can see, I'm just
making some random strokes. That's because I
know that it's going to be anyways covered in snow. So that's why I'm not going
into too much details. Also, a teeny-tiny light
there in the front. Now, let's move to a smaller size brush
where we can add in a lot more smaller details like the brake lines
and things like that. Here I take my Van **** brown, and I guess I'm going to add
some lines on to the basket. Let's default. I like that. Then now the attachment
of the basket, that's there, then like I said, something related
to the brakes gear, that's there and here
comes the string of that. The string goes underneath. Now the string, you
need to make it go underneath the cycle. Actually let's do
the center portion. I guess the center portion, let's add it back with
the gray tone itself. Then let me observe that so that it's slightly light in color. Now, let's go ahead and add
in those teeny-tiny lines. Like I said, we've got to be careful with those and you need to use the pointed tip of
your brush very carefully. This one is the central
line of my first one. I'm going to use that. Remember, you don't need to make a
perfectly completed lines. You can have dotted lines. You see? Now I'm going to make with
the other one. See how it looks. Just a lot of lines. Now we are almost done. The only thing left for us to do is to add in the
shadow on the top. For that, I'll switch
to my size 4 brush, pick up my white paint, and we're going to add in the
shadow to a lot of places. First of all, let me take that and I'm going to fill a lot of these areas on the
basket with white. I know that we did
leave it white, but it's good to add
more white to it. Obviously now a bit on
the top of the handles, everywhere, that's got
a horizontal edge has got like a little amount
of snow on the top. There and there. Then, like I said, this part of the cycle, the top portion is covered
in absolute as snow. See there. This is
the reason why we added the background part with a little bit of bluish
color, otherwise, if we had left it
completely white, then there is no shadow
element and also then there is no way that we can show the
shadow on top of the cycle. See on the top there, so here at the base, especially go ahead
and mask out load. Added a lot of snow
elements there. I guess there are some of
it can settle in the middle there as well, some Some. Some along there. I
guess that's enough. Now we can finish off by
adding a lot of splatters. Take the white paint, nicely, and go ahead and add
in a lot of splatters. Make sure you cover up the
cycle parts nicely with a lot of snow so that you don't have to worry about the fact
that you did not paint a lot of it in detail. This is the reason why I said, if we're going to be covering it in snow, what is the point? Unless it's a very,
very large painting, and then you're
trying to add in. Let me add in some darker
snow elements as well, and for that, I'm going
to add in my gray tone. That's the last step. I'm going to mix
in my nice gray, here to ultramarine blue and
my burnt sienna together. That's a lot of burnt sienna, which means I need more
of my ultramarine blue. Here I've mixed up my gray and it's a nice and
watery mixture and I'm going to add this to the
bottom part basically, again, because once it dries up, obviously it's going
to be lighter. Add a bit to the top. That's it. We're done. Now we can go
ahead and sign the painting and we can completely dry this up so that we
can remove the tape. Let's remove the tape and here is the
finished painting. I hope you like it and thank
you for joining me today.
27. Day 12 Colour Palette: Welcome to day 12, and this is the painting that
we are going to do today. It's just 13 days left to Christmas.
Can you believe that? Today, we paint Sander's truck. He's taking a Christmas tree
to his house. There you go. The colors we need
today are cadmium red or permanent red,
ultramarine blue, burnt sienna, burnt
umber or Van **** brown, raw sienna, sap
green, and indigo.
28. Day 12 - The Pickup Truck: Let us start. I'm going to place the [inaudible] goods
somewhere around here. Let's sketch out. There we go. I'll show you how
to do the process. It's basically a
rectangle here at first. There is the rectangle. That's like the back potion. Then I guess you can
add the sides of it. Inside part of the rectangle, let's fill it up with
another rectangle with more thickness here than
there is at the top region. Now, that is like a real
box structure there, and here we extend
a bit to the top. That's where the side
of the big list. There. Then obviously
the real part. That extends out from
there and under there, let's go about that position. The same here on the left, if you take and take it down. That's the position
of the views. Now let's extend
the bottom part of this rectangle
towards the bottom and add another rectangle, but slightly make
a rounded edge. There. Got a rectangle
there and this one, make it curved and joined
like that the same along here and the number plate. Let's have it right
here in the middle. Let it extend slightly
towards the bottom. Go ahead and remove
whatever is inside there. Then let's fit in the wheels. This one, I guess you can have a little line like that because we are seeing somewhat a little part of the other side, whereas for here we're not
seeing the other side. Then here's the wheel. It extends right here onto that. Again, we also see again, it is part of the wheel there. The other wheel is here. But the thing is, you don't have to sketch it out perfectly because we want it to
be showing that it's like passing through the snow. It's like it's got a lot of snow blowing off through the
wheels at the backside, so we don't have to
draw that clearly. Here, obviously, now the back portion
of the pickup truck, adding a little extension and a little part at the
front that we see here. We don't see anything
on that side because it's slightly at
an angle itself. Let's see. That is
how the inside part. There goes the inside part which is going to be covered
in snow in all that areas. This is where the backside goes. Sorry, the front side goes
and we put in the truck. Now, we get the front
part of the pickup truck. Again, tracing that. See, we only need to
trace out a little bit, and let's trace out
the top portion now. Again, only need to sketch
out the half portion. That's it because here
is now going to be the tree that this
pickup truck is getting. That's why see you can
just roughly sketch out the middle
portion of the tree. There, the little portion. I guess that's it for
the pencil sketch. We don't want to add
anything else right now because rest of it we can
add with our brush itself. Let me show this to you
clearly. Here you go. That is the pencil sketch
that we have to make. You can pause right here
and make the pencil sketch. Now that we're done
with the pencil sketch, let's get to the
painting process. I guess we'll paint
the background first and then we can move on to painting the car,
the pickup truck. For painting the background, here I'm going to
use my flat brush and I'm going to apply water over all the other
areas basically. Let's go ahead and apply
a nice amount of water. Remember to take a nice
considerable amount of water and to avoid any areas
of the pickup truck, again, we've got to paint
all of the other areas. Here. Anywhere close to there we go, go ahead and apply this. Again, you can see how I use my flat brush to
apply along the side. You don't really need a
pointed-edge brush itself. Here along the wheel
of this right side, go ahead and apply the water, it's absolutely fine
to go over that again. Because like I said, we
want it to be covered in the blowing of a snow part. Here you go. then, and over at the top. This is why I randomly sketched out the region where
I want my tree to be so that we can go around
and add in the water. Because it's quite
tricky, isn't it? If not, then we'll have to go around with our brush and
it might be a little tough. With the pointed round
brush which we want to paint and might seem
a little tricky. That's why I decided to
go and make it this way. Done with that. I'm
going to go with my size 8 brush and let's paint. What shall we put
in the background? I want to make it like
a nice snowy day, so it's got to be snowing, which means that there can't be a blue sky because it's got
to be covered in clouds. It's got to be a cloudy
day yes, of course. Just spending my paper so that I spotted a little bit
of extra water there. They're just pulling
it outside. That's it. The thing with when
we're applying the water in this manner is that there is a high chance that
the water could get accumulated at
some point because we're not able to apply evenly, and there is a point along the paper where we're
not applying the water. You can imagine how that goes. Like I said, so something
in the background there. I guess let's make it a few
houses in the background. For adding those houses, I'm going to go with
my burnt sienna, I'm just checking a bit of my burnt sienna and
I'm just going to add. You don't even have to make a perfect looking
houses or anything, we're just going
to imagine it as a house and just add
some random strokes. This part here,
that's our full run. Rest of it, just adding
some random stuff in there. I guess maybe another
structure of a house here. Here I'll make a
rectangular shape. You can see the paint
that I'm taking, it's just burnt sienna. But I also want to
do another thing. I don't want to leave
my top portion as entirely just white because I think when we remove the tape, that's not going to look good. What I'll basically do is
we'll add in a gray shade. I only have the gray shade in my palette from the last day, which is basically ultramarine and Payne's gray mixed
together, then I use that. I'm going to use a
very watery mixture and put in just a
random light color. Obviously, you don't have
to put it everywhere, just along the
edges and the area. The reason why I do this is because when I remove the tape, otherwise it's just going
to be a whole white area at the top without
having any borders. I like having those borders. That's why I add a little
bit of gray there. Here, just added some shapes and that was
a top part of the house. Then let's add in
some darker details. Here I go with my Van ****
brown and I'm going to add possibly some windows, maybe a door effect. It's just in the background. When it dries out, it
won't be even seen much. Maybe a dark line there
towards the top again. Let's actually get the top
portion of the house as well. Just mark out with your brush. It's covered in snow
so it doesn't have to be shown out in detail. Maybe a little chimney
there at the top. You can clearly see
how random I make it. Then I'm going to go
with my sap green. Just a little and I'm going
to put in little amount of clean stroke there
at the back side. Then let's get down to business and start adding the snow. Here, taking my ultramarine blue and here is a nice watery
mixture of my ultramarine blue. That's what I'm going to add
for the shadow of my snow, you might have
understood that by now. But now I'm going to
create a pathway. That part we do with my brush and create
with my brush itself. Can you see? But make it bigger as it comes towards the bottom. Another one there but again, bigger towards the bottom. Also possibly you
could add it slightly darker then also right below
where the [inaudible] is, there also let's add. Then this side is not
going to be that visible. Let me put in a lot of blue details here towards this side and I'll show you
what we're going to do. Didn't I see that this part of the wheel is going to be covered in the foggy part. I'll show you how we
create that foggy part. That needs to be
on the wet-on-wet. In order to do that, just let me just take in
a little bit of brown, just adding on the top. Because I saw that it's
really fading out. I just like to add some more. If yours is not fading
or if still there's a lot of water or if the
paper has dried out, don't do this process. What we got to do
now is we got to mix a nice black shade. How do I mix my black shade? I'm going to make it
nice and dark again. If I take my burnt umber
or Van **** brown, whichever, taking that and let me add ultramarine
blue to it. All this while we had been mixing our burnt sienna
and ultramarine blue. Right now I'm mixing ultramarine
blue and my burnt umber. Oops, that's the wrong blue. Anyways, it's just
blue and burnt umber. That creates like a very
nice dark black shade. That's what I'm
going to be using. You'll notice when I put that right underneath,
can you see? Yes, it's going to
create a spread. It's going to spread out.
It's absolutely fine. I'm just going to put that
underneath my car also shadow. Very important here to
capture that shadow. Here also, let's capture
that right underneath. It's the shadow
underneath the car, but I'll show you how we can blend that into the background. Here, let me add some there. Let me add some more there. A little part of that in. I've added the shadow. Now, we're going
to blend that in. How? We're going to
make sure that some of that black area just
spreads out to the bottom. Then we also need to create like a foggy separating out effect. I've just dropped some water
there and then here I'll think my black and I've just put in some
black tops there. I'm going to observe
what I'm going to do. I'm going to create a small pathway or,
how do I explain it? We just create empty area,
some area with white. In order to create that, or what you need to do is
basically drop in water. Can you see see the area
where I dropped in the water? The pigments separates out
and that's what we need. Here, I'm going to
drop in a little bit of extra water, a bit there. I think I'll drop
in a little bit more there because
I want to move the pigment out of that region. Let's say I've moved it out
of that region and here I take my ultramarine blue and I'm going to add some
nice shots there, a bit of black and blending
that into the background. Along with the snow
effect that we add, this will look amazing. Trust me. We're almost
done with the background. Let me just fill up a little
bit blue along this side. We have our pathway,
we have all of that. Let's now go do usual thing, which is basically to
splatter some water. The top part will
be much better. The bottom part, don't
worry about that right now. I guess what I can do is I'll probably take in a little
bit more ultramarine blue and add some
depth to this region. I know that this
region has a lot of water because we
just put in water. What we'll do right now, we'll add in some white spots. Splatter with white so that
they become the [inaudible]. I guess you understood the
process of that by now. I mean, we've been
doing it for so long. Just note one thing,
I'll try to stay away from my car because
we haven't yet needed it. Here I need it to have a
bit from that black region. I've got those nice species
of snow in the there. Let me go ahead. What I'm going to do is I
know that a lot of place on my pickup truck has actually
got that white spot. I'm just going to use my cloth to go ahead and absorb
it off from there. Wherever you can
spot the splatters, go ahead and absorb it. We actually don't need it
on the pickup truck itself. The rest of the
places are enough. All right, so we've
managed to capture that. Let me just try doing one thing, which is basically to break
that part right there. Can you see a part like a
dark patch, black there? Because I wanted to
depict as though the snow is creating a foggy effect
into that region also. Apply here, I've broken it. Can you see it, there is a break when we add in the red, you'll understand more. Now let's go ahead and quickly
drive this whole thing up. It's completely dry, so it's
now time for us to paint. Let's paint the tree first. Here I'm going to
take my sap green. I guess I can make
it slightly darker, so I'm just going to
put in a little bit of indigo to that mixture. That sap green and
indigo basically. We're going to put
that on our paper and create some fig tree, again, the branches
of the fig tree. So basically this
person, this pickup guy, is transporting a
nice Christmas tree, today's hole so that he can decorate and
celebrate Christmas. It's basically just go ahead and start adding some
branches, leave whitespaces. Observe closely how I do this process and then I'm pretty sure that you can do it too. So basically you
just got to add and you can have a lot of
whitespace is in this one. The reason being it will just be this snow for example here, a little towards the outside. The bottom part where you
needed to paint nicely, the part that overlaps
on to the backside. Now, the top portion
is what actually gets covered in the snow
like this one. Let's have a nice snow there, and then as you start
going towards the top, you stop getting a
lot of snow limit. See. I'm going to leave that knowledge gap there. So, you know, these
gaps that we made, you don't need to paint over it. You don't have to add
because that could just act as the snow. Like, for example, here, I added a bit and
this large chunk of white on the top
is the snow on it. We can see how I do it. Just add the branches
and then I just add little lines towards the outside. See, a lot of those added. Some red alone. Let's go ahead and
add some more. Fill in some random part. Make darker spots
at certain places? Here I pick up my
indigo and I'll mix it up again and I'm going to
create some darker spots. Yes, the first color
that we apply, it was a mixture of
indigo and green. For me, if you have the
green from White Nights or if you have nice dark
green, you could use that. I want to probably leave it like that because I love the way I've
added the tree, the way their pickup truck
is carrying the tree. Now let's go ahead and
paint the trunk itself. We'll start with
our usual permanent red or cadmium red,
whichever you have. Here I take a nice
consistency of my paint. I'm going to start, so
observe closely now. I'll apply my paint. I'm going to apply but like the one with the boots
when we are applying. You are okay to go ahead
and create a lot of gaps in between as in make your
paint slightly dry. When you apply, you will see that you get a lot
of an bright spots. Let it be having a
lot of bright spots. Here, I'm actually
adding the paint, but then can you see there
is a lot of bright spots. I am going to leave those bright spots on
the truck right now, so the rest of it
acts like the snow. Can you already see
how the top portion of the pickup truck has
a snow element on it. Let's do the same here. The top portion is going to
be covered in a lot of snow. Also, when I paint
each of these areas, I'll make sure that
I don't cover it up entirely with a
dark amount of paint. I'll let it have as many
white spots as it has. This week as we
painting it with wet, on dry, it tends to
have strokes like that. Let me go it up the
right side obviously. Again, any white spots, that data are absolutely fine. Now, along the top here I want to leave an a
lot of space where the snow can
actually accumulate. Here and let's see, the snow accumulates on top
of the car in such a manner. See that? Anything to the
top of that, let's paint. When I add the paint, now, can you see how the snow
accumulated at the back? Same thing too. You can see how I
get notified spaces. But since here this region
is like the backside, it's a vertical
element in the car. There isn't much space for
the snow to accumulate. You can understand that right? Now I got to go around
the tree shapes carefully and follow the line some random white
spots here and there is fine on this
vertical element. The rest of it just
go ahead and fill up. I feel that the truck, can
you see how I've done that? Now let's do this right
side, so the right side, I'm going to start
from the bottom because the top part
is like a curved part, which will again have
some snow accumulated. We'll start from the
bottom so that the biggest of the paint goes there. Any thick amount
of paint that we have on our brush goes there. As you gradually move
towards the top, make sure that you know, are you losing the
paint in your brush? And see me try and make it more dry and dry and add dry strokes. That again, the top portion
is covered in snow. The same thing we'll do
here towards the left one. See, I left a huge gap there. Let it be covered
in the snow there. Then what else? I know I need to come down here and make that base
off the backside of the front part of the
truck, little on there. Then this part of the truck
is also like the front side. I guess this here was supposed to be like the wooden plank. Then I guess at
the back there you start seeing again
some part of the back. Now, can you see it's
filled with snow. Now let's paint
those wooden plank. Well, before that
I did not paint the bottom part
yet. Let's do that. Here again, I pick
up my paint and add. This is the part where I said
that I'll show you how we turn it into a
nice foggy effect. Let me finish up the
first right-side. I've added the right
side now towards the left side on top
of the number plate. Here as I approach, so I've put in the paint. Now I'll wash my
brush completely. Get rid of all the paint on
your brush and go ahead and just apply a bit of water
and make the stroke. Your paint will definitely flow, but it's going to be a
slightly lighter shade there. Also, once you've
added the water, and you paint as flown
there, go ahead, use your brush, and absorb some paint. Let me show that to
you. Absorb the paint. Make sure you don't
have a line of red. Just a little thin to fret. That's what we needed just
because we are trying to show that it's like the foggy effect. Can you see how
now we've created that foggy effect right there? Keep sorbing and
see, on to the car. Now, I think we can go ahead and add in
the darker regions. For adding the darker region, my burnt umber with the same
red that we've been using. It's already there in my palate, that's why I mixed it, we've been using these
colors for days right now. Now we've got to
add in the bends. Here we have a bend
in the vehicle. If I add in my color
right below that, and we're going to blend it. See, then blended that. Then what else? On this right side also. Now let me blend that
into the red portion. You filled up both of those regions then what else do we need to
add dark paint. That's basically my brown
and my red together. That's the color I mix. I guess some dark paint underneath that because
whatever we're adding. It's basically the shadow of our different surfaces because there are
different levels. This is like the bumper which
is at different levels. The top portion is
going to have like a little shadow towards the
bottom. That's what we add. Then where else? This region here at the
left side remember, I said that we are seeing a
little part of the left side. Then I guess we have lots
of lines and things to add, but that we can add once
the paper is dried. I guess a little bit
of detailing here. Showing the bend. I really loved the
way it turned out. Now we've got to
paint that wheel. I'm going to go back
with the mixture of my brown and my ultramarine blue, which is basically my
nice dark black color. I'll paint the wheel
with it, the left wheel. Also observe closely what we're going to do
with the left wheel. Here I've painted
the left wheel, but we're going to
break it and create a connection towards
the right side onto the area where there
was that foggy effect. See, all I did was just
to use my brush and creating a softening
effect such that my paint flows into that region. Pick up the color again, don't break it all
towards the bottom. We just need a little
connection right there. Can you see now there
is a nice connection. We just don't want
it to be like in a single element because
we've made it look as though there's got to be a lot of the splatter of
snow at the back. Now, in order to create
the dirty track. Let's pick up a nice amount
of ultramarine blue. Here. I got the
ultramarine blue, I dry my brush so that
there is no extra water. Right below the truck to
create like line and yes, it is going to be somewhat dry. Can you see it's a dry stroke. The same along here. We can create more
that goes underneath. These are basically the tracks
created by other vehicles. There same on to these, but don't go feeling it all
the way towards the top. I guess I could take
a little and add to this side for the
wheel because I can see my pencil sketch. But like I said, don't completely fill it up. Just soften out that region. See, when you soften it out. Both wheels are there
but it's masked out in that dusty snow
flying around. Then we go with a
bit of raw sienna and allowed add the
little wood effect. Every top surface you can make it as though it's
covered in snow. Just a bit there and that
portion on the right. Then I spotted a little
red area here so I've got to paint a
little red area there. Now I see how it's all
covered in the snow. But remember always, whenever you add in snow you
have to add in shadows. Before we do that, let's add in the number plate. I'm just going to put
in a slight gray tone into my number plate, very subtle gray tone. Here I'm picking up
color from there, I'm putting it into that. I've just wet that region. Just know it's not
perfectly white. See, I've dropped in a
color and I'll blend that in there. I got that. Let me make the wheel part
a little darker there. I love how it's shown in
that is a nice foggy effect. I guess we shouldn't
paint all the way until the ultramarine dark color because it's supposed
to be foggy. Let's make that dip
foggy, that's good. Then what? Now the only thing remaining
is to add the shadows. For that here, I take my ultramarine blue and
not all the places, you don't have to
add everywhere. But just go ahead, a little amount of
blue here and there. Here inside, some
areas like here, can you see a little
along the top, just don't make it
perfectly white. That's the only thing that
we need to take care of. I guess that's it, it's very subtle whatever
I have put in, you can clearly see that. Now I guess it's
time for us to take our white paint and start adding a lot of
our small details. Before I dip in to my white, I think the paint here is dried. We can go ahead and add in the little detail that
we were supposed to add. That's basically my
red and my brown mixed together and a line. I've got to have a line
so I'm not going to go into that and leave
it slightly lighter. A line like that and
exhaust lines possibly , that as well. Paint is spreading at the end, let me take that. I've added the exhaust
lines and everything. Now it's time to
add in the white. Not just the splatters, but a lot of detailing
with the white to do, you could drop in a random
bit of white paint. Then I guess you have the
backside of the truck to do, there, backside of the truck. Then I'm going to write
in Ford, F-O-R-D. Doesn't have to be perfect. See, Ford. Then what? I guess, some nice lighter
strokes on to the top there. Make it like a nice
amount of tri strokes. Then I can go ahead and add some nice white spots wherever you missed to add the white and also you can use it to mask
out your pencil sketch. I can see the areas here
which I've left white, which is actually for the snow. But then you can use that
to add your white on the top and you don't get
rid of the pencil sketch. I like the way that stand out. Now we'll finish off
with the splatters. That is the last step, isn't it? I still have the
number plate to do. I'll do that after
the splatters maybe. Let's do the number plate. Hope it's dry, yes, it's dry. I'm going to take
the gray shade, a nice amount of my gray shade
and do the number plate. This is why I should have added it first, anyways, it's fine. [LAUGHTER] It's sun
car, nicely kept track. Let's assume that it is. Back to adding my splatters. Oh my God, did you realize I actually forgot
something to paint? Have you noted it? Just
going to quickly do that. I know that I've possibly
added in splatters there. It's just basically the
inside part of the truck. I'm just picking up a
little bit of raw sienna. I'm really sorry,
I just spotted it. If you spotted it, you can add it but you
don't have to go in, I need just to see a
little yellow color. I loved the way it stand out after adding
the yellow color. Was looking so blank, I think. Anyways so let me take my
time to do some splatters. I love that right
now, so we're done. Absolutely done so let's go
ahead and sign the painting. Now we can remove the tape. Here you go. Here is
the finished painting. I hope you like it. Have to show you something today
for this painting. Actually, look at this one. This is something that I
made I guess three years ago and this was actually
my reference so I just avoided so many things
like the background trees, I didn't want to add, but I can see a lot of improvement and a lot of difference in the
way I paint things right now. Earlier on, I used to paint my snow with just Payne's gray. But I love the way
the bottom side of the car is turned
out in this one. But the shadow and all
of the snow I like in this one and see the [LAUGHTER]
is much better here. The truck, but see the
white paint on my truck. I tried to add on top of the red it didn't
turn out really good. Here we've managed to keep
it a lot of white paint. Also, especially the first thing to note here is the tree. see the tree on this one and
see the tree on that one. It's definitely an
improvement for me, the tire tracks and all of that. I hope you like it and thank
you for joining me today.
29. Day 13 Colour Palette: Welcome to Day 13, and this is the painting that
we are going to do today. The colors we need
to do are sap green, indigo, burnt umber
or Van **** brown, burnt sienna, raw sienna, yellow ocher, ultramarine
blue, and cadmium red.
30. Day 13 - Girl With the Cup: Let us start. So it's a girl
holding out closing drink. It's basically just a
cup shape. Let's see. So we've got to add
it into her hands and she's wearing tight gloves. There that's the hand and
comes down to there and then she has nice sweaters. The other hand and the gloves go like that. Wait, and then that's
the bottom part of the cup and here's
our other finger. Again, holding the cup straight but hands are
[LAUGHTER] at an angle, so there and that's her hand. This is like part of the
hand that goes behind. Then we need to get
this part of the hand. Again, let's go. That's basically it,
it's very simple, isn't it? Got the cup. We don't want to
see what is inside the cup so let me
probably reduce the mouth of the cup. I want it to be very less, let's not make it possible to
see what's inside the cup. There's a handle here, which of course she's holding and he's
holding the other side, then, that's basically it. Let me show that to you closely. This here is the pencil sketch. Let's go ahead and
start painting. We're going to paint
the background first, obviously, which is
the easiest part. Let's go ahead and apply water to the whole
of the background. You will see me
using a large brush, but I'll be careful around
the edges of the hand. All her objects, around the cup, around
the hand, all of that, we need to be careful,
so here again. There you go. Jeff, we're very careful
around the hand. Now that we've
applied the water, let's go ahead and
start painting. We're going to apply
the background first. For painting the background, we're going to be adding
some nice background trees. For that, I'm going
to mix my sap green with a little
bit of indigo, so that I get like a
nice dark green color. I want a very nice dark
green color so that's the reason why I'm
mixing a nice quantity. Make it nice and dark. So even if you're using
the PG8 white night green, I think this time do
mix it up with indigo, okay because it needs to be
some more dark or possibly, you could mix in a little
bit of brown as well, that it has a slightly
brownish green. Not necessary, I'm just telling. Here I'm going to use the whole of my brush
and start adding. Let's add random foliage and
details into the background. You can add like lots
of tree background. Do create gaps, it's just going to
signify that it's the foliage and just creating
some random details. You can see how I'm doing it just randomly with my brush, I think I'll add some foliage
here towards the top. Then, once I've done that, now I'm going to add
some tree branches. Wait just a second, let me make this straight
because as you can see, it has like bend, which I don't want. Now that's much better. Now, let me go take
my dark brown. So either Van Dyck
brown or burnt umber. I keep saying Van
Dyck brown or burnt umber because I'm not
sure which one is which, but I know that both of them
are like a nice dark brown. It doesn't really matter,
the colors in this, obviously as you might
have understood by now, because this is not
my regular palette and yet I'm painting with this. I literally don't care about
the colors that I'm using, as in the exact shade. You just need to somewhat
get the colors, that's it. An Iceman of dark brown color, I need it to be nice
and creamy consistency. Here I'm going for
an approximate dry on wet consistency, and let me add make
some nice trees, I've added one there. Wherever you are adding,
go ahead and add in the nice tree branches, maybe one there and that's what the branch of that
tree is going to be, then another one there. Let's have another one starting
right on top of the cup, and this one is quite large, so it's going to go
over to the very top. Then let's have another
one right here. Again, this is a larger
tree so let's make it quite large and I guess I'll make it a little
bit in the foreground. It's going to come down, so it's there, possibly
somewhere around until here, that's why it's larger
but we're still adding it in the wet-on-wet because we want
it to be blurred. It goes in the background so that's a larger tree
in the background. Obviously, go ahead
and add lots of small upward strokes to mark
the trees in the background. Let's take our green color a bit more and possibly add in
some places like here, the top of this branch where I had added
like a tree shape, maybe a little here, so that it's just not
a single color, it's good to put in a little bit of multiple colors there. But make sure your paper
is not dry and you're not introducing extra
water, very careful. That's the background done. There aren't other colors to be applied towards the background. But like I said,
I don't prefer to leave my edges completely white so I'm going to go pick up a
little bit of my gray tone. You can see it's a
very watery mixture, and just going to simply put
it along the edges and add some paint just
so that it is not plain white and I have something to go when I peel off the tape. You can see it's a
very subtle tone, but just adding it. It's a snowy background. I knew it's the background snow, but then we could
create some effects into the snow and make
it look interesting. Here I'll go with my same brown and I'm just going to drop in some random dots
here and there. It could act like the
details in the snow so I'm not picking up a lot
of brown as you can see, but just completely random, I am putting random dots. I think that's much
better. Of course, look at this bottom part, my water spread, but I think I will adjust that. All I have to do is
just go over once more and add a little of paint. Probably it's going to
spread out a little, but I can adjust that. Some harsh edges there. That's okay. I guess, I made a mistake. You just saw this spot had dried and then I
reapplied some water. Then my water flowed
to that part and the inconsistency
of water is always the culprit that
causes such problems. But you can always go
ahead and adjust it in various forms like
I'm doing here. Just using my brush and trying
to create an even stroke. I got some harsh edge and
uneven strokes there, but I at least removed
that water edge. Shall we add in a white
background like we usually do? I like it. I've grown to liking
that because it would look good when there's a white background
there among the trees. When I say white background, I mean the white background splatters of the snow falling. I shall add that. Obviously, [NOISE] you only
need to add it towards the top because the other areas, it's not that going
to be dominant. But yes, you can add. We can add some here. It's not even coming on the top. I need to take off extra water, and I guess I dropped in a
large amount of water there. But I think it's
okay because it will just act as the
background splatters. If I had added
splatters of water, then that would be dried. See a lot of harsh edges
in today's painting. How am I doing this? Did I not apply the
water properly? My mind is elsewhere today. There. Anyway, now, let's go ahead and quickly
dry this up so that we can paint the hand and
the little cup. It's completely dried up, so let's go ahead and paint
the sweater part first. For painting that sweater, I am going to be taking
my yellow ocher, but I want it to be in a
very watery consistency. That's because I do not
want a darker color, a very subtle color like that. Can you see? It's very subtle. One another method to being that would be if you apply
a lot of water, take a teeny tiny amount of
the yellow ocher and add it. The same towards the right side. That's a lot of paint, so here. I am spreading that out. Yes. We do have to add shadows and the
details, but for now, just adding that subtle
tone of color is enough. There. Just added a
subtle tone of color. Now, while it dries up, I'll go ahead and
paint the hand. For painting the hand gloves, I'm going to take my raw sienna. I'm going to start
with my raw sienna. I think let's just get to it. Obviously, going to cover it up. Nice amount of raw sienna. As you can see, I'm using
a very watery mixture, and I'm trying my best to keep the entire gloves wet while I complete
all of the strokes. You can see me going
back again on the top because that's because I want it to remain wet while I do it. Coming to the edge here, I'm going to be careful
because if I touch the edge, then my paint is going
to flow inwards into the hand or possibly
the other head arm. You can see my yellow ocher is the actual part that's
actually flowing in. Before we actually
paint the other hand, you could actually put
in the details now. Here, I'll go with
my burnt sienna. Using the burnt sienna,
we're going to paint the design and the
details on the hand. I want it to be the
wet on wet method. That's why I said if
you could leave it wet, so don't make it straight, try and bend it. That's one design. Then I've got to
add another line. You can just do whatever
design you want. Maybe something along there. It's just some design on
the gloves, that's it. Added the design, now, I've got to obviously add in highlights and dark
details and all of that. Let me take in a bit of burnt
sienna and I'm going to add darker color onto the top or the right side where it's the area that's
going to touch the cup. That region is under the shadow because it's
enclosing a surface. Can you imagine
that in your head? You'll see clearly as I'm adding it because it's
enclosing a surface, so this region needs to
be under the shadow. That's why there's
a shadow there. Obviously, that means that this part of the hand
would be lighter. For that, I am going to
absorb and do some lifting. Yes, it's going
to be quite hard, but we can do it only
from the stump region. I guess you can add
white paint later on. But for now, let's
just do some lifting and create a lighter area there. Then, I guess now we can go ahead and
paint the right side. For painting right side here, I go back with my raw sienna. I'm going to add
to my right side, nice and watery mixture just like the left side because we do have
to add the details. Here I'm just trying
to keep it wet. Managed to either wet. Now immediately with
my burnt sienna, need to add in the design. Here the design, let's see, is somewhat like that. It doesn't have to
be exactly what you see in one
direction or anything. It's the way that
she wears the glove, so it's going to
possibly change. But the design is to
be same obviously. See something like that. Lots of other markings. Added that into the design. Now for the depth reagent. Going back with my brown, so this area, again, where she's holding the
cup needs to be darker. But let's blend that in
along with the raw sienna. Here's my raw sienna and
I'm blending that in. Can you see it's not the design, it's the dark region where she's actually
holding the cup. Need to understand the
difference between both of that. Then the other region where
again that is the darkness is right here because
her other hand is casting a little
shadow there. Obviously that shouldn't
look like the design, so go back with your raw sienna. Go add it on the top and just make it blend
into each other. Can see the difference
between this stroke and the blended stroke where we
try and make the shadow. See, that's now the shadow. It's not design. Very important to understand the difference
between both of that, although we are using
the same colors, that's what I actually
wanted to show in this one. Then there's
another place. Obviously, there's the
shadow which is here, which is again under
the shadow because this bar is clenched together. Here there is a shadow. I don't know. How do I show it. This hand is always going
to have like a shadow. Can you see as I bring
my hands close together, there is a shadow on this
one. That's what that is. That means if I take in a
little bit of my dark brown, that is [inaudible] brown, I
can see the difference now. I guess this is
burnt umber then. Here now taking my burnt umber, just going to add my burnt
umber to the top here. Because this design
is under shadow up until this point and
so is this point. Can you see now? Now
there is a clear shadow. Maybe you can take it a
little bit brown. Go ahead. Add it to the edge and blend it along
with the raw sienna. I like how it's done. Now we've added the
shadows and everything. I guess this right side needs to have a
little bit as well. This extreme right side, you wouldn't have to add too
much details, just a little. But see, as I blend it. I like how it's turned out. We've added all of the shadows. We've added the way. The hands are folded. I guess I need to add in a
bit more darker tone here. Because that's like
literally in shadow. Let me blend that in
to my raw sienna. Now the design of the yellow
ocher on the sweater. Now we can take in a dense yellow ocher and I'm
going to add in the design. It's not huge a design, just taking some yellow ocher and adding some lines
like that. Can you see? The same on the right side. They're not perfect lines as
well because I want to show the texture of the sweater. That's the lines. But again, still we're missing the shadow. Now for the shadow on that, I guess we can possibly mixing a little bit of gray with the yellow ocher. It's go ultramarine blue. This is the moment I
wish I had [inaudible]. Maybe a little bit
of brown along with the yellow ocher. Not bad. I'm going to use that here. See, along the edge. I use that, but obviously that's got a harsh edge so make sure to go ahead and
soften your stroke. Yes, your design is
going to slightly spread and it's absolutely
fine that it's spreading. A nice dark edge. Then a little dark edge
towards the side as well. Not as dark as the other one, but a slightly darker edge. Here I've just added my yellow
ocher and brown mixture. I'm going to add but most of it and just using
water to blend out. I like actually how when
I'm blending with my water, the yellow ocher spreads. See how it's standing out.
I actually really like it. Maybe it's going
to blend it out. Not entirely, just like that, so that the yellow ocher
releases out. Can you see that? It's proving out to be a unique texture on
top of the sweater. May be a bit more yellow Adding on top there because you can see that it
kind of went off. Yeah, that's actually
brilliant right now. The issue is, I've got
some white marks here, which I need to get rid of. Brown and yellow we're
going to mix together, so that would create the
shadow on this side. Now I've got the shadow, I've got the highlights
and everything. Now all I'm going to
do is let me take in a little bit of my gray, and I'm going to put it
in this area in between. That's because it's the
background area seen through her hands, and it's gray, right? Now let's paint the cup. I guess I'm going
to do that with my red shade because
I kind of like how we've been adding a lot of details and designs with red, and it's the Christmasy red. I absolutely love painting Christmas paintings because
when you add in red to it, they are just
absolutely gorgeous. So here building up with red. Be careful. Do not spill
it out onto the hands. And another place, where
I need to be careful, if you've done the
same, then you too, is at the bottom here. We just applied the gray. If you touch it, then it's going to spread out
into the water. Okay, there's the cup, but like I said, we
need to add the shadow. So the shadow of
the cup again with the red and brown mixture, and I'm going to put it
right there along the end. Let me take more
brown this time, and I want to fill it up at
the very end. Can you see? That's where she is
holding the cup, and it's got a slight bend. And as soon as I add that, can you see it's
looking as though it's wrapped around her hand. The same to this edge. Just a little. How the top is like
dropped in her hands, and you can blend
that brown inwards. Okay, there, blended that in. Then obviously I've got
the top part to paint. I guess the top part, I'll go with my
darker tone itself. Just creating a different
color tone there. Okay, we absorb and create a nice distinction
from the borders, taking a little bit of more
red like that to the top. Okay, can you see
how I've created a nice brim-like structure? So just absorbing from
the center portion, and then I applied a little
bit of red along the top. Okay, so see how I've
created that gap. Then, I guess we're almost done. Now what we have to do is
wait for this thing to dry so that we can add in
the details with white. Here you go, my painting
is completely dry. So I'm going to take a
bit of white and start adding some details like
a bit of highlight. Okay, so I've added a little bit of white onto that region. Now we need to blend that. Blend it into the raw sienna. It's going to take a little
ding to get that perfect. Maybe you can use in a little
bit of raw sienna again, on the top, and blend it. Okay, so see, got like
a nice white edge. And I said, we do the same
towards this side, right? Little amount of white, but need a bit of raw sienna, and going to blend that in. Okay, yeah. So blended that, then I'm going to add
some things onto the top. Okay, so let's make it a
nice design onto the cup. Let's make it like
a snowflake design. Just using the tip of my brush. I'm going to add that. Okay, so it's basically
something like that. There. A little snowflake design and we can go for random dots. Another snowflake design. I got one simple and
another snowflake design. But obviously, as you can see, it's gone out to the edge. Go ahead and add
in lots of dots. Okay, so that's the cup. Now, obviously, finishing off
with some nice splatters. Especially towards the top
where it's the dense forest, I want some nice splatters. I don't know how she's
managing to drink that by putting it in her
hand in front of the snow. Maybe for picture purposes,
Instagram, right? [LAUGHTER] All
right, there you go. It's all done. So we'll just go ahead
and sign the painting. And let's remove the tape. And here is the
finished painting. I hope you like it, and thank
you for joining me today.
31. Day 14 Colour Palette: Welcome to Day 14, and this is the painting that
we are going to do today. The colors we need
to do are indigo, ultramarine blue, cobalt blue, burnt umber or Van ****
brown, burnt sienna, sap green, permanent yellow
light, and cadmium red
32. Day 14 - The Gate: We'll sketch out the
main elements first. Let's sketch the
gate. Let's see. We have the gate at around
some way, halfway point today. If I take the halfway
point and I create a small dome shape, that is the top
part of the gate. First, let's add
the gate so that it's convenient for us to
add the read in the center. Then choosing the
midpoint of the paper. I think that's
approximately there. Draw the center
portion of the gate. Again, it doesn't have
everything has to be perfect. It's absolutely fine to have like little misdirection
here or there. Then let's have a
line going like that. We're not adding the
ratings of the gate, the different metal
bars on the gate. That one in the center
is the main one. Then let's add more bars. I'll add another one there. We'll start from the center
because that's where we can create more symmetrical effect. One there. Following
the symmetry, the same distance
towards the right. That one. Follow the same
distance again to the right. Same way to the left, the same distance,
approximately there. Got that. Now it's two rows. Obviously, we have to improvise and add much better details. I guess let's make some designs on the gate,
something like that. Let's say we have a bend
that goes like that. You might have seen
such designs in ways creating an S
curve like that, C curve in fact, there. Symmetrically onto the
other side as well. Follow the same height
level and everything. Just try to match along what's
there on the right side. That's basically it. Then that's supposed to create
a nice curve here. See, I've added the nice curve. We'll do the same on
the right side also. Again, following along
the same line remember, so that line there is the
one that we have to follow. That's the bottom. Same towards the other side. Added such a design. I don't want to copy the
design to the other side. What I'm basically
going to do this, let's add some
bars to that side. I guess that's much
better, isn't it? If you want, you can do the same design towards the other side. Continue on, but I prefer to
do bars because it's easier. I don't want to clutter with too much
details on my painting. There you go.
That's much better. Then we need to put the
reeds in the front. Let's say that there is something here and that's where the reed is
going to be attached. How big is the reed? We need to create
a nice big circle. Some of it obviously is going to go over to the sketch that we've made because that is the
attraction in our painting. We need to do that in a
big circle in the center. Looks like a doughnut and
the tree on the gate. Now towards the backside, I guess you can trace
out the outline of a house or just something. Maybe I'll put the house here. The snow-covered house. We don't need to add in a
lot of details or anything. Then the window of
the house there, maybe like the
doors on that side. Let me show now, this is the pencil sketch. Can you see? The gate is what we wanted to trace out in
a more detailed manner. Now let's get to painting this. Painting this, we are going to apply the water to the
whole of the paper. It doesn't matter that we have the details in the
foreground that we need to add. But again, like the name suggests, it's in
the foreground. It's okay to apply water
to the whole of the paper. I guess we'll add it
in the front later on. All right. Now that
you've applied the water, let's go ahead and
start painting. I'm going to start
with an indigo color. Picking my indigo paint because we want to create a night scene towards
the background. That's why we're
taking the indigo. Load up your brush with a nice amount of indigo
and start adding, and we'll add it towards
the sky region especially, and then as we come
closer to the house, we are going to leave the top portion of
the house as it is, white so that you can
add in the snowy region. Towards the top, make
sure it's nice and dark. It's darker towards the top. But as you come closer
towards the bottom, in case you can
reduce the darkness. Here, every time I pick up
a darker amount of indigo, I make sure that I go and
add it towards the top. Then as I come
towards the bottom, I'm decreasing the color. What you can do is pull out your pigment like
that, come down. Can you see it's lesser pigment? You're just moving
down the pigment. Here you come down. You've reached that point
where it's the gate. Now we'll go with
a bit of violet. Here's my violet paint, and I'm going to add a
very teeny tiny amount, just mixing a little
amount of violet. Again, it should be
very lighter tone. Don't make it dark color. Then also I want to add in
some lights in the house. There is my yellow and that's basically the
lights in the house. The light in the house needs to be reflected
in the snow underneath. That basically is the snow
just a bit underneath. Then I'm going to be in
the snow region now. I just put in the violet just to show some dark spots
here and there, but the major chunk of it we'll do with our ultramarine blue. The snowy region, we're going to do with
our ultramarine blue. You can either use
your cobalt blue also. I prefer ultramarine blue
because it's granulating and then it separates out and creates that
granulating effect. I like it, to see how it appears like the
texture in the snow. That's why I use it. Can you see the
granulation effect there? But I guess cobalt blue is
absolutely fine as well. Then a bit of violet, I guess, to the right side. I've just put in a
mixture of colors. Slight, violet, blue
in here and there. We've reached towards the house. Let me add the snow. Here, dark is on the roof. Nice snow effect. Then here I take my indigo
and we're going to go over the top and try and
even out our stroke. As you can see, I created a little gap of white there because that's for the chimney. But here you'll see
me using the paint, but then going around
the house again, and if there is not too
much water you brushed in, the mixing should be perfect. Yeah, the house itself,
we've added the color. Let's go ahead and
paint the house. I'm going to put it a subtle
amount of burnt sienna. Clean around the windows
and all the inside part. Obviously on top
of the gate also because the house is behind, then a bit of details. Always, don't forget shadow
even if it's the background. I'm just putting dark tone
there towards the top, and the top portion there may
be a bit below the window. Maybe you can create the
effect of the door using that. One of them, as you can see, are based on a very
soft edge method. Let me go ahead and absorb
and create some even stroke. Here at the base,
as you can see, I'm trying to blend
it along with a little amount of
ultramarine blue. We don't want it to be
clear at the bottom there. As you come towards the bottom, maybe a bit more
bluish effec., here, I caught my ultramarine
blue to the mixture there, and the light it's also
reflecting, I guess. I guess I like it. I
like the wedge on that. Oh, don't forget the chimney. I left a gap there so I
need to add a chimney. Just a block there, but can you already see how
when we add in the block, it looks as though there is fog coming out of
there? It's not fog. It's smoke basically. You can see the smoke
coming out there. Isn't it gorgeous?
Oh, I love it. I think I'll skip the
splatters of bloom's today, but I'll definitely add
a splatter of white. Before that, let me just
put in the windows. Yeah. Just use my dark brown
and that's how I did it. Maybe you can pick up
a bit more darker. Now, make sure that your
paint that you're using is on a dry basis so that
when you add to the top, it's dry on wet stroke. Let me clean up any
mess that it creates, a bit more of my
ultramarine blue, and try and get in some
darker shadow effects. Because don't also make the shadow all in
one single color. Try in within various tones
to do your shadow. I love it. You can see how the house
is now covered in snow. It's more brown, I guess, because it's done very light. Yeah, I love that. Now, let's go ahead and
add in the splatters of white. There you go. I'm going to switch to
a smaller size brush to add in my splatters, basically my size 4 brush. Picking a nice consistency
of my white paint. You can see they're not stars, they're the snow. Remember that. Added to the bottom as well. Now what we'll do is since
the base layer is done, we'll wait for this
whole thing to dry out. Here you go, it's
completely dried up now. Can you see how all the bright spots are
blended into the background? Now when we add the next white
spots on the top of this, it will have a nice
aerial perspective look. I guess now we can go
ahead and paint the rids. For that, I want to start
with my sap green color. Picking up a nice amount of my sap green and
I'm going to start. I'll start placing a
lot of fir tree shapes. But before I put in the green, I think we should go ahead and add in a lot of
Christmas bubbles. I guess that's the better idea. Here, I'll take my red
shade, nice permanent red. I start adding. Here,
I add a nice ball. You don't have to paint
in your entire circles. The reason being
it's good if you can depict some of these
decor items to be covered by the
leaves of the rid. Some of them can be
full circles of course. Always don't forget shadow. Let me quickly add in
the shadow for that. You know the mixture by now. It's brown and red mixed together and allowed
add it to the tip. Not just the tip, but you can
go and probably add it to any one side like here and add to the top
because like I said, the portion of that bubble is going to be covered
in the tree shape. Then let's add some
yellow as well, some nice yellow ones. Thank you. That's enough. Now for the shadow
of the yellow, taking my burnt sienna
and going on one edge. My paint is still wet, so it blends together
at certain areas. Now, let's get back to
adding the dark sap green. That's my sap green, and I'm going to
continue adding. I know I added a bobble there, but I would like to add
a nice ribbon there. As you can see, I'm
improvising as I make a nice ribbon to the top. I like it. I like the
way it stands out. But should we make the
ribbon a little bigger? Yeah. Shadow, obviously. Now finally back
with my green again. I know that I always say, yes, let's go back with green
and then I go ahead and keep adding more
and more details. But that's the thing, isn't it? I mean, like when
you're painting, you improvise and then
you find out that, you could add more details. You can see I add in a
lot of small strokes. I guess towards
the inside you can actually fill it up
because we have to add in like dark
effects and details. I take my sap green. I'm just going to go over, create the edge obviously, but inside maybe
you can fill it up, and it's okay to
have whitespaces because you can fill it
up with snow later on. That's the thing, isn't it? It doesn't have to be perfect. See how my yellow
slightly spreads. But you can also see how the
red is coming into shape. Even with just the green
and no shadow at all, it's still looking
very nice, isn't it? See a nice green added. But don't forget shadows. To add in the shadows here, I mix my indigo
with my sap green, and I will add that on the
top at random, obviously. Now is how we have to create the darker strokes and create
the shape of the leaves. Try some of them smaller, some of them larger
green spaces. You see one of my green stroke actually went on
top of that yellow, and it looks nice because
it looks as though that decor item is covered by
a little part of the leaf. That was definitely
unintentional, but I loved it. I've added. Let me try and add some darker
details at some places. For that, I am just taking only indigo and adding
like for example here, some areas around
the bobbles where you need to add
nice reflections. We've got that nicely. Now, probably we can refine the shapes of the
ribbon some more. Here I take that and add my red. There goes that ribbon. Maybe I'll put in another
ribbon or something there. Maybe another one over here. I think we will add
it to the already existing red and make
that into a ribbon. We are done adding the wreath. Now, the obvious thing left
is to add in the gate. Let's add in the gate, and for adding the gate, I am going to mix a nice
amount of gray here. I'm going to mix my dark
brown, my burnt umber, taking up my burnt umber, and I'm going to mix that
with my cobalt blue. Now need more brown. That'll create a nice
almost dark color, and then when we add
in water to that, we should be able to
create a gray color. Here, now adding
water to the mixture. This is the color that I'm
going to use for the gates. Let's take that, and I'm going to add. Here you go clicking
for the gate. You don't have to cover the
entire part of the gate. As you can see if
you look closely, I haven't covered the
entire pencil sketch, but I left a slight gap there so that we could cover it
up with snow later on. Also don't have to make perfect
sketches because again, we will be covering
it up with snow. Let's make each of the shapes. This part is very easy because all you have
to do is just go ahead and mark along the lines
that you've already added. Be careful about the
vertical ones though. Reason being, they are
not going to be that much covered in snow because
they're vertical ones. I guess I'll add some
vertical bars there. Gates otherwise it
looks very odd. I mean, how is the
top part connected? Maybe there's a connection
towards the other end, but we need to make
sure and think about the aesthetics
of the structure. Did I actually get it slanting? I guess I did. That's because of the dark part of that one. I guess I can correct it
up and make that straight. I can just cover it up
with snow later on. Now, that's done. Let's wait for this
to completely dry up so that we can
add in the snow. Now we're going to
add in the snow. Before we add in the white, we need to add in some shadows. How are we going to do that? Here I take my white paint a little bit and I'm
going to load it up with a little amount of
the gray that we mixed. See that. Little white. Can you see? It's got
a nice great touch, but I'm mixing a little bit
of ultramarine blue as well. Little bluish touch, and this is what we're going
to add on the top at first. If you look at this darker
shade towards the top, and again, remember,
it doesn't have to be perfect the
way you add them. Remember, pull off
the horizontal areas. That's where you
want to add these. You can see clearly I'm
not making perfect ones. Here, horizontal areas. Towards the top of
every area that you think the snow
can even settle down. Probably you can go
ahead and add some in between the reed as well.
That'll be the shadow. Yes, I know it looks
weird at the moment. We've added in the shadow. Let's dry this up and then we'll add in the
proper white paint. There you go. It's
completely dry now. Now let's go ahead
and add in the white, the proper white for the snow. Taking nice amount of
white in my brush, loading it up nicely, we're going to cover most
of the areas with snow. Don't make perfect lines. Go ahead and add random
things. Can you see? When I say random,
I mean don't make a perfect line, just do this. When you look at it closely, can you see there is the
dark black metal bar. Then you've got the
shadow of the snowy area, and then you've got
the proper highlight of the snow as well. Sometimes alone, we can
blend in that shadow. How you're going to
do that is if you're taking another brush
like for example, here, I've taken my size four brush and if you just run your brush along and blending your
white to some of the areas, then it gets mixed
into the bottom. Let me show that to
you closely again. Look at what's happened here. The shadow part and the
snow part is like covered. Looking together, isn't it? That will help in creating
a unique blend mixture. We don't want to go soften out entire edge, just some areas. I'll show you here again. Here, I pick my white. And then using my other brush, if I go and soften
just some areas. See there is a light softening and it looks as though the
snow is wrapped around. These are just little
technique that we can adopt. Here I have rectified
the mistake of my gate. See, I've blended it like an O. Going back with my white. I'm going to do this
blending along for almost some of the areas again
on each of the areas. I take my other brush and do
it along each of the areas. You'll see the difference. See, added nice shadow onto
many areas of the gate. Now, on to the vertical areas, you can actually go ahead and add some random bits of snow. Here you don't have to be
covering it up entirely white. Obviously, when we splatter, then also it's
going to have here. I'm using my smaller
brush here to do on top of the little other
areas of the gate. Because we just don't
want the gate area to be perfect. I really love it. Now, the task left to add
some snowy areas to our gray. You know where you put the gray. Closer to those regions is where you're
going to add snow. Let your gray be seen
and then in some areas, go ahead and put in a
little amount of snow. Mostly snow can settle in places where there
are surfaces to settle, for example, like traps here, a bit top of the ribbon. On the top of the leaves. See how nicely we've added
that. Now we're done. The only thing left is to do
the splatters and as usual. Here, let me load up my
brush with nice white paint. We're going to add
nice splatters. Onto house, onto
all of the areas. There you go. We've added. Now, let's go ahead
and sign the painting. Now, let's remove the tape. Here is the finished painting. I hope you like it. Thank
you for joining me today.
33. Day 15 Colour Palette: Welcome to Day 15, and this is the painting that
we are going to do today. The colors we need to
do are Prussian blue, burnt umber, burnt sienna, permanent yellow light,
permanent yellow deep, violet, ultramarine blue,
lavender, and White Gouache.
34. Day 15 - The Lantern: Then let us start. Our lamp is going to be resting
on the snow surface, so just some random lines then, let's now make the lamb. It's going to be a big
lamb we are actually focusing on towards
the lamb right there. Let's say that is the
body part of the lamp. Slightly curved
surface like that. Let's say that comes down. You feel this is quite longer
for the lamp so then maybe I'll increase the bottom part where my snow is supposed to be. That is where my snow will
be now, that's much better. Now my lines as
slanting let me get that straight and
little curving part towards that side so it
should be all in the snow. There, that's the curved part
let me add that as well. Adding a line
towards the bottom. It's all sitting
in the snow there. Then my lines are all going wonky today anyways. Here, then we add the top part, with a nice little curve there. Let's add another curve
on the top again, then a small dome like
structure on the top. This obviously extends
towards the other side, and on top of the dome we'll have top part of the lantern. It should be the
other way around. The curve should be like that, then here on the top. Let's have a small dome again, on the top so that's
how the top part is. Now the handle let's
make it attached here. There goes the handle
towards the top. That's the handle of the lamp. We're not seeing the top
portion of the lamp. I guess that's it
for the top portion. Now we'll add the inside part. The inside part again, here comes the bottom part. As it's resting in the snow. We need to draw
lines such that they are like immersed in the snow. We can see this part
is more immersed and the other side
is less evident. There. Obviously we have
to do the other side also, so the same with the other side. Follow along the same line, and very thin on the other side, perspective, pretty
important concept. Then there. I guess I'll add another center line because
I don't want it to be completely the area where we see so that's
basically the lamb. That's it. We don't
have to add anything more so we need to mark out the position where
it's going to be the lamp area inside. Let's assume it's like a
small ear or something. It's a small thing inside, which is obviously
going to be nicely lit. This entrancing in
a very light manner because obviously it needs
to be very light and the reflection of this on the inner surface and
also we need to be drawing line for the inner
line of the lamp and hence, that is the reflection. Let me show all of
this to you closely. This is our pencil sketch. There you go. Now, once you've done
the pencil sketch, let's get to painting this. I'm going to be
applying my water all around the lamp area. We'll avoid any part
of the lamp and we're going to apply our
water all around. Taking care to avoid all
the areas of the lamb, we'll apply the water. There you go, applying
the water all around. You can also apply
onto the snow areas, it's absolutely
fine Just the lamp is what we need to avoid. There. Let us start. I am going to take a nice
Prussian Blue color for this. [NOISE] Here, mixing my
Prussian Blue color. It's a very vibrant, nice, beautiful blue color and
we're going to add that. Along the edge of the lamb, all through the areas outside, we'll be adding this Prussian
Blue but should not add it in one single stroke. We should try and
make some nice, gorgeous things so for that, I'm going to go with
leaving some gaps. Let's create maybe some
bokeh light effect. Yes, I knew that
my paint is going to spread around.
It's absolutely fine. Wherever there is water, it's going to spread around
but it's good if you can leave some gap while
you're doing it. Here, a little
light effect there, maybe another light
effect there. Here, I apply. I guess, as I reach
towards the bottom, I'm going to decrease my stroke because I
don't want it to be a very dark stroke all right
next to the my snowy area. The darkest stroke all should be towards
the top so here I take my dark stroke and
I'm going to apply it, and I'll again try and
add some round lights. Now as you can see, now
the second time I add it, it's a bit more
evident, those lights. That's because now there
is more pigment they're to display and stay in
position, so that's the reason. Here, another one there, and the rest of the areas
you can go ahead and add. Maybe I'll add
another one there, so that version will be a lighter region of
the Prussian Blue. Nice dark color towards the
edge maybe another one there. Going down and
lightening my stroke. But isn't it too
perfectly light? I just put in some random spots because I didn't want it
to have a line there, that is not needed. Then I guess this top
region, it's dry. See what happens
when you focus on one side and it dries
up but it's okay. You can still go ahead
and just add because here I don't want to
add any bokeh effect. This region, I believe, must have dried up, so I'm just going to
quickly apply water into that side and just wet it up for our convenience
so at the bottom. Then going back
at the top again, let me try and displays of some pigment and try and
create a bokeh effect. I'm not looking for
perfect bokeh effect. If we were to do
perfect bokeh effect, we'd have to take
a lot of time and work on it but this class is intended to be like you have
take our time and do it, so I guess it's okay. We're not going to do that
heavy painting [NOISE] Here, I'm coming towards the bottom, lightening up my stroke. Let me take my dark paint again. We're going to add the
darkest paints towards the top regions so there, maybe another round there, and rest of the
regions where there is no round I'll fill it
up with my dark paint. There. Maybe I'll do a little
lifting in certain places. Just swirling around
my brush and creating a lifting effect to
create some nice bouquet. Basically, just swirl
your brush around, pick up the pigment,
wash it off, or rub it off on your
cloth or tissue, then go back to the paper. Once your brush is saturated, make sure you wash it off, then try your brush before you'd go back to the
lifting process. Or you could do that
each time as well. Sometimes I wash my
brush each time. I'd like to add
another one there. I guess that's it. Now, let's go
towards the bottom. As you approach
towards the bottom, we need to create the
light reflecting off. The light is there. Let's assume some nice yellow
color that's very vibrant. I've washed my brush
and I'm going to then lighten up my
stroke. Can you see? Just a teeny tiny amount. Then the reflection part as
well somewhere along here, so some nice reflection. Then, now the snow area. That closer to the light
effect we need to be painting with violet because that's
the complimentary color. You know that by now. Here, taking my violet and
adding to the snow region, just a nice amount of violet. Go ahead and mix it
up randomly there. Then we'll go ahead with the ultramarine blue,
our usual mixture. Go add that ultramarine
blue to the other side, creating the darker
effects of the snow, not the darker affects, the shadow areas basically. You can go ahead mix
in a little blue to the violet as well so
that you blend it. Back to my ultramarine
blue a little, just adding along the edge, especially towards
the bottom where it's bound to have some
nice dark spots. Also remember, don't make
it as a single color. Try and place randomness
and unevenness. That's what I'm basically
trying to do. Can you see? Just put in a lot of randomness. I guess we should put some
more here towards the edge. That's basically that. Then don't forget, I love to add the splatters. The splatters with white
in the background. I will do that. I'm going
to take my white paint. Let me try and hide
off the idea of the lamps so that
I don't have to go ahead and absorb
the paint it had on. It's pretty hard
with white on it. Then I guess a bit there and this side and the bottom. There you go. I've added
the nice splatters, so let's now go ahead and
dry this up. Here you go. You can see the areas
where we have lifted off the paint and also see the
areas where it's splattered. It's like a very lighter
tone of white in it. I know I see this every
single day because I see it at least it and just
admire the way it's done. That's right. I'm so sorry. [LAUGHTER] Let's go ahead and paint the inside
part of the lamp first. I'm going to start by applying
an even tone of water. Let's apply an even coat of
water inside the lamp region. I've applied the water. Now it's time for us to paint
the inside part. Here I start with
my yellow paint. I'm going to go around. You know the shape that
we've actually traced out, go around and create, because that region needs
to be nice and white. Then there is also the reflection part here on
this side, so that also. Move around, but that
can be nice and small. The rest of the areas, I'll apply the lighter
stroke of yellow. There, added the yellow. Now, I guess, which
color is next? I'll go with a permanent
yellow deep then next. That will go on the top into some of the edges
onto the other areas. Then we'll go back with brown. Now, the brown
obviously would be into the areas that are farther
away from the light source. Like I said, so
here we are trying to create a nice reflection. All of the brown, try and add it to the
areas in the middle. When I say reflection, it's like the side of the
lamp, the glass wall. The glass wall is reflecting this main light source.
That's what's happening. If you were to take
brown paint and add, but not just brown, go ahead and pick up a little
of the blue that you have. It's turning into
slight greenish tone. But I thought it would turn
into a nice gray tone, but this looks like a really cool blue and that's the
reason why it happens. But don't use Payne's
gray or anything. It's okay to have a
little dark brownish tone there or a grayish tone here. Then coming down, you can
see me blending my stroke, but I'm careful not
to touch any areas of my yellow or the region that
I want it to remain white. I guess we can go and take it a little towards
the bottom as well. There going towards the bottom. I know I've added a dense paint, but I will blend it up. I've blended that up, but I know I need to add more. Like probably the small here and one which it's
standing. The inside part. That's the land region. Then obviously the
bottom part is going to be slightly nice and dark. Let me take in a little amount
of my dark-brown to add to the bottom part of night here. Then blending a little amount of brown tone towards the top. Here, I take my brown
and start blending. I guess I'll add a bit
maroon towards the center. Can go with a darker
brown towards the edges. Added the brown, I guess we need to add to
that right side as well. Now, that right side, as we look upon it, you can clearly see that
there is that light source, but then it's also reflecting some part
of that night sky. The color there at the back is going to
be slightly violet. Why? Because it's the colder
version of the light, the same color that we
applied for the snow. It's not the snow
that's being reflected, but it's that little part of the sky plus the light
source being reflected. If you add in a little
amount of violet, then go ahead, blend the bottom part with
a little amount of brown. The bottom part is where it
gets more of the light being reflected and then blend
it towards the top again. You'll see how it does.
You see how it looks. A little amount of violet. I liked the concept
of the violet. Maybe it's violet that I should
have actually added here. But the problem with
adding violet on top of brown is it just sounds black. I think if I wanted
violet there, I should have added it at first. But I guess it's okay. I like the way that the
right side has turned out. That's that. Now that's done. I think we can go ahead
and paint the top portion. For that, I'm going to be taking a little amount of
my lavender pigment. I don't have this lavender
shade from Xin Han, so that's why I use the
one from the other brand that I have, which is Rembrandt. I think I've shown
you this before. This is the lavender
pigment that I'm using. Loading my brush with a nice amount of lavender,
I'm going to add. As you'll see, I'm
adding towards the top. That also make sure that like I have some nice white gaps or white spaces
in-between and that's completely necessary that I have those white
spaces in-between. Because that is
like the snow area. See, a nice amount of
shadowy lavender shade. The same thing you can
use on the other areas. As you will see, I have a lot of white spaces that
I'm leaving behind. Most of my strokes are dry. There, added that. Then I guess we can start
coming towards the bottom. Then as I start coming
towards the bottom, I'll start to mix my
lavender with my brown. That's my lavender, and I'll mix it up
with my burnt sienna. A nice amount of lavender and burnt
sienna mixed together. You'll get a slightly
grayish tone, and that's what we're
going to apply. This color while you're
applying it, again, make sure that you
leave a lot of white spaces in
random. See that? Up to that point, then
this color I'm going to apply on top of my
lavender paint as well. This will be like
the shadow areas. [inaudible] me out. I'll just use my brush and try
and blend in that mixture. It's equivalent to adding
burnt sienna on the top. But because we've mixed
it on the palette, it's going to be like
a different tone. If I had added burnt
sienna on the top, then I would get a heavy
dose of burnt sienna there, which I don't want, so that's the reason I decided
to go ahead and mix it on my palette before we
applied onto the paper. I got a nice mixed shade now. Now we need to
create some shadows. Creating the shadows, I
will take my violet because the darker color range of
this lavender is violet. We can use that to
create the shadows. Absorb extra water
from my brush. Then for creating the shadows, let me go ahead
and add in towards the base of each of the areas
that there are separation. As I add it towards the bottom part of that white space that I
have left behind, it implies that that's like a different surface
and what's the top? There is snow settled. Can you see that? We'll do the
same for this region here, which obviously again is another surface where
the snow can settle in. But here, as my
stroke has dried up, I need to go ahead
and start to soften it towards the bottom. Can you see? Now it's softened. Then I'm going to use
that same mixture of lavender and brown
to draw that handle. As you know, that's
a vertical surface, so it's absolutely fine. Maybe a little bit more
lavender on the top. That's attached to
the edge there. Then I guess now this part
has probably dried-up. Let's just go ahead and paint
the outside part right now. For painting the
outside part here, I load up my brush
with a nice amount of my burnt sienna and I'm just
basically going to start. Along the outside using my burnt sienna,
I'm going to paint. I guess we could add in a
slightly more darker color. To my burnt sienna, I'll
mix in my burnt umber. That's great brown actually. Or you could actually mix your violet and burnt
sienna together. You still get a darker tone. Here I use the edge and
paint towards the inside. Now why did I reach
towards the inside? [inaudible] off that burnt umber and I'll take only burnt sienna. That's just burnt
sienna right now. Adding that, can you see it? I guess we'll do the same. Along the top side, we can go for burnt
umber which is dark. Yes, you may leave some
white gaps here and there. Just paint the snow but
not along the edge. Again, not towards any
areas towards the bottom. Towards the bottom always cover
the entire of this again. Then let me paint
along the edge. That is the edge of the lamp. Then I'm going back with
my burnt sienna and I'm going to paint alongside that. See, it's a slightly
different color tone as it mixes with the burnt
umber on the right side. The same thing towards this side and the right side also and the base. Here, note what I said about the snow in different angles. See that? Now, it's in the snow. Can you see how we have
a nice bottom area? The light is playing tricks with me again because
there's always light here. I've got the windows closed
but then still the light is coming in and creating
different shades. Now, it's time to
paint the center part. For painting that center part, here I take my
permanent yellow light and that is what I will add
to that lit region there. That region is absolutely lit. Then I go with my burnt sienna and I blend it here
into my burnt sienna, the same along the bottom. You can blend your burnt
sienna into that yellow tone, gradual blending. That it. It's a lighter tone there. Then now towards
the extreme top, go with my burnt umber and blend the whole thing. Can you see? Now, there is that beautiful glow. The light is back. Anyways, can you see now
how we've created the beautiful glow of the
inside part of the lamp? I guess I'm happy with
where to stand out. Now, all we need to do is to wait for this to dry out and then we can
add the snow on the top. We've captured the
inner lit area. Now, it's trying to add
a lot of snow regions. Here, I take my
white paint and it's actually putting in
lots of areas where actually the snow can
accumulate and try and get in a dry brush. Here, let me make my brush dry. I dry it by drying
first on the outside on my tip so that when
it's dry, I know. See, it's all dry now and I will add that
towards the top, some nice dry strokes
towards the top. Can you see it? Probably it's just
started to snow and you've got a lot of
snow accumulating. Nice dry strokes. Then you can go ahead and start adding largest
splatters for the snow and that's how we
finish off this painting. I've added some nice
white splatters. Let's also add some blue
splatters for the bottom region. That one I will add
with my Prussian blue, the blue that we
were actually using. Just some nice splatters I guess towards the
bottom should do. I guess you can add also
onto the light, just that. That's it, not a lot
of those blue ones. Oops, I had moved out my
palette so that it won't get white and then I didn't realize that when I picked
up the Prussian blue, it was out of the frame.
Sorry about that. I guess we can go ahead and
sign our painting right now. Here's my brush and my cadmium
red to sign my painting. There you go. See my hands. Let's go ahead and
remove the tape. Here is the finished painting. I hope you like it. Thank
you for joining me today.
35. Day 16 Colour Palette: Welcome to Day 16 and it's just nine days left
to Christmas and this is the painting that
we are going to do today. The colors we need
today are dark green, ultramarine blue,
alizarin crimson, violet, raw sienna,
burnt sienna, burnt umber, Indian
gold, and cadmium red. From this lesson onwards, I'm going to be using
my other palette, which I've already mentioned
in the art supplies section. It is just so that you
know that there is no importance to the
colors that I am using. You don't have to use
the exact same colors. Always go and try and experiment
with different colors. This is the reason
why I have used different palettes
in this class.
36. Day 16 - The Bag: Let us start. You've already seen the
picture by the way. It's going to be a small
sac lying in the snow. Let's say there is the sac. You can mop down the snow. As you know, in the front of it, it's going to be a snowy region. Let's say that this is one
side of the bag there. Again, lots of snowy region.
Again, in the front. You don't have to draw the
bottom part of it perfectly. Then towards the top, we'll add the mouth of the sac. Inside it is going to be
the Christmas bubbles. Just add a lot of round shapes. I'll add one there, the one there, and let's see, another ball on the top. Then maybe another white one over there and possibly
a smaller one. Then shall we add some
at the bottom as well? Maybe we'll add one
here, right here, resting on the surface
among the snow. Then the knot of the bag. Here it's the shadow area. As you can see there is no specific shape. I just randomly
did that circular, not circular, but almost a
glass shape for the knot. There, that's it. I guess, that's it for
the pencil sketch. There you go. This is
how it looks closely. Now let's get to
the painting part. We will paint the
outside areas first. Obviously for that,
we're going to apply water to the whole of
the outside areas. I'm taking my flat brush, and I'm going to
apply water to all of the areas outside, so here. Make sure you avoid
all of the areas of the sac and even this
little string bit there. I like to paint with wet on wet. That's why I add in always
the water along the edge. I guess you can come down onto the
snow part as well. Because maybe we don't need a definite line for
the snowy region. I've almost applied the water, I think the rest
of it we can add when we're adding
with our brush. Here's my size eight brush, and let's start with
the background. The background, I think I'll probably go with
gold green today. Gold green color means that, here is my dark green and
we need to make it cooler, which means we add a blue to it. I think I'm going
to add ultramarine blue to it because it has a little bit of triangulation and that might be quite useful. Here a bit of green
and ultramarine mixed together so you can see the cool green shade and that's what I'm going
to add into the background. As you will see also, I'm going to add in
the background in a slightly angled manner. We're not going to make it
in a one single stroke. Here taking the cool green. The best thing about
mixing such greens is that every time you mix, you end up with a
different color. As you can see, I pick up
ultramarine blue again. I pick up my green again. Every time I mix it, my green is going to be slightly
different all the time. It won't be the same mixture. For example, if you
look here on the paper, you can see that there are
different varieties of green. If I add more green
to that mixture, see, it's slightly different. If I add more
ultramarine blue to it, it turns into a
watercolor version, but see how it shows up? That's why color mixing
is really amazing. Very careful along the edge
of the Christmas marbles. I guess, even
though we were like painting in different strokes, it is good to have your stroke right around
the Christmas bubble. Then you can go ahead
and leave shapes or create whatever shapes you want. More ultramarine blue. Careful along the edge
of the bag again. See that the bottom part has
already started to dry out. You can see how my strokes
are turning out to be. Before I paint there, let me go over to this side. You can see I also
tried to make use of the mixture of the green so sometimes
I pick up my green, sometimes it makes
it more cooler, so I want it to be having a different variety of the
green on my background. As you approach the
string, be careful. We are trying to
leave a gap there. Go around the string area. Take a bit more green. As I come towards
the extreme bottom, here, I'm using my green
without the ultramarine. Here is my green. Go ahead and leave cuts. It's okay that it's
got some harsh edges. We can soften it out later. Here, as you can see, I'm using a lot of dry brush. I've just run along
my brush, that's it, and because there isn't
even pigment, it dried out. Now I guess I'll pick up a little bit more ultramarine
stroke and try adding some random shapes onto the top because I knew
it's started to dry out. I really want to
just do some shapes, maybe a bit of dark green. As you can see, because of the ultramarine,
it's spread out. That is, it's granulated and created the
sedimentary property. If you look at maybe
pretty closely, you will see a lot of effects
of the ultramarine there, which is exactly why
I used that color. Maybe those gaps there, I'll fill it up
with ultramarine. It leaves a nice
amazing mixture. Created the background, let's go ahead and paint the foreground where the
snow is going to be. For that, I need
to wet my paper, I think it's dried out. I'm just using my Size 8 brush itself and I'm just
going to apply water to all around
the bottom part. Now, I'll take up
my ultramarine blue and go and start adding
some nice snow effects. We will leave a nice
white gap there. We're only adding the
shadow of the snow, so always remember that
when we're adding. I've left a little white gap there where the bag is
actually touching the surface. Then now I'll go with more
darker ultramarine blue and put some nice
details on to my snow. This is completely random. We've been doing this for all along so you know how it is. There's no perfect way that
you should be doing this, it's just completely random. I think today I'm
going to give it a little bit more depth, so I've taken a bit of violet, and I'm going to
mix that slightly. Not in all the places, I think just towards the
bottom. That should do. We're done with the background. I guess, for us to paint
all of the other details, we do have to wait
for this to dry, otherwise we'd be actually
pulling the paint. Before we draw in
the background, I'd like to put in some white. I always do that because it's good to have those
in the background. Here's my white paint, and I'm going to add
some nice stratus. Be careful of my bag, I don't want my paint on that. I guess that should
do. Now we'll wait for this thing to completely dry so that you can paint the bag. Here my paper has now dried. Before we proceed on
to painting the bag, I want to soften
some of the edges. What I'm going to be using
is a nice flat brush. Any flat brush that you
have is sufficient and simply run your brush
along and wipe it. You can use any flat brush. All we need to do is
simply wet the region, run your brush along, and
then quickly absorb it with your clothe so you see
a quite a softer edge there. That is basically the process. I guess we'll do it
on this side as well. There, I've softened
that other edge as well, now let's get to painting. Here, I'll go back
to my Size 8 brush, and I guess let's
paint the bag first, so this we can put
in the shadows. I'll start with a nice
yellow ocher shade and I'm going to paint. While I'm adding my tone, observe, there'll be
a lot of white gaps. Here, I'm putting in my color, but as you can see, I've left there a slight
gap of white there. Absolutely fine, and also when you're putting
in your stroke, you might create a lot of
white gaps in between, which is again perfectly fine. Don't try to fill up
all the white gaps. It's good to have a lot
of gaps in-between. Also, remember the string so we've got to paint around it, which is obviously again
quite a tricky process. We're not painting it in
the wet-on-wet method, we're going with wet-on-dry, so that's also there. I guess this side we
can make it quite dark. We made it slightly
lighter there because I wanted that
area to be the highlight. If that area is the highlight, this side naturally becomes
the area with the shadow. Go ahead and apply a slightly darker tone
towards this edge. Yes, remember to go around each of the
strings, very important. Here amongst the bag is joining. It's supposed to be a
little darker tone, so let me blend that darker
tone towards the bottom. Now we just painted it. In order to give it
a bit more shadow, we're going to add
details on the top. Here I'll go with my brown
paint and I'm going to put it right there into that gap. Since we just painted it, it'll blend in with the yellow ocher to
create the gap. I guess a bit more yellow ocher into places where it's not
blended properly. Here we do have to
go around again. As you can see, there's a lot of teeny-tiny gaps among
the string area. There's another. You'll see that my strokes are not perfect and I'm not aiming to
be perfect either. But just try to randomly
put in the color, and so here, blending with a lot of brown
into the areas inside. The extreme inside part, I'm putting a darker
tone as well. Can you see? The
color that comes out is lighter than the one
that's right there inside. Now, let me put in some more darker tone
for the right side. Not a darker tone, but like a shadow area for
the right side. More of my yellow ocher a
bit darker tone in fact. Put some of it to
the edge right here. Leave a tiny gap in between. See, so this area
is considerably lighter as opposed to
the area on the right. Maybe you can take
in a little bit of brown and add to the edge but it doesn't have to be and also you can add a little
bit of brown maybe to the bottom part of this right
side to show more depth. I like that. Now we've
got to paint the top. Again, the top taking
my nice yellow ocher. As I go towards the left, I lighten up my stroke, leave a gap of white
there towards the left. Here, applying the yellow ocher, now taking more dense pigment
towards the right side. Yes, leaving a lot
of gaps as I paint. Remember, more darker tone
towards the right side. That's the area
under the shadow. Remember, then now a
bit of brown I guess. You can use that
for the right side, just like we did
for this region. But now remember again, this area here is
still the fold. We need to have a bit more brown shade
there now, towards the top. Let's create a fold
at random places. I'm taking a bit more brown and fill it up along the edge. Make sure that in
those gap areas we don't need any white. I had some white gaps. I've filled that up. Can you see how we've created
a nice gap and a fold? How it's a bag that's tied up. Then I guess now we can go
ahead and paint the bubbles, and later we will
add in the string. Now the bubbles, what color shall we put in for the bubbles? Let's paint the
Christmas bubble. For that here I take my Alizarin
and I'm going to take in a little bit of my yellow
and mix into my alizarin. That creates a very
nice red shade. I'm going for
transparent method this time so that's why I'm
not using the cadmium red or my buck permanent red and use that to
paint my bubbles. I'll start right here. I'm going to leave a little
gap of white along the edge and then a little highlight. Then paint my Christmas bubble. As you can see, I've left
a slight white gap there. That is where my
highlight is going to be. I'll add the color for
the others as well. Let's say I add
here and I'll leave a nice wide area for
the highlight again. Then on this one as well again, leaving a nice white
area for the highlight. There I filled it
up with colors. I want to leave that one
as a different color, like a slightly golden
color probably. We've added a nice
amount of all those, but now we need to create
reflections or the shadows. For that, I'm going to mix the same Alizarin with
a little bit of violet. Can you see a little
bit of violet into my Alizarin and it's turned
a slightly darker shade. I'm going to use this
for the shadows. Here we'll apply it
right towards the edge. This one is like masked out
and sitting inside there. We need a lot of shadow. Let me wash that off and blend
it again with my alizarin. I think I'll do a
little lifting there and try to create a
nice edge.Some lifting, some dark shades, that's
what we're trying to do. I guess here towards the edge, it should be nice and dark. Here I take my violet again
and I put it along the edge. Maybe a bit of darker tone. Now see along the edge how
we've made that bubble. Now for the other ones as well. Let me take my brown mixing with my Alizarin and
adding to the edge here and add this edge and a bit there. Then I'll mix it up
with my Alizarin. Mixes in, blended
into my Alizarin. I guess the one there is
Alizarin, but obviously, we need some nice transparency
so here I'll run my brush along and absorb some of the
pigment then blend it again. Can you see how this one now
really looks as though there are three different
bubbles sitting there. This end here of the
ball sitting on top. Make sure to make it
darker towards the inside. It's absolutely essential that you make it darker
towards the inside. Now for the bubble
on the right side, I will go with my Indian gold. Here again, adding
the gold shade, but now I leave a
nice highlight. Again, very important
to add highlight. Then adding the golden shade. I know it looks perfectly
golden right now. So what I'll do is
along this highlight, before it dries out, lift some paint, so that it's like a yellowish
stone. Can you see? I've lifted some colors and
also a bit from the top. So it's now slightly yellowish. But towards the bottom, we need to add in the shadows. Here, I take my Indian gold and I'm going to add
in violet again. It turns into a nice brown tone. I'll put that along the edges. A bit more violet should
make it more dark brown. Am not using brown, but I'm
using a mixture of violet, and a gold shade. The more violet you mix, the more darker it turns. Put that towards the
extreme tip regions. The regions where the ball is actually touching the edges,. The other areas leave it as
those lighter brown shade. Now, can you see that
bubble how it's turned out? We have one more bubble to do. I'm very inclined to add it
with the red shade itself, because I like the way the
alizarin one stand out. Also it will be a good contrast here on the surface.
Don't you think so? Let's do that. Alizarin
with a little bit of yellow would make it a
nice light shade in here, and on the edge. Leave nice highlight. Again, remember to create an uneven surface because it's actually resting in
the snow, remember. Now, for the darker shade,
alizarin and violet. Darker towards the right
side. Can you see? I get something a bit more
violet and I'm going to add it towards the base and
the extreme right side. Then towards the area
of the highlight. Just going to use my brush and absorb a little paint
so that it's lighter. There. I love how that
bobble turned out. Now for the string. What color should we do?
Let's go for red itself. This time, now I'm going to take cadmium red for the string. So let's see, that's the string region
gives a nice contrast. So that's the reason
why I love to use this cadmium red or
in the other palette, it's the permanent red. Here I am adding. As you can see, I'm not trying
to fill it up entirely. There may be gaps in-between.
I'm not bothered. But I tried to keep most of the gaps
towards the left side. Added the string, but
don't forget shadows ever. Here, I'll take my red
and for that shadows, I'm going to add it into violet. You can see it's done
into a nice darker shade. We're going to put this into the areas that need the shadow. For example, here along the
step where it's joining, it needs to be darker. Can you not think of why
it needs to be darker? Obviously, because it's
a joint there and it's under lot of shadow
from the top region. See. Paint along right here. Then try and add some
lines like this perhaps. It'll be like the
lines on a string. Not a line but you know that
knotted look of the string. That's what we'll
try to achieve. All of them I'm trying to be placing towards
the right side. Remember, it doesn't
have to be perfect. It can a bit
different. I'm going to blend that into that region. Can you see as I add in a bit of red it's not as dark
as the violet one? So maybe I'll take a little
bit red and mix it more into that and use that. Then whenever I need it to be nice and dense that I'll
use the darker shade. Then the towards
the other edge I'll use some red with more
mixture of red and violet. I like how the string
has turned out. So we're almost done. We can finish off by adding some teeny tiny
details onto the bag. For that, I'll dig
in my burnt sienna. Just going to add some lines. Doesn't have to be perfect. Remember that always, and don't make
continuous lines also. I'm trying to make them
as broken as possible. Then cross as well. A bit towards the top. Obviously
they won't be straight. Try and add them going towards the center of the bag right
along where the joint is. See how I've added those lines. How did you love the way
this has turned out? Should we or should
we not add the snow? Let's add just a little bit because it's good to look
good, I guess, on the top. So here, taking my white paint just a little bit. That's amazing, isn't
it? We're done. So let's go ahead and
sign the painting. I'm going to use my cadmium red. let's go ahead and
remove the tape. Here you go. Here is
the finished painting. I hope you like it. Thank
you for joining me today.
37. Day 17 Colour Palette: Welcome to Day 17. It's just eight days
left to Christmas. This is the painting that
we are going to do today. The colors we need
today are indigo, transparent brown or
burnt umber, Indian gold, orange, cadmium red, sap green, dark green, cadmium yellow
deep, and white gouache
38. Day 17 - Christmas Decor at Home: Let's start. We'll make
the pencil sketch. I'm going to add in the window. Let's say our window
is at an angle, that is, we are looking at it from an angle, that's why. If I were to make a
line of my window right there and it
extends like that, and towards the top, it's obviously the window. Now, I'll add another line
there towards the top. You can use a ruler if
you want, there you go. That's the line of the window. Here at the bottom is obviously the other
line of the window. We've only made the
outside part of the window right now so we need to
mark down the inside part, so for the inside part where the window sill is going to be. Let's mark in a line
like that, then add in. That's now the window sill. Which means it's going to
extend towards the top, which is going to be the wall. Now, for the frame
of the window, there, and towards
this side as well. That's the frame of the window. Now, we'll add in the
window itself, as in, the bars on the window, so I'll add one here. Remember, these needs to be
not parallel to each other, but rather assuming a point
where they're going to meet, like a perspective
point, I guess, and that's like very far off from outside
of our painting. Just make this slightly
slanted for now, that's it. Now, let me do the inside one. The inside one is also going
to be slightly slanted, not as much as this. I'll make that smaller. Now, for the window, the ones towards
the vertical lines, they need not be angled or
anything, they're straight. They can be straight. Let's add multiple of them. I'll add one here. They are smaller
ones like this one. This is the one in the middle, that's why it's thicker, so another one towards
the right side. Added that, those two. Now, let me make another one, again, towards the top. That one is, again, going to be in a
more angled version. If you want, you could
actually go check it where this whole
thing is going to be, like where is the
vanishing point? If it is helpful. For me, it's outside
of the board. I know it. Now, we'll add the line on the top. Again, giving only a
slight angle to that one. That'll be of this
thickness again. Now, for the center
one, I guess, for this one, I'll make
it towards the center. Assuming that this
one has got three of these window parts, that is, these two bars, then the center of this
would be the center. Let's make it right at
the center of that one. There you go. That's now
the window sill done. But possibly, we need to add a window sill towards the
outside as well, I guess. That's good to have a window
sill towards the outside. That area would be here along this line
towards the outside. It goes like that and a little
area towards the outside, so an extension there. Now, this is the window. We are going to apply masking
fluid onto these bars right here because I want to create a snowy day outside and
pick the night scene. You'll see how easy it is if
we've got the masking fluid. But I know that many of you
may not have masking fluid. I'll tell you the alternative
right how to do it. You simply have to avoid these areas and put in the
colors that I'm going to put, but you'd have to work around a way in which you
have to blend colors. For example, if I'm using
a blue and a brown inside, I'm going to be applying
it to the whole, so if you're going to be
going around the edges, then, for example, apply a little bit
of brown here, then go ahead and mix in
a little bit of blue, so just create those
uneven color combos inside each of those squares. That's how you'd have to do it if you're not using
the masking fluid. It's as simple as that. But I am going to use
the masking fluid because it's quite
easier that way, and that's the reason
why I'm doing it. Here, I'm just going to use
this masking fluid because the other one that I
used in the other day, for the winter berries one, it's quite very loose, and I've observed that
when I try to rub it off, it leaves paint marks. That's the reason I'm
going with this one today. Just using that and
applying the masking fluid. As you can see, I have to
be very careful in applying just along the very edge
of your pencil sketch. Careful how you do it. It's easier for the
brush, I guess. Maybe what I could do is, I could apply like this and
then use my brush to spread it out into that
area. I'll try that. Here's my old brush. Not bad, I think that's
the best method to do it. Doesn't matter which
masking fluid I'm using, I'm just trying to
spread it out into that area where we've applied. Next area is this one. Let me spread that out again very carefully in all
my pencil sketch. Let me quickly apply some more. All right, there you go. I've applied the masking fluid. Now what we have to do
is wait for it to dry. Remember what I said
do not use a heat gun, or a hairdryer with
masking fluid because it can stick forever to your
paper and not come out. I think I'll come after some
time now. Let us start. I'm basically going to apply water into
that window region. Towards the inside
of that region. First rectangle inside. That's where we will
apply the water. Now that the masking
fluid has dried, we can freely paint inside. Like I said, if you're not using the masking fluid method, go ahead and paint each of
the squares separately. That's as simple as that. There is no problem if you
want to paint it that way. I've applied the water inside. Now, we'll add the paint. I'm shifting to my Size 8 brush and I'm going to
be picking up indigo. Taking a nice consistency
of my indigo paint. You can see, make
it nice and darker. This indigo paint
will start applying. Make sure to apply very
carefully along the edge, because we want our
paint to be inside. See this is the
reason why I said it's easier to paint
with the masking fluid, but I oops, that's green. Sorry, it's easier to paint with the masking fluid than without. But obviously, if not, you just have to go inside
each square. That's it. No much difference. I guess. Here taking my indigo and I'm applying and
make sure to apply a very darker consistency and along the edges as
well and very careful. Now I'm going to go
all the way downwards. As I go down, is where I want it to
be some other colors. I'll show it to you right away. Now I'm starting to reach
towards the bottom. Towards the bottom what
I'll do is I'll try and put in some
color like sepia. I'm making sepia
with my transparent brown and my Payne's
gray mixed together. Those colors go ahead and apply it on top of
the indigo as well. The thing is, it's
going to turn into a slightly brownish
blue mixture there. You can see it. This is why I said here it's easier with the masking fluid. But if not, just go
ahead and blend both of that colors together in that region
specifically, That's it. Here is my brown. Applying it. Let's
just round right now, you can see it's an
dense amount of brown. I'll put some on
this random regions. Then know the length at
the bottom carefully. Then a bit of blue, I guess, blue as in indigo. Here taking indigo. I want it to be nice and dark
that's the reason why I'm taking the indigo
paint and adding. Now you can see it's more
darker towards the bottom and there is a bluish tint towards the top.
Do you see that? That's what we
wanted to achieve, give that it's not
a natural gradient. It's random set of colors, I would say, it's not a natural
gradient. Remember that? Here, indigo towards the top. Nice and dark color
towards the edges. Can you see that? It's
very dark, isn't it? Now, while that paint
it's in dries out, we can add in some
splatters onto that paint. The splatters because it's
snowing outside the window. Here, taking my
white paint again, let me load up my brush with nice amount of my white paint. I've shifted to my Size 2 brush because it's
quite smaller and would be much better to add the splatters because I
want it to be smaller. Smaller splatters. Let me just mask off
the other regions it's not necessarily to
do with those regions. Here you can see how I'm
splattering the paint and the way that I splatter
onto the vet region, it's going to form
cauliflower effect, or known as blooms. It's going to form blooms. Nice splatters onto
that area in there. It's snowing outside. That's it. Now what we'll do is we'll wait for this whole thing to dry out. Here you go. It's completely dried out, so let me go ahead and peel
off the masking fluid. Carefully peel off
the masking fluid. Here, I have removed
the masking fluid. Now let's go ahead and
paint the windows. To paint that I will be using
an nice Indian gold sheet, a golden bright golden sheet, because we want it to shine through showing
the light inside. The vertical bars, go ahead
and apply them nicely. Don't have to leave
any gaps of white. But the horizontal ones, you can leave a slight gap
along the dark portion. That'll just depict
the snow outside the window on the other side, obviously you have
to remember that. That's the snow accumulated
on the outside part. The same on all of the
areas of the window. Make sure to cover the
bottom part nicely and also the center where
it's joining. Very important. Remember that. Now, the vertical ones. Now for the bars on the
windows let's add that. That is the outer
frame that also we can make with the same color because it's still the
frame of the window. I guess that part wasn't
actually the frame, the frame is this
other part here. But nevertheless,
we're going to anyway, spray the whole thing in yellow
so it's absolutely fine. If you ask me, if we're going to paint the whole
thing in yellow then why add this at first? Well, because it's not going
to be the same yellow. That's a nice golden shade. I guess, I'll put
in golden shade for the next one as well but then after that we won't add golden. But you can clearly see
the difference as you added multiple times because
you get that line there, which is what we want. Because your strokes
are going twice, you get that line there. Added that. Now we
paint the inside part. For painting the inside part, now I'm going to wet my paper. Let's go ahead and wet
the whole of that region. I won't go close to
where I've already applied the Indian gold because that might
make it spread. I'll stay away from that
region and randomly apply. Can you see the paint spreading? I guess some of it might spread. Now, I'll go back to my
Indian gold shade but now we're going to apply it in
wet-on-wet so it's going to be lighter than the one
that we've already added. Can you see how gorgeous it
is and how lighter it is? I guess when you're
applying the lighter paint, you can go nearer to the window because it's lighter
and it's fine. Always also make sure
that you're applying vertically downward strokes
except for the window sill, you can follow the direction, I would say off the objects. This window sill like this so follow the
direction like that. Then we've got the wall at the bottom that should
go down like that. That's how we would apply
the paint naturally. That'll show how it's
shining through. Now we need to create a different color tone for the window sill so
that it's separate. How would we do that? We are going to take in
a little bit of orange, mix it up into that mixture of Indian gold and apply
that on to that region. But as you'll see, it's still lighter than the one that we've
applied for the bars. I guess when this dries up, we'll add it somewhere on the
top so that it can be seen. Now going forward, the
painting is really simple. All we have to do now is
wait for this whole thing to dry out so that we can add in the elements
in the foreground. I'd like to put in some
random color variations. That's why just going to take
my yellow, the Indian gold. I'm going to put different
color variations randomly. I don't want it to be like in a one single flow of color, I wanted to pick like a wall there so it's going
to have colors. I'm happy with the way
that this has turned out so I'll quickly dry this up. There you go it's completely
dried up so now we can go ahead and add in
the decorations. For adding in the declarations, I will obviously start
with nice sap green color. There's my sap green
and we're going to add in the decorations onto
the window sill basically. Maybe before the sap
green we can actually put in the red flowers. For that, I'm going to use
my cadmium red and I'm going to make the
flowery shapes. Maybe flowers, maybe
ribbon we don't know. We don't have to look
into all those details. Just slum flowery shapes
on to the windowsill. This is also the perfect
time to cover out any mistakes that you
have, for example, masking fluid problems
or where you paint has leaked out,
anything of that sort. As you can see, I'm not even
making a perfect shape, I'm just randomly running along my brush and
creating few petals, some random details and using my size 4 brush now
going back with the sap green. We're trying to add in
a dense color around the flower region and also
some can go over to the top. Now, we only have an Indian gold color
underneath and we're painting with green so it's
definitely going to come on the top, you know by now. Some decor on the window. Added with the green. Now we need to put in shadows. Here I'll take my dark green. You can make your dark green by mixing a little bit of indigo. You don't have to use the
same green that I'm using. You know how with
the other pallet, I used to create a dark
green by mixing with indigo. The same process you can use here and add in a lot of small leaf shapes. Shadows basically. I'm pretty sure you know
by now because we've been doing a lot of
such strokes now. Anyways. There that
Window sill is covered. I guess since that is
covered and this is dry, we can go ahead and create
that nice separation. That would be with the orange and the
Indian gold mixture. There's the orange and
there's the Indian gold. We just slightly turn my paper because it's
convenient for me to control like that. Can you see? Now along the edge, I chose orange because it's a slightly different color than the Indian gold and will stand out showing
the separation. Right along the edge of the Indian gold that's
where we need to apply the orange and up to
this tip right here. There you go. Can you see? I guess towards the edge there, you can take up a little bit
of burnt sienna or brown. I think I'll go with brown. Here's my dark brown
color, my burnt umber. I'm going to put
that into the edge, so that there's a
separation there. We see a nice separation, and I'll try blending that
into the orange color. There. As you can see, it's turned into a
nice mixture now, but I need to blend that in. Here, picking up my orange mixture and
blending that in there. Yeah, that's much better. Then we'll finish off with a little Christmas
tree here on the left side. That's going to be easier. All we need to do is add
in that Christmas tree. Here taking my paint,
and we'll go over. I think I'll start
from the very top. At places you can go
ahead and add in, some Christmas bubbles hanging. I'm using my sap green
here, and coming down. Previously, and add depth later on by using other colors. Only a part of the Christmas tree is seen. The other half is out of the paper on the other
side of the room. As I come downwards, I'm going to add in more
detail for the strokes. Fill that top. Now obviously, darker strokes. Here adding the darker
strokes with my dark green. Random darker strokes. Some of them dry and create
the shape of leaves. I think mostly
towards the edges, I'll try and keep
it as sap green. At the bottom here,
make sure that you add in nice leaf shapes, just like the one that you've
added with the sap green, and maybe nice darker area there towards the bottom
because it's like the bottom it's more
dense, isn't it? All right, now we've got the
Christmas tree in place, all we got to do is add some
Christmas bubbles on there. I guess it's better if we
wait for this to dry out. But before that, while
we wait for it to dry, I guess we could
use a little bit of orange to paint along. These areas, this is also
part of the window sill, the little tiny gap seeing
there. Can you see? If I paint that with my
orange mixture there. There's that orange
part of the window sill and there's the wall part. While we painted
the window sill, our tree has dried up, so let's add in some
Christmas bubbles. I'll add that with little
amount of cadmium red, it's opaque. Remember that. You don't have to
paint or add fully. You can add just random. It's going to appear
as though it's like masked out by the
tree, some of them. It would make it seem
like apples, of course. Maybe one Christmas ball there. I guess I'll have
another one there. One little there, bird singing, and maybe
one bubble there. Maybe we'll add in some
ribbons at random places. Just ribbon shape. You can also add some
nice yellow ones. Here, I'll take my
cadmium yellow. You know the best thing, I'll mix my cadmium yellow
with cadmium orange. That'll give me a nice orange, not orange but a lighter
tone or cadmium yellow. It's like a cadmium yellow deep. If you actually
have cadmium yellow deep from Sennelier,
you can use that. I think these ones,
I'm going to place it towards the inside
because towards the edges its already caught
all these yellowish tones. But always remember
shadow for each of these. I'll take in a little bit
of violet and I'm going to add towards the outside edges, to the bottom specifically. Just need a little color
variation, that's it. It doesn't have to be perfect. I guess now we can go ahead and add in some
teeny-tiny lights. I'll take my cadmium
yellow first. What I'm going to do is, I'm going to use cadmium yellow, and I think I'll switch to a smaller size 2 brush because I wanted it to
happen on this point. Using my cadmium yellow, what I'm going to do
is I'm going to add a lot of teeny-tiny lights. I'm going to make
these star shape. Can you see a little star shape? I'll show it to you closely. I made a little star shape. I want to do that for
many of the areas. I'm just showing you
different ways in which you can actually
decorate the tree. You don't have to do exactly all of the things
that I'm doing. For example, you don't want
to add this star shape, it's absolutely fine, just
ignore it. That's it. I guess I put some
light there as well. I'm just putting a
little bit drops of yellow into this region. Let's see why in a moment. Just added lots of drops of
yellow at random places. They are not going to be yellow. Trust me, you've seen the final pictures
you know what's coming. I'll take my white paint. I did not apply a watery
mixture of my yellow, so most of my yellow
is already dried up. The first one that I did, so it's basically go ahead
and put in a drop of white on the top and try and
mimic the shape of the star. The reason why we added yellow
at first is that it has a yellow glow or like a
halo outside that light. It's going to turn out
beautiful, trust me. Do this process, and
you will see that some of those lights
has a halo shape, a touch of yellow towards
on the top of it. You'll be like, how
did you create that? I'm trying to add the
star shade that we did, but again now on the
top of the yellow. Do it such that some part of
the yellow is still visible. That way, you create that twinkle with a little
bit of halo effect. Also go ahead and add the little star-like structure
to the dots that you added as well so that it twinkles. There. Oh my God. Can you see how
the lights are twinkling? Isn't that gorgeous? Let's continue on
for these ones here. You can see how it's all twinkling. Isn't that gorgeous? If you want, you can
go ahead and still create a twinkling effect
all the way to the top. I am actually running
out of time to do that. But if you want,
you can do that. What now I'm going to do is
I want to put in a lot of random white dots
at certain places. This could be the lights
that are inside the tree. You know how the
lights are draped. Not all of them is now
going to be in the front, but some of them may be
way towards the back. That's why I've added
some certain white drops. The only thing left to do is
to add in some connection. I'm loading my liner brush
with a little amount of white. We don't need to draw it
perfectly, just random. Try and make some of them, not all of them
also, leave gaps. Connect them. Not perfectly, you can have breaks because it's going
through the leaves. The same scene and do
it for these ones. But try and create it like a tinsel effect draped
around the tree. You can see, and also I'm adding broken
lines, very important. See how I've done that? Let me show that to you closely. Now, [LAUGHTER]
really finish it off, I promise, by just adding little details
that I spotted here. It's a little thread for
this bubble right there. It's like hanging
on that branch. You can add heads to
some of your bubbles. But I guess I've
made most of them. This is the only one
towards the end, so that's fine, and we're done. Now can you see the effect
that we've created? It's snowing outside. We have the decoration
in the front, a Christmas tree along this. Isn't it gorgeous? Let's go ahead and
sign the painting , and let's remove the tape. Here is the finished painting. Hope you like it, and thank
you for joining me today.
39. Day 18 Colour Palette: Welcome to Day 18. It's just seven days
left to Christmas, and this is the painting that
we are going to do today. The colors we need to
do are Indian yellow, Indian gold, cadmium
red, alizarin crimson, sap green, a dark green, transparent brown
or burnt umber, and a bit of white gouache.
40. Day 18 - Wine Glasses: Let's start. We'll sketch out
the two glasses at first, which is going to be the only pencil sketch that
we have for this painting. Let's have those two glasses starting about one by
third of the paper. We make the mouth of the
glass an ellipse like that. Then you can use symmetry line if that's going to be helpful
for you to draw. Like for example, if I draw
a straight line like that, let me see if that's straight. Almost. Just drawing a
straight line like that. Then you can use
the symmetry line to draw the two edges
of the glass again. See. Two wine glass is going to come down like that and there is
the bottom part. Then the bottom,
the handle part. I guess I need to
make it slightly more thinner towards the bottom. There you go. Then add the
bottom part, the base. A slight curve at the base. That's one of the glasses, we'll add the other one behind. Because it's behind,
that means it's going to be slightly at the bottom there. Let's say it's masked out
behind that front one. Again, we'll have the brim
of the glass as seen. Let's draw the symmetry line. The brim has turned out to
be a little bit smaller, so let me try and make it
slightly bigger, I guess. Should be the same
size, both of them. But notice here, the brim, I've made it thinner,
the ellipse. Then the symmetry line, let me just put that. Here goes, just a teeny-tiny
area below the other one. Since I said it's behind
that one perspective, it's going to be
slightly smaller. There's the base of
the that already. It's the base. Then we can come and join it toward the base. Can you see? Yes.
It looks weird now, but when we paint it with
the background effect, it'll come into perspective. This is undo where
there is liquid in that glass and here also. It's almost at the same level, but because it's
at the backside, it will be actually equal
amounts in the glass. That is our pencil sketch. Let me show that to you closely. Here you go. This is the pencil sketch
that we have to make. Let's get to the painting part. I'm going to be applying water
to the whole of my paper. Don't worry about any highlights
or any region right now. Just go ahead and apply water
to the whole of the paper. Right now, it's
whole of the paper, when we apply paint is where we have to be careful, I'll
just tell you that. Apply the water onto the whole of the paper
on all the areas. There you go. As you can see, I've applied the water. Now, we'll go ahead
and start painting. I'm going to be using
one of my flat brushes and I'm going to take
Indian yellow shade. Indian yellow,
transparent yellow, any nice transparent yellow would be better
for this purpose. Using my transparent yellow,
I am going to start. I'm going to place my color towards the outside of
the glass right now. Very careful when you're adding towards
outside the glass. Then slowly, I'll come
over to the glass area. Let me tell you where are the areas that you
need to give white. You know that this outside
left side brim of the glass, we need to be leaving it white, and so is for this one, which is going to be
in the background, so that side brim of
the glass should also be in white area. The rest of the areas,
let's go ahead and apply. But again, you don't have to
apply an even tone of color. Let me, oops, that was Indian Yellow. There you go, Indian yellow. I want to apply my color. As I said, it's not left corner, so it's okay for me to go ahead. I skipped a little there. Here I come down skipping a bit and then I'll add my paint. The same thing, let's do here. Here, I've come all the
way up to the brim region. Then skipping that left region, I'm going to come down, leaving a slight gap of white
there in the middle. Then applying my paint again. Let's leave a little
light space on that right side then go
back with the paint. I guess we can paint the right said as a whole
itself. It's fine. A bit of color there, color in the middle, and obviously to the right side, go ahead and apply
your paint normally. You've seen the areas
that I've left white. Those are the important
areas that we need to capture in our painting. Here, taking my yellow and
a bit lighter space there, I guess the other
areas you can go ahead and start applying it. There, I've applied. Now we're using the
same flat brush. I'm going to take my
Indian gold shade, so it's a nice
golden color shade. You can mix it up
using your yellow, orange and maybe a teeny
tiny amount of brown into that mixture
and you will get this beautiful
golden color shade. Here adding that
golden color shade, but make sure now you don't add it to your
part of the glass. We're going to skip
all the areas of the glass while you're
adding this paint. You don't need to add
in all the areas also, we're going to just apply
in some random areas. Here, taking my golden shade, and I guess I'll apply
to the left here, a bit there, and I guess
a bit to the bottom. But now I'll skip the
area of white glass. Going around as you can see, so here towards the
right side and the left. The left, I think I'll
go ahead and draw in a very straight stroke, a nice, darker straight
stroke over there. Now I've washed
all the paint from my brush and I've switched
to my size 8 brush. Now we're going to start
adding the details onto this. For I think the details,
how do we start? Let's start with a
nice dark brown color. Here taking my dark brown, this is my burnt
umber and using that, I'm going to just randomly add details at the back,
so these details, it's because it's in the
background and when we bring the whole of the
wine glass into focus, this will go out of focus
so we don't have to worry about what actually
these details are. I've made a curved shape there. Then let's say I add in a little of my brown
stroke at the back like that and thin it
out towards the bottom. Maybe some more brown
stroke like that. Then now I've taken a bit
of my alizarin crimson. Taking in nice alizarin crimson. The reason why I go
with alizarin crimson is because there's
already a yellow on our paper so it's
going to just mix out and form a nice spreadsheet. Alizarin crimson because it's transparent, I prefer that. Let's add in the shape
of some berries. Here, another one there, so it's a nice round shape, that I'm adding,
another one there. I guess I'll put
another one there. These are all wet on wet so very careful that your paper is wet. Then maybe like something
else in the background there. Another round shape there. Something there. These are all in the
background so you actually don't need to bother about what are you doing
with your stroke. Then now the next thing. Let's pick up a little
bit of sap green. Here is my sap green. Again, I'm using sap green, but there's yellow already on my paper so it's going to
turn out very lighter. Here, let's use that sap green and let's actually
create a lot of gaps. I was meant to
create a gap there, but it didn't turn out
nicely so I skipped that. Here we're going to create
a lot of round shapes. [inaudible] either. I need to make them bigger
for it to turn out, I guess. Here pick one, another big one. Another bigger one. Maybe another one here, that was small anyways. Going with my paint, now when we add in the green go around the space that you've already
made those circles. I'm just trying to leave those
areas as blank, I guess. Here going green. Now we have to go
around the glass. Careful. Very careful. I guess here along
where it's greenish, we can add some green there and so I intended this
left side to be probably like some wall or surface there so that's why
I'm trying to add in a straight line like that. Remember we also
applied a flat stroke there so that is why. Now as I come
towards the bottom, I'm trying to make these
little foliage shapes. Not foliage exactly, but trying to create lots of gaps and start
adding my strokes. Whatever might be
[inaudible] try it out. I'll immediately try
and go and blend it into the already existing
part of the stroke. Here let me show you
what we can do here, so going to apply my stroke
there and my stroke here. Now is the part that
we have to be careful. I applied my stroke there, but I don't want it
spreading into the area of my glass so here
it's already spread. Let me take that out. You see here I'm wiping it off and any paint
that you apply, make sure that it
stays over the top. Same along here. Apply, but make sure that
it stays towards the edge. Then I guess we can
add a bit more. Remember, we added
some berries so I want to go around for the berries. Hope it's berries. I
don't know what it is. It's just some detailing
that we can add. Yes, it's okay to go over your glass actually because it's transparent and it's going to obviously reflect
on those things. Now coming over to this side. I've lightened out my stroke
and trying to thin it down, whatever I'm adding.
Can you see? Now let's go with
some darker shades so I'm taking my dark green, and I'll start adding into
some of the areas on the top. Let me try creating
some round shapes with my dark green.
It's not happening. That's because my paper still has a lot of wetness
and this is the reason why I'm actually unable to make
it and observe here the paint is starting to spread into my glass so I'll need
to do a lifting. This you have to do as well because we're painting with
the wet on wet technique, we actually need to do the
lifting and remove all those bleeding greens out
from the edge for your glass. I've removed that part. I guess I need to add the color towards
the right side also, but that I think we'll do when the paper is dry
and we blend in. Here I'm picking up
my dark green again and adding random detailing. Just blending in and
adding random detailing. Still spreading anything
that's spreading, let me just take out this bit. All right, done
with the lifting. Now we'll wait for this to
dry out so that we can add in the foreground. There you go. I've completely dried it up. Now we're going to do a lot
of negative painting to bring the focus of our
glass into the picture. Let me show that to you how
we're going to do that. Here I'm going to take
my Indian gold shade. Begin a nice amount of
your Indian gold shade. Now, along this right side
is where I'll start first. I'm going to apply my Indian
gold, but as you can see, I applied towards the
outside of my glass. Wherever you apply, make
sure that you apply towards the outside
of your glass. Then also, let me take it towards the top
brim right there. Now, we have to be
very quick at this. While your paper is still wet, go ahead and soften out that stroke and blend
it into the background. Here, let me blend
that bottom part. We already have Indian
gold at the bottom there, so when we blend it out, you'll see that it's
absolutely fine to blend it because it's already
got Indian gold there. The more clean water you use, you'll be able to
blend it without forming a water line inch. Now, taking a bit of sap green, let me add in a bit of
green stroke there. Again, we'll be adding
the wet on wet stroke. I just applied water there. If your strokes are not wet, go ahead and apply the green. Then immediately go ahead
and soften out the edges. Here, I am applying
but I'm taking my water and I'm
softening out the edges. Let's do the same. Now here taking
my sap green now, I'm going to go over. That's a lot of paint I guess, let me just soften and
decrease here along the edge, right at the brim there. Then there's that little
edge and that edge there. Now, we've done that, but as you know, go ahead and
immediately soften it out and blend those strokes
into the background. I know it's very tough
and you look stuff also. But we've been doing a lot
of these techniques now. There you go. You can see
how it looks after blending. Towards the outside again, digging a little bit of green
and adding because I didn't want that extra sap green to be right along the brim only. That is why we
actually need to be working very quickly
while we're spreading. Now, let's get to the
inside part of the glass. The inside part of the glass, what we're going to do
is we're going to leave a slight gap of that yellow. Can you see, a little
gap of that yellow, then take your paint and
fill in that ellipse. I guess, you can fill
up the inside part. I know that plain,
this is why I said it shouldn't have bled into
that region, but it's okay. I can adjust it with other
colors, so don't worry. Now you've added that brim. Now, let's go further into the inside part
of the glass now. The inside part of
the glass, again, leave some gaps on the left brim and also that little gap along the top such that it
forms the brim of the glass. You see that? Then
want to come down. Again, you've got the brim of that other glass, which
is actually behind. Go along the edge of that glass. Here again, we'll add the paint only up
to that top region, up to where there is
wine in the glass. Filled tacked up. Maybe I'll put in some
random darker shades. Just put in some darker shades. Now the other side
of that glass, that is this glass, again, going to leave a little gap or space between here as well. I'm going to add that little gap that's going
to come through the inside. Then let's do a similar process for painting the
outside part now. We're going to bring
that into focus. Let me just slightly
tilt my paper so that it's easy for
me to add in the color. Along the edge, negative
painting again. There. Immediately
washing my brush off, all the paint off, and blend that into
the background. Can you see, just blended that? Because it's green towards that outside area,
it won't matter. It won't look or you
can see what's inside. That's absolutely fine. Going back with my
Indian gold now, going to apply an oldest very
edge of the glass again. This edge and this edge here,
somewhere around there. Then pick up a
little bit of green, going to blend in with my green. There blend it in with my green. Now going to soften it. That's softened.
Now as you can see, we've made the
shape of the glass by negative painting technique. Now, we're going to
paint the inside part. For painting the inside part, let me take a nice
amount of my yellow, and mix in some nice Indian
gold shade to that and we're going to take it in a nice
and creamy consistency here. We're going to be painting
using that inside. I guess I want to add in
a little bit of brown to that Indian gold.
That's much better. A little bit of brown, that's my burnt umber
with my Indian gold. Using that, I want to add. Here, I'm going to leave a
slight gap along the edge. I'm going to add in
a stroke like that. Can you see? Then I'll make
another largest stroke here. Towards the bottom. Before we paint the other one, let's go ahead and
blend this up. Now what we're going to do is, you're going to run
around the edge of your brown stroke such that it releases
some of the color. But don't pull it all
towards the very end. We just needed to soften out right along that edge, that is. You don't have to
pull the color out. This is a different
kind of softening. It's just you're
softening the edge of it, but not pulling the paint to where the light region
is supposed to be. The light region is supposed
to be nice and white. Not white, but the
underlying color, which was the first
yellow that we applied. There. Can you see
how it's turned into a nice, gorgeous shade? I think we need to do the same along the
other edge as well. Quickly along the other edge, go ahead and soften. If it's not softening, run
your brush along like that, that should soften
out the paint. Then we're going to
pick up a little bit of my darker brown. I'm going to add that
starting from the top. I'm going to add some
strokes like that from the top and pulling
down like that, maybe a little from
the bottom up. You don't need to cover
the entire region, that's the important part here. I guess here, you can add to the
whole region up to there because that
glass is in the front. Taking a bit more of my
other brown mixture, adding some lines now, vertical lines like that. Then now let's do the
same for the one behind. Now the one behind, I guess that area is still wet, so I'll do for the
right side first. Here, adding vertically
down stroke, leaving a gap on the right side, and added the vertical stroke. Now I need to go ahead
and soften the edge. Quickly softening the edge. But remember, only softening, don't pull your paint. Soften that edge as well. Then I'm going to take my brown just like we
did with the other one, adding some brown stroke from the top to the bottom like that, and maybe a few from the bottom
towards the top as well. Make sure the edge is
nice and softened. Then I guess this region
is dry now. Yes, it is. I'm going with that brown
and Indian gold mixture. Now, we'll go ahead and add
this color along the edge of this glass and then coming down. As you come down, leave a gap of whitespace
there at the bottom. Taking my paint along
and adding. Can you see? But now, t looks immediately
softened out that edge. Soften, not pull. Very important that we
understand that concept. Then going with my dark brown, a bit of dark brown. Again, careful, it's
only along the edge. Nice strokes like that. Let me make that golden
brown mixture a bit more because we have the
bottom to paint as well. Now I'll paint along the bottom, so right along the glass shape. Again, I'll leave a
little whitespace there. When I say whitespace, I mean to say is
the negative space. Then using my brown, I'm going to come
down all the way. Here I guess you
don't need to soften out because it's a
very small area. But as you add the color
towards the bottom, you can follow along the line. For example, here, I'm following along the
line on the right side. You can leave a lot of
gaps and whitespaces. Then here adding the color here, again, leave lot of
gap and whitespaces. Absolutely fine. We'll add in the base like that. But the rest of it, don't add color, but spread out some
of your color. Same thing. Let's
do for this side. Leaving a little gap. Picking up my paint. There, I've spread out. But immediately, let's
take a little bit of brown and I actually want to
add in darker brown. I'll do the left side first because we did that first and
I don't want it to dry out. A little bit of brown strokes. Some brown strokes. Then observe we take a bit
of green and we're going to add in some green
strokes inside as well. Why? Because this
whole thing needs to reflect out that
it is transparent. See, a bit of green there. You can go ahead and add a bit of green towards
the bottom one as well to the base.
I'm blending that. Now, don't forget, we have the inside part of
this glass to paint as well. For that, now I'm going
to take my green color, I'm going to go
around this edge, carefully avoid the brim
area on the right side. Putting paint
inside. Also, again, the same here, leave a nice gap along the
elliptical shape. I'll take some darker colors, and do some random strokes. There, I guess,
towards this side, maybe we can put in some
golden shade in fact, because there's a lot of golden color towards that right side. It shouldn't be
perfectly green color. Yeah, that's much better. Now you can actually see
that there's a lot of gaps in places that we've added, but now is the time that
we need to go ahead and fill them up with
highlights and shadows. Here, I've made that golden
brown mixture again, and I'm going to be
shifting to my small size 4 brush for that. My Indian gold and my brown. They're going to use that, and we're going to add
in darker details. For example, here, on the edge, we're going to paint it into that region that we
actually left white, not white, left blank. Then blend that out slightly. Then let's make up
the same color, I'm going to add. You remember the paint
had bled out here, so I'm going to add
my brown tone there. Then don't apply in
all of the places, let's go ahead and apply
a little to that brim. Don't apply fully, just only along some places. Let's leave that
whole thing white. Then we have this edge. Then let's go around, and make this glass now to be in the absolute foreground,
so for that, you take in that color, and add it along the side edge. It looks weird as it
comes to the bottom. As it comes to the bottom, go ahead and soften
it out immediately. But towards the top region
there, leave that for me, can you see how you've added, then taking that
color mixture now, I'm going to add that
now to the top there. In some horizontal and
curvy lines, again, we will try to create the effect of some natural gas bubbles. Put some dots and
some detailing. The inside part of the glass behind is
not going to be seen. Only here where there is no liquid we'll see the
part of the glass. Here again, a little
bit of brown, and see, take it
towards the top, let's see if you have a
nice round shape there. Then, maybe you don't just
in some places along here. Guess the right side, we can go and
nicely cover it up. Not the entire part
again, careful. Then maybe a little line here. That was a bit too much, I'm just going to do soften it out. Then digging my brown adding some nice
curved shapes there. Can you see how we've created
a nice brim of the glass, and also the glass improper. Taking a bit off the color, going to add some curve lines
here towards the bottom. Now we're almost done. We only need to go ahead, and add in some
foreground details. Here I'm taking an
order of my sap green, and I'm going to put in a lot
of the Christmas branches. We need to make this painting Christmas Eve, remember that. Here, taking that
and here, I think, it will go behind
the glass, and here. Yes, I know it's just
a freebie right now. But then go ahead and add
in the fair tree effect. Use the pointed tip
of your brush here. It's going right on
top of the base, so this is why I didn't
go and add a lot of detailing into
that base region. I guess, I'll shift
to my size 2. This is too big for me for
painting those things. Here, size 2. That might be a
better pointed tip. Yes, it is, see. We'll add in an artificial tree
shapes here careful, it's supposed to go at the back. This taking to the left side, because it needs to be
having depth there. Then some dark paint for absolute depth, remember. Taking my dark green and adding
to the extreme left side. Then using that to create
oriented way to tree effect. Now I'm going to take
a bit of cadmium red, and add some nice red
berries at random places. Maybe I put in a half a
part of a berry there, a little there, and maybe
a little along there. Just some red spots. We're almost done. The only thing left to do is now to add the
absolute highlights. Here we're going to
use my white paint. Loading your brush with a
nice amount of white paint, and we're going to add it. Let's see some white
lines along there, little white detail there, maybe a little line there. These are the areas
with salute highlights. This is random, so you
don't have to worry about where exactly I'm adding. We know all those
areas we actually left in white or left the color, so that's where I'm adding. Here at the bottom, you can see then a
bit this left side. Here, also we've left. I guess, you can actually make on some other places on the top. Paint here on the base. Now, for the fun of it, we can add some nice splatters. I know it's not as
Dewey painting, but just adding these
little splatters for the sake of having fun. I'm adding an element of
magicality to our painting. Now before we finish off, the only thing left
for me is to add some nice white spot for
the bubbles in the wine. I'm going to be adding that
with the white paint itself. Here, loading my brush
with white paint, and then going to hide
the rest of the area, and going to concentrate all my white into that
part of the glass. Can you see? If you hide the rest of the
areas and concentrate, and come closer by doing
that, then you'll get. Also using a smaller
brush helps, because it's smaller strokes. Smaller splatters here again. Nice splatters, and you can see the bubbles formed
inside and we're done. Let's go ahead and sign the painting and let's remove the tape. Here is the finished painting. I hope you like it, and thank
you for joining me today.
41. Day 19 Colour Palette: Welcome to Day 19, and this is the painting that
we are going to do today. The colors we need today
are ultramarine blue, violet, transparent brown or
burnt umber, yellow ocher, dark green, indigo,
lavender, Indian yellow, or Naples yellow, cadmium red, Payne's gray, and
some white gouache.
42. Day 19 - The Hanging Lights: Let us start. First of all, I apologize for the
change in the background. I'm shooting this after
a really long time. That's why the whole setup
in my studio has changed, everything has changed
literally, so that's why. Let's add in the lights first. For adding in the lights,
it's a night scene obviously. We'll have the middle part
of the light somewhere here. That's going to be
like an ellipse, and make sure you
don't make this in a very dark pencil sketch, because we don't
want it to be seen, especially around
the light area. Here, we'll draw an elliptical shape somewhere around the one by third
area of the paper. There, that's the
elliptical shape. This center portion is where all the lights are
going to be attached. From here, we'll
add in the lights. One light from here. Make sure you add a curve
at the bottom right there. That's because it's
showing as though the light is hanging from
that loop in the center. This is like a loop. It's ellipse because we're
viewing it from the side. When we're viewing
it from the side, we see it as an ellipse, so it's a circle and all of these lights
are hanging on it. That's why to show
how it's hanging, there it goes one of them, then another one there. It's like a not a spider web, but all the lights are coming from this
center loop actually. I think we can add
one more there. Then another one right next
to where this is ending. We will add another one and
that's going outward there. Maybe another one there or not. This one, I'll make it such
that it's hanging from this. Let's ignore this one. I think only three is
enough in that side. Then the next one is a light
there, another light there. The ones at the bottom, we'll have it closer around. That's because that side is
what we see closer to us, as in that's the side
that is closer to us. That's why we see it
spaced apart more. As you may already know,
the top portion of a painting is what's
closest to us. That's why. Then I'll have more
of my lights here. We've had one going there, we've had one going
towards that side, then another light, so it's going that side. Let's have many more going
in different directions. Yeah. Now the thing is, as we come towards
the bottom ones, those cannot be going further
outward from the main take. The reason is, they need
to be hung somewhere. We'll make sure that those
lights are hung somewhere. These are also hung,
but it's going outside of the paper
and we're closer to it, so we don't see the
poles where it is hung. Let's say this one, it comes all the way there, and there's the pole
where it is hanging. We need to put in
perspective always. There, that's one pole. Then here is the ring of light. Then another one again here. I know that this looks a little bit tough, but
trust me, it's not. They all needn't to be
attached to poles itself, so they can be attached
to different things. That's that. Let's add
a pole for this one. Another pole there for that one. These are all poles
that are further away , and another pole. Let's assume that the ones that are attached to that side, all of the poles are
towards one line. That is why the lights
are attached like that. Let's make it snowy at the bottom where the
poles are attached, so the top part is where
the night scene is. To make this interesting,
should we add a Christmas tree? Because I feel that
just the lights itself doesn't make
any sense. Maybe yes. Maybe how about we do a little Christmas
tree along this side. I think that would
be interesting. Just the little part
of a Christmas tree. Yeah. I think that's nice. Then we can make it
covered in snow as well. That's that. That's
the pencil sketch, and I'll show it to
you closely now. There you go. That's the pencil sketch. Now let's get to painting this. This is going to be interesting. What we're going to
do is, we're going to apply water to the
whole of our paper. We need water on the
whole of the paper, so we are not bothered about whatever we have
added at the moment. But be wary of the
pencil sketch, we definitely need that. Then we apply to the
whole of our paper. Make sure you apply
the water evenly. I know I say this always. It's those sentences that is etched into my mind whenever
I'm applying the water. There you go. Shall we start at the bottom here for
adding the snow? I think that's much better, we'll start at the bottom part. Here, I am going to load up my brush with
ultramarine blue, of course, for the bottom part, where the snow is going to be, and we just randomly add
some bluish strokes. But remember, this
is a night scene, so we need to make
that nice and shadowy. That would mean some
violet tones as well. Let's add in some
nice violet tone. I guess you can mix in your
violet with the ultramarine blue so that you get
some nice strokes. I think that was too dark. Maybe I'll just lighten up
some areas and here adding, and we took a lot of blue towards that
side, so I'm just adding. Then, don't forget, we're adding a lot of lights, so we need to add in
some yellow strokes onto the ground so that there is a lot of reflection
of the lights. For that, I'm taking
my yellow ocher and I'm just going to randomly
drop it into the ground. Yellow ocher because it doesn't mix with any of these colors to form green or dark brown colors. Yes, it will mix badly
with ultramarine blue, but we did mix it with
violet, so that's why. I think we can go ahead and
add in a lot more shadow. Here, taking my
ultramarine blue, a bit of violet, mixing that together and
putting in shadowy areas. I think now let's go ahead
and paint that tree. For painting the tree, first of all, let's
put in the dark green. This is dark green PGA from White Nights,
it's very dark. I wanted the tree and
everything to be softer itself, so that's why I'm going with my wet on wet technique itself. But all I think I'm
going to do is, I'm going to switch my brush to a smaller size so that
my strokes gets smaller. There, that's my green. Remember to add strokes towards the outside such that it
mimics the shape of the tree. Can you see that
how I'm doing it? Some extensions
towards the outside, and to remember to form
the triangular shape. Even if your triangular
shape has gone, but you know that
you've got to make it a triangle from the top
towards the bottom. Like see for me, I'm extending further
more downwards than already what my
pencil sketch is. Okay there. Now we need to add
shadow effects, so for that obviously I will go with my indigo
and I'm going to mix it into that green there
and add lots of shadow bits. Remember, we need to add lots of snowy bits as well which
we'll do in a while. First let's get the shadow. Most of the shadow they
need to be towards the right side which is basically the center
portion of the tree. These ones are like what is
there towards the outside. Now I think my top part
has actually started to dry out so I'll probably
add in a little water. A lot of green in my brush but that's
okay because anyways we're going to make
it darker, there. Shall we now go ahead and paint the sky part
and make it darker? The ideal color to use for
that would be a neutral tint. The color I have in my
mind is neutral tint from Shmincke. What do you see? It's not that like
a grayish tone, but rather it's neutral
and it's actually, you can get that by mixing
maybe a bit of brown with violet I would say if I were to mix my
brown and violet together. Yeah, that's the color, it's almost like that plus maybe a little
bit of Payne's gray. That's the color
that I'm looking for and this is what we're going
to apply to the sky region. There, applying to
the sky region and as you can see obviously
when we apply this, our pencil sketch is going
to go away and you might be wondering that why did we make that effort to put
the pencil sketch? But trust me when this dries up, actually that pencil sketch
is going to come forward, that is, you'll be able
to see it so that's why you'll be able to
add lights on the top. Let's go ahead and
taking this color. This is a mixture of
brown, violet, and black. Of course, I apologize
for the light. I know that you can see
the reflection there, but obviously, I'm shooting at night and this is
already winter, and the sunsets
here are at 03:45 so it's impossible for
me to shoot in sunlight. I'm pretty sure
that you guys are okay, you're fine with them. As long as you get to
painting so I've washed off the paint because now as I
come towards the bottom, I want to make it
grow more brownish. Here, I'm taking my brown
and I'm adding that also. Remember, I'm extending just
right outside of the tree, coming downwards
with my brown then we'll probably go in with
some nice yellow ocher. I just want it to be
lighter tones towards the bottom where
it's ending because it's the night scene but then bottom part is not
as dark as the top part. Here that's my
yellow ocher added. Actually on my paper, I can see the lights that we have added with
the pencil sketch. Make sure to make it
darker towards the top. Nice and dark towards the top. Also make sure that your paper stays wet because
there is literally something that we
need to do right now and I'm pretty sure that you are going to kill me for this. Pick up a very small
brush. There you go. I've picked up my
size 2 brush here, and what we're going
to do is we're going to add some
white on the top. Here's my white paint, what I am going to do is
I'm going to take a little bit of my white paint and I'm going to
mix it with yellow. Or maybe you can mix
it with yellow ocher, I think yellow ocher
is a much better idea because then it's a
little bit opaque and you won't lose
the opaqueness of the white that
we're trying to use. I think that's both the
ideal color that I use. If you've got a Naples
yellow from gosh beans. If you have that, then
you can use that. I actually have it. I am refraining from
using that because, this is designer
squash Naples yellow, I'm not using it because
I never mentioned it in the material section, so I thought we'll
make that color. Why do we use it otherwise? Now what we're going to
do is we're going to add in a lot of lights here and there and we're going to
do it by [inaudible]. I'm doing for the tree
first because we've painted the tree long back so I'm just going to drop in my color that I just mixed
at random places. Just hope my tree hasn't
dried off completely. It's dried in many
places as you can see but maybe not that bad. But the sky is what we
need to do very quick. First of all the
ring that we made. Here you go, this is
what I'm going to do I can see my
ring on the paper. Make sure that you see
during or maybe you do. I said that don't make the
pencil sketch as dark. Maybe you can go ahead
and make it dark. If at this stage, if you feel that this paint won't be seen. There's the light, I love it. Then that's the one
going up with a bend. Now observe, the
light as it goes further away increase the
distance between the lights. Did you see what I just did? There should be one
more, we're going to do the one that went up like that. The ones further away are
closer together then as you come further off
from that center point, we need to make
it farther apart, [inaudible], very important. Again, let's do the next one
so here, closer together, closer together then
start building it ups, then increasing the distance. You see that? Then we need to add
now towards the right. Honestly speaking, I'll
tell you the truth, I'm not using pencil sketch
because I have in my mind how those lights should be so I'm actually using that and
I really apologize. Remember this lighting, it
should go behind the tree, the tree is in the front. We cleaned before it
dries up so that's why use a lot of
water when you're painting that sky
part so that it stays wet but also not too wet such that the whole thing
starts spreading out. I disrupted the line that
need a bit more yellow ocher. I'm adding the yellow
color at first. As in the lights are making it yellowish slightly so that's why we added the yellow ocher. Then we had the pool the right so that was
the pool located. I'll stop there maybe this
can go extended. That's fine. Then this one coming
towards the pool then the next one coming
towards the pool there. Then we add one more pool there. I love it. I love how the way
the lights have done that. Now you can go ahead and refine anything
that you feel is wrong. Like for example I would
like to make the shape of that center one a
bit more stronger. Assuming there's a lot of lights on that's entering there. Any place where you
feel that you know it's not light enough
you can add more. I can't do anything for my tree right now because that's gone. There's another
thing that I want to do that is to draw the lines. For that, I'm switching
to my liner brush here and here using
my liner brush. We take the same paint that
we used, the same color, but we need it to be
a very subtle line so that is why liner brush, it should be a very thin line. You're taking that, make sure that it doesn't have a lot of water because if it
has a lot of water, the cool thing that you did for adding those lights is
going to be missed again. Just using that thin
part of the brush, we will draw the string
where it's dashed. There. You've seen the final painting, so you know it doesn't
end up like this. There you go. We'll add
in the poles as well. For adding in the poles here, I'll go with my brown
and I'm going to mix it in the same color there, but I will add toppings greener. Here, loading it up with
Payne's gray so that it becomes such a dark
color such as sepia. I don't want it to be
completely grayish, so that's why I mixed a
little bit of brown to it. There, and using that, let's add in the poles. There's one of the poles. Can you believe my paper is
still wet, I love arches. This is the reason why, I always say this about arches. Can you see a little bit
of spreading around? It's still wet, my God. This and another one, there but obviously we need to correct the
bottom part of it. Here, I'll take my brush, I'll go with my bluish and paint and also maybe a little bit
of the brown paint itself, and whoops, that
was a lot of water. What did I just do? [LAUGHTER] That's okay. I know how to correct
it. I'll just go around and absorb that part. What I want to do is, I want to make sure that the
bottom part is blended in. What I'm doing is I'm
taking a little bit of water and apply towards
the base like that, then I'll absorb it. Here I apply water to that, and then I absorb it so that it looks faded into the background. Can you see all of that? It's faded into the background. Maybe I'll do that
for more area of the lamppost because I don't want the whole
thing to be seen. Now I know, so it's
picked up color from the external
region, but that's okay. I think it'll go off
when we add this new and it will make
all the lights and all. Now we're not done yet. I know my paper has dried, but I'm still going
to give it a go. I'm just going to add
in some splatters. I hope that this will be
wet on wet splatters. I hope and I'm pretty
sure it's not, but I guess in some areas
here that are still wet, but maybe those regions
will come to my rescue. Add it's nice note. I
know that this looks like a whole bunch of mess
right now. Don't worry. Now what we need to do is to make sure that we drive
this up completely. Here you go. I have dried it up completely and you can
see how it's turned out. I love the way that all of
the snow plus the lights now look as though
it's blended out, but you'll see in a while, why we did those things. I need my white paint again and we're going to
mix that same color again. Here, taking a bit
of my white and adding it there to that mixture. But I think this
time I might use, maybe a yellow color
into that mixture. I think that might be a
great idea so that you get that bright yellowish
tone for your light. Like I said, the ideal way
to use at this moment, maybe it's a yellow
gouache paint if you can mix that, the white. Mixing yellow gouache and
white together, my God, that's going to be
really ideal for this. Can you see how gorgeously light that shade
is turning out to be. This color now, we're
going to apply it. We need to be more whitish than yellowish,
remember that always. That's why I am picking up
more white from my mixture, my palette, and there. Now the point is to
go ahead and add light points in the center of
those regions that we did. That will make the
wet-on-wet stroke that we did to look like the
dispersing effect of the light. Isn't that beautiful? Make some nice round
light strokes. I think on that center circle, you don't need to actually
create a lot of gap. I think it has a lot
of light cluster together and plus it's
actually as good, but we've seen it as an ellipse, which means that definitely there's a lot of lights
cluster together. But make sure here to retain
the shape of the ellipse, which is actually what
is more important. There, now for the lights. But again, the closer and further thing that
you needed to add. Here, perspective is
always important. Can you see how beautiful
it's turning out to be? These ones have faded slightly, but actually I'm okay with it, because it's the one that
goes further off, isn't it? Maybe that was a happy mistake. Make sure to cover
all of the lights. There, added all of the light. Now we need to go and add in
that string again properly. The string also has some
light effect to it, which is why we added that with the wet-on-wet
affected first. Here, going back with my liner, loading it up, and it needs to be really thin, and I'm going to slightly bend my paper because that's
where I'm comfortable to. Also, remember, you don't
have to complete the lines. It's okay if in some of
the places you don't add, because your brain is going
to complete it for you. I think these ones, especially I might add a bit more because whatever I added
in the background is gone. Keep. There was one here. I actually didn't add any lights to it. I'll do that with
my liner itself. That's why I felt like
there's a gap there. What went wrong?
I really love it. I love the way it's done that, so I need to add lights for this Christmas ones as well and I'm just going to do
it with my liner itself. In fact, I was just thinking
for the Christmas ones, how about we add like
Christmas decor on the top, like lights on the top so
something of this sort. Here what I'm doing is I'm
doing a curve and then I add some blobs here and there. It doesn't need to be detailed. That's the thing, isn't it? Remember, don't make a curve. Always as you come
towards the bottom, it needs to have more curves. See, more curves. Where the curves are, you can add lights there
in between. I love it. Now, we added a lot of lights, but remember, there always
needs to be some shadows. For adding those shadows, even with the strings, there needs to be shadows, so adding those shadows means we need to
add darker colors. Here I'm loading up my brush
with my dark tarn and, you know those
gaps that we made, in some of those gaps, go ahead and fill with brown. The joint, I know that I said that the brain
will fill it, leave some of them intact, not intact, but leave some
of them as blank itself. But some of them go
ahead and add in brown strokes on the top. I think you can add
it onto the top of the yellow itself.
Doesn't matter. But it's just the effect of shadow in some of the areas. Yeah. I think
that's enough. See, I've added in just some of
the areas. Can you see? For example just
look at this one. This depicts more light areas
and shadow areas as well. Now, before we add in the
snow, there is one thing. Remember the shadow
of the balls. I know it's a night scene, so definitely we need to add
some shadow for the balls, but we can't add it in
a wet on dry method. What I'm going to do
is, I'm going to apply some water there
towards that region. Just re-apply a bit of water to my paper so I know that
if I apply too much, then I'm going to disturb the paints and you can see a line where
I've applied the water. That's where I'll use my clothe to absorb towards the bottom. Then we can add in the shadows. Since the light is at the top, then the shadow needs to
be towards the bottom. It doesn't even need to be in any even manner a bit
and then we can have lots of drops of brown and
things on the snow as well. Use your hands. Enhance the painting with
little blobs here and there. Maybe it's some rocks. I'm just saying, the snow area doesn't
need to be perfect. See, added some tarn spots, so maybe some extra brown
spots towards the bottom. Because nothing is perfect. Maybe the areas where
you know the snow has started to go of or
something like that. Then I'm just going
to go ahead and add some more decoration
onto my tree. For that, I'll pick up a
little bit of cadmium red and maybe add some Christmas
bubbles at some places. It's good to have some color
onto the tree, isn't it? That's why. Just a little bit of red Christmas bubbles
at certain places. I like that. Now let's get
back to adding the snow bit. Here is my white bead
and first of all, we need to add the
snow to the tree. Load your brush nicely with the white paint and
start adding it onto the tree in lots of places where the snow
can actually settle in. See if I had a lot of time and I was making
this meeting in detail, then obviously I would have
added the snow along with the wet-on-wet and added a lot
more effects onto this. But since that work is outside
the scope of this class, so that's why I'm not doing it. But you can see how I've
added the nice snowy effects. Add some nice snow
bits to the tree. Next we'll go with
the splatters. A lot of splatters, we need literally like a lot of splatters to make it snowy day. There you go, it's
snowing and we've added the tree, the splatters. In my head, it doesn't feel right without the shadow on the tree so I'm just going to pick up a little bit of
lavender and add it. It's just that my mind wouldn't agree to the fact
that there is no shadow for these white that we just added so what you can
do is just pick up a little bit of lavender
and add it to the base. If you don't have lavender, you can mix your white with
violet and you'll get it. I think now I'm happy. I added a bit of
extra lavender there, so I need to add white now. Now I'm happy
actually. We're done. Let's go ahead and sign the painting there, so I guess we only added
the splatters, but yeah, this end is still wet so I'll dry it up so that
we can remove the tape. Here you go. Let's
remove the tape and here is the
finished painting. I hope you like it and thank
you for joining me today.
43. Day 20 Colour Palette: Welcome to Day 20. This is the painting that
we are going to do today. The colors we need today
are Indanthrene blue, indigo, ultramarine blue,
and some white gouache. That's just very minimal
number of colors. Anyways, for the
Indanthrene blue, that's PB 60, the
pigment number. But if you don't have
Indanthrene blue, you can simply mix
your Prussian blue with indigo and you'll
get that color. But make sure that you
don't mix it with a lot of indigo such that when you add in the indigo, they
all look similar. That's why adjust your
mixes accordingly.
44. Day 20 - The Snowflake: Let us start. Today's one is quite easy as you
might have seen. But I found friends pictures of snowflakes and
I really loved it. I wanted to include that
as part of this class. Since I'm shooting after
a long time anyways. I really thought it'll be a good idea to include
some snowflakes. There is no pencil
sketch, we'll just go ahead and dive in straight away. I'm going to apply my water
onto the whole of the paper. Take your time and apply the
water evenly multiple times. I guess, there isn't
much wet met to do. But then you know me. I like to make sure that
my paper is nice and wet. Here you go. I've applied the water and I'm going to be starting with
my flat brush today. This is a half-inch flat brush. Using this, I'm going to start. I'm going to start
with the blue tones. Here, this one is
indanthrene blue, so it's a very dense,
dark blue color. But if you don't
have this color, you can actually mix, I guess, Prussian blue with
a bit of indigo. We'll be using
indigo on the top. When you're mixing,
make sure that you adjust the mixings
of both those colors. Here see the beautiful, gorgeous color that I'm
applying onto my paper. Since I'm using my flat brush, I'm just going ahead and going and applying
in various strokes. I don't like to apply
whole flat washes because it just looks flat. That's the problem. It's good when you're
making aesthetic stuff, but that's not the case. I'm not that person who would
just put random not random, but make such flat stuff. As you come towards the bottom, I want to create
an uneven surface. This uneven surface is where
the snow is on the ground. Mind you, this snowflake
that we are adding actually is a snowflake that's actually
very taken with a camera, that's got a high level
of magnification. Otherwise you won't
see that snowflake as magnified like that. I hope you understand that. The snow bar that
we see will also be as crystallized as possible. Here I'm taking my
indanthrene blue. I'm taking directly and
applying onto my paper. As you can see, adding in various directions,
various strokes. Make sure that you apply nicely. Nice directions, and cover the edges nicely. Taking dense pigment. I've put the indanthrene blue. Now we need to go into the next dark color,
we use indigo. We don't want to be adding
indigo all over the place, just in some places
so that you depict that depth or dark
areas in your painting. Load up your brush nicely
with indigo and start adding. Here, for example, I've taken up my indigo
and see just random. These are not clouds obviously. It's just, I don't know, random stuff in the background. I want to bring a
lot of indigo here. Main reason is because
that's one place where we're going to
add in the snowflake. The background part of it, if it's nice and dark enough,
it'll be really nice. Don't make it a tree shape
or anything, just fit in. Maybe I think I'll go back to
my indanthrene blue a bit. Keep that mixture if you've
been mixing this dark blue. Here is my indanthrene
blue and let me mix it up. I know that my paper
is really wet, as in the top portion
is going to stay wet because I've already
applied paint to it, but I don't want that
bottom portion to dry out. Before it dries out, I'll
try and paint the snow part. I'm just basically taking
the ultramarine blue. That's a very dark pigment. I've washed my brush and here
I'll lighten up my strokes. Just lighten up my stroke. As in, I'll just lift off some colors and see just
randomly put in a lot of colors. You can add random dark details as well. What did I pick up? I think I touched the orange slightly while I was
picking the ultramarine. It's got a bit of orange
there. Can you see that? Oops. [LAUGHTER] Yeah, I like that now. Let's get back to the
blues that we were adding. Basically here's the
indanthrene blue. Just going to add a bit
more to some areas where when I look I can see
that it looks a bit whitish as in because
when it dries, watercolors dry
one shade lighter. I don't want it to
go really light. That's the reason
why I'm picking up more color and just
adding in random places. I think this is going
to be the quickest painting [LAUGHTER]
in this class, come to think some of
them which were longer. But obviously when there's elements that you need to paint, strict element that
has a definite shape, then it takes time.
That's the problem. Maybe going for a snowflake for this one was really
good, isn't it? We're done with the background. The next easy part is to
add in a lot of snow. Basically, I'm just going
to take my Size 4 brush, load up a lot of white
paint onto my brush. Wash paint has dried up. I probably need to go
around a lot on the top so that I can loosen it up
and pick up the paint. You can see here. I need it to be nice and watery,
giving enough splashes. I guess that should be alright. Now I'm going to add
in the splatters. I love the splatter. See, I think I'll refrain from adding to this
large blob of indigo, but I'll try and put it
into the other places. This is just amazing. I just love wet
on wet splatters. It's like [LAUGHTER] my thing, I really like it. I think I'll add a
bit of these wet on wet splatters towards
the bottom as well. Before the whole thing dries up, I want to add in
some blooms as well. Maybe I'll stick my
water and start adding. Oops, I dropped a large
drop of water there. I don't want that because I
don't want to bloom there, so I just use my brush and
I absorb that water there. This is how you can correct
your mistakes if you do any. Let me take my water
and I've added. I hope it turns out well. Yeah, I can actually see, so
these ones are the blooms. These ones are the white ones. Yeah, I like it. You know what, I
feel we should add some additional texture also. Maybe what I'll do is, what I'm going to do is I'm going to
pick up my ultramarine blue, and I'm just going to go over
here towards the left side. I know we painted with some
slashes of white there. See that's blended out. But then I have something
else we can do. Let me just soften it up because my paper had
actually dried up. The paint that I just
added would leave a harsh edge which I don't want. Done with that. Now, the salt. Obviously, how would
a Christmas class go without some salt technique? Here just adding a bit
of salt on the top. I just hope it turns out fine and that the
paper hasn't dried. I'm going to add a little bit towards this left side as well. Those area has now
both, not both, splatters wet on
wet water splash and some salt
techniques as well. Let's see how this
turns out after drying. Obviously because
we've added the salt, we need to wait
for it to act upon and create those slashes. But while that happens, we can go ahead and
add some things. Here I'm going to use my liner
brush and my white paint. I'm going to load it up
nicely with white paint. We don't want the paint
to be watery, just loose. Then we're going
to add snowflakes. Make sure I just hope my
paper is too wet, no, it's not wet here, but I
started out so I have to go on. That's a pity, okay anyways. Just added a snowflake shape, but I'd like to know. What I'm going to
do is, I've made the shapes so I'm just going to absorb in a little bit from
the bottom part there. See, it's only a little
bit and I guess we can add another one to here as well. I did some nice ones today and let me
observe that as well. What you can do is just add
some crisscross shapes. We're just trying to depict the crystallized
part of the snow. That's why we're doing
this. Well the ends of the snow part
is crystallized. I think that's
enough. All the edges doesn't need to be
crystallized I guess, the start bar does enough. I just really hope
this salt works out, I had actually added it very late and I had to reapply water. Also I've used ultramarine blue which has its own granulation. I'm not sure if it will work, but I'm all right because we already have such beautiful
things on the paper. Let's wait for this to dry up. Here it's completely dried out. Well you love how this
side has turned out, see all those splatters. There's the salt effect. Actually, you know what? If you need to get those large
crystal shapes with salt, you need actually
large crystals. The salt that I'm actually
using is very fine so it means it's going to
create very fine areas. I guess that's a drawback, but if you do have
large salt crystals, then go ahead and use it, that's going to
create larger areas. Let me show this to
you up close too. Can you see these
are all very small? This actually looks
like the granulation of ultramarine itself. But if you had larger crystals, this plastic granulation of ultramarine would have
looked really beautiful. Let me just clear
up the salt from my paper. There you go. Now we'll go ahead and
add that large crystal. Here I'm starting with my size 4 brush and we actually
need a lot of white paint, but we need it in
a watery mixture. Here, I've dropped
in a lot of water, you can see the water flowing. We need the watery
mixture in blind, we need it to be
in a lighter tone. Don't put that entire
water into it. When there's water, it means
there is less pigment. Here, I've gotten rid of the excess water and I'm
going to add basically. Add large crystal is
going to be here, that's where we added
that dark spot. Let's start it from here and we're going to create
some unique shape. I'll explain how it is actually. It is basically a cross itself. Add broken lines if
you need to depict the cross because there
is a reason for it, then another one like that, and another one that
is towards that side. That's the shape. Now, if I were to add in the details. You can see because I've
added with the light stroke, you can see it's very light
on top of the indigo. Now, let's start making
these random shapes, and especially on
this side also. I'm just trying to focus
really closer to a crystal, that's what basically
I'm trying to do. As you reach towards that side, try adding little
shapes like that. This is basically the
shape of the crystal. You'll see it forming, so just understand what that is and then you can have a pause at the end. I'll show it up close
and then you can sketch out the same on your paper because there is no sketching, we're doing this directly
with the pencil. Because you can understand
that if we had added a sketch, the dark indigo would
have just taken it off, so there was no
point adding that. Then here again and here I guess I just
make it some dark crystals and to this area. Obviously it continues
onto this side and one to the top. Oops, oops. See, I just picked up paint and there was lot on my brush. This is why I said you should actually loosen out your brush and release the excess water, otherwise, this is what
you can end up with, these kind of problems. You see what I've created now? It's like a star shape but
in the crystallized form. This was using a lighter stroke. Now, we need to add in little
details here and there. Again, release excess water, make sure you always do that. Obviously, I'll definitely show you the final sketch at the end. I guess I'll make one edge dense and here maybe a line
through the center, and nice and crystallized
along this edge. Not all edges are
going to be so soft. Some of them are going to
have crystallized areas. This side. I like how that one has turned out. Maybe more dense paint now. Not taking the watery bit, but taking dense paint so that the white that we
add now will pop out. Also because you're adding
multiple times on the top, it will definitely pop out. Let me add it to
the edge like that. This side a bit more, I guess. I think that's enough, I can see how this is already looking
really nice, isn't it? But I just need to refine
the center portion, it needs to look
like a crystal. Now, that is much better. Can you believe
we're almost done? This is probably the quickest
in this class, isn't it? But don't forget, splatters. The gorgeous, beautiful
lots splatters, the wet on dry
splatters on the top, which needs to go over. But let's not add too much
and get carried away. I think this is enough
because if we add too much, then the beautiful effects that we tried to
create will go off. We're done so we can go
ahead and sign the painting. Here you go. I'm going
to sign the painting. Now let's remove the tape. Here you go. Isn't
it looking gorgeous? Thank you for joining me today.
45. Day 21 Colour Palette: Welcome to Day 21, and this is the painting that
we are going to do today. So the colors we need today
are Indian gold, orange, transparent brown or
burnt umber, violet, Payne's gray, lavender,
and white gouache. If you don't have Indian gold, you can mix it up
using Indian yellow, orange, and a bit of brown. Obviously, it won't
be as perfect as the Indian gold color, but this is an alternative
that you can use. Or you can go ahead with a yellow glow for
the tree as well, rather than the Indian gold glow that I've tried to
create here, okay?
46. Day 21 - The Christmas Tree: Let us start. We'll sketch
out the tree first. I guess the tree, let's make it symmetrical, so I'm just going to mark the center point and draw
a line towards the bottom, which will make it easy for
me to make it symmetrical. Here, if my tree is starting there and goes all the
way towards the bottom, and that's where it ends. Obviously, I don't make it
like a perfect triangle. That is the shape of our tree. Now, I'll refine it and add
the branches and stuff. There, that's our pencil sketch, very simple, isn't it? There you go. Now let's go ahead and paint
this whole thing. For that, we are going to apply water onto the
whole of our paper. Don't bother the tree right now, it's okay that we are going to paint the
whole thing together. Apply water evenly to
the whole of the paper. Take your time to do that. I've applied the water, so we're going to start with
a nice Indian gold color. Here's the Indian gold and we're going to
apply it onto our tree. Start right at the top, but make sure that
the strokes towards the ends of your
tree are continuous. Don't stop midway and I'll show you why not to stop midway. See, the place where you stop, it is going to spread out, so towards the edges, don't stop, just go and create that continuous
line of stroke. You can stop somewhere in the inside part but
not towards the outside. Or another way to
paint it is to take all your paint from the outside and go towards
the inside of the tree. That's another way to do it. For example here,
coming in, like that. You can do that obviously. Painting all of the
areas of the tree, and I'm using Indian gold color. The area of the tree is done so now let's go ahead and add the area surrounding. Here, I'm starting
with some orange, and I'm going to just
place a little bit of orange to this area, then let's go ahead and
use our main color. Our main color is going to be a color that's mixed by mixing, transparent brown, violet
and Payne's gray together. It creates a neutral tint color, so if you have the
neutral tint from [inaudible] then go
ahead and use it. That is my go-to color that
I'm trying to make here. I'm trying to stick
to these palette hence not taking that. I have that neutral
tint [inaudible] but I'm not using that because I promised I'd stay with just these colors in these
palette, so that is why. You can see my paper
is starting to dry out but if I make my
strokes continuous, then I should be able to
create a perfect blend. I haven't mixed enough paint, so just going to mix
it up as quick as possible and onto
my orange as well, my orange is just
going to blend out, but I'm trying to create
a night scene here. You can see that. Make sure that the paints that
you're using are nice and almost in a very
creamy consistency because if it's not in
a creamy consistency, you're going to paint
onto your tree also, which we do not want. Onto your tree now, you're going to go around it. That would be like the
negative painting method. We just painted the inside part, but now we're going to do
it on the outside areas. Any of the areas where the
Indian gold has seeped out, now is the time to go ahead, and it goes away. See, I'm using my
brown mixture to go and take it away
from the outside. A lot of my Indian gold
had actually seeped out. Just going to blend on
top of my orange there. What I'll probably
do is I've taken a little bit of orange
and mixed to one edge here so that I get the color that is actually
obtained by mixing that. My point of adding
orange there was just to get that background
touch of orange, so with actually mixing
orange to the same mixture, I should be able to get that. Stop somewhere there because we need to add snow
at the bottom. Here, coming towards the bottom, blending my orange in and
that's where I should stop. Now, we need to add depth. I see a lot of light. It's really still light, as in, when it dries up, it's going to be
lighter so I'm just mixing that same color
again so that it can go over the top and make the
edges and those areas dark. Make sure that you're using
nice wet-on-wet technique. Your paper needs to have that proper blend
so that's why I always say make sure
that you apply the water nicely and even if your paper
has started to dry out, you should be able to know by
now how to adjust that and that is the key thing to applying the best
wet-on-wet stroke. Here, I can see that my paper has dried out in
all of these areas, but the more pain I
apply on top of it and then I make sure that
the previous stroke that I applied and the
next stroke that I apply are continuous so that I'm able to make my
strokes match together, forming the wet-on-wet
technique perfectly. See, can you know? Even see any difference? Because of the light that
I'm using in my studio, you can actually see how
my strokes are going. Let me do that orange and
I'll probably blend in in these areas. Add mixture. Does it look like fire
at the back? My gosh. I didn't intend it to be that so maybe I'll change
it a little bit because these two ends looks
like it's a fire there. Let me just use that. Taking my brown, violet, and my gorgeous Payne's gray. Let me get rid of that. Probably if I add in more there towards that side,
then it should be fine. Mixing up that part. I only want that a little bit of orange glow there at the back. Now that's much better. It
doesn't look like a fire. Later on I felt that it
was looking like a fire. I know that my bottom
part has dried, but I need to add snow. What I'll do is I'll tilt my paper so that I can add
some water towards the bottom. Here, I've dotted my paper. I still have traces
of that brown on my brush. That's okay. Anyways, I've dotted my paper. Now, I'll go ahead and
add some violet paint. It's a night scene, so and we've got a lot of yellow
glow on our paper, which means that the
complimentary color is what we should use for
the snow. Remember that. Here, using my violet for
creating the snow effects. Starting from the very top, we'll be using violet. I just picked up a little
amount of violet and see how dense that color is. My God. Now, I guess I'll add in
a little bit of depth, so I've taken more violet, but now I'll go over the top and create
that depth of effect. Maybe a bit more and
make it more darker towards the bottom.
What do you see? I hope it doesn't look
like a whole strokes. Just properly blend that in, in case it looks weird. That's much better. Now we'll start adding details
onto the tree. For that, I'm switching
to my size 2 brush. I am going to mix up my orange. This is my transparent orange and my transparent
brown together, so that'll give me a
burnt sienna color, but burnt sienna is not
that really transparent, that is the reason why I mix
these two together always. I'm just going to
use that to create some tree effects and some
strokes onto my tree. The branch effect basically, the leaves of the boundary kind. Only not in all the areas. Leave lots of gaps and
it's absolutely fine. You'll observe that because
we hadn't dried our paper, some of your strokes are
going to be wet-on-dry, some of it is going
to be wet-on-wet. Honestly, don't bother. Let it turn out the
way it wants to. Can you see here I've
got a large globe of green and it's spreading. That's absolutely fine. I'm letting it do that. Need a large globe there. I actually just took the
brown from here itself. There's a lot of brown
and I don't mind that it's not pure brown. See, that's the thing when
you start a painting, you start to ignore
the fact that a lot of things about color when you want to achieve
certain effects. Don't come towards the bottom, because I have other plants
for the bottom part. I think I'll take a little bit more of the
brown now and mix it into that to make some
darker strokes, especially towards
the bottom there. Towards the bottom, I guess I'll add in some
more darker strokes. Also maybe we'll take this and start adding at random places. Some dark effect, that's it. Now, I'll probably go straight in with my brown itself.
Here's my brown. Now we're going to
refine and start adding a lot of small, small details. Like here, we'll start
adding some branches. We don't need to add
in a lot of branch because it's meant to
be nice and glowing, and covered in a lot of snow. We only need to add few
lines here and there, only a few lines here. That's why I'm using my
brown and just making some random strokes
here and there. Try and see if you can make more random strokes
towards the outside. That marks the end of where
the tree is supposed to be. Like here, you can see this is the end of the tree
is supposed to be here. You can see your pencil
sketch from beneath. Here you go. It's adding a lot of
teeny tiny details, especially towards
the end like I said, again, we're trying to
create the edge of the tree. Maybe a teeny-tiny edges
to the bottom part. I think we'll add more when the whole thing
is actually dried up. I guess I'm too late to add the white paint actually
because my paper has dried up. But I'm still going
to give it a try because I can see
some area here that's actually still wet
so maybe a little there and little to these areas. Not bad it's still spreading. See, it's still spreading
in these areas, good. Thank God. Now we will wait for this
to dry out so that we can add in the
details on the top. Here you go. It's completely
dried out. But guess what? Those white spot that
they had it they really faded away and I guess it's because it wasn't a
very dark background. I didn't think of that. I should have used
more dense paint. That's okay. But I
guess it's really nice. It's like very subtle
splatters or something. It's like very much
faded, isn't it? Now let's go ahead and add
this nobody does on the top. For that, Here's
what we're going to do. You need two brushes. I don't mind about the size, but I guess what I would suggest is of the two brushes that
you're going to be using. The larger size, use it for the lavender and the
smallest size for the white. I'm using a size 4
and a size 2 here. The size 4 I'll be using for lavender and the size 2 I'll be using for
the white paint. Let me have both of the
colors side-by-side, because we need to be doing
something of that sort. Here, this is my size 4
and I'm going to load it up with lavender there. That's my lavender paint and my white I'm going to be loading it up on
the size 2 brush. There, I've got
both things ready. Now we start. That's my lavender
and I'm going to add like snow
elements on the top. Will be going to cover many
areas of the tree with snow. Especially a lot towards the edges on the
top of the leaves. But those areas that we're
covering with lavender, the shadow, isn't it? I need to add properly
some snows and I want them to little bit blend together so that's why I'll take a little
bit of white as well. Let me show that to closely what is actually happening here. Here, when I add a little
bit of white on the top, can you see it blends
with the lavender and creates like a
gorgeous mixture of color. Can you see that and that's
what I want to create. This is the reason why I said, have both brushes
ready in your hand. Do few strokes then go
back quickly because otherwise your lavender
is going to dry out. Here added few lavender
strokes with my white. I don't want a dense
white just a little over the top so that it's there. These lavender once you
can add a lot of it. I was just going to pick up lavender from there
from my white pen. That would have been [inaudible]. Back to white. Can you see how gorgeous it's
standing out? I love it? Go ahead, sit and enjoy
this phase of mixing those two colors using the
two brushes on the top. I'm honestly enjoying. I hope you are as well. It's the lowest painting. As you might notice
and not adding like you strictly on the
top of every inch. I skip areas like for example if you
look at this one here, I had a large blob of lavender, but I only applied to little
bits and you can see how that paints actually
mixed up, isn't it? It looks nice as an advantage mixed up
in some random manner. That's why I don't bother as to how am I actually
adding in my white. I just randomly go in and put in some white blobs
here and there. Make sure you do that as well
because it looks beautiful when it doesn't have
a strict uniformity in the way that you're applying, for example see this
large blob here and I'm just going to see, I've touched my white paints at some random
places, that's it. I let the paint do its job
of mixing here and there. Don't you think that's nice that you let the
paint do the magic. Here we are approaching
towards the bottom. At the bottom here, make sure that you leave like
a little bit of that yellow Indian
gold to be seen. Because I wanted it to show that it's having a little bit of
glow towards the bottom, but it needs to have a lot
of snowy element as well so make sure you add in a lot of lavender than what you
did at the top areas. Pick my white quickly. Yeah, there. Oh, I love the way this tree
has actually turned out. I keep forgetting that I shouldn't say, I
love the painting. I remind myself for a reason
I shouldn't say that. But then I end up saying that. Now, I guess I'm
just going to add some darker shadows as well. For that here, I'll
take my violet paint. Again help with the
darker shadows, but I don't need it to
be in a lot of places. That's why I'll just
pop it up and add in some areas to the edge
of some of the lavender. It can mix on its own
with the lavender, with the white, and create gorgeous shades and
shapes of its own. But it'll be nice to have varying levels
of shadow effect. If you don't stay and keep
at a single color of shadow. It's always best to have multiple colors of shadow
when you're painting. Yeah, I think that's enough and I love the way
it's turned out. Now what we'll do is we
need to go add lots of twinkles and then
we'll be almost done. I think it's only left to add in the
twinkles on the snow, which means you only need
the white paint now. I guess I can move
this palette out of the way and just focus
on the white paint. Here I'm loading my
brush with white paint, will add the first
larger twinkle here, which is going to be
the star on the top. That'll be like larger
thing on the top. You need it to be
pointed remember. Here, extending. I need to create a halo
effect in the center. What do I do? This is just
literally trying out guys. I'm not sure if this
is going to work. I've made a circle
there at the center. Then what I'm going
to do is I'm going to absorb that. What happened? The stars faded, then now if I add the
same thing on the top, but I just need to make sure
that I follow the line. So hard to do that.
Yeah, not bad. I think I have that
halo in that center. Yeah, not bad. I'm using my size 2 brush
and I'm not that happy. I think I'll switch
to my liner at this point because
for these things, the liner is actually
what is the best for creating thin strokes. I always use to
create stars with my liner because
it creates an end. I'll just show you what I mean. There's lot of water, let
me absorb extra water. Here, if I do
something like this and lift off the edge of it, the pointed edge of
it is really pointed. It's actually much better. Here I will add
some twinkle there. I'm going to add these
twinkles in and out of places. You can make them large or
smaller, doesn't matter. But make sure you add
them in a lot of places. If you're worried that your
lavender might spread out, you can dry your painting. But actually we're only adding those twinkle areas in the areas where it's not covered by snow. Then it shouldn't be a problem. Don't touch those areas where
you have your lavender. Are twinkle been seen? Yeah. I guess when we add in
a lot of it will be seen. I just told people don't
confuse it with snow. The best way to add
these twinkles would be to actually add in with a halo like I think we did in Day 17 where we made
the Christmas tree, and we added a halo using yellow at first and then
adding the white ones. But I'm too lazy
today to do that. Honestly, I am, and
I'm really sorry. But maybe I should have
done that because I'm actually having fun
adding these white ones. I mean, what difference
would it have made just adding some more first
with yellow, that's it. The honest answer is actually, I didn't think of it at first, and now it's too late.
[LAUGHTER] Where else am I missing
those twinkles? Here. We've got a lot of twinkles in and I guess we can finish off
by adding a lot of snow. Obviously, for adding the snow, we can go ahead and use a
larger size brush and load up the paint and start
adding splatters. Here we go. I've added the splatters
and everything. So I guess it's safe to go ahead and sign the painting now and done. That's the last of
the paintings done. Let's remove the tape. I just hope everything is clear. I do see some white there, so maybe I'll just dry this up. That would be much
safer for us to do. Let's remove the tape. Here you go. Here's the final painting. I hope you like it and
thank you for joining me today and if you've joined me for all
the days, thank you.
47. Thank You!: Dear all, thank you for joining
me for all of these days. If you have been painting all
the 21 days along with me, thank you from the
bottom of my heart. Even if you haven't
and you've just joined here for some
of the projects, still thank you so much for being so supportive and
joining my Skillshare classes. Let's have a look at all the 21 paintings that
we did during this class. Here you go,
starting from Day 1. Once again, thank you for
joining me in this class. Don't forget to upload
your projects to the resources section
here in Skillshare. I will be personally reviewing each of the projects
in this class. Thank you all for joining
me today and wish you a Merry Christmas
and a Happy New Year.
 Geethu Chandramohan, Colourfulmystique - Top Teacher, Artist