Transcripts
1. Introduction: Hello, everyone. I'm
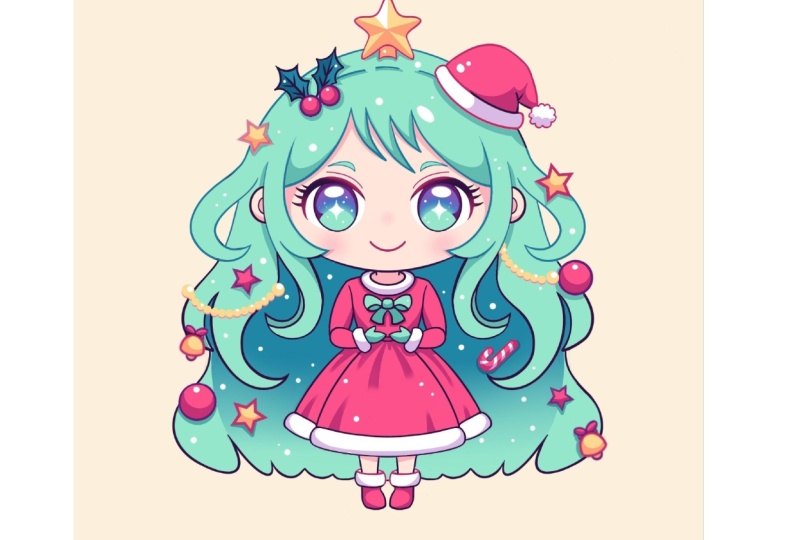
Uni, and in this class, we again to draw this
cute cow way illustration of an adorable Christmas
tree girl in procreate. During this class,
you'll get familiar with a lot of useful features
like symmetry tool, liquefied tool, Gaussian
blur, leaping masks, and blending modes and learn the basics of drawing
in procreate. By the end, you'll not only draw an adorable illustration
you'll be proud of, but also feel super
confident using procreate. And now let's spend
some time drawing.
2. Scheme, Head & Hair Sketch: Let's begin by deciding what kind of canvas we
are going to be using. Today, we're using a
standard square canvas that you can find in Procreate. Both our Pixel weed and Pixel
hat are set at 2048 pixels, our DPI are at 300 and our color profile is set as
SRGB with the low number. When it's all done,
let's just hit down, get redirected to our new Canvas and the first thing we
will need to do is to go under the project Rs stop and download all the materials
mentioned in this class. When you did it, we will go to our layers and we'll go
to the background color. Let's just go under cards
to see all the names that we have right
here and let's select this background color. When we did it, let's go to our color palette
one more time, go under cards and let's
select some darkish color. So for example, dark purple
lines will work perfectly. When we have the color selected, let's just go to
our brush library. We will go to the
ketchen folder, and let's select the
MirnderPencil brush. When we have
everything prepared, let's just go and start creating a little scheme
that will help us to build up our illustration. Firstly, just with one line, we will go and very boldly just create a shape
of the rectangle. Just hold your line at the end, and when it snaps to
this better shape, let's just go to the
popped up option, and we will go and find
the option rectinga. If you don't have the
option rectangle, you can try to create
the shape one more time. Now if it's a
little bit crooked, we can just go and adjust
the shape a little bit. So just move the notes to
create quite a straight shape. If you need to move it,
let's just go and hold our Apple pencil at some blink space and adjust the placement of these elements. We don't need it to be very straight when we have
something going in that way. Let's just go and tap on the screen to
accept our changes. Now, let's just go and position this shape right in the
middle of our canvas. We can do it very
easily just by going to our Aoki, going under uniform, and we will just go under snapping and inside
the settings, we will just go and Sogo
snapping right here. So now if we want to go and find the center
with the shape, we will need to hold
our Apple pencil and we will be looking for
these two orange lines, one vertical and one horizontal. So when you found
these two lines, let's just go and
unhold our Apple pencil and we will know that
we've positioned our shape right at the center. So now let's just work
a little bit more onto the shape and we will go and
use our free form method. Let's just go and make
the shape a little bit wider going on
the vertical axis, just go and create a
shape going in that way. Also, we can just go to the sides and make
it a little bit more narrow like that and just go and create something
going in that way. When we have the
result like that, and if we move something
and if we need to continue just putting this
shape right at the center, firstly we'll just need to go away from this mode
and one more time, go inside the error key, go on the uniform method, and again, try to find
these two orange lines. When you've positioned
your shape in that way, let's just tap on our
Air key one more time, and then we will
go to our list and create one more leave on top
by tapping on the plus icon. When we did it,
let's just go and select some contrast colors. So for example, let's just go
with dark pink lines color. And with this line, we
will just go and create the shape going through the whole shape right at
the center of our canvas. We'll hold our Apple pencil
and also we'll hold one of our fingers on the
screen to make sure that this line is straight. When you did it,
let's just go and position this line
right at the center. So the same way, just
go into our Aoki, going to the uniform method, holding our line and looking for this line that is going
on the horizontal axis. When you put your
shape at this line, let's just go and
deselect everything by going to our
Aoki one more time. And when we have the
results like that, let's just go to this line and let's just
write down center. Now when we have something
going in that way, let's just go again to our lays, create one more lay on top. We will go again and select
again some contrast colors. For example, let's just go
with some bluish color, and we will be going and
creating a couple of more lines that will help us again to
build up our illustration. So first, let's just go toward the bottom part and we
will create a line, the same horizontal
line going through the of our bottom part. So we'll just need to
hold our Apple pencil, hold one of our fingers on the screen to make it straight. If you see that it is not quite at the center
of this sheep, you can just go to
this editing mode that you have on the top and move this line toward the
center of this bottom element. When you are satisfied with
the position of this line, let just tap on the screen
to accept the changes, and we will do the
same on the top. Again, just going
through the middle part of this top element, holding our line, holding
one of our fingers. If we need to move it
to make sure that we are some kind of in
center of the sheep, go to the editing mode
and adjust this line. When you are done, let's
just go and name this line. So the first line
that we have on the top will be our fringe. When we have this fringe named, let's just go to the bottom and let just write down dress. Now when we have
these two lines, let's again go to our list. Let's create one more
lay on top and let's just go and again select
some contrast colors. For example, let's just go
with maybe this purple color, and when we have the
result like that, firstly, we will be just going
toward this part, the third segment right here, and we will go and find
the center of it again just by creating a straight line going on horizontal axis. Again, hold everything
that you need to hold. If you need to adjust
the placement, go to the editing mode. Let's just go to this line and let's just write down waste. And now when we have this line, let's go and find where we are going to
be creating our eyes. Firstly, we will go
to the second segment right here between our
fringe and center, and firstly, let's go a little
bit below the top line. Just doing the same thing,
creating eye shape, holding it at the end. If it didn't happen
from the first try, try it out one more time. Just create a straight line, hold your Apple pencil,
hold one of your fingers, and we will need to have a bit of space right here on the top, maybe a little bit
bigger shape right here. So position it in that way. And when you have the
result like that, let's just go a
little bit higher than the center line and
create another line here. We will have a bit more space right here than we
have on the top. So if you need to
move this line, let's just go to the
18 mode and move it. When we have something
going in that way, let's just go to
this little part, so you can just go
and create some kind of this shape and
write down ice. If you can see the difference
between these colors, you can just go to
the magic one, two, use attrition and brightness and find the color that
will be contrast. For example, something
green will look better. When you have the
results like that, let's just go and
deselect everything by hitting our Er key. When we have this
massive scheme, let's just go to our
lays and let's merge all of these layers
together if you don't want to adjust something. So to do that, we will just need to put one
of our fingers on the top layer and another on the bottom and make a
pinch movement like that. When we have it, let's go to this icon right here
onto this layer. We'll go to this apacte slider. We will grab it and we will
move it toward the left. We still can see
what's happening here, but it's not disturbing. So find the apaste level
that works for you. And when you are
done, let's just tap on the layer to close
this little window, and let's just create
one more layer on top. Now once this layer, we are ready to start creating our first elements
for this sketch. Let's first go and again,
make some preparations. We will select this layer. When it is selected, we will go and turn on one option
that Procrite has, again, to build up our
illustration in a more easy way. Let's just go under range
icon over the top left, we'll go under Canvas and we will toggle drawing
guide right here. We have the cells right here. It's not the option
that we need. We'll just need to go under Aden drawing guides
and on the bottom, we will select symmetry. Now when we have just
one line like that, we are not touching
anything here, we are just hitting
down over it so bright. And then let's just go to
our brush library and let's select either ProcritePencil
or technical pencil brush. When you've selected the brush, let's again get back
to our color palettes, and let's select again
some darkish color. So for example, the
same dark purple lines that we used before
will work perfectly. If you prefer some other color, you are welcome to select
anything that you like here. Now when we have the
results like that, if we create some kind
of the line on one side, we will be mirroring on
the opposite side too. So that is very
convenient for us. Let's just start by going to
this line that we have for our center and from this line from the center
line that we have right here, we'll be going up
and starting to create the shape of
the chin right here. So let's just go with a
very slight curve going up, going very boldly up and just creating
the shape like that. Starting to map out where we are going to
be creating our shape. You can go with a
more rounder shape. You can work with a couple
of lines right here. You can just create something that you would like to see here. So just find the shape that you would like to see for
your face right here. If it's easier for you to rotate the canvas and create
the line going in that way because
it may be a little bit more easier for your
hand flow right here, you are welcome to do what
you need to do right here. Now when we have
something in that way, let's just go grab our
eraser and let's just go and erase all the
unnecessary lines, so we will clean up our
little sketch right here. Let's just go all along these lines that we don't need and create a nice shape
right here for our head. When we have the
results like that, let's just get
back to our brush. Let's just take a look
at everything and decide whether we need to
adjust some parts or not. If you are satisfied
with everything here, let's continue by going and starting to create
facial features. Firstly, let's just go
to this line that we have right here as our
bottom part of the ice. Let's just go a little
bit lower than this line. Somewhere to the middle or a little bit higher
than the middle of this little part and we will put a little dot like that that
will represent the mouth. When we have it, let's just go and start creating the ice. Firstly, going toward one of the sides, doesn't
matter which one. We will start by going
to this line that we have in the center
and we will be just go and mapping out the
first little line that will help us
to create our ice. We will stop a bit from the center line and we
will have some kind of the one part of the e one size of the
eye right here between Actual yes that we are going
to be creating right now. Let's just make a little
markdown like that, and then we will just go to this line that we
have right here on the top and we will start creating the shape
going in that way. Let you just go and create a curve going down in that way. You can again try out to create a couple of
curves right here, a couple of little lines to map out what you want to
create right here. Will be going toward the
bottom and we will start to elongate the shape and create a very rounded
shape for our eye. Again, just try to create a
couple of lines right here. Try to create a nice
shape right here. If you see that you have some
lines that you don't need, let's just go and erase some of the lines
that we don't need. Just go in there, mapping out our shape and creating
something in that way. When we hand the result like that the basic
shape for our eyes. Let's just go toward
the bottom to this line that we have
right here in green color, and let's just go
and start creating a shape of this iris right here. Let's just go and with one line, create a shape like that. It is our ellips. We'll hold it at the end, and if you see that you
are holding your line, you can just go and
adjust the size to your liking by moving your Apple
pencil from side to side. You also can go and
rotate it if you want to. If it's not enough,
we can just go toward our editing mode
and adjust it from here. So let's again, spend
some time here. You can just take a look at everything from
the distance and find the placement for these elements that you
are creating right now. You can just go and make them
a little bit more rounded, a little bit more
open if you want to. So it's up to you
just position them on one line right here
on the bottom where we have this guiding line
and have some space on the top where we've created this first slide that
we've made right here. Now when we have something
going in that way, you also can go and maybe play around with the rotation
of these elements. You are not supposed
to create these shapes straightly vertical or
straightly not vertical. It's up to you. You can play around with the position
of these elements. Just have some space
right here in the middle. And when you hand the
result that you like, let just tap on the
screen and let just go and work onto this line
that we have on the top, and it is our line for our
little eyelashes right here. Let's just go a little bit
lower than this first line, and we will be
actually going and repeating the overall shape
that we have right here. Just going and creating a
similar line right here, just moving it a
little bit down. Let's just go and
create the shape. Let's just try to make it similar to the shape that we
have right here on the top. When you have this curve, let's just go and
nicely connect it with the first curve
that we have on the top. As for this bottom part, let's just go and create a nice little connection
going in that way, just a picky shape like that. When we have something
in that way, if you see that you still can work on some lines
and maybe some curves and something like you are
welcome to go and do that. When you have something
going in that way, let's just go over the
opposite side and we will create the lines
going in that way. We will create a couple of lines that will connect
our shape nicely. Then let's just take a look at everything and one more time, we will work onto the
sheep to our liking. We also can go right inside the shap and
straightaway shade it, so we are not confused later on what we need
to repeat right here and we can see more clear what we are doing right
here with the shep. Let's just go and very
easily just manually shade this inside part
of the eyelashes. Now, one more time, let's just take a look at
everything without our zoom in and let's just go and maybe
work more onto the shape. Let's just make it a little bit more rounded right
here on the top. If you need to work
with your eraser, just go and grab it, work onto the overlook, try to make it pretty
rounded, right here. If you need to maybe
go inside the shape and work onto the
overall shape from here, you are welcome to
go and do that, too. If you see that
maybe you want to straightaway go and
adjust some parts, we can do it very
easily just by going to our Metric one tool and
go under liquefy it here. We will use the option
push and we can just go to the size slider and adjust the size of the brush that we are going
to be pushing with. And we can just go to
some of the places. And for example, make this sheet that we have
right here on the top, note that elongated, but
more like a rounded shape. You can just go to
some of the places and tweak them and adjust the overall shape to your liking and go
to the size slider, adjust it if you need
to and work precisely onto some of the elements and adjust them to
your liking too. When you're satisfied
with everything here, let's just tap on
our adjustments twice to get away
from this mode. Let's just get back to
the brush and let's continue working onto our
eyelashes right here. Let's just go over the top and
we will create a couple of little shapes of
the triangles and we will be making the
eyelashes going in that way. You can just go with
two of these elements or three of these elements.
It's all up to you. You can go with a bigger
size with a smaller size. Again, just try to create something that you
would like to see here. When we hand the
results like that, let's just go a little bit
higher than this shape for our eyelashes and let's create a little eyelid just in
a shape like that. Repeating the overall
shape that we have right here and creating a
slide curve like that. Now when we have the
results like that, let's also go right
here inside the ice. First, we'll go over
the top and we will create the shape that later on we will turn
into the highlight. Let's just go over
the top and we will create the shape like that. It is some kind of an
oval shape right here, but it's a little bit
bigger on the bottom, so there is a bit
more convex curve. When we have it, let's just go a little bit lower
and let's create a big sparkle like that right
at the middle of our shape. You can just play
around with the shape. You can just try something
different right here. If you want to create
a different shape, just go with the flow and create what you
want to create here. When we have the
results like that, let's just go over the
top and let's just start creating our shapes
for the here. Firstly, we are
going to be working with the symmetrical elements, so we are not going
to be creating the top part of the
here straightaway. We will go to the
sides and we will start working with these
elements right here. Firstly, let's just go and map out where we are going to be starting to
create our here. It will be this line that we
have right here on the top. We will step a bit from it, so just slightly down and we'll make another
markdown like that. When we have it
from this markdown, we will be going toward
the sides and creating the rounded shapes right here that we will turn into our here. Let's just go closer to the sheet that we
have for our face, and we will start creating
the shape like that. When we have the
shape like that, let's continue going down and we will be just
starting to go and creating the curve
that firstly will go toward our shape of the face. So what we need to do
is to create a very, very smooth curve, and it will go more toward the shape
of the face right here. So you can just go a little
bit higher than this line that you have right
here for your chin. And we will just go straight
underneath our eye, and when we have
this first shape, you can just go and
maybe make the curl a little bit more toward
the eye like that. And then we'll just go outside and create a shape like that. We will have to add a bit of the weight right here
onto this element. So we will be just creating a very rounded shape
right here for this curl. Let's just go and
create something going in that way, again, working onto the curveness of this element and when we have something
going in that way, let's just go a little
bit to the side and we will just continue creating the shape going up in that way. We will need to create a
smoother shape going up. You can make it quite parallel to the first
curve near the fish. So when we have
something like that, let's just grab our
eraser and we will erase all of these
unnecessary lines. So just boldly go there and erase all of the parts
that are overlapping. So just clean up your
illustration right now. If you have some
lines that are going to the fish or
some other shapes, just go and erase
them and create a clean look for this element. Now when we have something
going in that way, let's continue by going and
creating other elements. Let's go to this
first element that we've created on the
top and from this ship, we will be going toward the side and we will be creating
our head right here. So again, just go
in the same way as we did with the first
curl right here, paying attention more
toward the ship on the top, where we have the intersection
between the side. So just go and creating the
shape going down in that way. We will go pretty close to this first shape
that we've created, just go in there and
creating this very, very nice and smooth curve. When we have it, we will
go towards this land that we have right
here for the fringe or a little bit higher than it. We will just go and maybe
erase this little part right here to just create the
angoon in that way. When you stopped at
this little please, let's just go and start creating the curl going a little bit
toward the different sides. So we'll be just creating a little dent right here
that will go in that way. Let's go and erase the
parts that we don't need, just go in there and erasing the lines that we are not
supposed to have right here, working onto the
smoothness on this line, so just creating a
couple of more lines right here and creating
something in that way. If you need to work a
little bit more and create more of the
smoothness to the line, you are welcome to go and
work on the overall shape. When you are satisfied, just go again to the brush
and just go and start creating some
peculiar shapes right here to create some
additional elements. When we have the
result like that, let's just go and start creating a little curl going in that way. We will just go a
little bit closer to inside part and just creating something
going in that way, we are creating again some
weight on the bottom part and we are creating
a flatted shape right here on the side. And when we have something
going in that way, let's just go and create the
curl going inside like that. Again, just creating a smooth connection
between the shapes. When we have something
going in that way, let's just go down to
this line where we have our waist and we will create another curl of a bigger size. You can go a little bit
beyond the frames of your first sheet that
you've created right here and just go and create
something going in that way. We will just need
to go gradually Start creating the lines that later on we will turn into a here and they will look pretty much as the Christmas tree. So now when we have
something going in that way, when we have the
result like that, let's just go again
toward the bottom and we will create another
little shape right here. So firstly, let's just go and mark down where we
are going to be finishing up our little
shape for the here, and it will be some kind of the center of this little
part on the bottom. When we have it, we
will just need to go and create another
curl like that, creating another smooth
shape like that, and when we have something
going in that way, let's just take a look at
everything from the distance. When we have the
results like that, we can see that these shapes are pretty similar
to one another, so we can just go and adjust
them with our liquefied too. Let's just go again
to our adjustments, liquefied to push option, and let's just work onto the overall shape that
we have right here. Make the size of the brush
a little bit bigger, and let's just start from
the top and we will be just going and creating the
shape going in that way. So just pretty triangular
shape on the top, and then we will be just
going to the scurls and we will be making this one on the
top, a little bit smaller. Let's just push it a
little bit toward the top. And these parts that we have
right here on the bottom, we will make in a big way. So let's just go and start going outside the shapes and
let's just go and work onto the shapes and create the gradually sized
elements right here. So let's just go and
start creating something. In that way, if you want to
play around and maybe try to create a different shapes for your little
curls right here, you are welcome to
go and do that. You can create some
little dents inside the shape so they will look
a little bit more smooth. You are welcome to
create something that you would like to see here. When you are satisfied with
the overall shape right here, let's just go away
from our adjustment. So tapping twice onto our shape, and let's get back to our brush, and let's continue working
onto other shapes right here. So firstly, if you want to maybe manually go and
adjust some outlines, you are welcome to
go and do that. You can just go and create a smoother line
right here outside. So just work onto the oral
shape if you need to. And let's just go toward this
first element right here, and we will add a little cut
right here inside the shape. So we will have a peculiar
shape here for the side part. So let's just go a little bit closer toward this edge
that we have right here, and we will basically repeat the sheet that
we have right here. Creating the similar curl, and then we will go toward the inside part and we will create a curl
going in that way. Creating some kind of a cut with a very smooth
lines right here. If you want to go
with a bigger shape or with a smaller shape, just go and try it out
a couple of times, find what works for you, try to make nice connections
between the shapes. When we hand the
result like that, let's just go and work more on at this little
part right here. We want to create another
curl going down in that way. So let's just get back to
a brush and let's just go toward this shape
that we have right here on the top and
from this shape, we'll be just going down and creating the curl going
down in that way. So we'll just
elongate this shape, and we will go toward
this waste element, waistline, and we will be just going with a curl
going in that way. So just create a bigger shape right here and
continue creating it, going down and make it
looking outside at the end. So just going in there and
creating the shape like that, you can try it out
a couple of times, try to create it in a nice way. Try to make it very,
very soft right here. And when we have the
results like that, let's just grab our eraser. We will go to this line
that we have on the top, and we will erase this little part right
here so we don't need it. We will be just going with a
different shape going down. So we will need to
erase this little part right here to add some
thickness to the curl. When we have something
going in that way, let's just go toward this little part that
we've just erased. We will go toward the soap with our first curl right here, so just creating a nicer and more rounded
shape right here, create a line going
up in that way, erase the part that
you don't need, and then let's just
go and connect it with this second curl
that we have right here. Just go a little bit higher
than this connection and just going down and
repeating the shape that we have right
here on the bottom. Again, try to add a bit more
of the weight on the bottom, so you will have a wider
shape on the bottom than it is on the sides and
on the top right here. If you need to go and
erase some lines, go and erase them, make this part a
little bit more flat. As for this part right here, let's just go and add
some thickness to it too. So we'll be just going
toward this little part and we will go on the top to
add some thickness to it. So let's just go and
create something. In that way, if you have some lines that you
need to work on, maybe erase, let's just
go and erase them. You can just go and work a lttle bit more onto this shape, maybe make it a little
bit wider right here. The overall shape will be a little bit bigger
for these elements. When you have something
going in that way, you can just grab an eraser and erase the parts
that you don't need. Go to the bottom too if you want to work onto these
little parts and erase all of the
unnecessary lines right here too to make a clean
look of your sketch. Now let's just take a
look at everything here and maybe let's just go
again to our liquefied two, and let's make these shapes a little bit more
toward the centers. We will just dreg them a
little bit toward the center. We will have some space right here between the first element that we have created as our curl and our
little cut right here, and we will put a little ear right here to these elements. If you want to work on
some other elements and maybe adjust the curls, the overall shape of them, you are welcome to
go and do that. When we have the result that we like, let's
just go again, from this mode, and let's go toward this line
that we have right here. Maybe we thicken it a little bit up and we will erase the
parts that we don't need. We will have some space to
add our little ears right here to make a very,
very cute illustration. Let's just go toward this line
that we have for our eyes, the bottom part and we will put just a little
ear right here. Get back to the brush first and just create a rounded
shape right here. You can just go and try
it out a couple of times. It's up to you. Let's just go and create an ear
going in that way. You can go with a
bigger shape or with a smaller shape,
it's up to you. When you hand the
result like that, let's just go and
continue working on our here by going to the second curl right
here and adding a few more lines going
from this little curl. We also can start by going
toward the ear that we have just created and just go down with a curl
going in that way. Let's just go and add some
thickness to this element. When we have something
going in that way, let just go toward this curl. If you have some lines
that you need to erase, just go and erase them. Then let's just create the continuation of this
little partridge here, so go inside the shape and then just creating a little
shape like that. If you want to work with
smoother shapes right here, not with a very pointy
elements for the curls ends, you are welcome to go
and turn them into some soft corners
right here instead of the very straight
ones, it's up to you. Just play around and
find what works for you. If you want to add a bit more on the thickness right
here on the bottom, you are welcome to create
it just by going manually. Add a bit more of the
weight on the bottom. And if you have some elements
that you need to erase, just go and erase them. Let's just clean up our shape and let's just take a look at everything from the distance. You also can go from
side to side and see more clearly what you
are doing right here. So if you just want to go
and adjust some elements, you are welcome to
go and adjust them on either side right here. When you have the
result that you like, let's just go and work onto
the bottom part of our here. Let's just go toward
the bottom part and we will go to
the sides right here and let's just go and work and create the part going
in that we suggest, softening up the
corner right here and just going up with a
little shape like that. Let's just go and maybe
connected in that way, creating some kind
of the softer shape, and then let's just go
and continue going toward the middle part and
creating a couple of more lines going in that way. We are trying to create the shape that will look like the bottom
part of the tree. We will just need to go with
a differently sized elements and create something in that. You can just play around with
a couple of these elements. You can just maybe
make a bigger cut right here between the shapes, try it out a couple
of more times. If you want to just create something that you would
like to see here and that would resemble some kind of the bottom part of the tree. We'll just need to create some fluffy parts right
here on the bottom. Let's just work
more on the ship. Just go not with
the straight line, for example, but create
some kind of a curfr here. So go up with some of these little parts and
create something very, very smooth and very, very nice. Let's just go and map out
what we are doing right here. Let's create some little cut
here to make some interest, to add some interest
to the picture. When you have something
going in that way, let's go and work on the body.
3. Body Sketch + Finalizing the Hair: So firstly, let's
just go straightly underneath the head that
we have right here, and we will start by creating
a little bow right here. Let's just go toward the center line that
we have right here and let's start by creating a shape of the circle like that. Create it in that way, and then we will go toward the side, and we'll be creating some kind of the shapes of
the little heart. So if it's easier to you to
ratch the canvas right here and to adjust the shape going in that way, let's
just go and do that. Let's just go and create a
very soft shape of the heart. You can make the bottom
part a little bit bigger than top part and work onto the connection right
here between the shapes so it will look very
smooth and very nice. Let's just take a look at
everything from the distance. When we hand the result that
we like, let's just go. So we're in the
sides where we have our little peculiar
shapes right here, and let's just go and add this little fold that we
will have onto our bow. When we hand the
results like that, let's just go to the sides, and let's create the loose ends right here to be
just going there and creating some kind of the shapes like that
going up in that way, working onto the thickness
on the elements, working onto the
connection right here. If you have some lines
that you need to erase, just go and erase them. As always, take a look at
everything from the distance, decide whether you maybe want to adjust some parts or notes. If you are satisfied
with everything here, let's just go and continue
creating our body. So firstly, let's
just go to word our e right here to
the inside part of it, and from it, we will just create an invisible line going down. If you want, you can
just go and create a little markdown that will be pretty
invisible right here. And when we have this markdown, we will go from the sheet
that we have for our head, and we'll be just going
down and creating the shep of the little
shoulders right here. Let's just go and create
it going in that way, we will go a little bit more
toward the inside part. When we hand the
result like that, let's just go and start creating little elements that
we use for our dress. Let's go closer to our
little bow and we will start creating the shape that will go down in a way like that. It will be our body. Let's just go and make it a little bit rounded right here. If it's overlapping our
overall shape of the bow, it's okay. We can
fix it later on. When we have the
body part like that, let's just go toward this little part where
we don't have anything, and from this little
part, we will go up and we will create a
little shape like that. So just a very rounded
rectingle and we also need to finish
up the shape by going toward this little shape
right here and going inside the shape to this
shoulder that we've created. Let's just work more once
at this little part, and when we have something
going in that way, let's just go down and we will continue creating the
line of the shoulder. Again, just mapping out where we need to
continue creating our shape and creating a little line going
down in that way. When we have it, let's just keep everything
as it is right now and work on our little
skirt on the bottom. We have these lines that
we have for the body. We are going toward
this line where we have our waist and from
this waistline, from these little parts that
we've created for our body, we'll be just going down and creating the
curves like that. Again, we are trying to
add more volume toward the bottom part and we are creating something
going in that way, going toward this line of the dress with these lines,
and when we have it, we will just go toward
the bottom and we will create a curve right here
to finish up our dress. You can go with a more
wider shape right here or maybe with a
more rounded shape right here, it's up to you. When you hand the
result like that, let's just go and
create another line on the bottom to finish up the
oral shape of the dress. Just creating the similar line to what we have on the top. Again, if it's easier for you, you can just rotate
your canvas and work with this line just
by going in that way. Just go a little bit beyond the first line and when we have something
going in that way, let's just go to the sides and let's create the continuation of the shape right here
in the shape of half of the ellips or
half of the circle. If you have some lines that
you need to adjust or erase, let's just go grab our eraser and work onto the oral
shape right here. So we will clean up the
oral shape and create a nicer shape for the
overall shape of our dress. When we have the
results like that, let's just go and
work onto the legs. So let's just wear this middle line that
we have right here, and we will be going
toward this line that we have right here
as our little skin. Let's just go and start
creating a little curve going a little bit toward this side
from our little middle part. So just a very, very
slight curve like that. When you have something
going in that way, let's just go toward
the opposite side and let's create the similar
shape right here going down. Work onto the oral
shape if you think that maybe you did the
curve right here, you are welcome to go and
change it a little bit. If you don't like how it looks, if you want to go maybe
with straight lines, you are welcome to go
and do that here too. Create the shape
that you would like to see right here for the leg. You can just go and
play around with the oral shape with the
thickness on these elements, with the thinness
on these elements, with everything that you want
to play around with here. Pay attention to
this bottom part right here and create
some soft curve. You can just go with the
rounder shape or with a shape of half of the circle or the shape of the very
roundorictingle here. You also can go and erase these parts that you
don't need to clean up the overall look of the cage and take a look at everything without these additional lines, and maybe you will see
that you will need to adjust some parts
without these lines. So let's just take a
look at everything. Let's decide whether
we maybe want to work more onto the legs and
let's just work on them. Now let's just go and get rid of all the lines
that we don't need, and let's add some accessories to our little legs right here. Let's just turn them
into the boots. We will first go toward
this line that we have right here as our
back part of the hair. We will go a little
bit lower and we will just go and create a
curve going like this. When we have it, let's just
go outside the shape and just go and start creating some fluffy part right
here on the top. So just create a
shape of the cloud. Let's just go and close up our shape and work onto the overall shape
of this element. Maybe you want to make it a little bit bigger or
a little bit smaller. It's up to you. If
you want to go and erase these lines that you
have right here inside, you are welcome to
go and erase them. Again, let's just take a
look at everything without our lines that we've just
erased and from the distance. If you need to go
and maybe erase some parts or work
more onto these parts, you are welcome to go and adjust these parts
to your liking. Let's just spend some time
here and adjust these sheps. When you are satisfied, let's just go and continue working on our arms right here. Firstly, let's just go and create a little shape
right here inside. We will be just go and creating a little heart right here. Let's just go and start by
creating the shape like that, very rounded heart right underneath our little
bow right here. And when we have the shape, let's just go and continue
creating our little arms. So firstly, we will go toward this little part that
we left right here, and we will go more toward the bottom and create another
shape of the rectangle. So let's just go and create
something going in that way. Just creating a soft
rectangle like that, just trying to match it with the previous
shape right here. And when you have the
result like that, let's just go toward this end
that is inside the shape, and let's just go and create a more rounded rectangle
here in a smaller. Just create something
in that way. Connect it nicely with the shape so you don't have
a big dent right here and erase all the lines that are overlapping
and that we don't need. So with our eraser, let's just go and erase the
parts that we don't need. You can adjust the size of
the brush that you are using for your eraser and adjust
the shapes with more es. You also can go a
little bit higher and erase these little parts
onto our bow if you want to. We also can go and finish up
our dress just by going to these little parts and creating a little line going towards
the middle shape right here. If you want, you also
can go and maybe add a little strip right
here on the top. So we will have the top part
of our dress on right here, and then let's just move on to these little parts that
we have right here. We will step a bit
from these shapes. We will create two more
little lines like that, and when we have
these two more lines, let's just go and create
another line going in that way, a little bit bigger than this
shape that we just created, and we'll be just going and creating a little mitten here. Let's just go to
where the side and we are not going to be
creating it in a straight way. We will go a little bit higher. Let's just go and start
creating it in that way, going a little bit up and creating the
shape like that and then just creating
the rounded shape right here on the bottom. Again, paying more attention toward this little part where we have creating the
intersection between the ship. Create it in a way
that is looking nice. If you want you can overlap the hard just a little bit so you don't create unnecessary tension right here between the ships. Then let's just go and continue creating our meting right
here on the bottom. Just go in that way, take a look at it
from the distance, if you want to maybe go and adjust the overall
shape right here, you are welcome to
go and do that. If they are still
looking quite straight, we can just go again to our favorite liquefied
tool and use our push option to adjust the
orall shape of our hands. Let's just go a
little bit higher and create the shape
going in that way. Our metans will go a little
bit on a diagonal axis. We also can work on these shapes that we have right here
for our elbows and just move them a little
bit down to create this diagonal effect
onto our arms. If you want to
work on some other areas with the liquefied tool, you are welcome to
go and do that. When we hand the
result like that, let's just get back
to our canvas. Let's just take a look at everything that we
have right here, decide whether we want to
adjust some parts or not. When we hand the
result like that, let's just go to our dress, and let's just go and add
some beautifications here. Let's just go and
create some pockets in the shape of the holy ellips. Let's just go toward this
little part right here. We'll go a little
bit higher than this land that we have for
the bottom of address, and we'll be going with little
shapes going in that way. You can just play
around with the size of these elements with the
thickness with everything, creating the shapes like that, trying to make
them on both sides even and trying to match
them on the bottom too. If you need to go and erase some parts with your eraser,
just go and do that. Again, take a look at everything without the lines of the sketch. If you are satisfied
with the shape, let's go right to the
middle shape right here to the middle line that
we have right here and let's create a little
bell right here. We will be just go and creating the shape
going in that way. Again, half of the
ellips like that. Then we'll go toward the
bottom and finish up our shape just by creating
a little curve right here. Then when we hand the
results like that, we'll go underneath and create
a little shape like that. On the top, we will go with similar shapes to what we
have right here on the bow. Let's just go maybe a
little bit higher and create these hard shapes
right here on the top. Just play around with
the overall shape. If you want to add more
details to this element, you are welcome to
go and do that. When we hand the
results like that, we will need to go toward
the top and create a little accessory here too and this accessory will be in
the shape of the star. Let's just go a little bit lower than the top part that
we have right here. We will create a
little markdown, just a slight curve like that, and then we will go up and create a rectangular
shape like that, going a little bit above the overall shape that we
have right here for our hair. When we have it, you can just go and erase this little
part right here, and when we have something
going in that way, let's just go and
work onto the star. Firstly, let's just go and start creating the
line going down in that way and we will create a very rounded star right here. So if it's easier
for you to just start by creating some
elements going in that way, just map out where you
are going to be creating these sheeps and let's just go and work onto the oral sheet. We will be working
with our corners and turning them into
the very soft curves. So just map out everything
that you need right here and let's just go and start creating our star in that way. We will need to create the straight lines
right here on the side. Let's just go and create it in a couple of differently
shaped lines right here. If you need to go and erase the parts that you don't need, let's just go and ease them. Let's go and maybe work
onto the overall shape, maybe make it a
little bit thicker, go and connecting
it on the bottom to erasing some parts
that we don't need. So just creating the shape, working on it, creating
something very, very smooth and very, very nice. Let's just go to the
top part and maybe adjust it a little bit just by going with a thicker
shape going up. So just spend some time here and adjust the star
to your liking, create a nice shape
right here on the top. Work with your brush,
work with your eraser, try to create a nice
shape of the star. Again, if you feel that maybe the liquefied tool will help you with creating this element, just go there and adjust
the shape to your liking. You can adjust the size of your brush and work with a smaller one or with
the bigger one. Take a look at everything
from the distance, decide whether you maybe want
to adjust something else. Let's just go and create
something going in that way. And when you are overall
satisfied with everything here, let's just go away from
our adjustments if you were inside the
adjustments let's just go inside the star
that we have just created and we'll
map out what we are going to be on the part where we are going
to be creating our colors. So first, we'll go and create the triangular shape
on the bottom, and then we'll go
toward the side and we will continue
creating the lands gone in that way and
just creating some kind of the skeleton of
the star in that way. When we have everything
in that way, if we don't have any more
elements that we will need to create in a symmetry tool with the help of
the symmetry tool, we will just go and turn it off. But probably let's just go and maybe work more a little bit onto this sheet
that we have right here on the bottom
with the curls. Let just go and make this part a little bit bigger
and work onto the oral sheet so we won't have a lot of free space right
here on the bottom. So let's just go and turn it into a bigger crew right here, working onto the oral shape, working onto this connection
that we had before, creating the shape that we
would like to see here, working with our brush, and with our eraser, again, trying to create more weight on the bottom than on the top. We also can go to this little curl that we have
right here on the top and maybe thin it up a little bit and have more
space for the ear. Let's just go and
maybe adjust the sheep just a little bit by creating
a new line right here, erasing the line
that we had before. Just thin the overall
shep like that and maybe move the ear a little
bit closer to where the face. So it is not that
positions weirdly. Let's just go and create
another shape of the erred here just closer to the
shape for our head. When we hand the
results like that, we don't have any more details that we need to create
with the symmetry tool. Let's just go and turn it off. We just need to go to our list. We'll tap on the
layer where we have this assisted little
tool and we will just turn off drawing assist
by selecting from the list. Now when we have the
result like that, let's just go and work on
some other areas and firstly, we'll just go and start
creating our fringe read here. Let's just go toward
the left side first. We'll go to this line
where we have our fringe. Just go in there and
creating something in that way and when we
have this first curl, let's just go to
the opposite side. Go and toward this line that
we have for our fringe. Creating a smaller and
rounder shape like that. When we have the first
element, if you want, you can go with a bigger
shape right here, so just go to the side and
create something in that way. When you have this first curl, let's just go step a bit from the side and let just go toward our main shape of the here and we will create
another curl right here. To finish up our fridge. So again, just pay attention to the position of this element to the overall shape right here. If you want, you can just
go grab your eraser and work onto the oral shape
just with your eraser. If you have something in that
way where there is no space between the little
eyelash that you've created and the shape that
you've created for the fringe, you either will need
to go a little bit lower than this shape that
you have on the bottom, the shape of the eyelash
or a little bit higher, you will have the space
right here and you won't have the unnecessary
attention to the elements. Now when we have something
going in that way, let's just go toward this
little part right here and maybe create it in a more different way
right here on the top, just a slightly bigger
curve going up. When we have something
going in that way, let's just clean up
our sketch right here and we will go toward
this little land that we have right here and
we will be just cutting this little part right here
just by going along this. We will have some
lines on the top, so we will have some kind
of continuation on the top, and we will just go and create some kind of a dotted
line like that. So just follow the
existing line and make some cuts in it to add
some pretty effects. Now let's just go along the shape and erase
some of the elements. If you see that maybe
you want to go along the lines and work on the
overall shape of the curl, you are welcome to
go and adjust it, maybe go a little bit closer to where the shape,
it's up to you. When we hand the
results like that, let's just go and add a
few more beautifications. Firstly, let's just go to our left side where we
don't have anything right here and we will put the little ball right here
in the shape of the circle. So just with one line creating our shape, holding
it at the end, we will hold one of our
fingers on the screen, we'll adjust the size. If you want to adjust the
position of this element, go to the 18 mode, find the
placement for this element. If you are at the editing mode, and if you want to go and
make this shape bigger, you are welcome to go
right between the nodes, hold your Apple pencil there, and just drag it outside. So now just take a look at
everything from the distance, decide whether you
are satisfied with the position of this element
right here when you are. Let's just tap on the screen and let's just go toward
the opposite side, and let's create a
help right here. We'll be just going toward this line that we
have right here for the inside part of the hair and we will just go with
the shape like that. When we have it,
let's just go up and create the similar
curve right here, when we have it just
going toward the side, creating the continuation
of the hair right here, the closing parts right here, and when we have this
bottom part of our head, let's just go and start
creating the top part. Just go in there firstly
over the left side and then going toward the top,
creating the lns going. In that way, you can just
work on the overall shape of the head to your liking you can make it a little
bit more open. A bit. Let's open
it's up to you. Let's just go with
the overall shape like that and go inside the shape right here and finish up the shape
going in that way. We also need to go right
here to the side and create a little fold right here to just see that we are
creating a fold. When we have something
going in that way, just go to the tip right
here and let's just create a fluffy part right
here as a little pompo. You can go just
with the shape like the circle right here or with the fluffy part,
it's up to you. When you have the
result that you like, let's just go and erase all of these lines
that we don't need, just with our eraser, going along the
elements that we don't need right here
and erasing them. Let's just do the same on this little ball right here too, and also for the ball,
let's just get back to it, and let's just go and add a little beautification that
we will create later on, and it will be in the shape
of some kind of a chin. Just go there and create a little shape like that
that will go a little bit beyond the frames and go toward the back
part of our head. When we hand the
result like that, let's just go and add a
few more beautifications. Let's just continue working
onto the top of our shape and let's just go to the top between the star and the bull. Let's just go and
create a couple of holy leaves here too. Firstly, let's just go and
create two circles like that, one bigger, one smaller, going a little bit to the side of our shape right here
to the inside part, erasing the parts
that we don't need. Let's just go and create three little lines going
in different directions. Just starting by creating a little shapes
going in that way. When we have something
going in that way, let's just go and
create a similar shape to what we have onto our pocket. Again, you can play around with the thickness of these
elements and with the amount of these
little shapes that you are creating,
just pay attention. So these little elements
are even on both sides. Just create the first one and go and create two
more on the bottom. Again, just do the same
thing as you did before. If it's easier for you
to rotate the canvas, just go and rotate it. Just create something very,
very nice right here. When you have the second leaf, let's just go and create
the last one right here. Again, if it's easier
to rotate the canvas, just go and rotate it. Do the same on the
opposite side too. If you've created
your element and if you don't like the position
or anything right here, we can either go again
to our liquefied tool and try to adjust it
with our liquefied tool. Or if you want, we can just
go to our ribbon icon, free hands method and we can
just go along this element. We can select only this element. So just loop in
the shape around, and when only this
element is selected, we will go to our
Aoki and we can just go to this
green note to rotate this element or to just position it differently
in a different way. So if you want to
make it bigger, you are welcome to go to one of the nodes in a corner
and drag it to the side. Just find the placement for this element, find the position. If you want to maybe rotate it, just go and rotate it. For example, we can just go with a differently positioned
shape like that. We have more space on the top, and we will have more
leaves on the top. So let's just go with
a shape like that. Let's just when we already tap on the first
icon that we were using, it was our ribbon icon. And if we have some elements
that we need to recreate. So for example, this
little part for our head, we'll just go and
manually do that. When we have the
result like that, let's continue by going and working with our ship
right here on the side. When we have our little fringe. Let's just go and
create a little clip right here in the shape
of the candy cane. Let's just create two
lines in that way, the straight one will create a nice continuation right
here on the bottom, and then we'll just create a rounder shape right
here on the top, and we will work onto
the thickness of this element and create
it on in that way. Let's just go and erase all of the overlapping parts
that we don't need. And if you want you can
just straightaway go and maybe add some little
stripes right here so you don't forget
to add them later on when we are going to be
creating the coloring parts. When we have something
going in that way, let's go and add a few more additional elements
on the bottom. So for example, let's just go underneath the ear
right here or to this little dance right here
and let's just go and create a little shape of the
little bow right here. The same way as before,
just go in there and creating the hard
shape on the side, you are welcome to create a bigger shape or
a smaller shape. It's up to you erase the
lines that you don't need, and just work with your
eraser onto this element. If you want to go and maybe create the loose
parts right here, you are welcome to
go and do that. We also will go toward
this bottom part of the dress right
here and let's just go and create another
bow right here. Again, just starting from
this little shape on the inside part and creating this hardship on the
outside helmets. Let's just go and
create it in that way, you can go with a
bigger shape or with a smaller shape,
it's up to you. When you have this bow, let's just go and add a
few more beautifications. For example, let's
just go right here to this dance or a little bit
higher than this dance, and let's create another
little bell right here. Let's just go the
same way as before, just creating half of the
ops on top like that, working onto the bottom part
by creating another curve, going and creating
this little finger on the bottom, firstly, going and erasing everything
that we don't need, and then just working
onto this shape on the top and creating
this little bow. So when we have the second ball, let's just go and create
another ball right here. For example, you can go and
create some other elements. You can work onto the
sizes of this element, onto the position
of these elements. You can go and create
some other details. If you want to, you can
go with some sparkles, maybe with some little dots, maybe some little small
balls right here, maybe with some stars. For the star, we can just
go and create it just by holding our Apple pencil at the end of the line when
we've created our star, we can just go to
the editing mode and adjust it or later
on if you want, we can just onto the stars with the
brush, the special one. So if you want to just map out where you are going
to be creating the stars, you are welcome to go and
do that just manually, and let's just go over
the opposite side, and let's create a couple more of the additional
elements here too. For example, let's
just go right here and add a little ball
right here again, holding our Apple pencil, holding our little
finger onto the screen, adjusting the placement
of these elements, working on set the
beautification right here and
adding a couple of more elements that we can use right here for
beautification part. Just position them nicely, erase the parts that
you don't need, just work onto the
elements right here. If you want to go and maybe add a few more little
lines that later on will turn into the chains
or something like that, let's just go and work on them, map out where you are
going to be creating them. For example, on one
side, on the other side, something in that we also can go a little bit inside the parts that we have right
here for our waist and for our outside
part of the dress, and we can add some
beautifications here too. Let's just go underneath
our little mittens right here and let's just go and create a couple of
lines like that. On the bottom of
these little lines, we will just go and create
two pump pumps like that. You can go with a
different size for them or with a bigger size or smaller size, it's
all up to you. If you want to go and maybe add a few more
additional elements in the shape of the little
sparkles or hearts, go and add them to these
blank spaces to fill up the areas that you
have right here on the here and overall
your illustration. Let's just go and add
a couple of more of these additional elements
to the blink spaces, some sparkle, some little maybe stars or
something like that. And we also will
go toward the top. We will take a look at
everything right here, decide whether we are satisfied
with everything here, and let's just take a look
at everything without the lines that we
have for our guides. Let's just go back to our
list and we will tap on this little check
mark right here on our little layer with our guide. We will just hide this layer. We'll take a look at everything and decide whether we want to adjust some parts or
not with our liquefied. Firstly, let's just
work with our liquefied two on the little shapes
that are symmetrical. So we'll just need to get
back to the slate, tap on it, and select our drawing assist and then go again
to our adjustments, liquefied two and work onto some of the areas
with our push brush. Let's just spend
some time here and adjust our little
girl a little bit, so it will look a
little bit better if you have some elements
that you want to adjust and then we will work on some other elements
without the symmetry too. Let's just spend
some time here and adjust our little
shapes right here. So when you join adjusting
the symmetrical parts, let's go back to our top on the leave where we have this
assisted little thingy, and we will turn our assisted
drawing from the list. Now, let's just go again to our liquefied tool and continue adjusting some
of the elements if we want to adjust them
just by going and very freely adjusting them
with our liquefied two. So again, spend some
time here if you want to adjust some parts and
adjust them to your liking. When you are satisfied
with everything here, let's just go away from our liquefied tool and let's just go to
brush one more time, and we will go to
this little space that we have right here and let's just go and
add a little bra right here, going in that way. We also can go and work on some other elements
if you want to adjust them or just go and
add a few more details. But mostly what we need
to do next is to go and position everything right at the center the same
way as we did before. So make sure that this
layer is selected and go to the AEO
key uniform method, snapping is on, and we
are again looking for these two orange lines to position our illustration
right at the center. Or we can go to the middle
node on the bottom and drag it down to just make the illustration bigger
without moving it. Now when we have the
results like that, let's just go away from
our o key and let's move on to our
next part where we are going to be edging
our clean lines.
4. Clean Lines: Symmetrical Parts: Let's begin our line in part firstly by going to
our brush library, we will go to the inking folder and we will select
technical pen brush. If you want off our lines
to be very, very smooth, we can just tap on this brush, go inside the brush studio, go under stabilization
on the left, and play with amount of streamline and amount
of stabilization. You can tweak this
option to your liking. You can go to the drum pad
and decide whether you want to adjust something
in any other way. Remember that you can always
get back to this option later on if you
want to adjust it. When you are done,
let just hit done, and then let go back to
our layers and we'll go to this layer where
we have our sketch rolled up on the icon, and we will go to the
opacity ladder and adjust the opacity to the level that we would
like to see here. When you are satisfied
with everything here, let's just tap on the lay and let's create one
more layer on top. And as we want our little shapes to be mirrored on
both sides evenly, let's just go and turn
on our symmetry too. Let's just tap on the lay and we will go and select
a drone assist. Then if you were selecting
the different color, let's just go and pick up
our dark purple lines color. We'll go and figure
out what kind of size of the brush
we want to use here. If you want to go with
something else a bit bolder, you are welcome to
go and do that. Then let's just start creating our little lines right here. We will be starting by creating all of the lines that
are symmetrical, and we don't really
need to repeat everything with 100% of
similarity right here. If you want to
adjust some parts, you are welcome to go
and adjust these parts. You can use all the options
that we used before. So you can just hold your
line and the end and adjust everything that you
want to adjust right here. Maybe you want to try
out something different, maybe just experiment a little bit and create
something else. Just make sure that
you're creating nice lines right here and
they are closed and smooth. Let's just go and
start by creating these lines onto our
little here right here. As you can see, as we are using our brush with the pressure, we can just go and adjust the pressure while we are
creating our lines and we can create them in differently
sized elements right here. We can just push a
little bit harder to our Apple pencil
and we can create thicker lines or more
interesting lines. So let's just continue by going there and we will
be just strateging Cas because it will
be easier for us to just navigate through the
illustration right here. We'll just need to pay
attention to the connection between the lines where we
are creating the connections, and you don't need to create the lines
just with one line. You can just go
and nicely connect the line where you
are some kind of rupturing it and just create a nice connection there and
make a smooth line like that. So let's just go and start recreating all of the lines
that we have right here, creating something similar
to what we have on the sage. Or, again, if you want to just find something
different right here, you are welcome to go and create some differently shaped
lines. It's all up to you. Work with your brush,
work with your eraser, use all the options
that we used before, and just recreate what you have right here for your lines. Again, if you have
some little gaps when you are creating the lines, work on them manually, work with your brush,
work with the eraser, try to achieve a smooth
look into your line, your line should
not have some bumps or some not so
pretty wobbly parts. Let's just continue by going and creating the line
going up like that. Or if you just creating
different lines right here, you're welcome to just start whenever and wherever you want. And just start to
create the lines. And our main goal here is to create the lines
that will be closed. That means that we
don't have any gaps in the lines that will
be outside the sheep. You can just create some
little gaps in the lines right here on the inside parts that will be okay.
We can fix it. But pay attention to
the outside lines. These ones should be closed. So just basically
recreating all the elements that we have on layer
with our sketch, adjusting some
parts, we can just go and maybe tweak some
elements right here. If you see that
maybe you want to go with a differently shaped
element, just go for it. Use all the options
that we used before. And again, when you are
creating the lines, try to pay more attention on the lines that will
be on the bottom, on the weight that we
are creating that we are attaching to our
little shapes right here. So just try to
create them in a way that they have more
weight on the bottom. Also, as we right now creating the elements that are
only symmetrical, we can just go above
these parts where we have additional elements
because we are going to be creating them on
a separate layer. So for now, just don't
pay attention to them. Just go very boldly
along all the lines that you have right here and go above these elements that you have
on your sketch and just create the lines that will be closed and will be smooth
and everything like that. When we have our main
shape of the hair, let's just work on
these little parts that we've created on our skage. Again, if you want to
adjust them in any way, you are welcome to
go and do that. Just try to make
nice connections that will look like they belong here and just create
the cuts that will look nice. Again, if you want to maybe
try out something different, maybe try out different
shape for these parts, you are welcome to
go and do that. Also, it's always good to create the very teepy
points right here on the outside parts
and just create them in that way because
it will look nice. And just create the
lines that will be outside a little bit
more in a thicker way. Again, we can use all the
options that we used before. So if you want to
create the ears by using the editing tool, you are welcome
to go and use it. If you want to add some
details at this stage, you are welcome to go and add these little details that
you want to add right here. Just for now work onto the
elements that are symmetrical. Again, when you are
done with one element, move on to the next one, continue creating your shapes, pay more attention
to the connections between the shapes that you are creating and try to make these connections
nice and smooth. You also can just
go to the bottom, for example, and create something different
here if you want. You can just go maybe with a different pattern for this
little parts right here, maybe explore something
different right here, create different
shapes right here if you want to create
something that you would like to see here
and remember that we will need to create closed
and smooth lines. Let's just go towards this sheet that we have
right here as our legs. Let's not close it right
here and let's just go and continue creating our lines
right here for our legs. So go to these little parts and connecting them nicely
when we have the first line. Let's just go to the
opposite side where we have our legs and let's just go and create this little
leg right here. Don't go too thin with your line where you have the connection
with other elements. So try to create an
evenly thick line. And when you have it,
let's just go and recreate these little
parts that we have right here for these
additional fluffy parts that we have on our boots. So let's just go
and recreate them. Again, you don't need to create everything just with one line, create a couple
of lines and make nice and smooth
connections between the shapes using your
brush and your eraser. When you have this shape, you can just go and
maybe try out to create the shape on the
bottom just with one line, hold it at the end. If it doesn't look right,
just go manually and create the elements
that you have right here just with your brush. Always rotate your
canvas and it's also very good to take a look at your illustration from the
distance to see whether you like what you are doing or
whether you have some spaces, some little places
that you will need to adjust or maybe try out
something different right here. Always take a look
at your illustration from the distance to
make sure that you like what you are doing at
this stage and that you don't need to adjust
some parts later on. So now let's just go and
close our ship right here between these little
parts on our shoes. So we will have the
ship for a here. When we have it, we also don't want to go, for
example, like that. We don't want to
connect our ships and create some not very nice
connection right here. We are creating some tension. We don't want it. We just
want to go either above or else bit below where we don't have the weird connection
with other ships. Now let's just move
on to our skirt and create this nice
shape right here. We can just hold it at the end, and we can just go and maybe a little bit overlap
it in the middle, but create a nice overall shape right here into the middle part. If you just need to go and erase some little parts right
here, just go and do that. If you notice that you have some not very nice lines where
you have the connections, maybe they are a little not
too thick to your taste, you are welcome to go and
adjust them to your liking. When you have this shape for the bottom
part of the dress, let's just go and create a parallel curve right
here on the top. Again, just doing
the same thing, we will just create a half of the line right here
and we will go and adjust the curvature just by going a little bit
outside the shape. Going to the opposite
side right here. If we need to adjust it, we
can just go to our 18 mode and make a nice connection
right here in the middle part. So just try to create a pearl curve to what
you have on the bottom. When you are done, just
tap on the screen. Make sure that you have a
nice connection right here. You don't have any bumps or any things that you
don't want here. Let's just go to
the side and let's create this connection just
with the curve like that. Again, connect it nicely. Use your brush, use your
eraser to work on at the corners and create something
very smooth right here. Use your eraser to erase the
parts that you don't need. And when you have these parts, let's just go and continue recreating all the elements
that are symmetrical. Let's just move on to the
square that we have right here. Again, just creating a curve,
holding it at the end. You can adjust the
thickness of the line. You can just go toward
the bottom part and maybe make this
line a little bit thicker that will go nicely toward the sheet that you have
right here on the bottom, maybe even make a
little rounded shape right here on the bottom. You have the result like that, let's just see what else
we need to add right here. Let's just go for these
little pockets right here. Let's just go and create them the same way
as we did before. So if you want to create them in a very
nice and smooth way, just hold your line in the
end and create them by using your quick shape tool and
editing mode if it's needed. Let's just hold our line at the end and
let's just connect our ship nicely on the bottom or on the top
where you are connecting it. Just make sure that the
overall ship is closed. Now when we have the
results like that, let's move on to our
little bell right here, and we will do the same thing
as we did onto our sketch. Hold line at the end. If we need to adjust the curvature or
anything right here, we are going to
our editing mode. You can go and make a nice
connection right here on the top by going else
bit closer to the edge. And just create a
nice connection manually if you need
to adjust some parts. Let's just go toward
the bottom and do the same thing as we
did with our skirt. Just go in there,
creating connection. If you want, you can go right
here to the corners and soften them up a little bit with your brush and
with your eraser. So just create something
very, very smooth and very, very nice right here and
let's just move on to the bottom and create this
little thing right here. When we have it, let's
just move on and recreate these little
shapes that we have right here for both onto this
little shape of our bell. And when we hand the
result like that, let's just go and start working on the top part of the body. Let's just go to one
of the sides and let's just start
recreating these elements. Or again, if you want to
experiment a little bit, you are welcome to go and create something different here. Let's just go first to these little parts
and recreate them, and then just pay attention to the position of these
elements that you are creating and let's
just go and make nice connections between
these two shapes. When you have it in that way, let's go and create two
little lines like that, and then we will
just be going to this little mittens part and we will be
recreating them too. Again, if you want to try out
something different here, if you see that you
are overlapping this little shape that you have right here on
the middle part, you're welcome to
try out something different and create
it in a smaller way. Again, take a look at your
illustration from the distance and decide whether you want
to adjust some parts or not, maybe try out it a couple of more times and create the
shape in a more nice way. So go there and create
the shape to your liking, find what works for you. And if you want to again, try it out one more time, just go and try it out one more time. Just create the shape that
you would like to see here. Adjust it with your brush
and with your eraser, if you need to
adjust the size of your brushes to just create a smooth lines and to precisely go to the places
that you want to change. Example, I would probably want
to go to this little line right here and make it
a little bit smaller, the overall shape of the
little hand right here, the arm, just go in there and making it in a more flat way. And when we have it, we can either right now go and recreate the sheet that we
have right here for the heart and erase the
parts that we don't need, or we can just keep it for
a liter and adjust it on the new layer when we are going to be creating all
the additional elements. You decide whether you want to adjust it right now
or adjust it later, and let's just go and
continue creating our lines going
outside the sheep. Let's just go and recreate this little shape that
we have right here. Again, we are trying not to create the line
going straightly to this little part
that we have between the little things right
here onto our arm. So just go a little bit
outside the shape so we don't have the unneeded
tension right here. And let's just go and
continue creating this little part right
here on the top, again, either with one line to create a smooth curve like
that or to create it in a few lines and create it just manually
with your brush. Let's continue by going to
the shoulder and creating it. Again, try to pay attention to this little part right here because it's the same arm and we will need to create a
line that will go even for this shape and make sure
that it goes on one line. Pay attention to this too. Try not to have a very thin
connection right here. If you have the thin line right here near the bottom part, just go and thicken this up
and don't forget to create this little part right here on the behind part of our dress. So now let's just go to
this little part and create this continuation
of our dress. We also can go right here
to this little part between the little hanging parts of our bow and create
it right here. And then we will
just go and create these little parts
right here on the top. If you want to soften up
these little corners, you are welcome to
go and do that. If you want to create a
different design for the dress, you are welcome to
go and do that, too, so it's all up to you. Just create it in a nice way, in a very festive way and just make nice connections
between the shapes. When you are done
with this task, let's just go and recreate
this shape that we have right here for the
bow. Create a shape. If you need to go to
the editing mode, you are welcome to go and select the circle
if you want to. So just create it in a way that you would
like to sit here. Let's just go toward
the side and let's recreate these shapes that we have right here for the sides. Again, if it's easier
for you to rotate the canvas and create
the shapes in that way, go and do it in that way. When we have the oral shape, don't forget to create these little parts right
here on the sides. Then let's just go and create these shapes that we
have as the loose parts. If you want to again try out
something different here, maybe not go towards the parts
of the dress on the side, you are welcome to
go and maybe make these little parts a little
bit in a thinner way. Just repeat the
oral shape that you have right here on your sketch and just create it in maybe smaller way if
you prefer it that way. Again, try to work
on the connections, try to work on the
side right here. When you are done, just get
back to the brush and let's continue by going and
recreating other elements. For now, let's just go
over the top and we will recreate the shape that we
have right here for the star, starting by creating these
little lines on the bottom, creating a nice
curve right here, and then let's just
go and recreate these little parts that we
have right here for our star. Again, trying to make
nice connections, trying to avoid having these little bumps
inside the lines. So if we need to go and erase some parts, we'll
go and do that. Let's just go toward
the sides and again create nice
connections right here. Work onto the sides right here, create the curves into the
very straight corners. Or, of course, if
you want to create very straight corners,
it's up to you. When we have the erase the
parts that you don't need, and let's continue
by going toward the top and let's recreate
these elements here, too. Let's just continue
working onto the shape and work onto the corners to
don't make them very, very straight and
very, very pointy. Try to create the curse
right here instead of the very straight lines and do the same on the
top right here too. So just work with your brush and with
your eraser to create nice elements in a smooth way to create a cuter illustration. So let's just go over the top and create this little
part right here. Let's also take a look
at it from the distance to decide whether we need to
adjust some parts or not. Maybe we will round up this
little shape on the top, work more onto the corners, and erase all the parts
that we don't need. We also won't be going toward the middle part
right here and we won't recreate these
lines for now. We will pay attention to it later on when we are going
to be creating our colors. For now, let's just make
sure that everything that we are creating looks nice and when you are satisfied
with everything, let's just go and work
on our facial features. Let's just get back to the brush and let's decide whether we want to maybe tweak our
eyes just a little bit. For example, let's just go and make this shape a little
bit more rounded. We will be doing the
same thing as we have it onto our
schage but maybe paying more attention to the roundness of
the overall shape. So let's just go
and with one line, we will try to recreate
the shape right here. We will just hold it at the end. We'll go to our editing mode and we will adjust it if we want to. Let's just go and maybe
adjust it a little bit more and create a more open
shape for our eye. You can always take a look at your illustration
from the distance, as mentioned before,
to make sure that you are creating it in a way
that you like right here. So if you need to maybe pay more attention to
the roundness of the take a look at it
from the distance and adjust your line by looking
at it from the distance. If you want to maybe move this line or try it
out one more time, you are welcome to
go and do that. Let's just maybe
try it out one more time and create a rounder shape, again, going toward
our aging mode and adjusting it even more. I'm looking more toward the opposite side
where I'm not touching this little dose right
here because it's easier to see what is
happening right here. You can just again, take
a look at reference from the distance to decide
whether you like it or not. Adjust it to your liking. If you want to maybe move
it a little bit, go and hold your Apple pencil at some blink space and
adjust the shape to your. When you are satisfied
with everything here, let's just tap on the screen
and accept our changes, and let's just go and manually start adjusting our shape to add more details on the top and everywhere
where we need our details. Let's just go over the top
and let's just recreate the same shape
that we have right here on the bottom part. Again, just taking a look
at it from the distance, going toward our editing
mode and adjusting it just by going to our
nodes and playing with them. Let's just try to make
it pretty similar to the previous little curve
that we have right here and maybe not make it too
thick right here. But of course, if you
want to make it thick, you are welcome to maybe move this line or adjust it
in any way possible. Just find what works for you. When you are satisfied
with the oral shape, let's just tap on the screen and let's just go and connect
the shape on the bottom, just by going manually
with a brush and creating a picky shape
right here on the bottom. Again, if it's easier
for you to go and rotate your canvas
and create the lines, in that way, you are
welcome to go and do that. Just work with your brush, work with your eraser, and create a nice
outlines right here. As for the opposite side, let's just go and create
our shape in that way. So just create it like that, a little V shape right here. And when you have
the clothes line, let's just go to our
icon on the top right, and let's just drag and drop
the color inside this shee. Let's zoom in our canvas and you will see that
you probably have little miscolord places right here inside this little shep. Let's just go and
manually recolor them, so we will have a nice nicely recolored
element right here. Again, if you want to maybe go and work more onto
the overall shape, you are welcome to
go and do that. You can use your brush,
use your eraser. With the eraser, you can use all the options that
we used before. You can just hold your brush at the end and go to the 18 mode and adjust the line to your
liking by using this mode. When you are satisfied, if you have some
elements that you need to work on just manually, go and adjust them. When you have the
result that you like, let's just go and work on
our little eye lashes. Let's just get back
to our brush and let's just go and recreate
these little elements. Maybe if you want, you can just go and make
them a little bit thicker or just go with a
different shape right here. Just try to make a nice
connection and try to make the pretty not
so scary shape. Again, take a look at
everything from the distance, decide whether you
like it or not, adjust it to your liking, maybe make it a
little bit longer if you want to
when you are done, let's just go over the
top and let's just go and create this little lead
that we have right here. When you have the
result like that, let's just go and create this big sheet that we have
right here inside the eye. Adding a little
bit more pressure toward apple pencil and
just hold line at the end. If you need to go and adjust it through your editing mode, maybe move it a little bit or adjust the
position and tration, it's up to you go and do what
you need to do right here. When you are done, just tap on the screen and
accept the changes. We are not going
to be going toward these little shape that
we've created right here. We will edit onto our stage where we are going
to be creating our colors. For now, let's just
make sure that we have a nice outline right here. If we need to go and
adjust something manually, let's just go and adjust it. A let's just go and recreate this little shape for our mouth. You can go and recreate
it on the same place where you have it onto your
stage, or if you want, you can move it a little
bit higher or lower to adjust the overall look
of your face right here. Now, again, let's just take
a look at everything from the distance and decide
whether we like it or not. If you want to make
slight changes, you are welcome to go to the liquefied tool
one more time. But when you are
using liquefied tool, you are worsening the quality of your lines just a little bit, so you either will need to go and go along the lines one
more time to make them crisp, or just try to make only
the necessary changes with your liquefied tool to just avoid worsening your
quality right here. So if you want to adjust something with your
liquefied tool, you are welcome to
go and do that. Try to just use only the necessary
adjustments right here. So for example, we
can just go and maybe work a little bit onto
this he right here. When you are done, let's
just go away from this mode. Let's just zoom in our canvas. If the quality of
the line is okay, we can just keep it as it is. And when we have the
result like that, we are done with these
parts that are symmetrical, so we will just need
to go and recreate other elements right here
that are not symmetrical.
5. Clean Lines: Not Symmetrical Parts: Now for the not
symmetrical parts, let's just go to our layers. Let's create one more
layer on top and let's just go and continue
creating other details here. Let's very freely go and start from the
fringe, for example. You can use, again, all the
options that we used before. Hold your line at the end, create nice connections
between the shapes. You can go with a more
thicker line right here on the bottom with a very
thin line right here on the let's just go and continue
creating our opposite side of this little fringe with the same tools
that we are using. Again, using our editing mode, if we need to make
nice connections, trying to make nice transitions between the shapes right here, if we need to add it in a more natural way
with our brush, you are welcome to
go and do that. As for this little part,
let's just go again and pay attention to the
position of this line. We are not touching our
little eyelash right here, so if you need to go and take a look at it from the
distance, go and do that. Just try to create
a nice little shape right here going toward
the opposite side. If you have some things
that you need to erase, just go and erase them. When we hand the
results like that, let's just get
back to our brush, and let's just go
and start recreating all the elements that
are not symmetrical. Let's first go maybe
toward this little heart. But for the heart, we can use the symmetry so we can just
for 1 second, turn it on. Let's just get back to our
list, tap on the layer, and select a drone assist, and let's just go and recreate the shape that we have
right here for the heart. You can go and overlap the overall shape of
the mittens right here. You can go and try
it out a couple of times to position it nicely and to just see the shape
that she wants to see here. So just create it in
a couple of ways, just make it rounded
and very, very cute. Go with a bigger shape with a smaller shape, it's up to you. When you have the
result that you like, let's just go and maybe find the better placement
for this element. Firstly, let's just
go again to our list, tap on this lay because we don't need our assisted
drone anymore. Let's just select
it from the list. Let's just go to
this S ribbon icon. We will select our little shape of the heart that we've created, loom this shape around,
go to the A key. If you want to make it bigger, just go and gradually
make it bigger by using uniform method and by dragging
it a little bit down. From where you are right now. Let's just overlap the
shade that we have right here and when you have
the result that you like, let's just go toward our first
icon that we were using. It was our S ribbon icon, and we will just
select everything. So now let's just go toward these little overlapping
parts and straightaway, let's just go and erase them. We will have a
nice result and we don't need to think
about it later. Now let's just get
back to our brush, and let's just go and continue recreating these little parts
that we have right here, just with straight lines, we are holding them
and the ends just creating these little
elements right here and then going toward
the bottom end recreating these
rounded pom pom parts. So for them, just go creating
them in a way that we are holding our line at
the end and holding one of our fingers
at the screen. It just the size of
the brush if you want to create them in
a more delicate way. So just try it out
one more time. If you need to again, try to
hold your line at the end, hold one of your
fingers on the screen, and let's just go to
the opposite side and create something
similar here. Again, holding our line, holding one of our
fingers on the screen, trying to make it the same
size that we have on our left, trying to position it onto the middle part where
we have this line. So if you want to maybe move
this shape a little bit, you are welcome to
go and do that. When we have the
results like that, let's go to the bow on the
dress and recreate it. Let's start by creating the circle right here
the same way as before, holding one of our
fingers on the screen, going toward the sides and creating these little
hardships right here. So just recreate what you have right here
onto your sketch, create it in a nice way, make sure that you don't have
any gaps into your lines. If you want to go and create these additional
elements on the sides, you are welcome to
go and do that. Let's go and do the same
right here onto the left. Again, either you can go and copy this little part and
position it right here. For example, if you already have this little
thing right here, let's just go to
our truman icon. We can just select this
element, loop it around, and when we have only
this element selected, we can just go to
our screen with three fingers and
we can just wipe. We will use the option Copy first and then we'll
do it one more time, three fingers down and
use the option piece. When we did it, if
we go to our list, you will see that
we have a new layer with inserted image right here. We can just go straightly to our AR key uniform
method and just drag this shape towards the next element
in the same shape. Let's just go maybe
rotate it a little bit, make it bigger or smaller. Find the placement
for these elements. When you are done, just
tap on the screen, and what we need
to do is to go to our list and merge these
two layers together. Let's just go today on the top and we will use
the option merge. Now when we have the
result like that, we can do the same thing with
our little bell right here. Let's just go again
to our ribbon icon, select this element right here and do the same
thing one more time. Three fingers down, copy, three fingers down
pies then we will just move the shape
toward the opposite side. If you did it on the layer where you don't
have this little part, because we have created on
our layer with the symmetry, we can just get back to this layer where we
have the elements, and as we already
have the selection, we can just go to
the ribbon icon, hold the icon, and
it will be selected. Let's just do it one more
time, three fingers down copy, three fingers down past. Now when we have this
additional elements, let's just move it back toward the initial place where we
want it. Let's just rotate it. Let's just find the
placement for it and we can just go and position it
in a way that we like, then we'll just need to
merge these two layers, the layer on the top and the layer with the
inserted image. To go into the layer on the top, where we have the
additional elements, tap in on it,
selecting merge down, and continue creating
other elements right here. Let's just go toward our
little bulls right here. Let's create them just by
creating the rounded shape, holding our apple pencil, holding one of our fingers. If we need to move it, let's just go and
move it, for example, we can just move it closer to this little shape that
we have for our hair, so it will look nice. If you need to go and
adjust some parts manually, you are welcome to
go and do that. Just try to make nice
and smooth connections where you have connected
this little shape. So now let's just
go through all of these balls and
recreate them manually, just go in there the same way, holding our Apple pencil, holding one of our fingers, and doing it two more times. So let's just go over the
top and create it here, too. Again, holding making it
bigger if we want to find a different placement
by going to the 18 mode if we want to
create it in that way. When we have the
result like that, we also will need to get back to this little bro that
we have right here. So let's just go
and recreate it. You can try out different
placement right here or try out a
different shape. Just create something very,
very smooth and very, very nice right
here, and let's just go and continue creating
other elements. So you can decide which elements you want to recreate right here. So, for example, let's just go for this little
stick right here. We are creating
two straight lines right here for the key. Then connecting it
nicely on the bottom. Just creating
something similar to what we have onto our sketch. Trying to make nice
connections between the ships, if we need to go to
the eating mode, going there and
adjusting our ship. If we need to work
onto the connections manually with our brush
and with our eraser, just go in there and
doing what we need to do. Let's continue by
going over the top and recreating this
part right here, creating a curve going toward the top and trying to create
this nice shape right here. Again, you don't need to
recreate it just with one line. You can connect it nicely with the different curve when you are creating
it on the bottom. Now when we have this shape, let's continue by going
toward our little hat, and let's just go
and recreate it too. Just with one line,
we are creating our bottom part right here. Let's just make it a
little bit flatter. So just go into our 18 mode
and recreating this line, doing the same thing on the top and just connecting it
nicely on the side. Again, if you need to work onto the connections with your
brush and with your eraser, just go and do what you
need to do right here. Try to make a nice line
and nice connection on one side and do the same on the opposite side when you are ready with the previous side. So again, trying to
make a nice connection, go into our 18 mode, trying to make it
similar to what we have on the
opposite side, again, working with our brush and
with our eraser to create a nice silete and nice shapes
right here on the side. Just go and create the top part. Again, if you want, you can go and do the same as you have it onto your sketch or just try out something
different right here. Basically, what we need to do is to create this loose part right here and don't forget to create this little shape right
here on the side. We will have some
of a fold right here and then just
connect it with the pompom part and just create this pompom
right here manually. Just go in a rounder
shape just by creating this very wavy
shape for the outline. So now when we have
something like that, let's go and recreate these
little leaves right here. So again, starting by
creating this circle, another circle near it, maybe alphabet smaller one. Suggest creating it by holding our Apple
pencil and holding one of our fingers and then just go and recreating
these elements, starting by creating
these little lines that will help us to create the
actual leaves right here. Again, you can
repeat what you have onto your sketch or just
try out to create it in a more clean way just
by holding your line in the end and using the icing mode if you
need to at some point. Trying to make the
sides parallel One another, so they are
mirrored and they are looking nice and these little parts
are at the same places. When you have the first one, go and create another one. Again, the same
way, just creating it by holding our little line. Let's just go and
maybe rotate it to see more clearly
what we are doing. Try to avoid connecting the
parts with other shapes. Just go and overlap the
shapes. It will be better. When you have the second leaf, just move on to the next
one and create the last one of these leaves to
finish up the top shape. Now, when we hand the
result like that, we can go and manually add these little stars and
little highlights. But also, we can just go to our folder that
you downloaded from the Project on
Resource app and use these stem
brushes right here. So let's just go and
find the stem brush. So we are going to
be going to this UI STEM brushes folder, and we will find these stars. We will just need first to
go to this star full middle, for example, or if you prefer some other little shape right here, you're
welcome to try it out. When we have it, if you have the size that is not suitable
for this illustration, if it's too big, you can just
go and tap on the brush, go under properties and adjust this minimum
size of the brush. Adjust it to your liking. When you are done, let's just make the size of it a
lttle bit bigger and go to these places where
we have our stars and just go and add these
little stars right here. You can just put
the little star, and then if it's too big, you can go to the S ribbon icon, adjust it just by going to the Ero key and
resize it, rotate it. Do what you need to do with
this elements to your liking. When you have it, just
go and deselect it. If you want to just go and
copy this little element and go to some other places and put it just as it is right here, you're welcome to
go and do that. Or just go and manual these little stars just
by using your brush. Again, if you need to adjust it, just go to the ribbon icon, Ero key, rotate it. If you need to find a
different placement for it, just do what you need
to do right here. When you are done
with this brush, let's just go and find the
little sparkle right here. You can just use the
sparkle chubby brush, or you can just go
to the next folder, which is our simple stamps
and select sparkle from here. For example, let's just go
with a sparkle two brush, and let's just go to
these little places and adjust these little
spaces right here. So let's just go and put a couple of highlights
like that to all these elements where we have our highlights
on our sketch. Adjust the size,
vary it to make it peculiar right here and go and try not to overdo this task. If you want to go and maybe
add a couple of more of these elements to the places that are not mentioned
onto your sketch, you are welcome to
go and do that. Just try not to overdo it. For example, we can go and maybe put little highlights
right here. And when we are done
with this task, let's just get back to
our previous brush. Again, we are going to our inking folder and we are using our
technical pan brush. We will be just going and recreating these little
parts right here on the top. So let's just go and create
little lines right here. So just following the lines
that we have onto our sketch. If you want, you
can just go with a thinner shape on
the top and go with a more thicker line on
the end on this line and just go there and create the elements that
you have right here. Also, if you want, you can go
to the places, for example, that are not overlap, and we can just go and
thin some lines up. But for this, we
will just need to firstly go and erase all
the overlapping parts, and we can do it very easily
just by getting back to our list and going to our where we have this
assisted drawing. Firstly, let's just go turn
off this assisted drawing. So we'll just need to tap on our telect drawing
assist from the list, and let's just go
with our eraser to all of the
overlapping places. And very, very accurately, we'll just go and erase the
parts that we don't need. In the same way,
we can just go to some of the areas
that, for example, we want to thicken with our
eraser onto this layer, and let's just go
and straightaway, just go and erase these little parts to
make them even cuter. So now let's just go all over the places where we have
the overlapping parts, and with our eraser, we will just go and
get rid of them. When you are done
with this task, let's just go to our layers and hide our layer
with the sketch. Go into this little
checkmark, tapping on it, taking a look at everything
that we have right here. If we don't need to erase some little parts and
adjust something here, we will just go
again to our layers and we'll merge these
two layers together, so the layer with the
additional elements and our main layer
with the lines. Let's just go to the
top one, tap on it, and select merge down so
everything is on one layer. You can make sure that
everything is on one layer just by going and hiding and
unhiding this layer. So now one more time,
taking a look at our lines. If we're satisfied
with everything here, we can move on to our next part where we are going to be
adding the basic colors.
6. Base Colors: Let's begin this part
by doing the following. We will go to our layers. We'll go to this layer
where we have our lines. We will tap on this layer and
we will choose reference. That way we can use
these lines and we can add the colors
on separate layers. So let's just go to the layer
that we have underneath, and we'll create one
more layer here. Let's just go to
our color palette and let's select the skin color, and we will go to
our little icon, and we'll be dragging and
dropping the color to all of the areas that
belongs to the skin part. We can just drag
and drop it to one of the areas and
then just go to this continue filling over
the top and just go to the places that we need to
recolor and just tap on. Let's just go all
over the places that we need to recolor
with the skin color, and let's just go and
recolor these little places. To make sure that we've recolored everything
that we want, firstly, let's just go and exam
the changes right here by tapping on
this little chip mark, and then we'll go
back to our list and we will hide our layer
with the background. If you've recolored
everything right here, let's just get back this layer, and let's create one more layer above our leer with our skin. When we did it, let's just
go to our color palettes and just go and select
this CN blue color. And with this color,
we will just go toward our eyes and we will
recolor these sheeps. When we have this in that way, let's just go again to our last, create one more lay on top, and let's just go again
to our color palette and let's start
working on our here. Firstly, let's just go and select this CN color right here and we will change the color of the back part of our here. Let's just go and add
the color to all of these areas and when we
hand the result like that, let's just go and create
one more layer on top. Just make sure that
you don't have any gaps inside your little parts that
you need to recolor. If you need to go to some eras
manually and adjust them, go and do what you need to do. So now when we've
recolor these parts, let's just go again to our list. Let's create one
more lay on top. Let's go back to
our color palette, select blue green color, and let's recolor the rest
of the here right here. Let's just go to all of
the places that belong to our here and let's just
go and recolor them. We also will need to go and recolor this little
bro right here. So let's just go and recolor it just by dragging and
dropping the color. And when we have the
result like that, let's again get
back to our list. Let's create one
more lay on soap. Let's just go and select the pink color from
our color palette. With the pink color, we will
just go and start recoloring some areas and we will start by recoloring the
areas on the address. You can just go and tap onto these little parts by using this color drop
method over the top. And when you have the
results like that, let's also go to these
little parts right here on the address
and recolor them too. The same color, we
will go to the socks or the boots, and
with the same color, let's just go and
recolor the hat and maybe some of the additional elements that
we have right here. So for example, we can go to
this little bull right here, maybe toward this little shape
that we have right here, maybe towards some other areas. So just go and recolor
some of the elements with this color that you would like to see in this red color. When you are done
with this color, let's just go and extend the changes over the
soap, and again, go into our list, creating
one more lay on top, go into our color palettes
and selecting the next color. For example, let's
just go with, again, blue green color, and we will go and recolor
some of the areas. For example, we
can go and recolor these little mittens
that we have right here. We can go and recolor
these little parts. Going to the bow right here
and recoloring it, too, going toward these loose parts right here and recoloring them. If you want, we can also go
to these little parts that we have right here as our
pockets and recolor them. When we have everything
recolored, or, for example, if you want to go
to this bow and recolor it with this
greenish color, you are welcome to
go and do that. When we are satisfied
with everything here, let's just go and
create one more layer. Again, just go into our layers, creating one more layer on top. Let's just go to our
color palettes and let's just go with this
light orange color. With a light orange color, we will go and recolor
some other elements. For example, our little
bowls right here, maybe our little bells, maybe some other areas, maybe these little stars that we have remaining on our canvas. Just go to some
of the places and recolor them with this color. When you are done
with this task, let's just get back to our list, create one more layer on soap. Let's go to our color palettes and select the white color. With the white color, let's
just go and recolor all of these little fluffy parts that we have on our illustration. So just tapping on these little areas and
recoloring them too. Let's just go to these little
parts right here, too, and let's just take
a look at what we need to recolor else, and we'll just go
and recolor it too. So for example, let's just go to these little pom
poms right here. Probably we will just need to go back to the
layer where we have our yellow elements and tricolor this little heart
with the yellow color. Let's just go again
to our layers. Let's go back to
the yellow color. Let's just go to
our color palettes, light orange color, and drag it toward our little
heart right here. And also we'll just need to go and recolor this little
part right here, let just go and either
create a new layer on top. So just go tap on the plus icon and create a new layer or you
can just get back to this layer where you have
the back part of the here and recolor this
element on here. We'll use the same CN color, so let's just go and recolor these little parts just by dragging and dropping
the color inside. Zoom in your canvas and make sure that everything
is recolored. You might have some little
misclor places where you have the thinner shapes so when you are satisfied
with everything here, the very last thing
will be to go and add these additional white
areas onto our eyes. Let's just get back to
our layers and let's just go underneath this layer where
we have these blue sheeps. To go into our layer with our skin and create one
more layer from here. Getting back to
our color palette and selecting the white color. And also as we want to create
it on both sides evenly, let's just turn on our assisted
drawing onto this layer. When we did it,
let's just go and create these white
shapes right here, just going along the overall shape that
we have right here, tapping, holding our
Apple pencil and the end, going into our 18
mode if we need to. So just go and creating
something in that way. Just pay attention to the size that you
are working on with. You just need to go a little bit closer to this line
that you have right here for the eyelashes and create the shape
going in that. Again, take a look at
everything from the distance and decide whether you are
satisfied with everything. If you are, let's just tap on the screen and let's just drag
and drop the color inside. We can do it right
now because we have our reference selected onto
the layer with our lines. We don't need it anymore, so
let's just go to the layer. We will tap on it, we
will turn off reference, and we will just get back to the layer with white outlines. Now let's just try
it out one more time and just create
the shapes right here. If you want to adjust
it in any way, you can just use
your liquefied tool, for example, and
adjust it from here. For example, we can
just go and maybe work a little bit more
onto the sheep and make it a little bit not that rounded and adjust
it to our liking, so it doesn't look
a little bit weird. So take a look at everything
from the distance, decide whether you
like the shape or not. And if you do, let's just tap on our adjustments twice to
get away from this mode. And when you are satisfied
with everything here, when you've record everything, let's move on to our next part where we are going to be working on the areas and adjusting them and
making them beautiful.
7. Shadows: Let's begin this part first
step by going to our layers, and we will go to
our bottom layer, which is our layer
with the skin. Let's create one more
layer on top and let's just tap on this lay and
let's select clipping mask. That way, we'll be adding the additional colors
only on the areas that we have on our previous color without going beyond the frames. Now, let's just
tap on this layer and let's select a drone assist, and then we will go to our color palettes and
select the pink color. Also we will just need to
go to our brush library. We will go to the
airbrushing folder and we will select
soft blend brush. We will change the opacity on this brush to
something around 20%, and then we'll
just go underneath our ice right here and we'll be creating little
checks right here. Let's just go very boldly and
start creating the sheeps, try to create them
in a round the way, try to just create
them in a very smooth. When you are satisfied
with the shape, let's just go and adjust the opacity of these layers
so it's not that bright. When we are satisfied
with the shape, let's just get back
to our layers. Let's just go to this I can adjust the opacity just
by moving it toward the left until we are satisfied with the color right
here for our cheeks. So find the level that works for you, and
when you are done, just tap on the layer and just go and create one
more layer on top. We will do the same
thing. We'll tap on it. We will choose our
clipping mask, and we will start working on some little
shadows right here. So for the shadows, let's just go and change our blending mode, and we can do it
very easily just by going to our icon and selecting multiply blending mode that will be very
good for our shadows. For the opacity, straightaway, let's just go with
something around 50%, and then we'll just get
back to our brush library. We'll go to the inking folder, and this time, let's just go
and select studio pan brush. We'll use the same pink color, and we will go underneath
the hair first, and we will be just repeating the shapes right here
to create the shadow. You can just go and adjust
the size of your brush. You can just hold your line and the end and adjust
it to your liking. If you want, you
can go to the eight mode and adjust it from here. When you've created
the first shape, let's just go and continue
creating other shapes just by repeating the
shapes that we have right here for our
little fringe. As for the parts that we have right here
outside the shape, let's just switch the size of our brush and let just go and go a little bit inwards with the shadows by creating a
very, very smooth curves. Let's just go and
continue creating our line just by
going inwards and connecting it some kind with our sheet that we have
right here as our fridge. Try it out a couple of times. If you did it else bit, you are welcome to go grab your eraser and adjust
it to your liking. Just try to create a very
smooth curve right here. If you want, you can go a little bit lower and create
the shadow going towards the little fringe part that we have right
here on the side. When you have it on one side, let's just do the same
on the opposite side, so it's easier to
start a little bit further away from this
little part that we want to fill with
color and create the nice and smooth
shadow going in that way. Fill the rest of
the area manually, work onto the
smoothness on the line, take a look at everything
from the distance. Also, we will just
need to go underneath these little parts right here and add little shadows here. When you are done
with this task, let just go toward
the ears and maybe put the inner parts
in the shadow, and also we can do the same for the bottom
parts of the ears. Just create a very smooth
and peculiar shapes right here for the shadows
and also we will just need to go to the whole area that we have right here and
put it completely in a shadow because our
head is quite big and it is overlapping
these little parts. You also can go to
these little areas right here and put the
shadow on the bottom. When we hand the
result like that, we also will need to go to our little legs right here and create the
shadows going in that way. Just create the
diagonal lines right here and create the
shadows in that way. If you want, you can go
to the side, for example, and add little shadows right
here near this fluffy part. So just slightly
shadows right here, and now let's just take a
look at everything and decide whether the amount of opacity
is enough or too much. If it's too much, we are
going back to our layers, going to the icon right
here and adjusting the opacity so it
looks nice right here. So something around 35, maybe 30% looks better. And when we are satisfied
with everything here, let's just go and start
working on our ice. Let's create one
more layer on top. Let's tap on the layer and let's select
our clipping mask. A as we want to work on both
sides, at the same time, let's just tap on it and let's just select our drone assist. Now when we have the
result like that, let's just go zoom in our canvas and we will go
to our color palettes and we will start by wearing the
soup with the purple color. Let's select the purple
colour right here and let's just go and create the
shape going in that way. When you have it just recolor
the rest of the area on top and then let just get back to our color palette and select
this blue green color. With this color, we will just go toward the bottom
part and create the similar shape
right here and recolor the rest of the area
with this color. Now, let's just go
and do the following. We will make a slight
gradient right here. So we will be just going
toward our Magic one, two. We will go under Gaussian blur, and you can see we
have this little tool right here, Gaussian blur, 0%. We'll just need to hold our Apple pencil
and the screen and just move our Apple pencil until we have the
result that we like. So we can just go with a very
blurry element right here, so just something
going in that way, or you can just go with a slight blur right here and
find what works for you. So just create a little blur
right here, blurry element. When you're satisfied
with everything here, let's just go and
deselect everything by hitting our magic
one, 21 more time. Now let's just go and work a little bit more onto the sheeps. Firstly, either
on the same layer or just by going to our list and creating one more
layer on top and doing the same thing right here
with the preparation. So tapping, clipping
mask, tapping, are drawing assist,
and then we will just go with the same color that
we are using right now, blue green, and
we will just go a little bit lower than
this blurry effect right here and we will
just recreate the sp right here so it
is a solid color. When you have it, let's just go and recolor the
rest of the area on the bottom and then let's just go and work more
onto the top part. Let's just get back to our
color palette, for example, we can just go with this
dark magenta line color and we can just go toward the top and we can add a bit of the darker color right
here on the side. Let's just go and recreate
the overall shape that we have right
here for our shape. And let's just go and maybe make some kind of the pattern
right here inside the eyes. For example, we can just go closer to the shape
that we've created on the bottom and create some kind of the shape
going in that way, just by creating a little
additional element right here inside the eye
that will look pretty nice. If you want to adjust some
things a little bit more, you are welcome to
go and do that. You can go with a darker color. You can go with
different color here, it's up to you if
you want to maybe elaborate on the pattern
right here inside the eyes, you are welcome to
go and do that. We also can go and add a bit of the darker
color right here on the soap and we can do it again very easily just
by going to our layers, creating one more layer, tapping on it, selecting clipping mask, selecting our drawn
assist and going to the N icon and selecting
our multiply blending mode. Let's just keep the
opacity at maximum for now and then we'll go back
to our brush library, airbrushing folder,
soft bland brush. Let's just go to our
color palettes and select either CN blue color or just CN color right
here, very softly, we will go from the top and we can just darken
this area right here to create some
peculiar effect right here and some
depth right here. Just create something you
in that way if you want to and just create
it in a smooth way. We don't want to have a very see change the
colors right here, so just spend some time here and create something
going in that way. If you want to try
out different colors, maybe the same dark
magenta color right here, you are welcome to go
and do this one more time just by going over the top and adjusting this little part. When you are satisfied with it, you are welcome to
go and maybe change the opacity level so it
is not that drastic. And when you are
done with this task, let's just go and recreate these elements that we
had onto our sketch. Firstly, let's just
create one more layer. We will tap on this layer, clip in mask, tap on the layer, select drawing assist,
and then we can go and turn on our
layer with our sketch. Firstly, we just need
to go and find it. It is here on the bottom. We just need to hold this
layer and drag it above all the layers that we have right here into
our layers panel. Move it even above
the layer with your lines and then
just go and hide it. We will see that we have these little sparkles right here and everything like that. So we can just get back to this new layer that
we've created. We can just go back
to our color palette, select the white
color, and firstly, just go and recreate this little sparkle shapes
that we have on the top. So start by going to
the brush library. We will go again to
our inkin folder, and you can go either
with studio pan brush or technical pan and just go there and recreate
this sparkle, the little highlight
that you had right here. You can just go and
hold your line at the end and create the
shape in that way. You can dragon drop the
color inside and work onto this shape with your eraser
to adjust it if you want to. Try to make it pretty rounded. Don't go too close to the shape
that you have on the top. Just take a look at
everything from the distance, and let's just go and recreate these little sparkles
inside the eyes the same way as we did
our little sparkles into our here and everywhere. We'll just go back to
our brush library. We'll go to our simple
stamps little folder, and we'll select our
sparkle brush right here. Adjust the size of your
brush and go right here inside the shape and add these little
sparkles right here. Try to put them
right at the center. So if you need to try it
out a couple of times, just go and try it out
a couple of times. When you are ready just
drag and drop the color inside and take a look at
everything from the distance. If you want to go maybe
with a smaller size of these little sparkles and add them somewhere closer
to the first element, you are welcome to
go and do that. When you had this
little sparkle, it will be a little bit hard to recolor it the same
way as we did before, so it will be easier
for us to just get back to our brush library, the same ink folder and select either our technical
pen brush or our studio pen brush and just go right here and
add the color inside. If you want to go and add a few more elements with this
color and inside the eye, you are welcome to
go and do that. You can do it by using
the symmetry tool, but also if you
want to maybe add a bit of a difference
inside the eyes, you can just get
back to your layer, tap on the layer, and turn off your assisted drawing and just go manually and add
a few little dots, few little sparkles to some
of the areas inside the ice. Do it on both sides
and just create these little sparkles
in different ways. Everything will look
a little bit nicer. So now when we hand
the result like that, let's just get back
to our layers and hide our layer with our sketch. When we are done with this task, let's just go and continue creating other
elements right here. So firstly, let's
just get back to this layer where we have
the back of our hair, and let's just go and
do the following. We will create one
more layer on top. We'll tap on this layer and we will choose our
clipping mask. We can just go and select our drawing
assist, but for now, let's just go and add a bit of the gradient
right here on the bottom, so we will just go and work
without our symmetry too. Let's first get back
to our brush library. We will just go again
to our airbrush and folders, soft blend brush, and we will just go
to our color palette and select this
blue green color. We will adjust the
size of our brush something bigger and
very, very boldly, we will just go toward
the bottom and we'll be adding this additional
gradient right here. Again, we are trying to avoid very harsh transition
between the colors. So if you want, you
can just go with a very thin color right
here on the bottom and then just go lightly toward
the middle part and just some kind of smudge this little shape right
here with these two. Adjust it to your liking, add as much color as
you want right here. When you are satisfied
with everything here, let's just go and add
the additional color right here to these little
parts on the outside sheet. Let's just get back
to our brush library. We'll go again to
our ink and folder, studio pen brush,
technical pen Brush, decide on your own, and then we will just get
back to this leader and we will tap on it and we will
select our drone assist. Now, let's just go to this
little place right here and we will just go and
create the shep going up, so it will just be a continuation of this little
shape going up in that way. If you want, you also
can just maybe adjust it to your liking and create
a slight curve right here. So just depends on your
preferences right here. Just go and create
something in that way or just go and create something
going in a different way. We will just need to go and create the different color
right here on the bottom. So just try it out
a couple of times. You can work with your brush, you can work with your eraser. Just find what works for you, go to the bottom and recolor
this little place manually. So we will have a nice
additional element in this color right
here on the bottom. Just try to create a nice
silhouette with this little two and don't go too close to this little gap that
you have right here. If you just need to create something different right here, you are welcome to
go and do that. You can try out on the
different sides right here, maybe create a peculiar
curve right here. When you're satisfied
with everything here, let's continue by going to
our layers and going to our next layer with our so let's just create one
more layer right here, tap on it, clip in mask, go into the icon and select in our multiply
blending mode. Let's just go with
something around 50% of opacity or a little bit
toward our left side, maybe 40% for now, and we will just go toward our color palettes and
select the CN color. When we've selected the color, let's just go and start adding some shadows to some
parts of our here. Firstly, let's just go to these little parts
right here and we will be creating the shadow right here underneath
this little parts. Just repeat the sheet that
you have on the bottom, go and create something
going in that way. When you have the
results like that, let's also go toward these little parts and
put them in the shadow. Let's just recolor
these little parts and when you have the
results like that, let's just go right
here where we have our ears and make a little
shadow right here too. When you have a nice
shape right here, you can continue creating it
right here on the bottom. Repeat the oral shape
that you have right here, create a nice shadow
going in that way. When you have it, let's just go toward the bottom
part right here of our fringe and let's just go with a rounded
shape like that. Let's create this big
shadow right here, put it completely in a
shadow from the bottom. When you have it,
let's just go and continue creating the shadow
going to this little part. Let's create it right here. Let's just go toward the
bottom part and create, again, a rounded shape
right here for our shadow. When we have it, we
will go underneath this little part and
create a big shadow here, too, again, with a rounded shap. Let's just go and put
the shadow right here. If you want to maybe work
onto the connection, go and work on it, and also we'll just need to go underneath all of
the elements that we have right here and put
the shadows to them too. Just go and repeat in the
shapes that we have right here behind all of these
elements that we have on top. So if you just need to
go and create the shape, holding your line,
go into the 18 mode, doing everything that we
need right here to create nice shadows underneath all of the objects that
we have right here. Let's just go and create them mostly over
one of the sides, and also we'll just need to
go toward these little lines, and we will just need to add
little shadows here too. So let's just go the same
way as we have it onto our lines layer and create these peculiar
shapes right here. When we have it, let's
just go under our star. Let's repeat the shape
that we have right here and going toward the bottom and repeating this
shape here too. If you want to go
with a bigger shape, maybe create the continuation
right here on the bottom, you are welcome to
go and do that. Just pay attention to
the overall shape, and when you have
it, let's just go and continue creating
our shadows. For example, let's just
go toward our little hat. Let's just go underneath it. Let's create a
little shadow right here because we have a
little pumping right here, so just repeating
the overall shape. And then let's just go toward
this side and recreate the similar little
shadow that we have on the opposite side or
creating something similar, but not exactly similar to what we have on
the opposite side. Create your shadow, and the shadow right here
onto this little part. When you are done with it, let's just take a look
at everything and add our little shadows to all of the additional elements
that we have right here. We also will need to go right here where we have our ear and put a little shadow to this area and
underneath the ear too. Just go there and
create something similar to what you have
on the opposite side too. Continue edging your shadows
underneath other objects. And when you have everything
done on one side, just move on to the
opposite side and create the same thing here too. Just go underneath
every object that we have right here and edging
our little shadows. When we are done with this task, let's just go again
to our layers and let's just go
to our next layer, which is our layer
with red elements. Let's create one
more layer on top, top on the layers, select
our clipping mask, go into the icon, selecting
our multiply blending mode, setting the opacite to
something around 50% for now. Let's just get back
to our color palettes and select this purple color, and with the purple color, let's just go and start
adding our shadows. Firstly, let's just go
to our little dress, and let's just go underneath the hands and the arms
that we have right here and we'll just go and repeat the shapes with our
darker color right here. The same way as before, just go underneath all the
objects that we need to put our shadow under and just go in there
and add in our shadows. So just doing the
same thing as before, just creating our shadows, going toward the bottom
parts of our elements, going toward all of the elements
that we have right here and adding our peculiar
shapes for our shadows. Going toward the
outside parts too, but firstly, let's just deal with our little
dress right here. We can just go to these
little parts right here on the sides
and we can just add little shadows right here to just adjust everything
that we have right here. We also can put the shadow
right here where we have our heart and then
let's just go to other elements and put
our shadows to them. Just go more toward the
bottoms and let just create these shadows going to all of the elements that
we have right here. We also will need
to go underneath our little parts right here for our boots and just
go toward one of the sides and create a very
smooth curve like that. Do the same on the
opposite side too. So just create the first
curve and then just repeat what you are doing
right here the same way as you have it on
the opposite side too. If you want, you also can
go to these little parts right here to the edges
and create little shadows right here just to emphasize the oral shape of the dress and to add some interest
to the little part. If you want, you
can also go right here near this little line
and add a shadow here, Let's just go and
continue creating our little shadows to all of the red elements that
we have right here, to all of these little bows, to all of these little additional sparkles
and everything, mostly going toward
the bottom parts and adding our shadows. If you overdid something, just grab your eraser and adjust the shapes
to your liking. When we are done with
the bottom part, let's just go right here
toward this little cane, and let's add the
shadow right here. Try to have no gaps into your shadow so
everything is recolored. When you have it, let's just go toward
these little parts. Let's add the
shadows to them too. Let's just go toward the heads. Let's just go toward
one of the sides and let's just go and create a
shadow going in that way. We will need to emphasize
our little fault right here, so we will have a
shadow here too, just following
everything that we have right here for this fault and
going a little bit higher. Let's just go and add the color
to the rest of the array. Manually, if we need to
maybe adjust something, we will go and manually do that. Let's just go grab our eraser
and if we need to just go and maybe make the shadows a little bit in a different way, we will just go and do that. When we are done
with this red color, let's go and do one more
thing onto this layer. We'll just get back to our list. We'll go to this layer where
we have our red elements. We'll tap on this lee and
we will choose Alpha. When we did it, we will go back to our color palette
like the white color, and with the white color, we'll just go to our cane right here, and we'll be just
edging the stripes. Adjust the size of
your brush and go along the sheep and create
these little stripes. Follow along the overall sheet
that you have right here. Don't go with just
straight lines, go with little curves. When you are done,
let's just get back to our layers,
tap on this layer, turn off our Alpha log, and let's continue by going to the next layer where we
need to add our shadows. It will be our greenish
layer right here. Let's just go create
one more layer on top, tap on this layer, clipping mask, tap on the N icon, multiply
blending modes. The level of opacity is
something around 50%. If you want, you can just go
a little bit to the left, maybe 40% or you can
just get back to this option later on and adjust it later on
if you need to. So then just get back
to our color palette, select the CN color, and let's just go to all these additional
greenish elements, and let's start adding
our shadows right here. Let's first go right here to the bow and let's just
add a shadow right here. And we also will go
to the side right here on the bow and we will put a little shadow right here to this little part and to this
little part right here, too. The bottom of this little
rounded shape, if you want to, we can just go and
completely put these two elements in a shadow on both
sides and then just go toward our little mittens
and put the bottoms of them in a shadow two just by repeating the orall shape
that we have for them. Let's just again do it on
both sides very accurately, just creating something
going in that way. If you want to add
little shadows right here on the bottom parts of these pockets to make
them a bit more in three D, you are welcome to go and
add these little shadows just by following the oral shape that you have right here, go toward all of
the green elements that you have right here and
add your little shadows to the bottom parts and to
these little parts that are supposed to be some kind
of the inside parts. Now when we have the
results like that, when we've recolored
everything right here, make sure that you like the amount of opacity
for this element. If you want to go and adjust it, make it a little
bit more visible, you are welcome
to go and do that maybe 50% of opacity
wasn't a bad choice. Find the amount
that works for you and let's continue by
going to our next layer. For our next layer, let's create a new layer on top,
tap on the layer, select clipping mask,
tap on the N icon, multiply blending mode,
50% of opacity for now. Let's just go to our
color palette and as we are working with our
yellow elements, let's just go with the pink
color for the shadows. Again, let's just start by going to some
of the bolls right here and let's just go and
add the shadows right here. This color is a
little bit too much, so let's just go
and maybe adjust the opacity to
something around 40%, find what works for you. When you are done.
Let's just go and continue adding the shadows to the rest of the elements
that are in our yellow color. We also can see that we didn't
recolor this little parts. So if you want to recolor it, let's just get back to our lays, find this whitish layer, choose your white color and add the color right here
to these little parts, or just manually go and recolor these little
parts right here. When you are done to quickly get back to the previous color, you can just hold
your little icon right here and then
just go back to this layer where you were recoloring some of the
elements in a yellow color, and let's just go and continue
recoloring these parts and adding the shadows to the bottom part of
these elements. Let's just go along all
of these little parts, Let's just go to the
bottom parts of them, and let's just go and
add our little shadows. Let's just go to the
bull right here, add this little shadow
with this color. And then we will move on to
our little star on the top. And before doing that, let's just go to
our little heart right here on the bottom. Let's just add a bit of the shadow right here
to the bottom part. If you overdid it,
go with your brush, go with your eraser,
adjust it to your liking. And when you are done,
let's just go to our star. Firstly, we will just need
to go back to our layers. We will unhide our layer with our sketch and
on the same layer, the same way as
we've created all of our little shadows right here. Let's just go and
start working on these little elements
right here to create a nicely looking star. So just go and adjust
the size of our brush. Let's completely put this
little stick a shadow, just go manually and
recoloring this little part, and then we are starting
to recreate these lines. So just go on with straight
lines toward the center like that first and then edging the color
inside right here. You can just loom
this whole shape around and drag and drop
the color to this area. Then let's just go toward these little parts and let's just add little
shadows here too. Firstly, going toward this
little element right here and going toward
this little part that you have on the bottom. If you overdid it with this little star with this little triangular
shape, a bit, if you didn't go toward
the center right here, you are welcome to work
with your eraser and work with it to make this element
a little bit smaller. And then just go and
create this langon in that way and then connect it
right here onto the side. Repeat everything
that we did before, just go and recolor
this element right here and do the same on
the opposite side too. So first going toward the center of this shape and
then just going from the middle part right
here and adding the color inside to create
a nice shape right here. We are not going to be creating the line with this
color on the top. So for now, when we have
the results like that, let's just get back to our
layers and hide the layer with our sketch to take a look at everything and see whether
we've recolored everything. When you are satisfied
with everything here, let's get back to our layers, going into our whitish layer, creating one more
layer on top topping, selecting clipping mask, and
icon multiply blending mode. Let's go with something
around 40% of opacity. And we will go and select the same purplish color
that we used before, and let's just go
and start eating the shadows to these white parts that we have on
our illustrations. Let's just go and start from this little head that
we have right here, we will go to this
little place and start by creating a little curve like that and then just go manual entry color
and the rest of the area with our brush. Let's just go to the bottom of this pom pom with
a wavy line like that to emphasize the shape and add the shadow in that way. Then let's just go to all of other whitish areas and let's just go and add
the colors to them too. Going toward the bottom
parts right here and creating our shadows to
these little pieces, going toward these little parts, just creating something similar
to what we have a shadow going toward our little shapes of the mittens and
our skin right here. If you want to maybe
make these parts wavy, you are welcome to
go and do that. Going toward the little
bolls right here, adding our little shadows, going toward this
little part right here. Recoloring everything
that is in white color. If you want, you can go toward this little part right here onto this shade that we have for our bottom part of the dress and add a little
shadow right here. So just go into both
of the sides and just going closer to the edge. You can go through
the whole shape right here and just add a little
shadow going in that. Hold your line at the
end, go to the 18 mode, adjust it to your liking. Just try to make it
very, very nice. If you need to work with
your brush and with your eraser to create nice
outlines and nice connections, you just want to go and do that. You can also add shadows underneath these additional
elements on the dress. Let's just go to these
little fluffy parts onto our boots and let's just add
the shadows on the side. So just go in there and
creating something in that way. When we have the
results like that, let's just take a
look at everything. Whether we've recolored
everything or not, make sure if we
recolored everything, the very last thing
with our shadows is these little parts.
So let's just select it. Let's create one more layer, tap, select clipping mask, tap on the icon,
multiply Blending mod, 50% of opacity, go into
our color palette, see and color and go into some
of these areas right here, maybe to one half
of the leaves and recoloring them to create
some kind of the shadow. And now when we have
the result like that, we are done with our shadows, and the next part will be
our little highlights.
8. Highlights & Final Beautification: So let's just start by going to our layers and create
one more layer on top. Onto this layer, we
will just go toward our color palette and
select the white color. And with the white color, we will go and adjust
this brush firstly, and we will go firstly toward our little
fringe right here, and we will be just going
there and put in little dots. So let's just go and side on
the size, all these element, you can go with a bigger
size or with a smaller size, and we will be
creating some kind of the highlights with
this little shape. You can just go with the very
big highlights like that. You can just go and
create them just by holding your Apple pencil
at the end of the line, going to the eating mode, creating something,
going in that way. So just create a couple of big highlights like that on
the fringe and then just go and start eating little
dots that will represent the snow and OSA will emphasize everything that we have right here for
our little highlights. We will also go to
this little part right here on our star. It just decides O your brush, and let just go and create
this little line the same way as we've created our
little parts with the shadows. But this time, we are
going to be going toward this little elements and
recoloring it with white color. Don't go beyond the frame. So if you did, just go and erase the parts
that you don't need. Go with your eraser and erase the parts
that you don't need inside the shape too if you did something that you
wasn't supposed to do, go and continue creating these little highlights
on some areas. You can just go to the hat and create some peculiar
little dots right here. Let's just go toward all of the elements that we
have right here and we will be just going
there and putting our dots in a shape of
this little highlights. Again, your main goal right here is not to
overdo everything, but to add enough
of these elements to create this
magical atmosphere. If you want to switch the
brush to the studio pan, for example, and work
with it right here, you are welcome to
go and do that. So probably you will have a bigger size right
here and you don't want to just go and work with your editing mode
right here, for example. So just go over some
of the places and add these highlights
with this white color. Again, try not to
overdo everything. We also can go and maybe add
some peculiar shapes right here to just create a
different shape for our boots. If you already did it, just
go with your eraser above this little shape and erase
it where you have the shadow. And then just go
and continue adding this little elements to all over the places right
here that you have. When you are satisfied
with the results, the very last thing that we will need to do right here is to recolor some of the
lines to create a nice, very smooth looking
illustration. Let's just go to our
layers and let's just go above our layer
with our lines. Let's create one more
layer from here, tap on this layer and
select our clipping mask. We will go and
start by selecting the color with a title
dark pink lines, and who will be working
on our eyes first. We'll just need to get back to our layers, tap on this layer, and select our drone as we'll be ding it on both sides evenly. Let's just get back
to our brush library. Let's just go to the airbrushing folder, soft bland brush. Let's just go toward these
tips that we have right here. But firstly, make the
size of the brush a little bit smaller
and we will just go right here to our
little tips and we will be just adding the
color right here. Just go on with a very nice and smooth
gradient right here. Again, just working
onto the transition of the colors and creating
some gone in that way. If you want to go to the
opposite side and maybe add a bit of the color right here too, let's just go and do that. If you want to maybe try out the pink color
right here at the very, very tips, you are
welcome to go and create a very nicely looking
gradient right here. Again, try to not
overdo everything, just add a bit of
this color right here to create a nice
look right here. When you are
satisfied, let's also go toward this little
mouth right here. Let's first get back to our dark pink line color
and recolor it right here. We also will recolor these
little parts that we have as our leads
with this color too. When we are done with this task, let's just get back
to our brush library. We will go to our inking
folders, studio pen brush, going back to our last and
creating one more lay on top, tapping on the last,
select our clipping mask, and win the same color. Let's just go to all of the yellow objects
and let's just go entry coolor
the lines on them. Very very quickly, let's
just go entry all of these little lines or some of these lines. So it's up to you. If you have some little elements that are quite similar
in the colors, you can just go and make
very nice transition between the colors just by creating
the curves going in that way. Let's just go and continue recoloring some of
these elements. If you, for example,
don't want to go and create the red outlines right here onto
these little parts, you are welcome to skip
these little stars right here and recolor them
maybe with a yellow color. So very accurately just go into all of these
yellow elements even to this little star that
we have on the top t cooloring them with this
reddish pinkish color. We also will go to
these white parts right here onto the hat
and recolor them too. Again, if you want to
go and maybe create a nice connection instead
of this very full line right here where
you have the shadow, you are welcome to go and
work with your brush, work with your eraser, go toward the top and do the same
right here on the top. Go until you have this little shadow right
here and just create a nice shape like
that and recolor this little pump
pump thing right here with the same color. Let's recolor our little shape of the candy cane right
here with this color too. So just go in there and recolor it to make it smooth and nice. If we overdid something, we will grab our eraser, we grab our brush and recolor these little pieces that
we need to recolor. We also can go right here to
the inside parts where we have these little fluffy parts
onto our boots or socks, and let's just go and recolor
them too with this color. When we are done with this task, let's just go and select
some darkish color, for example, for example, dark magenta lines, and
with this color, we can just go entry color some of these little
purplish things right here and add the peculiar
color right here to the line. Very easily, let's
just go entri color these little pieces, places with this color. We also can try out to create
the color right here onto this little bell with this purplish color and
recolor it right here. You can go to some other areas and recolor them too
with this color. It's up to you create something that you
would like to see here. And when you are
done, let's just select this light orange
color, for example, and recolor these little stars, and we can do it on
a separate layer so we can adjust
it a little bit. Let's just create
one more layer, tap on it, select clipping mask, and let's just go and recolor these little stars that
we have right here. Met with our little brush. So very accurately,
just go in there and recoloring these little lines
that we have right here. Just go through all of
these little shapes that we've created with
our brush very easily, just go and recolor them. Only these yellow parts, if you recolor something
in a different color, you are welcome to
keep it as it is. When we have the
result like that, let's just get back
to our adjustments, hue saturation and brightness
and let's just go and adjust the hue saturation and
brightness if we want to. For example, let's just go with a darker shape right here, maybe a different hue. You are welcome to select
some orange color right here, maybe even darker or lighter, it's up to you just find
what works for you and that doesn't look a little bit weird with these little
elements right here. So adjust it to your liking. If you want to go
darker, go darker. If you don't want to do that, you are welcome to just keep
them as they were before. Just create something that
you would like to see here. If you are satisfied with these elements with the
color of the outlines, let's just get back
to our canvas, and probably we will just
go inside the shapes and we will erase this little part that we have right here
as the shadowy part. So let's just get
back to the layer. Let's just find
this yellowy layer and our layer with the shadows. Let's just grab our eraser and fix this little
part right here. So we will have the
star inside the shape, and we'll do it on this
little star right here too. So now when we have
the results like that, let's just get back
to our layers. Let's just find
this layer where we have our peculiar little shapes. And let's create one
more layer on top. Let's just tap on this layer and let's select our clipping mask. Let's just get back to our
color palettes and let's just go and select the CN
blue lines color. We will start recoloring some
of the lines that we have right here on our inside parts, mostly inside parts of our here. So let's just go
there and firstly, start by going to the lines that we have right
here on the top, very accurately recolor them. Use your brush, just go there and create the outlines
in a different color. Go closer to all of the elements and work
on these little parts. As for this little element that we have right
here outside the ship, let's just go toward this little bow that we
have right here and recolor this little line
and we will keep the rest with the color
that we have right now. And we also will go toward these little parts right
here inside the ship, and we will go and recolor some of the lines
here with this color. We also will go toward these little parts that
we have on our fringe, onto our little
eyebrow right here, and we will recolor them too with our color that we
are using right now. So very accurately,
just go to all of these little inside parts and just recolor them
with this color. You also can go right
here and create a nice connection right
here onto this side. You can go to this little
part right here near the ear and recolor this
little part right here. You are welcome to recolor all of the lines that
you have inside the shapes to create a very
interesting illustration. Let's just go and do the
same on the opposite side, starting with our fringe, very accurately
just go in there, recoloring all the lines that
we have inside our shapes. Just repeat what you did
on the previous side, add the colors on the
lines behind the ears, on the hair near the face, and on the cut near the edge. All the similar lines you've recolored on the opposite side. Now, when we are
done with this task, let's just go and add
a few more details. If you remember, on our
layer with this sketch, we had some additional
little lines that were representing the
little chains right here. Let's just go and create
one more layer on top and we are not going
to be clipping this layer. We will go and select
our light orange color, and we will go and
do the following. We are going to
our brush library. We will go to the
calligraphy folder and we will choose Monan brush. Let's just go and adjust
it just a little bit, so we will be using
this brush to create these peculiar
chain shapes. Let's just tap on the brush, go inside the brush, T
we'll go under stroke path. We'll go to the spacing
right here and we will be adjusting it until we have
a nice line like that. So you can play around
with the space between your little dots right here to create something that
you would like to see here. When you are satisfied,
you can just try out how it works on the drawing pad
when you are creating a line. If you are satisfied, let's
just hit down and let's just go to where these little elements that
we have right here. Firstly, we will go with a
bigger size of the brush. We will go outside the sheets, and we will be just putting
the little dots like that. Let's just go right
here. We will also go to both sides that
we have right here. We will create a bigger shapes. We'll go to this little part and connect it with our
little bowl right here. And when we have the
result like that, let's just go and adjust
the size of our brush. You can just decide on your own how big you want
the shapes to be, and let's just go and
create our lines to create these little
chains right here. Let's just go and create them in the same way as
we have them on earlier with the sketch or if you want to
experiment alto bit, you are welcome to go and adjust the shapes
to your liking. Let's just go and create a
couple of these elements. So maybe three of them. Create them in a way
that you prefer. Adjust the curvatures, adjust everything that
you want to adjust. If you are satisfied
with everything here, let's first go and
hide our layer with our sketch and take a look
at it without the lines. If you are satisfied
with everything here, let's just go firstly and make our moonlan brush similar
to what it was before. So go again to our brush studio and adjusting the spacing, setting it at none and then just heating down and getting
back to our layers. Let's just make a
copy of this layer, swiping the layer from right to left and choosing duplicate. Now we will go to this layer
that we have on the bottom, and we will first go to our
error key and we will zoom in our canvas and we will just drag this shape
a little bit down. Slightly down when you
are satisfied with it, let's just tap on our r key
and let's again get back to our adjustments and change hue
saturation and brightness. We will be aiming for something similar to what we
have right here. Let's just go change our hue, change our saturation and
brightness if we want to. Let's just go with something pretty similar to
what we have right here that will look like we have some kind of
the shadow right here. When we're satisfied with it, let's just tap on
our matric one, two, and if you are satisfied
with everything here, let's just go and merge
these two layers together. Go into the top layer, tapping on it, selecting
our merge down. If we have some elements
that we need to erase that are overlapping
other objects, let's just go grab our eraser and erase these little parts. Go through all of
these elements, take a look and then
decide whether you maybe want to go right
here and erase some parts, make sure that you
like the result. And when you are
done, let's also get back to our color palette
and select the white color. With the white color,
we will just go towards some of these little balls
that we have right here, and we will just go and create some kind of the
sparkles right here, just adding some volume to
this element and just go and creating some kind of the
highlights effect right here. Let's just go to some of
these little shapes right here and add the few of
these little sparkles. If you want to go and maybe
add a few more sparkles, you can just go either to the same lay or create
one more lay on top. Go with the bigger size
of the brush and maybe create some bigger shapes right here onto
some of the areas. Again, try not to overdo it. Add a few of these bigger
shapes of the snow or highlights right here and just create something that you would like to
see right here. Mostly go to the places where
there is nothing or just a few of the details
and just create a couple of these little
elements if you want. And when you are satisfied
with everything here, we are done with
our illustration. Thank you for
watching this class, review if you liked
it and can tine subscribing for Markay
videos in the future. Looking forward to
senior projects.
 Uni Corn, ⭐Kawaii Art Enthusiast⭐