Transcripts
1. Introduction: Hello, and welcome to this
all levels watercolor class. Today, we're going to be creating multiple
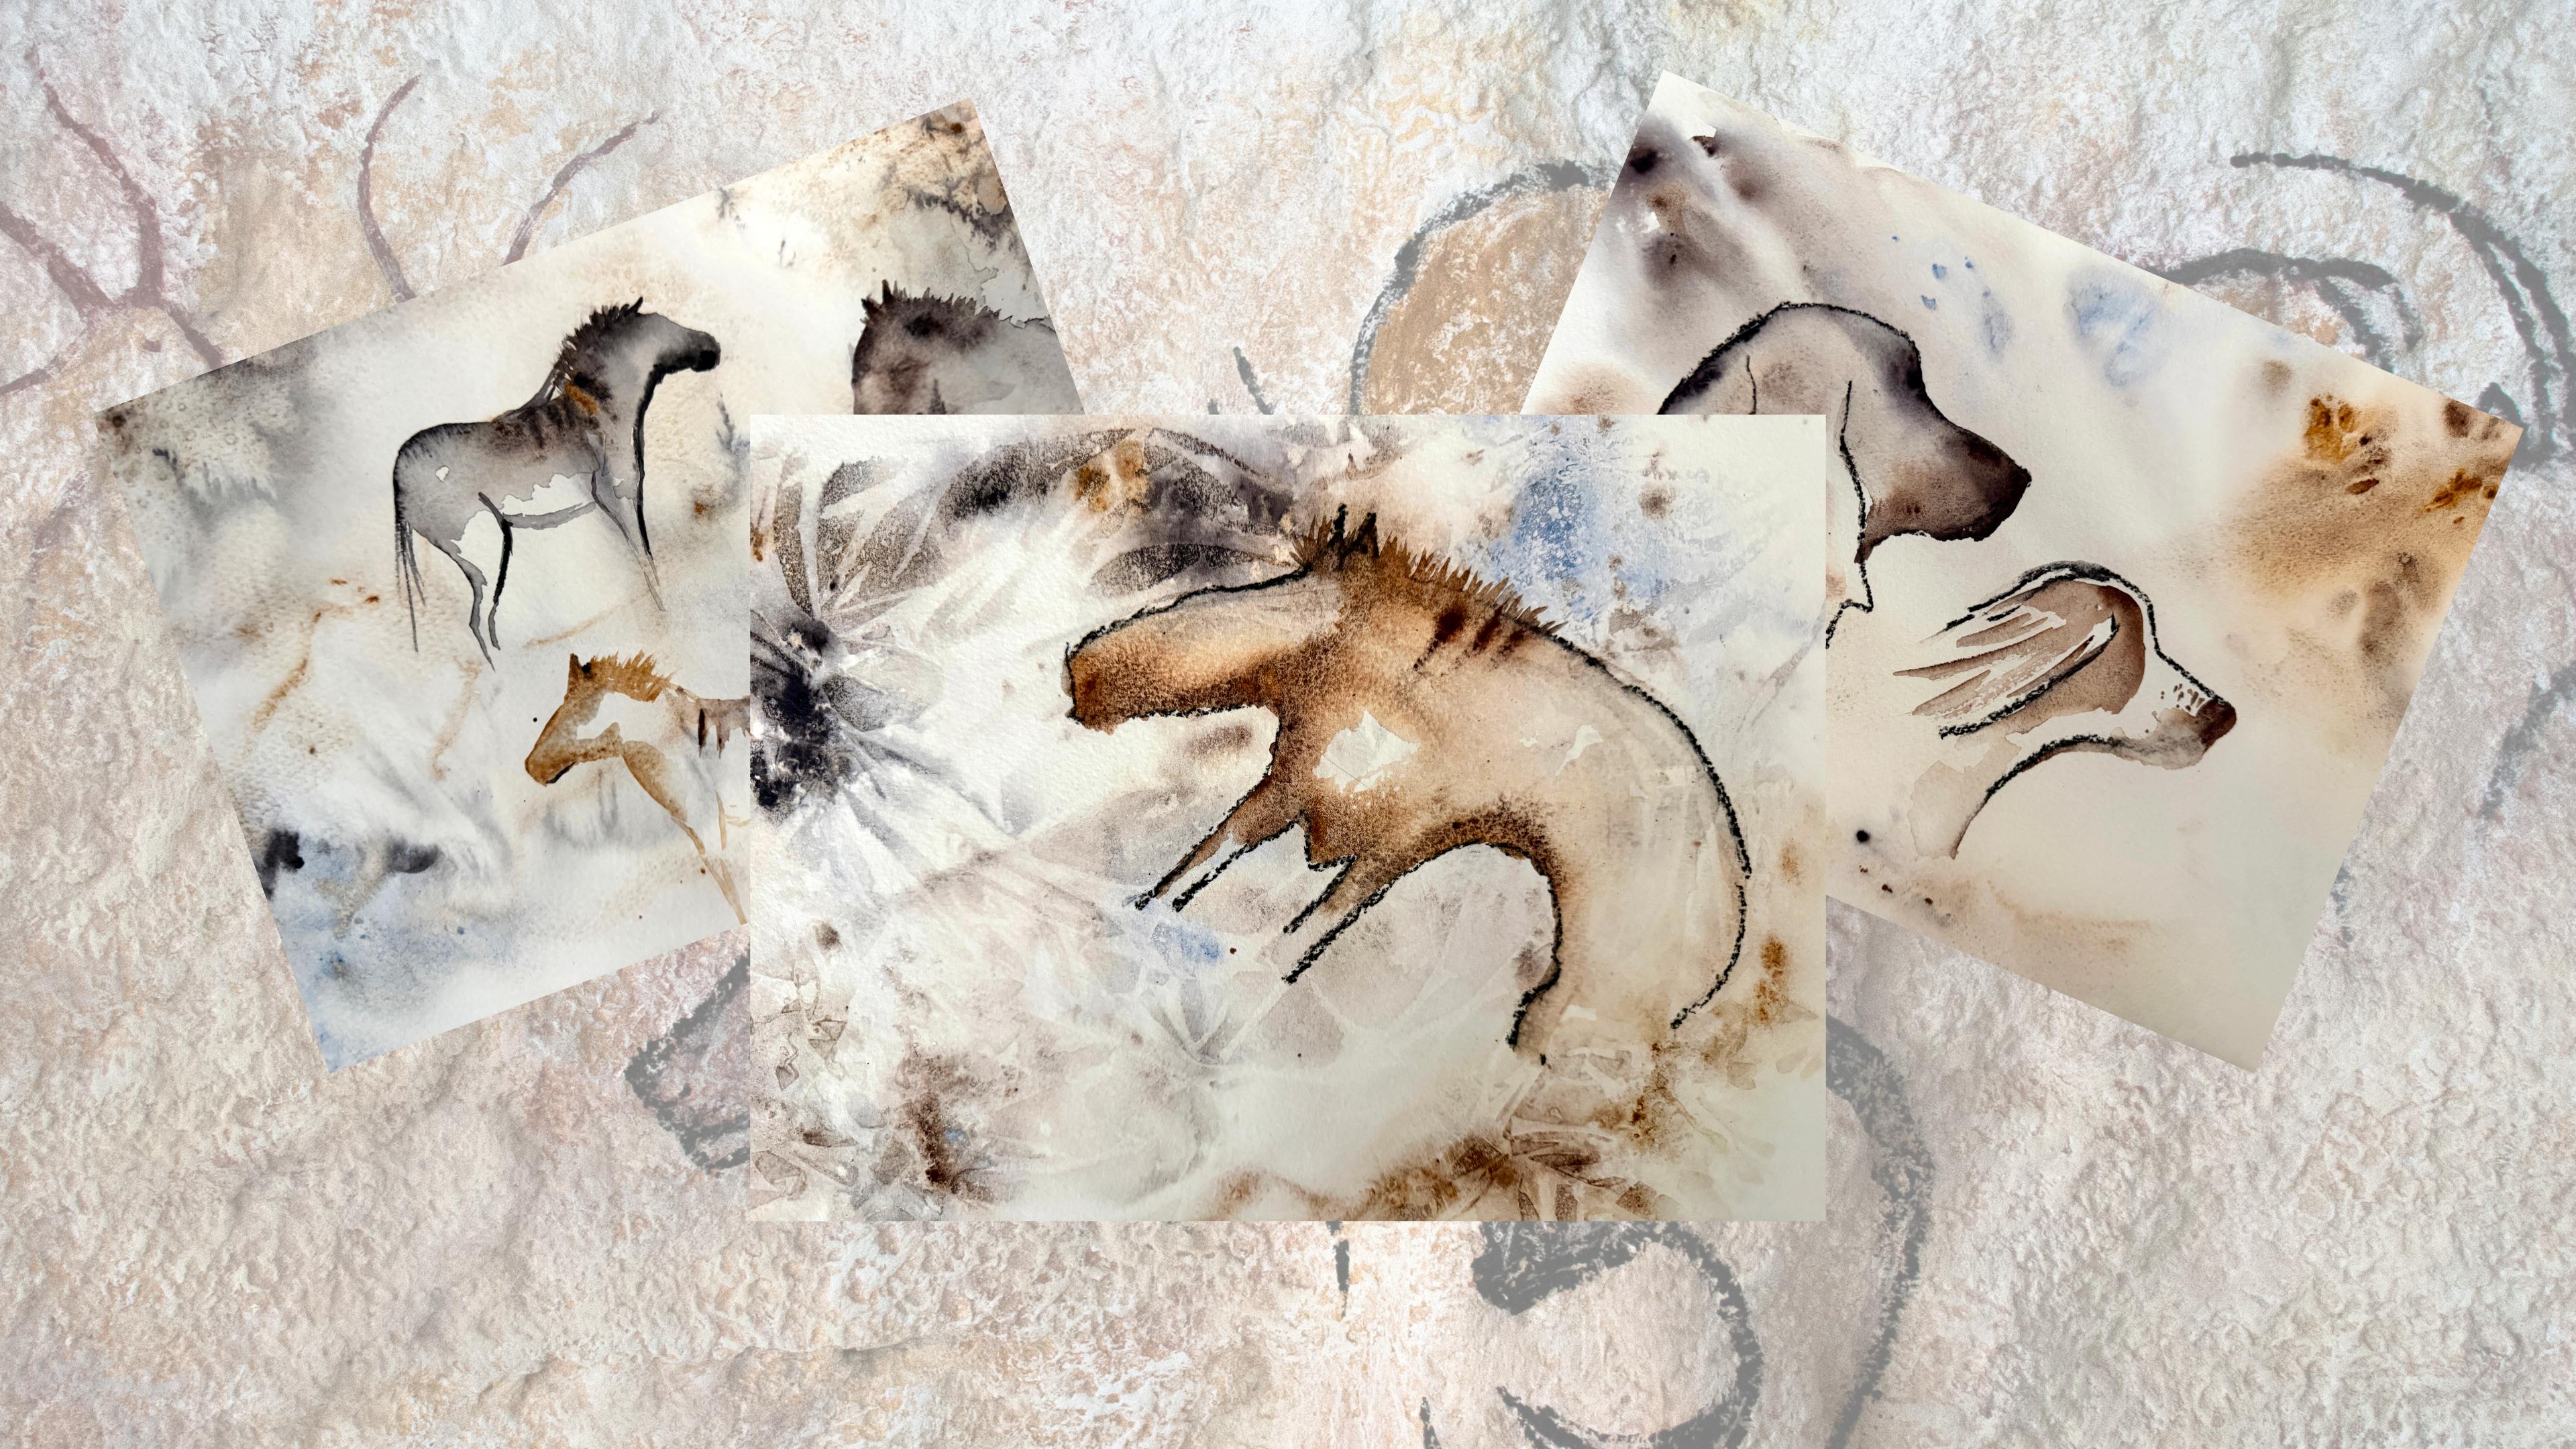
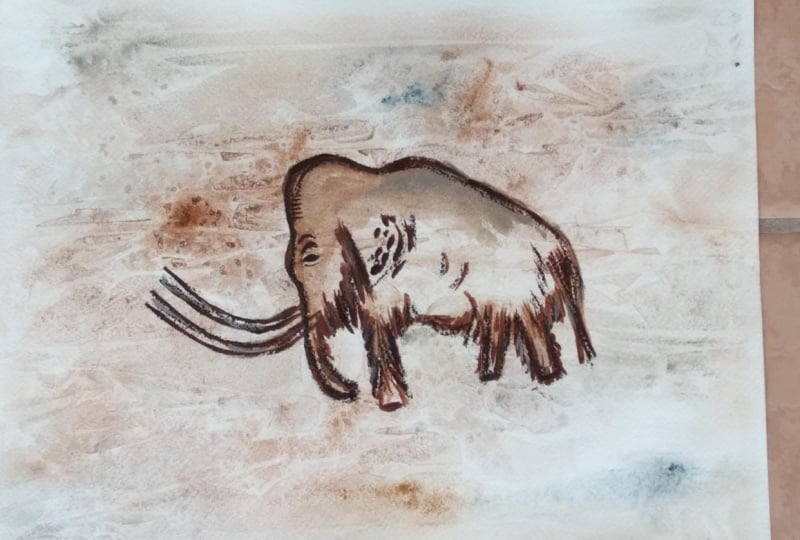
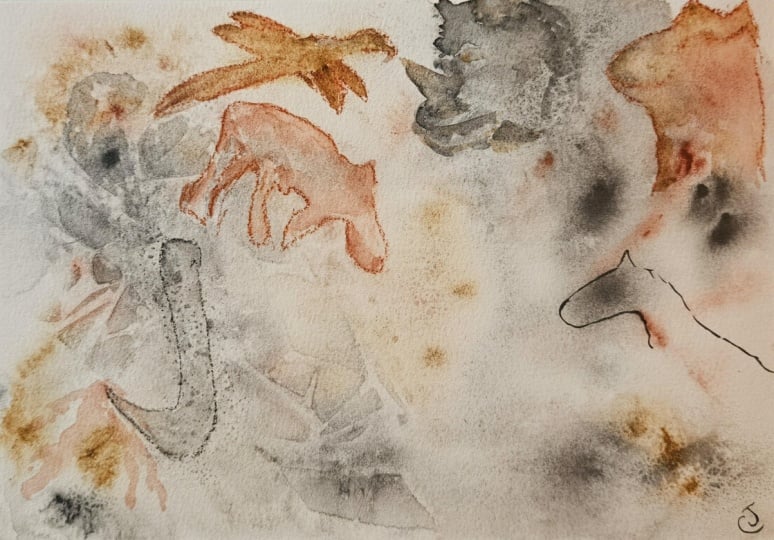
cave paintings. This is a lovely, simple class that
lets your imagination explore and wander through
time with no fixed agenda. I think, like me, you're
being triged to learn more about the very
first forms of art. And did our ancestors actually step back from those
cave paintings to go? Yeah, I'm not sure
about that eye. I'm Jane Davies. I live, paint, teach, and walk my lovely spaniels in the beautiful South Downs
National Park in England. Over the last 20 years, I've taught myself the free flow technique that
you see today. Not having been to art school, finding my own way has been
fun and sometimes daunting, but has allowed me to
develop my own style. This has led me to teach others either on a
one to one basis or as part of a group in a wonderful studio in the
heart of the South Downs. I also run a successful
art business where two days are never the same from the thrill
of exhibiting to painting pet and
wildlife commissions in my own home studio. In all my classes, you will follow
along in real time, where I can guide you
to keeping your work loose and fresh
without overfussing. If you're just starting out, my three beginner
classes will guide you. With your first masterpiece
painted in only 15 minutes. Then you'll find dozens
of my master classes available covering a wide
range of beautiful subjects. In each one, I share the techniques I use in
my own professional work. We'll have a lot
of fun together, and you'll gain the
understanding and confidence to
incorporate everything you learn into your own work. You'll be amazed at how
easy watercolor can be. I provided you with some lovely reference photos
for you to choose from. And this time, I would
encourage you to paint them freehand in the spirit
of our ancestors. I'll be showing
you how to create three fun backgrounds using my free flow
wet-on-wet technique. We'll be tilting,
adding salt and clingfilm to create the
illusion of a cave wall, and maybe the start of
an imaginary creature. Then I'll show you how to add a cave painting to
your background, and I've used my two spaniels as inspiration for one of them. So you could paint
your pet, too. This class, I'm sure will
ignite your imagination, and maybe for the first time, you will realize how much water you really need to
add to your paper. If you'd like to learn
more about me or my work, then please pop
over to my website at Jane Davies
watercolors.co.uk. This can be found
on my profile page, along with links to my
Instagram and Facebook pages. Well, I love to share
my art and adventures, especially on stories
with many ideas, works in progress, and
tales of studio life. I really hope you will share all your paintings on the
projects and resources pages. I love seeing your masterpieces. And don't forget
I'm here to help if you get stuck or
have any questions. I want you to experience
that buzz of painting in this liberating
wet-on-wet loose style. So come and join me.
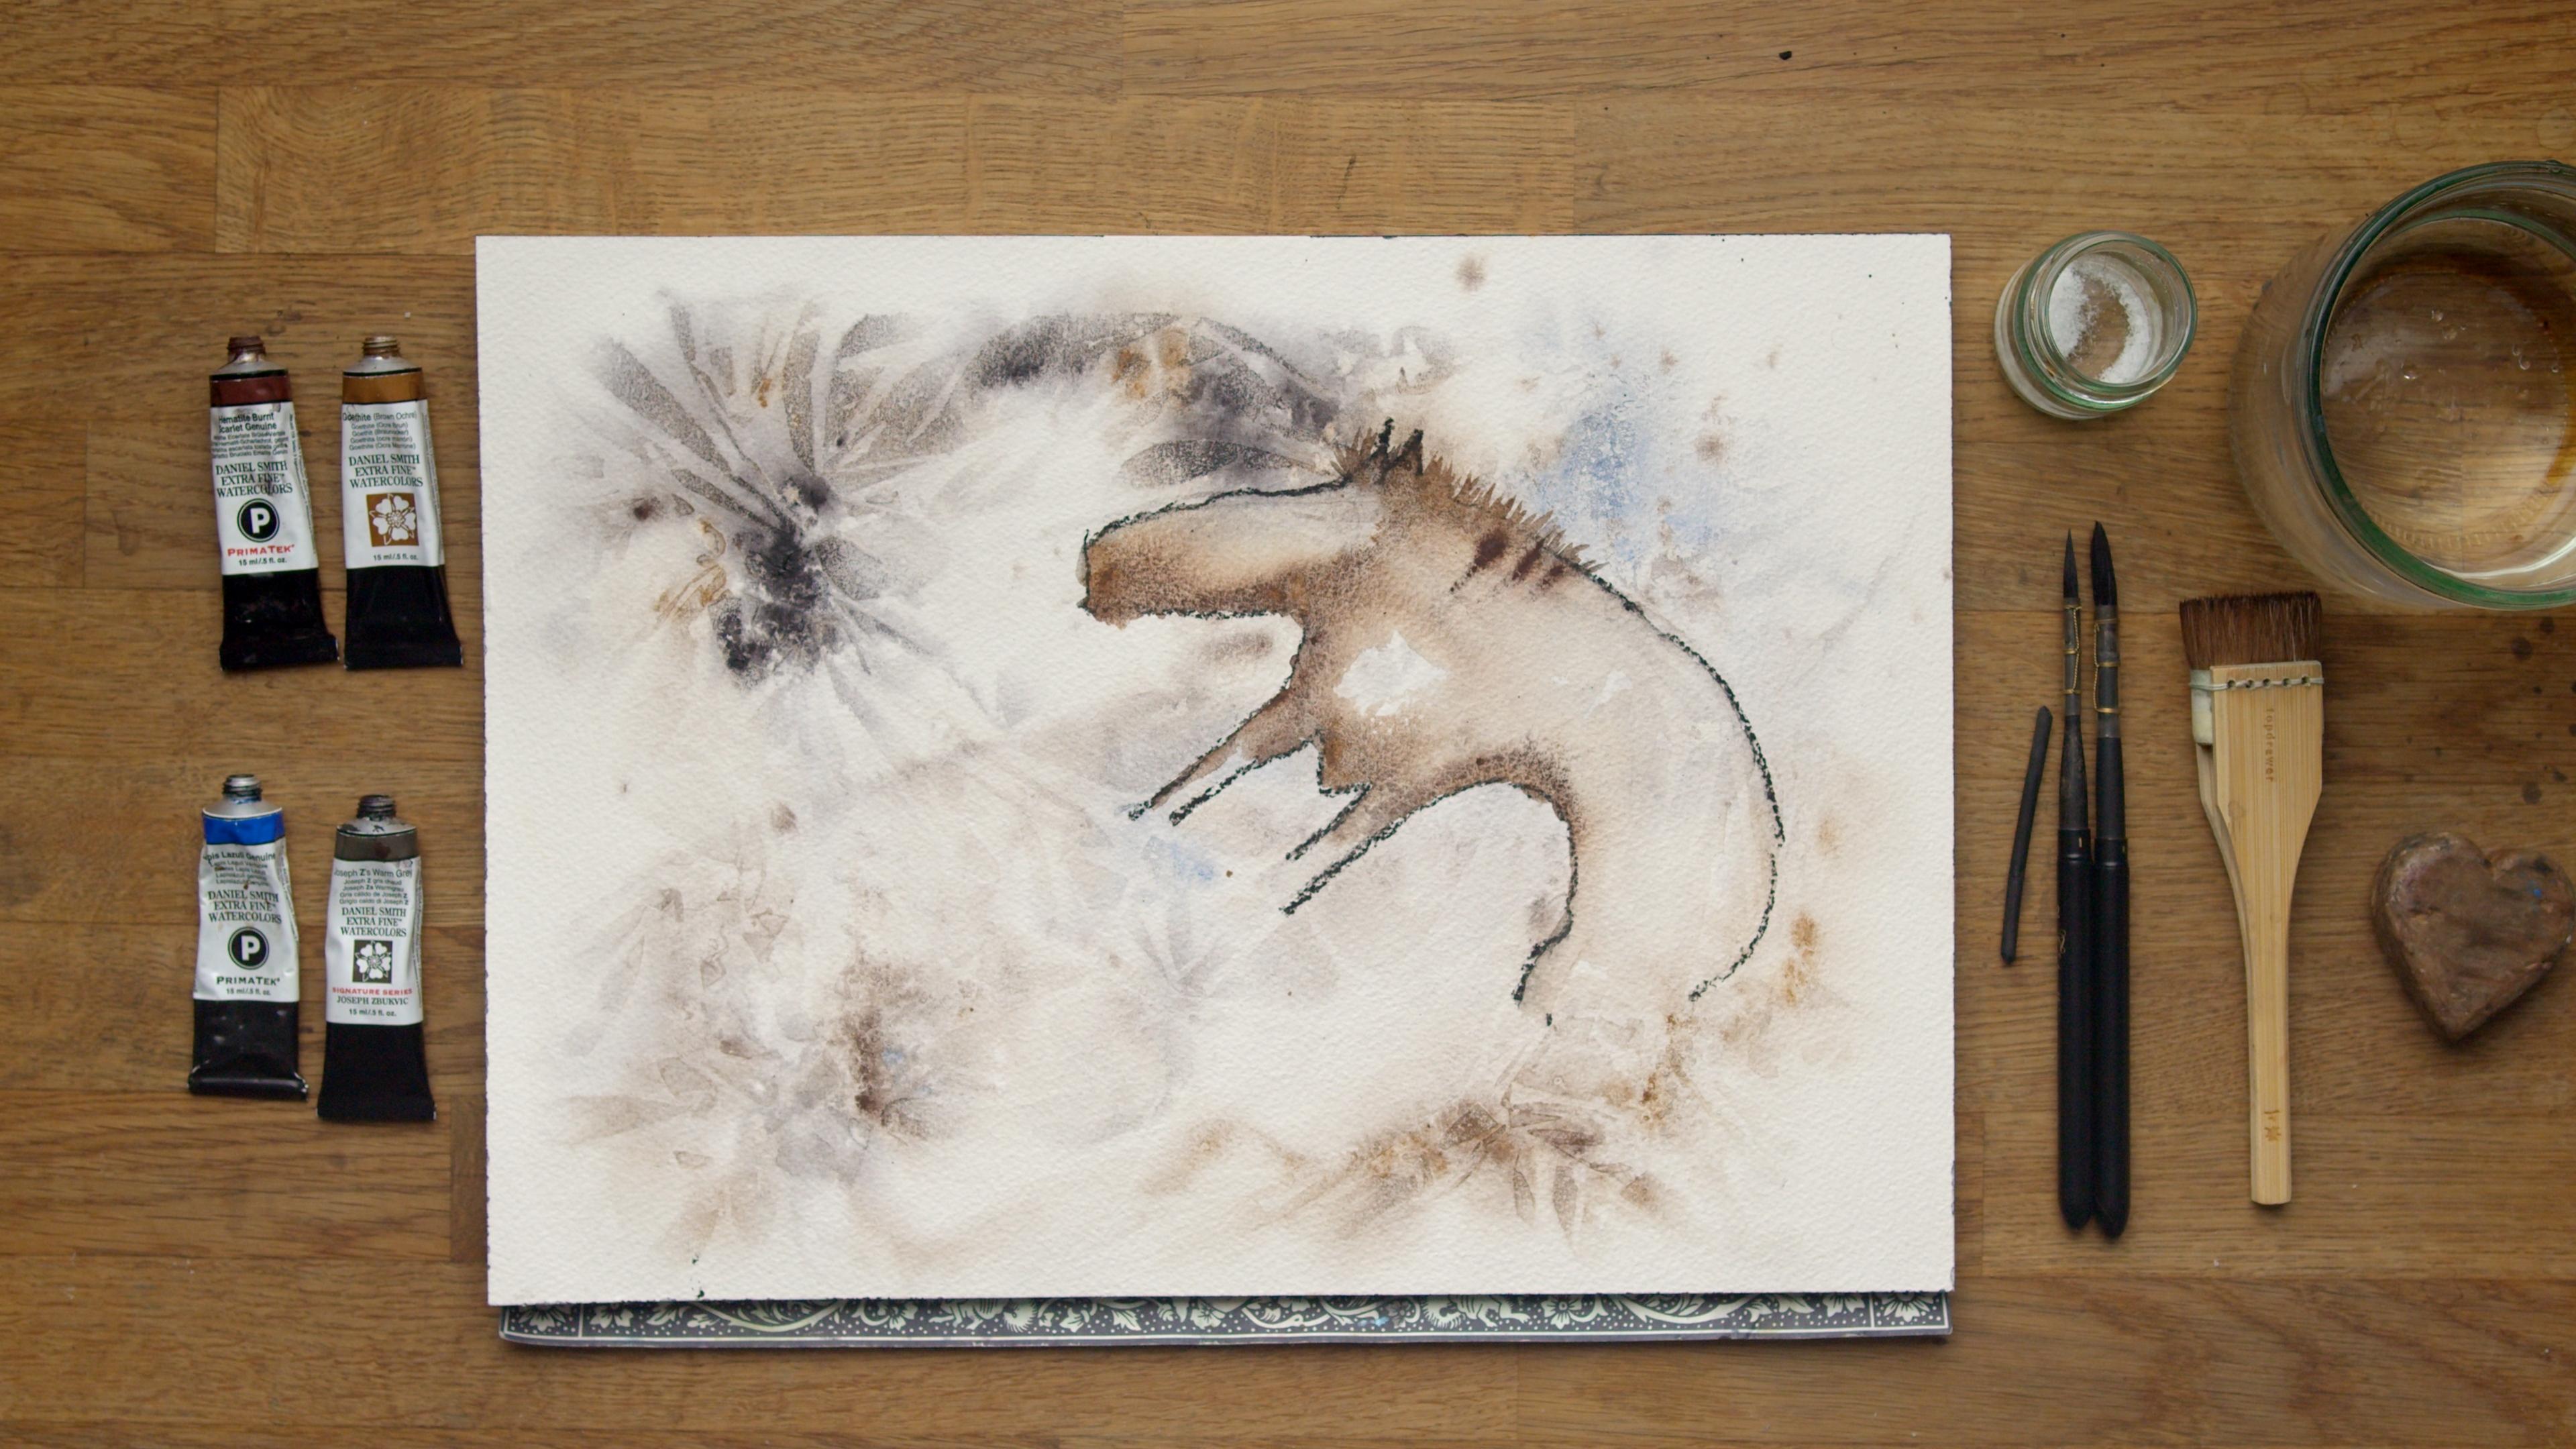
2. Materials: So let me run through
all the materials. You're going to need to do this really fun, light hearted class. Let me start with my paints. The Daniel Smith as normal. But again, if you've
got other brands, it really doesn't matter. And again, I highly stress, it doesn't matter what
color, particularly, I used some that I thought might be authentic
colors they may have had, and I'm very much
stressing the M. So I've got hammertte burnt scarlet Genuine
Goethite which I love. It's a lovely color.
It's just a Brown Ochre. Lapis lazo, 'cause I just
love the colour again. And the Joseph warm gray. If you do have a paint
that reacts well to salt, incorporate that I've
really only added this 'cause it gave
me some lovely. Let me show you bring this piece in some lovely salt marks. And the salt marks work particularly well
on this Bockingford, which is one of
the papers I used, 'cause it's wood pulp
rather than cotton. So, yep, that's worth
finding a paint that reacts well with
salt because these actually don't particularly
the other three. So this paper I have
in front of me, I have used three
different papers, and that's really purely because
of what I have in stock, this little class was lovely just to reconnect with some of the papers I've got 'cause you get a bit unfamiliar
with them, don't you? And you forget how they work. So this is a nice
excuse just as I say, to reconnect with your paper and your paints and
have a playound. So I've got in front
of me some arches. I used the Bockingford. And I use some magnati. Pronouncing that really
badly, so my apologies. These can all be found links can all be found in the projects
and resources pages, and that goes for all the material you see
in front of you. What am I up to Salt
SLT was really fun. As I say, explain
why that was good. Pot of water. I've got a little
mid little trusty heart. If you haven't come across this, I use this just to
give my paper tilt. If I'm totally honest with you, I don't think I actually
use it in the class, but you may find
that a useful thing. I got a big brush,
and that's just for purely covering the paper quickly and wetting it all down. And I've got two travel brushes made by Tintoretto,
and they're lovely. I really like these. And again, there'll
be some links in the projects and resources pages to those, if you
want to have a look. Little charcoal stick, 'cause I charcoal some of
these patterns out, but if you don't have
a charcoal stick, even, like, a heavy
grade pencil, a high HB. Or just your paint. You can just draw those lines
out with a nice, fine tip paint brush. So yeah, don't feel
if you haven't got exactly what's on this table that you
can't do this class, 'cause this is a
really free flow go for it. Or, any other thing. Little bit of clingfilm
'cause that was fun. I've used clingfilm in varying amounts on
the three pieces, so that's fun and a good tip. Before you start 'cause I
struggle to unravel this. So yeah, you might be worth
getting unraveled before you start your
paintings and you're not struggling, trying
to get a piece out. Like I was. What else is there
to say hair dryer, which I always have sort of
off camera. And it's handy. When I poured the
cling film off here, I could just feel my
paper was a bit cold, so I gave it a quick whiz
over the hair dryer. But I do stress it it's useful not to blow your hair
dryer over the wet paper. But saying that, it
could be a technique you might think that
would be quite fun. What happens if I blow
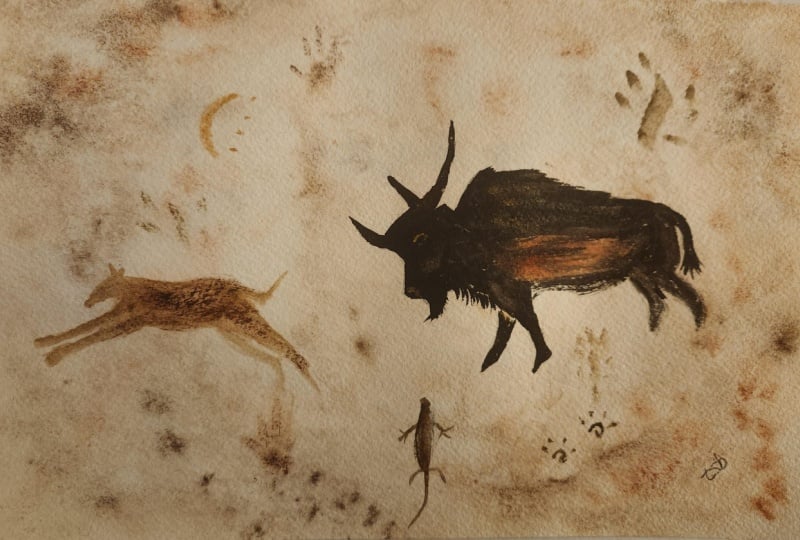
my pigment around with the hair dryer? Go for it. There's also on the projects
and resources pages, some downloadable pictures
of the cave paintings. So you can use those to
copy out your horses, or you might like the deer
on there or the wolves. So they're all there for you
to use either as just as reference photos in
front of you or to be able to put them
onto a piece of paper. There's some little videos, which are highly stress. Yeah, to watch because they
are really interesting. So really interesting,
obviously, the original form of art. So I'll pop those in there
and they'll be there for you to click on
and watch. Right. I think that's it. So let's
go and create some magic.
3. First Background: Right, then. Let's make
some fun backgrounds. So I've just removed
my salt and what's it little charcoal thing
and the walnut ink, 'cause I don't need
those on my desk. So I'm picking up my big brush, and we're gonna make this
really lovely and wet. I did experiment with
leaving little gaps. Let me show you that
wonderful carry on. So I obviously didn't
wet those little areas, so it was clear paper. Not so sure, but, of course, in the
spirit of this class, if you fancy doing
that, then yeah, leave it a little gap, but
I'm gonna soak all mine. I wasn't so keen. So I'm
starting with the bokingfdg. Why. Absolute favorite paper. Now, you can see these
aren't stretched. I think in the spirit of
the gain of this class, it's just a lovely one to pick up your piece of paper,
have a bit of fun with it. But you will see it buckling a good tip is to flip it over and then wet
the other side of it, and that will stop it buckling. But be warmed, it does
take a bit longer to dry. So let's let's do that. Then hopefully it won't
be curling on me, and it will be nicer
for you to view, hopefully. Let's flip that back. Get the right way up, and I've got some marks on there already. Nice and wet. I'm
gonna put that down. I'm pick up my bigger brush. I don't want in a little while. It's just a little bit twee, and I can't piu enough paint. So I'm just gonna have
I've got the gothte, the Joseph warm gray,
and the hematite. I'm simply gonna
make some patterns. I'm really trying not to
think about this too much. I'll say, the Joseph is lovely cause the salt
reacts to it well. So that's why I've
included that. So it'll be a warmth down here. I say we're trying to
create a cave wall. And what was interesting. I got a little bit. A
little Dickey on these, actually, these cave paintings, 'cause they're so interesting. It's obviously the
first form of art. And they actually used the form of the rock
to create the animals. So if there was a little mound somewhere in the rock face, they used that relief
to create something. I'm not sure how that's
really going to help us on this because we can't
create any lumps and bumps, but we can try and create
some sort of form. But really, I'm just I'm
just punking paint down. I'm just going to see
how that materializes. That's why I'm going
to do three, and I can just have a play around with those three and
add different um, ideas or different creatures. Got a bit mi. In number
just gonna tap that ink, so I just I love this blue. It's got a little
contaminated there, I think, that's a bit better. Now, bear in mind, we've got
to put some figures in here, our lovely cave
paintings themselves. So if you make the inside
or the sum areas very dark, obviously, it's gonna you've
got to paint over them. So if you make it very
dark, it's a little harder, but I don't really want anybody to feel too restrained, really. This is just, say, a lovely simple playground. And you might find
the backgrounds are useful for something else. You may think, Oh, actually, I could do something
else on here some Yeah, maybe the simple trees and
all sorts of fun things. So again, I'm just
placing, just allowing. And I will do just a little bit of little bit go right there, 'cause there's a
lot of pushy color. Sneaking those up,
put that back now. I guess you're gonna
do a little bit of tipping and tilting. That fully. Do this
off the camera. And again, the more exaggerated
you tilt this, obviously, the more your painting
is going to run and give you a different look. So you can leave this to
dry completely on a tilt. You can do this, whiz it around a little bit,
and then lay it flat. We've got salt to add. There's some clingfilm
we can add to these. So that looks quite interesting, I think. Don't overthink it. Just let it let it be, 'cause it obviously will
dry differently, as well. So what you get now is not necessarily what you're gonna
end up with, obviously. It's a let me pop. I've
got a little bit of salt. I was just gonna cry and
concentrate it on the where the Joseph was
because that will give us the most marked. Now, do I put a bit of Kling
film over this one, let's? Let's do a bit of Kling film. I should have been
a bit organized and poured some of this off before I started, so let's Mm. Don't you just hate clingfilm? I I'm just got a
little piece here. I'm not going to fight it too
much while you're watching, but you're gonna obviously
add larger pieces. You could add a piece
right over the top of it. So many things, so many ideas. But I'm just gonna plank
that little bit down there. A little tail there and see
if that can do something. As that dries, again, we can add some wall paint as it dries cause
that would give you a different effect
the paint's not going to move as quickly
as it begins to dry. So maybe we can do it's a swiggle it could be a
fault in the cave wall, like a little Fk line. And again, I think
they use any fk lines. If that looked like it
creates a back of an animal, they would even
use the fk lines, or at least that's what
experts thought they would do. Obviously, we don't
know, do we really? Yeah, that looks
quite interesting. I'm gonna literally pick
this up and leave it to dry. I'm actually going to leave
it to dry flat this one, 'cause that looks quite nice. Let's move it to one side.
4. Second Background: Now, got myself some archers, so let's see what we can
make out of this one. Fun in there. And if you're following this kind of from
having done tweak, which was the pet portrait
of my own spaniel, that was quite an intent class. Quite full on. So this is a bit of a relief from that because it's
just a bit of fun. Same colors I'm gonna pick up. I just have all the four
in my hand at one time. I'm going to do
pretty much the same. I just want to I would, we will add the figures. But they're all
gonna be different, and I can look at
them when they've dried and decide what
figures I'm going to put where we've got some
interesting patterns. Let's go a little bit
more hematite here. Actually it's quite fun to try different papers
again, isn't it? Because I tend to use
Bockingford the most, so I don't often use archers, so it's quite nice to pick that up again and get a
bit familiar with that. So you could almost
close your eyes and just kind of try and
do some wiggle marks. You could drop some
water in there. If it's going a bit dry, so you can get some
nice water marks if you don't want the salt. Just put a bit of dark up here. So I'm not worrying
of any splatters. I'm trying to I'd like to keep
the center a bit clearer. So when I do the animals, um, they're not I'll
say, they're not, um, you know, I haven't got a very dark
background to work over, so I'm just doing a few
splatters, if I can. The good thing about
this arched pad is it's a gummed pad, so it might It's not
bucking quite so much, so I don't need to whet
the background of that. How does that look?
Look interesting. It's different. Alright. Oh, this one, I think I'm
going to add a bit more salt. I'm gonna add a bit more I'm I might add the Kling
film over the top, I need to unravel that, so bear with me
while I unravel it. Right. After fighting
with my ling fing roll. What I needed is a
nice little h. Um, it's in a pop box over
serrated edge, but I hadn't. Just got a roll of it
knocking around my studio, so Anyway, so I've laid
that right over the top. S as say, a little bit
of salt underneath, and let's give it a bit
of a squidge around. See how that dries. Right.
That's pop that to one side.
5. Third Background: And now I have a bit of a precious piece
of paper, actually. A Pusa of the magnetiObly pronounced very
badly, so apologies. But, I love this paper. Again. Nice and wet. So get all loving wet. Yeah, I'm gonna flip this over. It's more, say, it's
just so it doesn't, curl up too much so the camera
can see it a bit clearer. I think if I get very
curly buckle edges, it's going to be
a tricky one for you to see. Bit back again. Papers normally has a right
and a wrong way round, so they will be packed the right way around,
if that makes sense. If you pull it out of the
sleeve with the writing on top, you should have your
paper on the right side. Alright. But to one side again? Pretty much rinse and repeat. So same sort of thing. You pop some color down. You'll probably feeling
a little bit braver now, and now you're on the third one because
you're probably like, R, I can do this. I'm just gonna Whack
a bit of colour on. Let's not worry too much
where it's all going. I'm gonna give this one
a nice tilt, as well. And I might leave this
one actually to tilt, as it dries, so I'll give it a good old tilt and
leave it to dry. I get get some nice runs, then. We'll show you when
I finish this. All my practice pieces, cause I've done quie a
few practice pieces. It was, uh, it's
been fun, actually. And they're just the background. So they're just we need enough, you need quite a bit of paint on your paper if we're
going to tilt it 'cause often tilting it will make some of the
paint run off the page, so make sure you've
got enough on there. But saying that, I did
one very pale one, and that's probably
alright, actually. I would show up your
cave paintings a little bit better because
there's not so much color down. So maybe you'd choose to
do this one very light and Yeah, I think that's right. Let's give this one a nice tilt. When it's down, you
have a mess here. It's just one of those it's
one of those exercises. So let's give that a nice tilt. If you can see that running. And what I can do add a
little bit more interest, I can load up my brush
again and drop water in. So that's allowing
that paint to run. You can all start to see
little mini landscapes and all sorts of
things, can't you? So I think you'll find
this quite a fun exercise, and you may decide not even to put some
cave paintings on, as I said earlier,
you may go, Oh, that might be quite fun
to do something else. Rain storm coming off clouds. I'm gonna put that
down for a second. Can I add a bit of water
in this one section here. Can you see that running? And again, there's
absolutely nothing to stop me adding a bit more
paint at this stage. So don't have an idea and go, What would that
do if I did that? This is just a fantastic
exercise to do exactly that, I think you learn a lot by being a bit freer and you've got we've no great agenda
really on this class. And if one of your
backgrounds doesn't work, so be it. But you
will have learned. You've had a bit of
fun, and you have learned a few things
along the way, I'm sure. So that's quite
fun. I quite like how that's moved around. You see that sort of bands
of like where I've dropped that water in a bit
of water there. Courage that. I say, I'm going to leave
this one to dry. I was gonna be off camera, but I'm gonna leave
this one to dry on a nice tilt and see how that. What that produces me. So, yes. Let them dry actually. I wouldn't use a hair
dryer, so this class could, you could do this in the morning or the afternoon or the evening and come back to it
the following day. But I wouldn't hair
dry them personally. Again, it might be something you might want to
experiment with. Right, I'm gonna pop this down, and I'm gonna show you those
other backgrounds I've done. You just give this a
little bit of a cleanness. Nothing quite like
making a mess is a Now, this is Bkinfeg
and that's actually, I use a little bit
of all night ink on there, which we didn't do. I didn't on any of those, but all night inks quite fun. I wasn't quite sure. It
leaves a bit of a matte look, but that's that one. This I quite like 'cause I must admit I was at I was
chatting to a friend, she rang me halfway
through doing this, and I was just
dropping some colour in here while I was
talking to her, but it had started
to dry and you see, it's almost given
some fault lines. And interestingly, I can see. I don't know if you can see.
It's like looking at cloud, isn't it? This could be a man. Coming over here, I
can almost see an ear, and this is the front portion of a horse's head coming round. You can see the nostril here and almost coming
round into a neck. So I may have a
go at doing that. Um, let's see if I can reproduce a horse out
of that, but who knows? I think you saw
that one already. I was just playing around with some different
colours, actually. It's again, quite fun. I wasn't quite sure on
leaving the big gaps, but, you know, that's an eye
there somewhere, isn't it? This is the very washed out
one I mentioned that would be quite a good background when
you're doing the animals, 'cause obviously,
you see that and the background isn't being
too distracting there. But personally, I
like doing all these, that's a bit of
archers, actually. Io be either way. You could
be turning them around all sorts of um orientations. It's quite a fun one. That
actually had two layers, and I used sort of a straight edge of paper
to try and create some marks. I'm not sure if I like that, and I'm not sure if I
liked actually two layers. It got a bit muddy and then
almost a bit too intense. Talking about intense, though, this is a bit of
bokinfood look at that. And that's given me
something quite unusual. Harder, I said, to try and find some gaps to put
the animals into. But, you know, this
could be something. And I was talking about
how they were using the form of the
walls, so, you know, you could go turn
it around and go, you can sort of see
something there, or it could be a part of a body. So it'll be quite fun
when yours have dried, whether you can see
something you can incorporate into your paintings. Um, yeah, that's just
me just playing around before I filmed this class to give me an idea
of what I was doing. So, yes, I hope yours are drawing love lily,
love lily beautifully. And I say, leave them to dry naturally if you can possibly do that it will give you the most give you the
best sort of form. I think if you start putting your hair dryer over that salt, and that Kling film obviously gonna blow the king film off. So, yes, be patient
and allow them to dry, and then we can put
some animals on them.
6. First Piece: So how do your pieces look? I really love how
mine have turned out. This is the first one, the one I painted on
the Bockingford paper, though I must confess I was
a little hesitant hesitant, a little hastily taking
the cling film off. I might not have waited
completely until it dried, so you can see it hasn't
worked, unfortunately. But had I been more patient, it would have given me
some nice crinkly effects. But I love how the salts worked. It's given me some lovely,
interesting marks. And that's well, personally, the joy for this paper, it marks really well
because it's not cotton. It's wood pulp. It's fantastic for mark making. I'm going to flip this
round the other way, and I'm going to try and use some of the lines
that's been created. As they apparently once did, we don't really know, do we? And it almost feels
wrong to be copying someone else's work from a completely different era and a completely
different way of life to then try and paint
what they painted is it's a kind of a weird,
rather humbling feeling. So, yes, I'm going to
go and do some horses. So these have been
taken from there'll be some the reference photos are in the projects
and resources pages, and I'll also give you some downloadable
templates if you don't want to repaint them, but I'm going to try
and repaint them. It's quite fun to say,
this is a very loose, liberating piece of
or clast shall I say, so go for it. Just give it a go. So I'm going to pick
up the Joseph Grey. And I'm going to start
roughly with the neck. I've got my piece
in front of me, although it's particularly not helping me because I'm they've switched the orientation
is the other way around. But anyway, I'm gonna
start with a neck. Coming up here. We've got some
funny little ears, haven't we coming on here? We'll do the main quite quickly. Let's just push that man up. What did they see back then?
What was their life like? So different It's
hard to even imagine, isn't it, what it
must have been like. And yeah, amazing to think that was the first
form of art back then. And it also gets me wondering. Did they step back and go? Yeah, not sure about that. I've over fiddled. I shouldn't have put that
extra bit of I don't know. Oxide on there. Okay, so I'm wetting that down
and bringing that round. It's run along the back
of that mark there, see if we can kind of
incorporate that line. 'Cause it's fascinating what's
in here, and I did notice. So I'm going off piece here. I could almost have done
some sort of creature here. But it didn't seem to make
sense with the head here, and I was going slightly
off piece there. So I thought I would start with a horse and keep
things a bit simpler. I'm just going to
do a simple back. I'm actually gonna run
and take it a little out of that line. Come down. I want to try and I
don't want to colour it all or colour it
and fill it all in. I want to leave some
just simple lines. So we come down here and
it's paint on my brush. I come down here, do a leg. Bring her up here. And it's interesting, actually. Most of the work I've seen
is all done in profile. There's very little sort of
facing towards your angles. So they obviously
figured that was a rightly so an easier
way to depict animals. Let's goose picked up
the hematite there. I just want to put some
little lines down here. Always worth stepping away,
sort of having a little look. That still applies. Sure it applied
to them, as well. Did they step back in
their cave and look? We'll never know, will
we. Keep adjusting. As long as this is still wet. You keep adjusting your lines. I'm gonna give them a dark nose. They seem to have a
dark sort of muzzle. Put it down a bit more,
extend it out a bit. It looks quite fun, doesn't it? So stripy lines. I would say don't over fiddles, 'cause from what I can
see, they're not fiddled. They haven't done a lot
of detail in any of them. And they're quite
big. They're bigger than I thought, actually. Uh they are not this size. They're more, you know, the
pieces are much larger. Much larger than I
Videos will pop. I did get into
them a little bit, and I will pop a couple
of little links to videos that you might
find interesting, which obviously goes into
a lot more detail and a lot more accuracy than I
will babble on about here. So, yeah, waving worth
having a look. I know. Oh. Yeah, a little watch 'cause
it's, I say, fascinating. I've just seeing a
little face here. Is that something little it
animal there, little horse? Let's try and do him. There's nothing like
planning your class out, Jane, I just going for it? I just saw that
little horse there. Is that a little
horse's head there? Let's try and use that line. Maybe it's try and keep that that fuzziness
of the line there. I quite like to be
able to keep that. I've lost, the crease mark
that I actually was following, so can I make this? It's gonna look maybe a little
falli dumpling of a horse? Come down here and maybe use
some of that line there. Is it there. Just give him
a little bit of a man. But a lot of the cave
paintings I can make out are in France and Spain, and they've actually
done replicas. Because a lot of them
you can't get into, they've closed them off of
potential human damage. Just our breath was
deteriorating some of the caves. So they've actually done, like, replicas next door to them, where they've taken
the inside of the cave dimensions and form and recreated that so you can go and visit
a replica of them, which must be amazing
to go and see. That's quite fun, isn't
it? I can almost see. It's a leg coming down
there, maybe a little leg. Yeah, I'm just gonna
whip that down, see if you put a little
bit of paint there just to incorporate that
round. It's quite dinky. Okay, see what else I can
do. Let's have another one. Uh, let's do it let's
change the colors up. Let's do another horse here. I'll have him facing
the other way. I'm just gonna actually draw the outline to
this one, I think. Let's come down here. Down my brush. Now to think they obviously
wouldn't have had photos. Quite obviously. So this would have all been
done by through memory. So none of the luxuries we
have of reference photos and printouts and all being done from what they
can visually remember. So I'm gonna put a little
bit of blue in there. Why not? Let's have
it all bit of a blue. So, yeah, just let your
imagination be free. Whatever your fancy
doing to them. I think that's gonna give you the nice spontaneity,
and it's just to say, just a little bit of fun to explore your paints and explore your materials
without the pressure of a very important piece. Yeah, I think that's quite fun. I'll probably just
leave it at that. That's to what I will
do. Ts colored down. I quite like the stripes
down here on these. Somehow it makes them look a
bit more authentic somehow. What they were, I do not know. It's like a zebra cross. Horse? Yeah, that's
quite fun, isn't it? I wasn't gonna put
put a little in here, this is probably gonna ruin it. But just a simple
eating up those ears. Yeah, I'd probably
say Don't fiddle like I'm doing now 'cause it's
probably gonna ruin it. That is a little weird now. I'm not sure if that actually
looks like a horse anymore. Got a unicorn even. Fab. I'm gonna I'm gonna
leave leave that at that. And it's just a nice way
of exploring the paper, isn't it and using some
patterns and just getting your mind thinking in a
slightly different way. So, yeah, that's your
number one piece.
7. Second Piece: Okay, so this is a
little bit of arches. And this is where I covered it completely in clingfilm,
if you remember. I did take that off and just dry this paper completely
so I knew it was dry. So I'm going to brush
off that salt mark. Well, you can see the arch, it doesn't give me such unusual
patterning. Good or bad. Of you want for a nice an easier deeper that's not going
to be quite so mark, Mike. You can see that's a lot softer. But I'm going to see if I can there's a really weird
ante tail looking creature I've somehow created in here, so I'm going to try
and replicate him, what I'm going to
do, I might use my charcoal stick
and sketch it out. So I can see I think
there's, like, a bottom of the neck, and there's a leg
coming down here. I'm using that. On a bit here, there. It's coming up. Something like body. I might just leave
that at that and back. I can't quite see where it ends, but I'm going to do,
something like that. He's gonna look quite
weird, isn't he? I'm gonna do some
ears. What are there? I'm not sure what he
is. He's quite fun. Um, let's have that
down there. Okay. Yeah, let's let's fill him in. So I'm gonna wet
this piece down, so this is quite nice 'cause
we can go back to being a bit a bit more free
flow and how I paint. So let's incorporate
those two elements. So I'm gonna wet that down, wet those weird two ears down. I'm gonna come into
the leg down to that funny V to the leg. I might just come halfway down. So I'm gonna end him
somewhere like that. Like an antita, a
very strange antia. I'm going to use.
What am I gonna use? I'm going to use the hematite
because it's quite dark. I don't want to
use too much gray, actually, sorry the
hematite and the gotte. So let's put the hematite. Gpite just in there.
Again, if it doesn't move, it's the same things
apply, obviously. Give it a little bit
of a wet and a russle. Any game, we can tilt paper. So don't forget it's all
the same things that apply. That's a bit of
strength down there. Obviously, you probably
haven't got one of these, so it's, you know, you're kind
of watching me, I suppose. But if you can find yourself
a little funny creature, then yeah, just wet down that entire area and just drop some painting. It is worth watching
those little videos, you know, I mentioned. It just gets you into the vibe
and how they were created and what they used and
the materials they used. They were somewhat limited. They didn't have tubes of
Daniel Smith paints to go and buy and use. What would they have
made of them? They would have loved them,
probably, wouldn't they? So, yes, it was a lot of
mashing up natural pigments, using water, I think,
their own spit, and just going for it, I guess. So, a very different
way of creating. At all our luxuries
of beautiful paint. There was some lovely
handprints I came across. What they put there?
I think it was that they thought it
was a little girl, and she'd put her hand there and actually used what
they thought, again, was hollowed out, bond and had blown the
paint around her hand. Was she then taken
her hand away and left with outline
of a handprints. Yeah. Go and have
a look at those. Well, he's unusual.
He's a thing. I'm not sure what a thing he is. I'm gonna put those
weird stripes in there. Again, I've created
something completely, who knows what he is,
but I'd rather like him. I'm not sure if I
should put an e. I'm gonna put an e. I ruined that horseback then, didn't I? So I might leave it at that. Yeah, I like him. Try to give him a little bit of a little Tufty took him a
little bit of a Tufty thing. So, I look forward
to seeing what you find in your paintings
or your background and whether you can find a weird
creature like this you can create or you can use
some of the reference photos, and create some antelope or some buffalo, some
amazing buffaloes. I think in one of
the French caves. Now, I'm actually
bulking on the name of it Lasso Lasso, I think, caves. There's the hall of the bulls. So there's a huge
cavernous area, and they've painted bulls
all the way around it. And there's a giant bull I think it's somewhere
like 17 foot long, so huge, huge piece of work. Okay, I'm going to
just leave that one there 'cause I can't
see anything else here. Obviously I want
to put backgrounds and all that sort of
nonsense in there. So, um yeah, I'm just going to see how that dries and
see what he looks like.
8. Third Piece: So, lastly, this is my
bit of McNay paper. I left that on quite a tilt. It's a little insipid. There's nothing very exciting
going on there, is there? I did manage to keep
that nice line of water, so I dropped water in here
and allowed that to run, but it's yeah, it's not giving
me anything very exciting. So what I thought
I would do is do my two spaniels in a
kind of cave esque way. So I'm going to pop
those in there, like So I'm just gonna put that over there so I can refer back to
them a little bit. Again, I found some profile
pictures of the two dogs, because they're
mainly the cave art seem to be in profile, and it makes it a bit easier. Let's perform with Chalcostick. Then we go. So, let's start. Let's start with Twiggy, she's
gonna be featured twice in her class back to back coming somewhere down here like this. Yes, she was the subject of
the last class I filmed. You found she's drawing
twig on her slightly more. Um, refined way then go
and seek out to kick that class twig class. I
should leave it at that. It was quite a fun one
of a little scarlet a smaller little spaniel. I think she was facing into the wind so her ears
were blowing backward. Give that line back there. So keep these lines
nice and simple. Quite that should have been a bit that's drawn up a line that quite
made that wide enough. Yeah, let's see how
we go with those. That's what I'm gonna
do tweak first. And I'm gonna use
the Joseph Grey, and we're going to a bit like my weird antelope creature.
I'm going to wet down. It's just a little
section there, actually. And I've got the Joseph Grey, and I'll go to
have that hematite cause a nice combination. I'm not gonna worry too
much about her coloring. Just go to pops and pat down. And again, you can
kind of, you know, if your lines have gone
a little bit weird, you can always make
them a bit wider. So yeah, find your pet. If you fancy doing your pet, get a nice profile
picture of them. Just sketch them out by memory. I say, it's just
a very fun class for you to have and explore. See how it feels actually,
do them from memory. Doing freehand. It came there. I don't want to
get too involved, 'cause generally they seem
to be quite sparse in there. There's no great detail
in these cave paintings, so I'm not gonna put fur in and bits
and pieces or flicks. It's gonna lose that that
cave esque kind of look. Put a little bit
of colour in here. Straight until dry paper there. And then I can just
wet a little bit out. Ga do a leg coming down there. So it's not filled in. I like the unfilled
kind of vibe. I think that I'd do
for there. And it's a lovely this magneti paper. It's a lovely I love you
soft and blend beautifully. I'm gonna go straight in there. No haven't wiped the paper down. Put a bit of color there. Step away. I'm gonna
leave it at that. I like that. It's quite fun. Quite minimal. Now, let's
do a little Scarlet. I'm gonna go straight in here. I'm not gonna worry about
wetting stuff down. She's got some little markings that come somewhere
like this and around I can do some
flicks for her ears. You've had impression
those ears were moving. So I don't want to to start
doing any major detail. Then she's got got a
little got a little bit of a shop nose there square off
a bit. That's quite her. And she's got a little pink nose and a little bit
of marking here, so I put that down. She got white chest,
so I don't want to do too much
colour down there. And she's got get
rid of some of that. Push that back a
bit. Which really hard not to try and do
to do lots of detail. Get rid of that
Charcoal marked there. Right. Leave it, Jane. I just gonna put it. She's
got some little spots. Got tap a few spots in there. Okay a bit more color there. Yeah, that's quite
that's quite fun. Fab's making me smile. And I think that's it. I don't really want
to do it anymore, so it's just a quick
impression of them. So that's really it, guys. I hope you enjoyed this
really simple little class as a just a bit of fun. Oh, I know what I was going to say before I
start rattling all that off. There was let me
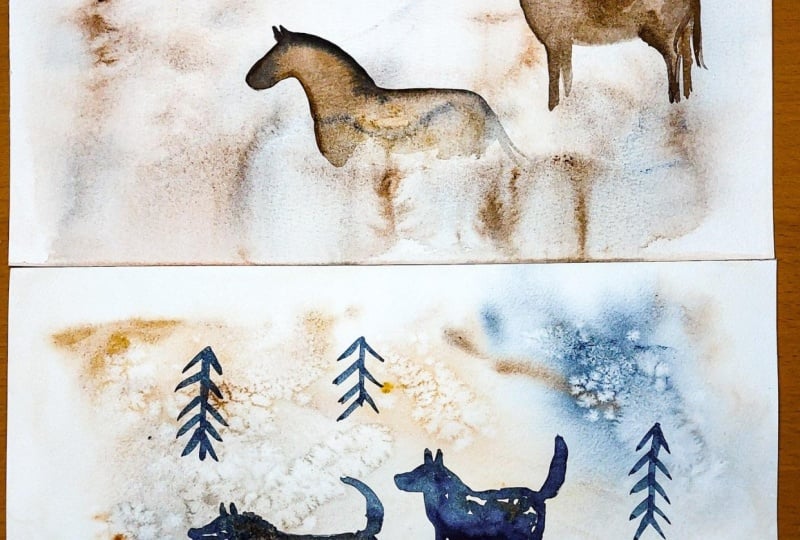
show you this one. I did do so there's a reference
photo of these wolves. So again, just a background, and I hand paint, sorry, I painted these in. So they're quite fun.
Actually, then the charcoal, a tip the charcoal worked better for the
trees and the paint. But, yeah, I did that exactly
like we did with the horses and nothing very unique or
different, but quite fun. So, yes, I say, I hope
you enjoyed this. It's just a nice little
way to explore your paper, your paints, and
just be a bit freer. And I would stress,
go and have a look at those little videos that I've put links to cause
it's fascinating. And I think like you like you. Like me, you may end
up down a bit of a rabbit hole exploring
the first form of art. I mean, what's not to love. So yes, thank you
for joining me.
9. Bonus Horse: Okay, I'm going to see if I
can make a horse out of this. Like I showed you earlier, I can see. I can see a man. I can almost see an
ear coming in here, and this is the front of the
face coming in and a neck. So I try not to ruin him
'cause I rather like this. I'm going to leave the main
as the Kling fill markings. I'm going to try and
come and put a bit of colour in so you can
see where I'm headed to. I say, this is all really
for you to watch, really, because you won't have had the same weird pattern
in your piece. But look for them,
look for your pieces. And the only reason I haven't
turned some of my paper up some of the pieces of paper
are a little bit taller, so I can't get
them onto my board without it disappearing
off the camera. So have a twist around. You may find all
sorts of things. You might even work
at that angle. But but yeah, have a see if you can you
can detect something. So I'm gonna try and run
run gently around here. I want to keep that
lovely watermark. And I think I'm gonna
pull the neck down here. So I'm gonna use this line. I think at work. I just wet it all down. And you actually see him
even just wetting the paper, how that's starting to form. Aren't it nice and wet? No dry marks. That down a bit. All right, I'm gonna
use. Where's that gray? How long do you use this gray? I gonna tap that colour in? Do I get that moving? Definitely a case of
squinting your eyes and seeing it materialize or not. I can see something coming here. Poor wet neck down there. I give it a little tilt. A bit of a dry patch there.
That's why it's not moving. So pull that out a
bit. Like a nostril. I mean, doesn't have to
be a prehistoric horse? It can be a modern day horse, and you're just doing it in
the style of a cave painting. So don't, don't feel tied that you have to do a
just like doing the dogs. You have to do a prehistoric,
a prestoicPiece. Can I see the ear coming here? Am I going? No, I can
see an ear there, proper squinting, I have to really keep squinting
use I'm losing it. Otherwise, I can't I can't
quite see what I'm doing. Yeah, that's looking quite fun. What do you back up there?
Tell me a little bit of blue. Bit happy. What I might do is try to kind
of incorporate, actually, that so the eye can
see that I'm using that clingfilm mark
as the main, as well. So it might just vary gently. Just add a few strokes in
there so I can like I say, the eye then sees those
Kling film marks. That's that larvae
sweep there, isn't it? I often think, can you actually make when you're scrunching
up that clingfilm? Can you make it into shapes? But I think it's quite a
tall order to try and create form or ignite a good form of an animal by scrunching
up bits of clingfilm. But again, worth a try. You like a little bit of a tilt. So It's quite magical just
watching it run, isn't it? I quite like. I'm not
gonna do too much. I think that's a
little impression of a little horse just in there using the shape
that we had in there. I say, hopefully captured
that as a man in there. You can just see there's
something there. Right. I'm gonna down my brush, and my paints before I ruin
what I've created there.
10. Final Thoughts: So I hope you
enjoyed this class. There's something
madly liberating, just allowing your
imagination to be free and create
what you want. Well, what fun
backgrounds did you make? Remember, you need lots of water to allow
that paint to flow. What techniques did you use? Or perhaps you found some more
fun ways to add interest. Did you enjoy adding
the simple animals? Or perhaps you found your
own imaginary creature? I really hope you simply had fun with these pieces
with no pressure. Oh, the joy of it to slip into creating
with no set outcome. So we look forward to seeing
you in the next class.
 Jane Davies, Professional Artist and Teacher