Transcripts
1. Class Overview: Hi there. Welcome to this Skillshare class on carving your first linocut print. My name is Matt Reno, I'm a Lexington, Kentucky print maker. I love linocut and I love sharing that process with other people. In my day job, I'm a graphic designer. All day I'm working with pixels and grids, all these things that have to be perfect. That's the great thing about linocut. It doesn't have to be perfect, you can get your hands dirty, it's something tangible instead of digital. It's a great way to unwind. At nighttime, I like putting on some music or a podcast and just carving away, the time flies right by. In this class, you're going to learn the process of putting your image on a linocut block, carving it, putting ink on it, printing it, and then having copies of your own art to give away, to sell, or to keep for yourself. The supplies you'll need are linocut block, cutters, a brayer or something to press with even just a spoon is fine, ink, paper, drawing supplies, including tracing paper. Most of these supplies can be found in Speedball starter kit. That's an inexpensive way to get what you need to see if you like the process and if you do, you can always upgrade your supplies down the line. Thanks again for joining me. Let's start talking about your class project.
2. Class Project: After watching this class you're going to have the knowledge you need to create your own Linocut print with your own design on it. As for what that design is, it can be absolutely anything. You can come up with something brand new or you can go back to a drawing you've made in the past that you want to convert into a linocut. It's totally up to you. I do recommend keeping it simple though. Just get the process down and build from there. A lot of the art I make with linocut is landscape, and they're fairly detailed. However, for this class, I'm keeping it simple. Today, I'm going to make a very basic nature scene that I drew in a sketchbook nothing complicated we're just going through the process. We don't have to make anything elaborate today. Please share pictures of your art in the class project section. I would love to see what you come up with including work-in-progress photos. Post some of those if you have any questions along the way I'm always happy to answer them for you.
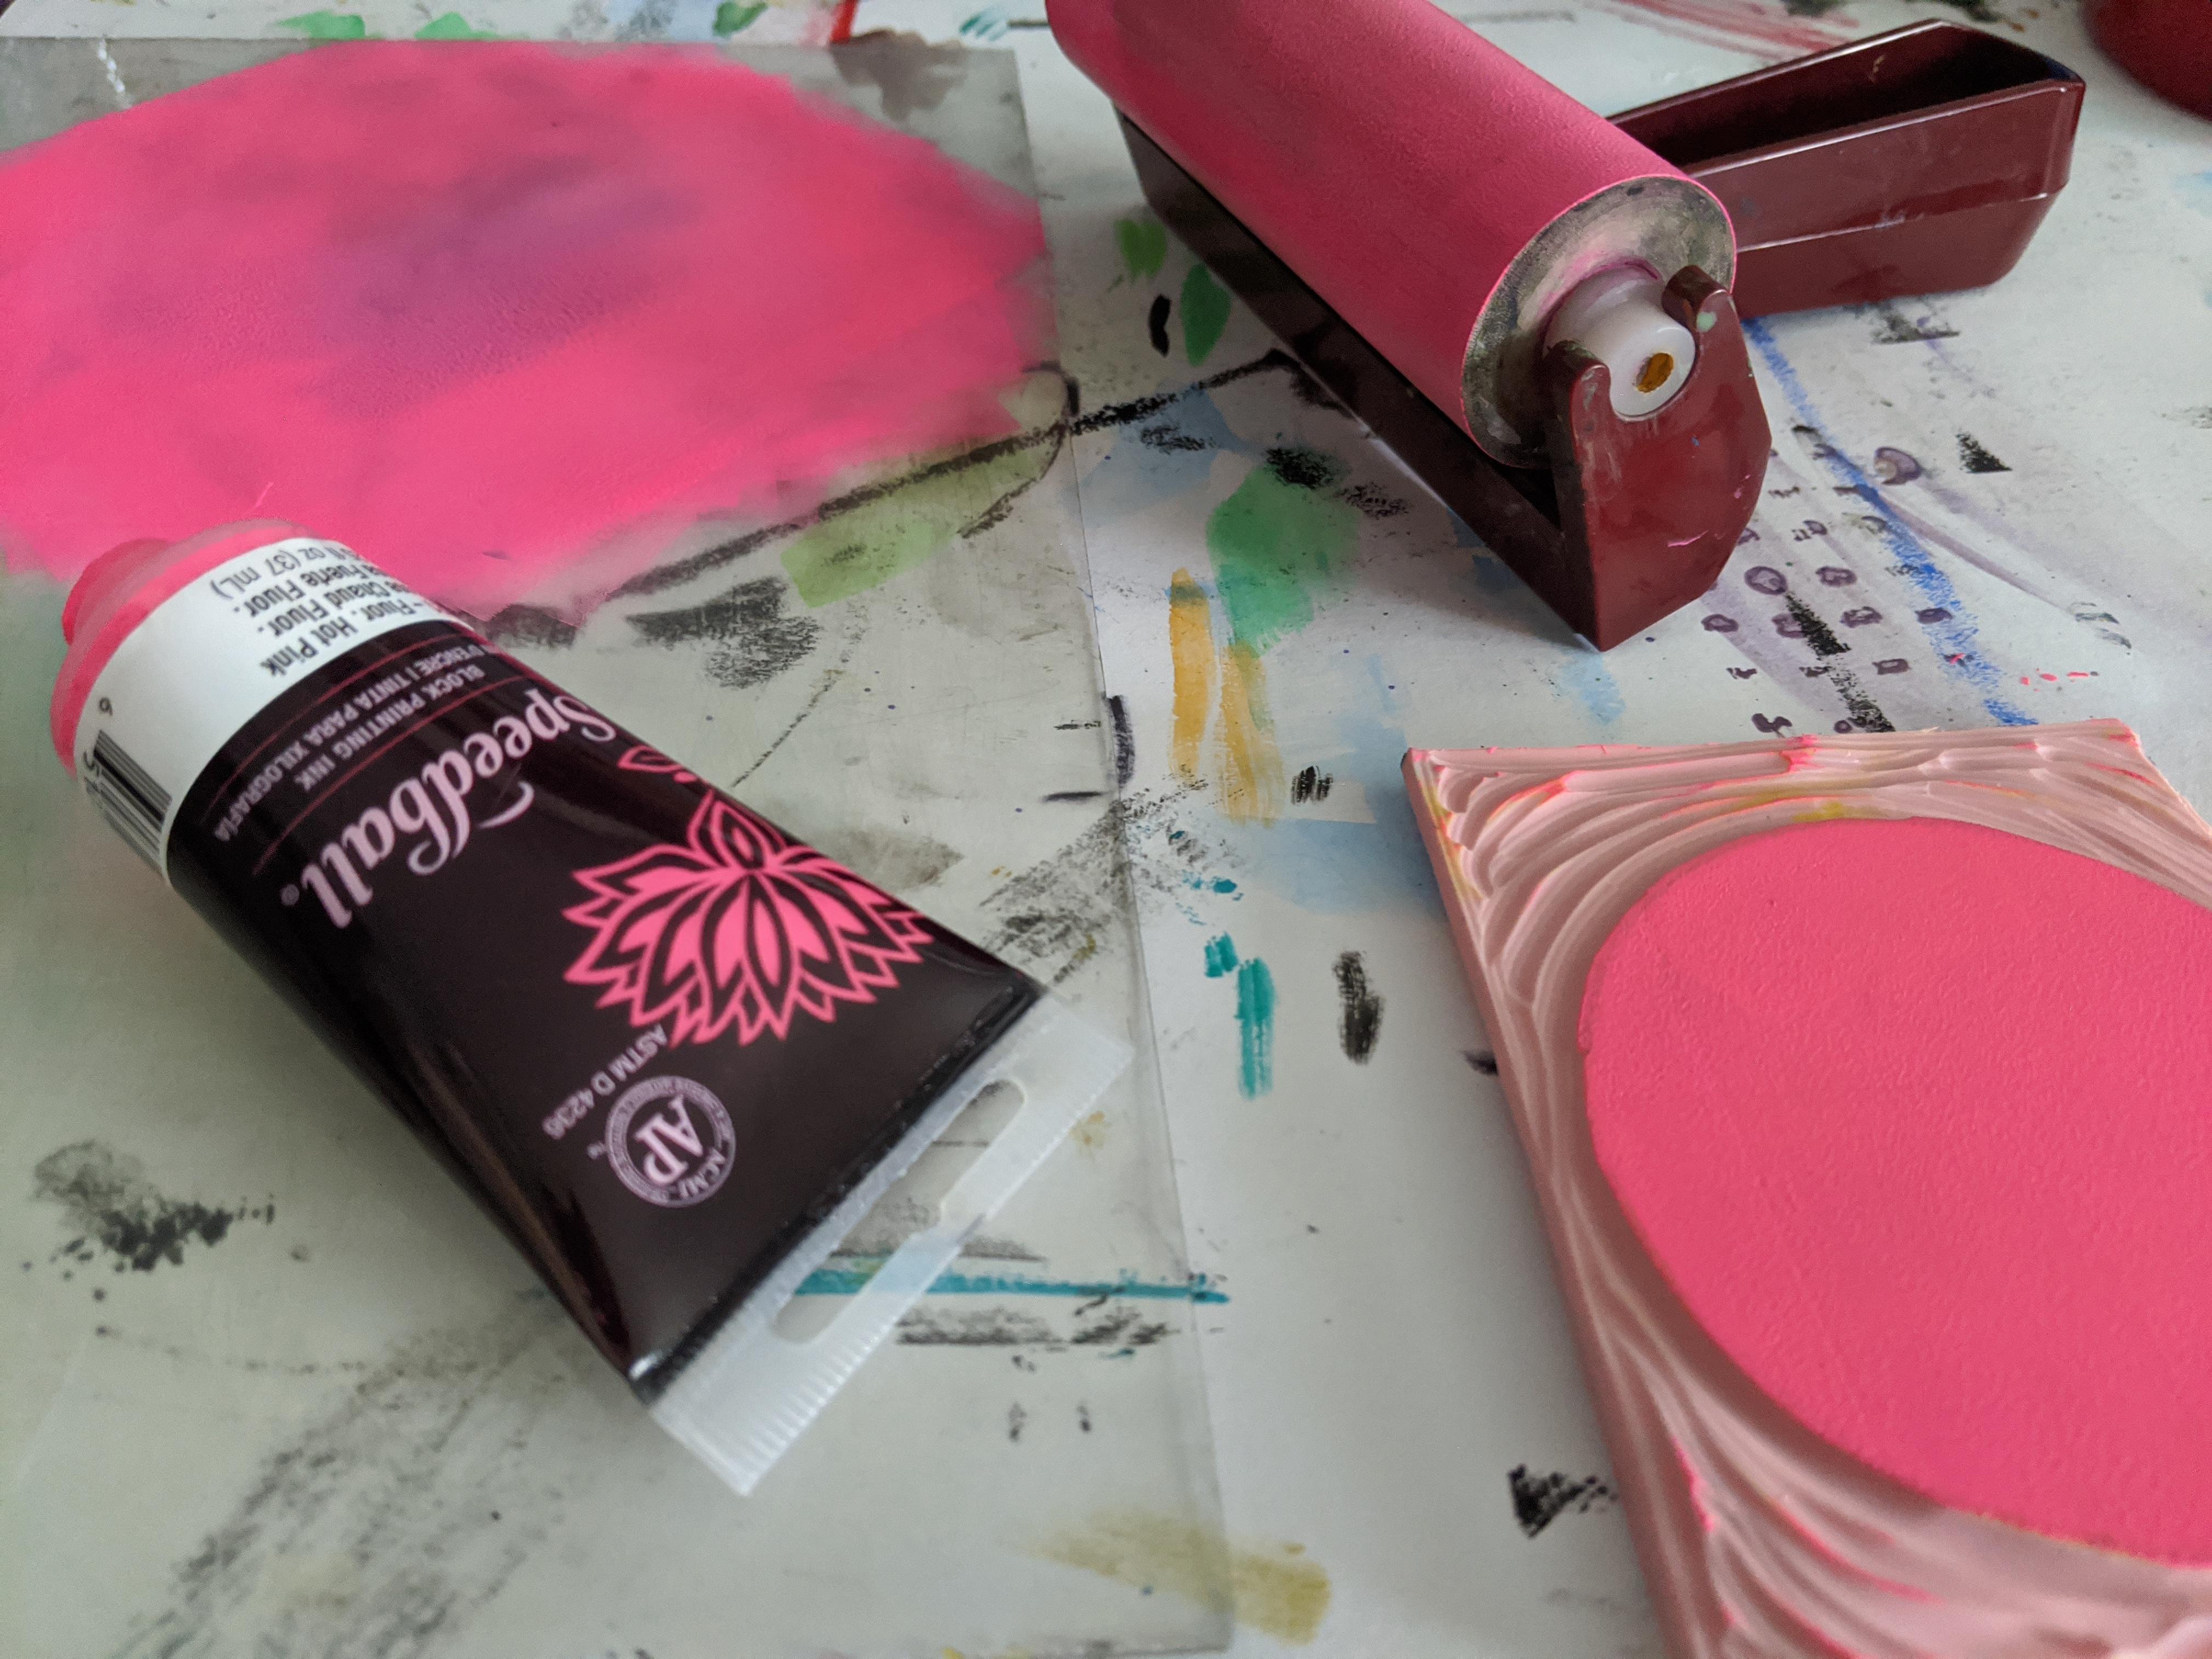
3. Supplies: Let's start talking about the supplies you're going to need for lineup cut. There are lots of brands that make different kinds of supplies. I'll go over a few different things, but we're mostly going to talk about the basics today. Like I said earlier, you might want to order a speedball block printing starter kit. That's going to give you the basics of what you're going to need. The block that it comes with is speedy carve. This is honestly more rubber than linoleum, but the great thing about it is how smooth it is, how easy it is to cut. It's great for beginners, but it's also great for people who've been doing this for a while. If you want to make something really quickly, I definitely recommend the speedy carve. The block I use the most, however, is battleship gray. It's from brick. This is just sturdier. It's pretty thin. It's easy to use, just not quite as smooth as the speedy carve. Still, both are great blocks. I recommend either one. Next up, we'll go over the cutters. These are the things you actually use to carve the block. Your starter kit comes with one of these. The whole thing is the handle, but the cutter is on the inside. Just unscrew the back and then dump them out and screw it back on. You want to keep it screwed on when you're using it, so it fits in the palm of your hand. Really cool thing about these is how portable they are and that you don't always have the blade sticking out, so it's a little safer for storage. To put a blade in, you want to unscrew this not all the way because if you do, the pieces are going to fall apart and then you're going to have to carefully put it back together. That's not a lot of fun. So do not unscrew this all the way just enough so that you can slip the blades in. This is a number 1, this is pretty small one, it's good for fine details. The larger the cutter is, the more of the block it's going to take away. So the small ones are good for fine details. You'll notice that the bottom of the non-sharp part, curved like that. That's the part you're going to slide in here. Now, can you see that? There you go. You've got a ball bearing thing with two metal curves on either side. You're going to slide the cutter in-between the ball in the middle and the thinner curved part, and then just screw it back on to tighten it and then you're ready to carve. So you've got a number 1, there is number 2. This also comes with a 3 and a 5. Again, the larger it is, the more of the block it's going to take away, leaving more whitespace. Then you've got this little piece right here. I don't use this a ton, but occasionally, it's good for some really fine details. This one, you can do a lot of different things with it. It's so sharp that you can hold it like a pen and just scratch some details in. If you want to make something look a little rougher, add some shading like that. You can also, because it's curved but it's still sharp, so you can hold it and just scrape things away. I've used it to add a little realism. I think there's a lot of different things you can do with this number 6. Experiment, have some fun and see what happens. Another type of cutter I use a lot that I'll touch on is a file swiss-made cutter. Again, they come in many different sizes and shapes: V blades, U blades. Just depends on how much of the block you want to carve away, how much detail you want to have. Those are nice, they're a little more expensive, so definitely not something you want to get when you're just starting out. You want to make sure that you really do enjoy lineup cut and you're going to do it for a long time before you start getting different cutters like that. Once your block is carved, you've got to put ink on it. Now you've probably gotten a bottle of this with your starter kit. There are different types of inks. There is water-based, that's what you got with your starter kit. There's also oil-based inks. The oil-based inks are better color lasting longer. However, if you're just printing at home, you're going to want to use water-soluble prints because those will wash away easily. You're not going to make a complete mess out of your bathroom sink. Getting the ink onto the block, you're going to use a tool called a brayer. These come in a lot of different sizes. This is the standard one. There's also smaller ones if you have a smaller area and maybe if you're using different colors and you don't want to accidentally get one color on a part where it's not supposed to be. But there's even huge ones if you're working with really big prints, really big pieces of paper. But this is a good size for most prints. Just find some surface to put your ink on. I just have these pieces of plastic but a piece of cardboard would be fine too anything fairly sturdy. You just put some ink on it and you roll these. We'll go over this a little later. But basics is you roll until this whole thing is covered in ink, and then you put that on your block to transfer the ink onto it. For paper, you can use pretty much anything, but you're going to want something fairly sturdy if you're making prints. This is what I have. It's Arnhem 1618. It's really good paper. But if you find something else that suits you better, that's perfectly all right. You're also going to need some tool for pressing the paper onto the block to transfer the ink. I use barens. Again, you can get these from speedball or other places. There's many different kinds of barens out there. But if you don't want to get one of those right away, just get a spoon. That'll do the trick too. It'll provide even pressure all over the paper for transferring your print. Next, let's go over some safety tips.
4. Safety Tips: Since we're working with sharp objects, let's go over some basic safety tips. I don't want you to get turned off from print-making just because you stab yourself in the hand during your first print. To avoid that, you want to always keep your hand behind the cutter. It could be tempting to put your free hand in front of the cutter to hold onto the block, but please don't do that because your cutter could slip and you could end up jabbing yourself in the palm or in a finger, and that ruins the fun. If you have to turn the cutter while you're carving, whether it's for a curve or some lines going in different directions, just make sure that you're turning the plaque or you're turning yourself. You're not just turning the cutter and then having it face your palm, that's dangerous. Always keep your free hand behind the cutter. Also, make sure you're carving away from your body. Again, sometimes you're going to turn the block depending on what kind of a design you have on there, that's fine, just make sure that you don't end up aiming toward yourself in any way. Finally, let's talk about the blick battleship gray blocks or anything else that's fairly sturdy, sturdier than the speedy curved ones. This isn't an issue with speedy carve, the cutters going to glide right through really smoothly. But these, it's because they are a little sturdier, you're going to want to heat them up first. All you need to do is take a hairdryer before you cut, and just run the hairdryer over there for a minute and soften up the block. But what that's going to do is prevent you from having to put extra pressure on the cutter. Because when you do that, and I found this out the hard way, you're going to send that pain up your arm into your shoulder and your neck, and you're going to be in pain for a couple of days after a long carving session. You don't want that, anytime you're using one of the sturdier blocks, just take a minute to heat it up before you start cutting. That's it for safety tips, let's actually get into the linocut process now.
5. Transferring an Image to the Block: The original sketch from my notebook. The reason we transfer the image to the block rather than drawing directly onto it, is because the image is going to print in reverse, so you have to put a reverse image on the block to carve it. If your drawing is going to be perfectly symmetrical, you might as well draw directly onto the block. That's perfectly all right. But if it needs to go in a certain direction, especially if you have words and letters in your image, you're going to want to do them backwards. Rather than draw backwards, this is an easy way to make sure everything is correct. I've used tracing paper and pen to trace my original drawing. Now I'm scribbling over the whole thing with pencil. When it's completely covered with pencil, I'm going to flip it over and lay it on top of the block. Then I'm going to redraw it with pencil, and what that's going to do is push the pencil scrabbling onto the block so you end up with that reverse image. Yes, this process does take a little bit more time, essentially, you end up drawing the same thing several times, but it pays off in the end. It's better than accidentally reversing something that's not supposed to be reversed in your final print. I've done that before where one letter in a word was backwards, and then I had to end up doing some extra steps any way to fix that mistake. It's better to do all this work upfront. One issue with the speedy carved block as opposed to something a little sturdier like the Blick Battleship Gray that I had mentioned earlier, is that the image sometimes looks a little smudged after you do the transfer. Your best bet is to draw over those lines one more time just so you have very clear lines to guide your carving. Again, it's an extra step, but it's totally worth it in the end. Once you've got your image transferred, you're ready to start carving.
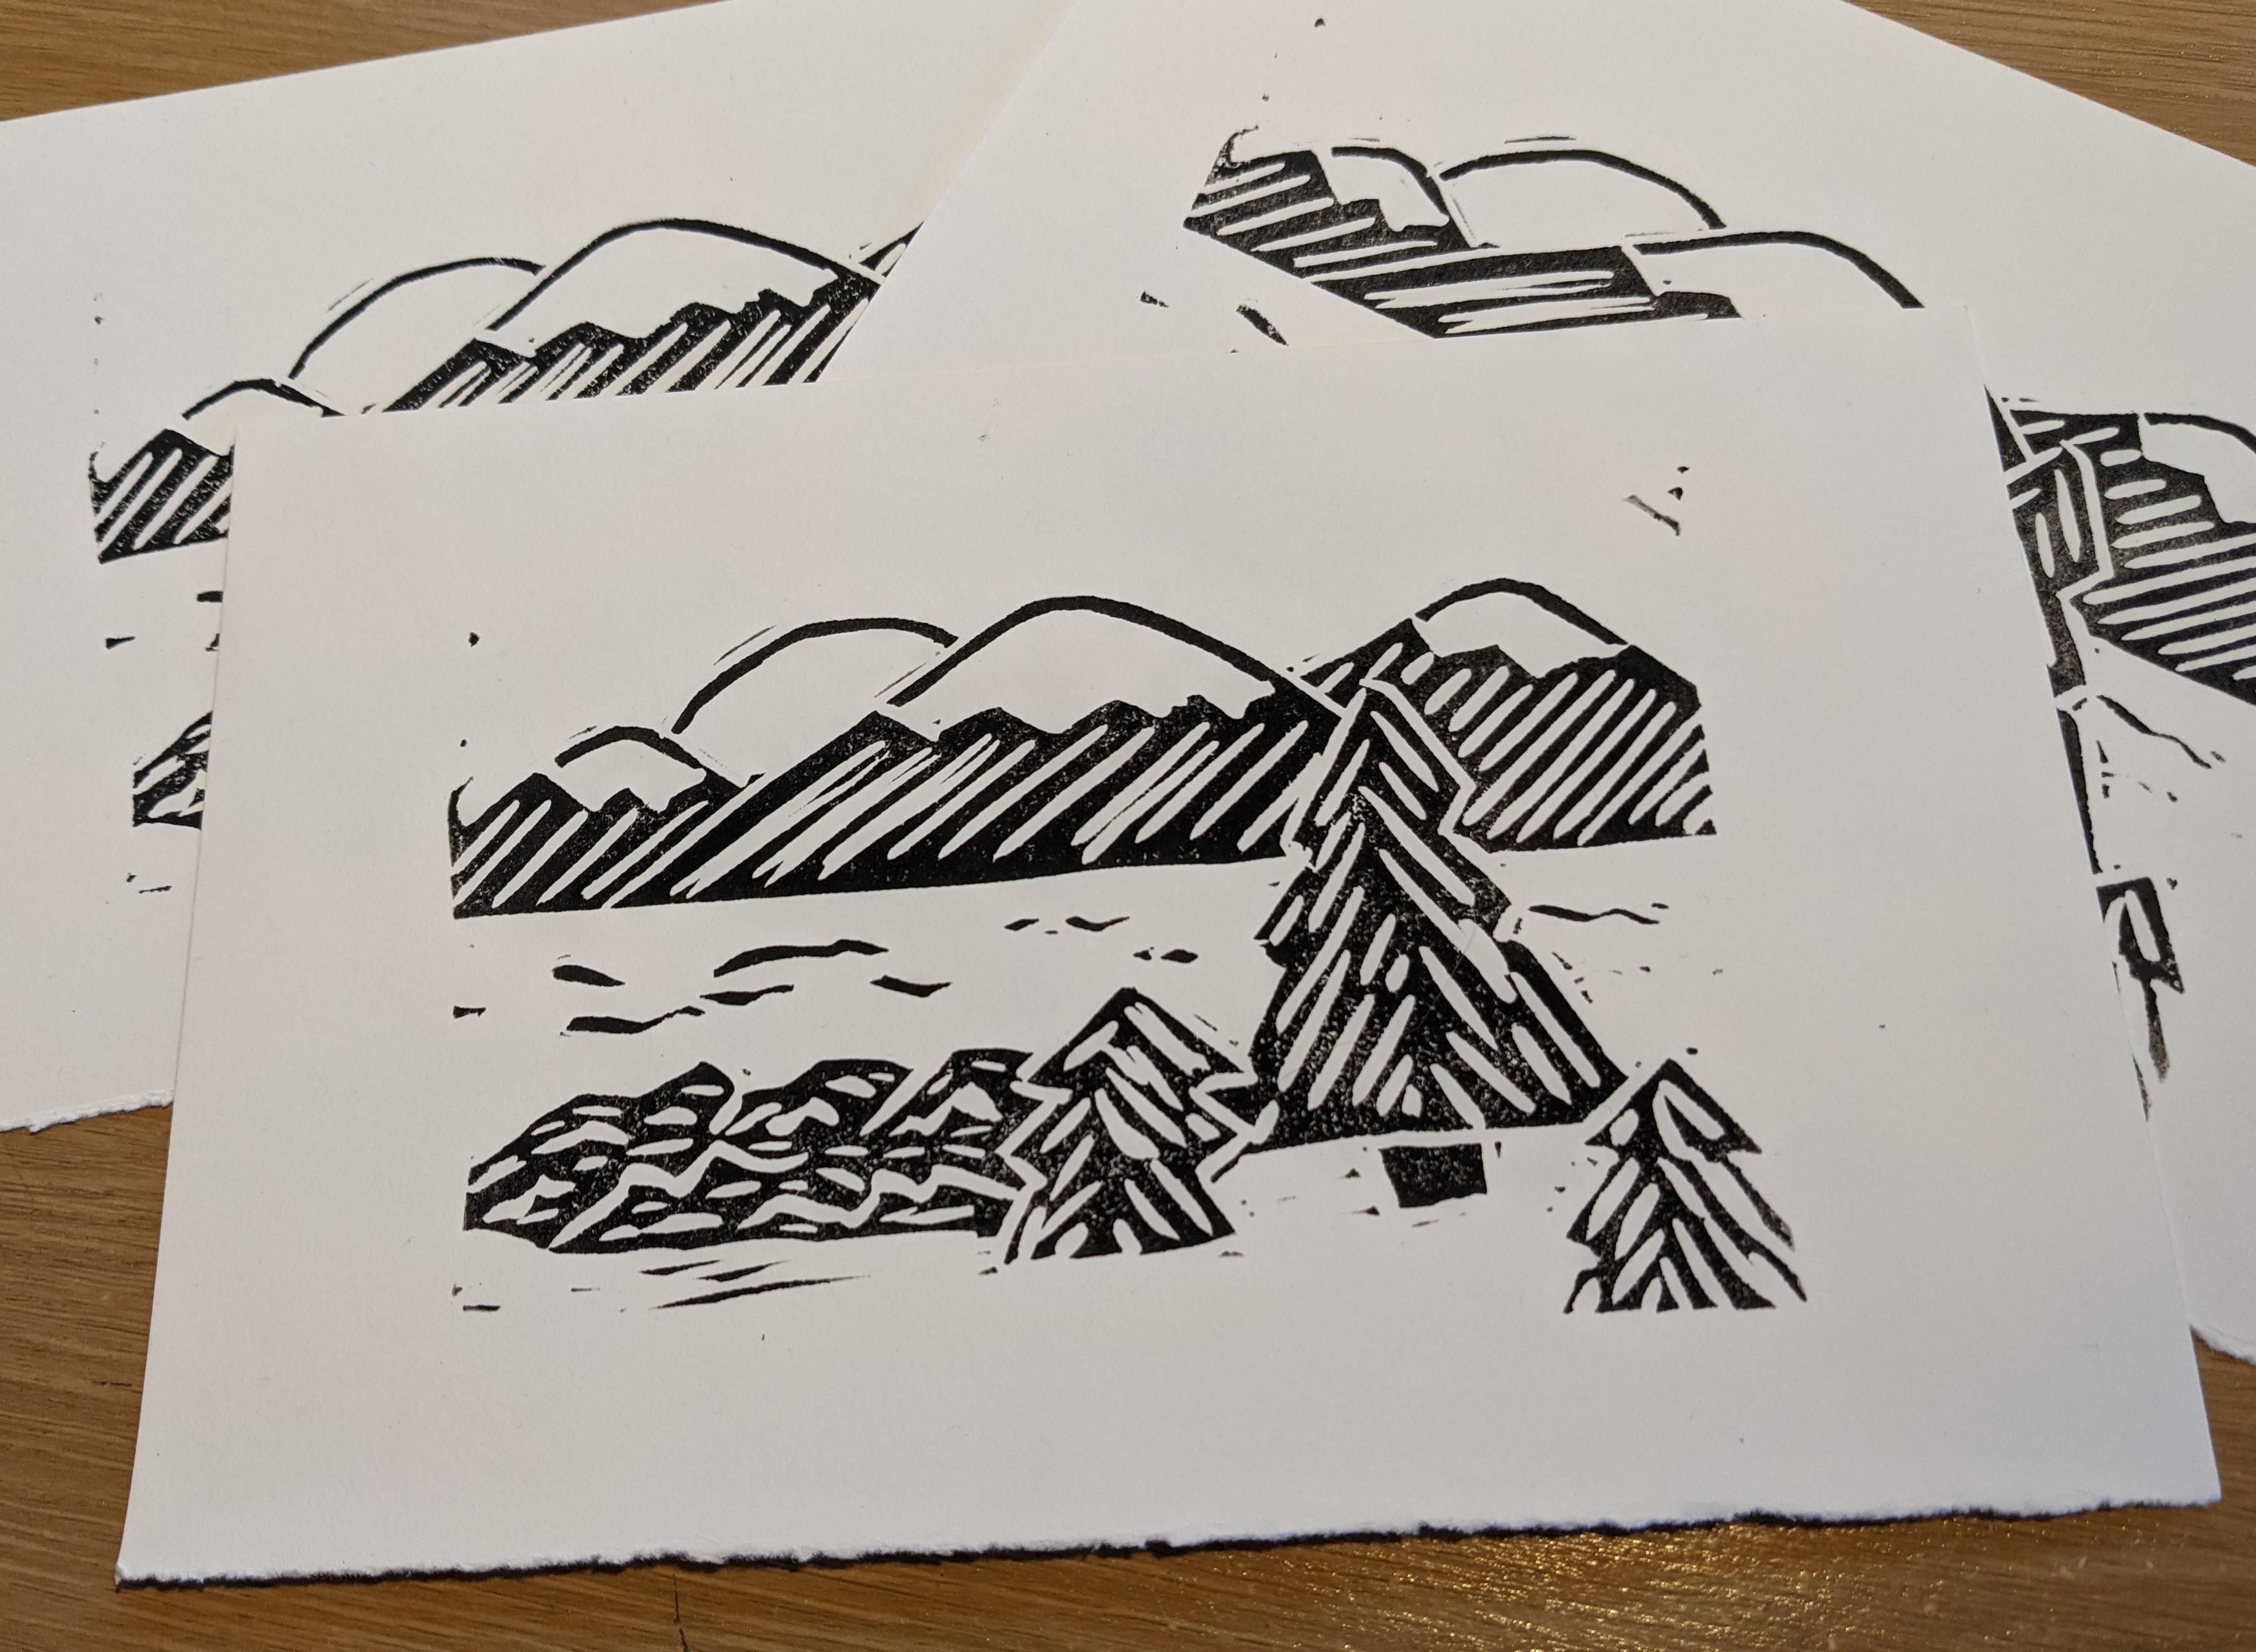
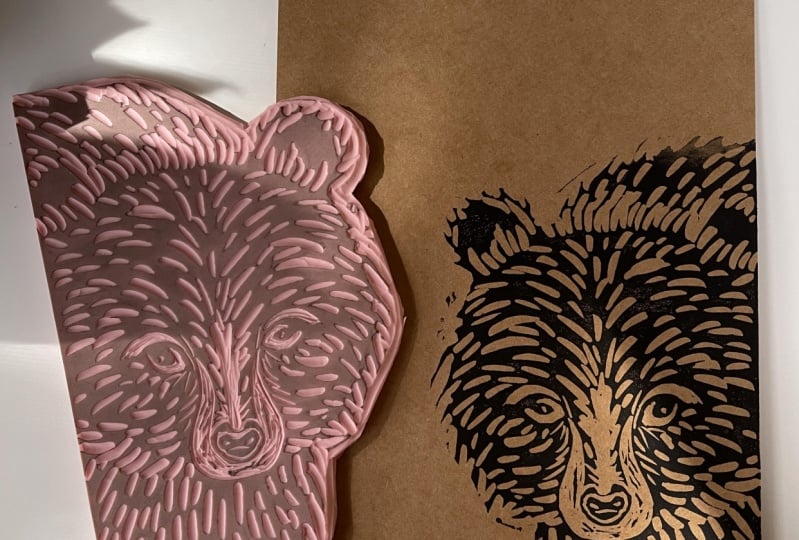
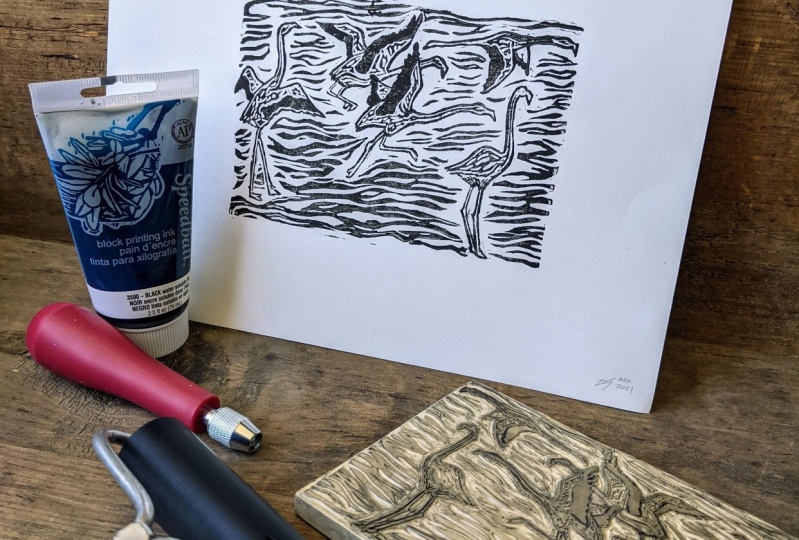
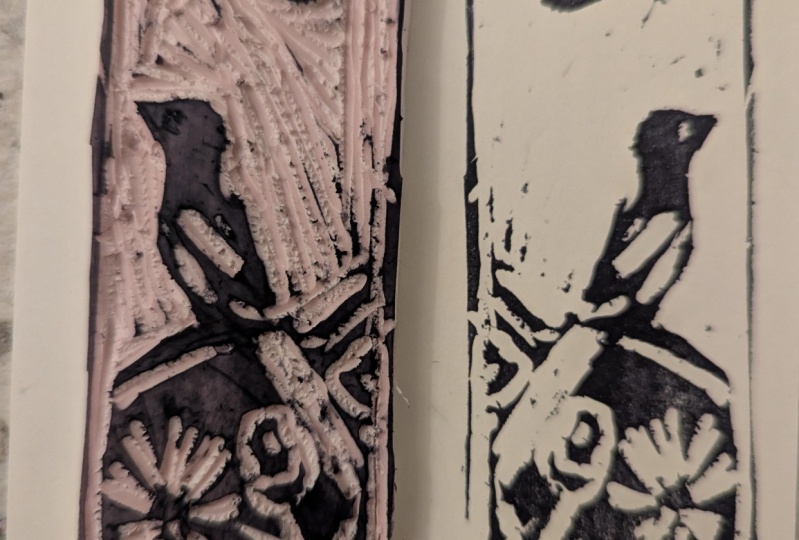
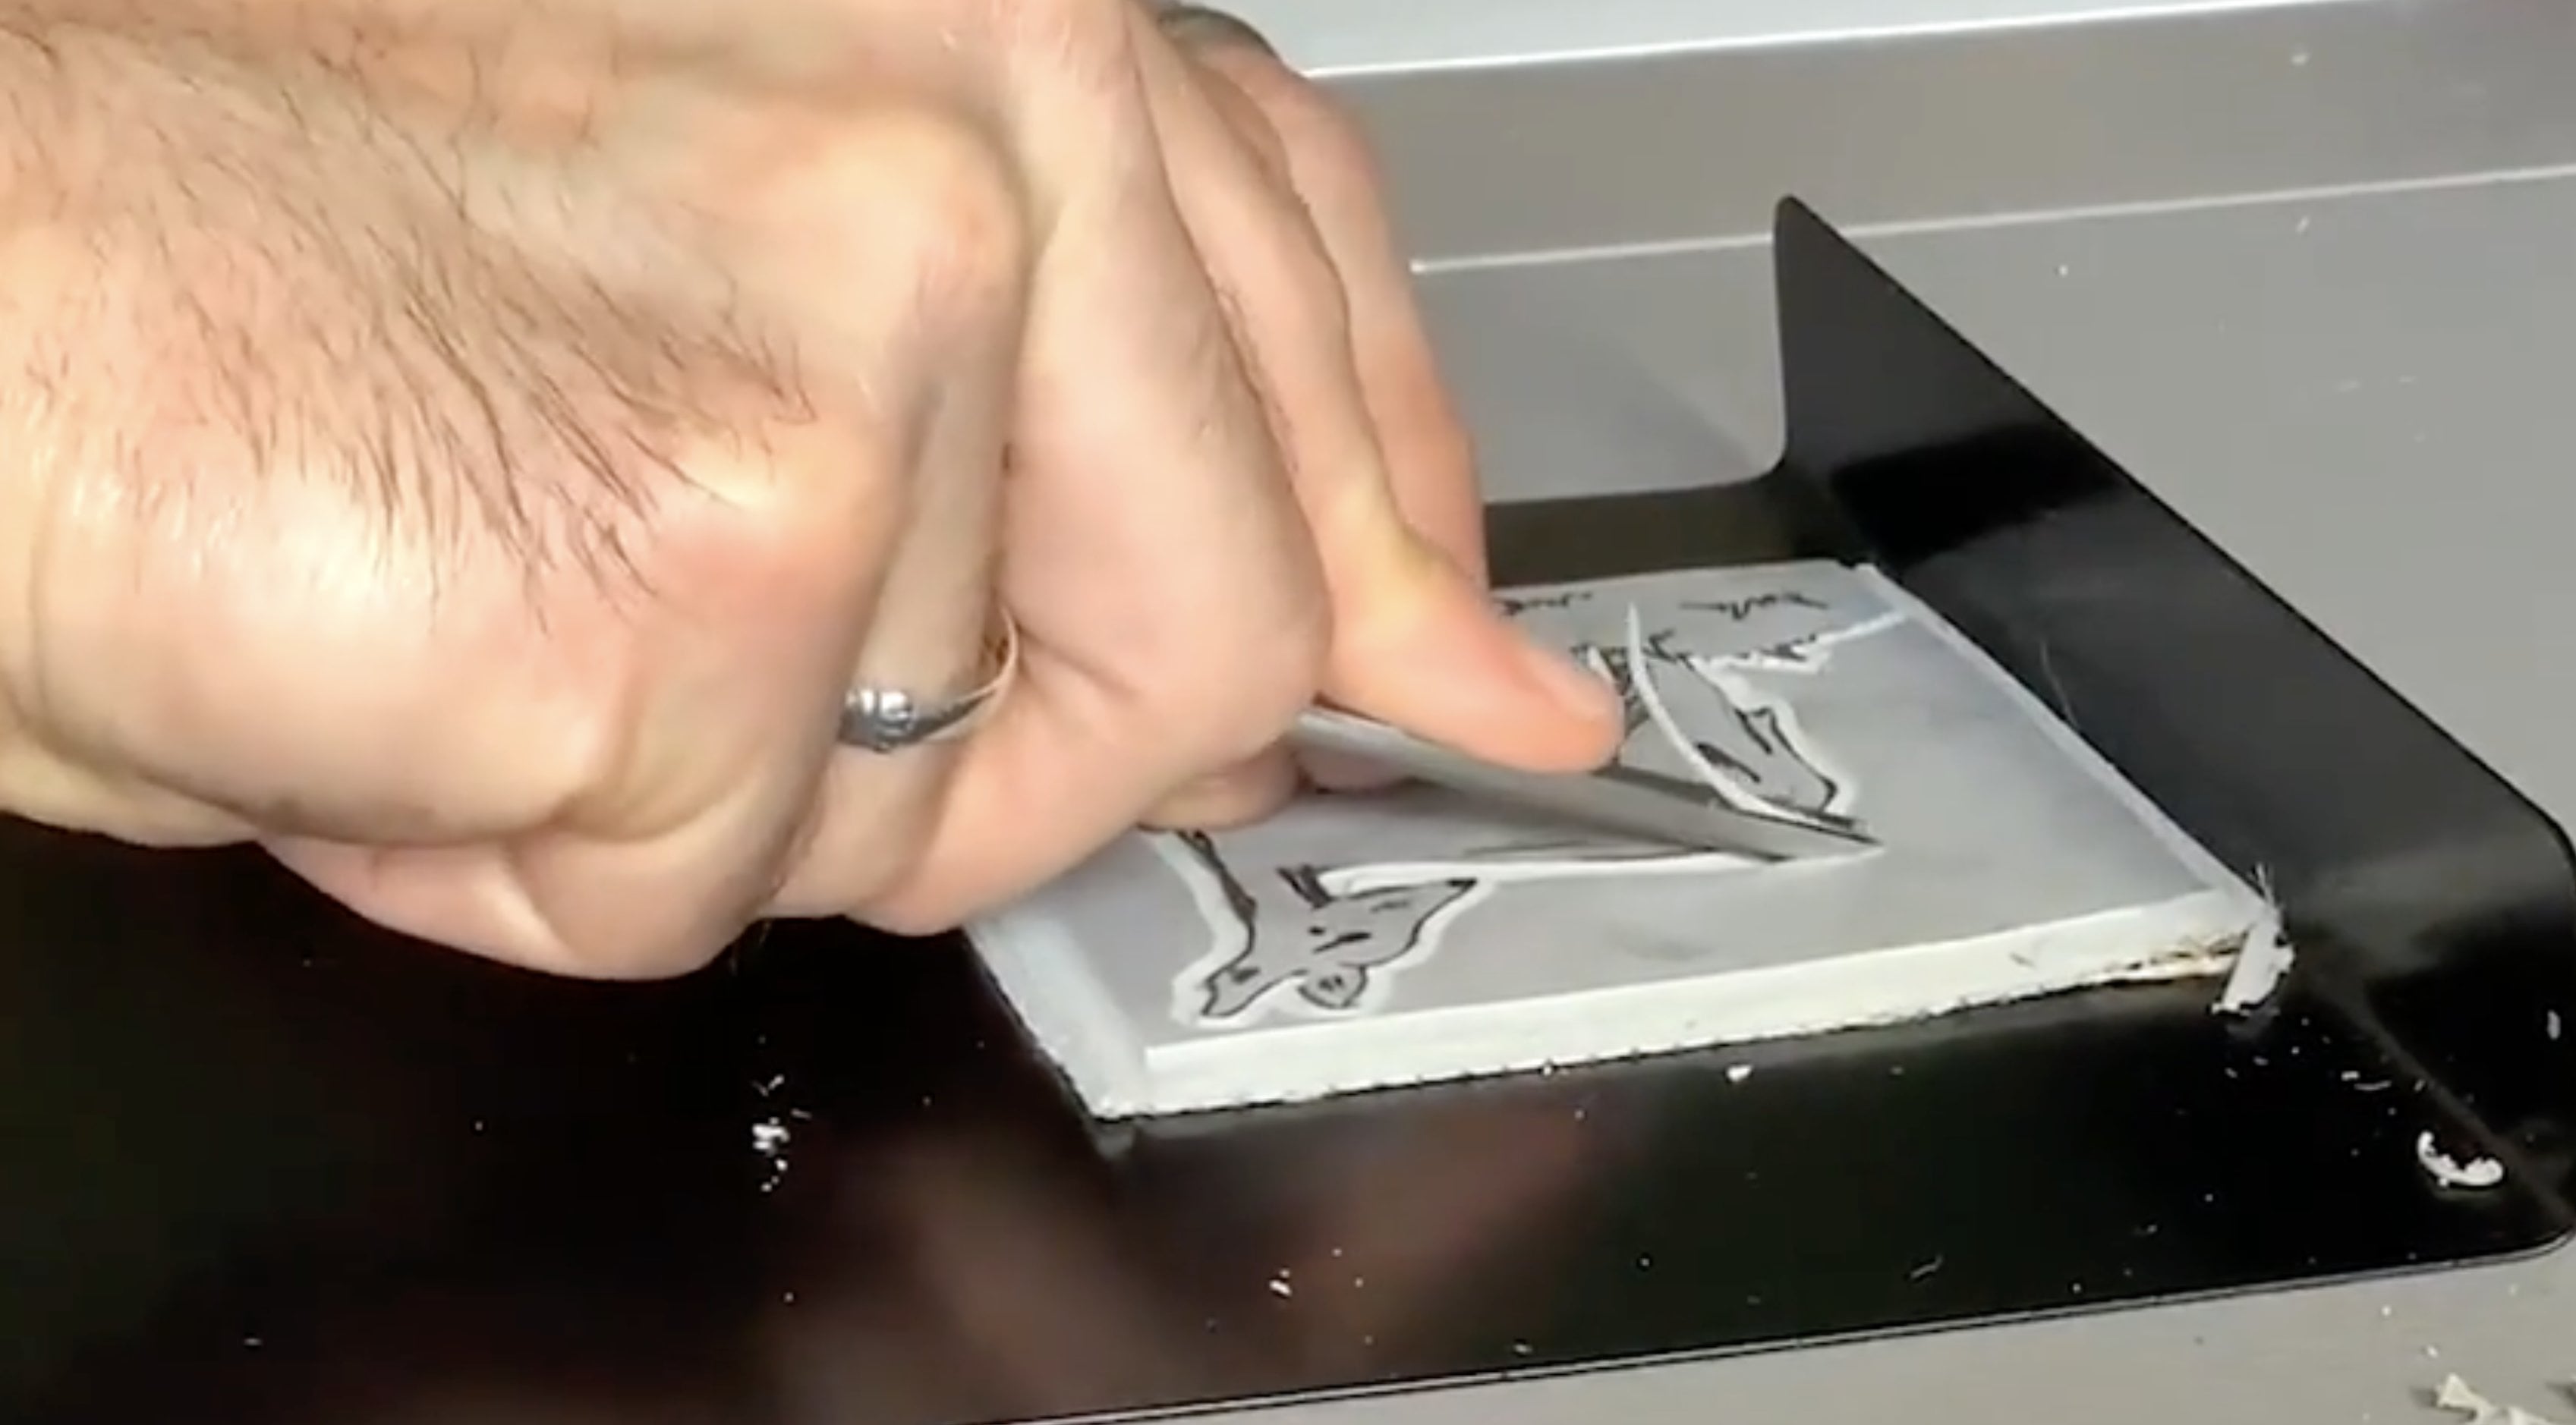
6. Carving the Block: Now that we have an image on the block, it's time to carve. Keep in mind, anything you carve away, that's where the paper is going to show through, that's the wide space. Anything that you don't carve is what the ink is going to go on, that's going to be your positive space. I'm starting with my largest cutter right now. That's number 5. I'm just going around the edges, clearing away some space. It just makes it easier to work later on. I'll get into the smaller cutters later for the more detailed spots, but this is just that border. I try not to go right to the edge with my image. I like to leave some wide space on the final print which is especially helpful if you're going to sell it or frame it. That way, people can frame it, matte it, whatever, and it doesn't go right to the edge or pieces of it don't get obscured by a frame. When you're carving, you don't want to gouge too deeply. A lot of people think you have to go really deep with the cutter, almost have it going straight down. That's not the case. Just go at a slight angle and then glide across, especially with this speed ball, speedy carve. You can glide pretty easily. That's a really smooth cut, so you don't have to go too deep. You can always read a piece later if you feel it's not deep enough, too much ink is getting on it. Now, I'm down to my number 2 carver. That's one of the smallest ones. I'm not using the number 1. That's the very thin one. It doesn't work that well on a speedy carve. It's good for a sturdier block, but I have a lot of trouble using the number 1 on something so soft like this. I just don't worry about it. I use a number 2 and that's just fine. What I want to do right now is just go around these black lines, just getting an outline of everything. I'm not worried about taking too many large spaces off the block. I just want to get everything outline the mountains, the trees, the rocks, the lake. Once I have all that done, then I can go back and look at the pieces that need a lot more of the block carved away, such as the mountain tops, the sun, the sky. Now, we'll just speed the video up until it's time to change cutters again. Now, I've changed the cutter from a number 2 to a three. This is going to give me a little bit more of a deeper, wider gouge. Not quite as big as the five, but just enough to start making a difference. When I'm first outlining shapes, even if I do plan on carving away a lot of the background, I still like to start off small, and work my way up. That way I'm not accidentally carving over pieces that are supposed to remain intact. If this causes too many lines to be leftover, I can always carve them away later, but I would rather err on the side of caution in the beginning parts of the carving process. Sometimes you want to carve away an area completely to make it more pure white, so the sun, the mountain top, I'm trying to carve away as much of the block as I can on these. Whereas other areas, I might not be so careful because I want to leave some lines behind. You'll see what I mean when we're printing, when we're putting ink on it. But you can see a little bit, as you're working on block, that you are leaving some lines behind and those might get picked up with ink later on. Depending on what you're doing, you may want to leave them behind, you may want to carve them away so you get a very clear background. That's totally up to you. That's one of those areas where you can experiment and see what works best for you or for this specific piece you're working on. With this specific print, I'm trying to vary the line direction as I'm carving, depending on the area that I'm working on. For example, the mountains have slanted lines, the sun, sky, the mountain tops. Those I'm carving away so that there's a lot of wide space. The lake has more squiggly lines, so it looks like water. The trees have lines going in different directions. This is a technique used to differentiate pieces, especially when you're working on something that's going to be all in one color. I'm printing this in black and white, so I want to make sure the different areas I'm carving away are going to look different from each other. Again, let me reiterate the safety tip. Always carve with the blades pointing away from your body and keep your free hand behind the blade, never in front of it because you don't want to hurt yourself. I've got a little bit more carving to do and then we're going to make this block and really come to life when we put ink on it.
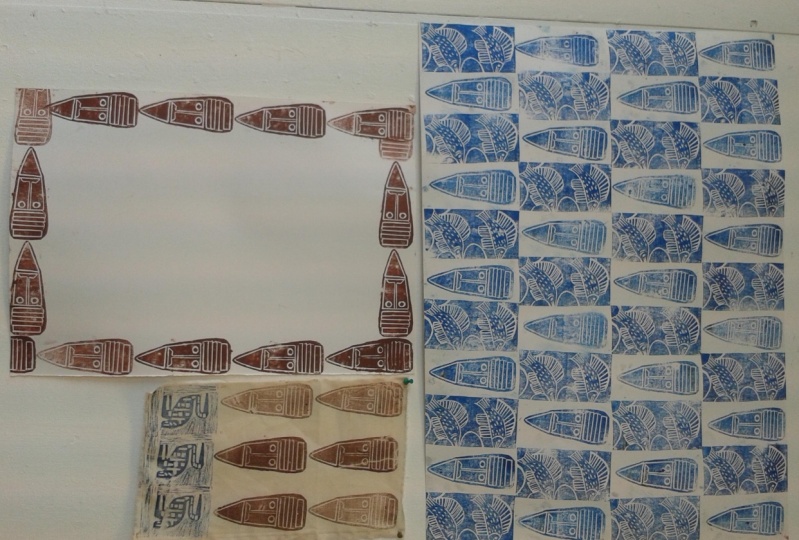
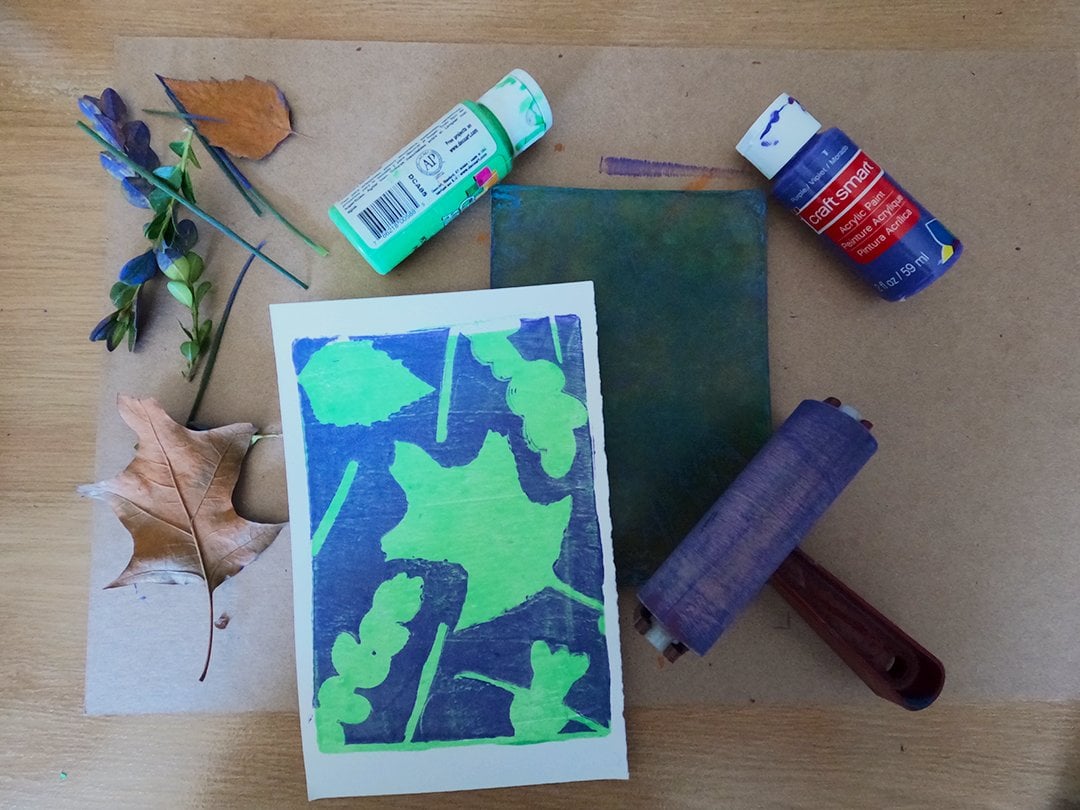
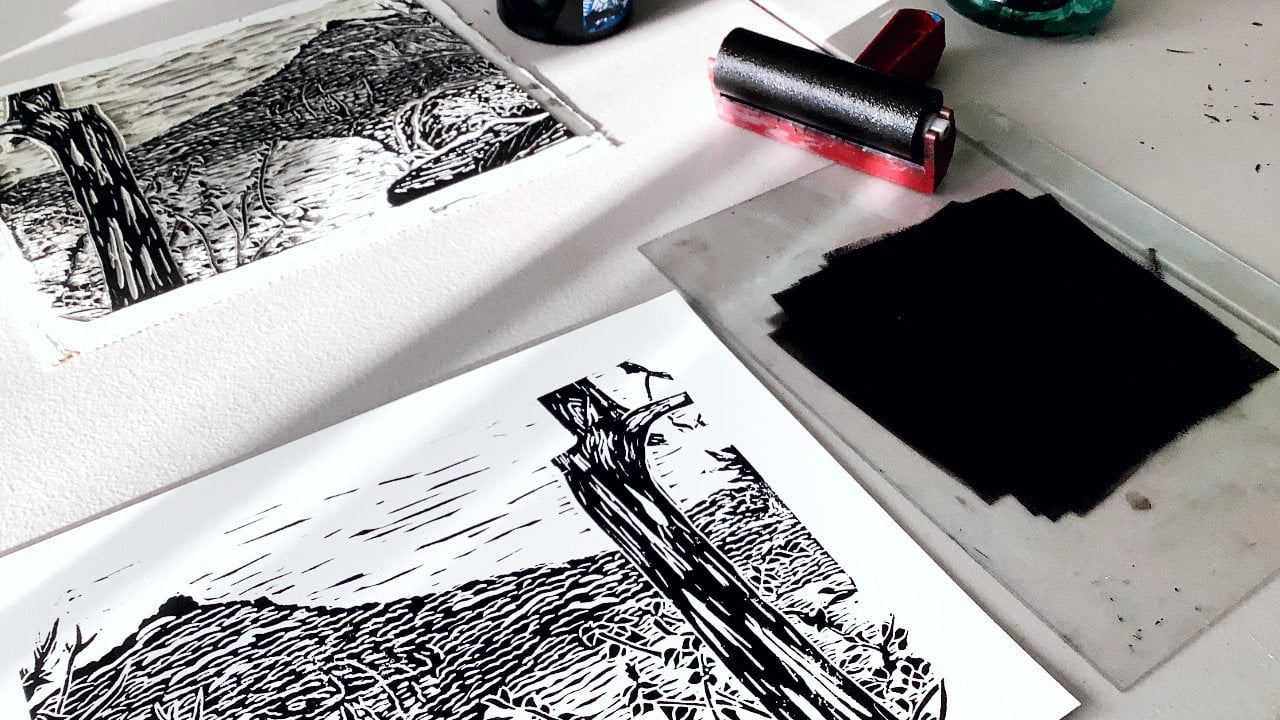
7. Inking and Pressing: Now it's finally time to put some ink on the block and make your final print. I'm taking some ink out of a jar and spreading it onto this firm plastic sheet. If you find anything that's firm, sturdy, flat, even a piece of cardboard will be fine. Just something that you can spread out the ink on before you transfer it to the block. You don't need a ton of ink, just enough so you can get a nice even coating. Start rolling your brayer onto the ink in different directions, making sure that you're covering the entire cylindrical piece of the brayer. Roll it evenly from left to right, up and down. You don't need to press too hard with the brayer because really you want the ink sitting on top of the pieces that you did not carve away. When you're ready, put a piece of paper on top of the block. I recommend doing test prints beforehand. I'm just going to dive right in and use some regular printing paper, but just to make sure that you have the right amount of ink, the right pressure. There's no extra carving that needs to be done. Do a test print with some scrap pieces of paper. Once you've got the paper laying on top of the block, take your baron or spoon, whatever you're using for pressing, and rub it firmly evenly in multiple directions, making sure that you cover the entire block, everything that you want to transfer is covered evenly. When you think you've got the whole area covered, take one corner, and peel it up, and see your final design. The great thing about printmaking is you can just keep repeating this inking and pressing process to make as many prints as you want.
8. FinalThoughts: Thank you for taking this Skillshare class. I hope you enjoyed learning how to carve your first linocut print. Please post pictures in the class project section, including work in progress pictures. If you have any questions at anytime, I'm always happy to answer them for you. Put them in the class project section, or you can contact me directly on Instagram at Matt Reno Art or through my website, mattreno.com. Thanks again. I can't wait to see what you came up with.
 Matt Reno, Linocut printmaker