Transcripts
1. Intro: Thanks for checking
out this deep dive in printmaking tools. My name is Matt Reed. I've been involved in printmaking
since 2017. I'm happy to share what I've
learned with other artists. I've given overviews of printmaking tools in
previous classes. But here, I'm going to
explain a little bit more about the tools I
use and why I use them. I should mention that there is no paid product placement here. Although I talk about
specific brands, I'm doing so only to tell
you about what works for me. After finishing this class, I encourage you to research and try out not just the
brands I mentioned, but also alternative brands to find out what works best
for your art style. For your class project, post an image of a
lino cut print you've made and write about
the tools you used. This will help other people
who take this class gain perspectives on
various lino cut tools beyond my recommendations. To learn more about the
printmaking process, you can watch any of
my other classes. If you're new to printmaking, I have a beginners
class that covers the basics. Let's get started.
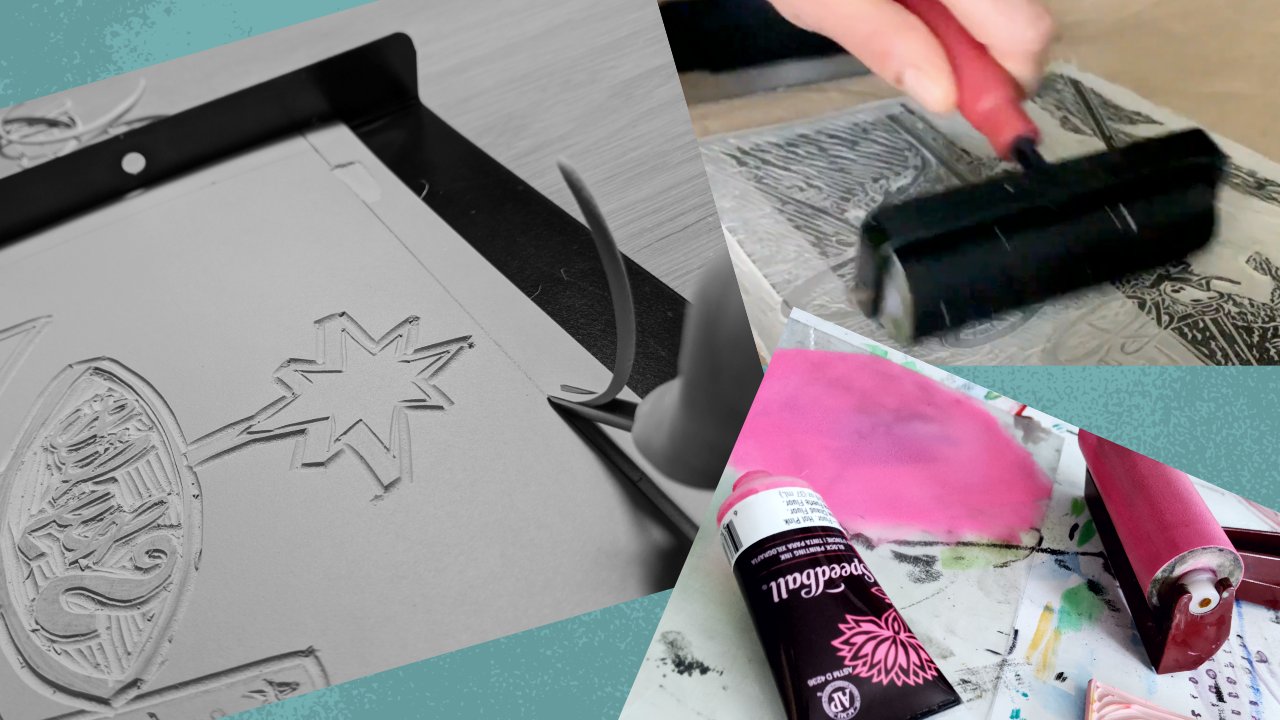
2. Blocks: The great block for beginners is the speed ball speedy car. They come in a variety of sizes and are very
easy to carve. It's made from a soft, rubbery material that makes
carving incredibly smooth. One downside is that transferring images
can be a little messy. The pencil marks tend to
smudge during the transfer. You may have to redraw your image to make it
clearer before carving. That's why I like using
speedy carve blocks for smaller pieces that don't
require a ton of detail. For larger, more
detailed pieces, I use Blick battleship,
gray linoleum blocks. They're made of a firmer,
sturdier linoleum. Make sure your blades are sharp, not just for details,
but also for safety. Speaking of safety,
keep in mind that while speedy carve blocks are soft enough to carve
with minimal force. Carving the blix blocks
is not as effortless. You do have to put some
extra force into it, which may result in
slippage of the blade. I highly recommend using a
block hook to prevent that. This simple metal
piece sits easily on your table and takes some
of the force out of carving. Another problem that
could arise from carving too stiff a block is a
sore neck or shoulder. Pushing the blade into
a stiff surface exerts force that can move up your arm into your
shoulder and neck. To prevent that, you want to heat up the block
before carving. You can do this easily by running a hair dryer
over the block for a minute or so until it's soft enough to reduce
strain while carving. Heating isn't necessary
with speedy carve. Another way to reduce strain is by choosing
the right cutters, which we'll get into
in the next video.
3. Cutters: One of the most popular line of cut carving tools is the
Speedball Speed carve set. Like most people starting
out in line of cut, I learned this art form
using a speedball cut. I kept using it for a few
years, and it worked just fine. One cool thing about
it is that you can store the blades
inside the handle. It's a convenient and affordable option that gets the job done. However, as my print
making volume increased, I felt it was time
for an upgrade. I opted for file tools. First of all, I should
note that these are a lot pricier than the
speedball cutters. If you're new to line a cut, there's no sense in investing around $30 per
single bladed tool, when you can spend $10 on a speedball tool with multiple
interchangeable blades. But if you're getting
serious about print making, it pays to put some of your print sale profits
toward better tools. One huge plus to
the file tools is how easily they cut
through the linoleum. As I mentioned earlier, Blick battleship gray
blocks are fairly sturdy, and speedball tools aren't
the best fit for this block. I had to keep a hair dryer
handy to heat up the block before each carving session
to prevent straining my neck. With file tools, this
is no longer necessary. These tools move
through the block smoothly without having
to pre soften with heat. That's because they're
built not just for linoleum, but also for wood. I can't speak much to their
wood carving capabilities, although I have used them on one fairly dense piece of
wood with good results. Another aspect that keeps things moving smoothly is
the handle shape. The mushroom shape ends fit
comfortably in your palm, and the 70 millimeter
metal blades are enough to allow
you to safely place a finger near the end when you need added guidance
for fine lines. I've been able to
get the lines I need with just a
handful of tools. But if you need more
versatility in your lines, file has a large
number of blade types and sizes so that
you can gouge away large portions of
your block or create fine details with a
1 millimeter blade. You'll find choices of
V blades and U gouges, referring to the
curve of the blade. I enjoy having the
nearly flat sweep blade, which you can use to clear away lines left behind from
the other blades. This is good for creating
large portions of white space. These are the tools that I use, but there are other brands that other block printers love. Although I can offer
firsthand insight on them, you may want to
check out tools from Flex cut or Power grip and
see what's right for you.
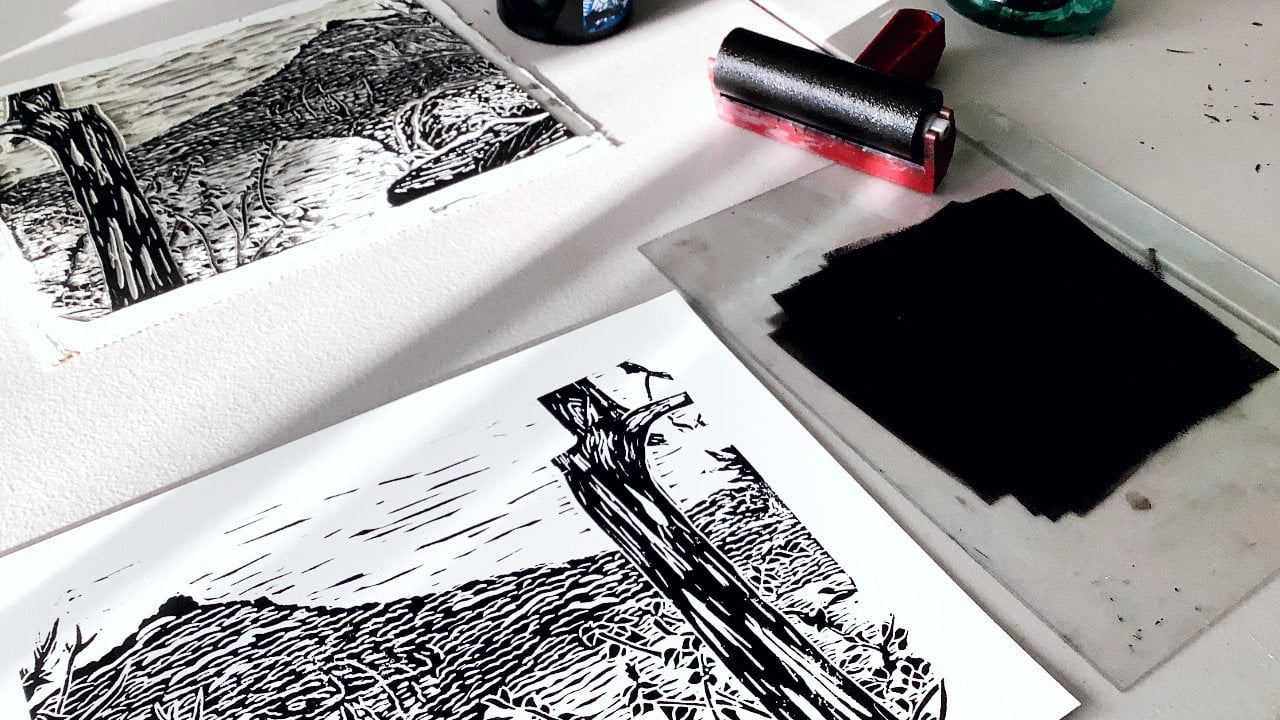
4. Inks: There are lots of great
print making inks out there. I recommend starting with small bottles to see
what works best for you. Since you can mix colors, there's no need to
stock up on greens, purples, and oranges right away. Just get a starter
pack with black, red, blue, yellow, and white for lightning your
colors if necessary. Keep in mind that there
are two main kinds of ink, water soluble and oil based. If you're printing at home and cleaning your materials
in a bathroom sink, definitely make sure
you're using water soluble as oil based
could stain your sink. Oil based dinks also require
more than water for cleanup. Vegetable oil works great for
washing off oil based ink. But of course that can't
go down your home sink. Save the oil based dinks
for when you have access to a print making studio
with a heavy duty sink. I found that water based
relief inks work just fine, but oil based inks
give the print an added touch of
richness and boldness. Gamblin has an excellent line
of inks as does speedball.
5. Brayers: S. The brayer is an essential print
making tool used to evenly distribute ink
across your printing block. Braers ensure a smooth, consistent layer of ink and come in various sizes and materials, each suited for different print making techniques and ink types. One of the most popular brands for beginners is speedball. Speedball brayers are widely
available and affordable, making them a great choice for those just starting
out in printmaking. These brayers typically
feature a hard rubber roller, which is durable
and easy to clean. Speedball brayers are versatile, working well with both water
based and oil based inks. They also come in various sizes, allowing you to choose the
right tool for your project. However, speedball brayers
do have some limitations. The hard rubber can
sometimes create a slightly textured
surface on your print, which may not be ideal
for all projects. Additionally, over
time, the rubber may degrade or become
less responsive, especially if not
properly maintained. To keep your brayers
in good shape, wash them after each use, but clean them gently with water that's warm
but not too hot. If you're looking to upgrade
your print making tools, you might consider Tacach press. They offer high quality brayers with polyurethane rollers, known for their durability
and ability to hold ink well. These brayers provide
excellent coverage and are particularly good
for large scale prints. Another more affordable
option is the Iovart brayers, which feature comfortable
handles, and in some cases, interchangeable rollers, allowing you to switch
between soft and hard rubber, depending on what's best for the project
you're working on. Ultimately, the choice of brayer depends on your specific needs, budget, and the type of
printmaking you're doing. As you progress in your
printmaking journey, you may find it
beneficial to have a selection of brayers
for different purposes.
6. Paper: What kind of paper
should you print? Well, you want something
thick and sturdy. Standard computer printer paper just won't do your art, justice. I use Arnhem 16 18 by Speedball. It's a 100% rag acid free print making paper with a semi
smooth vellum surface. It's not cardstock thick, but it definitely has
a substantial fiel. Where does the Arnhem
16 18 name come from? Well, it's made near the
city of Arnhem in Holland in a mill that's produced
fine paper since 16 18. Because this paper is strong
and highly absorbent, it'll accept multiple
layers of ink, making it great for things
like reduction line of cut, as well as other print
making techniques.
7. Barens: Now, let's talk about barns, tools you use for pressing
your designs onto paper. When I first started
print making, I got a speed ball bearing,
which works great. It has a large, smooth surface, and it's very easy to press. If you want to go even simpler, you don't have to
buy a barn at all. Just grab a smooth spoon
from your kitchen. You can even use your hand, although that may not provide the best amount of
pressure and smoothness. The tool I use for pressing
is a print frog glass barn, made by iron frog press. Print frogs are
made of hand blown recycled glass and come in
a wide variety of styles. It's the tool you won't stash away between
printing sessions. I keep mine on my desk as
part of the room decor. Of course, looking nice isn't as crucial
as functionality. Fortunately, the print
frog is very functional. The smooth round handle
fits perfectly in the palm of your hand and creates a
comfortable but sturdy grip. It's heavy enough to provide enough pressure for an
evenly inked print. Meaning you can ease
up on the elbow grease and it glides across the
paper amazingly smoothly. Yes, these items are pricey, so therefore dedicated
print makers. If you're just starting out, you'll be fine with a spoon
or a speed ball bearing. But if you're frequently
hand pressing prints, I would recommend upgrading to a higher quality piece of
equipment like a print frog.
8. Wrap-Up: There you go. More info on the tools I use to make prints. Again, these are
what worked for me. You may find that
different products are more suited to your needs. If that's the case, please
describe what you use in the comments or class project
section. I'm Matt Reno. You can find my work
at mat reno.com. Thanks for watching
this skill share class, and I look forward to
seeing your prints.
 Matt Reno, Linocut printmaker