Transcripts
1. Trailer and Introduction: In the past 18 years, I have published several
projects for cardists, three magazines, two
books, and one card game. I've also recently completed
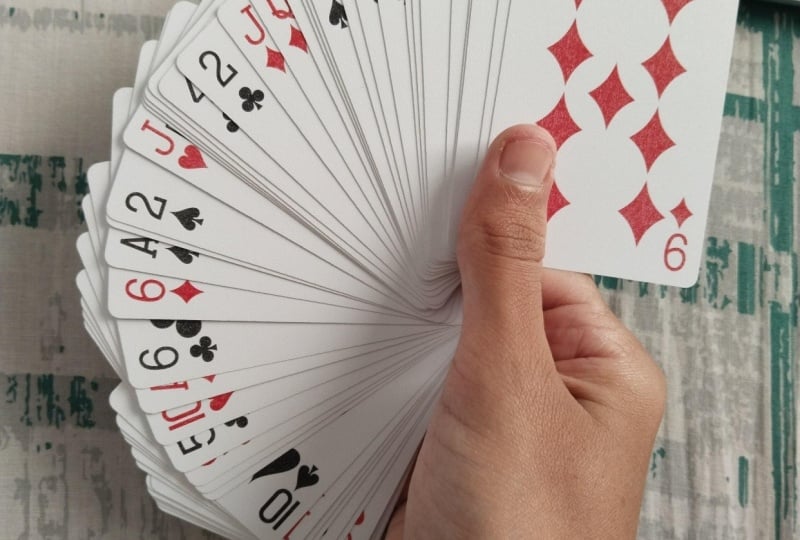
this project on Instagram, where I have performed
one new card flourishing every day
for a whole year. In this Skillshare course, we're going to be looking
at different ways in which you can fan a deck of
playing cards. Don't worry. All of these are very, very, okay, not all of
them, but, like, most of them are very
approachable and you can start picking them up and
practicing them right away. So grab your deck of playing cards, and let's get it started. Welcome to Cardistry
Boot Camp fans.
2. Welcome To The Course: Hey, my name is Baz. Welcome
to the Cardistry boot camp. In this course, we're going
to be looking at fans. As you saw, probably
in the trailer, that's why you're watching
this course right. Now, I've been doing
Cardistry for over 80. Wait, I actually already talked about that
in the beginning. Let's just go directly
into the course. Just grab a deck
of playing cards. If we're going to
talk about playing cards in the next
episode, as well. I'm a little bit excited. I, you know, been
working on this course, and I'm really
happy with it, and I'm really happy
how it turned out. And I think there's
a bunch card fans in here that you can start
picking up right away, and I'm pretty
excited to show you everything that is in store
here. So let's get it going.
3. Decks You NEED: For this course, you
don't actually need anything more than a
deck of play cards. I'm going to be using
the Tally-Ho circle back because of two reasons. One, they're super cheap, and you can find them
absolutely anywhere, probably even in Walmart
or any magic shop. Any magic shop has
them for, like, a couple of bucks, which
is insanely perfect. And number two, number two
is that they are the best. They're considered
universally to be the best cards for cardist. And there's a very
beautiful history with these playing cards
because they've been used. Back when there were
very popular forums in the cardist community called DeKunique and Cheaters Cheaters. And even when Theory 11 had a forum and people
were, like, going there, people were using these cards because these were the go to playing cards
before cards became a thing and everybody was printing their own
playing cards. So, still, I use these. They look amazing.
They feel amazing. But you can use any poker size playing cards
that you want. Do know that these fans work with basically any
playing cards, for that matter,
they can be bridge. They can be mini cards. But we're gonna be learning
with a poker size. So for the beginning, I advise you to learn
with a poker size. But if your hands are a
little bit smaller than mine, or, you know, you feel like you feel
more comfortable with a bridge sized stick and definitely use that one.
Let's get it going.
4. The Thumb Fan: The biggest misconception with the thumb fan is that
everything is happening from the thumb fan as if your thumb fan is the one
creating all of this fan. But the whole secret lies
in your left hand fingers. Without your left hand fingers, the thumb fan would
probably look something. Now, this is a very new deck, so it will by itself
fan very well. I'm doing a lot of pressure
from my thumb here, so it's very hard to
actually do a bad fan. Let me try with the other
one. The other hand. Now, now, because I already know exactly what I need to do. But when you place the deck
inside your hand, first, when you're going
to try and do this, the card is going to hit
the base of your thumb, so you can't do it all the way. It's going to feel awkward, or you don't know exactly how to press on
the playing cards. So it's just going
to go like this. You're basically just expecting for all of the cards to move, but in reality, just
the top few move. So there's a couple of
things happening over here. The first thing is
the way that we hold the fan, how we hold the deck. We're going to place
it over here in the crutch of our hand, and we're going to
place our left thumb all the way to the other corner. From this position, we're
going to really keep the deck tight in between our finger
and the rest of our fingers. But don't keep it way too tight. Like, don't squish it just enough so the cars
don't slip away. From this position,
our thumb over here is basically
going to glide. So it's going to start
from the bottom, and it's going to glide
all the way to the top. So it doesn't stay in
the same position. If it would stay in
the same position, you see I would fan the bottom cards, and
then that would be it. This is actually a
technique we're going to use much later
for other fans. But for this one, we need
to be able to glide. So we start from the bottom
and now we're here, okay? So we start from here,
we go a little bit, and then we move our thumb
a little bit higher, and then we move our thumb
a little bit higher. So basically, you see
that's what's happening. You start from the bottom, and then you slowly make
your way to the top. I just cannot not get Drake out of my head
every time I say that. So get this gliding motion. It's going to help
you a little bit if you bevel the cards like this, and then imagine that your thumb is making its way up to the top, climbing all of these
cards to the top. And you should get
something similar to this. Now, once you get in the motion
of being able to do that, obviously, you have to do
it in a circular motion. But then what's
going to help you is if you apply a little bit of pressure on the
playing cards. S? With my thumb, I'm going to push
down on the cards and do this motion
at the same time. By pressing down on
the playing cards, the pressure from your
thumb is going to help them arrange in a beautiful
fashion like this, see? The positioning of your right thumb is also very important. You're not just placing
it somewhere randomly, though most of the times
it's going to work. But if you place it here
at the outer corner, you're going to have much
more control over the cards. And in reality, with the basic
fan thumb fan, that is it. As long as you
hold it over here, seeing in this fashion with the cards a little bit
crooked like this. And then we do the thumb fan, you should get
something like that. Now, in time, you are going to start moving your
fingers underneath, sort of like playing the guitar, in order to allow the
cards to expand more, notice that I am curling them
a little bit underneath, just like this a little bit, so that I can actually
make a bigger fan. So it's not just this, see, it's not just a
straight line almost, but rather, I already
turn the cards like that. And then see just like that, I can almost make a
360 fan like this. Now, once more, we just
push it like that. My fingers are a
little bit curled in. I am applying pressure
right here at this corner with my curled
fingers over there. And then I'm doing the fan
all the way through so that I can make this V shape
almost, just like that. Now, when you want to close the fan using one single hand, you are going to twist, just like this,
your index finger, push the cards forward, and at the same time, your other fingers
are going to pull. So it's this motion
where you're pulling and pushing with your index and
with the middle finger. See, I'm pushing and I'm
pulling at the same time. And due to the momentum, you're going to get this because if I would just push and pull, it's only until here. So in order to close the rest, you have to rely
on the momentum. So you start doing it, and then you tilt your
hand towards yourself. And you release part of the pressure from
your index finger, but you still keep a little bit pressing on the card so that they have something to hold on. Notice that my nail is
actually the one that is being pressed against the
cards because this way, they can slide down without latching onto
the tip of my finger. On the nail, they can slide. On the tip of my finger, they will probably
stick because sometimes I have sweat and you get
something like this. There you go, guys.
I know I'm over explaining maybe a little
bit to the thumb fan. Maybe some of you have
already gotten it, but the idea is that this
is the fundamentals. If you can get the thumb fan, you can do a lot more
from that position, which is exactly what
we're going to do. And this is why I wanted
to make sure that you have everything that is
necessary in order to do it.
5. Index Fan: A variation on the thumb
fan is the index fan, and you will see many
people do this at the beginning when they
are learning cardistry. They will use their
index because it is much easier to slide our index from the
bottom all the way to the top than it is to
do this with our thumb. So, yes, I know I explained
something a little bit more difficult at the
beginning because now this is going to
feel much easier. But I don't necessarily
like this fan because there's
something weird about having one finger
sticking out like this. As having the thumb over here
feels much more natural. I think it's probably because
the thumb is smaller, so it's cuter or because
there's two thumbs over here and it feels more natural to
see instead of seeing this, which feels very geometric
for some reason. So if you find still, if you find this to be much
more suitable for you, definitely do it using
your index finger.
6. The Infinite Fan: For the infinite thumb fan, we're actually doing something opposite to the Siamese Fan. Instead of fanning the
cards from the bottom, we're starting with the
cards from the top. So notice that over
here, we've actually fanned the top 20 cards. Now, if I move my thumb on
this position and I just pull, it's going to just push the
playing cards, obviously. But what we want, we want to
continue fanning the cards. So we're going to go all
the way to the left. And almost do another fan on
top of the one that exists. But in reality, it's all of
these cards are being spread. They're being spread out so that they now go
over the other ones. And notice how you can keep
doing this and it becomes an infinite fan where the
name actually comes from. So spread these a little bit. Then we come over here
to the left side, and we do a similar motion where we're coming
towards the top. And then again, over here in a similar motion where we're
coming towards the top. One thing that you
will notice is that since these
cards are moving in a much more chaotic way than when you're doing
a normal thumb fan, you're going to have to
play a little bit with the pressure from your
fingers underneath. So over here, a little
bit, they're moving. Let me do that from
the beginning. Here, Boom, then all
the way to the left, boom, and then boom. Now, one thing that I would tell you is when
you're doing this, the pressure from
your left hand is juggling between the index
finger and the middle finger. So when you are doing this, you are just applying pressure from your index finger mostly. But when you're doing this, a little bit, I'm feeling
that the index is pushing in the beginning and then I'm moving towards the right one. Maybe maybe you shouldn't
think about stuff like this, try and try and do it. Maybe I'm over explaining. I just realized, do
this, see how it looks, and keep playing with
the pressure from both your right thumb
and your left hand, and you will find something
that feels right. And then you will have
done the Infinite Fan.
7. Inverse Thumb Fan: So we've learned
how to do this fan, where we're going counter
clockwise to place it, and now we're going to
learn the opposite one. So this is basically like the windshield fan where
we're doing it with one hand. But in this case,
instead of using our right fingers to do this, we're using our left fingers to guide the whole deck into a fan. We're applying pressure with our thumb from the
top on this side, and underneath our index finger is curled and applying
pressure as well. Then all we need to do
is use our left finger, any finger that you
wish, and just go in a clockwise motion in
order to create the fan. It should happen by itself. There shouldn't be any
motion from the left hand. It's basically just
sitting like that. See, like this. And then
while it's keeping pressure, I'm just using my left hand to create the fan, just like that. Around with the way where you're placing your thumb based on
where you're placing it, you're going to get a
different shaped fan, as you can see over here. And I feel like this is definitely one that you
should know because it's nice to go from this one into other combinations
for cardistry. See? And it flows really well, and it's super easy.
8. The Fan Drop: One way in which you can
practice your thumb fan is to be able to
make a thumb fan, which you can actually
place on your right hand. Now, this is a little bit different than just
a regular thumb fan. Sometimes we would do
a thumb fan like this, and you will notice
that this section in the center isn't
actually very stable. If I would put this on
my finger over here, it wouldn't actually
sit because we need a very solid foundation
here in the center. So whereas usually when
you do a thumb fan, you don't really think about how exactly you want
this thumb fan to look. You're doing this one,
you are making sure that you have a very
strong core over here. Notice how all of these cards rotated and they ended up
back in the same spot. This allows me to place this fan over here on my
hand and to balance it. Now, the way that we
do this is by moving our thumb a little bit higher over here
towards the center, and this is going to allow the deck to basically
rotate much closer. Well, oh, stuff like
this does happen, especially when we're
looking at the camera, and this is why we got to get accustomed to picking them up. There we go. So when
we're doing this, I place the thumb a
little bit higher, as you can see, I'm
fanning the cards, and you will notice
that it feels much, much sturdier now
when you let go. Everything will just sit there. And we're going to
place this section right over here in
this on this hole. So we're placing it right
here in the center. So this part over here is going
right here in the center. And you'll notice that the
fan can just stay over there. Now, if we just throw this and
catch it as we did before, it will look as if it's a
very, very difficult move. But in reality, all
you're doing is you're just positioning it
back where you put it from. See, I can put it back over
there and catch it again. Because we have a strong
foundation over there, the cards won't actually split
and go all over the place. They will stay together. And this is called a fan toss. It's a great way in
which you can practice your thumb fan and also show off because
it's such a nice move. Let's see. There we
go. Oh, look at that. This is something that happens
sometimes when you drop your cards on the floor
and something goes inside. You know, starts splitting
over there, but it's okay. We can still do it
and catch the cards. And there you go.
9. The Double Fan: For this one, we're actually
doing a fan inside of a fan. So we're going to repeat the thing that we did
for the Siamese Fan, where we're just spreading the bottom part, as you can see. And from here, we're
going to push all of this forward over here. So notice that I have
to lift off my thumb, which means that this
whole fan is being supported by my right
hand. So I come over here. I'm pushing down on the back of the fan so that I can
move this forward. And now my thumb is going
to move in this position. And we repeat the same thing
and execute another fan. Or to close it, we have to
go backwards over here, and then we close
it from over there. So, once we're here, we can just instantly push
this to that position. Square everything
up a little bit so that it's a little
bit more tidy, and then we can fan this
again to have a double fan. You can even move it
a little bit with your fingers from
underneath in order to give it some fluid motion.
Let's go over it again. The bottom part,
once we're here, I can already move this forward. Fan again, once we're here, we can move the fans
a little bit by closing our fingers
just a little bit, not enough so that it
splits over there. Then we close it over here, and we close it from
the other side down. Boom, moves, boom, show, and then we close it
the other way around.
10. The Smear Fan: The next fan that we're going to learn is called the Smear Fan, and that's because of this motion that you're
doing with your fingers, your fingers are curling in like this as if they're
doing a dance, and your thumb is going
the opposite direction. If you put some playing cards
while you're doing that, you should get something
similar to this. Now, in no way do I think that it is as
simple as I am just telling you right
now because I've been doing it for so many
years that at this point, it probably will
not look like this. You know, I know it is a
bit discouraging to see me doing it like that as if
it's easy to just get this. But there's a lot
of micro motions that I'm doing without
even realizing. So it's very important the
way that these fingers move. Notice that when
I'm moving them, it starts out as a small spread, but then these fingers are bringing the cards
at an angle, see? And it is the way that
they move inside. But most importantly,
it's the pressure. So at the beginning, we start off with all of the fingers, but then these two fingers
from the bottom are actually moving away in order for
these two to do this. So my index finger and my thumb are holding the
foundation of the fan, and my middle finger is
guiding all of the rest of the cards over here and the
middle finger is over here. Now, let's just focus on
the bottom part, right? So thumb over here at the corner, fingers
straight, right? Now, I start moving my
thumb just like this. And applying pressure at
the same time. There we go. And then my fingers
from over here are going to start
their motion as well. So they start their motion, and my thumb is going
to continue extending. So it's going to
continue extending. You're going to drop
cards at the beginning, and you're going to
drop cards a lot. When you're doing card
industry, dropping cards becomes something that happens. I've asked people on Instagram, how many cards do they
think they dropped? And many have talked about hundreds of thousands because it's something
that happens. This is 20 cards. I just dropped them,
and that's 20. Sometimes in a day,
you can drop easily 500 or maybe even more if you're just
practicing constantly. So a number like this
shouldn't scare you at all, and you should definitely not feel ashamed if
you're dropping cards. So many people will even begin in this position
over here, see? Because this way they
can come over here, and get much easier into this smearing
motion into this motion. But for the beginning, don't have to worry
about that because just as well you can
get into this position, see where you're doing it
over here with the hand. Now, there's not much more
I have to tell you about. You break half of the
deck, you move it forward. I keep it between my fingers. I grip this part, and
I am doing the fan. And there you go, guys.
That is the Smear fan.
11. Two Handed Smear Fan: Take a look at this bad boy. We're going to be
using two hands in order to create a Smear fan. So if usually we're doing a Smear fan using just
one hand, in this case, we're going to use
our left hand to spread all of these
cards even more so that we have a
bigger Smear fan. This is like a two
handed Smear fan or a big boy Smear fan. Now, the only thing that's
different from here is that we're going to be grabbing the deck
in this position, which is usual for the Smear
fan. See, from over here. But instead of just
doing that one thing, we're going to use
our left fingers to spread all of these cards. So we're using our right thumb to spread these
ones from the top, and we're using our left fingers to spread all of these ones. And notice that I can
actually go the extra mile until I'm almost
completely going 360. Can even probably do a 360 if you move your
finger out of the way. Take a look at that.
Take a look at that bad boy right over there. So the way that that happens. So you see, I'm
just spreading with my thumb over here at
the corner a little bit. I'm keeping with my
hands all of these ones, and then I'm spreading them as I'm lifting my fingers
as I'm extending. Sorry about that. There you. Now, I put them back this way. If I want to have a
361, I start doing it, and then at this point, instead of keeping my
index finger underneath, I'm going to move it over here. So you can even start like
that, but it's weird. It's just a weird
position to be in. So you go here and
when you're here, you can actually have oh, no, actually, your other fingers
are going underneath. EcusmiEczmi. So it's not your index finger,
it's the other fingers. So you go from over here, and then these fingers are extending and they're going
underneath of that card. So spread, and then
these ones are extending and they're getting
the card from underneath. Then I can actually
spread all of these, prepare to pick up cards from the floor, maybe, maybe not. And we're extending
them in a circle until they almost
touch the other ones. So we have a full, full fan. Around with it. I just like doing it this way. I feel like it's got a
nice ring to it, you know, when you're just you're
over here and then boom, you're just spreading
all of that. It is possible, I think, to actually do it
with just one hand, the smear fan like that, but I've always found
it so comfy, you know, like a coffee Smear
fan, basically. So there you go, guys.
A coffee Smear fan and also one where you
can actually extend. And there we go. We're gonna pick up
cards now. Okay.
12. The S Fan: Now that you know how to
make a Smear fan, well, I'm just saying now that you know it's not like you're not watching the rest
of the videos one after the other, and
it's completely fine. Don't worry about it.
I think it's nice to be able to practice
things in different ways, even though you can't completely do a Smear fan in each hand. One of the most
challenging things about cardist is that many things you'll have to learn
in your right hand, and then right afterwards, you're probably going
to have to learn the same thing in
your left hand. And that's because when
you're doing Cardistry, you're going to be
using both hands sometimes completely equally. Even in double cuts like
this in two handed cuts. Each one of our hands does
something individually. And in the beginning,
you learn this from something as simple
as a Smear fan. So I said as simple.
I'm sorry about that. Everything feels a little bit more difficult in the beginning, but it was just like, you
know what I'm saying? So we have the Smear
fan over here, and we learn it in the
left hand as well. It's the same thing where you do it in the left hand, okay? It's going to take
a couple of days, but don't worry about it. Now, the way that you can
do it in a simple way is you break both packets.
You move them like this. You grab the first
one over here and notice that I'm grabbing
it so that I can hold it. And I'm grabbing it like this in that fashion that I showed you. This is because I want to
separate both packets. I put my fingers over here, and then I fan both. Now, this in itself is very beautiful as
you have two fans, but you can also connect them, and the way that I connect them is by going with my fingers underneath and putting
this fan on top. And now we have the
fundamental S fan. This is the most classic
way of performing an S fan. We go like this and
then just like that. It is a beautiful way to
practice your Smear Fan, to put them together like this. It's also a little bit corny because it has been
done so much since the 60s that magicians have developed a
certain hate for it. But hey, don't listen to them. I still think it is
amazing, you know? Look at that. Beautiful. Now, you have seen me do this, go from this position, and this is the
way that normally people would go into a
double fan into split fans. This is how they're
called split fans. So the way that I do this is by having the cards
in this position, which is called the Bittle grip position in our right hand. I come with my left hand. Either you can riffle, which is more advanced, you press with your index finger on the back and with your thumb, you pull back like this. And this happens
because the cards are a little bit bevelled like that so that you can
glide your thumb on the side. So I riffle, I allow this to
fall in my hands and flip. And now from over here, I
move my fingers to the side and I go into the Smear
fan, just like that. Now, one of the things that you might do that actually
I do by mistake, is that you notice that this one card is
almost going to fall. That's because I placed my left hand thumb
way too much to the side over here so that
when I'm doing the Smear fan, you can see that card
is almost falling. There's nothing almost
nothing holding it there. In order to avoid doing that, make sure that you
place your thumb not completely to the corner, but a little bit
towards the center. And this is going to allow you a much better grip on
the top section as well. And there you go, guys.
That was the split fans.
13. Windshield Fan: Here's another way
in which we can perform a one handed fan. This is part of the
windshield routine from card manipulation where magicians used to
open and close fans, kind of like how the wind
wipers in a car go up and down. And this has become a very popular way of
performing one handed fans, mainly because it gives you this version of the
S fan, you know? Now, I've shown you
a couple of things that you can do with this just because this is going to be a little bit more difficult
than the Smear Fan, and you might feel a little bit discouraged
to learn this one, as well, but it is a very
beautiful fan to do. So here's what
happens over here. We're going to place our fingers and open them the opposite way. But you do it by placing
it in this grip. Notice that my finger
is curled in inside, and I'm going to
extend it outwards. So this is what happens when
only my index moves, see? We can already get
to this position. So if just our index
moves from here to here, and our thumb holds the
playing cards over here, we are going to get this. Now, in order to extend the
rest of the playing cards, we're going to have to help our fan with the rest of our fingers and
our index finger, once it goes here, we'll
have to bring it back. And this is what gives
it that last shape. So it's our index finger
bringing the cards back a little bit and the rest of our
fingers extending those cards. So watch. Extend, and then my
fingers are going to extend the rest over
there, just like that. Let's get into a
different position. Here. Watch. Boom. See? Now, obviously, I probably
could have thought this through and shown you this from a different point of view. See how my fingers extend over there and push
on the playing cards. That's exactly what you
want to happen over here. So this last part is our fingers
going upwards over here. See, like that. Let's go back. We go up, this is just
our index finger. Then we push a little
bit with our fingers, and then we curl in our index to bring the fan
into a semicircle. So over here, push a little bit and then
bring the cards back. Push, and the card
should move into a semicircle over here. Now, I keep wanting
to do this fan. It's very similar in position to the Carnahan fan
that we have over here. But you have to understand that here is just a slow,
slow movement. Where you're just opening the fingers, opening
the fingers. Play around with it.
Play around with it, and you're going to find exactly the movement
and the pressure. That is very important.
It's a combination of movement and pressure. Look, I'm doing it super slow. The pressure very, very soft, very soft, and
it's still moving. So you don't need to
put a lot of pressure. This is a lot of pressure now.
See. So both of them work, but try and be calm
when you're doing it. Boom. Boom. And you're going to get something
like this at one point. If you have any
questions, obviously, drop them in the section below, and I will definitely answer
them if there are any.
14. S Spread Fan: Now, this is a variation on
the Ascari fan by Huron Low, and we're just spreading
the cards over here and then guiding
them in an S shape. So this is similar to
the other fan that we learned over here where
we're spreading the cards, and then we're guiding them. But instead of spreading
them and pushing them, we're just going to bring them like this towards
ourselves. So we go here. You see, I'm already
shaping the S. And then I'm going to guide the cards a little bit
towards the inside. And then when I'm over here, I'm going to use my hand to give them the
other part of the S. So one see over
here, and then it goes. Now, the idea is that
this happens by itself. You see how the center part just rotates and there's
already an S shape. And that's mainly because
when you're in this position, if we're using our
left hand over here, to just bring these cards inwards while we're also
retaining the same shape. Notice over here, I am just
moving my hand inwards. The whole fan will create this shape by itself.
Here, and notice. I'm not doing anything.
I'm just moving inwards. This fan will be created, and then these cards will
also follow the other cards. And this is what
creates this a fan. As if you are fanning
them yourself, but you are also helping
the fan a little bit. So when you're over
here, I could just push, as you can see, but it
doesn't have a perfect shape. So in order to create that perfect shape, I
put my thumb over there. This is going to help give it that nice twist at that point. And I'm also using my fingers to just push them
back a little bit. Here, I start moving, see? And putting my thumb, using the pressure from my
hand to create this fan, and then I stop in this
position over there. And then I just come back. Now, there are many ways in
which you can do an S fan. As we saw, we can do it. From these fans, we can do
it from the regular fans. But this version especially
is very close to my heart because it
happens as if instantly. And whenever I show
this to somebody, especially if they've
never seen cardist, they're very amazed by this. I have to do something
to this one card. You see that keeps
sticking over there. There we go. And that
is the Spread Fan.
15. The Siamese Fan: For the Siamese Fan, we're going to combine a
thumb fan with a smear fan. Now, it doesn't look like
much from this point of view, but from the front,
you saw how it looks. It's got a really
nice aesthetic to it. So we're going to
do a thumb fan, but instead of fanning
all of the playing cards, we're actually keeping half
of the deck in this position. So the way that we
do this, we have to control just how many
cards we're fanning. And notice that I've left
half of the deck over here. The way that I do
this is that instead of just going with my thumb all the way to
the top of the deck, I'm actually stopping in the
center somewhere over there. So I'm actually just spreading the bottom half
as much as I can. Now, one more tip that you
can do when you're doing a thumb fan is to already bevel the cards a little
bit from the beginning. Say, I'm already beveling
the cards over here. And then when I'm
gripping the cards, I'm gripping them
with my right hand from this part as well, and this is going
to help me just a little bit manage how
many cards I'm taking. Another way that you
can do this is by splitting the deck
half like that. So now you can
actually fan these, and then you can take
the maybe actually, maybe that's a different
moment. That's a different fan. We can do this just
a little bit, see, a little bit so that
we can take a look exactly until where we can
actually move our thumb. This is supposed just to be
like a tricycle, you know, where you're just
helping yourself a little bit focus on that part. Now, once you're
in this position, you're going to grab everything
from this point and do a smear fan with your
right hand over here, and we're just going to smear
fan the cards like that. Now, from the front, it's
got a nice aesthetic. I actually move the camera
a little bit as well. From the back, it looks very, very let's say, okay. Over here, and then
from this position, we're going to extend
our hand just like that. Notice that the thumb
fan doesn't move at all. Once you're over here,
the thumb moves here, I'm releasing with my thumb and I'm moving the rest
just like that. And then we have
the Siamese Fan. To close it, we
bring it back here, and then we close
everything like that.
16. THOH Fan: Here is another way in which
you can execute a fan. In a sense, you're actually
using your middle finger from the other hand
to execute this fan, so it's not a thumb fan,
it's not an index fan, but it's a middle finger fan. You can laugh about that
as much as you want. Now, the idea is that this fan by itself might
not look so surprising, but this one is going
to be at the core of many other fans that you're going to encounter later on. So let's check it
out. We grip the fan over here with our
right hand from the top and our index finger. So instead of holding it here, and fanning it like this. That's basically what's
happening, by the way, when you're doing it from here, that's basically
what's happening. You are gripping it from here and instead of
doing it with one hand, from over there, or doing it from over
here with two hands. Yes, in case you never tried, if you do the fan from your
right hand with your left, it's going to look
completely blank, and this is great if you're
doing some magic tricks. So you are gripping the fan
from underneath like that, on this section on this section, and you are doing this. Now, if you want, you can
start with it like this where you're holding it here and then you're
fanning it with your thumb. But afterwards, you're
going to have to do it this way, the proper way. So we're gripping over here and then using our middle finger, we're going to guide
the cards in a fan. Our right hand isn't
doing anything. Our thumb obviously is
guiding these cards, but besides that, the right
hand isn't doing anything. It's just holding the
deck, just like that. And then we're going to have this beautiful fan
in our right hand. It's not much. But let me show you something that
you can do with this.
17. Biz's Riffle Fan: So this is an early version of the Riffle Fan by
Dimitri R Larry, and I devised this back in 2014. Now, we're holding the
deck as usual over here, as when we are dribbling
or when we are rifling. And the whole action
of this happens as we are rifling the
corner of the deck. So if you do not
know how to do this, you hold the deck
in this position, and then we press
with our thumb on the back of the cards
with our index, and our thumb just glides upwards on the index on
the corner of the deck. But notice that my index also is coming towards the thumb, because this is what it's allowing the thumb
to glide like this. Now, we're going to replicate this as our index finger from our left hand is
applying pressure with the nail right here on
this side of the packet. And if we do that,
because our nail is allowing the cards
to basically move, it's going to create
a nice fan like that. Op. Now, when you are
performing the fan, I'm not just riffling from here and expecting
something to happen. See if we just riffle from this side, nothing will happen. That's because a lot of the action happens in
this area as well. When I am dribbling, my fingers from
here are actually moving like this because
if they wouldn't move, the cards would start
let me show you once. The cards wouldn't
move. I'm doing it. I'm doing it by instinct. I actually don't think
how that would work. I think Oh, no, I'm still doing it by instinct. It's very hard not to do it. So you start here and notice that the fingers
will extend like that, and that is exactly
what's happening here. In order to allow the card for the cards to
actually become a fan, I'm actually extending
my fingers from underneath to allow the cards to move into a fan like that. Besides this, there is momentum. So over here, we're holding
the cards vertically. I'm allowing the cards to fall, and then as I move down, I'm also helping
the fan form, see? So over here like that,
the cards are moving, but also this part is
being moved by my hand, and this part from over here, I'm moving it with my
hand as well, like that. So rifle and move the fan at
the same time, like that. You're going to have
to play a little bit with the way that
you place your nail over here in order to also
allow the cars to move, but also hold them
at the same time. Once you finish the motion, you can let go because
your fingers from underneath are actually
holding the whole fan, and it's going to give you
this very nice aesthetic. Boom, just like that. Now, you can't always let go. If it's a compact fan like
this one, then you can let go. I'm taking a look at the camera. There we go. Then you can let go because it's all
sitting in one place. But if you're doing a much bigger fan for some
reason like this one, now I know I can't really let go here because the cards are going to run out. So
you will feel it. This is a feeling thing.
You will realize. But as long as you can do this and you allow
the cards to fall, notice that as the
cards are falling, I am moving my wrist
towards my right side in order for them to
sit into a nice fan. And there you go, guys.
That is the dribble fan. The Riffle fan. That
is the Riffle Fan. And there you go, guys.
And there you go, guys. That is the Riffle Fan by Biz.
18. S Fan Second Version: Here is an S fan where you end up holding it with
just one single hand. Now, this is based on
two previous fans, which we've already learned. First one, we're going
to fan the cards, similar to what we learned when we wanted to
do the fan tas. So you want to make
this fan smaller. Don't try and make a
very big fan like that. Second thing, we're
going to spread. We're going to fan just
the bottom section. So notice that I have fan over here and now the bottom
section is done, and we still have a
big packet over here, which we're going to
fan the second time. Now, the way that we
grab this whole thing is by inserting these
fingers like this. So from underneath,
here's what's happening. My thumb is going to be
there, and I'm placing in a piece style my fingers so that they hold the whole
fan. Over here. From underneath, I'm
placing it on my palm, and then my thumb is
coming right over here. So as you can see, this is
how I'm holding the fan. So now all I need to do is come with my thumb and then
execute the end of this fan. Now, depending on where
you place your thumb, you're going to get a different
S shape over there, see? But you're going to end up in this very beautiful manner with just one single hand
holding everything. Now, obviously, this
section is equally as important because how big or how small you make
this curvature, then you're going to
have it over here, see? Well, this takes a
little bit of playing, and then you're
definitely going to find one style that you like. So we're over here,
I place my thumb, fan the cards, and then I
have this S in both my hands. When I want to close it,
come from over here, start closing, and we're completely done. And
there you go, guys.
19. The Pizza Fan: So in order to do the pizza fan, we're going to split the deck into a quarter over
here, just like that. Place it so it's exactly
at this point in the hand. Then we're going to place
another part of the deck, equal to that right underneath, as you can see just like this, and we're going to place
one right in the center. And from here, it's
completely easy. This is one of the easiest
fans, and I love it. This is why I call
it the pizza fan. You place your other hand
so your thumbs are kissing, just like that, and then both hands are going to move
in opposite directions. So the left hand is
moving leftwards, and the right hand is
moving rightwards, as you're applying
pressure on the cards, and you'll notice that
the cards are going to create this shape, this pizza shape, this
circle shape by themselves, because you are applying
pressure in both directions. And then you open it, you close it, and you're done. So fall here, put
here in the center. Press, apply pressure
in the center. What I do over here
is I extend my pinky. So my pinky comes all
the way over here. I extend it so that it's holding this side of
the packet as well. And if I could show
you from underneath, you will see that my hand is like this holding everything. So it starts off like that, but then it opens up in
order to hold everything. When you're done, place your
hand back on both packets, rotate them back in
the same position. I come to the bottom,
I grab everything, and I'm completely done. And there you go.
That's the pizza fan.
20. Seashell Fan: This is called the Seashell Fan. And for this, we're
going to direct our attention at this
corner over here, as we're going to use
our right fingers over here to just make a fan. So we're placing our
thumb and the cards are revolving around the
fact that there's pressure from our thumb
applied on the corner. And our index and
our middle finger are going to guide everything. But it's also our
thumb that is moving. So it's not just
sitting in place. It's applying pressure and
moving at the same time. And it's because of this that
we can create this shape. Now, we start with the thumb. We move a little bit, right? Then we continue moving. And then if we need to,
somewhere around here, we're going to use
our middle pinky and ring finger to extend
these cards even more. So notice that
when I'm starting, I'm not sitting over here. I could sit with my left
hand completely stiff. But I feel like it
looks a little bit awkward to just have
the hand sit there, just like that,
just sit there and then my right hand
is doing everything. And I think it's nice if we have a little bit
of surprise, you know, because when you're twisting your hand, nothing is visible, and then when you're
turning it around, you can see the fan being made. So because of that, I'm twisting my right hand
towards the inside, and this is going to
allow me to also fan the cards from underneath from this position as I'm opening. So that's what's
happening. You're going like that and opening
them as well. I suppose you could
even do it like that. If you cannot do it over here, you could grab the
whole deck and then just create a fan. It
looks different, right? It just looks like a normal
fan from this point of view. You know, if you go like this and then you
continue putting it, it doesn't really
have flow to it, but in the beginning,
let's say that it passes. But when you're feeling ready, definitely place your fingers
over here at the corner, twist your wrist a little
bit on the inside, start creating the fan, and then twist it around so
that you have that seashell. Structure over there, you know, like. Just like that. Now, I apologize if the camera keeps focusing on my hand over there instead
of on the cards. And you should get
that this spiral, this very nice
fibonacci spiral over here. And there you go. Corner, a little bit of a twist. Rotate. The fingers
are doing this trip. So, you know, as it's spinning, and then when we
want to put it back, put our fingers back, and
we just rotate everything. Maybe I should just say this
is the fibonacci fan, right? The spiral fan. The
Fibonacci fan, there we go.
21. The Backhand Fan: This is called the Backhand Fan, and we're basically
using our back hand as both a table and also the way that we're fanning the cards. As you can see,
it's the motion of the hand that makes the fan. I'm going to explain
with just the thumb. So you're basically doing this, as you can see, just that. There you go. Here's
a backwards fan. Instead of doing it like
that, we can go like this. It looks even better
if we go like that. I never actually tried
this. It looks bad. Let me tell you. So instead
of doing it with your hand, you're doing it with
the back of your hand. So you're doing that with
the back of your hand. And your left hand,
at the same time is moving counter
counter clockwise. And spreading it on the back. As you can see, if we do
it face up, it looks bad. This is why we're doing
it face down like that. So I'm spreading, and my
thumb from over here is extended because it needs to support this side of the fan. If my thumb is not there
and we make a bigger fan, it's going to fall to the floor. So we start over here. Notice that I'm actually not completely straight,
but at an angle. Here, I start extending
counterclockwise with my wrist and then over here,
I'm flipping everything. We're in this position, and then I'm using my left hand to create the rest of the fan. And then I place my
right thumb. It's okay. I'm going to place
my right thumb right over here underneath so that I can continue and leave them on top of the thumb. So here we start. We have over here,
extend my thumb, spread a little
bit, and display. When we want to close
it, we place our hand back and we just
reverse the motion. So let's see over
here at an angle, reverse, show, put
our hand back, and then we can bring it. If you're feeling a
little bit ambitious, you can create a
smaller fan over here, and instead of closing it, you can throw it and grab
it in the other hand. So you make a smaller
fan here because you can actually control
how big the fan you're making based on
how much you're moving your left hand when you're
extending it like that. Then from over
here, you can throw it and grab it in
the other hand. It's very similar to the
fan toss that we learned. But instead of having
it over there, we're having it on
the back of our hand, but it's absolutely
the same thing. Here and there, place
our thumb over here. I'm going to try and catch it in the right hand. There we go. And we are done. Obviously, now we're going to have to pick up all the cards from the floor, but this is cardistry
what we're practicing, this is completely normal.
22. The Pressure Fan: The following fan on the list
is called the Pressure Fan, and that's because we're
going to apply a lot of pressure on the playing
cards, right here. And notice that the cards
fanned due to the pressure, not because we guided
them with our finger, but because we pressed down and we sprung the
cards from our hands. So it's very similar
to doing this. But instead of doing that, we
are doing it on the hands. So the way that this works, we're going to grab the cards,
just bear with me. I know. It looks like it's
going to be difficult, and it is weird
in the beginning, mainly because these cards feel like they're
very, very tough. So I suggest you
split the deck into half and just play with
half of the cards. So we grip the deck in
ttle grip over here. We position it just like
we usually do over there, maybe a little bit to the side. And then we're going to apply
pressure inside over here. So our right hand
applies pressure. And then because it's seated right over
here at the corner, because of this pressure, the cards on the left side
want to just do this. That's called under
pressure from Dan and Dave. Over here, see? The cards
just want to spring out. The way that under
pressure thing works, this is a bonus for
all of you guys watching is you're
applying pressure over here at the corner and your index finger keeps
applying pressure. You're going to
feel those cards, just go away from your fingers. Now, obviously, if I
just apply pressure, you'll have something like this. So what is actually happening
when you're applying pressure is I am
applying pressure, but I'm also moving
my index finger. So I'm doing something
like this, see? That's the motion that you
want to have like that. Because when you're doing
that with your index finger, those cards will
want to come out. If you are just doing
this and moving the fan or if you're just doing this and not moving
your index finger, you're just going to get this.
Nothing's going to happen. So the secret is in moving your fingers over
here on the side, you know, like that and applying the pressure
at the same time. S? When we're doing
our pressure fan, we want to do the same motion of springing those cards
into our left hand, but we're never going to stop. We're going to do that and
create a fan at the same time. This fan became very, very popular in the card
manipulation community because you can fan
any deck of cards, no matter how old it
is with this method. You can have a deck that is complete complete
bat, like garbage, and you can still fan it
perfectly using this method, because like I said, it's the pressure and not anything
else that you're doing. There's many cards that
if you'll do this, they're going to
separate in blocks. But when you're doing
the pressure fan, you're going to mostly
get something like this, a very fluid fan structure. So there you go, guys. Fingers
over here at the corner, thumb over there, grip, start applying
pressure. And move. You're holding the whole fan between your left hand, thumb, and the palm, so you're
going to have to have a really tight grip
when you're doing this. Do that motion, and you're
going to have this fan. And there you go. That
is the pressure fan.
23. The Big Faro Fan: This is a big fan, as you
can see, because it's big. The first thing that
you're going to have to do is farrow. Now, a farro is a pretty pretty challenging move if you're a complete beginner, but with the right instructions, I'm sure that you can do it. First thing that
you do is you break the deck into two
halves, just like this. Now, make sure that the one in your right hand is
actually bigger than the one in your left hand because when you're
going to do the fan, you want to leave
all of the cards in the right hand
packet, as you can see. Don't have to think about, Oh, is this, fairly split?
Do I have too many here? Even if you have too
many, it's still going to look like
a really good fan. See, that's quite a few cards, and it still looks
pretty good over there. Kind of looks like a
peacock for some reason. See? Just like that. So you don't have to worry
about this in the beginning. Now, we break off, like I said, more cards
in our right hand. You hit them so that you make sure that they're
both straight. Now, here's what's
going to happen here. I'm going to go at an angle and contact the top part and
start sliding up and down. Now, the idea is that here, I want the cars to
start going in. If you have a fairly
good deck from bicycle, it's going to happen by itself, just if you push them forward. But if you push them
forward and don't do anything, nothing's
going to happen. Also, you don't want to push
them dead in like this. Now, I might have done it, but in the beginning, it
won't happen like that. It will definitely
ruin your cards. So you want to go at an
angle with your right hand, start weaving them in slightly. And then in order to
keep weaving them in, notice that my right
hand is coming inwards so that the cards can start going in, just like that. So let's go again. Put them in. My index finger is over
here so that I make sure that the cards
are sitting straight, making sure that the top card from this packet is the one that is going
to arrive first. I start pushing them in and
weaving them a little bit. Then I close in my wrist so that the cards
can start moving in forward. Now, once you arrive
in this position, in case one of the cards does not go in and it's over here, just push it down so that you're holding everything
with your right hand. Move the packet into your
left hand over here. Now, these cards just move them slightly to the
right or to the left. Doesn't matter, as long as they don't sit completely straight, because it's going to
look much better if they're slightly
moved to one side. Grip everything in the center, move your right hand over here, and then do a fan
as you normally would with a thumb
fan, just like that. And you're going to
get this position. And as long as you
can do a thumb fan, you can definitely do
this one much faster. Once you're over
here, just close the fan, grip both sides. Squish them in and then
do a bridge shuffle. So let's go over one more time. We're over here.
We go in, we push, move them to the left
or to the right, place this one in our left
hand, grip everything. I like to do this with my index finger because
for some reason, though at the end, I'm
still squishing them in. But in the beginning,
it helps me slide the packet left and
right, a little bit more. Fan, once you arrive here,
you can close it in or. If these cards aren't
pushed in a lot, you can actually pick them up all of them,
just like that. And then you have them
over here and you can do a windshield fan
with just one hand, and then you're back into
this position over here. But we can talk
more about combos a little bit later. But
there you go, guys. This is a big ferro fan. Boom, boom. Spread them, show them over here, close them in. And you are done.
24. Expanded Big Fan: For the expanded big fan, we're going to first do a big
fan over here. There we go. So we're just going to make it. And now over here, we're
going to come with our right hand from the top so that we can hold the whole fan as our thumb moves underneath. In order for the thumb
to move underneath, we need to also go in like this with our
hand. S just like that. So it goes in so that now my thumb can be
underneath over there. So we're creating space for our thumb to move
in that position. Obviously, I'm going to have to pick up all of these cards. Boo, just like that. So let's do it again. We have the big
thumb fan over here. Hold all of these cards, move our thumb underneath. And now our right hand is going to move
these cards inwards, and our thumb is going to move those cards
inwards, just like that. And our fingers
just a little bit, they extend the cards. Now, as you can see, this is not really okay when
you're teaching and, you're moving everything slower. But even if it looks a
little bit like this, it still looks
amazing, doesn't it? There you have it, guys. The extended big fan over here, over here, and then we are expanding it using
our hands just like that. In order to close
it, you can start moving your hand inwards until your thumb can actually
move underneath and then start moving your
left hand as well inwards. You're in a very weird
position, as you can see, but this is going to allow
you to grip everything with your right thumb
from underneath and then bring them around so
that you can put them back in your left hand in preparation
for a bridge shuffle. And there you go, guys. That was the expanded big thumb fan.
25. The Jaspas Fan: Now, this fan was created by
Jaspas, and as you can see, at its core, we're going to be doing this fan that
we just learned. But instead of only
fanning the cards, by the time that we arrive
somewhere around here, our thumb is not going
to stay on these cards, but rather move down
just like that. So it's going to hold
these cards but allow the following ones to be free in order for us to move
them in a circle like that. So this happens over here. We start fanning, and
once we get over here, you'll notice that your thumb
can just move like that. It can move on the inside. And once it's on the inside, if you flip the fan, your thumb is now not holding
these cards anymore. So you can use your left hand to just take these cards and continue spreading
them in a circle on your hand, just like that. Now, obviously, it's a
bit more difficult when you're doing it slow.
Over here, see. And we're going to just
twist them in a fan. So then you have this very
beautiful display of a shell. It could be called
the shell fan. But I'm just calling it Jaz pass fan because I have no
idea how he called it. So I just shout out to Jaspas,
obviously, that's why. But it has this shell,
this shell shape. Now, you can go that way. So one thing that cardist do, they do the fan over here, and then they might separate
this fan from that fan, something that I don't
do, as you can see, I can't really do it,
and then have two fans. If you want, you can try that. But if not, one thing
that I like doing is instead of spreading the
cards on my hand in a circle, I just spread them on my hand. So that is one thing.
We're going to go here and then spread them
on the hand over there. And as you can see, you have this nice display spread of a spread in a fan at the
same time. I move forward. I get all of those cards, and then I'm left with
a fan in my right hand. But this is part of
the combos that we're going to be talking about
later in this section. So one more time, Jaspas Fan, we come over here, we continue the spread. We can show it. If not, once you
have the spread, you can actually
spread them on whoop, touch the camera over there, and you can spread them.
It's very difficult. Let me just get a nice position over here so you guys can
see what's happening. Boom, see, I spread
them on my hand. I can show them, and then I
do the ending just like that. And that is the Jaz pass
fan with a variation. Obviously, play a little
bit with this fan, as there is many more
things that you can do from this position
when you're over there. As you can see, you can
already make two fans if you just go the other way,
but that is being jamming. That fan actually exists, so it would be idea we can actually learn that one as well. So I actually completely
forgot about this fan. So when you're over here, you already have a packet here, so you have a fan, and using
your hand and the fan, you're going to help
yourself create another fan. Now, there was a lot of
fans in one sentence. So here, you bring the
whole packet together. You place your thumb as if
you're going to do a fan, and then you're fanning those cards using your
fingers from underneath, but also the fan from
your right hand. And it's going to create
a very similar fan to the Siamese
twins that we did. Only this time, both
fans look the same. You know, they have this
ukchuk like an M shape. So like I said,
this way of fanning the cards is definitely one that opens a lot of possibilities. So play along with it and
see what you can find.
26. Moebius Fan: So this is almost
like a mobius strip, but it's only half
of the mobius strip, and it's based on
the variation of the Carnahan fan
that we learned. So we're going to start off in that position where
we grip here. And instead of flipping the cards instantly on
the back of our thumb, we are going to spread them and then contact them from the
back with our fingers. So we're stopping them
from fully going on the back of our fingers
because if we allow them, all of this fan
is going to turn. So what we want is instead of everything turn
we're going to block parts of that to stay
down. We're over here. We just go upwards. S I extend my index finger. We already have part of the fan. I'm blocking the cards
from underneath, but I continue with
my index finger to push and perform
the Carnahan fan. If you keep doing
that, you will have this shape where the cards
create this S shape. Now, as you can see, cards might fall down because what you want is
not to have a complete, very tight grip on this because if I have
a very tight grip, these cards are
going to fly off. I'm going to have these,
which are separated. We're going to have a few
sticking out over here. Maybe this is going to pop
because as you can see, this is a much more
fragile display. What we want is after the
initial fan over here, we're going to stop the cards, and then we're going to allow them a little bit to go upwards. So I'm not completely
stopping them. I'm allowing them a little bit, because if I don't
going to pop like that. So spread, start allow. There we go. Allowing
them, I need more cards. Yes, you do need half
of the deck for this, but less cards won't work. So start spreading over here. To do this slowly, do
the corona hand fan. And then over here, what
I'm doing is I continue pushing in order to have
the extra bend at the end. Here, continue and have
that extra bend at the end. Now, this is going
to put a strain on your index finger
because you are using the index
finger to bend all of these cards into a sound
wave, just like that. While everything is
holding this back, the index finger is holding
by itself that whole section. So it will feel painful,
a little bit painful. I would say that for sure. But with enough practice, you're going to be able to
get exactly this shape, show it off, and then
you come and you slowly close it back
in your left hand. I do advise you to not practice this a lot at the beginning,
because even now, I've been doing it for
4 minutes constantly, and my index finger
hurts a lot, like a lot. So make sure to switch between the things that
you're practicing so that you don't strain
one finger a lot. And there you go. That
is the mobius fan.
27. The Flower Fan: The following fan
that we're going to learn is called
the flower fan, and it's one of my favorites. But as you can
see, I've switched decks because in order
for this to work, you'll need to really
destroy the deck. What I say destroy is that
by doing this constantly, the deck will start being
naturally bend in this way, instead of it being bend
that way, you know? Now, this doesn't mean that you will fully destroy the deck. If you just bend it
the other way around, you can still use it to play cards or to perform
magic tricks. And even like this, it will still function
completely well for any other cardist moves
that you're practicing. But the other deck
is one that I've been using quite for a little time, let's
say, a couple of days. And this is a deck
that I've worn out. So I've been using this
for quite some time, which means that it's
much easier to bend. The cards have bended so many
times that at this point, it's much easier for me
to bend it like this. Now, when you're starting
off the flour fan, start off with less card. So don't go with the full deck, start off with half of the deck. We're going to basically be springing the cards
just like when we did the waterfall fan from here or the cascade fan,
however you want to call it. But instead of
doing it this way, we're doing the same
motion over here. So we're bending the cards, and what's going to happen is as our left hand is like this, we are going to
make this C shape, which is actually the
other way around, right? So we're going to go
clockwise like this and slowly leave
cards on our way. So we start doing, we bend, we start
from over here. Now, our left hand is
going to hold everything. And notice, I let go of a few
cards, a few cards again. I let go of a few cards, and I keep leaving
cards one by one. Now, over here, you will feel that this is the
moment when you'll feel like your thumb is really holding everything
together, you know? You might not get it
from the first go because it's important
to adjust and see exactly where you need to start off so that when you
get somewhere around here, you can keep continuing and still have space on the
thumb in order to do this. Because if you
start off too deep, I can't go any further, see, because I don't have any space. But if you start off too high, then these cards might
just spring forward. So start off in the center. See, I put my cards over here
on this and on the thumb. I put them at an
angle. I start going. I start applying pressure
from both hands. Over here, I allow the
cards by springing them. I'm springing them,
and at the same time, I'm moving so that I can leave them hopefully quite neatly, the same space between
each playing card. S, just like that. Now, this is a difficult fan. I'm not saying that this
is supposed to be easy, but it's such a
satisfying feeling when you're pulling
it off because it's a very very unique
fan, as you can see. It's not something that
you'll see in movies. It's not something that
you'll see every day somebody do because it's such a it's such a rare thing to do to bend cards like this, right?
And take a look at that. It looks so nice even
from this point of view. So one more time,
get accustomed to doing this because this is
what you're basically doing. What's happening when
you're springing, it might just look like
I'm doing nothing. But when I'm springing,
this is bending. Nothing is happening when
you're just bending. When you're springing, what's happening at
a microscopic level is I'm bending and then I'm
slowly twisting my thumb. See, I'm allowing
the cards to escape. So I'm bending, and now if I just unflex my
thumbs a little bit, but I continue bending. So the pressure isn't
coming from the tip, but from this side, and
the same applies here, not from the tip,
but from this side, then this will give space
for the cars to just spring. And we're doing the
same thing here. We're bending and
at the same time, we are slowly shifting the focus from the
tip all the way over here to the first
joint of the finger. So it starts off with
pressure from the tip. And then as we make our way, now it's in the
center of the thumb. I keep going. Now,
as you can see, my thumb is in this position, which means it's at the first joint until
it's fully elongated, because I need to apply
pressure with just the joint, and then we'll
have the full fan. Now, I am going in very, very much detail because these are the things that
I really wish somebody told me exactly when I started because I didn't
really understand what to do with my fingers. But this way, you
know exactly what to pay attention to in the beginning and
then you'll slowly be able to get a nice
and great flower fan. If you put too much
pressure on the thumbs, the cards might just
go all over the place. But if you put too
little pressure, then the cards will
not stay together. So you have to play
around and see exactly how much pressure
you have to put. See, I'm applying pressure. Over here, I'm still applying
pressure, pretty much. This is quite a lot of pressure, but not too much so that
the cars just spring. And then when I want
to finish, I just take it and place it down. There you go, guys.
That's the flower fan.
28. Inverse Flower Fan: Mm. Here is the inverse of the flower fan. So instead of doing
it from this side, where we're spreading from
left to right clockwise, we're going to do it
counter clockwise, and we're going to
begin by gripping the bottom side of
the packet over here, and we're going to
place the top side right here on the palm. Now, the main difference
between these two, because it might just feel as if you're going one
way or the other, is the fact that
for the first time, you're going to be using
a lot of your pinky, your ring finger, and
your middle finger. Whereas here,
everything is being held together by your index, middle finger, and ring finger. Your pinky doesn't do anything. Here, you're going to feel a
different side of your hand. You see, I haven't even
arrived at my index. At this point, I can probably
just hold everything. My index is just holding
two cards, you know. So a lot of everything is sitting on the bottom
part of your hand. So this might feel a little
bit weird at the beginning. Also, when you're going from this position all
the way to the top, notice that when I start,
let's go over here. Sorry about that. Let's see. Notice that when I'm starting, I'm not actually
starting over here. So I'm not starting
in the center of the thumb, as I usually do. Because if we do that, the deck is way too high on this side. And if I keep going, I
won't have any space in which to have these
cards just sitting. So imagine that we
start over here, not really over there,
but somewhere over here. So we start over here,
and because we're going counter clockwise,
we'll have space. See, all of this becomes the space where the
cards are going to sit, and we're going
to grab the cards using this part of our fingers. This is why when we begin, we're going much deeper in the hand. We're starting
somewhere over here. And even on the thumb,
I'm not going over here. I'm going somewhere
over here near the center of the joint, and
we're doing the same thing. Now, another thing that
I'm doing is I'm not sitting completely static
with my left hand. Instead of sitting
completely static, I'm going to actually go
in opposite directions, as you can see, with both hands. So I'm starting
over here and then I'm opening both of my hands. This is going to
help you since it's going to leave your right hand in a much more
comfortable position, then if you were to just sit still with your left hand, see, at one point, it's
going to become very weird to go all the
way to the top. So by moving both of our
hands at the same time, we're going to have much more
control over everything. There we go, and
take a look at that. Now, isn't that beautiful? Take a look at how that looks. Then we can come back.
Gripping at the bottom, all three fingers over here. Boom start springing slowly. And somewhere around here, my index finger is going
to be put in position. And then towards the end, notice that I'm
springing much less over here because all I want
is to separate the cards. Here, the spring is much more powerful because I want
to start spreading them. These are going to fall much
hard to just maintain it. So here the spring is
much more powerful, and then towards the end, I am actually springing them
less and less because I want to have a little bit more
control over these cards. Now, not only that, but when
you're going from over here, yeah, it's your thumb, index, and middle finger. When you're doing it over here, it's your middle finger
and all of these, right? So your middle finger is
playing a big part over here. Which is going to feel a little bit weird
in the beginning, but towards the end, notice that it's actually
just the middle finger and the ring finger doing
everything over here. So we're springing from there. Now, these are all the details. I'm telling you all the details because I think it's much
better for you to hear them, and then you can start just
playing around with the move yourself and with
the positioning. You're going to drop
cards just like I do, so don't worry about it at all. Just go back and build those
flowers. There you go. Now, one way that you can end this after you have the fan, place your thumb
right underneath and then close the left hand
until you arrive over here. And it's going to give
you this nice feeling. There we go over here. Boom, and now I can just close my hand and
it feels very nice. You're ending in this
gun position, you know. There you go, guys. That's
the inverse flower fan.
29. Dragon S Fan: M so here's my way of performing a flower
fan in an S shape. We're going to start off
by fanning the cards, similar to a flower fan. But instead of completing
the flower fan, as we usually do, we
are going to continue, and we're going to go
in this direction. So what's happening here is
that I'm holding the cards from underneath with the pinky so that I can go
completely down. So instead of going this way, instead of going like this, just until here, we are
actually continuing. We're not stopping here, but I'm bringing everything
a little bit more closer so that I can spring those cards inside of my hand. And these last few ones which are being held by my pinky and the base of my palm are going
to be moved at an angle. And that's going to give us this S shape to
the flower fan. So we start from over here. When we get over
here, I continue, but I go inside of my
palm, and then these ones, I'm going to spring and
slowly move them out of my hand so that I can
have an S shape to this. You will have to find an
angle in which it looks good. It doesn't always look good. Sometimes it just
looks like pure chaos. But when you get the spring
of cards quite well, something like this, then you can get something
that is abstract, but also sort of nice. It is difficult. This is a
difficult flower fan version, but I've always wanted to have one that felt like an S fan. So I devised this
one back in 2015. There we go over here. Notice that this will
happen quite a few times, and it does happen when I'm not going deep
enough into the palm. So I'm going here, and I'm not going deep enough. See if I go deep enough, then those cards
will not spring out. So make sure that these
cards are inside and that they're being held by your fingers and this
side of your thumb. So you go inside, and then
you'll end up with something. It's not always
perfect. Over here, we go inside, and
then these ones, I'm going to spring
them out a little bit. Take a look at that and then I close it
and I put it back. And that is the
dragon flower fan.
30. Let's Jam Together: In this section, we're just
going to jam together. This idea is, how do you string different flourishes into
one single routine, right? So try and look at everything
that you've learned and see which are the things
that can go well together. Like, for example, from here, we can make one fan, right? It's cardist will always
string them with a closer. S, I'm closing it on my index. I'm rotating it around
and then putting here. So just like this motion around. So you can go here. This is Aviv span.
We put it down. We can come here into this fan. I can bring all of these cards, show this one, bring
this one, put it here. This is a bit awkward.
Probably I wouldn't do that. Then I can close
everything together. I can come and do one,
bring the other one, make this and try and just have fun with
the way that they move. So we go here, here, we
put them together, right? We close, and then
I go here, right? Put it here, boom. Fan. So just play along with the way that they flow and see what feels comfortable
for you to do. Now, what are the succession of fans that you would
like to string together? A very basic technique would
be a very basic routine. Would you go from this
one, close, this one, this one, And then, sorry, forgot this one
over here, you stop. If you want, you can go
into another one over here, but I always do this, but it's such an awkward
position to be in. And you want to close
completely flush like that. Now, the idea of fans is just
to have a beautiful moment, a beautiful aesthetic of
showing all the playing cards. You know, you don't
even have to do, like, a lot one after the other. You don't got to do like nine. You just take two,
three that you like and see how you like them and
just do them like that. Here's one that I haven't shown you, but you can do as well, where you're doing
the S fan and you're placing it on your wrist, but it's very uncomfortable
for the wrist over here. It's very painful, actually. But it's got a nice
aesthetic, you know, this idea of being
able to do the S fan, and then just place
it and have it on one hand over there, like that. See. But there you go, guys. Play around with them, string them together, see
what you like, place them on the back
of your hand like that, show them, you
know, and have fun. Basically, that's the
whole idea of cardist for you to just have fun
with playing cards.
31. A Few Words Before I Elevator Out: And we've arrived at
the end of this course. Thank you very much for
being with me up until now. I hope you have learned
some amazing fans that you can start
playing around with. If you have any
questions, leave them down in the description below. I just drop some playing cards, which is completely fine
because during this course, you probably too have dropped
maybe 1,000 playing cards, which you should always
pride yourself with. Pride yourself with the
number of playing cards that you have dropped because it means
that you're trying. It means that you are getting better and you are practicing, and that is the best
thing that you can do. My name is Biz, you can
find me on Instagram. You can find me on Facebook. You can find me on TikTok. All in the description below, if you want to
show me some love, you can show me some love
anywhere until next time. I'll see you in the
next episode. To
 Elisav Bizau, Close Up Magician, Cardist, Creator