Transcripts
1. Intro: Video and mainly short-form
video is currently the best way to showcase your work, and what
you love to do. You managed to film
some clips and then you realize that it had
to do some editing, which can seem
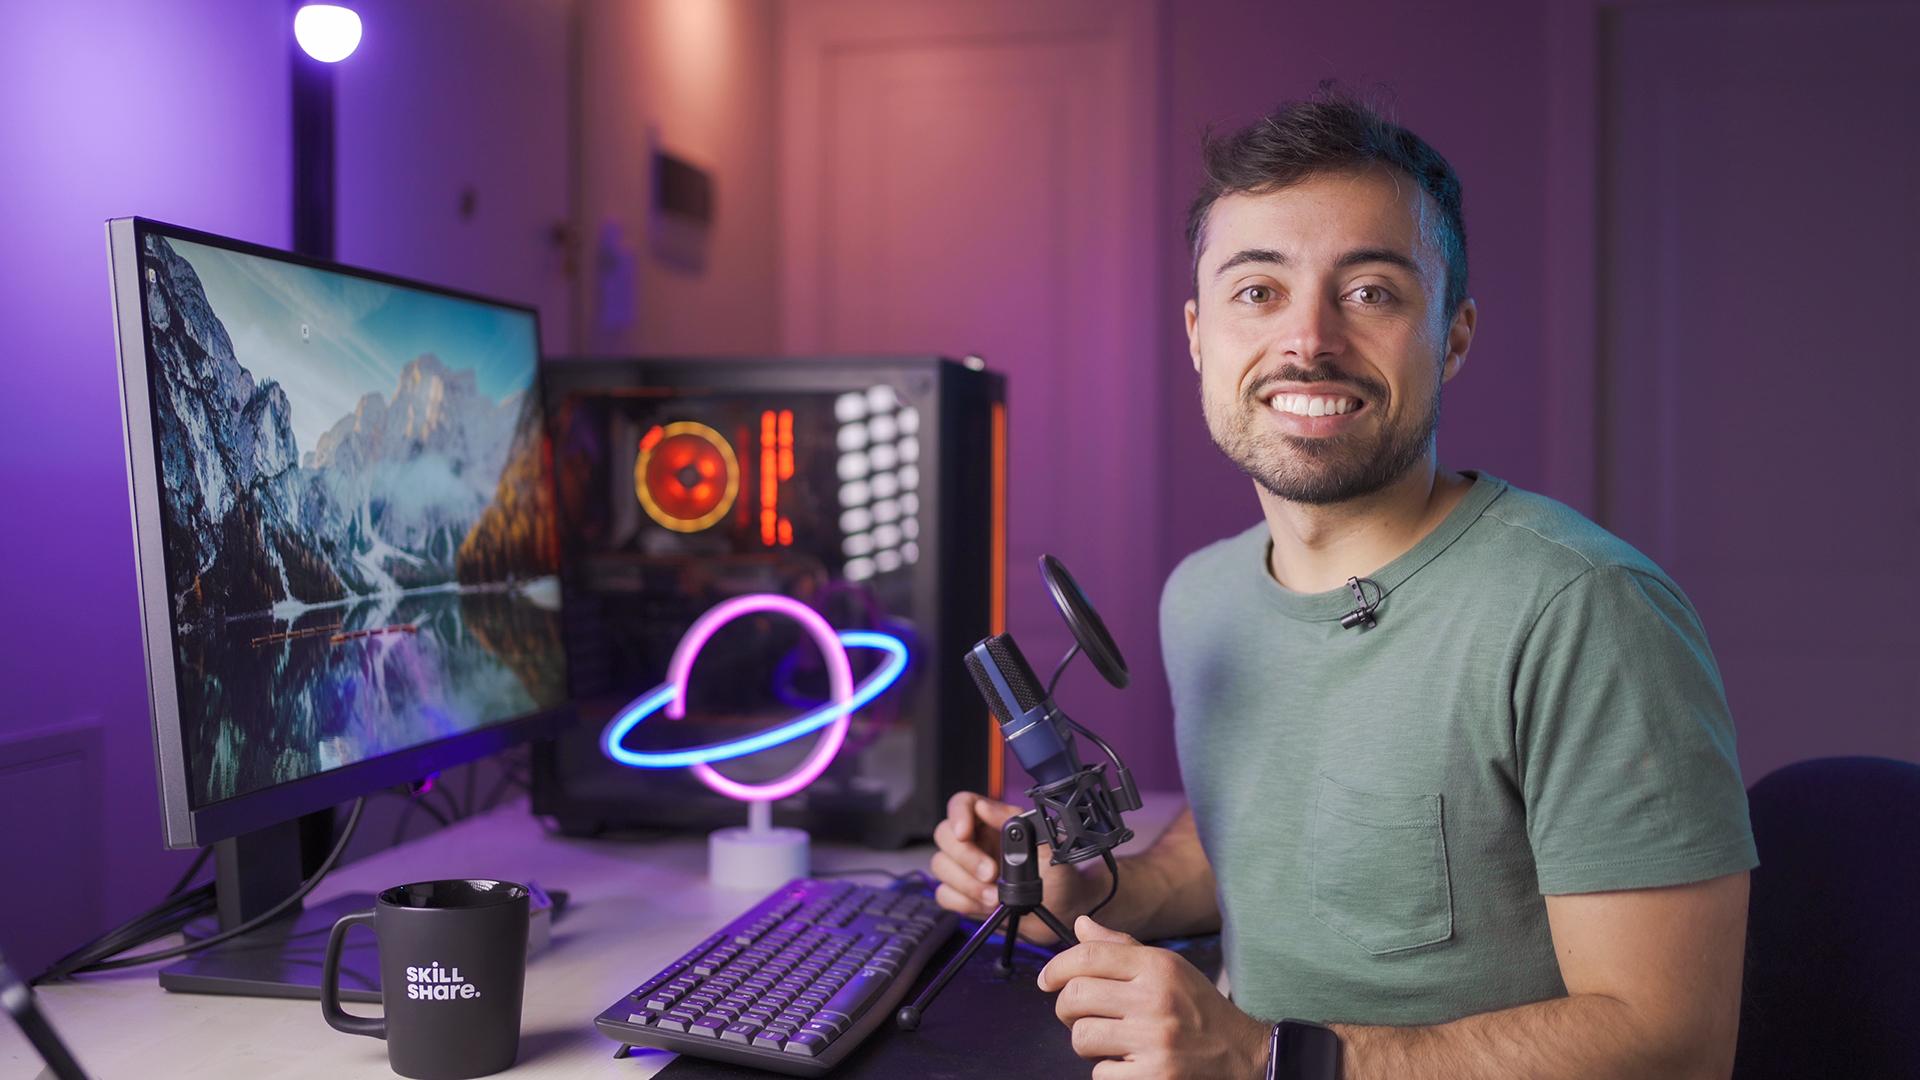
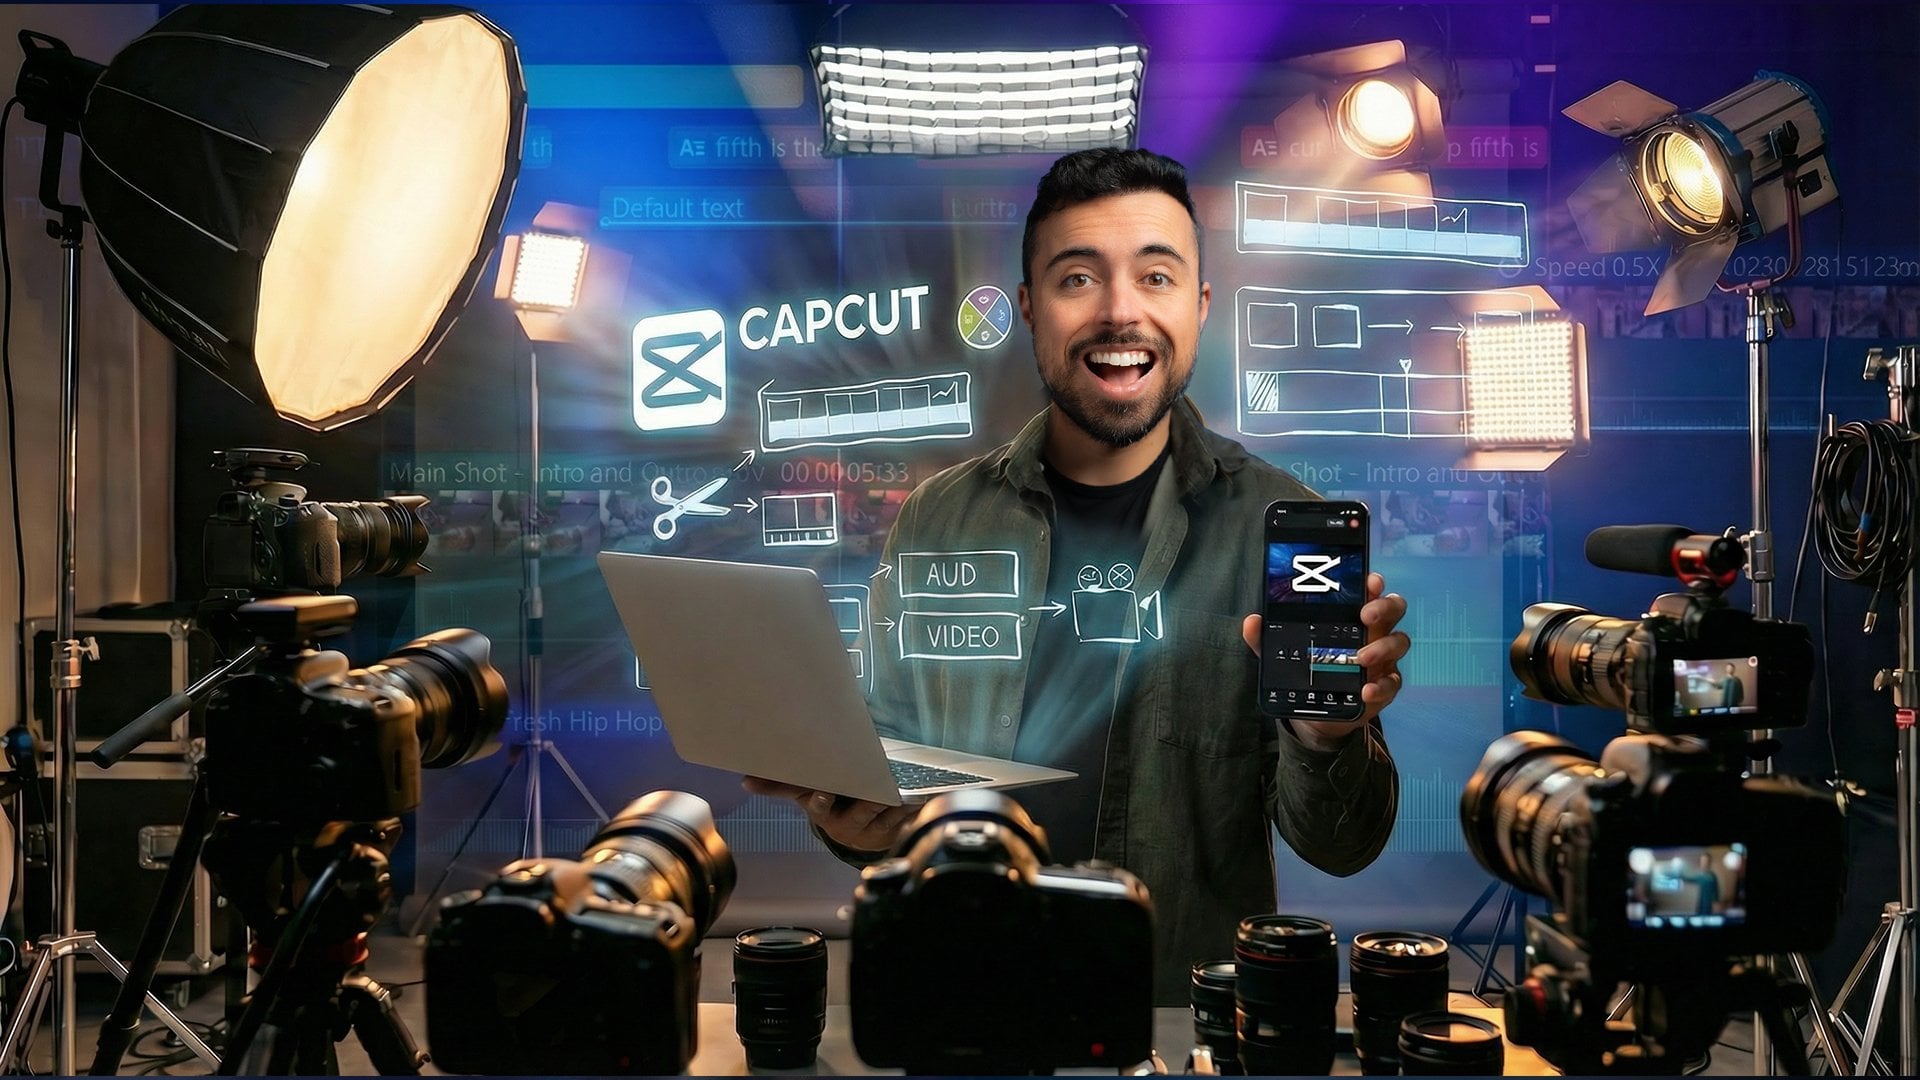
really overwhelming, complicated, and expensive. Well, no more because today I'm going to
show you a very fun and easy-to-use desktop
software called Capcut. I'm [inaudible], a
digital content creator with a passion for
video editing. Throughout my career, I've
been working with clients, but also creating my own
content for a variety of platforms such as YouTube,
TikTok, and Instagram. In this course I'm going to
be teaching you from zero, everything you
need to know about video editing and
especially about Capcut so that it can get up and running with your videos
as soon as possible. I'm pretty sure you're
going to be looking at the editing process in a much more relaxed
way after this course. For some time now
Capcut has been one of the best editing apps
on your smartphone. But on the desktop version, you get some extra
bonus like using a larger screen so you can see perfectly well
what you're doing, managing files,
processing power. If you're on a desktop or a
notebook, Windows or Mac, it will work the same in
the upcoming lessons, we're going to be
covering a range of topics from how to import, stream and organize
your timeline up to adding effects,
transitions, stacks, automatic captions,
all of these, but especially how to make
your videos stand out. By the end of the course, you're going to
be able to create professional-looking
videos that are sure to grab your
audience's attention. If you're ready to
take your social media game to the next level, join me in the next lesson and let's have some
fun with Capcut.
2. Class Project: I'm very happy you decided
to watch this class. To begin with, we're going to
discuss your class project. The idea here is that
to really learn, you shouldn't just watch
me doing something, but you should do
it yourself also. Throughout the class,
each lesson is going to teach you a different
set of skills. For each one of them,
I'm going to choose the best footage to showcase the feature
that I want you to see. To learn alongside me, you can download all the
footage we are going to use in the Resources section. By learning how
these features work, it's going to be all
about your creativity to mix them and create
your own videos. In one of the last
lessons, I'm going to edit a video from start to finish. Your project can be to
either recreate that video, to put in practice everything
that you've learned. Or if you're feeling
extra confident, to simply create your own video and upload it to
the Projects panel. You can put it on Google Drive, Dropbox and just share the link or on
YouTube, for example, and leave it as unlisted, so that only us
with the link can actually see and
comment on your videos. I will repeat this because
it's very important. Watching the class
is a huge step. But actually putting
it into practice is going to be a
much bigger one. So watch it, but try it. In the next lesson,
we're going to be talking about how to install CapCut and the basic settings you got to do to begin editing.
3. Initial Setup: Let's start installing CapCut and you can go to capcut.com or you can also find it in the Microsoft Store
or the Apple Store. It is completely
free to download, and unless you use
some of the pro features that are
inside the app, you don't have to pay anything
to export the videos. By the way, as I said before, there are three
different versions. There's the smartphone,
the web version, and the desktop version. They're all very similar with
minor feature differences between each one of them but mainly with the
smartphone version, you're going to be
stuck with a smaller screen, the web version, you're going to have to upload all your clips to the Cloud, and the desktop version
just seems to me that it's the easiest and fastest one
to get your videos edited. Once you get it installed, you can just open
CapCut using the icon. When you open it, you're
going to be greeted by this home screen where
you're going to be able to see all your past projects. If you just installed,
it's going to be empty and it can create
a user so that it's connected with your
TikTok account if you want to post
directly there. Also now CapCut is implementing this Cloud service in which
you're going to be able to share projects between
your smartphone and your desktop if you'd like. But first, let's go to
the settings up here. We're just going to click on this gear icon and
go to settings. Here there are some
things that you want to change before you even begin editing something
to make everything faster and easier for you. First of all, where
it's going to save automatically the draft
of your projects. You can choose a home
folder for that. Cache files are going to
make scrubbing through your timeline and everything
a little bit faster, but it can accumulate
a lot of data. If you don't have that much
space on your computer, you can put it to auto-delete
this cache after some days. Also, you can see how
much cache you're using right now and you can just
clear it if you need to. Let's see edit, and here
we have image duration, meaning that when
you throw a picture inside of your timeline, how long is it going to be? Right now it's set for the
default which is five seconds. Frame rate is
important because it depends on how you're
recording your clips. You can check in your camera or your phone settings to see
how you've been recording. But generally, in the US, you would use 30
frames per second, and in Europe 25 due
to some standards. In my case, for example, I'm going to change it to 25. Timecode, you don't need
to change anything. Let's go to performance. Now these three first
options should be on to make it a
little bit faster but if you find any problems in exporting the
project later on, these also might be the cause. Just keep it in mind,
but leave it on for now. Now, proximal is very
important for those that use lower or older computers. This is going to create a
lower-resolution file for every clip you
import into CapCut. It's going to take
some time processing that in the beginning,
but later on, it's going to make
your editing so much more fluid and easier. If you're already
thinking, oh, this is my case, click this one. Let's save this and let's
create a new project. Here we've got the main
interface of CapCut and it looks a little
bit empty for now. I'll just import one video to make it easier to
understand each part of it. In front of the video, you can
just click import and then find the folder that you want or you can simply
open the folder, drag and drop it over here and it's already going
to show you the video. Up here on the left, we
have the main panel with the menus and what
you've got imported. First local we have all the files that
we've imported already. In this case, only this
drone file and on library, you have everything
that CapCut offers you already automatically
inside the app. For the audio panel, we have
music, sound effects, text. You're going to find
many different types of templates and everything for
you to use in your videos, including the captions, stickers to spice
up your editing. Many different effects
that you can use in your videos and CapCut is
quite famous with these. Transitions for you to go from one scene to the other
without simply cutting, theaters are going to change the look of your videos
and on adjustment, you can do it also, but in a more manual way. In the meantime,
here in the middle, you have the preview panel
where you're going to see the video that you selected
up here on the left. You can also drag these lines
to make everything bigger or smaller so you can adjust
the screen the way you want. Simply you're going to see
that there's a counter here showing timer for the video
clip that is going on, how long it is. Here on the bottom right,
you're going to be able to see the zoom function
so that you can just zoom in and out to see the video clip from a
little bit closer by. You're going to be
able to see it full screen if you want to, you can just press
Esc to come back. You're seeing ratio
right now is grayed out because we didn't throw
this in the timeline yet, but we're going to
do it in one second. Here up on the right, you're going to
just be able to see the settings that we
did before so just to control if your main settings are exactly the way
that you want them. Down here we have the timeline that we are only actually
going to be able to see the options when
we drag and drop our first clip into there. I'll just click here, drag it over here, and drop it, and now we have our first video in the timeline. The preview right
now is actually showing what we've
got over here. Now we can see that some
things changed the writing on the interface because we have a little bit more control
over what's going on. Since I have this clip clicked, now we can go back first
through the preview panel where some options that are now available that weren't before. First of all, I'm
going to click here on the Zoom and I'm just going to take it out a little bit
so that you can see that. When I have it
clicked, now we have these balls all around
that are going to allow me to actually manipulate the video
directly from here. Another option available now is the ratio, there
wasn't before. This is just what shape is
going to be your video. If you're creating
stuff for social media, for example and it
has to be vertical, you can just come up here and choose 9 by 16, for example. If you're doing things for
YouTube and horizontal, you can choose 16 by 9. Let me just click here
9 by 16, for example, and you can see the
interface immediately change it and now the video is
centered over there. I'm going to go back to
the original so that it's a little bit
easier for you to see. Now one trick that can be very important for you is
coming up here and there, these very small
three little bars, you can click on
it and you got to have some options
like oscilloscope. We're not going to
use this for now, but preview quality
can be very important. There's performance priority
or quality priority. This is going to
change how your video looks in the preview panel. If you want to see it
with the maximum quality, you can choose quality priority. But if you feel that the
computer is going a little bit slower and you're not being able to see the video in real time, you can choose
performance priority and probably it's
going to help a lot. Also, we're going to have
down here export steel frame, which is going to allow
you to export a JPEG file. A picture from what you're
seeing on the screen right now that can be useful for creating thumbnails,
for example. Now here on the right,
having the clip selected, we have all of the options of things that we can
do with this view, like changing where
the video is, opacity, how it looks, how fast it is. If you want to add
any animation, we can do it from
here also and do all color adjustments
to that clip. Mostly everything we can do
with this slip is going to be up there, and down
here on the timeline, we're going to have
some buttons here on the left which actually are going to reflect
some of the things we find in the inspector. Here on the right, we have some other
options that are more specifically to the
timeline handling itself, which is exactly
what we're going to talk about in the next class.
4. Working on the Timeline: In this lesson,
we're going to talk a little bit about the timeline, which is mostly where
you're going to set up how your video is
going to look like. The timeline is where
you're going to place all of your media, meaning: videos, audio, effects, text, everything. It works the same way as it
would if you're placing all of these in the physical
world properly on a table. If you place a photo
on the table but replace another one on top, you're only going to be able
to see the one that is on top because it's covering
the one that is below, and it works the same way
here. Let me show you. I'm going to do the
same that I did before, just dragging and dropping
a new file over here. Now we have this
other drone clip. Let's draw this video here on the timeline
and you're going to be able to see that we
have this white cursor, which indicates where
in time we are. Here, we have the
numbers from zero and forward meaning the
time on this timeline. If we just press play, we bring it here and we
press ''Space bar'' to play, you're going to be able
to see that it's going forward because it's
playing the video. When I zoom out, you're
going to be able to sit here in the preview
panel what's going on. You can see that there's
only these video over here. The other one begins
right at this mark. If we just play from here, you're going to be
able to see that it's playing the video below and suddenly it gets covered
by the one that is above. That's exactly how
it's going to work. Whenever you're stack stuff
on top of each other, you're going to be able
to see what's on the top. I showed you how to drag and drop these
videos onto the timeline. But what if you don't want the whole video to be in there? Now there are two
different options. The first one is
that it can cut it before importing or
after importing. After importing means that you have the whole
video over here, and when you go with
the mouse closer by, you're going to be able
to see that it changes, the cursor just changes to
this double-sided arrow and you can drag and drop it
to the left or to the right, meaning you're going
to be able to expand or make it smaller. Let's say I wanted it to
start about here after that shadow on the lower
part. We can just do that. Now it goes back to showing
me the timeline itself. This part is not being covered
anymore by that video. But I can still
drag it and drop it to whatever place I
want around here. One other way of
doing is clicking up here in the middle panel in
the video that you want to insert and getting these handles here exactly the way that we
did in timeline itself and throwing it to the right
or to the left to find the in point and the out point
where you want it to end. Let's say you just wanted this
small piece that now it's surrounded by this blue box. You can now drag and drop
it on the timeline and you're going to be able
to see that it's much smaller than the original one, meaning that it only
took that small piece. Or you can just click this
''Plus'' button and it's going to add to track
at the beginning. Then you can put it
wherever you want it. Now one cool thing is
that you can actually see up here which
of these clips have you already added to the
timeline so that you don't use it again by mistake and
which ones you've used it, but using a cropped
version, a cut version. If these you can be aware
if you're using a clip for a second time or if there's maybe a part of a clip
that you haven't used yet. You can still check
for another piece and use it in other
part of the video. Now here on the right,
you're going to have some specific timeline settings and a couple of options
more. Let's go one by one. The first one is that I want to show you and you're
going to notice immediately is that there is a recording button over here, which actually is going to open this recording panel
so that you can do voice-overs directly
inside CapCut. You don't need to
record it anywhere else and then import it here. You can just do directly
inside the software, so easy. Another one you're probably
going to use all the time, which is this magnifying
tool over here. Let me show you zoomed
out how you're going to see it and it just means that the more you
go to the right, the zoomed in, you are
going to be in the timeline itself so that you can change things with a lot of precision. Or if you want to have a bird's-eye view
of what's going on, you can just throw it
to the left and see the whole timeline
with all the clips. Now we have the
main track magnet, the auto snapping, the linkage between
video and audio, and the preview access. The main track magnet
means then whenever you grab something from the
main track over here, meaning the first one, it's just going to drag
everything altogether. When you let it go,
it's just going to snap back to the beginning. It won't let to
have a gap right at the start by mistake.
That can be very useful. But if you want to have a
little bit more control, you can turn it off and now you're going to be able to drag everything and just place
it wherever you want. Then you can just insert whatever you prefer
in the beginning. By the way, these
ones are important for you to know
because they're easily disabled or enabled through
shortcuts on the keyboard. Maybe you're going to see that something changes
on the timeline, the behavior just change it and you don't
know what it is. You can check it because it's probably going to
be one of these, and the preview axis
is the one that enables you to just
scroll the mouse over the timeline
and immediately see on the preview panel
what's going on. If your computer can handle it, it can be very practical
because you immediately see where you're
at in the video. But if you don't like it or
it's just slowing you down, you can disable it. Now when you go with the
mouse over the timeline, you won't see anything. You're going to have
to drag the play head alongside with the
cursor click and drag to be able to see on the
preview panel where you are on the timeline and what
I can see at that point. Clicking one of the clips
here on the timeline, you see that also there are some options now
here on the left. These are things that
mostly you can do also on the upper-right panel, but you can have them here more accessible also
through shortcuts. You can see there we have
all of these, Select, Split and Select
leftwards and rightwards. You can just grab one of
these like for example the Split and just
cut a video into, then go back to Select and
now you see that we have two different videos
separated that we can just drag and
drop separately. Or you can use the shortcut
that we just saw there b so that it enables it changes the cursor and now you can
cut the video as much as you want and a to come back
to the original one. Now you can just select them, drop them, and do
whatever you want. If you use Select leftward, you're going to be able to
select everything there is to the left of where you
click on the timeline. In this case here, everything
that is in this direction. If you select
everything rightward, you're going to be able
to select everything that is to the right of that one, including all these layers here. When you're very comfortable
with these tools, using the shortcuts is going to make everything much faster. Later on, we're going to talk a little bit more about them. In here we have some
other options like split, which is just going to split the selected clip into
where the playhead is. Delete or backspace is going to eliminate that clip
that is selected. Now I have to click a new one
to see the options again. Now Freeze is a very
interesting option because sometimes you just want to pause the video for a second and see an image for
a little bit longer. Let me zoom out
here a little bit. You can see that
here we just have the drone going forward. But let's say I just wanted to stop in this image here for five seconds to show something on screen like text for example. I can just click the clip,
click on ''Freeze''. It's going to create
a three-seconds freeze-frame where it is. Then right after
we have the clip continuing from where it stopped normally
with the movement. Other cool options we're
going to find over here are the Reverse. It's just going to
grab a clip like this, for example in which the
drone is going forward. You can click the clip over here and then
click on ''Reverse''. It's going to do its thing, and it's just going to
reverse this clip backwards. Now if we play this one, it's actually going backwards. There is also the mirror
option in which is just going to mirror
the video around. You can do the way you prefer. As I said before, you can
access all of these up here on the right also and have a little bit more control. The last option we
got over here is the cropping. You can
just click "Crop". It's going to open
this new window. Now you can just
select how much of this video you actually
want to show on screen. Let's say you just wanted this portion over
here of the video. You can just click "Confirm". Now you see that
you can just see that part that you've
cropped before. Last but not least, let me just show you something
that is very cool about the timeline in CapCut by adding some other items
here like stickers, text, effects, or
maybe a filter. Let me zoom here on the left
of the timeline for you to be able to see very
clearly what's going on. CapCut organizes everything
automatically for you. You have all the layers
and it doesn't allow you for you to have video
and other effects, text or things in the same line. All of these are
going to be videos. This is a layer just for text. This one is a layer just for stickers and this
one for filters. You can also lock them, meaning that you cannot
move these around anymore, so that's going to be in place. You can also hide them by clicking this eye
icon over here. The ones that have
audio, you can also mute it by clicking this
icon over here. Differently from other editors, CapCut tries to keep
video and audio together. If you import a
clip that has audio like this one for example
you're going to be able to see that actually
the audio is down here is this small line below the
preview of the video. If I just try to
drag it up or down, you're going to be able
to see that I'm playing with the volume of the audio. But it makes it a
little bit difficult to control this way. One thing you can do is right-click and go to
''Separate audio''. Now you're going to be
able to see that there is a layer with the audio
symbol down here. This is the audio of
that video over there, for which you will also
have the control of blocking our new
team if you'd like. Now to select things
on the timeline, you can either click on them
individually or you can drag and create a rectangle around everything that
you want to select. Now they're all going
to move together. Actually if this is exactly
the way you wanted it to be, you could click with
the right mouse button and come up to group. This is going to create a
group amongst all of these. Now if you click any of them, you're actually going
to be selecting all of them at the same time so that you don't have to
repeat the same action one million times by dragging, selecting all of them together
and then moving it around. Now one-click is
enough and you can drag all of it
wherever you want. In this lesson, you learned everything you need
to know to navigate the timeline with any kind of object you want
to place in there. Editing later on
it's going to be all about stacking things
in the timeline to show wherever you want and moving them around the
way you just learned. Now we're ready to move
on to the next lesson, which we're going to talk about all the parameters we can
change for one video clip. These include some
basic things like positioning and
zooming on the videos, but also some truly insane
ones that CapCut offers, especially for being a free
software. See you there.
5. Adjusting Clip Properties: In this lesson, we're
going to see how can we manipulate video in
many different ways. Let's take a look.
As you can see important many other
videos around here. You've got to find them all in the resources section
of this class. To show you the
first steps about how to manipulate video. I'm just going to grab one
talking head video like this. I'm going to select
this small portion, we don't need a lot of it. I'm going to add it
to the timeline. We have it here now. As you can see, it was
filmed horizontally, but it was meant to
be a vertical video. Let's zoom in so we can see
the whole preview here. As you noticed, I
changed this to 9 by 16 so that it's
already in vertical format. First thing, obviously,
let's rotate this video. Everything you want to
do, you want to click first on the clip over
here on the timeline, and then it's going to be
selected on the preview. You can see already the
handles all around it for you to manipulate it
manually, properly. Also here on the right, you're going to be able to find all of the things that
you can do with it. Maybe this first
portion here can be done by dialing a number. For example, let's say rotate and we want to
rotate 90 degrees. It's going to rotate it
clockwise 90 degrees. You can use this
dial over here to do it manually like this. Or you can do it on the preview panel
properly and just go rotate and you're going
to be able to see how many degrees you're
rotating on the top. But anyways, not to
go crazy with it. You could just go 90 if it
was turned to one side, or you can also use
negative numbers here. You could do -90 and it
would go to the right way. Scale can be changed by
the percentage over here, or you can also change it
using the handle over here. But what I would recommend you is to use the handles here in the preview panel because
they snap to the angles. You can know exactly when
it's big enough to cover the whole screen and that's how easy it is to manipulate
video over here. Now to take it one extra step, you could maybe want
to animate this. This takes us to the
concept of keyframes. It's basically telling
the software at a certain point in time what are going to
be the parameters, and then telling in
another point in time, what are the parameters
you want there. For example, let's
say we want to zoom in on this image very slowly. In this point here we
want it exactly as it is. You can come up
here to the right, and you're going to be able
to notice that there are these diamond shapes over here, and these are the
keyframe setters. As you can see, you
could do it for scale, position, rotation,
all of these. As an example, let's do it
just for the scale right now. I'll add a keyframe right here. I know that this
point is marked. Let's go forward a little bit. Let's say maybe up to here. Let's set another keyframe by clicking on the same
logo, add keyframe. Now let's say that we want it
to be zoomed in about here. What the software
is going to be is going to understand that
you want to go from point A to point B and it's just going to make
that sequence flow. For example now,
if you click here on this sign pointing
to the left, we're going to go back to
the previous keyframe. In our first load you're
going to see that it's zooming in either by the handles here or also by the number on the side here
that just keeps increasing. As I said, you can
do it for any of the other parameters
like rotation, position wherever you want. Next step is the blending mode. This one is more complicated to understand if I don't
give you an example. I'll just import
this clip of fire on top here of our footage, and you can see that it just
doesn't make any sense. I'll make it a
little bit bigger, and now it's covering the
whole image we had before. But if we play now with the blending mode like
for example Brighton, it's going to keep only
the brighter parts of that video clip. Then now you get an
effect like this in which you can still
see the layer below, but on top you have the bright parts of the
clip we just inserted. Each blending mode
here is going to do something a little
bit different. You can experiment and see
because for each type of footage the effect is going
to be a little bit different. But mainly the ones that I use a lot are screen and overlay, because they keep the
brightest parts of the images. You can use something like this, for example, on top
of your footage. What am I thinking okay,
this has no use for me, but probably you saw this being used many times already
on social media, especially when you've
seen these ones over here. Let me delete the fire and
let's add a little piece of a drone shot over here and
change it to original. Now we've got this very
cool video layer over here. Then you can come up here to the blending mode
and choose darker, for example, and voila. Now we have this old film
effects on top of your footage. Still in the blending
mode, you're going to find the opacity slider. This is going to say how
transparent this layer is from 100% in which
you see it completely, and going down, you're going
to begin seeing what's exactly below the drone layer, which is my talking
head video over here. This can be used if you want
to mix two images together. Next up is stabilization, and this is totally
crazy inside CapCut. I'm going to show you
two different clips. The first one is this, in which you can definitely
see that there's some movement because
everything is handheld. If you want to make it
a little bit smoother, you just go through Stabilize,
you click on the clip, you come to Stabilize and you have the choice
of doing recommended, minimum cut, or most stable, because the software is
going to zoom in and try to compensate for the movement after you select
which one you want. For example, in this
one recommended, you're going to be
able to see this. It's a little bit of
a zoomed in version, but all the movement is various
move and looks very nice. Let's put it to the test and try something a little
bit more extreme. This one is a completely
handheld moving shot. In every step of the way you can actually feel the camera
jumping up and down. Doing the most stable
stabilization option inside CapCut you get this, in which you can
still feel the steps, but it's so much better. Now you've got to
be a little bit careful about this
one because it makes things a little
bit wobbly all around. Depending on the footage and depending on how shaky it is, the results are going
to be different. Observe it very well before
saying that it's done, but still, you can do
miracles with this thing. Next up we have two
different options that are available only in
the pro-version, but actually you can test them with the free version of CapCut, but when you try to export, it's going to tell you that
it's available only for pro, so you're going to
have to pay before you can have your final video ready. The first one is
noise reduction, and this is meant to reduce
a little bit of that noise, especially when
you're filming with high ISO at night.
This is quite insane. Check out this clip then
right before sunrise, you can see that from here, it doesn't look that bad. But when you go in a little bit, you're going to be able
to see that the sky is full of these dots, which is grain from high ISO. When you enable noise reduction, it's going to work on the clip, and you're going to
be able to see it like this, completely clean. You do loose a little
bit of definition, but depending on how bad, what's the situation
of your clip, you can totally save it. Let me zoom back out. This might just do
a miracle for you. This last one is called
Removing video flickers. If you have any video that just have those lights
flickering because of the issue with the
shutter speed you're using the camera or
on the smartphone, depending on how bad it is, you might be able to fix it
using this option over here. In the previous lessons,
you'll learn how to move around the timeline and how to adjust a video clip exactly the way
you want it to be. In the next lessons,
you're going to see more advanced video properties, they look very
complicated to do, so they add a lot of
value to your video, but they're actually quite
simple. See you there.
6. Pro Features Made Easy: Let's see some advanced video
properties here right now. Let's begin with
the cutout effect. There are basically
two different ways of doing it inside Capcut. The first one is
the outer cutout in which Capcut just
tries to understand the borders of what's
the main subject of that clip and cuts out the rest. The second type is
the chroma key, which is the traditional effect used in cinema and everywhere to cut out the person by using
a plain color background, usually green or blue, because there are colors that
are usually not present in the human skin and cutting those colors entirely
from the scene, leaving only what's
not using them. Let me show you. First, let's try
the simplest one, which is the auto cutout. For that I'm just going to
grab this clip over here. You're going to find it
in the Resource Center. Let me place it
right at the start. I'm simply going to
click on the clip, and I'm going to come up
here to the center and I'm going to choose Auto cutout. Capcut immediately is going
to try to understand what's the background and
what's the subject and cut all the rest. As you can see, now I can just redimension this clip and
place it wherever I want, and it's going to look like
it's been there all the time. You can see that some times it doesn't understand exactly what the subject is because here probably there was
a reflection or something that made
the background color hit a little bit the shirt so
it's actually not precise. But what it can do
in this case is just come up here and drag this down a little bit and just hide the parts that
don't work that well. But mainly 99% of the job is
done automatically for you. This can be great if you're
doing some tutorial or explaining something on a screen like I'm doing here right now. Instead of having all
the scenario behind, you can place yourself
on top of the footage. Now the other way to go about
it is using the chroma key. For that, I'm going to
use this clip over here of the dog with a
green background. For that, you just come up here and you have to
choose Chroma key. In this case, Capcut doesn't
do anything automatically. You have to go to
the color picker and just choose the background. In this case, I'm going
to choose here the green. Now you come up to
this strength slider. The more you go to the right, the more you eliminate
the green from the scene. But if you go too much, you're also going to take out small portions that
have a little bit of a green cast on it so you have to find the right spot for it. What I recommend is for you
to play with the strength until most of the green in the background
is gone like here, for example, where you don't
see it anywhere around. Then play with the shadow slider to fine tune it a little bit. As you can see that here, for example, on
the here and here, you gain back a little bit of detail that was deleted before. Like this, it looks pretty good. If I zoom out a little
bit and I reduce this, it's very hard to
tell what's going on. We can play, and now we have the dog on top of our footage. Now let's see another
feature from the Video tab, which is called masking. This is a way that
it's a little bit more customizable for you to be able to display one
video on top of each other. Let me show you by
bringing on the timeline. One of these videos in which I'm talking to the camera over here. It totally covers
our drone shots. Let's go over here. Let's just rotate it
using this quick button. I'm going to make it
smaller a little bit. Let's pretend that here I'm explaining something
about this landscape. I'm just going to be
positioning myself here in this corner and
coming up to mask. With a clip selected
you have here now on the masking option,
many different shapes. One of them that I think
it's very nice for this kind of video
is the circle one. This is going to create
this circle on top of the footage that you can make bigger or smaller as you wish. Mainly this is going to be like a paper on top of your clip with just the hole and you
can to be able to show that clip only
through that hole. Now you can readjust it, you can reposition, make
it bigger or smaller. Here in the Properties
you can also rotate it. In this case it's round so
it doesn't make any sense. But you can also further the
borders so you can make it integrate a little bit better
with the background video. Let's say you like the
way that it is right now. If you just move it around, you're just moving the mask. But if you want to
move the video down to have it in the
corner, for example, you have to come back to
the Basic tab and just move the entire
video to the corner. I will have an explainer video on top of the footage you want, just by using masks. You could for example, import another type of video over here. Let's import this one. As before, now this is totally
covering our layer below. Let's go to Mask and I'm
going to use film strip. Now it creates a film strip in which I see this video
only in the middle, and I can adjust the
height of this bar. When I play, I can still
see also the video below. You could have film strip, you can have circle, rectangle, you could
make in the shape of a heart or on the
shape of a star. You're the director here. Another way that will make
a little bit more sense would be the split one. I'm only going to remind you that if you look
here in the corner, you see that we have the diamond shapes over here,
which means keyframes. If you wanted to
animate this mask, you could also do that. Another tip is that you
can also invert the mask. In this case here, for example, I apply the mask to this one. The part that shows
is the one on top. But if I wanted it
to be the opposite, you can come up to
this More button over here and just
click "Reverse", and now it's going to
show the bottom part of that clip and on the
upper part, what's below. This works for all the masks. Let's talk a little bit about
beauty enhancements and artificial intelligence
of the software about this is just
totally insane. To access this banner,
you can come up here and just click on enhance. I have many different options, they're all unmarked.
Let's go one by one. On face, you're going to
have many different options, like evening out the
skin, smoothing the skin. You can see that makes
a lot of difference. It goes from very
plasticky to more natural. You can find a place in
between that you like. You can go brightening the
face if it's necessary. Teeth whitening is
also insane in this. You can go to the right and
just make it totally false, but you can find a spot in
between that looks very good. Skin tone is a pro function, but it's also amazing.
Let me show you. If you wanted to completely transform the tan of the model, you could just click one
of these and they all actually look quite
natural, is incredible. I'm going to leave
off, otherwise you cannot export this video. Let's go to facial beauty. Here mainly going to be able to change the physical dimensions. This is quite difficult
for the software to do because it has to stretch
the image around. You're going to see
that in some cases it manages to do a very good job, like making the face
thinner a little bit. But you see that it
wobbles also the rest, like the hair and the neck, everything changes a little bit. I have to be very careful of the intensity you're going
to use these sliders. Here changes only the
lower, the middle, or the higher part of the face. If you have a big
forehead like me, you could make it a
little bit smaller. On makeup it tries to
understand the features of the face and apply
a complete makeup, or you can split it by
eyelashes, shadow, lipstick. But let's just do
one here that is complete makeup and it
can look quite fake, but some of them can look very real like this one, for example. Still you have the degrees
slider in which you can lower the intensity a little bit to make it look a little
bit more real. Or you can just bump it up. Let's see with and without. Now for the body enhancements, let's bring in this
clip over here. On the preview panel,
when you zoom in, you can see also this
thumbnail over here, so that you can see that part
of the image that you want. I'll just click on body and we have many different
options over here. For example, we can try legs. This tries to make them
longer a little bit. But also you can see that it's stretching out the whole beach. If you don't want all of that, you have to be very careful
with how strong this effect. Most of these are going
to work better if you have a very simple background. Because this is the
software can just stretch the background and you won't
even notice the difference. Waist. There are even some
more advanced sliders here like these
ones, for example. The smoothening works very well, and also brightening
can be very useful. Now you know how to change out the properties of a video clip. Next up, let's take a look
about how to change the speed. But not only how to make
it faster or slower, we're going to learn
how to do this highly customizable gradual
changes in velocity.
7. Retiming Your Videos: In this lesson, we're
going to see two ways of changing speed. The first one is coming up
here and clicking on Normal. Here you're going to find
this lighter four times, which means that
right now it's 1x, so its normal speed. If you throw it up here, it's going to go up to 100x. It can make the clip
100 times faster,. Below, you're going
to be able to see the duration that
previously was 84 seconds. Now, it's going down to 0.9. We can actually change the speed based either on how many times you want it to be faster or
how long you want it to be. You can see that in
the timeline also, the more I move here the slider, it's already going
to show me how long the clip is going
to be over there. If originally this was
the speed of the footage, if I crank it up, let's say here to 5x, now, we're going
to have something that looks more like this. But let's roll back to 1x here. What I want to do now
is that I want the clip to begin slowly at normal speed, speed up, and then slow down by the end to
review the lake. Let's go here to Curve. Now, you can choose
one of these templates in which if the
curve is going up, it means a faster speed
and if it's going down, it means to be slower. Or you can choose to
do a customized one. So let's click on one
of the templates, for example, montage. If I zoom out and play this, you're going to be
able to see that also you can see it
playing over here. As soon as it reaches the
first key point over here, it's going to start
speeding up and you can see it on the
preview panel there. It's going to reach
the maximum which is set to 10x over here. It slows down, reaches the second point in which
it's almost stopping, then it begins to
speed up again. You can see the curve over here and it's going to go back
to the normal speed, then our speed being the
stronger dashed line. Now, here we have to be
a little bit careful because if this
footage wasn't shot, meant to be in slow motion, slowing down below 1x means that it's going to be
a little bit choppy. As you can see here, you
can see that there are these small jumps in the scene that doesn't
look very cool. So in this case, we cannot
have the speed below 1x. Let's just drag this up here. You can drag both parts separately and they
will snap together. It will just keep
everything at minimum 1x. Let's put this here, here, and here. Now, we're not going below 1x. If your footage is like mine
here, there's still hope. You can click in
this small box over here called smooth slow-mo. What it's going to do
is that it's going to take all the footage
that is below 1x speed and it's
actually going to try to create the frames in-between
to make it look fluid. I applied it. Let's
see how it looks. It looks way, way better than before. This is how you
add the templates, but let's do it also manually. Let's go here to customize. Here, the line is
completely flat. You're going to do it manually. We already have some key points defined over here,
so let's use them. Let's say that in
the beginning here, we're going to keep it 1x. Then we're going to speed up. I'm just going to throw
it up here up to 10x. Let's say that this one
here in the middle, I wouldn't care much, so I don't want it. I can come here and I can click the Minus button
and just delete it. I can come to the second
one and let's say that I still want the high-speed
to come up to here. This is the point in
which I want the footage to begin slowing down
until it comes back to 1x. Let's see how it
looks right now. It begins slowly, speeds up to 10x versus all the clouds, arrives to the lake and
then starts to slow down. If you want to change
it, for example, if you think that it's
slowing down way too late, you can just drag these
ones to the left. It's very easy to drag these because they are
already attached. They're snapping to the line. Now you will have it
very fast here and by here it will be
already at normal speed. Anyway, this is for
landscape video. But if you're talking about the normal video of a
person talking, for example, and you just want it to speed it up a little bit, and let's say that I just
want it to be 5x the speed, and now it's way, way faster. You still have one option here, which is the voice don't change. But if our Capcut will not
change the voice tone. So not one but if you want the voice to
change just like a cartoon, you can just click it here, and now you're going
to be able to listen that very thin voice. It depends on what
you want to do. That's it about
speed. Let's talk a little bit about audio
in the next lesson.
8. Getting Audio Right: Audio might just be the most important part of your videos. Although it really depends
on you recording it well, there are some things we can
do also in post-production inside CapCut to make it
better or even cooler. Let's take a look here
inside the audio panel. By having one clip selected, I just put one of these talking head videos on the timeline. The audio panel over here offers some basic changes like volume, fade-in, fade-out,
which mean volume, exactly what you would imagine. The lower you go here
with the slider, you're going to see
also that here, if you zoom in a lot, you're going to be able to
see the same slider being represented by this
white line and also the waveform on
the back over here. If you change here or if
you change over here, it's going to be the same thing, depends on how you
prefer to do it. Fade-in and fade-out
are used to make the volume go from zero to up, in the case of the fade-in, and fade-out, from
normal volume to zero. This in the talking head video doesn't make that much sense but if you add a little bit
of music on the background, let's say this one, for example. Let's just add it over here. Let's say you just want it
to slowly fade-in from zero. You can do it two
different ways. The first one is by using
the fade-in slider here, and it's going to show
you how many seconds it's going to take for the music to arrive to its normal volume. Also it's represented here
by this black shadow. Here's going to be the
moment in which the music reaches its normal volume. As you can see, CapCut
created this small, black ball over here that is
actually the fade-in slider. You can also do it over here. While you drag it, you can also see how long it's going to take for the volume to
go from zero to normal. Now below these basic features, there's also noise reduction, which can be really
useful if you have a lot of noise
in the background of your voice to isolate it a little bit better and
be less distracting. Just like the beauty features, you also have this strength
slider here so you can make it a little
bit easier on the ears. On voice effect, you can
make some crazy stuff like, for example, making
me sound like an elf. Faster way to do this
five videos split-screen, or maybe like a robot, this
or this, let me show you. It depends on what
you want to do. Last but not least, you have the Channels feature and
this can be very useful for those of you using specially
dual recorder microphones. Like for example, the
Rode Wireless GO II or the DJI Mics, which are very famous nowadays. These have two
different recorders and in each one record
to one channel, meaning left or right. When someone's listening
with the headphones, you can only listen what was
recorded with one of them on one side and the
other on the other side. If you want to have
a normal audio with both recorder this
sounding simultaneously, you have to come up to here, and you can choose fill
right with left or left with right depending
on where the audio is. If that's not the case,
you can just skip this feature but for those
of you that have it, I know that this
is a life-saver. To round it up, let me show you some things in the timeline that changed when we inserted
in our a clip with audio. As you could see
before, CapCut keeps the audio here together
with the video but you can also right-click it and you can
separate the audio. Meaning that now
you're going to have a dedicated track just for the audio that belongs
to that video clip. You can do the same things
you can change the volume, you can also change the fade-in and fade-out if you
want it all from here, and it's a little bit more accessible because
it's just a little bit bigger for you to deal with
but besides this trick, now we have some
different buttons that appeared up here on the left, which are different
from the options we had before when we had
the video clicked. Now, we still have the split
and the delete functions, but these three other
ones here are functions in which you're
going to be able to detect the beats on a song, for example, or that
you can set yourself markers for you to
cut the footage. Let me click it here
and I'm going to create one beat in this point. You're going to see
that it creates this yellow dot and now
the play-head snaps to it. It makes it very easy for
you to just click the video, for example, and split it. Now you can insert something
else over here and just keep doing that but
if you don't want to create these points manually, in which here it looks
like it's very clear what are the points of highs
and lows in the music, you can just click
the audio and you can click on AI Auto beat. This is what it's going to do, is just going to choose
between Beats 1, 2 or melody, let's say
Beat 1, for example. It's just going to create automatically all the beats in the song respectful to what
it thinks is the Beat 1. Let's go here and
choose Beats 2. Now it's going to create all
the secondary beats also. Let's see Melody. Now it's going to create all these ones in
which it's going to begin to go lower to enter
the melody of the song. Now we've got the whole
audio track marked ready for you to cut the video
the way you want it. This is very useful,
especially for those short videos
in which you have a very fast song and
just a sequence of images or videos that alternate. You don't need to have
a musical ear anymore, this is just going to tell
you exactly where to cut it. Now, besides the music
here in the audio panel, you're also going to
find sound effects. You can also use the search
to find whatever you want. If you just searched for dog, for example, like we
have here right now, and pressed Enter, now
you're going to find a bunch of different sound
effects related to dog. All you have to do is add
just like we did with the music and you're
going to find it in a new audio track down here. Another very practical
audio function is using the recording
button over here. It opens up this
dialog panel over here in which you
can see the level, you can see what
is the device that you're going to record
from, in this case, I'm just going to
use this headset, you can set the volume, and you can also set
options here like echo reduction or mute project. Echo reduction, I'm
going to add and let's just record here as
more voice-over. Let's make our first test. I'm going to set the
record by clicking here. It's going to give us 3, 2, 1. Now you can record your voice and everything
is going to be on a separate track. It's finished. That's it. You don't need
to record the audio on another device and
then import it here. You can do it directly
inside the timeline. By now you know how
to use the software, how to navigate the
timeline and change parameters for a
video and for audio. Next step, we're
going to spice up the editing by using text.
9. Adding Text: Let's talk a little
bit about how to add text to your videos. This can include text on-screen, titles, or also captions. I just placed here a drone
shot and the timeline and we have up here on the
left, the Text banner. Here we're going to
have different options. The first one is
just Default text. Below we're going
to have Effects, Text Templates and
also Auto Captions. Let's go one by one.
If you add text, there's just default text. I can just add it to the track. As you can see, just as
it on another layer. Now we have just
like video or audio, we have the panel up
here on the right with different properties
just for text. These are pretty much
self-explanatory. You can change up here on
the right the text itself. So let's just write
Capcut for example. You can change the font. So I'm just going
to choose this one. Style, bold, underlined, italic. There are some pre-made
models like these ones. They actually look very cool. You can make it wider or
a little bit tighter. You can change the
scale from here. These are all
key-frameable also. You can add a stroke
if you want and change also the color at
the background. Say how big is it going to be. You can put a glow to it, and also some drop
shadow if you want, in which you can also
change the color. You can set it as
apart as you want, and you can also blur the
shadow as much as you want. I'm not saying that this
looks incredibly beautiful. I just wanted to show
you the options you get. Now basically this
text banner is going to be the same here if you're inserting just a normal text or if you're editing
captions for example. On bubble up here, you're
going to be able to add some background
to the this text. Like it was some anime
or something like that. Well, it might make sense
depending what you want to do. On the effects,
you're going to find many different templates
that go a little bit farther than just editing the text in the other
panel we used before. They have some
textures, patterns, many different
things that you can see the preview over here. Mainly these are going to be the same ones that you're
going to find if you go directly to the effects
tab up here on the left. If you knew already that you
wanted to use one of these, you can just choose here and add it to the
timeline instead of adding a normal text and then later on choosing
inside the panel, which is the effect
you want to use. Now when you have the
text layer selected, then go to animation. You're going to
see that there are so many different options to make this text
pop in and out. This is exactly what
you're going to be seeing here on the right, there is in, out, and loop. As the name say, if you
choose an effect for in, like for example flipping, I'm just going to go
to the first one. It's going to add
a different effect just for the beginning
of the text. Then it stops. Out there's going to be an effect
to make it go away. Let's say for example mini zoom, in which it just does a very
mini zoom and disappears. Instead, if you go
to the loop section, then it's going to
be something that is just going to keep happening. For example let's
choose this one. It's just going to keep looping and looping
until the end. How if we zoom into the
mass that we just made, you can see that there are
three different lines here. So Capcut respects what you choose in the order you choose. So we actually still have
the intro that we used. The looped part goes up to here, and here we have the out part. So now it's making this
mess of an effect. I hope you have
better taste than me. Let's keep tracking for now
and go to Text to Speech. This one is exactly
what it says, is just going to read everything that you write on screen. Let's make it just a
little bit longer. I'm just going to
write. Let's pick one of these like for
example, Mayo storyteller. Capcut is the best
editing software. But it's not ready yet.
It was just a preview. You can come up to
here and you can click on Start reading. Now Capcut is really going
to apply it and it's going to create the
audio exactly with that. Capcut is the best
editing software. That's it. The cool thing is that now that
audio is created, it's not exactly attached
to the text itself. So you can just write
whatever you want, even not having a fancy font
or something like that, you can delete the text and
you still have the audio. So if you wanted to create
a narration to the video, like for the drone shot, for example, you
could still have it. So if you don't want
to put your own voice, you can just choose one of
the voices inside Capcut. Now the last part inside the text panel and
one that a lot of people are going
to use Capcut just for that is the auto captions, which is just amazing. That's all about the
basic text editing. In the next lesson, we're
going to talk about how to caption generation.
10. Generating Captions: In this lesson, we're
going to learn how to do automatic captions
inside CapCut. It's super easy and
highly customizable. Let's check it out. Here you have many language
options from English, Turkish, Romanian,
to many others, and we're just going to
leave it with English and I put here on
the timeline right now a short video that I have that doesn't
have subtitles yet. We're just going to
click here on Create. As soon as it finishes,
you're going to see now that we have a
layer dedicated to the captions over
here in the timeline and you can see that
it's all split. If we scroll here
to the timeline, we have all the sentences here,
it recognized everything. Up here on the
panel on the right, if we click one of these, now we have one extra panel which is called the
captions itself. Here you can correct everything
that it didn't get right. You can add new lines or you
can delete them if you want. Now when editing the captions, there are two ways
to go about it. The first one is
to come up here, select the line you want, place the cursor and press "Enter". It's going to create
another line of caption for you and it's going to respect the timing
here on the timeline, so you don't need to
worry about moving the captions around,
CapCut does it all. But if instead you just wanted this to be a two-lined caption, you could press "Control Enter", and now you see that you have
two lines on that caption. For short video content,
it might be a little bit difficult to read two
lines of captions, but depends on how fast-paced is the video you're putting out. I'm just going to break it
down a little bit here and let's speed up this process so that you don't have
to watch all of it. As you can see now
here in the beginning, I have many different
smaller parts, but we can't read this caption
really well like this, so let's just click
on the first one. Up here, we have the
same panels that we had before to edit text, but now we're actually
editing the caption. I'm just going to choose
one of those that I think are going to stand out better on top of this video, like this one, for example. I'm going to make it
a little bit bigger, change the font.
That's about it. If I have this box here
clicked apply to all, it means that all of the
subtitles are going to be affected by these
changes that I did. If there's some case, for example, here, let's say that I don't
want the subtitle to be covering these items
here on screen, I can just click on this
specific caption and click "Apply To All" and
now I can move it around. I can either go to
position and size and change it here using the
numbers or by clicking on it, I can actually now move the subtitle around to
wherever I feel fit. Maybe I just want to
move it a little bit up, not to cover something
here on the screen. Now it's in the perfect
position and you can see that the previous one is still
in the in original place. This takes just a
minute for you to have captions for a whole video. If by any chance you already had captions prepared by
another software, you can also import
them here using local captions and just
coming to the import panel. Now with the captions
then, your video can be watched by absolutely anyone. In the next lesson, let's talk a little
bit about stickers, effects, transitions to make your video really eye-catching.
11. Having Fun With Stickers: Let's talk a little
bit about stickers, and it's quite
simple, but there's a couple of tricks to it
that I want to show you. As always, up here on the left, you want to click
on Stickers and now there's the only option
you've got down here. There are many
different categories for you to find
exactly what you want. Now, let's say, for example,
by the end of the video, you want to add one of
these subscribe buttons. Immediately, CapCut edits
here here the playhead was and it's perfectly here
by the end of the video. When you look at the
preview, you have the same controls as you
do with other elements, so you can just move
it around as you want. You can change the size by
using the handles over here or using the panel over
here on the right. You only got scale, position, rotate, very basic features
with the stickers. If I play this here, we just got the subscribe
button appearing there, the bell going on,
and that's it. Now, if I were to change
the length of this sticker, I would actually be
cutting it in half. If I just drag it down here, for example, it comes
up and it's over. It's not like it's
speeding it up and there's no way of doing it with
the panel or here. Here, I'm going to introduce you another thing from the timeline that I hadn't showed before, which is the creation
of compound clips. In the timeline,
if you just drag the cursor over many
different elements, is going to select all of them together and now if
you right-click, you could create
a compound clip, which is having all of these
mixed into one element only. If I were to create one
like this, for example, it will just put everything together inside this
massive clip down here. It's not what I want to do, so let me just Control Z to
get back here to how it was before and I'm going to create a compound clip just
with the sticker itself. I'm going to do it here and now when I click on
the compound clip, it acts like it was a video. If I come up to speed, now I have the option of
speeding it up a little bit. If I just make it twice as fast, I can now see that the sticker
comes up and it goes all the way until the bell there on the top and it finishes off. Actually, now the sticker
is being considered a video and it can change all of the things that he could
on a normal video clip by doing the compound clip. Anyways, there are
one million options inside here for you to choose. Just pay attention. There
are many here that are meant just for use
with the pro version. They are all tagged on the upper left part with pro written. Just be aware of
it because later on when you're going
to export the video, it might tell you that you use some pro feature and it's
going to be difficult a little bit to find
what it is because of these small stickers
along the way. That was it about stickers. Let's talk about effects
and transitions.
12. Play with Effects and Transitions: If you wanted to make
your videos stand out, this is the perfect
lesson to learn how to do it with effects and transitions. They work a little
bit differently on the timeline, I'm going
to show you here. Let's begin with the effects. Here for example let's say that in the beginning of
this short video, I want to have some
effect to really call attention of people
right from the start. If you come up here
to the Effects tab, you're going to
see that it's all categorized like tags,
like many other things. They have different categories here for you to search from. There are two main ones, video
effects and body effects. Let's start with video effects. But for now, let's just
choose one of these here, like for example the
negative graffiti. The moment that you
click on one of these, you're already going
to be able to see a preview on the Preview
panel over here. If you like it, you can just
click on the Add button. It's going to add as
a layer on top of it. Everything that is below is
going to be affected by this. This means that if you
want to make it shorter, you can just grab it and
make it finish over here. Or if you just want it to
last for the whole video, you could just make that also. Then you're just going
to have this overlay all the time in the video. But see how this video now
really pops when you begin with this zoom transition
that I had already before. Then suddenly this pops in and then we begin
to show the drone. If they said that
we really need to call attention the
first three seconds, I don't see how people are
going to scroll past this one. These were the video effects, but below that we have
also the body effects. These are ones in which the
intelligence of the software understands where your face
is or where your body is, and make some effects
that interact with it. Like for example
this one here with the eyes, and it's the same. If you click over
here on the list, you're going to be able
to see the preview on the Preview panel. Some are just amazing how the
software manages to track your head or your face and just keep the effect going
on indefinitely, and some are also going to be
quite funny like this one. Anyways, the moment you are
ready to add any of these, it's going to be just like
the other one with edit. It's going to be a new
layer on top here. It's going to be applied
to the video as long as this layer is on top of
the video you want to effect. Enough with the
effects. Let's talk a little bit about transitions. These are a little bit different because
they're not going to be layers on top of the
videos you already have. Here, for example I split the video in two
different parts, here and here, having the playhead
at this position. If I come here to the
Transitions tab and just choose one of
these trending ones like the Boolean for example, I'll just click on Add to track. Now you can see that it added this symbol right
in-between the two clips. This shows that there's
a transition over here. I can also change how
long is it going to take. Let's make it a
little bit smaller and let's see a preview. That's a very cool way
to transition from the drone shots to my
talking head video. In this case, I would
leave it as fast as it is. But just for us to see it,
let me make it a little bit longer and let's
see how it looks like. DJ l just released
the mini three, but there's also the mini three. It makes this zoom
a little bit slower and the fade a little
bit more saddle. It depends on the effect that
you want for your video. You can also change the
duration up here on the right. While having it selected, you can also delete
if you want it. I'm just going to Control
Z to have it back. If you want to change to
another type of transition, you can just have it selected, click on the new one
that you want to apply and click on plus. Now if you play it,
you're going to see that there's a new transition
there in place. It looks like it didn't change
anything because it's in the same position and it
kept the same length. But now it's the new
one that I chose. Actually both of them are very cool and you're
going to find many other very interesting ones over all of these
categories here. They always change
the ones that are on the trending page. Now we know how to
edit video, audio, adding texts, transitions,
effects, all of it. Before we edit the video
together from scratch, let's take a look at one
bonus lesson about colors. Depending on how you
recorded your videos, you might need this step
to make your videos really pop. See you there.
13. How To Get Perfect Colors: Now, the post-production
is mainly based on stacking together the
videos, the audios, and all the effects that you
want in the final video, but it might be
necessary also to do some color correction
or grading. This depends if the way you
record it asks really for it, or if you just want to be
more creative about it. Either way, let's take a look
on CapCut on how to do it. We have two different clips
here on the timeline. One is a normal camera shot and the other one
is a drone shot. The easiest and fastest
way to make them pop inside CapCut
is just going to the filter span over here and you're going to have a bunch
of different filters here. They're going to change
how the view looks. Same as always, it's
enough for you to click on one of these to see the
preview on the preview panel. The thumbnails give you a rough idea of how they're going to look like in the end. Same as always, pay a
lot of attention for these that have the pro
tag on top of them, otherwise, you can't
export the video later unless you pay for it.
Not to use one of these. It's enough to click "Add to track" and it's
going to add here on the timeline and you can drag it for as long as you want. Up here in the parameters, now you have this trend slider, so you can make it
a little bit more subtle or stronger as you wish. One other thing to
pay attention to, I'm going to add these other
filters here as an example, is that depending on the
way you shot your footage, some of these
filters can be quite aggressive and they can
actually destroy your image. This one, for example,
changes so much the colors of the
sky that we don't have enough info on the footage to make
this a real gradient. You can actually see the separation of the
colors over here, which doesn't look cool at all. Just be aware of this
because adding some of the filters instead of making
the footage look very cool, it can totally
destroy the image. Now instead of a
filter, if you want to do everything manually, you can just click on the clip and come up here to Adjustment. You're going to have many
different panels over here. This could be totally a
complete class on itself. Let's take a look at the basic features for you
to make your image look very good without
having to go way too deep. Now, inside the basic panel, the first thing you're going
to find is the Auto adjust. This is just going
to change the colors of the clip to make
it pop a little bit, but it's a pro function, so be aware of it. Below, we've got the
HDR conversion tool, and also this depends on
how your shot the footage. In this case, I did shoot
it with an HDR profile and CapCut is recognizing and it's converting it
already for me. This is how it would look
without the conversion, and this is after
the conversion. A LUT or look-up table is going to act exactly like a filter. If I click on the list, you're
going to see that I have only one over here
that I loaded myself. CapCut calls it LUT filters. You're going to find
them all over here. If you want to load your own, if you have a back of loads that you downloaded
from somewhere, you can come up to Adjustment
here on the left, LUT, and you can simply import it from wherever you
have your LUTs. They're going to show up here and you can also
add them over here. Now the adjustment
panel down here is just like editing a photo. You're going to
have other controls for brightness, contrast. You can affect only the
highlights or the shadows. This is going to be the color
correction of the footage, making the saturation and the colors and the
contrast look right. Now if you want to be a
little bit more creative, you can proceed on
to the next step, which is the HSL: hue, saturation, and luminance. Here you're going to
have control over each color independently. Let's pick the
orange that is very strong in this
image, for example, and let's say that we just
want it to be supersaturated. I'm just going to bring
it up here and now we have this ultra-strong sunset. The next step you have the
curves and the color wheels, which are for more
advanced color graders. These ones really give fine control over the
colors on the shadows, highlights, mid-tones,
everywhere. But you should
definitely only use them if you really know
what you're doing. As a second example, we've got
this drone shot over here, and this is shot
in the log format. As you can see, it's
a very grayish, and saturated image
that allows for a better color grading and
correction in post-production. What I'm going to do here
is add LUT on top of this footage so that
we can convert it back to a normal-looking
image and then begin to color correct
and color grade it. Since I imported already
one of my LUTs over here, you can see that it's selected. If I click, we can
already see the preview. If I click on "Add to track", it's going to add an
adjustment layer that I can just drag to the end of it. Now this is going to be
applied to all my images. Just notice that
this is completely different from
clicking on the clip, going to adjustment, and adding the LUT over here. If I actually were
to do it right now, I would add this
LUT twice because it's inside the clip
and also on top of it, so I'm not going to do it. The way I recommend you to
go about it is that if you have only one clip during
the whole timeline, you can simply add it on the clip itself,
and that's fine. If you have more than one, it makes no sense for you
to go clip after clip, adding the LUT inside
the adjustments panel, instead of simply adding
it one time over here and just dragging it over
across the whole timeline. Let's say for example
that I wanted to apply this LUT also to the first clip, I can just drag this over here, and now it's applied
to both of them. This is very exaggerated, but anyways, this is to show you that you could do
that if you wanted. Clicking on this adjustment
layer over here, now you can see
that also you have all the other
controls over here. Let's say that in this case, I want to add a little bit of magenta to take away
the green cast. Let's make it a little
bit warmer like this. I'm going to pump a little
bit of contrast in the image, reduce the highlights to recover a little bit on the top
there, the mountains. Let's sharpen it just a little bit and now it's
looking pretty good. Now there's one less function that I want to show you here, because it's very important, especially if you have a
view of a person on it. I'm going to drag over it, the LUT that we used
before for the drone. It's not meant for that, so it's going to do a lot
of damage to the image. But anyways, that's exactly
what I want to show you. In this case, the layer is
affecting the whole image, including the skin,
which looks totally off. But CapCut offers this
small button over here, which is the skin
tone protection, which is meant to make the skin tone a little
bit more natural. You could still apply the LUT and it's going
to be applied to all the images except
the skin itself. Still, if I enabled and
disabled the track here, you can see that the LUT is
affecting the whole image. It's giving it a
little bit more punch, a little bit more contrast, even a little bit too much, but the skin is not going
crazy like it was before. If you're adding a LUT to an
image that has a person be sure that it's not affecting
the skin tones way too much, or try this feature
to try to save it. In this case here,
a good mix would be to put the strength
of the LUT at 50% and have the skin tone
protection on. All right. Now you know
everything you need to edit a very complex video from scratch on your own , but I'm not going
to leave you alone. We're going to edit a
complete video together.
14. Full Edit Workflow From Scratch: Finally, this is
the lesson where we grab everything you've learned so far and apply it
into one single video. The idea is to
edit a short video talking about CapCut desktop. I highly encourage you to go to the Resources section and download all the files
you can find over there. This video is going to
talk about five reasons why you should use
CapCut for desktop. You're going to find
six different videos of me talking to the camera. The intro and outro
are in the same file. Then the five reasons split
into five different clips. In five other clips, that are going to
be the bureau to complement everything that
I'm saying to the camera. Now it's up to you to
decide if you want to edit alongside me here
doing the same things, or if you want to learn
how to do it and then apply your own vision
to this video later on. Let's do it. I'm going to
create a new project over here. First thing we're
going to do is come to modify up here on the right. We're going to be sure
to give this a name. I'm just going to give
CapCut Example Video. I'm just keeping it in
its original place. Ratio, we're going
to do it vertical. You can choose 9 by 16. Resolution is adapted. Let's change it to customize
and be sure that we have it at 1080 by 1920, meaning full HD vertical. The frame rate has to be 25 because of the footage
I'm providing you. The color space has
to be SDR Rec.709. If all these are good,
save, and we can begin. It's time to bring
in all our videos, and I have them all
in this folder here. I'm just going to
drag and drop them. Now we have all of our
files inside here. If you click them here on the media panel you're
going to be able to see the preview and
understand what they are. You have the six talking
head videos over here, and you have five of
the Bureau videos. The first thing
you're going to cut is the intro and outro. You can find main
short intro and outro and drag it to
the timeline over here. Be sure to click on the clip, come here to the
panel and change it to -90 on the Rotate. It's going to have
the right orientation now and just grab here one of the handles and let
it snap to the corner. Perfect. Now, always
when recording, there's going to be mistakes
and you're going to try new takes on saying something
a little bit differently. That's the case for
this video over here, where you're going to see that I repeat the same sentence. Fifth is the best, the
fifth one is the best. Two times, we have to
keep only one of course, the other ones I've
trimmed already to make it a little
bit easier for you. Let's listen it
from the beginning. Come here, let me tell you
not one but five reasons why you should be editing
with CapCut for desktop. Fifth is the best,
that way that I prefer to cut this
views is seen very clearly there waveform
so that I can know when there was a pause and when
I was actually talking. To the depth, we've
kept cuts with these more waveform here. It's very difficult
for me, so I prefer to right-click and go
to separate audio. Now it's very clear
where do we have to cut. The first part is this one. Come here, let me tell you not one, but five
reasons why you should be editing with
CapCut for desktop. This first part is perfect, so we have to cut over here. There are two ways of doing it. You can press B and come here and cut both
audio and video. Now we have two different parts of the same video and audio. Or I can just Control Z, go back and I can just put the cursor
here, the playhead here, and go Control Shift B, and then it's going to cut
both of them the same way, cuts audio and video
at the same time. Now for the second part, we just have to keep one of the texts. I'm going to keep the last one, but you can choose
which one you prefer. I'm just going to
come up here very close to when I'm
talking Control Shift B. Again, select both of these Backspace to
delete and it's gone. Now I can zoom in a little bit using control and scroll up. Here by the end of
the sentence, we can do just the same
Control Shift B, select them, delete,
and that's it. Now this video is
going to have a loop, meaning that the
last sentence of the video is going to
take us to the first one. When this video plays on social, you don't even realize when it finished and it's
starting again. My idea here is to
have it starting exactly when I say five reasons. It's going to be
this break here, five reasons, but five reasons. I'm just going to cut
the video over here. This is going to be the start, five reasons why you should be editing with CapCut for desktop. The fifth one is the best. These are the start
of the video and this part here is actually
going to be the ending. I'm just going to
drag and drop it here by Dan. Come here. Let me tell you,
not one but five. All this part, come here is going to be the less
part of the video. You'll probably notice
that when I dragged this, it just snapped back
onto the timeline. This is because we have
this active over here, the main track magnet. For now, I'm going
to turn this off so that I can give it
some space here, since this is going
to be by the end. It's clear for us, what's the part that has
to be by the end and which parts have to
be in the beginning. Intro is done, outro is done. Let's go to the first reason. Let's drag this
into the timeline, and now we have this. Let me separate the audio
again. Let's hear it. Super easy video control
animations, positioning, zooming using sliders are
directly on the preview. Now you've probably noticed
two different things. The first one is
that we have to do the same adjustment that
we did in the first video, meaning spinning it around. I'll just do the -90 and I'm going to drag here and let
it snap to the corner. You notice that there's a
bunch of background noise. Using sliders or
directly on the preview. The original was not like that, but I wanted to apply what
you've learned so far. To save this audio,
what it can do is click here on the audio part. Come here to the
panel and you can use the noise reduction to make
it sound a little bit better. Super easy video control
animations positioning, zooming. Now this is without. Control animations
positioning, zooming. It's much better with, it's still not perfect,
but it's much better. Let's get this video over here, Control Shift V. Now whenever you drag
something on the timeline, you're going to see this
line pop-up when you're exactly at the border
with another clip. If you leave it here, they're just going to
be perfectly together. Super easy video
control, animations, positioning, zooming, using sliders or
directly on the preview. Perfect. This is
the second part. Let's just snap it
here to the beginning. We got the second part ready. Just remembering
when you want to be sure that you are at
the end of the clip, you can press up and
down to navigate the start or the ending of
any clip on the timeline. Reason number 2 on the
timeline right now, let's do the same separate
audio. We can listen. Super easy to cut reposition, change, all organized by
type of media in layers. This one is perfect already. Let's just snap it in here. Let's take the reason number 3. Whenever you're in doubt if you added something already or not, remember that
you're going to see edit applied here on
the Media Library. Separate audio. Regions are
super fast to use in preview. Let's go with the
reason number 4. Now we have reason number 5. Which takes us to
the fifth reason. It is completely free. This is the end of the timeline. I'm going to press O to set
the out point over here. I'm just going to zoom out. I'm going to press I in the beginning to be sure
that here's the input. Whenever we export, we are
going to export everything that is in-between the
in and the out points. Now let's be sure that
all of the clips are turned correctly.
This one is not. Let's repeat this
for the other ones. For this last clip, I want to do some keyframing to
zoom in and out. To do that, I'm just going
to click on the video so that the properties
that appear up here, I'm going to be sure
to being the beginning of the shot around here. I'm going to set some keyframes. In this case, I just want
some scale keyframes, so I'm going to add one
over here. Let's see. Come here. I want this now to be scaled up a little
bit like this, and it automatically sets another keyframe when you
change one of the parameters. I leave it for a while. In here, I'm going to
set another keyframe. In here, I'm going to
set it back to 177, which was the initial value. Now we should have a
zoom in and a zoom out. Come here. Let me tell
you not one but perfect. When you click the video
over here in the timeline, you can see where the
keyframes are also, so you can have a better
understanding of until when the movement is going to happen and when it's
going to come back. You can watch here
to see that it goes here and then goes back. Once this is done,
now it's time for us to bring in all the B-roll. They're named the B-roll
reason 1, 2, 3, 4, 5. Let's bring in reason
number 1 over here. I'm just going to position
it on a higher layer so that it can cover the
screen when I'm talking. Here is where the first reason ends and here's where it begins. We have this amount of time to show something on the screen. Let's see what we
have here on this. Here, as you can
see in the preview, just going over the
properties panel, clicking on some things and then redimensioning some stuff
on the preview itself. Let's say that definitely I want some of these clicks over here, so we can start the video here by cutting using
the timeline controls. Let's go until there, where I begin to move the mouse. I'm going to use B and just
cut the video over here. Now we have a second video. We have them separately
and I'm going to bring me up to where I start to play with the footage
there until we're here. This is the amount of
B-roll that I want to use. As you can see, it's
impossible to fit both of these clips on top of
the talking head videos. What we're going to have to
do here is to read time, the speed of the B-roll, so that we can show it a little
bit faster on the screen. To do that, there are
two different ways. The first one is coming up to speed over here in
the properties and just playing with how many times faster you want it to be. You're going to be seeing
on the timeline also that now it's much smaller. But it can be
difficult to time it perfectly doing like this, so what I prefer to do is
to just leave it at 1x. When you click it on speed, it changes also how it
looks here on the timeline. Now when you grab the mouse
and you come up to here, you can actually drag
it and it's going to automatically change also
on this slider up there, so you can just make it time perfectly until where
you want it to go. I'm going to leave this part
of the B-roll like this, and I'm going to bring
on the second one, and I'm going to do the same
to make it finish about here so that I can still see myself talking about
it when it's over. Let's see. Super easy
video control animations, positioning, zooming
using sliders are directly on the preview. Perfect. Now we
just have to resize the B-roll so that it covers
the screen as you want it. I'm going to make it bigger. For this, I always like to use the preview controls
because it just makes it so much faster to reposition and resize and do
whatever you want. It's just dragging
and dropping and making it snap to the corners,
and we're good to go. Control animations,
positioning, and zooming. For this one, I'm just going
to make it bigger so that the preview panel is as big as possible
here on the screen. Yes, like this looks good. Zooming using sliders are directly on the
preview timeline. Perfect. Basically now what
we're going to do is select the parts that
interests you the most in the B-roll for parts 2, 3, 4, and 5 and overlay them on top of the talking head
videos on the timeline here. I'm going to do it now, so
let's just make it faster. Now we're on reason
5 and this one, I want to do something a little bit different
than the others. Instead of just putting them on the timeline covering
my talking head video, I want to put this
one here and I want to show two different
parts of the same B-roll. I want to show the
preview and I also want to show what I'm
changing on the parameters. To do that, I can
simply come here, select the video and put it on the right place that I want it, Control C and Control V to have a second version of the
exact same video on top. I'm going to place them
on two different layers, and I'm going to
position one of them a little bit to the left. I'm going to put maybe the
parameters here on the left. I'm going to make it
a little bit bigger, right about here, more or less showing until the
middle of the screen. The one behind, I'm just going to put like this, and then to show the
preview panel over here. When I play this now, there are some pro features, but there are more advanced and most people won't need it. You're going to be able
to see both of them. But I didn't get the right
parts because it's only after here where I actually start changing a little
bit of the colors, and that's the
interesting part to see. Yeah, it was exactly here. I'm just going to cut it back. Cut this one and
to the same point. Bring both backwards
here. Let's see now. There are some pro features, but there are more
advanced and most people won't need it.
Roughly like that. One more idea, one
more thing to change, I want one of the reasons
in the middle for my face to be appearing
above the B-roll, but in a different way. Either I cut out the
green screen effect or maybe masking it as we learned in the
previous lessons. Let's try all of them and see
which one works best here. Let's say that I want it over
one of these reasons here, which is reason number
3, for example. To have it on top, I'm going to need
to get this video, which is the talking head
video and create a copy. I'm just going to go Control C, Control V. Now we
have two of them. If I place it on top here, now, you don't see
the B-roll anymore. You are seeing the
talking head again. Let's see if it's going
to work. Let's come out here to cut out. Let's click our "Cutout" and see what kept cut is going
to manage to do here, and looks like it's not
doing a very good job. The shortest two mix
of the background, so it disappeared many times. We don't have much
control over it, so this is not going to work. I'm just going to
uncheck this function. The only solution here
is really to use a mask. To do that, I'm going to
come up to Mask over here and let's do maybe a circle one, and like this it creates
a hole here that we can only see part of the
footage that was behind. I'm going to leave
it around like this. Going to reposition it.
Let's make it maybe oval like this and add a
little bit of feathering. That looks about right, and if you go now back to basic, you can move this
video all around, and I'm going to leave it about here is okay. Let's
see how it looks. That doesn't make much
sense to begin over there, so I'll press up in the
beginning of the clip here, and I'm going to cut it to start exactly on the same time
where the B-roll begins. Transitions are superfast
to use in preview. That looks good, but there's a cut here in the
talking head video, that I don't like
to make it show. I'm just going to cut also
this and this second part here I'm going to move to another place on the
screen. Let's see. Lesions are superfast
to use in preview, and there are infinite option. I'm going to cut just to the beginning of the audio here, so let's make it about here, and I'll cut also the B-roll for them both to match together. Now I just want to get a little bit of this blank
space here in the middle. I'm just going to
go Control Shift B so that it cuts
everything that is in the timeline in here whereas exactly where they audio
from the first one ends. Let's zoom in a little bit and let's select all
of these and delete. Now extra trick. If you
want to make everything snap back here, there
are two solutions. The first one is if
you come up here and select everything
rightwards. You drag everything, you come back to the
cursor with A and you just drag it all until it snaps. Or what other thing you can
do is just come back here and reactivate the main track magnet so that there are no gaps
in the middle of the video. The moment I activate it, boom, everything snaps back, so it's an easier
way for you to fix this small gaps when
everything is aligned. You just created the space
in between the clips. I'm going to
deactivate it again. I think that for A-roll and
B-roll, we're good here. Let's spice this edit
up a little bit. Now, whenever you open the
effects tab you can be so overwhelmed because there are so many options around here. What I can recommend
you is to when you do a first project is to go
through the effects tab, take a look at everything and just save them by clicking on the star that you find whenever you hover
the mouse over them. When you click it,
they are going to appear always on the top here. For example, I really
like the camera shake. I put a star on it. It's always here. Because if every single time you're going to
go through all of the effects to try to find the
right one for your videos, you're going to
lose a lot of time. Let's add this one here, a little bit of camera shake, and I want to add
also a body effect. For that, I really like
this electrical scanning. I'm going to save it
as my favorite also, and I'm going to edit it
here onto the timeline. Now let's see how it looks. Five reasons why you should be editing. It
looks pretty good. We're going to adjust
a couple of things and you can see that they affect everything below as soon
as the layer exists here. This effect is going to go
through until this part here. We don't need that much, so let's make it a
little bit smaller. First of all, I suggest the lateral optical
scanning effect. This looks pretty good. I want the camera
shake to start just a little after this
first effect hits, so maybe here, for example, and let's make it shorter a
little bit. Both of them. Let's see how this looks. Five reasons why you
should be editing. Maybe a little bit before. Five reasons why you
should be editing with. I'm going to finish
the camera shake a little bit before also
make it a little bit faster. Perfect, that looks really
cool for the intro. Now, in-between the different
reasons on this video, I wanted to have
some transition, not to have just a direct
cut in-between them. You can place the
playhead exactly where there is a cutting between
two different shots, come up to transitions and just choose the
one you prefer. Here I'm going to choose
one of the trending ones, the pull in is
usually very nice. Now it adds it here to the
timeline, but not as a layer, it adds it exactly in between
the two different shots. In the timeline, you can also adjust how long is
it going to be, a very short or a bit
longer transition. Also, you can adjust
it on this slider up here on the right. Let's
see how this looks. This is the best.
It's way too fast. Let's make it a
little bit longer. That looks pretty cool. I'm just going to do
exactly the same for all of the other transitions in
between the different reasons. I'm just going to get
here, plus, perfect. We have a transition
over all the reasons. Now we're going to do captions, but I want the
first few sentences to be in a proper title. For that, we're going
to come up to Texts, and I want to go
to Text Template. This has different
templates that are already animated and it can look very cool for the
start of the video. I really like this one, so
I'm going to add a star and I'm going to grab it and
add it to the timeline here. It looks pretty good. Let's click on it and
up here on the right, we can change whatever we want. I'm just going to write
here, five reasons. Below, I want to change
is to CapCut Desktop. Scale looks good. I'm just not a big
fan that the text is here in the middle of the
screen in front of my face. I'm just going to drag it
down a little bit. Let's see. Reasons why you should
be editing with CapCut for desktop.
It looks pretty good. One thing that's going to
happen to you when you're editing is that you're
going to realize small adjustments
that you can do when you're doing other
stuff, like here, for example, in which
I think the cut from this first sentence
to the second one is a bit too harsh without
anything in the middle. What I want to do
is I'm going to click in the second video here, and I'm just going to
change a little bit of the zoom by clicking on
the preview properly. It almost looks like it's a camera change, but not really. CapCut for desktop. The fifth one is the best. It looks much better this
way. Time to do the captions. Let's come here
to Auto Captions. Let's choose English Create. Once it's done, let's come up
here to Captions and we can check if it recognize all
the speech correctly, and also change how long
they're going to be. The first sentence actually, I'm not going to use
because I already have the title here in place. I'm just going to delete
it by clicking here and we're going to begin
with the captions on the fifth one, is the best. It's enough for me. I'm going to try to make them
as short as possible. I'm going to cut it
on the fifth one is the best super easy
video control. I'm just going to keep pressing, enter and making
another line every time there are two
or three words. Let's go through it. Whenever you make a mistake
you want to go back. You can come through Z or
you can select a line and press backspace so that it joins back with the upper line. Now it's time to edit the
captions as we want it. I'm just going to click
on the first one. Go to text, be sure that
apply to always hear clicked. I'm just going to adopt
a style that can be easy to read in front
of all these colors. I'm going to choose
another font. One thing that I like to do is increase the size of
the background so that the text is not
too tight inside here. I'm going to change 50 to 55, also the width to 55, so that now we have a little
bit more space over there. Also the positioning, I like to put it a little bit higher, like minus 850 because of the onscreen texts
on Instagram TikTok. This way you are sure that the subtitle is going to
appear above all of that. Let's take a look.
The fifth one is the best, super easy
video control animations, positioning, zooming. It's looking pretty
good. Now stickers, there's place for one sticker
here that I want to add, which is something
related to mind when I say that it's
completely free. Let's just scroll
through and try to find something that is related like this emoji here
for example we can favorite and immediately
added to the timeline. Let's make it as long
as that subtitle. I'm going to reposition it and make just a
little bit smaller. Doesn't need to be
that big around here. Let's say it is completely
free. It looks pretty good. We're almost there,
just going to add some music and some
sound effects. First sound effects,
we're going to add are for the beginning here. I've sifted through the
sound effects already and I found a couple of them that
can work very well for this. The catch here is, sometimes you don't need to find something that is specifically
about what you're seeing. Like in this case, for example
we see some electricity, but I felt that sound
effect of a dagger. That sounds really cool
for this. This one. Let's add it to the
timeline and it's going to create another
layer just for that. Let's put it here where the
electrical effect begins. Reasons why you should be
editing. Sounds very cool. You can lower the volume if
you want by using the bar here or the volume here
on the parameters step. This first part is
good. Now I want to add some sound effects
for the transitions. For that, there's a sound
effect called whoosh. That usually works very well
for this stuff [NOISE]. I think the first one was
enough. Let's save it. I'm just going to
do the same for all the other transitions. I'm going to click on the
transition or as it begins. We're just going to add
the whoosh in all of them. Now we have something like this. The fifth one is the best. Super easy video.
Looks pretty cool. We're almost done. Let's try
to find some music for this. Here we can try
to find something cool around the vlog area. Let's see what we
have. I like this one. Here where he tried to find
a good song for a video. You can also go saving
by clicking on the star and doing the same
as it did with the stickers or if the text, everything is just going to keep the ones that are
like on the top here. I'll just edit and it's going to add where the playhead is. Let's move it to the
right place and it's not finishing together
with the song. We can use B and just cut it exactly here and
delete the rest. Now let's hear it. It's
probably going to be too loud. Exactly, so let's
make it lower by lowering the volume
bar over here. Usually if you're
below 25 to 30 dB, it's going to be okay for you to listen to the voice also. Reasons why you
should be editing with CapCut for desktop. The fifth one is the
best. Super easy if you do control animations. By using this slider over here, we have a little bit more
fine control then instead of just using the
volume bar down here. I really liked this tries,
let's go to the final step, which is adding a little
bit of color to the video. As you saw in the
color grading lesson, there are two ways of doing it. The first one is just clicking
on the clip itself and changing the colors and the
adjustment panel over here. Or you can come to the
adjustments here on the left and just add
a custom adjustment. It's going to create this
adjustment layer that we can bring over here to the beginning and stretch
it out until the end. Use one of the videos as an example to how it's
going to look in the end. Let's say this one, for example and I'm
just going to bring in a little bit more contrast. I'm going to lower
the highlights a little bit so that the lights in the back don't
call that much attention. I'm going to bring up the
shadows just a tiny bit. Maybe add just a little
bit of vignetting. If you go to the
left to add white, if you go to the right, you
add a little bit of black. Just the tiny touch like this. I think all the rest looks pretty cool and I've
changed anything else. This is with and without. Very subtle change
gives an exit edge. If you're ready, let's
watch the final version. Five reasons why you
should be editing with CapCut for desktop. The
fifth one is the best. Super easy if you do control
animations, positioning, zooming using gliders are directly on the previous
timeline control. You see everything you got super easy to preposition changed. Organized by type
of media in layer. Effects and transitions are super fast to use in preview, and there are infinite option. Stabilization, noise
reduction proxies. All fancy features from
pro expensive software, which takes us to the fifth
reason it is completely free. There are some procedures, but there are more
advanced and most people won't need it. Come here. Let me tell you not to one, but five reasons
why you should be editing is CapCut for
desktop and that's it. I hope you liked that. I can't wait to see what you create. All these videos
are on your own. In the next lesson we're
going to learn how to export this video or any other, using CapCut that to have a final product in your
hands to be able to share.
15. Exporting Your Video: Your video is edited and
ready to be exported. To do it, there are two
main things you have to do. The first one is coming up
to the timeline and being sure that everything
finishes together. Let's zoom in by the
end here so that we can have a little bit
of a better look. You're going to see that the adjustment layer doesn't finish together with the video, so we're going to drag it up here to be sure it's
going to snap it there. Also the song is
going over the video. Let's just drag it here. Now we have everything
matching together. Let's zoom out to see
all the timeline. Now before exporting,
you're going to press "O" on the keyboard
to set the out point. Here in the beginning, "I", to set the in point. If you don't do it, CapCut
is just going to consider that the whole timeline is
what you want to export. But just to be sure,
it's better to do it. Then to export,
all you need to do is to come up here to the right, and there's the export button. It's going to open this
dialog box in which you have all the options
that you're going to need. First of all, there's the title. CapCut example. On "Export to",
you're going to find the folder where you want
the video to be placed. First, you have to
check video exporting. This is going to be sure
that the video part of the video is
actually exported. The resolution is
exactly what it says, you can choose up to 4K. Now, bit rate is going
to dictate how good is the quality of the
exported video. You can choose one
of the presets, lower recommended, or higher, or just go customized
depending if you know the bit rate of your
original footage. If you don't know, I would
totally suggest you to put higher and just
leave it as it is. Now, Codec is going
to be a little bit different if you're
using Windows or Mac, but H.264 is going
to be available on both of them and is one
of the most used Codec, so you're going to
be sure that it's going to work anywhere. The other ones are
more compressed Codec, they save a little bit of space, still good quality, but they're not going to be
compatible everywhere. To be sure, I would recommend
you to use H.264 here. If you want to be a
little bit fancier, you can choose HEVC on Windows and Apple ProRes if
you're on a Mac. The format, you can go
with the standard MP4, especially if you're on Windows, but on Mac is going to leave
you as a MOV as default. The frame rate here is
important that you match exactly what it had
as the timeline. Right there in the
first lessons about the timeline, we set this up. I would just suggest you
to keep exactly the same. If you put 30 frames per second back then, put here also. Export audio, if checked, is going to export the audio of your timeline as
a separate file. If you want that, you
can keep it clicked. Here there's caption
exporting also, but it's a pro feature. You're ready to export, just
click "Export" over here, and it's going to tell you in the ProRes bar how it's going, and also the estimated size. As soon as it's over, it's
going to offer you to post directly to YouTube
or TikTok over here. You can open the folder
and you're going to find all the files over there. If you chose to export
also the audio, you're going to see that
there's an MP3 file also in the folder. Otherwise, you're just going
to see the video file here that you can play and that has the audio inside as it should. That's about it. In
the next lesson, we're just going
to wrap it all up.
16. Conclusion: Congratulations, you're a
pro-social video editor now. You learned how to set up
the timeline, ad videos, audio effects, text, captions, and much more. But most importantly, how to tell a story or
teach something in a very short space of time while keeping the viewer
entertained and engaged. Now, don't forget to
create your own version of the video we edited together, or even better to create
something of your own. I'm anxious to see
what you come up with and upload to
the project section. And always remember that for
any doubts or questions, you can always use
the discussions panel below and I'm going to
help you along the way. Thanks once again for watching this class and if you
want to keep learning, check out the other
classes I have in my profile about
video production, photo, and video editing. And if you want to see more
of the content I create, you're going to find all my
social medias linked below. That's all.
Congratulations again and I'll see you next time.
 Enrico Luzi, Creative travel content