Transcripts
1. Intro: No, no, no, this doesn't
look quite right. Why don't we try it like this? This is much better. Switching from that to this
took me literally 10 minutes. The trick is just knowing
what to look out for. This is exactly what you're
going to learn in this class. Hi, I'm Enri, travel
and commercial photographer and
filmmaker based in Italy, but I'm usually on the go, telling the stories of my client's brands through
images and videos. I've helped partnerships
and created content for the likes of Airbnb, Oppo, Pagani, and many others. Everyone is diving into
videos these days and has become vital to establish
your online identity, Instagram Stories,
Reels, TikTok, YouTube, but it can
be so overwhelming. It looks simple until you hit "Record" and then
nothing seems right. Then suddenly, you have to learn a whole new theme even before starting to record what you
were meant to in first place. In this class, we're
going to break video production down in many simple steps for you to be able to record
your first videos. We're going to talk
about scripting, how to prepare your set, how to use natural and
artificial lights in your favor, how to record super clear audio, and how to film
additional material that will enhance your message, and then how to bring it all together in post-production with nice move edits,
visuals, everything. This class is aimed at
anyone who wants to create video content
by themselves. If you have your own
brand and your shop, if you're an artist or if you're a photographer
that realized that video is taking over all
the platforms nowadays, all you need is a simple
camera to begin with and yes, your smartphone
will do just fine. For the class project,
you're going to be recording a one-minute video from scratch presenting yourself
and your space. At the end of the class,
you're going to have all the knowledge necessary to create your own content and make it look like a
high-value production, even without owning the
most expensive gear. You're going to have
a clear checklist in your mind about the
things to look out for to have successful recording and editing sessions on your own. It's going to be an
exciting journey and we are here to get the
ball rolling together. I'll see you in the other side. [MUSIC]
2. Class Project: [MUSIC] Now the class project couldn't be anything
else than creating a video to share
with our community. I'd love to see how you apply what you learned
during this class, putting some thought into
planning your scenario, camera, audio, lights to create a short video telling me what to do and how you're recording it. The topic is going to be a presentation of yourself
in your studio setup. This way, you're going to be
applying all the techniques you learned in this
class to do it by trying out different
options to find the best positioning for
your camera lighting gear, setting it up correctly
and filming day row, talking about what you love and explaining how you're doing it. What are you using
to film and how and then adding some
bureau on top of that. But don't worry, we're
gong to go into detail on every step of the process. Now sharing this video in
the project [inaudible] is vital for you to really
learn what's in here. Nothing's going to
help your learning process more than applying it immediately after
watching these videos. Posting it there will allow the community and me to give you immediate feedback on how can you improve it right
from the start. Now your video projects should
be about one minute long, in which the main shot is going to be a talking head shot, just like you're seeing
here we view talking to the camera in which you're going to tell
me what to work with, what is your passion. Then also show me what are you recording with,
what is your light, where you position in your room and doing the explanation while
you're still talking. You can also add
some bureau showing the images of what
you're talking about to illustrate
it even better. You can add some
facts, your name or your logo to your
video if you want. But above all, don't
worry about what anyone thinks and don't be shy. Now practice makes
perfect and I'm only helping you to take
the first step into being super comfortable with
the camera so that it can record whatever you want
later without a problem. Remember that you are already one step ahead of so
many other people by investing your time in watching this lesson and we're going
to do this all together. Now in the sequence, watch an example of
the project for you to have an idea of the structure
and how to set it up. Hi, I'm Andrea, a mathematician
that teaches kids of all ages how cool maps can be when they're learning
how to memorize it, thanks to everyone that's super
quickly. Let me show you. Here's the trick,
first you write from 0-9 and then from 0-9 again. There you go. I decided
to take this course to level up a bit my
videos on social media. Mainly I'm moving my couch or my table around to be
close to the windows. I'm using my smartphone as my main camera on top of some MacBooks. They
are good for that. But sometimes I use
this small tripod when I need to show
something that I'm writing. For the audio, I'm using this
ear buds as my microphone. Sometimes when it
gets a bit darker, I'm using also as
more light from aperture that was
recommended in the course. It's not very
difficult to set up. When I'm done, I
put everything in the same drawer and in
five minutes tomorrow, I can just start all over again. I guess that's
all. Thank you for watching and see you next time. Now a quick tip to
help you guys follow along with the lessons
in a much better way, I included in the resources
section of this course, this guidebook that has
some extra information or content about each of the lessons that you're
going to find here. You're going to see the
links and pages that I mentioned and some
additional ones. All of these links are
clickable and they're going take you directly to
what you want to see. Besides that, you're
also going to find some diagrams and illustrations, especially about the
lessons in which I talk about how to set up your space and also
some quick reference guides for things such as
the settings of your camera. For the editing
lessons, for example, I included the very big list of shortcuts that you might
want to use and it's just difficult to
write down while I'm explaining during the lesson.
The PDF is all there. There's the lessons
in this course. But in the end,
you're going to find the also a recording checklist. This one is meant to be just a quick reference
for you before recording to be sure that you remember to set up
everything correctly. I guess that's all
about the guidebook, download it in the
resources section, and continue on to
the other lessons. Take the chance for any
doubts or questions, remember that you can always use the discussion panel below. I'll see you in the next lesson where we're going to discuss
the purpose of your content.
3. Purpose of Your Content: [MUSIC] Before setting
out and hitting record, some pre-production can save
you a lot of time later on, if not avoiding having
to do it all over again. Now for the purpose
of the class project, you're going to be
creating a video to test out and present your setup. It's very to the point
that we understand the purpose which is
posting in our gallery. But whenever you're
creating content for the Internet it's important to think about
some things first. So the first thing
is going to be defining where this video
is going to end up. If it's going to
be on a website, if it's going to be
on social media, if you ask, which one? If you're going to
post it on YouTube, for example, this is going to dictate some things
like, for example, the format if you're going
to use it horizontally or vertically and also about the pacing and the
length of the video, which is going to
change dramatically depending on where you post it. Instagram or Facebook stories, TikTok, or YouTube shorts. They're all in vertical format, and it's 1080 by 1920. This is also called in many
cameras as 1080p or full HD. For these are definitely
going to be better off recording
already vertically. Now regarding the resolution, you need to think of what
your final file needs to be. If this video is going to be in the loop on a
massive television, for example, you're
going to need the maximum resolution possible. But if you're just
going to play it on a smartphone, for example, then you can get away with some smaller resolutions
without a problem. If you're in doubt,
just shoot as high as possible because
later you're going to be able to reframe it or scale it down without
losing any quality. But instead, the
opposite is not true. If you shoot it smaller than what you needed the file to be, you're going to
have to stretch up the image and you're going
to lose quality with it. That's when you begin to
see that the image is not sharp enough or pixelated. Also, remember that depending on the app you're
going to be posting, there's going to be text on the screen covering
part of your image. Let's say, for example, you
want to show a product, but you leave it on the table and you post it on Instagram, well, it's going
to be covered by all these things over here, and then it doesn't
look very cool. It's also important to
define who is going to be your target audience
because things like age, for example, are
going to dictate massively how you're going to express yourself
through the camera. Talking to a teenager is
going to be completely different than talking to
a person that is over 60. If you mix the style
too much people would just won't give you
their time anymore. Lastly, which emotion do you want to evoke
from the video? Is it supposed to
be inspirational, fun, entertaining,
or educational? Of course, you can mix them up to create your own concept, but just having an idea is
going to help you later, especially in the editing, where you're going
to be choosing which song to use,
sound effects, which images to add on top
of your talking head video. A good exercise for
you to practice after this lesson is going to be
answering these questions; to define where your
content will be posted. Define a general idea of
who your audience is, and write down the
main emotion you want people to get
from your video. So let me give you an example
and show how to approach answering these for this
lesson, for example. First, the content is going
to be horizontal and in the 5-10 minute
range more or less, so no need to rush, but I
also cannot go too slowly. The audience is probably going
to be young creators and entrepreneurs trying to improve their brand presence online. The outcome is that
people should feel inspired to take action. You can share your answers in the discussion panel to have them really clear in your mind. Now I'll see you in the
next class for us to script and plan your
video together.
4. Scripting and Planning: [MUSIC] Scripting is
a very important part of your pre-production, and every five minutes
you're going to spend here is going to save your
10 minutes later on. This script can be something as simple as just making
a bullet list, and then free styling over it. Or you can be extremely detailed in writing word-by-word
what you're going to say and
which camera and angle you're going to
use for each shot. Now to decide which route is
going to work best for you, I'd say that if you're
starting out right now, I would take something
like an intermediate step by making a rough guideline
of what you're going to say, but not going overly
detailed about everything, not to make you overthink
too much the recording. Now if you're not using
it to recording it, just having bullet points is going to be difficult for you to express yourself in a clear and concise
way to the camera. For my videos, for example, I like to script deeper when
the topic is really broad, meaning that I could go
many different ways while talking to the camera and
maybe I would get lost. Or if the time is really
short, for example, when I'm recording
a 15 seconds reels, in which I have to express an idea in just that timeframe. In that case, you
need to up the pace, but it still has to
be understandable. Today I'm going to show you
the app that is going to change the way you
use your Sony camera. No more bulky
external monitors and no more fighting with
the imaging edge app. This third-party
app is going make your smartphone even smarter. Is going to turn it into
an external monitor where can see the zebras
focused speaking. You can change all the
parameters in the camera. When the video is a
little bit longer, you have a little bit
more time and patience to be able to talk more
naturally to the camera. Just paying attention to
when you make some mistake, you have to start again from the beginning of the sentence. Otherwise, later on, cutting this video is going
to be terrible, but more on this on
the arrow lesson. Now where to write this script. You can go the
old-fashioned way, which is simply using
a notebook to do it. Or if you'd like more
than digital approach, I can suggest two
different apps. One is called Evernote and the other one is
called the Milanote. Evernote is a really
cool notes taking app, that you can add a lot of
different medias to it. You can add images, videos, references, you can clip
stuff from websites. It's really cool because
it's synchronizes across all your devices, so you can have it
on your computer, your notebook, your smartphone. Let me show you this
shot list I prepare to film the reference
project you saw before. Now the shot list you guys saw in that blank template
are going to be available and the
links are inside the guidebook that
I mentioned before. So that you have it
clear in your mind, what exactly do you need to
write down for this shot, you can use the blank
template and write down five shots that you think you're going to use inside
your project. Now this list probably is
going to change with time. As you watch the other lessons, you're going to see
other ways that you can illustrate whatever
you're talking about and you're going
to be changing or adding some extra
shots to this list, but this is perfectly normal. The important thing is
for you to use it right now and begin imagining in your mind how this
video is going to look and what you're
going to need to do it. As I mentioned, links
are in the guidebook. To use it is very simple. You can just create as
many notebooks as you'd like and have the
notes inside it. For example, to create tables
in which I can reference, which is going to be
the camera, the lens. A lot of people call this app a second brain because you
can write down stuff that you don't need to actually
to memorize and you can just refer to it later
when you need it again. For example, for this
lessons in which I needed to write down what was the
height of the tripod, what were the
settings that I had in both cameras to always have the same thing in case I needed to record in two different days. This makes sure that I don't
forget anything making it really difficult later on to
fix it in post-production. Now Milanote is a
little bit more like visual planner in which you
can create the boxes with content and you can also
link them around to understand also
what's going to be the flow of your recording. Now both of them
have free versions. They're just going to limit on the amount of stuff
you can upload, but the functions
mostly are there. If you'd like them, you can
check what the paid version has to offer and see
if it suits you. Now one other thing that can be really useful if your script is using a teleprompter
app like this one. Now this is going to
allow you to have your bullet points or the tax properly rolling up and you
can just read it as it goes. Now for this one to work well, there is a trick to it. Interior, you need something like a mirror that
is going to be in front of the lens and that
can reflect text back to you. This way it seems you're looking at the
camera at all times, but actually you're
reading the text. Now this is not a very
portable solution it can be a little bit
boring to set it up. Now the other
solution would be to have the camera as
far as possible, but zoomed in and the text as close as
possible to the lens. This is going to
make the movement of your eyes from right to left a little bit more
difficult to notice. Then it won't seem as
much like your reading, which usually is
the main problem when you're using
a teleprompter. Now if you feel none of
these works well for you, you can also try
the interview style recording in which
the person being filmed is actually looking
at the teleprompter or what should be the
person interviewing them. The recording properly
is made at an angle like this camera over
here, for example. This way if the
person is reading, it's almost impossible to notice that the eyes are
growing sideways. This takes some time
to feel really fluid. What I recommend
you is to record, check it on the computer, see what works or what doesn't, and then change
it and try again. Slowly you're going
to begin feeling much more natural in
front of the camera. The key takeaways
for this lesson are: time spent in planning, is time saved when recording, discover what works
best for you by trying different methods
and reiterating. The more you do it,
the better you get it. In the next lesson,
we're going to organize your space and set up the
lighting to start recording.
5. Setting Up Your Space and Lights: [MUSIC] In this lesson, we'll be setting up
your environment to start recording,
positioning yourself, the camera, the lights, and the microphones to make
it look like a cinema set. Now the first and most
important thing to do, because all else is going
to revolve around it, is to define what's going to be your key light, your main light. If you're using natural light, it's going to be close to one of the windows you
have in your space. But it really depends on the
time of the day that you are going to be recording this
because direct sunlight, for example, is a total no
go for this situations. It is going to produce
a lot of contrast, blown highlights, it's much
more difficult to manage. Now for everything
there's some solution, and if that's the only time of the day that you can
actually record, you can also use
some diffusion panel in front of the window to
make it a little bit softer. Like for example,
some white sheets or a very thin curtain. Another super important thing is to avoid being too backlit. When the light is just
coming from behind, your face is just going
to look very dark, so you need another
light in front of you to compensate for that, or maybe something to bounce the light that is
coming from behind. To compensate for this shadows, you can use any white cardboard that you already
have in your house, but ideally sitting
at 45 degrees to the light is going to produce
the best results possible. Just pay attention that if
you use something colorful, it's also going to bounce
that color onto you. [MUSIC] One strategy that
I use sometimes like now, for example, is using a notebook with a white screen
on it just to compensate for the darker part since my main light
is on my left here. Just don't use
flashes or lanterns because they're going
to ruin your shot. Now, if you don't have a
good natural source of light or your time of recording
doesn't allow for it, we can check also some
artificial lights, they are going to
help you record even when it's in
total darkness. Let's take a look at
some artificial lights of different budgets. There are some cheap and
great looking options like ring lights or
a small LED lights. They're already going
to help you pop. In that grid from
that can already be the most basic soft box that you can find
with a lamp in which you simply have this
thin white layer in front of the lamp that just helps diffuse the light and makes it so
much nicer on you. Probably the ultimate for a home video
production would be to have a bit of a
stronger LED light with a large soft box and
a couple of diffusers that make the light source
soft and nice on you, and on top of that,
you can also add the grid in front
of it that helps the light be a little
bit more directional and not spill everywhere
on the scene. If you don't have it, it's hard to make your
background very dark so that it can add other
colors or lights to it. How you position yourself
according to the light is going to change how dramatic
this video is going to be. More of dramatic videos call
for more contrast images. The more sideways
you put the light, the more brightness you're
going to have on one side and more shadows you are
going to have on the other. The more frontal it is, the more it is considered
some beauty light. Now where to be in the room. You mainly depend on
your source of light, but the angle can vary a little bit depending
on the depth you have and also which
background do you want to capture
in your video. As a general guideline, the further you are
from the background, the nicer it is because it helps you detach a little bit
from the background, making it much nicer
for the viewer. Also keeping many of
the distractions you might have in the
background out of focus. Now here you can experiment by rotating your camera around a little bit and trying
different angles to see which one fits you best. Remember the idea is to find a spot that has very good light, where you're a
little bit distanced from the background and that the background actually looks
nice even if out of focus. Now regarding sitting down or standing up to talk
to the camera. I feel like usually
when I'm standing up, it's easier to put
more energy out. It looks like the camera
sucks the energy out of us, so we need to double it to
make it look normal on camera. This definitely goes
into the category of recording and checking
it before continuing for you to have an idea of
how much you have to dial up or down your tone
to make it look cool. Now two extra treats regarding
lights that can help you. The first one is positioning some practical lights in the
background of your shot. These are going to help
transform the walls behind you in
something a little bit more colorful and interesting, and also helps in giving some separation from
you to the wall. There are some cool solutions
like PavoTubes or the Aputure MC that I'm
using here right now. But something much simpler and practical that you
can do is just buying a couple of smart bulbs and replacing the normal lights
on your house with that. Something like the
Philips Hue or any other brands
will work just fine, just like these lights that
I have here on my left. They're all controlled by the Google Home app and I can change the color as I please. One of the trick
related to light but also a little bit
towards fashion is for you not to wear
something that is exactly the same color
as your background. The more contrasting colors you've got, like for example, if you have a blue background and you wear a yellow shirt, or if you have a
green background and you wear a red shirt, are going to make
your pop so much. If you don't want
to go that extreme, you can go with analog colors. Like me, for example,
right now wearing blue with a purple background. They are closed colors
but not the same, which already helps me make a color scheme for the video
without making it too crazy. Now all of these may sound a little bit
complicated right now, but actually it's
just a series of very small adjustments
put together. Let's do a recap
together, shall we? First we talked about our
main source of light and where to position
ourselves according to it. It can be the window,
can be a small LED, can be a big soft box. If well positioned, any of these are going to look great. Then we learned that
separating yourself from the background makes it look
much more professional, and to do that you can
physically distance yourself and also add some
lights to the background. Besides that, choosing
the colors will really help the viewer
concentrate on you. To the key takeaways. Privileged soft light through diffusion or reflection
for better results. Separation from the back
is key for a pro look. Different light angles
creates different moods, so pick the one that
suits you best. Now as a homework
for this lesson, I want you to just look around you and find the three
different spots that you imagine could be very good for recording and
just try them out. Record just a little bit
for you to be able to see later in the computer
how they look over there. Then you're going to have
a little bit better idea if the angle looks nice, and what exactly around
you should change or move a little bit so that
it looks even better. If you want, you can
take even a picture of each one of them and
post in the galleries section so that we
can take a look and give our opinion also about
which one looks the best. In the guidebook, you're
going to find some diagrams illustrating the
positioning of yourself, the camera, and your main light. This will probably
help you explore a little bit around.
[MUSIC] That's it. In the next lesson, we're
going to put the camera in place and set it up
to start recording.
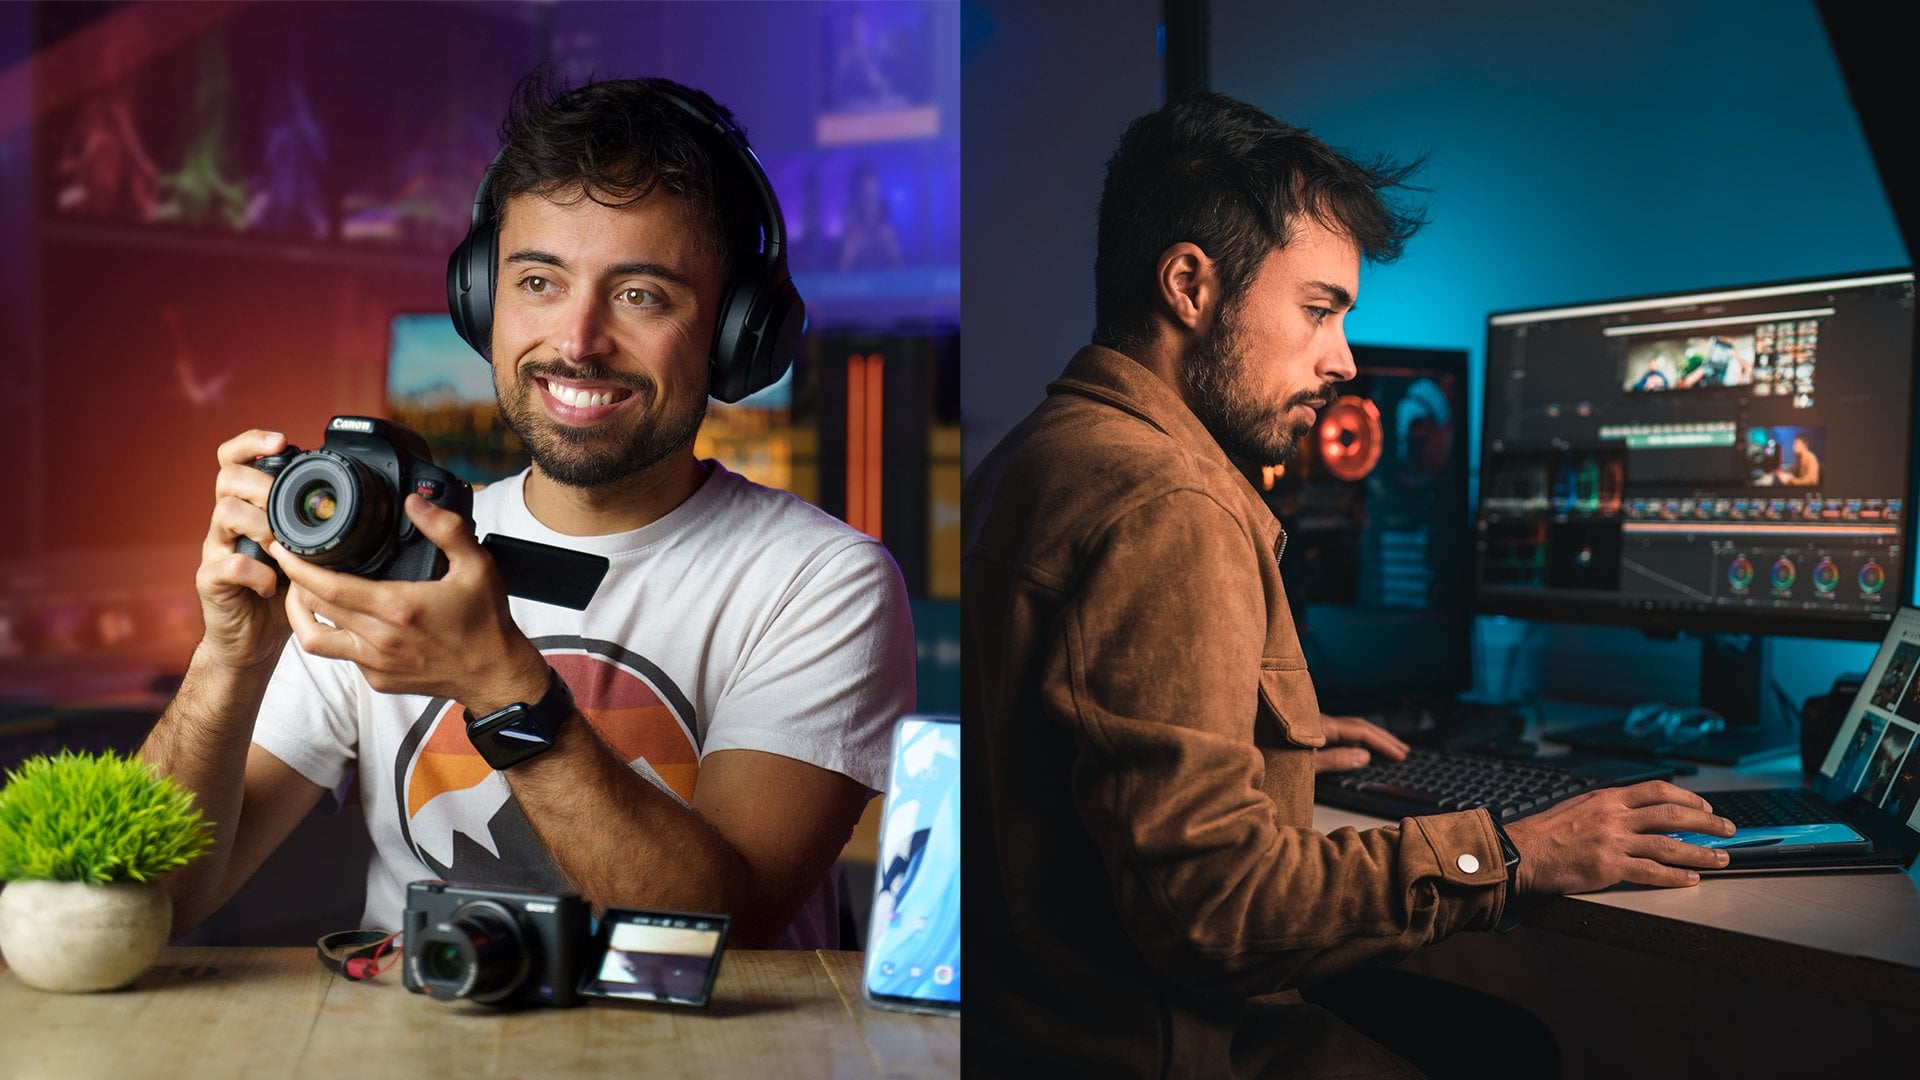
6. Setting Up Your Camera: [MUSIC] In this lesson, we're going to go over the different kinds
of cameras that you might use to
record your videos and how to set them up correctly
for the best quality and avoiding surprises
considering you're going to be doing this solo. Way too many things can happen when you're not monitoring it. First of all, let's
pick your camera. The most basic you probably
already have is a smartphone. All you really need is to stack a pile of books
and put it there. If you want to be a little
bit more comfortable, you can also get a
small tripod for it. It can be with rigid legs or just flexible ones like this small Joby tripod
that I have over here. Now for maximum comfort, you can just set the
selfie camera and be sure what you're
doing at all times. But usually, this camera has a lower quality than
the ones in the back. If you're feeling
confident, you can set up model in the exact same place you're going to be
and make a couple of tests to see if it
works out for you. A strong advice here is to have your camera or
smartphone plugged in. Having to change
batteries or worse, having it run out
in the middle of a recording can
just ruin your day. If you're feeling
like stepping up a notch your production value, you could go for a proper
camera mirrorless DSLR, these are going to give
you a better image quality and some more features. A compact camera like the
Sony ZV1 for example, gives you excellent
out-of-focus. It's so small and portable, has a beauty filter, a product showcase feature,
and it's super stable. My only problem with it is the battery that
doesn't last much. It's got already a
newer brother that actually allows you to
change lenses also, making it much more
complete small camera. But it's a little
bit more expensive, and it's been a little bit
hard to find these days. The same thing is going
to apply to basic DSLRs or more advanced mirrorless
or DSLR cameras. They're going to give
you a much better image quality and features. On screen now, you're
going to be able to see a comparison of many
of these side-by-side. Mostly what you're
going to notice is that in the most
expensive systems, you're going to be able to
blur more of the background, you have a better separation from your subject to
all the other things. You have much more
control over it. One thing that I can
recommend you right now is that even if you
have the budget, I don't recommend you
to go right now to the shop and buy the most
expensive camera you can get. It's much better if you begin just with a smartphone
or whatever you have already and have a feel for it and see what
you actually need. Also the more expensive
cameras need you to invest a little bit more time on
how to properly use them. It's much better to take
it one step at a time. Talking property about how
to set up your camera, there are some features
that I totally recommend to use in automatic, and they're going to make
your life much easier. Others that I totally recommend you to
put in manual mode, meaning that to have absolute
control over them and that your camera
won't do anything crazy in the middle of the shot. I'm not going to go
crazy and give you details about the settings for every variable and camera
that exist out there, but I'm going to give
you a general guideline that you can also find
in the resources section below as a checklist to remind you what to have to
control in your camera. The first setting is going to be setting the camera to manual or pro mode in which you can actually control
everything by yourself. Next step is going to be which resolution
you're going to use. Is it full HD or a 4K? It really depends on
the resulting file you need from this video. As a general rule,
you have to record at that the same size or bigger to be able to export with the same
quality in the end. Just bear in mind that
higher resolutions demand a little bit more on your computer later on
in the editing process. I totally recommend
you to test with your first files to
see how it works out. You might feel, for example,
that with 4K resolution, it's just too slow to edit, and it's going to be impossible to put out videos like this. Then it might be better to make these videos intended before now until you upgrade
your editing system. Imagine a video like
a sequence of photos, and this is how you're going
to choose how many pictures per second the camera is going to take to
make this video. Usually for these kind of
videos, you're going to film between 24 and 30
frames per second. Anything higher than that is
usually aimed at producing some slow motion later
on in the editing. We're going to talk about
it in the B-roll section. Now the shutter speed, and this is going to affect how much motion blur you're
going to have in your scene if you don't have
any things look robotic and natural,
just strange. If you have too much,
things begin to look a little bit dreamy or trippy. If you're not choosing it to
have some artistic effect, usually double the frame rate
is going to work for you. Let's say for example, you chose 25 frames per second
to record it, then a shutter of one over
50 is going to be enough to have the right amount of motion blur and make it
look really natural. The aperture is
going to determine how much of your shot is going to be in focus and not
what's going to be in focus, but how much of it. Usually the smaller the number, more blurry areas you're going
to have around your shot, which can make it
really nice and make your subject really pop
like here, for example, in which I am in focus, but the background is a little
bit soft and out-of-focus. Let me show you
how it would look if everything was in focus. [MUSIC] The ISO is going to be the less resource to compensate if you don't have enough light and there is nothing else that
you can add to it. On a smartphone, I definitely
wouldn't go over 200. On a very basic DSLR, maybe 400, that
would be my maximum. [MUSIC] On a more
professional camera, even 1,600 can be
perfectly acceptable. This is a general guideline, but if you feel
you're going to need much more than that to make for the right exposure on
camera, then probably, it's the time to go back and reassess the lighting
of your scene to see if we can do
something to fix it without having to
resort to the ISO. The white balance is something
absolutely critical to put in manual mode and
set it up by yourself. I've seen so many people
having trouble with it because the
cameras suddenly felt that it was better
to compensate for yellow or blue and just shifting the colors all around
in the middle of the shot and making
a mess out of it. Considering you're
using white light, be it from a window or from a proper LED light you bought, you can set it
around 5,500 Kelvin, and you're going to be just
fine around this range. If for some reason you had no other resource and you had to use a yellow or a blue light, you can use the white balance
to compensate for it. Just checking camera which
temperature makes it neutral. As a reference point,
you can just hold up a piece of paper and
check if it looks white. Now that you know all
these, a pro tip is to record the 30 seconds video
of just you in front of the camera and take
it to the computer right away before
continuing recording. You might notice that some of the settings was not right and you didn't notice which
could ruin everything later. Or maybe that you just
forgot something in the background that you'd
only realized right now. Our key takeaways are start simple and grow
according to your needs, manual control would
definitely avoid surprises when
recording by yourself, and test everything before
hitting "Record" for real. This homework is very
important because one of the worst feelings
is when you take a lot of time to
set up everything around you and when
you try to record, there is some failure or some wrong setting in the camera that just
ruins everything. Just take your time, get
your camera right now, and do some clips around you
just to get the feel of it. I just wanted to check if the settings are
right and you can use the reference in
the guidebook to do so. Record some clips to have
an idea about the light, the shadow, how
contrasted the image is, if the resolution looks fine. But most of all, this
is just aimed at you getting comfortable
of being in front of your own camera and understanding how it
looks from this side. [MUSIC] Now if all looks good, we'll get going in
the next lesson with maybe the most
important part, audio.
7. Setting Up Audio: [MUSIC] Now, there are many different
ways to record audio, but one thing's for sure, overlooking this can
be a total disaster. Just tell me, which of
the following two videos would do rather watch? This is an example of a video
with auxiliary lighting, a cleaner background
but with no microphone. I'm just using the built-in
microphone from the camera. This is an example of a
video with backlight only, but with a very
well-positioned microphone. I'm pretty sure which
one you picked. Let me show you how
to improve this, easy, cheap, and fast. Now, before taking a look at
each microphone we can use, let's take a look at some issues that are going to be
common to all of them. The first one is try to
eliminate as much as possible the surrounding
noises you might have, even from home appliance, for example, a fridge
or air conditioning. Sometimes, of course,
it's going to be impossible to turn
them off entirely. The more you can step away from them is already going to
make a huge difference. This is how it sounds
when the microphone is too close to something
that is making noise. Sound can change a lot, even if you're just
a couple of meters away from the position
you were before. The second one is to be as close as possible
to the microphone. If you're using the internal
microphone from the camera or a shotgun mike
connected to it, have it as close as
possible to you. Right now, for
example, I have mine just out of frame here, which is about one hand
away from my mouth. If you use a lavalier mic, for example, don't
leave it on the table. Just clip it on you and it's
going to sound much better. Now, one of the terrible
enemies for audio is the wind. Probably, it's going to be
better to record indoors, or if you have to do it outside, try to position
yourself in a way that your body is blocking the wind. [NOISE] The first
one is the one that actually goes around the [FOREIGN] There was a sign there saying that there
was a path this way. The more protected the
microphone is from it, the better it's going to be. Usually, lavalier
microphones come with more protection
that you can put on it. Other microphones have this
thing called dead cat, that is just some fur
that will protect from the wind reaching
the microphone directly. But anyway, if you can
avoid it, it's better. Now, the last one is that sound seems to reflect everywhere. The more empty the room
you are recording, the more echo you're
going to get. The more you can add to
it like curtains, sofas, carpets, anything
is already going to help dampen the
sound a little bit. With this in place, let's take a look at
our different options. First, let's consider that
you're going to be using the internal microphone from your smartphone or
from your camera. Without putting any fur to it, this is how it would sound. This is how it sounds
with the smartphone. It's quite far away
from me and I'm not using any
external microphone. With a little bit of care, this is where you can get it to. This is how it sounds with the
smartphone really close to me sitting on the
table. Not bad. One trick here, considering
that you cannot move the microphone independently
from the camera, is to use the widest
angle lens possible. This way you can get the camera as close as possible to you, and this is the microphone also. The next option is a budget
but very powerful solution, which are these
lavalier microphones that you just clip
to your shirt. Usually, all you need is
that the camera has the 3.5 millimeters
check to connect it, or your smartphone needs
to have this port or an adapter to the USB-C
or lightning port, depending on which
smartphone you have. But it's definitely also
possible to use with them and it's going
to sound much better. They can already anticipate
that this is going to be the best value solution of
all the microphones I'm going to present here
because it's such a big leap from not having any microphone to having a lavalier microphone. It's cheap and
really easy to use. Be careful to position it around the chest area and not let any clothes hit
it in the middle, otherwise, it's going to
produce a lot of noise. Other things to pay
attention to are necklaces. [NOISE] Noice because of
jackets or necklaces. If you don't like the idea of having so many
cables lying around, you can upgrade to a
wireless solution, for example, the
rode Wireless Go. In this one, you're still
going to have a receiver connected to the camera
or to the smartphone. But there won't be
any cable between this receiver and
the transmitter, which is actually the
microphone that is going to stay with
the person talking. Now, this is a test to see how the wireless mic sounds in
a very busy environment. I love the solution,
especially when I'm recording outside so that it can be
totally free from the camera. You can get pretty far with it. Lastly and for best audio
quality are the shotgun mics. These usually have a
very nice response to the voice and just
sound so natural. But they are a
little bit bigger, a little bit more difficult to operate and to
position by yourself. Let's make a quick
comparison and listen again how each one of them
sounds separately. This is how the
internal microphone from the camera sounds like. This is an example of how a shotgun microphone
sounds like. This is how a
wireless microphone positioned on my
jacket sounds like. This is how a
lavalier microphone sounds like
positioned just here. Now, after choosing
your microphone, don't forget you're going
to have to set the level of audio also in your
camera or a smartphone. Remember that when
you're recording, you're going to have highs
and lows of the time, so be sure to account for that when you're
setting the volume. Usually, if you see the
outer level control reaching about minus 6 dB,
you're going to be okay. Now, this was less
impactive information. If you have any
doubts, just write them in the discussion
panel below. Let's see our key
takeaways here. Audio is usually more important
than the video quality. The closer the microphone
is to the speaker, the better it's going to sound. Definitely, avoid the
wind and try to turn off everything around
it that makes noise. For this lesson, I
really recommend you to do some audio tests. If you're just using the
microphone on the camera, experiment with
how far can you be from it without
having a lot of echo. If you're using something else like a lavalier microphone, experiment with how high can you put it and that it
still sounds good, and pay attention to
the clothes you're using and where
you're positioning it because if it moves around in the middle and
just makes noise, it might totally ruin your shot. This test will also
help you understand how your camera handles audio
and how to enable it. Of course, this is
going to remind you to set the correct levels, so that you don't have a
very loud voice or very low. In the guidebook,
you're going to find some references
for these levels. [MUSIC] In the next lesson, we're finally going to
get the cameras rolling.
8. Recording A-Roll: [MUSIC] We are finally
hitting record. You should have now your
camera setup correctly. All this through the
beautiful compose be to have one or two cameras. Now check our battery levels
and plug everything you can. Check how much time of
recording you have in each SD card and set yourself a timer not to lose
track if necessary. This is considering
you're going to be recording everything
by yourself. If you have some help, then you can be a
little bit more relaxed about this stuff. Now grab your script and
position it right outside of the frame or make it
part of the scenery. One thing to remember
is that you're not talking to a camera, you're talking to a person that is watching you right now. It's important to keep the
spirit and to look into the lens and not to the
LCD screen, for example. Now one less technical aspect is which kind of focus to use. I don't mean your own focus on the script or
something like that. But if you're going
to use out-of-focus or manual focus on the camera, if you're pretty
sure your camera has good autofocus and
you can rely on it, then just go with it if it's
going to be much simpler. If not, I would totally suggest that to put
it in manual focus, set something in the same
place you're going to be sitting and just focus on that, like this you can be
sure that nothing is going to change in
the middle because focus is something
that can be extremely distracting and can
ruin your shot. If you already recorded
it, then it happened. You can add now
something on top of it, another image just to cover for it in those seconds
where it happened. But the best thing
is to avoid it. In some cameras you'd
have to flip a switch and in others you just have
to do it on the menu. Extra trick; it can be really useful to see yourself
while you're filming, just to be sure that
all the framing and everything looks good. So if you have a camera that has an articulated LCD
screen that you can just flip around,
perfect. Use that. In case you don't
like, for example, using a camera that
doesn't have this kind of screen or maybe
you're using your phone, but you really wanted
to use the better lens, you can try positioning
a mirror behind them. Like this, at least you can see if it's recording
and have an idea if everything is in
place and nothing behind you fell down or
something like that. This is the time
to hit record on all the cameras and we are live. The first thing
to do now is just to give three loud claps. [NOISE] You're going to
understand this much better later on when we're in the editing to synchronize all our files. Now breathe deeply and
count to three before starting talking and also
at the end of a sentence. This is going to give
you some space between sentences that can be really
useful later on to edit. As for myself, if I'm not
using a teleprompter, it's really difficult to
memorize very long sentences. What I do is that
I break them down in much smaller ones that are much easier to carry on and also give it the right attitude. Just be sure that if
you make any mistake to start a sentence all over
again from the beginning, instead of trying to retake a word that was
broken in the middle, like this it would just seem
like you were on a roll and talking to the camera and
you never actually stopped. Like for example, what
if I told you that this very last part
that you listened to was cut in many different parts and you didn't notice.
Do you see it? With some re-framing and cutting away to the
secondary camera, you can just eliminate this stops and it
just feels natural. Just be sure to keep
a notebook close by for you to write down
some things that happen. Let me give you an example
about the notes that I would do if
recording something. Mainly two things
are going to happen when you're recording yourself. The first one is that
you're going to make some mistake and you're going to have to begin a sentence
all over again. In this case, I just
find too boring to stop recording
and begin again because maybe it's
just going to happen way too many times for
it to be practical. My solution in this case is
just when I get it right to give it a little bit of
time before I continue. But in case you're
reading, you're not making that many mistakes. It might be easier if you
just stop recording and start over again to have different
takes of the same thing. You can check in your camera
or in your phone what's the name of the file
you have right now. Probably it's going to be
on a numerical sequence. In my case, for example,
I would write down that my first test clip
was named C001. That then I record the
three different times the same thing and they are
the Clips 02,03, and 04. Beside these on the table, I could write that 02 was
good but not very fluid. Maybe 03 was very
good and 04 was good, but it wasn't better
than the previous one. This is just going
to save you so much time because later in the editing you don't have
to watch all of these again. You already know that that file in the middle is the good one. Of course, sometimes it might be useful if in doubt for you to watch again in the
computer to have a view also of how you looked. But this is already
going to give you a very good reference about
what to pay attention to. One other thing that
can happen is if some loud noise happens
in the middle of your recording but you
don't want to stop it to begin again because it was
just something very quick. You can check on the screen of your camera for how long
you've been recording, write down this time code so
that in the editing later, you already know
that you have to pay attention to that moment. Now for this lesson,
I want you to do something exactly like this, a talking head shot
to the camera so that you get feel of
being in front of it. You can also use the template
linked in the guidebook for you to write down what
happens during your session. One other suggestion is
trying not to record a very long session
in only one file. First because some
natural disaster can happen like for example, your battery running out. But most of all just
to try to protect it from small failures
that can happen. Like for example, the microphone cable unplugging
itself for some reason or maybe some noise in the
background that you didn't even realize was
happening at that moment. Onto the key takeaways
of this lesson, give some breathing time at the start and the
end of your shots. Keeping notes of
interruption and cuts will immensely help you
later in the editing. Constantly assess if everything
is running smoothly. Assuming everything
is going alright, you have A-roll recorded, and now it's time
to grab the camera, and let's record some B-roll. [MUSIC]
9. Recording B-Roll: [MUSIC] In this lesson, you're going to learn how to film the videos
that are going to be supporting what
you're talking about. These help the viewer
understand the context, and also contribute to grab their attention
instead of having just a fixed and static
shots during all times. Now the principles
for positioning, depth and light that
we talked about before they all apply here also. Separation from the background
and good lighting are key. Now for the B-roll property, you're going to
have to be moving your set around a little
bit, especially the lights. For this I like to
write down a list of everything that I want to
do in a specific position, and do all my B-roll
there at once. Only then I'm going to be moving around my camera and lights to other position to
continue working from there. This is going to save
you a lot of time, but requires just a little
bit more organization, especially when
writing down what all the shots that
it took refer to. To prepare a B-roll
shortlist you can download the templates that is
linked in the guidebook. There you're going to be
able to fill it up with all the bureau or
additional information that you need to be
able to complete your message on top of
your talking head video. The way that I like to
go about it is watching all the talking head videos once again and in the template, filling it up with
everything that I want to show in those moments. Meaning that I'm going to insert the time of the video
in which I want to insert something else and
what do I have to show there? But in this moment I'm
not really worried about how am I going to show it. Just what? After I
finish this first pass I have an idea of how many
things do I need to shoot. This now is also
going to give me a rough idea about
how many shots of the same thing I'm going to need to perform to convey a message. Like this, I can
start brainstorming, how can I show it
to the best way? Maybe it's positioning
on a nice place, maybe it's just creating different movements
with the camera around it so that I just have some variety of shots
that I can use later. With these, you also
going to be able to fill the information about where
you want to shoot this. After this list is ready, you can just filter it by location and do
everything that you need in the same spot and
then move on to the next. You're going to see that
in my example shortlist, there were two main columns. The first one was talking about where I was going to shoot it. The second one was saying if the studio is going to be all closed with the lights on or if it was going to
use natural light. This allowed me to save so much time by
not having to move around too much and opening and closing curtains
all the same. Now for this lesson, I
wanted to write down three different B-roll
shots that you're going to use in your project video. Try to think of different angles and movements for
you to showcase it. Definitely avoid the eye
level looking down shot, try to get closer, try to get lower, try to insert a little
bit of movement. Everything that you can do that is a little bit different from the normal eye level perspective is going to generate
much more interest. If you're going to
film yourself doing some activity like painting, drawing, using the computer, you're probably going to be
better off using a tripod. Then you're just going
to repeat the same sequence over and over. First place the camera according to your taste and the light. If it's an artificial light, then placing it in
the proper position or positioning yourself
according to it. Controlling if manual
out-of-focus is set, recording and repeating. In case you're going to
be filming at hand-held, then some other tricks apply. First, maybe you're
going to want to bump up a little bit the frames per
second on your recording. Remember when we talked
about it before, the frames per second
are the amount of pictures the camera is going
to take within a second. Now let's just think about it, there's a book, for example. Imagine that the person watching your video later
on is going to be reading your movie at
25 pages per second. Now if you record at 100
pages or pictures per second, it's going to take the same
person four times more to be able to see all
those pictures or pages, meaning that it's going
to feel like slow motion. This helps a lot also for
stabilizing the footage. Watch this clip
without slowing down. [MUSIC] Now in slow motion to see how much of that
jitter just goes away. [MUSIC] Now, if your intention is not
to slow down the footage, be sure to check in your
camera if you have some in cameras stabilization
or maybe on your lens to make
it much smoother. In some cameras like
the ZV-1, for example, you're going to be
able to choose between standard or active
stabilization. Usually the more stable options are going to crop
in a little bit, so you have to account for
that when you're recording. Are there good tricks
to be stable is to try to support your elbows
against your body, move really slowly and
preferably just by transferring your weight
from one leg to the other. It takes a little
bit of practice, but in no time you're going
to be doing amazing B-roll. One other cool trick is to put the camera on top of
some clothing and just slide it
around the table or the floor to make
it really fluid. On smartphones, be sure to check in the
settings if you have some super stabilization option. Usually it comes at the cost of reducing a little
bit the resolution, so be sure to check it. Now as a general rule, it's important to create
some movement, be it with the object you're filming or with
the camera itself. This generates much more
interest in the scene. After all, we are talking about video and not just photography. You can transfer the
weight of your body laterally or maybe
forward and back, you can use this lighting trick, you can move it up and
down or maybe behind some object to create a little bit more
depth in the scene. The key takeaways
of this lesson are, organize a shortlist
to avoid wasting time, there's no motion
can make B-roll much more stable if handheld, and movement creates
more interest. Just remember, you don't
necessarily need to show absolutely everything
you're talking about all the time, otherwise, too many cuts can also be so distracting when you're
watching a video, and then the audience loses
the connection with you. But when using the right moment, it can change the
rhythm a little bit and illustrates something that maybe for the viewer is not that obvious
as it is for you.
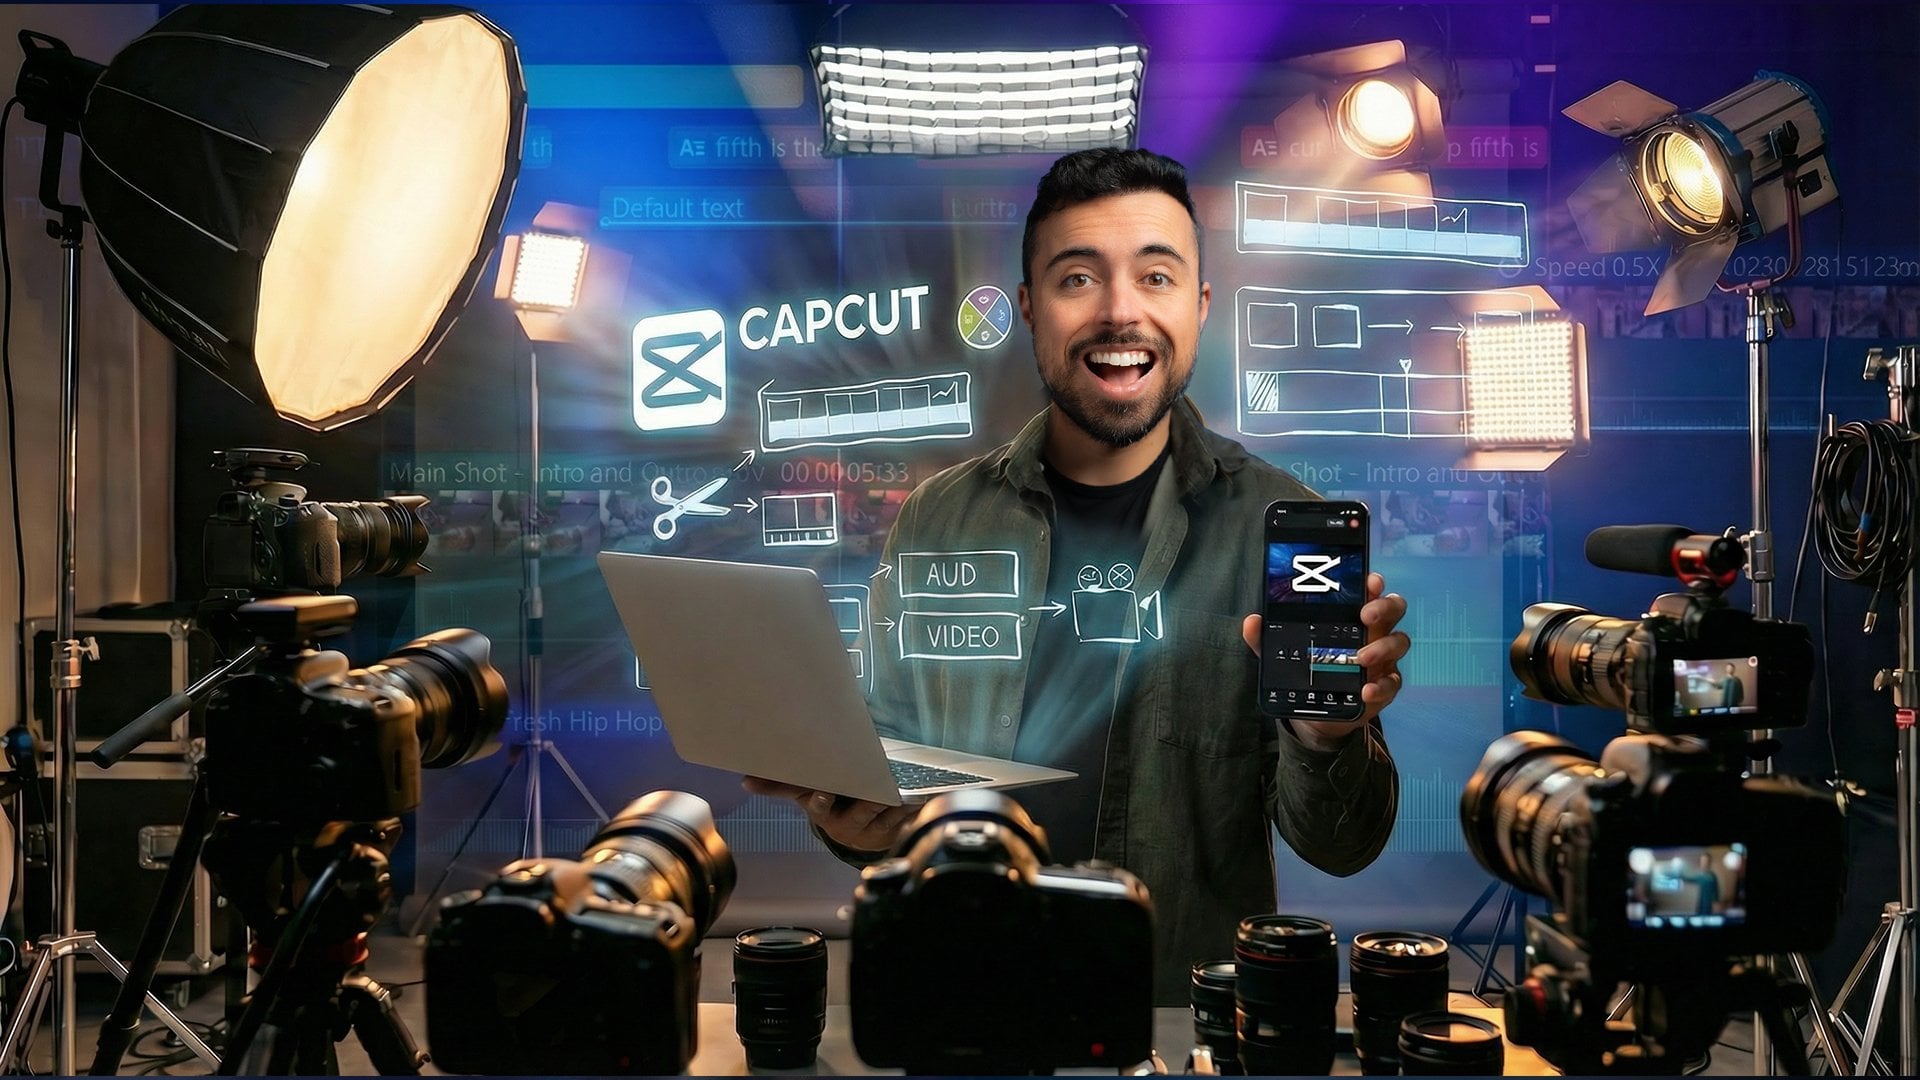
10. Importing and Editing: [MUSIC] So you carefully filmed everything
you needed and now it's time to put
it all together. In the next few lessons,
you're going to be seen me using Da Vinci Resolve, which is a very good software to edit and works either
on Windows and Mac. Also other softwares that
you can use and they are famous and very good
also are Adobe Premiere, that works on both platforms or Final Cut that works
only on a Mac. If you're going to be
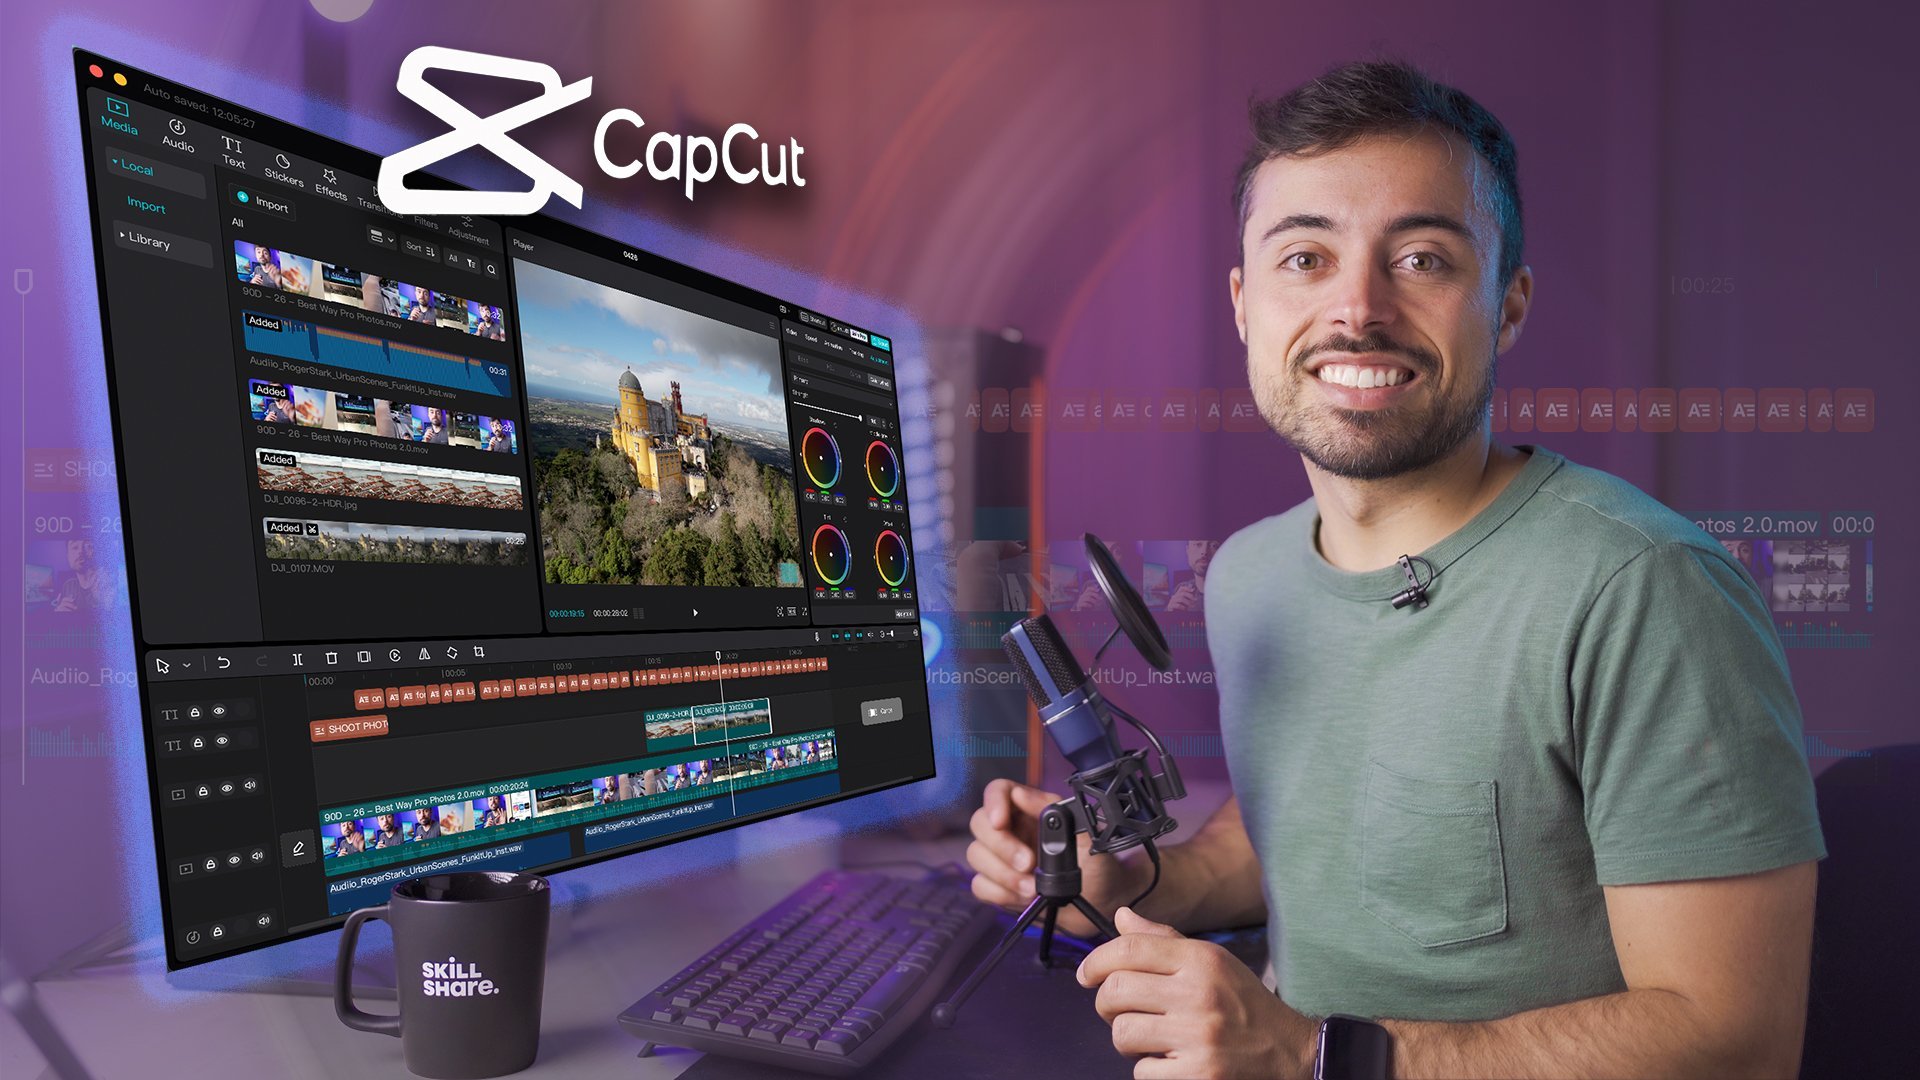
editing on a smartphone, I can totally recommend CapCut, which is totally my
favorites, and also VN. Now it's time for you
to get your SD cards or transfer your files from your phone into the computer if that's where you're
going to be editing. Let's open Da Vinci
Resolve and begin. Let's open the Da Vinci
Resolve over here. This is the paid version, but everything we are
going to use today are tools that are included
also in the free version. So don't need to worry. To begin with, I'm going
to create a new project down here and I will just name it Skillshare Editing
Lesson and create. Now it's going to create
a new project with the default settings
from Da Vinci Resolve, but you can always
come down here, click this gear to and
then you're going to be able to see all the settings you have for this project. The most important part
here is going to be to check what's the resolution
of your timeline. In this case here
the default was 4k, but we're going to
change this to 1080p, which is this version over here. The rest is fine, 25
frames per second, which is what we're going
to be using and I will just hit Save and we're good. Now every editing
software is going to have different panels for you
to do different things. Mainly there's going
to be one panel for you to import your footage, one for you to edit, one to treat audio, one to treat color, and one to export. But you don't need to
worry about all of these, we're mainly going to be using the edit and the
export pages only. In the Da Vinci Resolve, you can access them by going down here into these icons and I'm just going to go
into the edit page. If you are in Premiere
or Final Cut, there will be a similar page over there
where you're going to be able to see all
the editing tools. In case you're not
seeing something, you can always come
up to Window on some softwares or
Workspace and you're going to be able to see
here what's on and what's not on the screen
for you to be able to use. Now first thing we
have to do is to bring everything
inside the software. I'm just going to
open here the folder that I separated just for this. Most editing softwares
accept you just carrying a folder inside it and it's going to keep
the same structure, so you can already
organize your files before and just drag them in. That's what I'm going
to do, I'll just have here one folder for the smartphone videos and one folder for the
camera videos. I'm just going to
select them both. In the case of Da Vinci, I have to drag it
over the master over here and it's going to
ask me if I want to change the project frame
rate because the files, some of them are different from what we just set
inside the Da Vinci. I'll just click, don't change, just keep it and now
everything is inside here in their respective
folder all organized. Now Da Vinci, you're
already going to have a timeline ready for you to
work down here on the right. Another softwares like
Premiere for example, you're going to have a
button just for that, which is like a blank
page and you just click on that and
choose new timeline. In this case, I'm just
going to go to Timelines, Create New Timeline
and it just asks me if I just want to use the
same project settings that we set before, what is the name? What's the kind of audio
track that I want? I'm just going to cancel
because one is created already. I don't need to create
a new one for this. Remember, for example, when
we talked about filming in vertical and if that's
exactly what it did, what you're going
to do when you are creating a new timeline is inverting the numbers
for full HD for example. So instead of doing
In 1920 by 1080, you're going to do 1080
by 1920 in the height. Let me show you
how it works here. For example, I have two
files from the Sony camera. I'm just going to grab
one of them and I'm going to drag it over
here to the timeline. Now you're going to see two bars divided by this line
here in the middle. Let me zoom in a
little bit and you're going to see a
little bit better. So this blue bar up here is
the video part of your fire. Video 1 is exactly the name of this layer and below
here you have Audio 1, which is the audio that is
connected to that video. If we play it here, you're going to be
able to see that it's exactly the
audio for that video. Here you're already
going to be able to see how long is it. Here you can see that it's 27 minutes long, just this file. Now, in the audio and you
probably noticed already, you have some gaps and you
have some of these spikes. What you can see is exactly where I was talking and where it was just silent or at least I wasn't talking really
close to the microphone. This is going to be exactly
the queue we are going to use to know where
to cut this file. I'm going to show you. But
before we begin cutting, there is something
really important to do. In case you used two
or more cameras, it's much easier
if you just bring them into the
timeline right now, than later on. I want
to show you why. The other file we had
was this one here. So I'm just going
to drag it over. I'm going to make
it a little bit bigger here for us to see. You can always see
this preview of what the file is everywhere. As you can see, this one
was my main camera and this one was the
secondary camera and both audios are here. Now for us to see very
clearly which one is which I'm going to
right-click and I'm going to go to Clip
Color and change the color to violet,
for example. This one here, I'm going
to do the same and I'm just going to change
it to orange. That's really clear which
order belongs to each video. As you can see, the
audios are not matching, meaning that if I
just go over to this position and I hide
this layer for a second, I'm not in the same
position in both videos. So I have to align them together and this is
where you're going to choose both of them by
dragging around like this, right-clicking and just going. In Da Vinci its auto align clips based on waveform and
the software is just automatically going to align both and you can see that it's perfect because the shape of the audio just matches
perfectly one of the other. Before in the recording
arrow lesson, I told you to give three loud
claps for you to be able to use later in
the editing stage and this is exactly why. Sometimes the talking is just not enough for
the software to understand what's going on and the clapping really
helps for this to work. Now if you're in a
controlled environment in which you can see
here, for example, the moments that I'm not
talking, it's almost silent. It's not going to be a problem. So you don't really
have to worry about it, but in case this was
much more mixed, the claps just solve the issue. Now I'm just going to
quickly hide the Media Pool here for us to be seeing
these a little bit bigger. One thing that you
probably noticed is that we have this Preview
Window up here. This is showing the frame
from this video in pink. What happens if I hide it? Then you begin to
see what's below, which is this video over here, meaning that what's on top has the preference over
what you're looking. Imagine that these videos
are just like photos on a tabletop and you're actually putting them one on
top of the other. So the only thing you can see is actually what's on the top. If you just remove it
temporarily like here, then you're going to
see what's below. Now mainly what you're
going to need is to use the cutting tools to be able to split this file
into what you need. For example, let's just go here close to the first
part where I'm talking. So now the class project
couldn't be anything else than. Now the main idea
of editing is just going to be cutting
things around, using the right tools
for that and selecting the parts and moving them to wherever you want them
on your timeline. For example, here we
have these two videos, and I can see that
I tried to say some sentence about
three times over here, and the last one is
the correct one. I'm just going to come up
to here and I'm going to grab the blade tool
that you can see here that you can
access by clicking or using a shortcut
B on your keyboard. Let's just press in B. Now wherever I place my
mouse on top of the video, you're going to be able
to see that blade tool. If I click, it's going
to generate a cut. As you can see, it just
created a board there in-between this part over
here and this part over here. If I go back to the
selection tool by clicking here or typing A
on the keyboard, I'm going to be able
to select the part on the right or the
part on the left. But just notice that the video in orange
hasn't changed at all. It means that I'm just cutting
through the first slides, but I'm not going
through to the end. You can either use the
blade tool to cut them both if you want and it
cuts video and audio, or you can use one tool, that just cuts them altogether. Now as you might have noticed, it's going to take a long
time if you have to cut twice every time that
you're to cut something. I reassign some keys on the keyboard to make it
as fast as possible. This is something that
are going to be seen in mostly all of the
editing softwares. There's a very high level
of customization you can do with your keyboard to
make it faster to do things. In my case, I assigned three different shortcuts
that I use absolutely all the time and
makes editing so much faster, which are Q, W, and E. We're going to
show you what they do, but you can also find
some extra information about it in the guidebook, attached to this class. In this case, for example, E is the one that is going
to cut through everything. I can just press it once
and as you can see, it just slice through
all the clips, and now I can move any of these independently
if I want to. The other ones that I
mentioned, they are Q and W. Q is the one that cuts everything that is behind the play head until
the first cut. Let's see, for example,
I'm just going to drag this layer
head around here. Let's say that I wanted
to begin from here. I need to delete everything
that is around here. What I could do would
be to make a cut, select them, and
then press Delete. It just brings everything back and we achieved what we wanted. But there's a faster way. I can just come up to here to the same position
and I can press Q, and it just cuts and cancels everything that
is behind that point. Here is absolutely [NOISE]. Imagine that I want
to cut what's between the last part of the sentence
here, and the first cut. Instead of cutting,
selecting, and deleting, I'm just going to press
W and it just cuts everything and brings it all
together so much faster. When I have a small
timeline like this with just two clips, it seems that it might
be useless to learn this thing because you
don't actually gain that much more time
just by doing this. But when have several
layers and you've been doing this
for half an hour, one hour, this shortcut saves so much time because
it all adds up together. Your job from now on is just going through the
whole timeline, cutting and deleting the
parts that you don't need anymore so that we end up
with something like this. [MUSIC] As you can see, using these was
quite quick to just get through all the videos
and audios in here. Mainly I used key, W and E to do all this cutting. Now besides all this cutting and deleting and dragging
the clips around, there's one other
thing that we're going to use very constantly, which is dragging the
edges of the clips around to make them shorter
or a little bit longer. Let's see, for example,
this clip over here. When I drag it over and
you can just see that I finish talking and then I just changed my
look to the sides, to the script, and then you
go to the other camera. We need to reduce this
part here to cut it. Before I do that, so would be around
here, for example. Now, if you should
drag the mouse really close to the edge of that clip, it becomes something
different with an arrow. If you click it, you're going to be
able to see that now, you can just drag this clip around to the right
or to the left, so cutting or
expanding this clip. In this case, I'm just going
to clip it until here, whereas exactly where my look
finishes for both of them. Then I can just drag this one. Now the connection is
seamless and we don't have any looking around
or something like that. If you need to
cover for something a little bit more
serious or long. So if you're in a
desperate situation, you can just come
to your bureau and lay it on the timeline
exactly on top of that point, and then the connection between one clip and the
other is going to come through the clip that
was laid there before, is going to alternate
to the bureau and, then we can also
credit back here. It's going to go back to
this second clip normally. The idea is to make the
video flow and not make your spectator notice everything that happen in the backstage. To navigate on the timeline, I was just carrying the play head around until
the points that I wanted. Probably you'll notice
that I was zooming in and zooming out and also moving
laterally on the timeline. This was just achieved by
using also some shortcuts. If you press down
Alt or Option on a Mac and you use this
scroll up and down, you're going to make
it bigger or smaller. If you press Control
and up and down, you're just going to
navigate on the timeline. In some other editing softwares, this is actually inverted. Alt is going to allow
you to go around and Control is going to
make it go up and down, so it depends, but also the other controls are usually on screen like
here, for example, that you have the zooms lie there that you could just use, or you could just navigate
around using this. But after a while when
you learn the shortcuts, it's just so much faster to do that way instead of
having to go with the mouse where
you want to go and then moving everything
to the right point. Again, all these shortcuts are going to be
on the guidebook. Let's go for the key takeaways. The first one is that laying the clips on the timeline
and synchronizing them has to be the
first thing you do when editing multi-cameras. The first cut of
the video is super important for you to
have an idea of where it's going and
what's going to be the base for the rest of
the video, the foundation. If you have any
experience with editing, you already know that it's not a very complicated puzzle, it just needs some practice. But if you never had any contact with an editing software, I really recommend
you to open right now the one of your choice and try importing some of the
files that are shot from the previous
lessons and homeworks. Learning a new software
always requires you to have a little bit of
time of getting used to. Just import some of the
files you already have, throw them on the
timeline and just begin chopping them
up into pieces that you actually
want to use to have the feel for the software
and how it operates. If you want to already to become a much more skewed editor, go check the guidebook
where I left a lot of shortcuts for you to
experiment and memorize. You can also print the page and have it by your
computer so that you can quickly refer
to it while you're editing and memorize
them forever. [MUSIC]
11. Timing Your Edits: [MUSIC] Now the next step is going to be creating some
gaps in the video that is on top for you to be able
to see the lower one. For example, in here we're just seeing myself in
the secondary camera. Choose one of these
like this, for example, to alternate between the camera here in this part that finishes just around here in this cut and then to this other
cut over here. To do that, you just have
to select this video and cancel it either using
delete or backspace. Now if you use delete, it just brings everything over here to the left
and we don't want that. I'm just going to click and then hit Backspace and that's it. Now since we don't have that
video over here anymore, you're going to be able to
see the video that is below. We just created a change
[OVERLAPPING] in this part. The important thing to do is to decide which audio track is going to be your
main one because in this moment they're
just the same, but they're coming from
different cameras. In this case, the audio
connected from the main camera was the one that had the
microphone connected to it. What I could do is just delete all the audio
that is down here, but I like to keep it just to be sure that everything
is still synchronizing. That I didn't move
anything by mistake. What I usually do is that
I just come up here, to where these controls
on the audio track, and I mute this track. This way, I can always
have the track over there. I can be sure that
it's synchronized and if I play [OVERLAPPING] I'm actually just playing
with my track over here. But don't worry, we're
going to going to detail on every step of the process. Now sharing this video
in the project together, is vital for you to really
learn what's in here. Now once you've done
this rough cut, it's time to bring
in the bureau, all those complementary
images that you shot for us to put on
top of this video. In other words, you've seen
this basic preparation. I'm going to bring
in the videos from the example project that you saw in one of the first classes, and here we have it. In this part, I'm just
talking about that I'm moving things around to find the right spot and
that I'm using a pile of books to support the
smartphone too film myself. This is where I want to
bring exactly that image. To do that, you can just come
back to the meter pool over here and you're going
to be able to see all the other shots
that it took. If you just pass
the mouse over it, you're going to be able to see a very quick preview of
what these files are. One other mode of doing
this is coming up here and choosing this dual Windows
setup, in which you can. For example,
double-click this one. Now you have all your
files over here. You have a preview file here about what you just
clicked and you have here, what's on the timeline. If I just scroll over
here [NOISE] you're going to be seeing
the timeline itself. If you scroll over here, you're just going to see
the video that you're about to insert into the
timeline, like this. You can choose just
the piece that you want and bring it
into the timeline. In this case, I'm talking
about the pile of books and the smartphone
being on top of it. I just want to bring in
one of these images here, for example, in which
you can see the light, the pile of books, and the
smartphone just down here. Let's say I wanted from here until this part
here, for example. To do that, you can just drag and drop this
on the timeline, but then it's going to
bring the whole clip inside and I don't want that, or you can just select here
the part that you want, type I on the keyboard, which makes an endpoint, and just go to the end and type O and it marks
the outpoint. As you can see, it
highlighted here on this small timeline just
the piece that I want. Now if I bring it in, it's going to bring
just that piece. Probably you noticed that
when I hovered over here, appeared two different buttons. One for video and one for audio. You could actually bring to the timeline just the video or just the audio or if you just click on the image
itself and bring it in, you're going to be bringing
everything together. I'm going to delete because
in this case actually, the only thing that matters
to me is the video. I'm just going to bring in the video and just
position it exactly. I'm using my smartphone as my main camera on top
of some Math books, they're good for that offset. I show exactly what
I'm talking about. Now if you watch carefully,
the Bureau lesson, you know that some of these
clips might've been shot in a higher frame rate
than 25 frames per second. To see that, you
can just come up to here and make it a list instead of this thumbnails and you're going to
be able to see FPS. Other editing softwares
just the same. You're going to be able
to see these pool of media as a list
or as thumbnails. You can see this
column called FPS. You're going to be able
to see that, for example, this clip over here
was shot at 60 FPS. Let's see which one it is. It's this one over here. Let's bring it into the timeline directly also. We can do that. We're going to be
able to see that it's just playing real-time, just giving a small glimpse into the light that I was
using to record. What I can do here is select
this footage and press R on the keyboard and
it's going to bring up the change clip
speed dialog box. In other softwares,
also the same. Can be control R or you
can also right-click and go into real-time controls
or change time, read time. It's always going to be
something around this. In my case, I'm
just going to press R and here you're going to see speed frames per
second or duration. You can simply
change one of these and it's just going to calculate
for you what you want. Let's say, for example, this
is 60 frames per second. Let's slow down this
clip the maximum we can. Since we are on a 25 frames per second timeline and we
have 60 frames per second, we can still slow down
this to 40 percent. Let's put here 40 change. Now if I play this back,
you're going to be able to see that it's just slowed down to 40 percent speed perfectly without any problems
of skipped frames or anything like that because
we had more material than we actually needed
to in this timeline. We are almost good to go. Let's add one more
item to this timeline, which is music, because we have an
edit anything yet to the audio part
of this project. I'm just going to
drag one wave file over here and it's
the same thing. If you just double-click it, you're going to be able to
see in the preview panel here all the waveform
of the song. You can just select one part or you can simply drag and drop. In this case, you have to
drop it on the audio part. You don't need to
create manually one new track here for
you to insert something, you can just drag it. I'm just going to do it again. The moment you position it below a track that
already exists, automatically the software
creates a new track for that. We don't need it, so I'm just going to put it back there. If you make it bigger over here, you're going to be able
to see all the track laid out here for you. It finishes around here. [MUSIC] You can see it's impossible to understand
anything that I'm saying because it's way too
loud, the music. But controlling the volume on audio tracks it's super easy, and you can do it directly here without using any shortcuts. As you can see, this
small white line that is passing
here in the middle, the moment you pass
the mouse over it, I'm going to zoom in
to make it even clear, it becomes this double arrow
thing that you can just drag and drop to increase or decrease the
volume of something. Let's do it here, for
example, for this song, I'm just going to click
and drag it down. You're going to be able
to see how much we are decreasing in dB, in real-time, and also the waveform
going smaller and smaller, which also makes it much
easier to understand if it's being reduced or
what's happening here. I'm just going to leave
it here around minus 40 dB and let's
play it back again. I'm using this ear buds as my microphone and sometimes
when it gets a bit darker. Now you can't even listen it. I'm just going to drag
it up a little bit. I'm using also a
small light from aperture that was
recommended in the course. Now you can here. Now
it's working pretty good. You just have to regulate so
that the audio of the song doesn't overcome your voice and then it becomes too
difficult to understand. Let's go for the key takeaways. The first one is that lay the clips on the timeline
and synchronizing them has to be the
first thing you do when editing multi-cameras. The first cut of
the video is super important for you to
have an idea of where it's going and what's
going to be the base for the rest of the
video, the foundation. Use different cuts to
keep the video flowing. One exercise here
that is going to help you understand
better the relationship between the amount
of frames per second that is shot on your
camera and your timeline in the editing software
is to just grab one of these clips that are supposed
to become slow motion, throw them in the timeline, and just slow them down
and see how they react. Let's say for example,
you have 100 frames per second clip and the timeline is 25 in the sense you could slow it down up to
twenty-five percent. I want you to configure
it like that, see how it looks, and then try some
higher percentages, for example 50 percent, meaning that it's
going to be slowed down only to half of the speed. Then try 75 percent and see how much that
slows down the clip. In the guidebook, you're
going to find some references about the frames per
second and how much you have to slow them down in percentage so that you
have similar results. But what I want here
is just for you to pay attention about how fluid a clip looks with different speeds and also
how stable it looks. [MUSIC] Now that you know
the basics of video editing, in the next lesson
we're going to talk about creating smooth edits.
12. Creating Smooth Edits: [MUSIC] Editing a video is
much like telling a story. The more fluid you can make it, the more interesting it is
for the person watching it. To generate this feeling, there are many
techniques that you can use inside the editing software. Let me show you some of them. The most common way
of cutting a clip is seemingly a rough cut in
which one clip finishes, [NOISE] one begins
immediately after it. But there are some other
ways that we can do this that helps flow the video
a little bit better. One of the most used ways of joining two clips together is using an effect that exists
in all editing softwares. The name is usually something
around Cross Dissolve. Here's how you apply it to. You just drag it over to the connection
between the clips. You can see that now there's this rectangle exactly
around the edges over here, which means that if
you play it back, it's going to
[OVERLAPPING] Let me just show you one and a
little bit bigger over here. To share with our community. [NOISE]. What happened here
is that one clip fades out and the other one fades in while the
other is still visible. It makes them connected somehow. You shouldn't
overdo this effect, but in some cases it
can be a nice way of going from one
clip to the other. Next up we have J and L cuts, and they are named like this, exactly because
of the shape they generate inside the timeline. The J cuts are the ones in
which the clip below is going to be heard before it actually appears on the
screen. Let me show you. Let's open up some space
here, for example. I'm just going to
drag this clips up to create some space. I'm just going to zoom
in a little bit and you can see the camera
ends around here. If I grab all these
clips that are here, and I anticipate them until the audio hits exactly
the play head. It means that when one
finishes immediately, [NOISE] topic is going
to be a present. In this case, since
we're not cutting away to a different camera, It's a little bit strange. I think it's more interesting
if we do it like this, for example, we have this angle and then we cut
away to this other angle. Let's see how it sounds.
[OVERLAPPING] The topic is going to be a presentation of
your area of camera. You just listen it a little bit before you actually
see the image. It just connects it and make it much faster and more fluid. Now the L cut is the opposite. You're going to be able
to see the clip ahead, but you're still
going to be listening the clip that came
before like this, for example, I
already positioned one in which [OVERLAPPING]. [MUSIC] You're already
seeing the next clip, but you could still hear the
ending of the clip before. Now a cutaway is simply like we were adding B-roll
before in which you're just like cutting from
one scene to another and then coming back
to show something, to explain something
or even to cover some mistakes or errors then that row and behind the scenes. But don't worry, we're
going to go into detail on every step of the. You can still listen
the clip from before, why you're seeing that image. You can already anticipate
what's coming in the next one before you
actually see it. It's a very interesting
technique also, to make everything
flow together with just an abrupt cut between
those two clips there. Now you probably
noticed by now that this cutaway is from one
camera angle to another, have a very specific reason. This is exactly to give
some flow to the video. Like for example, in
this part here in which the main camera,
[OVERLAPPING] [NOISE]. Then I have to take a
look at the script to understand where
should I go to now. Then in this point, I can simply cut it and just
connect it to the next clip. It's going to look like this, [NOISE] now sharing this video. It just looks strange because we are in the same
position and I just [OVERLAPPING] and that continued from another hand position
in the same place. Two things that we
can do here are, one of them is simply cutting
away to the other angle, to the other camera. In this case, we can just see, of the process,
[NOISE] [OVERLAPPING]. You've seen it throughout this whole course and
its exactly like this. It just gives flow to speech that was actually
stopped before. Now once you get there,
you can use if you have just one camera is to
change the framing, so for example, you can
go from this to this. You can actually just come to the Zoom and just make
it a little bit closer. Then you have this. [OVERLAPPING] It's a
little bit of a jump, but it just makes it more interesting and actually
still looks natural. For most editing softwares, you're going to find this panel over here that allows you to change many things about the video or the
audio of that clip. This is like a Properties tab. There are so many
options inside here, but one that you're
going to be using very often are the scale, which in this case it's
called Zoom the positioning. You can simply move in
the x axis or the y-axis. This video, up and
down or laterally. You can zoom in and out. You can just use
these to reposition your framing and then make things like this
cut for example, or simply showing something on screen that you
wanted to highlight. Let's go to the key takeaway. Use different cuts to keep the video flowing
more naturally. Don't exaggerate on
one style of cut. Otherwise, the video just
becomes predictable instead of flowing together and
it just becomes boring. If you've already imported
some talking head video into your editing software
and cut it up a little bit. This is the perfect
timing for you to try some J and L cuts.If you didn't, this is the moment for you to import them and do the same. This exercise is
going to help you understand a little
bit better about how multiple layers work and how much of this cuts is
going to be too fast, or how much is going to just make the editing a
little bit more fluid. With time, you also
develop some sensibility about it and it's just going
to get better and better. But for now, just try it out and see how it looks and sounds. [MUSIC] In the
next lesson, we're going to be talking about adding some text and visuals
to finalize your video.
13. Creating Titles and Effects: [MUSIC] Your video is almost
ready to go to the oven. We just need to spice
it up a little bit. We're going to do it by
adding some titles, texts, things that will enhance the message that
you want to pass, and also some sound effects
and visual effects. For titles and visuals, you can usually find the library inside your own editing
software, like on the video. For example, you're
going to be able to find under effects library, a very vast collection of many things you could
use like transitions, audio transitions, many different titles that
you just need to hover over the name to see what
exactly they are going to do and also generate
some solid colors. There are also some special
effects like pretending that you're on TV or just
on a DSLR filming. This can be useful
and you can also download some more over the Internet in many
different websites that I'm going to help you
also with a list. To use any of those, let's
just use a lower third. For example, that is one of
those texts that come up just to say the name of the
person that is talking. Let's just grab one lower third over here and position
it on the timeline. It acts exactly
like a video clip. You just position,
it has an animation, [OVERLAPPING] and
then a fade sound. What you can do is click on it. Now on the attributes panel that you find here on the right, you're going to
be able to change also the text if you want, you can just put your name or put whatever
you want in there. It's going to appear, [OVERLAPPING] and go away. These are already embedded
inside the editing software. On Premiere, for example,
you're going to find inside the essential
graphics panel and in other software there's always
going to be a place with some of these pre-built effects. Now, if you don't like
the effects that you have pre-built in your software, you can also download
some more graphics. Some that I can
recommend you are Envato and Motion Array. These are all paid, but it can pay a monthly
subscription and download many different
things that will for sure enhance a lot your videos. If you're looking for music,
there is a free library inside the YouTube website
in which you can just download totally
copyright free songs to use in whatever
project you'd like. It's really cool that
you can filter them by genre or mood or
how fast they are. There are also many options for paid subscription websites
like Epidemic Sound, Artlist, or Audiio. These are usually going to have some better tracks than the free ones that
you can find in other websites like the
YouTube one that I just mentioned but you have to pay a subscription to
these websites. If you're looking for
some sound effects, there are many in
freesound.org and it's a very good library provided
by the users themselves. Now if what you
need is some video of something that you
can't capture yourself, you can go to
pexels.com that has a lot of free assets for you to use in many
different projects. Each thing has got a
different license. On some of them you
have to give credit to the creator and
some are just free, you don't need to do anything. But also if you need something a little bit more professional, you can go to Storyblocks. It's a really good website for stock footage or
images like this. Finishing touch on
our video here, it can be to color these clips to make
them pop even more. Let me show you how it's done. As I told you
before, the editing softwares all have
different panels. In this case here
we're just going to go to the color panel. The [inaudible] color panel, it's a very complete
suite for coloring. But mostly what you're
going to see in all editing softwares is
going to be like for example, on Premiere, there's going
to be a Lumetri panel, which is going to have all
the controls for you to adjust exposure, shadows, make your clip a little bit brighter or a little bit darker, and play around with
the saturation. It's enough for you to
know that it's possible to do all these around
this page here. For example, let me show you brightening it
up a little bit, making it a little bit
more contrasty here, and maybe boosting the
saturation a little bit. Just be sure not to go too
far with these controls. Because depending on the clips and the camera that you have, these are going to be a little
bit more or less flexible. It's better to follow the tips
from the other lessons and just get it as right
as possible in camera. Now, all you need
to do is export the video and it's going
to be ready to be shared. Let's see the key
takeaways of this lesson. Text, visuals, sound effects, visual effects, can be the finishing touch
of a pro video. The videos can always
be color corrected, but don't overdo it and try
to get it right in camera. This is the time
for you to reopen the project and try inserting some titles in the beginning and some effects to some clips. With this exercise, you're going to realize what happens when you try to stretch them out or
move them around a little bit, which controls you have
over different titles, and how some effects behave
inserted in different clips. Some are going to be super light and you're going to
be able to preview them immediately and others
are going to be super heavy. You're going to even have to do some processing before you can even visualize
what they're doing. This is also going to give
you an idea about how well your computer handles the files and effects that
you're inserting. This is going to give
you some boundaries about what's going
to be practical and look good and what's just going to be a huge
waste of time. [MUSIC] In the next lesson, we are going to be
exporting your video and making it ready
to be shared.
14. Exporting Your Video: [MUSIC] The video looks amazing and now it's
the moment to bake it into a final file
ready to share. Editing softwares
are going to have some sort of option like
delivery or export. In there, be sure to
select both video and audio for the final
file to be complete. Next step, you have to choose which kind of format or
codec you're going to use. There are so many
options that one could get totally lost in here. But one of the most common
accepted everywhere is H.264 or MP4. Just find this option
in your editing software and you're
going to be just fine. Now regarding the quality, some editing softwares
are just going to ask if you want a regular, good, or very good quality. Other ones are going
to let you dial in the exact amount of information you want in the final file. It's difficult to give a precise number because also depends on the quality of the camera
you use it to record. Consider that for
YouTube for example, if you go for something around the 30 megabits per second, up to 50, you're going to
have very good quality. Now if you're aiming
for something that is going to be displayed
on a larger screen, then you can go for a little
bit higher than that. Then in this, you just
click "Export" and you're editing software is going to get everything
that you've done, all the titles, all
the information, all the transitions and
cuts that you made, and bake it all
in only one file. Now, this process can take quite a long time depending
on your computer. Just be sure to check that the progress bar is going
forward and that it doesn't say an insane amount
of time left to finish. As an exporting exercise, just try to export
whatever timeline you're already playing
around with until now. Don't wait until your
whole class project is done to do your first export. This is important for
two different reasons. The first one is to
understand how long your computer takes to
export as more file. The second one is
for you to take this file and send it
over to your smartphone, for example, and
see how it looks. See if it looks way different
or if it's similar. This is going to
give you an idea if the resolution is good, if the audio is nice,
if the size is correct. Also, about the colors, you
can see in different devices. In the guidebook,
you're going to find that quick reference for the settings to use
to export your files. Once it's complete,
it's ready to share. You are now officially a video production company all in one.
15. Conclusion: [MUSIC] Congratulations. You now have all
the tools required to start doing right away high-quality videos at home using the gear you already got, but the knowledge
to do much more. We talked about how to set up your environment and your gear for the best quality possible, and you learned many
tricks on how to do it in the most
efficient way possible, besides discovering many tools that can help you
along this path. We got the cameras rolling, and it all came together
in the editing software. A-roll, secondary
camera, B-roll, sounds, effects, music. I really hope this
class encourages you to enjoy the
process of filming, of showing your art, what you love, and to inspire you to create
more and more. Remember, now it's on you. Show us your space, tell us all about it on the short video using all the techniques
you've learned here. Post it on the project board, and I'll be sure
to give feedback, on what you can improve and
what's already top quality. For more content
about photography, video making tips and tricks, just follow me on all
social medias, @flyenri. Be it Instagram, Twitter, on YouTube, you're going
to find me everywhere. If you want, just shoot me a DM saying you came from Skillshare. I really like to
connect with you guys. I hope this was a fun
and info-packed class, and I can't wait to see
what you come up with. To the next class. [FOREIGN] [MUSIC]
 Enrico Luzi, Creative travel content