Transcripts
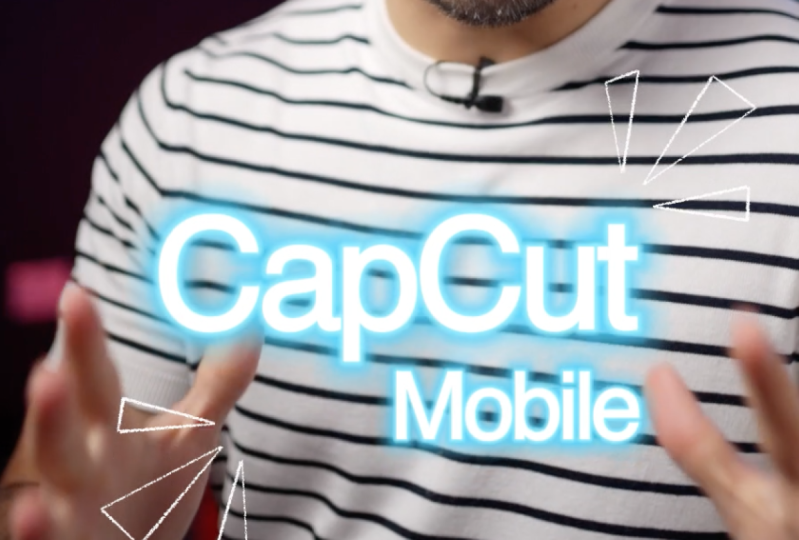
1. Intro: Video, especially short
form video is one of the best ways to
share your ideas, showcase your work and
connect with others. Maybe you've captured
some amazing clips, but now you're wondering
how to edit them without feeling overwhelmed by
complicated or expensive tools. And that's where Capcot
mobile comes in. It's a simple, powerful, and fun video editing app
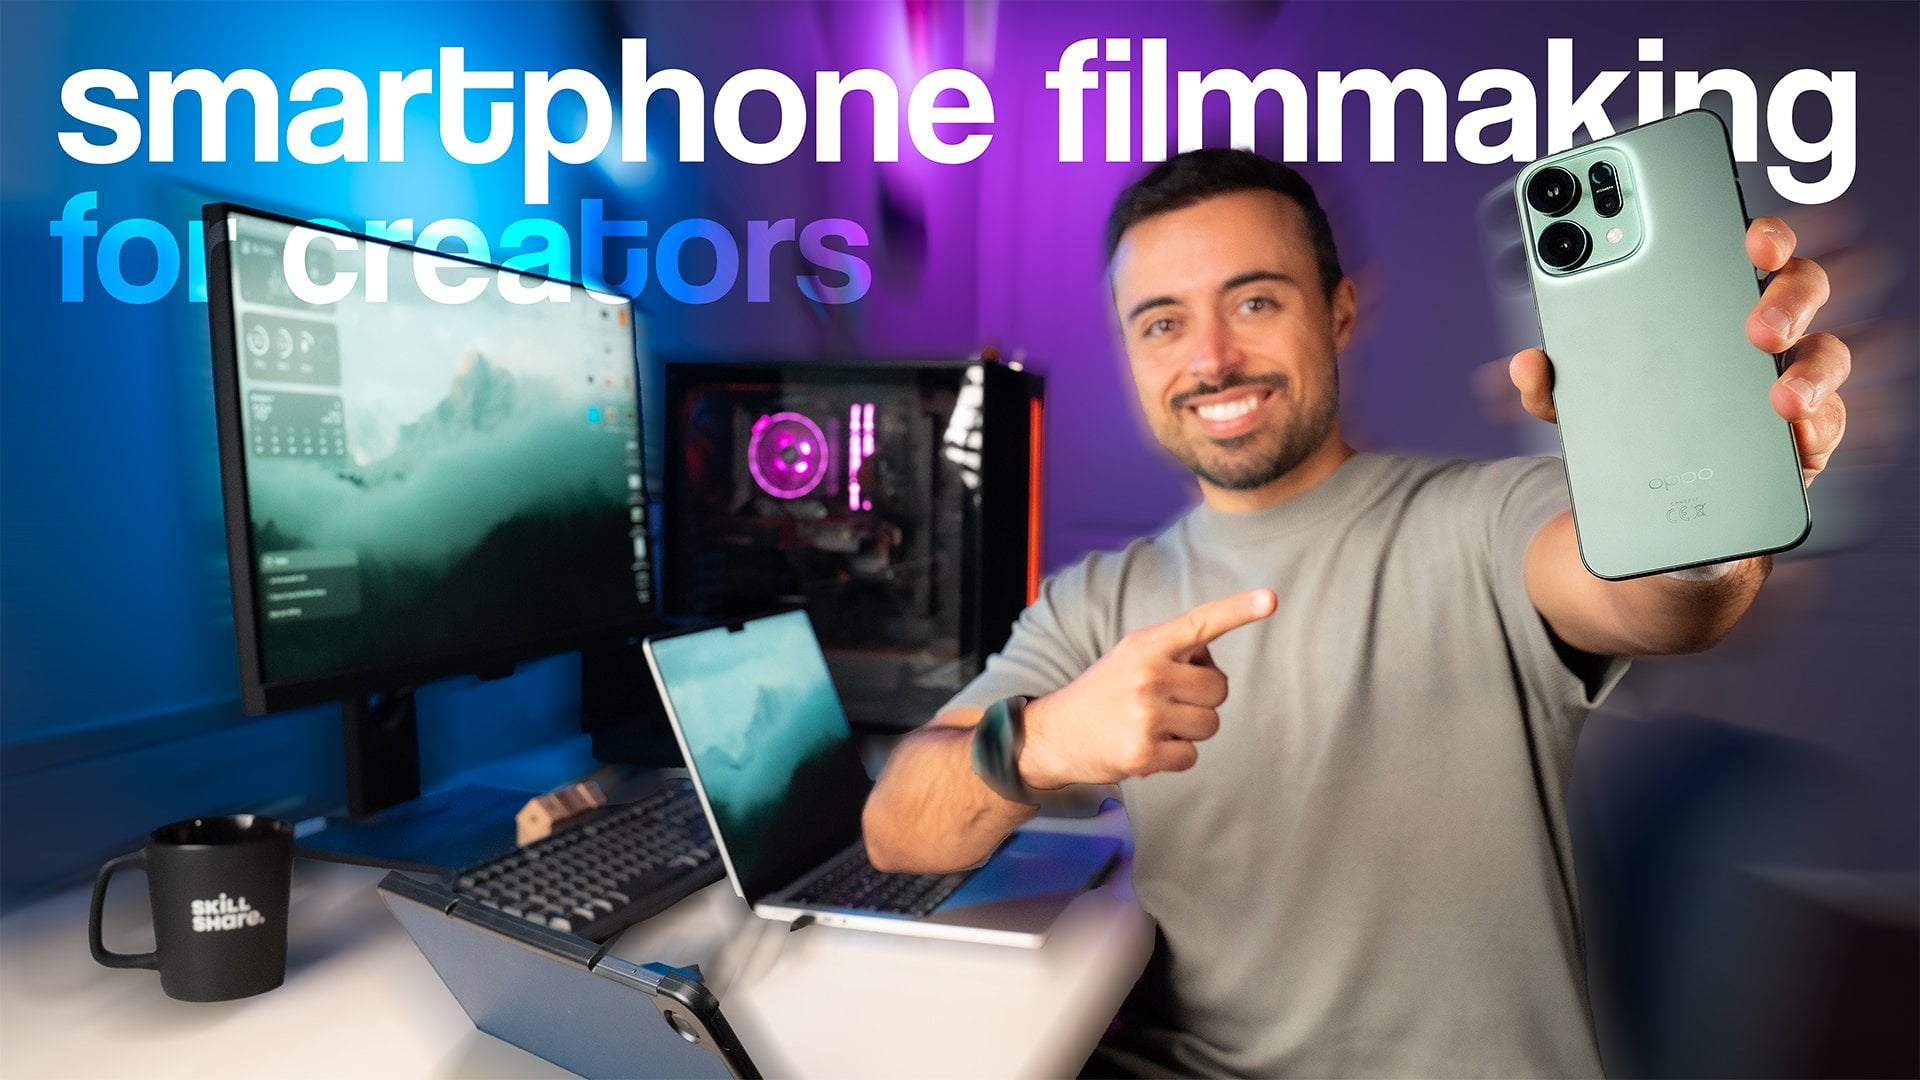
right at your fingertips. Hi, I'm Andrew, a
digital content creator with a passion for
storytelling through video. Over the years, I've
worked with clients and created content for platforms
like Instagram, Tik Tok, YouTube, and I've
learned how important it is to have tools that are both
accessible and effective. In this class, I'm
going to guide you through everything
you need to know about editing videos
with Capcat Mobile, whether you're starting
from scratch or looking to level up your skills. By the end, editing will
feel like second nature. Capcat has long been one of the top video editing
apps for smartphones, and for good reason, it offers a full editing suite right
in the palm of your hands. In the upcoming
lessons, we're going to explore everything
from starting a new project and trimming
clips to adding effects, captions, transitions,
and much more. By the end of this class,
you're going to be creating eye catching professional
quality videos, so grab your phone or
tablet and let's dive into the world of video
editing with Capt Mobile.
2. Class Project: Welcome to this class. I'm really thrilled
to have you here. Now, let's dive
into an important first step, your class project. Learning video editing is all about doing, not just watching. So this class is designed to teach you key skills
step by step, but it's up to you to bring those skills to life by
practicing on your own. Each lesson is
going to introduce a different tool or
feature in Capcod mobile, and I'll provide
the perfect footage to demonstrate how it works. You can download all
the materials from the resources section to follow
along with me as I added. This hands on approach will make it much
easier for you to understand the techniques and start using them creatively. For your project, I
want you to apply what you've learned by editing
your own short video. Towards the end of the
class, I'm going to walk you through a complete edit
from start to finish, and you can recreate
that video as a way to practice
everything we've covered. Or if you're feeling
adventurous, create something
entirely on your own. Once you finish your video, you can share it with the class. You can upload it to
Google Drive, Dropbox, or even YouTube and set
it as enlisted if you prefer privacy and drop the
link in the projects patter. This way, we can all see and celebrate your progress, and
I can give you feedback. Five reasons why
Capcot Mobile is the ultimate solution
to edit on the go. And, trust me, the fifth one
is gonna blow your mind. First, Capcot mobile gives you incredible features like
AI tools, face tracking, fax templates and effect you'd expect from expensive
software with plugins, all in the palm of your hand. Second, the app is super
complete but simple to use. You can cut clips, d
effects, captions. It's perfect for beginners, but super handy also for
experienced editors. Third, the media
library's next level. You can find sound effects,
music, create voiceovers. It's perfect for creating
dynamic eye catching edits. Four, boring editing
tasks are liking. Can Ao generate captions, use premade templates, easily
layer Brea, add sounds. It's designed to save your time by being an all in one solution. And fifth and finally,
Capcut is almost free. You can create incredible
edits without spending a dime. But if you want to unlock
Advanced Pro Tools, you can try them even before you activate a
monthly subscription. You see, it's not one or two, but five reasons why Capcut Mobile is the
ultimate solution. Remember, watching the
lesson is a fantastic start, but the real learning
happens when you experiment and put those
techniques to work. So don't be afraid to get
creative and try things out. You're gonna be amazed
at how quickly you grow. Next, we're gonna explore
how to set up Capcut Mobile and start editing your first
project. Let's get to it.
3. Initial Setup: Welcome to the next step in
your Capct mobile journey. Before we dive into
the editing tools, it's important to
set everything up and get familiar with
the starting options. This is going to make the
entire editing process smoother and more enjoyable. First, if you haven't already, download and install Capcut
from your app store. It's free and available
for both Android and IOS, so make sure it's ready to go. When you open the app, you're going to land on
the home screen, which is where your
editing journey begins. Here, you have a few options
to kick off your project. Okay, so let's get into it, and that's just open Capcot. And here you're going
to see the main interface of the app. And right from the start,
you're going to have three different options on
how to start a project here. The first one is going to be
down here under templates. And this is the fastest
but least flexible way for you to start a project. It's going to have some pre made edit in which
you're just going to add the files that you want
and the timing and music. It's all pre chosen. This is just if you want to
get a video out quickly, but we're not going to
dive too much into this because you're
going to learn how to do everything from scratch. But later, if you want to
search around here and see if you can find anything that
is interesting, go for it. So let's go back to Edit, and now we're going to
click on New Project. And here, what you
see is your gallery, is all the files
that you have in your smartphone or
on your tablet. And you can navigate
the photos by going up here on this arrow. Or you can see your
online storage. There's a Cloud storage included
with Capcot in which you can transfer files from your smartphone to the
tablet everywhere you want. And there's also the library, which are the media files
that Capcot offers you. And now we are not going
to use any of these. But in the further lessons, yes, there's a lot of
cool stuff in here. So let's just go
back to the albums, and all the resources
and files you see here are going to be available
in the resources panel. So you can do exactly
the same I'm doing, or you can use your own
files as you prefer. Now here there's a
trick. There are two ways of clicking
on the files. The first one is to select them, which is clicking on this
ball on the upper right, the circle, and then
you're going to see that they are selected
on the bottom here. The second way is by clicking in the middle of the preview. So let's click on this
Dog video, for example. This opens up the
preview of the video, and here you can crop it, meaning that you
don't need to take a whole video inside your
project if you don't need to. Like, for example, if
you had a 1 minute video that you only need 5 seconds, you could simply come here, move the yellow handles around, and you're going to see how long is selected from that clip. Click Okay. And now just
that's going to be imported. And you can see which
clips are trimmed already by seeing the
scissors up here. Okay, if you're happy with this, we can proceed, but now you
have the second choice. You can click collage down here, and you're going to
be presented with these different templates to just make a mosaic of the
video files that it shows. If this is something that can be interesting to you, go for it. We're going to go back, and we're going to choose
the third option, which is the most flexible one, which is just clicking on Ed. And now we're in the main
interface of Capcod which is where we're going to spend the rest of our
time in this class.
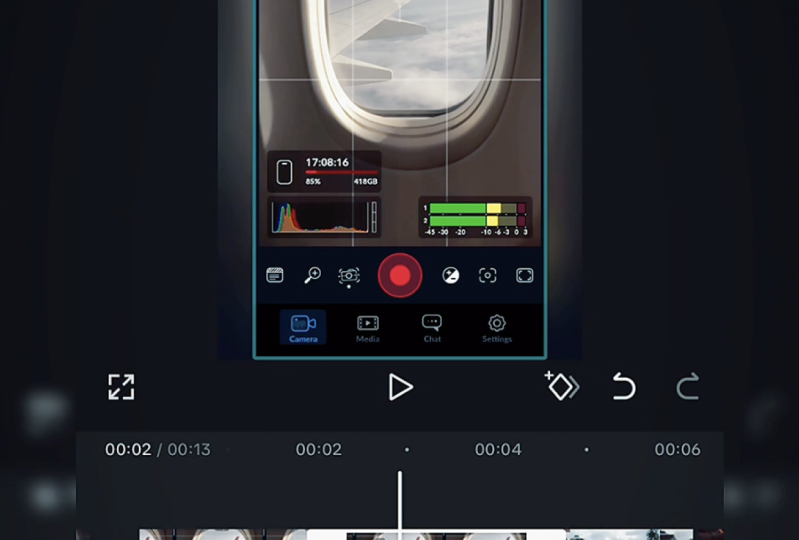
4. Main Interface: That your project is set up, it's time to get familiar with Capcat Mobile's main interface. Knowing where to find tools
and how the layout works, is going to save
you tons of time and make editing
much more intuitive. So let's break it all down. Now, basically, what
you got here is the screen divided in
three different pieces. The upper part is
the preview panel. The middle, there are some
buttons and the timeline itself where you can scroll and see what the video is about. And the bottom part here with the buttons and all the options that are
available to you. You can click up here to see the preview larger and go back. You can click here
to play or pause. We're going to skip this
button and you have also undo and redo buttons, which are going
to be very useful if you make any
kind of mistakes. In the middle here, you
have the timeline itself, and it's where you can see all the video clips you've got. You can use both fingers to see a zoomed in or
Zoomed out version. In the middle here,
you can see where you are and how long
this timeline is. Have a reference about how
long this video is right now. And remember that I told
you you could still add video files after
you started editing. It's just by clicking on
the plus signal here, and then you're going
to be presented with the gallery all over again. If you don't want, just go back. And finally, on the bottom here, you're going to see all
the high level options that you've got on Capgut. But just be aware
that these are going to change depending
on what you're doing. But, for example, if I click on one of the clips
in the timeline, now you're going to see
everything that you can do with the clip itself. It's a lot of stuff,
but don't worry. We're going to go
through all of these. Now, the timeline is basically like having papers on a table, and whatever you place on top is what's going
to be visible. Different from desktop
versions of editing softers because you have
a limited space here. Capca tries to organize and summarize things
in different ways. So let's see first how
video layers work. In this case, here we
have only the main layer. So all of the clips are just spread on the table
one after the other. But if I come to the
second clip, for example, and I scroll to the
right until overlay, you're going to see
now that this clip is positioned below. And if you scroll around,
you're going to see that that's the video
that is visible, even though you got
this other video here on the main
layer right now. This means that the order
in which you see things is exactly like this
from you to the top. It's like you just
position the paper on top of the main layer that
was already on the table. Okay, but now what happens
if I dis select this clip? Let's press back
here, back again. And now we're back
to that main menu, and where is that clip? It's summarized as this small
drop icon on the top here. The red line symbolizes
until where is it going? So the main track is always
visible and available, but further video layers are
all going to be up there. And if you want to see it again, all you have to do is click on that and it's going to
expand it all over again. And this is something
really cool about Capcat. All the kind of medias
are organized with different colors and
in different places. So you never lose something. Now, if you want to reorganize things on the timeline,
like for example, getting this Sigo clip and
moving into the front, all you have to do
is click and hold. It's going to pop up, and now you can move it
around as you prefer. So let's move it here
to the first position. So now that is the first clip, and then we see the
clip that is in our second layer actually above, and it's going to
cover all of the clips until the very end when
this dog clip begins. If you want to see things
a little bit better, you can zoom in again. To extend or shorten a clip, you can just click on the
clip you want to change, hold the handle
here on the side, and just move it left or
right to be able to crop it. And something
interesting is that you're going to feel that it is kind of snapping to the
borders of other stuff. So when I go, it's
going to snap to the playhead that indicates
where we're playing from. It's going to snap to
the end of other clips. There's also this vibration, this haptic feedback so that
you know what you're doing. Also, you'll probably
notice that when you select a clip
on the timeline, it becomes with this blue
border around the preview. This means that this is the clip that is selected and active, and you can change
also its position, rotation and scale
directly on the preview. So just by holding here on the preview
and moving it around, you can reposition it with two
fingers, you can scale it. Or if you just want to rotate, you can use also the
two fingers like this. So it's very easy to have
it exactly as you wanted. And now you can see even more clearly the layers because you can also see a piece of
the background clip here. Now sometimes you're going
to want to be very precise about how you reposition
or re dimension a clip. And for that, you can just
click the clip and go down here to the options
until you find basics. And here, you can do the same
with the handle so that you can know exactly how much
you're moving it around, scale and also rotate. Okay, by mastering these basics, you're going to be super
confident navigating around Capgat mobile and setting up
your timeline like a pro. In the next lesson, we're
going to be diving deeper into adjusting clip
properties. See you there.
5. Clip Properties: This lesson will focus on how to adjust clip properties
in Capcad mobile. These tools will help you modify your video clips to match
your creative vision, whether it's streaming,
edding effects, or creating dynamic animations. Let's explore the
options step by step. You're going to see
there's an infinite amount of clip properties
that you can change, but let's try to split them in categories to make
things a bit easier. And the first category is
going to be the essentials. And if at any time,
you feel a little bit lost about what
each thing does, you can check the resources panel because
there's going to be a PDF with all the buttons
and what everything does. First of all, trimming
the clips can be directly on the timeline
by holding the handles, but you can also come
to the bottom and use the first option,
which is split. By this, you just
position the playhead wherever you want to
split this clip into. So let's say around here, be sure that it's
selected and click split. Now you're going to
be able to see that it's actually two
different clips. And on the upper
part of the clip, you're going to be able to
see also how long it lasts. So this is 10 seconds,
and this is 7.6. You'll notice that I'll skip
some of the buttons here, and it's just
because they belong to another category that I'm going to explain
in another lesson. So don't worry about it. Now by splitting this file, we created another option, which is holding the
clip and bringing it down so that you create
even another layer here. And with this, now you're
going to see that there are two different drop icons
on the upper part here. If you actually just
wanted to split this clip so that you could
delete the second part, you can just select it and click this bin and the clip
is going to disappear. And if you delete it by mistake, remember that undo bottom, that's the moment to use it. If instead you really love this clip and you want
to have two of these, you can just click Duplicate. And you can change the
opacity of a clip by clicking here and reducing it so that you can see
also the background. Reverse does what it says. Just reverse a clip around. And freeze is a really
interesting option because let's say you have
a motion and you just want to freeze a
frame so that you can put some text or some
explanation on top of it. You can have the clip
selected, click Freeze, and now a new clip which is just still from that moment is going to be present
in the timeline. And by the four, it's
going to take 3 seconds. So you have the motion. You have that frame frozen for 3 seconds, and then the continuity
of the clip. And there's a bunch
of audio controls here that we're going to
see on a dedicated lesson. Other things to notice here in the interface is that you
have the possibility to mute all the audio clips from this if you just
want to add some music. And in between the clips, you always have this white box, which is the transition box. By clicking on it, the
special menu comes up, which you can just choose whichever kind of
transition you want, and that's what's
going to happen when you play through that gap. Now, the beauty of Capcot
mobile is that you can mix all of these features
to create something unique. For example, you could use
speed, slow down a clip, bring it to a freeze frame, add some text, and highlight
a dramatic moment like this. Learning these tools,
you're going to have the flexibility to shape the
videos the way you want. In the next lesson,
we're going to talk a little bit more about
the speed option.
6. Adjusting Speed: Check out one of Capcut Mobile's most powerful features,
the speed tool. Whether you want to create
dramatic slow motion effects, speed things up for time lapse or at dynamic speed variations, this tool gives you all
the flexibility you need. Let's explore these options. Okay, let's play with
speed a little bit more. So for this, I'm going to create a dedicated timeline just with that clip that
I showed you before. Which is this one. And here, let's cut just the piece that we want to
play around with. So let's say that it's beginning here and just goes until
here, more or less. Let's delete the other one so that it makes our life easier, our timeline a
little bit cleaner. So if I play this,
that's what you got. Only 3 seconds of
clip, normal speed. So if you click on it
and you go to speed, now we have several
different options here. If you go to normal,
it's going to be the same as we did in
the last lesson, which is just choosing a factor of speed that you want
to make it faster, and then it's going to last
even less or to slow it down, meaning that it's going to
last a little bit longer. Now, this is totally
dependent on how many frames per second
you shot this clip. If you don't know
exactly what that is, I'm going to leave it in the
resources panel something that explains it a
little bit better. But for now, all you
have to think is that your timeline is being
read at a certain speed. In this case, 25
frames per second. And this clip was shot
at 50 frames per second. We need to have
double the amount of frames that you need
to show in a second. So when you see this 50 frames, but 25 frames each second, it means that it's going
to last 2 seconds. So it's going to feel
like it's slower. Let's do it again for
you to see how it works. I'm going to pull it
back to 0.5. Click Okay. And now the clip lasts 7.5 seconds instead of the
three initial ones. And if I play it, you can
see that it slowed down. Now, this is the linear
option because the whole clip now is at the same
speed, which means 50%. Instead of doing this,
we could use the curves. So let's try it. I'm
going to go to normal, and I'm going to set
it back to one X. We're back to the original.
Now I'm going to click curve. And as you can see, there
is a custom option, but there's also many
different pre made options. One that I like a lot
is this flash in. Let's take a look at
one of these options here for you to
see what it does. So I'm going to choose
bullet, for example. And what it does in
this graph here, you're going to be
able to see that it goes faster than
the original file. Then it drops down to 0.5, and then it goes back up again. This means that if I
play it, it's fast, super slow, fast again. And here you can
adjust it as you wish. So in this case,
here, for example, I think the slow
part is too short. So for that, I can
open up a little bit more this middle part over here. So that all this region here,
which is the slow part, meaning that it's on 0.5, is just going to last a little bit longer. Let's
see how it looks. That looks pretty
cool. Now, as you see, you have total flexibility
on how you want it to move. If you think the fast
part is too fast, you can just lower
it closer to one X. O and I have this effect. If you think one of the
control points is unnecessary, you can just select
it and delete bit. Or if you think
actually it was useful, you can add a bit,
and it's going to add that point
of control again. So you can just play
around with this to make the speed change up
and down as you wish. Now, just one thing
that is important to remember is that not
to make this choppy, you should be working
with multiples of the frame rates that you shot this video in. Wait,
I'm going to explain. So if this video is at 50 frames per second and the
timeline is 25, you can play it at 50%
without any problems. It's just going to take twice as long for you to
see all the frames. If you use a weird
number in between, it's going to have to skip some frames or to
add some frames in, and it's not going to look
as fluid as it should. Now, if you don't have the pro option, that's
what you should do. If you do have, you can
disrespect that a little bit by using the
smooth slow mo here. Just choose faster process or better quality and check if
the result is good enough. Just as a reference,
if you go to custom instead of choosing one
of the other templates, you get a flat graph that you can start working from zero. Now, for the last option, we're going to go to
velocity effects. And as you can see, this
is one that is going to go along with the music you
choose for this video. So let's just add a sound. Sounds fine. I'm going to
drag it to the start here. Let's use the clip again, velocity effects and flash. And now we can see
the yellow dots, which are the beats
of this song. Sometimes it's going to get it right and do something cool, sometimes not that much. Yet, remember that here we are learning how to do
everything manually, so you will always be able to replicate any kind of effect. The speed tool is a great
resource to have with you. It's going to help a
lot to match cuts, time it with the music, and make everything more engaging. Now that you know how
to set the pace and rhythm of your videos,
in the next lesson, we're going to talk a
little bit more about color grading and adjustments to make your videos really pop.
7. Color Correcting and Grading: Time to explore how to
enhance the visual style of your videos using Capcat
mobiles adjustments, filters, and advanced
video quality tools. These features let to fine
tune the look of your footage, bring your creative
vision to life. No video editing tool
is complete without color adjustments
and grading tools. Let's start, once again, a new project just with the top in head video that
you have in the resources. And here you can click on the
clip and just go to adjust. If you've done any kind
of photo editing before, you're going to see that
this is very similar. Just bear in mind
that the way this was shot is going to dictate how much can you mess around with the colors and
the adjustments? After a certain point, it's just going to start
breaking down, so you have to keep
it at that limit. Inside the adjust menu, you're going to
see that there are some pro options here that
we're going to skip for now, and later on, you're
going to be able to see some things
like brightness, which is going to brighten or darken your image, contrast, all of them are sliders
that you can just go up and down and see whatever
suits your footage. Wouldn't go too crazy
with any of these, but if something
doesn't look right, you can definitely still
fix a little bit here. Color temperature
can be found here. You can fade the image a
little bit if you'd like. Add some vignette to add some importance to what's
in the center of the frame. And if you want to
add some texture, you could also add some grain. And these changes are being
applied only to this clip. But if you have a huge
timeline and you would like these changes to be applied
to all of the clips, you have this option down
here on applied to all. So just click on that, and it's going to be
applied everywhere. Later, do a check just to see if no clip is really
different from each other, but this is a very good way
to keep some consistency. Now, I love the
filters option here inside of Capcat because
you have not only a lot of interesting lots or filters that give a different
look to your video, but they are splitting some
interesting categories. Like, for example,
a movies category. So if you want to
replicate some sort of style from a movie or
from a video game, you can just try to find
it inside here and apply. So let's say, for
example, that I like this Openheimer filter. The moment you click on it, there's a slider
on the bottom that is going to dictate how intense you want this effect to be. I'm going to leave it around
here and just click Okay. And the last option we got this in this panel is
the video quality. This panel at the moment
of recording this lesson, it's all pro features. But there are some very
interesting ones like reducing image
noise, optical flow, which is just going to make things fluid if you don't have enough frames to make something slower and even a super
resolution option. Meaning that if you have
a lower resolution video, you could still upscale it to something bigger that
looks a bit chopper. None of these, they're
going to do any kind of magic, but they
do improve your. Okay, so what's the correct
way of using all of these? If you have any
kind of footage on your timeline, I
would click on it, go to adjust and start with the basic adjustments to
make the image look right, meaning that white looks
white, black looks black, and the style of fading vignette and everything looks the
way that you like it. Now, if you want to
customize it even further, you can go to filters, select one of these
that are available, and apply it to your image. So mastering these
tools are going to help you elevate the
look of your video. In the next lesson, we're
going to focus on getting the audio of your video, right. We're going to add
music, sound effects, voiceovers. Let's do it.
8. Mastering Sound: One of the most critical
aspects of video editing audio. Good audio can elevate your video and make it
much more engaging, whether it's adding
background music, enhancing voice clarity,
or syncing sound effects. Let's explore the tools, Capcut mobile offers to
get your audio just right. Okay, so first thing we're going to do is create a new project using only the
talking head video that you have in the
resources section. I'm going to edit. Now we
have a single clip timeline. I'm going to click on the clip, and I'm just going to go all the way to the right and you're going to find here
extract audio. And what is it going to
do? It's going to separate the video from the
audio part of the clip. Now, this can be useful
for two different reasons. The first one is that now
you can see the waveform of the audio and you can
understand when you need to lower the music
or up a little bit. And in case you have some o on top of your
talking head video, you can still visualize on the timeline. Where is it going? So let's say here I add
that clip of the dog, for example, I'm going
to come down here to the end and I'm
going to click Overlay. Next, let's add some music. And for that, in this higher level menu that
we have on the bottom here, you can click on Audio, and you're going to have
several different options. One of them is
going to be sounds. And this is going to open
the media library from Capcot where you can find
many different songs, and you can filter
them by style. There's log, travel,
summer, pop, beat. You can choose
whatever you prefer or even search by a
song or an artist. You can click to preview and plus to add it
to the timeline. Now, I'm just going to drag
it back right to the start. And as I told you,
now in this way, you can see the timeline
with both waveforms, and you can see where the music and the talking is colliding. And now clicking on
each one of them, you're going to have
similar controls, including the one about volume. So if you just want to have kind of like a background music, you can just come here and
lower it way down until seven, for example, and this
is what you get. Five reasons why
Capcut mobile is the ultimate solution
to edit on the go. It could even be lower, but
anyway, you get the point. Now, you probably notice
also that we have sound effects in
this menu down here. And this is going
to include a lot of categories that are
super useful, like, for example,
transitions or just to express a mood,
Halloween, fight, magic. And whenever you find something
that is useful and you think you're probably going
to want to reuse that, you can just favorite it, and later, you're
going to be able to find it in your favorites list. I have here things, for example, like a beep, turning
pages. Camera shutter. Whenever I put a photo
in one of my reels, I use this to express it
or wishes for transitions. Now for the dialog portions, you can click on the
waveform and you can come down to enhance voice. This is the current
pro version of how to enhance the
voice and the clari. For the music part,
something that I use quite often is the fade. So clicking on it, you
have the fade option, and this is useful
if you don't want the song to just start abruptly. You want it to start
coming up slowly. So I'll just change the
fade into 3 seconds, for example, Give it okay. And now you can see that
there is this bar down here that goes from black
until it disappears. Meaning, here, the song is
just fading in. Let's listen. So you see it's not one or two, but my reasons why
Capct mobile is It's a more subtle way of making the music
enter the video. Now, this version of
Capcut introduced something really cool
called text to Audio. And here, basically, you could
type whatever you wanted, then it's going to
convert into a voiceover. Let's just use one
of the examples. You have some AI
options like expanding, shortening, it's just
going to write it for you. And the moment you say that
it's done, you can choose. Which kind of voice
do you prefer? I'm just going to choose
Andrew, for example. Hello, dear friends?
I'm going to pick next, split automatically. And now we have not
only the voiceover but even the captions for it. Let's make a chocolate.
Five reasons prepare now, in this case, this is mixed
with the audio from my voice. But if you quickly
just mute it to see what's going on.
Hello, dear friends. Today, let's make
a chocolate cake. First, prepare flour. And you can see that even
the reading is quite cool. It's not something mechanical
or, like, Google translate. Anyways, this is the
case in which you don't want to put
your voice yourself. But if you prefer that way, there is also a way
to make voiceovers by yourself inside here. Just click the audio option
again and go to record. Now, all you need to
do is step, hold, and everything you're going to be saying is going to become a file and audio file inside the timeline. I
finished recording. I'm going to press
Okay, and here it is. Everything you're going
to do text do ride. I'm just going to add
some sound effects here just to show
you how it looks. And as you probably
notice, the audios are all separated by layers. One of them is the audio
from the video file. One of them is the music. One of them has the voiceover
and the sound effects. And one layer has
the text to voice. And the moment that I press back and go back to the main menu, these are all grouped together inside the sound
collection layer. To expand it, all I
need to do is tap audio down here and
everything is back out. Or you can just step directly
over sound collection. There are more layers
than you can see, you can just hold and drag up and down to be
able to see everything. So how can you combine
all of these together? Basically, like we did here, having a talking head video, you can separate the audio. Then add some music, add some sound effects for the transitions or for the things that
happen in the video. If there's too much noise, you can use the reduced noise, or if it's actually a video just with voiceover or a
screen recording. You could do the
voiceover yourself directly inside the app without needing to
use anything else. Now, these are going to make your videos much more polished. In the next lesson,
we're going to be adding text to your videos, titles, templates,
captions. Let's do it.
9. Editing Text: Text can be a powerful
storytelling tool in your videos. Whether you're adding titles, emphasizing points or
creating dynamic visuals, Capcod mobile makes it easy to integrate texts
into your edits. In this lesson, we're going
to explore how to add text, use templates, and even
draw custom elements. Adding text to your
video sounds very easy, but there are so
many options inside Capcot that it can become
a little bit confusing. So let's go through some of
the most important ones. As usual, I'm going to
start a new project, just a talking head video,
which is the simplest one. And down here, you have
the option of text. Let's start by the first
one, just add text. And as you can see it has also its dedicated layer just like the other elements that
we've seen so far. Now here, I'm just
going to write something like Capcut mova. And here you could choose
something like a template. It's not one or two. So you see it's not one. So
you see it's not one or two. And if you go to
the other menus, you can actually customize
it a little bit. So you could change the font. You could change the
style, the colors, if you want to add some
background or change the opacity, all kinds of character editing, just like a text editor, really. And on animations, you could change the way that it
appears on the screen. So it's by spinning, if it's going to be
rotating anyways, there are thousands
of options here. And on the bottom,
you can choose how long this transition or
animation is going to be. Now here we have
an inverted option of what we saw in
the previous lesson. We have the option of
doing a text to speech. So let's see if I select this Capcti text box
that I've written, I can just go to text to speech, use narration, for
example, choose a voice. Cacatct mobile. Press Okay. So you see it's not in what. And now I have also the
audio about that text. And for now, I can only
see the text box here, which is what we were editing. But you know that the audio was inserted already because
we heard it, right? But remember, since
it's an audio, it's going to appear only when we are showing audio layers. So if I go back and I
go to the audio part, now I can see the Capcot mobile small audio
box over here. And as anything else, I can drag it around. I can make it shorter or
longer. It's up to you. And encompass inside
the text area, there are also the stickers. So if you want to add
something like this, for example, life
reasons why caption. You can insert it, you
can give it an okay. And now we're going to be
seeing it as a yellow box down here for all the
duration of its animation. Okay, so in this
lesson, we covered the basics of adding
text into your video. In the next lesson, let
me show you just a little bit deeper how it
is to add captions.
10. Creating Captions: Captions are a
fantastic way to make your videos more
accessible and engaging. They help convey your message, even when the sound is off, making your content
suitable for all viewers. In this lesson, we're
going to explore how to generate captions
in Capcod mobile, refine them by
identifying filler words, and customize them with
templates and animations. Okay, let's start by
doing the simplest thing, which is creating
a new project with the talking head video and
add it to the timeline. Clicking on it, we're
just going to go to text and auto captions. Here, you don't need to
change anything right now. But if you wanted,
you could already say from where you want the
captions to be made of. So in this case, I'm just
going to choose video, but it could be
from a voiceover, from everything,
and the templates, also, which kind of
captions do you want? This can be changed later, but you can choose it here already. Bilingual captions is a pro
option that is going to generate double captions in
two different languages. And identifying filler
words is going to identify all the useless words
you have in the middle of your speech that can
be completely cuto. Okay, I'm just going to click Generate and we're going
to see what it does. As the other elements in cap
cut, you see now a layer, brown layer just with
the captions one after the other that you can actually manipulate
individually, so you could make them shorter. You can make them longer. And if you want to move them
around the screen also, you could just by doing it directly on the
preview panel here. Now, let's say something was misunderstood and it's
not written correctly. You could double tap it on the preview panel
and re edit there, so you could just write
something different. Or by having one of
the captions selected, you could come down here
and go to Edit captions. This way you can
see the whole list, and the moment you
scroll it down, you're going to see that also
the video is going forward. And here, the same
thing applies. You just click on it and you can type in whatever is
correct in that place. If you didn't select a style before when creating
the captions, you can do it by
clicking here on style and just choosing
something different. Let's say that now I think this one is better,
and here we go. If you want to fine tune it, you can go to the font stab,
select different fonts. You can select different styles with different backgrounds, different colors, at
glow, at a background. It really depends on
the kind of background you have to make the
captions visible. Plus, you can even choose
which kind of animation you want when the caption
appears on the screen. It could be just popping
up or it could have some crazy effects like some
glitter coming off of it. Super Let's go over that. And the moment you
deselect the text, you go back to the main menu
and the main timeline view, and now everything
is just a brown line on top of your main track. To have access to
the captions again, all you have to do is click on the text menu, and
here we are again. In the next lesson, we're
going to talk about a very special effect
called rotoscoping. Or you could nickname it
the green screen effect.
11. Rotoscoping or Green Screen: Rotoscoping is a
powerful feature in Capcod mobile that lets you isolate subjects in your videos, opening up endless
creative possibilities. You can play stickers,
text or effects behind the subject or even
remove backgrounds entirely. In this lesson, we will explore both the automatic and
custom rotoscoping options, and I'm going to
show you how to make the most of this feature. To better explain,
let's just create a project with the
talking head video again. Let's click on the
clip and let's come to remove background. Now for this case, I'm going
to use the auto removal. And whenever Capct has
to apply something, you're going to be able
to see on the bottom left corner here that
it's still processing it. The moment it says that it's done, you can just click Okay. And now what you're
going to see is just the subject cut out. The background is totally gone. So let's add, for
example, the dog video. And whenever you
add a new video, it goes to the main track. So let's click on our
rotoscope video here. Click Overlay and send
it to the layer above. Let's put it back
to the beginning. And now what you can see
is the video that we rotoscoped in front or
above the other video. This is very good for those
react videos, for example. In this case, you
could make me smaller like I'm commenting
on the dog video. I'm going to do it using
the preview directly, just by pinching
with the two fingers and just dragging me down, for example, to this
corner over here. Five reasons why Cact mobile
is the ultimate solution. And as you can see, the
cutout is pretty good. Okay, but what if you don't
have the pro version, you cannot do this automatic
background removal. Okay, let's try one other way. I'm just going to delete
everything we have here. Let's click on it again, and let's go again to remove BG. Now I'm going to click on custom removal and choosing the brush, I'm just going to
paint over myself, trying to get to the
borders as much as I can. Now Capcat is going to apply this custom removal
throughout the hook clip, and let's see how it
does. Okay, it's done. And as you can see, the
things that were already present in the frame
that we painted, they were more or less kept well throughout the whole thing. But the bigger problem is really the portions of the body, hands, and arms, they weren't
in that frame, and it can't really
manage to get those. So for example, in this
case, if I just wanted my face to be in there,
it will be okay. But the rest of
the body kind of. So if you don't have
the pro subscription, it's better to do it
using a green screen. In this case, I didn't record anything with a green
screen to show you, but we have the
media library from Capcut that we saw in one
of the first lessons. So let's try to get something from there to show
you how it works. I'm just going to click Plus, come here to Library, and there's an option exactly
written green screen. So let's just choose something like this music
bar waveform here. I'm going to edit, click, I'm going to go to overlay I'm going to put it on
top of our video here. I'm just going to add once
more our original video so that we have the whole of it and not just this weird
cutout that I did. Okay, so now basically, all we want is to
keep the white part, but remove what's green on this. If you are recording yourself, you would need the green panel
behind you, for example. And the concept would be just the same. You just click on it. Go to remove BG and
this time we're going to go to romaki
the third option. And basically, what
it's asking you is, Okay, which color do
you want to be removed? So you're just going
to go around here on the preview and just leave that.in the middle
exactly on top of a place that represents the color. In this
case, the green. And you can see that
it automatically already did a great job. It is possible to
see that there's a little bit of green on
top of the white there. So you can play a little
bit of the intensity to see how much it's going to
eliminate that shadow, feathering the edges and
cleaning up the edges. Okay, it's looking pretty good. I'm going to make it
a little bit bigger. Put it down here, and
this is what we got. One, two, five reasons why Cacut mobile is the ultimate
solution to edit on the go. So this is the
perfect way to insert overlays or other elements
on top of your videos. Now let's take this one
step further and say that you wanted this animation
to be actually behind me. Now, the way we
should go about it is imagining the papers on the
table like we did before. You're going to
have a base layer, which is me talking and
all the background. On top of it, we're going to have this new animation that we inserted and that we want to be sandwiched between the
background and me. And now on the top layer, I need a cutout of just
me covering that portion. But not the background. So we have these three layers
in succession so that we can see that it's more three
dimensional, in a sense. To do that, let's
duplicate this file here. We're going to click it and
we're going to go to overlay. Let's drag it back to the start. And now here we can visualize
the sandwich already. But the problem is
that the top layer, meaning this one, also
has the background, so it's covering everything
that is in the back. So let's do again
what we did before. Let's remove the background. And now you can see that
it's working already, but it's not in a
very good position. So let's put it maybe up here
and make it even bigger. Just as an example, it gives you incredible features like
face tracking tech plates. An effect you'd expect from expensive useful and that I
want to show you right now. And for that, let's go again to the media library from Capcot. Let's import something,
go to library. And what I want to find here is something interesting
that is black and white. So let's see, for example, this missing signal video. Okay, this is going
to do. Let's edit. We go to overlay. Let's just drag it on
top of everything else. Okay, so now we have
the issue that this is just covering everything
in the back, right? So let's keep it selected, and let's come to splice. Now, this just like
the green screen is a way in which
you're going to tell the softer to eliminate
a color or luminosity. In this case, I want the
white or brighter parts of this image to be kept, but the darker ones no. There are many options here, and I'm not going to go
through all of them. So I'm just going to
select one that I know is going to keep
the bright parts, but eliminate the dark ones. So I'm going to try overlay. And that could work or lighten. That's a
little bit too harsh. So let's use overlay. And here you can regulate how
strong is it going to be. So I'm just going to
keep it this way. And now what you can see is
that the effect comes on top. It's going to blow your First, Cact mobile gives you
incredible features. And this is just one example, but you could use also
other effects like smoke transitions or maybe
leaves falling from the sky. It really depends if the footage is in front of a green screen or if it's black and white and has different grades
of luminosity, you just have to choose the
right two for what you have. And here, if you
wanted to add anything else in between me
and the background, you could add text stickers
wherever you'd like. The procedure is
exactly the same. Now, this is really
going to give a professional edge
to your videos. In the next lesson, let's talk a little bit about
adding effects and transitions to get that
spark into your videos.
12. Effects and Transitions: This lesson, we're
diving into one of the most exciting parts of video editing effects
and transitions. These tools help add
energy, creativity, and polish to your videos, making them truly stand out. We'll explore how
to use transitions between clips, apply
different effects, and take advantage
of AI power tools to elevate your edits. Now, just as a reminder, effects and transitions
are not always necessary. It depends on the story
that you want to tell. But sometimes if you want to make things flow a little bit easier or if you want to call attention or use it on a hook, for example, for a short video, they can work really well. Let's start by creating
a new project again, and we're going to use all of the four items that we
had in this timeline now. As we saw in the
interface lesson, we always have this
box in between the clips which represents
the transitions. So if you just click one of them and you add any
kind of transition, you're going to be
able to see that it's going to be
played out like that. Especially when you
have two completely different scenes like this, it's very interesting to
add a transition to really mark the passage from one place to the other instead
of a rough cut. And always remember that you can change the duration of it. So if you wanted it to be
really long, you could do it. Now to access other options, all you have to do
is come down to the main menu down here and
you have the effect stab. If you choose the video effect, these are going to affect
the video as a whole, not something specific
within the frame. And the categories
are very descriptive. So you're going to
have light effects, glitch, distortion, spark. So let's just add one of these like this film
wave, for example, and you're going to see the
new layer is a purple one, and it represents where this effect is going
to be played out. So if I scroll just a
little bit on the back, you're going to see
that it's not being applied and suddenly
it kicks in. Until the end here. So one thing you have to pay
attention to is if your effect is actually covering the whole duration of the
clip that you want to affect. In this case, here, let's
zoom in a little bit. And I'm just going to drag the edges here until it snaps to the edge here and also here. Exactly. Now, as I said, these effects are going to
affect the whole frame, everything that is in the
video in that moment. But there's a second option
called body effects, and this one I'm
going to apply to the first talking
head video here. Let's go to effects,
body effects. And in this one, Capct
is actually going to identify the
subject, in this case, me and apply something
above it or behind it, it's just going to
interact with it. So let's just use the first one, for example, target flicker. And as you can see,
it's just like making the contour around me
and applying the effect only there. You get the point. Another very cool effect
that is not actually inside the effect stab
is the camera tracking. And for this one, I'm going
to choose camera tracking, and here you can choose what
do you want to be tracked. So let's say I'm just tracking
the face in this one. So you see it's not one or two, but five reasons why Capcut mobile is the ultimate
solution to it on the go. Trust me, the fifth one, I'm
going to blow your mind. Now, here, what Capcut is
doing is keeping my face exactly in the same position
throughout the whole video. But what happens is
that I move around. So the border here
at some points, you can see that it's totally off the border, like
here on the right. So you have different
options. You can make it blur that side, or you can make it fit canvas. And this way it's going to
have to zoom in a little bit. And if you play it like that,
you're going to see how incredibly perfectly in the same position
my face remains. Bo is the ultimate
solution to on the go. I might sound silly, but this is already different enough that it's going to call attention in comparison to other videos. And now, what you're
seeing that Capcad created here are keyframes
throughout the whole video, meaning that it is
changing the position on the x axis and also on the Y axis all the time to keep the face
perfectly centered. And this goes into a topic
that could be a whole class. Key framing is the entrance
to a lot of effects. Basically, it's you
saying to the softer. These are the properties
I want you to track. In this case, the position, the zoom, the rotation. In the beginning, it's
going to be like this. And then you can
create a keyframe for the ending and
say, in the end, the conditions are
going to be like that, and the magic is
that the software creates what's in between. So if you have a video
that is turned like this in the beginning and in
the end, it's like this, the software is going to
figure out that it has to rotate it while it
goes to the right. Another very nice effect
here is the relight. Let's just choose warm light. And this is basically faking lights that were not
that in the initial set. In the preview panel, you can actually still move them around, and you can see how
perfectly the shape of the light adapts to my face, still keeping the
other side darker. Now, it's up to you to combine these effects and transitions
in a tasteful way. In the next lesson,
we're going to be talking about some
of the features that are outside of this
editing interface. The ones that we saw
in the main interface when we first opened the app. And there are some features
that are going to help you even film content
for your edits.
13. Extra Features: Capcat mobile isn't just
a video editing tool. It also offers a range
of features outside the main editing interface that can make your
workflow faster, easier and more creative. In this lesson, we will
explore the extra features, including the built in camera, the templates, the
image editing, and even a telepropter. Okay, here we are
in the main screen, and I want you to press on this down arrow to expand
the options we've got. The first one we're going
to try is the camera. As you can see, this is a super easy
way to record content directly from inside Capct and throw this in the
timeline right away. The one shot video option is basically just
a normal camera. But the interesting one
is the second option, which is called ModClips. Basically, here,
you're going to choose how long you want the
final video to be. And the moment you hit record, it's going to start recording. And then you can just stop it. And it's going to
keep it at 3 seconds telling you that you still have that amount of time to go. How much you went
around that circle is already indicating to you
also how much you have left. So let's say I just record the second portion and we
are down to six, 7 seconds. And this makes it much
easier if you want to record in different positions,
different sides. So let's say that now I want
to continue it from here, and I'm just going to
finish my video talking in this direction and just
do a last bit from here. Okay. I record. It's going to start recording. And then you can just
say, I just record the second portion and we
are down to six, 7 seconds. Now I want to continue it. So basically, it cut the clips already and it's ready to edit. You could export directly like this or you
could press Edit. And you're going to see that there were clips that you shot completely separately that now are thrown into the timeline. Okay, let's discard this. And you're going to see
that some of the options you got here you got also inside the timeline or
the main interface also. But sometimes this just might be the most important
thing for you. Like, for example, to
have a caption video. So you could just start
directly from here. Now, one option here that I really like is the teleprompter. And this is basically this text box that remains on top of the camera here that I
could just start recording, for example, it's
going to count down, and it's going to start
scrolling the text. Hi, I'm Capco teleprompter, and I can help you
remember all your lines. This feature supports editing
text and go on like this. In this way, you're
almost looking at the selfie camera
on the phone, which means it looks like you're recording out of the
top of your mind, but you're actually
reading everything. Also here, you're going
to find some other stuff that usually you wouldn't
find in a video editor, like, for example,
a photo editor. You're going to
find here basically all the options you would
find in light room, for example, not
all, but some of it. So you could adjust
the brightness, the contrast,
saturation, and so on. Now, by leveraging
these extra features, you can save a lot of time. Stay organized, produce
high quality videos. And in the next
and final lesson, I'm going to walk you through a complete editing workflow from start to finish to bring together everything
that we've learned.
14. Complete Workflow - Part 01: This lesson, we're
going to put everything we've learned into action, with a full editing workflow. Together, we're
going to create a real highlighting
five reasons why Capcat mobile is
the best solution for creating videos on the go. And this is a perfect
project to bring all the features together
and showcase your skills. This can be interesting for
you to understand how to mix the different features
we've learned into one edit. If you want to practice first
and recreate the same reel, all the files are in
the resources panel. If you want to use
the same files but create something
different, have a go edit. And if you want to film and edit something on your own,
that's perfect, too. Just don't let the extra
work get in the way of you getting some practice about
editing. Let's do it. Okay, so if you downloaded the videos from the
resources section, now you have all of
these available to you. Mainly, there are some
talking head videos and four Bureau shots that just include screen recordings of
the Capcad interface. I want you to select all of
the talking head videos, and we are going to
import them without checking in which
order they are. We're going to rearrange them
right now in the timeline. So all you need to do is to listen the beginning
of the video to check which tip
it is because I always say first, second, third. And you can press, hold your finger on
each one of the videos. They're separated by
this white block, which is the transition block. And you can just click hold
and drag it left or right. The ultimate solution
to edit one or two, but five reasons why Capcat
mobile is the ultimate. Okay, so now we arrive
to the last video, which is also the first one because this video is in a loop. We're going to
select it, and we're going to go to extract audio because this
is going to help us spot exactly where
to cut this video. You can see the drop on
the audio over there. It's exactly where
we want to cut it. But I'm going to
cut it right here. And now that it's
perfectly done, I'm going to eliminate the audio because it's not
connected to the video. And if I try to play it right
now, it's going to be mute, so I have to recover the
audio from both of these, and I'm going to dig the
less piece to the beginning. CapcutFive reasons
why Capct mobile is the ultimate solution
to edit on the go. Perfect. So it starts with five
reasons the Capcut mobile. Okay. Now let's add some body effects to
the first video because the first 3 seconds are the hook and it's really important
to call attention. In this case, here,
I'm just going to use this vortex effect. And as you can see,
you have many options. And if you click five and stop your finger on
top of any of the effects, it's going to go to this
step which is the safe. One is going to blow your mind. And always remember that
you can still click on top of the effect and
customize it a little bit. Five reasons why
Capcut mobile is the ultimate solution
to edit on the go. And trust me, the fifth one
is gonna blow your mind. First, Capcut mobile gives you Okay, it's
looking pretty good. And then on the second part
of the video is just me explaining that the fifth tip is going to be the most
outstanding one. So let's cut it here. I'm going to make it
a little bit bigger. On the go. And, trust me, the fifth one is gonna and maybe for this one, I'm just going to
eliminate the effect just to have this change.
And trust me Scenery. One is gonna blow your
mind. First, Capcut mobile. And also gonna zoom
in a little bit. And by that to do that, I just use really pinching on the interface on
the preview itself. Mind first Let's include the first transition between this first scene
and the first tip. You can choose
whichever you like. And for this first tip, I'm just going to make the
screen a little bit smaller. And I wanted to go to the background option, and
we're going to chose blur. This way, whatever it is
on the top is also to be replicated on the background but blurry, and you can
choose how much you want. Tracking both features
like AI tools. In this case, here, let's split this one
a little bit more. I want to get this
part with the AI. AI tools, face track. AI tools. Okay, perfect.
It's perfectly split. And the idea here is
that I'm going to create something that is in the background, just behind me. So we're going to duplicate it, overlay it just like you saw
in the rotoscoping lesson. And let's go to remove BG, and I'm going to use the
auto removal in this case. Capcet is going to work,
background removed. Perfect. So now we have the
top and the bottom layers. But now we need to know what's
going to go in between. So let's go to Ed,
go to the library. Let's try to find something like artificial intelligence or
something related to that. Okay, this one
looks pretty good. I'm just going to
click HD, Import it. Now it's on the main
track. We need it to go below or above, actually. I go to make it shorter a
little bit, go to overlay. Okay, now it's in
the second layer and I'm going to overlay
once more this one. See that we don't have the
option to overlay here. And if we see the layers,
they're on the same one. So what I'm going to
do in this one here is just drag and drop it down. Perfect. But I have to pay attention because cap
cut like this looks like me on top of the Artificial
Intelligence Bureau on top of the background. But actually, you have
to check the layers, and you have to
rearrange it correctly. Okay, so now my cutout
is on top of that. We just have to rearrange now the artificial
intelligence part, and it's going to look cool. I'm going to grab
it on the preview, make it a little bit bigger,
rotate it 90 degrees. Scale it up, and now it's
covering all the background. But it looks a little bit
weird with my cutout, so I'm just going to
reduce the opacity a little bit. Perfect. Now we just need a way to
make it go in and out. And for that, I'm going to
click animations and choose combo because this includes
in and out at the same time. Just like AI tools,
face tracking. Yes, it looks perfect. I like AI tools, face
tracking, tech Great. Let's continue.
Now, for this part, I'm going to go to
the camera tracking. I'm going to choose
face and let it track. And here, it's very
important to choose fit Canvas and keep face size. This way, this is the
effect you're going to get. The face is always
in the middle, and there are no
gaps in the borders. Software with plugins
in the pom for hand. Second. Perfect. Very cool. Okay, here, let's try to find a moment in which I
can track my hand so that I can make
some money appear and use also sound effect
for that later on. Pom for him second the app. I'm going to choose this bag, make it a little bit bigger. And just position in the first frame in which
the hand looks more or less well defined there
because it's also blurry. I'm going to start
tracking by putting this over my hand,
and it's really fast. But you can see that it kind of moves together with the hand. I'm gonna try again, and
you can keep trying it until you manage
to track something that is really visible
to the software. In this case, it's
always useful if you have a watch or if
you have a ring or something that it's easier to detect with the contrast
in comparison to the rest. Okay, tracking completed. And it looks good until I
start to lower the hand. So I'm just going to cut
the sticker to that point. Pom for hand. Pom for
hand. The p for hand. Okay. Pom hand. It's enough. I just
want this little bit. Hand. Okay, so now let's do
the text templates. In this part here, I'm
just going to go to text, go to text templates. Choose something
that I like. You can always find something
interesting in the trending tab. Text templates. An effect
you'd expect from Exp. Okay. This one sounds good. Text templates. An effect
you'd expect from Exp. And to edit, you can
just click on the bottom where the text panel appears, or you can also double tap on the screen
in the right place, and it's gonna allow you
to edit over there also. In this case, template
is going to go there, and back to nature, I'm
going to change the text. It's enough. It's
just an example. You can choose something
nicer later when you edit it. I'm going to reposition. And whenever you choose
something on the screen, you have four options there, and one of them is rotate. One of them is to
scale it up or down. Text templates. It's looking pretty
good. It's more or less following when I
say text templates. I'm going to make
it just a little bit shorter Benefactor Great. I'm going to cut it
here because then when I start talking about effects,
I want to add something. Effects, video effects. And let's just choose something
interesting here that can last the whole duration of
the rest of this the hand. In the pump for hand.
Second, the episode. Okay, let's make a cut here and let's start the next
part of the scene. Okay, this is the part in which I'm going
to add some vio. So I'm just going to cut here
where I want to insert it. And I'm going to put myself
on top of the Bureau. So for that, I'm
just going to choose the mask and the round
one in this case. Now on the spanel you can just rearrange the mask for it
to be as big as you want, and you can also feather it. When you move it, you're moving only the mask, not
the video itself. When you click outside
of the mask panel, now you're moving
the whole video now with the mask
already inserted. So I'm just going to position myself up there in the corner, and I'm going to insert
also an animation, a combo animation
to have the in and out so that I just don't
over there like this. St efects captions. But simple to use.
You can cut clips. Some of them are going to
make more sense than others. You can just go click artifact. And even before it applies, you can already see reasons
How is it going to look like? But simple to use. You can cut complete,
but simple to use. You can cut clips
artifact captions. Okay, this is looking good. You can cut clips,
artifact captions. It's perfect for So this is the one that
I used in this part, which is just me starting to cut this clip where
there's an airplane. So all you need to do is find a similar one and
just go for it. Here I'm going to crop
a little bit because since I'm on the
timeline already, I don't want to mess
it up by having a super long clip, pushing
everything forward. So I'm just going to
select this bit, add, and now it's after the
part that I masked. So I'm going to
click, go to overlay. Now it's on the second layer, pull it back a
little bit. Perfect. Per complete but simple to use. You can cut clips fact. Now, just the order is inverted. So I'm going to
click on the Bureau. Make it a little bit shorter, match exact the
length that I want. And then I'm going to go
there. I'm going to click main track so that I send
it to the main track. Now onto the mass layer and overlay so that
it goes above, push it back. Simple use. And there wepact captions. It's perfect. Complete. Now, the background
is black because I didn't choose anything,
so we're going to fix that. We're gonna make it a little bit bigger, see if it
works like that. But then I'm cutting a
little bit of the interface. I'm not a big fan of that. So I'm just gonna
make it smaller so that you can see
the whole screen, go to background blur and do
the same as we did before. But simple to use. You can
cut clips artifact, caption. Perfect Now, we need the transition to make
this Bro come in and out. But simple to use. You
can cut clips, artifacts. Entrances there beginnuhan also the outsiders. Okay. Perfect. Now, from the second
to the third tip, I'm going to use this
transition adjust. Its Brico. It's gonna need some sound effects later,
but we're going to edit. Don't worry. Okay, now let's go add some
zero for this part. It's this one where I choose something from the media
library. I just show around. I'm gonna crop it also
just like I did before. Maybe this initial
part because there's some loading over there and
I don't want it to appear. Yeah, this is
looking pretty good. I think I'm going
to go with this. It's just 8 seconds. Let's make it a little
bit smaller and shorter. Okay, let's edit HD. It's going to
compress the video, and now it's on the main track. You can find sound
effects music, create voiceovers. Perfect. And in this case here, what I'm going to choose is just to have the audio behind or on top
of that part of the video. So for that, I'm just
going to duplicate this, bring it back, make it exactly
the length that I need. And I'm going to remove the background and insert myself there just in the corner. Just like a green screen effect really commenting on something. You can find Same thing. B the background,
and there we go. But now I just pop
there in the corner. And as you've seen,
I don't like it. I don't like it
this way very much. So I'm just going to
insert an animation, a combo in and out. Perfect. You can find sound effect to music,
great voiceovers. In this case, I usually like something that comes
from outside the screen. So I'm just gonna go with one of these trains in sound
effect to music. Combo animations.
Perfect for create. Okay, this looks pretty good. You can find sound effect
to music, great voiceovers. And Capcs gonna keep removing
the background because it's updating whenever you move
that clip around a little bit. Create voiceovers. Perfect for creating dynamic eye
catching edits, four. Okay, that worked pretty good. Now let's see the transition between the third tip
and the fourth tip. Perfect for creating dynamic
eye catching edits, fourth. Perfect for creating Okay, here I'm deciding
actually to do the same for the whole length
of the talking head video. Find sound efects music,
create voice over. It's just more
interesting that way. Perfect for creating
dynamic eye catching. Dynamic eye catching edit. I saw that there's
some issue with the animation in which it just
fades away in the middle. So I just removed it. I'm
going to insert it again, and let's see if it's
going to fix it. Trying animation.
Sometimes Capcot is just updating the
cache behind what you're doing, and
it might get stuck. So you might just need
to remove an effect and put it again or go out
and backto the app. In the next lesson,
we're going to see the part of editing this. Yes.
15. Complete Workflow - Part 02: Okay, we're back to part two, and we're still doing this transition from the
third tip to the fourth. I'm going to cut it right
here, cut this piece. And since I'm talking about
being lightning fast, I'm going to go in the obvious and I'm just
going to select video effect with
lightning. Hiking. Okay, this one
looks pretty good. And it's really interesting how Capcut interacts
with the subject on the scene as the
lighting changes and also there are some lightning behind
and in front of me. Okay, that's looking good. Now, let's add again
some Bro here. In this case, it's
going to be this one in which I'm just creating
some captions. I'm gonna make it shorter
about 4 seconds now. You can always watch it
there on the bottom, edit, and it's going to go
into the main track here. You can generate
captions, de emplate. Easily layer bureau, add
sounds, it's design. Okay, this is the case
in which I'm just going to overlay the
audio from this part. So I'm just going to cut it. I'm going to go to extract audio and I'm going to
bring it back over here. Es o. To make it a little bit
shorter because I'm going to add a little bit more
Bro in this area. Now, this part here in
which I'm just selecting which type of captions do
I want, media library. I have also the
part in which I'm choosing Bro that I want
to use in this video. Yeah, this one is going
to look pretty nice. I'm going to crop
it a little bit. We're around 3 seconds here, maybe a little bit
shorter. That sounds. Okay, now we have
two Bros covering the entire length of the
audio from this clip. Maybe I can still fit one more. So I might make this one a
little bit shorter over here. And you can also
always re dimension the clips by doing this
clicking on it and just dragging the white borders
around to make it longer or to make it a little bit
less, be a little bit shorter. Okay, now we have three ros of screen recordings of Capcut. And the third one
is an actual Bro imported into the video. But you see that
it's horizontal, so I'm just going to
scale it up a little bit, and I'm going to have this camel here around the
middle of the scene. Okay, that's quite about where the audio finishes
from me talking. In this case, I wanted to
try some camera tracking, but I noticed that it didn't
really work very well. But I'll let you see
what happens here. So after a little while, the camera tracking got lost and just zoomed in crazily
onto the camera. So I'm just going to
skip it. It's very slow, so it's really easy to track. I don't need that.
In some cases, it works. So cases, it doesn't. You just have to try Okay, let's blur the background
so that we have a little bit of something. It's a little bit
nicer on the back. It's just not like the
playing screenshot, screen recording on the top. We have here me talking about
the lightning fast edits. Let's make this a
little bit smaller. We have the Bureau of the camel. And now the transition between
that and the next point. Okay, let's make it a
little bit shorter so that when the audio finishes, also the visual finishes. Yeah. Okay, here we're talking
about an all in one solution. And as a transition, I'm just going to add
something interesting here. I want it to be a
little bit different. So this one looks pretty
nice for the ending. Now, between one and
the other scenes, it's always the
talking head video, just going to scale it up a
little bit to seem like it's another scene or to seem like it's a continuation
of the same scene, although these are in
two different moments. Now, let's search here
for the freeze frame. And as I told you in
one of the lessons, this just creates a
completely frozen frame of 3 seconds of the last scene
last frame that you saw. And we're going to
use this to create a transition into the next clip. Okay, I really like this
horizontal slides option. Let's see how it looks. Yeah, it's pretty cool. It's gonna need
some sound effects, but the visual is
very interesting. Without spending a dime. Okay, we're almost there. Okay, let's cut this
clip over here, and I'm saying that
you can create incredible it without
spending a time. So I'm just going to
grab one of the bureaus in which I'm talking about
the pro features over here. I like this bit
in which I'm just stretching out the
color adjustment panel, and there are three pro
features over here, which kind of illustrates
what I'm talking about. So it's going to go
into the main track. Let's choose a transition
for this bureau, this screen recording
to come onto the scene. Okay, it looks pretty
cool like this. Let's go to the
volume. I don't really need the audio that
comes from the bureau. And let's extract the audio. To try them Let's extract the audio from the following
piece and bring it back so that it continues just with the audio
on top of the bureau. We make it a little bit shorter to less more or less
the same thing. And I really want a sticker to point out where the
pro features are. They're already quite
clear on the scene, but I just want to
help the viewer really see what I'm
pointing out here. The stickers are just
going to be still, but some of them are going to be animated and they're
quite nice like this. You just need to understand
what's the movement. So for example, here it goes a little bit over where I want. I'm just going to
grab in this moment, drag it on the preview
panel, put it where I want. And if I change here the
loop or the movement itself, it's going to change completely how it interacts with the video. So in this case,
I'm just going to use the same movement that was already set up in the
arrow when I inserted it. Okay.cPerfect. It works with the
arrow. So now let's just go to recovering the audio. The at a monthly
it's not a dime. But if you want to let's make this bureau last
exactly how much we need. Try them before you activate
the monthly subscription. Okay, we're talking about activating the
monthly subscription. It should end right about here. And then we're going to
go onto the last piece, which is the Otro, which is going to connect to the intro because it's looped. For this one, I'm going
to choose something crazy like this paper transition here. Yeah, it's going to finish
with me with the hand up like this and starts
exactly like that. Okay, perfect. The visuals are looking very,
very interesting. Now I think we have to go on
to the sound part of this. But before, let's just
add a filter to it. These videos have been
already color corrected, but we can add
some special flair to it by adding one
of the filters, and I really like this
hassle blade too. Just be sure that if you want
to affect the whole video, and this is what we want here because it's all
talking head video, you just drag it all the way until the end
so for the sound, I'm just going to go
for any song that I can find here that has
a little bit of a beat, and you can just click and listen to all the
songs that you'd like. I'm just going to keep
with the first one. And I really want the start of the audio to be a hit like here. So I'm just going
to cut this audio exactly here and bring it back. You have to remember that
if this video is a loop, you need the music
to loop, also, otherwise, it's
too easy to spot. I'm going to put the volume
around ten, otherwise, it's too conflicting with the
voice. Eight sounds good. And I really want the
beginning to be a hit. So I'm just going
to add a keyframe right in the beginning,
a little bit later on. And when you see it
red on the timeline, it means that it's
activated and you're changing the property
in that point. So here I'm going to make
the volume 30 and you can see that it goes down
until the second keyframe. And by the end, I
want it to fade out. So here, I'm going to split it. The music is super long, drag and drop it until the end. It's going to snap to the
end. You're going to feel it. And here I'm going to
click fade and use the fade out about 2 seconds. And you're going to be able
to see there the fade symbol. Perfect. So it fades out in the end and then
starts with a hit. Okay. Next step, sound effects. I already saved a bunch of sound effects that I
use quite often here. So one of them is going to be the one special for this video effect,
which is the vortex. Now, the key is that
you have to move the sound effect around
to be able to be sure that the right moment in the sound effect also matches what's happening
on the screen. And you don't want the volume of the sound effect to
be too overwhelming, otherwise, it's just distracting
and not interesting. Now for almost every transition, I'm going to add some
sort of sound effect, and most of them are
going to be wooshs. There are many different types. If you just type woosh just
like it's written there, or with also WH OOSH,
it's also going to work. And you're going to have all
these weeping Wushes and things that just match very
well with the transitions. In this case, here, I have
this science AI video. So I just search something like artificial intelligence
or something and found this one or science. Sometimes the sound
effect doesn't have to be exactly what you're
seeing on the screen. And you can get really
creative with this. You're gonna find some things
that are totally nonsense, but they just match as
audio as a sound effect. Now, here I have
the text template, so I'm just going
to find some typing on a keyboard. This looks good. Sounds very nice. Reposition it, make it a little bit Lower
the volume. And we're good. Now, this transition, I'm just going to use
something different. I'm going to go with this
science fiction because I wish just didn't match at
all. Gonna make it shorter. Lower the volume. And we're good.
Now for this one, I really need a money
bell. That's it. A cash register. Done.
Position it right, and you can't really overlap it if it's in the same layer. So either you
create a new one or you just make it as connected as possible to
the previous sound effect. Now, in this case,
here, simple wish. Again, here. Third, and out here we do have something like a paper
transition or something, so turning a page could work. Okay. Next one is
going to be a wooh. Position it so the
hit matches the visual and there's going to
be another one over here. That's the importance of
saving them on your favorites. Otherwise, you have to search
for them every single time. It's just a waste
of time. Well, we need a lightning sound effect. There's going to be a bunch of them, but this one sounds good. All right. I want it to start a little bit before and a little bit after. And the sound can't be
really overwhelming. I'm just going to
fade it in and out. We have all the
bureau. Now we have a transition over
here. Classical woosh. Now that crazy transition. And for that one, I'm going
to use this light recovery. Like a Scifi styled
sound effect. Lower the volume to 30. You think. And this is a very strange transition
to a a sound effect, but it looked
something kind of like a majong game or
something like that. So I just searched for tiles. I found a bunch of
sound effects that have absolutely nothing
to do with this. No, not at all. To simple. But this
one sounds good. Okay. Now, remember that whenever you click
on sound collection, you can see all of the
audios that you have. And in this case,
here, since I have the freeze frame, I'm
going to get the music. I'm going to create four keyframes and the
ones in the middle, I'm going to raise the
volume up to 37 or 40. And this means that there's
going to be a step up in the music in that moment
where the visuals are still. So the music is
going to compensate it, and then it goes back down. Now here we have the arrow, so I want to put a bell, a ding or something like that, which I have already saved. Positioning. Okay, now it's matching. And finally, the
last transition, which is this paper, crumbled paper sound effect.
Gonna position it right. Cut it here. Fading and out, just out in this
case. And that's it. So regarding sound effects,
I think we're good. Okay, every single time you
do one pass of visuals, sound effects,
captions or whatever, it's good to watch it all over to see if it's all correct. So I'll do the captions. I'm just going to choose video. And here, I'm going to choose already the template
that I want to use, which are these white letters
with black background. You don't need to
choose it now, but it just makes it easier. Captions are going
to be generated. It's super fast. And now they're all on this bottom
layer here marked as brown. And if you change one of them, you're going to be
changing all of them. Now, first, I'm going
to choose the font. I want to change it. So
I'm going to change. I'm going to choose
for this genial font. It's up here, selected. Now all of the fonts,
all of the subtitles, the captions are all the same. Repositioning also affects
all of the subtitles. I'm going to make it
a little bit smaller. Okay, now it looks good. And that's the process
of just editing all the captions and seeing that everything is
written correctly. You can do it on the screen,
just like I told you in the text and captions lesson. But I prefer to go through the dit captions panel
because like this, I can really see the whole text, and I can already see
also the next lines. Also clicking on
the panel is easier than on the screen
itself because you also have the
buttons to re dimension, to close, to rotate. So here just makes it easier. Some things are going to be understood wrong by Capcut like Auto and Auto Bureau, Bureau. So I'm just going to go
through here really quickly, fixing all of the small
mistakes that I made, but it's like 2% of it.
I'll see you when I finish. Okay, it's looking pretty
good. Let's take a look. Is the ultimate
solution to rusts incredible features
like AI tools, face tracking, text
templates effect. Now, in this part here, I
already said text templates, and I already had the text
template itself on the screen. So we don't need the
subtitles on top of that. So I'm going to delete,
reposition it a little bit. And here is missing one word, so I'm just going to edit. Effect, you'd expect from
expensive. Okay, perfect. Alright, this is the end of our lesson with the
complete workflow. And the next lesson,
we're going to talk about exporting your video.
16. Exporting Your Video: Done all the hard work
of editing your video, now it's time to export it. In this lesson, we walk through the exporting options
in Capcod Mobile, ensuring your video looks its best no matter where
you're sharing it. We'll cover settings
for resolution, quality, frame rate, and more. For this exporting lesson, let's just choose
one of the videos that we were editing before, like this one, for example. And what I need you to pay
attention here is this menu on the upper right part
right beside export. Here is where you're
going to choose. First, the resolution of the
file you're going to export. Now, bear in mind that
for social media, the bare minimum is
going to be ten ADP. Now here really depends on where you're going to show this video. If your idea is to
put it on a TV, definitely four K, just to
see it on a smartphone two K. If you're going to publish
it on social media, ten ADP might just be
the best option here. The thing is, you
could try to publish something in a
higher resolution, but normally the
social media apps are going to compress it down. So the least they have to compress something, the
better it's going to look. The frame rate is
going to depend on the clips that you
were using before. In this case, the
clip that I was using was 25 frames per second. So I'm just going to
export like that. The code rate for this video
is just going to follow more or less the quality
of the original files. Now, this is one that usually I see it as a little bit better
if you put it at high, and the file size doesn't change that much,
as you can see, it goes 11-13, in this case. Here in the watermark option, you're going to be
able to choose where the cap Cod logo is going to go, or if you have the pro version, you can actually
hide it completely. Just one remark in case you're using 30 frames per
second or more. You can actually enable
the optical flow, which is going to try to make
your video look smoother. So in case you have
the pro and you have the original files at
25 frames per second. But you want to export is 30, you could use this
option to compensate. Now, you could leave it as it is and just continue editing. But if this is your final step, you can just click Export. And now you're good to share it. Now, if you're in
doubt about which kind of clips you've got and which are going
to be the best export settings for you, I highly recommend you to export in some
different settings and compare them really
by watching one after the other and trying
to guess which one was it. This kind of blind test
is going to give you a better feeling of which are the real best
settings for you. Alright, in the next lesson, we're going to wrap it all up.
17. Conclusion: First of all, congratulations. You've made it to the
end of the class, and that's a big deal. Taking the time to
learn and improve your video editing skills shows your commitment to growing
as a content creator, and I'm so proud of the
effort you've put in. Let's take a moment
to reflect on what we've covered
on this class. We started with the
initial setup and explored how to select clips
and organize your project. You learned to navigate
the timeline and layers while mastering tools like trimming, splitting,
adding effects. We dove into advanced features
like speed adjustments, rotoscoping, and AI effects to take your edits
to the next level. Now, you also got hands
on with audio editing, text, captions,
and so much more. Now, you have other
tools you need to create professional quality videos
all from your mobile device. If you're hungry for
more, you can check out my other classes
on skew share. If you feel like having a little bit more space edit
would be good. You can try the Capcut
for desktop class. It's perfect for those
who want to edit on a larger screen with
additional features. Maybe trying the victor
Resolve for creators looking to dive into advanced video editing and color grading. If you want to keep mobile, you can check out Lightroom mobile and learn how to
edit stunning photos directly from your phone. Each of these classes builds on the skills you've
developed here, giving you even more ways
to create amazing content. If you want, you
can follow me for more tips on my social
media platforms. I share quick editing tips, creative inspiration,
and updates whenever new features
or tools are released. And you'll also be the first to know when I launch new classes. Thank you so much
for sticking around and completing this class. Your time and
dedication means a lot, and I hope you're
feeling confident and excited to create
your next project. Now, remember, the best way
to improve is by practicing. So go ahead, apply what you've learned and share your
work with the world. And if you have
any questions, if you need any kind of feedback, you can use the
discussions panel and post your work in
the dedicated area. Thanks again and
happy editing. Show.
 Enrico Luzi, Creative travel content