Transcripts
1. Welcome to the Course: Creating a
print-on-demand business can be one of the most
enjoyable things if done right. Hi, I'm Shimmy Morris. I'm a YouTuber and an
online entrepreneur. I ran various businesses
such as Amazon FBA, print on demand, YouTube, a podcast, a blog, and when I'm not
doing any of that, I absolutely love
socializing and traveling. I've been in and out of print-on-demand for
the last nine years, and I think I've done
quite well with it. More recently, I've been helping people out through YouTube. Many people who watch my YouTube videos
asked me to create a more structured approach to the print-on-demand business, and that's where this
course came from. This has been in the making
for the last six months, and I'm really excited to
finally bring it to you. I hope you enjoy it. It's a culmination of
everything I've learned and implemented over the years, which should
hopefully help you in your own print-on-demand
businesses. Thank you so much for joining. If you have any questions, please feel free to
ask them down below, and I hope you enjoy
all the other videos.
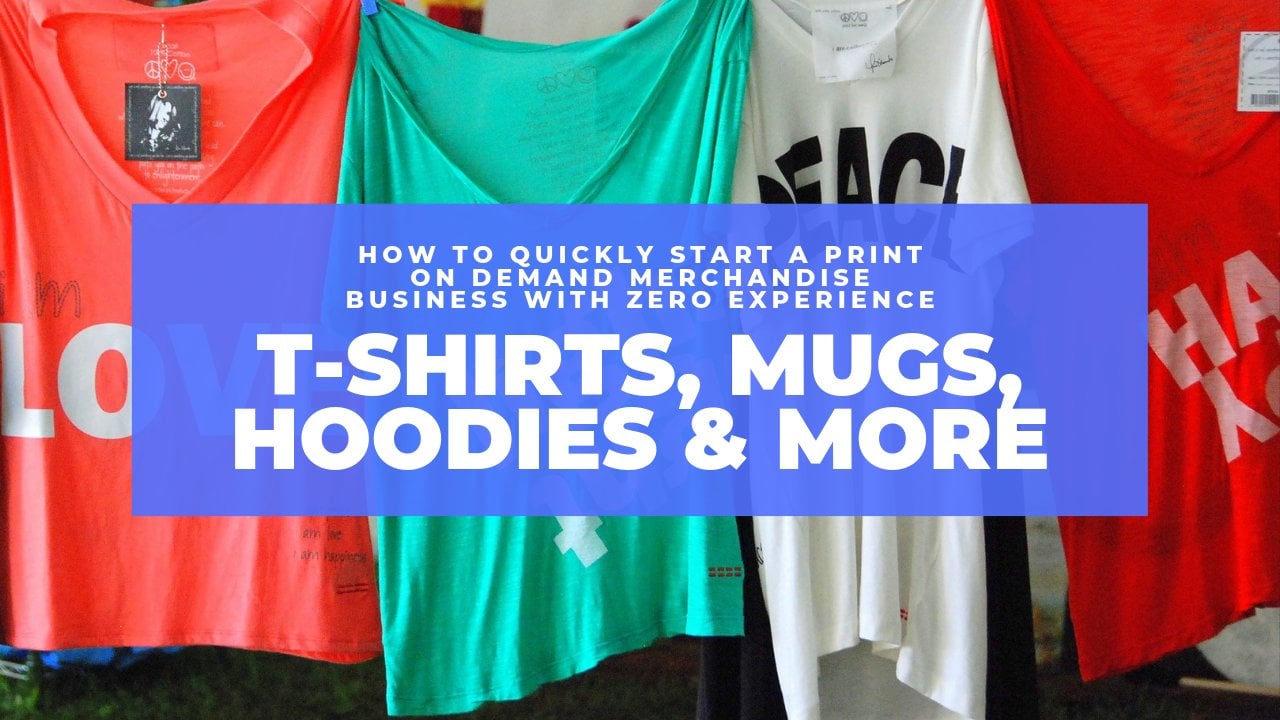
2. What We'll Cover: This course is going to
be split into six parts. You're currently
watching part 1, welcome to the course. We then have part 2, creating a store; part 3, research; part 4, designing; part 5, selling, and part 6, recap. We are going to fully go over setting up a store with
platforms like Amazon, eBay, Etsy, Printful, Moteefe, and many
more as time goes on. We're then going to be
looking at finding designs, creating designs, and adapting designs
to make them your own. We'll also be creating
brand-new ideas from scratch. We need to populate our
stores with something, and this is where we'll do that. We'll then learn how to create
the best possible designs. If you want to create
text-only designs, we're going to do that, or if you want to
learn how to create the most incredible
graphic design, we're going to learn
how to do that as well. We also have color theory key
principles to follow and, best of all, programs to
actually create designs in. There is a full Figma tutorial. I chose Figma because it is a free tool that is
incredibly powerful, and as well as that,
as time goes on, I'm going to be adding
new tutorials for different tools
like Photoshop and Affinity Designer so
that you can learn so many different ways to
create amazing designs. I'll also be going
over where you can actually find
royalty-free images, and I have a really cool
surprise for you later on in the course where I give you a whole bunch of
niches ready to go. We'll then go over the selling side of
things: keywords, what to charge, how
to pick products, what products you
should be picking, and how to create powerful descriptions so that when people land on your page, they feel like they want to
actually buy your products. At the end, we'll recap
everything we did, and then you can join
in on a little project, which I think you'll
really enjoy. This will, hopefully,
get you even more help with your designs
and your business. I just want to stress, this is not a get-rich-quick
scheme at all. This is all about how to create really cool designs and learn all the
different elements of creating cool design with
the added benefit of potentially selling
those designs later on, but the core concept of
this course is about how to create really cool
print-on-demand designs.
3. What Is Print On Demand: What is print-on-demand? Print-on-demand is
a way for you to sell customized products to individual customers
without having to worry about shipping, managing inventory, or
printing their design. You would create the
design and put it on an item of clothing or
an object of some sort. Once a customer
places an order for one of your items with
your design on it, the printing company you've
partnered with will get automatically notified
and they will print it, package it, and ship it
out to that customer. The reason it's so
cool is because you don't really need
any money to do it. You don't need to order
anything in bulk, nothing. You can just focus on creating and researching
new designs. It's awesome because you're selling something from scratch. You're not reselling
someone else's design. It's not like drop
shipping where you're already selling
an already made product. You're selling something
that you have made yourself and you don't
have to worry about ordering the items in bulk and not knowing if they're
going to sell because the printing partner
will send it out on an individual level
each time someone buys. That is what print-on-demand is.
4. The 2 Types of Printing Companies: There are two types of print on-demand
production companies that you could partner with, ones that have an
integrated marketplace and ones that don't. Let me explain a
little bit further. We have the ability
to self print on demand products on
our own websites. We're going to go over this in more detail later
on but for now, let me quickly tell
you what it's like. You'd have to send your own
traffic via advertising, social media or other forms of marketing to get people
to your website. What we would do here, is set up our website with
one of the various print on demand printing partners and
then when we get an order, that partner will get
notified automatically and send that product
out to the customer. But in order for us
to get an order, we need to actually send
the traffic ourselves via various forms of marketing. Otherwise, how is anyone going to really
know about our websites? Print fold would be considered a print on-demand
production partner that does not have an
integrated marketplace, meaning you have to connect
it to your website or to a platform where customers can actually go and
buy your products. On the flip side, there are companies that do have an integrated marketplace
where individuals can browse and buy your
products all from an organic approach without
having to be marketed to. Companies like Amazon,
Redbubble, Etsy, eBay all have
integrated marketplaces that get a serious
amount of traffic every single month that
lots of people randomly browse and could stumble
across some of your designs. The benefit of using a
platform like this is you don't have to worry about the marketing side
of the business, which can be very,
very difficult. The only thing you have
to focus on is creating designs and uploading them and because these websites
get their own traffic, the chances of getting
organic sales is possible. Saying that, I would always recommend building up some form of audience at the same time, whether or not you've
chosen a put on demand company that has an
integrated marketplace or one that doesn't build
up your own audience because that will
allow you to get far more sales down the line. What do I recommend? For new time print
on demand sellers, I would always recommend
picking companies that have an integrated marketplace
just so you can dip your toes in the water and have a
feel for what it's like, companies like Etsy,
Amazon, and eBay. If you have already
done that or you have an audience
before even starting, I would recommend
creating your own store, either with Shopify or Xero or any other website
builder that you want to do. You can then integrate
that store to various different printing
partners like Printful, sometimes Motif and with that, you'll be able to have your
own website, your own store, and you'll be able to
make a bit more money as the modules will
be slightly better. Then at the same time, I would also recommend uploading some of your
designs to Amazon, eBay, and Etsy just
so your designs have even more exposure and even more chances
of getting sales.
5. Creating an Amazon Merch Store: [MUSIC] If you are able
to sell on Amazon Merch, then you are in an
amazing position. But for a lot of people, sell on Amazon Merch
is just a dream. It's really hard
because you have to get accepted and not
everyone gets accepted. Sometimes you get
rejected and then you get rejected again and again and
people just stop applying. Merch by Amazon is a merch-focused part
of the bigger Amazon. It's a really great way to sell your products because Amazon
gets so much traffic. They have so much trust and you can make quite a good
amount of profits. I have in the past created a step-by-step video on
how to get accepted. As I can't keep setting
up new Amazon Merch accounts because it will get flagged up and I
will get in trouble, I'm going to show
you a video that I have already shot in the past about how to get accepted
to Merch by Amazon. I just want to quickly say, if you don't get accepted
first time, then apply again. I know some people say
you're not allowed to apply again and other
say you are allowed. But at the end of the day, you should just keep
applying because when you stop applying,
it doesn't really matter. You're not applying
anymore, it doesn't matter if you're
allowed or not allowed. You're not going to be accepted
if you're not applying, so you should just
keep applying and hope one day you
do get accepted. Let's go and watch this video on how to get accepted
to Amazon Merch. Please bear in mind,
nothing is guaranteed. You can still get rejected
and you might need to do the whole process again and again until you do
eventually get accepted. Step 1 is to go to this page. This is just a Merch
by Amazon page where you would click "Sign
up" over there. Now if you already
have an account, all you have to do is login
and it will take you to the service agreement page where you just have to click
"Exit" and move on. Let's do that. You can
see I've logged in here. Now I haven't logged in
with my account because I already have an
Amazon Merch account, so I use my wife's account. But you can see
service agreement. I just have to click "Accept". Now what I need to
do is I need to go through and do all these steps. Sign up for Merch account. You've got business and
contact information, bank account and
routing numbers, social security numbers, and other tax
identification number. Let's click "Continue". First things first, we've
got to put our country in. Let's put in our country
of United Kingdom. Now you can see there are
some unsupported countries. Obviously, if your
country isn't supported, then you're just going
to have to wait. I don't know what would
happen if you used a VPN. I've never tried that, but
obviously you could try that. Next, we've got to put
on our business name. Now if you don't have
a business name, you could just use your name.
That's absolutely fine. If your name is Shimmy Morris,
that would be very odd. But you could just
put in Shimmy Morris. If you do have a business
name, then use it, but only use it if
it has something to do with graphical design, print-on-demand,
that kind of thing. If you have a business in
something totally random, you don't want to use
it here because it wouldn't make any sense. For me, I'm just going
to put in Shimmy Morris. Address, obviously
you want to put in your address. I'm going
to put all this in. If it's blurred out, it's
just because I don't want to share that stuff. Make sure to enter
genuine information here. This is really,
really important. You check this,
double check this, and triple check
this to make sure you're entering
everything correctly. The next is putting in
your bank information. Again, I would put in
the United Kingdom because that's
where I'm located. Then I put my
account holder name, my IBAN, my BIC code, and the name of the bank. If you don't have the
ability to do this, then you can use
something like Payoneer and that should work
absolutely fine. Once we've done
that, we now have to complete the tax information. It says you have unsave changes. Let's click "Save and
Continue" and now we're going to be
completing the tax stuff. The tax stuff can be
a bit complicated. You have to decide, are you an individual, are
you a business. For US tax purposes, are you a US person? I'm going to say no. If
you are a US person, then you'll go through
all these things. If you're not from the US,
if you're from the UK, we have a tax treaty, so there shouldn't
be any extra tax. But if you're not, it's going to be dependent on whatever country you're from. I can't really save
every single country. What I will do is I'll
try and put a link down below that will give you a bit more information about this. If you are in the UK, your
unique tax reference could be your national
insurance number or your unique tax code,
whatever it could be. Once you've done that,
you want to scroll down, click "I consent", put
your signature in here, which will just be your name, and click "Save and Preview". Then you are led to this page. Let's just click "Submit Form", and now we're good to go. Now we can click
"Exit Interview". Once you've done
that, we are led back here with all our information. Again, it will be blurred out. We can just go and click
"Save and Continue". This will take us
to the next step. Now the next step, this is where the
important step is. You want to start by
choosing industry types. You could go novelty t-shirt business if that's what you are, you could go brands, small
business wherever it is. Novelty t-shirt
business is fine. Organization name, again, you could put your name
or your business name. Now, additional information. This is where it's
super, super important. You have to spend time on this. The punctuation
has to be perfect, the spelling has to be perfect. This is what they're
going to be reading. Imagine it's an interview and you are trying
to get the job. You need to really make
sure that you stand out. There's a few things
you're going to want to consider
putting in this box. I've written down a whole
list here on my iPad. The first one is, if you have an active audience,
reference it. If you have sales, print-on-demand sales
elsewhere, reference them. If you have
qualifications in design, graphic design, anything I
like this, reference it. If you have any
certificate for completing Photoshop courses or
Illustrator course or anything, make sure to let them know. If you consider
yourself an artist with a unique style or a
cool style, tell them. If you have a portfolio
of t-shirts or designs or something,
reference that portfolio. If you're an influencer, let them know you're
an influencer. A few other things, if
you've been successful with Amazon FBA in the past or you're currently successful
with Amazon FBA, tell them about it, all the same company. All of these things
will increase your chances of actually
getting accepted. You would write a whole essay. It doesn't have to be a whole
essay, but it should have enough information where
the person reading it on the other end really
feels like they know you and they think you would be
perfect for Merch by Amazon. Just a few more, if
you've been doing POD for a very long time
and you feel that you're very
experienced, tell them. Say, "I've been doing
print-on-demand now five years. I've got sales on
Teespoon and Redbubble, TeeChip and Teezily, and now I want to
start getting sales on Amazon and I've got all the designs ready to
go in the right format, 4,500 by 5,400 pixels, and it's ready to go on Amazon." This is what you want
to tell them because then they will look
at it and be like, "This person knows
exactly what he's doing. He's going to get
sales on our platform, which means we're going
to make more money." That's what they want to hear. They basically want someone with experience selling
on their platform. They want someone who's not going to break any of the terms. Let's talk about
a few big no-nos. If the portfolio that
you are referencing is not completely above
board, don't reference it. If it's got designs
that are infringing, if it's got designs that are bad and not particularly creative, then just don't bother
referencing it or maybe delete or
hide those designs for the time being because
you don't want Amazon to go and see those designs because that will not help your chances. You really want
to make sure that your designs are
fully up to scratch, only show the best of
the best of the best. Now you could create a specific portfolio
for this on a website, any website where you can
display all of your design, maybe even on an
Instagram account, whatever you want to do. This is a bit extra work and I can understand that
you don't want to do it, but it will definitely help you just so that Amazon
can see that you are pretty good at art design and you have a couple
of designs ready to go. Another big no-no is please, please double and triple
check your spelling. No spelling mistakes,
no bad punctuation. Make sure a family
member reads it, make sure a friend reads it, make sure an
acquaintance read it. Make sure it is perfect
when it comes to a grammatical point of
view because they are going to read it and they
want it to make sense. If it doesn't make sense in their minds, they're
thinking, well, that means potentially
titles on Amazon of this person won't
makes sense and their descriptions and their
bullets won't make sense. They want someone who's
going to be able to write perfect sentences because
they're thinking, if you are selling
on their platform, they want the products
to show perfect English. Now just a quick tip. If you feel like you have any good designs that
you can reference, what you could do is you
could go over to Fiverr and pay for a couple of designs, three, four, or maybe
even five designs. It will cost you a bit of money, but it allows you to
populate a portfolio with really good designs
that Amazon can then go and see and be
pretty happy with. Now as well as that, you want to try and read
the terms and conditions. Reading the terms
and conditions will allow you to reference them, which Amazon will really, really like because
then they will think, "He's actually gone out there and read the
terms and conditions, so he knows exactly
what he's allowed to do and what he's
not allowed to do. This person is not going to be a troublemaker for us."
That's what you want to do. Finally, you want to copy and paste everything you put in your additional information into a notes file of some sort on your phone, on your computer. Because once you click "Submit Request" or "Send Request", you aren't able to
access that anymore, and if you get rejected, you might want to write
something different or change up what
you wrote or read it back and see what
you did wrong so that way you'll be
able to reference it whenever you want. Now once you've filled it out, you could put your website in which could be your portfolio. Then you need to
enter this CAPTCHA, and finally you need to
click "Send Request". That is how you would get
accepted to Amazon Merch. Well, what should you do now? Well, now you should
head straight over to Merch by Amazon, login or create an account, and fill in that application
to try and get accepted. Once you have got accepted, you'll be able to
upload one design per day up to a maximum
of 10 designs. Amazon works on a
tier-based system. You've got tier 10, and then tier 25, and so on and so on. What this means is
you're allowed to have 10 designs and 25 designs and they split out
with how many designs you're allowed to upload a day. This way they're able to
regulate the number of designs coming into
their platform and make sure they aren't
breaking terms and they are good design
and all of that stuff. Now, that's not to say that some of these designs
aren't breaking terms, sometimes a few fall
through the cracks. But for now, all you
should focus on is setting up an Amazon
Merch account. If you already have
one, brilliant. We can go to the next video. But also please bear in mind, you don't need a Merch by Amazon account in order to
do print-on-demand. The other videos in this section is going
to show you how to set up a print-on-demand
account with many other platforms as well.
6. Setting Up With Amazon: As well as selling on Merge by
Amazon, which has free. Obviously, if you get accepted, you could also sell on
Amazon's main platform. This would be through
Amazon Seller Central. This is quite a
bit more confusing and it doesn't have that same
vibe as managed by Amazon, but it has a lot of potential. If you have the
time and you have the patience for
Amazon Seller Central, it can be really good for you. You don't need to do
this if you don't want the stress of selling on
Amazon's main platform, is just another way for
you to get some sales. The first thing you
want to do is head over to Printful as the
printing partner we're going to be using to connect
Amazon to a t-shirt company. Once you are in Printful,
if you don't have Printful, you can create a
Printful account and you want to go to stores
here on the left. Then you can scroll down and see all the different stores
you can integrate with. Well, for now, we're integrating with
Amazon's Marketplace. We need to click "Connect". Step 1, will be logging into your Amazon Seller
Central account. If you don't have one, you can just click the link here and register for a new one, click "Sign-up". Very simple. The next thing you need to know is to connect
Amazon to Printful, you're going to need an
Amazon professional plan, which costs $39 and 99 cents
a month plus referral fees. This is why I said you can skip this one if you don't want the hassle and you'd
want to be paying, because the brilliant part of print-on-demand is that you can do the whole thing for free. You can use free platforms, free marketing and get
free sales effectively. This costs $39 and
99 cents a month. It takes away from that
element of it being free. But if you want to
continue, let's continue. Now, you can sell onto your own brand, but
if you do that, Amazon require you to take your own pictures wearing the item or a model
wearing the item. You can't use Mockup images. Amazon needs real-life photos. Just another hassle in
this process really. Honestly, if you do want to skip this video and not learn how to create an Amazon store with Printful, that's
completely okay. The next thing you
need to do is choose the regions you want
to sell on USA, Canada, Mexico, UK,
France, and so on. I would definitely recommend
starting to sell in the US. Just start with that and then work your way
across all of them. Once you've done
that, once you have an Amazon Seller
Central account setup, and once you have
Printful setup, you can click "Authorize". Let's click
"Authorize" and login. This is what it will look like once you click "Authorize"
and once you login. We're going to head
over to United States and click "Select Account". Once we've done that, it will say authorize
a new developer. I understand. Click "Next", and then you're
done. Click "Next". It should take us back to either Amazon Seller
Central or Printful. Look at that. We're authorized
on Amazon. It's amazing. All we need to do
is click "Save". Let's click "amazon.com"
and click "Save". Look at how easy that was. Now, I already have a GTIN exemption/a registered brand from Amazon,
I need to apply. I'm just going to
click "Create Store". Easy. Now, this did look a lot easier and that's
because I already had an Amazon Seller
Central account setup. The difficult part of
this whole process is the setting up of the
Amazon Seller Central. If you want to go and do that, then I'll recommend go
in to do that and then coming back to Printful
and connecting it all up. But once I've done that,
once you connect it all up, you can now add a product
and sync it to your store. It's very simple. We're going to start
with the unisex basic soft-style t-shirt, and we're going to
add a design to it. Let's just add a design. This was a cute layer of
Valentine's Day design. We add that and we can
proceed to Mockup. Remember you need
your own images. Then we can click
"Proceed to details". We can change the title, we can change the description, and then we can click
"Proceed to pricing". Here, we can actually
do all the pricing. We can pick how much
money we want to make. We can up the price and we can see exactly how much we are going to be making. Then click "Proceed
to marketplaces". You want to select the marketplace we're
going to be selling on and click "Submit to store". Then it will sync up here. It's syncing over here, it will show up at the bottom and then
you'll be able to go and view it on Amazon. Like I said, the process, once you have an Amazon
Seller Central account is pretty straightforward. The only difficult part is creating Amazon Seller
Central account. Go and try that out now, if that's something
you want to do.
7. Setting Up With Ebay: [MUSIC] eBay is another awesome platform to sell your designs on. eBay is a huge
powerhouse that gets over 800 million visits
every single month, is definitely
something you want to consider selling
your designs on. How do we do that?
Well, here's a quick step-by-step on how to set up eBay again with Printful. The first thing you
want to do is head over to stores again in your
Printful dashboard, click choose a
platform over here, and then you can
scroll down until you find the eBay marketplace. Then you have to
click "Connect". Now you can watch this video with getting started with eBay, it's a brilliant
video, very quick, very easy to follow, or you can just go
straight into doing it. You can click "Connect
to eBay" and then you're going to be
filling out all the necessary details, you're going to have to connect
the same PayPal address. You're going to select
the handling times, you're going to do
the payment policy, the return policy, and
then you're going to finalize it and
sync some products. Let's go through the steps, starting with connecting
it with eBay. Once we log into eBay, we can click grant
application access printful. Let's click "I agree". This will take us back to the Printful page
where you can see I've connected to my eBay name and now I need to fill out
all of this stuff, so the brand name,
my PayPal address. Let's do the brand name, it can be anything,
[NOISE] Awesome some. The PayPal address has to be
the same one that is linked to my PayPal and the maximum handling time
in days is five. They automatically
fill that out for you. Then we can click "Continue". Now we can go to the next
step, the payment policy. We can do printful
payment policy, I'm very happy with
that and click "Continue" and then
return policy, I also want to do the
print for return policy. Click "Continue", and then
we have to click "Finalize". Let's have a look at
that and you can see, "Hold on, the data is
been synchronized. Your eBay account currently
has a remaining allowance of 940 items and 24,000
retail value this month." Brilliant, all we have to do now is click, "Add a product." Now again, this is because I already had an eBay
account set up. If you don't have an
eBay account setup, you're going to want
to do that first. Once creating an eBay account, you can connect it
to a PayPal account, but you're also going
to have to create, and then to set the
whole thing up, you might need to
create a mock listing, but don't worry, you
can delete the listing, it won't cost you
anything just to get your eBay account going
and once you've done that, you can connect it to Printful. right, what do we have to do? We have to add a
product and sync it. Let's go through the
steps again of adding a product and syncing
it to our eBay store. It's really
straightforward again, let's find that super
cheap t-shirt it is over here and let's add a mock design that we
already have uploaded, it can be anything. Let's have a look, let's
upload this turtle, another Valentine's Day design. Then we can click
"Proceed to mockups", we can have a whole
bunch of mockups. After that, we can
proceed to the details, we can change the
title, all of this. Very simple, click
"Proceed to pricing". We can set all the
price we want, so the profit we want,
edit quantities, so we'll set the quantities, let's say 20, 20, 20, 20, and so on. Then we can click
"Submit to store". Bear in mind how many products
you're allowed to add to your store and how much it costs to add an
individual product. Sometimes you get a free
amount of product to add every single month
and other times it does cost around 35 cents, so just bear that in
mind depending on what your eBay account says you have. Then we have to click
"Submit to store" and it's going to be submitting to the store over here
and it's that easy. We can go and have
a look at it in eBay and it will be right there. Let's wait for
this to submit and we're going to go and have
a look at it in eBay. Now if we go down here, we can click "View in eBay" and this is our eBay product.
Look how easy that was. We got small, medium, large, all of that, the price, different mockup
pictures and it's all the same picture,
all different sizes. I would say definitely
edit that description, but this is a great
way to add tons and tons of products to eBay. Now one thing I recommend
is always offering free shipping and just eating
up that cost yourself, so charging a bit more
extra money and offering free shipping because
eBay love free shipping, you get ranked better, you get more sales, you get more conversions. Try and offer free shipping
when you can. That's eBay. eBay is a very simple platform unlike Amazon Seller Central, I would recommend everyone
to list their items on eBay, it just makes so much sense considering they get
so much traffic.
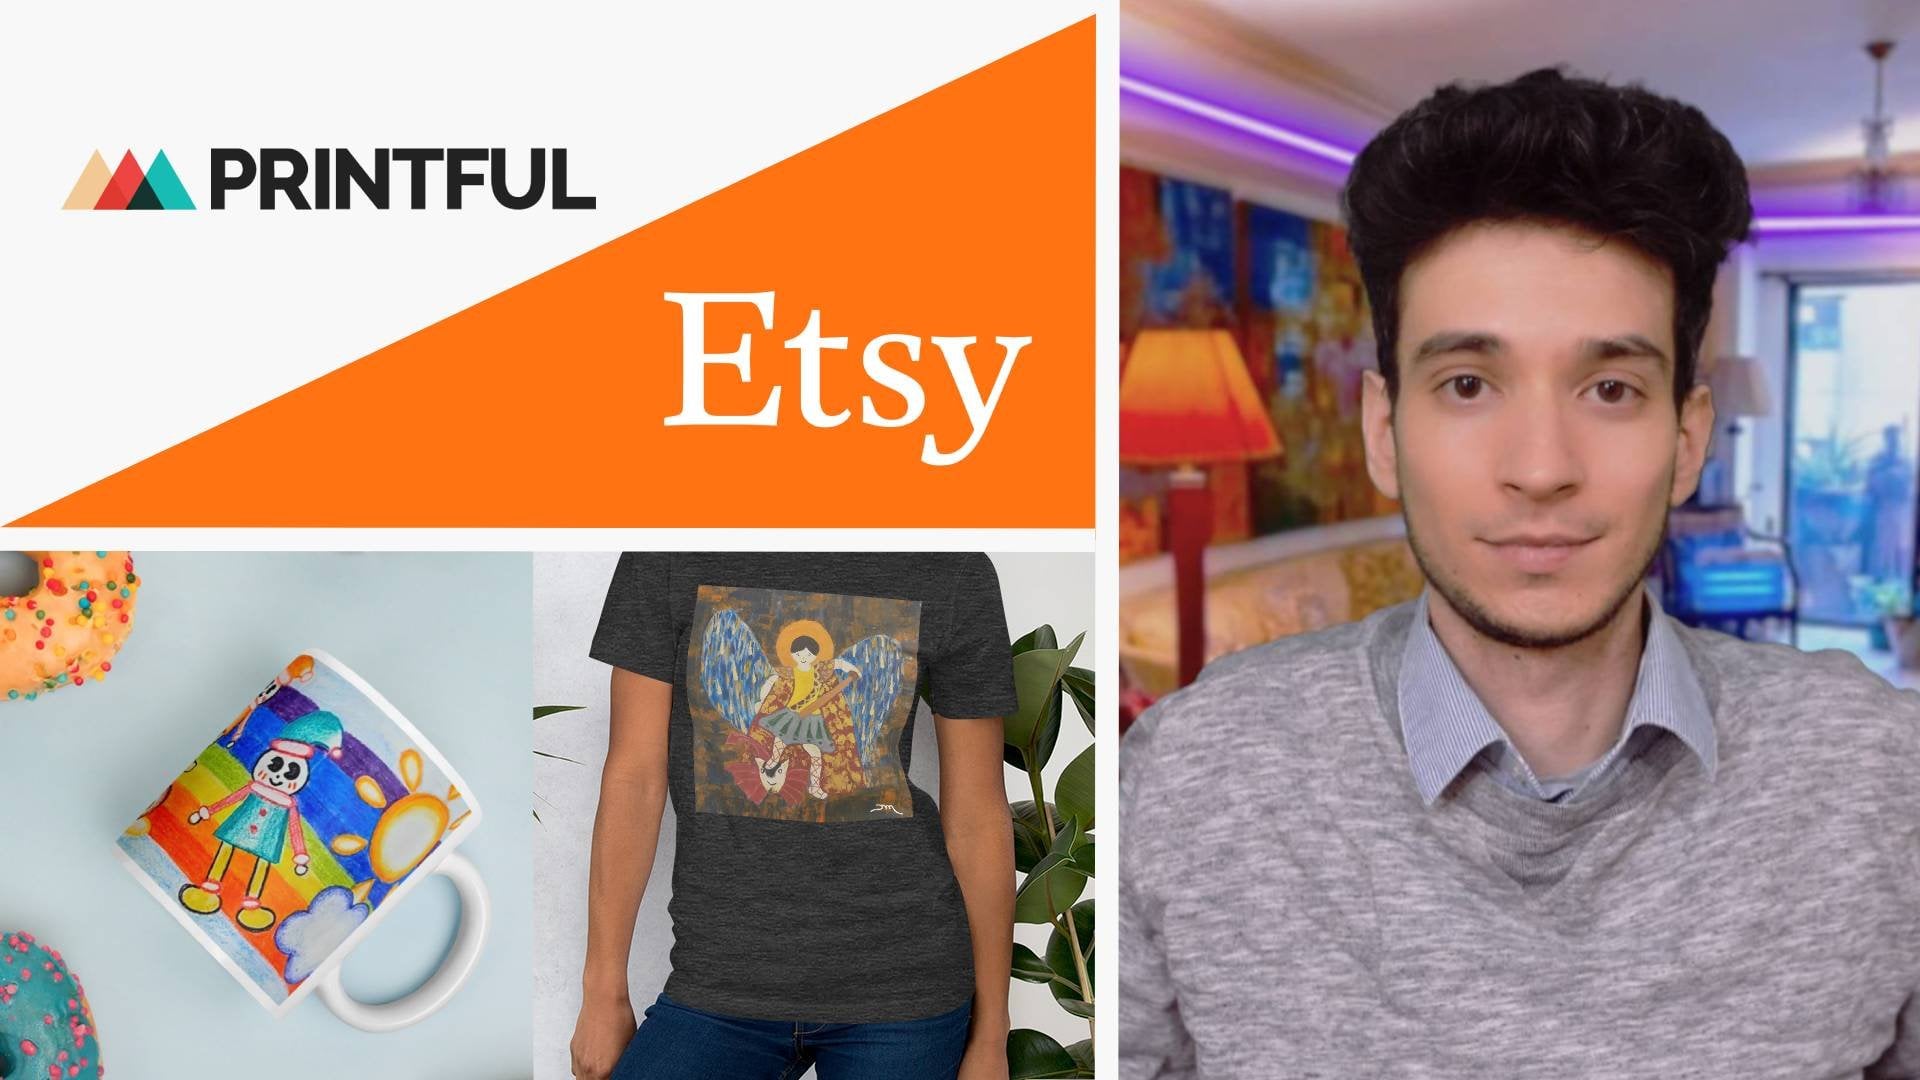
8. Setting Up With Etsy: Selling print on demand products on
Etsy is a must, it's a great marketplace. However, it's not
as straightforward. Now the reason for that is Etsy isn't a print
on-demand platform. It's a platform where
you can sell lots of different things and
print-on-demand products is just one of them. You would have to
connect Etsy with a print-on-demand partner like we did with eBay and Amazon. For this scenario
we're going to be connecting it to Printful. Now I have already shot
the tutorial videos, so let's check that out. The first thing we need to do is actually head over to Etsy.com. I'm doing this in
private browsing with a VPN because
I've already got an account and I don't know the rules of setting up
more than one account, so I want to be extra safe here. We want to do Etsy.com. Now let's sign in or
create an account. Click "Register". Super-easy, barely
an inconvenience. Now all we'll have to do, as
you can see your account, so in your account, you've got all this stuff here. You've got a Notifications tab, you've got a likes
button or a heart. You've got your account and
you've got a shopping cart. You want to go to your account and you want to go
to Sell on Etsy. Let's take Sell on Etsy. Once you pick Sell on Etsy
it will take off to this, learn how to sell on Etsy page. Basically, trying to convince
you to sell on Etsy, but you don't need
to be convinced. What you want to do is you
want to open your Etsy shop. Let's click "Open Etsy Shop." Now you have to just go
through the shop preferences. You've got a name the shop, you've got to stop your shop, and you've got to
decide how you'll get paid and you got
to set up billing. We're going to
speed through this. English, shop country,
United Kingdom, the shop currency
then that's for me. You might be in US dollars, you might be in
Canadian dollars, wherever you are,
that totally fine. This shop is going to be
called a YouTube Test, which is available, brilliant. Then you want to click
"Add a listing." Now, bear in mind it does cost $0.20 to add a listing
which is completely fine. You just have to add a listing. It doesn't have to be
an important listing, you're going to delete it after. Let's just say this, setting up a shop has cost you $0.20 is not the
end of the world, but you want to put in
all the information. So I'm going to go through and
print all the information. I'm going to add a
listing, but again, it doesn't matter because this listing is
going to be deleted. This is just to
create the store. Here it says production partner. This is where we're going
to put in Printful. But again, don't
worry because we're going to explain how to connect Printful and how to actually add Printful products as soon as
we get through this stage. Once you've done that,
you want to click "Save and Continue", and you can see it's right here. Now you have to say how
you're going to get paid. So are you a business
or an individual? How are you get paid? Let's put all this
information in. If any of this is blurred out, it's just because it's
my personal information, I don't want it shared. But it doesn't really matter, just put in your
information is very simple. The next thing you
have to do is click, "Save and Continue" and then it setup a billing which will be a card that you can
pay for Etsy listings, Etsy ads, or whatever
they may be. Now, I'm going to skip this
step and go straight to my already made account because I don't want to make
two accounts here. That's the whole process
of creating the shop. Now, let's actually go to
my already made account and talk about the different
elements within that one. I'm now on the Etsy website, you should have created your
Etsy store at the moment. What we're going to do
is I'm going to login to my existing Etsy store and
go through that with you. This is a fairly new store, I created a video about it just last week. Let's have a look. What you're going to do
is you're going to click this marketplace "Shop Manager" tab and this will take you to your overall shop dashboard. I've actually been
getting viewed, which I'm really impressed with. The first thing we want
to do is we want to go and setup our profile. We want to click your
name at the bottom, and you want to
click your profile. Once you've done that, you'll be able to choose an image, you'll be able to
choose your city, your birthday about favorite materials,
literally anything. Put in a bit of
information about you, so people know you. Remember, Etsy is a very
personalized website. People want to be shopping handmade goods here from people that they
liked the sound off. They don't want to be
shopping from corporations, that's not why
they come to Etsy. Once you've done that, the
next thing you want to do is create a banner.
Let me show you. Let's go to the Etsy store here, under sales channel
you'll see Etsy. Mine is ThePugScene, this
is the one that I created. This is what my shop will look like to anyone
else looking. You've got the banner, you've got the
different t-shirts, and it looks very similar
to my Shopify store. Now we want to edit this, so we're going to
go back and we're going to click the
little pencil. You've got the little
pencil or the pen, wherever it is, and that
allows us to edit it. That allows us to edit the cover so you can
do change layout, you can add a cover, so
you can do a big banner, a mini banner, no banner. I am testing the big
banner at the moment. The mini banner might do well, but from videos I've seen and
people that I've spoken to, they have said use
the big banner. So using the big banner, the minimum image size is 1,200 by 300 pixels,
click "Done." The next thing that
you want to do is add some image over here
like a profile. I added ThePugScene logo again, you can add
whatever you want. It can be a picture of you, it doesn't matter, and
then to be honest, it's probably better
to have a picture of you because it makes it more of that personalized home feel rather than the
corporate shop feel, but again, I'm still
just testing things out. You've got your name there,
you want to change this, so I've put mine just as awesome the power
of a pet lovers, but you can have it
wherever you want. Then that's about it. You've got the contact owner,
the shop owner over here. That's my name, that's my photo, and that's why I
left the logo of ThePugScene as the shop image, just so that it
all looked really professional and it looked good. Coming down here, you can have
featured area to highlight specific listings
and then you can rearrange your listings,
which is very simple. You just click "Rearrange" and you can just drag listings. After looking at
your analytics and seeing which listings are
getting the most clicks, maybe even the most sales, you can rearrange those listings and put them at the front. Now, the next thing you're
going to want to do is add a partner at a
printing partner. You don't have any products on your shop because you
haven't added them yet, unless you're going for a
product that you have in your house and you can just add that product
whenever you want. But in this video, I want to show you
how to connect a t-shirt or a
print-on-demand accompany to connect it so that you could
actually start selling print-on-demand products
like these t-shirts here. What we're going to do is
we're going to go into settings on the left, and then we're going to go
into production partners. Let's click production partners and now you can click "Add
A New Production Partner." So click Add A New
Production Partner. You want to do the production partner's
name, the location, and about them, and
then you want to say about your
partnership, whenever. I didn't have a
technical ability, I design everything myself, and they do everything for me, and then you want to
click "Save partner." In terms of location
for Printful they're located in
Chatsworth, California. You can just do
that, that's fine. Now when it comes to actually
connecting Printful, you need to go to the
Printful website. Let's go to printful.com. Again, the links to
Printful or the links to Etsy will be in the
description below. The link for Printful is
actually an affiliate link, so if you don't want
to use my link, I understand it doesn't
really make a difference, but I've put it there to
make it easier for you. Once in Printful, you want to go over to the left here
and click "Stores." When you are in your stores, you'd be able to actually
add specific store, you'll be able to
add to the platform. You can see I've got
my Printful store, which isn't really a store. I've got my pug scene on Shopify and the
pug scene on Etsy. They make this so
unbelievably easy. All you have to do is go
ahead and choose a platform. Once you've chosen a platform, it will be Etsy, you
have to click "Connect." What's going to happen is,
we click Connect with Etsy. All we have to do, we click the "Connect
to Etsy" button below and it will show us something
that looks like this. You are signed in as Printful. You have to click
"Allow Access" and this will happen on your Etsy, it will take you to Etsy,
you'll click "Allow Access" and then
it's super easy. You just have to
create products. For example, Connect to Etsy. I don't know if I'll
be able to to do this again because I've already done it, but here we go. You assign it as
shimmymorris@gmail.com. You can see we're on the
Etsy website right now, you want to just
click "Allow Access." I'm not going to click
it because I've already connected it and I don't
want to screw anything up. Once you've done that
and you've connected it, it will take you to this
looking page where you can see ThePugScene
store or your store, whatever that one
is on your Etsy. You can see overall, I'm still on Printful here. What we want to do is
we want to click "Add product" and then we can just click any
product we want to add. Let's say we are
adding a T-shirt, all shirts, and we're just going to
add a quick test program. I'm going to delete it
afterwards. We're going to add a quick test product. Let's just go for this one. Let's just design something
in house over here. This is tes. Now, let's go to proceed to mockups. What I would suggest
is, don't have a mockup of a man or a woman, have a mockup of just
the T-shirt because that way you can attract both
female and male customers. But as well as at, also have a mockup of a
man and a woman, try to have it in many
different mockups as possible. I'm going to actually show
you a website that I use to get so many different
mockups in just a minute. Let's click "Proceed
to details". Now, you want to put a title in. This is just a test. You want to put a
description in. A lot of people say,
don't put description in. I think it's important to
put description because this is just so standard, it's so fake looking. You want to just put description that makes
it feel real and genuine. Try and put something quirky,
something cool, whatever. Make sure to keep this area 100 percent combed ring spun, all of that stuff because
that is important, and you can make it more interesting with
emojis or whatever. You want to make it more homey, you want a homey feel. Then, you want to scroll down, you've got the size guide,
and now you want to add tags. You want to add all
the tags you can, and you want to make
sure they're relevant. If this was a Christmas T-shirt, I wouldn't add tags
for Mother's Day. This is adult t-shirt, I'm not going to add tags for St. Patrick's Day because St.
Patrick's Day is trending. You want to make
sure you're adding relevant tags so you show
up at relevant searches. Let's just say this
is a YouTube T-shirt, I'll put in YouTube, I'll put in YouTube T-shirt, I'll put in video, I'll put in vlog,
all those things. You see what I'm saying?
The next thing we'll do is style, unisex, find product. Pick one animal landscape, famous landmark, London. These are just different
sets, different categories, but forget about
that, doesn't matter. Then click "Proceed to pricing". Now, when you're in pricing,
this is what you'll see. This is the cost $13.71
or in the UK, £9.78. That's how much
it's costing you. The retail price I put here is, that I'll put here is £13.56. Now, I hit "increase it by either an amount or a percent." Let's say I want to
increase it by three, that will up to profit
of six pounds £6.78, and a product price of £16.56. A little tip here. When you're first
starting on Etsy, the biggest thing
you're going to have on your side is the price. You want to be really
competitive on price. Forget profit at the moment. You just want to get some
traffic and some sales, and some reviews to your store. This is a long-term gain, it's not to make money
today or tomorrow. We just want to get
traffic so that over time we'll eventually raise our prices and make
money that way. When I first started, I put my increase, I increased one or
two or something, a really small amounts, really, really small amounts. Overtime, I'll increase it
just when I get more sales. At the moment, £14.56, this is the expensive T-Shirt. You can see it $13.71
as a base price. I always go for
the cheapest one, which I believe is like
$8.70 or something, which makes it a lot cheaper, allows me to charge £12 for
T-shirt on my Etsy store, which is about £14
when they add tax. Then, when you want to
click "Submit to store." Now, once you've done
that, you can scroll down, and it will show up over here. This is just a test, it's
uploading. You can see. Now, what you want to
click "Edit in Etsy." You can edit in Etsy
and it will take you to the Etsy product page. Now, you can see you've
got your primary image, which is this guy. You've got your secondary image, which is the sizes, and you can add a photo, and then you can
add more things. Then, you've got the thumbnail, you've got a video. If you can add a
video, that's amazing, that's so cool, and it will do so much better because video does better than photo always. If you want to add a video,
what you could do is, you can either get a mockup of a video or you could
actually buy your T-shirt, which will cost you cost
price plus shipping, and you can shoot a video of it. If you have a T-shirt
that's just doing really well, it's
getting a lot of sales, order it yourself and shoot
a quick promo video of it, and then you can
put that in here. Now, the next thing you
want to do is, well, not really much because
everything is done already. You did all the titles,
did everything else in the print for platform. The next thing you want to
do is you want to click "Production partners"
just tick Printful. You want to go through and
you want to click "Publish." Now, it might say straightaway, fill out all the
required fields. That seems to happen
every single time, and when I click "Publish"
again, it does show up. You can see there's a
non-refundable fee of $0.20 for each listing, which is completely fine.
Don't worry about that. In terms of shipping,
by the way, I'll start with the
plentiful shipping, I've just stuck with that. I'm not changing anything
around that. That is about it. Now, if we have a look at Etsy, the website, what we'll see is, we'll see over here
on the homepage for me, you can see these, we'll have free UK delivery,
which is really cool. There are so many items
with free UK delivery. Now, it's very hard to say if free delivery boosts
your listing up a bit, but it's definitely a
really good incentive. How can you add free
delivery to your listings? Let me show you. You've
got your shop here. You want to go to marketing
over here on the left, and you want to go to
sales and coupons. This allows you to create
either a sale or an offer. You can see I've got a
free shipping offer, which is a duration of 15 days. It's live until the
fifth of March. I haven't made any
money from it. I made it a couple of days ago. But in terms of creating,
it's very simple. You can click, "Add a new special offer"
here at the top, click "New special offer." You can do run a sale,
create a coupon, or send offers to
interested shoppers. We're going to do run a sale. You could do percent off
or free standard delivery, and then if you domestic only. Just a little tip. If you don't actually
want to lose money on your end by
offering free shipping, you can also just bump up price. If you're selling
an item for $13 and you want to
offer free shipping, click "Free shipping"
and then bump the price up to about $15. That still looks better
than $13 plus $4 shipping. It looks better
just to sell it for $15 with free shipping, people like seeing
free shipping. It's a weird thing. I think it's because of Amazon
Prime nowadays, and basically so many
different platforms offer free shipping and
super far shipping. It's in people's heads, that they just want
free shipping. I know me personally, I love free shipping. That's what I'd recommend. That's how you would do
a free shipping coupon. Now, you can do other
types of coupons. That you can create a
coupon here, percent off, again, you could do
free standard shipping, a fixed amount off. Then, you can also do send
offer to interested shoppers. But we're not going to do that. But don't worry
about that for now. That is creating a
free shipping offer. I would recommend doing
that straight off the bar just at least
at the beginning. The next important
tab is Etsy ads. Now, Etsy ads, just
again, over here, marketing, and then Etsy ads. Etsy ads is very interesting. All you basically
do is you click "Start" and it just
starts at the ad. You can see my ad views, 1,203 views, five clicks. I haven't had any
orders from it. It's been about four days. I don't know how
well Etsy ads do. Just because you can't
really put in any keyword, any targeting, it's just a
matter of clicking on or off. I'm still testing out at Etsy
to see if it's worth it. So far, I don't
think it's worth it. I set my budget to $5 a
day for five listings. If we scroll down, we can see the clicks. I've had two clicks
for this listing, two clicks for this system, one for this, and
none for these two. Etsy ads again, it's just something to
click "Start with." If you wanted to
test it properly, maybe do 25 to $50 a day just
to really really test it. However, I just want to tell everyone based on
videos I've seen, based on what people
have told me, Etsy ad really aren't that good. They used to be a lot
better apparently. But now because
everything is just done automatically,
they're not very good. What I've heard from someone who sells quite a lot on Etsy is, with Etsy ads, they just
push your store to people, but don't actually
try to get sales. Your store will end up
getting a lot of likes, but no sales, and you'll get a lot of clicks, but no sales. So our Etsy ad worth it. It's too soon to tell for me. Definitely try it out, see what happens maybe
for a week or two weeks. They recommend testing
out for 30 days, 30 days is quite a lot, especially if you have
a budget of five or six or even $10, that's
a lot of money. It's up to you, whether or
not you want to do Etsy ads. But just to go through
it, you can manage your budget over
here, very simple. You can manage advertised
listings over here. You can tick list things
that are not done. Let me, for example,
tick these two that for some reason
aren't advertised. Click "Update." Really simple, and click "Turn off ads." I haven't yet turned off my ads just because
I'm still trying. I'm still seeing
what's happening. That's the advertising tab. That's how you connect
Printful and Etsy, is not as straightforward
as we'd like, but once it's all done, it will all be automatic
in terms of getting sales, and it's just an
amazing platform to be selling your designs on. Now, you can't connect it
with other printing partners. You don't have to connect
it with Printful. The reason why we're
using Printful here is because I've
just used Printful as an example for all the different connecting
partners on this course. You can sign up for
Printful anyway, the old links will be
everywhere, and that's it. I would definitely
recommend using Etsy. So far we've done Amazon, Etsy, and eBay. I would 100% say sign up for
eBay and sign up for Etsy. They are too amazing
places marketplaces, I should say, where you can sell your print-on
demand products.
9. Finding The Perfect Niche: [MUSIC] A lots of the time, picking a niche is
far too overthought, and way too much weight is put on that niche you've chosen. In reality, there are so
many niches out there that you could turn
into profitable niches. You could focus on food
designs, job designs, holiday design, animal
designs or all of the above. Think of it like a puzzle, the niche is only one
piece of the puzzle. You need to make sure
all the pieces are connected in order to have
a successful business. A niche is generally known as a specialized
sector or category. In the pre-on-demand business, the niche is a category
that is aimed at a specific set of people that all share a similar interest. The reason there are so powerful is because
you get repeat buyers. They are recommended more frequently and you
are able to build a targeted audience that
you can sell so much more to than just
pre-on-demand products. If you happen to be an
expert in your chosen niche, already been excellent,
that's brilliant. However, if you are not, make sure to spend
some time fully researching and becoming
an expert in your niche. You're going to want to know what questions
customers are asking, what they want to see, what designs they would wear, and the trends in
that chosen niche. It's no good picking a
niche you know nothing about and creating designs
that no one wants to wear. Become an expert, spend
a few hours really digging into that niche and learning everything
you can about it. We're going to go through
a few methods and places where you can come
up with some cool ideas. Firstly, I want to talk
about one method that is vital when it comes to
conducting niche research. More specifically, knowing how to use the data you found, and that is through the
copy and paste method. Don't get confused with copy
and paste and stealing. I do not recommend that, please don't steal
anyone else's ideas. What I suggest is finding other successful ideas and
seeking inspiration from them, recreating them with your
own twist, your own colors, your own fonts, maybe
your own wording, the basis of the design, the niche and the
message can be the same but you have to make sure the execution is different. For example, if you see
a t-shirt like this, this grandpa is the best
grandpa, That's great. You can use that niche,
the grandparent niche. You can use that message about your grandpa
being the best. Except you'd want to execute
it slightly differently. You would want to say something
like this grandpa rules, something slightly different
that has the same message. It's in the same niche, the same idea but you've just done it
slightly differently. Now let's talk about a
couple of tools that you can use to actually conduct
really good niche research. Starting with Pinterest, you
want to utilize Pinterest. Let's head over to Pinterest, it's an incredibly simple method but don't let that put you off. What we would do is search for a topic then the product
and then the theme. For example, math,
would be the topic, t-shirts is the product, and funny is the theme. We search for funny maths, t-shirts and then start looking
around for inspiration. Another example could
be dogs is the topic, mugs is the product. Again, funny is the theme. You could do serious or
something else but I believe funny always works best. This would make the search
term funny dog Mugs. Then again, we can go
from there to seek inspiration and come up with
our own really cool ideas. Next, you want to utilize search engines like
Amazon, eBay, and Google. You can use the same approach
that we did for Pinterest, where you search for
a topic, a product, and a theme, except
now you're doing it on eBay or Amazon or Google, so you're going to get
completely different results. They are all power-houses
with hundreds of millions of searches every single
month so there was a lot of data for you
to actually find. The next tool is the
Redbubble tag tool. This is a great
way to see what's working on Redbubble, however, take this with a pinch of
salt because Redbubble shouldn't be the staple
of your niche research. I think it's
valuable as an extra but not as a main focus.
Let's take a look. You can see things
are categorized into popularity and change
and then what they are, they're category, their
niche, or whatever. You can see, what's become
popular over a period of time and then you can click the link and actually go into Redbubble. This is a great way of
finding out what is popular, what is getting more popular, and what is getting
less popular. What you'll find a lot
of the time in Redbubble are things that you are not
actually allowed to design. That's why I say, don't
use red bubble as the staple of your
niche research. Use it as just a helpful hand to kick start a few ideas in your
brain and that's about it. Have a play-around
with this tool. It's completely free and
it can just be really interesting to see what's
working for other people. The next tool is the
Google Trends tool. This is a great tool
and even though it doesn't relate directly
to print on demand, it's a good indication of what's trending and where in the world it happens
to be trending. You can also have a look
at the relatable topics, which is really useful. One thing I would do with this
tool is I would search for a specific term and then see on the trend line how
popular that term is. If it's over 60 or 70, I consider that quite popular. If it's under, then I don't think of it as
being that popular. However, one thing that is very important to note
is I don't ever look at one of these tools and then go off the
basis of just that. I'll look at all of the tools around one topic or one niche, whatever you want
to call it and I'll base my results on that. That's because suddenly it
could be really popular on the Google Trends tool but
you might not be able to find anything on eBay or Amazon. That's okay, you don't
need every single tool to say that this niche
is a fantastic niche. You just need some
of them to say that. And then you want to use all
the other tools to see if they'll booster
up that niche and give you even more ideas. Another great tool is
called Trend Hunter. It also doesn't relate directly
to pre-on-demand but it's an incredible resource
to see what's trending in many different
categories around the world. The idea tab is pretty
cool as well as that. It's just a wealth of
interesting information. One thing to note is all of
these niche tools that I've just told you are
absolutely free to use. That's what I wanted
to make sure, I didn't want you to have
the sign-up to anything. I wanted you to be
able to conduct all of this research for free. As I said earlier, there is no golden
ticket niche here, so many have the capability
of being incredibly popular, and it's just one
piece of the puzzle. In the next video, I'm going to give you
a super long list of niche ideas that you could start basing your
research around. Feel free to use any of them
and hopefully they spark some new ideas in your
mind that help you come up with even more ideas.
10. A Super Long List of Niches: In this very simple video, I want to give you a long
list of niche ideas that you could use as the
foundation for your research. I'm not saying these niches
will guarantee success. There's a lot of work
required, and remember, they are just one piece of
a very, very large puzzle. I'll show all the niches on the screen as I say them
but as well as that, you'll be able to download
a PDF with all of them. The niches that we have here are the animal niche. You got dog, cats, pandas, sloths, monkeys, fish, cows, and llamas. You've got food, healthy food, yoga and meditation, guns, traveling, anime, and then jobs. You have nurses,
technician, bartender, firefighter, lawyer,
electrician, engineer, musician, and teacher. On the sports,
you've got cycling, snow sports, football,
tennis, and fishing. You've got awareness, politics, school, universities
and colleges. You've got different ages, like 18, 25, turning 60. You've got entertainment like video games, books,
and television. You've got family. A
child, grandchild, grandparents, parents,
and all the others. You've got hobbies
like gardening, space, cause music, and computing. Now, as well as that, you
have many, many more niches. But hopefully, these can spot something in your
brain and allow you to use it as a foundation so that when you start doing
your research on Pinterest, Google, eBay, Amazon, Trend Hunter, any
of these places, you can use these niches as
the base for that research.
11. Double Niche Game Plan: The double niche game plan. This is a really, really cool method and I
think it works wonders. After analyzing some of the best designs
across many niches, the biggest similarity that I could see between
these designs, is that they all incorporated
two niches per design. For example, moms and dogs, fishing and America, movie
references and animals. What you can see here is
you can see a niche plus another niche and it tends to
equal a successful design. Now of course, I'm
not saying if you go for that double niche game plan, you'll go on to create
successful designs. But it is definitely
a similarity between all the
successful designs that I've seen out there. The reason this works so well is because you are niching
down the audience so much to a very
targeted set of people. Selling a broad design is
great and it gives you that ability to scale
if that's the case. But a lot of the time, people just don't want to buy a design and you have
to get really targeted in order to find that
individual that wants to spend money on a funny
or wacky t-shirt. The idea here is if you find
someone who likes a niche, you've picked their interests, but they still
don't want to buy. However, if you find
someone who likes a niche and then the next niche that's
still on that t-shirt, there'll be like, this design
is literary talking to me. I want to wear this, I want to own this. It doesn't have to be
a t-shirt by the way. It can be a pillow, a mug, anything really. It can be a yoga mat and
it doesn't really matter. But the point is if
you're speaking to a person who likes two
elements of the design, it means there is a
higher chance of them actually wanting to
own that design. This doesn't guarantee
some of the bio-design. As well as that don't use this double niche game plan for every single one of
your good designs. Sometimes it's nice just to have a focused single niche design, but definitely make
sure to consider this double niche game plan
when brainstorming for ideas. When it comes to brainstorming, make sure those two
niches that you've picked actually
go well together. Some niches go really well
together like moms and cats, stats and cars, things like that and
others, not so much. For example, food and cars
that seems a bit random to me. But honestly, it is quite hard to find
two niches that are so polar opposite
that they won't go well together because
a lot of the time, there are always
elements of a niche that go with elements
of another niche. When it comes to designing, think of this method.
12. Building Your Ideal Customer: It's one thing to have the perfect niche and even have the perfect design, but if you haven't planned out who your ideal customer is, it's like hitting a baseball
with a blindfold on. Unless you know exactly who
that design is targeted to, I wouldn't call it
a perfect design. Having narrowed down
your target audience to find out exactly
who they are, it will make it much easier
to design products for them and to figure out what products
they would actually buy. We need to create a customer avatar or
a customer profile. Here is what you need to
consider: the age range, the location, the
gender, the race, the household income,
the education level, hobbies and interests,
lifestyle, and personality. Coming up with all of this information
seems very daunting. But let me give you an
example and show you it's actually not that difficult. Let's say we've chosen
a product around the geeky movie
references, niche. It's quite specific,
I know and it's also quite a difficult niche
as you'll run into a lot of copyright
and trademark issues, but let's just go with
that for the time being. Our ideal customer
might look something like this: the millennial
generation 18-35, UK or USA-based, mostly male, any race, middle-class with college education
interested in superheroes, fantasy, comic book,
board games, and science. We can then go and use this information to
find products that perfectly suit our ideal
customer's profile. For example, t-shirts,
gaming mats, and mugs seem like
the ideal products. Likewise with the design, because we know
this audience loves comics and fancy and science, creating designs that speak specifically to them
shouldn't be very difficult. Finally, we can continue to use this information later on
when it comes to keywords, or more importantly, mockups. Mockup being that picture where they're wearing
design and as a person and it allows
the customer to see what the design will
look like on a real human. Now, we can use this
information to create mockups that speak to
the specific audience. For example, we're
not going to use a 55-year-old woman
who is wearing a geeky t-shirt as one of our mockups because that doesn't really speak to the audience that we are trying to target. All this information will
always be really relevant throughout the process of designing and then
selling that design. Once you know exactly
who you are talking to, it becomes much easier to
know how to sell to them.
13. How Many Niches Should You Do: The question on everyone's mind after seeing that super long list of
niches that I gave is, "How many niches should
I actually go for?" Honestly, there is
no magic answer. I would say it like this, rather than picking a niche
because there's money in it, because that is
never guaranteed, pick a niche that you specifically find
interest in yourself. This will make researching a lot easier and a lot more enjoyable, and you'll also have an edge because you'll
know a lot about that niche and because you'll
be the target customer, filling out the customer
profile will be really easy. As well as that, if
you find it hard to get sales with that
niche you've chosen, it wouldn't phase you
as much because you would have actually
enjoyed the time designing and researching and creating products
for that niche, rather than just
chasing the money, which is always a
bad thing to do. If you feel like you have no specific interest in
any niche whatsoever, then all I'll say is pick one, any, it doesn't matter, and then start researching it, and start from
scratch basically. Once you've created a bunch of designs and a bunch of products, then move on to
another niche and add another one and another
one and another one. If you're wondering,
"Well, how do I display all of my different
niches on my website? Should they be all jumbled up? Should they be categorized?" Well, once you have
various different niches, I would say categorize them into those individual niches and keep your website or your
storefront very, very clean. For example, if you have an
Etsy shop, an eBay shop, or an Amazon shop,
just plonk all of your designs on those stores. You can only add categories
on certain websites. If, however, you are creating
a niche-specific website, then try and keep that on point and if you want to delve
into another niche then I would suggest creating
another website and keeping it separate from that
first niche website. This is why, as a beginner, you should just
focus on one thing. Get really, really good
at understanding how to research and how to
create amazing designs, maybe even create a little
character that can go across your niches on your t-shirts or pillows or whatever products
you end up selling. Once you get really, really good at it on
a specific niche, you'll find it much, much easier going
into new niches.
14. Trends VS Evergreen: There are two types of
designs that you can make. You can make trendy designs that have a very short shelf-life, or you could create
Evergreen designs that don't really
have a shelf-life. Here's a quick example, photography t-shirts
or Halloween t-shirt, one's Evergreen
and one's trendy. The questions are, which should you focus most of
your attention on, which one is better
and which one will allow you to make
the most amount of sales? I think you should
focus your attention on both, but within reason. Let me explain don't constantly chase that trend
hoping to strike gold, this is not a good approach, and it's a one-way ticket to driving you
absolutely insane. You want to build a long-term sustainable business here
at the end of the day. If I had to split my time up, I would say spend 70% of
your time focusing on Evergreen designs
they'll actually help grow your business, and then spend 30% of your
time on chasing those trends, hoping to get a couple
of extra sales. Trends are good because
they allow you to get those sales more easily
and slightly quicker. An in-turn can help you rank only algorithm if you're
using platforms like Amazon, eBay, Red Bubble, or Etsy or any of
those platforms. It can also help boost
your motivation, just seeing all those
extra sales coming in. However, you have to remember, there's going to be a
lot more competition with the trendy designs. Because everyone else is going to want to get those quick sales as well and that
can actually lead you to getting no sales, which is why I would never spend too much time focusing
on the trendy designs. As well as that, you also have a very short window where
that trend lives and then dies and then you have to move on and find the next
one and it can be very stressful constantly trying
to find that next trend. Where it's much easier
just to focus on Evergreen designs that will
last for forever basically. When there is a
really good trend and it's really popular, there was a huge fight to
the top to see who can win that trend war and get
the most sales and this can be incredibly
frustrating. In my 30% time
allocation for trends, I will research what
will be trending, not what's currently trending, but what I can aim to create
designs for in the future. This way I would have
got there first and hopefully I'll have a leg
up on the competition. There are obvious
trends like Christmas, Valentine's Day and Halloween,
and things like that, where you want to create
designs for a few months in advance so that
you are ready to go, ready to sell before anyone
else, but that's obvious. I'm talking about trends that
aren't big days big days, I'm talking about
little things that become trends like
the wordle app, at this point in time
it's a huge trend. Foreseeing that would be based on a lot of research
and it would've been really good
if you caught onto that trend two months
before anyone else did. When it comes to
Evergreen designs, this will be the backbone
of your business. This will be keeping your
business alive and this is what you should spend most
of your time focusing on. This is my go-to method. Thoroughly researching a niche until it's totally
flooding my brain, then creating designs that
are not associated with a specific date which
allows it to be sold at any point
throughout the year. This way, making them
even more Evergreen. Finding designs
that can be sold in 10 years or in a
month is key here. Then, once solidifying
a bunch of ideas and creating them and
having them ready to go and uploading them, I'll then see
potentially how that Evergreen design could be translated into a
particular upcoming trend. For example, if my
Evergreen design is around photography
niche when it comes to Christmas or
Valentine's Day or another trendy time of the year, I'll see how I can use
all the information and all that research
that I've done, and convert it into a trend in design as well
as an Evergreen design. At this point, I'll
have a handful of Evergreen designs with a
couple of trendy designs, which in my opinion is the
best position to be in.
15. Full Pretty Merch Research Tutorial: [MUSIC] I wanted
to do a tutorial of my favorite paid
option in this course so that if you wanted to take
your research even further, you have that option available. The one I would recommend
is Pretty Much. Before I do a little tutorial, showing you how I conduct design research
using Pretty Much, let me just quickly
tell you why I use them over anyone else. Number 1, their price is
extremely competitive, it's actually one of
the cheapest ones out there for what they offer. Number 2, I really like
the UI and the UX, which is the user interface and user experience of this tool. I find it really easy to use, and it actually reminds
me when I'm using an iPhone just because of
how simple everything is, it looks clean and it's really
easy to navigate round. Number 3, this is a really
odd reason but truthfully, I really like the
people behind the tool. I really like the company. I think it's a
really good group of people and they really
genuinely care about you. I've suggested ideas to them
and I've spoken to them, and they've actually tried
implementing new ideas and are planning on
implementing some future ideas. It's really nice to see how
much they actually care. They're not just some
faceless corporations somewhere in the
middle of nowhere, they're actual company
and they really do care. For me, that's a big deal. This is the Pretty
Much research tool. You can see over here,
I can click "Research". I've also got Products,
Analytics, and Dashboard. But the only thing we're
discussing in the video, this tutorial is just for
the research section. Now, at the moment, you do need an Amazon merch account in
order to get access to this. But I have spoken to them
and I have said to them, you have got to make this
available to everyone, and they told me
they are doing that. Hopefully, in the
next six weeks, there will be a
web-based platform that anyone can get access to, you will not need to have
a merch by Amazon account. That's going to be really cool. First things first,
let's just go through the bottom over here and
discuss what everything means. You can see here, you've
got this hashtag 746, this is the BSR. You then got this upwards
arrow that says 324. Now, this says the BSR
has decreased by 324. This is really good because
the lower the BSR number, the better it's going to do, the better it's
going to be ranking, and the more sales they're
going to be getting. You then have this number
which is their price, you then have this
number which is their estimated sales per month. Finally, you have this over here which is just
their reviews. Now, that is the card. Like I said, it's very simple,
it's very user-friendly. What you can do is
if you want to see a little bit more information, you can go over here and
you can click "Analyze". Now, you can view the product
on Amazon, if you wish, or you click
"Analyze" and it will open this Product Analyzer. First, I just have to say, everything is really
fast and really speedy. It just shoots around. That's another reason why
I like this tool because the main reason I pay for
a tool is because I didn't feel like I have time to do everything individually
and not just have it all there for me
ready to go in this format. I like the speed,
I want it to be as fast and snappy as possible. You've got over here.
You got Best Seller, Amazon Choice, Official Brand. This tells us what attributes it has. Is
it an Amazon Choice? No. Is it a Best Seller? Yes. Is it an Official Brand? No. Then you've got,
is it available? Yes. The BSR changed. The date uploaded, I
think that's really cool because if you can see, it's been uploaded in 2016
and it's doing really well. That's cool to see
that that would be an evergreen design, and we love evergreen
designs, don't we? We then got the
marketplace, the BSO, the price, the estimated
sales, and the reviews. Now, a couple of other
things you have here, which is really useful, is you have the product
bullets right here so you don't have to go in to the actual Amazon
page. You got it all. You basically got all information
you need right there. Then of course, you've
got keyword analysis. This is really cool because
if you want to create your own St. Patrick's Day design, you might want to
use shenanigans, squad, shenanigans squad, and maybe some other keywords, and you can see how many
times that they've used it. Now, you can also click
this where you can view it directly on Google Trends. Very smart. You've got
the feature bullets here. Now, for me, I find this useful because I will see how
they've done their bullets. I will try and create
my bullet similar. Not exactly the same but
similar because clearly, it's working for them. You can then just go
ahead to the next part and just view all
the products like this really quickly rather than going out and clicking
the products. That's the designs
that you've got down here and what all
these numbers mean. Now, let me just
quickly tell you, they update these numbers
every single day, which is something
I really liked because a lot of other tools update every week or
every couple of days. Here, it's every single day, which means you're getting
the most accurate numbers, which is really important
when you're doing research. Now, let's discuss the
different search options. You got sort by. Now, as you can see here, I've put nothing in the keyword, I've just clicked "Search", and it's sorted by BSR. Again, you've got the
eye across everything so you can really get as much
information as you need. But anyways, you can sort by BSR, which is what we've done. You can also sort by sales, and you can choose most to
least or least to most. That way, you can see what's
getting the most sales. There's a lot of
Ukraine stuff there. I really hope this people are giving that
profit to charity, but I don't know. Anyway, you've also
got BSR change, which I think is a
really cool one because BSR change allows you to see what's going to
be up and coming. This might be a BSR, 324,000, but it's had a
10.9 million BSR change. Clearly, it's getting
sales because the way a BSR can change
is by going up the rank, and the way to go up the
rank is to get more sales. If we can see designs
have a huge BSR change, we can say that they
are going to be getting sales and maybe they're going to take off in the
next couple of weeks, which is something that's
really useful for us. You also got the
seven-day average BSR and the 30-day average BSR. I find this one really useful because it allows you to find more evergreen designs that are doing well over a
longer period of time. Because if we just go by BSR, we can see, okay, great,
let's search BSR. This might be really trendy
and doing really well now, but if we go to a
30-day average BSR, that will show it has
a more evergreen type of quality to it
because clearly, it's done well over a period
of 30 days like this one. I'm not old, I'm classic, this has been doing
well for years. It's really cool to see. You then got, You can sort
by number of reviews, you can sort by rating. Here, number of views, 4,p46. You can sort by rating, this will just be how
good the reviews are. Then you've got, you can
sort by date uploaded. Now, this is another really
cool one because you can see what recently
been uploaded. You got newest to oldest
or oldest to newest. If we got oldest to newest, if we have a look at analyzers,
when was this uploaded? In 2015. That's really cool. Somebody uploaded that long ago. Look at this trash truck. Anyways, this, I find really cool because you're
able to see what people are currently
uploading and maybe do research around that. Yes, of course, there's Ukraine, you've got St.
Patrick's Day stuff, and you can do research around this stuff and see if there's a reason
why it's doing well. The next thing you
can see is you can select the Marketplace. You've got United
States, United Kingdom, Germany, France, Italy,
Spain, and Japan. For example, if we
click "Germany" and we click "Search", we're not going to
sort by date uploaded, let's sort by BSR. You can see how fast it
searches, it's crazy. But you can see what's
most popular in Germany, and it's completely different to what's popular in
the United States. This is really important. You've even got
designs in German. I think that's really
cool because if you have a really good design, you could try and
translate it to German and put it on
the German marketplace. You've got the same thing
in the United Kingdom. It's going to be a completely
different array of designs. Depending on what
market you sell in, that's the market
you're going to want to be doing research in. I find this area the tool
pretty cool as well. Again, can you see how
user-friendly this all is? You've got everything here, you've got the marketplace,
type of product, the sort by, the BSR range, you can just reset
all the filters. It's all very user-friendly, it's very clean,
and it's very fast. That's just something
I really like. Now, you also have more filters where you
can show official brands, yes or no, and show deleted
products, yes or no. Then you've also
got the products. You can be searching
for T-shirts, pullover hoodies, pop
sockets, or phone cases. Now, these aren't available in all countries but if
you go to United States, you'll see they're available. Germany, pullover hoodies,
France, Italy, Spain. You can see, in United States,
they're all available, and it wouldn't surprise me
if they're trying to make as many products available
across all the marketplaces. But if we give a pop sockets
and we just click "Search", we can see what the most
popular pop sockets are and how many sales
they're getting in. Flipping heck, that's
a lot of sales. Again, really useful information when it
comes to doing research, when it comes to seeing
what designs are working. Now, as well as all of that, as well as doing the
blank keyword search where you don't put anything in here, you just click "Search". You can't also put keywords in. If you're wondering
what keywords should you put in, well, I want to tell you
about a really cool method that I like using. That involves using
the Redbubble website. Now, this method, I call the random
key letter search. That's a mouthful, but
let me explain to you. That's when you click "Search Design" and you put it
in just a random letter. I'm going to put
in H. You can see, you've got hydro,
hobbies, Harry Potter, happiness, hoyoverse, happy mother's day with love, hiking with my puppy good day. What this does is this
shows me a whole bunch of really popular potential
search terms with that letter. If I go and then put HE, you've got hentaii, hearing impaired,
hearts, helluva boss. You could do this
with any letters. The idea here is you put a random letter in,
you get an idea. Shane Warne, shabba ranks, save the planet keep it green. What you would then do is go and search that in Amazon and
see how well it's doing. If we put in save the planet, we can do searching, and we can also change
from exact match to close match or to partial match. Let's go to partial
match because we're happy for it to be just similar. You then also got, you
can sort by list or grid. Now, you can see it was sorted
by BSR, save the planet. This is telling us how
that search term is doing. That random search
term that we just found by just clicking the S on our keyboard has given us
a whole bunch of ideas, so many different ideas. Now, there's not that
many designs out there, which I think is pretty
cool because you've got pretty low BSR, 240,000. I know it doesn't sound
low, but that's pretty low. 14-30 sales a day is plenty when it comes to merge by Amazon because you can have 30, 40, 50 designs, depends
on what tier you're on, and be getting 15 sales a day across all your
different designs. That's very unlikely,
but you could be getting 14 or 15 sales a day across a bunch of your
different designs. The fact that there's
not much competition here, I really like. That was just using my
random keyword search thing. I really recommend
doing that because I think it's just
a really cool way to spark your mind with
some new cool ideas. Research takes a
really long time. I think my time is
more valuable put in other areas like coming
up with designs, trying to get sales, the marketing aspects, and also working on my
other businesses. I don't want to focus so much of my time
researching, researching, researching if I'm
able to speed that up somehow using a tool that I will always go for that option. But of course, it depends
on if you can afford that. If you can afford that and
you want to save time, then it seems like a
good option and it just gives you so much information. Because I really
like this tool and I use the tool every single day, and I want to do a tutorial
of this tool in my course, obviously, I would
recommend getting it. But rather than just
recommend getting it, I actually contacted pretty
much to see if they would do an exclusive price
for my students. I explained to them
what I was doing, I explained to them I was
making a course and I want to create a tutorial for
pretty much in my course. They really loved that idea. I actually said to them, "Well, can you offer an exclusive
price to my students?" They said, yes, 100 percent. They've been able to do that. Now, at the moment,
the exclusive student only price is 20 percent off, which I think is pretty good. It could be very helpful
for a lot of people. If you do want pretty much
with that 20 percent off discount and you really want
to do research like this, then go to this link and
use the code shimmy20, and that will allow you to
get that 20 percent off. Now, if you have any questions or you run into any troubles, then of course, message me. Again, like I said, of all the research tools, I was going to make a tutorial
on lots of different ones, but I just thought
you didn't need to pay for tons of different
research tools. For that reason, I
don't need to have tons of different paid
research tools in my course. I'd rather just have my
favorite most used one. That's what I've
done. Like I said, it's my favorite for
many different reasons. Definitely go to that
link and check that out.
16. Make Sure to Check the Trademarks: [MUSIC] One thing that's very important when it comes
to product demand is to make sure you're not
stealing anyone's designs, you're not running into
any copyright issues. The way to make sure
you're not doing this is to search for the trademark
of specific designs. Now, they don't
always show up and sometimes you just have to
use your own intuition of, don't ever use the Nike tick. What are people thinking? But what you want to
do is once you've done your product research and you've got a whole
list of ideas, you then want to
make sure you're able to sell those ideas. Now, there are tree
options when it comes to finding out
different trademarks. You've got the USPTO
website. That's for America. You have others for the UK, you've got others for Germany, France, all over the place. Now, previously I spoke
about using pretty much for the Trend Finder. What they've recently added is a trademark search tool as well. Now, I find this really useful. For example, you've got
Happy St. Patrick's Day. What we can do is we can go
into the trademark search, and we can put in Happy St. Patrick's Day and I
can click Search. Now, this is searching
all marketplaces, all product classes, and all statuses and
nothing is found. That makes a lot
of sense because that would never be trademarked. But then you have other things. For example, I paused
my game to be here. Now, the reason why I like this element of the tool is because yes, I can
do the search. I can go and do the search on all the individual platforms to find out if I'm allowed
to sell a product. But like I said earlier, I'm all about saving
time and focusing my time on the most
important task at hand. For me, going and doing all of this searching is not
a good use of my time. Because I have pretty much
Pro Plus plan anyways, it's just this is
an added benefit that they have this
trademark search tool. But if you don't want
to have this tool, you don't want to have the
trademark search tool, you can do all the
individual searches and I'm go show you how to
do that in a second. But if you do have the tool, then definitely use this
trademark search element. As you can see, I paused
my game to be here, this is filed in
the United States. You can look on
the USPTO website. By clicking this, you
open a new tab and it'll take you to
the USPTO website. You can see it's
filed for t-shirts. It's also filed in
the UK and this is the Intellectual
Property Office. Again, I paused my game to be here for some reason is filed again by this person
on this date. You just got two
different dates there. Now, you've got also
t-shirt, PopSockets, pillows, and this is
just one search term. What I would recommend doing is once you've got your
long list of ideas, put them all in here and make sure you are allowed
to sell them. This is a very sweet,
a very simple video. I just really wanted to drum it in that you do not
want to be breaking any rules when it
comes to copyright or any laws like that
because it's not good. Firstly, you can
get your account banned. You don't want that. Secondly, if it's serious, you could probably get sued, and you don't
want that as well. If it's even more serious, well, I don't even want
to think about it. But basically you
just want to really be careful. That's
why I like this tool. Again, like the Trend Finder
section of this tool, you can have access
to all of this and this is all comes under that same 20 discount
that I was able to get from them for students only. If you do want it, that
link is over there. The code is shimmy20. This is just a really
powerful tool. Again, if you don't want to pay, then you can just go
to the USPTO website, which is over here,
USPTO trademark search and you can
search that database. Let's have a look. If we
click "Search the database", we go to Basic Word Mark Search. Then, I paused my
game to be here. This is a bit of an
ugly and clunky layout, but you can see all
the different files. This one is dead,
which is why it didn't show up over here, and then you've got these
which showed up over here. Again, like I said,
you can just do this for every single
one of your designs. The reason I like
this is because it shows throughout the
different countries, so it saves me a
bit of time there, and it's just a much
prettier layer, as you can see the difference
between these two layouts. I'm all about a
user-friendly experience. If you already have this
tool, then go for it. I wouldn't say you should get the PrettyMerch Pro
Plus plan just for the trademark search because the Trend Finder is so
much more powerful, it's so much better and that's what you
should get it for. The trademark search is
like an added benefit. It's really useful. It comes in handy, and
it's just an extra thing. They are going to be adding
more things as well. It's just cool
they're going to be adding all these
different tools, all under one umbrella. All I'll say is,
to end this video, just make sure you
are not breaking any terms and make
sure that you have searched to find out
if you are allowed to sell a specific design.
17. My Design Process: [MUSIC].This section
of the course is going to be fully
dedicated to designing. There is so much to cover. How to design, where to design, what to design, principles to follow, color and font theory. This is an absolutely
awesome section. Before taking you through
all of those steps, I wanted to go through my
process of designing with you and hopefully find a process
that works well for you. I will start with
a bit of research. Now we went over this
previously in the course, so I'm not going to dwell on it. After writing down
some funny quotes, memes and puns and
just general ideas, I'll get a pen and
paper and start lightly sketching
some ideas out. If it's just a
design using words, I'll skip this step and go
straight to the computer. But if I want to
make a character, I'm going to go with the
pencil and the paper. Now for me, I'm a
very visual person. I love art, I love drawing, and that is my favorite part about the print on
demand business, which is why I like
having a piece of paper and a pencil and I can
just sketch some ideas. But that isn't
everyone's cup of tea. Some people like to go
straight to the computer. Some people like to download already created images and
that's absolutely fine. We're going to find your
perfect process as well. Next, I'll take a
photo of my design or scan it into the computer
and open it up into the app, Procreate on the iPad, and then I'll use the
pencil and create a more defined
drawing of my design. Now, not everyone has an
iPad and it's not vital, so that's totally okay if
you want to skip this step. Again, this is just my process. Once I finish the
drawing on Procreate, I'll save it and send it to the computer and then open it up in Photoshop for just
a bit more tweaking. This is where I'll add text and potentially manipulate
that text around the design and make
sure it fits well with the design and the color
and theme and all of that. Usually, this is me done with the design and the process
can take 30 minutes, the process can take five hours. It totally depends on the
complexity of that design. If it's a text-based design, I'll go straight to Photoshop
or straight to Canva, I'll skip out the
whole iPad step just because I don't
think it's necessary. Usually, I'll go to Canva and that's because they
have so many graphics, so many elements and so many fonts that are
ready for you to use. I can quickly pop
things in on the fly and see how it will look
and then just as quickly, delete things and move on, and that's why I like using
Canva for my designs. If I really like the design and I decide I don't want
to use the Canva elements, I can use what I've
created on Canva as a basis to create
my own drawing, which is sometimes
what I end up doing. That is my design process. Now for this course, I've decided rather than do a full Photoshop
tutorial to begin with, rather I want to create
a Figma tutorial. The reason for that is
Figma is free and a very powerful tool and perfect
for print on demand. Photoshop can cause
quite a bit of money. What I'm going to
do is over time, I'll add a Photoshop tutorial. I'll add an Affinity
Designer tutorial. I'll add tutorials and all these other tools
so that in time, you can just watch tutorials
for a whole bunch of different tools and decide
which one you want to do. Now, let's go over the
core principles you have to consider
when it comes to creating a print
on demand design.
18. The Core Design Principles: There's quite a lot to consider when creating
a new design. It's really easy to
forget things when you're all excited about
a new idea that you have. It's important to remember
the core principles. Please come back and
watch this video multiple times if you ever
have a design and you just feel like
it doesn't take all those boxes and you
want to make sure it does. Here are seven things you need to consider when
creating a design. Let's start with number 1. Number 1, the size
of the design. Depending on what
you're putting it on, T-shirt, yoga mat, hoodie, mug, they're all going to have a different size as well as that each individual
design will look its best at a particular size. After designing something
my advice would be to put it on a mock-up of various different
products so you can see if the size
of that design works on that particular product or if it just looks a bit silly. Now, I use Placeit for mockups and I have a
video talking all about mockups where you can get
free mockups and paid mock-ups and that'll be
later on in the course. Number 2 is placement
of the design. Another important thing to consider is the
placement of a design. Should it be centered or
should the words be to the left or to the right or
should the words be centered? You have to factor all of these things in when
creating a design. You can use the rule of thirds, which is typically
used in art and photography but it does work
well with print on demand. Now, as well as using
the rule of thirds, you also want to make sure
that you are creating your design based of a grid. That way you can make
sure all the elements are evenly spaced
and that it looks absolutely perfect
because at the end of the day someone is going to
buy your design and wear it and you don't want any
discrepancies between the spacing of letters
or graphics or anything. With the rule of thirds,
you can use the lines and the key points to figure out where your
wording should be, where your design should be, and what looks
particularly good. Another thing to consider when
creating a design is what that design is and who's going
to wear it and make sure, unless intended,
that design doesn't highlight specific
body features. Now, a lot of the time
with designs that are funny and sometimes
rude and jokey, they're specifically trying to highlight areas of the body. But a lot of the time designers will create a
design and unintentionally highlight specific
areas of the body and it actually ends
up looking really silly and that wasn't
what they wanted. Make sure it doesn't
look like that. The third category
is color theory. Now, color theory is a long
and complicated topic, one that I'm not qualified
in and I don't want to pretend to be qualified in. What I like to use is a really cool and
free tool that gives me everything I need
to know about color. This tool helps me
match up colors, helps me understand
what colors mean, it helps me make
sure that colors don't stand out when they
shouldn't stand out, and it allows me to
find the right colors to trigger the right emotions. This is the Canva color tool. It has four mini-tools
all free to use. The palette generator,
the palette ideas, color wheel, and color meanings. The palette generator
allows you to upload your own image and see the
hues that they've used. This is good if you've seen
a design with coloring that you like or one
that matches your vibe. There's also tons of
palette ideas too. The color wheel is
a quick tool to see which color goes
with which colors, which works really
well when deciding on the item color and then
the graphic color. Then you have color meanings. Color meanings is incredibly important to find out what
actual colors mean and what you should use
for what specific time and for advertising and what emotions you're
trying to trigger. It's just very cool. This place has it all and I've learned so much about color. It's just a fascinating topic especially when using it for
design or for marketing. Number 4 is the
color of the item, whether it's a
pillow, a T-shirt, a hoodie, a mug, whatever it is. Knowing the color
that you're trying to design on is very important. This is similar to the last one about color theory but
you have to remember that a printed color will never look exactly the same as
the actual item color. There'll always be some
minor differences. A purple design and a purple T-shirt might look slightly
different and this is where using mockups becomes
very valuable because you'll be able to put your
design on a specific color, let's say pillow, and you'll be able to see, does it look good with
that color combination? If you want to go for
the classic combination then you'd want to go for a black T-shirt
with a white design or a color design
with a white border. Number 5 is font. Choosing the right
font is vital. When choosing the right font you want to make sure it's readable. Meaning it has to
be big enough so that people can
see it and not so swirly and grungy or whatever so that people can't properly
see what it says. Try not to use too many fonts. One to two fonts is ideal. Also sticking to the
same category typeface makes a design come together
just a little bit better. You want to think about
the color of the font, is nice to have a
contrasting color from the background to the font so that it stands out even more. However you want to make
sure that the colors don't clash with the background because not only can
that be hard to read, it can be painful to look at. You want to mainly be using display typefaces for print on demand as they are
the easiest to read and the easiest look at. They are the most
popular with this art. Try not to distort the
fonts too much and stretch it in weird
ways because again, that just makes it
very hard to read. Number 6, choosing the right graphic to match the design and
to match the mood. A graphic isn't a standard
object on a design. It has to match the
other graphics, it has to match the fonts, it has to match the color, and it has to match the
overall theme of that design. A lot of the time the font can match the associated niche. Let's say it's a school
T-shirt or a Western T-shirt, you can find a font that
matches really well with that. Likewise with the graphic. You want the graphic to
match the overall niche. You don't want to use
semi-realistic graphics with super cartoony graphics because that would
look really odd. You also don't want
to use real photos with cartoony graphics
because again, that will look really odd
and you'll be surprised. I've seen a lot of
people do this very frequently and it's just a
big no in print on demand. Number 7, making sure you put it on a mock-up
so that you can see exactly what it looks like before deciding it's finished. This is without a doubt the most important
step because without this step it's hard
to visualize what it could look like on
your chosen object. Let's say you're setting
a T-shirt or a pillow, you need to see if the colors
of the design, the size, and the placement, all
go well with that item. Don't just put it on one mockup. Let's say you have a
T-shirt, put it on men, women, children, senior people, everyone and people of
different races and ethnicities just to see if it looks
good across the board. The next thing to
do would be to send that mock-up to family and friends and get
their opinion on it. What do they think and you could ask them
specific questions. Ask them, does the
font look good? Does the graphic match the font? Do the colors all match? Does this match
the overall theme of what I'm going for here? Let other people tell you
what they think as well. I use Placeit for this but I
do discuss in another video where you can get tons of free mockups as
well because again, I don't want you
to have to spend money if you don't
want to spend money. Those are the core
principles that you have got to consider when
creating your designs. As I said earlier, please come back to this video when
creating your design to make sure you're taking
all of these boxes because they are
really important.
19. 3 Awesome Types of Designs: [MUSIC] In my mind, there are three types of designs
that someone could make. Picture-only-based designs,
text-only-based designs, and a combination of both. Picture-only-based
designs work amazingly if you have a huge audience
or you're trying to get your designs into shops like H&M and Zara and River Island. Those suit picture
designs perfectly. The difficulty with
picture-based designs is it's hard to convey a specific message
and it's hard to pinpoint a specific audience. A picture does speak
a thousand words, but in this case, you don't want to do that. You want to be talking to
a few people and making a very clear and obvious
point with your design. Pictures can also work if it's a very obvious design targeting
a very obvious audience. For example, the dinosaur niche. When people created dinosaurs around Christmas
and they created a dinosaur wrapped around lights and a
Christmas tree vibe, that was a picture that
didn't need any words but it spoke to a specific audience
and it worked perfectly. However, designs like this are very broad and it
could go either way. If you are an amazing artist and the reason you're doing this
is because you enjoy art, then go for it. Create those amazing pictures and try and sell them because, at the end of the day, I want you to fully
enjoy yourself. Truth be told, I love
picture designs. I find them so fascinating,
so interesting. But the truth is, they are a lot harder to sell. Text-only designs, in
my opinion, is great. It's an amazing way to share your specific message
to a specific audience. If it's a joke upon a meme, the best way to share
that is through text because you get your
message across very easily, even if it's none of
those and it's something like, "I'm a technician. What's your superpower?"
Even with that, it speaks to a very
specific audience. It has a very obvious message, and a lot of the time, that's what people like to wear. This type of design
is also very popular because it means everyone in the print-on-demand business, whether you're amazing at
art or not amazing in art, you're able to sell these
types of designs because you don't need to be
a graphic genius to come up with a good pun and put it on
a t-shirt via some text. You could literally open Canva, plug some text in
and come up with an amazing texts-only design. Finally, a combo. This is a sweet spot for most, a text-based design that has some integration of graphics, either cartoony or
realistic, whatever it is. It could mainly be
the picture with some small text or it could
be the other way round, and the main central point is the text with just
some graphics thrown in here and there to really help illustrate what
the design is about. This is by far my
favorite approach, and that's because
I love creating a funny t-shirt with some text, but I also love drawing. I love creating designs and
graphics, and this way, it allows me to create
this funny t-shirt, which I think sell a lot better, and also incorporate
some graphic elements that I've either drawn or found, and I just love bringing
it all together. I think it speaks to the
largest group of people, but also it keeps it
nice and targeted, creating a joke or a funny t-shirt and
being able to illustrate it further and make it even
funnier with a graphic, it's a win-win situation. These types of designs are
becoming so popular now, especially as the world
of text-only designs is slowly shrinking because
they're becoming way too saturated and
everyone has done them, and as well as that
people realizing they could just make them themselves
if they really wanted. But when you incorporate
graphics into that text, you're giving the edge back and making it look really cool, complicated, but also simple. That's what I think
is cool because you're making a design
that complicated, but it's not actually
complicated. You just throw in a graphic there and someone's
being like, "Oh, that looks really good, that's really funny, and
it makes a lot of sense." But for you, it hasn't been
particularly difficult to throw a very basic graphic
into a text-only design. Those are the three
types of designs. Which one should you do? Well, at the end of the day, you can try all three, but focus on the ones that you think you're going
to enjoy in those. If it's picture-only, text-only or a combination, focus on that and
just enjoy yourself. Don't forget, you can
do different ones. You can do some picture
one, some text ones, some combo ones.
You can mix it up. There's no specific
design that is going to be guaranteed to sell
more than another design. At the end of the
day, you never know, so just enjoy yourself with it. You don't want the
process to be a burden because then you're
not going to have fun and you're not going
to want to continue.
20. Fonts: Fonts play a huge part in your print on-demand designs. You might just be a little bit surprised
to find out that you can't use any font you want on your print
on-demand designs. You might be thinking, who at earth is going
to notice the font I'm using and then
send me a cease and desist letter
or try and sue me for one reason or another
because of the font I'm using? Now most of the time
that is the case. No one's going to notice. You're probably never
going to get that big where someone takes notice, but you never know which
design could go viral, could take off and end up getting thousands
and thousands of sales. You do not want that design
to have a font that wasn't allowed because you could
get in a lot of trouble. It's just safer and
also legal to play by the books and only use fonts
that have commercial use. But it's okay because here's a list of websites
where you can download the fonts and use
them for your print on-demand t-shirts
without any issues. There are also a paid options, but I'm not going to
discuss paid options. I'm just going to go over
the free options because obviously that's what
everyone wants to hear. The first subset
is Google Fonts. Now Google Fonts has so
many different fonts. You can see here
it's not just a font and missing a couple of things here and there, it's full fonts. It's really,really cool and you can download as
many as you want. You can use as many as you want. You'll see over there
it says commercial use. I recommend browsing
Google Font Library and having a look and downloading
some pretty cool fonts. The next is Canva. Canva have a paid option
and a free option. Regardless of which
option you go for, you can use the fonts
for commercial use. If you use the paid option, you have a few more
fonts available to you, but the free option still has a whole bunch of fonts
that you could use. Definitely have a look at Canva if you want some cool fonts. The next is 10001 fonts. Now this is a website
where you can get tons of different
fonts but make sure you are on the
commercial use part of their website where
all the fonts you would be downloading would be allowed for print
on demand because they do have lots of fonts which
aren't allowed as well. Finally, Creative Fabrica. Now Creative Fabrica have a
whole bunch of paid fonts, but they also have a whole
bunch of free fonts. So, definitely check
out the section of their website where
you can download free fonts and see
if you can use those in your designs because
they are really cool, created by artists, they are so artistic
and they can make anyone's design
look really impressive. With these four websites
you used to have an army of fonts
at your disposal, not just for print on
demand but for marketing, advertising, your social
media posts, anything really. It's always useful having a huge catalog of fonts
on your computer.
21. The Multiplying Design Method: This is an awesome method, one that has worked really well. The reason I like the
multiplying method is because it's very low effort and it proven to work with previous designs.
What do I mean? Taking a design that looks like this maybe and copying it across many different niches or many different categories
in a particular niche. You could do this with jobs, you could do this
with family members, and you could do this
with animals sometimes. For example, I came across a really cute dabbing
animal design. Rather than just leave it
at that one animal dabbing, what they did was they created
a whole series of animals, all dabbing, which
is really funny. But also what they've
done there is they've used a successful
design that's worked well and rather than
just moved on and started from scratch and try to think of another cool design, they just used that
concept across the niche and they
created a dabbing zebra, a dabbing llama, a dabbing
lion, whatever it is. It's just a brilliant
way to multiply a niche with a design that you
know people already like. At the end of the day, this is a very simple concept, but a lot of people
don't think about it. They think as soon as they
have a successful design, they have to go back
to the drawing board and start all over again, rather than look at
their successful design, see why it was successful, and see how they can
adapt it and just make a similar design that
could also be successful. The same thing goes
for a lot of things, a viral YouTube video, a viral Instagram post. You can see things
that worked for it originally and then rather than have to reinvent the wheel, you can just adapt it and make it again
slightly differently. People are like an algorithm. It's weird to say, but if an
individual likes a design, there is a much higher
chance they're going to like a similar design to that as well than
them like a brand new, never seen before design. That makes sense when
you're trying to cater to people on
what they like. If someone has said,
"I like that," don't go and create them
something like that, create them that, but just
slightly differently. For example, the job niche, you have, I'm a bartender. What's your superpower? Let's say that does really well. All you should do next
is change the job title. I am a technician. What's
your superpower. I'm a nurse. What's your superpower? I'm a carpenter. What's
your superpower? This can be done hundreds of times and it works amazingly. Now, just because
one design works, it doesn't guarantee
the others will work, but it certainly gives you a better chance
that it will work. If you've ever had a
successful design before, go and analyze that
design and see if it can be translated into
another niche, or maybe even the same niche with a slight tweak
or something, but at the end of the day with
the overall same concept.
22. Programs You Could Design In: There are so many different
programs you can design in, and in fact, some print-on-demand
websites allow you to design directly
on their websites. Some programs cost and
some programs are free. In this course, I wanted to
give you the option of both. Upcoming we have a full Figma tutorial
that has been made by my wife who is a Figma
genius and as well as that, we'll also do a
tutorial using Canva. Now, specifically Canva Pro. You can use the free
version of Canva, but for this tutorial, I'll be using Canva Pro. That's because I
feel that Canva Pro is a cheap way of doing
graphic design work. It's not like photoshop and
it's not really expensive, but it's also not super cheap, a couple of dollars
or pounds a month. It's just somewhere
in the middle, but it has so much potential. That's why I wanted to
include a Canva tutorial as the paid option and
a Figma tutorial, as well as those two tools
we're going to cover. There are a ton more
tools that one could use. Hopefully, in time, I'll be able to make a tutorial
or bring an expert in to make a tutorial for each and
every one of those tools. For now, I'll just let
you know what they are. You have Affinity
Designer, Photoshop, Procreate, Photopea,
GIMP, Pixel x, Photo Pos Pro, Krita, Lumina, Adobe Illustrator,
and as well as that print-on-demand
company's built-in designers like Printful and Gooten. They have their own little
designer on their website, which I don't ever usually use because they usually quite bad. Those are all the programs
I could think of. If there are any other
programs that I've missed out that you would like to
learn about at some point, let me know down below in the comments section and
I'll add it to the list. Again, at some point, I'm planning on
creating tutorials for every single one of these
tools so that you could come to this course and learn everything
you could possibly imagine when it comes to print-on-demand and
graphic design.
23. CMYK VS RGB: What should you create
your designs in? CMYK or RGB? This has been an ongoing
question for quite a long time, and I've tested both to
really see the difference. Here is everything you
need to know about the two color modes and
what you should be doing. RGB. Well, RGB stands
for red, green, and blue, and this is the color space for
digital imagery. Basically, it's
used for displaying anything digital:
photos, logos, videos, websites, anything that
you're viewing on a screen. Usually, with RGB, the colors are far more
vibrant and they pop, and they look a lot better. CMYK. Well, CMYK stands for cyan, magenta, yellow, and
key, key being black. It's the color mode for
tangible printed materials. Basically, CMYK are the
colors you're going to have on your
print-on-demand stuff once it's been printed. Business cards, posters,
flyers, billboards, they are all going to be
using the CMYK color profile. Designing in CMYK makes the most sense because
it allows you to get the most accurate
representation of what your design will look like
once it's being printed. The main issue lies with file formats because most of the time with
print-on-demand, we are creating something
and then saving it in a PNG format. The reason we're
doing this is so that the background is transparent, and when we upload
it onto the website, we don't have any ugly borders
or anything like that. Now, PNG doesn't
actually support the CMYK color profile.
What do we do? However, that's not
such a big deal because you can design the CMYK color modes image to reflect the CMYK color gametes. This way you will have very
little discrepancy from what you see on the screen to
what actually gets printed. When a printing company
says they accept RGB, what they mean is they
accept RGB files, but before printing
every image goes through the printer's native
raster image process, which basically
converts a PNG with an RGB color profile to
a CMYK color profile, which makes it
okay for printing. I mainly design in RGB just because I can't be
bothered for all the faff, and sometimes I'll
design in CMYK. Now, when it comes to
actually printing, companies can take
both file formats, so I just go for RGB if
that's what's already set up, but I do understand the
importance of going for CMYK. Now, if you realize
the major differences, which is the fact that
RGB colors are a lot brighter and CMYK
they're a lot more dull, and when they get printed,
they'll be a lot more dull, if you are able to visualize that whilst designing an RGB, then that's absolutely fine. But if you feel you really, really can't differentiate
between the two when you're designing
an RGB and you really just want to see what
it's going to look like, then I would recommend
designing in CMYK. Alternatively, what you
could do is you could design in RGB and then
convert it to CMYK, put it on a mock-up so
that you can see exactly what it will look like
with the right colors. That's probably the best
option if you don't want to design in CMYK. That's it for color profiles. Now, I know it sounds confusing, and RGB, CMYK, it's a mess. But let me put it this way, when I use Photoshop or Canva, I'll just do RGB and
if I really want to see what it's going to
look like because I can't envision what
it will look like, then I'll convert it to CMYK and I'll slap it on a mock-up so I can see what it will look like. But most of the
time it comes out absolutely fine to me
and I'm not bothered. I would say you choose
what you want to do. That's everything you needed
to know about CMYK and RGB.
24. Where to Get Free Images: Where should you get free images for your
print-on-demand designs? Not everyone is
graphically-inclined, and even if you are, you might not have time to
just sit there with a pen and draw something out either on a piece of
paper or an iPad. Having a list of websites
where you can get free, commercially available
designs that you can put on t-shirts,
that's a goldmine. Here are some free places. You have Unsplash, Realistic Shots, Pixabay, which is great for
graphics and vectors, Life of Pixs, and Gratisography. Those are great for photographs, but with print-on-demand,
a lot of the time, we like to use graphics as well, so let's go over a
couple of free places where you can get some
graphics for your designs. You've got vectorcharacters.net, vectorportal.com. You've got Vecteezy. Now, with everything I've
just mentioned here, you always want to
tweak it just a bit, either by adding your own text, mixing it with another
graphic or another design. You never want to just
take a picture or a graphic from the website, plonk it on a t-shirt, and sell it just like that
with no changes at all, because well, firstly, a lot of people
don't know if that's okay, there's a bit of a line
there and we just don't know if it's okay or not okay, but as well as that you want
your design to be unique. For that reason, try
and add other elements. Change the colors, add text, *** other graphics, do
things to make it unique. These were just a couple of free resources where
you could get graphics. Now in the next video, let's have a look at some
paid resources where you can get really cool
images and graphics.
25. Where to Get Paid Images: [MUSIC] There are of course an endless number of websites where you
can get paid vectors, graphics, and PNG files. But I didn't want to go through every single one so
I'm just going to list the most popular
ones that I've used and the ones that I
find all the best. The first is Shutterstock, you then got iStockPhoto, you've got Depositphotos, you've got Vexels, you've got Placeit, and
you've got Creative Fabrica. I know it's not very many but the reason for that is
I like to draw a lot of my elements when it comes to print-on-demand and I'll only use these websites if
I don't have time, I'm seeking inspiration, or I want to take what someone
else has drawn and edit it and change it and adapt
it to what I'm thinking. It's just sometimes
easier to start with a base drawing and edit it than have to draw from scratch. I definitely recommend
checking out those sites if you
do want to pay. Of all those sites, my favorite is probably Vexels
and Creative Fabrica as their libraries are vast
and they have some awesome, awesome print on-demand
ready graphics to go.
26. Full Figma Tutorial : Welcome to the full
Figma tutorial. Now, I didn't use Figma as
much as I probably should. However, my wife not only did she study it in university, she's been using it
for years and she is a total width using Figma. I really wanted to use Figma
in this course rather than Photoshop or Illustrator
or Affinity Designer. That's because Figma
is just as powerful. Well, it's pretty much just
as powerful, but it's free. I want you to be able
to use a free tool. Now of course, it can be quite complicated to use
so my wife, Lauren, has created a really in-depth tutorial for you
for this course. I'm just really happy
she was able to do this. Check it out and
I hope you enjoy. Today I'm going to be showing
you the software called Figma and how you can use it for your print
on-demand design. Figma is usually used for
digital design files, such as designing
apps and websites. But there's no reason
why you can't use it for your print
on-demand designs too. It's a Cloud-based program and it's free for individual use. You can download
the desktop app at figma.com/downloads
to get started. They also have an
online version, but I really recommend
getting the desktop app just because it has a
few more features and it's easier to use. For both versions though you do need an Internet connection. Once you've downloaded
the app and opened it, this is the screen that
you'll be greeted with. This entire space here as your workspace and
it's pretty large. Let me show you, if I draw a
rectangle, I can zoom out. You can see just
how much workspace you have to work with. You can start designing
straight onto the space just by adding shapes, designs, texts
wherever you want. But if you do want to be
a bit more organized, you can use Figma as well
as journal art boards, which are called frames. You can find the frame's option in the panel here at the top, or you can press F to
access it as a shortcut. To add a frame or you need to do is click and drag as if you're drawing any rectangle
or any shape and release. If you draw over something that's already
on your art board, it will be automatically
added to that frame. But if you just add an art
board onto a blank area, let's say you wanted to add
your design onto the frame. Right now you can see
in the layers panel that I have a rectangle
and I have the frame. If I want to add
this rectangle on, I can simply just drag it in and that will keep this within this frame, within
this art board. Analyze panel,
again, you can see the rectangle is now
inside frame one. If I was to collapse it, you can see the
rectangles inside. I recommend working in
frames because it just keeps everything a bit more organized and helps keep track
of your designs. To adjust the frame size, you can either drag
from the bottom here holding down Shift
to keep the constraints, or you can use the panel here at the side to adjust the
width and the height. Let's say for this example, we're going to adjust
it to 4,500 by 5,400 for merch by
Amazon, for example. I now have a frame
that I can work in for a merch by Amazon design. When it comes to exposing, it will be really simple
to have the right size. I'm now going to take you
around the toolbar at the top, I'll show you what everything
is and how it works, starting with the Move button. This is the Move button,
this little arrow, and the shortcut to access
it is V. What this does, it allows you to click
on shapes and move them around the workspace.
Pretty simple. The next section is Scale, which is in the same
area as the movie. Just have to click on
the little arrow or use the shortcut K to access it. What scale does is, allows you to resize
objects and shapes keeping the proportions
exactly the same. This is basically the
same function as if you were to hold down shift when
when resizing an object, so if I go back to move, I just did the shortcut V. I can still resize the
objects on move, but it won't automatically
keep the constraints, but I find it much easier to just hold down shift and that
will keep the constraints. I don't really use the
scale option much. The next section
we have is Frames, which we've already gone over, so I'm going to skip across to the next one which
is our Shape tools. Within this, we have a
few different options. I'm going to start
with a Rectangle or the shortcut R. When
you select any shape, if you just click
on your workspace, it will automatically draw a square or whatever
shape you're doing, a rectangle, with
100 by 100 pixels. A circle will have a
diameter of 100 pixels. That's just the automatic
default for clicking. However, if you also
go on rectangle, you can also drag the size. You can hold down shift to keep the constraints or you could
just drag a random size. If you know exactly the size
of the rectangle you want, you can change it also using the width and height options in the panel here on the right. To rotate the shape
that you've made, you just hold down at the
corner for this arrow to come up and you can spin
it using your mouse. You can also use the
rotation section here. If you know the specific value. Or you can go up in
increments of one, where if you hold
down shift that will go up in increments of 10. To round off the
corners of a shape. You can navigate to this little circle in
the corner and just drag it in and out to
change the corner radius. You can also use this
value here to change it. I can change it to 40. Or if you want to edit
each corner individually, you can click on
this button here which will either allow
you to edit each corner individually over here by itself or you can
go in and change the values for each one
using this panel here. The next shape that we have in our options is the line which
you can either find here or use the shortcut
L. To draw a line you simply choose a point and
drag out to the side. If you hold down Shift, it will keep your
line to increments of 45 degrees as you go around rather than
having every option. You can change the angle
of your line again in this panel and you
can also change the width of your
line over here. The next option we
have the arrow. The shortcut for
this is Shift and L. This basically has the
same function as the line. You can edit it the same way. The only difference is you can choose the arrowheads that
you want on your arrows. You've got one the left
and one on the right, on the top and on the bottom. Then you can change these here. If I go in, I can change it to that or you can reverse it using this button. The next one we have is
the ellipse of the circle, which is the shortcut
L. If you click, you'll get a circle with 100. Or you can again drag free form shape or hold down Shift to keep the constraints. Again, you can use the width
and the height options here to change your circle. This little button here will keep the constraints the same. Whenever I change here, it will automatically change it. If you have this
button selected, it only affects what
happens when you type in. I can have that
button selected and drag and it will
still change it. The second is the last shape
that we have is the polygon. This one doesn't
have a shortcut, so you have to select
it from the menu. The default shape, if you click, will be a triangle
that's like 100 by 100. The length of the side are 100. But you can change the amount of points that your polygon has by increasing
this value here. This can go from
anything from 3 to 60. If I go up in increments of one, you can see it basically ends up just looking
like a circle by the time you get to 60. But it won't be a
perfect circle, it will still have some edges. The last shape that
we have is the star. Again, it doesn't
have a shortcut, so you have to select it. If you click again, you'll get 100 by 100, or you can drag a
star of your choice. The default will also be
a star with five sides. But again, you can
decrease this to three and go anywhere up to 60 for a star with
loads of points. There's a few options for
changing the star here. So we can change the
number of points. We can also change the
ratio of this angle here. So If you drag it in, it will make for thinner spikier points in
the smaller center. You can drag it out for a larger center with
slight fatter points. The other thing you can do again is change the radius
of the points. So If you drag this in
or use the section here, it will make your points
less sharp and more rounded. The shape might
be called a star, but you can see
other have changed like all these other points, and given it so many spikes, and made all round. And It doesn't really
look like a star anymore. It's more like a splurge, so it may seem like there's only a few shape
options in Figma, but the amount you
can do with them, you can create all
sorts of shapes. The last option in the
shapes thing is place image. That will just open
up a file window that you can select an
image to place into Figma, but you can also
just drag and drop, or I think you can
also do it from here, File, Place Image, as well. I always drag and drop
because it's the easiest. Moving along in the toolbar, the next option we
have is the Pen tool, which is a shortcut P. So what the Pen tool does, it allows you to
draw straight lines like this just by clicking
from point-to-point, and you can even make
them meet up in the end, and you'll end up
with a custom shape. If you wanted to
make a curved line, as opposed to a straight line, all you do is you'd click
to make your first point, and instead of just clicking
to make another point, you'd click but hold
down the mouse, and then you can drag that point from side to side until you
get a curve that you'd like. You can go in and edit
these curves afterwards, so it doesn't have to
be perfect first time, and to finish the curve,
you just release. The default is, as soon as you make one
curved line for Figma tool, so you've complete the curve
with another curved line. So I'm not holding
down the mouse at all. I'm just moving the
truck pad around. When I click it will
make a second curve, and then it will go back to straight lines like
we had before. You can continue
making curved lines. If I let say make a curve here, and then I'm not holding down, but if I do hold
down when I click, it will do another
curved line, and so on. Just clicking, will give
you straight lines, and holding down whilst you click will give
you curved lines. If you only want
one curved line, but as I said, the default is for it
to make another one, I've clicked and I've held
down and I've released, and it's giving me that
automatic second curved line. If I click on that point, it will set it back to
default of straight lines. You can do that for any
point in the things. If I'm making a load
of curved lines, it will always carry on
making curved lines unless I click that point and it will
go back to straight lines. Will show this in
more detail soon, but to change the stroke
weight of your line, you can do it in
this section here. We're also going into more detail soon about
how you can adjust these curves and move
these points around. The next tool, which is under the Pen tool is the pencil tool. This is similar to the pencil. It's Shift P to access it as a shortcut or you can
click on it from the Menu. All this is literally a pencil. You just hold down. You can draw whatever shapes you want and also it will smooth
out a bit at the end. And if I use the move tool. You can see it's all one shape. I already use this
tool too much, but I can imagine if I
had a drawing tablet, like a Wacom or
something that I'm using a pen to draw
straight onto my computer, it could be really useful in the design phase by
sketching out designs. But just using a tripod, I find it a bit
difficult to use. The next one that we have in
the menu is the Text button. We're going to go into
Text a bit later on, but just so you know
that's where it is. I've just drawn some
quick rectangles just to demonstrate the
Hand tool, which is next. If you click on the Hand tool, all it does is allows us to
move the workspace around. I really don't use the Hand tool because when you're
on the Move tool, I just use my track bud light, like use two fingers
to swipe around, to navigate around my workspace. I really don't use that at all. And the last thing
that we have in the menu bar is
the Comment tool. So I can imagine this
is a really good tool. Let's say you have
a business partner, you're working
collaboratively with someone on the same document. What it allows you to do
is leave a comment and it'll keep it separately
in this panel on the side. How I can imagine using this in a print-on-demand
design situation is, let's say I remember I want
to add an eighth square, but I don't have time to do it, then thereby just
want to quickly note it down, so I remember. I can actually click anywhere
and say add a square. It will leave me this notification
here where I've left it or in the pane here. For me, as a reminder,
to come back and do it. That's how I imagine using
it in this scenario. When it's done, you can either add a comment or just mark it resolved
and it will disappear. The next thing we're going
to look at is how to edit these simple shapes. So we know how to make
these simple shapes, but we might want to edit them, make them a bit more custom. So to enter the edit mode for each shape you want
to double-click, and that will bring up these diagonal lines when
you're hovering over the shape. It will also alter
the menu here. You have a few different tools. So to add a point, you're going to want
to click the Pen tool. Again, you can use
the shortcut P. When you hover over the
edge of your shape, you'll see a red line and
these points that appear. So if you click, that will
mean you can add a point. So the default that Figma does is when you add a point
and want you to solve, it gives you a line as if you're going to
add another point. It will actually draw that
line to connect the two. So to get out of that, if
we just wanted to say, add another point on
the right-hand side here but we don't want
this line to connect it, all we have to do is click
V to end the Move tool. To navigate to the Move tool, click on your shape, Click P again, and that will give you the
freedom to add another point. So let's just add
a few more points. I'm going V, click P. So that has added an extra four points
along all four sides. To actually edit the shape now that we have
these new points, we want to stay on the
Move tool and we can actually move these points. You can move the corners
in that we had before as well to create whatever
shape you want. As you can see, we have something
that doesn't resemble the rectangle that we
had earlier at all. And then just press "Enter" to exit the editing shape mode. The next option that we have in the editing shape mode
is this Bend tool. When we click on the Bend
tool, what that does, it will change these
very pointy edges and corners into curves. All you do is click the Bend
tool and select that button. It will also be quicker again, turn it back to a point. So we're just going to
make a few of these curved like so, and then if we go to the
Move tool, the V tool, the shortcut V, and we can edit these bends and curves
that we've just made. So we can use the spiky angle
things to edit them. The default of the
bend tool is to give an angle to both
sides of your point. But let's say we want this side here to still have
a straight line. All we would do to do that
is click on this side, the one that we want to
remove the angle from, click on the Paddle to
change the bend for that side and press
the backspace and that will delete it to this motion where you can now edit one side of that point. To bring it back to hang
both sides editable, you just click the
bend tool and select that point again and that will enable you to
move this side again. The last option we have on the editing shape menu is
this paint bucket tool. This doesn't actually
have anything to do with changing the
color of a shape. But it's a way of deleting
areas within a shape. If I use the pen tool, let's say I draw another
shape also in the editor, so the square and then I go
to the paint bucket tool. You can see if I hover over, I've got two different
stripy zones that I've separated out. If I click on this one, it
will remove the fill from that section to create like a window within
this main shape. We're going to move on to the color and
styling of a shape. I've just drawn a basic square. If I go to the right-hand
side panel here, you've got the fill option here. The default is a
gray whenever you make a shape but
you can change this by using this color
picker thing here. You can use the tool
here if you want to choose a specific color somewhere
else from your project. You can either use
the color picker, use these select
the tools or you can type in the hex
code or RGB values. There's lots of
different options for color modes over there. This value here will change
the opacity which is linked to this
second slider here. If you want to create a gradient as opposed to a
solid fill, linear gradient, radial gradient and angle gradient or diamond
gradient or you could fill the square with an
image which will take you to a file selector button here. We're just going to
keep it solid for now. The next thing you
might want to do is add a stroke to your shape. To add a stroke,
you click the plus next to the stroke button. By adding a black stroke, you can't really see it
at the moment because it's one pixel thin. But if I increase that line, you can see that stroke
starting to appear. Your stroke can
either be central. That's when the strokes
all spilled out and in the same amount into the
shape or you can put it inside where it's
all on the inside or outside where it's all on
the outside of the shape. You can change the stroke
from a solid line to a dashed line by clicking
these three buttons and changing it to a dash
and you can adjust the size of your dashes
using this section here. I'm going to remove the
stroke and you have this effect section which allows you to add things
like drop shadows, layer blurs, inner shadows
and black background blurs. I'll just add a drop
shadow for illustration. Let's make it 10 pixels out. You can see I added there. It's going to make
it a lot blurrier. Then you can see
we've added a nice soft drop shadow
behind the shape. I don't think that is used so much in print on
demand it's probably more for web design. But it's nice to know that
you have that feature. We're now going
to look at texts. To access the text, see there's this button
here or you can use the letter T as a shortcut. You can just drag
to make a textbox. We're going to make
the font quite a lot bigger so we can
actually see it. I'm just going to type
something regular, like hello. To change the font,
it's the same as any other text editor really. Change it to Arial. Again, you can change the bold, change the size of the text, increase or decrease
the letter spacing, and if you had more
than one line of text, that will be the
line-height, central, etc. On the line and make board is the same shortcuts as anywhere else control,
you control B, strike through and you can also change it all
to uppercase if you wanted to or lowercase
or title case, sentence case, title case
using these options here. For now, I'm just going
to keep it as I typed it, which is that little line. To change the color of the font, you can use the fill
sections, make it a red. Again, you can add a stroke
like on your shapes. Footprint on-demand often
we want to be able to edit our texts more than a
simple text editor can do. For example, we might want
to change this o into a heart or extend these
latter l's up high. In order to do that,
we have to convert text into a vector. The way to do that is
you want to right-click over your text or you can also do this from
the layers panel. Right-click and you want
to click outline stroke, that will create vector
versions of your text. I've got two layers here
because it's done the stroke as a layer and also just
the basic texts as layer. If now I can drag the
stroke away from the text, which is cool because
you could create some effects like this of putting it a bit
off-center, that thing. But as I said before, I'm just going to delete
the stroke for now. This also allows you to edit your text the same way
you would edit shapes. I can double-click
and it will bring up all these extra points. Like I said, if I wanted to
make these l's extra long, I can hold down shift to keep it straight and go
in and edit these l's or I could make it
fatter this one, like so. Or I might want to change this o into a heart like we said. This is going to
be really rough. A very quick version
of a basic hot. Obviously it was
a bit more time. You could finish
that a little more, you get the idea,
pretend that's a heart, looks more like a flame. That's how you edit
your text options. What this does is when you know, let's say you want
to resize your text, hold down shift to keep the
constraints because then our vectors it will
edit the size as if they were like shapes
or anything else. Whereas if we, let's just
put hello again as text. If we go to edit the size, it won't actually edit the size, it will just edit the text
box that the text is in. If I make it really small, that will go on top of
each other like that or big it will just get
way and flood the space. I have a basic understanding of how all the elements
on Figma work and the texts and the shapes. I'm going to take you
through my six step process to creating a design on Figma from stock to a
piece of paper that's having a finished design
ready to export and upload. When I'm designing, the
first thing I'd like to do is draw on actual paper. I've drawn this little picture of a reindeer here
on a piece of paper. I just find it easier
to design on paper. Some people felt to go straight to computer or use an iPad. I've taken a photo of this
reindeer and I have it here. I'm just going to
drag it into Figma like I said before I mentioned that and here you can see our basic reindeer
for this little project. I'm going to put everything on a frame just to keep organized and I will keep out
4,500 by 5,400. It's ready for Amazon March. I've got my reindeer
within my frame now. The next thing that I would do, I would use a mixture of
the pen tool or shapes, to solve outline this pencil drawing into a digital drawing. I'll show you how
I would do that. For the bottom of the nose, I would use an ellipse,
and I would solve, drag it to the type
of size and shape I want and I remove the fill
and just always use a stroke, let's just go 15. That's that first shape done. I'm not going to
edit it too much. Here, I'm just going to
get my basic shapes and then I'll be able to
go in and edit it. The next thing I want is
this top of the head area. I've got another ellipse. I'm just going to draw here
then place it about there, remove the fill out a
stroke again over about 15. Now I've got two ellipses they're going to
make up the head. But as you can see, I have a bit of an overlap. I want this second ellipse, the bottom part here
not to be here. I'm going to go
into the shape by double-clicking and edit it so I remove this bottom section. The way I'm going to do that, is I'm going to go to P for pen and at the point where they
cross I'll zoom in here. I'm going to add a point and I'm going to do the
same on the other side. P again for pen and
add a point in there. Now if I click on this
point in the middle of those two points
and press backspace, it will delete everything
up until those two points. Now I have a much
better head shape without that extra bit there. I'm going to go and use some more ellipses to finish
off the nose and the ears, and then we'll do the [inaudible]
and the mouth together. Now I've done the ears, the eyes, the nose,
and the head. I'm going to go up
to the antlers, and I did all of that
using the ellipse tool, but for the antlers, because they are really random shape, I'm going to use the pen tool. I'm going to select the point on the head where they start. I'm using the curves that
we learned about before. By holding down, I'm
just going to create nice curves on the
top of the antlers, all the way around, like this. Each point I click,
I'm just holding down until I get a
curve that I like. We can go in and edit
them afterwards too. I'm going to bring that
around a bit here. Enter to finish it off, so I'm going to increase
that to 15 as well. Now there are some areas like here that I'm not
quite happy with. I'm going to double-click, and just use the curve tools and the points to change this. I do want this to be behind
the ear. There we go, I did it. You might have seen me do
it really fast before, but when it came to
copying symmetrical items, what I did was command
D which duplicates it. I want to flip a
horizontal because it's going to be the other
way which is "Shift H." Or you can also right-click and access flip horizontal. I'm just going to drag
this to the other side, and put it there like that. Now we have the same
antler on both sides. The last bit is the mouth. Again, I'm just going
to use the pen tool, select the first point, and then hold down on the
second point to create a curve. There we have our basic
outline of our reindeer. If I remove the image on
the background just by using the toggle view button, you can see an outline of a
very cute looking reindeer. The next step for our reindeer
would be to color him in. We want to add some color, so I'm going to show
you how I do that. Again just by doing
a few elements, and then I'll go
and finish it off. I'll show you the
finished product. Let's start with the nose, because we all know reindeers
need a bright red nose. To create the color, the first thing I'm actually
going to do is I'm going to select everything, and do command G to group
that outline together. I'm going to label this outline just to keep
everything organized. Now all my outline vectors and shapes are in
this folder here. Now I'm going to
select the Pen tool, so to do the color what
I'm going to do is basically re-draw around
every shape again, but just using the pen tool, and then we'll fill
it and place it behind the outline so
that the outline is what covers any wavy lines
that we have, you'll see. I'm going to select
the pen tool, and go all the way
around the nose. I'm going to remove the
stroke just so I have a line. You just want to click from
point to point making sure it always stays within the
outline that you have. Like so. Finish off by
joining the points. Then I'm going to
click the "Plus by the fill" to add a fill, and it will add
the default gray. We want this to be
a nice red color for Rudolph like that. As you can see, our fill is above our outline
in our layer panel. The way we want our
outline to cover that jaggedy edge that we have. We want to drag our vector for the fill underneath outline. Which when we press
"Enter" we'll now have that smooth line, and we have a colored nose. I'm going to finish
off the coloring in, and you'll see what it looks
like when it's all colored. Now we've got our
reindeer all colored in using that same
method I showed you. The next thing I
would normally do is bring the design
to life a bit. That might be by adding
some shadows, highlights. For example, on this guy, like if you think about where the highlights and
shadows might be, so his nose is sticking
out of his face, so that part would be
a bit of a shadow her. He's like this part
of his face is in front of this box there might
be a bit of a shadow here. Those ears are a bit
behind his head, there might be a shadow here, and a bit behind his ears, so there might be a shadow here. I'm just going to go in and
add a few of those shadows, so starting with under his nose. What I do to add shadow is
literally the same technique, so I'll go to the pen tool, I'll create the curves, and the lines of where
I think the shadow should be like this. Then bring the back ground
over the stroke line. To complete the shape, press "Enter," and
then I'll fill. What I normally do is
select the same color, and then I will need to
remove the stroke line. I would select the
same color and then puddle around with this until I find a
color that I like. Again, we need to put this under all these outlines,
so like that. That gives his nose
a bit of a lift of the bottom of the face area. Let's do the same
thing over here. I'll use the pen tool again. I'm just going to click
straight here and hold down to create a nice curve. Select again to get
off the curve setting, and draw it back down. To remove the
stroke out of fill, and use the same color here. I want it to just
go a little bit darker overly about there, and place it under
all the outlines. It's very subtle, but it just brings the
design to life a bit. I'm going to go and
finish adding all of those stroke shadows. I've added in that
one unto the nose, this over on the cheek area into the ears and of the shadow of what
the antler would be, and the last thing
that I want to do is just bring the nose and
the eyes to life of it, it's going to draw
a little ellipse, put it on the side, and make it white. Just for a bit of a highlight. Shiny red nose, and the same for the eyes, so I'm just going to
draw a bit in the eye, a bit of a twist, and we'll go white, and command D to duplicate
it into the other eye. There we have our reindeer. He is ready to be
put on a T-shirt and finish off with some text
just to complete the design. Let's do that next step now. First thing that
I'm going to do to complete the design
is put this guy on a black background
because most part of the t-shirt is a black color. I want to make sure
he works on black. I've selected the frame, click on Fill and
change it from white to black. Like that. A few things I've noticed, we've lost the effect
of the outline of the reindeer around the
antlers on the bottom here, because obviously we're using a black outline and now
we're on a black t-shirt. We're going to want to fix that. The way we can fix
that is by adding a white border all the
way around this reindeer. I'm going to duplicate
the outline folder here within the frame, and I'm going to
drag one under fill, so it's at the very
bottom of our image. I'm going to change all of the fills from
inside to outside. That will mean that
the fill will spill on the outside of the
line that we've drawn, and I'm going up
the stroke width. It's probably around about, let's go for 60. What that's done is it's added a white border all the
way around our reindeer, and now this guy is popping
out on the black background. The last thing we're going
to do is add some text. Let's just go for a
simple Merry Christmas. I've added a text box. It's very small, but
let's make it bigger. Always highlight into
it, there we go. All the way big. We're just going to
have Merry Christmas across the bottom here. I think it would look cool
if the Merry Christmas is in a different font and also curved around the
bottom of his face. We're going to
change the font to, l have a font that I
like called Fancoy, which came from
Creative Fabrica, so here's Merry Christmas. I'll still make it a bit bigger. There we go. This
font is missing the middles of letters.
It doesn't have them. We're going to add that as well because I like it
better with them. But first we're going to
want to curve it around. Figma has some plugins
that you can get. They have cool ones like
removing backgrounds, you can make custom frame
presets that will show up in the preset frame section
when you make a frame, but the one we're going
to use is called arc. What arc does is it will
take your text and you can arc it either
that way or that way. We're going to arc it
about minus 26 percent, let's say, and apply. It actually creates a group of letters separate to
the ones that you added, so you need to find
it on your document. We're going to make it white, drag it in and there it is. Let's just get rid of this,
drag it out our frame, so here's our Merry
Christmas text. I think it will
look cute in red, the same as the nose, so let's change it
to a red color. I think about also
written out so it has the same matching white
background and red border. The way we're going to
do that is we're going to duplicate this. Let's call this text, I'm going to duplicate this
text group, so duplicate. Now we have the
one that's behind it that were going to
change to a white-color. You wouldn't see it yet
because it's exactly the same as this and it's
directly behind it. We're going to also add
a stroke which is white. If you zoom in, you'll see
we have a one pixel stroke showing because it's
on the outside. If we up this to, I think 60 will be a
bit much for this, probably about 25, and now shows up with that
nice whiteboard behind it. The last thing we want to
do is add the black border. So we're going do
the same method, this time duplicate
the top one again, so we've got the red ones, and this time it's going
to be on top of the red. This top section here, we don't want to fill, we just want a
stroke on this one, so add a stray which is black. We can put it in the center and increase that, there we go. We have a nice bubbly
font for Merry Christmas. Last, last lap but not
least is we want to add the centers to
the e and the a, so nice and easy
way of doing that, we're just going to use
the pen tool again. Create an random shape for the middle of this e.
It doesn't really have to be anything perfect, it's quite a random design, a random font, add
a fill to that, make it white and get rid of that and we want to
keep that stroke. But we want to make it the
same as the black one was, which is 11. Like so. We have the inside of the e, and we're going to do the
same for the a, so pen tool. We're going to go
in and edit that. I've got these points there, like so, add a fill of white. Now we have a inside of the a. There we have our final design, the last thing to do, so
we'll just position it properly on our frame, so we can do that by pretty
much just selecting all of our layers and moving
them around the arc board, because everything is a vector, we can resize like this as well. It won't alter to any
of the dimensions, so I'd say that is
pretty good then, nice and central, and now we have our final
design using Figma. The last thing that we'd
want to do is export it. To export the whole frame, if I manage by Amazon, you'd actually want to export
it without the background, so we just want
obviously the image. Because the teacher
is the black thing, so we'd click on Frame
and remove the fill, which will remove the fill, and then while we're
still clicked on frame with everything selected, we could get rid of this. That was just the original
image. We can remove that now. Click on Frame and
we want to export, and you can export PNG, JPEG, SVG, and PDF. Just click Export
and PNG, "Save". It's now in our downloads, and here is our reindeer, ready to upload to whatever print on demand
company we want to use. And that was the Figma tutorial. Pretty crazy. It's
a fantastic tool. Just watching that
tutorial myself, I'm learning how to use it way better than I used to
be able to use it. I just think it's an
awesome, awesome tool. Definitely download Figma and start using it to
create your designs, and if you ever need
to come back to tutorial than for sure, and if you have more questions, Lauren will be able to answer anyone's questions around
the Figma program. That's awesome. Now let's
do a Canvas tutorial.
27. The Full Canva Tutorial: [MUSIC] Canva is an
awesome program, and there was just so
much you can do with it. I have the paid version. However, there is also a free version that you could use just to see if you like it. Let's go over a tutorial
on how you would use Canva specifically
for print on demand. Because as you can see here, you can use Canva for so
many different things. You've got presentation,
social media, video, print products, marketing,
office, and more stuff. It's actually a crazy, crazy graphic design tool. First things first,
we have the size. What we want to do
is click "Create Design" and then we want
to put in a custom size. Now, the size that I use
is 4,500 by 5,400 pixels. Typically, this is the
size for Amazon Merch, but it works for
pretty much everyone. After putting that
in 4,500 by 5,400, we click ''Create New Design'', and then this is what we have. We have a whole bunch
of templates over here. We have elements, uploads, text, backgrounds,
logos, and more. Let's just go over
some basic rules. Fonts are okay for
commercial use, meaning you could
use fonts and do, hello world, and you could sell that on
a T-shirt, no problem. Templates are not okay
for commercial use. I would never use a CV
for commercial use. But let's say I search
t-shirt template. You cannot use template
for commercial use. You have got to change them
and make them your own. Graphics are sometimes okay, and by graphics,
I mean elements. You have so many
different types. Now, sometimes it's okay, but you want to make
sure that you do not use graphics as the center
focus of the design, only to add to the design. If it's on the side or it's just a small element of a much bigger design,
then it's okay. When you do use a graphic, let's say you use this graphic, you want to tweak the colors and everything to really
make it your own. You can see here I can
go in and actually tweak all the different colors
and make it totally unique, and that's how you know, there is a very small
chance that anyone is going to have the exact same
color combination as you. Now that we understand
the basic rules of Canva, let me show you how to use Canva on quite a basic level because, again, it doesn't
have to be confusing. First things first, we're
going to add a box. You see, here's the box, and you've got a couple
of things up here. You can change the
color of the box. You can animate the box, but that's irrelevant to creating a
print-on-demand design. You also got the
positioning of the box. You can center it, all of these different things. As well as that, you can
also move it forward or backwards if you have
multiple different designs. One thing to note,
which is quite cool, is you can see these
purple lines that show up, and these are great
center points. Here you can see that's the center of your design
to keep it in there. You've also got your horizontal and your vertical
lines so you can really make sure everything
is centered perfectly. You can also change the
opacity or the transparency. You can then link it
to something else. You can lock it, or you can duplicate
it or delete it. Now, this top bar
over here will change depending on what's
on your Canvas. If we add text, let's move this text up to
the top and let's say, hello. Now, you can see the top
here has actually changed. We now have the font, we have the size, the color, if it's bold
or not, if it's italic, centered if it's going to
have dots like a list, we can do a letter spacing, we can have effects. There's so much
we can do, and we got all these extra stuff here, and we've got positioning. Let's say we want to
add some effects. We can go for a glow effect, and then we can
change the color. We can go for a yellow
color, a purple color. There's a lot that
you can do here, but a lot of this is very
straightforward, very basic. What I recommend is
playing around with it. Now you can see I've
got the text here. We can also change
the positioning. If we go to position, we can move it back, we
can move it forward. We couldn't do that before because we only had one element, but now we have two
elements on here, we can actually change
the positioning. You can see it's very,
very straightforward. It's very simple. One thing I like to do is
change the background color. Let's say I haven't
selected anything. You can see the toolbar.
There's nothing really there. If I select the background, I can change the background
color to whatever I want. What I would do is I will change the background color to the color of the
t-shirt I'm designing. Let's say I'll
duplicate this and say I want to create this
on a gray background. I also want to create
a yellow t-shirt, so I make a yellow background, and then I also want to
create a red t-shirt, so I'll create a red background. What I can do is I can
go through and think, does this design work on the
yellow?What needs changing? Does it work on the red?
What needs changing? Sometimes things
will need changing. Maybe the border color
will need to go from red to white or
whatever it may be. This is obviously a very
bad example of a design. Let's put something in there
which actually looks good. We're going to go
with the classic. I'm a bartender, what's
your superpower? We'll go I'm a, and then make a new line. Very simple, you can
just ''Control C'', ''Control V'', a bartender. Let's make it slightly bigger. Then we've got what's
your superpower? Again, ''Control C'',
''Control V'' to copy that. We're going to make
it a lot smaller. What's your, and then
one more, superpower. What you can see
here is you can see the purple lines are
showing up everywhere, and you can see I can center
it all over the place. What else you can do is you
can select all of this. You can go to these
three dots here. You can click
"Position," and now you can actually space
evenly as well. We can vertically space, and you can see how they
all pop now that the space in-between each word is perfect. It's very cool what
you can do here. Again, I didn't really
like the effect here, so I'm just going to go
for the ''No Effect'', and then I'm just
going to change the color and do
whatever I want. I don't know how
to make it gray, but I'm going to make it black. For this one, I can make it
this effect or this effect. There's so many different
effects you can do, and then you can change
the colors as well. You can actually go into
the effect and change the color of the effect as well. There's a lot you can do just
using Canvas' owned things. Now let's add a graphic
and remember what I said. You don't want to make the
graphic the main thing, but you can add it
as a compliment. For example, we're
going to elements, and we'll search for beer. Because a bartender, that seems to match. You could do this
if you're making a St Patrick's day design, you can square off
your design here. Another cool trick here
is if you have a Mac, you can hold down on ''Option'', and you can just drag this, and it copies it. You can rotate it and
snap it to 180 and then square of the design. This is an absolutely
atrocious design. Let's change the
whole size of it. Center in the middle. You can do so many
different things. You can add some beer here. Let's add some beer, and we'll change the
size of this beer, and we'll put that at the top there. There's a lot
you can do here. But as you can
see, I'm not using these elements as the main, main thing for this design. It's just complementing
the overall design, and that's absolutely fine. As well as that we can also change the elements to make
them even more unique. Here I can change the colors of the beer to be whatever
I want it to be. I can make it green, I can make it red. It doesn't really
look a beer anymore, but you get my point. You can really do whatever
you want to these designs. Once you've done that,
like I said before, you want to duplicate this, you want to change
the background. Let's say I want to sell
us on a yellow t-shirt. You can see, does this work? Actually, no, these colors
don't work very well. What I'm going to do is change these colors to black as well. I'm going to change the
effect back to normal. You can see what I'm
doing here is I'm tweaking each
individual design and making sure they work with the background of the
potential t-shirt, or pillow, or sticker. Whatever that product
background color is, I'm making sure it works. I don't like these things, and this color is all off. Let me change this color
back to what it was. I think it was that color. I can't remember.
But what you can see here is now that
doesn't actually go. What I will do is maybe I will change that to a
different color, maybe a gray or something, and this would be the
yellow for the beer. Whatever it may be, maybe it
needs a border or something. But what you can see
here is you can use Canvas to create so
many different designs, and that's what you have now. With the pro version, the only difference is you
have more things available. You can use the
images and the text for commercial use
with pro or with free. But like I said, the
difference is if I go to ''Bartender'' here
and I go for ''Fonts'', you can see all of
these that have a little crown as for pro, and there's a lot of
different pro fonts, and this just goes on forever and ever and ever
and ever and ever. There are so many fonts,
it's absolutely crazy. It will still go on,
a tiny this is gone. It's actually crazy
how many fonts are. Likewise with elements. There's a lot of pro
elements you can see. It's got a little
pro logo next to it, and that's how you know, it's a pro element, and you can only use it
if you pay for Canva. If you don't want to
pay, that's fine. It's just you get a lot more. That's basically how
you would use Canva. It's not very complicated and just make sure that
everything matches, the fonts, the
graphics, the colors. Like we spoke about in
the core principles, use that video
alongside this one, and just has some fun with Canva because there's a
lot you can do with it.
28. Outsourcing Designs: [MUSIC] Not everyone wants to
design their own t-shirts, and that's totally okay. If you have a budget to
outsource your designs, that is an amazing thing to do. It will save you a
lot of time and it's a great way to get really, really high-quality
professional designs. Here are a few places
that you could look at. Number one, 99designs. This is quite a
cool and unique way of getting designs made. You create a project and a whole bunch of designers
will create what they think you would want based on your project
requirements. You then pick the
winner and they get paid and that's the
design you end with. It can be expensive
and time-consuming, but it's a great way
to get a variety of styles when
envisioning a design. The next place is Fiverr. This is a great platform
to get cheaper designs. Usually you'll have to pay
extra for commercial rights, but that's quite normal. You have hundreds and sometimes thousands of people
to choose from with varying price ranges
and varying skill ability. Once you have picked someone, you can message them with your idea or maybe
even send them examples and they'll have absolutely no problem
making something for you. Sometimes the prices you see on the page aren't always
the final prices. Sometimes you can get a
custom quote from the seller. Finally, the third
place is Upwork. Upwork is similar to Fiverr, except I feel it's a bit
more professional and also a lot more expensive
or so it seems. Usually you pay people
based on an hourly rate. However, you can create a project rate and pay
people per project. You can either create a
new job and leave it, or you can create a new job and invite people to that job, people that you think are quantified to create
a design for you. It's a lot more official. It's like hiring a freelancer. You can always go back to that person over
and over again and have them pretty much work
for you on an hourly basis. You can hire someone,
for example, $15 per hour, $20 per hour
for three hours a day. They could create
designs for you for those three hours
every single day, if of course you have
the budget for that. I would always
recommend designing yourself because you end
up saving a lot of money. But if you can't design yourself because
you feel like you can't do any designs or you have a budget going into it and you
want to save some time, then it's a brilliant idea to get someone else
to design for you. Now after watching this
course, hopefully, you'll be able to ask to create some basic designs yourself, even if you thought previously
you were unable to. But of course that's up to you. I would always suggest
at the same time as paying someone else
to do your designs, try and practice it yourself and see if it is
something you will eventually be able
to do yourself because it does save a fortune.
29. Design affirmation: [MUSIC] This is not a step
to be skipped. It's really, really important, and it just so
happens to be one of the easiest and
most valuable steps in this entire course. Brilliant. After
finishing the design, you want to put that design
on a mock-up and send it to three family members
and three friends. If you don't have
either of those two, you can just send it
to some acquaintances and if you don't have a mock-up, you can just send the
basic design to them. The reason you want to
do this is you want another pair of eyes
on your design to give you some constructive
criticism and some genuinely honest feedback. You don't want to send
every single design that you make because
that could get really annoying for the people
around you so maybe send every fifth or
every 10th design. What you'll find is the things
that people are saying, you'll be able to
incorporate that into your other designs that you
haven't sent them as well. Make sure to tell them to be ruthless and brutally honest. You don't want praise here. You want someone to dissect
your design and point out all the things that
is wrong with it and all the things that
they like about it. This will in turn help you
design future designs but as well as that it will
help you understand what people like and what
people don't like. It's just like having your book proofread
if you are a writer. Your design needs to
be proofread in a way. It needs to be checked
by other people to make sure it's good. If you get a lot of
things to work on, well, that's a good thing because it means your future designs
will be a lot better, and if you've got a lot of
people saying the same thing, it's something to look out for. If a lot of people are saying, "I didn't get this design, it's just not very funny," maybe you shouldn't
sell that design, maybe it won't catch on. Some of the feedback can
be very hard to hear, but just remember no
one is being malicious. People are genuinely
trying to help you. They are your friends and
they want the best for you.
30. What Should You Charge: Deciding what to charge, this is a tough one
because it's not a one-price-fits-all
kind of situation. Each niche, each design, each product type might have a different price
that fits with it. When it comes to pricing, you want to make sure
you're making a profit, but you also don't want to be overcharging
or undercharging. Now, I know this
sounds really obvious, but unfortunately
with print-on-demand, a lot of the time you'll
find that products are quite expensive as a base price, so you have to end up charging quite a lot of money
to make any money. Now, you don't
want to charge too much because you'll end
up pressing yourself out of the market and you
won't end up getting any sales unless you have a very passionate audience
base to begin with. Because every niche
will be different, the best way to come up
with accurate pricing is to look at the top 20
or 30 selling designs either on Amazon or Etsy of your chosen niche and seeing what everyone
else is charging, working out an average
of everyone's prices, and then you can get your price. You can then make
it slightly lower, slightly higher,
whatever you want to do. I would recommend starting
with making it slightly lower and then increasing it as you start getting
more of use. For example, if we want
to sell a dog t-shirt, we can search Amazon for
funny dog t-shirt and then we can sort by the top
20 or the top 30 designs. Then we can see what the top 20 or top 30
designs are priced at. What we want to do is sort by reviews so we can see what's actually selling
because we don't care about the prices of designs
that aren't selling, we care about designs
that are selling. Once we sort by reviews, we'll be able to get
an accurate idea of what's selling and
what it's selling for. Now, bear in mind, when you do start
sorting by reviews, the designs that will pop
up with your search term, "Funny dog t-shirt," might not be related to dogs so much. In fact, the results
looked like this. They can be really random. The average selling
price here was $18.46, which is actually really good because that
will be our aim, and as well as that $18.46 is well over the mark
to get some profits. We know we're going to be making quite a good amount of money, selling it at that price point, which means we can lower the price and be
cheaper than everyone else and sell it for
$16.50 or $16.99, and we know we're still
going to be okay. As I said, to start with, you want to sell below
average and then you want to slowly increase
it as reviews come in. That is probably the best and most accurate way to come up with pricing your design without pricing it
too high or too low. Now, when it comes
to pricing research, I wouldn't recommend going to Redbubble and basing it
off of their prices, and that's because Redbubble's
t-shirt base prices are a lot higher than
other platforms. Because the basic t-Shirt
price is around $17-$18, the actual t-shirt selling
price is going to be over $20. That's not an accurate
representation of what print-on-demand
t-shirts should cost. Avoid using Redbubble. The best places to come up with these accurate prices is
Amazon, Etsy, and eBay. That will give you a really good understanding of
what customers are paying for when they're paying for
print-on-demand t-shirts.
31. Finding The Best Keywords: [MUSIC] Making sure you have relevant and
searchable keywords is vital for the success
of any design. You may have that on
occasion when you don't have keywords and just by luck, you end up getting sales. But nine times out of 10, you need to have relevant
searchable keywords. You need to make sure that
the design you're trying to sell is categorized
properly on the Internet. You do that by carefully
picking amazing keywords. Now you have two
types of keywords. You have long tail keywords
and short tail keywords. Long tail keywords is when
the phrase is generally made up of 3-5 words. As these words are
more specific, it allows you to
get more targeted. Usually, the traffic is higher-quality and
convert more often because you've used more words to define that target audience. For example, targeting the word dogs may seem like a good idea, but it's very broad
and it won't get a high conversion rate
because of how broad it is. But targeting funny
dog t-shirt for moms will be a lot more targeted and we'll get a much
higher conversion rates. This is because it's talked in a much more specific group
of people and in doing so, you're going to get a
high conversion rate, a high click-through
rate, and more sales. You then have short
tail keywords. These are phrases
with only 1-2 words. These are a lot more broad and it's smart to
have a couple of these types of keywords dotted around your description
and bullets. But by no means should these
keywords be your main focus. It's great to have some
short tail keywords on hand, ready to go in case
your design blows up. Because if your
design does blow up, you're going to want
to broaden the search, allow more people
to see your design, so you'll end up
replacing some of your long tail keywords
with short tail keywords, and that way you'll
be able to reach a much broader audience. Now, I know it sounds counterintuitive because
you're probably thinking, well, wouldn't I want to just reach a broader
audience to begin with, so that more people
can see my design. Yes, that might be true, but that's not what you
want to do because you want to create a high
converting sales page. You want to create a product that when someone lands on it, they're more likely to buy. if someone is searching for funny dog mom's t-shirt and they stumble across your t-shirt
that literally says that, chances are they're
going to buy it. But if someone just
searches for the word dog, they might not be
looking for a t-shirt, they might not be
looking for any product. That's why it's very important at the beginning to focus
on long tail keywords. Now, let's talk about some
tools because there's quite a few tools out there that allow you to get all
of this keyword data. Here are some of
my favorite ones. Starting with the Google
Keyword Planner tool. This is by far my favorite tool. It's brilliant and it's free. You might need to create an
ad just to get access to it, but you can cancel that ad straight away and
not pay any money and then you have access to the Google Keyword Planner tool. This is data taken
directly from Google. You can see literally
how many searches, specific keywords, specific phrases actually end up getting, as well as that
it gives you data on how much it would
cost if you wanted to advertise those
specific keywords and it's just incredible. I use the Google Keyword
Planner tool for pretty much everything;
on-demand, Amazon, YouTube. If I'm feeling
nosy and I want to find out how popular
a specific term is, is just fascinating that all of this information is right there at the tips
of your fingers. The next one is, Ahrefs. Usually, this is a paid thing, but they have a
free searching tool and that's what I
want you to use. This allows you to search
a few different things. You can say Google, Bing, YouTube, or Amazon. I know it sounds pretty crazy, but you can literally
select which one you want, put the search term
in and it will give you data
around that website and how many times that specific keyword
has been searched for. Definitely use
that tool as well. The next is called
Keyword Surfer. Now, this is a Chrome
plugin and it gives you data right then and there when you're
searching on Google. Now, I don't think it's as accurate as the Google
Keyword Planner tool, but it's still a
great indication of how well individual keywords
and phrases are doing. When you search Google, you'll see all the data is
already there for you and it's just a really useful tool
to have in Google Chrome. With those three tools, you should find it
easy coming up with long tail and short tail
keywords for your titles, descriptions, and your bullets. The next thing you need to do is figure out how to
actually implement them. You could use them
directly in your designs, like on the actual t-shirt or pillow or whatever
you're selling if it's a particular popular
phrase and everyone knows it and you're
allowed to use it like it's not trademarked
or copyrighted, then yes, you could
use it in your design. But more commonly, these
keywords are used in the title, description, and the bullets. A very important thing to
note is don't just stuff these keywords in randomly where it doesn't make any sense. I've seen so many people do that where on their Amazon
listings they just have keyword all over the
place and it just looks silly. You want to try and form actual sentences
with your keywords. For example, you have this one. Friends and family will love this funny men's birthday
slogan tee with a quote. Classic car graphic
makes this the perfect gift for vehicle addicts
and piston heads. Now, I know it doesn't
make amazing sense. It's not going to win
any awards for writing, but it still makes sense
and it still looks okay. Let's compare that to something
which doesn't look okay. We've got this
one. Gift t-shirt, gift t-shirts, gift
for men's t-shirts, gifts for men t-shirts,
gift men t-shirts, gifts for her t-shirt, gift for girls,
gift for t-shirt. It's madness, it's
absolute chaos. It's just the word
gift. It's ridiculous. That's what you don't want to do because it
doesn't make any sense. It's impossible to read and
it's probably not doing the best job when it
comes through actually ranking that design anyway. The first one used full stops, it used commas and it tried to make
articulated tendencies. Even though sometimes
**** there they did try and stuff in
that extra keyword, overall it made sense
compared to the second one, which was literally
just the definition of keyword stuffing, which is what you
do not want to do. Once you put your
keywords on your listing, you can also start to use
them in your marketing, so on your Instagram posts,
your Facebook posts, your YouTube
description, wherever you are planning on sharing
it, your Twitter posts. Wherever you are sharing it, it doesn't matter but you'll have all keywords that you can use
throughout your marketing. They work well for
free marketing, like I just said,
Facebook, Instagram, and whatnot, but they work even better when you end up
doing paid advertising. If you're paying for Google
ads and you're paying for every single time
someone searches for funny dog t-shirt for mum, you show a bang right
there at the top. That's going to be
really valuable. Now, I can't imagine that
keyword gets many searches. However, if you have 50 or 60 different keywords like that, and you're paying
for all of them, you're going to be
getting quite a bit of traffic to your page. The first thing for you
to do after watching this video is to find
a design that you're trying to sell and go and find 23 long tail keywords and
seven short tail keywords. That way you would
have built a list of 30 keywords that
you could target. You could use the
tools that I listed earlier and once you
have all those keywords, you can try and form sentences
with those keywords. Obviously, use other words in the sentences that might
not be your keywords, but you can form sentences
with those keywords, update your listings on
Amazon or wherever you're selling your product with
these new sentences, and see how it goes. Now let's move on
to the next video.
32. Spying on Competitions Keywords: I've already spoken
about keywords, places you can find them, and best practices
on how to use them. There's one way I
didn't mention, and that's because
I wanted to give it its own dedicated video. That way is spying on your competitor's
keywords to see what they are doing and
what's working for them. Rather than just
picking any competitor you want to obviously pick
competitors that you know, are getting sales
because clearly, you know they're doing
something right. The issue is finding competitors that are getting sales
without using any tools. Now on Amazon, you can use a whole bunch of
different tools and in this course I mainly
speak about pretty much where you can actually
see who's getting sales, how many reviews they have, all the information
you possibly need, their keywords, all of that. But if you're not using any
tool, what should you do? Well, if you're not
using any tools, you want to base your
research on reviews. You would search Amazon for a specific design
idea that you had in mind and then you would
organize by number of reviews, the person with the most
reviews are sharp at the top and then it will
work their way down. Now, this doesn't
guarantee sales. It doesn't mean the person with the most reviews is
getting the most sales, but it does mean that
they have gotten sales previously and they're
probably doing quite well now. You can also go into an individual Amazon
listing and see that BSR, and if their BSR is
good under 20,000, they're probably getting a
couple of sales as well. Now, once you have this information in
front of you, yes, it's time-consuming, which is why I like using a
tool pretty much. But if you don't
want to do that, that was the way to do it. Now, once you have all of
these people in front of you, you'll be able to
look at that title, that bullets and if
they have descriptions, you'll be able to
look at that as well. This will be a great indication
of view when it comes to picking out the keywords that
you want on your listing. Another great place is Etsy, because on Etsy you can
actually click on a product and see how many reviews a
specific product has got. You can see how many cells
an entire shop has got, you can see how many reviews an entire shop has
got, but like I said, you can also see
how many reviews and individual product
has got, which means, you know that product is getting sales
because generally, the view also has a date to it. You can see how old
that sale was and how relevant this
product actually is now. Once you're on the
Etsy sales page, you'll be able to
see their title, their description, and any other keywords that they've
used on their listening. This is just a brilliant
way to build up a long list of
keywords that have proven to work for other people. Now, this doesn't mean it's going to a 100
percent work for you, but it's a better
indication that it will. You've also got Redbubble
for keyword research. However, with Redbubble, it's much harder to actually
see what's selling. We don't really know how many
sales things are getting. The best thing you
can do is search for a specific term and then
organize by best-selling. Now, even though we don't have any data with the reviews, because everyone has the same reviews on Redbubble
and we don't have any data on the sales because we've organized
by best-selling, we can just assume that the ones at the top
or getting sales. Again, this is an assumption. We can't be sure of it, but once we've made
that assumption, we can then get a title that
they've used and if we want, we can scroll all
the way down to the bottom of the
Redbubble sales page for that t-shirt or
that item and see exactly what keywords
they've actually used. I wouldn't focus your
attention on Redbubble. In fact, I can't even
use it as a last resort just to get a bit
more data but really Amazon and Etsy alone are
absolutely perfect for spine on your
competitor's keywords. That's it. I really
recommend that you do this. You are a long list of keywords, you put it next to the long
list of keywords that you created for yourself and
you see what's missing, what you already found out. When it comes to
creating your listing, your description, your title, at the end of this course, you'll have all of these
keywords ready to go.
33. How To Curate The Perfect Titles, Bullets and Descriptions: [MUSIC] A lot of people don't utilize
descriptions or bullets enough, and there can be a great way to get a couple
more keywords in, as well as that it's an amazing opportunity
for you to convince buyers just a little bit
more to buy your products. I absolutely love it when a
store gets really creative with their descriptions
and they create these funny, wacky descriptions. It really gives a
store that edge and a reason to come back and a reason to share
with your friends. It makes it funny and it
gives it a personal touch, it just really good. Everyone can think of
that one store that has this funny descriptions
as well as that try and tell a story and try to be relatable when you're
selling a product. For example, if you're
selling a hoody, use words like warm
and cozy and outdoors and maybe even watching TV, because that is where someone might want
to wear a hoodie. They're going to want to
be warm and cozy in it. They're going to
want to snuggle up on the couch watching TV, or maybe they're
going to want to go outside for a long walk. Use these words, use these
sentences and now paint a really vivid picture in your
potential customers mind. For example, this sentence. Imagine cozying
up by the TV with this super warm soft hoodie with a unique design
on the front, it's so cozy, you might
just fall asleep. Something like that
where it paints a really vivid picture
in your customer's mind. It gets them in the mood that I want to feel
that and they buy. That's an amazing way to
convert traffic into sales. Now, I'm not saying
you should say that specifically
my point is just coming up with a story
where you are creating really good imagery in
your customer's mind so that they really end up
wanting this product. You also want to make sure you end with a good call to action. The last bullet or the end of your description whatever
it is you want to say, if you want to wear this
limited decent t-shirt, then add it to your
basket and buy now. Now again I'm not
saying you have to say those exact words, but you do want to have
some form of a call to action at the end of
your bullet or description. The same rules apply for both
bullets and description. Now a lot of companies don't
have that bullet feature, Amazon merch and
Amazon FBA does, but a lot of places don't. But everything I'm saying here, the way you use your keywords, the forming normal
sentences with the keywords that you
found and creating this imagery for your
customer that goes the same for the description
and for the bullets. Give this a go, find a product you're
selling and put yourself in your
customer's mind, what will they be thinking
and feeling and what will they want to see and what will they want to purchase. This might seem like
a difficult task. If you're struggling to do
with one of your designs, instead find something you actually want to buy
maybe you want to buy a new camera or an
iPhone or something and then think about
your thought process. What have you thought
when you've gone to that sales page what has
been your thought process, your journey from wanting
to actually buying. Once you've done that, you can relate it back to
your design and put yourself into a customer's mind that would want to buy your design. Earlier on, I said it's good to do a niche
that you know a lot about and you passionate
about and this is one of those reasons why. Because if you create design that you're genuinely
passionate about, it will be very easy to put yourself in your
customer's mind and create really good descriptions
and really good bullets. Once doing this and combining it with a long list of
keywords you have found, you should find it easy to create beautiful
descriptions and beautiful bullets that
customers will want to read and will
convert much higher.
34. Submitting Your Design for Review: [MUSIC] This is probably one of the
best elements of this course, and that is submitting
your design for feedback. Now, just down below, you're able to add your
designs into the project area, and in doing so, I will be able to get feedback on your individual designs. What I ask is that
you peace only upload one per month so that
it's manageable, and so that I can review every single person's design because I want to help
you with coloring, with placement, with the
actual overall design, with the graphics
that you've used. You don't necessarily have to
sell this particular design if you're nervous
about other people stealing it or whatever it is, but this is a great
way for you to use what you've learned
through these classes, and implement them into
a design and then get direct feedback from
me about that design. So definitely take
advantage of it, and put your designs in
the project down below, so I can give you my
constructive feedback.
35. Setting Goals For Moving Forward: [MUSIC] Setting goals is
incredibly important and it will give you great
direction in terms of moving forward rather than just staying still and not really realizing where you're
going or what you're doing. Everyone might be at
different stages so you might need to start
at a different goal. I'm going to list a whole bunch of goals in order that you could focus on and you can
see where you're up to and where you
should start from. Number 1, sign up
for Merch by Amazon. Number 2, sign up and connect Etsy with Printful and
any other partner. Number 3, sign-up for eBay. Number 4, create a
Shopify store and connect with Printful
or another partner. Number 5, create a list
of five different niches. Number 6, match those
five niches with another five niches
so you can create that double niche system. Number 7, create your ideal customer's
avatar or profile. Number 8, right down
10 t-shirts that will be trendy in the
next three months. Number 9, write down 20
evergreen t-shirt ideas. Number 10, create four designs. Number 11, multiply
those designs onto three different products, e.g, a t-shirt, a hoodie, or a cushion. Number 12, find 30 keywords for every single
design you make. Designs in the same niche
can have similar keywords. Number 13, upload
those four designs. Number 14, create titles, descriptions, and bullets
for those four designs. Number 15, create
a marketing plan. Number 16, execute
your marketing plan, and number 17,
submit a design for a review so that I could
give you my opinion. Now, these goals
that I just told you is from nothing
to having a print on demand company and
having designs out there in the open for
people to actually buy. This is everything
you need to follow to create your own print
on demand company.
36. Recap What We've Learnt: [MUSIC] We've now reached
the last section so let's go over
everything we've learned. We've covered quite
a few topics so far. We started with understanding the different types of market
places for Print on Demand. We then created an
Amazon Merge account, some of us created an Amazon
Seller Central account, an eBay account, and some of us created an Etsy account
and a Shopify account. There were plenty of accounts we created in order to
sell our designs. I will be adding many more tutorials for other
platforms down the line. I wanted to start with
a few basic ones and then as time goes on
I'll add more and more. We then went over everything you need to know regarding research. Coming up with ideas,
multiplying ideas, figuring out if trends or
evergreen is the way to go, and figuring out how
to find niches and what to do with those niches
once you've found them. We also spoke about core principles when
it came to designing. We went over different
designs and we covered a few different programs
to create designs in. Again, more tutorials on different designing
platforms like Photoshop and Affinity Designer will be coming out
in the near future. Finally we discussed
what to charge, how to find keywords, and then how to implement
those keywords into your title description
and bullets. Of course, as well
as that how to actually market your design. Again, the marketing
aspect of this course, more videos will be
added as time goes on. As I test new things and
as new things come out, I will continuously add
new awesome videos. By the end of this course, hopefully you've
set up an account, you've been able
to pick a niche, then create designs
for this niche, then upload it to various
different stores, and finally drive traffic
to those different stores. This is super awesome so well done for getting this far and
watching the whole course. Now let's go over some
goals for you so you can move forward with your
Print on Demand Business.
 Shimmy Morris, YouTuber - Creator