Transcripts
1. Welcome!: Welcome to Briar Rose, where we're going
to be exploring the painterly technique. Before we jump in, for
those who don't know me, as well as a skill
share teacher, I'm also a surface
pattern designer, specializing in bedding. I grew up in the design world as the family business
was Tom Louis Studios. Although I went down a
different career route and have been a musician and
a therapist all my life. Getting back to the class, I'll be taking you through
how to mix neutral tints, how to add texture, with mark making, and
varying brush strokes. We'll be focusing on the three main elements of
the painterly technique, color, brush stroke,
and texture. We'll be using a fairly
limited palette from warm, buttery yellows, neutral
grays, and creamy whites. And as always, you can
upload your work in the projects and resources
area of our class, and hit the Submit
project button. A lot of you share your projects over on Instagram as well, and I would love to see
it, so please tag me. And you can also find me
on YouTube and Pinterest. So, are we ready to get on with the class? Let's get started.
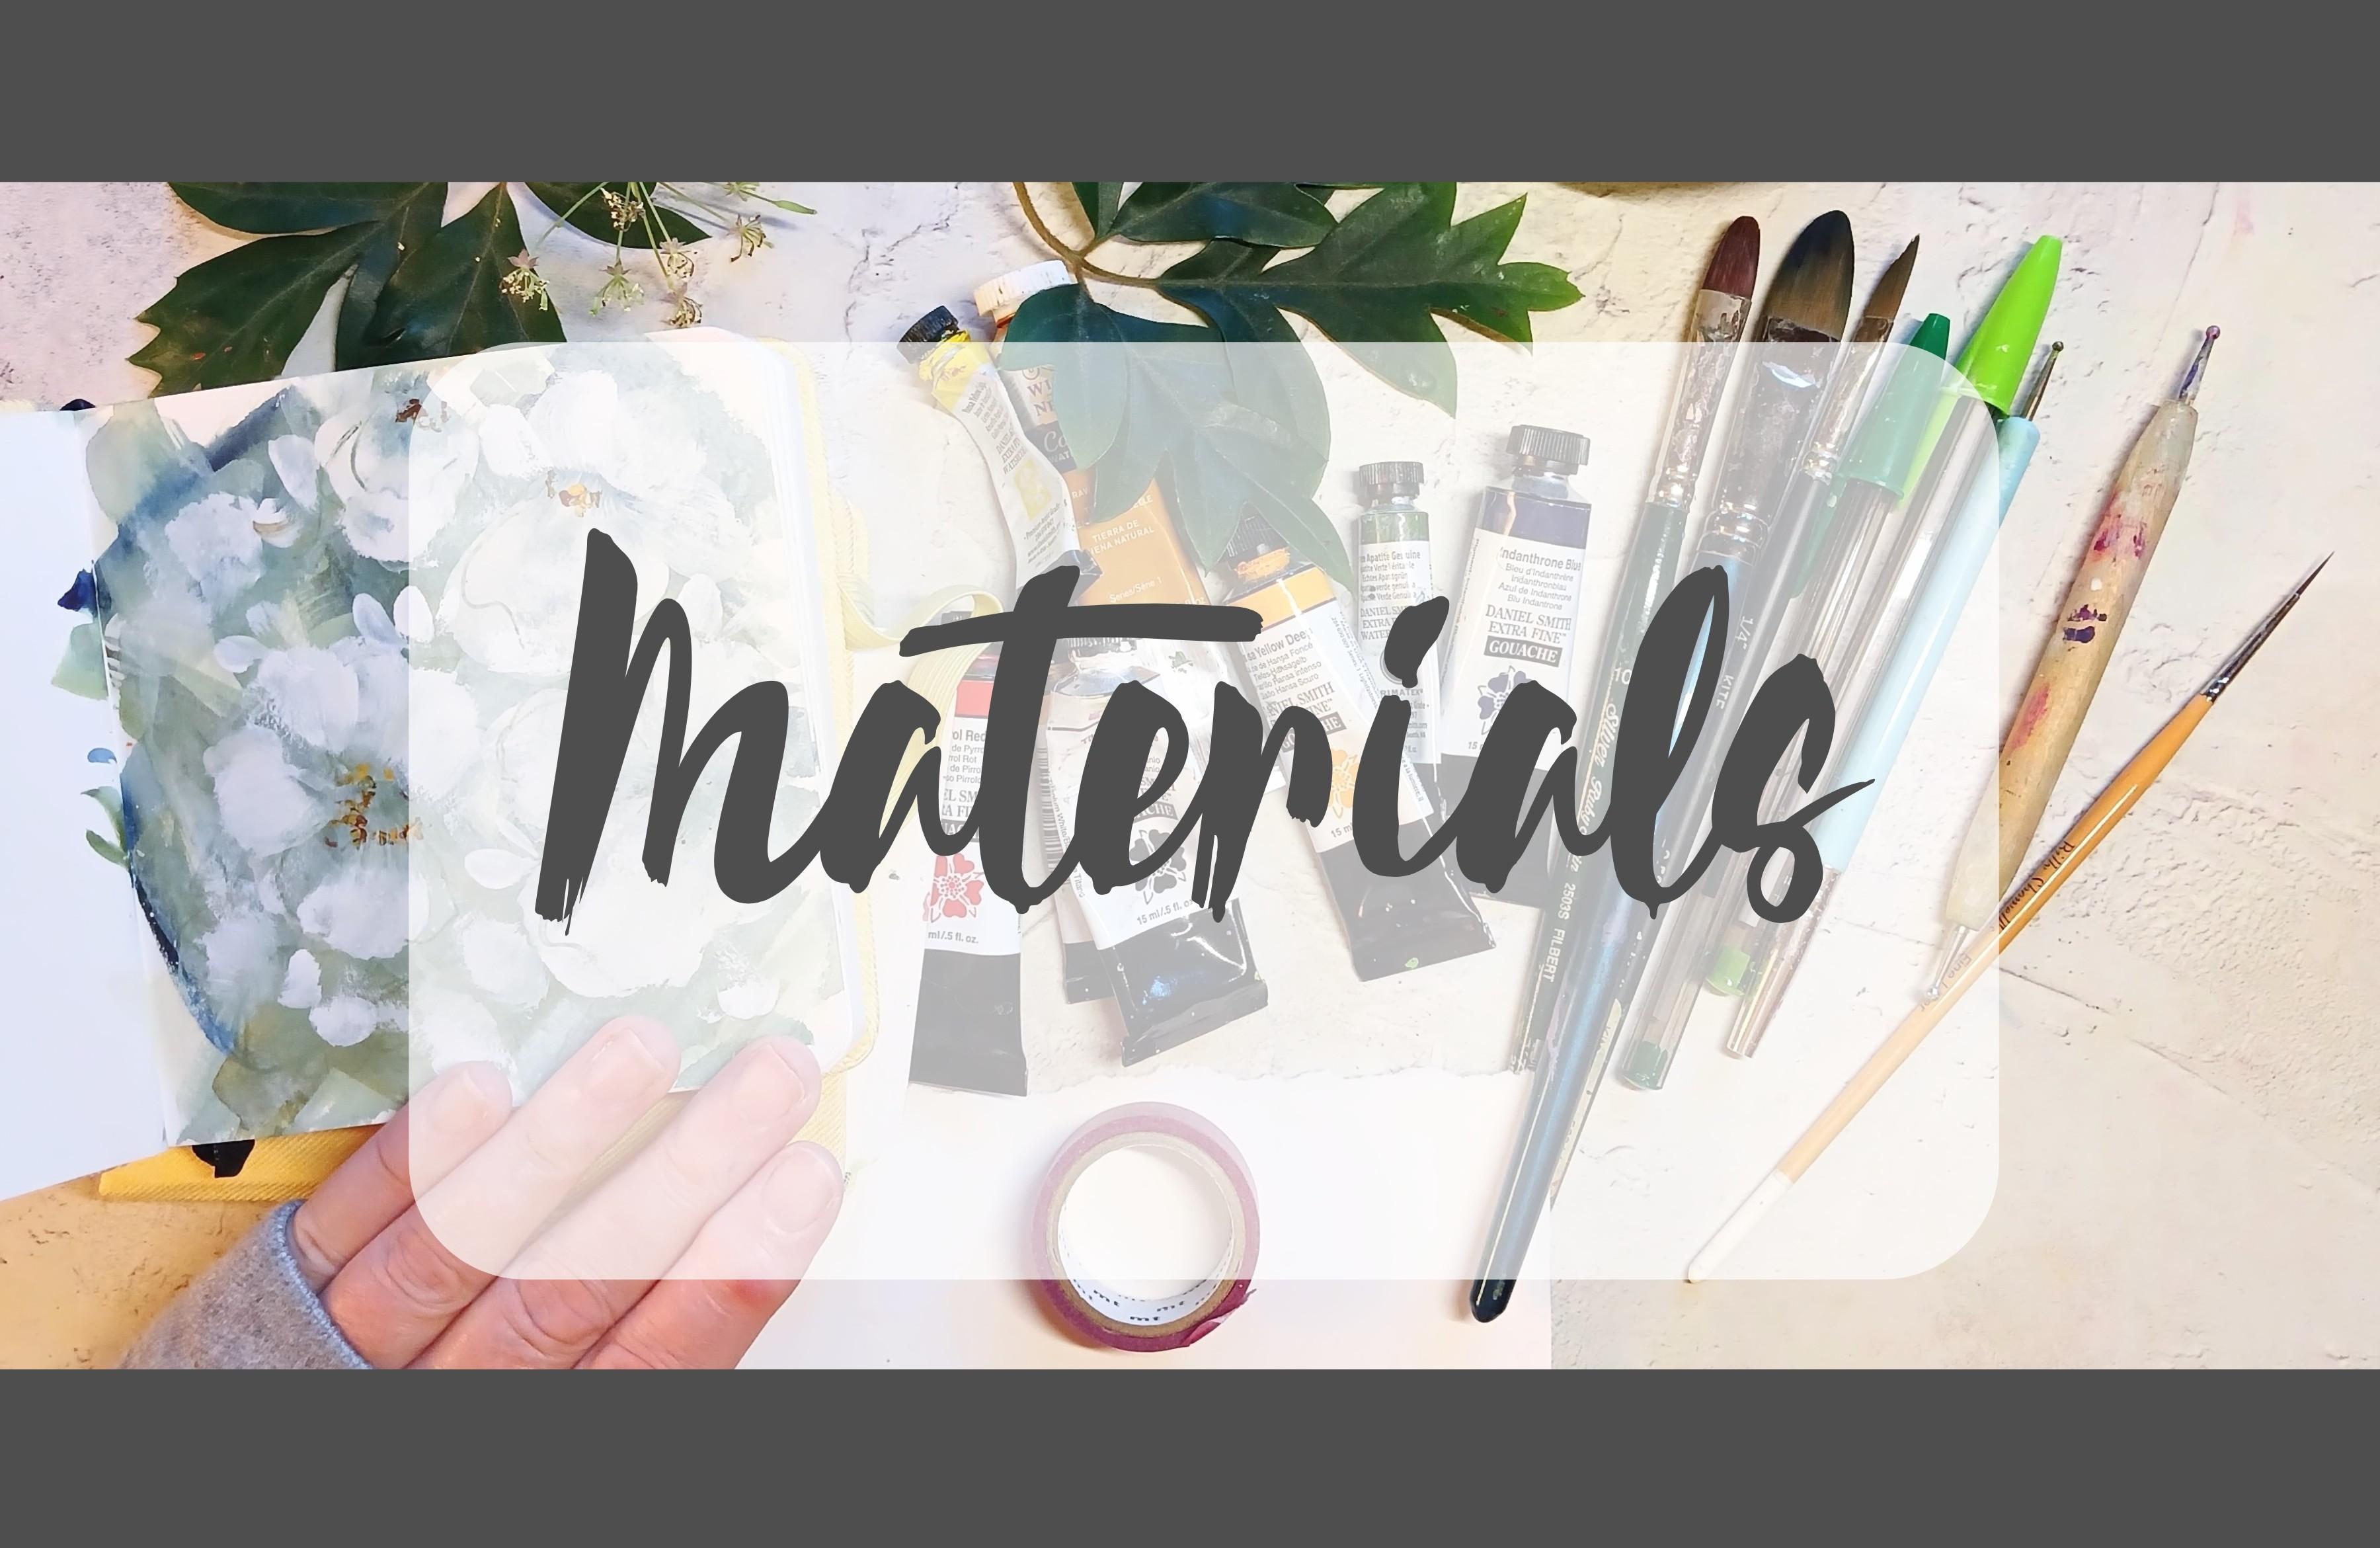
2. Preparing Our Materials : Let me run through
materials for you. I used this sketchbook
by my stationery. I haven't used it before, but I'm really getting on
very well with it. The pages open nicely, and I can tape off quite
easily across both pages. So I use empty washy tape, and I find it's really reliable and rarely
tears the paper. Little bit of scrap paper, all will become clear, and let's move over
to our paints. I'm using a mixture of
gauche and watercolor here. You could interchange or use
all watercolor all gouache. So I have dann blue, handsy yellow deep, Titanium
white, and pyrol red. You don't really need the red. I used it to mix the gray from
three primaries and white. So if we move over
to water colors, I have buff titanium, racena, handsome yellow light, and green appetite genuine. So again, you don't
need the red. We could mix all the
colors that we need without it just by using
a gray or a black. If we move to brushes now, I've chosen a fill
bit for this class because it makes
lovely petal shapes. I would add here that
we need a brush that's slightly firmer because we're going to be creating
a lot of texture, and it's all in
the brush stroke. And we want a brush
that will resist that a little bit rather than one
that has very soft bristles. And this is one of my favorites, which is also a size
ten ruby satin. We'll be using a dagger
brush. If you have one. If you don't, you can also use a round brush for the marks
that we'll be making. And a fine liner. If you don't have a liner, you could always use the tip of a small round brush
will be mark making, and I love these clay
modeling tools for that. You can scratch,
and you can also dot with them.
Really, really handy. If you don't have one, you could always scratch with a dip pen or a skewer or indeed use the bottom of a brush
for scratchy marks. But anything really that makes
marks through the paint, I also used these big
pens for the first time, and I loved the way that it
carved through the paint, but it also on dryer surfaces, turned back to a pen, so it kind of has a dual
function here for us. I'm also going to be
using a spray bottle. This creates texture
in our background. So if you don't
have one of these, you might have a fine diffuser. But I do prefer this one because you can adjust the
spray with the nozzle. So let's move on to
our first lesson, which is all about creating our beautiful
textured background.
3. Practise: Creating Our Background : So I'm going to start by mixing some danhrone blue with the
green appetite genuine. This makes a cooler green. I'm going to use a bit of scrap paper just to
get going, really. It takes away the
anxiety or any nerves about creating a piece
from a blank page. I'm bringing in a little
bit of a warmer green thereby adding yellow
to the green appetite. So we're varying the direction
of our brush strokes, and we're also going between wetter marks and dry brushing. Just a few more
strokes in this color, and then let's mix
a warmer green. You can use any yellow, and you can either mix satin
with a blue or with a green. I've mixed it with
the dahron blue, and I'm just now adding
some lovely warm green. And some of the brush
strokes will blend because the layer beneath
is still wet in places. I think that really
adds to the texture, which is what we're going for with this painterly technique. Now let's create another layer. I'm putting down some
white gouache here. This is Titanium white. You could also use white watercolor or doctor PH
Martin's bleed proof white. To create the creamy look
that we're going for, I'm going to add some
handsy yellow deep. Now, this color actually
takes over quite a lot. So just a tiny bit of this we'll turn that white into
a buttery color. I've got some handsy
yellow light here, so I'm going to put some
of that down as well. Just to take a little bit of warmth of the
handsy yellow deep. But any yellow here mixed
with white or even a brown. I'm going for a single
cream mix here. I really love this color, so
I'm going to put it down. Again, we'll get some blending
and some dry brushing. We want to keep that main component of the
painily effect texture. Just to reiterate here, you can use any brush
for this layer. Before this dries, let's get
in and do some mark making. This is the clay modeling
tool that I mentioned. And we're just going to
make some random marks. It's quite hard to get
away from wanting to form a shape that looks
like a leaf or a flower. Of course, if some of the
shapes are leaf like, that's absolutely fine, too. Just go with the flow. Now, I haven't used big
pens before for this, so I'm going to
see what happens. I'm going in with the
darker green first. Just squiggles, and you can see that I'm holding it,
right at the top. This makes for more
organic shapes, a little less controlled. In with the lighter green. I'm making a few marks here that are a little
bit more leaf like. It's so enjoyable.
4. Practise: Differing Brush Strokes: So moving on to our
brush practice, he could prepare
any color for this. You don't need to use a gray. I just mixed a very quick gray with the three primaries
and some white. You could use a very
simple gray with just black and white mixed together or paints
gray and white. Phil bits are lovely
for petals and leaves, pushing down and
then just lifting, pushing and twisting
at the bottom there. So let's do another
straight one. And then down and
twisting towards the end. Now the side. Press down, lift up, press and up. So we're going to practice
speed and pressure. We're going to be pushing
into the page a lot more. Push and lift really quickly, and we're pressing down a
lot more into the page. This creates a rougher
feel and again, adds to the overall texture. Let's try that on the
side of the brush. So we're going to continue
experimenting with pressure. This is what I call a
print brush technique. So what I'm doing
there is almost taking the top of the
brush over onto itself. What this does is create these really expression
brush marks. Really get the brush
to work for you here. Let's try the side. And then in from an angle. So this very gestural
movement has three elements. We're using more
pigment and less water. We're using speed, and
we're using pressure. So let's add another layer. And I'm using almost
neat white here. Lots of pigment, less
water on your brush. Adding over a layer. We don't want to obscure
what's underneath, so you can go a little
bit to the right or left of the petal
underneath or over it, but not completely obscuring it. This starts to build up
the layers on top of that layered textural background that we're going to be using. This is so attractive
to look at. Just going to mix up some handsy yellow deep
there with some white, just to vary the color
a little bit for you. And we're going to use the
tip of the brush to half way. So we're going to create
a small tear drop. So we're going to place
our brush on the page, go out to the left
and curve round. Using the side of my brush, I'm going out to the
left and curving round. We're going to use this
small tear drop brush mark to create our half
open flowers and buds. Let's try it again. Brush down, out to the left and then
round to the right. So a tear drop curve. And we're just aiming
for that thinner line at the bottom to meet in the middle if you're doing
the half opened flowers. We could do this quickly, too, press down all the way, curve round, and lift
up really quickly. So continue to
practice these moves, out to the left, out to the
right, slower movements. And let's continue practicing, moving from the side of the
brush to the full brush. And finally, let me show you this neat little way
of creating buds. So you do your tear drop, and then just above that
one, you do another one. It's so cute, and I
use it quite often, so one little tear drop and
another one over the top.
5. Practise: Flowers, Centres & Mark making: Let's flip back to
our background page, and I'm just going to show you another technique that
we're going to do together. And that is to use value as
we've done in other classes. So we're just going to
build up layers slowly, starting off with more
translucent petals and building up to a greater value with
thicker paint on our brush. So for this exercise, I'm just mixing up a very
quick tint with white, yellow, and a touch of green. And we want to add
enough water to this to be a 50 50 mix. So for this first brush stroke, we're going to go back to that move where you did together. Full brush, and we're
going to push down quite forcefully and pull the top of the brush over itself almost. I can see that's
quite pigmented, and we're not seeing a lot of the background come through. So let's just try that a
bit more watered down. And that's very translucent, and I love the way that the
paint galas in the middle. But let's try something
between these two. And that, I feel is
a really good one for the base layer
of these petals. We've got the texture,
and we've got some of the background showing. You can do this
upward movement too. It takes a little
bit more practice, but you can get some
lovely brush strokes using this upward movement. And now let's mix a
little bit more pigment. This is mostly white, and we've got quite a lot
of paint on our brush. And we're doing a
very similar mark. But you can see because
we've added more paint, we're building up those layers. You can still see the petal behind and the
background showing. So let's continue to
practice this brush stroke, using the whole
width of the brush, fanning it out, and
then bringing it up. And you can start to
see how we can build up texture also with
the use of value. You also get these
lovely edges from where the brush has left the page at the end
of the movement. Let's move on to centers, and I'm just mixing up some
red, blue, and yellow. It doesn't matter at
this stage that we get the perfect color because I'll be taking you through that. So I'm using the dotty end
of the clay modeling tool. And what I'm doing here
is a mixture of dots and also just rolling the end of the modeling tool onto the page. A little bit of
yellow. A little bit of that more browny ready mix. Getting a few colors in there, I feel really does
bring things to life. So going in between all the
colors that we might have going on on our palette by
now is a really nice move. It brings variety. It also highlights
if we have some darker green or brown and then
use a yellow on top of it. So you can either continue
then to make marks with the modeling tool
or you can switch over to a pen, if you like. You can also use your dip pen
or a skewer at this point. And I'm just very loosely making shapes around the petals. And I love the way
that it carves into the still wet paint. A lovely effect using
pens is this where you can drag the paint
around to create a mark. What this does also is, it creates thicker
and thinner lines, and that really does add
to the painterly effect. It's a really beautiful
technique and one that you might want to take
forward in your future work.
6. Practise: Larger and Smaller Leaves & Mark making : Moving on to leaves. I'm
just going to mix some of that green appetite with
the dan thrown blue. The full brush there, pressing down gently, fanning the brush out a
little bit and lifting up. It's a very similar movement to the one that we've
done with the petals. You can do swifter movements
or slower movements. Let's go down diagonally a little bit and create
some smaller leaves. We're using the side
of the brush here. And if you press down into the page with less
pigment on your brush, less water, you
get more texture. So let's now try that pressing, almost printing with our brush. It's quite a forcible movement, and we're pressing
right into the page, fanning that brush
as much as possible and almost going over with
the top of the brush. And it leaves this gorgeous, gorgeous texture where the
brush leaves the page. If you wanted to get a
really textured effect, you can always separate the
bristles on your brush. So, let me just show you that. I think what's really
great is not to do all textured leaves or all one style of fluid,
more watery leaves, and just mix it up
a little bit and alternate between those
very textured leaves, and leaves a little
bit more flowy, more water, a little bit
of pigment on the brush. And whilst it's still wet, let's go in and do
some more marks. So I'm using the darker
green bi pen here. You could also use your
choice of scruchy thing. And what I love to do here is just trace the
edges around very, very roughly or add
a bit of veining. This is one of those
things I could do all day. I love this bit. If your paint starts to dry and you want
to add more marks, you can always just add a little bit more paint and then go back in
with your big pen.
7. Practise: Dagger Brush Leaves: So I'm moving over
to the dagger brush, which is a kite from Jackson's. And because we've got quite
a lot of the same leaves, same shape leaves, I wanted
to add some ribony leaves. And this is a beautiful
brush for those. So just for the purposes
of this practice, and I'm mixing there
some green, yellow, and red with that white that's already in
the left well there. And I'm just quickly
mixing up like a mustard green French mustard. We can use this in two ways. We can use the tip of
the brush for lines, let me just show
you, so we can pull through some detailing
on the leaves this way. Either veins or you could actually do some
little wiggly lines around the edges of the leaves. If you don't have
a dagger brush, you could also use a liner
brush for this effect. Anything that creates
a nice fine line. And let me just show you
on a fresh page here. So we can start off
with some lines. Just pull them through
really quickly, and they create these lovely
thin, slender leaves. So I'm using my brush
upside down there. That's important with
these dagger brushes because it makes it
a lovely, fine line. And then I just love these little traces around the leaves, little details on the edges. So we're using the brush
the right way round now. I'm going to pull through
a very ribbon nee movement because just using a kk brush in a straight
movement like this, I don't feel creates
a really nice shape. I'm going to just do that again. It's okay, but I think you're better with a
round brush for that. So starting with the tip, drag it through a little bit. Press down, we're going
to go to the left. So we're using the broad
part of the brush. Pull up to a tip at the bottom. Let's try again. Tip out to the left and
then back up again. So now let's try a
double one of those. So we're going to
start again with the tip and then
squiggle your brush. Now, this looks more
complicated than it is. So don't worry about am I going
left, right, or whatever? Just wiggle your brush and
the brush will do it for you. Slowly there you can see
how beautiful that is. It's great for ribbons as well, of course. Nice
undulating shapes. You could practice this as much as you like just to
get into the flow, and of course, you can go out to the right rather than the left. Restful to do these. You can practice
doing them really slowly and also in a
very swift movement. All I'm doing there is wiggling
my brush left and right. And of course, you could then add some little
stems to the leaves. You can either do it as a complete movement or you
could add the stems later. So let's now go back to our flowers and practice
some finishing touches.
8. Practise: Flowers; Finishing Touches: So we're going to use
that brush print method on these petals just to
bring some layers through. So again, we're
using more pigment, so I'm just placing some
more white down there. So I'm just going to
load up my smaller fil bit there with quite neat white. We don't want too much
paint on our brush. So I've just taken
the excess off. And I'm going in with
that very pushing into the page, very
swift movement. Really let go with this
because the more that you do, the more expression fall and the more painterly
it will become. So not much water on your brush. Lots of pigment. And if you
want some dry brushing, take some of the
pigment off your brush. So let's try that again. Really push into the page, printing with your brush. Very quick movement to pull
it up again off the page. And again, you could try that upward movement
with your brush. So we're not wanting to obscure all of the
petals from underneath. So go around them or you could place new petals in between
two of the larger ones. And who says all the petals need to be on one full flower? This is all about
texture and expression. So I'm just placing them
wherever I feel, I want them. Lots of pigment again. And this time,
we're going to pull some tiny little
bud like shapes. I'm using the side
of the filbert here. And it's almost going back to the tear drop brush stroke
that we did earlier together. So keeping awareness
that we're working with those translucent
layers underneath and slowly building
up the value, adding more and more
pigment to our brush. So now, let's go in for
some real dry brushing. And we covered this
in Millis Meadow. So load your brush with
a lot of that white. And then actually, we want to take quite a lot of that off. So I'm just going
to find something sketchy that I can practice on before I
commit to the page. I'm moving the
side of the brush, skimming almost
over those petals. So it's a very
light pressure and the absolute opposite of what we were doing with the
brush print method. So now that I've got
that all lined up, I'm going to try it
on our petals here. But don't feel you
have to pull that over exactly onto a petal. It's nice to do in
between as well, maybe outside of the
edges of the petal. And just the side of the brush, catching it a little
bit on the top, and then a very, very
light skimming movement. And to keep preparing
your brush to make sure that you've got
the right consistency. That was a little
too much paint. I didn't like that, so I've just taken some more paint off. I do love this technique, and as you'll see
from my recent work, I've been using it quite a lot. To me, it creates this lovely little layer
of magic over the top. And I think that's now
called co aesthetic. So yes, definitely
going for that. I do live in Scotland after all. So, wow, we've got through
the practice runs. So let's now move on
to the project itself.
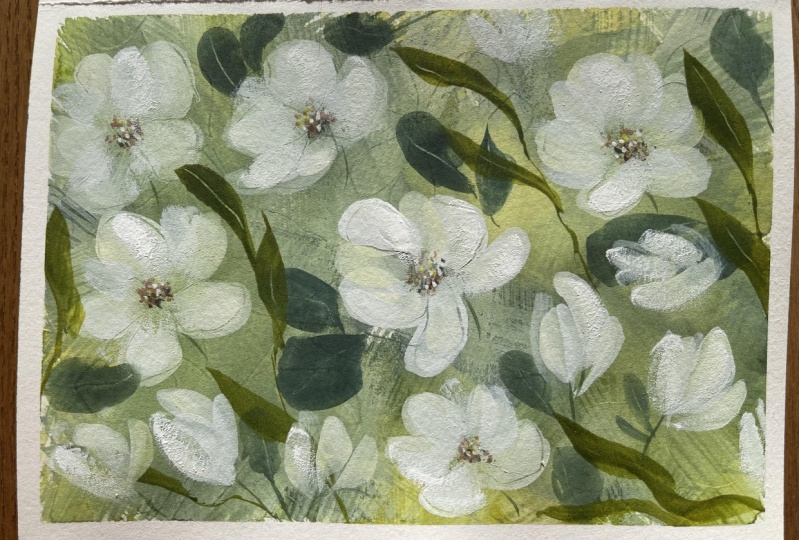
9. Class Project: Briar Rose Background: So let's start by
taping off our page. This is 15 millimeter tape. And I do love taping
off the edges, especially when I'm doing more abstract work.
It really frames it. So, let's get started
with our colors, some mixing green appetite
with the danthrone blue there. I got my scrap bit of paper. Now let's just make some
really random marks. So, the lovely thing
about this technique is we can use all
sorts of mixes of green from the cooler
end towards the daherne blue to the warmer end
of the handsy yellow deep. So I'm mixing some of the handsy yellow deep with
the green appetite. That creates a
lovely warm green. So I'm just working between
those three colors, keeping it nice and fluid. Lovely warm browns to spring
greens to cool greens. And we're laying
down a base here for the whole paintly effect. It's all about the
brush strokes. Some warmer brush
strokes in there. And you can see there's
also a mix between more watery color and a little bit of dry
brushing as well. Just finishing up now with the last of
those brush strokes, and then we're going to
mix our second layer. So let's mix some of the beautiful buttery
color using white, hansy yellow deep and a tiny bit of the
handsy yellow light. Ddying a little bit more white. And this is probably
a 50 50 mix. So, I want to see that
first layer coming through. So not too wet and not
too dry for this layer. We're going to just let that
settle for a short while. And now we're going to mix
a layer of more pigmented white and do the same thing
just vary our brush strokes. Less is more for this bit. We're going to pick
up our water spray and spray on each
side of the page.
10. Class Project: Mark Making & Colour Mixing: I'm going to just mark the page a little bit with
this modeling tool. You could use a dip
pen or a skewer. Although we may go
over these marks, I think it's an essential part
of creating this project. I've got my pen there.
I love these big pens. This is the darker green. Let your hand wander
over the page. Don't feel you have
to create leaves. These are just marks. And I'm just going to use the
lighter green here as well. If you don't have
these big pens, you could always
use a pencil or put some ink in your dip pen and make a few scratchy
marks with that. So first of all, I'm
just going to mix up the handsy yellow
with some thrown blue, and a little pyrol red. And what we're doing there is what we've done in
previous classes to create a brown or a gray out of the
three primary colors. You can see that I've brought
that over to the white, and I'm just mixing that up. It's a nice or warm gray. Adding a little bit of the buttery mix from
our background. Buff titanium and
hands yellow light. There's no correct
way with this. We're mixing neutrals, and
these are all beautiful tints, and you can mix your own, you don't have to follow
exactly what I'm doing. They all start to merge together as we go
through the project. What I'm doing is creating
a few different tints. We've got a buttery
yellow on the left, and we've got that nice
warm gray on the right. I forget how overbearing
the handsy yellow deep is. So it kind of took over
that white a little bit. So I've taken that over to
our gray on the right there. What we're aiming for
really is a range of different grays
and buttery whites.
11. Class Project: Flowers & Buds: So I'm picking up
that very warm kind of dove gray mix from earlier. Warming it up a little bit. Maybe a little too much, and taking some of the
green appetite over. And let's lay down some
initial flower shapes. I'm interchanging between
the tints that we've mixed. What we're aiming for there is slightly different
tints on each petal. The more you mix, the satisfying it is really once you've
got your palette, and just mixing with
those three pies, can produce such a
wide range of tints. So very quick brush strokes. No thinking about it too much, don't think of it as a
flower, placing down shapes. Going in with a warmer color
there over that dove gray. So we're doing what we practiced here and pressing down
quite hard on the brush. Just on some of the petals, we can vary our brush strokes, vary the pressure on our brush. So let's just keep
going round and adding tints and cooler tints. The reason why I love preparing
a background for pieces like this is that when we
push down on our brush, you can start to see from
the brush stroke itself, the color coming
through underneath. So I am continuing there to use the brush and the
side of my brush. What we're doing is
building up subtle layers, which really brings
these roses to life. We're also thinking about
movement and composition. So we've got their three
main flower heads appearing, and they're traveling
across the page in a really pleasing manner from
top right to bottom left. I love that fawn bage color. Paler layers now on top of those slightly
darker muted tints. A few little buds. The beauty with this
is that you can change the shape of your flowers
at any point, really. Aim to try and relax and move fairly
quickly and intuitively.
12. Class Project: Dark Leaves: Let's mix up some greens
for our leaves now. Mixing a tiny bit of
everything in their really. The mixes we've already done, adding a little bit of rosena, the full brush and the side. Mixing some of that hands yellow deep in with the drone blue. We can slow down a
little bit here and start to think very gently about where we
want to place our leaves. And I twisted my brush around
a little bit for that leaf. And adding some little leaves around the half opened flowers. And the buds, using
the side of the brush.
13. Class Project: Mark Making On Leaves & Flowers: I really love this bit. We're going to get out
whatever you're using for scratching and just make
marks in the leaves. And again, we may go
over these marks, but it all adds to
the whole journey, I think, of painterly
pieces like this. So I'm just tracing out
around some of the petals, pulling out some lines. It starts to get a little
bit more relaxing now. We've laid down a
lot of brushstrokes, faster and slower movements, and now we can just ponder on our piece and see what
we would like to add.
14. Class Project: Flower Centres : I'm mixing some blue
and the asana there. This is to add just some
very simple details to the center of the flowers. I want to mix a brown. So I'm just adding a little
bit more of that hands yellow deep. And that's perfect. I'm using the clay
modeling tool. If you don't have one of those, you could use the bottom
of a small brush, and let's those in very lightly. I think because the piece
has got so much abandoned, we don't want to get
too detailed here. I'm thinking actually that
that's a bit too big, so I'm just going to move down to a smaller modeling tool, adding a little bit of
the hands yellow deep. A bit more brown. Dotting in various colors to the center of the
flower looks really nice. I've got brown and
orange yellowy feel, and also I might just add
a little bit of white. Here goes the white
knocks it back ale bit. That's one, very simple way of bringing character to
your flower centers. So I'm just continuing
around using the raw sienna, white and the brown
that we've mixed up.
15. Class Project: Dagger Brush Leaves: I'm now going to move over to the sword brush and mixing in some of the green appetite with
the hands yellow deep. Want to bring a
different color in now. This color will also
bring together that darker green that we have
and the creamy flowers. Adding a little bit of
detail there around the leaves as well as
forming new leaves. Nice fluid movement.
Pulling leaves, also just creating
some very fine lines through the leaves that
we already painted. I really love this part of the whole process because
we're slowing down now. We've done the first
expression full movements, and we're just adding
a little details now. So the pace is a lot slower. You can see how these two
greens compliment each other.
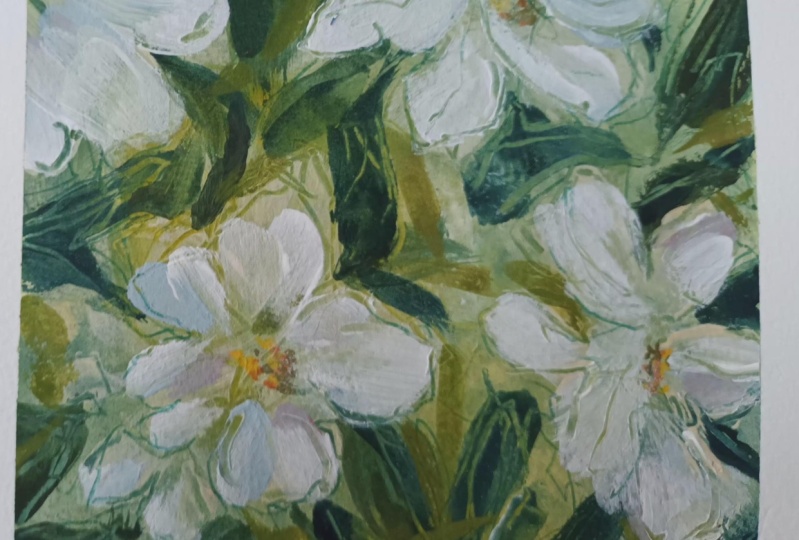
16. Class Project: Layering Flowers: And switching back to the smaller filbert now to
create some petals. I wasn't too keen on
the three leaves there, so I'm just going
over with some white. Concentrating now
again on the flowers. We're gently creating
some little buds here, filling out the half
opened flowers, using the side of the brush, and we're using that
pressed down and twist brush movement
that we practiced. As we did with Mili's Meadow, we're now going to build
up the value of our paint. I'm going to go in
with quite a lot of pigmented white now. At this stage, you can
go over petals that you've already laid down
or create new ones. Again, using that pushing
down and twisting, it just creates these lovely, free flowing petals with
lots of movement in them. I really want to
add some of those pressing down and
twisting movements here. It makes the petal edges quite
rough and full of texture. Push right down, bending
the brush back over. It's really nice to play some of these over the existing petals. Quite rough and quick movements. We're almost now
printing with the brush, pressing it into the page, and it creates these beautiful broken edges on the petals. And what that does is
reveal the layers beneath. Dry brushing over
the softer lines is a really lovely way to
increase the texture. So I'm continuing to
value and brush stroke. A few more of those
creamy yellow buds. These are particularly effective when painted over
the dark leaves. Just taking a moment to see
what else I would like to do. And now we've loosened
up such a lot. Why don't we try some of those pushing into
the page brush marks? It adds a final layer of texture on top of
all the layers, and it's so fun to do. So check over your
work now and have a look and see if there's
anything out of balance.
17. Class Project: Dry Brushing: We can add now the final
dry brushing technique. And I'm using the
side of the brush. It's almost the
opposite movement to the pressing into
the page brush stroke, because what we're
doing is skimming over the surface of
the paper, very, very gently, a lot of
pigment on the brush, hardly any water,
very, very dry. Again, this is lovely to do over the darker areas
of your painting. Very spare movements. And just checking over. Think just a few more
on these petals. So the paint is on the
edge of the brush only, and I'm just pulling in, following the line
of the petals. And coming to the
end of our project, just consider the
last movements. I think we deserve a bit of
a rest and a cup of tea, and then we'll move on
to the final reveal.
18. Thank You! : Okay, so it's revealed time. This is my favorite part. Especially when we're doing
more semi abstract work, framing it like this really does add to the overall effect. So we've explored the
three main elements of the painterly technique. Color in the mixing of neutral
tints, brush stroke, soft, expressive movement, and
texture through layering, mark making, and dry brushing. I hope this class has kindled a love of creating easy,
textured backgrounds. It can be daunting always painting on blank
white surfaces. But using this approach, where the flowers almost seem to appear
effortlessly through the layers can be an effective technique to
take forward in your work. Thanks so much for joining me. Take good care of yourself, and I'll see you again soon. Bye for now.
 Holly Tomas Art, Watercolour | Gouache | Mixed Media