Transcripts
1. Introduction: What makes this class unique? It's the combination of the
tenderness of the flowers and oil pastels with their naive and unpredictable
nature of mark-making, we will learn to merge those two styles
together to create a series of simple yet expressive oil pastel
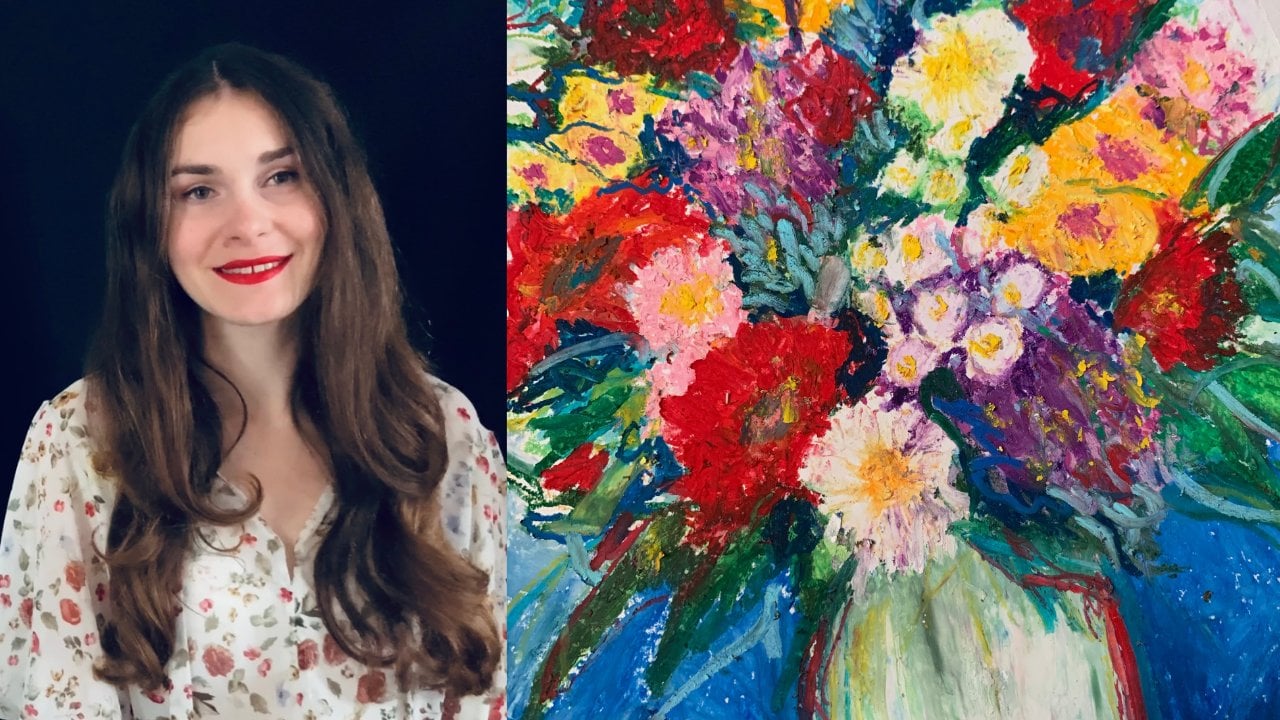
botanical drawings. Hi, my name is Alina, are many cranial artists. And if you have been following
my classes for awhile, you already know about my love to oil pastels and flowers. I haven't decided once again, to combine those two
passions of mine and create this botanical drawing
course with oil pastels. This course will include several short glasses
that I post each week and every time together we will create a drawing
of different flowers. Today, we'll start this
course with the first-class, and I think we should start with something really special. So for the first
class of this course, I chose to draw gorgeous
wild flowers, Butter Cups. I adore these flowers for
their shiny yellow petals. So I hope you will enjoy creating this
drawing with me today. First, we'll start by looking at inspiration and reference
photo for drawing. And next, we will simplify
the reference photo to fit our naive and simple style of the trauma and the
oil pastel features. Finally, we will develop
our base layer by layer. This class is probably
best uses for beginners who have no
experience with oil pastels. And for anyone who likes
creating botanical drawings and wants to try out
such a unique medium as oil pastels for the
total beginners and also for those who want to follow me in this
class step-by-step. And to create the same touring, I have created a coloring
of my final results. So you can download and
print it out in black and white and simply apply your
oil pastels on top of it. By the end of this course, not only you will learn
to depict the beauty of flowers by using oil pastels. But you will also have
the whole set of your own minimalistic, simple
botanical drawings. So make sure to follow me so
you don't miss a new class. To your collection of
botanical drawings.
2. Class Project: Your project for this
class is to create a drawing of butter
cups using oil pastels. For that. First, choose your
reference for the drawing. Here are several ways
for you to do it. The first and perhaps
the best option is to choose the reference I
will be using in this class. By using the same references me, it will be easier for
you to follow me through the drawing process and to create the same
botanical drawing. Another option is if you want to choose your
own reference for it so you can look through the Pinterest board I have
created for this class. There you will find some of
the best reference photos, or you can conduct your own research and
choose the reference photo, you choose the best for you. Finally, I would love to see what you have
to share with us. So please don't forget to upload a picture of your
class projects. Once it's done.
3. Tools & Materials: In this lesson, Let's go over
some tools and materials you will need for this class to create your botanical drawing. My medium for today's class, and this whole course
is oil pastel. And I will be using my
favorite oil pastels of Sennelier brand that I bought
on my last trip to Paris. These are probably
the best oil pastels you can find on the market. There are so soft and creamy, rich and bright pigment. So if you get a chance, I totally recommend
you to get at least oil pastels takes of this
brand and try them out. There are three oil pastels we will be using
today in this class. Go to yellow or a little brown. And yellow brown. If you don't have exact
same colors, don't worry, just find the closest analog to them amongst the colors that
you have at your disposal. Next, the paper in this class, I will be using white
watercolor paper. Make sure that the
paper you are using is stored in alpha for oil pastels. And finally, you need some masking tape to fix
your paper to the surface. You might also need
just a few napkins. So clean up your
oil pastels sticks and perhaps your fingers. So those are the supplies I
will be using for this class. If you have any
questions regarding art supplies or anything at all, feel free to ask me in
the discussion section.
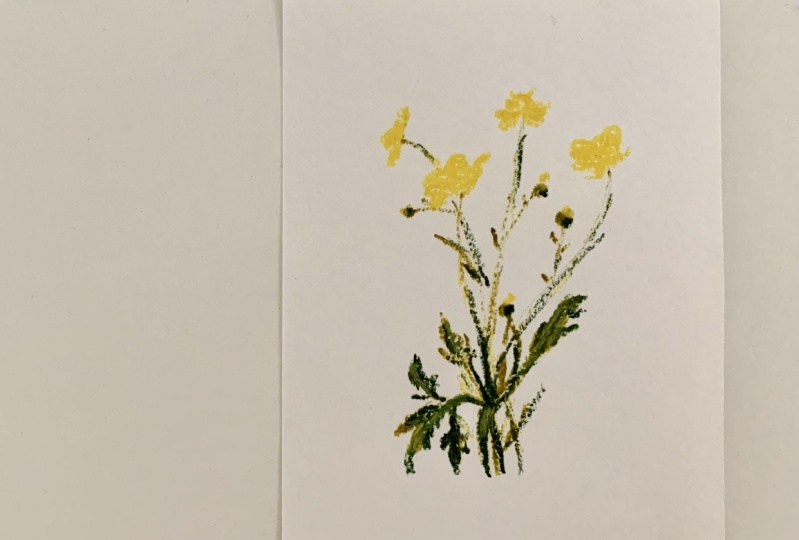
4. Drawing Buttercups: Let's start our
drawing by looking at inspiration and choosing
the reference images first. If you follow the link to the Pinterest board
I have put together, you will find some of the best images to
use for this class. But you can also conduct your
own research. Of course. I chose this photo
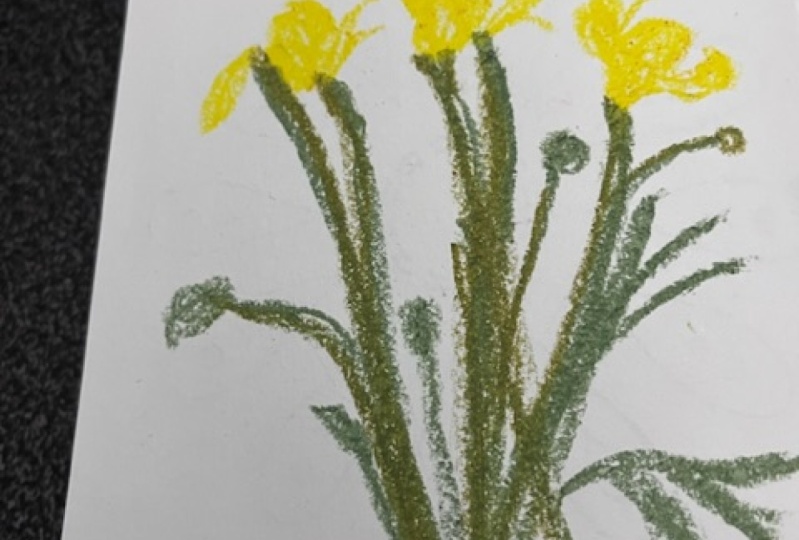
for reference, and I'm starting it by drawing
the flowers right away. As a reminder, for
the yellow flowers, I'm using gold yellow color. As I'm drawing each flower. I'm trying to
recreate the shape of the petals that I noticed
on the reference photo. As we want our
botanical drawing to be simple and minimalistic. And we are using
limited color palette. Shapes and colors are two
main characters in this play. As you draw your flowers, tried to recreate the
shapes of the petals. You see on the reference. Next, let's work on the stems
are out of our butter cups. And here I'm using
yellow brown oil pastel. So little trick I want
to share with you. If you want to create a
thin line with oil pastels, you can use the opposite side
of your oil pastel stick. That's a great way to
both create a thin line and to maintain these
naive simple style of drawing with oil pastels with their immediate
market-making. Now we can move forward and add some leaves
to the flowers. Here I keep on using my
yellow brown oil pastels. So why did they choose exactly
these reference photo? I'm just trying to avoid
choosing the fibers with too many details and with
complicated texture. Otherwise, we could just suck on trying to recreate
every single detail. And it would just be too
much time and effort for such a simple and
minimalistic drawing what we are trying to create. So instead, I chose the flower with a more simple
shapes and less details. You can actually
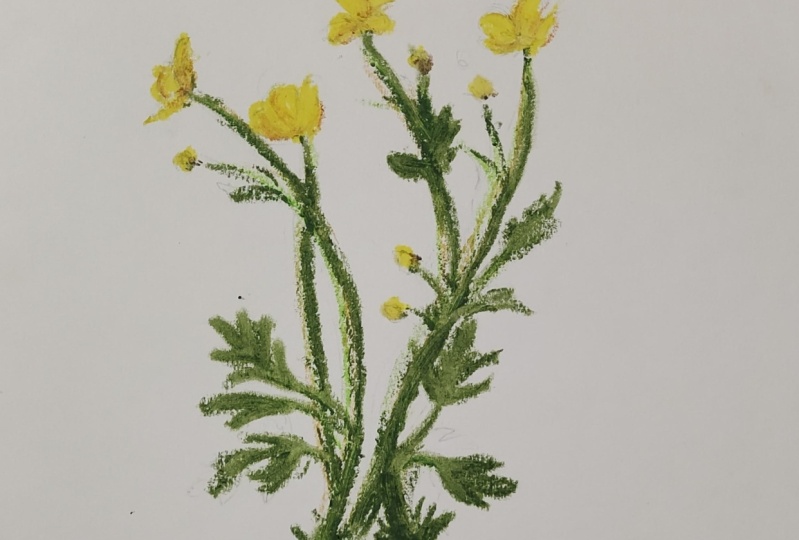
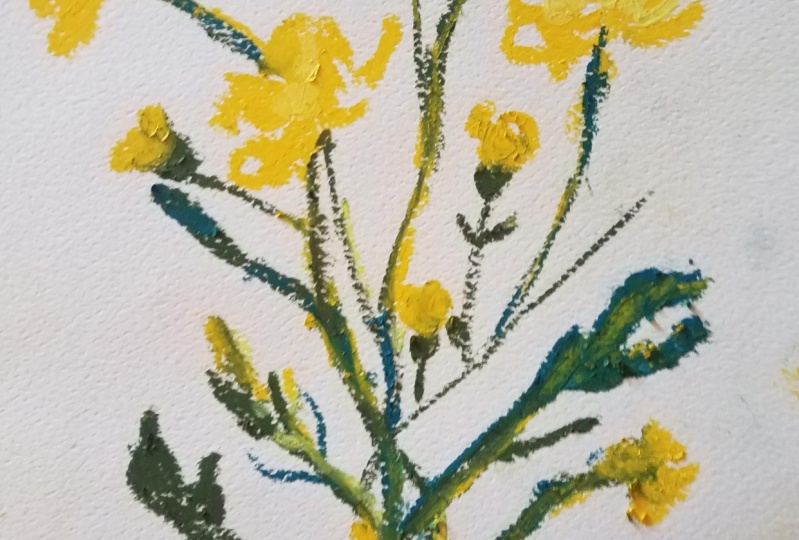
finish your drawing by adding leaves to
your Butter Cups. I personally already
likely result. Or you can add the
darker value of green to add more
depth to the drawing. This is exactly what
I have decided to do. So now I'm going to layer my olive brown oil pastel on
top of the leaves and stems. I have already layered. As you do so try not to block
your primary layer fully. Instead layer the
darker values here and there to add more shades and
contrast your final drawing. And keep on adding some final touch to dropping
until you like the result. So what do we finally
get? It sent? Simple minimalistic drawing on Butter Cups created with
a limited color palette. We have combined
tender flowers with naive and expressive
mark-making of oil pastels. And I have to say, I really love the
result and adjust, just makes me want to keep on drawing even more flowers
in a similar style. That's what we're going to
keep on doing next week. But until then, I will see you in the next lesson
for the final thoughts.
5. Final Thoughts: Welcome back. I hope you enjoyed
this class and you're happy with your final
drawing of the Butter Cups. I know. I'm happy with mine. As a reminder, this was
just our first-class of the whole course of botanical
drawing with oil pastels. Next time we will
create a drawing of another beautiful wildflower. If there's any flower
you really want to, for me to include
in this course, please let me know in
the discussion section and maybe this is gonna
be our next project. Finally, I would love to see what you have
to share with us. So please don't forget to upload the picture of
your class project. Thank you so much for joining
me in this class today, and I will see you next time.
 Alina Harvi, Ukrainian Artist