Botanical Art: Introduction to the Cyanotype Process | Diana Caragan Stinyard | Skillshare
Search

Playback Speed


1.0x


  • 0.5x
  • 0.75x
  • 1x (Normal)
  • 1.25x
  • 1.5x
  • 1.75x
  • 2x

Botanical Art: Introduction to the Cyanotype Process

teacher avatar Diana Caragan Stinyard, Artist/Designer/Photographer

Watch this class and thousands more

Get unlimited access to every class
Taught by industry leaders & working professionals
Topics include illustration, design, photography, and more

Watch this class and thousands more

Get unlimited access to every class
Taught by industry leaders & working professionals
Topics include illustration, design, photography, and more

Lessons in This Class

    • 1.

      Intro

      0:48

    • 2.

      Cyanotype History

      0:56

    • 3.

      Tools & Supplies

      0:59

    • 4.

      Project Assignment

      0:28

    • 5.

      5 Mixture

      1:29

    • 6.

      5b Sensitizing the Paper

      1:37

    • 7.

      6 Contact Print

      1:56

    • 8.

      7 Exposure Development

      1:22

    • 9.

      Final Thoughts

      1:38

  • --
  • Beginner level
  • Intermediate level
  • Advanced level
  • All levels

Community Generated

The level is determined by a majority opinion of students who have reviewed this class. The teacher's recommendation is shown until at least 5 student responses are collected.

188

Students

1

Project

About This Class

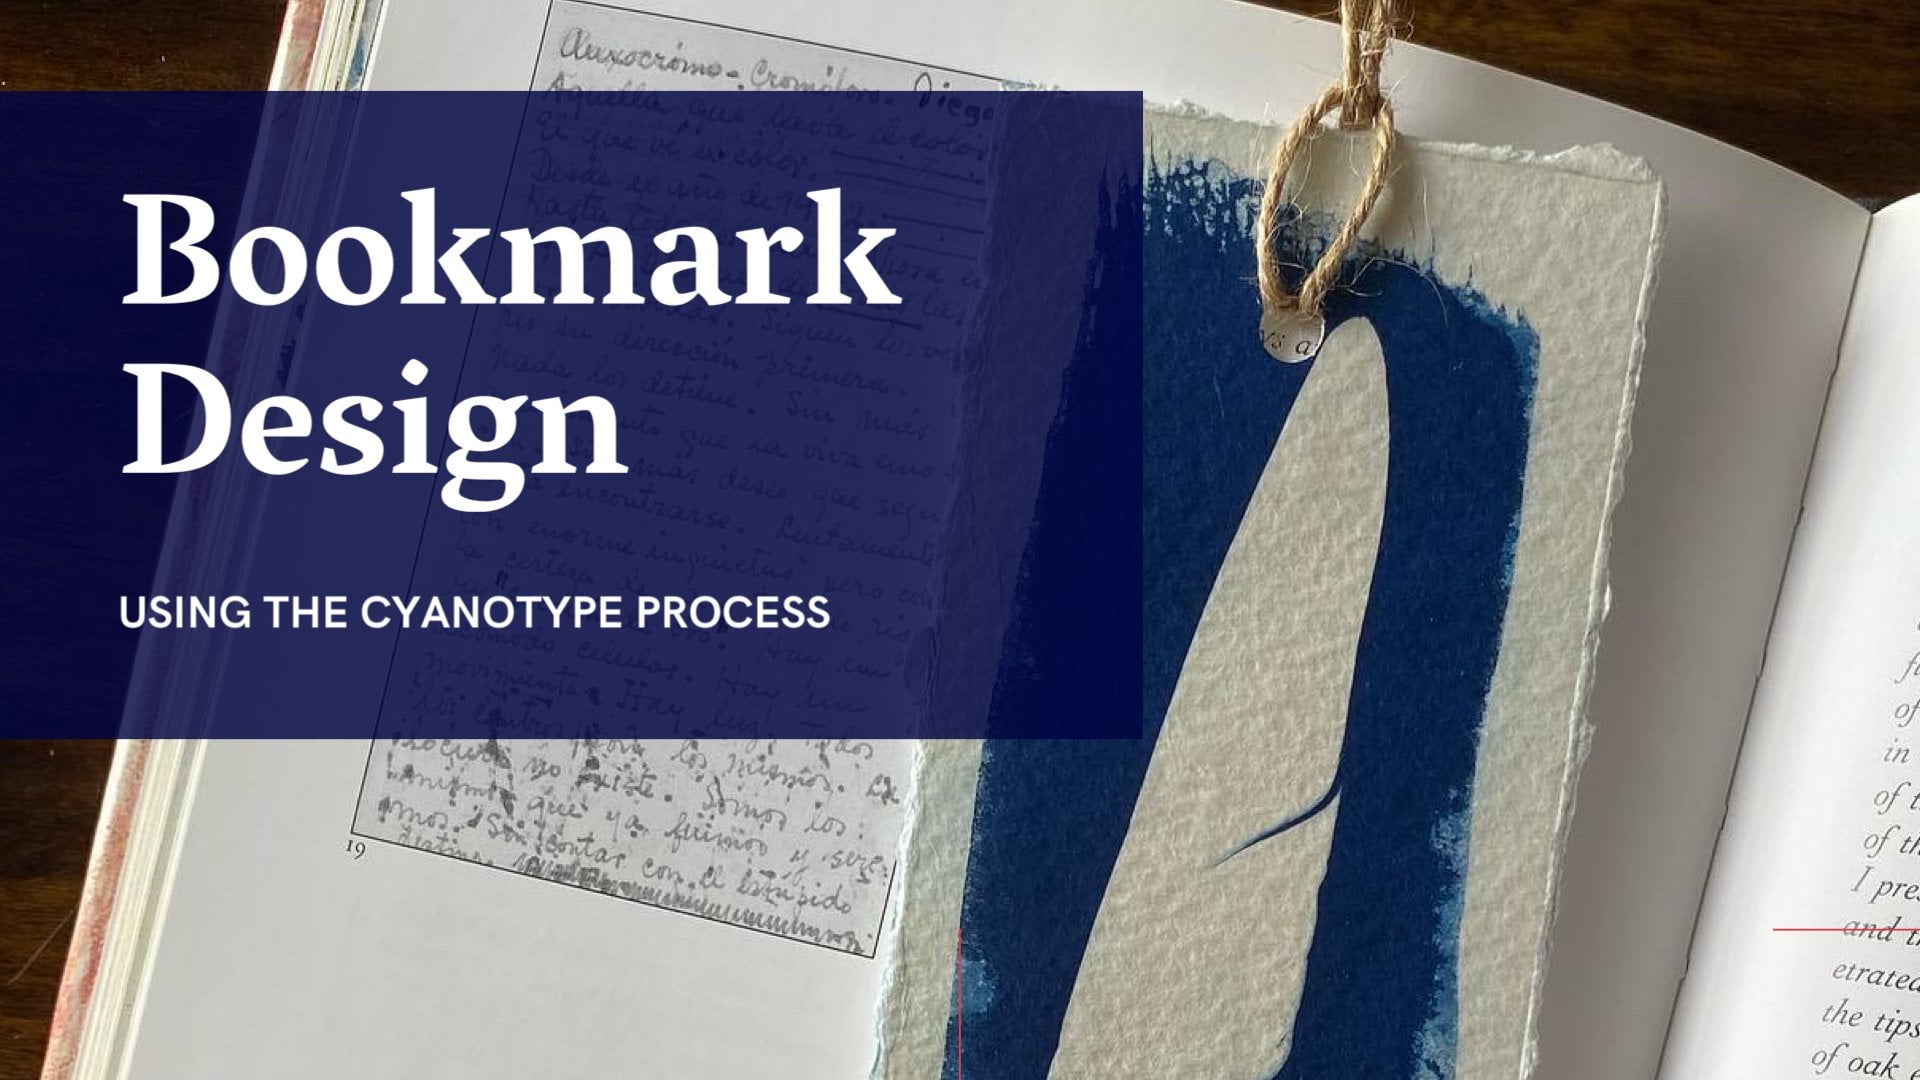
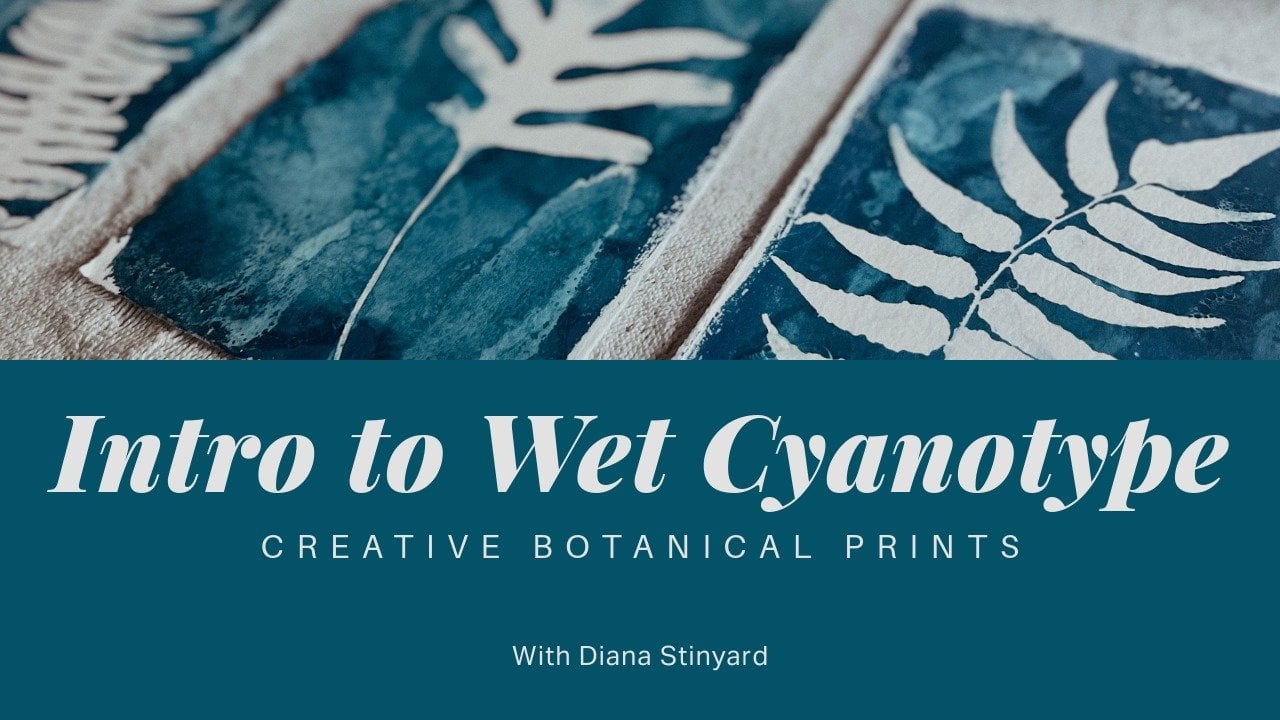
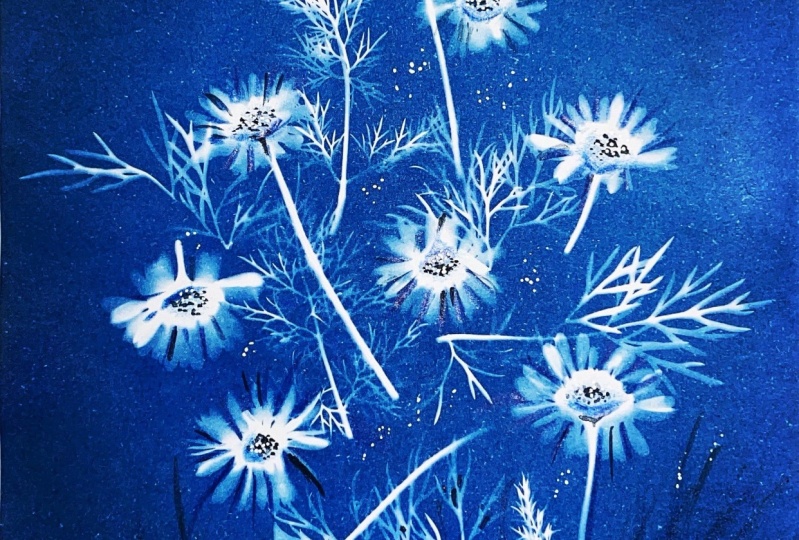
In this Skillshare class, I will be showing you how to create botanical art by using the cyanotype process. You’ll learn the basic process of cyanotype including the required supplies and tools needed, how to prepare the sensitized paper, exposure, and development of the final print. This class is open to any levels and no prior skills or knowledge required. This is going to be a fun class for those who are interested in learning one of the alternative photography processes.

WHAT IS CYANOTYPE?

Cyanotype process is one of the popular alternative photography processes, its most common use in engineering and architecture until the advent of modern photocopiers. It is a contact print process that produces Prussian blue/cyan color and requires a sensitizing solution of ferric ammonium citrate and potassium ferricyanide. 

CLASS LESSONS

Here's the breakdown of the class lesson:

INTRODUCTION- description of the class and a brief intro of myself/background

CLASS PROJECT- explain the steps & requirements for the class project

WHAT IS CYANOTYPE- a short history of cyanotype (origin, creator, usage)

TOOLS & SUPPLIES- a list and photo of all materials will be used in the class

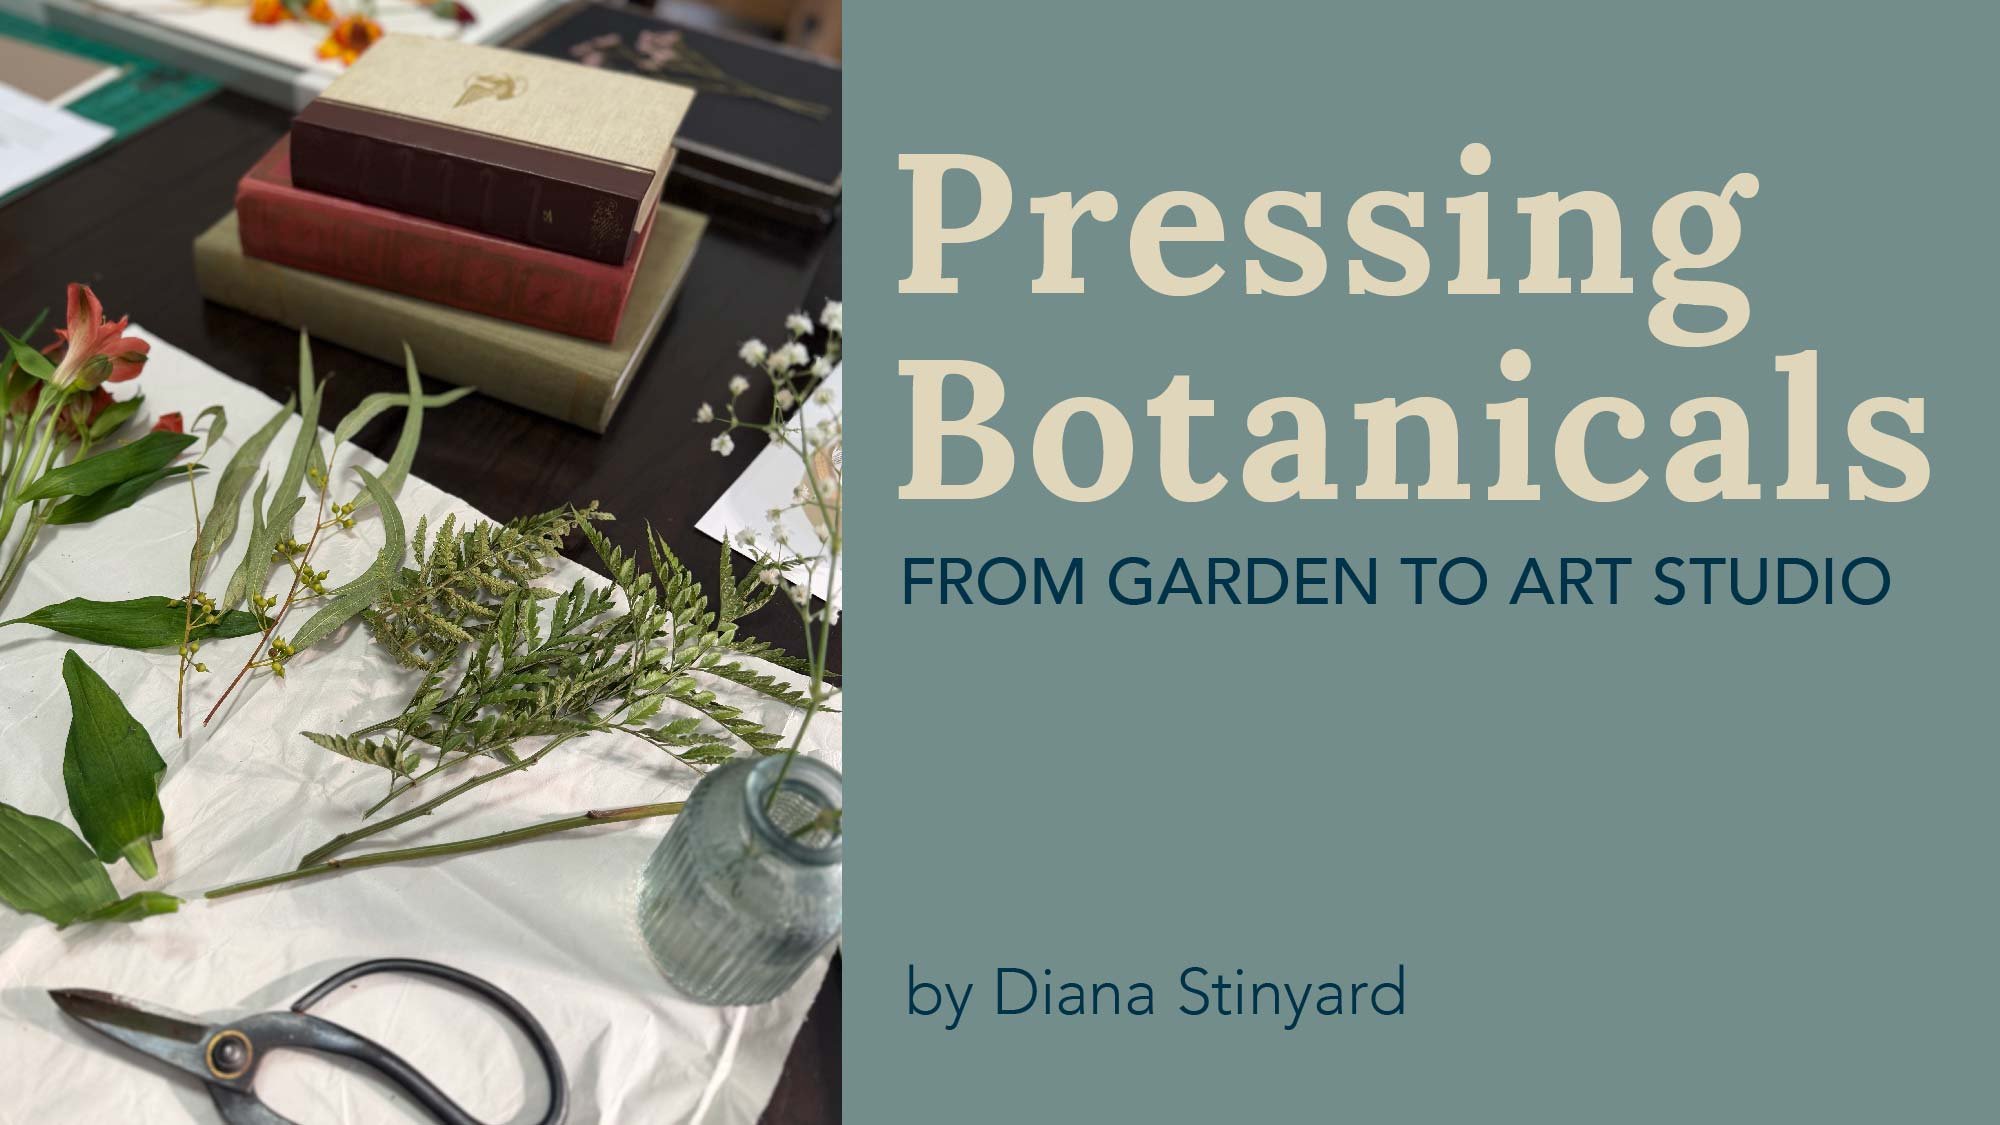
STEP BY STEP PROCEDURES- a breakdown of individual steps: mixing solution, sensitizing the paper, plant arrangements/designing, exposing, and developing

FINAL THOUGHTS- a recap of the whole class & class project reminder.

Meet Your Teacher

Teacher Profile Image

Diana Caragan Stinyard

Artist/Designer/Photographer

Teacher

Hey there, I'm Diana, a fine artist, graphic designer, and photographer from Texas living in South Italy. I grew up surrounded by artists and musicians in my family, so art has been a big part of my life. I love everything about creating nature-inspired art, whether designing illustrations, taking photos, or making cyanotype prints. Art has given me so much joy, inspiration, and a sense of gratification. Over the years, I've learned different skills from different projects I worked on. Most of my inspiration comes from my culture, social background, travels, and experiences in life. I am passionate about learning new things and sharing that knowledge with everyone.

See full profile

Level: Beginner

Class Ratings

Expectations Met?
    Exceeded!
  • 0%
  • Yes
  • 0%
  • Somewhat
  • 0%
  • Not really
  • 0%

Why Join Skillshare?

Take award-winning Skillshare Original Classes

Each class has short lessons, hands-on projects

Your membership supports Skillshare teachers

Learn From Anywhere

Take classes on the go with the Skillshare app. Stream or download to watch on the plane, the subway, or wherever you learn best.

Transcripts

1. Intro: Hello. My name is Diana. I am a graphic designer and photographer based in San Antonio, Texas. I have been designing and do photography for almost 10 years now. In this class, I will be teaching you how to make a botanical art. By using the Scion a type process, you'll learn the basic process of science type. And what are the materials needed to create a botanical art? I will provide physical demonstrations and helpful tips to show you how easy it is to create a botanical art while learning the scion a type process. This class is open to any levels, with or without experience. This sounds interesting to you. Watch my next video. 2. Cyanotype History: Sion. A type is 100 70 year old alternative photographic printing process that produces Prince in a distinctive Persian blue color or science blueprint. The process uses to chemicals, barracks, ammonium site trip and potash in very exciting. It was invented by Sir Her show, a Burling astronomer and scientists in 18 42. Then in 18 43 and Atkins, a botanist, brought science Type two photography. She developed the process cold photographs, a photographic image made without a camera but placing objects directly onto the surface of a light sensitive material, such a photographic paper and then exposing it to a lot. By this process, Adkins is regarded as the first female photographer. 3. Tools & Supplies: 4. Project Assignment: So for the class project, you will be making your botanical art trim by following all the steps that you learn from the class. After you make your final print, take photos of your print and shared to the class project. Also, share your thoughts all the experiences that you had while doing the process. I can't wait to see your botanical art brick. 5. 5 Mixture: So for this class, you'll need your measuring cup and your cough syrup, measuring cup or shot glass, your brush, watercolor paper and your chemicals. You have your party and then your partner, okay? 6. 5b Sensitizing the Paper: so we will take our watercolor paper and have it ready to be coated with the mixture that we just mean. So we'll take the pink brush and dip it into the mixture and coat the paper with the mixture and you can get us creative us you want with your brush strokes. Just make sure that you coat the paper evenly and you don't leave about any area. Typically this part we need to be in a darker room, so the coated paper is not exposed to the direct life. So you want to make sure that you don't explosive to direct light. You can also try putting some tape on the corners of the paper toe. Hold it down so it doesn't move. When you coat the paper on this part, I am quoting the paper from edge to edge. You can try different ways on how you want to coat your paper. You can try different shapes. You can also try different brush strokes. You can get us eight of us. You want pretty much just have fun with it. 7. 6 Contact Print: so we will take the picture frame that we want to use for this project. And we will only keep the glass part and the back part of the frame. And this is what we will use for a contact print. Now we will take are coated paper and place it on top of the backing of the frame and use the masking tape to keep it flat. This will help keep the plants from moving around when the paper is flat onto the surface. So now we take the plants that we want to use for the sign for your botanical art. It could be dry, or it could be fresh plants, whatever it is that you choose for your botanical art. So for just a sign, I'd like keep it simple. So I just chose a piece of plants with little Dr flowers and then place the glass part on top of it. Keep it flat. Now that we have the contact prints set up, we will use the clothespins. Or you can also use big paper clips to secure the backing and the glass part of the frame. And by doing this, it will give it a much cleaner look 8. 7 Exposure Development: Now that the cat contact print is set up, we will take it outside for exposure. Make sure that the print is facing directly the sun, so exposure. It's much effective and for this type of print, and for this size I usually explosive for no more than 3.5 minutes. So after exposed to print, we will get it ready for development. So I have prepared a container with 3/4 of full of water, and we submerged the print into the water and just let it sit in there and just move it around until that the sign comes out. So you can do this for maybe a minute, minute and 1/2 until you are fully satisfied with your print. After we developed the print, we will go and hang it up to air dry for hour, hour and 1/2 9. Final Thoughts: Hey, guys, guess what did. Uh, so this is the print that I made for this class. It came out pretty pretty also. McCobb I meant this blue color on this print. And here's the other one that I also so I used to go to different plants on this one. So I really hope that you had a wonderful time watching the videos for this class and also learning the process of science type. I think Scion, a type process is a very easy process to learn and also funds explored. And actually, I'm still exploring sanitize, and I'm trying different things here and there. And I will also be sharing those videos once I figured out those fun projects anyway, so don't forget your project for this class. Don't forget to share your photos and share your thoughts and experiences. Your struggles share them all. I'd love to hear it. And if you have any questions, just reach out and I will try my best to answer those questions so I cannot wait to see your photos by