Transcripts
1. Welcome To The Class: Hi, this is my initiative
as well from India, and this is the second part of mini catwalk for non-artists. In the previous bag, we created these beautiful and
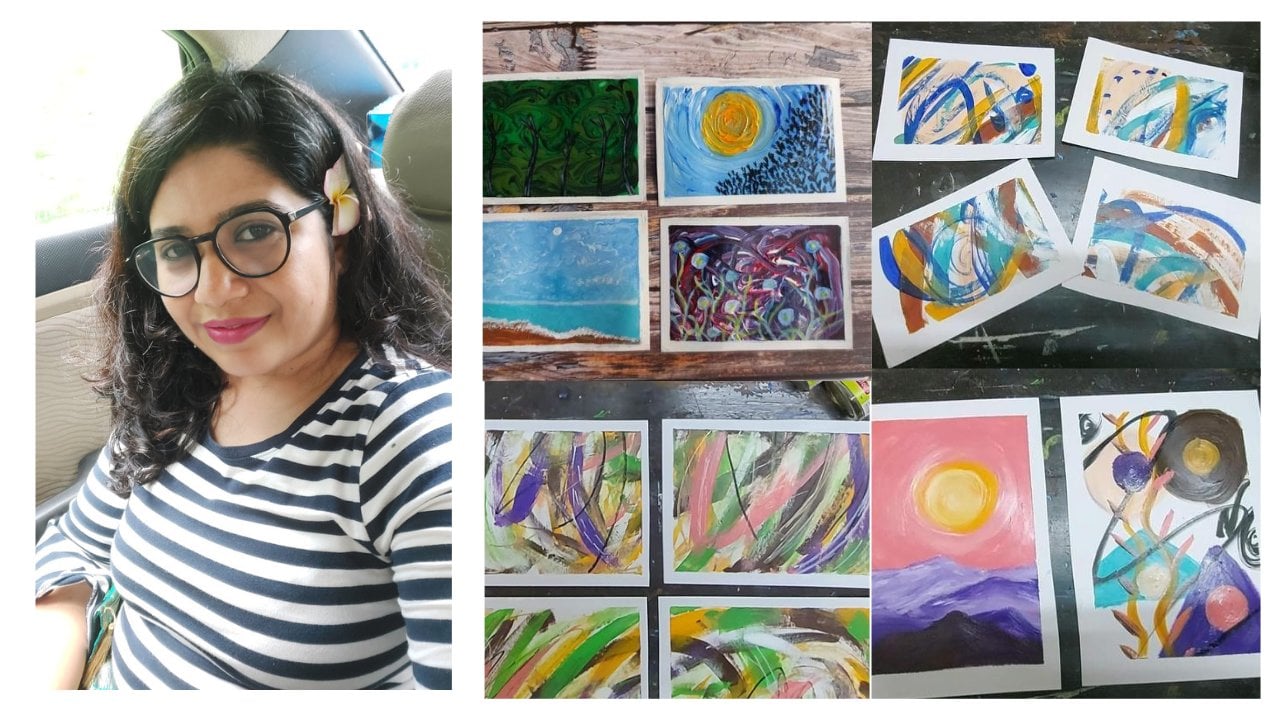
gorgeous abstract AdWords. And in this beautiful
michigan residents, flowers inspired by nature. Nature has always been the greatest source of
inspiration for me. Whenever I take a walk
around the block or I go to a bar to admire the
beauty of nature. And it always amazes me. These beautiful little Joe's
or the beautiful flowers. They're known just
as binding but also very healing and calming
and therapeutic. And that's the reason why I have chosen the theme of this class. And as you already know that
this class is for beginners and so you do have
any dried experience. All this class is
absolutely, We figured us. I will take you through
all the supplies they need and meet you on the importance and the need
to use all the knowledge. You do. Mini gala full of flowers. All of this sounds
interesting to you. In the next lesson.
2. Supplies: So here are all the supplies
we need for the class. First of all, the canvas, I will be using these
mini Canvas boots, which are four by four inches. And you can use small
size acrylic paper also. Then, for the tools, I have these Q-tips
which are going to be very important
for the project. And for the brushes. I'm using this small
number, three round brush. Very small detailing brush. This is triple 0. And a small flat brush
for the background, because the surface
is very small, so we need all small brushes. Then for the color, I have
black for the background. Then these are the colors. So some greens, some things, some are yellow and blue
shades of brown and purple. That's what I have. These are heavy body
acrylic colors. You're free to use any brand, any colors of your choice. Just the background color is
going to be black because the CDs of artwork we're going to make is that
bloom in the dark? And then we're going to use
this small palette knife. If you don't have
a palette knife, you can use a small spoon
or even your finger. Then a jar of water or rag of cloth and exam or anything, any board that can protect your tabletop from
getting colored. And that is it. This is all we need
for this class. So meet me in the next lesson
where we start painting.
3. The Background Color: Welcome back. This lesson
is very, very simple. We have to just paint the
background of the canvases. So I have already removed
the canvas is from the packaging with the
black acrylic color. I'll be painting the canvases. But first of all, I place
this acrylic good on the table so that my
table doesn't get colors. And as you see, I dip the brush in the
water and then kept it dry. I did this so that the brush
moves on the Canvas easily. We don't have to use
a very wet brush. You don't have to mix
water in a critic. I'm already using
fluidic critic color. It's just that the bristles
are slightly down. Alright? And starting from one N, I'm going on over
to the other end. With this flat brush
very easily and simply with left-right movement
or up and down movement. I'm just painting this
mini Canvas boot, and this is how I have to
paint all for Canvas boots. The important thing here
is to make sure to paint the edges or the corners
of the canvas board like. So. First one is ready. In this family, we have to
paint all full canvas boots. So let's do it. Very
easy and simple step. Apply the color on the
surface like that. Just like that. And right here, I'm doing
real time with this Canvas, also, not speeding up. And you can follow along at
your own pace if at all, you find the video to be fast, you can just pause it there, finish your background wash, and then you can unpause it and watch
it from there. Right? So here is our second canvass. Ready with the background. Just make sure not to
leave any whitespace, right, covered the entire
canvas generously. If you think there
is any whitespace left to school for
another code and do it. Again, covering the
corners and edges. Like so. And they're all four
canvases are ready. Now. Once we are done,
keep them for drying. And don't forget to put your
brush in water and don't forget to close
your paint bottle. Alright, I'll see you
in the next lesson where we will start
painting our florals.
4. Practice: Welcome back. Let's keep our wet canvases
aside and take out rough paper or a rough notebook to practice our
strokes for this, I'm taking this
detailing brush of mine and taking any color, just making the
pretzels little damp. Don't forget to dab extra
water in the rack of cloth. Here I'm taking the paint
directly from the tube. You can also squeeze
some paint on the mixing palette if you're using or on the acrylic board. And with the tip of my brush, I'm just dragging the
tip of my brush on the paper and I'm getting
these fine pen straight lines. You see that my bristles
are fairly dry. That's why we're getting these dry brush effects
which we are going to use in the den
Dalian project. And you see with turning
my wrist a little bit, I can get a curvy line. And the same way, if I press the
bristles a little, I get this leaf-like stroke. Right? Now. I am dragging the
brush downwards. And again I'm getting the
straight lines. Like that. You can practice these strokes
better, bigger brush also. Try making some marks using
the belly of your brush. Not doing anything
and just pressing the entire belly of my
brush on the paper. And I'm getting these
paddle-like marks, which can be used as leads, all the petals of the flower. See that. And the same stroke. I'm just pressing and dragging. And I'm getting these
bigger point dd. So press it, drag it and lifted. That's how we get these leaves. Now, let's take another color, any color and practice
some other strokes. Here. I'm dabbing the tip of my brush on the
people and making these tiny dots clustered
with each other. This can be used for
making the statements or the center part of any flower
very easily and simply. This is called stippling. Now, let's try to make some
small curvy lines emerging from a point like that
in every direction. And like this, we can
make our than D lens. As you see, all the curves are coming out of 1. Like that. Very simple strokes. I'm using the brush just
like pencil or pen. And they're now. Let's try another one. Now, let's take the fun tool. That's the Q-tip. And let's see what
we can do with this. So here I take some paint
on the tip of the Q tip. Tip of the Q-tip with girls. And I just dab it on the paper
just like that randomly. And as you see, we make a
ball-shaped cluster of dots, or we can make a cone
shaped cluster of the dots. And both the shapes give
us flowers already. The round one can
be our hydrangea, and the conical one can be
lavender or lilac or anything. All we have to do is just
attach a stem and leaf. And we have the flower
already leaking. Add another color
to the clusters. Like that. Make sure not to cover it all. Not to cover the previous
color completely. Just give a hint of
another color like so. There you have it, a hydrangea and a
lavender or lilac. Just got a stem and leaf
with these classes. And you see the magic pick stem and abroad leave. And they go. I'm adding
pin-ups, stamps. And I just press the belly of my brush on the
paper and dragged it and lifted it to
make the leaves. Let's see what the palette
knife can do, right? So I take some paint at the tip of my palette
knife like that, and I'm holding it
just how I hold a butter knife or even a pencil. And I'm just dabbing the
paint on the people. And the dad, I'm making different marks
depicting a flower. I can do that for leaf also. It's very simple. Just take some paint on the tip and put it on paper
or the canvas. And there you go. You can make four
petaled flowers, three petaled flowers, or just one dab for
something like a tulip. The same effect you can even
achieve video finger if you don't happen to have the
palette knife like that, take a tiny amount of paint on your finger and just
dab it like that. It's always fun to paint
with your own fingers. This can also be done
with a Q-tip like that. So whatever tool you're
comfortable with, you can use it to meet these pretty flowers
on your canvas. It's very simple and easy. Let's give a nice center
to the flowers with the help of the Q-tip using
a different color like that. I am now going to try this tool which is
available in every household. So it's a little spoon,
It's a teaspoon. And with the handle. I'm trying to use it
as my palette knife. I've never done that before, but I'm just testing
it out if I can do it. And yes, we can achieve loose style flowers
with this. Like so. I will also test out the
upper part of the spoon. What marks we get with that. Let's take some paint on the upper part of the spoon
and let's put it on paper. And I think this is better. If you don't have a pallet
knife and if you don't want to use your finger
or acuity for this, you can even make flowers
with the tip of your spoon. Any small spoon will do. You can even try
a popsicle stick. This just tried out
different tools and see what marks
you get using them. So practice all these strokes. There. I gave these flowers
and I center. And there we have it.
Beautiful wildflower. Right? So you practice these strokes and I'll see
you in the next lesson. Your project for
this lesson is to practice different strokes
using different tools. So click a picture of your practice page and
share it in the gallery.
5. Project-Dandelions On Canvas: Welcome back. It's time for
our very first project. So let's squeeze out some
white paint on the clipboard. And let's apply the strokes, the practiced in the
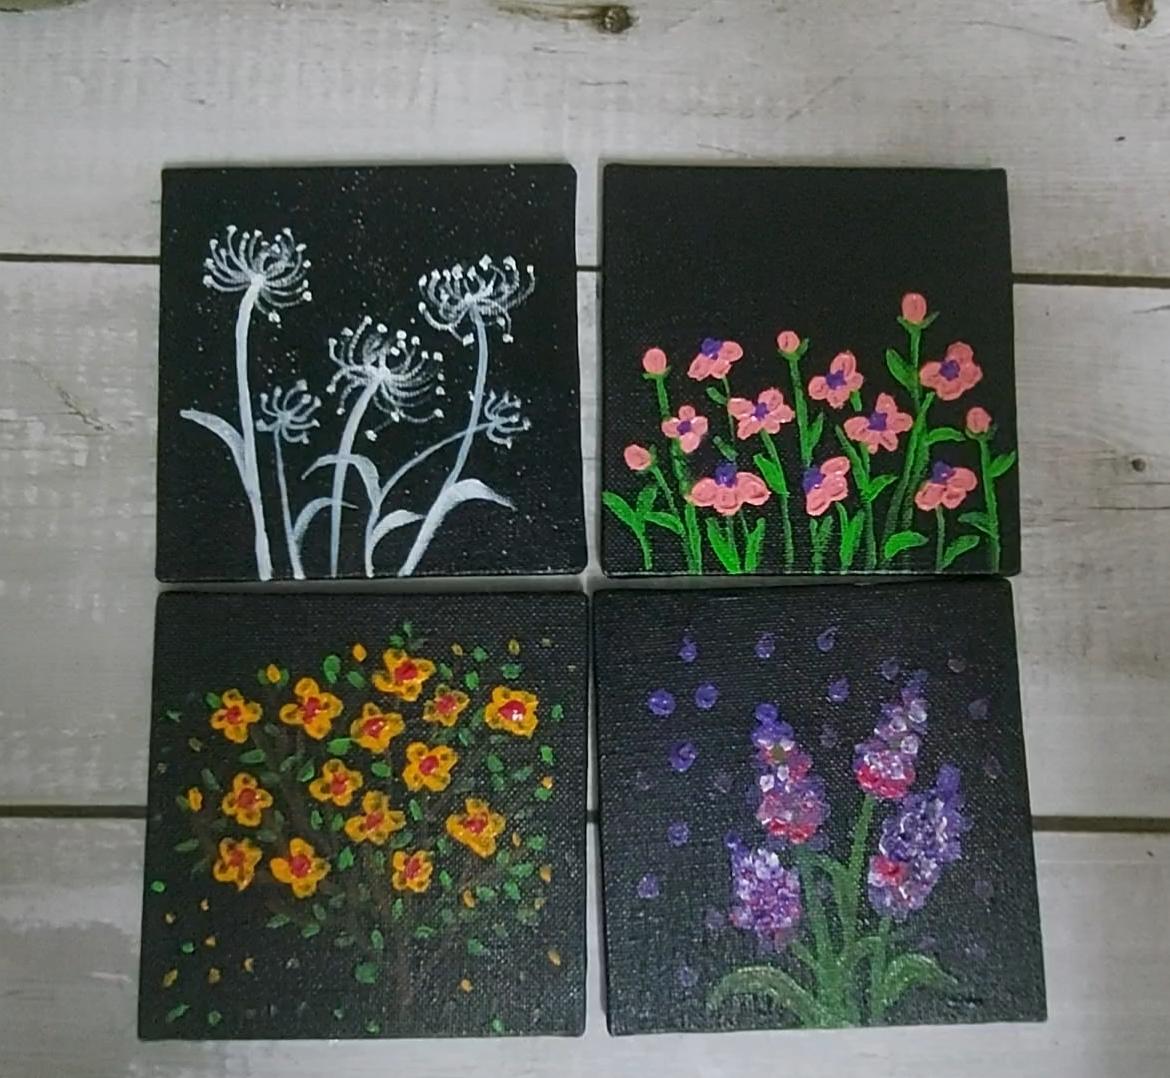
previous lesson. It's the, than the lens and
we have already practiced it. So let's get started. All we have to do
is make some small, small curvy lines
joined together at 1 or emerging out from a point, just like the practice lesson. And if you notice, right now, it will seem easier because we are using the
painted canvas right now. So brush movement
will be easier than what it was when we
practiced on a paper. Now, let's add a dot on the
top of each car like that. And there we have our
first Sandy and ready. Now let's meet all
the others like this. Bunch of curvy lines, dots on the tapes. It very easy and very simple to meet these
beautiful that aliens. And here's another one. Let's add one more big than
dealing to the composition. After that, if needed, we will add some tiny ones. Here. I have reversed
the process. I first meet a dot, and from that dot I'm making small curvy
lines coming out. So it's just the same thing. I have taken the reverse, but instead of making many tiny, there'll be lines
joining at a point. I first made the point, and from there I made lots of curvy lines coming
out of that point. There is no such
rule, no set rule. When it comes to art. You can follow any style. There's no wrong way to do that. It's a way of
expressing yourself. And of course, everybody's
expressions will be unique and different.
The perfect. So it's pointless to compare
yourself with someone else. Because no two people are alike. Everybody is unique
in their own way. And so is there There's
nothing is wrong or right. When it comes to add. It's just a process
that we all enjoy. And the final outcome
is always unique. Ghettos the stem, another one. And here's another one. Wow, it looks pretty as it is, but I'm going to add
some more tiny ones to the composition there. Now, let's add some leaves, exactly the way we practiced
in the practice lesson. Pressing the belly of the
brush completely on the canvas and dragging it and lifting
it. Just like that. Press, drag and lift. There we have it. Now, let's add a
finishing touch by sprinkling some white
paint on top of it. This step is
completely optional. I've made the bristles of my
brush really, really red. And I took some white gained in it in the wet brush and I'm just tapping it to sprinkle or splatter some
color for the texture. If you're not
confident about this, you can completely
skip this step. And if you're going for it, just make sure to keep other
canvases aside because I forgot and you see this platters on it. This is the final loop. The class project
for this lesson is click a picture of your dandelions and shared
it in the project gallery. The next lesson is pink flowers.
6. Project-Pink Flowers: Welcome back, my friend. In this lesson, we are going to make beautiful pink flowers. So let's squeeze out
some pink color on the clipboard or on a mixing
palette, in your case. And we're going to use
the palette knife. Or if you want to use the spoon, the tiny spoon as it did
in the practice session. You can completely do that here. Just like the practice lesson. I'm going to take some paint
at the tip of my life. And I'm just going to put
it on the canvas like this, making the petals
of this, my flower. And we are done. Now. All we have
to do is make as many flowers like this
as we want. Here we go. There are three
petals, four petals. Just the way you like it. It's as simple as that. Escape, rotating the
canvas time-to-time to have your flowers looking
in different directions. Just the baby do in the nature. And that's exactly what we want. Just some wild flowers
from our imagination, V naught aiming for any hyper realism or
realism in this class, such as go on, making all the flowers. Don't stress. Just relax
and enjoy the process. I think we have enough flowers. Now, let's add some bugs, and it's very simple. Just add single dots
here and then randomly. And you'll have them. And we're done now, let's add some stamens are the central part
of the flowers. There, we have it. Now let's add some statements or the center part of
the flowers for that. I'm using my tiny
detailing brush and I'm stippling some purple color
in the center of each flower. Remember stippling, be practiced it in the practice lesson. And right now it's
time to use that only. Dad. Once we are done
adding all the statements, let's move on to adding the stems and the
leaves to our flowers. So here's some bright
green on my clipboard and I go, dad. And they're very heavy. Monsoon has arrived
here in India. And as we paint these
wild flowers, you know, there is the season of wild
flowers here in my country. Let me know what is the weather in your part of the world? I would love to know that We have finished
adding all the stamps. Now, let's add some leaves. The pre-seen brush. We have reached the
end of this lesson. Looking how lovely
this Canvas looks. Your class project for this lesson is to
click a picture of your pink flowers
and share them in the project gallery for
me and others who see. See you in the next lesson, where we will make some
beautiful yellow blossoms.
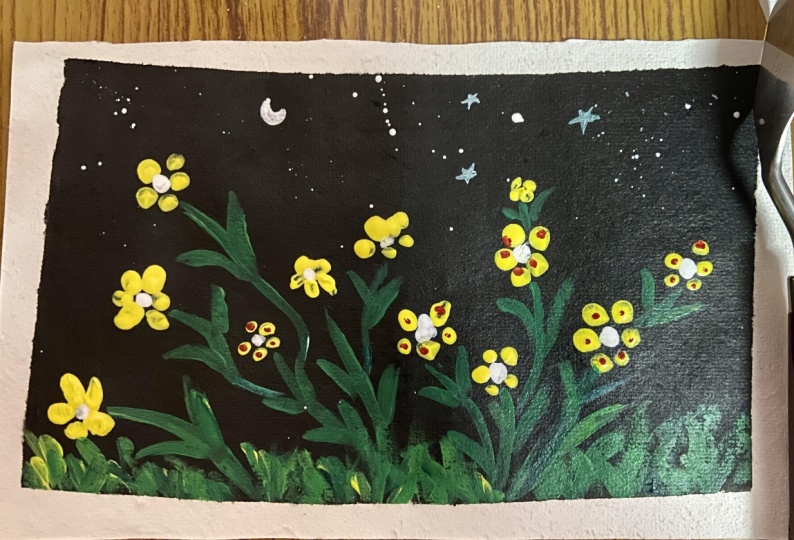
7. Project-Yellow Blooms: Welcome back and thank you
so much for joining me. Let's make some gorgeous
yellow blossoms. And for that, I'm squeezing
out some yellow color on my clipboard and fit a Q-tip. Let's get started. Just take some paint
on your Q-tip. Dab it on the Canvas, just like that,
making the petals of this beautiful yellow flower. We have practiced this step
in the practice lesson, so it's not going to be
difficult at all for you. Just go on dabbing, go on the canvas. And soon we will have a bunch of gorgeous
yellow blossoms. It looks so pretty
already, isn't it? Now, let's create
some dark pink color or a magenta color, and add that to the center of the flowers using the same
technique of the Q-tip. And there we have
our lovely flowers. Now I'm going to
take my dark brown to add some branches
to these flowers. I'm trying to give
it a feel of a tree, a tiny tree full of flowers, but you are free to add
the stems and the leaves, just the way we added them
in the previous lesson. So you are totally
free to do that. But here I am giving you an idea of how we can make it
look like a tree also, it's a variation due
the previous lesson. So here I go. You are totally free to make
it look the way you like it. Right there. Now, it's time to
add some leaves. So let's take this
same bright green. And let's add single strokes, tiny strokes for the leaf. Just like that. Very
easy and simple. I'm only touching the belly
of my brush to the canvas. And I'm getting these
beautiful tiny leaves. Again, it's like just making
the mark of my brush. So depending on the
brush you're using, you will have different marks. Or if you're using the
similar brush as me, you will have the same marks. But whatever the cases, one thing is for sure
that we are going to have a lovely mini Canvas at
the end of this project. There. It kind of looks
like an orange tree to me. I don't know why these are
all flowers and not oranges. But somehow it looks like
an orange treated rate. Let me know what you
think about this canvas. And here I'm using the
tip of my brush to add some loose petals flowing
in the air here and there. And I will also add some
loose leaves which are not attached to any
branch. Just like that. I'm also adding some yellow
dabs to the branches, tip of the branches to make
it look like the buds of the flower. Pro tip here. At any point, if you think you have overcrowded your Canvas, you can just use the
black paint to cover up some max and you get a cleaner
Canvas just like that. Alright, so with this, we have reached the end
of this class also. And the class project
for this lesson is to click a picture of your yellow blooms and share
it in the project gallery. Meet me in the next lesson
where we will mix up lavender.
8. Project- Violets & Purples: Welcome to the final
project of this class. And in this lesson, we are going to
beat some gotchas lavender with the
help of this Q-tip. It's a simple trick that we practiced in the
practice lesson. I took some purple color in the Q-tip and
I'm going to dab, dab, dab forming
a conical shape. This purple color. Once
I'm done with that, I will be touching it up
with magenta and white. And we will be done. It's as simple as that, and the results are coaches. Now let's add a dash
of magenta duties. And at that, just right like that. And we have our
beautiful lavender. Let's make a couple
of more like so. Now I'm going to add some
loose purple dots all over the canvas to just add some interest to the painting. It's completely optional. You can choose to skip it, but I really like it. Now. I'm squeezing out
some green and with that, I will be adding some stems
and leaves to my lab. Does. This step is also
very easy and simple. And we have practiced it
in the practice lesson, and we have also
added such stems and leaves in our
previous projects. So just go for it. It's easy peasy, just like that. With this step, our
painting is ready. But as you can see, I have smashed the
one of the lavender. And if you also have done
something like that, you can easily fix it by using some of the
background color. And I will take
the black color in my brush and I'll put
some dots over it. And it will create the gaps
between the purple dots. So if you have smashed your
lavender flower like this, you can fix it. On top of this. I will
be also touching up with a little bit of white
and a little bit of pink. And like that, we will fix our mistakes and
finish our painting. I could have easily
edited this part out, but I just wanted to
show you how you can fix your mistake with a critic
if you've made one. Now, I'm touching
up my stems and leaves with a dash
of brown, Not much, just a dash of dry brush over the leaves and the stems just to add some interests and dementia. And that's it. We're done with this project and we're
done with this class. Okay, just a little
touch up with white. And after that, we are literally
finally dun, dun, dun. So this is the end of this lesson and the
end of this class. Here are all four paintings
that we made in this class. I hope you enjoyed
it as much as I did. But don't go away. Meet me in the next video. I will share my final thoughts with you and I will show you a glimpse of the next class which I'm going to
upload next week. And it's going to be a
part of the same series. Alright, I'll see you
in the next lesson. Don't forget to share your
projects in the gallery.
9. Bye & Beyond!: And we reached the
end of this class. I hope you liked it. I hope you learn something. Don't forget to
share your artwork in the project gallery. I would love to
see them and don't forget to stay tuned
for the next class, which I will be
uploading next week. You can follow me here
on Skillshare to get notified about every
future uploads of mine. And the next class is going
to be beautiful and cute. Sky escapes, where we will
be painting some clouds and moon and sun in a very comic
way or hippy, odd way. So I'll see you in that glass. Till then. Stay happy, stay bless,
and keep painting.
 Manishaa Shriivastava, Artist, Art Educator, Author