Transcripts
1. Introduction: I really love sci-fi
films and creating a whole 3D scene with nothing but a single
still photograph. Like you, I don't have tens of millions of dollars
to devote just to VFX. Blender has become a
super valuable tool for me as a filmmaker to manifest
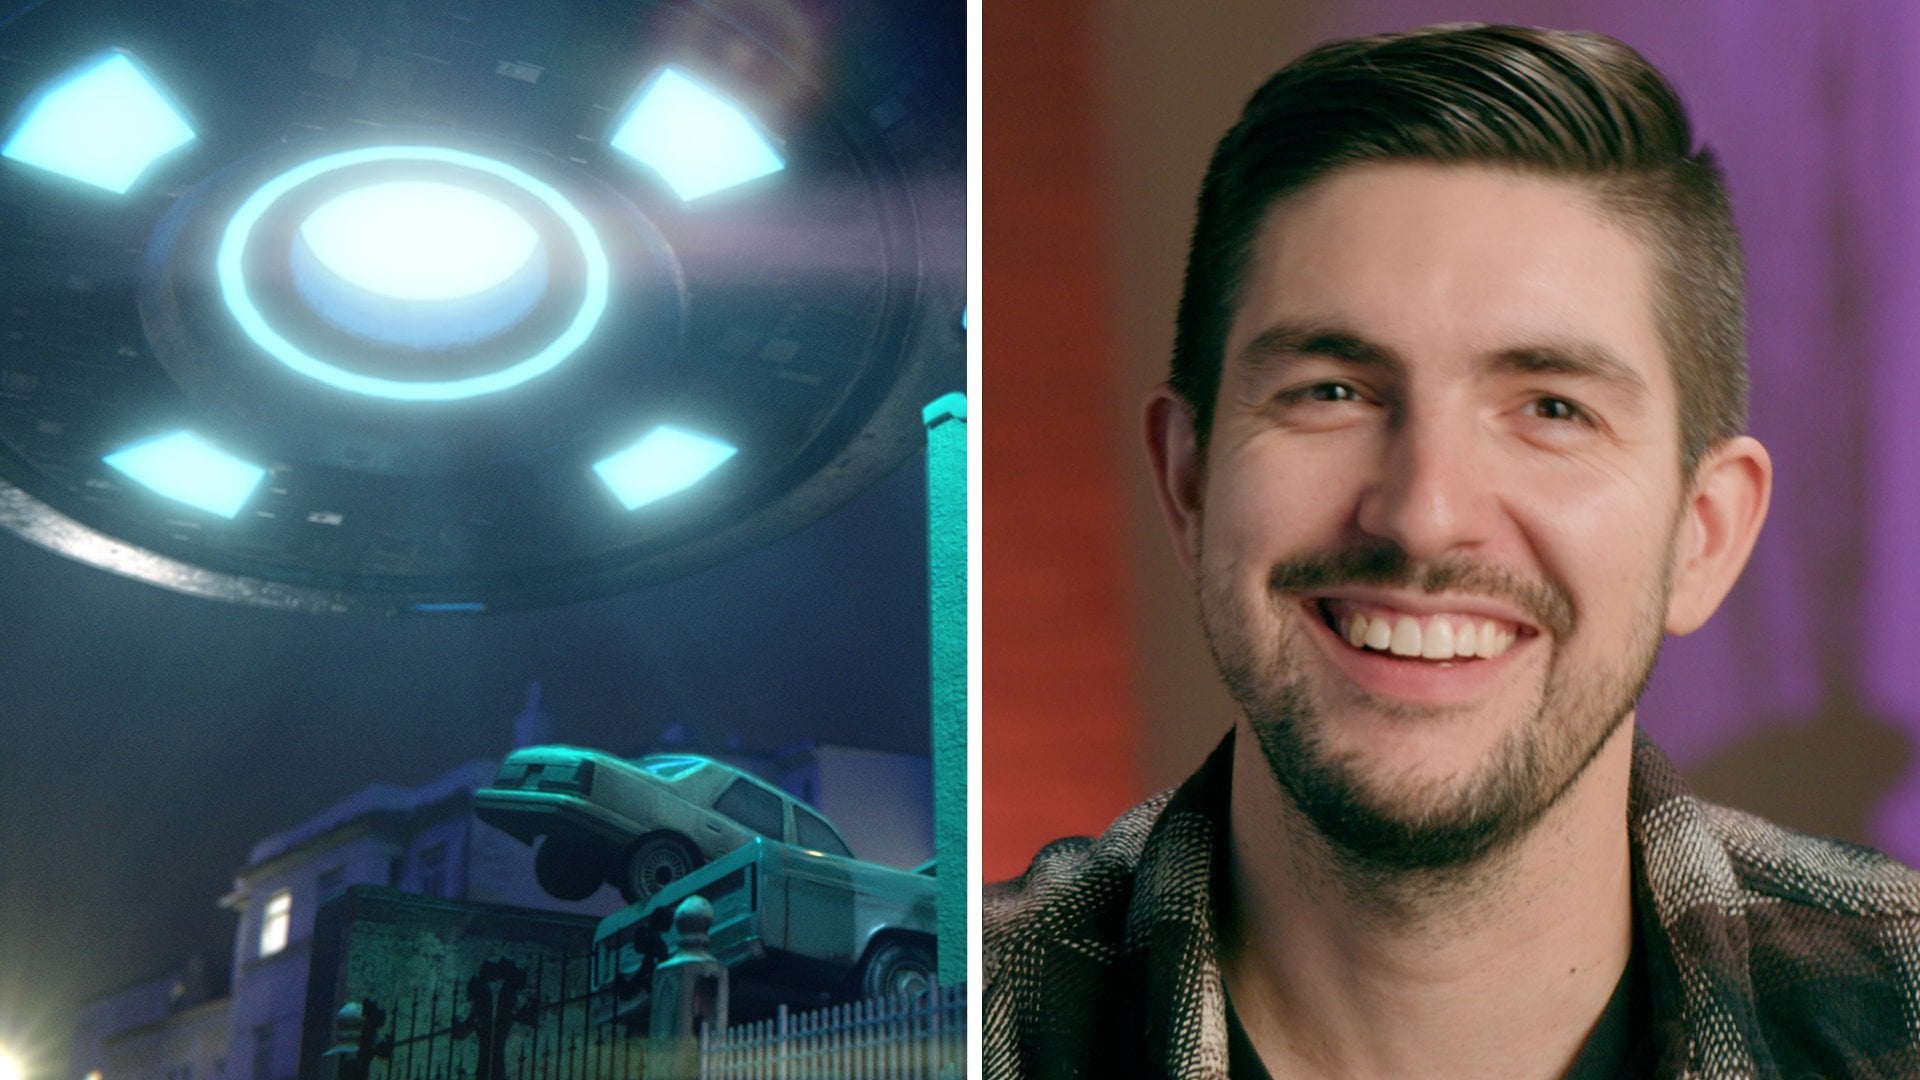
what's in my imagination. Hello, I'm Alden Peters, I'm an independent filmmaker, Motion Graphics and VFX artist. I directed a feature length
documentary called Coming Out on Amazon Prime and a
short film called Femme. I also worked on a sci-fi short film called
Friends of Sophia, where I did all the
VFX shots myself, and I also make
TikToks and YouTube tutorials of VFX
shots using Blender. In this class, we're going
to take a single photograph. Use a free software called fSpy to analyze
the camera angle. Bring that into Blender, create an entire 3D scene with geometry that matches
that photograph. Rendering out of Blender
and then compositing everything in after effects
to make it look cohesive. This is a class for filmmakers
who want to elevate the production value of the type of films that you are making. Ideally, you do know
the basics of Blender. Brush up on the basics
before diving in. There are going to be
five classes total, each one using different
techniques in Blender. When you do all
of these classes, you're going to end up with
your own sci-fi short film. There are so many
ways you can apply Blender to your filmmaking, and so hopefully you end up
with a project in this class that excites you to continue
your Blender journey. I'm super excited for you to follow along, so
let's get started.
2. Getting Started: I'm super excited you're
here. I'm Alden Peters. I'm an independent filmmaker, and I've been using Blender for VFX and motion graphics
for the last few years, including a sci-fi short film
called Friends of Sophia, where I did all the VFX
shots myself using Blender. By incorporating
VFX using Blender, I was able to make an entire
cyberpunk sci-fi world just on my computer at
home, completely for free. I'm super excited
to be able to share everything I've learned with you so you can do
the same thing, whether you're
making a sci-fi film or an independent drama. Some things you do need
to know for this class are the fundamentals of Blender. You should be able to
navigate Blender and know the fundamentals
before diving in. If you need to brush up
on some fundamentals, definitely check
out Derek Elliott's class here on Skillshare. There are going to be
five classes total, each one using different
techniques in Blender. When you do all
of these classes, you're going to end up with
your own sci-fi short film. I found that when
I do the most and learn the most when I have a project that I'm working on, rather than just
doing single shot. When you complete all
of these classes, you're going to end up
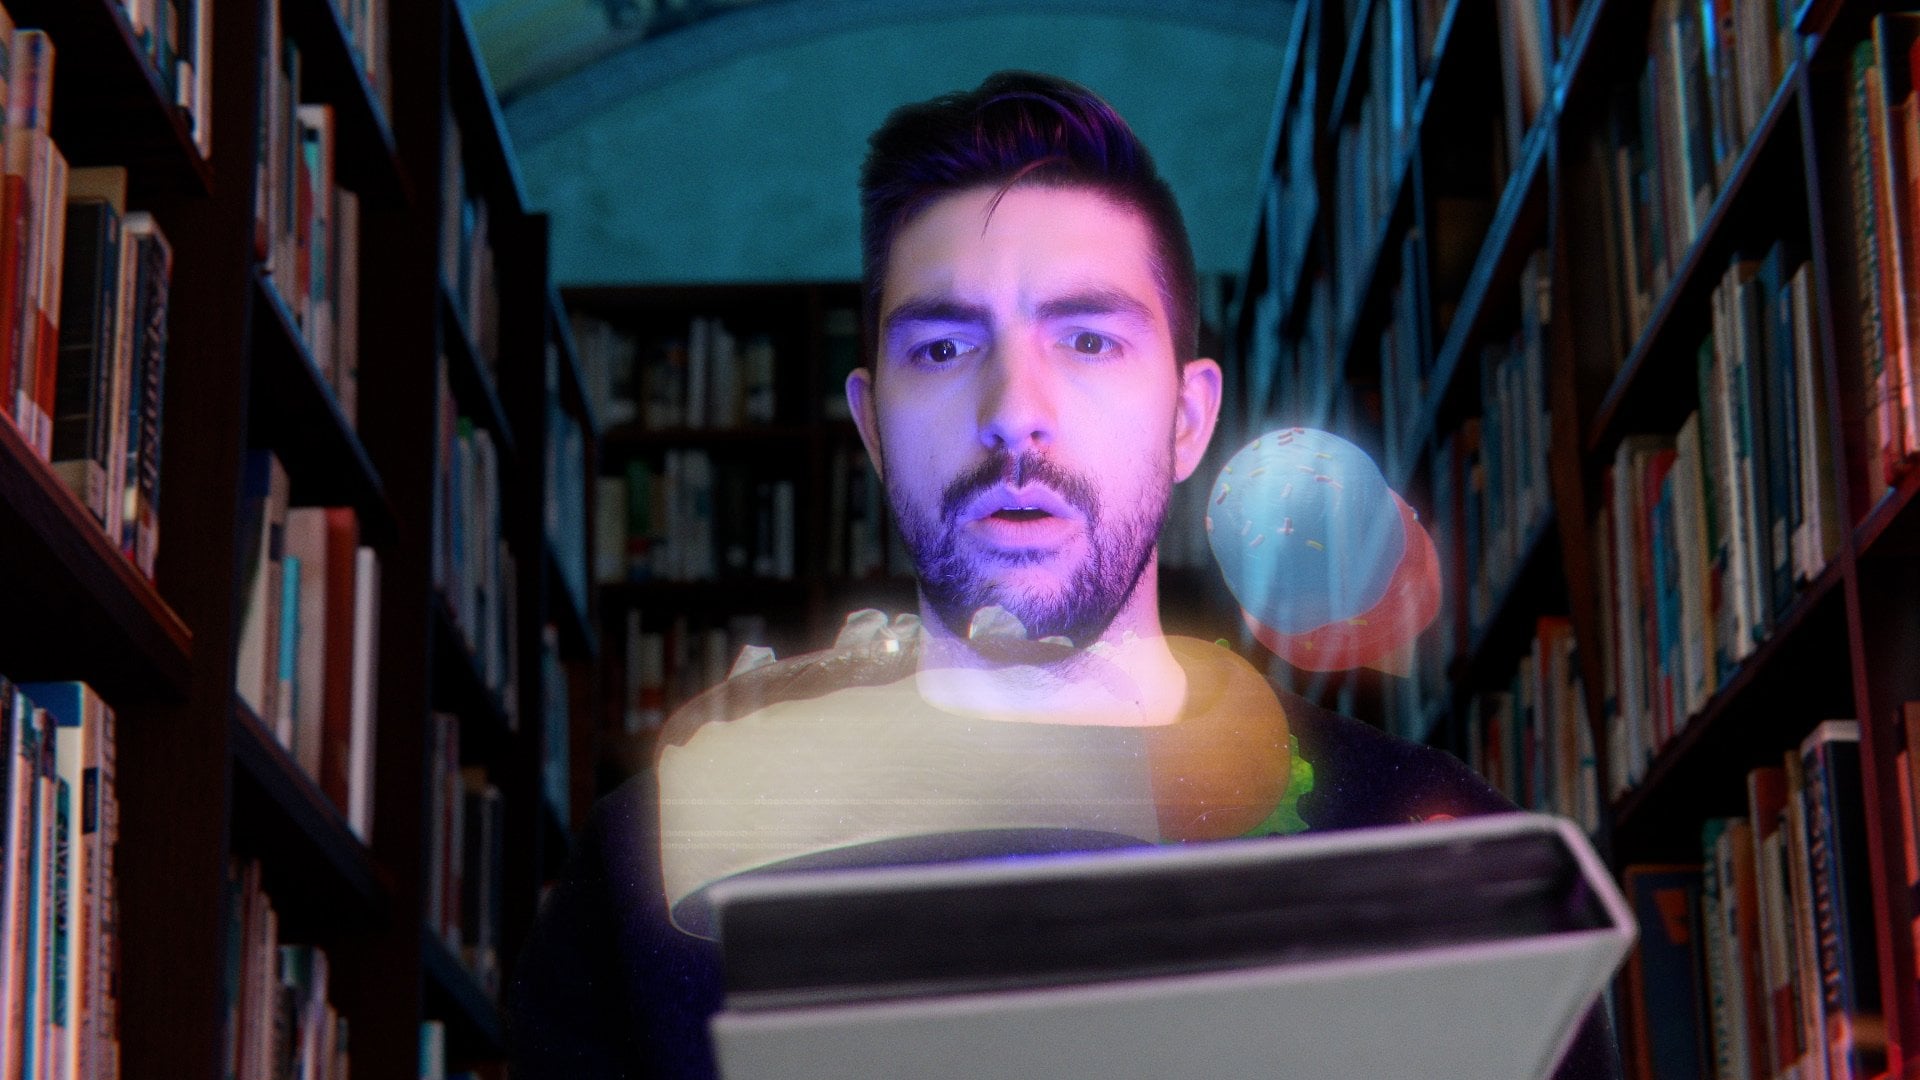
with your own sci-fi film, and that's going
to include taking a single image and creating a whole 3D environment from it, 3D object tracking and adding holograms to objects
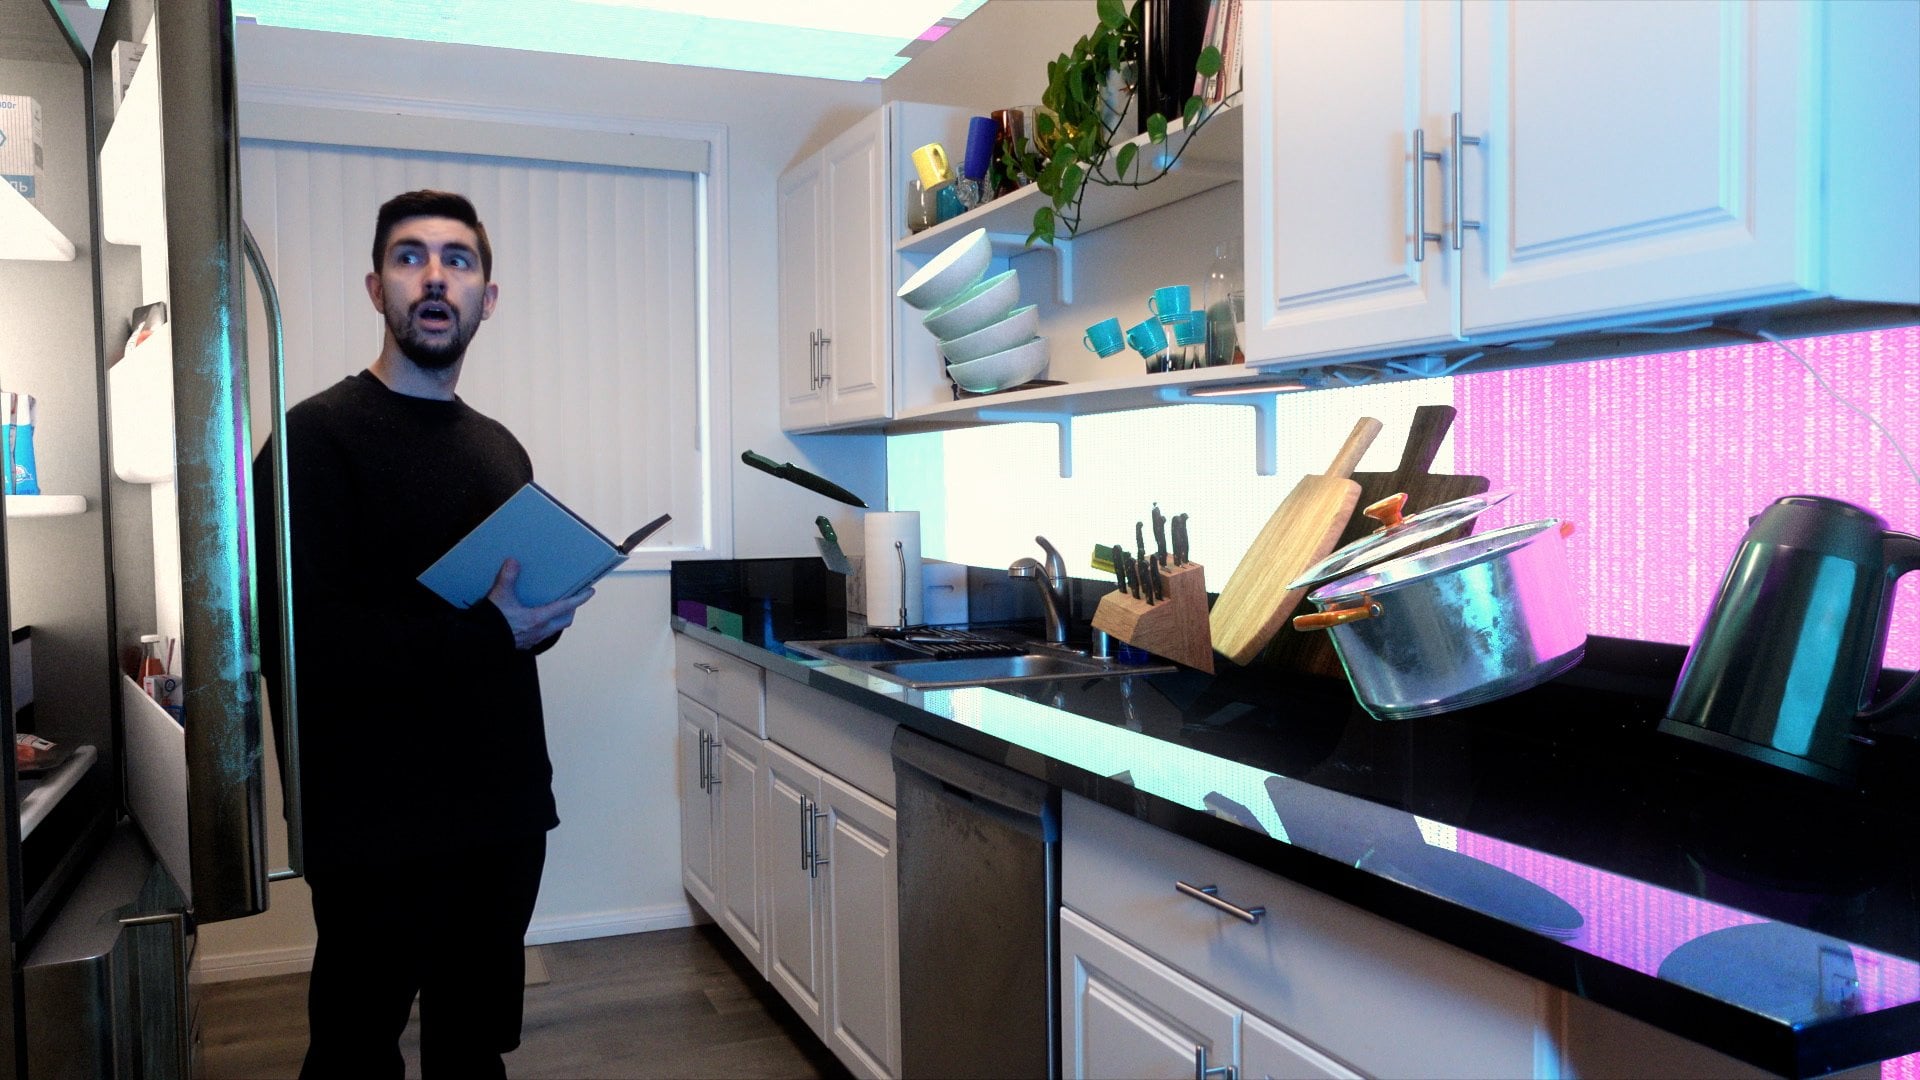
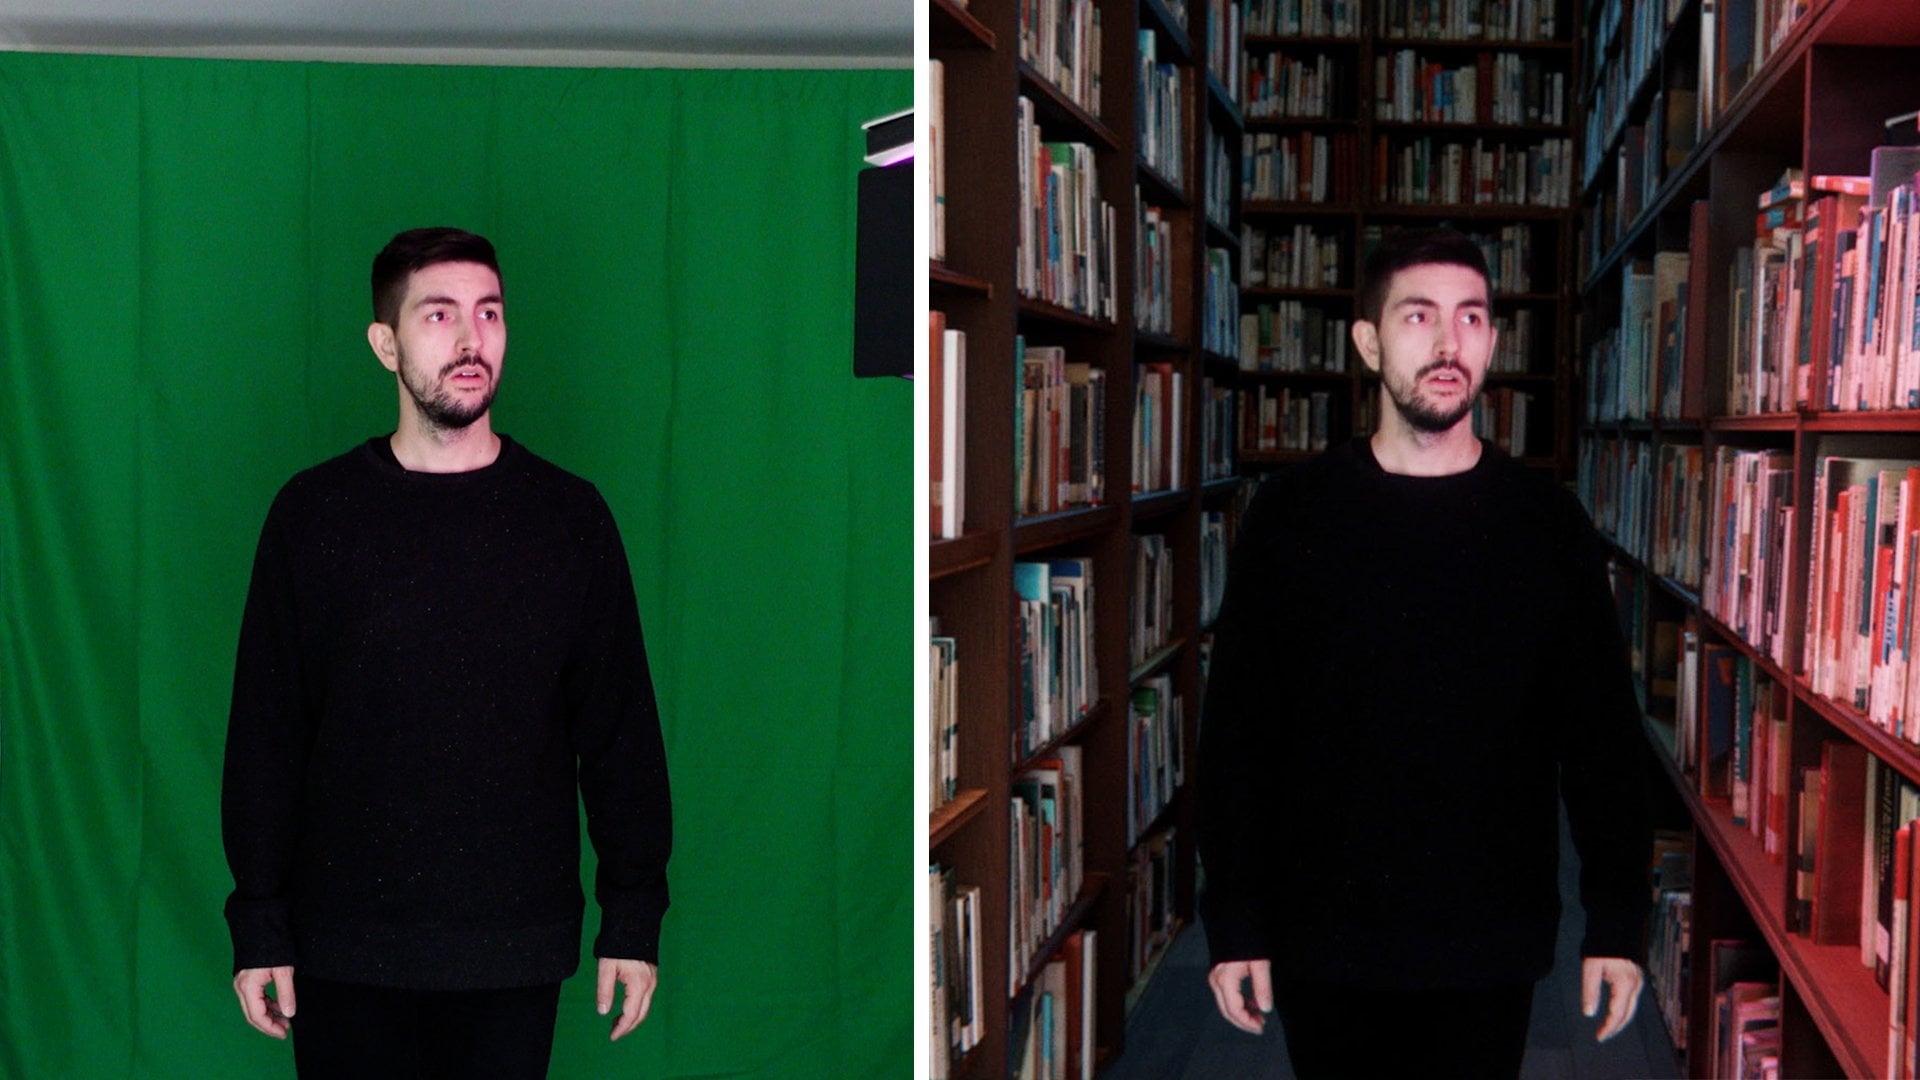
that you're holding, taking green screen footage and bringing that into a
3D scene in Blender, and doing a full
3D set extension. Motion tracking your
footage in Blender and then adding more of
a 3D scene to it. If you're ready to go,
download Blender and fSpy. Both of them are free
open-source software. I'll also be using
After Effects. I use 2023 and 2024. If you're using a prior version, the Alpha matte and luma matte functionality changes
a little bit. I'm going to use this
stock photo from Pexels. Pexels is a free stock
footage and photo website. You can download the
photo that I'm using in the class resources and follow
along using the same one. Now that we've gone
through what you need, let's move on and
start with fSpy.
3. Using fSpy : Now we're going to
jump into fSpy. This is a piece of software that helps you analyze an image and recreate the camera angle and determine the
camera focal length. This is an image of an alley that we're
going to be using. I did photoshop out
some signs already. But when you're
looking for an image, whether you use this one or
another one from Pexels, you want to look for
something that has very clean geometric
shapes on the buildings. That is going to make
your life a lot easier. If you're choosing
an image, ideally, it is landscape because
that's going to be the orientation of the
shot that we're making. But you can use a
vertical image as well. The difference, though is
you're not going to have as much wide latitude
within that shot, so you're going to have
to punch in a lot more, and it's like cropping a vertical image down into
a landscape proportions. To start with, open up
fSpy and you can just drag your image right into
this piece of software. There's a dim image option here that helps you
see these axes. I like to turn it off just so I can see the image
a little better. Then we have these handles. Some are labeled x,
some are labeled y. We can also go up here and
change some to z if needed. We're going to align
those to the x y z axes we see in this image. You're going to look
for clean lines. I'm going to change this one to z because we have
these buildings. Once you have something
roughly lined up, you can see this origin
point as you drag it around, the shot be pointing
along those axes. But first, let's refine them. If you hit shift while you
are lining up these handles, you can get a much more
refined placement. Now when we drag
around this cursor, you can see that it's lining
up fairly accurately. The y needs some
work over there. Let's find maybe a place up
here on the window instead. You can see that now this
y is lining up with all of our geometry here in the image. Now, wherever we place
this cursor is going to be the origin point in
Blender. Choose a corner. I'm going to hit Shift and drag it over here to the
edge of this building. Then save your fSpy project. Now that we're all
lined up and have this fSpy project saved. Let's open up Blender and
move on with our scene.
4. Scene Setup: Now it's time to
open up Blender, and we're going to set up
some project settings. This is what Blender looks
like when you first open it. We're just going to start
with a standard project here. Over here in this tab,
we are going to go to our output here, and this is where we can
set up our resolution. We're going to be
working in 1920 by 1080, but if you were doing 4K
or anything like that, this is where you would
change that setting, and also your frame rate 24-2,398 if you are working
in that frame rate. The next thing we're
going to do is install the fSpy add-on. You can download that
add-on in the same place where you download the fSpy
software on their website. It's going to download
a zip folder, don't open the zip folder. We're just going to
install the whole thing. In Edit, Preferences, click on Add-ons, and then we're going
to choose "Install". Navigate to where you saved
your fSpy Blender plug-in, click on the zip folder, and choose "Install Add-on", then toggle it on. Some other add-ons
we're going to activate now because we're going to use them in this class, and more classes
are Node Wrangler. If you search node wranglers here and you just toggle it on, a lot of blender
add-ons come installed, but they're not activated, so you can choose which ones you need based on the project. The other add-on is import
images as planes right there, and that should be good
to get us started. Select everything in your
project and hit X to delete it, and then go to
File, Import, fSpy. That menu option is going to be there once you've
installed the add-on. Navigate to where you saved your fSpy project and import it. If you split the frame here, what this did was
import a camera, the origin point in Blender is the point in fSpy
where we set it, and all of our x, y, and z axes in Blender line
up with the shot itself. This camera has the image we
used as a background plane. The first thing we're going
to do now is start to create some geometry that
matches the image itself. Later, we're going to project our image onto that geometry, and that'll give us
the 3D environment. To start, Shift A
and add a plane. Let's rotate it on the
x-axis 90 degrees, and on the z-axis 90 degrees. We're going to line up
the bottom quarter of this plane to the origin
point in Blender. You can go into Edit Mode, and when you have
an edge selected, if you hit G and then either x, y, or z, it'll be
locked to that axis. If you hit G and then y, we can move this plane
along the y-axis, and G and then z, we can
move it up on the z-axis, and that'll give us a plane that's lined up with
this building here. If we want to see
this a little better, we can go into the visibility here and
choose MatCap and random, and that's going to
give each piece of geometry its own unique color. You have to do it
in both windows, if you have two windows open. From here, we can,
still in Edit Mode, choose the bottom,
hit E to extrude, and then X along the x-axis and move it along the ground there, and then also E and then Z
to move it up on the z-axis. We will take these
two sides and extrude them along the y-axis
down the street. Add a loop cut and line it
up with this building here. Hitting X to extrude this
street down that way, and then choose these two edges there and E and extrude
them upon the z-axis. I can also Shift
A and add a cube, and we're going to line this up to the building in
the background. Now that we have some depth, move it down along the z-axis, and scale it to line
up with that building. Hit L to select all of the
faces of this geometry, and then R and Z
to rotate it along the z-axis to get
that angle correct. I'm going to continue
adding geometry to the scene to add more detail
to the background buildings, ledges along the building, and different elevations between the street and the sidewalk. That's going to take
me a few minutes, but we'll meet here
when I'm done. Because this image is an old, looks like a European alley, there is some inconsistency to the straight lines of the
sidewalk and the street itself, just because it's
old Copplestone, so I had to go in and manually adjust some points to get
everything lined up and split the geometry a
little bit so I could focus on just the road
and then each building. Now that I've added
that geometry, I'm going to join
everything together, and then I'm going to
add a material using that alley image as
an image texture. Now, let's join our geometry. If I select everything in here and hit
Control or Command J, that'll join all of
our separate shapes into a single piece of geometry. Now we're going to add
an image texture to it. Up at the top of Blender,
there's a Shading tab, which changes some of
the window layout. You can use that if
it works for you. I'd like to just click
and drag and open another window here and
choose Shader Editor. To start with, here in the
Materials tab, click New. This is going to give it
a principled BSDF shader. We're going to drag
the alley image right into our Shader
Editor window. Choose the color node here and drag it into base
color in the material. If we change our view
to viewport shading, we can see that our image
is now on this geometry, but everything is way off, so we're going to add a couple more effects
to make this work. First, I'm going to turn off the background image on
the camera here so I can just see the material
that I'm working with. In the Modifiers tab, under Edit, choose UVProject. In UVMap, choose UVMap, and Object, choose
this ALLEY.fspy. That's the name of the
camera that got dragged in. We can start to see things
lined up a little better, but first, we have to set up
our aspect ratio right here. I'm going to pull up the
information from this image. The dimensions are 2784 by 1856, and I'm going to put that in
here in the aspect ratio, and that will get the image properly lined up
with our camera. In our material, if we
change repeat to clip, we'll see where the
image is clipping. Over here in the
non-camera view, you can see where the edges
of our shot have to be. Already, we have a 3D
version of this image, so we can add a new camera move, but let's add some more
geometry into the scene. Over here on the window
on the left side, if I add some loop
cuts to this geometry, I'm going to get a
lot more detail, especially when I add lights
to create new shadows, so I'm going to add
some loop cuts. I'm going to find all of
the edges of the window and the edges of all of the dividers between the window panes. Everything that I
think is going to have a slightly different depth. In Edit Mode, I'm going
to choose a loop cut, and since everything should
be pretty much aligned, I'm just going to go find all of the edges of this window on the outside and all of the dividers between
the planes of glass. Sometimes things aren't going to be super perfectly aligned, but this process that we're doing here with the projection of the texture is a little bit forgiving, so
that's okay for now. Then I'm going to select
all of the window panes, and hit E to extrude
them backwards. Just to see what I'm doing here, I'm going to add another
material by clicking this plus icon here
on the Materials tab, and I'm just going to call it something like
storefront windows. Since the window panes
are already selected, I can click a sign, and that's going to give
it this new white texture. It looks like I pushed the windows back just a little far, so I'm going to select them
again and hit G and X to move them along
the x-axis until I get some of this incorrect
projection fixed. I'm going to continue
this process with different windows and doors that I see throughout the scene. The more time you spend
here and the more detail, the more payoff you have later. It doesn't take too long
because everything is pretty much aligned on
the x, y, and z axes, so just spend a little time to do it and then meet
back here when you're done.
5. Adding a Camera Move: Now that we have all of
this geometry in our scene, we can add a new camera and
create a new camera move. To do that, hit Shift A camera. It's going to pop up here
on the origin point, so let's move it near enough
where this F spy camera is. If you toggle this down
and click this green icon, this will become
your active camera. Here in object properties. Let's just turn off some of this rotation until we
get something like this. One thing that I find
helpful in this stage is in the camera settings
under view port display. This pass partout setting, if you turn it up, it's going to make everything
outside of your shot black. I find that I think
that my shot is wider than it is if I'm
seeing it in the frame here. So this just helps you see
exactly what's in camera. I'm going to add
a slight push in. So we're going to move in and
rotate toward the window, where we're going to be
adding some detail later. We're going to do that by
adding some key frames. In your object properties here, you can keyframe in two ways. One is to hover
over a property and hit I That's going to
create a new keyframe. The other thing
you can do is when you have an object highlighted, you hit I and you can choose which properties you want
to add a keyframe for. For now, let's add this as our first keyframe.
Move forward. Hit G. Maybe you add some rotation
here and hit I again. That's going to give
us this camera move, and that has all of
the parallaxing of a 3D environment instead of just panning across
a single image. Now that we have all of the geometry and camera setup for our scene, the next class, we're going to move
on to 3D modeling and texturing to make everything
look much more photo real.
6. 3D Models, Lighting and Texture: Now that we have
the scene set up, we're going to add
some lights and new 3D geometry to
add some more detail. The first thing I'm
going to note is the different render
engines within Blender. There's Eevee,
which is real time, and cycles, which
is ray tracing. Eevee is going to give
you an approximation of how light is going
to act in the scene, and cycles is going
to actually calculate every pixel where the light hits and goes back
toward the camera. Cycles takes a lot
longer to render out, but the details are
much more realistic. Depending on what kind of
computer you're using, you might have to use
one or the other. We're going to use cycles for
the rest of this project. But sometimes it's helpful, especially when you're
adding 3D geometry, to keep everything in Eevee so that Blender
doesn't crash, and then switch over to
cycles for final adjustments. Switch over to viewport shading, and this is going to
give us a view of the scene with all
of our lighting. Nothing is happening because there's nothing in there yet. But if we hit "Shift A", add an area light, move
this around, rotate it. Then down here in your
object data properties, let's boost this up to
something like 1,500, so we can really see
what's going on. Then let's move one down
at the end of the alley, change it to something
like 500 instead. Then if we just
change the colors just to see what's going
on here a little bit more, this is when we're
going to start to see a lot of the detail
that we added here. We can see that this
light is shining properly on all of
these buildings, but the more extrusions we do, the more this is going
to look realistic. If we switch over to cycles, it takes a little bit to load. But one thing you'll notice
between the two is the way shadow fall-off works is a
lot more accurate in cycles. Now I'm going to set
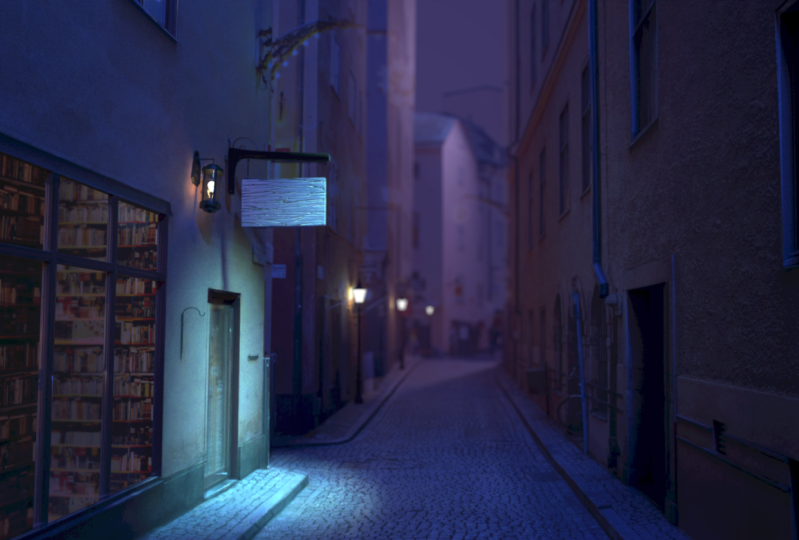
up these lights, and basically,
relight the scene. What we originally had was
an alley in the daytime, but we're going to make
this take place at night. I'm going to take this
light in the back, give it a cyan hue, and have it shine
down from up there. I'm going to do something
a little similar here. I also see that there
are some lights within the shot itself, so I'm going to add
some warm hue lights here to mimic what's
going on there. I will add a point light, since it will emit
in all directions, and line this up as best I can. Something like that.
Then just switch over to cycles to get a more accurate view of how
your lighting setup looks. You can keep playing around and make this scene look
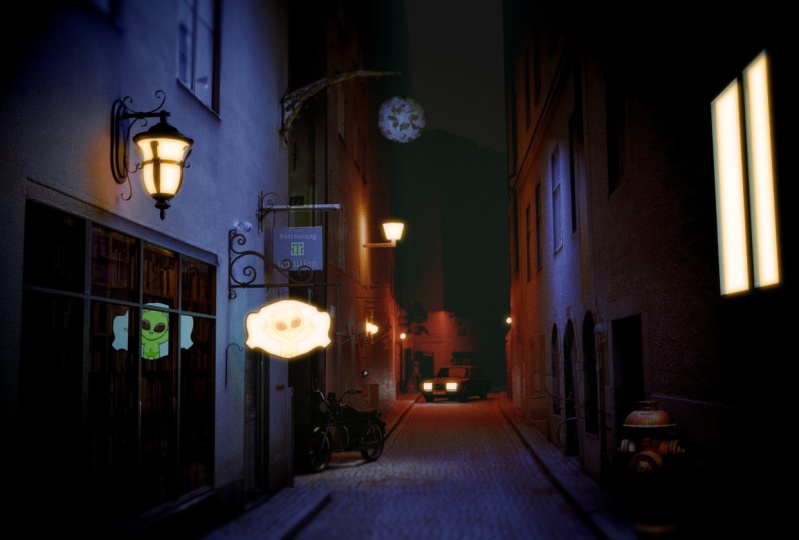
however you want. I'm going to add some
more cyan lights right above the store, just to direct the audience's attention towards
the store front. Now that we have some
lighting in place, we're going to work with
the materials to give it even more texture so
it feels more real. To do that we're going to
go into our shader editor. One thing we'll notice is
that the buildings are pretty uniform in texture and in
roughness, or shininess. We can take this image and just drag it right
into roughness. If we hit "Shift A" and
add a color ramp node, drag it between those two, we can adjust how this looks. Now that we have node
wrangler installed, we can use Ctrl Shift
click on any node, and you will see the
view from that node. For roughness, this
color ramp is going from all the way black
to all the way white. Everything that is full black in this image is going
to be zero roughness, so it is completely shiny, and everything that is full white is going to
have full roughness, which means it'll be
completely matte. The first thing we can
do is adjust the sliders to change which parts of
the image have roughness, and then we can bring the black way up and
the white a bit down. That's going to give, like
when you see up here, some variation in roughness. This texture in the image
that could be something like water dripping down the side will be more reflective than
other parts of the image. The next thing we can
do is add a bump node. Shift A, bump. We're going to plug this
normal into normal, and we're going to take
this image texture and put it into height. This is going to
take that image data and turn it into bump data. This is like slightly
extruded sections of the image itself. If we turn this way way down, we are going to have some
more subtle variation here in the wall, and again, that is something that
when we switch to cycles, we're going to see in a
little bit more detail. The next step is
going to be adding even more geometry to our scene. You can go in and extrude doorways and windows to
add more of that detail. We can also bring in 3D models. You can find free 3D models on sites like Sketchfab
and TurboSquid. There's also a free
add-on called BlenderKit, which when installed
allows you to download free 3D models
right within Blender. First, let's download
and install BlenderKit. You follow the same process, which is go into Preferences, hit "Install", and choose
the BlenderKit zip file. Click this box, and that
activates the add-on. Now, if you hit "N"
over in this side menu, you're going to have
a BlenderKit tab , and from within this tab, you can search something
like street light, down here in search filters
if you choose free first, and there are all of these 3D models you can
download with a single click. I'm going to download
these orb lights just because they look sci-fy, and I can replace the lights in this scene
here with a 3D model. With one click, that
model is downloaded. It'll pull up here in
its own collection and have an empty that you can
control everything with. If I move this light down here, or even install it maybe right
here above the storefront. If we go into render view, and in the materials of
this, we have an emission, so we can adjust the
color a little bit. No. It's a little bit cooler
to match our scene. If you download an OBJ file or an FBX file from
Sketchfab or TurboSquid, here's how you import
that into your project. Choose File, Import, either OBJ or FBX, depending on what kind
of file you downloaded. Let's try this
one. Hit "Import", and this is going to
import a model of a sign. We can scale that
down and put it in place above our storefront. A lot of times when you
download these models, the materials won't be linked, and it'll show up as magenta. We just have to reconnect it. A quick way to do that
is just to go to File, External Data, Find
Missing Files. Navigate to where you have your 3D model saved and
choose find missing files. Sometimes it takes a second, sometimes it's pretty quick. We are going to replace
what's in the sign, but we have the other
materials ready to go now. This is a really fun part of
the process where you get to add a bunch of 3D models
and stuff to your scene, and start creating
something new. Using Sketchfab,
using TurboSquid, using BlenderKit, there's
a ton of free stuff out there that you can
download and have fun with. I'm going to do a bit of that and then meet you back
here when I'm done.
7. Adding Details and Movement: Now we're going to add some
detail into the storefront, so I'm going to import
images as planes. This was that add-on
we activated earlier. Then I'm going to
navigate to where I have some library imagery saved from pixels and that's
going to bring in that image already on a
plane with its own material. I'm just going to rotate
it and set it inside it a little bit as if there are bookshelves behind
this window here. With the storefront
windows material , in this drop down here, if I change it to glass and
then look in rendered view, I can see through this
pane of glass here. In the Shader Editor for
this glass material, I'm going to bring the
roughness down so that I can see through the
glass a little clearer. I also I am going to separate
this glass geometry, so I'm going to select
all of the faces, click "P", separate
by selection. Now this pane of glass
will be its own geometry. I can delete the non
glass materials from it. I'm going to add an
area light inside the store and shine it
onto the bookshelf plane, and keep tweaking and making adjustments until it
starts to look right. Then shift a image
images as planes again, and I'm going to navigate
to another library image. I'm going to scale and
position this image. With this first one, I'm going to go into the modifiers tab, add an array so that I can tile that image a couple times left and
right and up and down, just so I can get
these bookshelves to fill the inside of
that storefront. You do see a little bit of
a scene between the books, but I can disguise
that right behind that horizontal divider between glass planes on the storefront. In the second image texture, I'm going to add an
RGB curves between the image and the
base color and just adjust some of the contrast and color so that the two images match each other a
little bit better. Make some changes to
the interior light and then render out
a quick test image just to see how
everything's looking. But this is basically
how we're going to create an interior to
our storefront that also has a bit of parallaxing between the window and the two bookshelves within
the building as well. For the storefront sign, we're going to use
the UV editor to change the image that's
on that 3D model. In this 3D model, if
we tap into edit mode, we have this sign material here, and I'm going to
drop in this image. This is something that I made in mid journey that just has an alien reading a book and books
written in a Sci-Fi font. I'm going to open another
window down here, the UV editor window. Now when I tab into edit
mode with our model, and I select the faces, I can hit "U" unwrap, or if I have it all squared up, I can choose U,
project from view, and then that model
is going to be projected directly
onto this image here. In this UV editor window, if you scale and the same keys S and G to scale
and move things around, you can set up which part of your image is visible
on that geometry. Then in our shader editor
with the sign material, I'm going to drag the color down into the
emission node here, and turn that up to
something like one. That's going to
make the sign glow, which doesn't make a
whole lot of sense, but it's a Sci-Fi bookstore, so we can have a little bit
of creative license here. Another thing we're
going to do is add some movement to the sign. We have the lights shining on the storefront and the sign
waving back and forth, just to draw the viewer's eye to that storefront
as much as we can. To do that, we are going
to animate shape keys, and shape keys allow you to animate the shape of
the geometry itself. Instead of controlling
the global position or rotation of an object, we're actually adjusting
the mesh itself. With the sign selected, go into the object
data properties, right now, there's no shape
keys on your mesh at all, so we're going to click "Plus". This is basis, so this is the mesh as is and
hit "Plus" again, and that'll generate a Key 1. With this Key 1 selected, if we go into edit mode, and let's say we moved this over here like this and we
tap out of edit mode, it goes back to normal. But then we have this
value here where we can transition from the
basis to the shape. What we're going to do
is animate the sign swinging forward. Undo that. To do that, I want this sign
to hinge from right up here. If I select the bar right
above it, hit "Shift S", I can move the cursor
to selected and that brings this
main cursor from the world origin to the center of the plane
that I had highlighted. If you hit "L", you will select all vertices and edges
connected together. If I do that on the center part of the sign
down here on the bottom, and then also each of
these little shapes. Then there's this drop
down up at the top, the transform pivot point. If you click on that
and choose 3D cursor, this is going to rotate around where we just
place that cursor. We want to rotate it
along the x-axis, but as you can see, we just have the sign selected, but
none of the chain. There is this proportional
editing tool here. When you have that selected, whatever edges or vertices
or planes you have selected, it'll also in a fall off, select everything
else around it. If we rotate this now along the x-axis and scroll our
wheel up and down, we can select more
or less of the mesh. If we slide this forward
and tab out of edit mode, we can then animate the
sign moving forward. We have a minimum and
maximum range right now, it's zero, which is here and
one all the way forward. But if we set this to -1, we can also animate it
the opposite direction. We can add a little bit of
swinging on the sign here. To do that, go to
our first frame, hit "High" on the value. Go forward 10 frames
or so, move it back, move forward at a keyframe. This is going a little fast, so let's just space these out a little bit until we
get something we like. There's something
subtle right there. Then we can repeat
these keyframes here. In this dropdown, if we change from our timeline to
our graph editor, we have all these keyframes,
and we see a graph. It's similar to
the value graph or the speed graph that you
can see in after effects. But if we select everything
with A and hit "Shift E" and choose make
cyclic F modifier. This is going to repeat those
keyframes indefinitely. This will give us
a constant motion of the sign swinging
back and forth. As you can see, it jumps
a little bit because we also need to copy and
paste the first keyframe, so the animation ends
at the beginning. There we have a swinging sign. You can continue to use
these resources and techniques to add as much detail as you'd
like to your scene. This is the really fun,
creative part of the process where everything you start adding just makes it
better and better. In the next lesson,
we're going to go over render settings and compositing everything
together in after effects.
8. Rendering Your Video: Now, we're going to go over
render setting in Blender. In the Output tab, there are in this dropdown, you have a ton of
different options from Video to PNG's image sequences, but we're going to use an
EXR multilayer sequence. The EXR image sequence is
going to allow us to take multiple render passes
and keep it all together in one single file and
then in after effects, we can split up those different render passes and
composite them together. This way you can avoid needing to render through your scene multiple times to get each of those passes. You
can just do it once. When you first choose EXR
multilayer in Blender, your codec is going to
be set to lossless. We can change this
to DWAB lossy. This is a slightly lossy format, but you're not
going to see any of that degradation in quality, and it'll keep each EXR file about the same size
as a PNG so it keeps your exports fairly
small versus rendering out like a full ProRes
video version of your shot. Up here in the View
Layer tab here, we can select which different passes we
want to render out. Combined will be checked. Combined is how your scene looks to your eye so when you
view it in rendered view, that's going to be that version. But there's also
other little things we can include here too. The mist pass is going
to give us a gradient from black to white of the
distance from our shots, so as things are more
in the distance, they're lighter, so
in after effects, you can use that to
composite volumetrics or use a camera Lens Blur
and use this as a Luminar. The emission layer
is going to have just the materials that have an emissive
texture so that's all of our lights and the sign and that
way we can control just those areas and add some glow to the
all of the lights. The ambient occlusion is just a nice clay render of our shot so we don't really
need this for compositing, but for posterity, it's
nice to have so we can have our 3D scene
with no materials, no lights and see all of the
3D geometry in our shot. Once you've activated
the mist pass, the controls for the mist
is in the World tab. Mist is a little annoying because it exists
in three spaces. First, you have to turn it on. You can control the start
and end in the World tab, and to see where the
start and end is, you have to do that
through the camera. If we go into the camera in the Viewport display
here, if we choose mist, we will be able to
see a line here that has the start and the end
and then in our World view, we can adjust how close and how far that mist point
starts and begins, so that depends on
your shot itself, and if you think
you're going to want more blurring in the far back
round or the entire thing, you can have it more
of an extreme gradient or more of a softer gradient. The other part of
your render setup is if you're using
cycles, sample count. It is by default set to 4098, which is extremely high. That would be detail
for every single pixel in a 4098 frame. We
can bring that down. I usually start at around 250, I found that that's
generally a nice balance between getting the computer
to render at a decent speed, but also preserve
some of that detail. If you render something
out at too low of a sample rate, all of your, especially your
reflective materials are going to start
looking really muddy and they're going to be
flickering and that's because it is taking an average of a whole area of your frame rather than
focusing in on a point. If you do a render and
it looks a little muddy, especially from
the denoiser that is already active in Blender, you might want to
try just rendering the shot out again with
a higher sample rate. But for this purpose, let's do 250 and
see how that looks. The denoiser is
already turned on, so we can leave that as is. If you're rendering in EV, you might want to turn on Bloom, which is going to
add some glow to your emissive textures in your shot and ambient occlusion, which will add some
more detail to the shadow regions
within your shot. The other reason
we are rendering out with an EXR image sequence instead of a video
file is that if Blender crashes or if something, you lose power or
anything goes wrong, you still have all of
those frames rendered out, and you can just pick
up where you left off. That way if you're rendering out a single ProRes video file and there's an issue
that's all wasted time. The other reason that
that's nice is you can do a test render of 10,15 frames, bring that into after effects, and see how it's looking so you don't have to
wait to render out your entire shot to see if you need a higher sample
count, for example. Now that we have
this all set up, let's render out our shot, this could take overnight or most of the day s
I'd like to set up my renders for the
end of the day when I no longer need to work on
anything else on my computer. I already did a
render of this scene, so I'm going to use that to
bring into after effects. Because you are rendering out
a lot of image sequences, it's super important
to be organized and label all of your
folders properly, and within your after effects or Blender project to
also keep everything organized and labeled super clearly because it's going
to be really easy to lose track of everything
and so try as best you can to keep all your naming conventions and stuff the same. I am also guilty of
just working working, working without
keeping everything organized and having
to go back and do it. But as much as you can stay organized in the moment,
the better off you'll be.
9. Compositing in After Effects: I have some folders set up
in after effects already, and I'm just going to, in the renders folder, import that EXR sequence. When you navigate to
your EXR sequence, OpenEXR sequence should
be checked here. It might not be. If it isn't, you're just going to
import a single frame. But if you click that, it's
going to import as footage. If you right click and go
to interpret footage main, you can double check
your frame right here. It came in at 30
frames per second, but we want to
change it to 23.976. Then we can drag it
into a new composition. The first thing
you'll notice is that EXRs show up as completely black when
they're in after effects, so you have to actually add two effects to the
clip to see anything. The first one is extractor, which comes with after effects. In this layers drop down, we have all of our
different render layers available here. If we clicked combined, we see our scene, but the
dynamic range is off. If we add a color
profile converter effect and click linearize, we see our shot back
to how it was before. It might be a little more flat than what you saw
within blender, and that's just because of how after effects looks
at this color data, but that's actually great
because that gives us more latitude to do some color grading here
and after effects. If we label this combined, duplicate it, change this
to emit, for example. Now we have all of the materials in here that
had an emissive texture. If we set that to screen
and just added a fast blur, we're going to get a glow on just those emissive
parts of our shot. If we duplicate it again, label this one missed, change this to the miss layer, we're going to see we
have that gradient from close to the
camera to far away. If we wanted to say tint that to a warmer color, and
set it to screen. Bring the opacity way down, we can add a little bit
of a volumetric effect. Things that are farther away have this foggy glow to them. You can also make a
new adjustment layer, call this blur and add a
camera lens blur effect. We're going to use
the luminance of the miss layer to determine where the
blurring is occurring. If we duplicate this mist
pass here, let's isolate it. Bring up the opacity, turn it to normal,
turn off the tints, just so it's back to normal. Command Shift C to
pre-compose it, move all attributes
to a new composition. That's going to give us a
pre-comp with this data here. Now, if we set that as the
layer map on the blur, we're going to have more blur in the background compared
to the foreground. If we set this to a smaller number like something like two. We can also then go in here
with a levels adjustment and increase the
contrast if we need to. To refine where we have
that blur in our shot here. Then the last couple effects
that I'm going to include here are just an overall
film glow and film grain. Let's add a couple more
adjustment layers here. I'm using some Boris
effects plugins. There's a link for 15% off of Boris effects in the
class resources. You can also use some built in effects in after
effects as well. I just like how fast these effects work to get
the look that I want. If I add film glow, so here's the film glow effect. We can just drop this down
to something like 30, and maybe expand the
radius a little bit. I like a look that has blown out highlights and a lot
of film grain texture. But I find that adding
elements similar to, like a film emulation helps sell all the effects from looking
too crisp and too perfect. As much as I can almost
muddy an image to look as imperfect as an image from a camera is because
of the real world, the more realistic I
find the shot looks. But you can do all of
these effects to taste. Then film grain. One thing about
these Boris effects plugins that I do like is the controls are right here in the
middle of your shot, so you can just
scale things up and down while zoomed in to taste, to see how intense you want that film grain to
be and the size. I'm going to add another
adjustment layer and add lumina tree color. In color wheels, I'm
just going to bring down the mid tones and the
shadows just to touch. Now, let's do a ram preview. Here's the ram
preview of our shot. We have the sign swinging, some paraxen within
the bookstore. One thing you'll notice is
in the reflection back here, you'll see some
chattering and that's going to be part of the
sample count issue. When you start seeing
noise like that, you might want to increase
your sample count, but for our purposes here, I think this looks fine. Now that we've gone
through all of these steps and done all of
this work to make the shot, let's take a look back
at where we started. This is our 3D scene that
we built in Blender, and it all started with
this single image.
10. Final Thoughts: Congratulations on
making it this far. We've gone from taking
a single image using fSpy and blender to
create a full 3D shot. This is a really
powerful technique because you can create exterior or B roll
shots when you couldn't afford to actually get a crew in a certain location, so you can add more coverage and production value to
all of your films. We've covered a
lot of techniques. If you have any questions, definitely ask me in
the discussion board and I'll respond to them. I also really want to
see what photos and shots you come up with
in the project gallery. Thank you for watching, and I'll see you
in the next class.
 Alden Peters, Filmmaker, VFX Artist