Transcripts
1. Introduction: Technology and objects
in sci-fi films like lightsabers and holograms and blasters are hallmark
of the genre. With Blender, we can bring those elements into
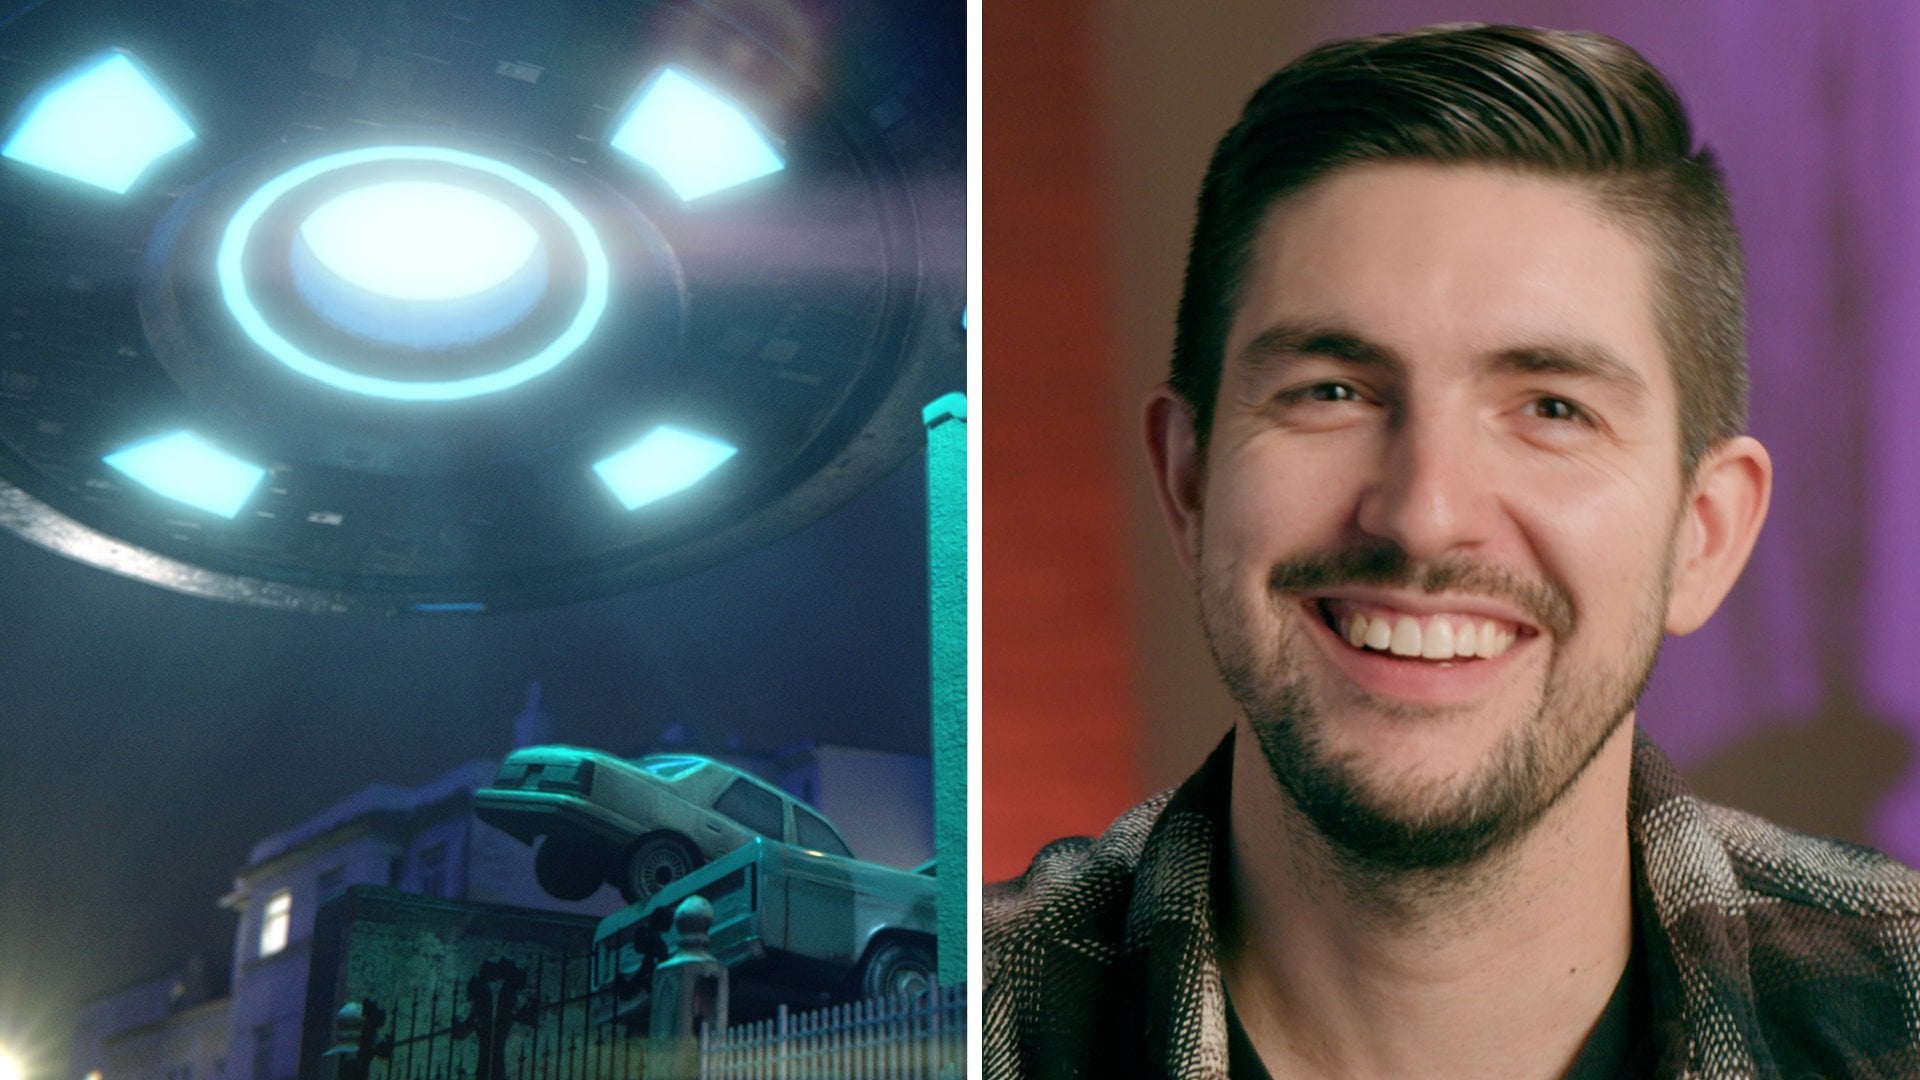
our own films. I'm Alden Peters. I'm an independent
filmmaker and VFX artist. You might have seen some of
my tutorials on YouTube or TikTok and some of my films on Amazon Prime, YouTube or Revere. I love film as a
storytelling medium, and I love that
technology and software has made the barrier to entry much lower
than it used to be. In this class, you'll do some 3D object
tracking and Blender. We animate some three D models and render those out of Blender. Then in After Effects, we're going to replace the
cover of a book that we've been tracking and then
compositing everything together. I'm excited to teach this
class because by the end, not only will you have a shot
with some cool holograms, but you can take the
lessons learned and even motion track
and create 3D props. There are going to be
five classes total, each one using different
techniques in Blender. When you do all
of these classes, you're going to end up with
your own sci-fi short film. To follow along, you'll need
Blender and After Effects. Ideally you do have some
familiarity with Blender. Definitely brush up
on the basics of the interface and how to
navigate the software. I hope you leave this class with a new set of tools that you can carry forward into all of
your future film projects. I'm really excited to jump into 3D object tracking and blender. It's a super powerful tool
and a technique you're going to use quite often.
Let's get started.
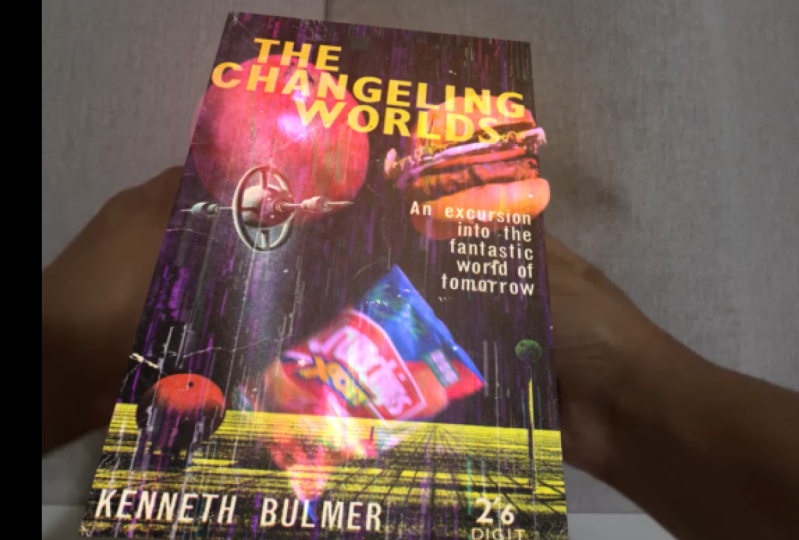
2. Getting Started: In this project, we are
going to take footage of moving a book around and we're going to track some
3D holograms on top of that book and then composite everything together
in After Effects. Learning how to do 3D
object tracking in Blender, it's extremely powerful and
it's a technique you can apply to other shots you might
want to make in your film. If you had a 3D model of some type of device
other than a book, you could track the motion perfectly and completely
replace what you're holding. You're going to
need both Blender and After Effects
for this class, as well as the free
Blender kit add-on. For this shot, I
film myself holding a book and rotating
it around so that I can be sure to get a full 3D range of motion instead of just
a simple side-to-side. You can use a book
or any flat surface, but be sure you film
this on a tripod. It's also helpful to add track markers to
the book as well. So I added white pieces of
tape and with a Sharpie, just made some X's throughout. If you do something like
this, be sure to also get a clean plate of the book
without anything on it. For this one, I just flipped it over because the back
of the book just had the gray material without any of the cover information as well. Another thing you can do is add some practical
lighting as if the holograms are emitting light onto your hands and
the book itself. I had a pink light shining from the left hand side
of the frame here. Now that we've covered what
you need, take your shot, convert it into a PNG sequence, and then let's get
started in Blender.
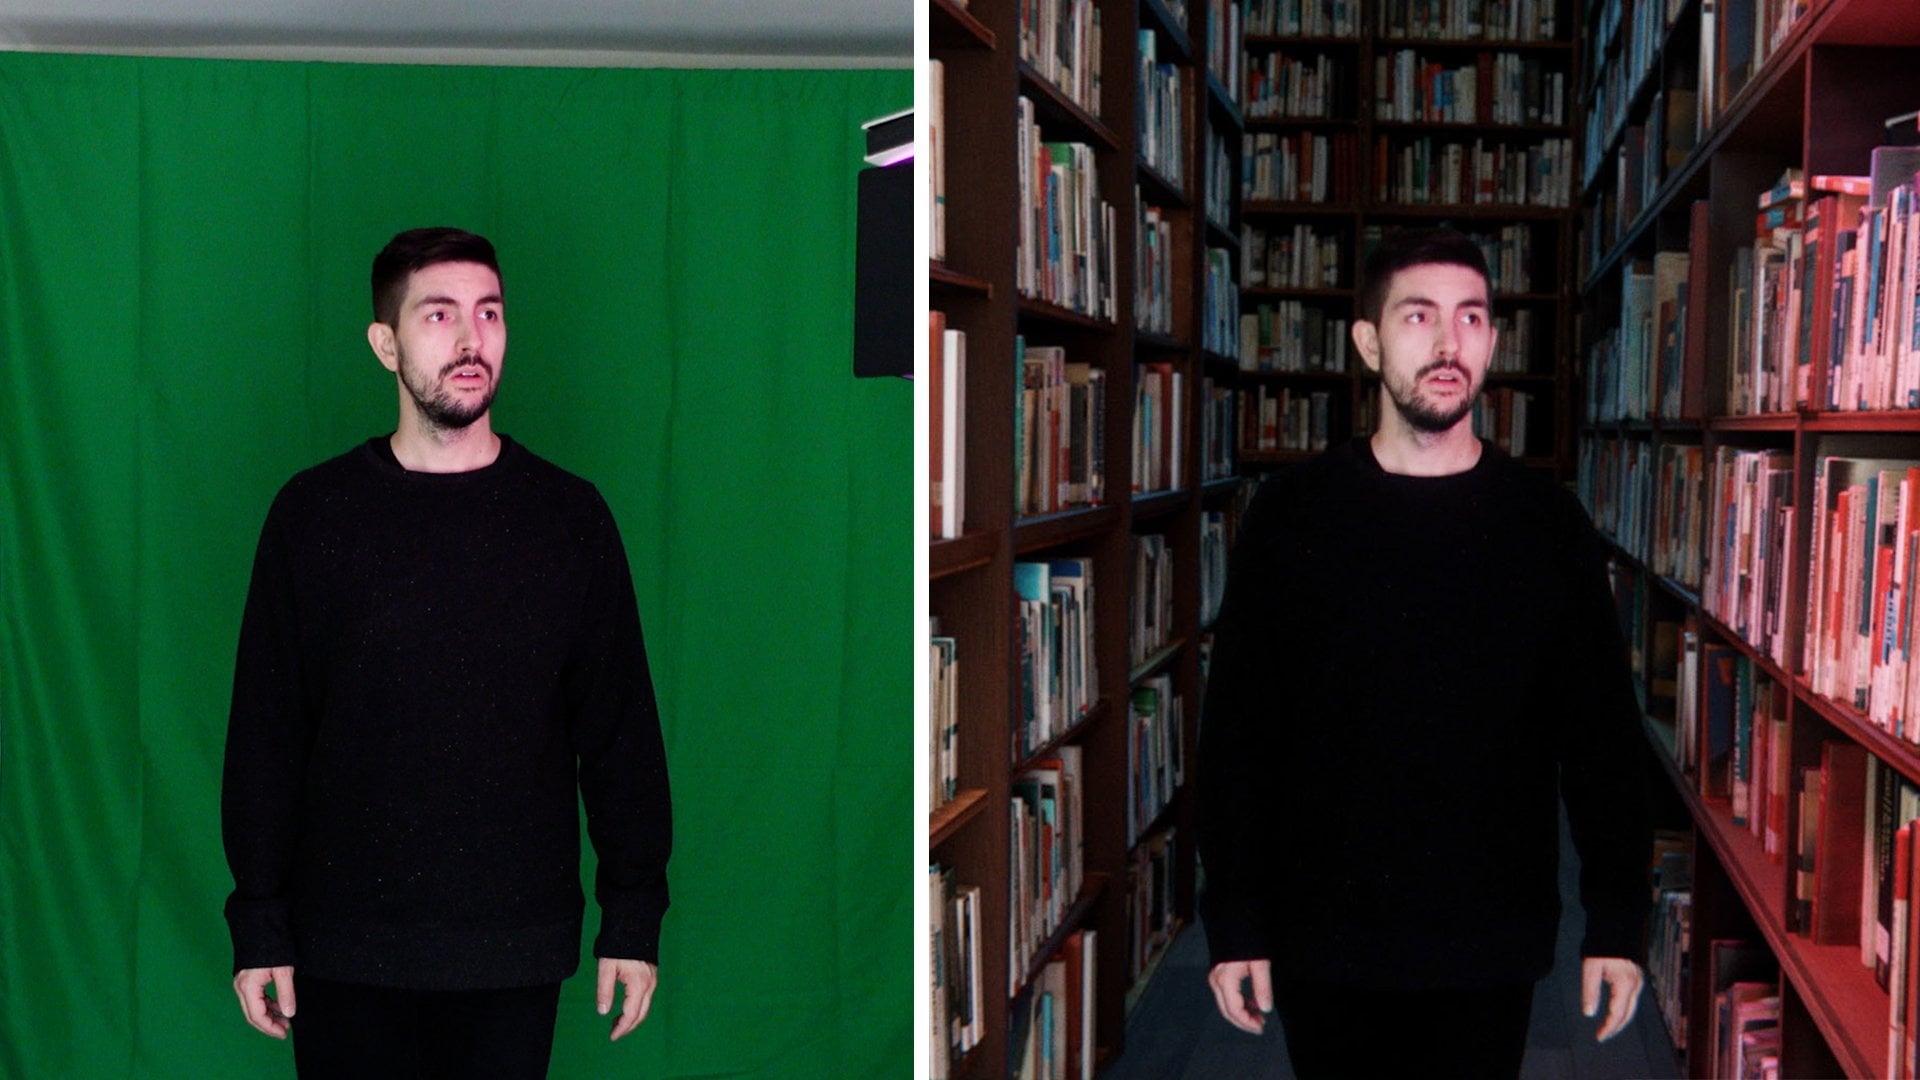
3. Using 3D Object Tracking: The first thing you're
going to want to do is take your shot and export it as a PNG image sequence
because Blender handles image sequences much better than it handles footage. Open up Blender. We can delete everything here in our project. Click on the plus up here
because we are going to go to VFX, Motion Tracking. This is going to
open a new window with a few other tools
available to us. First, let's import our shot. Click "Open" and then
navigate to where you had your image
sequence saved. Also, don't forget to
save your project. Now that we have our
footage imported, click "Set Scene Frames", and this is going to trim your Blender timeline to the amount of frames that
you have in your footage. We can also go double
check in here, change this from 24 to 23.98 if that's the frame rate that
you shot your footage in. Then we can click "Prefetch". This is going to add cache to our shot so that we can
play through at real time. This is what that
footage looks like. Before we put any of our
track markers on our shot, go to the Track tab
here on the right. Under Objects, there will
be a camera in there. By default, Blender is set
up to do a camera track, but this is an object track. If we click plus, we have a new object here
that is highlighted. The reason we kept this shot on tripod is to make this
tracking a lot simpler. Otherwise, what you
would have to do is first track the camera and then secondarily track
the object with that camera tracking
data already done. But to keep things simple, shoot it on a tripod and just add the object tracker here. Before we place our markers, there's a couple of settings
we want to adjust over here. The first one is the type of
motion that we're tracking, and there's a dropdown here
with a few different options. Location would just be a
two-dimensional movement. Location and rotation and scale is what you would get in
After Effects perhaps. But because we have
an object that is moving and the
perspective is changing, we're going to
choose perspective. Sometimes if that perspective
is not as extreme, you can choose affine,
which is close. The difference is that
perspective can take a little bit longer to
compute what's going on, but it's going to give us a
little better results here. The other thing we want
to turn on is normalize. We're turning that on
because if you look here, you'll see that sometimes the light hits our
tracker markers, and the color is
changing a little bit, and normalize will look at not just the frame where
you first set your marker, but it'll look at all of the
frames before and after, so as that color changes, it can keep up with
that color change. First, let's find
a frame here in the shot where we can see
pretty much everything evenly, it's looking like around here. Then just Control click
to add your first marker. Over here in this Track tab, you can see what your
tracker is seeing. We might want to scale this up just a little bit to
get more of the x. You can hit G to
move this around, or you can just click and
drag in this window here. I might want to turn up the size here so
that when I click, it's already scaled up
a little bit bigger. You need eight tracker markers accurate throughout
the entire shot. They don't have to
be the same eight. But because we have all
the tracks markers, all the xs in the
footage itself, I'm just going to add a mark on each one of these
so that if some fail, it shouldn't be an issue. Here we go with a tracker
setup on all of these markers. Hit A to select them all. Then to track forward, there are a couple
options down here. There is tracking
forward by one frame, tracking forward all the
way to the end of the shot, removing all tracking data to the right of the
timeline or to the left. Let's just track forward all the way to the
end of the shot. Then let's go back to this frame here and then track to the
beginning of the shot. As you can see, we did
lose some track markers, and that's probably
just because they fell off of the frame. But we have most of the
track markers consistent, and we do have those data
points here at the end. But this is looking pretty good. Let's go to the Solve
tab here on the left. First, just click
"Solve Object Motion". Up here, we have a solve error, and that solve
error is in pixel. How many pixels
off is our track? Ideally, we want it below one. It's less than one pixel
off from the actual track. Somewhere around 0.5 and 0.3
is what you're aiming for, let's say you wanted to
put something directly on the book or if you wanted to replace the book
with another prop. Because we're doing a hologram, which is going to
be floating above the surface of the
book and because holograms can't even have their own little
shakiness or glitches, we do have a little
bit more leeway in what our error could be. If we're not getting
something below one, in this case, it's fine. But here's how you can refine your track to get a more
accurate solve error. In the Cleanup tab here, click "Clean Tracks", and let's find any of
these trackers that have an error of let's say 10. If you hit Enter, a
couple were highlighted. That means these two trackers
have a 10-pixel error. If we hit x and delete those, click "Solve" again, that
dropped our solve error. We can repeat this
process until we get more and more accurate without losing too
many of our trackers. We are at an error of 1.6, and we could even
get more accurate. But because those holograms are going to be floating off
of the surface a little bit, this is going to give
us a good enough solve for our needs today. In this Solve tab, if you
scroll down to the bottom, click "Setup Tracking Scene", and that's going to
set up a camera, an object, and some
motion tracking data. If we go back to
our layout view, we're going to see
a camera here, and we're also going
to see nothing else. We have to turn on the visibility
of our tracker markers. We can do that here in
the viewport overlays. Click on "Motion Tracking", and then all of
these track marks are going to be visible to us. We can also scale those
up or down as needed. If we split our viewport here and click on
the camera view, our shot is going to
be a background image. We can actually delete this
ground and cube that was created because we're going to add our own geometry
to the scene. If you look in the camera view, you can see that
these empties in our scene are aligned with the tracker
markers on the book. If we look at these track marks, we can see the surface
of the book itself. Next thing we want to do is
Shift A, let's add a plane. We're going to create a reference of the
cover of our book. Let's just move, rotate, and scale to line up roughly where the
surface of the book is. We can get this angle right by looking at these
reference points. If you hit S and then hit X, Y, or Z twice, you can scale an
object on its local X, Y, and Z axis instead of the X, Y, and Z axis of your scene. This is at frame 158. Of course, if we move
forward, it's all misaligned. If we Shift A, add an empty, usually, we'll do a sphere. Let's move this roughly
where this book is. We can give this empty. An empty is similar to a null
object in After Effects. It's invisible. You can use it to parent other
objects together, but it won't show
up in any render. We can apply all of our motion
tracking information to the empty and then
parent anything else in our scene to that empty so we don't have to apply the same modifier
again and again. Here in the Constraints tab, we're going to choose
"Object Solver" because we did an object
track for object. Click "Object". Camera, choose camera, and hit "Set Inverse". Now, this empty moves
along with our track. If we go back to this frame and then parent with Command P, our book reference
to that empty. Suddenly, our book cover
will move with our track. Now, it doesn't align perfect, but that's okay because this
is just a reference point. Also, because all of this tracking data is
in this object solver, we can scale and move our
camera so it's closer to the center of our world here. Then now, let's say
we have a mesh. Let's choose the monkey. If we have this
hovered over the book. If we parent that to our empty. You can see all of our object tracking information
has been applied. Now that we have
our footage tracked and we have all of our
tracking data in Blender, met me in the next
lesson, which is adding our 3D holograms and rendering
everything out of Blender.
4. 3D Modeling, Animating, & Rendering: Now, let's add some 3D
models to our scene, which will be the holograms. To do this, I'm using the
free Blender kit add on. Because this whole scene is inspired by the Twilight
Zone episode To Serve Man, there's this alien
cookbook element. I'm going to add some
3D models of food, and that will serve as the
hologram around this book. I'm just going to
search food in here, Free First, and look
for some models that maybe can be a little more cartoony or simple than if we are going for photorealistic. Let's start with this ice cream. That's going to bring in a collection with an
empty as a control. We can scale and position this ice cream cone
somewhere here. We can turn off Suzanne there. Take this empty and parent
it to our main control. In fact, let's call this
the tracking control, just to keep things a
little more organized. Now we can see our models
are attracted to this book. I might also add another little animation of
one of these slices of cake, which looks like is parented
to this empty here. We can just hit "I", set a key frame for
location and rotation. Here, toward the
end of the shot, maybe move this up toward
the camera a little bit. Just add a little
bit more movement here toward the end of the shot. Let's turn off this plane. To render out a hologram, we're going to stay in
EV instead of cycles. If we turn on render view, everything is a little bit dark. Let's add a light, a sun. When you add a sun, it's
similar to the actual sun. You will just have
constant light from one direction shining
on your entire scene. If we angle this from the
point of view of the camera, we're just going to
get some overall illumination of
our objects here. When we render this out,
we can render it out as a PNG sequence with Alpha. But to get that Alpha channel, over here in the
Render Properties tab, go to Film and
choose Transparent. But one thing you
might notice if you render an image
after you've done a track is that you don't actually end up with
a transparent image. You get the footage
composited in the background, which
we can see here. That is the way
that Blender just sets up the scene when you
do the object tracking, and we can adjust that
in the Compositing tab. They have a bunch of node
set up to render out your transparent image
and then place it back on top of the footage
used for the tracking. We just have to remove some
of this stuff and instead, just go from here, which is our Render Layers
and get rid of all of the movie clip and
Alpha over nodes there. We can go from these
render layers straight to the composite and
also to the viewer. Now if we render out, our image should get just the holograms with a
transparent background. You can have your holograms be whatever 3D models you want. When you're finished, export a PNG sequence with
an Alpha channel, and then meet me in the next
lesson in after effects.
5. Replacing Book Cover in After Effects: So here and after effects, before we add our hologram
on top of our book, we're going to need to
replace the cover of the book itself so
that it's plain. To replace this book cover, the first thing we're
going to need to do is track the book, get some corner pin data, which we're going to
apply to our clean plate, which we're going to
lay on top of our shot. We're going to do our
tracking with Mocha. Mocha AE comes installed
in after effects. Mocha Pro is a paid version, and there's a 15% discount
link in the class resources. They have a lot of similar
tracking functionality, but the way you can export
out of Mocha and bring it back into after
effects is different. So for the initial tracking, we can just do Mocha AE. If you click on
Mocha, it's going to open another window. Let's find a frame that has
the whole book surface. If we click this
pen tool up here, we can draw a square on
the surface of the book. Here, this is the type of
motion that we are tracking. We want to also choose perspective because we do have that tilt in
the book itself. Then here we can track
forward and track backwards. So let's track forward. Go back to our keyframe
and track backward. Mocha is what's called
a planer tracker. So instead of tracking
specific points in the shot, it's tracking an entire plane. So this is really good
for surfaces like books or signs or anything else you need
to track and replace. Mocha Pro can also track meshes, so you can track the folding
shapes of clothing as well. Now this track is done. We can check it with these
two options up here. We can show the planar
surface and also the grid. So if we show the planar surface and drag these corners to the
corners of our book, as well as this grid, we can see how well
this track worked. We're just going to
want to zoom in, use the Z tool and click
and drag and then x, which is your hand
tool to move the shot around and just make sure that when we see
the corners of the book, we are as accurate as possible
because the points of this blue box is going to be the points
of our corner pin. That looks pretty good.
Save, and then close. Add a new solid. We'll call this, book cover. Okay. Then precompose it. Move all attributes
into a new composition. In this way, we can apply our corner pin to this pre comp, then we can go
inside and replace what's actually on
the book surface. So in our book composition, and our Mocha AE effect, go to Tracking Data, Create Track Data, hit "Okay," Corner Pin, and select our pre
comp as the target, apply "Export," and now this solid is covering
the surface of the book. We can quickly add
some text in here to make sure our
alignment is right. Yeah. Now if we replace
this within this pre comp, the clean plate that
we have of our book, the cover of our book
will be covered. So here's a clean
plate of the book. I'm just going to right
click, choose Time, Freeze Frame, just
because I only need one frame of
this clean plate. If we go back into
this pre comp, we can see that it's stretching the entire composition over
the cover of the book. So we just need to stretch this book to fill the
entire frame here. To do that, you can
do a corner pin or what I like to use instead is the CC power pin because it also shows you the angles
that you're creating. So we're just going
to stretch this until this book cover fills our frame. Then you can click and drag the sides as well to
stretch this out. If we go back into our pre comp, we have the start of our
replaced book cover. Two things we might
want to adjust. One, the edges are
really harsh, and two, we're going to need to rotoscope the thumbs on top of the book cover and
place them back on top. To soften those edges, we can take this book
cover comp here, parent the alpha of your clean
plate to this book cover, and then just double click
on the mask tool here. Then hit F. If we
increase the feather, we're just going to get a slight softening of the edges here, which makes these
edges a little softer. We can also bring the mask in a little bit and then refine everything to make sure you're still
covering the track marks, but are getting a little
bit of a soft edge. We'll call that good for now. Now, let's go in and
rotoscope the thumbs. To do that, we can open up
Mocha and do this again in Mocha. Book track. This icon here means that
if you track forward, this layer will be tracking, and since we have the
track data already, we can turn that off
by clicking that. Instead, let's make a
couple new shapes over the thumbs and just track throughout the shot. Now, if we go back to
our first keyframe, and the key frames are these green triangles down
here on the timeline, let's instead of just
having this rough outline, actually bring this in to
mask out the thumb here. Mocha uses x splines, which work a little
differently than like a Bezier spline that you're used to by using the pen
tool and after effects. If you click and drag
these blue handles, it'll adjust that curve. I found that when you are creating a mask around
any curved object, I'm able to get a much
more accurate curve that follows the shape properly with fewer actual points
along the mask. If you want to add, like here, it looks like we need
another point in our mask, click the plus here, and then we can add
another one here. Since this is already
tracked to the thumb, it'll follow along fairly well, but just as the perspective
changes a little bit, we're going to need to
key frame our mask a bit. To do that, all we need to do is make a simple adjustment, and a new key frame
will be made. Also, keep in mind, we
only need to mask out the part of the thumb that's in front of the cover of the book, so over here, we can ignore. Then continue this
process until you get the thumbs completely masked out for the duration
of your shot. If you're using Mocha Pro, you can select those two masks, choose export mask,
copy to clipboard, and then you can
paste that as a mask on a shape layer in
your composition. Once you've masked
out your thumbs, you can place that on top of the cover of the book
that you've replaced, and you end up with
something like this, which is a clean plate
of the book with the same motion that we had
in the original footage. You can also add
some more detail like adding some shadow
under the thumbs, or you can even go into the pre comp and use
adjustment layers using Lumetri to adjust the shading as the book moves throughout the light in
the production footage. Once you've replaced
the cover of your book, we can move on to
the next lesson, which is compositing
an after effects, where we take our
hologram render and put it on top of
this book footage.
6. Compositing in After Effects: Now let's bring
in our render and create a hologram effect
on top of our footage. Out of blender, this is
what we ended up with, which is all of our model just with the
texturing that it has. We're going to do a
couple of things to make this feel more
like a hologram. The first is to set it
to screen, duplicate it. I had a fast blur. Duplicate it again,
had some more blur. Because it is like a little
bit too bright in spots, let's duplicate
this bottom layer, set it to normal and bring the
opacity down a little bit. This is a super fast way to get a hologram effect to anything you're
trying to compose it. But there are a couple
more tricks that we can use to take this
to the next level. The first one is separating
our RGB channels. Let's take an instance
of our hologram. Let's turn off the other ones. We can see what we're doing. Bring the opacity up. We're going to apply a set
channels effect to it. What this effect
does is right now, it's saying the red channel
applies to the red channel, blue to blue, green to green. If we turn some of these off, we end up with just
the red channel. This one, let's
turn off, add green back, and blue. Then if we set these to add, our color is going to go back to normal almost as
if it's screened. But if we then took our blue one and brought
its position over, we can get some offsetting
of our RGB channels, which will also help
with a hologram. If we place this below
our two glowing layers, we have a cool look
there as well. Another thing we can do to
add some glitchiness and irregularity to
the hologram image is to take a glitch texture. Drag this on. We
are going to use this glitch texture
as a Luma Mat. Let's add a tint
effect and levels. Maybe we swap the colors here. Crush that a little bit. Then if we applied these RGB layers to
that glitch layer, change it from
Alpha to Luma here. We get some lines from our glitch texture
affecting the holograms. This is a little more
extreme then we want it, so let's make it so
it's not fully blur. When setting this up, though, I want to add something
more to the effect. If I go into my book pre-comp and add the
glitch on top of this, I can actually have
set it to screen. I can add some glitching to the surface of
the book as well. Because this is stretched,
something like that. I also found a logo of an alien face and have that glowing just to help
sell the effect. Here's our finish up with
the holograms flickering on and some glitch texturing
on the surface of the book.
7. Final Thoughts: Congratulations on
making it this far, especially with object tracking. I know doing any
kind of tracking in 3D seems very daunting. But now you have that
skill set and you can carry it forward into
future projects. If any questions come up, definitely ask me in
the discussion board, and I'm excited to see
your final renders and even your works in progress
in the project gallery. Thanks for following along and
see you in the next class.
 Alden Peters, Filmmaker, VFX Artist