Transcripts
1. Introduction: Blender unlocks a ton for
world building by adding all the little details
in your film that you might not necessarily have been able to do
during production. Those details help tell a story about the world where
your characters are living. My name is Alden Peters. I'm a film director,
editor, and VFX service. You may have seen my VFX
tutorials on YouTube or TikTok or my films on
Amazon Prime or Revere. I like working within
the Sci-Fi genre because it's a lot of fun to transport audiences to other times and other places. I'm excited to teach this class, because 3D set extensions are a really awesome way to add incredible production
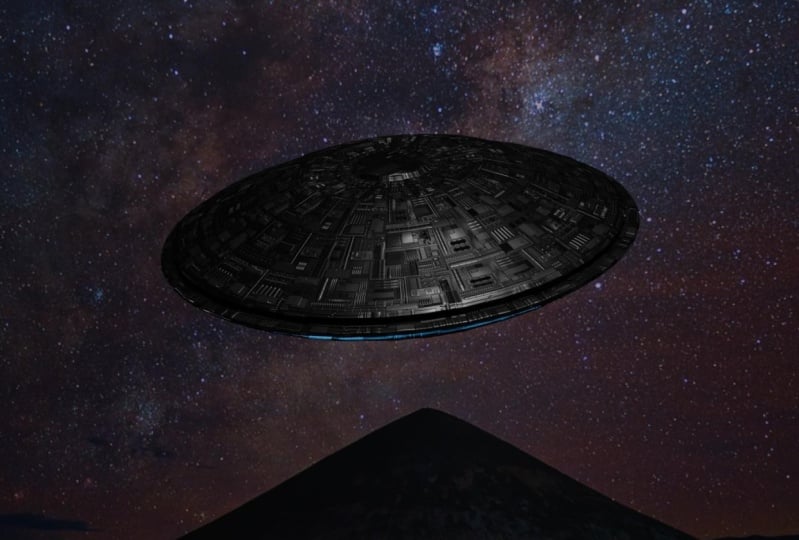
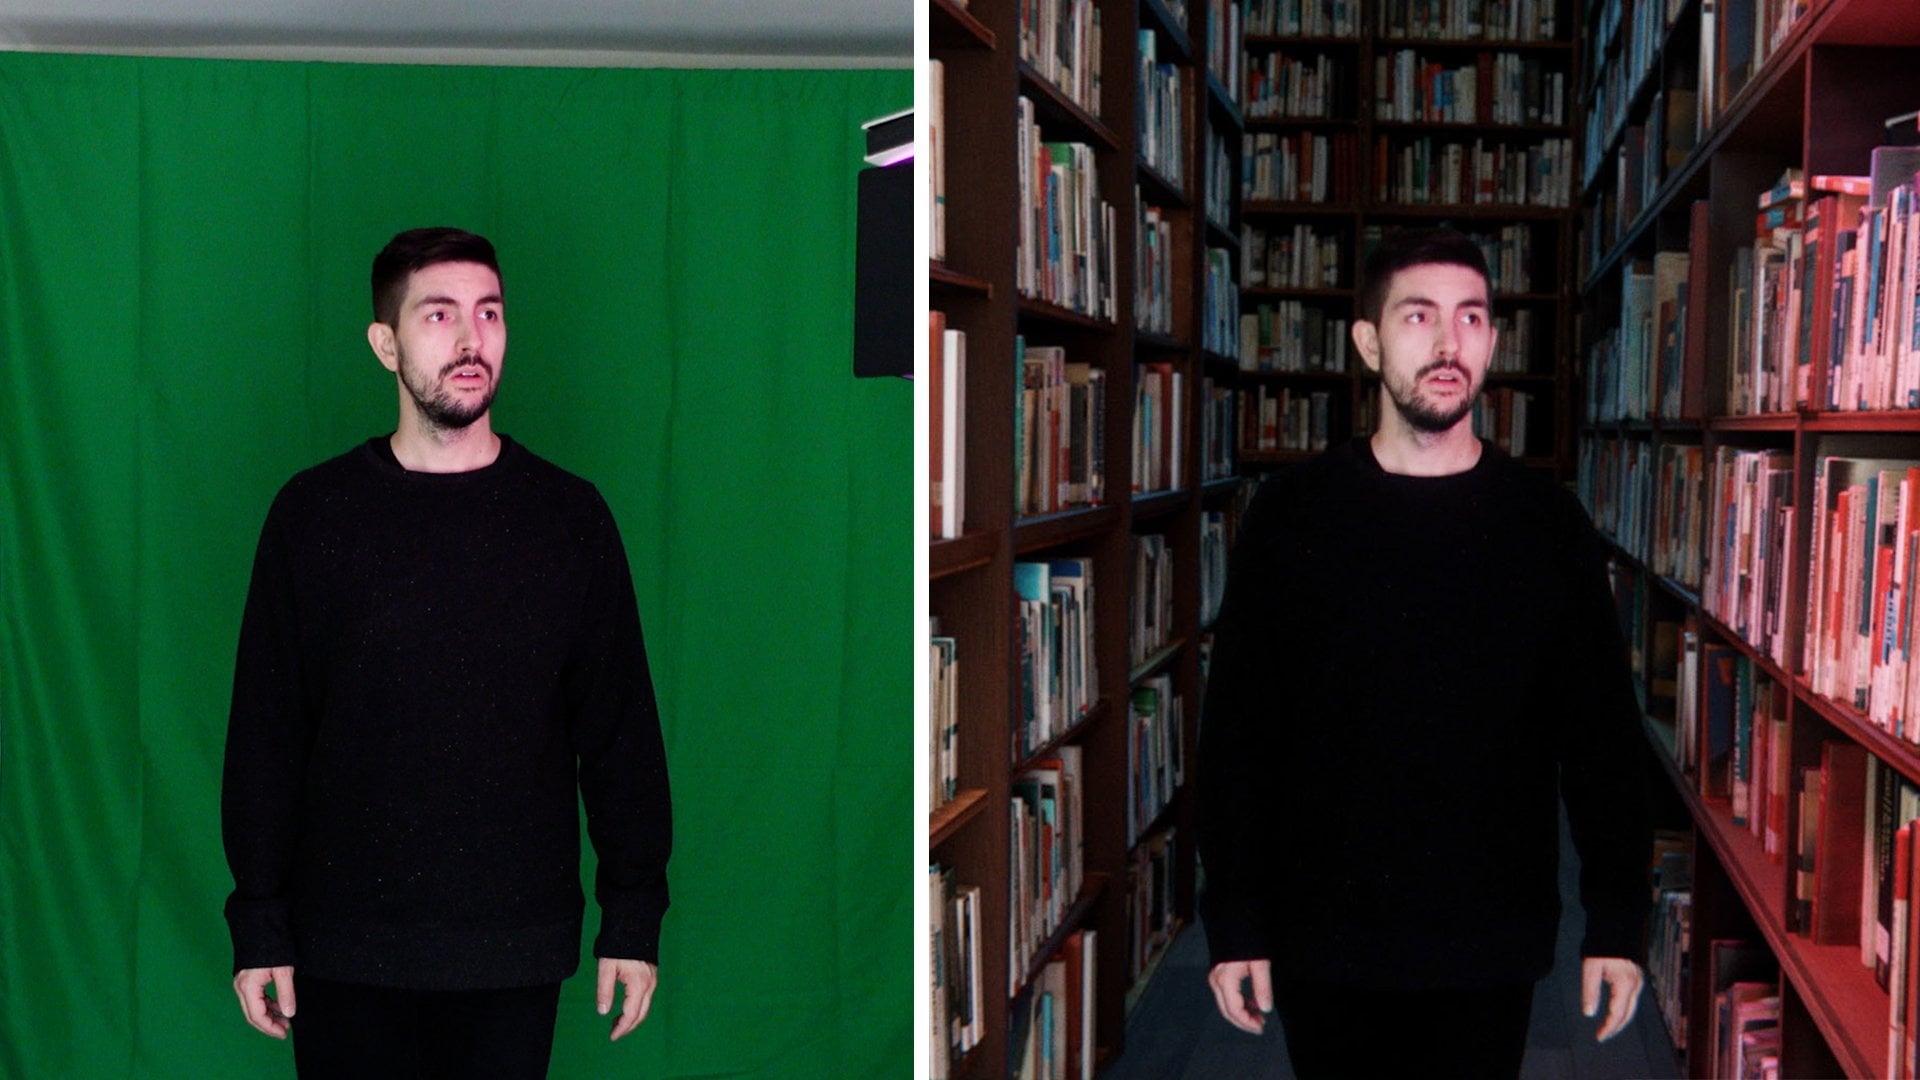
value to your films. By the end of this class, you'll have taken a
shot that you can film in your apartment and
have it appear as if the camera is moving
out of a window been looking up at a flying saucer
over an apartment building. We're going to take
production footage. We're going to motion
track it using blenders built in
camera tracking tools. We're also going to go over
3D tracking using Synthize. In Blender, we're
going to extend our set and add some detail, and then in after effects, we're going to composite
everything together. This is a class for filmmakers working on independent budgets, who want to add a
ton of production value to their projects. Ideally, you do have some
experience using blenders, so brush up on the basics like how to navigate
the software. There are going to be
five classes total, each one using different
techniques in Blender. When you do all
of these classes, you're going to end up with
your own Sci-Fi short film. I hope you leave this class
with the confidence to think beyond your limitations when you're making an
independent film. I'm excited to have you follow along, so let's get started.
2. Getting Started: If you followed
along on the other classes in this learning path. This class serves
as a culmination of a lot of those techniques
plus some new ones. We're going to use
FSP and UV projection to recreate our
scene in three DD. We're going to be extruding image textures to
create building. We're going to be adding and
animating three D models. But this time,
we're also going to include some three
D camera tracking. We're going to do
that within Blender using blenders built in tools, but I'm also going
to show you how to do three D tracking using Synthz which is a
third party piece of software by Boris effects. There's a 15% discount code
in the class resources. To get started, you're
going to want to film yourself or a subject. Just an irregular environment
indoors in an apartment. Instead of shooting on a tripod, you're going to want to
add some camera movement. In this time, it's pulling the camera backwards
and tilting up. We're going to motion track
that movement add a wall, so the camera appears as
if it's moving outside of a window and then add a
whole environment outside. If you're working on a shot like this where you're
going to be adding a three D set
extension or there's part of your shot that you
know you're not going to see, add as many trackable objects
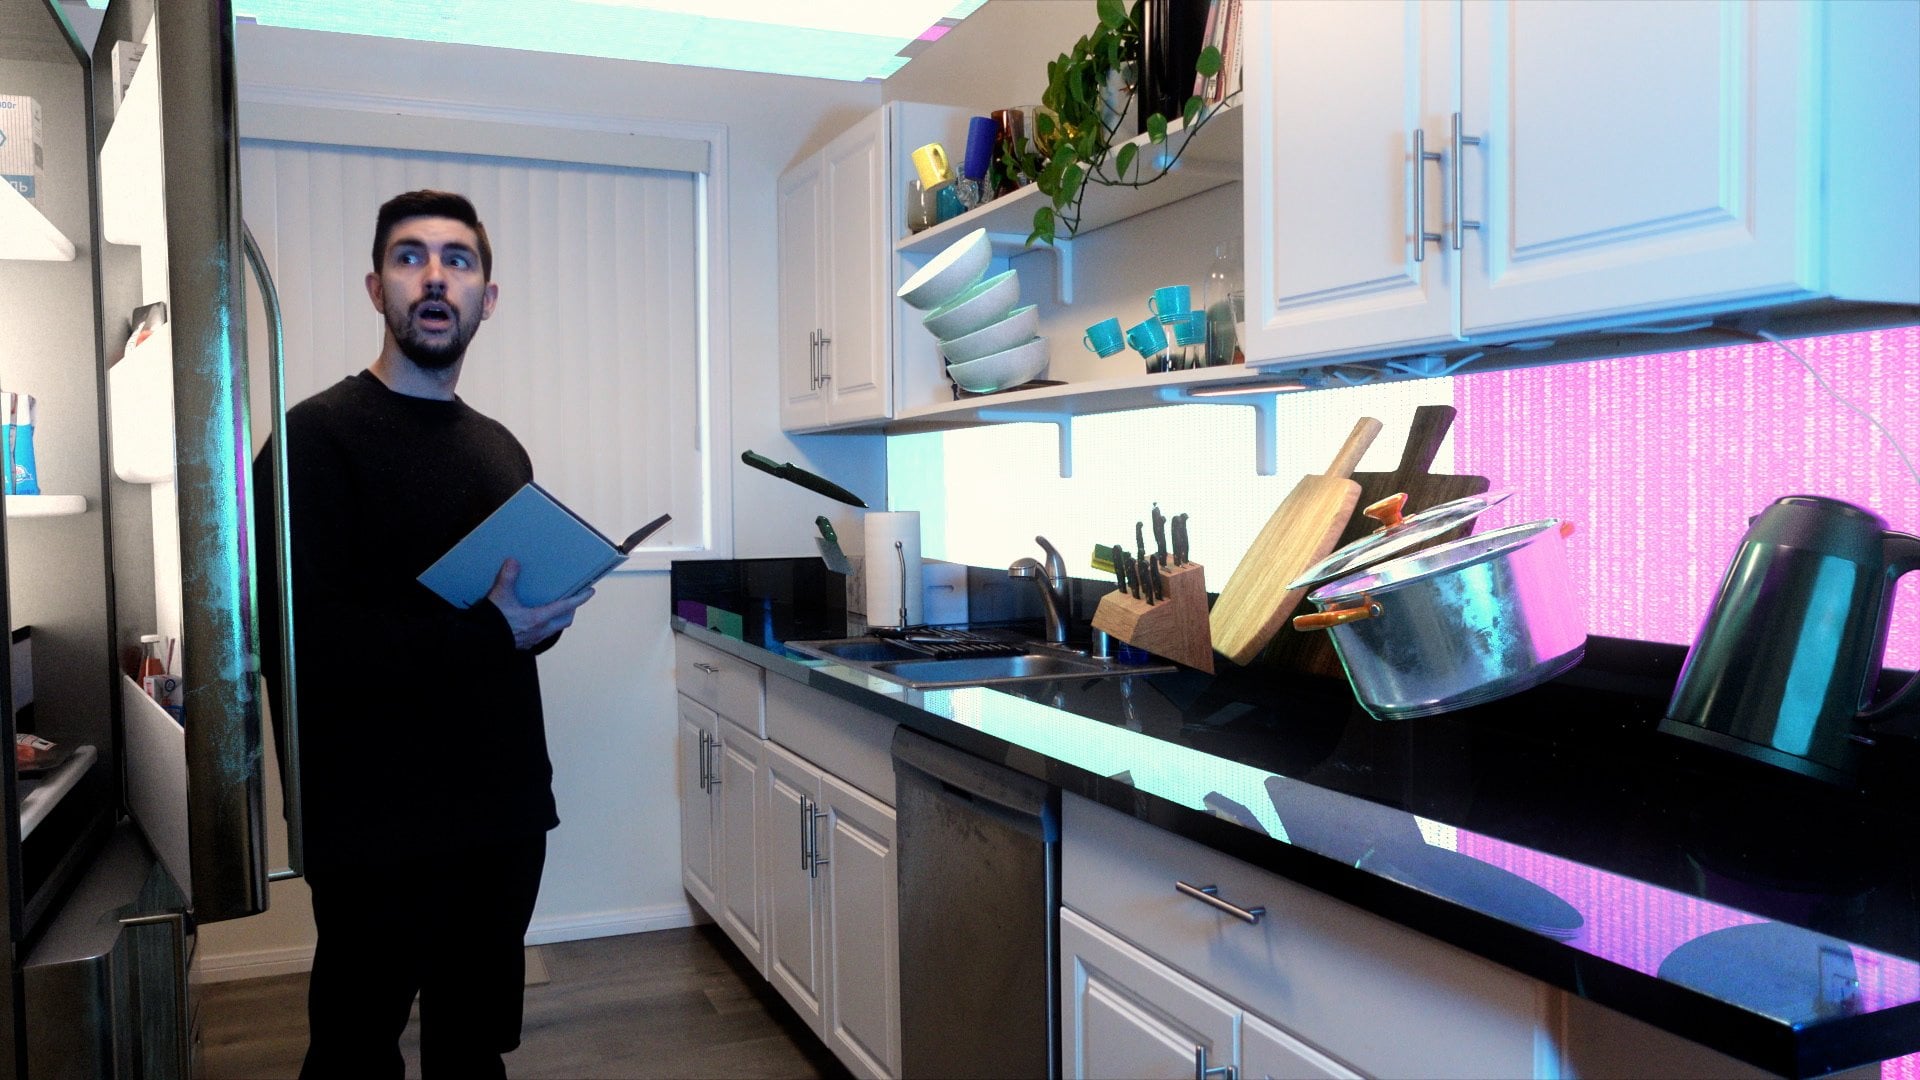
as possible in that area. This is the raw footage
that I shot in my kitchen. So on the table here,
I added a bunch of elements that are
good candidates for some tracking points. We're going to add a
three D set extension, so this camera move looks like it's coming
out of a window, and we see the exterior
of a building. Each of the shots that
we've put together in this entire learning path are meant to edit
together into one, 1 minute short film. So whatever lighting you used in the kitchen shot where
everything was floating, mimic that in this shot as well. So go record your production
footage and then convert it to a PNG image sequence,
which Blender prefers. And then let's get started
in our first lesson, which is three D tracking
using Blenders built in tools.
3. 3D Camera Tracking Using Blender: O. We're going to
start in Blender using Blenders built in tools for three D camera tracking. A lot of the steps of
this process are similar to Class three when we did
some three D object tracking. But this time, we
want to make sure we're tracking that
camera movement. When you're in Blender,
up on the top, click the plus VFX
motion tracking, and this will open up the
motion tracking window. Choose open and navigate
to your footage. Choose set key frames. Blender will then trim the
in and out points to match your footage and prefetch
to cache your shot. Double check that
your frame rate matches the frame
rate of your footage. In this case, we're using
23 98 instead of 24. Similar to three D
object tracking, you're going to need
eight points on screen at all times throughout your
shot for the track to work. There are two main
techniques for tracking. You can go in and choose precise points that
you want to track throughout your shot or for as much as the shot as possible. Or you can choose auto detect, try to get as many points
as possible tracked, and then refine from there. Depending on your
shot, one technique might work better
than the other. So if one isn't working, try the other and vice versa. In object tracking over here in the track tab and objects. We added an object before. We don't need to do
that in this case. Down in camera, if
you know the sensor width of your camera or the focal length or the
pixel aspect ratio, you can put all of
those settings in here. Blender will
automatically try to detect them as it's doing
the camera solve as well. But if you know
them, it'll go much faster if you input all
of that information here. Over on the left for
our tracker settings, we're going to choose a fine. That's because we don't have
the same perspective motion that we did when we are tracking
the book in class three. We're going to choose normalize. And then control click
to set your markers. You want to find high
contrast points in your shot and ideally a point in your
footage that's on screen for as long as possible. Control click to add
your track mark. You want to find high
contrast points. So places where shadow and light meat are good
candidates for track points. We're going to start
with these hit A and then track forward
through our shot. That got us to
about frame two 50. So starting here, let's
add some new track marks. There's this picture
frame on the wall. So let's select those
new tracking points that we just added and
continue to track forward. Let's also go back to
the frame where they start and track
backwards as well. Now let's go to the
middle of the shot here. If you're working on a shot like this where you're
going to be adding a three D set
extension or there's part of your shot that you
know you're not going to see. Add as many trackable objects
as possible in that area. So on the table here,
I added a bunch of elements that are
good candidates for some tracking points. Well, let's choose these
and do the same thing, track forwards and
then track backward. Up here in this view, you
can see which part of your shots have enough
current tracking marks. Yellow is fine. Gray is better, but
red means there are fewer than eight tracker markers at that
point in the frame. So let's go to the end and find some more
points we can track. This could be a good
time to show you the detect features option. If you click detect features
and then down here, if you toggle the drop down, you can set the distance
to something smaller. Let's say 40, bring
the margin down 15. This is going to add just
even more track marks and then track
backward from there. Try it again in another
part of your shot. And we can see up here, we have enough track
marks for the duration. Now let's go to our self
tab to solve camera motion. And we have a solve
error of 10.5 pixels. We want that solve error
ideally to be under one pixel. So let's start deleting trackers that are
affecting that error. To start with, let's delete
all of the trackers that are on the subject or the book motion that has nothing to do with
the camera itself. Select them and just hit X. And it solve again. Now we're down to an 8.98 error. And from here, we're going to go to clean up and clean tracks. Let's choose a projection
error of something like 20. Let's go even less. Maybe ten. Delete those solve camera again. That brings our
error down to four. Repeat this process. Let's see tracks that are
let's say seven pixels off. Delete them, solve again. We've got an error now of 2.5, so we're getting closer.
Clean again. Okay. Another thing to look out
for when you are doing some camera tracking is
this graph down here. So this is x and y motion, and this blue line
is the camera track. You want that blue line to
be as smooth as possible. So depending on the
wave of that blue line, you can see which part of your shots are the
most inaccurate. You can also see, for example, this track mark here seems way off compared to the
graph of the other ones. So you can visually just
choose a track mark that seems like it's off and delete it from
this view as well. And then try solving again. Now we're down to 2.3. 2.2. Success is just
around the corner. 1.8. You can continue
to refine this in your shot to get as close as possible to something
beneath one. 1.8 actually isn't too bad
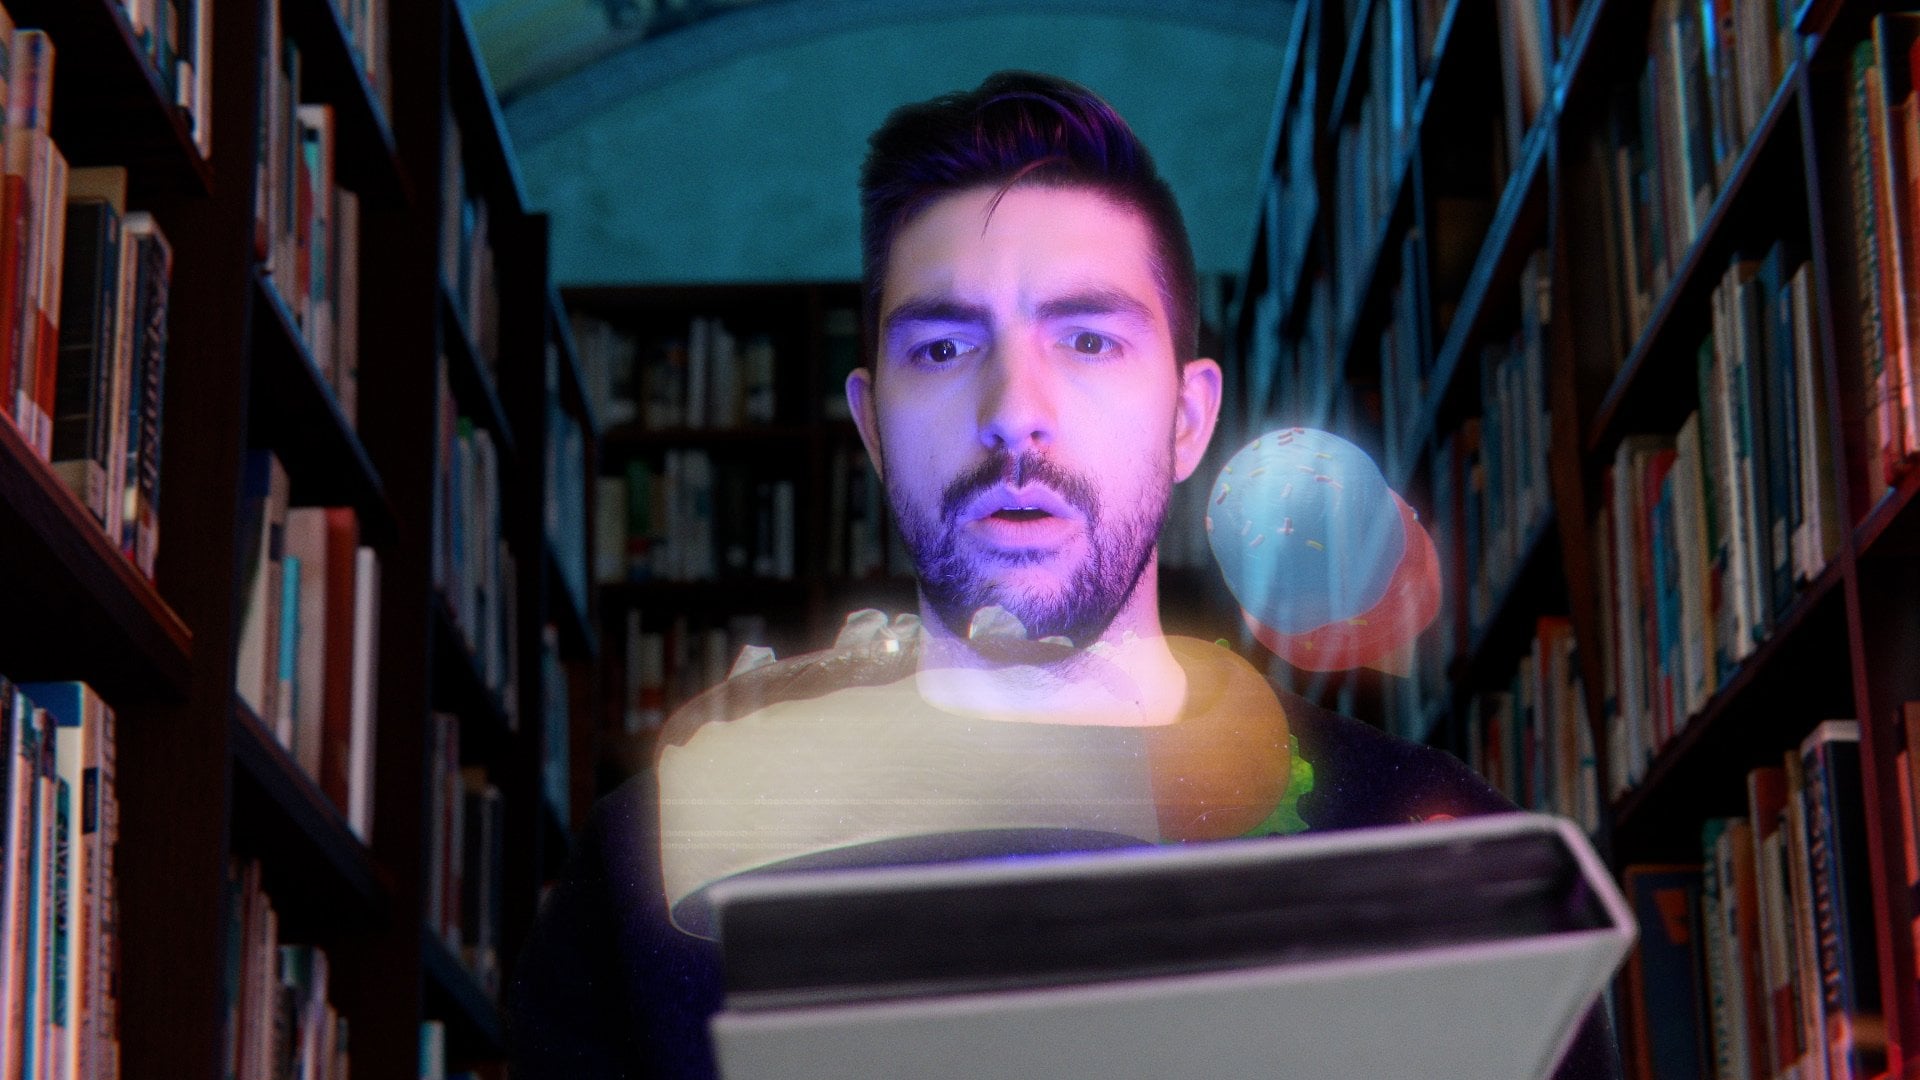
of a track in general, especially for a shot like this. So in class three, we did some object
tracking with a hologram. And a higher error
was fine because the hologram was going
to hover above the book. And similar to this, our camera will be moving out of a window. So the wall and window is what we're going to need
for the camera track. We're not placing something
directly into the scene, like on top of the
counter or something, so that super super
accurate track isn't quite as crucial here. I think this one will work fine. When you're ready to set up your scene with your
camera tracking data, scroll down in the soft tab and choose setup tracking scene. This is going to put a camera in your scene that has your
footage as a background image, and all of your
tracker markers are going to be empties within
that scene as well. Let's go to our layout view. In the overlays drop down, choose motion tracking so we can see all our tracking points. We can also split
the window here, turn on our camera view. And all of this tracking data
is connected to our camera, so we can move our
camera freely. The location and rotation of the camera isn't being animated. Instead, all of that is
coming from a constraint, a camera solver restraint. So we can freely rotate and move our camera so we can adjust the floor plane to be
more accurate this way. Now we can rescale this cube and use it as reference
geometry for the wall. I'm going to choose
this track mark this tracker that's
on this light. That's about where
I want the wall to be so I can line up the cube to that tracker mark
delete that plane. And our wall and window will
be somewhere around here. Tracking and blender
can be very finicky. A lot of the times you'll
have to try it again and again to get a super
accurate solve. But there are other pieces
of software you can use to get an accurate camera
track, such as Synthes. And in the next lesson, we're
going to go over how to do a three D camera
track and synthze and then bring that
data into Blender.
4. 3D Camera Tracking Using Syntheyes: Now we're going to cover
three D camera tracking using Synthiz which is a third
party piece of software. You have to pay for Synthiz either a one time license or
a monthly subscription fee. But there's a 15% discount
link in the class resources. I find that because Synthiz is dedicated only to three
D camera tracking, the process is a lot smoother, a lot more efficient,
and a lot more accurate. So when you open Synthiz, this is what the
interface looks like. First, we are going to want to import our shot.
So click Import. Choose shot, and then navigate to where
you have your shot. Click open and a
window will pop up confirming your frame rate and the dimensions
of the shot itself. I shot this in four K, so I'm going to do the motion
tracking in four K, bring it into
Blender in that way, but then we'll be working
in ten 80 after that. I do need to change
this 24-23976 frames per second. Click Okay. It's automatically
going to pre fletch your shot and cash it down here. Okay. And the first thing we're going to do
is just click Auto. Choose, yes. And it's going to analyze and do an initial
track of your shot. So here we have an initial track with all of our tracker markers, and we have an error of 7.3
pixels similar to blender. We want that error as
small as possible, something around 0.5 ideally, 0.3 for something really good. From here, we're going
to change automatic to refine and choose slow but Sure. So as we refine the track, it might take a
little bit more time, but it'll be more accurate.
Similar to blender. We just want to get rid of the track marks that
have the most error. Before we go and refine
all of our tracker marks, let's delete anything
that's on your subject, something that's not helpful to the camera move and anything that is
tracking a reflection. So anything here in the
mirror, we can delete. And then also anything here on the book
and on my sweater. With those markers
deleted, click Go again. Now we have an error
of 1.08 pixels. So this is already a
pretty good track. But we can refine it
a little bit more. So if we go into track
cleanup trackers, the shortcut for
this is Shift C, and we might return to this
menu a few more times. Down here in high
error trackers, looks like we have four with
an error of 30 or more. If you click fix, it'll
delete those. Hit go again. And now our solve error is 0.95. A Shift C to bring
that menu up again. Let's reduce this to
something like 25. Only one, so let's try 2015. Okay, three with 15. Click fix. Go 0.91. And keep repeating this process. Sometimes when you go back into this menu, it's
still set to ten, and now there are four with
an error of ten or more, and that's because with
the new refined track, it found that ten of them actually do have a
little bit more error. Let's see if we drop
that even down to five. Now we're at 0.6. 0.50 0.289. So this is a super
accurate track here. If we change this
view now to three D, Quad, change it to
quad perspective, and then choose lockdown
on this bottom one, we can see our camera
track from a bunch of different angles from above from the side and
the camera view, so we can see all of
this camera movement. From here, we can also rotate everything so we can get
our ground plane accurate. Over on the left, we
have navigation tools, movement, rotation, and scale. If we choose hole here, this will move the camera
and all the track marks. So we can rotate and move the perspective
from above and from the side until we
get something that has a floor plane that feels. Correct. Something like that
is already kind of close. But this is looking pretty good. The other thing we can do here
if we unchecked hole here and use this wand set to box, but we can create some
reference geometry right here in Synthes. So if we just click and drag, we can make a cube here, and then we can rotate it 90 degrees and then move it kind of where we would
like a wall to be. And just check our track here. So this would be
where, you know, the wall where the camera would come through the wall.
Let's add a second one. Thing like this. So this was done much more
accurately and much faster than using Blenders built in camera tracking tools. I highly recommend using Synthiz if you need to do
three D camera tracking. But now, let's get all of
this tracking data and camera from Synthi into Blender. To do so, we're just
going to export. There is a blender
Python option. Every time I've used that,
Blender has crashed. So instead, we're
going to use Alembic. So this is going to create an Alembic file that we can then open in Blender and have all of our camera
and tracking data. Navigate to where you want
to save this and click Okay. And then let's open blender. In a new project, we can delete
everything and go to file import Alembic ABC and then navigate to where we
saved our synthz project. Okay. And this is going
to bring in our camera, all of our tracker points
and our reference geometry. Everything enters
blender massive. So we're going to
make some adjustments and then scale everything down. The first thing you'll
notice is there's kind of this far away plane, and that's sort of like if
you look in the camera view, it's set in the background, but we can just hit
X and delete that. For our camera at a
background image. Navigate to your footage, so our footage is a background
image for our camera. And then we see in
our camera view here, our tracker marks and
our reference geometry. You might notice,
though, that there is just a touch of sliding
if you go frame by frame. And that is because blender
starts at frame one, and Synthz and all editing
software starts at frame zero. So there's going to be a
one frame discrepancy. But we can change that in our constraint tab under
time frame offset, select one, and then all of these tracker marks will be
locked onto our footage. Another difference between
Synthes and Blenders built in camera tracker is that all of your tracker markers in
Blender are empties, but here they're actual objects. That will show up
in your render. So select all of
your trackers here. Hit M. New collection.
All this trackers. And then make sure we turn
it off so they don't render. Now, let's scale
everything down. So if we shift A at
an empty a sphere, let's scale it up a bit, and let's parent the camera. These two pieces of
reference geometry, and the empty that holds
all these camera trackers. Command P, parent
it to this empty, and then we can
just scale it down. So the scale of our scene
is a little more accurate. Our camera also might
appear super small. So in the camera tab
under viewport display, we can increase the scale there just so we can see the
camera a little bit better. Now that we have
our footage track and all of that
information in blender, join me in the next lesson where we start building
out our scene.
5. Building the Scene: Now that we have all of our
tracking data in Blender, now we're going to
build out our scene, including the exterior
of the building, some parked cars, and a
UFO hovering overhead. We're also going to
adjust the camera move once it exits the
building out the window. First model the exterior facade until we have the placement of the exterior of the building that's
somewhere we're happy with. Then we can also add a cylinder, scale it down along the Z-axis, and that'll be the UFO
hovering overhead. Animate the location
and rotation, so it's approaching the building
as the camera pulls out. Now we're going to use fSpy to help us build kitchen geometry. We're going to follow
the same process we used in Class 2, so if you want a
step-by-step breakdown, go revisit that class. As a reminder that step includes bringing in a single
frame from your footage, aligning your X, Y, and Z axis in fSpy, and setting your origin point
to a corner in the shot. Back in Blender, import
your fSpy project, add a new plane, and set up some
reference geometry. Tap into edit mode and move the edges of this plane
and extrude along the X, Y, and Z axis. Continue adding
geometry for all of the cabinetry and
counters and fridge. Selecting both your fSpy camera and the geometry you created, align everything as
best you can with the perspective from your
main tracked camera. Add a material using
the image sequence of your footage onto this
geometry of your kitchen. In the modifiers, add a
subdivision surface modifier, set to simple, increase
the resolution, and then add a UV
project modifier. Choose UV map and this time, instead of choosing
the fSpy camera, choose the camera that
is motion tracked. Be sure to set the aspect ratio to the dimensions
of the footage. You might need to readjust the positioning of
some of your geometry. Because the camera is
going to be moving, it's a little less
forgiving than a still camera projecting a texture onto some
reference geometry. Because we used our
motion-tracked camera in our UV project modifier, the camera tracking motion and the projection will
cancel each other out, so everything in
your shot will stay projected in its proper
place on your geometry. If you look closely,
you're going to see some warping just because of the change of perspective but if you're looking
through the camera view, everything should look
normal but you can watch as the texture sweeps across
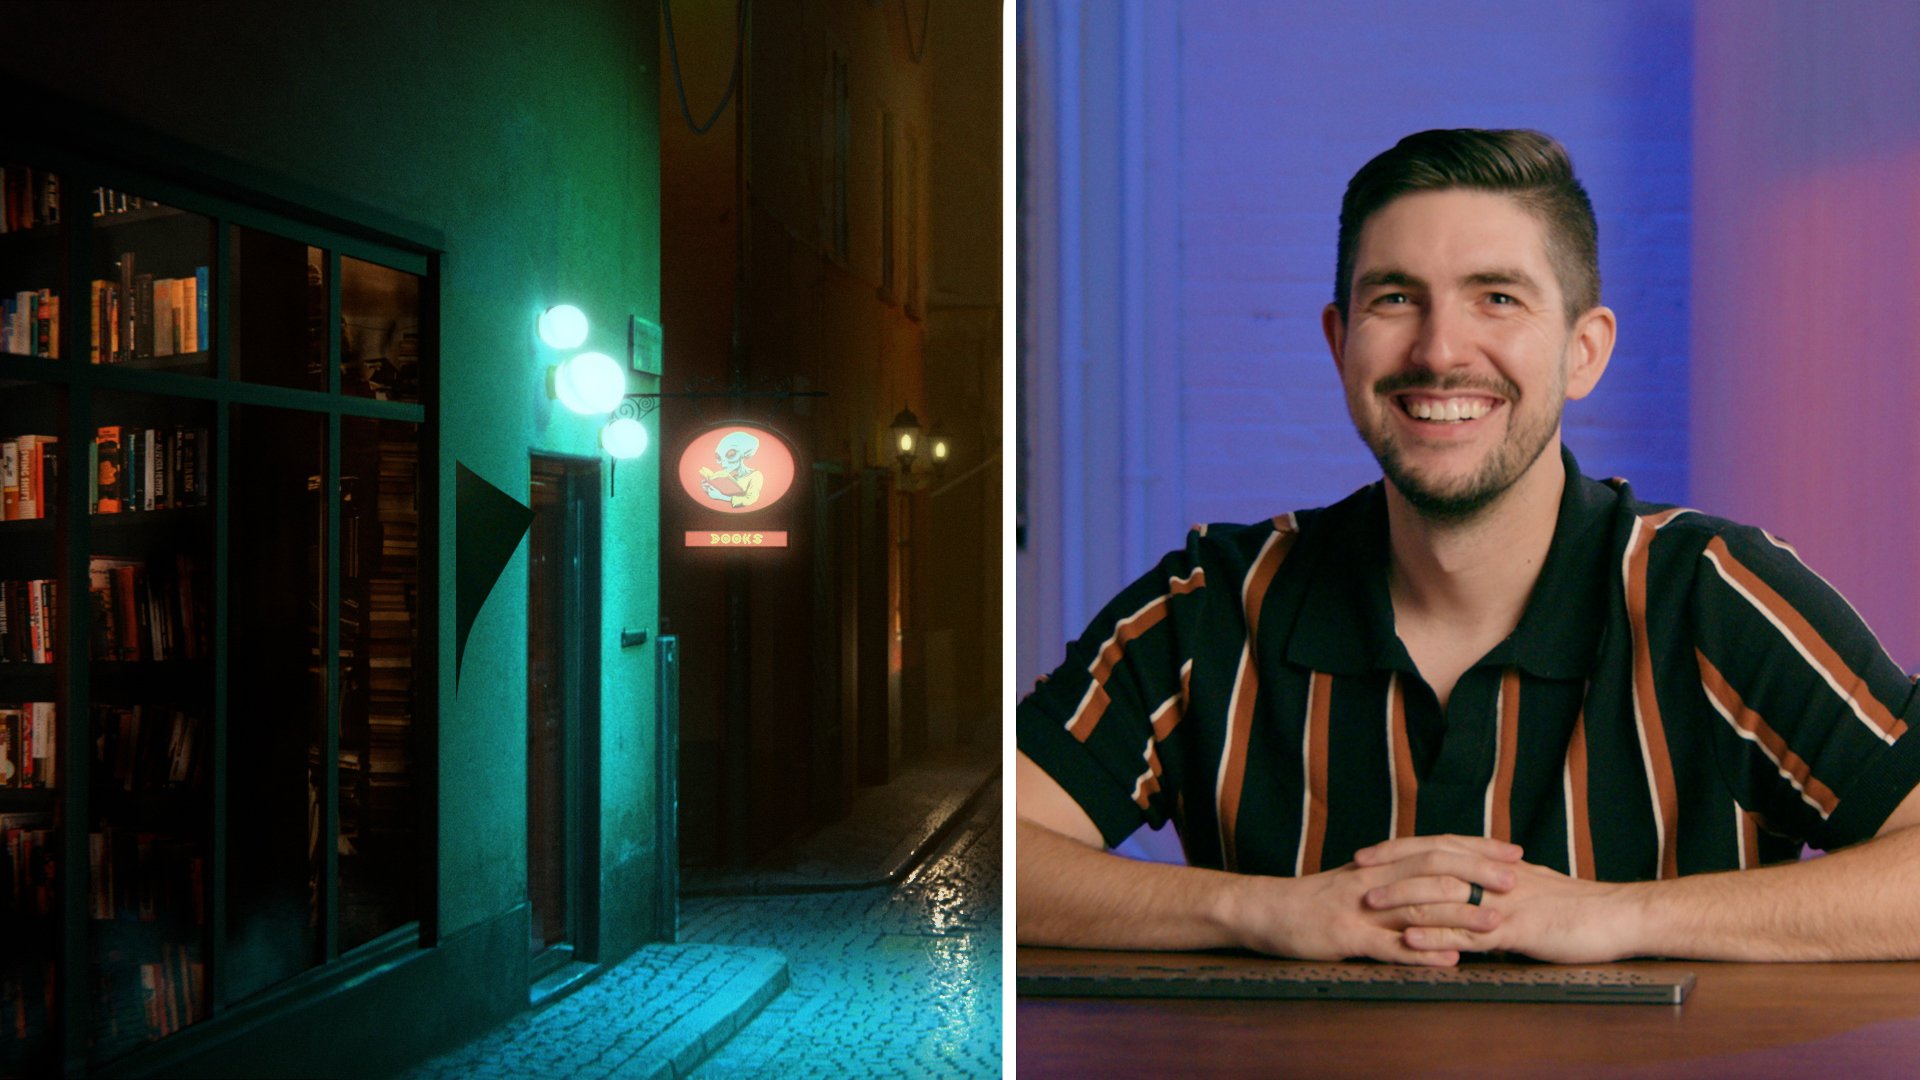
the geometry you've made. Next, we're going to add an
HDRI image to our scene. You can download free HDRI
images from Poly Haven. I'm using this one, which
is a nighttime street. In your shader editor
in the object dropdown, you switch it to World. You can add some curve nodes
to adjust the brightness and color of your HDRI so that it
matches your scene better. Now let's build our
apartment exterior facade. I'm using this image. In addition to
websites like Pixels, you can find imagery on
Flicker, for example. You can search by
commercial use, no copyright, or various
Creative Commons licenses. Just triple-check what kind of permissions you have
before you use an image, especially if you're using
it for a commercial project. Import it as images as planes, and then an edit mode, similar to the technique
we used in Class 1, we're going to add loop cuts, choose areas of the facade
that have different depths, and extrude them forward and backwards bringing
the windows in, for example, and
bringing ledges out. When the camera moves outside
of the apartment building, I'm also going to add some
reference geometry here for some cars parked outside
the side of the apartment, and I'm going to add a
plane as the ground. I'm going to select the edges of the ground plane and hit E to extrude Z to extrude them up to have a wall
around the driveway. Our camera movement is being guided by a camera constraint, so we can use that to
our advantage to add some extra movement to our camera once it's
outside of the apartment. To do so, you want to duplicate your main camera because the first instance
of your camera is necessary to project
the texture properly on the geometry of the interior of the kitchen but once
we have a second one, we can name it
something like ADL. Then once it's outside of
the apartment building, if you go into this
Constraints tab, the influence is how strongly it is being tied
to the tracking. If I keyframe that influence, once it passes
through the window, at the end of the shot, I can move the camera to
a new position, and as that animates, the camera will continue to pull back even farther and drop to the ground in a much more extreme way
than our initial shot, which just tilted
up a little bit when we were inside
the apartment. Here's what that looks like
once we're all finished. Continue blocking out your scene with any additional objects you want whether it's
cars or anything in the exterior and then
in the next lesson, we're going to add more detail.
6. Adding Detail to the Scene: Now let's add more
detail into our scene. First, I'm going to
take this image that I was using as the
apartment facade, and in Photoshop, I'm just going to
remove the fence and also cut it out so
it has transparency. Then I'm going to import it into Blender using images as planes. In edit mode, add loop cuts. Then we're going to
select all of those faces and hit E to extrude them
forward or backwards. Once you do that extrusion, you might notice that some
of the sides are stretched. If you open the UV editor, select those faces
and hit U, unwrap, you can then scale and
move that section of the model to project the
texture more normally. Some areas we're going to model separately like these
drainage pipes. Add a cylinder, rotate it, and scale it down. In Edit mode, select the face, E to extrude and S to scale it, and then E again to
extrude it back. Add the same apartment
material to the cylinder. In the UV editor, select U, project from view, and then
align it with the texture. Then add an array modifier to the cylinder and
line everything up. Because it's an array, this is repeating the same pattern
over and over again. But if we apply this
array modifier, tap into Edit mode, select U, project from view, and just
line everything up again. Now we can get some variation between each of those
drainage pipes. Another detail
we're going to add is the molding up
here on the roof. To do that, we are
going to use a curve. Shift A, add a curve. Let's do a path. This appears here at
our world origin. If you scale it up, you might be able to see
it a little better. Let's first get it align to this building.
Something like that. Tab in to Edit mode and making sure that
we're locked in this facing the z-axis so that we are only moving it along
the z and x-axis. Hit G, and place all of your points along this curve, and then E to extrude. The path will naturally add
a curve between points. If you need more curvature, you can select two points
like this right here, right click and
choose subdivide, and then move the
one in between. Then keep hitting E to extrude along path
here on the roof. Right now, the
path is similar to an empty in the sense that
there's nothing there. But if we go into the path
properties under geometry, if you increase the depth, it'll become a cylinder
and if you extrude it, decrease the depth a little bit, it'll have a little bit
more of a flat extrusion, similar to what that molding on the roof of the
apartment would be. Now that we also have some
geometry here to reference, we can also adjust all of
the points along the path. I'm going to use the Blender
kit add-on to look for a new front door and just replace the one that
we have in the image. Because I was using Photoshop to remove the fence of
the apartment facade, the door doesn't
look super great, but if we just drop in a 3D one, it should work nicely. I'm also going to add a lower
section to the building. Just using cubes and resizing
them, add another cube, scale it to the size of a stair
and add an array modifier and set both the z and x-axis to negative one so
it cascades down, and then let's add
a ground plane. Now let's add some
lighting to our scene. To start with, we're
going to add a sun, but we want it to
match the light that's baked into this
apartment texture, which is coming from
above and to the right. We want to match
the shadows that are already on this texture. So adjust the rotation in
our object properties of the sun until they look about even with the shadows that are already
on that building. Then in the light properties, if we change the
color to a blue hue, it'll feel more like moonlight. I also am importing
some 3D models of cars. I found these on Sketchfab. I was looking for car models that were made with
photogrammetry, which is when you take
multiple photos of an object and create
a 3D model from that. Because they were created
with photographs, there's already a lot of details like those surface
imperfections and irregularities that you're
not going to get with a super clean model that
you might otherwise find. Import your 3D models,
and place them. Sometimes when you
import your models, the textures won't be connected. If you have Node
wrangler installed, and if the textures are labeled a certain way depending on wherever you
downloaded them from, if you add a Principled
BSDF shader, select it and hit
Control Shift T, then select all of
your materials, Blender will automatically place them and have them plugged
into the correct nodes, so your base color
normal, roughness, etc. Some materials like
the materials for this truck were not
labeled properly, so Blender doesn't know how
to automatically assign them. If that's the case for
something you downloaded, you just have to bring in
the materials one by one and then plug them into
their corresponding sockets in the shader editor. I downloaded this UFO
model from Sketchfab. I'm going to have
it hovering over this building to continue this sci-fi theme that
we're going with. I'm also going to add an
area light and parent it to this model so the
emission texture from the model isn't
doing all of the work shining light down
onto the scene. I'm going to give
it a cyan color. That's going to sweep
across the whole scene. Next, I'm going to add the
HDRI image I downloaded. I want to add the fence
back into our scene from our initial image
of the apartment, so I'm going to
import it again using images as planes and
then cut out the fence. Scale it and have it all
aligned to our scene. Then tab into Edit mode and use loop cuts to isolate one of
the pillars in the fence. When we're in Edit mode, if you choose this icon, you can select the knife tool. We can create some more edges. We can cut out the rounded
section of this fence pillar, tap to Edit mode and hit
E to extrude it back. Then in our material settings, set it to opaque so we're not seeing through different
parts of the material. Do the same thing for the
other section of the fence, then add array modifiers to
each one to build our fence. Then it'll look
something like this. If you put all of the fence
into a single collection, hit Shift A, you can add
a collection instance. Then we have all
of these objects as one piece, so we
can duplicate it, rotate it at 90 degrees and have the fence continue down
the side of the building. I'm also going to use
Blender kit to add additional apartment buildings
outside of this one and depend all of the
floating kitchen items that we used in Class 4. Then adjust all of their
position and rotation keyframes so that
we can see them through the window
as our camera moves. Keep adding as much detail
as you want to your scene. This is a part of the process that can take
as long as you'd like. When you're ready, export
an EXR image sequence. To go over all of those render
settings in more detail, refer back to Class 1. In the next lesson,
we'll composite everything together
in after effects.
7. Compositing in After Effects: Now we're going to do some
compositing tricks in after effects to help make your
render really come alive. Bring your EXR
sequence into after effects a extractor and a
color profile converter, so everything shows up normally. Duplicate your combined layer, set one to mist and
another two emission. Set your emission layer to screen and add a fasplur so
the emission layer glows. Add an adjustment layer with lmentary color to bring some contrast back
into the image. Now, on a black solid, add a boris effects lens
flare and set it to screen. If you click FX editor, you can customize the
look of your lens flare. However, you'd like if you want a horizontal an
amorphic lens lens flare or something else. Another thing I'd
like to add if I have anything super bright in a render is a solid layer of a certain color set to light, the opacity down
to something like ten and a mask that's
extremely feathered. Basically, it's kind
of like a kind of like a haze as if
you were shining a bright light at
an actual lens. Turn the feather up to
something like 2,500. I'm going to bring
in the film glow and film grain layers that I've been using for the
other shots as well. Here's a before
and after of what the render look like
outside of Blender and then with some of these
compositing layers on top. I'm going to add
another lens flare for this light in the
background as well, which we see down in
the corner of the shot. The next thing we're
going to work on is the transition from inside the kitchen to outside
of the building of the camera passing
through the window. So we're going to add
some distortion and blurring as if the camera is moving through
a pane of glass. First, let's start
with a distortion that's going to cross the frame. Hit Command Y to add a
solid. Let's make it white. And then let's add a mask
on half of the frame, hit M. Turn on the stopwatch
to add a key frame. And around here when
the transition ends, double click the mask
and slide it over. And then we have this white bar passing in front of the screen. Command Shift C to precompose. Move all attributes
to a new composition, and let's call this
transition map. In this pre comp, let's
also add a black solid as well and place it
underneath the white one. Hit F and turn up
the feather here, so it's more of a gradient. We can move this
transition map down below all of our visible
layers, so we don't see it. And instead, add an
adjustment layer, a transition distortion. Add a displacement map. And then under the
displacement map layer, choose that pre comp we
just made. Transition map. For vertical, set it to zero. For horizontal, we're going
to choose mints. Okay. Is to something like
20 add a key frame. So this has some distortion as the camera is moving. And then we're going
to stack a couple more adjustment layers
on top of this. Let's add another adjustment
layer. Call it blur. Add a camera lens blur. And let's keep frame this transitioning
on and off as well, We probably want the
blur to end around here. Add chromatic aberration. So that as if the
camera is moving through a lens and kind of
splitting light a little bit. We'll drop this below
our distortion. And then we can edit the
distortion and the center of either our red green
magenta or blue yellow colors. We can animate these
distortion amounts. And the last adjustment layer. It's the lens distortion effect. If we turn this down
to something like 15 and key frame this as well. Just adding a little
more distortion as the passing through
a pane of glass. And when stacked on
top of each other, we have an effect
that looks like this. You can use your
miss pass to add some additional blurring
using a camera lens blur. And you can increase or
decrease that amount by adding something like Lumetri to
the missed pass itself. It kind of changes a little
bit as the camera moves. So I'm going to keyframe
the color wheels of. So that it's not causing too much blurring when the
camera to the building. Can also add a slight haze
or volumetric effect by adding a tint effect to the mist pass and
setting it to screen, then turning the opacity down. Some other final
compositing touches are adding a slight blur to the window once
we're outside of it, also adding a reflection over the surface of
the window material, and then some final looks like a film glow and a film grain. You can adjust all
these settings or apply any other effects to get the desired result
you're going for. If you want to use any of these boris effects
that I've used, there's a 15% discount code
in the class resources. So now let's take a look at
the whole finished piece.
8. Final Thoughts: Congratulations on
completing this class. We've covered 3D camera tracking in Blender and Synthesize, and on a full 3D set extension. If you've followed
all five classes, you can now put
all of your shots together into a single film. One of the great
things about having a 3D scene built in blender, is that, you can just move your camera around and
get additional coverage. Following these same techniques throughout these five classes, you can also get additional
establishing shots. Now let's take a look
at the finished film. Whenever you're making any shots using Blender or doing other
kind of visual effects, sound effects is a
whole second half to selling the effect, so be sure to include sound effects to
whatever you're doing. If any questions come
up during this class, put them in the
Discussion board, and I'm super excited to
see your final renders from this class or your entire finished films in
the project gallery. Thank you for watching. Bye.
 Alden Peters, Filmmaker, VFX Artist