Transcripts
1. Introduction: If you've done a film, you
know how expensive it is to do a company move from one
location to another to another. But if you can shoot all
of that in one space in front of a green screen and then add those
backgrounds later, you can get a lot more coverage in a lot more locations for a lot less money. I'm Alden Peters.
I'm a director, a motion graphics,
and VFX artist. You might have seen my films, including a feature
length documentary, Coming Out on Amazon Prime, and have also maybe
seen some tutorials I've posted on
YouTube and TikTok. I make independent films
because maybe like you, I compulsively can't help
but do anything else, and I use tools like
Blender to try to manifest my imagination without the need for tens of millions of dollars. In this class project, we're going to take some
green screen footage. We're going to
bring it into after effects to do some keying. Then bring that
keyed footage into Blender where we're going
to build a 3D scene. Then we're going to go
over some render settings and compositing
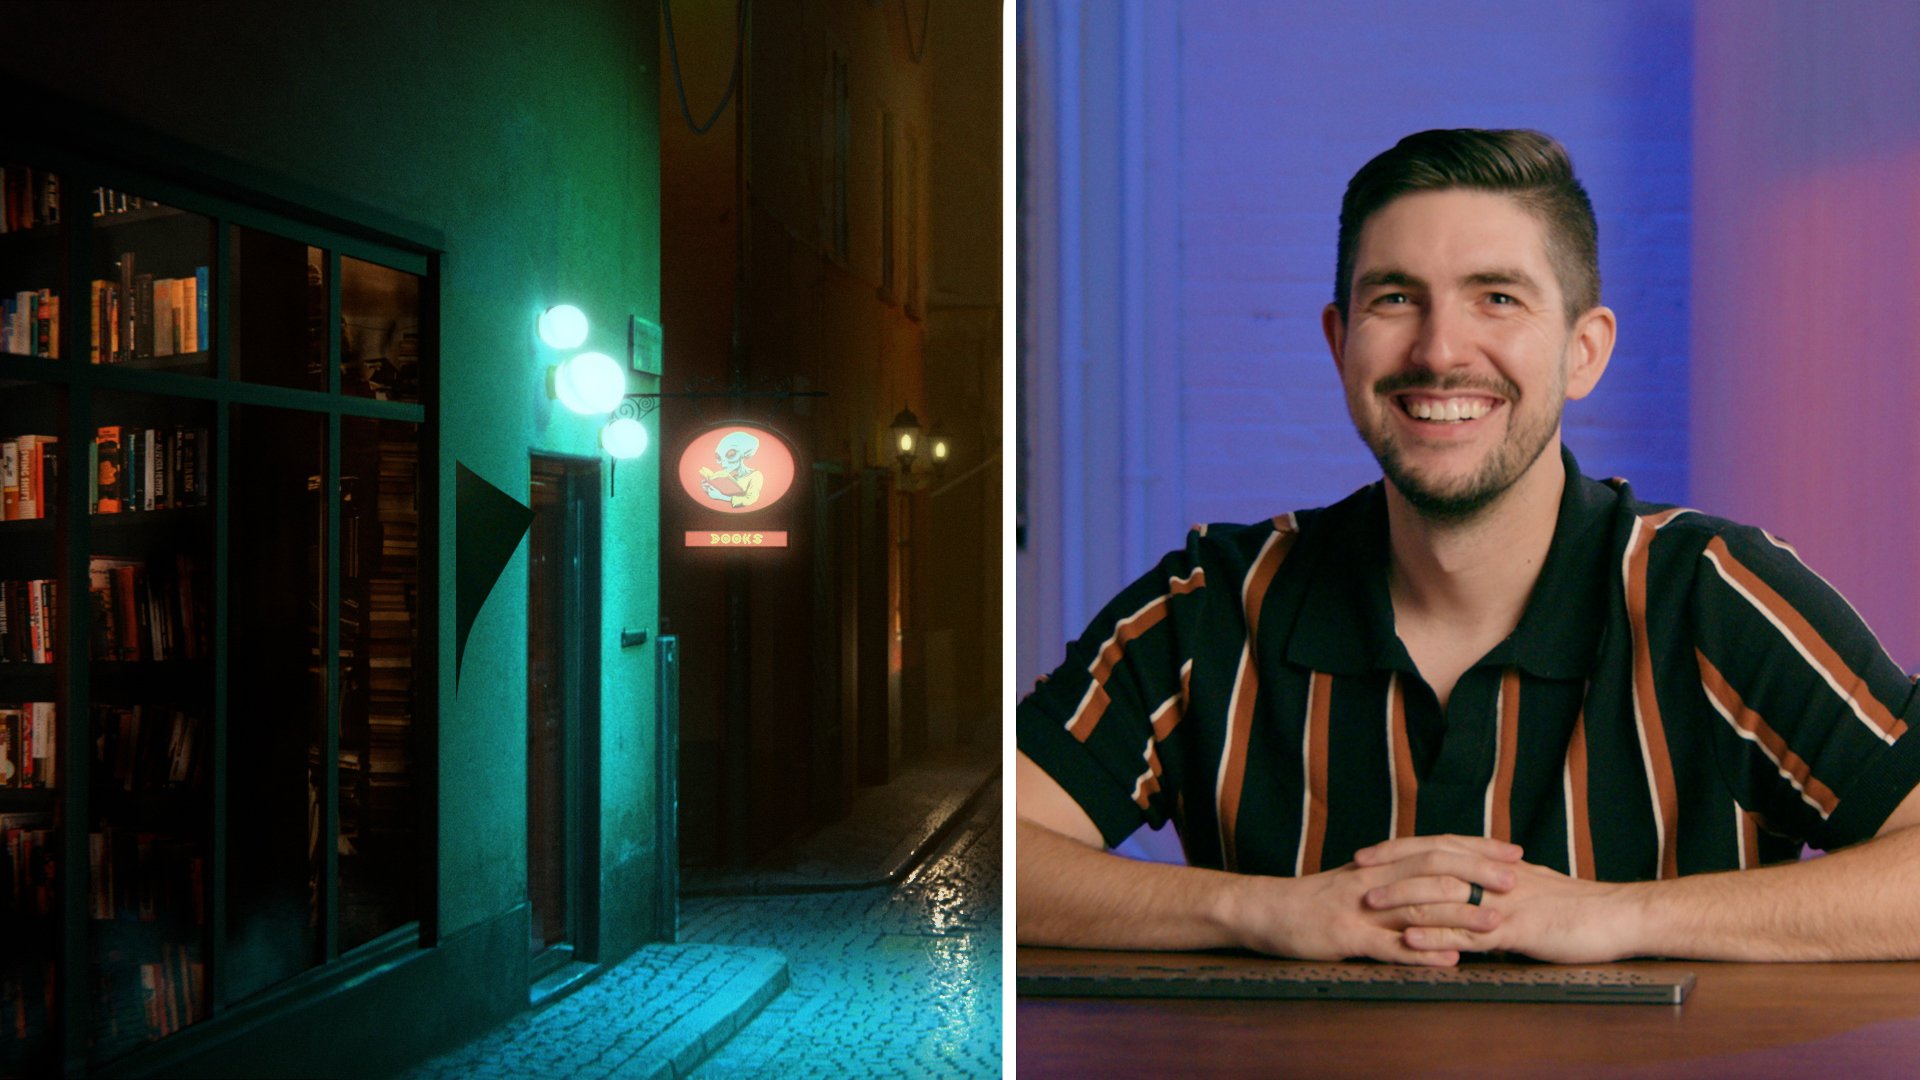
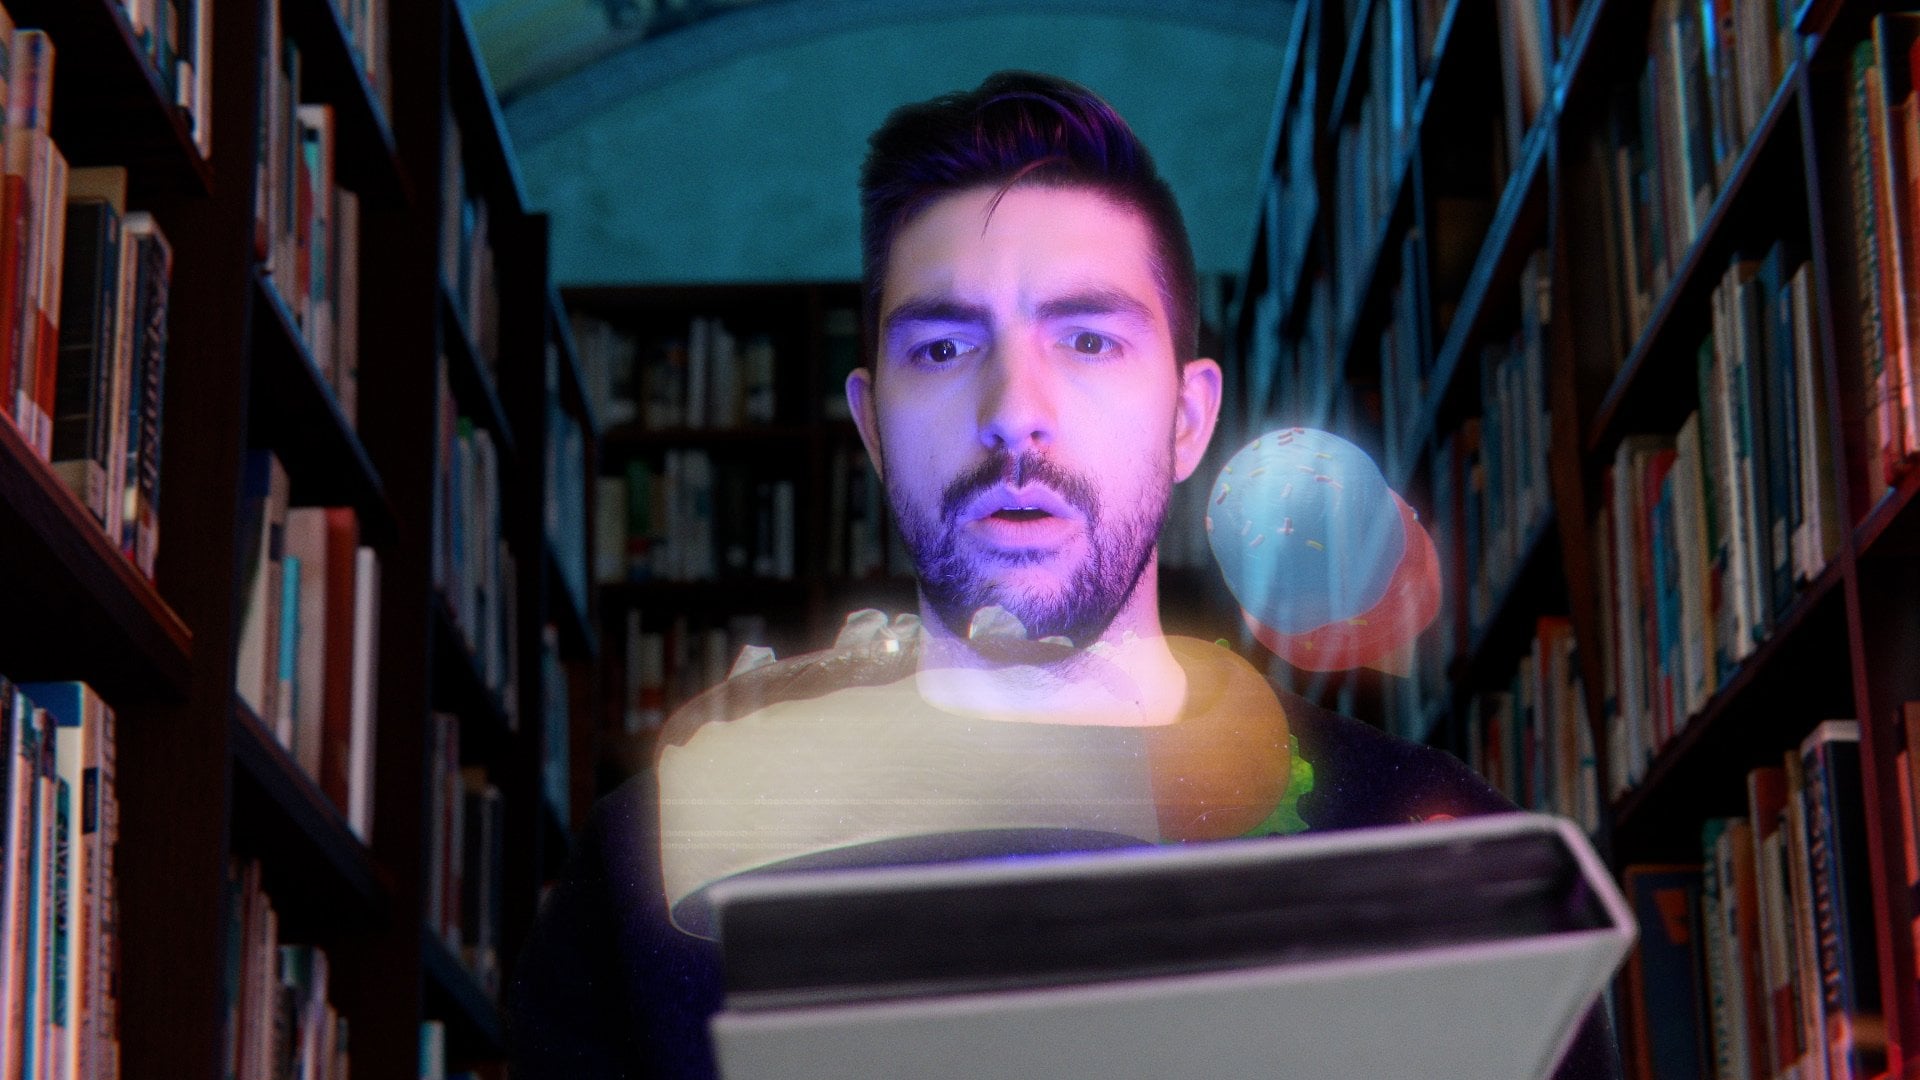
in after effects. By the end of this class, you're going to have this shot
walking through a library, starting with just footage
taken inside an apartment. There are going to be
five classes total, each one using different
techniques in Blender. When you do all
of these classes, you're going to end up with
your own sci-fi short film. You should know the fundamentals of Blender before
you take this class. To follow along,
you're going to need a computer with
Blender, after effects, a free software called fSpy, the camera and tripod,
and a green screen. The fact that you're willing
to dive in and learn a new skill in this class is
already super impressive. I'm super excited.
Let's get started.
2. Getting Started: Some notes about getting your green screen
footage is that you don't have to be in a studio with a full green screen psych, you can use a cheap Amazon
green screen like this one, which is what I did for
the footage we're using. And I just used a Sony
point-and-shoot camera. This is a ZV-1. If you're doing this project
for a film, let's say, you're probably using a cinema camera or something similar, so your workflow will be
a little bit different. But if you're doing
this project for just something online or
as cheaply as possible, tools like this will
get you just as far. When you look at
our footage because this is just a green
screen in a living room, we actually see the
rest of the room, and that actually works
to your advantage. I find that whenever stuff
is shot professionally in a studio where everything in the screen is green
except the subject, if all the right tracking
markers aren't put in place, it becomes very challenging to determine where that camera is. But if we can see the room, we can use tools
like fSpy like in the first class to set up the camera
exactly where it was. Some general things to
look out for are even lighting on your
green screen and avoiding green spill
on your subject. Usually, the closer your
subject is to the green screen, the more green spill
they're going to get. That is green reflection on
the edges of your subject. When you key your subject out, you might notice that there's
still some green edges. There are ways to fix
that, but as much as you can avoid it during
production, the better. With one of these green screen fabrics that you're
just hanging up, it would be better to steam
or iron the green screen, but I'm going to
show you how to do the process even if you don't. This is straight out of the bag, and I'll show you how to get
good results even with that. Another thing to
keep in mind is that a lot of the time when somebody is in front of a green screen, the impulse is to get
really generic lighting, and then you're
going to run into some problems later because
that means the scene that you create in Blender is
also going to have to be lit with that same kind
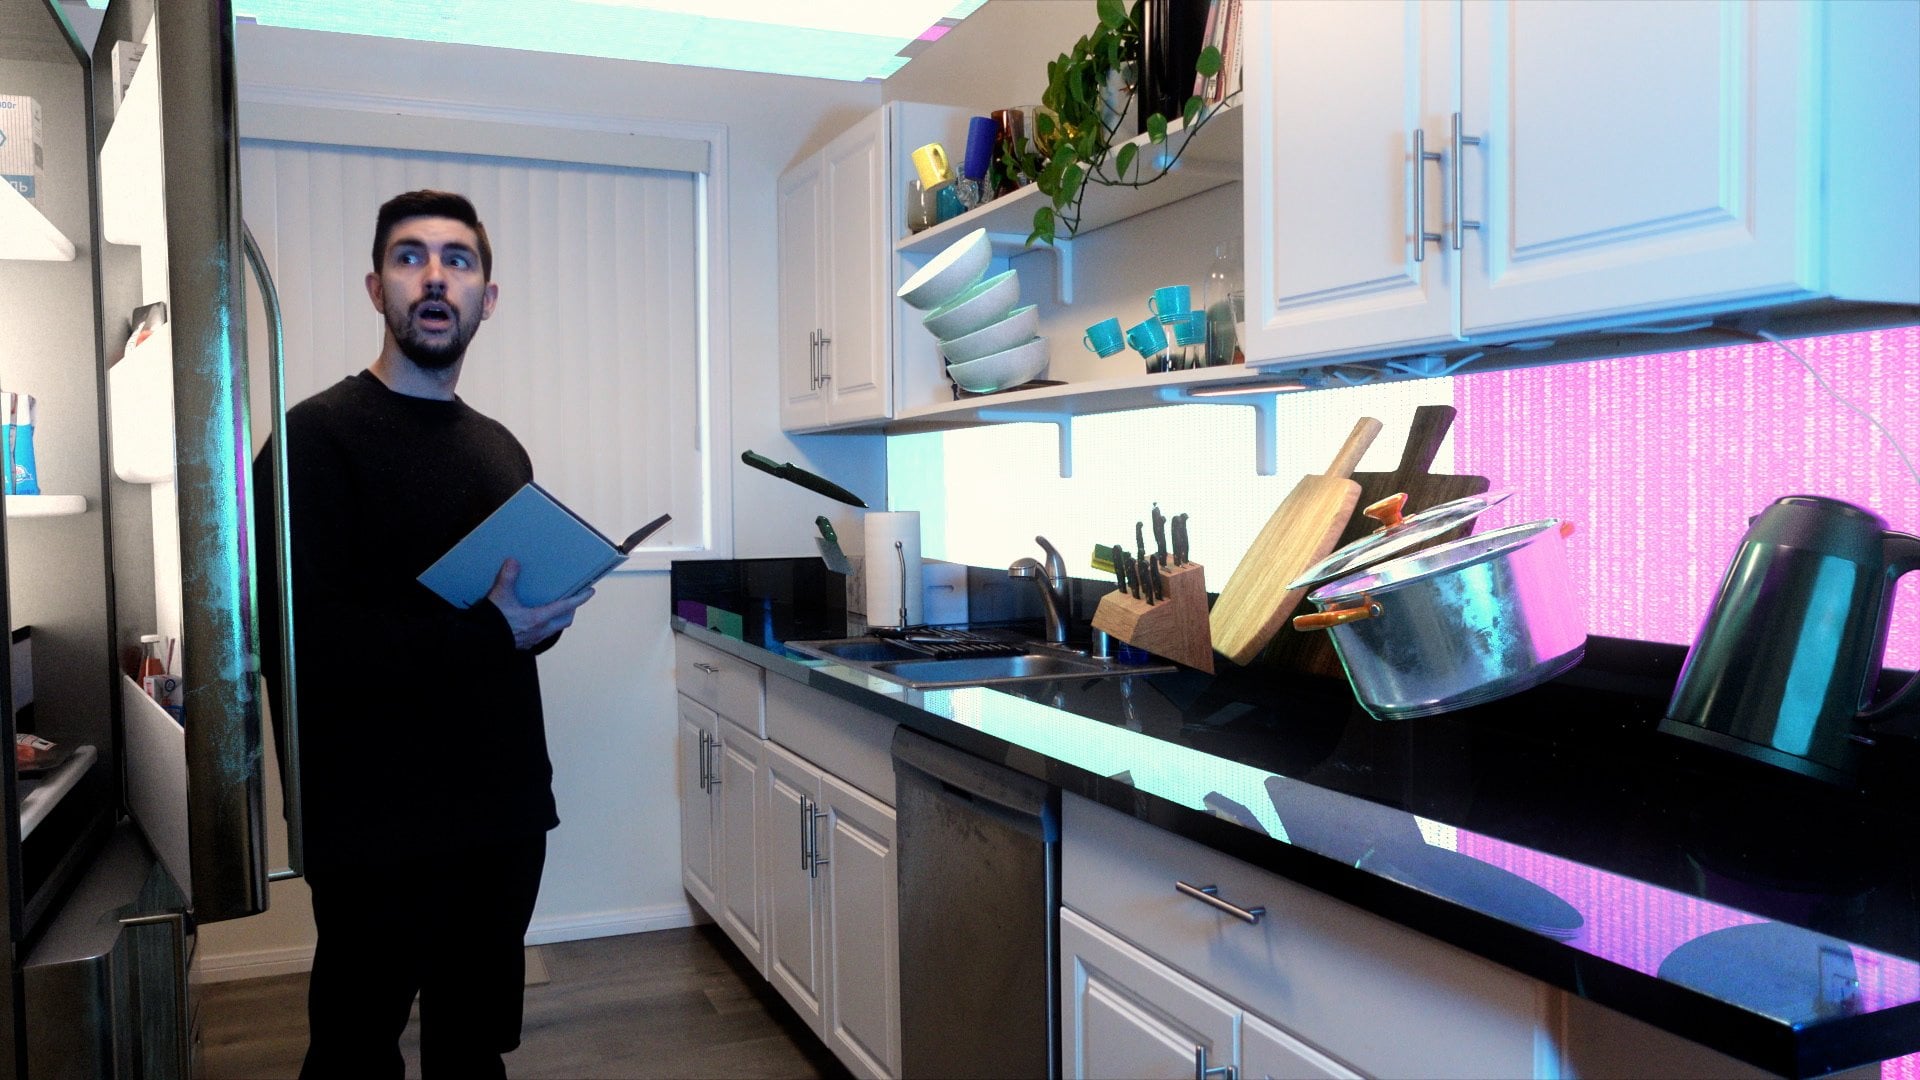
of even generic lighting. One trick, even if
your key light is a big soft light is to add some type of practical light
in your footage as well. In this shot, there is
a pink light that I'm walking toward as I grab
the book, and that way, I can add that pink light
into the green scene to make the footage
and the background a little bit more cohesive. You'll recognize
this sometimes when you see a Marvel movie
or something where all the environments are
lit really intricately except the subjects
themselves seem to only be lit by a soft key. If you are intentional with
what your shot is going to be and add the lighting
in the production phase, you're going to get
much better results. For this shot, my idea
is that I'm going to start looking up at the
ceiling of this library, tilt down to myself, I step forward, and grab a book
off the bookshelf. I started this shot
looking up so that my gaze is matching what this camera in Blender
is going to be, so having an idea of what
you want this shot to be like and how it's
going to be composed is also going to be
really helpful for you. For this class, you're going
to need Blender, fSpy, and After Effects, you're also going to need
a green screen, a camera, and a tripod. I put a link in the class
resources with one of my YouTube videos about shooting in front
of a green screen. So if you want more
tips, check that out, shoot your green screen footage, and then meet me in
the next lesson.
3. Keying Footage in After Effects: Now that you have your
green screen footage, let's open After Effects and bring it into
a new composition. There are three ways
we're going to prepare our footage before we
do the actual keying. First, we're going to increase the saturation of the
green in the shot. Then we're going to
denoise our footage, and then we're going to
add a garbage mask around the subject so that
we're only really keying the areas
directly behind them. If you're using footage
from a cinema camera, you're definitely going to
want to talk to a colorist or someone on your team about the color space that
you're working within. But something to keep in mind
is that we can manipulate this footage as much
as we want because the end result is going
to be an Alpha Matte. To increase the green, we can add Lumetri color to
our footage here. In Curves, Hue saturation. We can choose green and just increase this
saturation a little bit. Next, we're going to
denoise our footage. There are some built-in tools in After Effects to
denoise footage, but there are also paid tools that are a little
bit more powerful, including Neat Video
and Boris Effects. Today, we're going to be using the Boris Effects denoiser, there is a 15% discount link
in the class resources. Now we're going to add
some noise reduction. There is this BCC Noise
Reduction effect. We need to place it above the Lumetri effect, and
with these sliders, we can adjust how much smoothing we are going to
add to our image. If we also add an Unsharp Mask, set this somewhere 50-100, we can bring back some of the
crispness in our footage. This is going to add some
overall consistency to the green pixels with a
little less chattering, which will happen
later in our key. Sometimes in After Effects, when you stack up a
bunch of effects, it can really start to lag, especially if you don't have a lot of RAM in your computer. So at this point, I'm
just going to render out a PNG sequence of the footage with
the denoiser and the green pixels saturate
a little bit more, and then move forward with that. I already have that
export prepared, so I'm just going to drag
this into a new composition. Then move on to the next step, which is adding a garbage matte. If I hit Q, this will pull up the mask tool, and I'm just going
to outline myself, hit M, that'll pull up the mask path keyframe,
add a keyframe. Let's just move forward and just make sure that this
mask is always surrounding. That looks like I'm
always within that mask. From here, we can move
forward with our key. To do that, we're going to
add the Keylight effect. This comes already
installed in After Effects. To start with,
we're going to take this eye dropper and
choose a green pixel. Immediately kind of disappears. In this drop-down here,
we're going to change from Final result to
Intermediate result. This is going to give
us some more control down the road with
the color spill. What you'll notice is
that there's still kind of this haze of
gray pixels around me. We can adjust that by viewing down here
from RGB to Alpha. In this view, all of the
black pixels are transparent. The white pixels
have full opacity. And so we just need to make some adjustments to turn all
of these grays into black. To do that, we're going to
go down to the Screen Matte, we're going to clip the
black and the white. If we go back to RGB. Another way we can do this too, if we need some
additional control here is to add curves or levels, set them from RGB to Alpha, and then just pull back a little bit here to add
some more transparency. The fact this isn't
completely transparent, once there's a background
there should be okay. Let's take the first 100 pixels or so and do a RAM preview. We're going to see
what the motion on our edges looks like. We can see some kind
of warbling here. If we don't do any denoising, that's going to be
even more pronounced. But another effect we can
add on here is Key Cleaner. If we reduce chatter and
adjust some settings here, we're going to get a little bit more refinement on
these edges here. Another effect we can add
is Refine Hard matte, which is going to do a
little bit more of the same. It definitely makes the
edges a little sharp as is, so we can adjust some settings here to give it a little
bit more softness. This is where you're
going to notice After Effects starting to
slow down a bit, as you can see in
this RAM preview. But even if we just watch these first few
cached frames here, we can see a much smoother
edge here to the key. The last thing we're going
to do is work on our spill. Thankfully, there
actually wasn't too much spill in this shot, but we do see some green
around some of the edges. To do that, if you do an
Advanced Spill Suppressor, it should already be set to
kind of like a green color, so it'll take your green pixels and make them a
little bit more gray. But if you need some
more refinement, you can change it from
Standard to Ultra and actually choose the green pixel color if this isn't working for you. At this 0.2, I usually like to bring in any
kind of image in the background just to see how this key is playing
with something behind it. Sometimes if your background is extremely light or
extremely dark, you're going to see
different edges differently. Knowing, one, what your shot is going
to ultimately look like, is it going to be a darker scene or brighter scene, is helpful. Then you can adjust all
of the settings and the effects that you've added to make sure you get a clean edge. Once you've done all of that, again, it's time to
export a PNG sequence. This time, you want to make
sure your PNG sequence has an Alpha channel
because we're going to use this
as an Alpha matte. This is just because
as you've seen, all of these green
screen effects, do stack up and start to
slow down After Effects. I already have one rendered out. I'm going to bring in our footage and set
it as an Alpha matte. When I'm reaching for the book, I'm actually reaching
beyond the green screen, so I am going to
do a little bit of rotoscoping just to
cut out my hand. To do that, I'm going
to use Mocha Pro. There is a link to a 15% discount of Mocha Pro
in the class resources. I like Mocha Pro
because it gives you a little bit more control over the curved
edges of your mask. You start with a track and then can refine the
mask from there. But if you just want to
use the pen tool and animate your mask that
way, you can do that, too. Sometimes if you have
some motion blur in your green screen footage, or you need a lot of extra hair detail for
maybe frizzy your hair, you might need other
tools as well. If you have a more
challenging key, sometimes you need to bring in other tools for different
parts of your shot. Once you have your final key, render it out as a
PNG image sequence with an Alpha channel. Then in the next lesson,
we're going to open up blender and set up our
scene to match our footage.
4. Setting Up Your 3D Scene: Now we're going
to start building out our scene in Blender. To start with, we're going
to follow the same process that we did in the
first class using fSpy. Take a single still from
your green screen footage, bring it into fSpy and do
a solve for the camera. Then you can bring
that into Blender. The next step is to build
some reference geometry of your room and
your green screen. This way, our Blender project
will all be to scale. This is also one
of the benefits to seeing the room around
the green screen. If you had nothing but
a green pyk behind you, it would be really difficult to get the camera
position accurate. Now we're in Blender with
our reference geometry. Our camera has a background
image of our footage, so if we scrub through, we can see our green
screen shot in our camera. Next, you're going
to want to download a model of a person. You can get this
from TurboSquid, Sketchfab, or Blender kit. It doesn't really matter, all that really matters is
the scale within the scene. If this came in a
little bit large, we're basically going to scale
this down and position it where we think the subject is in front of
this green screen. I know that this is pretty
close to the screen itself. This is how we're going to keep the scale accurate
in our whole scene. I have stepped forward.
I'm just going to hit Shift D and duplicate this model and move it forward until the scale
seems about right. This is going to
roughly block out the start and end position of the subject as if they
were in 3D space here. I'm also going to add a cylinder and just have a reference point
here for this light, which is also holding the book, but this is going
to be the position of the book on a bookshelf. This is probably just in
front of the subject, something more or
less like this. With all of our reference
geometry in place, now we can add our footage
using images as planes. We're going to have to switch
to viewport shading to be able to see this footage. But let's line it up as best we can to our model here. In your Shader Editor, this sometimes comes in
as just a single image, so if you open again, hit A, and open image, you're going to get all
of those frames in there. Then if it's not playing, it's because auto
refresh isn't selected, so make sure that
checkbox is ticked. Right now, our footage
is on a flat plane, and the plane is in one position as the
subject is moving forward, but it's actually not
moving through 3D space. But if we animate this
plane moving forward, it can cast shadows in the environment and add
to a lot more realism. First, we're going to
animate the plane moving forward to the second position where we have this
reference person, and then to compensate for
that scale adjustment, we're also going to
animate the scale down. It's going to be a little bit of a forced perspective,
but it will work. To start with, let's animate the location of
our footage here, scrub forward until it gets
to the second position, move it aligned with
this reference, and animate a keyframe there. You can also animate
the scale and try to scale it down so it matches the background
image of the camera itself, because that has
the footage without any scale applied to it. If we scale this down, we can also move it up and over a little bit and hit to
add a keyframe here. What this is going to do is have our subject stepping
forward through 3D space, and then landing in
a second position and from our camera
position here, if I turn off this
background image and let's also turn
off these reference, folks, it looks
normal to the camera. Now, the book
itself shouldn't be moving because it's going to be sitting here just
on the bookshelf. After this keyframe,
splice this images planes, if you go into tab and
just add a loop cut, you can go to where
the book edge is. Select this edge, hit P, separate by
selection, and now we have two pieces
of geometry here. For the second one, we're just going to delete
those keyframes. The subject will be
moving in 3D space, but the book will stay put. Then they will be aligned again once they get into
the second position. I'm going to quickly create some reference
geometry of other books. If I place this
scale along the x, y and z axes to get this to
be roughly book portions, I'm going to turn off
this cylinder as well. If I go into modifiers,
generate array, this create duplicates
of your mesh here. We don't want it
along the x axis, maybe along the y axis. If you hold down shift
and slide the value over, it'll go a lot slower so you can get a more accurate number here and then increase
the count just to get some idea of what that bookshelf
is going to be like and grabbing this
book off of the top. From here, keep adding
more reference geometry, more books, and bookshelves, duplicate everything and
get your shot set up, so you have rows of bookshelves
throughout your scene. We're also going to
add a new camera and animate a tilt down. Because your footage
is a flat plane, if you have too much
movement of your camera, you're going to see
that that's flat, but if you are panning, tilting, tracking left and
right a little bit and booming up and
down a little bit, and you keep that
perspective relatively similar to the perspective of the camera to your
green screen footage, you're going to get a lot of
parallaxing in your shot, which adds to the realism
without destroying the illusion that you just have a 2D plane here in your scene. Now, here we are with our shot. We have the camera tilting
and rotating down, the subject moving forward and then grabbing this
bookshelf off the shelves. When you play this
back in Blender, you're going to see
the frames per second, and that started out at 23, but now we're doing
three frames per second. Because the render
times can take a while, it's really helpful just to do a test render to make sure all
of your motion looks good. One way to do that is if
you go into the output, set a save location. We'll call this Library Test 1. Here we can change this
to video and encoding, change this to quick time. Then up here, if you go view,
viewport, render animation, this is going to give you
just a really fast render of of the view in your viewport. This is without any of the materials applied
or any of the lighting. It goes pretty
quick, and then you can play it back in real time. Here's what this shot looks
like playing in real time. In our footage, we
see some of the light in front of the book because
it's resting on top, so when we're putting
in our bookshelf, we just want to make sure
we obscure that and only see the book itself and not the light that
it's sitting on top of. Keep building out your reference geometry and get
your camera set up, and then join me in the next
lesson where we are going to build out a realistic bookshelf.
5. Building a Bookshelf Model: Now we're going to build a
3D model of a bookshelf, using an image and UV project. This technique can be used
to build all sorts of 3D objects using
photos and blender. In a new project file, bring
in an image of a bookshelf. I got this one from Pixels. In Photoshop, I did make sure the X and Y-axes are as
straight as possible. In a new blender project, bring in that image texture
using images as planes, and then we're going
to add a new camera. A little quick tip here is like, whatever perspective you're
looking at in your viewport, if you add a camera, it's going to have
that perspective. If you lock to one axis
and then add a camera, it's going to have no
rotation on that axis. We want it both of these
perfectly aligned on our plane, if we add in the modifiers
tab, UV project. Choose UV map. In object,
choose your camera. Then if we move our camera
forward and backwards, we can see that we are projecting this texture
onto that plane. Here in the aspect ratio, we're going to
want to put in the dimensions of this image, and this one is 5,931 by 3,959. Enter that value
here. Now we have this image in the
correct aspect ratio. If we move our camera
forward and backwards, we can see it fill
up that frame. The reason we're doing it this way will be clear
in just a moment. The first thing we're going
to do is go in here and add some loop cuts
along the shelving because we're just
going to extrude the shelves backwards. Then select all the faces of the shelves and hit E to
extrude them backwards. If you do this extrusion,
you might notice that you can see through the texture. Sometimes the face that's closest to the camera
becomes transparent. This is a material setting
when you use images as planes. In the materials tab,
if you go to settings, instead of Alpha
blend and Alpha clip, set it to opaque, and then you can see
the material properly. Now we have this bookshelf here, if we are in edit mode
and hit Shift + A and add a cube and line it up to one of
the books on the shelf. Scale the X and Z-axes. Place it where would
go on the shelf. Because we use the
UV project modifier, we can add as much geometry
as we want to this object, and it's just going to
project straight onto it. If we keep adding books and scale them to the books
on the bookshelf, we're going to end
up with a 3D model that has all of
this book detail. If you're doing this process and you notice some distortion, one thing you can add is
the subdivision modifier again under modifiers
generate subdivision surface. Again, make sure you
set it to simple, and then you can increase
this a little bit. As you can see down here on
the bottom of the shelf, it's just going
to straighten out some of those lines
a little bit. I'm going to add another
plane and just show you what happens if you're not using the
UV project modifier. I'm going to add
the same material, go into edit mode, and if you add a cube, it's going to
project this texture arbitrarily onto that cube. If you tried to add
a book this way, you'd have to keep
having to reproject the material onto this geometry. But we can avoid all of that by using this UV project modifier. Continue this process. It can be a little bit tedious, especially if you have a
bookshelf with a ton of books. But it's pretty simple. You just keep duplicating that cube, scaling it for the next
book along the bookshelf. Then by the end of it, you're going to end up with a
bookshelf that has a ton of geometry that's going to look really good when we
add our own lighting. Here I have a finished
bookshelf already done. You can see we have
all this geometry, and when that's really
going to sing is if we go into rendered view and
add a couple of lights. Let's add a couple of
point lights real quick. When this is in our scene, we're going to be
able to see all of the detail of this geometry
of these bookshelves. Which is going to look a lot better than if it was
just a flat plane. Before we get to the next step, make sure that in
the modifiers tab under UV project,
you click "Apply". This is going to then lock that texture onto
the image so you can append it into another project without having to rely on the camera itself. Build out your bookshelf
by duplicating the cube and scaling along
the X Y and Z-axes as needed, and then meet me
in the next lesson when we're going to replace our reference geometry of bookshelves with this bookshelf.
6. Building a 3D Scene: We're going to import that
bookshelf that we just made from that project file
into our main project file. To do that, we're going
to go to File, Append. Navigate to where you had
your bookshelf project file saved and then you'll see
all of these folders. You can append your camera,
lighting, materials, anything from one
Blender project to another but we're
going to go into Object and click on the bookshelf that has
the applied texture. We're just going to line this up with our reference geometry, rotate it along the z-axis. You might notice if you applied the subdivision modifier
to your bookshelf, it might start
slowing down Blender, especially as you duplicate this bookshelf again and again. But if we turn off the real time viewport
on this modifier, we're not going to see it
while we're just working, but it will be activated
in our render here. Let's just get our scale
relatively similar. I'm going to turn off
the reference geometry. Then in modifiers,
we're just going to add an array modifier. We want this to go
the other direction, so just click -1. We can increase that
count a little bit. Now that we're building
out our scene on our own, we can also make the room a bigger than the reference of the living room
where we shot this. We can also stack
these array modifiers. This first array
modifier duplicates the bookshelf backward but
if we add another one, and then sometimes you have
to figure out which of these factors correspond to the actual bookshelf
because when you're rotating it around,
sometimes it changes. But in this case, the vertical
is y and we can duplicate this a few times to make the
bookshelves higher as well. Now, let's add some
lighting to our scene to match the green screen
footage that we have. We have an overall
even lighting. Then as the subject gets
closer to this book, there's this pink glow. In the footage, it was a
constant source of light. But in here, I'm going
to gradually have this pink glow illuminate as the subject gets
closer to this book. Let's go into the rendered view and start by adding
an area light. We're just going to
scale this way up, place it above our bookshelves, and let's just keep increasing this until we get
something that looks okay. That roughly matches
the illumination here. Maybe rotate it a little bit. We can also bring another one
over here, rotate it back. Maybe give this one
more of a cyan color. I'm going to add a point light, line it up with our book, which is right here. Make it that same pink color, and let's try
something like 1,500. Something like
this. Around here, let's add a key
frame to that power, and then go back a few frames, set it to zero. This is going to gradually
turn on as I walk forward. Then we have this pink lighting on the bookshelf
and on the subject, and that's just going
to make the two feel a little bit more cohesive. The next thing we're
going to add is a depth of field to
our camera in Blender. To do that, select your camera
in the Camera tab here, turn on depth of field. When you toggle that down, we have a distance that we
can adjust and an F stop. One thing that's helpful
to know is if you go to the viewport display
and click "Limits", this cross hair here is where
your camera is focusing, so you can see how far
that depth of field is. You can also choose an object that it'll constantly focus on. In this case, I'm going to choose the layer of our subject. Click the eye dropper
and choose it to see what you're doing
a little more extremely. Turn this stop way down, and then you can see with a little bit more precision
exactly what's in focus. Then we can just bring that up until we have the depth of
field that feels appropriate. Another way you can help avoid a repeating pattern is to take one book from
your bookshelf asset, and then you can have a single book asset that you can place in shelves just to make sure we're not seeing the same
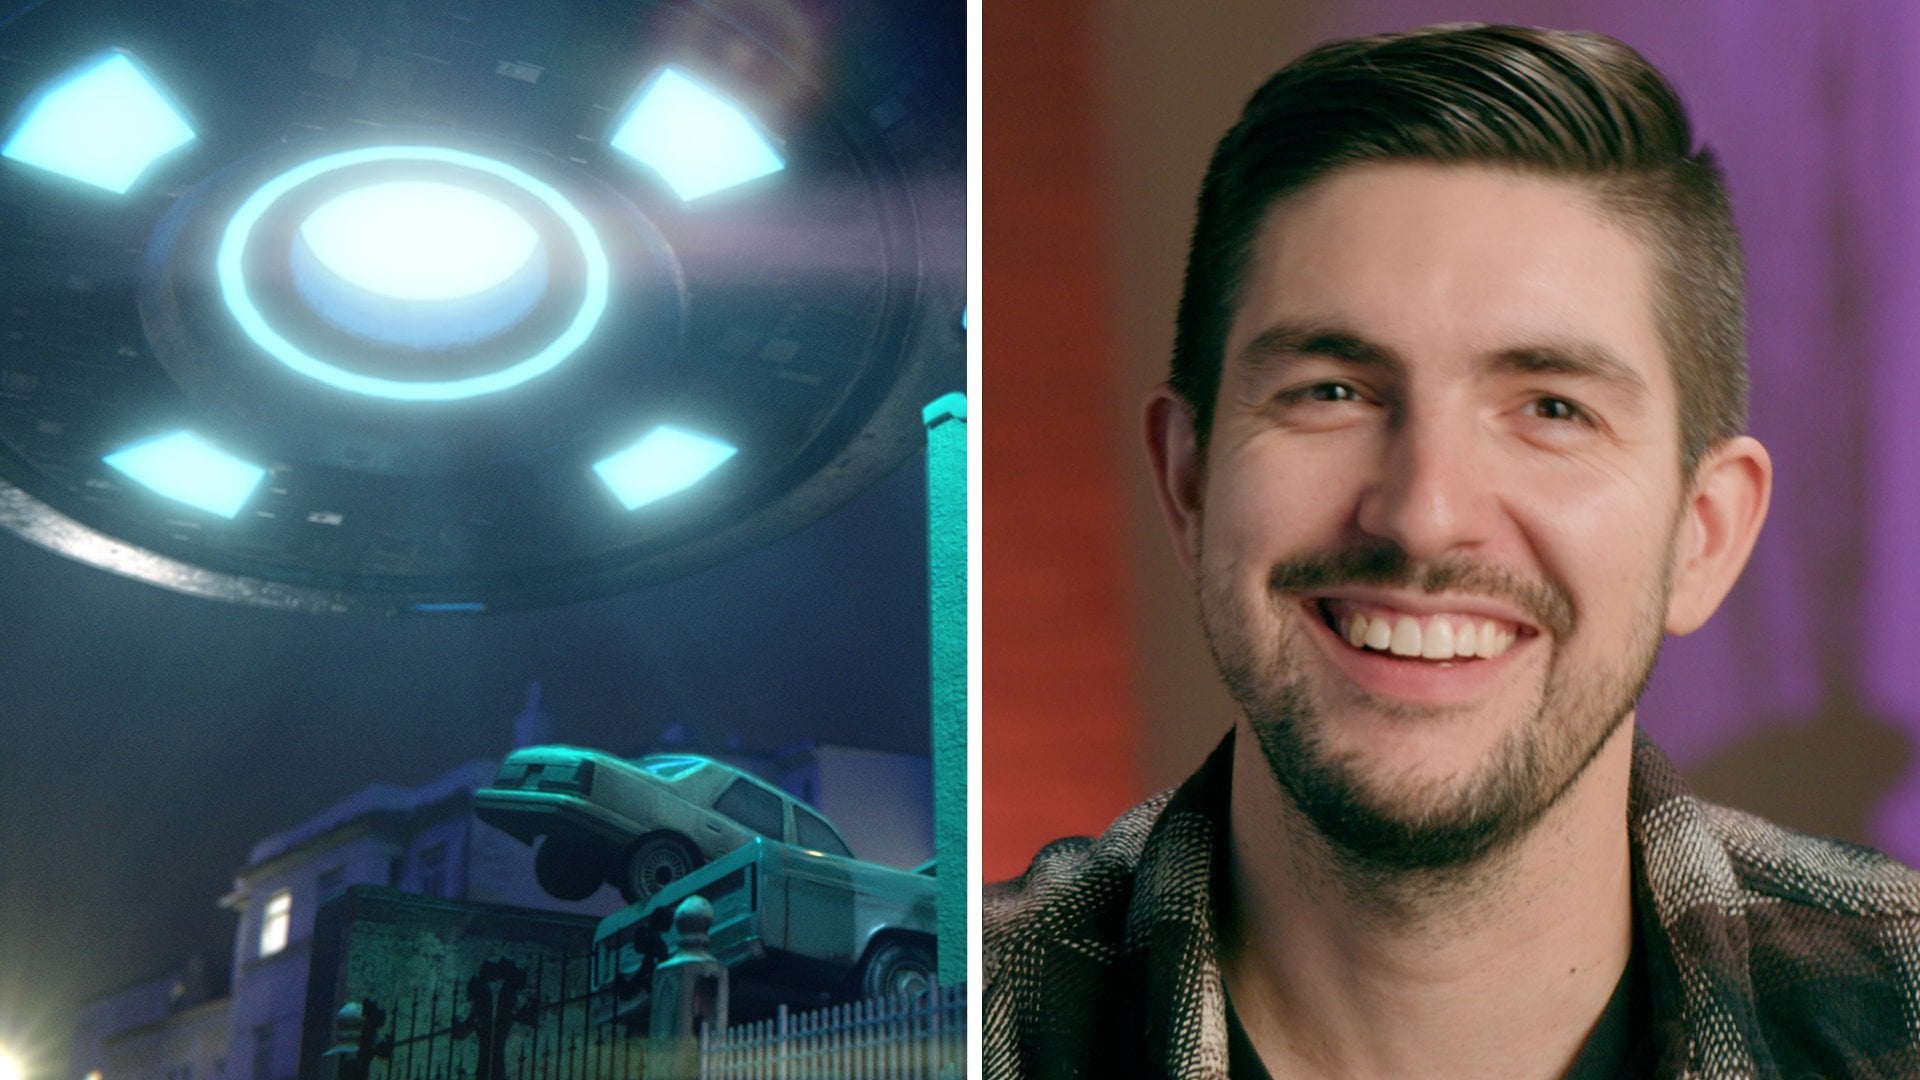
pattern again and again. I used Midjourney to create
this image that's like a baroque/Renaissance
painting of a bunch of UFOs. We're going to make this into an arch ceiling above
all the bookshelves. Rotate this along the x-axis. Place it above our room
here, scale it up. To add an arch, if you go into
edit mode, add a loop cut, with this edge selected, hit G and rise it up
and hit Command B, and that's going to bevel it. Then if you scroll
on your mouse, you can increase the
resolution of that arch. I also want to add
a little bit of detail to this texture as well. One way we can do that is by, let's see, UFO painting texture. If we just add another one, we can go into Blender kit, search for materials,
type in painting. Let's do something like this. Now we have this abstract
painting texture. What's nice about
this is we have a bunch of images here in the material that we can copy and paste into our main
painting materials. In particular, this
is going to have a normal texture that
has brush strokes, and this is just going to add a little bit more detail
into our main painting. If we just copy paste
the normal texture and the normal map and then
plug this in here. This is what it
looks like before. But then if we add this
normal texture in, we can see some
painting detail here. We can probably turn the
strength down to about 0.5. Similarly, if we add a bump map, place it between our normal and our
principled BSDF shader, bring our image
texture into height, this is also going
to give us some bump around the image texture itself. Then we can increase
this intensity down to something like 0.2
on each of these. This is a way you can get a lot more detail into
your image texture, give it more of a painter look. You can do that by pulling image textures from materials that you get from Blender kit. For the back wall, I'm going to add a material from Blender kit. But now I want to
add some molding between the wall
and the ceiling. To do that, we're going to
model a shape of the molding, use an array modifier, but have it follow a curve
along the edge of the ceiling. To do this, let's start
by adding a cube. Move it up here for now. Let's scale it down a bit, add some loop cuts, and let's extrude
this middle part in. Something like that. Then
if we Shift, add a curve, and we can do a circle and then rotate at 90
degrees on the x-axis, and we're just going to
try to line it up with the curve of this
back wall here. If we go into edit
mode by hitting Tab, we can choose the
edge of the circle, move it along the x-axis. Move this up a little. We can also just move
the handles themselves. Something like this could
be a good starting point. To have an array follow a curve, you need the curve object and the object that has
the array modifier in the same position. To copy and paste that position, there's just an add-on called Copy Attributes Menu
if you toggle that on, you will be able to
choose your object, then choose your curve, and then hit Control
C and copy location. This puts your object down here because that's the origin point of your curve, but that's okay. Because now, with
our cube selected, we're going to add
an array modifier, and we're also going to go
add modifier deform curve. For the curve, we're going
to choose our circle. Here, if we increase this, we can see that
our array modifier is moving along this curve here. If we scale it down, WE can have a little
smaller molding. Then if we hit G, and then X, move it along the x-axis, we can control where it starts. Here, let's scale
it down even more. Also select them both and move them closer
to this wall here. Now with the cubes selected, we can just increase the count. If we tab in edit mode
in our curve, hit A, right click and subdivide, you can even do it
a couple times, we'll get a smoother curve.
7. Compositing and Rendering: Now, let's go over the
Compositing tab in Blender. Similar to the shader editor, you can use a bunch
of different nodes in the Compositing tab to do some compositing
during your render. To make this work, you
have to turn on use nodes, and you also have to
render out a single frame. First, let's render an image. Once you have a shot rendered, it'll show up in the background here in the Compositing tab. It might be zoomed out a bit. If you hit V, you can zoom out, and if you hit Option
V, you can zoom in. We're going to set
up some nodes here. One of the first things
I'm going to do is turn off Denoise because,
in your render, Denoise happens at the end, but because we're
going to be adding some nodes during the render, we want to Denoise the image before we start
adding these other effects. We can actually just add
a Denoise node instead. Here, Shift A, search and look for Denoise, so we're going to add that one. Shift A, and we're going
to add lens distortion. Now, if we take our image, bring it into image, image here into image, and then from lens distortion, bring that into the
composite and the viewer. Now, if we increase
the distortion, we can see what's going on here, but if we add some dispersion, we can add some
chromatic aberration, and if we keep this subtle, it'll just add a little bit of aberration along the edges, which just helps the image
feel a little less crisp. We can bring that down
to something like 0.01. Now, we're going to render
our shot out of Blender, and then bring it into After Effects for some compositing. Similar to the last class,
we're going to set up a multilayer EXR image sequence
and set up our combined, missed, emission, and
ambient occlusion passes. Because this is a
green screen shot, we're going to want to
render it out three times. We want a complete shot, we want to render out just the background with no subject, and we want to render
out the subject on its own with transparency. To render out of Blender
with transparency, you have to go into
your Render tab, under film, choose
"Transparent". This is true if
you're rendering out a PNG image sequence
or anything. But if you use the
Compositor tab and you render out
your shot here, there won't be transparency unless you set up some
additional nodes. Let's go over how to do that. In our nodes here, we
have our image going through Denoise and
lens distortion, but we also want to
run our Alpha channel through the same lens
distortion node as well, so we're going to
duplicate this, set Alpha to image, add a set Alpha node, bring in our image from up here, and set this image to Alpha. Be sure to drag the set Alpha to your Composite and
your Viewer tab. This way, the image
and the Alpha channel, both have the same lens
distortion based on that node. Render out those passes from Blender and then meet
me in After Effects. Here in After Effects, I
have my main render of the whole image and also a background version that doesn't have
the subject in it. For the Alpha pass, I just rendered out a PNG
image sequence. Because this also
includes the book, I really quickly masked out
the book in this pre-comp and then just called this
pre-comp Alpha Mat 2 so it's just the subject. Let's add an adjustment layer
and add a Lumetri color, and just bring down the midtones and
shadows a little bit. Next, we're going to
add a light wrap. This is taking that clean
background plate and wrapping it around the edges
of the composited subject. We're going to use
the Alpha channel, and we're going to
use that background render to make this
light wrap effect. Bring in your background render, we're going to
call it lightwrap. We're going to add four effects to it: First, a fast blur, a set mat, a channel blur, and then we're going
to duplicate that set mat and put it
behind the channel blur. For a set mat, we're
going to choose this pre-comp of
our Alpha channel. On the first set mat, we're
going to invert the mat. In channel blur, we're going to increase the Alpha blurriness, set it to something like 15, and you can see it creep over the edge of the subject here, and we're also going to
increase the fast blur so it doesn't have almost
like a transparent effect. If we set this light
wrap to screen, it's also going to illuminate
the edges a little bit. This is really helpful if the background behind your
subject is very bright. In this case, the background
isn't super bright, so we're going to bring
the opacity way down. This technique will
help the foreground and background blend together
just a little bit better. The next thing we're
going to do to blend the foreground and background
a little bit is add a subtle blur to just the
edges of our subject, so let's add a new
adjustment layer and call this edge blur. Duplicate our light wrap, we're going to
increase the opacity up to 100 and just drag this
below our combined layer, this is just going to be an
Alpha mat for our edge blur. If we parent the Alpha
channel to that light wrap, we can see what we're doing
if we add a fill effect. You can see that this adjustment
layer is now applying to only the edges
of our subject. If we add a camera lens blur, set it to something like two, we can soften those edges just a little bit to help blur the lines between the
foreground and the background. In After Effects, you can add some final looks to your shot, similar to the last class, including a film glow
or a film grain, and any other color
correction you want to do. Then set up your render
in After Effects, and let's take a look
at the final shot.
8. Final Thoughts: Congratulations on
making it this far. We covered a lot of ground. If you have any
additional questions, put them in the
discussion board. Don't forget that
sometimes you're going to run into Blender
crashes or you're going to have to rerender
your shot multiple times because you accidentally kept
a layer on instead of off. That's totally normal
and part of the process, but stick with it, and
I can't wait to see your final renders in
the project gallery. Goodbye, and I'll see
you in the next class.
 Alden Peters, Filmmaker, VFX Artist