Transcripts
1. Blender Essentials for Beginners: Transform and Gizmo Basics: Hello, everyone, and welcome to Blender Essentials for Beginners transforms and Gizmo basics. If you have ever opened
Blender, grabbed an object, and somehow sent
flying into the void, rotate it into an
absolute nonsense, you are in a right place. In this course, we are going right back to
the foundations and properly learning how to control objects in Blender
with confidence. Will cover the core
transformation tools like move, rotate, and scale, and we will break down how Gizmo actually works. From there, we will explore professional
pipeline techniques, customizing origin
locations and rotation and fixing meshes with their starting positions
for easier export. We will also cover one of the biggest beginner
sticking points in Blender, which is object origins. You will learn what they
are, why they matter, and how they affect rotation, placement, pivoting,
and even modifiers. As the course goes on, we will move into
transforms orientations, pivot point controls, item panel values, dimensions, and the important habit of
applying transforms correctly. And finally, we will tackle some real world problem solving, handling awkward object behavior and understanding how to get
clean, predictable results. So if you want Blender to feel less confusing and a
lot more controllable, let us get started.
2. Mastering Transform Tools and Gizmo Controls in Blender: Hello and welcome everyone to Blender Essentials for
Beginners Transform and Gizmo Basics. And we're going to start
off by saying real quick that this is a resource pack
which you're able to get. We're going to be using it to popularize ourselves with
the basics of Blender. It is not necessary, but feel free to download it and follow
along with the lessons. Next thing is on the
bottom left hand corner, you will always see the
keys I am clicking. So whether I'm using
shortcuts with keyboard or whenther
I'm using a mouse, you will see exactly
which buttons I am using. So without further ado,
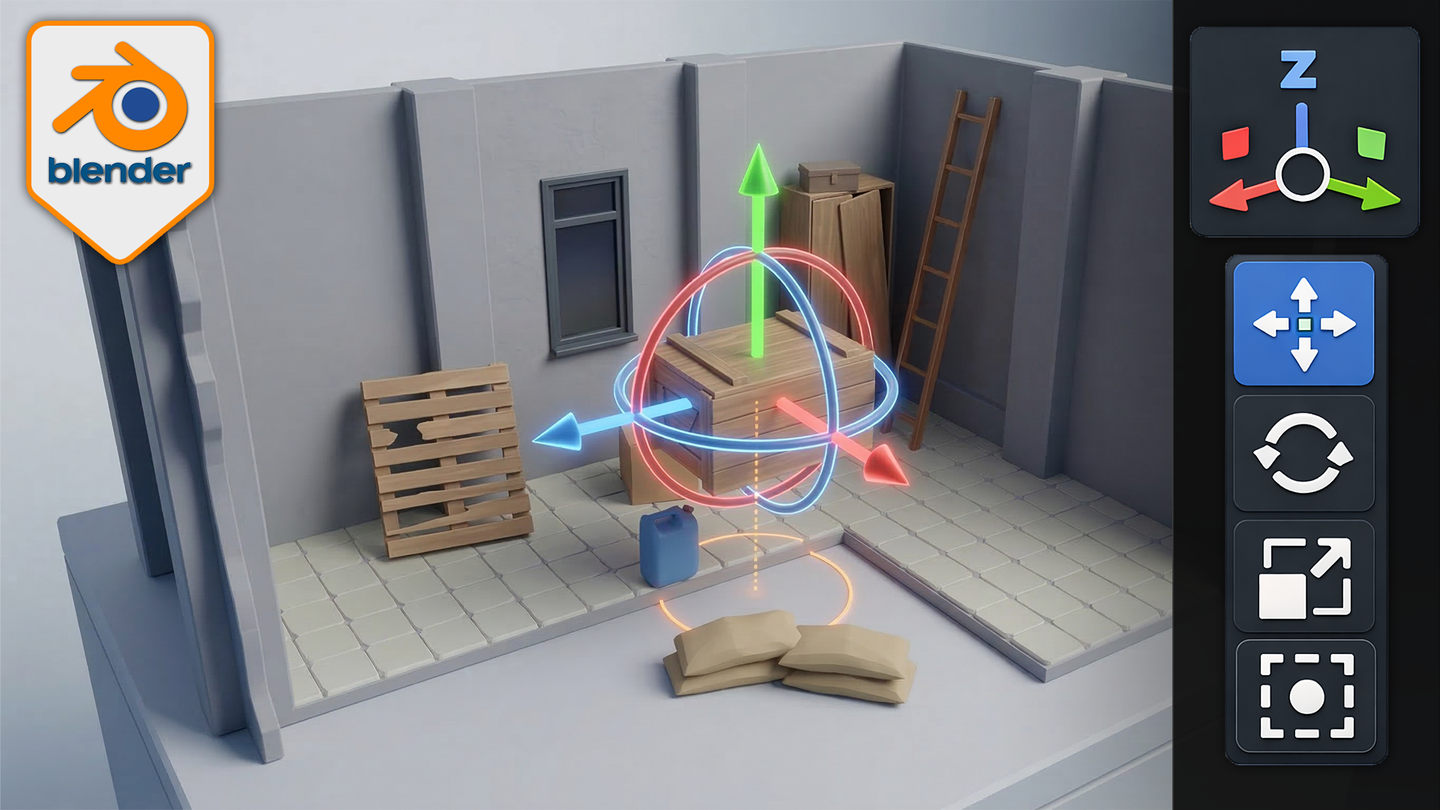
let's get right into it. P spurs is we're going to
familiarize ourselves with the scaling transforms
and rotation tools. In order for you to see that, you'll be able to click on this little icon over
here on this arrow, which will open up
the option tab bar that has all of these options. You can also click T to close it or open
it as a shortcut. For first option, we're
going to use Move Tool. By clicking on this
option over here, you'll have an option move
around objects when selected. If you're not seeing any of the items being
highlighted when selected, you might have an
option ticked off. In the top right hand corner, if you have show
overlays ticked off, you won't be seeing the
highlighted section. So keep that in mind. If you have this show
Gizmo turned off, you won't be seeing
the Gizmo itself. So make sure that these
both are turned on. With this option turned on, you should be able
to see the Gizmo on your selected object. If you're still not
seeing this set Gizmo, make sure to click
on the arrow over here and enable active tools. With this option on,
you'll notice that you should be seeing
this active Gizmo. Depending on the
tool you're using, it's going to have
different sort of gizmo. And these gizmos end up being a particular size
depending on the screen. So if we have this object
further away from us, this gizmo is going to look quite big in comparison
to the object. But once we get closer, we'll have it relatively small in comparison
to this box object. We want to change the Gizmo size itself relative to the screen, we'll have to go onto
edit preferences, go on to viewport settings
and then use Gizmo size. By changing this, we can
change up the scale, so it can be quite large or
small. So it is up to you. We can also click Backspace, while severing our mouse
over this value to bring it back to the default
75 pixels of size. So that's the default
size that we're having. So, yeah, that's going to
be it from this lesson. If you're enjoying it so far, please leave a like and a
review as it helps out to continue making more teaching
material for you guys. I'll be seeing you
in the next lesson.
3. Precise Object Movement with Axis and View Constraints: Hello and welcome back e rod to Blender Essentials for Beginners transform and Gizmo Basics. Now that we are onto the
selected object, Zoomed in, nice and personal,
we're going to start off by using Move tool. So you can either click
on this button over here, or as you hover over, you'll see that
there is a shortcut Shift space bar and G. So if I was to be on another object selection
or another tool, I could click Shift Spacebar, which will pop up
with this menu, and then we can either
select it through this menu or just click G
as previously mentioned. So that will allow us to
go onto the Move Tool. Oh, let's talk a little
bit about the move tool. I'm going to bring in an enhanced version of what
we're seeing with the Gizmo. You'll notice that the
arrows are flipped, and the reason for
that is because they indicate which direction
the axes are facing. That's going to be based
on the world location, rotation of an object, and which transformation
orientation we're using, which we're going to
get to that in a bit. For Saras, let's talk a little bit about the Gizmo itself. So each one of the
transforms tools will have its own unique Gizmo, but they work
relatively similar. So at the very start
in the centerpiece, we'll have an option
to allow us to move an object based on view angle. So for example, if
we are positioning ourselves to be at
the diagonal angle, so we can move this
through the side diagonally or to the
right diagonally. We can also go up and down, so if I was to have my camera
position from the top, able to use this metal circle to essentially bring it over to the top back to the wall
or closer to the edge. Like, so one thing to note is because it's purely
based on the viewpoint, if I was to not have
it completely over the top view and
just slightly off, you will notice that once we
start dragging it across, we are going to make
it basically float. So the recommended use for this would be to use
orographic setup. If I was to just simply
use the Gizmo on the right hand side to just
go to the top down view, we'd be able to then have
perfect top orthographic view, same for left or right view, which will allow us to then move it in exactly
desired direction. So this is quite
good thing to know. So top down view, we can just reposition this
box, for example, over more on the side and have it a little bit more separated
from the canister. Maybe that's something
we want to do. So next up is we
have the arrows. Arrows will allow
us to essentially move the object in the
desired orientation. So the top arrow
will allow us to move this in this axis upwards. If I was to click and
hold on this arrow, we'll see that there is
a line now appearing which shows us which axis
it's being locked up to. So now we can only go up
and down with this object. Then we also have red
and green arrows, respectively for X and
Y axis, which again, allows us to lock the object in to these two
axes, just like so. What's really cool is going to be these squares
over on the side. These squares will allow us
to block one specific axis. So for example, if I was to use this green
square over here, we'll be blocking
it this green axis. So it's not going
to be using it. It's only going to be going
in Z axis and X axis. So if I was to use it, so, you'll notice that we're now
going in Z axis and X axis, so we can't bring this box back. But if we're using
this little square over here at the bottom, which blocks the Z axis, it's going to allow us to move
it in X and Y directions, meaning that it is going
to be equivalent of having the top down view and
moving it like we did with the middle circle. So just like that, we're
able to move it around, and maybe we can now bring it a little bit closer from the edge, making sure that the box is not tipping over from the floor. All right, so that's going
to be it from this lesson. And next one, we're going
to cover the rotation. So thank you so
much for watching, and I'll be seeing you in a bit.
4. Trackball and Axis Locked Rotation in Blender: Hello, and welcome back everyone
to blend Essentials for beginners transforms
and Gizmo basics. In the last lesson, we cover
the transformation tool. We're now going to move
on to the rotation tool. Let's go ahead and select it, and you'll see we have now
ourselves a different Gizmo. The shortcut for it is shift space and using this rotation or clicking R or just simply clicking on the icon
on the left hand side. And once we click on it, it's going to be relatively
similar to the transformation except it's going to focus
on the rotational axis. So instead of having something in the center
like a small little bubble, what we have over here
is a tracking ball that is going to essentially
let us move it freely, our box in any direction
that you want, we can go up, down, and we can rotate it around. So it's very similar
to the Trackball. To use it, you
simply have to click within the zone of the rotation, everything except for these
colored lines that we see. So if you click on basically
this area over here, we'll be able to, well,
rotate it around. And just like that, we can have some real nice control
over the rotation. I say control, but
it's more like a free choice of just
rotating it around. We can just slightly tilt it, maybe make it seem like it's
offset from these steps. Maybe this one is, like,
cracked a little bit, so it's going into the ground. And that's going to
the quarter, right? F. All right, so next up is we have these lines,
these colored lines. So the colored lines
will be axis lock. So we have the green, which is going to lock Y axis. We have the red covering
the X axis like so, we can rotate it
in that direction. And Z axis, it's going to just make sure it rotates
around the Z axis. If at some point, you're not sure which
axis you're facing, just look at the top right
hand corner and you'll see the axis for the
world environment. So next up, we have one
more extra tool over here, and that's going to be this little white line
at the very corner. So it goes all the way
around our lovely circle, and that allows us to
rotate it based on the viewport of the
way you're looking. So right now we are looking
this way and it's going to allow us to rotate it like so. And if we were to have it
from the top down view, we'll be able to rotate it
from the top down view. And if we're angled, that's also going to give us an impact. So all of it is
very lovely stuff. And yeah, that's pretty
much the rotation setup. In the next lesson,
we're going to go ahead and cover the scaling tool. So thank you so
much for watching, and I will be seeing
you in a bit.
5. Uniform and Axis Scaling with Smart Object Variations: Hello, welcome back everyone
to blend Essentials for beginners transforms
and Gizmo basics. Now we cover ourselves
through rotation. Let's go and move
on to scaling tool. So if we were to click on
this little button over here or you shift space and S, we can essentially use this Gizmo to scale
it up and down. So we have the first one, the first option
right in the center. That's going to be the ability to scale it up and down in
regards to the whole object. So no different transforms
is going to be changed. So in regards to the transforms, first thing that we have is, as you can see, we
have two circles. One is going towards
the centerpiece and another one goes
all the way around. And basically, the area
that is in between them is going to allow you
to scale it up or down. And this circle just shows the original value
at the very center, shows the original
value of the scale. Once we start scaling it up, it's going to expand, so you'll be able to
see manually through this gizmoe that it is expanding
if I was just to use it, like so you can see it expanding from that default
grade out no circle. We make it smaller,
it's going to be smaller that original circle. So that helps us to kind of visualize how it looks
like on the screen. Next up, we have
the usual setups. We have the ability
to control X scaling, like so, we can extend this
box, make it very chunky. We can widen it up using the Y. So yeah, the Y scale, like so, making it very wide
as a box or again, we can also just use Z axis
to make it much, much taller. Now we have ourselves
a chunkier base. All of these options can
be quite useful to making some alternative
versions of an object. So for example, this
one over here can be duplicated if we were
go back to move tool, use shift and D and escape, we're able to then duplicate the object, move it
off to the side. And now with this, we can use rotation
rotate it a little bit to another edge so we wouldn't have
the same rotation. Go to the scale tool
and we can use a set of axes to kind of make
it quite a bit taller. Now, it looks like a
completely separate box. Maybe we can also
bring it back using the move tool a little bit more to the back, and there we go. We got ourselves two
interesting looking boxes by just simply using the
gizmos that we have. And now going back
to the scaling, what we can do is we
can also scale it in terms of locking the axis. So using these
squares over here, we'll be able to lock
individual axis. Again, the blue square
will lock with that axis. So if we make yet
another box, let's say, putting it into another corner, I'm going to use
just move tool over, like so, and this time, I will shift D, escape, make a duplicate, put it up into this
corner, use the rotation, just kind of align it more
with the corner of the wall, and we can even use
the blue square. We put it like so. And then
going to the scale mode, we can use the same
blue square to kind of widen it up but not
change the height of it. It's going to look very, very interestingly
on this corner. I think that's looking
quite nicely. There we go. Maybe we need to raise
it a little bit, just like so, and we have multiple boxes
in our scene now. All right, so that's
going to be it for me. Thank you so much for watching, and we will be seeing
each other in a bit.
6. Mastering the Transform Gizmo for Precise Control: Hello and welcome back everyone
to blend Essentials for Beginners transforms
and Gizmo basics. In the last lesson, we
went over some scaling, how we can use it and how
we can combine it with our previous Gizmos to get some interesting
results for these boxes. Next up, we're going to talk a little bit about the
transforms option. So if we click on this
or you shift space and use the transforms
option over here, we'll get ourselves
this monstrosity. I call it monstrosity because it gives us
so much control, but at the same time, because
of the lack of restriction, it might be a little bit
finicky or TDs to use. And the reason I say that is because this option
has everything. I'm going to pull up
the enhanced version just so we could explain
a little bit about this. And we have option to scale it. Using these options over here, we also have an
option to rotate it. So by using the axis,
we can rotate it. We can also use this white
box around to rotate it, and then we have move tools. Move tools will
allow us to, well, move it in the direction of XYZ, as well as we can
use this little ball in the middle to move it
around based on the axis. So all of it, as you can see, is very interesting because it allows us to move
it and position it in exactly the way
that we want without worrying about or
fidgeting with the gizmos. And the reason I say it's the
downside is because, well, it is quite fidgety because all of these parts are
squished up together. They can be a little
bit tedious to you. So my recommendation with a use like that is maybe
it's a good place to start, especially if you
don't want to go between multiple gizmos. And the other reason for using this would be if you
have a touchpad, if you have a drawing tablet
or something of the sort, you might feel this more at ease because you don't
exactly need to use a keyboard. Everything is going to
be on your fingertips. That is quite nice. So as a quick practice, let's go ahead and copy some of those gas canisters and
put it onto the side. So we're going to hit
Shift D and escape, make sure that we are just duplicating it and keeping
it in the same location. Then going to move it using this transformation
Gizmo or, like, so endless place it in the corner and also
rotate it just like that. And now we're going to do,
again, shift D, escape, and put this. In another way. So we can, for
example, maybe lay down on the floor, raise
it up a little bit. And just like that, we got
ourselves a nice little setup. Maybe we can even squish it
for this particular setup, maybe squishing it
in Zac. There we go. Something like this is going
to make it look quite flat, like a different type
of canister, perhaps. And I'm quite happy
with this result. Yeah, it looks too thin, maybe it was empty and
it got tipped over. Good little storytelling to do. All right, so that's going
to be it for this lesson. Thank you so much for watching, and I will be seeing
you in a bit.
7. Understanding and Setting Object Origin Points: Hello and welcome back everyone
to blend Essentials for beginners transforms
and Gizmo basics. Now, before we get on with
the rest of the tools and the options
and how we can use transforms to our advantage, let's go ahead and learn
a little bit about origin points and what
exactly they are. So you might have noticed at this point that at
every single tool, you have a little orange.in
the middle of an object. It might always be in the
middle of the object, though. For example, if we were to
select this wall over here, it's going to be in a corner. And essentially what this
is is when we have this little.in our selection
of an object, it shows where the centerpiece of that mesh is not
the centerpiece, as in the center of, like, a volume of an
object as a whole, but where the Objects instance, consider the placement
of that mesh, the origin of that to be. Based on that, it basically determines the location of
each individual vertice. And we can also use this
origin point to determine placements as well as rotation
or an object as a whole. So for example, if we have this wall selected in the
back and we go to rotation, we can rotate this wall
based on an origin point. So that is pretty good. If we have something
like this box selected, which has the centerpiece of the origin point being
placed in the middle, yet it's placed at the bottom. We can technically make a
bit of rotation like this. So the box itself will look like it's placed
more at the base. The best way of
thinking of it is that the mesh itself is the shape, whilst the origin is a handle that controls where
the object is placed, as well as its rotation
based on that origin point. In order for you
to control that, in order for you to place
it in other places, what you can do is
you can change it. By selecting an object and making use out of
just simple selection, you can be in any
one of the tools. I just prefer to be in
a normal selection. We can right click,
go to set Origins, and we have a whole bunch
of options to choose from. First one is going to
be geometric origin. That means it's going to put to the volume of
the mesh itself. If we were to click
on it, we will put the origin point to
the center of this mesh. You can see what
happened, though, I placed an entire
mesh into the ground. So if we're not careful, going to get a little
bit of an issue. I think this one
also, we also had this create at the
base with the origin. If I was to right click, set it to geometry to origin, it's going to move our entire
mesh to the origin point. There is another version
though we can use set origin to geometry. So we're going to move the
origin point to geometry, the main center point. To the volume of the mesh, which is going to
leave centered. Now, with the center,
we can, for example, go to rotation, and
we can see that we're rotating it
in the centerpiece. So if we have an object that's maybe like a
canister over here, we set it to origin toeometry. We're going to get it like how the origin point now didn't go to the very center of the mesh instead it went a
little bit higher. The reason being is that it
grabs the volume of the pass. So if we go to edit mode
real quick by hitting Tab, we'll see that we
have more faces at the upper section with the cap, and because of that,
it's going to give us this sort of an origin point. So that would be quite useful. But if we want more control, we can use other items. So the other thing
that we can use is the use of origin
to free cursor. The precursor itself
is a little item that can be placed anywhere
within a Blender scene. By holding Shift
and right click, you can see us moving this
little piece over here. So by just moving it around, we can essentially click on anywhere like
this corner over, like so and determine
where the predecursor is. Then using this predecursor, we can use set origins to
free decursor just like that. And now we have
it in the corner. Using it, we can rotate our
canister maybe to the side, like so and we can just have it spill somewhere up in
the edge if we want to. That would be pretty nice
as well, just like that. Ours I don't really
like displacement. I'm going to click
Control set to undo it. But yeah, it helps us to maybe rotate it around
and over side, like, so and that looks
quite nice, I think. A quick little tip, if you want more control with
this free cursor, what you can do is you
can select an object. You can hit tab to
go into Edit mode. And then afterwards, you can either use vertex selection
or face selection, even edge selection.
All of it works. You can select a vertical
like so you can hit ShiftinS and use
cursor to active. That way, it puts it
directly on your selection. Afterwards, we can go
back on to object mode. So, we can right click. We can set origin to precursor, and now we have it directly
on the very corner. So now if we were
to rotate this, it's going to rotate
it all the way across, like so it's quite useful
little option to have. And whilst we're here, we
can duplicate this box. We can hit Shift D and E scape. You make a duplicate
mesh of this item. And the reason I
wanted to do that was because I wanted to show you that origin points are being
kept by duplicate items. So you can see that this item has the origin point
this orange.in a corner. This item will also
have it in the corner. Even if we move it, the corner
will still stay the same. Couple of other options
that we have over here is, if we set origin point to
origin to center mass, it'll essentially calculate
the entire surface area of this box and place our
origin right in the center. And this is great for
more thin objects. So, for example, the cardboard, you can see it's
relatively thin as a mesh. It will work way better. The other option is if we use set origin points to volume. So this one is going to calculate the volume
of the mesh itself. I would like to note that it doesn't like non
manifold geometry. It needs consistent phases. So if we go onto
the mesh itself, here is just normal
topology, all is good. But if there are some let's
say, issues with topology, like this where it can't exactly estimate the right
normal phases, it can have some problems
with the volume itself. We're just letting but both
options work quite well. So for example, if we grab
the sister previously, you saw that origin to geometry is going to
offset it in a corner. But if we want a nice
middle section using both surface or volume will
work quite well for us. So it's something
to keep in mind. And yeah, that's going to
be it from this lesson. Thank you so much
for watching, and I will be seeing you in a bit.
8. Advanced Origin Control with Affect Only Origins: Hello and welcome back on to Blender Essentials
for Beginners, transform and Gizmo basics. In the last lesson, we
went over different and various ways for adjusting
the origin point, a lovely little
thing that's very functional for meshes
and very much needed. Let's go ahead and
continue on with additional parameters and see how else we can adjust
this origin point. Oh, one thing that we
can do it manually is by going to the options at
the top right hand corner, and we can select
Affect Only Origins. If we select that,
we'll notice that now our origin is giving
a different Gizmo. You can see we're having
these Gizmo icons over here, and I believe that's going to be for whichever tool we use, we're going to see these
additional handles. So because we have
this Don for Origins. When we are moving an object
is not going to be moving, it's actually just
going to be moving this little tiny dot
that we have over here. So using this, let's
try to align it back to the angle
of our canister. So right now, we're putting
it to the bottom, like so, and if we go to the top, we see that it's also a little
bit offset with rotation. So the other thing that I'd
like you to know is that every origin point will
also have its own rotation. So if we try to realign it, which by the way, is going to be very important coming back. But if we try to align
it using the set axis, we can just slightly offset it. The other thing
that you might have noticed is that origin point is also going to include
its own rotation. So right now it's
rotated in this area, and that's basically
based on, well, the origin point itself.
We can rotate it. So if we go to rotation point, we could, for example,
rotate it like so, and now it'll think that
this default rotation is how the object
is meant to be. If I was to go back to move
and turn off the origins, like so, we'll see
that nothing happens. But as a quick highlight, we're going to go into
this a lot further. If we were to change from
global to local axis, we'll see now that
it's facing straight. So before if I was to grab, for example, a
canister over here, you'll notice that
the arrows are facing in the right direction based on the rotation
of the canister. But now we rotated
this origin point, and now it thinks that
the local rotation is, well, almost identical
to the world origin. So that's one thing we could do the other thing that I
like to let you know is that we can adjust
the origin points by doing it indirectly by
keeping it as that centerpiece. But if we go to edit mode, so let's say we select, let's say we select
back to the Scanister. We're going to torture the
Scanister a little more. If we go onto Edit mode, can select entire mesh. We can go into rotation, and then we can rotate the mesh. So now we're not
rotating an object, but we're rotating everything
inside of the object, all the vertex information. Meaning that when
we're rotating this, the origin point itself
does not notice that. It feels like it's going
to be kept the same. So if we go out of the edit
mode onto the object mode, you'll notice now that it's
facing in the same direction. So that is going to be so
much different in comparison. So if I was to, for example, rotate this canister
on the side, you'll notice that arrows will always be pointing
in the right setup, but because we rotated this, it's going to
actually be flipped. The red arrow is going
to be facing this way, and the red arrow is going to be facing for the back
anister that way. And this is quite
important, I believe, because, well, we can
go on to Edit mode. We can, for example,
go to move tool, so clicking A to select it, and then I can just move this to the very bottom until
we get it like so. So we're moving an
entire mesh information. All the vertices now have
been basically adjusted. If I was to go on
to object mode, we'll see that we now have the origin point
at the very top. If we were to go to rotation, for example, we can rotate
it from the top now. So again, little
nice functionality, an alternative way
for doing things. Not always do I use it, but something like
trees, for example, if you're creating
foliage from scratch, you can imagine that there's
leaves or something, and you need to have just slight readjustment
based on the texture, just going into edit mode
and, you know, moving it. To the sides, for
example, for this ladder, I want this to be a little
bit more to the side, maybe at the bottom. I
could totally do that. I could just move it up like so, and now we have the origin
point at the very bottom. Going back to object mode, we can just, you know,
place the ladder back, and now we'll have a perfect, perfect setup because we
can go onto rotation. We can rotate it based
on this origin point, and we'll have so
much nicer control because it's always going
to be touching the ground. You can see this part is
always touched ground, meaning that we can rotate this ladder a little
bit, like so, and it's going to look like it's behaving a little
bit more interestingly. Something like this, perhaps. Like, so feel free to play
around with the origin points. Once you get a feel of it, it actually saves you
a lot of trouble. So right now, as you saw, I was able to
readjust the ladder itself by not having
too much of a hassle. But by simply doing
this, we were able to get a lot more of
an interesting result. I'll just go back
to the global mode. So we'd simplify it for now. But yeah, just
rotating the ladder. It's looking like it's
barely holding up. Maybe we can even smudge it a little bit to
the corner, like so. That looks quite nice. Alright, we're just scattering, making a mess of the objects that are in the scene, but
that's totally, right. You guys still look so nice. And, of course, let's
not forget that we can scale it a little bit squishy
perhaps, if we want to. We total do that for
some boxes. That's okay. Alright, so we're going to continue on with this
in the next lesson. Thank you so much
for watching, and I will be seeing you in a bit.
9. Mastering Location, Rotation, Scale and Origins: Hello and welcome
back in front to Blender Essentials
for Beginners, transforms and Gizmo basics. We went over Gizmos
and what they are, how we can make use out
of them a little bit. The reason for that is because the next part will require us to understand
what Gizmos are. And that is going to
be the item panel. On the top right hand corner, we have an option called
item panel in other ways, it's called N panel
because we can use N to open it up and close. So there is an arrow. We can just click to open it up. But, you know, feel free to use, and that is just a nice
shortcut to make use out of. So what this is, well, this is what determines how your objects behave
within the world setting. And using these parameters, you essentially tell it
where exactly and how exactly the item needs to be
placed in a world position. Oh, the first thing that we
have are going to be X, Y, and Z location positions, we can use these positions
to change the coordin. So for example, right
now, it is at 2.9. If we set this to
something like four, we'll see it move to the side. If I set this to, let's say one, we'll move it to va side. We can also have
negative values, so that's going to
hop to the outside of this green line because in this area, it's
positive values. In this area, it's
negative X values. Same goes for Y
coordinate, so positive, negative on the section
and z coordinate would be like above or
below the ground level. So with that mind, if we were to set
this two minus two, you can flip it to the outside, and setting it to, you
can move it like so. Very nifty thing about this is that you can click and hold, if you notice the
mouse itself is, well, turning into a
double sided arrow. So we can click and hold and
you can slide left or right. So whilst clicking our
left mouse button, we can just slide it like so, and we can reposition
our object. So for fine tuning, this kind of setup
is perfect for us. If I want, for
example, another box of this little Amocrt, we can duplicate it,
Shift D, click Escape, and now I can use Z value to
just place it right above. So by holding, we
can do it like so. Aberpty thing is that we can use shift button whilst using
our left mouse button. To make it more accurate. So it's not going
to be as sensitive. So while it's holding shift,
you can see it, it's much, much more accurate in terms
of how we can use it. You might have
noticed on the side, we also have a lock mechanism, so this will allow us to
essentially lock the position. So if we like the z value,
we can just lock it, and now if we try to move it, you'll see that we have an
arrow that disappeared. So we can lock all of
these positions like so, and now we cannot touch it. We cannot move out of this way, which is pretty good maybe sometimes with the
transforms Gizmo because now it just
stables these rotations. If we want the rotation to be in exact same spot, we
can just keep it, and then we can just play
around with maybe scaling a little bit or rotation. We just put it in a bit
of a different direction. That would be pretty nifty tool. You know, alternatively, if
we have an object, let's say, like this box over here, which is placed
already on the floor, if we lock the z value, we don't have to worry
about the z value now. We can go to move. We can even use this middle arrow over here, and it's never going
to move the z value. Even though I just noticed that when holding the middle circle, the Z axis pops up, but it doesn't mean
that it can be used. You can see it sliding
on the floor but never going up or down in
terms of the floor. So that's quite nice. So
next step is rotation. Rotation is pretty
self explanatory. It allows us to
rotate X coordinates, Y coordinates and z coordinates. You can also use backspace on these values to just reset
the rotation completely, so it brings you back to
the default rotated angle. And then afterwards,
we can just rotate it perhaps a little
more, move this up. Corner and you can
see these values changing just like that. And again, as before with
locking the XYZ location, rotation also has its options. You can see me lock
in the values, and now we will not
be able to rotate it. Even though the gizmo shows up, you will not be able to move it. If you want one value
to be just opened up, you can have it, for
example, a Z value. So now we can just rotate it in Z direction and we'll not be
able to flip over this box, which is pretty neat sometimes
a good little thing to do. Next up, we have
this bar over here. We're not going to touch it just yet because we need to get back because we need to
get back to final options. So next up, we have scale. So this is a multiplier
of the actual object. It's going to multiply
the scale of the mesh. By default, it should
be set to 111. If it's not we're going to learn how we can apply the values and whatnot
in later video. But all we need to know
now is that we can change the scale over here in X, Y, and Z coordinates. We can also lock the directions. And it's going to work
exactly the same way. But instead of
rotation and location, we are changing the scale. Now, the thing that I want to mention, first and foremost, was how location, rotation
and scale interacts. The reason this is
important is because, well, you might not get
accurate results if you don't understand
that origins is essentially what this item location rotation
and scale facts. So what it means by that
is that the origin point is going to be the coordinate for where the
location is placed. If I have coordinant
for example, where this precursor is, if I was to right click and change the origin to geometry, you'll see that the location now has changed to this area. If I click Set origin
to free dcursor, you'll see that now location
has changed to this area. So it doesn't treat
this mesh as an item. It is simply mesh rendering the vertices and
rendering the textures. What the transformation tool, what the actual object
in the world is, is this origin point. Can use this origin point
to tell where to be placed. And then based on
the origin point, we're going to tell
where mesh coordins are. So right now,
because it's so off, you can see that easily
the location, for example, will be way off in a distance if I was to
set it to a value of two, which was previously
this box over here, you can see it way
off on the side. And the reason it's important
is it's because setting a coordinate to relative
location is very important. Hving it, for example,
for something like a door will allow you to
rotate an object, just like we did with
this wall over here, you'd be able to rotate
an object on his hinges. And the other thing is
that if I was to select back to this box with
crazy offset origin, the other thing is that the
scaling is essentially a multiplier of the original
mesh scale values. If I was to change
this value over here, it's going to be
changed based on the origin point and not
the mesh values itself. And the other thing that I left out was that you can change
all of these at once. If you were to click and
hold and then drag it down, you can change the scale. So now we can, for
example, change it to three, a sort to two. We can change it
to a value of 0.5, like so, and now we
can see it shrinking. But not only does it
shrink because it is a multiplicative value for all of the meshed vertices
from the orchid point, it's going to also bring this box a little closer
to the orchid point. And if we were to set it
to something like ten, it's going to put it
way off in a distance. That is something worth knowing. And if I was to put
it to a scale of one and bring the origin
point to geometry, I can then change this to ten, and you'll see that it
is going to be upscaling it based on the
center of this item. Alright, I think that is
a good place to start. Thank you so much for watching, and I will be seeing
you in a bit.
10. Using Dimensions for Accurate Real World Scale: Hello and welcome
back everyone to Blender essentials
for beginners. Transforms gives more basics. In the last lesson, we went
over the menu and tab, which allows us to, well control the transforms of an object. And we also found out it's relation with the origin point. We're still not finished
with the setup. We still haven't touched
dimensions, and so previously, the scale was a sort of a
multiplier for an object. So the dimension is
the final result. And the way it
works is it creates every mesh has a sort of
an invisible bounding box. This bounding box would
cover up an entire mesh, so you can imagine every
item like this would have this sort of an invisible box which will touch up the highest, the lowest point, and
as well as the side. So instead of this,
maybe it would be closer to this shape
because it would be, well, touching this size. Like so. And that value essentially what it gets
represented by dimension. So it's not just, you know, grabbing the assumed
top points maybe, but it will also include the highest vertice
points as well. So all of these highest
vertice points is what's going to cause these
dimension outputs. Very simple for a simple box. If I was to set the cursor to world origin
and spawn a cube, we can see that
default dimension is set by two by two by two, even though the scale is set by one because when
we create a cube, we have an option
to select the size. So default by default, it should be set to 2 meters, and that is what
portrays here 2 meters. If I was to change the dimension or let's
say Z value to four, it'll be four in height. It is especially
important for things like this ladder over here because we will know the exact z value, exact length of this value. If I was to make a
duplicate out of this, and move it off to the side. We could, for example,
say that we want this to be not 2.8 meters, but 2 meters, and it's
going to squish in scale. You can see that the
multiplier is now set to 0.71, and it's going to squish
it to the right amount so the dimension of the bounding
box will fit the ladder. Another thing that I'd
like to mention is that these bounding boxes are created based on the
default rotation. So right now we have a
rotation that's set like this. But by default, if we have
this that as zero, zero, zero, this is what is being used
to get the dimensions. So right now, if I was to change this to a value of three, this ladder is going to
be exactly 3 meters, which just so happens to be
the same height as this wall, which as you can see, if I was to show you the
dimensions of it, it's also 3 meters. Well, 2.99 meters. And yeah, this is great to determine
the accurate values for when we want the
right dimensions. The only other thing that
I'd like to mention is that this reads the
default rotation. But what happens if the
rotation itself is off? Well, we're going to learn
that in the next lesson. One more final
thing that I'd like to mention before ending this lesson is XY Z Ellure. This essentially just is a different way
for storing data. By default, it should
be set to X Y Z order. There are other orders, and it's more for
mathematical sakes on how to save it on the file. We also have W XY Z, which is, well, an additional value that could potentially be
used for a certain motion. That requires more
mathematical approach. But yeah, essentially, it's just the way that Blender
stores data. We should keep it
as XYZ by default. All right, so that's going
to be it from this lesson. Thank you so much
for watching, and I will be seeing you in a bit.
11. Applying Transforms and Resetting with Ctrl A: Loon, welcome back everyone to Blender Essentials
for Beginners, transform and Gizmo basics. In the last lesson, we
went over the panel. Now we're going to continue on with learning how to make
a better use out of it. So first things
first, we're going to learn a little bit
about the shortcuts. And the shortcut that
I'd like to teach you is going to be how
to reset these values. Without just pressing backspace by going on to the end panel, you can have an
additional version. So for example, I want to
change the scale back to 111. I can click Backspace, and
that's going to give us the default value of the object. Oh, instead of doing that, what we can do is if we
have an upscaled object, we can simply click Alt and S. So Alt and S will allow
you to reset scale. But that's what it
stands for as for scale, Alt and S will reset it. Then if we have a
different rotation, let's say we have an
offset for rotation, we can use Alt and R to
reset all of its rotation. Finally, we're going to
reset the location by using Alt G. The Alt and grab Alt G is going to
reset the location, back to the world center. So this is going to be where the origin point is
going to be located, back to a value of
zero, zero, zero. And even though you can see
that the object is upset, it is going to be positioned
in the center of the world, technically, because
technically, the object is this origin point, and all of the mesh parts, all of the vertices
that we see over here are based on the local location
from that origin point. So that is pretty much that. But what happens if you
don't have the right values? What if for starters, well, we don't have the object
properly adjusted to the center? Well, we already talked a
little bit about changing the location of the origin point by either going
to options panel, enabling the origins or going
to edit and clicking A, then moving this to
be more centered. Like, so all of these would be viable because
then afterwards, this would be considered
the base of the mesh. And if I was to
move the location, I can click lg, and that's going to be back to the
center of the world. What happens if the default, let's say, scale is way off. So let's say we make some
differences in edit mode, we make the ladder
small, for example, and it's good in mesh, but maybe it's not going to be good in terms of the
scale or its location. Then after we're done, you know, we might think that, like, Hey, it's going to be right. We can simply go to object mode. We can fix the
rotation manually, like so, and that's
going to be right. Well, for starters, you might notice that even though
we change the rotation, even though we maybe move
it in the right location and adjust the scale
and Object mode. If I was to click Alt and S, it's going to bring back
that tiny, tiny location. And if I click Alt and R, it's going to bring back
that wide rotation. This can be quite problematic. The first problem
that we have is that the dimensions is not
going to be properly set up. So even though we
were to, you know, put the ladder
somewhat straight, even though we were to upscale
it a reasonable level, and we'd say that like, Hey, what's the scale of this ladder? Well, it shows me as 1.8. But is it actually 1.8? Well, that's not really case. If I was to set it to
a value of three and then try to put it
up to the side, it looks like it's good, but it's not because it
was actually in the floor. If we put it out of the floor, we'll see that now it's
way above the level. And the reason being is that
it uses that local rotation. So what the bounding box is, if you click AltnR is this. It sees that it's 3 meters because it doesn't consider this
to be a diagonal. It just sees it from
the ground level to the up level to this part, that it is the full height. Such a problem is quite common, especially if you're making
an object from scratch. Maybe you started off with an object by just
being an object mode, scaling it down to what
you'd want, like, let's say, a wall, and then
you went into mode, you changed up some shape. And then you thought that,
A, it's right setup. But if you look at
the scale over here, the scale for
dimensions are way off. And if you were to click AltnS, it's going to bring up a complete different shape
than what we want. So a way to fix it
is quite simple. We have an option called
Control and A menu. Control and A menu
will allow us to apply the transforms
onto the object, thinking that it's set properly. So for Sarus right now, this is the default
rotation for this object. If I was to change the rotation, by moving it more straight,
something like so, then we can click Control
A and apply rotation. Now notice how this
option that says 26 in a rotation tab is going to be now set to
zero, zero, zero. So what it does, essentially, it grabs the rotation and then applies it
directly to the setup, keeping the gizmo in its place. So if we look at the Gizmo, especially in
rotation, we can see it now being perfectly solid. And if we click Alt and R, it's going to bring
back to this. So the next part
would be the scale. If we click Alt and S, it's going to give
us the tiny ladder. We don't want this. If we want to keep
the same scale, we can use that same menu, click and Control and A,
applying the scale this time. Applying the scale will
allow us to make that mesh, to have that scale
as a default value. Meaning now that
we, for example, click S Z, we can make
it larger and whatnot. And if you click Alt and S, it's going to bring back to that default considered
scale of a mesh. Now, the other thing is we
have an option for location. Location is going to be
a little bit different. The reason being is that we have this offset of origin
over on the side. But if we try to
apply the location, what it's going to do
is when we click on it, it's going to apply
to the world origin. So now it's going to have
a crazy origin point, meaning, if we try to rotate it, it's going to give us a hope check that's
way off on the center. The reason it does that
is because, again, the origin point
is just considers the relationship itself
to the world location. So when we apply it, it does basically
the same calculation as it does for
scaling and rotation. It assumes that the location or rotation or scale is in the center of where the mesh is, and that's the default
setup for that mesh. So instead of doing that, if you have an object
already off on the side, just use what we learned before, just resetting it to origin
of geometry or using a precursor or any of the other different
changes that we learn. The other parameters
that we have over here that are important
would be rotation at scale. So this would be the same
option for rotation at scale, except it does it all at once. If I have I have rotation
sideways and I have motion, sorry, scale, a
little bit different. We can use Control in A and
use rotation and scale. So this will now apply the
rotation and the scale values. Meaning now we have this
ladder be wonky and the scale will be in
this direction as well. So obviously, this
is not what I want. I'm just going to undo this. But if you have some
quick adjustments, let's say this ladder
is a little bit off in rotation or
let's say we want this ladder by default
to be in 90 degrees. So I would just change this
rotation to be 90 degrees, then maybe we can
change the scale be exactly dimension
of f or the height, and then we can use Control A and apply rotation at scale. And this default mesh
now is going to be in rotated disposition and has
the dimension of 3 meters. And, yeah, that's going to
be it from this lesson. Thank you so much
for watching, and I will be seeing you in a bit.
12. Global vs Local Transform Orientations Explained: Hello, and welcome
back everyone to Blender Essentials
for Beginners, transforms and Gizmo basics. In the last lesson, we
went over the N item app. Now we're going to
talk a little bit about this upper menu over here, which includes
transforms orientations and transforms pivot points. So both of these are
quite important, especially when moving
around the objects. Let's go ahead and
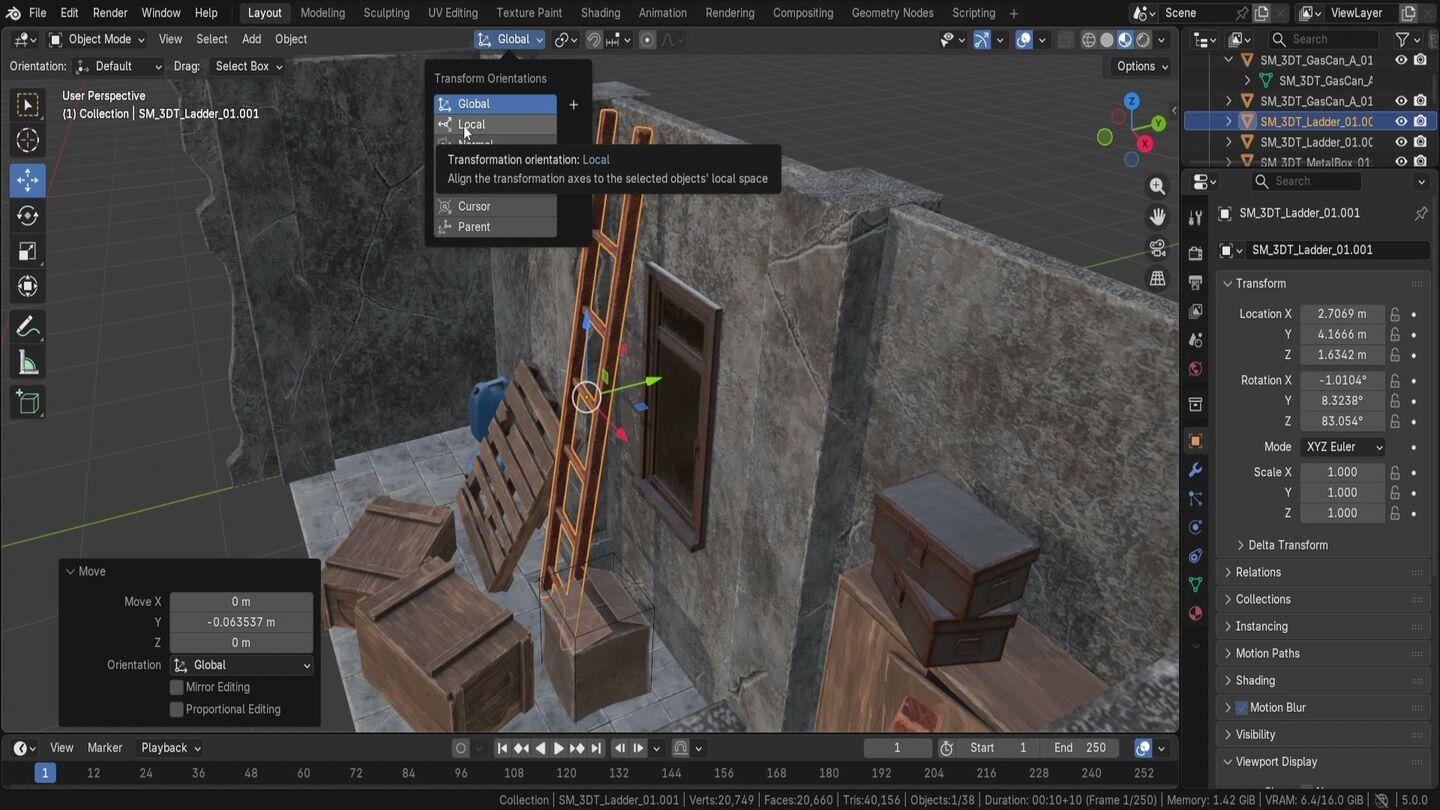
talk a little bit about transforms orientations. We already touched up
a little bit about the difference between
global and local, but let's go into
full depth for them. Firstly, I'll go ahead
and click N because we don't really need
the menu on the side. And now the global
transforms orientations, which should be default
motion will affect how we use the motion as well as
rotate and even scale options. So this will determine the rotation of the Gizmo itself and how we
can move the object. The default global orientation will always be determined
by the world rotation. And if we look at the bottom, we'll see that there is green
line as well as red line, which shows which direction
the roll is facing. We can also look at the top right hand corner at the Gizmo, which will show that
the white direction is going in the back, as well as z direction
going to the top. And that will never
change no matter how much we rotate or change the object, it will always be going
into that direction. You can see Z going upward and why going towards
the world direction. So that will always give
us consistent results, and we can use, for example, the ladder to put it in the
back without worrying it, that's going to
give us an offset. We'll be always able to push it to the back in
that same direction. So we want to rotate it. We can do it. We can just
go ahead and rotate it. And again, the same
for rotation axis, we can use the X rotation, and we know that even though
this was slightly tilted, as you can see over
here, slightly tilted, it doesn't matter because
when rotating with X axis, we'll be able to just tilt it in the direction of the wall. By just doing that, we're
able to, for example, position this
second ladder over, like so, and it's going to
give us a nice later result. And of course, the scale
will also be the same. It will no matter the rotation that we tilted this ladder, we can use the Z axis to
essentially stretch it out, not based on an object rotation, but based on the world look rotations so you can see
it just goes up and down. And because we had it tilted, it's going to give us
a bit of an odd shape. Maybe it's going
to be a little bit more better of an example. If we were to squish it down, you can see that we're squishing it out
purely vertically, and that means that the tilting is not going
to be quite as nice. So what do we do when we
actually want to, for example, squish it down in terms
of this rotation. So just to kind of make it
a little bit easier to see, I'm going to rotate this
ladder a little bit more. And for that, we can use
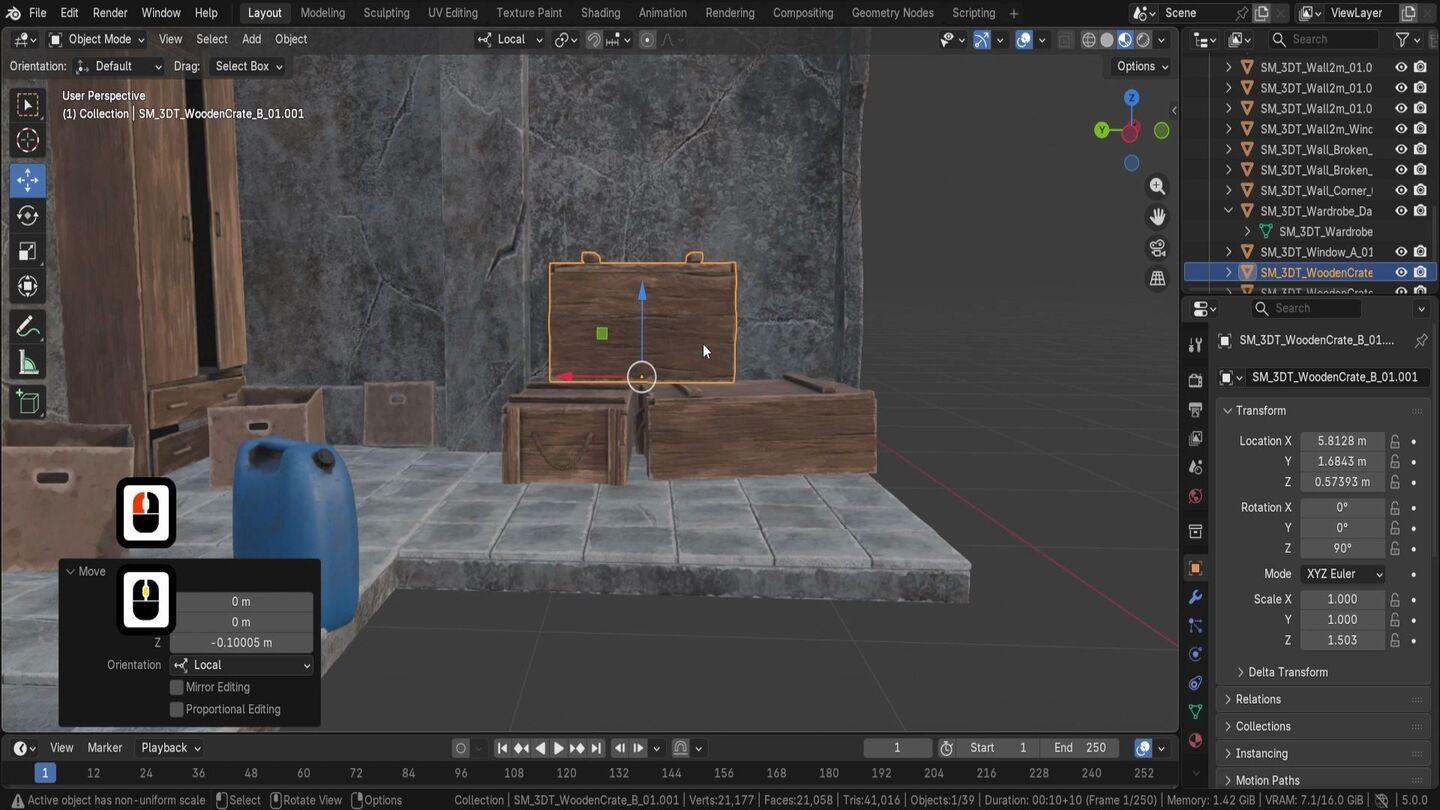
instead of using Global, we can use local
transforms orientations. This will be based
on the objects, local space on
this origin point. So right now because we have the origin point slightly
tilted with the ladder, because the default rotation
is going to be like this, we can see that by
clicking Alt and R, I can see the default rotation, which is then going to show
us the default rotation, and that's going to be aligning
with the world rotation. But because we already
had this rotated, we can see that the z
axis is slightly tilted. The Y axis is going this direction because
we rotated this ladder. And just like that,
we can, for example, move it up and down based
on this tilt and see the blue line being
offset a little bit. But what's important
here is that we have the scaling
now also tilted. So if we were to squeeze it
down just a little bit like so and have this
smaller ladder like so, we can then just move it
down a little bit, actually, moving it down with
global scaling. Global Gizmo would be better
because it would still be touching the wall, so it's not going
to be affected. And just like we were able to have it
somewhere in the corner. I think that's quite reasonable. So yeah, local axis
is very important, especially when we want to make sure that
we're not affecting the position of a
the object itself. So here, for example, the
box is already rotated, having it in global orientation,
we wouldn't be able to, for example, squish it nicely. I would squish sideways,
as you can see, like so, and that's not
going to be quite as nice. But squishing it by local axis, it would give us direct squish, and we can just fold
this box, for example. If we want to do that, we
are totally free to do so, and maybe we want
to just position this on the ground
so we can do that. That would be great. Before doing that though, I
would like to just make a duplicate, put it
off on the side, and now I'll just use scaling
with the local parameters, push it down, or such a box
is going to be quite right. Even if the basis gets squished, it's going to look like
a real nice folded box, I think. That's quite nice. Let's go ahead now and move back with the
global orientation. Move it all the way
through back, like so, and there we have it
just going to place it nicely at the corner
of the setup. Maybe even click AltnR just to kind of reset the
rotation, and there we go. Now we can go into
rotation axis. Move it a little
bit to the side, so it would be a
little bit tilted and position it to the corner. Just like so. Nice bit of
packaging on the side. Alright, so that is going
to be it from this lesson. Thank you so much
for watching, and I'll be seeing you in a bit.
13. Normal, Cursor and Parent Transform Orientations: Hello and welcome
back and forth to Blender Essentials
for Beginners, transforms and Gizmo basics. We went over Gizmos
and what they are, how we can make use out
of them a little bit. The reason for that is because the next part will Alright, so next up, we have
normal orientation. This one is a little
bit interesting if we are using it on an object, let's say, with the normal
selected by default, it's just going to give
you a local space. And the reason for
that is because this is trying to make use
out of normal pass. So with that, it's
just going to give you local coordinates
if it's just an object. If we go into edit mode, though, so let me just go into edit mode and select
one of the faces, you'll notice that
it now tries to use the normal phases of
the edge of Well, in this case, of the
face, it can also be an edge or a vertice. So if we select the vertice, we can select a corner like so, and it'll give us the average
normal of that vertice. So this kind of use is super nice because
you can just direct and determine where you want the rotation to
be with the face. If I was to select
the face on the side, I can then drag it
out and it's going to be equivalent to that
of extrusion operation. And you can see that it's nicely just expanding
this plank on the side. So it's all nice and lovely. What do you do when you want to use this in an object mode? You can't really use
it. It goes back to the normal local orientation. You can see that if I was
to go to Local transforms, it'll give you the same outcome. Well, the fastest way
to make use out of it is if we were to use a cursor
transforms orientation. We were to click on
cursor over here, let's go ahead and quickly talk a little bit
about what this is. Essentially, this will make
use out of the cursor itself. So free the cursor
by holding Shift, we can click, and that's going to determine how it's
going to look like. By default, it's going to be
based on the perspective, the last click perspective. So if we go and position
our camera to the top, use shift right click, it's going to then determine the setup of this Gizmo,
as you can see, so. So it's quite nice and handy, especially when using with
the or for graphic view. So if we go to the
top down view, you shift right click, it gives us a quick little
orientation of that. But the nice thing of the
predecursor we'll be able to make use out of
cursor orientation and set it up with
the face normal, even though we are
in object mode. The best way of doing it is by simply holding shift and
tapping on the screen. You'll see that we are able to change based on
where the Gizmo is, but it's also going to be
based on how we view it. If we're looking at from an
angle and we click on it, we're going to change the
orientation of this Gizmo. If we want to make
sure that it's using a specific pase normal, we need to go actually
onto the cursor itself. And here we have
orientation options. By default, it'll be set
to orientation view. If we were to set
it to geometry, it'll match the surface normal. So let's go ahead and select it. Now when we are using just a tap by just making sure we're using
this cursor selected, we'll be able to
tap on the face. Let's say this corner of here. And if we go to the Gizmo move, you'll see that now
it's facing diagonally. So this is very nice
because we can just tap on the face and
have it selected. To be used as that orientation. So again, now if you want it to be at the top
facing orientation, maybe go manually on the cursor, tap here, go back and you'll see that the Gizmo
is now facing upwards. And if we were to use more of
a won key type of a setup, so for example, this rope over here, we
want to, for example, I don't know, maybe follow
along special way of grain. We can by clicking on
the face over here, we can have more unique
type orientation. Now you can see
that it's going to be based on this orientation. A little nice little
functionality to keep in mind. So going back to orientations, we also have Gimbal. So Gimbal is going to
make use out of the axis itself of the N item menu. So this menu has XYZ Euler. So that's what Gimbal is using. And it's quite nice for certain bits of
animation, bone animation, especially because if we
look at something like this, it has completely broken down the Gizmode stretches
out in unusual way. The reason for that
is because it is showing the mathematical way of how the rotation is behaving. So because now it's said
as XYZ, saved information. If we were to
change it to X Z Y, we'll have this change
completely, as you can see, because now we're using
a Kimbo rotation. So that's something of a little bit of information
in case you want to rotate it in a mathematical way for,
mainly animations. Next up, we have a view. So that is literally
what we'd have with the setup when we're
looking at it, this little blue white this little white circle for
every one of the rotations, this is what would be effective. So if we were to just use
it in a global position, this white circle will be
basing it the rotation, sorry, the motion on our viewpod This same is going to be done with using
the view of this, and maybe it's quite
useful because you can just offset it
in one axis again, your viewpoint, you can
see it going up and down. And we don't see the z axis, the reason being is that, well, it's always going to be behind, and it's always going to be invisible to us because
it's based on a viewpoint. Maybe if you have a
second viewport like SO, I'm just going to
show you real quick. You can see We are changing
the rotation of this one. But when we are moving it over, based on this viewpoint, it's going to go diagonally on the other one because it's
based on the left viewpoint. So maybe it's a nice little
functionality, again, to make use out of we already
talked about the cursor. Finally, the parent the parrot is an interesting one
because it allows you to move multiple objects based on already pre
existing rotations. So right now, by default, is going to be set to
the world position. The reason being is that it's not detecting any
of the parents. If it will, it would use the local position
of this orientation. So let's say I was to attach multiple little items onto
this board over here. Let's say these little
items over here, we don't really want to move them every time we're
moving the shelf. We want to attach it,
and it would be nice if we were to have the
same rotation points. So if I was to rotate this, it would keep that
same rotation of local axis to be able to, well, move it maybe in the same
rotation based on where this wardrobe have those
little boxes on the top. And for us to do that, we'll firstly need
to make sure we parent these little
boxes to the wardrobe. Parenting is essentially if
we were to hit Control B, we can set parent to the
final selected item. So keep transforms. And now, when we are moving
just this wardrobe, we essentially are going to be moving everything that
is parented to it, so you can see that
these little items are now parented to
the main wardrobe. So if we have the parent
transforms turned on, we'll be able to for example, rotate this wardrobe to maybe
more diagonal way, like so. And now, because we rotated
it, we can go to local. We can see that the rotation
is based on wardrobe itself, which is very nice, for
example, to move them out. And these items will also have that same exact rotation if we were to select the
parent, we select the parent. Now we can see that both of these will have
that same rotation, even though previously the
local axis, you can see, it is using the
instance local axis. But if we want to use
that same rotation, sending it to parent
will allow you to basically just have these
two objects selected and then moving it based on the relationship
of this cupboard, so we can just directly move it to the side
of the cupboard. We don't have to worry about it. Offsetting it a bit too
much to the back or to the front is going to
allow us to do that. One more thing that I
left off is the fact that each and every single tool, whether it's rotation,
scale or move, can have its own
unique orientations. So right now, at the very top, we have this set as global, meaning that every single item, every single tool will be
using the global orientations. So it's quite nice. But let's say we
want the scaling, for example, to be always set to local because let's
say we want to, you know, squish it or maybe
expand it a little bit, we want to make sure that
it expands in a local axis, doesn't just kind of
warp it in dd way. For us to do that, what
we can do is at the top, there is another option
for orientation, and that is going to be
for the individual tools. By default, it's set
as well default, meaning that, no matter
what we change here, it's going to always
be setting it up for every single tool
as the same option. If I was to have
this set to Global and let's say the scale
needs to be different, we can change it
over here to local. And now you can see that this
Gizmo is using local axis. So now if I was to
go to rotation, it'll have global axis. Move will also
have global acess. But if I go to scale, it will have local axis. So that is quite nifty
little option to have. If we want to, for example,
expand it a little bit, because I'm expanding also
the items at the top, I'm just going to go
ahead and select this, hit Alt P, clear parents
and keep transforms. And now we can go back to this and play around with
the scale a little bit, extend it, made it kit a
little bit wider. Why not? And we have ourselves
a nice little shelf that's a little bit
more messy on the side. And yeah, that's going to
be it from this video. Thank you so much for watching, and I will be seeing
you in a bit.
14. Mastering Transform Pivot Points and 3D Cursor Control: Hello. Welcome back around to Blender Essentials
for Beginners, transforms and Gizmo basics. In the last lesson, we went over the transforms
orientations. Now we're going to move on to the transforms pivot points. This option is worth
knowing about because when you're rotating
or scaling an object, the software needs to determine from where
you're doing it. Like, where is the
starting point? Where is the pivot point? That you're using. And we already talked about
the pivot points. That is what's
going to be used by default to rotate objects, or let's say you want to rotate
or adjust multiple items. Some of those options
will help you do that. So first things first
bounding box center, this will be the same
collision that we talked about when we have an item. It creates a sort of
a cube all around it, making sure that
everything is included. And that option is going to be great for
multiple selections. So right now, if we have this box selected,
you see by default, it's still going to go back onto the origin point, which is, you know, great,
especially for keeping that rotation in placement. But if we want to use multiple items with
this bounding box, you'll see the Gizmo
starting to change. And the way it
does it is, again, it sort of creates this
invisible box this time. All around our objects
selection of objects. So it gives us the Gizmo right in the
center of these items. This is very different to
the default median point because median point will grab the center point based
on the selection of items. We'll come back to the
median point in a bit. But essentially, if I have an object
selected to the side, you'll see that this gizmo moves barely because we
have multiple pieces, selected, multiple items
selected on our side, which has ordinary points
well on these sides. But if we were to select it back to the
bounding box center, it's going to include
this one object, and it's just going
to try to create this invisible box around all of our items and then centering the Gizmo
right in the middle. So no matter how much we
select now in the middle, because the bounding Mx
included a larger scale, it's not going to move. Maybe if we select
this ladder because it was more on the
edge of the wall. But this option allows us to quickly select multiple
items, let's say, and have them maybe slightly
rotated as a whole, and working with
collections like that can sometimes
be beneficial. This also applies for scaling. So again, with the scaling on, I'm going to change the
orientation back to the default so we can use
the global orientations. And with this selected, we can even do some scaling
that's going to be based on the global
bounding box, so it's going to stretch
it out nicely for us. So next up is something
called free decursor. This one is my favorite one
because it allows you to have so much control over the
scaling and rotation, and you can customize
it in any way you want. So for example, we want to lay down this little
palette over here. By using our free Dcursor, we can just place it right
in front of it like so, and then I would just maybe move some of
those crates off to the side so we'd have
some space for like so. And then picking this pallet up, we can just change the
transforms rotation to local. So we'd have the right rotation. We go onto rotation,
and because our pivot our virtual pivot that is
being used as a free decursor, we can just rotate
it, and right away, it's going to get it flattened
down so you can see, like, so we can just put
it on the ground, and it's going to be really, really nicely set up for us. If it's still a little
bit in the ground, don't be afraid to just
move it up a little bit. But just like that, we got to selves a
nice little setup. And things like that is
also quite nice for, well, fixing up this door, let's say, if you
go onto Edit mode, like so, and we
click L to select this entire part with the
delimiter being normal, then we can click L also on the sandal and we have
an entire door selected. So if we try moving it
with the free cursor, we'll see that art
is moving like so. And with this, we
can fix this door. So in order for us to do that, we're just going to maybe click Holding Shift on an area that's touching the edges right where the edge is intersecting
with this part. And once we do it, we
can go on to rotation, and we can then simply, well, rotate it,
we fix this door. So that would be a little
bit better, of course. It's not going to be perfect. But just like that, we are able to fix it up nice and maybe even open
it up a little bit. And yeah, very, very
nice little tool. And don't forget that you do have lots of control
was to free the cursor. You can select on an
edge, for example, or a vertice, like so in the new shifting as
cursor to selected. And this can also be used
to make some finer tweaks. Again, lots and lots of
control with this option. So next up, have an option
for individual origins. This is a lovely one
because you can have multiple items selected
in an object mode. And every time you select it, even though the origin point is going to be in the center, it doesn't mean that
when you're using it, it's going to use it
as a center point because every single item
will be treated individually. If we were to move the z axis, it's going to move all of them around their
own origin points. This is such a great
tool because we can essentially make some
quick rotations, for example, to these
items like so all at once, we can rotate it and it's
going to be done like that. The thing that you should
worry about is whether or not you're using global
or local orientations. These are the main ones. If, for example, I was to select this box over here
and select this one, which is having completely
different rotation, rotating it by
default might look right if we were to use one
axis wood for world rotation. But if we change to local, that's where the magic
happens because then each one of them will treat not
only individual origins, but whether or not
they locally rotated to their own axis. So if we try to use that value Care is going to
work quite well. But let's say I pick up this
canister over on the side, like so and then
use the Z value, and you'll see both of them rotating in different
angles because Z value for this one is going to be facing in this
direction locally, whilst in this canister, it's going to be facing upwards. So a very nice little tool, especially when, for example, we have these ladders
over here and we have the individual
origin selected, local, transforms
rotation selected. We can go to rotation and maybe lightly adjust the z
axis to kind of make them a little tilt
sideways based on their already prepositioned
tilted setup. So a very nice little
functionality to have. Next up is we have this
default median points. So by default, you
should have this on. So if you've not
changed it before, this should be the default. And essentially, it's just going to make sure that it grabs multiple objects and takes their origin points and then averages out where the
middle point would be. So if I select this point over here and this point over here, which is in a little bit more to the right and upper, if
we select both of them, it's going to place it right in between these points
over, like so. So again, very nice
and good tool to use. By default, it's probably
the best tool to have. So that's why it's kept as a default because it just
simplifies everything. Let's say we have
these walls over here that we want to
maybe rotate or remove. We can select them all at once. We can click on Rotate, and we could just, you know, rotate them all nicely. Or we can scale
them all at once. We can have the median points, so it would be right
in the middle. I will change the orientation at this point to default
for the scale. Otherwise, we might lose it. So scale from the previous
lesson was set to local. We're just changing
it to default, so it would use
this upper section. And now when we're scaling it, we can see that it scales up together nicely from
this center point. And finally, we have an
option for active elements. This option is so nice, so good because you can
select multiple objects. Let's say we select
all of these items, and then by holding Shift, you select the last one, and that last selected object
or the object that you select first one and
you don't select any others will have more
of an orange outliner. So you can see this
is more orange, type of an outliner in comparison
to the ones in the back which have more of
a red outliner. This indicates that this object is now the main selection. And with this main selection, we can do many handy things, and one of them will be,
for example, rotating, so we can rotate it based
on this object rotation. We can rotate all of these with the axis being this object. Or let's say we can select this crate in the
back and select multiple objects to its side, like so, we can use this
object as a sort of a pivot point to just well,
push it off the wall. So now if we start scaling it, we see that everything gets
pushed off the set wall. And, you know, once you're
done pushing it off the wall, you can select back on these
objects like so and then use AltnR and then sorry
not AltnR Alton S, and then it resets the scale. So essentially, we're pushing
the pivot points outwards, but then we are resetting
their actual scale offset. So it's a nice way
to kind of, like, move all the items with a set of multiplier off to the side. And then making sure that they as objects get their
original shade back. And yeah, that's pretty much it. Let's go ahead and just select medium point back to normal, and we're going to continue on with this in the next lesson. Thank you so much
for watching, and I will be seeing you in a bit.
15. Speed Up Modeling with Grab Rotate Scale Shortcuts: Hello, welcome back everyone to Blender Essentials for Beginners transform and Gizmo Basics. Now we are closing
up towards the end. I would like to I would like to show you the best
usability out of these tools, and that would be the
shortcuts that we have. So if you hover over, you might have noticed
that not only does it have shift space as a shortcut, it also has letters next to it. And, technically, we
don't have to use just shift space to get
access to these shortcuts. Instead, what we can do is
just simply click a button. So by clicking G, when we
have an object selected, we can move it around. So you can see it, so we're
able to move it around. Good to hit escape to
cancel this operation, and using rotate, we'll
need to click R. That way, we're able to rotate it around. These options are very good. So the final one is
going to be scale, so S. So that will
allow us to scale it based on our selected
transforms pivot point. And yeah, all of these
will help you so so much. So G for grab to move it around, R to rotate and S to scale. That's the way to remember. But by themselves, they're not going to be quite as
good because, well, they're always going
to be locked based on your viewport side, which
way you're looking. So if we want to rotate
it the right way, that's not going to be enough. And that's where additional
shortcuts come in handy. And those shortcuts
would be X Y and Z, representatively
to X Y and Z axis. So if we click G to move it
around, we can then click X. That will essentially lock it to the X axis so we can just drag it and push it to the side, and maybe we want to push it GY to the back just like that. So that way, we're not
moving the z axis. So that's pretty handy, and that works with both
rotation and scaling. So if you click R, which will allow us to rotate it,
and then we can click X, which will then lock the X, so we can maybe whisk
this box to our side. And then we can use RY to
reposition it a little bit. And just like that,
we get ourselves to the right type of setup of
this box facing sideways. And again, scaling will
also work the same. As an X, we're able to squish
it out in a nice setup. All of these axes will also
be affected whether or not you have global or local or other
orientations selected. So, for example, if
I have this rotated diagonally and then use local orientations
and use S and X, we'll see that it goes outwards. So my most recommended
use for this would be to just have your
motion set on move. That way you have this
lovely Gizmo with arrows, and that way, you'll see which exactly weight's going to
be needed to re rotate it. So right now because
we have local set, we'll notice that we have the
red arrow facing that way, and that shows us
that we can use SX to scale it up and
down in that direction. So very nice and handy
or alternatively, if you want to rotate
around X axis, we can use R and
X and just rotate this box back to
normal, just like that. The other nice thing that I like to let you know is that not only can you use it with the RX Z, but you can also
use with R Shift X, and that will lock the X out, essentially giving you
the control to rotate it around both Z and Y axis, as you see by the lines
going across the screen. So for example,
if I want to move my object in Y and X axis, I can lock out the Z
axis by clicking G, Shift Z, and that way, we can move Y and X
axis accordingly. Similarly to this, we can also do it with the
scaling option. So for example, I
can use scale and then use shift in
X, and that way, it'll lock out my X axis, only scaling it in
Y and Z directions. So we can essentially
get this sort of a shopping looking bag type of a setup out of a simple box. So really, really lovely stuff when it comes
to the options. And with that, you'll be
able to do 90% of the work, I would say, unless it is
very, very much specialized. Sometimes you need to well, whatever to change the way the item is interacted
with the Gizmo, or maybe you need to
change from global to local or even use the cursor. All of these would be, 10% type of cases,
and most of the time, you would just need to just
manual rotate it like so. The final thing that I'd like to mention is that not
only can you do that, you can also write in
the values manually. So if I bring back the
transforms option over here, and I will click AltnR to reset the rotation for this box just for the sake of
previewing it better, we can use our Ze to rotate it and lock it on the Ze axis, and then notice how at the
very top, we have a value. This value can be written in
manually using the Numpad. So if I write in 90, we'll have an option to have 90 degrees
completely rotated, and then we can click Enter, and that's going to give us
90 degrees complete rotation. That also includes
the same for scaling. So if I click as two, it's going to scale
everything by two, like so. If we want it to be
scaled only in Z axis, we would need to do it as Z two, and that's only going
to be going in Z axis. And again, finally, for G, we can also do it as well. So G Y, and we can click one or if we want it
to be going the other way, we can hit minus. Minus sign will
invert the value. So if we are going, for example, R Y 90 to rotate it this way, we can add a minus sign that will rotate
it the other way. Very, very handy type of a tool. The thing that I'd
also like to mention is that it is an additive. It's not replacing the rotation. So if I was to set this
rotation to 45 degrees, like so so it would be
diagonal by writing in R S 90, it's going to rotate
it 90 degrees, so it's going to be
45 plus 90 degrees, giving us 135 of a
rotation, 135 degrees. So let's say this little
canister falling over, we can use local
transforms orientations. And then, knowing that we have this green arrow
going to the side, we can rotate it around it. So R Y, and then we can
even check which way is up. So we can see that going in a negative direction,
it's going upwards. So then afterwards,
we can use minus 190 and hit Enter
and there we go, replacing this canister back
to the top, just like that. Maybe we need to lower it
down a little bit though. Fully that makes sense.
It is very, very handy. And honestly, again, this is going to speed up so much of your work if you
continue on using it. So, yeah, that's going
to be it for me. Thank you so much
for watching, and I will be seeing you in a bit.
16. Scene Cleanup Using Grab Rotate Scale and 3D Cursor: Hello and welcome back everyone
to Blender essentials for Beginners transforms
and Gizmo basics. Now that we went over
all of the basics, let's go ahead and
make use out of, especially the shortcuts
that I've taught you at the very end to
clean up this place. So first things first,
this cupboard over here, we close it up a little bit, and we can use our Z and just rotate it to
where we'd like it to be. Alternatively, we can hit
AltenR to just rotate, reset the rotation, and then
we can put it in a corner. I think it was looking
a little bit too messy. Also these boxes over here, we can also use AltenR and
there we go, nice and tidy. Of course, we're going to look a little bit too uniform as is. So what I would say we can do here is we can just slightly rotate this in z axis
like so, and there we go. Slight bit of rotation makes it a little bit more natural. Next up this ladder over here. We're not trying to
climb over the wall. Let's go ahead and
position both of these ladders and place it
somewhere in the corner. So we're going to firstly
move these scanners to GY, just move it off in a side using global transforms because of is they're going to be going
off in different directions. So instead of local space, we're using global to just
move it off to the side. Then we can just
select this ladder, put it closer to the up
ladder, select both of them, click Alt and R, and we're going to get the
default rotation for both one of which had a
different Gizmo setup. So we rotated this ladder. We're just going to
go ahead and fix it, so both of them would go facing the right way. Let's
go ahead and do that. R is at 90, and I'm going
to use minus just to make sure it doesn't go into the wall because the origin point
was in a corner here. So then afterwards, we can position both of these ladders, select both of the ladders, make sure that we
have median points selected for transforms,
pivot point. And use RX 90, just to place it on the side, RZ 90, and we can just simply move these ladders
up into the corner. So maybe this corner might not be quite as
well, but you know what? I think it's okay
because this pillar is getting in a way so let's see. Yeah, I think it's
right, honestly. RX, let's rotate it a
little bit, like so, move it so it would be touching
the edge of the pillar. And let's make sure these
ladders are not floating or are not on into
the ground too much and maybe select
this out item like so because this origin point is acorda and I don't really
want to deal with it. I will just go ahead and change the transfer pivot point to
free the cursor, hit, shift, just place it at
the base, like so, and then R X and then slightly tilted to
the side that way. I'm not changing the
bottom too much, and maybe we need to, you know, destabilize it like so. And let's get back into the median point or
transforms pivot points. Then afterwards, we can go ahead and fix these boxes
over as well. I'm going to move them all in one corner because I think they would look much
nicer in a corner. So let's go ahead and just make sure everything looks nice. We're going to move these
boxes out of the way. This wooden crate can just be rotated or said nice bit
of rotation. Move it in. I'm not going to
reset its transforms, because I think it's going to look a little
bit more natural. We don't want it to be look like it's been
placed by a robot. We're setting it
up to look tiny, but not not to an extreme level. And I am wondering if this is
going to be quite alright. Maybe this box, I'm
going to cheese it a little bit and use S and Y
and just kind of squish it. But SNY should be squished with local axis because this
is slightly sideways. Oh, sorry, S and X. So we can see when
I click S and Y, the axis was in the
wrong direction. So by clicking X afterwards, I'm able to change the direction right away
and then scale it down. So that way, we have enough space now to
push this inwards. Afterwards, we have
this per crate. Let's go ahead and move it to the very top of
this pile, like so. And if for this one,
I will just use AltinR and use RZ maybe RZ 90, like so, move it
closer to the wall, and we got ourselves
a nice little pile. Placed on our setup. So here, for example, we got a little bit of an
issue where I'm placing this crate and we are not
touching the uprocrate. So the easiest solution
for that would be holding shift to grab this very edge where you can imagine the weight would be
distributed when it's tilted, and we can use it to rotate it a little bit to be touching
this shorter crate. These two creates a
little bit different because we're playing
around with scale. We can even make
this even smaller, like so, so it would have
more of an extreme value. But yeah, afterwards,
we can just use Shift and right click, place our precursor, use the precursor as a
transforms PivoPoint and then use R and X and then, oh, sorry, R and Y and then
just rotate it downwards until we start touching
the little piece, like so. And just like that, we got to sell some nice little setup. We can even potentially bring it down. Although,
you know what? Yeah, we are going
to bring it down. So in this case, I'm going to just go
to this upper corner, hold shift, tap it here, and then have the
view set up like so. So that way, I know
that this point over here and the upper point over here is not going to
be rotate as much, but this point is going to be tilted downwards
as much as I want. So with that said, I'm
going to then just click R and slowly rotate it inwards, like so, and then maybe
tilted upwards like that. So that way, it looks
like, you know, it's nicely tilted and weighted
properly on those crates. You know, every crate,
maybe it was handmade. They're not exactly
the same sizes, but we tight it up
this corner, like, so oh, next up, we have a bunch of canvases. We don't need that many Cases
to be scattered around. Let's go ahead and just
simply click GX or use the global transforms with the median point and
use GX. There we go. And we can just place
it nicely together. Maybe it can be rotated
a little bit to be, you know, closer
with one another. We don't need to be perfectly
placing them because they are just quickly placed
in their own little spot. And that way, if needed, they can be grabbed, but, you know, maybe they were
placed there in a rush. Next up, we have
ourselves a palette. We can use Alt and R to
just rotate around because the top one over here
looks much, much better. And honestly, I just
realized that we can totally grab all
of these lukanoss, bring them up and place the palette underneath
just like that. So notice how the move tool, I'm also using it, not just the shortcuts, but with the Gizmo
itself, because, well, it has all these
lovely options and tools. So that's my
personal preference. Feel free to experiment
and play around with all these little options to get yourself the preferred
way of doing things, whichever way works
best for you. But yeah, when I am
personally working, I prefer to just move tool
open most of the time, and then afterwards, use the shortcuts mainly
for the rest. But even so sometimes GY, just to move it whenever
the arrow, for example, is intertwined with the upper, I would still do it anyways. This box has a boundary box, let me just go ahead and
delete it as a visual, and I'm going to place these
crates over in the corner, click Alt and R, and just
make sure that we have them. Nicely stacked up. So maybe they are prepared
to be used or I don't know, maybe to store some
food or something. Maybe it needs to
be gotten out of this little cabinet over here. Out of the wardrobe, maybe
someone was hiding it, or maybe it's in
another location. Anyway, it's here, I'm going
to just rotate this by nine degrees because it was already placed
nicely on the wall, and I just want it
to be cleaned up nicely like so. And there we go. We cleaned ourselves this
lovely little section using the tools provided, and we got ourselves,
although a cracked setup, still nicely looked after place. So that's going to be it for me. Thank you so much for watching. And yeah, happy
modeling, everyone.
17. Fix Transform Issues Origins, Parenting and Scale: Hello on. Welcome
back everyone to Blender Essentials
for Beginners, transform and Gizmo basics. So we're pretty much done
with all of the lessons. Now we're just going to go for quick problem solvings for
the most common issues. So first things first,
if you don't see the origin point when
you select an object, if this little Gizmo doesn't pop up and you don't
see the orange dot right in the middle of your item or if it's
not in a corner, then you might need to reset it. And to do that, all
you have to do is just right click Set
origin to geometry, and then it'll go
back to the object. So that's just making
sure that it's there. Next up, how would you know where to place
the origin point? Well, or something like Blender, it might be a little
bit more forgiving because if you're
using acid browser, something like this
little browser over here, you might be able to
bring into your scene the items needed quite easily,
as you can see over here, the human reference
without much of a problem regardless of where
the origin point would be. But I would highly
recommend to have the origin point
at the bottom of, well, most of the
assets and prefabs. The reason for that is that if you're using it
for game engines, game engines would use this origin point for
placement of items. So for something like crates or, you know, shelves, having it at the bottom is
the best option. So to do that, the easiest way would either to use origin to geometry or origin to surface. We can use origin to
geometry like soap. Then once it has centered
in terms of X and Y axis, we can use options and
use effect only origins, and then bring it down. We can hit. We can
just simply move it downwards until we are
happy with the positioning. And once we are in the
right spot like so, we will be pretty happy and we'll be able to
turn off the origins. And now we have the origin
spot in the right position. The reason why centered origins are quite good is because, well, it also helps with
the transformation. So if we're trying to
rotate it around its axis, around that axis,
we'll be able to do it quite easily without
this formation. If we were to try
doing something like, for example, the
ladder over here, not only would it rotate it in the center based on a center, it would also rotate it
well, around its origin. So having origin
points centered and at the bottom would
usually help quite a bit. Think for a canister over here, you'd be able to easier
tip it over or whatnot. So having canister
option, for example, this one over here,
be at the bottom, you'll be able to easily dip
this over by using RY 90, like so, and then just pull it off from the
ground a little bit. Super simple, super easy
type of a result, like so. The exceptions to
that rule would be something like
module kit type of parts or items like walls walls are very good
for having it in a corner. The reason for that
is because then it allows you to connect it
quite nicely and easily. We can duplicate
this, for example, and then we can just click G Y, move it to the side,
we can see that it connects when it's at minus two. So you can see that
upper section I'm looking at over
here and minus two, so I can just use minus two to make sure it's
the right value, and just like that, we'll be able to connect it perfectly. We can duplicate again, G
Y minus two, and again, we'll move it nicely to the
corner then afterwards, it's also super easy to make sure that it's giving
us a nice grid. So we can even duplicate
the set again, GY, minus two, like so and then
use RZ 90, and there we go. We got to sell a perfect corner. So having it in the corners of the walls is quite
nice and handy. Also, something
for a grid type of options would also be pretty good to have it in a
corner because again, it helps us to grade
well variations. GX I believe this is minus two, you can have it like
so and for example, we can do GY, GY, minus two, as well. We can have it like
so, or alternatively, it would also be
pretty good to use RZ 90 or -90 if we want to
expand it to this direction. So by just simply
rotating this preset, we are able to make sure that the item patterns that are visible would not be
quite as repeatable. So these styles
would be different by just simply having
a quick rotation. We'll be able to sort that out because of this
origin being corner. Another thing is,
what happens if you end up having some issues with
the transformation itself? What if it's not working in the right way to how
you want it to be? Let's say it is using another object and
you're trying to move it in one way
and it's not working. Well, firstly, you could
check whether or not at the top is using
transforms oritations to the global or local. Most of the cases
you would want that, and you'd want to
check if the tool itself is using the
default setting. Alternative thing
that you can do is, for example, in this case, we can use G and Y to
move it up and down. But what if we wanted
to be used as a Gizmo, the world position, G and Y. So we can use actual
world position and bypass this entire or transforms rotation
by clicking G Y, and then Y again. And that will change.
You can see at the top, it changes along global Y. So if you click Y again, we will turn that off
clicking at once. I'll go along the preposition
selection that we have, which in this case is along cursor Y that I have selected. But if I click Y again, it's now going to go
along global axis. So that's quite nifty because if we have something
like rotation, and we're trying to
use, for example, Z, and it's like, Hey, it's not working because now
it's maybe using a local axis or the cursor
axis for orientation. But if you click Z again, it's now going to
use global rotation. So that's quite nifty and
handy to make use out of. Uh, and I would
highly recommend, whilst using just
in general gizmos, to just double check whether
or not the Gizmo that is positioned on your
origin point matches to the one on the top. That gives a huge indicator
whether or not it's using world position or
anything else in general. Next up, what if an object is behaving a
little bit weirdly? So right now I have two shelves, and if I was to select one
shelf and use G x minus one, it will go to the
left because it goes towards the
negative direction. However, if I select
this outer shelf and use GX minus one, it will go the other direction. So what's going on with that? Using one for one way and
another one for another way. And if you look at the gizmos, you'll notice that they're
completely flipped. So the reason for that is even
though these gizmos well, are using by the same instance, they have the same mesh. If we look at the end menu, we'll notice something
that the scale is actually flipped
on the Y axis. So if we click AltnS, it actually flips it over, and then we need to use R Z 180, and that's going to give us
the right set times flipping an item in regards to scale
helps us to mirror it. We can also use an option by just right clicking while
it's an object mode to mirror it based on global
X or local X axis depending on your
preferred setup. But by just mirroring
it, maybe you'd want to have a variant that would, well, look a little
bit different. You can see this one here is now broken on the
other side a little bit. So having variance is great and all I would mirror
some things like text, for example, if you have
some text on an item, that would be mirrored. Other than that, it would
work pretty well outside of the fact that the local axis will start behaving differently. If I have these two selected, have the individual origins
and local axes turned on, and I use RX, you'll notice that they are
waving towards one another. They are going in completely
different directions. And the reason for
that is, again, because the axes, as you can see over here, are
completely flipped. So that is something
worth noting. Same applies for
something like crates, if we have a duplicate
of this crate over here on the side and have
it mirrored in z direction, like so, just to have it, placed maybe on a
top or something of that sort for extra variety. Then we try selecting
them both and use our Z now they start going
in different directions because they're using
individual origins and local transforms
orientations. If we try having this
as median point, thinking that it would
have it in the middle, it will not affect it anyways, because both of these are
using local transforms. But if we change this to global, then it will use
the world position, and now they will both
behave in the same way. The other thing that
I'd like to mention, although we haven't
touched much on that is that there might be
issues towards parenting. If I have this selected, this cupboard and just parent extra metal boxes on the top, Uh, making sure that my
main selection is wardrobe, so I can click
Control P. I can pa rinted while keeping
the transforms. Now, when I'm rotating
the wardrobe, these items at the top are
also going to be rotating. However, if I rotate it by a little bit and
then decide to well, unparent them, we
can clear parent, and then it's going to snap
back reason for that is because you need to know that when you're
parenting something, they are attaching
themselves onto an item. So right now it's attaching
onto the wardrobe, meaning that the origin point, the location of
where the object is, is going to always be relative to the origin point
of the wardrobe. So if I was to change the origin point of
this wardrobe to the frecursor like so, um, like so, it's going to start showing these dotted lines
indicating that the items that are on top of the wardrobe
are relative position to this dot over on the
selected surface. So now if I try to
rotate the object, like so, you'll see that it's rotating everything
based on that. And if I have it
rotated and try to unparent using the
normal clear parent, it's also going
so based on that, sometimes parenting can
give you some issues. But most of the time,
when unparenting, if you just click on the one that says clear
and keep transforms, you'll be able to unparent
it with little to no effort. As a final little say, what
I'd like to mention is that when things go wrong
with scaling or moving, in all of those times,
it's not random. There's always some
mathematical reason behind it. So I highly recommend
to always check whether it's the origin point or whether or not the item is using the correct orientation
for the pivot, or if you have multiple
items selected, making sure that the
pivot point is being used as the proper setup. A desired result.
Transformation values, again, also matter. So if you have some scale that is flipped or in
this case, for example, the item scale is not 11, one, and you want to use it
as a default prefab, I highly recommend to just apply the scale when using
Internet scene. So in this case, I can
just click Control at A and apply scale. So now I'm resetting the scale. This is the main one, honestly. You have rotation
and negative value, that's quite right because, well, we sometimes need to
go in the other direction. Location also, it really depends on which
side, but scaling, especially scaling, it's
really important that you have it is a positive value. And then finally,
parenting can also affect your transformation and how
it behaves with the objects. So keep an eye on that as well. Aw, thank you so
much for watching. Happy modeling, everyone.
18. Fix Mirror Modifier with Custom Transform Orientation: Hello, and welcome
back everyone to Blender Essentials for Beginners transforms and Gizmo basics. The other thing
about origins that I'd like to mention
is that some of the modifiers may use them
to deform your object mesh. And what I mean by
that is, for example, with this palette, I have the origin at the right hand side, and if I was to add
mirror, like so, it will use this origin point to determine how they wanted
to be flipping the mesh. So right now you can see
because of this origin point, I'm going to be flipping
it to the outer side. But if I was to use
transforms effect Origins, it will allow me to move this origin point
so you can see that mirroring now is being mirrored well to the
up side, just like so. And if I was to use set
origins to the volume mass, like so I can flip
it to the upside, essentially fixing this hole
that we had over there. Just to make sure it doesn't
overlap with one another, I'll go ahead and turn
on bisect and maybe adjust this a little
bit manually. Like so. And that is how we end up fixing the issue with
the hole over here. So now we have a palette that actually supports the weight
of these canisters. Now, let's say we
have an issue with the applied rotation
of the origin points. So let's say we have a ladder that maybe we rotate
it and, you know, sometimes we want
to rotate it back, clicking AltnR helps us
to straighten it up. But let's say we rotated
in a wid position, and by accident, we
applied the rotation. So now, this rotation
is set as default, and we have the angle tilted. If we click AltnR, it's going to give us
to that tilted angle. So what can we do about
it? Well, the solution is to make use out of the
faces of the mesh itself. And for us to do that, we'd
go onto the edit mode, so we select one of the pass that is more
straightened up. So in this case, this edge over here is quite
straight for ladder. We're going to go
ahead and select it, and then we're going to use
the transforms orientation. There is one more feature
which we missed out, and that would be to create an orientation that would
be custom to the selection. This case, because we have
the selection set to face, we're going to click plus, and that's going to give us
the custom phase selection. It even renames it for us, and we can use this section over here to have a custom name, but that's going to be called by default phase because
we had phase selection. We can also set it up as edge selection or
vertex selection, and based on the normals of those mesh
information selected, we can have custom orientation. Right now, as you can see, it is facing the set value
facing sideways, so it's already
much better because it's already 90 degrees
proper from the ladder. So that we're left to do
is make sure that we use this orientation if we go out of edit mode
now to object mode, because we have this phase
orientation saved up. When we have this selected, we can see on our
orientation or the Gizmo. We'll have this still 90
degrees from the ladder. And then afterwards,
we'll go to options to be affecting only the
transforms of origins. Like so, you can see that
we have this now enabled, and then we'll go to Object transforms and we'll use a line to transforms
orientations. And that way, you can
see that this option for Affect Only Origins will be set right as
we want it to be. Now we can go ahead
and tick this off and we'll have this
properly set up. And then all we have to
do is just simply click AltenR and it's going to
rotate it to the right set. Of course, this ladder
might be a little bit off in regards to,
well, it's rotation. We want it to be facing upwards. So we're going to go back
to the transforms to make use out of either
local or global, but we just simply need to
make sure that we rotate this by 90 degrees, like so, I'm going to use -90
degrees just like that, and we're facing it with
the right proper setup. Then afterwards, we can
just click Control A, apply rotation, and we finally got ourselves
the right rotation. So we can rotate it sideways, and then we can hit Alt and R, and it's going to give us
the right proper rotation for this angle facing
upward using this, we can fix this
angle of the shelf. It was always bothering me throughout all
of these lessons, so let's make sure we fix it. For us to do that,
we're going to go ahead and just go
into Edit mode. Click L using Select
Linked to normals, just making sure we're selecting
all of these mesh items. We can hit P to
separate by selection. Now we have this door as
a separate mesh entity. That's great for us. Then we
simply go into Edit mode. We select the phase, like so we go ahead and
create a new phase. So it's going to be phase 001. And now it's going to have
this proper rotation. Afterwards, we go back
onto object modes, have the selected hit
transforms effect only Origins, select Object, transforms
align to transforms oritation and now
we can hit AltnR. Oh, sorry, let's go ahead
and click Control Z. We need to go ahead and turn
off Affect Only Origins. Then we can hit AltnR and it's going to give
us the right setup. And we can turn off the
transforms orientation. We the default one, use R X 90, like so, and we can just
lightly adjust it like so. Nicely straightened up for me. Afterwards, we can
just select both of them, select the shelf last, hit Control J, and make
this a combined object. But now we have ourselves a
lovely shelf in the back. So thank you so much for
going through all of these tips on transforms
and origins with me. I really hope this
helped make Blender feel a little bit clearer
and easier to control. If you enjoy the course,
please leave a review and do share it with others
who might find it useful.
 3D Tudor, The 3D Tutor