Transcripts
1. Introduction to the Ultimate Guide to Blender 3D Rigging & Animation: Welcome everyone to
the ultimate guide to Blender 3D rigging
and animation. And this is the introduction
that will lay out what will be covered in this
comprehensive course. First up is the
basics of animation. This part of the
course will cover the basics of animation, no bones or rigs,
because keyframes, we'll also be looking into interpolation modes and how we can use them to
smooth out animation. Next door, we have
swing animation using the skills we
learned from stage one, we can take this up a notch by creating our first
rig and single bones. This is the basis of most animations you'll find
out there moving onto, we'll turn in when working
with anything spinning, it's important to understand
how frames keys work. In this stage, we
will be explaining how to create a spinning wheel. It's not only has
to look realistic, but needs to be achieved in the shortest amount
of time possible. Moving on through the course, we have basic waiting
and in this part, we'll be looking
at how weighting works and how to add
weight to bones. This is important to create
a certain level of realism. We'll also be looking at when
and how to use bendy bones. Finally, for the basic
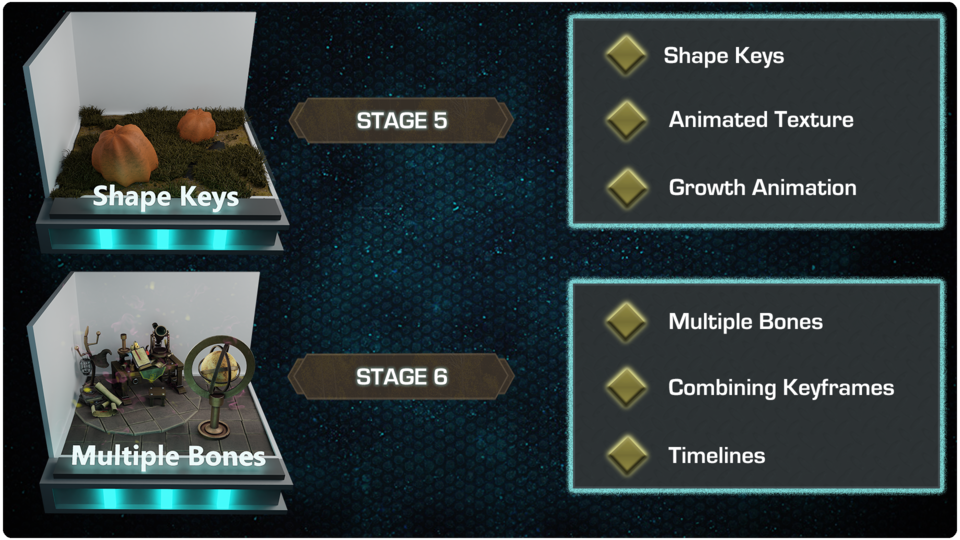
part of the course, we have Shape Keys to a very powerful tool that
we have at our disposal. And not only changed
the shape of objects in ways that rigs simply cannot do, but we're also able to
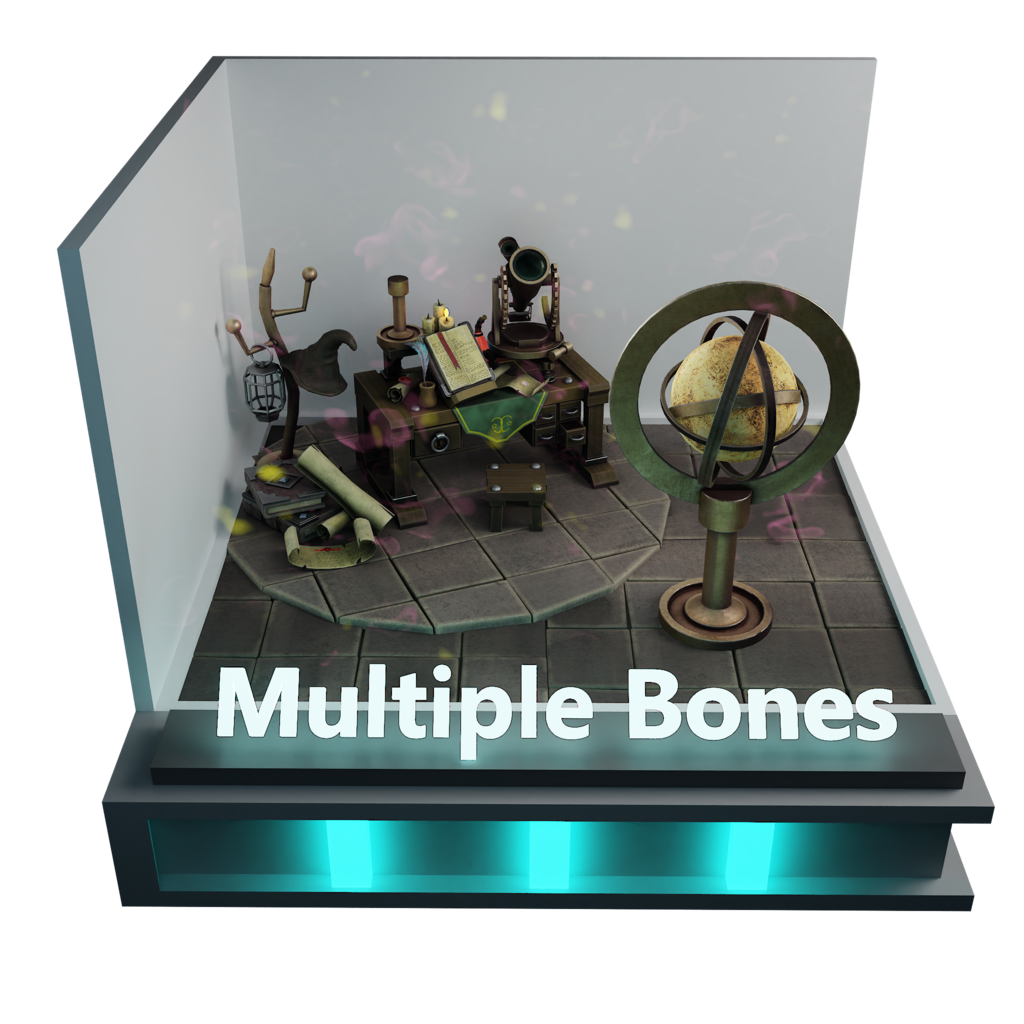
combine multiple shape keys. Now as we take the
cost up a notch, we're going to be talking
about multiple bones. And in some point in time, you will have models
that will need a lot more than just one single bone. In this part of the course,
we'll learn how we can create animations
with multiple bones working independently from each other
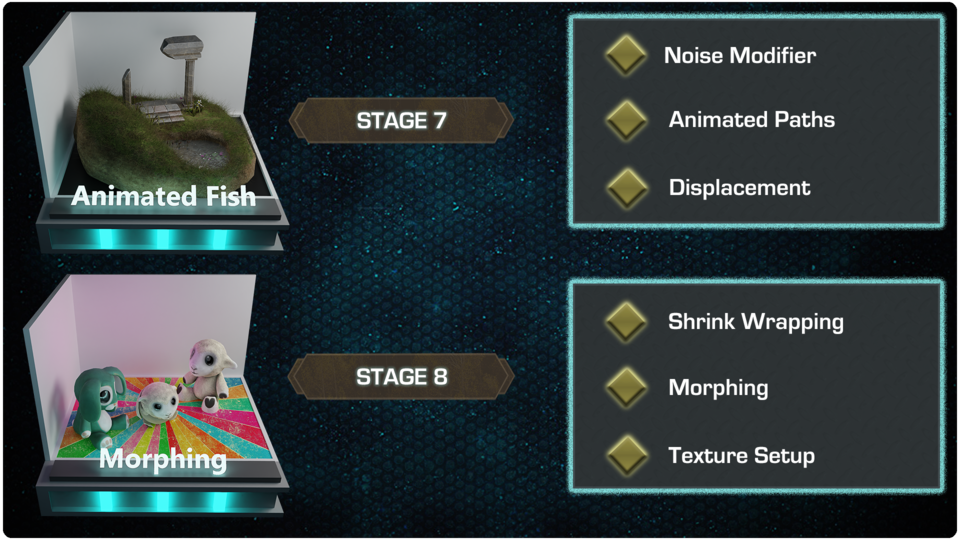
because it couldn't be an animation course if
we're not going to be covering any type of wildlife. So in this part of the course, we'll be looking at
fish and animates in any wildlife in a realistic
way can be pretty difficult. Luckily, we have a fair
amount of tools then blender to speed up both
the workflow and realism. You'll be introduced
to the graph editor and we'll look at modifiers and how to combine
them with displacement. Next, we'll be moving
onto morphing. Morphing is a process of taking one object and turn
it into another. Now this is not as simple
as just clicking a button. And then this part
of the course, we'll be looking at how to
set up this process and also how to change the textures
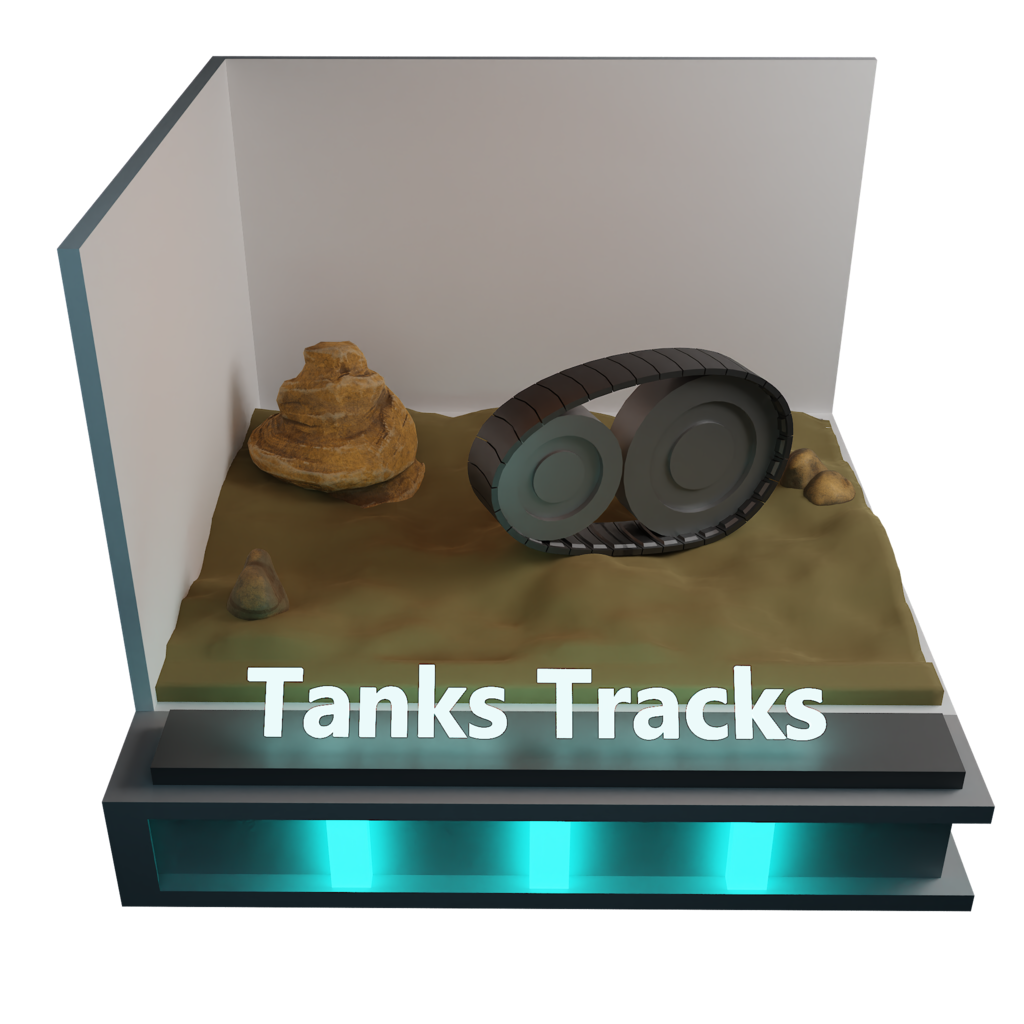
along with the object. Now the one most
of you are waiting for is actually tank tracks. And here we are. This
has to be the number one asked for animation across
all of our channels. And this is why I've
included it in the course. We'll be going
through how to stick our tracks to any terrain. And you'll finish this part with the skills to create handles and drivers have your
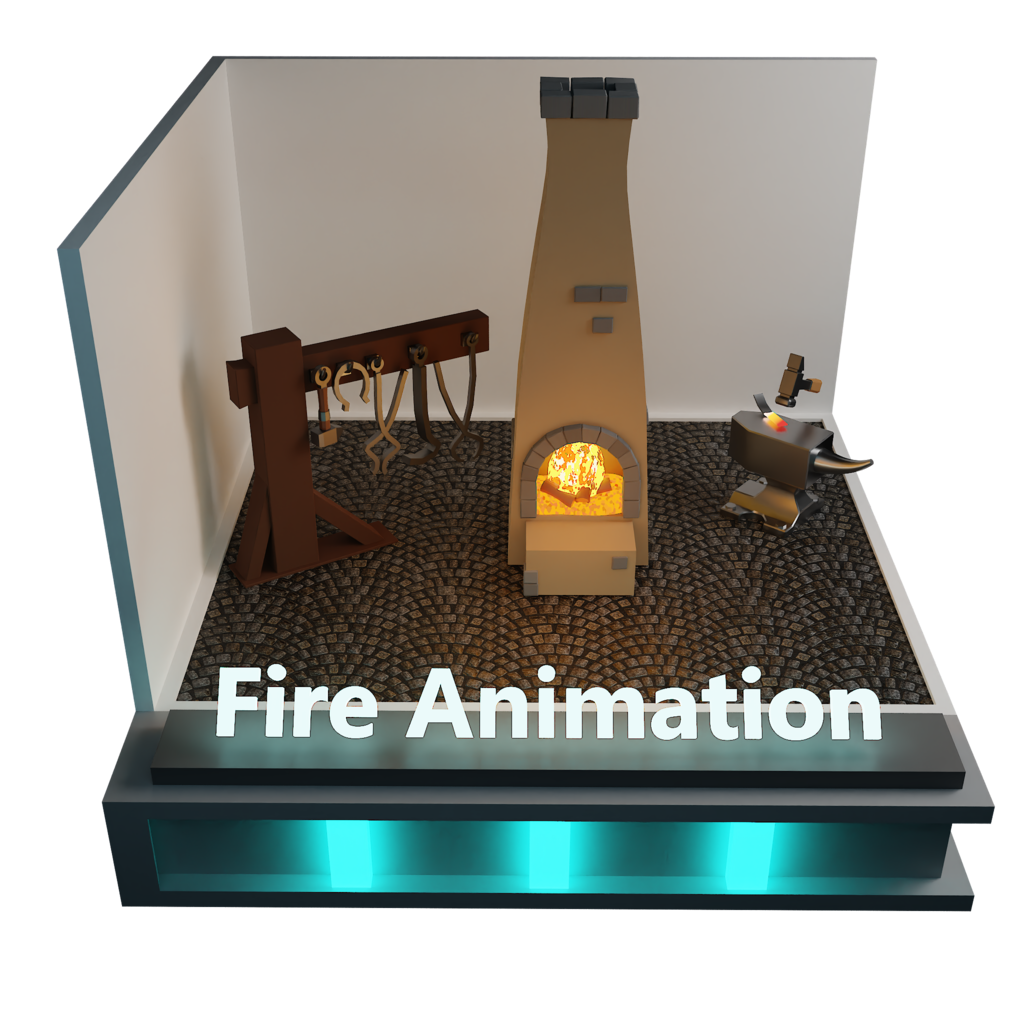
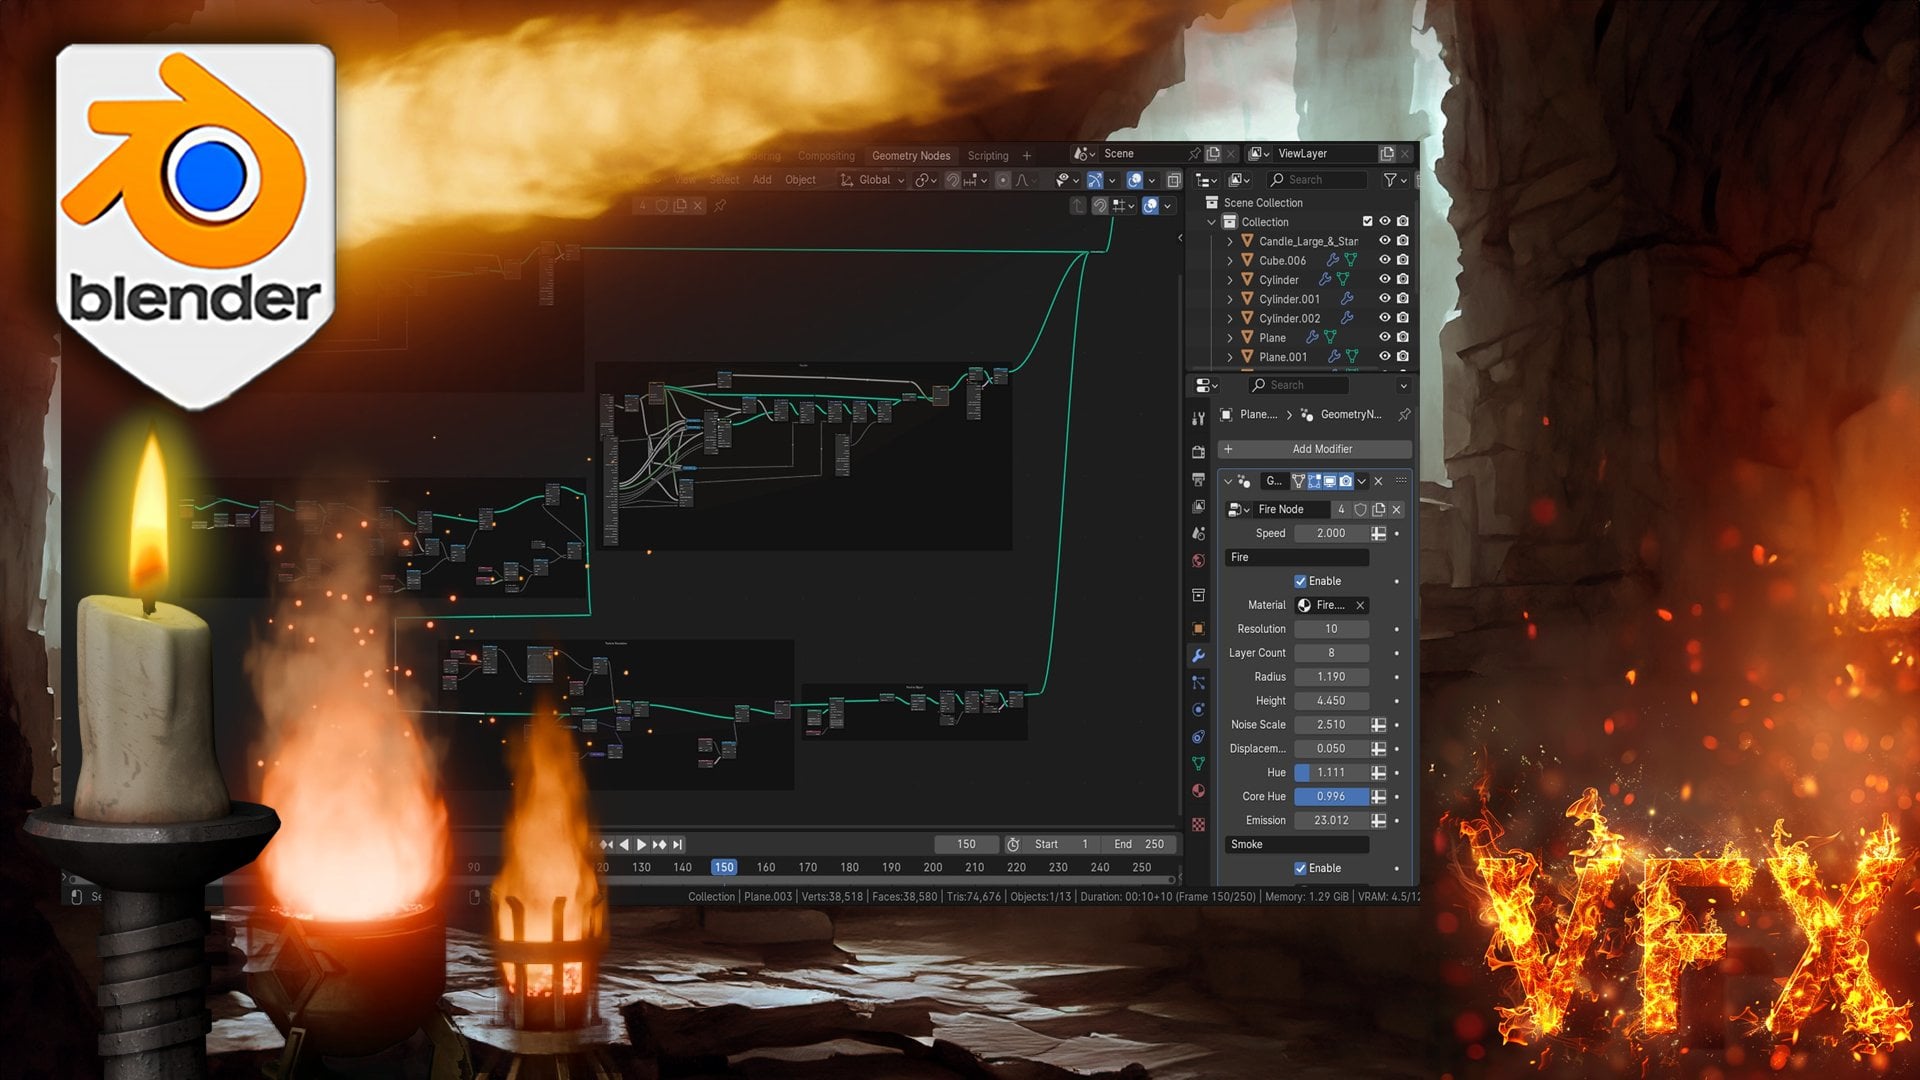
own tank tracks move in a realistic way. Moving on, we're onto
fire and light flicker. And there's always the
abundance of models that require flames in
some shape or form. This means is a key
component of the course. Not only how to create
flames from scratch, but also how to animate them. Empties and displacement
will be the key to realistic flames without the need for complex
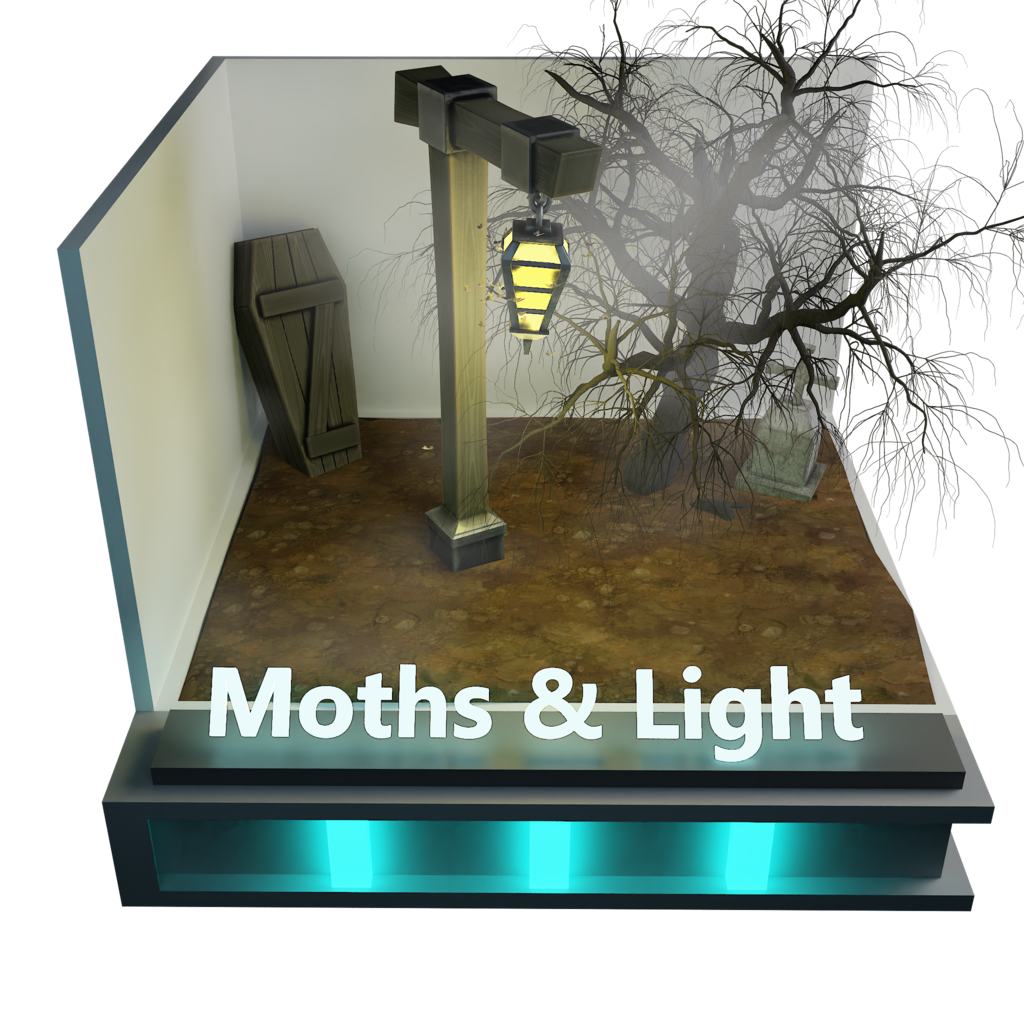
simulations. Next run to mop and lights. It's the little things that can really bring a seem to live. In this part of the course, we'll be covering
object tracking. And this can be used
to create things like flying moths around
the light source. Rather light goes,
the muscle will follow all thanks to
the boyd brain system, which is an amazing feature that comes with the
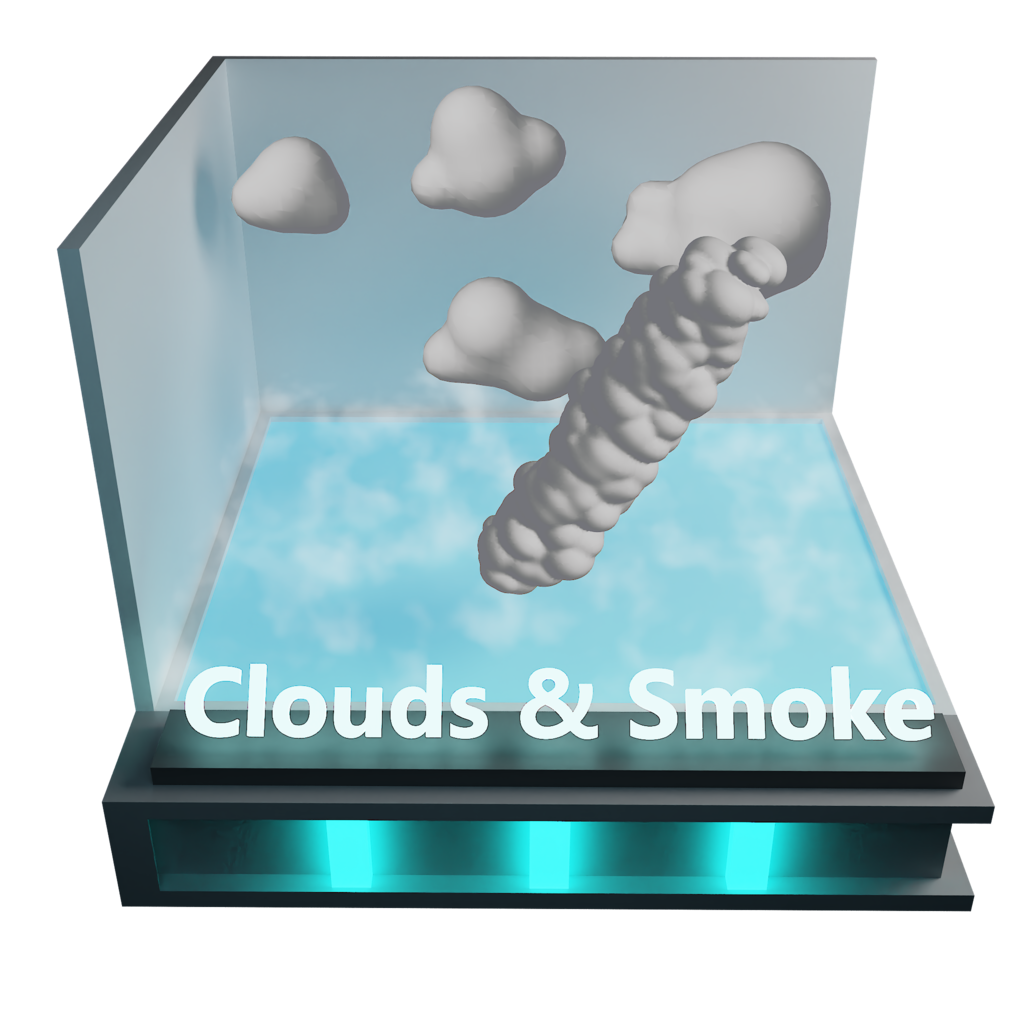
particles settle. Also on this course,
we'll be covering clouds and smoke and
things like that. And this particles will create a really nice
stylized smoke effect using mainly blend
the particle system with keyframes and what's best. You can also then see
your smoke in real time. Now again, we're going
to be taking it up another notch in the
next part of the course. And this will be
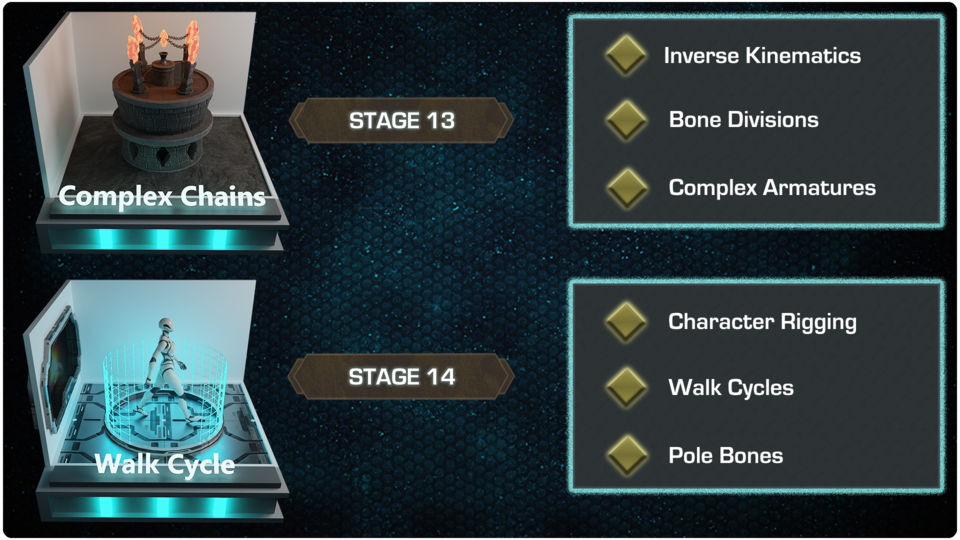
covering complex change. This part will involve as
bringing much of what we've learned so far and
applying it altogether. This will involve as
creating a complex rig and we'll also introduce you
to inverse kinematics, Alright, Case for sure. We'll also look at
bone check-in and really take the level
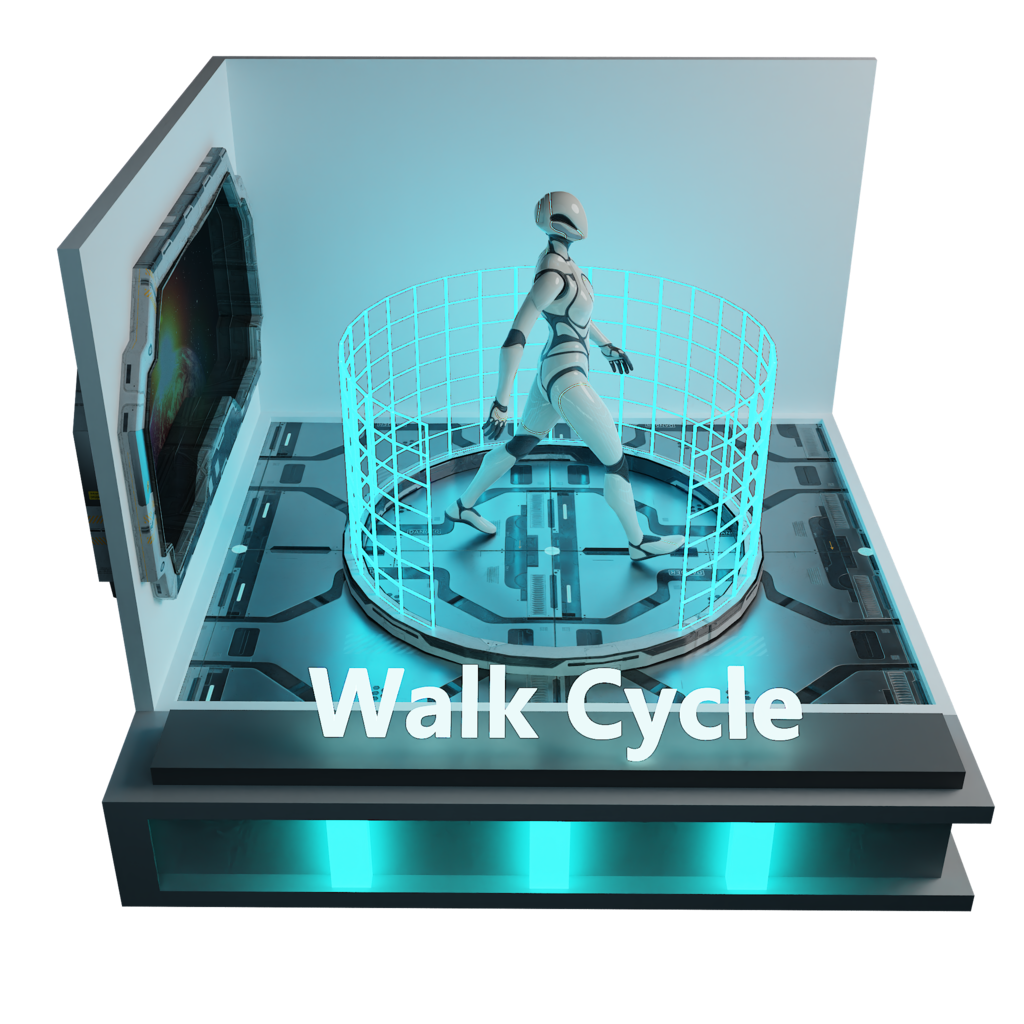
of learning open up. Finally, it couldn't
be an animation and rigging course
without a walk cycle. We left the best too
near the last year we'll be focusing on character
rigging and animation. This will be done over a
few lessons and there's a massive amount and learning
to be taken from this. The only will be rigging
your own character. You will learn just
how easy it is to make a basic walk cycle. This is the most
if you intend to create your own games
and characters. And what's also a most, if you want to get
into 3D modelling is of course, a
camera turntable. This is the final part of the course before the main event. And if you ever want to show
off your own 3D models, you're going to need a simple, effective cameras turntable
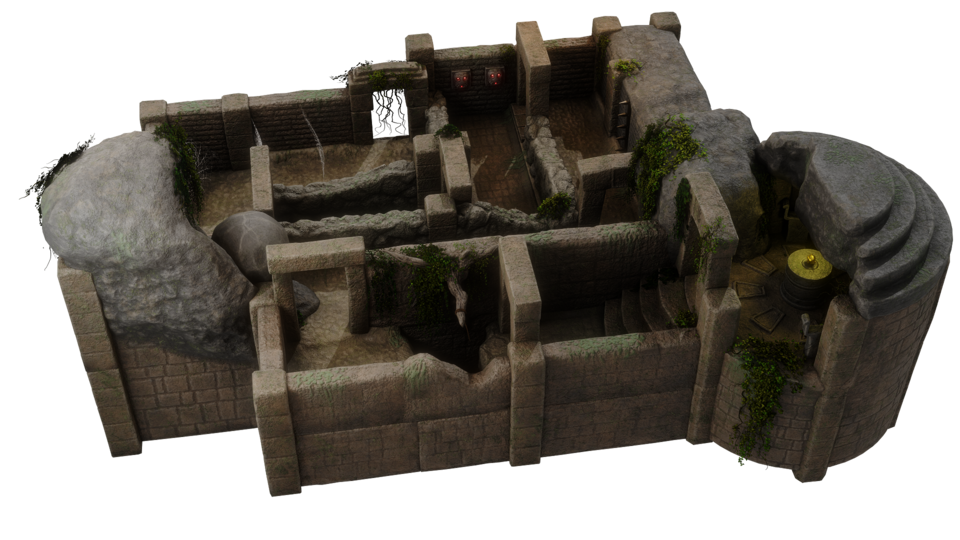
that can be easily setup. And finally, we actually put within the course
a massive scene. So you can actually take all of those skills that
you've learned and test them out by curating
things like rolling boulders, Jake in ceilings,
and much, much more. This will be a really great
way to finish off the course, putting everything that
you've learned into practice. Or as you can see,
it's a massive course. But of course, you will look
at time and time again, like I said in the beginning, you've ever wanted to get
into animation and Reagan, and even if you
complete beginner, there's never been a better
time to get started with the ultimate guide to blend the three rigging and animation. While you're waiting
for, come join me on this course and see how far your imagination
will take you. Happy modeling everyone.
2. Overview of the Blender Scene Layout: Welcome everyone to the
ultimate guide to Blender, 3D rigging and animation. So why do we call it
the ultimate guide? Well, that's because
we'll be going through everything in this course
from basic movements, animation, tank tracks, most animals and even
a character rig. Finally, I've created
an actual launch scene. We'll be able to
test a majority of the skills that you're going to learn throughout the course. Now, we know modelling
in this course is purely about rigging
and animation. So I'm going to presume
that you're going to know a bit about the basics
of the blender UI, the movement towards the camera movement, things like that. They're not really going to
be covered in this course. And what better
place to start than our actual training scene, which I actually sets up. So let's quickly go through
our training scene. So you will see at the moment
I've got one that says basic animation over
the right-hand side in our scene collection. You can see that we
have all of these going 1-14 and then a special one
called camera turntable. The first one is the lighting. All we have in this scene is
just a basic direct light. Sunlight sets all
and that is all. That's just so if you want to actually put your render on to actually see what we're
actually doing in the scene. You can actually do that.
Of course, it's on EV. And the other thing is if you just want to turn on your light, then just click on your song. Come over to the
right-hand side, click on this little lump. I'm just going to pull this up so you can see what I'm doing. I click on the little lamb, then there's put this onto
or something like that. And all that's
gonna do is turn up the light within
our scene like so. So now you can see it looks
a bit better and you can see these things moving
in real time in EV. So let's actually close out. Let's look at the
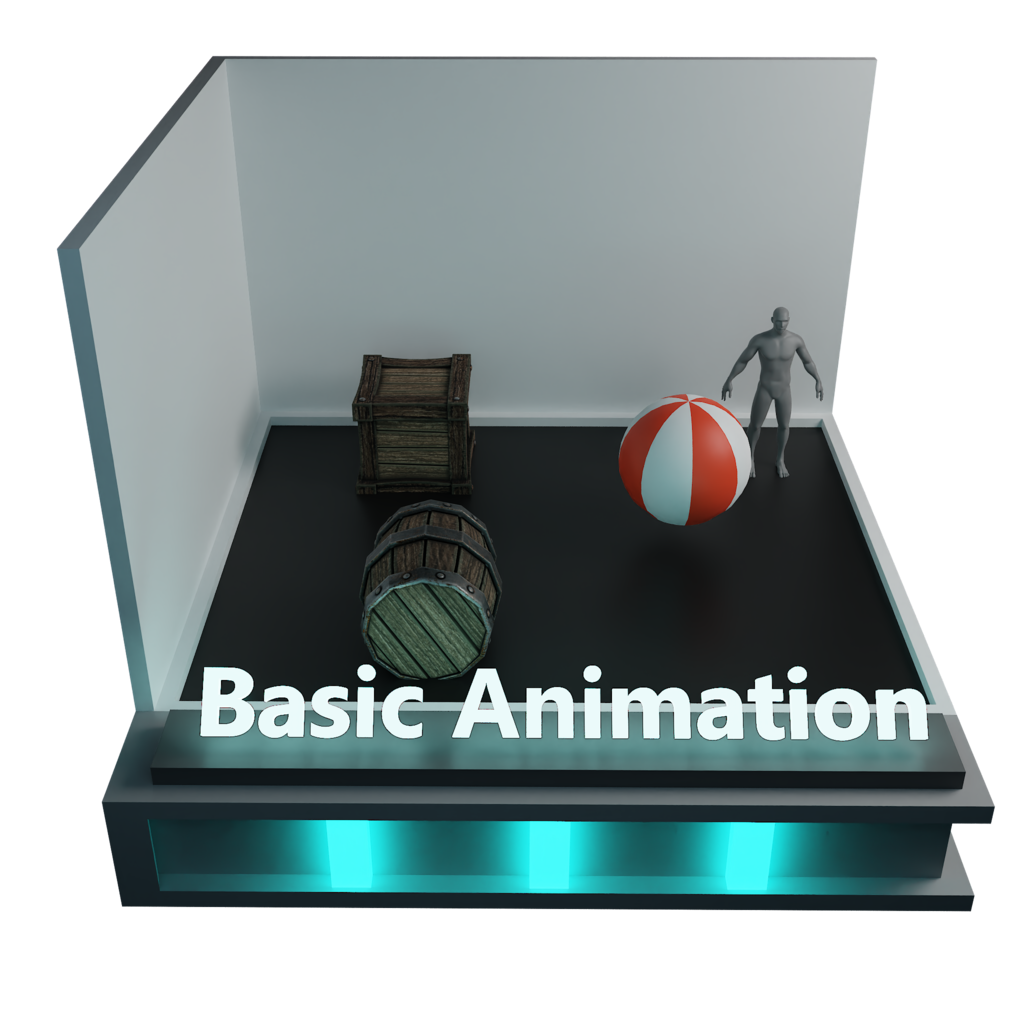
first one then. The first one is called
basic animation. This is the one that we're
going to start with. And we're basically
starting with something that's
very, very easy. And as we work our
way down here, they're going to get
more complex and you're gonna learn more
and more things. So the first one here, you can also see that
we have a man in here, and he's actually
really important. We've got a actual reference of a standard human is 1.8 m tall, I think something around there. And basically he's there so that you can actually understand that when you're actually going to animate
and Rick things, you actually need
to make sure that you are to scale
is very important. Anything you create is to scale. So you can see here
this beach ball, it's a pretty big beach ball. And you will see when we
come to animate this, it will bounce in such a way that seems to be
the size that is. In other words, if we add a
little tiny bowl in there, it would bounce and move very differently through here if
we have a big ball in there. So in other words,
things like gravity, things like collisions really do have an impact on
how big something is. But more than that, if
you set up a rig on, let's say this
barrel or something, and then you send it through
to something like Unity or Unreal Engine five,
or even Sketchfab. The animations aren't,
probably not going to work the way you intended because
it's first of all, it's going to come in the
scene absolutely huge. Someone then is going to
have to scale it back down. And then what it could do is destroy all of your animations. So they don't actually
work correctly. So that's why you
wanna do things where basically you get
something, you scale it. And then the most
important thing is if I click on here and
I press Control a, we reset our transformations before adding any bones
or any sort of animation. Really important we do that. The reason is that
blender needs to understand the shape and size of the things that
we're working with. Another words, if I got this query and
I made it this big, if I did a reset my
transformations, blender would still
believe that this query was this size that
we had it before. So whenever we change
anything or scale, anything or anything like that, we resell transformations and then we can start
adding animations, rigs, things like that. So now let's come to something
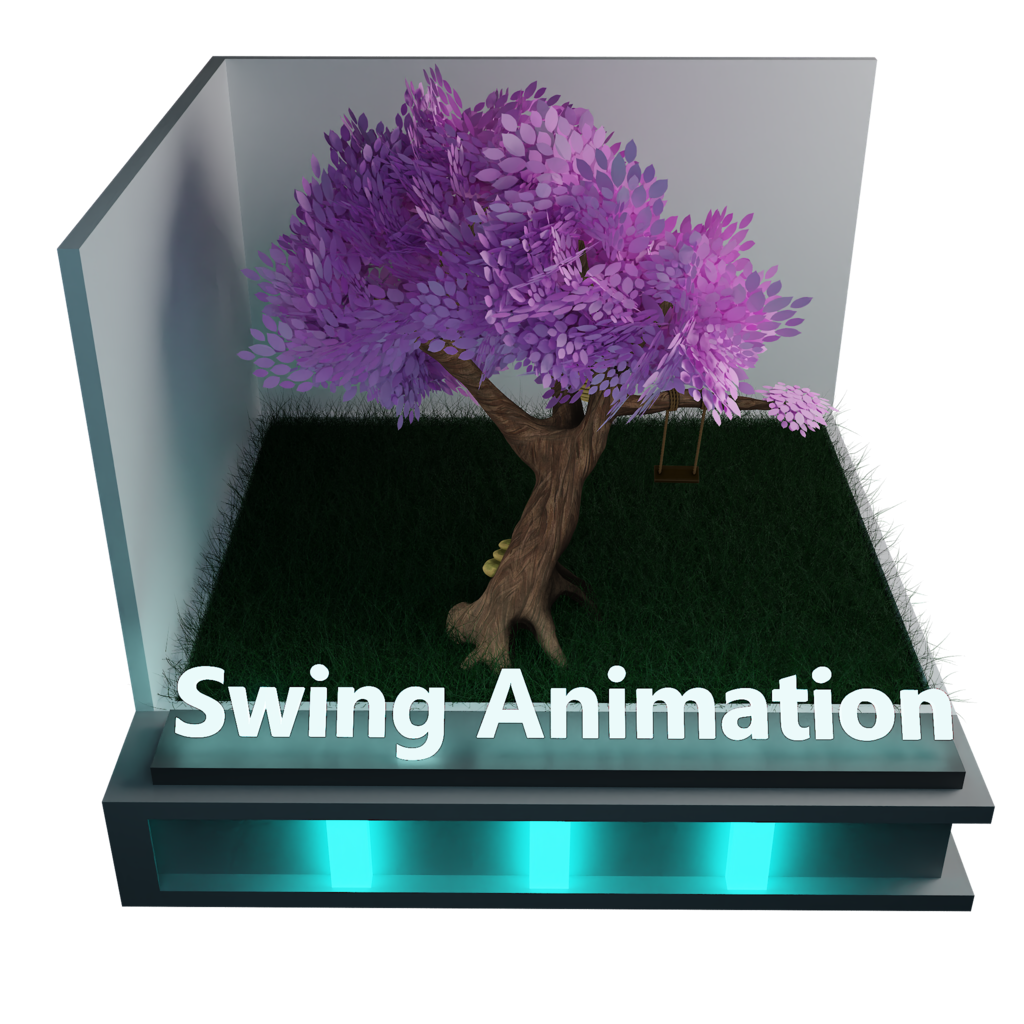
like our second one. So you will see now we've got something like
a swing animation. So we're actually going to
come in and put in a rig on here to make this swing
move in a realistic way. So you can see that
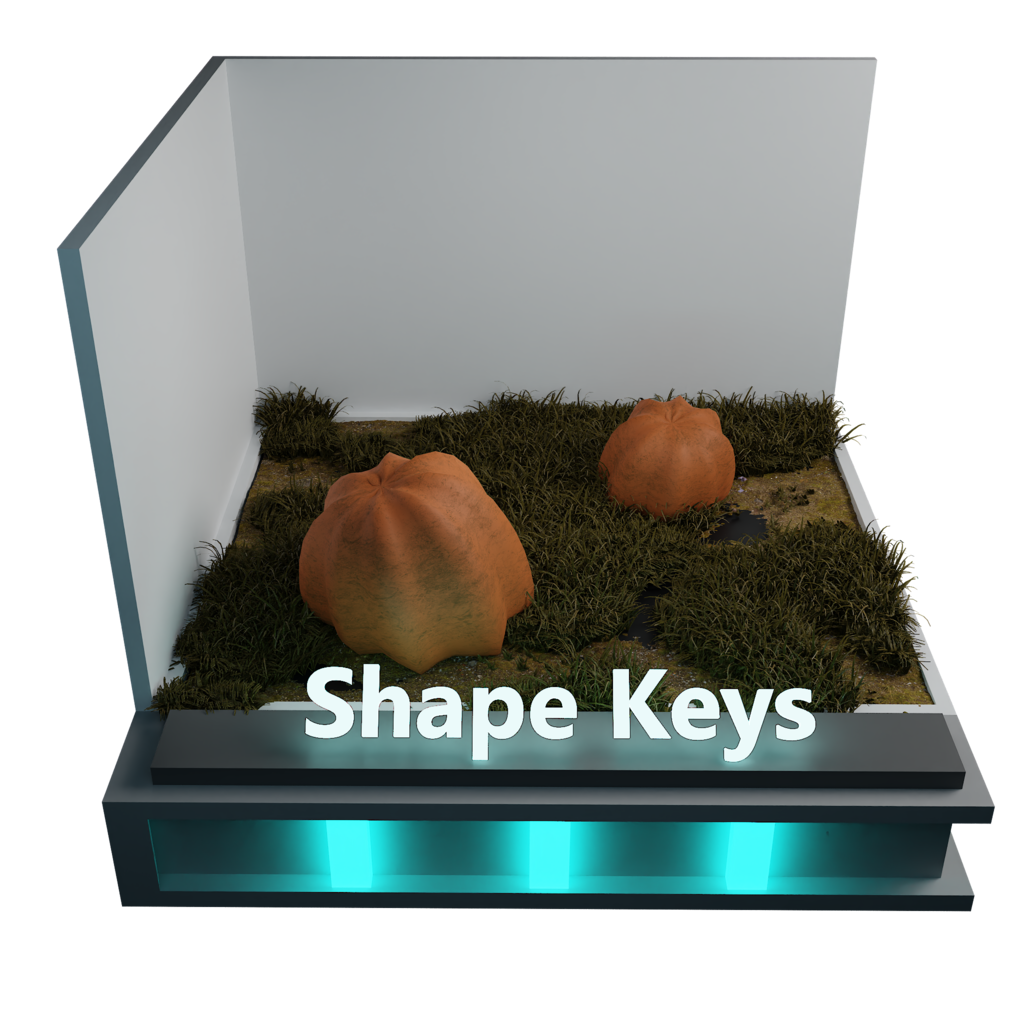
as we go down here, we've got things
like shape keys. How do you make a
pumpkin, for instance, go from a tiny seed all the way up to a big pumpkin
that looks realistic. You can see at the
moment there's pumpkin doesn't look very realistic. But I'm going to
show you how you can actually change that and make it actually grow
into a proper pumpkin. We've also got things
where you're going to need multiple bones
like on this, you can see that we need to
put multiple bones and adds to actually make this
spin in a realistic way. We've also got things
on here like fish. So we've got fishing
here, you know, animals moving in
a realistic way, like a fish swimming through
the ocean and things. We need to actually
make sure we know how to do that and we're going
to actually go through that. You've also got things
like tank tracks. We've got more thing on here and we've got things
like complex chains. With a complex chains, you can see that we want this stone to go open a
certain way and we want these chains to actually
follow it along so that it's moving in
a realistic way. This is gray in case you've got characters with chains on them. Or if it's a horse
pulling the carriage with either a row per chains
or something like that. You need to know how to
actually read out correctly. Finally, then we've
got our human OBJ, sorry, our human actual model. And you can see that
we're going to actually rig this properly in
an actual walk cycle. You can also say that other
moment she's absolutely huge, so we're going to scale it down, get it to the right size,
reset the transformations. And then we're
gonna paul Reagan. And also in the download page, you will find in there an actual walk cycle
reference guide. So your belt to animate
this one very easily. Your belt to take that away for future use when
you actually want to animate your own characters
and things like that. Finally them, we've
got something which is the camera turn table and
we've included in this end because you can't really have a complete animation
guide without showing you how to actually work
with the blend the camera, have it going around a 360
degree turn and actually take a nice render of your actual model or your
castle or whatever it might be. I think it's important
that we put this in there. Alright, Finally,
then let's move on to the actual scene
before we get started. The way here is our main scene that we're
actually going to animate once we've actually gone through all
those processes. And what this will
do is it'll give you a real actual test of all
the skills that you've learned to animate things like these polling rocks will make this sealing gel to slightly. We'll have this monkey and the sand bag
coming in and out. Of course, we're going
to have the rock rolling down here like from
Indiana Jones. And we've got the spikes that
are going to be coming in. Now. We've got the arrows that
are going to be firing. And of course we've got
the floor that will be folding away and
things like that. So you can see it's really good because
we're going to take all those skills and put them
into a real-world practice. So you might have a scene that you want to
find a mutation in, or you might be going
into industry and you've got things
you need to animate. And he said, it's
the biggest seen, there's lots of
complexity there. You need to bring
them all together. I'm going to show you how to do that once we've gone through all of these other lessons that we're going to go through. The main thing about
this is it's settled. So it's really, really easy for you to actually work with. You're going to know
exactly where you are with all of these
lessons going down. We're gonna go through each
11 by one and just getting you used to working with
Blender or everyone. So on the next lesson, the first one we're
actually going to work on is going to be basic animations. And I'll see you
on the next one. Thanks a lot. Bye bye.
3. Basic Transform 3D Animation: Welcome back everyone.
So the ultimate guide to Blender 3D rigging
and animation. And this is where
we're going to style. The first one we're going
to come to is this gray. Now, there are a couple of ways you can animate in Blender. One of them is actually
just animating on the fly, where you just actually
inserts in keys. And the other one is
basically building a rig and using bones and waiting
and things like that. So I'm going to
show you both ways. Now it's important to know that the basic animation will only pretty much work within blender. You can bake out the actual animations once
you've got them in place. But it's still more
or less probably not going to work in the
games engine that you want. So it's always bear generally unless you're
only working in Blender and you want to do
something simple to start adding in bones. But I'm going to show
you both ways anyway. So I'm going to do is I'm going
to grab this bar authors. I'm just going to move
it over here, like so. Now the other thing
you'll notice is we don't actually
have any way to control how we're actually
going to animate this. And the reason is because at the moment remodeling
and what we need to do is you need to go to
the layout and now you'll see completely changes. It's changed even
back to materials, so it's non-random bone anymore. What you will see now that
we've actually got a timeline. Now at the moment,
in this timeline, we have a number of things
that you need to be aware of. So the first one
is the play bonds. So we have all
played bonds here. If you press space bar, you'll see that it
actually starts playing. If you press space bar again, you will see it stops playing. Now one of the most important
things before we begin is understanding what this
actual timeline is. This basically starts
at one and ends on 500. If I put it ending on 25, let's say we can only
have animations going in, wants to 25 keyframes, and then it will restart again. So it's very important to make sure that you
keep frames are high in all your animation
before you begin. You can also, on
the flyer a guess, but what I'm trying to say
is that you don't want to end in halfway
through the animation. So if that happens, this is the reason why now you
can change it here, but you can also change it
where this little printer is. You have a frame star and
you have a frame end, and you can also change
it on here as well, which makes it handy
for when you want to render out animations
and things like that. Alright, so now, then, now we've discussed that when you go in into the timeline, you can actually zoom
in with your mouse. You can hold the middle
mouse button to move across. And you can also hold the
middle mouse and pull it down. Sometimes if you can't
see keyframes in here, they'll actually be
hidden up the top. And the other way it's
again back is just two. Get the mouse, middle mouse
button and just pull it down. Or we can actually press the
dot born on the number pad, but we'll discuss that a little bit later
on in the course. Now, the other thing is
it's kind of hard sometimes to put this exactly
where you want it to go. So what I tend to do is
if I can't get to that, I'll come over to the
right-hand side and I'm just going to
set this on one. Now. The other thing is, it's also important to make sure that you're not starting
animations on zeros. Never style animations on zero, always start them on one. And the reason is
because once that ends, pass 300, it's basically going to start on
frame one again, if you have an
animation Stein from, let's say frame zero, it's not actually going
to work correctly and you're going to
see a slight jaundice. So if that happens, you
know that you've probably set the keyframe to zero. Now that brings us
onto keyframes. What are they? So let's discuss what
keyframe is a key-frame. So let's grab this actual
crate, the eyeball on. And what we've got is a menu
here telling us where we actually want to pin this in space and time
within blender. That's basically
what keyframe is. One point in space and time, this object is going to be here. And then in another
point in space and time, the object is going to be here. And basically
keyframes a lot anchor points to anchor
either this scale, the rotation, All the location. Now you've got keyframes in just simple animation like
what are we going to do here? Or you have them much more complex in bones
and rigs because there are a lot more
things what needs to be altered all at the same time. So that's where the
complexity comes from, and that is basically
what a keyframe is. Okay, so the first
thing we're gonna do is we're going to press, I'm going to click location. Now that means
that this crate at the moment on frame one is here, basically here in
the actual viewport. Now the other thing
is when you press in, I don't preside down here
because it's actually going to not work well you need to do is press I in the actual viewport. Alright, so what I'm gonna do is I'll grab this cradle move LV. And let's say I want to keyframe this from warm to how
many frames is over here. Now the problem you're
going to have is the moment I move this
timeline now let's put my keyframe and I'm going
to make it jump back. So what you need to do
is you need to move this timeline before actually
pretty new keyframe. And I'm going to
move it over here, and then I want it to move, let's say over two,
just before this bowl. Let's say something like that. And then I'm going to
press I and location. Now what you'll see is
if I press Space-bar, the actual query is going
to move over there too. The end, endpoint
which is one faulty. Now you can see at the moment, it's going all the
way over here. And then what will happen is the moment I go past this point, it's going to restart again. Now we don't really want that. So what we wanted to do
is go back to this point. The other thing we
want to do is it's a bit slow for my liking
moving over here. So I really want
to speed this up. So the way that I
can speed it will pull the easiest way to speed up is simply come over
here on frame one. So it's basically the start. And then where you're
going to do is you're going to press a and you're going to
grab both of these. So a will select everything. Now if I press S, I'm going to move these now to
where I want them. If I put this from over
here and I'll press S, You will see that we're
moving them from this point. So it's important when you're
scaling these to make it faster or slower that you all
scaling from brain wants. So if I scale this
story in the timeline, 60 frames instead, like so. Now press space bar and you can see it's much, much faster. Now the other thing
is you might want to scale these down
because it might be, let's say over frame 275 and you've got
a wheel rotate him. Now 275/4, Let's say because you want that we'll
rotate in 90 degrees, spread over four, which will show you when we
come to our actual, we'll turn in animation. It's going to be really
hard to work out where we actually
needs par keyframes. So what you really want
to do is you want to put your keyframes in with uneven number between them and then scale them down to
wherever you need them. That is the easiest way. Now the other thing is,
if I put this to frame, let's say one-twenty,
let's put this on frame 120. Press
the space bar. This will move over here. But then what happens is
when he gets to one-twenty, it's simply just going
to pop back in place. Now that's not something that
I really want to happen. I want it to actually move
back down to this space. Now because halfway
point is over 60, we might as well make it to 120. So I don't really want
to move this back here and try and put a keyframe into where
it's actually going to be. So I'm going to
do instead is I'm going to put this on one-twenty. I'm going to grab
just this keyframe here because this
is the star one. I want to press
Shift D to duplicate it and then I'm going
to move it over. Now you will notice as this
moves big yellow bar on them, basically what that's
telling me is, is that this is the same. So it's basically
the same location as what this one is over here, the moment ago posterior and
drop this in one-twenty. This will disappear because
it's no longer the same. Then I can see if I restart this Space-bar comes to
the stop and goes back, and then it should keep going backwards and forwards, like so. Now let's say I want to make it come to this point
quicker than go back. If I grab the middle wall, press G just to move
it along like so. Now, when I press space bar
is going really slow here. But he's gonna go
back really fast that you can see now
you can actually speed, it will all slowing down. Now the other thing you'll
notice is the fact that it starts off really
slow and that's great for a rolling start
and things like that. But the moment he
actually gets over here, where actually you can see it slows down and then
it's the same and then we want it basically the same speed all
the way through. This is important
that you learn this because when you're on
a wheel or something, if you don't have that or if you don't know
how to do that, you're going to end
up with this kind of Judah remote motion. So what we're gonna do now
is we're going to call them to our actual barrel. I want to spend my bow around, so all y, sorry, RX 90. And let's have it
facing the right way. Then we're going to do is now I'm going to put this
on a little bit higher. So let's try 200. Now you will notice the moment
of parental wondered. This will go forwards
and it will go back, and then it'll just stop
because we've only begun this over 160 frames. So you've got to bear
in mind that if you're doing like a large scene
or something like that, if you're rendering
out in blender, you really need to keep
the animations altogether. So let's say you're
doing over 500 frames. You need all your animations so you swings and
things like that, all going up to 500 frames. Now, if you'll send it through something like Unreal Engine, the animations can be split up. The animations. We'll work over how many frames the animations all set up. In Blender though, we're
doing over 500 frames and we can't actually say each
individual one like that. So this is the way that we
have to actually work this. In other words, the
animation is not based over the model frames, It's based over
the entire scene, so we just have to take
that into account. Alright, so what
we'll do then on the next lesson is I'll
show you how to set up a role in barrels
an hour to make it move in a realistic fashion. Alright, everyone,
I hope you enjoyed that and I'll see you in
the next one. Thanks a lot. Bye bye.
4. 3D Barrel Rolling Motion: Welcome back everyone to
the ultimate guide to blend a 3D rigging
and animation. And this is where we left off. Alright, so now let's
come to our bow. And the third thing I
wanna do with my barrel is I want to rotate it. So in other words,
I wanted to roll. Now when you're animating something that's
always better off to break down location,
scale, and rotation. This is because
it makes it easy. In other words, if
I'm trying to move this at the same time, is actually rotating it as the same time as making
it bigger or smaller. It gets really,
really complex fast. So you're better off
breaking it down into small sections and putting
it on location, rotation, and scale, unless you know
that you're not really going to be alternate
that much so then you can put it on all
three. What do I mean by that? So if I press I, you'll
see that we have options, location,
rotation scale. All we have one which is
this one here, for instance, which is all three together, which is really, really nice. Now, they're all ways of actually changing
them independently. But it's better actually, if we start just with location, rotation and scale, if you're sure you don't
want to alter an event. So for instance, if I just
want it to start here, I can put on location
rotation scale. And if I want it to move
over here by pressing the G key, that will
do it this way. So 100 G over here, i location rotation scale, and now you'll see they
just moves over there. So all wave location,
rotation scale. Now we could have done that
with of course just location. And the thing is there. Now we know that we're not
gonna be able to alter the scale or the
rotation easily. So in other words, it stops
us doing that as well. Alright, so now let's put
it back to one because if I come in now and
delete these keyframes, you'll see it still stays there, and that's not what we want. So if I press Control Z, and then what I'm
going to do is delete the key frames once I
put it back to one. Now you'll see that it's
back to where it is. Now. The other thing is, as I said, because we rotated it, Let's press Control a and all transforms right-click
origin to geometry. Now because we've reset
all the transformations. If I scale this
up, for instance, to get this back to what the
transformation should be. All I need to press
is also an S, and what they'll do is
reset the actual scale. That's also important when
we're using animations. So old tests, Alt
G and all tall, basically will reset
the actual location, the rotation, and the scale. So this is really important
because it makes them very easy to get back
what we had before. So now let's come to our barrel and what
we'll do is we'll stop with the rotation
like so if I press, I am going to click on location, rotation and scale, then what I'm going to do
is it's based over 200. So I know I should
put this on 50, so I'm just going
to click on here. Then we're going to do is
I'm going to rotate this. So all why 90? And just rotate
it by 90 degrees. And I'm going to press I
location rotation scale. Now if I move this, we should see that this
starts to roll like so. Now we want to do is
want to put it on 100. And the reason I'm
doing this, obviously we want this to roll in a 360 degrees because then it can actually carry
on rolling if we need it. So I'm going to do now
I've got this here, is pressed all why 90 and then press i location rotation scale. Now 200 and just rotate
it 180 degrees instead, rather than for 90 degrees. It's not worth doing it. If you're doing a turning
or something like that, it's always better to
break it down into four parts if you try and
break it down into two parts, blender was sometimes mess up. So what do I mean
that if I come over here and put it onto
wondered and rotate this, so I'm going to
press all why 108. So I'm going to press I
location rotation scale. Now although this will work
sometimes when you do this, it will stop here and actually start rotating the
other way round because blender is filling in all of these keyframes
independently, even though you can't see them. The way that this works is that blend is
trying to get from this point with the rotation
here to this rotation here. And it fills all of
them in, in-between. So I'm gonna do is I'm
going to put this on 150. I'm going to click it on here. Then what I'm going to do
is I'm going to rotate it. So all y. In fact, because, because we've got it here, the other thing is, we haven't decided how fast it's going
to go between here and here. Blender hard though. The real way to do this is
actually to put it on here, delete this one out
the way so we don't mess it up, but it Oman 50. Then what we're going to do
is press 0, Y, sorry, 90. And then we're going to click
i, location rotation scale. Finally, we're going
to put this on 200. Then we're going to
click off by 90. Location rotation scale. Now I'm gonna do is I'm going
to play this through and it should start rolling. Then you can see
it actually stops. So it's not a continuous roll, which is something that we actually need because we
need it to keep rolling. We don't really want it to stop. So the way I'm going
to actually do this is I'm going to
grab these three. And then we're going to
talk about interpolation. So once I've grabbed
these three, I'm going to
right-click and you'll see that we have
interpolation mode. Now, if I put this on constant, for instance, you'll
see now stops. And then it just
spins around like so it doesn't actually roll. But you will see it does
role in the beginning. But because we only change the interpolation
mode on this point, nothing happens with
this point here. That's useful because it
means that we can have a slow start to our role and then it just can
be a constant roles. So what I'm going to
do is I'm going to grab all three of these. I'm going to Right-click
interpolation. I'm going to pray and linear, Well that means is it's
going to be a linear speeds. So now if I press, come to here, press
the space bar. There you go. You can see it
actually starts to slow and now it's
picked up the pace. And the reason for that
is because we probably need another key frame in here which is going
to stop there, just jump in there because
this is still a non-linear. So we just need another
keyframe in there to stop it, kind of, as you
can see, rolling. And then it stops and then
it starts rolling again. Now we're not actually
going to do that in this one because that's a
little bit more complex, but we are going to
discuss that a little bit later on in the course. But for now, what we wanna
do is we want it also. He'll be moving
from here to here. Now the problem we've got is we actually set the location, the rotation, and the scale. So the moment now
we move this and change any of those, we're
going to have problems. So the easiest way
to fix this instead is to come over to animation. So once we click this button, will see that another
actual tab opens. Now let's put this
on material instead. What we're going to do now
is just come round to all viral and you will see down now we have a lot
more options on here. And this is sometimes
why you wanna go into animation tab rather
than just the layout. So sometimes easy just
to work on the layout. And then when you gain
something more complex, going to the animation tab, now if we open this
object transformation, it looks like a lot here, but in actual fact it's not. Can I, here is the
three locations of where this is
in space and time, the rotations and the scale. You can basically discount
the scale right out of the bath because we haven't done anything with the scale. So what we could do
is in actual fact, we could come to our scale first B and grab
them all like so. And then just press Delete. And basically we
deleted those other way because we haven't
altered any scale. So if you wanted to make this a little bit more
simple, you could do. Now what we need to
do now is we just want to alter or location. So I'm going to come in now. I'm going to press
your space bar because I've come
into a different tab, which means my
gizmos disappeared. So while wants to do
now is on frame one. So again you can
see it's non-zero, we want it on frame one. Now the moment we can't
actually see anything on here, and instead of it being on here, it's actually down on
the ball in the air. So all I'm gonna do is I'm
gonna put this on frame one. And then we're going
to do is I'm going to press I location, rotation scale because then it's just going to
follow them along. We didn't we could have just put location on there for
press controls that again, and I just press I, we can actually set the location
now it will still role. So if I come over here
like so to frame 50, and I'll move it,
let's say here. And I'll just press I location. And now pull this back. You'll see that the
barrel will still roll. Move at the same time. Now you can see it's obviously
not working very well. So what we're gonna do is
I'm just going to press Control Z and just put
that back to where it was. I'm hoping that it's
not going to move, which is not It's just rolling. So that's great. So now I want to do is move this barrel from here,
all the way over here. So we've pressed I,
we've got it here. Now let's move it to 200, and let's move it all
the way over here. Then we're going
to first location. Now when we press Space bar, you will see the barrel will not move until
right near the end. The reason for that is, is because we hit
location rotation scale. So it's got both the location
and that's why it's not moving because we only set
the location over this side. So what we wanna do is we
want to come down and we want to delete all
of the location. So let's come in and grab
only these location. I'm just going to
click on one of these. Grabbing all the
location will be like so the press
Delete, and there we go. Now it should only be the
rotation, which is great. So now let's come in, put
it on their frame one, and press the
eyeball on location. And then we're just gonna
go over to frame 200. We're going to
move it over here. Like so, I'm going
to press I location. Now when we press the space bar, you will see that all
barrel rolls along. Now you will see it's got a
load of sliding in there. That's not something we want. And the reason is because
this barrel basically is moving too much distance
for the actual role. You'll see this a
lot when you playing some games where the character, his legs will be moving, sliding along the ground. The reason for that is because
the actual location is too far or too short based
on his actual movement. So that's something
that we're going to discuss in the next lesson. Alright everyone, so I
hope you enjoyed that and I'll see you in the next
one. Thanks a lot. Bye bye.
5. Digital Ball Soft Body Simulation: Welcome everyone to
the ultimate guide to Blender 3D rigging
and animation. And this is where we left off. Now what I want to
do is I want to actually shorten
this distance out. In other words, I don't
want it moving pi so far. So I want to do is I want
to come to frame 200 and I want to pull that back to
say something like that. And instead now when
I press i location, now what I should've done
is it means that this now should roll a little bit better than
where it did before. So if I press space
bar and say rolling, it looks a lot more
realistic now. And we haven't got
as much sliding on there as what we had before. We still have some
sliding on the end. And the reason for
that is because when you're doing
a rolling barrel or something like that, you actually want it to go slightly further than
the actual role. In other words, if I
grab all three of these, so I'm clicking on one, shift, clicking the next one. And the moments do
is I'm just going to move them over. So I
want to impress them. Move them over to, let's say
210, something like that. And then one we're going to
do now is I'm also going to change the frames to end. On 210. It will press space bar. Now you'll see role in nearly, nearly in the correct place. What I'm gonna do is
I'm gonna press G, moving back to 205. Well this on 205,
press space bar. Now you'll see it's
rolling along, rolling, rolling, rolling comes
to nearly a stop. And there you go. You
can see it's near enough, nearly, nearly there. So you can see that
we can play around with this a little
bit when you do get the idea of how this
barrel now is made to look realistic in the way
that we've set this up. Alright, so we've
just actually gone through then how we do rotation, how we do location. We haven't discussed scale yet. We're going to discuss that
a little bit later on. But these are the basics of
animation within blender. Now if I go back to Layout now, you'll see all that disappears. If anything, they're not a
lot of information there. Now, the other thing is, if I try and put this
back over it, of course, when the moment I start the animation is just
going to restart again. So now you can see
I've got both of these moving exactly the
way you wanted to. Now, let's say discussed as
part of the basic animation, balls bouncing and
things like that. Well, the first thing I'm
gonna do is for anything that's bouncing in real time, you're going to need a collider. So you could have this power rolling down here on its own. That's something you
can actually do. But what we'll do
is we'll work on this ball and I'll show
you exactly how it works. So let's come to the
floor first though. Come over to our, whereas it's our physics
property over here. And then what we're gonna
do is we're going to put this on collision. So I'm going to
click on collision. I don't need to alter any
of this at the moment. All it's there for is to make
sure that when this bowl actually drops down is going to actually
collide with this block. Now, let's come back
to this beach ball. And what I wanna do is
put this on soft body. Now if I press space bar now, nothing's going to happen. The ball's not by a role or anything like that.
There you go. It's just going to flow
up and down like this, which is not exactly
what we want. So how do we make this
bold drop-down there? All we need to do is turn off the goal down to
where it says edges. And all you wanna do then is put the bending on something like a. Now what will happen is
the bowl will drop down. You will hit the floor,
and it will actually look kind of realistic. So if I put this on here, you'll see all bounces. And there you go. That's based on the
amount of bending. If I put the bending on
something like bull, you'll see now
just how much pain didn't actually
happens with that. If I put this bending
on something like 20, you guys bouncing a lot more
like an actual beach ball. Now the other thing is
what you can do with this is you can actually
turn off gravity. So gravity is determining
how heavy this ball is. We can also turn off. We'll just try to note
the elastic plasticity and now press space bar. There you go. You can see these really
do have a longer effect. So let's come down
and we'll have something called
field ways here. And what we wanna
do is first of all, I'm going to turn
down the gravity to something like nought 0.1, basically reducing
the gravities, just something akin to on the moon or
something like that. Now if I press space, you'll see it float downwards slower. But when it bounces,
it bounces much higher because obviously
there's less gravity here. Now if we put this,
Let's say on two, that'll be two ball basically, which is twice as much gravity is what we have here on Earth. When I press the space bar, you'll see it really
tries and pushes it into the floor because obviously there's a lot more
gravity pushing it down. So let's just set
that back to one. There we go. There's no beach
ball bouncing up and down. Alright, so the things
that we've gone through now is the basics animation of saying something with
a roll and moving along, setting something outweighs just moving in space and time, just the location and
going onto the beach ball. So now you know how to sell a basic animation to
do with the physics. So base is something falling, something driving along,
or something like that. Just the basic
animation of that. Alright, so the next thing
we're going to do then is move on to all swing animation. So I'm going to click
off the base animation. Come to our swing. Here
we are, Here's our swing. So swings and things like that. Everything past this
point pretty much except morphine or things like shape keys will be used
in basically a rig from this point out because the basic animation
as a science, as I said, will work
in just blender. But if you really want to
learn about animation, you really need to start using bones and
things like that. Alright, so the first
thing we need to do is if we bring in our cursor, Shift right-click
wherever this cursor is, that is where a
bone will appear. So if I refresh it, come down
and bringing an armature, you will see the bone
appears that not very handy if we want
our bone over there, I need to move it now over
to where it needs to be. It's a really hard
way of doing it. So the easiest way of doing it actually is to come to our tree. Chris top, I'm
going to do is I'm gonna go over the top, like so. And then what I'm
going to do is I'm basically going to double-tap the a just to make sure
I've got nothing selected. I want to print it said
to go into wire-frame. And then all I'm going
to do is I'm just going to select all of
these points here. So if I press B and select all of these
points here like so, and then I'm going
to press Shift S because it's a selected tab. Let's put it back onto material. And now you can see
that that cursor pretty much in the middle of
this actual trichome, exactly where it wants to do. Alright, let's double-tap the a limb moments do is
I'm going to press Shift a, bringing a armature. Now it's important
that you understand the first bone they bring in should always be something
called a root bone. All one bone to roll them
all basis what I call it. It's basically the bone where every other
bone is attached to. It serves no other
purpose over them. If you move this bone, every other bone moves with it. It's important because if
you don't have a root bone, sometimes when you send through rigs and
things like that too, unreal or even in Blender, you'll end up with
the actual animation moving from where you
initially wanted to do. So it's very important
that we actually great a root bone and attached
or other bones to it. Alright, so now this is
the actual root bone. We're going to have
this probably, I'll turn it sideways. So what I'm gonna do
is I'm just going to press all why 90? I'll just pull it
out a little bit. Now they're all
view all the things that you need to
know about bones. First of all, we've got
a armature in here, so this will give
us an armature. So what do I mean by that? If I come in and just I'm just going to put these
into a nice order. So I'm just going to
click all of these up. And then I'm going to
find you the armchair. I'm going to pull
this down a little bit so I can see what I'm doing. There is no armature here, so this is this bone. It's very important
when you bring in a new armature that
you rename it because there is a bug in Blender
where if you send the armature or rig out to another program
like Unreal Engine, it doesn't actually
work correctly if it's still left with
the name armature. So I'm just going to rename
this to swing, like so. And then I'm going to grab
the armature and put it in swing animation like that,
then I'm going to open it up. You can see at the
moment, if I open this, you can see that we've got all material one, they open this. We've got one bone,
which is this one. This is important because
I'm going to show you in the next lesson that you will be able to see all
the bones that yeah, I didn't hear why it's important that you
also call them bones. Alright, but once
I hope you enjoyed that and I'll see
you in the next one. Thanks a lot. Bye.
6. Swing Animation Rigging: Welcome back everyone to
the ultimate guide to blend a 3D rigging
and animation. And this is where we left off. Now I'm going to do is before
we actually do anything with this is we're going
to bring in one more bone. So if I press Shift a, I'm going to bring
in another bone. Now the thing is,
if I press Shift a in object mode is going to create another bone
next to this one, which means these are two separate objects now
and we really don't want that because it's
creating a new armatures. So I don't want that. What I wanna do is
I want to click on the first bond of
built-in press Tab so that I'm in edit
mode and then press Shift a and you'll notice you don't even
have to go and find it. It will just literally
bring in a bone. Alright, so now we've done that. We've got two bones here, like so, now we
need to name them. So I'm gonna come over
to this little bone icon over here and you'll see that
this one is called bone. So what we're gonna do is
I'm gonna go away and pull this route bone when it
come to this one here. Now, I'm going to
call this swing bone. And the reason I'm
always calling them bone is the fact that now you can
see they appear in here. Now if I want to do a search, all I need to do is for in bone. And he's going to
bring up all of the bones that I'm looking for. If I just put in
swing without bone, then it'd be waste time putting in bone because I won't
be able to find it. So that's why we're actually naming them correctly as well. And it's very important,
might not seem important now. But the moment you have hundreds
of bones in this scene, you really going to want to make sure that you've named them bone and you've named them
what exactly they do. So really, really important. Now the other thing is, if
I go over the top of this, you can see that it's
not quite in line. So over the top with this swing, That's also important
because when this bone is swinging
with the swing, we want it in line
with the swing. So first of all,
I'm going to rotate it around so that
is pointing down. So if I press all x and 90, we can see we have
another problem in that this bone is rotating
from the center up here. Now, even if I grabbed
this here and rotate it, you'll see nothing happens. So I want to rotate
it correctly. Now, the best way of
doing that is to press the little sideways V next
to the question mark. And it'll open up
a menu like this. And the one we
want is 3D cursor. What that means is anytime
I'm pulling anything, it's always going to be
pulled from this actual case. So if I'm scaling this, you can see from the 3D cursor, if I move the 3D
cursor over here, it will scale from over here. Well, I want to do is
I want to rotate this, so x hundred and 80 and rotate
it so it's pointing down. Now at this point, we
should put that back. So we're going to press
the little sideways vegan and we're going to put it back to individual origins. And then what we're
gonna do is we're going to reset all transformations. Now we don't need to reset
the transformations of the actual tree
because we're not actually rigging or doing
anything with the tree. Well, we need to do is reset the transformations of
the actual swing here. So if I press Control
eight, all transforms. Click its origins geometry, and now it's all set, ready to attach this rig
to this actual swing. All we nearly all set. Now the other thing is you can see if I go back
to this bone now, if I press seven and
go over the top, if I press Add wireframe, you can see that this is not really in line with the actual swing and
that's important. I want to actually put this
in line before I start because then it's
going to make sure I swing is going in
the correct way. So if I press Alt Z though, you will see nothing
actually happens. What you need to do to
rotate that is if you come over to your
bone over here, you will see you've got
one that says roll. Now if I turn the role, you will see that I can roll
the bone in the correct way. Now the other thing
is that the moment I can't actually move
this bone and a neat too. So I'm going to press
Shift Spacebar, move tool. And what I'm going
to do is as well, because if I'm moving this, It's moving like at this angle. And I really don't want that. What I wanted to do is move
the angle of point on. So if I set this to normal now, now I can move it
basically along that branch into the middle
where we actually want it. And now we're perfectly so
I'm going to press said, go back to solid, put this on
material, and there we go. Now it's ready to actually
be attached to our swim. We've named our bones, we've
resale transformations. We've put up bombs exactly
where we want them. We have our root bone. Now we can actually join needle just before
we do that though, if we press Tab when we
go into object mode, when calm down now and you
will see that we have one that says Not in the bones on
here, viewport display. They can see that we have
the viewport display here. Now what we can do is we can actually show the
names of the bones, which is really, really handy to make sure that
we've named them all. We can also have them in front. So in other words, nothing
will be hidden by these bones. It will basically always
be in front of them, really handy if you've
got things like arms and legs and you can't quite
see the bones and things. What we can also do though, is we can change the
look of the bones. Now, I like the way these
bones look for U1 mount. Want to change them
to just be a wire or a B bone or
something like that. But I liked I liked
the octahedral look. So I'm going to keep mom there, but you want to
change your look, then you're welcome to do so. Now I wanna do is
we want to attach this swing onto these bones. So I'm gonna grab my swing. I'm going to come
over, grabbed my bone. I'm going to press Control
P. And you can see now we've got a new menu that pops
up, set parents who. Now the thing is, we want to set this in a certain
way because if we don't, it means it's going to
cause us a lot more work. So I'm just going to
quickly go through these. So if you're saying it with empty groups is basically making this swing
that we've got here. Have no way to name
whatsoever the way or be the thing that actually carries the swing forwards or sideways
and things like that. But we have no weights on there. It means it's free
for OLS to put the weights on the
bottom right-hand side. I'm just going to put
an image on there which shows you
what weighting is. You'll see on the left-hand
side we have waiting in red, which is 100% way. And on the other side
where waiting in a really, really light greeny
bluish color. And that basically is
no way whatsoever. On the other side is dark blue, it means absolutely zero weight. So in the middle you can
see that it will be yellow, we orangey, something like that. And what that means
is like, well, it's nought, 0.5 is
halfway between. This is important because that dictates how much a bone will influence that
particular part of the mesh based on the weight, what you've actually gone there. So that's why it's so important. So if we put an empty groups, it means that we have control of weight painting or waiting
this actual swing. Now if we put it on with
envelope weight or blender does, is it kind of put some weights on there but not enough to actually
get the job done. So it's basically a hall, no way between no weights
and automatic waves. You might want like you're doing a character and
you actually want to sort out where the joints are moving
and things like that. You actually want
to do it yourself. You've got the expense, do it, and you wanted to move
in in a certain way. It could even be something
like an octopus. He's got an arm and you want a waiter way because of how the bone is laid
down, things like that. And that's when you might use something with envelope weights. Now the other thing is
with automatic weights, which is this one here, means that blended does
all of the job for you. This is great when you're
dealing with something like a character or
something like that. We need a full rig waiting and you need the arms to
move in a certain way. But it's not very
good if we're talking about swing because we only have one bone
in here and we don't want it really to be
weighted the bonus. So what we're gonna do on this occasion is choose
with them to groups. And there we go. Now this
is actually waited to this. So the next thing we wanna do now is if I come to my swing, you will see that now
under the modifies tab. Open minute the pole is sold, we have something called
armature already put on there. So you can see now it's gone
armature attached to this. Also, if we come down to this
little green arrow here, you can see now at
the root bone and the sphenoid bone attached
to our swing, ready to go? Now if we come to
our actual bones, so I'm gonna come to
my bones just for now. I'm gonna come over to
where it says object mode. And I'm going to
go into pose mode. If I grab this bone, you'll see it does nothing, actually nothing against
the swing whatsoever. So the pose mode is basically how you are going
to do your keys, basically how you
insert your keys, same as what we did on
the basic animation. But we're going to be doing
that with the actual bones. You can insert keys in
object mode, Edit mode. The only way it can do
it is in pose mode. Now let's go back
to object mode. What I'm going to do now is
I want to weight this up. So let's quickly go
into our swing now. We're going to press
the Tab button. The moment you press
the Tab button, you will see we have
another option here, which is how much weight do you want to assign to
each of these bones? Now the thing is, the real bone, as I told you, doesn't
want any weight on it. So if we go to the root bomb, will basically
remove 100 per cent or one of the weight on there. So we're going to
click that. Then we're going to go to our swing bone. And basically we want to
make sure that all of these swing 100% of the weight on it. So in other words, if I press a and grab it all
and then come over to where it says Assign 100
per cent, the assigned bond. Now, if I go over to here, come down to where it
says weight paint, you can see now that
this bone here as 100%, this bone here has nothing. So the real bone has nothing. In the swing bone has 100%. Now, while you're
in white paint, you can actually come
over and actually paint the weights in as well. So there is that,
Well, we're not going to discuss that right now. While we're just going to do
is discuss the real bone and the swing bone and the weighting options that we just gave it. Once you see this
knight can go back to object mode, like so. Now that means that if I
come to pose mode now, so I'm just going to go
to click on my bones. Oh, to pose mode. It means now when I
grabbed this bone, the whole swing moves with it. It means when I grab this
bone though, nothing happens. And the reason is, uh, go back to object mode. Whenever you make a root bone, all of the other bones, she'll be parented
to this route bone. So one way to do now is
I'm going to press Tab. I'm going to grab this
actual swing bone, rubbing my route bone, press Control P and
then keep offset. If I kept the connected, you'll see I'll move the bone and they don't actually
want to do that. What I want to do is press
Control P and keep offset. Now if I move this bone now, you will see nothing happens, but you will see there's
an actual line there. And that means that
this bone is connected. What that means is though, if I come now to pose and
now grabbed my route bone, everything is going
to move with it because this route
bone, as I said, is the one that
controls everything, is basically controls where
it is in space and time. And it doesn't
matter what you do with all the other bones. They, wherever I put this, the animation will still move. So I'll show you
that actually what I mean by that on
the next lesson. All right everyone,
so I hope you enjoyed that and I'll see
you on the next one. Thanks a lot. Bye bye.
7. Water Wheel 3D Rolling Animation: Welcome back everyone to
the ultimate guide to blend the 3D rigging
and animation. And this is where we left off. Alright, so now let's come into this bone and what
we wanna do is we basically want to set our
timeline to one to one. Like so whenever you're doing a swing or
anything like that, you don't want it to
start in the middle, obviously, you want it to stop. If I press R and X and
pull it back this way, you want it to start over here. Now the other thing is make sure that you're on normal and now global because if I
go over the top of it and I rotate this on global, so our x, you can see that
that's when he's going to go in the wrong way because it's basically
going straight. And we don't want
to go in straight. We want to go in the way that the bone is actually facing. So that's why we're going
to put this on normal. Then what we can do is
now we can actually press RX and move it back to, let's say something like here. And then I'm going to do
is I'm going to press I location rotation scale. Now I need to do is
you need to move it. We need to have a moving
over to the other side. So if I put this, let's say on 100, and then I'm going
to press all x and move it over
to here, like so. And then when I press
location rotation scale, now it should move from here all the way
down through here, like so, and then stop. Now we want to actually move
in all the way back as well. Now the moment we've
still got this on 205, so let's just put this onto wondered what I'm gonna do now. Instead of again,
trying to position it wherever I think
it needs to be, I'm going to grab this and
I'm going to press Shift day, bring it along and just
put it onto 200 likes. So now we should start
actually going back. Now the thing is as well. If the swing isn't
moving properly, what you wanna do is you want to make sure that the
interpolation, as we spoke about when the
barrel is on the right side. So in other words, if I go to interpolation and put
this on constant, Exactly, It's just going
to click between them. So you might want that if it's a clock or something like that. Now we don't actually want that. The one we want it is linear. It will put it on
Bezier as well. You will see this also a reason why we don't
use Bezier as well. You can see that, sorry,
no Bezier, linear. I'll show you what
linear looks like. So if print on linear like so you'll see as it
comes back, slows down. And it looks really,
really clunky. So we don't actually
want it like that. What we want it on the Bezier. And you'll see that the
interpolation is perfect. It's perfectly weighted. You can see how it comes up. He has some weight to it, and then it goes actually back. And that is exactly
what we want. As we've been doing
this, we've not exactly been very
accurate with this. So in other words,
it might swing further backwards than
it does for words, and you might actually
not want that. So what I'm going
to do is I'm going to come through here. I'm going to press C n born. What I'll do is I'll open
up the transform panel. Now you can see that it's
mainly the excise movements. So you can see this
is on two to nine. As I move this over, you'll see that that x moves
backwards and forwards. And you can see now
it goes to 229 here. You can see in the center
though it's only on two to six. In other words, where a
little bit out on this, the easiest way to do your
swing actually installed, you swing wherever you want it, home over to where the
axes and press Control C, then it will be
exactly copied there. And then what you're going
to do is you're going to come over to the hundred, 100, like so. And then what we're going
to do is I'm going to press Minus Control V. And there you go. Now
the swing will be going as far back as it is boards
and the perfectly in line. The one thing though
I did forget to do is you can see it's two minus naught 0.2
to 60 shouldn't be, she'll be nought 0.2 to nine. So I'm going to just going
to click here again, it looks like minus
Control V Enter. And then what I wanna
do is now I want to reset this actual key. So basically I need
to insert the key. So I compress over here as well, or a compressed I in
the actual viewport. And now you'll see that
this should move really, really nicely backwards
and forwards. Like so. So there you go. That's our actual Swing. Actually done. Once you've done
that way you can do is you can come to object mode and you can just hide
these bones out of the way. And then we can swing
and let it swing. And you can see just
how nice it looks. Now the thing is we
can actually as well, we could go in
there and obviously alter how far this swinging, because it's swinging
quite a long way. What we can also do, the best thing is this is
why we made our root bone. So I'm going to do, I'm just
going to click on here. And I'm going to press
Alt H just to bring our bones back so he's H to hide them all tastes
to bring them back. Now, the moment I
come to pump mode, wrap this bone,
moving out over here. When I press space bar, you'll see that this root bone, because it actually has no
actual keys actually inserted wherever I put it is where the actual bone is going to go. In other words, where is
the swing going to go? If I press Alt G Now, it's going to
actually put it right back into the place
where it was. That's really important that we actually have that on there. All right everyone,
so that's basically the swing exercise done. So what I can do
now is I can put this back on to object
mode and come over now. And I can shut this down. Now. Let's open up
our wheel turning. Like so in this exercise where you're going to
do is you're going to find now out to ultimately put in movements without actually
pressing the Insert key, which is really handy if you've got a lot of movements
to actually get through. So let's actually
look at that now. So the first thing when to do again is we'll base it over 200, like we did with
the last exercise. So I'm gonna put it on
one and then one wins. There is a need, first of all, the root bone in here. And then I need another bone to actually move the wheel
again with the root bone. The root bone will do nothing except bring all
the bones together. So if you've got root bone, you really don't
want to just use a root bone to move this wheel. You want to route
bone and then an extra bone to actually
move the wheel. So I hope that makes sense. So first of all, we need to get the root bone in the center. So I'm going to
click on the wheel. I want to press
Tab. I'm going to come grab the
center of my wheel, press Shift as Christa
selected, press the top blog. And now I'm going to
bring him a bone. So shipped a bring in an
armature and there is my bone. I want to scale it up a little bit because the
scale of it really doesn't make any difference
to the wheel whatsoever. Then I'm just going
to press Alt and why? 90? And you can see,
I've pulled it out here. Don't really want it pointing this way because
it's the root bone. So I'm just going to
press all dead underneath and you can see it's
not moving correctly. The reason is not
moving correctly is because I'm still normal. So I'm going to put in global, then repressed all
that pungent AT, and just spin it
going the other way. Now what can do now I've
got my route bone in there, can just pull it
out a little bit like so make it a
little bit bigger. And what that means is really, really easy for me
to see and really easy for me to move this
around if I need to. Now let's bring in another bone. Now it's important that we press the top bonds so
we're in edit mode, then we'll press Shift a
and there is our new bone. Now I'm going to grab this
bone, I'm going to press S, and I'm going to press 0, Y, 90, and put it into place. I'm going to pull it back
a little bit like so. Now before we begin, again, the checks that we need to
go through is grab your, we'll press Control a or transforms right-click
Set Origin geometry. And now we can do is we
can come to our bones. Before we join them all up, we just need to name them. So if I come in now and
grab this bone here, so I'm going to come
down to my bone again. I'm going to call
this a root bone. Like so. Come to this bone, I'm going
to call it we'll bone. We'll get rid of these
things after it. Like so press Enter. And then finally, when it
come down to my armature on the color wheel
on a drug though, then put it in my wheel turning. I'm also going to save my work. So I'm going to
click File and Save. You've not saved out before. I'll just click Save As and
then save it out like so. And now we can do is
I can just open this so you can see
everything's in here. The bones are named
as you can see. So if I open this up, you can see root bone, we'll bone all named. You can see as well because we're working
on a new armature. It, if we come over to
our actual armature, we just need to plug
names on again. You probably going to
have to do that every single time you bring
in all mature in. So just make sure that you've done that if you want those on. Now finally, we're going to join this bone up to this bone. Because again, it's a root bone. That's the bone that we
want to control everything. So I'm going to grab this
bone, Shift-click this bone, press Control B, sorry, Control P, and
always keep offset. So keep upset. And there we go. Now
if I move this bone, so grab this one first G, you'll see that little line
that goes between them. Finally, now let's join
them all together. You'll notice that
the moment if I come to my modifies tab, there is no armature on there. If I come to the
little green icon, there's no actual
bones on here as well. What I'm gonna do is I'm
going to grab my bones. Grandma, we'll press
Control P I'm sorry. Go their own way around. Grab my we'll grab my
bones, press Control P. And then what we're
gonna do is again, we're going to put it on with empty groups because it's going to make it
just far easier. Because it's just
going to be one bone that's going to turn
the whole wheel. So we put an empty
groups like grandma, we'll now, now you can
see there's bones there. Grab my little
spanner and you can see there's an arbitrary
on there as well. Alright, so on the
next lesson, then, we'll get this wheel moving in a really nice realistic way. Alright everyone,
I hope you enjoyed that and I'll see
you on the next one. Thanks a lot. Bye bye.
8. Stylized Tree Animation: Welcome back everyone to
the ultimate guide to blend the 3D rigging
and animation. Now let's put the
waiting on these. So the first thing
I'm going to do, I want to come to my wheel. I'm going to press Tab. I want to press a
to grab everything. I want to come
tomorrow bone and, uh, basically wants to remove all of the weight from
the root bone. Really important
that you do that because if anything
ever goes wrong, you know, you've
already done this. So, you know, it's
not going to be down to the actual root bone. Next we want to do go
to the wheel bone. I'm going to click Assign with
100% on the actual wheel. And then if I press Tab now, I should, if I
click on my bones, come to my object mode, go to pose, grab this bone and the wheels
should move with it like so. And now if I grabbed
my route bone, everything should move
with it, like so. Alright, so far so good. Now let's click on
our whale bone. A moment to do. First of all is I'm going to
actually click on this bond here so you can
see if I hover over this, it says all tolkien. Now what this does is it
basically does the keys for you. So now if I press
all x 90 already has a key frame in that if I
could then come to 50 or 90, another keyframe in, and
let's go to 100 or 90. Then finally, one-fifth x 9,090. Press the space bar. There we go. Everything is already
Keating for us now, I highly recommend once
you've actually done that, you turn off this automatic keen because the
amount of times I've actually missed domain
animation because I've left the arm and just
forgot to turn it off. And instead of key
frames in when I'm just trying to
speed up something, I'll slow it down and
just did a load of key frames and have to go
in and delete them all. It's just making sure
that you turn it off. Now the other thing
you'll notice, of course, is that the interpolation
is incorrect. So let's actually
go in and fix that. So what I'm gonna do is I'm
going to press space bar. I'm going to right-click come to interpolation and I'm
going to put it onto, I think there'll be on
linear on this one that's of a log linear. Reach us restore,
and there we go. Alright, so if I press
come up to Object Mode. Hi my bones. There we go. There is a beautiful
turning wheel and you can see how quickly
and easily it was to do that. Alright, let's press space bar and then what we'll do
is we'll come on over. I'll show the wheel turning. And then what we're gonna
do is we're going to come now to our basic waiting on an actual tree. So what we're gonna do on this one is we're
actually going to weight it with something
called bendy bones, which is something that
you can use if you want something like
tentacles or trees swaying or even a bendy arm like Harry Potter or
something like that. It's a really good technique to use if you want
something like this. Alright, so what we're
gonna do is first of all, we're going to bring
in our first bone. So I'm going to press Shift
day bringing our armature. I want to go over to the
right-hand side then. I want to make sure
I'm clicking on this little running man and
I'm going to put on names. First of all, I'm going
to put it in front, and I'm also going to put
this on B bones instead just so we can actually see what we're actually
doing with this one. Next of all, what I want to show you is this at the moment. So you can see the armature
is named armature. If I press F2 instead, we can actually
change the name of the armature and we can call it tree rig or
something like that. And there you go. You can see now on
the right-hand side, it's actually changed it. So I'm just going to
drag that into there. We can also press F2 as
well when we're actually dealing with bones instead of going over to the
right-hand side. So there's just that
take into account. So the first thing I'm
gonna do is I'm going to actually grab this and I'm
going to pull it down. So I'm going to make it smaller. I'm also going to press one, so I'm in the front
view, like so. And then what I'm going to
do is I'm going to press Extrude that to hold
it along the z axis. I'm going to pull it all
the way up, like so. And then what I'm
going to do finally, I'm going to press E and Z, and we're going to
pull up a really small one right at the top. So you should end up with
a small one, a small one, and then all of this big
one on here like so. Now we're going to do is
we're going to come to this top bone here. And I'm going to
press Alt and P, and I'm just going to
clear the parents. So now you should be able
to grab this with G and it should be cleared off from
this large bone here. Then what I'm going to
do is I'm just going to click on this large bone. And then what we're going
to do is I'm gonna come over to the
right-hand side here. I'm going to click on
this actual bone here. And we have something
that's called bendy bones. And this is what we're actually
going to use to actually make this tree sway and
all that good stuff. Now, it's important
on this one that you do have B bones on. So be bones, which
is this over here. Because if not, if I put
this back to octahedral, you'll see that when it comes to my bendy bones and
put the segments. So this one here onto ten, you won't actually
see anything happen. The only way you
can actually see it happening is if you
put it on the bone and now you'll see
that we've got all of these little bones are
broken up like so. Now let's first of all,
before we do anything else, let's just grab this bomb bone. And what I'm going to do
is I'm just going to press Shift a bringing another bone. All I'm going to do is press all why 90 and bring
this one round. And of course, this one is going to be our actual root bone. So I'm going to grab this bone, I'm going to press F2 and
I'm going to rename this to root bone, like so. Then I'm going to
grab the bottom bone. So I'm going to press F2
and I'm going to call this it's very bottom bone, like so I'm going to
grab these middle bones, have to I'm going
to call it tree. Then the bone. Then finally the top. So I'm going to press F2
and I'm going to call this tree top bone
like so. Alright. So now we can do is we can
actually grab all of these. I can grab my route bone last, I can press Control P
and I can keep offset. So this now when I
actually move this, you should see all
of those lines actually connected
to these parts, which is, again, we
need the root bone to move this tree
wherever it wants to. So now I wanna do is you
want to come to pose mode. And then what we're going to
do is grab this middle bone. We're going to come over to
the right-hand side and we add something called
add bone constraints. And the one we're going to do
a click is the stretch two. So we're going to
click our stretch two. You'll notice it goes and
actual different color. And the target of course, is going to be our armature, which is Object Tree rig. As you can see now,
the actual bone now we're actually looking for
is going to be the top bone. So it's the tree top bone here. So this one here should be the
one that you're targeting. Now when you click on this
top bone, you try and move. If you press G, you
will notice that all of these bones actually start
to stretch with this one, although they're not actually moving in the right way yet, because we've not set that up. But you will see that it
can actually stretch out. So, just so you know this now, you can actually use this for other things if you
really wanted to have something bouncing
up and down like this. So now let's click on
our middle bone again. And what I'm gonna do is
I'm gonna come over to the right-hand side onto
this little bone icon. And if we actually
go all the way down, you will see that we've got
a start and an end, Handel. And this is what we're
actually going to change. And what we're going to
change these two is we're going to change
them to absolute. We're going to just
going to change them both to absolute light. So now the start and lonely should be this
tree bottom bone here. So if I click on
this, we'll have tree bottom bone and then the N1 should of
course be the top. So if I click on this now, we should have tree
top bone like so. Now the moment of
truth, if we come to our top bone now and
we try and rotate it. So if I press R and Y, you can see that the whole thing starts to sway in the wind. And of course, if I press all Todd, just
to put that back, I can also move it as well, like so we have a lot
of control now of it. Now if I grab this bottom bone, the root bone, everything
should move along with it. So now we've done that, it's finally time to come
to Object Mode. Grab our actual bone, grab all tree, press Control
P, not the wrong way round, grab our tree, grab
our bone Control P, and bring it with automatic
weights, like so. And then what we can
do is now we can come back to pose mode, grab this part here. And now you'll see that our tree looks as though
it's swaying in the wind. We compress all and why as
well just to sway it like so, so very, very gently, like so. And you can see it's a
really, really nice effect. So now we can do is
we can actually come in to our actual timeline. We can set this up a
little bit bent already. So what I would do is just
bend it just slightly like so. And then what I'm going
to do is I'm going to have it on automatic here. So I'm just going to
put this back to one. So I'm going to put
this on automatic. And then what I'm going
to do is I'm going to put them faulty. And we've grown to 200
or something like that. So then we're going
to do is I want a bit of randomness and near as well. So I'm just going to
swipe back the other way. I'm going to grab it then to this way because it
didn't actually sets it. And I'm going to press
Alt and y this way. Like so. Then I'm
going to come to, let's say 100,
something like that. And then sorry about
the other way. Like so. And then let's
come to one-sixth. Then we'll sway
it the other way. And if you notice,
all I'm doing at the moment is just the rotation, I'm just going to
sway it that way. Then finally, I just want
this one to be exactly the same on the N one because basically I wanted to
finish on the end. So it's a repeating animation. So if I grab this one now, press shift D and bring
it all the way over 200. And there we go. Alright,
so now we should have, is this thing slowly
sway in late? So there we go. Now I want to do is
we actually want to actually make it move
a little bit as well. So gotta be careful though, when we actually make a move, we can't actually
move it with this. So what we need to do is we need to move
everything with this. So again, I'm going
to come back to 1.1. I'm trying to do now is follow the way that the
actual tree is going. So if I press G and just move it a little bit
this way, like so, then if I come back to here, then I press G and move it
the other way, like so. Then I come to 100 and then G, like so, and then come
back to one-sixth. Again, everything's doing,
doing automatically, like so. And then finally
what I want to make sure again that
I've copied this, so I want to make sure
that I'm copying this. So what I'm going
to do is I'm just going to click on this, but this two actually in there. One is a rotation and
one is the location. So I'm just going to make sure
that I grab them both like so and then press Shift D and bring them both over, like so. Swap them in there. And now what I should
have is a full animation. So if I come in now, just put this on object mode, hide those out of
the way with H. Whoops, let's bring
it back with old age. Let's grab this part, hide out of the way, and now
let's press the space bar. There you go. We're all getting a little
bit of frame loss just because of the fact we've got some materials in here. If I put this onto our object
mode instead and try it, we should actually get
higher frame rate, which were slightly
higher frame rate. Well, there you go. You can see it's looking really, really realistic, stylized
way of actually doing that. Alright, so I'm really
happy with that. So what we're gonna do now is we're actually going to go back to material mode among going to do is just
bring back the rig. So I'll teach bringing
back the rig. And finally while wants to
do is I just want to make sure that it let's have a look. Yes, if I move this, everything moves with it. And also in pose
mode, if I move this, everything moves with
it just to check now, then we know that this
has actually done. Alright, so what we'll do
is now we'll just close out the basic waiting and then we'll open up the next one
which is shaped keys. And basically we've
got this then sell for the actual next lesson. And what we're gonna
do with this one is we're going to make it actually into a real
looking pumpkin. So we're going to
have it going from a tiny seed into
an actual pumpkin. Alright everyone, so
I hope you enjoyed that and I'll see
you on the next one. Thanks a lot. Bye bye.
9. Vegetation Growth Using Shape Key: Welcome back everyone to
the ultimate guide to Blender 3D rigging
and animation. And this is where we left off, so we're actually on
our actual pumpkin. Now I'm going to actually
click on my pumpkin. And we're going to show you
two things with this actual maybe two lessons we might get done in
one, but we'll see, while I'm basically
going to show you is how to actually use Shape Keys in your animation and also how we can actually use I'm colors. So we can actually change
shaders as well with animation. So the first thing I want
to do is I wanted to come over to my little triangle here. And basically you
can see we've got one that says shape keys here. Now when I click one plus and I'm going to click
it again and again. Now the first one, we never actually touch, so we never actually
touch that one at all. We just leave it. It's basically like
the root bone. In this case it's the
root, root shaped key. The next one we're gonna
do is we're going to have seed, so we'll call it C. And then finally, we'll call the last one pumpkin, like so. Alright, so let's first of
all come to the seed one. And then what I'm
going to do is I'm going to try and turn this into a pumpkin seeds. So if you've got an
image or something, I will put an image down on the bottom right-hand
side here are what are the actual pumpkin growth
actually looks like, and you'll see it's really
thin and small and kind of comes off of an actual a
vine or something like that. And then it gets
heavier and heavier. Finally, it goes
down onto the floor. And then as those
really broad parts of the pumpkin
that actually come out when it first
starts off as well. The actual pumpkin is
green, It's not orange. So we also need to take
that into account. Alright, so what we'll
do is we'll press Tab. So we've got this one
selected in our Shape Keys. We're going to press Tab. And what we're gonna do is we're actually going to change this. So I'm going to
come in, I want to press Alt Shift
and click on that then is going to give me a line going all the
way around there. Then we're going to
do is we're gonna put proportional editing on. And then I'm going to
actually try and turn this now into more of a seat. So you can see now,
I've great like this, I'm going to pull
it down like so. And you can see now it's looking a lot more deed like the walls. I'm also going to make this a
little bit thinner as well. Now you can actually just grab one phase and you
can bring it in as long as you're careful with
it so you can bring it in. Like so. Don't worry about
any anything at all apart from the fact that you
really don't want to break the mesh so you're not going to worry too much about the shape. Alright, so that's pretty nice. You can see now
when I press tab, it basically bounces back
to what we had it before. And why is that? Well, what you've
actually done now is you've actually created a Schottky where now
you can actually go in and move this on the fly. So for instance, if
I've got my seats selected now and,
uh, come to value, you can see that I can change
it into the actual seed, which is really, really great. Okay, so now we've got that. Now we want to make
the actual pumpkin. So let's come to the
actual pumpkin patch. And what I'm gonna do
now is I'm going to call me in this time with
edge select, Alt, Shift and click, and just grab a few of these edges going round. Like so, like so, like so, and maybe like
so, something like that. Still with proportional
editing on. Now what I'm going to do is I'm going to bring them in now. Like so, press the Tab button. And now what I can do is
I can actually bring this up and change it into my actual pumpkin with those those lumps that
you see on pumpkin. So it actually looks a
little bit more like it. Now the one thing I
wanted to do also, I just want to put
this back again. I want to go back into it. And what I wanna do
is I want to bring this in so I can actually
press control law. I can't actually bring it in
from there as you can see. So some reason that's
not actually working. But what I can do
instead of that is I can grab all of
these going round. So I'm going to press
C to grab them all. So see in the middle and then I'm going
to do is just press I and bring them in, like so. And then I'm going to do is I'm just going to pull them in. So I'm going to pull them in. Like so. Then what I'm going to do is I'm just going to check
that out now. So if I bring that up, now we go, That's exactly
what I'm looking for. Normally, they would have
some sort of stem on here. This one doesn't go on just
to keep it simple for you. But you can see now that's exactly what we're looking for. Alright, so now what I want
to do is I want to put this back to zero again, so we have the basis
of our pumpkin. Now, let's put the timeline
over something like 300. We don't want it too long. We want to just
long enough so we can actually learn something. And then what I want
to do is I wanted to put this onto zero, not zero, so one, always on one. Let's then go to
the shading panel. You'll see that in
the shading panel, we've got everything
set up in here. It doesn't really matter what. Most of these can actually be edited, so you can edit you. What I mean by edited is, I mean you can actually insert a keyframe on most of these. So just take that into account. So the first thing I want to do is I just want to pull this over to the side and actually wanted to just bring
in a timeline. So I'm going to do
is I'm going to click on this down arrow. I'm going to come over
and bring in my timeline. And now you can see that beta, we can see our timeline. So we can move
this backwards and forwards in the actual
shavings panel, which is exactly
what I want to do. Okay, so what I'm going
to do is I'm going to put this first of all on 300. If you can't click it, just remember, just
type it in here. Like so. And then what I'm going
to do is I'm going to come to my view, my saturation, my
value, and my fact i'm, I'm gonna do is I'm
going to press I, I, I, and I like so then
we're gonna do is I'm gonna go back then to zero. So now what I want to do
is I actually want to make this a color which
would be the seed. So for instance, is quiet
at Blue, greenish color. So I'm going to do
is I want to mess around like you want and
then you've got your green. Now I do want to lower
the saturation of this, and I also want to load the facts a little bit
so I'll bring it down, bring the saturation down, and just play around with it until you're happy
with how your seed. He's going to look
some jaws trying to, I think something like that. I'm just going to
say impure one, maybe something like that. Yeah, I think I'm
happy with that. So this kind of
deep green color. And what I'm going to do now
is I'm going to go down, I'm going to press I, I, I, and I liked. So now what should happen
is as I move along, you will see that
this will change from this nice green
color to an orange color. So if I press Space-bar now, you'll see it
starting to change. And eventually it should become that beautiful orange
color of pumpkins. And there you go. There
is the orange color. Now we can also go in
if we're not happy with the color in the
middle, which I'm not. And they say turn it, turn it to any
color that we want. So I'm just going to bring
the saturation down. I'm going to also pull this down a little bit
and just mess around. I'm not going to actually
mess around with the value because that's
really messing it up. I'm going to bring the hue
down to nought, 0.55. Maybe. Let's try that.
Let's try and bring the saturation up a
little bit like so. Let's mess around
with this value. Yeah, something like that. And then again, I, I, I, and I, and let's give
that another try. So from here, it should get the middle now and go to the color that I picked. It shouldn't be too bright of a green because that's
not what I wanted. Should go to this greenish
color belt like potato, and then actually turn into
this really nice orange color that we're actually looking for. Alright, so there you go. That's that part done. Now we can do is we can
go back to our layout. And what we wanna do is we
want to put this onto one. And then what I want to do
is I want to make sure that I'm making it smaller
from this part here. So what I wanna do is click on the little sideways V again, come to 3D cursor. And while I wanna do is
I want to, first of all, I need to put this on 300 light, so we'll do the end part first because that's
the easiest part. So what I wanna do is I
want to turn this up. So if I turn this up here, and then what I can do
is I can hover over this value. I can press I. And then what I can do is and
come back into my viewport, I can press, I location,
rotation and scale. Alright, so now let's
come back to one. Now we want to basically
make this into the seed. So what I wanna do is I
want to make it smaller. So if I make it smaller, you'll notice because we've made it smaller from that point. It gets smaller
from here, like so. And then we'll start
off at that size. We've got automatic on. So just remember that
you've got this on. I mean, it should be
okay on this part here. But just remember if
you've got the unjust to turn that off, you
don't want it on. Now I want to do is I
want to turn the pumpkin. So this part here
all the way down. So I'm gonna turn it
all the way down. I'm going to press I. And then what we're going to do is I'm
going to come to my seed. I'm going to turn this
all the way up, like so, I'm going to press I liked so, alright, so now let's
see where we are. So if I press space bar now, we can see it starts getting bigger, bigger, bigger, bigger. You can see we have a problem. And the reason is
for that is because we need our seed to
change as we come up. So in other words, once we
get to around about here, like so we need our seed on
this one to actually change. So if you put this down to zero, now, press the I born. And then as we come up now you can see that it gets bigger. Then it starts to come out. Now I don't like the fact
that it starts coming out here because
normally pumpkin is the girl really, really far. And then these kind
of things come out. So we want to go back
to our pumpkin now, this down to zero and
press the I button. Now you'll see that
as I come in and press Space-bar starts
to get bigger changes. Did this really round pumpkin? Then we start to have
it where it actually starts to bulge out, like so. So there you go. That is a way that you can
actually create pumpkins. Now I know there is
more to it than that, which you could do
with it, instead of it actually getting bigger
in that kind of way, you could use shake keys
to actually enlarge it, which would probably look
a lot more realistic than it just kinda growing
from this part like, so it doesn't look very
realistic at the moment. It needs to topple over as well and move a
little bit to get that real realism in there
and things like that. But this is basic shape
keys in a nutshell. And I think actually you
should have learned a lot from this actual
part of the course. Alright everyone, so I
hope you enjoyed that. What we'll do now is we'll
just close that down. And then what we're gonna
do is we're just going to open this one up and
we're going to actually create some multiple bones in this which are going
to be rotating round. All right everyone,
So hope you enjoyed that and I'll see
you in the next one. Thanks a lot. Bye bye.
10. Multiple Bone Animation for 3D Globe: Welcome back everyone to
the ultimate guide to blend the 3D rigging
and animation. And this is where
we left it off. Now on this one,
what we wanna do is we want to work with multiple bones all moving at different angles and it
around at the same time, just to really pick
up that complexity, all building actual rigs. Alright, so what we're
gonna do, first of all, he's going to make sure that your actual curses
in the census. So you're going to grab
your actual globe. You're going to
press L on this one, do it an edge select
just to make sure if there's any seams or
anything like that. You're grabbing the whole
of the actual sphere. And then what you're gonna
do is just going to press Shift S cursor to select it. All right, I'm going to press Tab and then what I'm going to do is I'm going to
bring in my first bone. So I'm going to press
Shift a all mature. I'm going to actually
put this bone on names and I'm going to
put it in front like so. Then we're going to do
is I'm going to press Shift a again, but I need to be sure I'm
actually in edit mode, Edit mode, shift day. And then all I'm going
to do now is I'm going to bring this one down. So you can see that I can't
bring it down at the moment because it's actually
grabbing the whole thing. So all I'm gonna do is I'm just going to grab it
like that through that and then I'm
going to bring it down to here and then
rotate it around. So all why 90? 90, something like that. I'm going to make it
a little bit bigger. And as we've discussed
many times now, this is actually going to
be my actual root bump. Alright, so now we'll actually
bring in another one. So I'm going to
press Shift a and then I'm going to press all why? 90 and then Shift a, and then our y -90, and then finally Shift
a and then our X 90. And we should end
up with bones like this plus a full
bones like this, plus a real bone like so. Alright, so now let's go and
actually name these things. So first of all, I'm
going to press Tab. I'm going to grab
my actual armature. I want to press F2
and I'm going to call this globe rig Enter. And then what I'm going to
do is I'm going to drag my globe break into multiple bones. One like so, open that up and then we go,
It's all in there. And then we're going to do
is I'm going to press Tab. I'm going to come to the
bottom one, press F2. I'm going to call this
root bone. Like so. Now we'll come to the
middle one here and what we'll do is press F2 and
we'll call this sphere. And then I'll come
to this one here, and I'll call this
one the inner ring. So we have three rings ear. So we'll call this inner ring. And don't forget to put, I need to put bone
on here actually. So I'm just going to press F2. Always, always put
bone on the end. Now with this one,
I'll call it to inner. So we'll call it inner bone. Like so, this one we'll
call middle bone. Middle. And of course you can call these whatever you want to call them. And then the top one,
we'll just call it out. So F2 out to bone, like so. Alright, so now I want to do is we just want to make
sure first of all, that all of these will be
connected to the root bound. So I'm George is going to
grab each one of these, grab this last press Control
P and then keep upset. And now when I move this,
we showed that of all of those actually coming from there because they're
all in the center. By the way, you'll
only see one line. So don't worry
actually about that. If the lines, by the
way, are annoying you. I think there's
actually where is it? I think it might be on here. There we go. So we can see that we've
got bones, we can turn off. We've also got origins. We can turn off. We've got relationships, lines. So you can actually turn
those lines off if you don't want them on there.
Alright, so moving on. Now what we need
to do is you need to obviously wait this. Now, we're only
going to wait this with no weights like
we've done before, not with the weights, weight painting or
anything like that. So what I'm gonna do is
I'm going to grab this, I'm going to grab my bones
are going to press Control P, and I'm gonna give it
with empty groups again. Now what we're gonna
do is I'm going to grab my actual mesh. I'm going to look
first of all to make sure that there's
the armature on. Now you can see on this one. So this is actually a good
thing that I'm going to show you that we've actually got
an armature on already. And this is because I brought
this in from another scene. So when you go and check this, just make sure that you can
see here that this is red, which means it's not
actually working. So you can just actually
come on and cross that off. Now the other problem
you're going to have is that you can see here that I've got a lot
of extra bones here. Now I can see that if I come
all the way up to here, they can see sphere middle
bone in a bone to bone, root bone that from
the root bone here. So if I pull this
down a little bit, so it kinda pull this down, you'll be able to pull
this down. There we go. These are all my
bones. So you can see I've got my sphere
all the way up through. I need to basically
get rid of all these. So I'm going to
come to this one. I'm going to click
the minus r minus, F minus, and the minus
off. There we go. Now, I'm not sure if in the course you will
actually have this issue. We've still got the
actual armature attached. I hope I take them off. I might leave this one on
just so you're aware of that. So you can actually make sure you might have already
put an armature on it. It might come in with
a non maturity on it which you don't want
or something like that. This is how you
clear them all off. So now when I press Space-bar, nothing should
actually move with this because there's
no armature, There's no bones attached. Alright, so now let's
actually come in. And what we're gonna do
first is we'll click on our globe and we'll come
down to our root bone, which is this one here. We're going to press tab. We're
going to grab everything. And then again, we're
going to remove 100 per cent of the way. Now we'll do is we'll
come to our outer bone. So this one here, so
this is this here. I'm going to grab it on nucleic, a sign on your
percent of the way the inner bone is going
to be this one here. I'll assign on your percent of the way the middle bone is
going to be this one here, l assign 100% of the weight. And finally the sphere bone, which is this one
here, click Assign. Now we showed the half. If we come up now to wait paint, we should have now the sphere, the middle, the inner, the outer, and finally the
root bone with nothing. So just have a quick check on that and it should
look like that. And now finally we can go back to Edit Mode, which
is what we're on. Now, what we should
be able to do now is grab any of these bones. So if I grabbed my armature, go into pose mode, grab this one for instance, and say, let's rotate it
like so you can see that outer one now is actually
moving around like so. And that is exactly
what we want. You can see we have got a
bit of a stretch in there. And the reason for that is is that when I turn
this so as you can see, if I go to my front view now, so one and I press
all unwind spin this. Can you see how it's
actually going out of line? Now that's really not
something we want. And the reason for
that is because this actual cursor is really not in the right
place for this one. So let's actually fix up first. So we're gonna go
back to Edit Mode. What I'm going to do now
is I'm going to press tab, come back to my globe. I want to grab all of
this going round here. I'm going to press Shift
S cursor to select it and you'll see how it
moves very, very slightly. And that is exactly
what our issue is. Now what I'm going to
do now I'm going to come back now to my bones. I'm going to grab this bone. And when I move
this to start with, so if I press Shift S
selections cursor to keep offset is going to put it in the middle and that's
really not what we want. So just put it like that. And then what you can
do is you can come down to the bottom shift S again and selections
cursor, keep offset. Now you'll see it
goes in the middle, albeit it gets a bit smaller. Now you can do them.
If you grab it, you can actually
pull it out like so. Now when we actually
come into pose mode, we should now if I press Alt and why we should be able
to move that perfectly. Alright, so now let's check to see we've got the same
problem with the other ones. So I'm going to grab this one. I'm going to press R and y. And you can see exactly the
same issue with this one. And let's try this one as well. So our NY and exactly the
same issue with this one. So let's actually
get those fixed. So I'm showing you
so you actually understand if
something's going wrong, how you can actually fix it, or good ways to actually
fix these things. Okay, So let's go
back into edit mode among going to do is I'm going
to come now to my globe. I'm going to grab this one
first, so the middle one, Shift S cursor to select it. And I'm hoping that
that actually move. I think it's moved because
it's a selected like so. And let's grab my inner, which is this one here. So I'm going to press Tab and then one Wednesdays
I'm going to press Shift S and selections
cursor like so. I'm going to grab
this bottom bit here, Shift S, selection cursor. And then we're going to
do is I'm going to grab the whole thing and pull it
out a little bit like so. And then I'm going to do the
same thing with this one. So I'm going to
grab this one here. So L shift S because
it's a selected. One way to do is I'm
going to press Tab, grew up this one. Shift S selection to cursor. And then I'm going to
grab the back of it here, Shift S selection to cursor, grab it all s, pull it out. Alright, so the moment of truth, Let's see if these all work now. So I'm going to go
into pose mode. I'm going to check
this one first. I think I know that
this one works, so yeah, that one's
working fine. And then all, and why
working fine now? And then we can say R
and Y working fine. And finally then
the actual globe, which is this front one, so it can press Alt and why? We can see that one is
also a little bit out. So what I'm going to
do on that one is I'm gonna do the same thing,
pretty much what I did. You can see it's a tiny, tiny bit out, so I'm going
to come to object mode. Sorry I didn't mode, comeback, grab my actual lobe, like so. And then one way to do
is I'm going to press, actually I'm not going to do
that because I think that this should be more in
the middle with the sum. I'm actually not
going to do that. What I'm going to
do is I'm going to grab this one like so. And then I'm going to press one, I'm going to press Shift S and selection, selection to care. So like so now I think that's
actually going to work. I'm going to grab the
back of it, Shift S, selection, cursor, keep offset,
and then make it bigger. S like so I'm hoping, hoping that that
actually fixes it. So let's come now to pose mode. Grab this one, are, and why? There we go. Now it's moving perfectly. Let's see if it's actually
moving the other way as well. So our x, and there we go now, yeah, I'm very, very
happy with that. Alright, so now
that's fully set up. I'm going to actually
come up to the top, save up my work. And then what we'll do
on the next one is we'll actually get this
rotating around. All right, everyone.
So I hope you enjoyed that and I'll
see you on the next one. Thanks a lot. Bye bye.
11. Globe 3D Animation Loop: Welcome back everyone to
the ultimate guide to Blender 3D rigging
and animation. And this is where we left off. Alright, let's set
our time frame, time fun timeframe down to one. And then what we'll do is
we'll start now, actually, I'm putting in a key, so I'm going to press I,
location, rotation and scale. Now I'm gonna do is
I'm going to come up to we're on 300 at the moment, which is kinda going to
make this I'm a little bit difficult because you've got to basically break
it down over 300. So we're better off
actually pulling it over 200 and having each frame on
50 because there's always, there's going to be for
actual frames per revolution. So if I put this now onto 200, like so, and then we
can go to frame 50. So let's put it down one. And then we can
rotate it around. So 90, like so. And it's going to
ultimately poor framing. And then we can go to 100 and
then our 90, and then 150. So our 90, and then
finally 100 or 90. Now we do know that
it's going to start off slow before it starts
picking up any speed. Like so we don't
actually want that. So what we wanna do is
Right-click interpolation. And I think we want it on
linear, strand, linear. So it should now just keep
going around like so. Alright, so I'm happy with how that looks
now what I'm going to do is I'm just gonna
put this back on one. And then one way to
do now is I'm going to mess with this one. So if I press R and X, we shouldn't end up
with this one going around like so.
Let's start then. What we'll do is we'll press
i location rotation scale, and then we'll come
to the 5D Mark, and then we'll press
all x and 9,100 X 91, 50 or 90, and then to 100. So, and then our X 90. And then what I'm going
to do is of course, Right-click interpolation,
put it on linear. Alright, so now we should end up with something like this, which is looking
really, really nice. And now we just go
back to one again. Now because we've done this one, Let's do the middle one. So let's do this middle one. And I'm going to press I
location rotation scale. And then what I'm going
to do is I'm gonna press all that 90. Whoops, I'm not gonna do that because I need
to put on 51st. And then we go and
then all said 9,100. And I'm basically just pressing
F9 to get it right back. So 200, so I was at 90, like so. And now we should end up
with something like this. And it's looking
fairly, fairly complex. And they're all
meeting in the middle. And he's looking
really, really nice. Alright, so now we've just
got the outer ring left. So let's put it
back to one again. So with the last one, let's go a little bit nuts with
this one as well. So what we'll do is
we'll grab this one, will basically press
location, rotation and scale. And then what we're
gonna do is I'm going to rotate it by, let's say our X 90. So let's rotate it there. In fact, no, I don't. I need to put on 51st, so I'm 50 and then our X 90 and then 191 fifth dy x 90, and finally back to 290. Alright, now let's come
back to the 5D Mark. And what we'll do is we'll also spin it a different
way on this one. So what we'll do is
we'll press all why 90. So no, yeah. Oh, why 90? 90 will spin it that way. Then we'll come to the 100 mark. And what we can't do here
is to repress all why you'll see those just going to spin it on there so we
don't really want that. So what I wanna do is all x 90. And then what will
happen is we'll have this feeding into this one and we don't really
want that either. So all I'm going to do, we're going to come
back to one-fifth. I'm going to put it on all why? 90, like so. And then it should move like so. And the last thing I'm
going to do is I'm going to right-click on here,
interpolation mode. I'm going to grab them
all actually impress a Right-click
interpolation mode. And let's put it on bezier, just make sure because
then what we'll do is we'll smooth everything out. So this is going to be
a bit erotic, this one, but it's going to
be smoothed out because of the
interpolation mode. So now if we go back, hit Spacebar, and there we go. And you can see it's following
on after each other. It's kind of erratic. This outer ring, which is
exactly what I'm looking for. Like so, alright, so now
let's actually come up, put this onto object mode. Let's hide these other way. First of all, I
just want to make sure it all moves with it. I'm just doing the last
check before I do anything, I'm just going to grab this one, making sure that
all moves with it. And the other thing is,
we could make sure that the whole of this moves with this because there's no
point just moving this. So what we'll do is
before finishing will actually come back to edit mode. We'll press tab, we'll
come back to our globe. We'll go over to here, will come to our route. Then I'm going to press Tab among gonna do is I'm
going to grab the whole of this part and then
I'm going to set this to weight of 100 light. So now if I press tab, come back to my pose mode. So I'm going to grab my
bones back to my pose mode. And now for grab this, it
should move the whole thing. So I should theoretically
be able to put this here or over here. And it also carries
on moving like so. And then it should
be able to place Alt G and put it right back
to the beginning again. Alright, so now let's actually, you can, That's exactly
what I've worried about. You can see because
I've got this on, it's actually moved
it over there. I'm just going to
click that off, delete these out the way, and then I'm just going to press Alt G and just put it back. And now it should just
move us as intended. Alright, so now let's
come up to object mode. I'm going to hide
these out the way, so I add all the bones. And this is what you should
be left with a really, really nice rotating globe. All right, everyone, So
that is that part done. So you can see now how we've
brought up the complexity of actually adding bones and the complexity of moving bones around them,
things like that. So that is basically
that actual part of the course done
on the next one, what we're going to look
at is our animated face. This will be a shorter lesson. We're going to end it here
because that one is a little bit different from oldest stuff we've been doing before. All right, everyone, so
I hope you enjoyed that and I'll see you on the
next one. Thanks a lot. Bye bye.
12. Fish Swim Motion: Welcome back everyone to
the ultimate guide to Blender 3D rigging
and animation. So we finished up on our globe. And the next one we're
going to come to is our animator fish. So let's close
that out and let's bring in our animates fish. Now within this scene, you can see that we
have some water. We have on beautiful
base and some, some stonework and
things like that. And we've also got
some lilies and things just to make
a really nice scene. Alright, so what we want
to do is we basically want this fish to be in this part of the pond and swimming
around and we want it to look to be
swimming in a natural way. So you could use this on any fish kind of
things that you have. You can use it on certain
types of animals. You can use these techniques
for even birds and things that are flying
around or even butterflies. So let's get started. So the first thing I'm going to do is I'm actually going to bring in a curve and
set that up for me. So the first thing, let's
press Shift a and we'll come down and we'll
bring in a circle. Then I'm going to press seven. I'm going to go over the top. And I'm just going
to first of all, position my circle
exactly where I wanted. The thing is it needs
to be under the water, of course, around about there. We can move this up and down once we've actually
got our fish in there. But I think something like
that debt is about right. Then what I'm going to do
is I'm going to press Tab. I want to press a to make
sure I've grabbed all of these actual vertices here. I'm going to right-click and I'm going to do is sub-divide. Alright, now I'm
going to do is I'm actually going to
pull these over. So this is basically going
to be the path full of fish. So I'm going to do is
I'm going to come in, grab this here and
while I'm over the top, so I'll press seven,
scroll to the top. I want to press G and you'll find them that you
should be able to move that out in a nice,
smooth actual way. So we're going to move
it out over to here. And what you don't
want to have happen. I'm with when the fish is like swim around or
anything like that, you really don't want it to
have too much of a gradient, so you don't want it to
be really, really sharp. So you can see this one here. It's a little bit sharp, so I'm going to actually
try and smooth it off. Now if you're having
problems moving it off, like so, just come in, grab the, both the vertices
that you want to, where you want it smooth enough, right-click and
click sub-divide. And then what you can do
is you can come in then and just smooth it off
a little bit like so. So now you can see it's a
really, really nice curve. It's going under the actual lily pads
and things like that. Alright, so that's
the actual curve. Actually Don ready for
our fish to follow that. Now we're gonna do is
we're going to actually come to our fish and we're going to add in a displacement because we've displacement, you actually can
animate things like fire or fish or birds or
marks and things like that. We can actually use
the displacement to actually animate something. So what I'm going to do
is I'm going to come to our little spanner here,
adding a modifier. And we're going to
use displays like so. Alright, and you'll
see at the moment, it's made him kind of weird, but don't worry, because
we're going to fix that. So next of all,
what we want to do is I want to put it onto knew. Then what I want to
do is rename this, so I want to call it
fish, swim large. Now the reason I'm calling it large is because you
can actually add, you can stack displacements. So in other words, you can have like large movements
within the fish, but then you could
also have very tiny fast movements
within the fish. It all depends really
what you want. So as long as you've
named this fish large, when we come to our texture map, which is over here, you will see that
we've got fish large if we bring in
another displacement. So if we add in
another displacement and call that something else, it will appear in here. So you can actually alter them buggy and
say at the moment we've got a flame in there,
don't worry about that. So now I want to do is I
want to put this onto Cloud. So we're looking for the
one that says clouds, and you'll see it
goes like that. And the reason is
because the scale of this at the moment is
way, way too small. So this displacement
is actually working, kind of go in on the black and white within
this actual image. If I turn this up to
something like 1.66, you will see now that our
fish is not looking right, but he's looking certainly better than what
it did do before. Now the reason he looks more
like a Gopi than a fish, or which is a fish bowl is much smaller fish is
because we need to change the coordinates if we put the coordinates on
global instead, and let's set the direction
something like y. Now you'll see we've
got our fish back. So what did we actually do that? Well now, if we actually
drag him along, you will see that
there's a very, very tiny movement of them actually swimming
side-to-side. That is exactly what we want. Now of course as well,
you can mess around with our actual textures. So you might want to try
some of these textures out, but I find for fish, especially cloud seems
to be the best one. Now we're going to go in here
and I'll change a few of these once we actually
get this fishing. So the thing is now we
need to actually have him swimming around this
actual pond here. So what I'm going to do is
I'm going to grab my fish. And I'm going to in fact,
first of all, actually, I'm going to, I'm going to grab the Walter and I'm going
to hide it out of the way. Then I'm going to come
in to where my actual Half is or a curve, what we're going to
turn into a pub. And I just need to make
sure that the fish, he's not actually
going to be going through this bit of mod here. So what I'll do is I'll grab it. I'll press seven to
go over the top, and then I'll press G and
I'll just move it out there so he's not going to
actually go through them, just making sure that
I'm happy with it. And then once I'm
happy with it now, if you come over to
the right-hand side, you will see that you
have the curve option. But if you scroll down, you'll actually see
that you've got one that says path animation. Now at the moment
you can see that this is over so many frames, so 100 frames, in other words, we PowerPoints on here. It would go around this hundred frames, so
we want this higher. So let's put it on
something like 300. And let's also set the n
value of our actual timeframe to 300 as well to match up like so now we want to put
off fish against this. So I'm going to grab this, I'm going to grab the actual
path pressing Control P. And we have one that
says follow pop. The moment you click that arm, you will see that
you have a line now to your actual fish. And if I press Space-bar, you'll see that the fish
is trying to follow it, albeit it's in the wrong way. It doesn't look like it's
doing anything right now. Now what we need to do now
is we need to put this back to one and we need to
reset this fish to here. So I'm going to come
into my actual curve. I'm going to grab
this point here. I want to press Shift
S cursor to select it. And then what I'm going to
do is I'm going to grab my fish and I'm going
to press Shift S, and I'm going to pick
selection to cursor. Now all fish should
follow this around. Now we have a few problems here. First of all, he's going
to be going the wrong way. So we need to spinning around. So I'm going to do
is I'm going to try now lining up with
the actual curve. So if I press Alt and said, Let's lie anymore with
the curve like so. Now when we press Space bar, we can see that it's following
that curve, like so. And he's actually swimming
around, as you can see, if I double tap the a now
you can see it's kind of got that beautiful fish
movement as he goes round. Now the thing is, when you're
doing something like this, it's sometimes a bit bare. If you make him a little bit smaller because then
they actual turns aren't as obvious
as you can see now swimming in a much,
much better way, but you can see why
he was reluctant as well to make it such a sharp
turn because you really, really don't want
sharp turns with this. Now then let's discuss
what we can actually do to make him swim a
little bit more. So first of all, we
can come down to our actual strength
of our displacement. If we put this on, let's
say something like 50, you'll see that it's
really, really crazy. But if we only put
it up slightly, so one point to
something like that, it does make the actual action of the fish much, much more. And I can see swing around. Now the other thing is, I think actually with this and eating something a
little bit slower. So I'm going to do is I'm going
to come back to my curve. I'm going to go over
to my curve options. And what I'm going to do is
I'm going to put this on 400. And then one wins do is change the timeline to also be on 400. And now you'll see
is swimming much, much slower and he's looking
a lot more realistic. Now the other thing
is that we can do is we can grab our fish. I can press shift D. I can make it much, much smaller this fish, make sure it's relatively close, like so something like that. And then what I can do
is I can come over back to my modifies tab and
I can change this to, let's say 1.4,
something like that. Then what I can do is now
if I press space bar, you'll see that these facial though they actually
follow each other, they actually move
in a different way. So this one will be moving more because if we click
on this page, you'll see this is still set 1.2 and this fish is set at 1.4. Again, the only thing
you can't do though, is the actual texture
to the moment you change this texture,
it will change. So if I put this on nought 0.1, it will change both of them. As you can see now
the boat actually moving in that certain way. Now, the other thing
is you need to be careful that you don't set this to hide so
you're not getting a lot of movement or
anything like that. Now if we bring back haul water, so if I press Alt H, In fact, I will go in and just
hide this out of the way. So if I press H hide
out of the way, and now we can look at our fish swimming around our actual pond. And you can see now they
look pretty realistic. And obviously you can
have a shoal of fish as well in there or
something like that. Alright, so that's a
really easy way of animating fish with
displacements. So we've learned
another way of actually animating something based on an actual curve
which we turned into a path and also based
on displacement. So you can see now it's a
real part of the kit of the whole kind of
Blender animations. Alright, I hope you enjoyed that and I'll see you on the
next one, everyone. Thanks a lot. Bye bye.
13. Stuffed Animal Body Morphing: Welcome back everyone
to the ultimate guide to blend the three
rigging and animation. And this is where
we left off with our fish that's now done. So if we close that
one down and let's open up the next one
which is called molten. Now what we want to do with this one is we actually
wanted to take these cute little guys and actually turn them
from one to the other. So into a verbal and
then into a sheep, from a sheep to a favorable
to an actual rabbits. So that's the idea here. And this actually then will give you the skills to actually go ahead and modify things
like barrels into crate. So 0, whatever, wherever your
imagination mine take you. Alright, so the first
thing I want to do then is just go through
actually the shader. So if we come over to the
shading panel, the issue, what you're going to have with
these is you need to make sure that you shader
is set up correctly. Now, if you look at this, it might look complicated, but as soon as I go through, you'll actually
understand what it is. It's basically just for shaders brought into a mix shader. So these two are mixed shaders. One is the bunny and the sheep. So what that allows us to
do is swap between them. So for instance, if I come to
this one and bring this up, you'll see actually
changes over to the sheep. While this is allows us to do
then is as we're more thin, we're also able to change
the textures on the fly at the same time because you can actually animate
textures as well. Now that's explained, we will be coming in and covering this a lot more once we've
actually finished the molten, but for now, let's
actually do them open. So the first thing
I'm gonna do is I'm going to bring in a sphere. I'm going to make sure that each of these has
the orientation in the center which shows
Should I want to press Shift S cursor selected, and I'm going to
press Shift day. I'm bringing a UV sphere. I'm going to make it a
little bit smaller, like so. And what I'm also going to
do this, use these spheres. I'm going to actually
sub-divide it. So I'm gonna come over
to my modifies tab. I'm going to come down to
where it says subdivision. I'm going to bring you 12 and then one wins
do is I'm going to press Control J just to actually apply that
subdivision on there. And then I'm going to
right-click and shapes move. Alright, so for now, we've actually got a sphere in. We've got our rabbit and
we've got our shapes. So now let's actually come in and think about
morphing them. The first thing I
want to do though, is actually bring our
sheep over to our robots. So while we've got
this cursor here, I'm just going to press
Shift S selection cursor, and then we go, we've got our
sheep over there as well. I'm Jules going to pull him
down just a little bit, just so it fits a little bit
there within there as well. The next thing I'm going to
do is I'm actually going to join the sheep and
the rabbit together, but I'm going to grab
the sheet first, then the rabbit because that actually has the
right material on. And then I'm just going to
press Control J, like so. Now I'm just going to come over. In fact, I won't do that,
but I need to actually take off this bottom
actual material because we only want one material on here because
then that will make it much, much easier for
us to wait width. Alright, now I want
to do is we want to come over and now
we've joined them all, come to our modifies top. And what we're gonna do is
going to add in a shrink wrap. So come down to where
it says shrink wrap, bring that in and the target wants to
be the sexual sphere. So the moment I click
on this sphere, you'll see what happens. Everything disappears. Now if I hide the sphere, you'll see, whoops, I
didn't hide the sphere. Let me just grab the sphere
by hide it out of the way. Here is our actual theme and our Bonnie turned
into an actual bowl, which looks kind of cool. Alright, so what I'm gonna
do now is I'm going to click on My sheep and my bunny. And then what I'm going to do
is I'm going to come over, click this little down arrow. What you wanna do is
you want to apply it as an actual shape case. So apply a shape k. Now I'm gonna do is I'm
just going to press Alt H. And I'm actually, you can see that we've got this, this line appeared here. And the reason for that is
because it's a Bezier and it wants put in him with
our animated fish like so. That's actually hit another way. Now this sphere here, we
can actually delete it. We don't actually need anymore. And you will now be able to
come to your sheep and rub it and come down to
where this is here. So this shape per key here. And then what you
should be able to do now is if I scroll down, you can see I've clicked
on my shrink wrap, your love, the shrink wrap
in with the shape keys. The moment I bring this up, you can see that the
bot actually start turning into a lovely sphere. Now, I want to do is I want to add another couple
of shape keys. So the first one I'm going
to do add ion is plus, I'm going to call this
rabbit or Bonnie, whichever one you want
to call it, like so. And then what I'm
going to do now is I'm going to press Tab, come to my rabbit,
which is ESR here. And then one wins do is
I'm gonna make him really, really small without proportional editing
on really small. So it disappears into
the actual sheep. I'm also going to pull
him back a little bit. So he's actually
really in there so we can't actually see him at all. Then we're going to do
is I'm going to press tab and you'll see actually appears the
moment then I put this up, you'll see actually disappears
and reappears like so. Okay, so now we're going to click on one more
and you guessed it, we're going to call
this one sheep. And we're gonna do the
same thing with this guy. So I'm going to grab
the sheep this time. I'm going to press S, pull
them in like so rarely small. And then one we're going
to do is I'm just going to pull him back into place. So he's actually in
our rub it so you can't see the sheep,
all the rabbit. The moment I actually click
the tab button again, you'll see E appears and
then he disappears, like so. Alright, so now we're ready to actually start animating this. So if I come over
and put this on one, we can actually
start with there. Let's actually bring
down our sheep. So I'm going to
come to our sheep. I'm going to bring him
all the way in like so. And then what I'm going to
do now is I'm going to make basically a keyframe for each
of these overcome to this. I can value this, I can value over here. And all I'm doing is
pressing the eyeball on down all of these. Now at the moment we've got
it over 400, which is fine. We will shorten it
down as we go on. But the first one I'm
going to do is 100. Now what I wanted to do
is I want him to turn into a third ball and then swap with the sheep
and turn into the sheep. So that's what we're
trying to do here. So what I need to do
is I need to come to the shrink wrap and I need to bring that down like so. And then I need to
come to my sheep and I need to bring
him down like so. And you should end up
with something like this, which is a mixture of the
rabbit, the actual sheep. So all I'm gonna do now is
we're going to press i, i, i an eye on all of those. And then what I'm going
to do is I'm going to come to the 200. Like so. Now I'm going to
do is I'm going to turn this back into the sheep. So the first thing we're
gonna do is I'm going to bring this up. Like so. No, not in the sheep, sorry, I'm going to
bring that down. I'm going to bring
the shrink wrap down. So the shrink wrap down like so. And then the rabbit, I'm also going to
bring up like so. And now I should be
able to press i, i, i, i, now let's see what
that actually looks like. So you can see those molten
the rabbit to the sheep. Alright, so I hope
you have to relax. It's pretty nice, but we
can do better than that. So what we're gonna do
now is the other way. So we're going to move
them back into a rabbit. Now, I'm not sure. I think we might be
able to grab this one. I'm bringing it up, so let's
see if we can actually bring that up and put it on 300. Let's just have a
look what that does. I think that'll work
and then I just need to molt embark into the rabbit. Now if I bring this
one, press shift D, bring it all the
way up to 400 gold than mole back into the rabbit. Like so. So we've got rabbit, sheep. There we go. Really,
really nice. Now I'm happy with that. The one thing I do need to
do now is I need to go in now and alter the basic
textures of this. So what I'm going
to do is I'm gonna put this on one again. I'm gonna go to my
shading panel now. I'm going to open that up. While I'm going to do
is I'm also going to delete this actual material off because this was just really to show you what the
sheep should look like. So if I minuses off now, we should just be
left with this. Alright, so you can see on mine, I've got my timeline over here. If you've not very
timeline on here, just click on here and put it on your actual
timeline, like so. And then what you can
do is you can lift this up if you needed to. If you need to view
what you're looking at, I don t think actually
need that so so far, so I'm just going
to pull it down. I'm just going to zoom
in a little bit to it. Alright, so what we wanna do is we want to put this basically, well, first of all, I want
to make this smaller. So I'm gonna do is I'm
going to grab them all with a I want to bring them down to
around about 200, I think something
something around 200. So I'm just going to zoom in, make sure that these are on 200. So for presses and pull
them out, and there you go. So now we can actually
set the end to 100, and now you'll find that that much should
be much quicker. Like so. Alright, lets just to make it
a little bit easier for us. So what I'm going to do
now is at the moment, I'm going to keep this on like
that, basically like this. So I'm going to do
is I'm going to come in and I'm gonna go
to each of these. So I've got these facts here. I'm going to press I, I and I. And then I'm gonna come back to I think I'm going to
leave that on there. I'm going to put
it on one again. I'm going to press I and I. And then what I'm going
to do is I'm going to come to the 50 mark. So just by one. And I want to
change it basically to the third bowl of the sheep. So what I'm going to
do is I'm going to bring this one up. There you go. There's our sheep
and I'm not sure. Yeah, I'm going to
leave that one as is. Yeah, that's the sheep. So I'm going to bring it
all the way up like so then when you press i i i and then one month to do
now is I'm gonna go to 55. Like so what I want to do is I want to basically
have my sheep in there. So I want this down.
Let's have a look. I want it on. I'm thinking I want it on that that's
why I want it on. And then I want to turn that
up to the actual sheep. Yeah, that's how I want it. So i i, i now, let's see what that actually
looks like in real-time. So it should turn it
into the sheep, like so. And now we want to turn it
back into the actual rabbits. So on here, It's
absolutely fine. We don't need to
change anything at all on here because we're
already at the sheep. So now it wants to do
is we want to come to 145 and basically just
swap them over 145. And water wants to do at
this point is click I, I and I, and then one-fifth, I'm going to put this on 150. A Beta wants to turn
it the other way now. So what I'm going to do
is I'm going to first of all put this to the table. I'm going to bring this verbal
down to wear blue then. And then one way to do is
I'm going to click i, i, i. And then finally I'm
gonna go to 155. I basically want to turn this from the third
ball to the rabbit. So I'm going to click
that up, lake that down. I, I, I like so. And now we should note with
its swapping between them. Both like so. Rarely really nice way of
actually morphine things. I'm just going to check
actually in C if I grabbed them all right-click and put
it onto where Bezier. I just want to see if actually
that makes any difference. So I'm just going to see if
it makes it a bit smoother. Okay, So I'm going to actually try and put it onto linear. Yeah, that's
definitely altered it. So I just want to see if
that's actually smooth it. I'm not sure which
one I like best, but either way, they
still pretty nice. Alright, so basically
that covers the whole of the
actual morphine. So I'm just going to
set this back to once. So it just looks nice
when we actually open it. And then what we'll do now
is we'll close that down. And on the next one we're
actually going to be working on tank tracks. So I hope you enjoyed that. I hope you got a lot out of it and I'll see you on
the next one, everyone. Thanks a lot. Bye bye.
14. 3D Tank Track Curvature Setup: Welcome back everyone to
the ultimate guide to Blender 3D rigging
and animation. And that's why I left it off. Now, let's close the morphing down and come to
our tank tracks. And you'll see that
when you open up this one that we've got all of our terrain here where we're going to make
our tank tracks. So go over. This was done just using a
displacement on a plane. It's actually important how bumpy you actually have
this because that then will have an effect on how much
your tank tracks actually do dig into the sand or whatever terrain
you're looking at. Because of course it's
based on vertices. So in other words,
this is trying to stick to this terrain. So what I'm going to
do first of all is I'm just going to show
you how that works. So if we come to our
actual wheel here, we've got tank trucks
going around here. So if it comes to this, well,
I'm just going to press Shift D and just bring
it out a little bit. And then what I'm
going to do is I'm jaws now come in to show you that this point
here is very important. So you need to have your
orientation down the bomb. The way you do that is
you just press Tab, you go underneath it, grab the edge there, and then all you would do is
Shift S goes to selected, and then you just right-click
origin to 3D cursor. So then you can set up there. Alright, so how do we do? Well, what we do is we
come to our actual wheel. We're going to come to over
here and you'll see one that's constraints and
object constraint. And the one you're going to
put on is a shrink wrap. And they actual
target is of course going to be our actual terrain. And then you, what you wanna
do is you want to actually change this where it says nearest surface point and change it to target
normal project. And the reason I changed that is because then I have
actually some controls. So now if I move my wheel out, you will see that if I move
my wheel up and down now, like so, you can see here where it's actually
going into the sun. So if I press dark,
just zoom in. So now what you can do is
you can actually press tab. You can grab the whole thing. And when I bring
the whole thing, now you'll see that this
still won't change. So if I bring it
up in edit mode, you'll see that our orientation stays there the moment
I press tab now, it will be appearance
that now you will see that the wheels still
tries and follows this, but it's not actually stuck
in the ground like that. Which means now we can bring
this down and actually control how far we actually want that sat on
top of the ground. So that's why that's
so important. Alright, so we've got all
we'll basically set up, we're happy with where it is. The other thing of course
to remember is that your tank tracks are going
to be underneath here, so you need to give it a
little bit of leeway on there. Now I'm going to do is
I'm basically going to crop close this off. I'm going to bring my wheel back then and just put it into place. So now we know how that works. We've got our tank track
here, as you can see, I'm going to do now
is just going to delete this one, delete this. You can see now when
I click on my wheel, my orientation is there. And all I'm gonna do is I'm basically going to
make another wheel. I'm going to press Shift D. And you could make five wheels and have
it as a tank travel. What we'll do is we'll
make it a little bit different just to show you
how this actually works. So if I press seven now
to go over the top, what I'm gonna do is I'm just
going to press S and why bring this in so it's the same
size as the other one and you basically you want it
as close as you can so you don't really want
a big gap in here, so you don't want this overhear
or something like that. And the reason is because
obviously they wouldn't work. Tank tracks simply have
to have something that actually the tank tract
is able to rest on. So it's very important
that we put them relatively close
together, like so. Alright, so I'm not
going to join them up. All I'm going to do is I'm just going to pull
them over here. And the reason I'm
going to do that is because then if I press one, I can actually see
what I'm doing. Now I'm going to do
is I'm going to press Shift S cursor to select it. And of course it's
going to put in-between both of these orientations here. And then I'm going
to bring in a curve, and it's going to be a circle. Now I'm going to
spin that round. So our X 90 spin it round and I'm going to
lift it up like so. Now the other thing is
when I brought a circling, you will know that this circle will only have four points. So if I come to this circle
and press the Tab button, you can see it's only
got four points. Now you might want to
work with these POB. What I find is just to grab
the whole thing, right-click. And then all I'm going to
do is sub-divide like so. And I find that just much
easier to work with. Now what I also
find easier to work with those voids when
I grabbed my circle. Now I'm going to bring
down proportional editing. And then we're going to do
is press Shift Spacebar. And then I've got my
move tool and I'm able to move this into place. So the first thing
I tend to do it, I tend to just get this
one into place and then I get this one in
its place, like so. And then a think about how to
kind of move these around. Now what I tend to do is I will come in and just
delete these off. So grab both of these
vertices oppressively verses and you can see already
that makes it much easier. Now, tiny proportional
editing off and what we can do now is we have a lot more finesse
and control over this. So what you wanna do is
you want to get this as close as possible. While not as close as
possible, you want to, you want to leave a band
around there so that you can actually track,
can actually go in there. Alright, then what I'm going
to do is pull this one up. I'm going to bring it down then. Like so you can see now we've
got a nice flow of jaws, wants to probably come
up a little bit more. So it's got that nice flow. Now, let's work on
this one as well. So we're going to get a
nice flow on this one. You can see that's
looking quite nice. And then on this one what I'll
do is I'll just delete it. So if I delete, that says, uh, now you can see we've
nearly got that flat because we want this
to be relatively flat, because our wheels
are relatively flat. So if I grab, let's say this
one now and pull this up, you can see now I can
actually get that to be relatively flat so I can
bring this over like so. And then I can also
bring this one up. There we go. Now
we can see we're getting somewhere, like so. And let's bring it
down a little bit. Let's bring it across. Let's have a look at that. And yeah, that's should do. We don't want to play around
with this for too long. So I'm just trying to show
you how to actually do this. Alright, so then once
you've got this, we've got basically
a, the wheels, we've got our circle that our tank tracks
are going to follow. So now we need to do is we
need to actually ports on. I think actually, yeah, we can bring it over
to our actual sun. So I'm just going to bring it over to my son here
when I press down again just to zoom
in and then I'm just going to, I
think put it there. What we'll do now
is now a great old. I'll press Shift S Again. I'm gonna do cursor
to select it like so what I'm going to bring in
now is an empty, so shift a, bring in a empty now empties
if I press one are really, really important because
what it enables it to do is it enables things
to follow along. So you can actually do
a lot of animations following an actual empty. And it's called an
empty because it will not appear in the render. So for these tank tracks, we're going to
actually have them. You could have them following a cube even but it's
better to use an empty because then
it's invisible to the render and you don't
actually have to worry about it. So what we're gonna
do now is if I grab both of these and I attached
them to me, I'm too. So if I grabbed my empty
last, so this empty here, press Control P and
come down to object. And now you can see
we've got some lands. Now wherever I move
that empty, of course, these actual wheels are
going to go along with it. Next of all, what I
wanna do now is I want to put these wheels down
to the actual floor. So the way I'm going to do
that, as we've talked about, we've come to Object
Constraint, go to shrink wrap. And what we're gonna do is we're going to put this
down to the last one, which is target
normal projection. And then I'm going to
put the target onto this actual floor,
which is the ground. Same on the other
one. Don't worry if you if you curves over there, it doesn't really matter because we're going to solve
that in a minute. So shrink wrap one
target floor, like so. Alright, so now let's
pull this circle down. So if I press one, I
wanted to pull it down. I'm going to press Z just to make sure that I'm
rounding again. So I'm going to pull it
all the way down, like so. Again, solid. And there we go.
Now that's looking pretty nice. We can
bring them down. We've got control over this
if we need to as we know. And now I want to
do is want to put the circle first of all, more in the middle
because you can see these have kind of
moved out a little bit. So let's pull this over here. Like so. And then you go, now you
circles more in the middle. Now what you need to
do is you need to grab your thirst wheel, grab your actual circle. So we shift selecting
this circle and then we're
going to press Tab. And what I'm gonna do now
is I'm going to attach these three points here
to match your wheel. So if I grab these three points, so this one down here, and all I'm gonna do
then is press Control H. And you're going to see
one that says hook, selected, hope to
selected object. Click that on. And then you're going
to press top grubby. Next we'll grab the
actual circle press tab, and we're going to
grab these two. Now, what we're gonna do
is exactly the same thing. So Control H to selected
objects like so. Alright, so now what happens
is if I move this empty, you should see that the
actual tank tracks and the wheels all move along
independently like so. That's exactly what
we want to do here. Alright, so what
we'll do then on the next lesson
is we'll actually come and get our tank
tracks actually on here. And then it should
all move around together over this terrain. All right, everyone,
so I hope you enjoyed that and I'll
see you on the next one. Thanks a lot. Bye bye.
15. Animating Tank Track on 3D Terrain: Welcome back everyone
to the ultimate guide to blend the 3D
rigging and animation. And this is where we left off. Alright, so let's come out and grab our actual tank tracks. I'm going to move
those over like so. We're going to have
to mess around with these a little bit. The other thing I'm going
to do is if I press tab, you will see that I have
subdivided my tank tracks up. And the reason I've
done that is because obviously going to be bending
around and if you don't, they're actually going to end
up with a lot of stretching and that might not be
something you actually want. Alright, so what I'm going to do now is I'm going to actually bring in an array modifier
on my tank track. So I'm also going to press Control a Ultron Psalms right-click Set origins
geometry and then add, sorry not unconstrained,
go to my modifies tab, add in an array. And then we're going
to do is I'm going to put my array to fit, curve, fit curve like so. And the curve of
course is going to be our actual circle like so. Now the next thing that we
want to do is we want to actually bring in
another modifier, which will be a curve modifier. So come down bringing the curve and the curve of course is going to be our Bezier
curve, like so. And you can see already that
is looking pretty nice. Now, the thing is
you can see we've got some issues in here. One of them is that it's way, way too big at the moment. Now, we don't actually
want to shrink it. And what I wanna do is just
bring it down like so. And then what you'll find is
that actually goes around it like so we need to
move it over as well, of course, because it's
a little bit too far over and we might need to make it a little
bit smaller now. So if I bring it down, Joe's going to make
it a little bit smaller and just play around
with it a little bit, just getting it into
the right place. As you can see, that I'm
Joel is going to pull it out just a little bit. Now you are free to
move your curves. So if I come to my curve, for instance, and click
on my curve here, as you can see, we are free to actually bring
this in a little bit. Still. Don't worry about that. We are actually able to do that. So you can make it fit a little bit better
if you need to. And the other thing
is now you can see that we're not
quite fitting this. And the reason is not that in the actual curve
of the moment is because all I need to do now because of move this around. It's press Control a all transforms right-click
origin geometry, and now it will
actually fit perfectly. Okay, so there we go. Now if we want to move this, now if I move this,
for instance, it's not actually going
to do anything because the moment our actual curve isn't really moving with this, the only reason
the curves move in is because it's attached
to these wheels. So what you need
to do is instead is you need to grab your Bezier, you need to grab then your
empty press Control P, and then you're going
to click object. And what that's gonna
do now is it's going to parent or the actual Bezier, as you can see, to our tank
wheels and our actual curves. Now if I come to my
curve and I move it, you will see that we've got tank tracks that actually
move up and down. Now the problem we
can see is then moving the wrong way and that's not something that we want. So what I wanna do now is I just want to go into my curve. I want to press top. I want to press a. And the normal gonna do is right-click and
you're going to have one if you come down which
says switch directions. So just click that
on switch direction, press the Tab button, and now when I move them, everything should
move perfectly. Again, remember, you
have got control over how close to this law
that your tank tracks move. But that's in a nutshell. What we can do now is I can put this on one, for instance, so, and then press i
location rotation scale, and then that's probably
on 200, like so. And let's move it all the
way over here, like so. And then let's press i,
location rotation scale. And now let's go. And there you go, you
can see you've got moving tank tracks that move perfectly with
the actual terrain. You can see that as I said, if you train is really,
really jumps up, what will happen is the more wheels you've actually got in the mall tank like it is not wally for instance, the battery, it's actually going to
be at moving over things because each of these
wheels would be smaller and the level much more surface area that's connected
to the actual floor. All right, everyone, so
that's that one done. So what I want to do now is
I just want to tidy this up. I want to put this into
my actual tank tracks. I want to put my also my curve in there and just make sure
everything's in there. I just want to make
sure that it's still working which it is. And then more wants
to do is I want to close this down now. I want to open up now my
fire lights and Flickr, and this is what, this is the one that we will be doing
on the next lesson. I'm also going to
go up and save it. And basically I hope you
learned a lot from that. Tank tracks are quieter, complex is something
that we needed support in this actual guide. If it's going to
be a full course on animation and Reagan. Alright everyone,
I hope you enjoyed that and I'll see
you on the next one. Thanks a lot. Bye bye.
16. Materials and Nodes Introduction: Now before we actually
move on to our next bit, what I wanna do is I want
to play you a short video, because when we move on to
our fire and light flicker, you need to know a little bit
about materials and nodes. Now if you don't want to
know about fire and Flickr, then don't bother actually watching this and
just move on to Matson lights if that's
what you want to do and you can come back
later if you want to. But this then here
is the materials and maps introduction. So enjoy. Welcome everyone to this short introduction on important texture maps and creating materials
within Blender. Here will be going through
basic materials setups and easy ways to import your
texture maps or within blender. Then we'll be moving
on to an explanation of what maps do and
why they're important. So with all that said,
let's get started. So in this basic scene
that I've set up, you will see that I've got these three objects and
the role UV unwrapped. So now let's come to
our first object. And let's say we've
already marked all seems as you can see. Now let's come up to Edit. First of all, what we're
going to be bringing in is a add-on called
Node Wrangler. And this is going to
make it very easy to set up materials
within your scene. So let's come to edit,
come down to Preferences, come over to where
it says add-ons. And then we're going to
search for node N 0 D, E. And you'll see one
called Node Wrangler. Make sure that's ticked on. And then let's close this down. Now I want to do is actually
create our material. So if we come over to
the right-hand side, you'll see this little
football kind of icon. Let's click on the plus. And then what that actually does is create a new material. And let's click New
and give it a name. Let's call this would. Because I've already
created a wall. It will come up as one.001. If you've got a 001, it will come up as
wood.002 and so on. You'll notice as well that
this has come in as a principled BSD F. And this basically is the magical
node shader within blender that makes it easy to import all your maps
and things like that. So now we've got this. What we need to do now
is we need to head on over to our shading panel, which is this button here. Once in the shading panel, you'll see basic setup, same as what we had in
the modelling panel. And now if I zoom out
here a little bit, you'll see that we've actually
got a basic setup already. So we've got all
material output. And of course, this is where all the nodes end up in the end. Then we've got our principles, which is what I told you about, is the magic kind
of blend the node. And if we zoom in a little bit, you'll see we've got all of these things where it
can plug things in or we can mess around with these
without actual map plugged in. So now let's come and
click on our principal, BSD f, and what we're going
to press Control Shift and t. And that then will
open up the file of where you want to
actually find your map. So make sure you store them in a place where you know
where they are going, find them, and then you
should end up with five maps. Normally it's five maps. Actually you can download. One is the base color, the next one down is metallic. Next one down is roughness. The next one down is height. And then you've got normal. They're normally the
basic five maps. So now we need to do is
you need come to the first one and shift select
the bottom one, and then that'll
select them all. And then come over
to where it says principled texture sets
up and click down. And there you go. The vole actually come in. You'll notice blender is automatically set
everything up for us. This is part of what the
No granular actual dose. Now if we zoom in a little bit
so we can see what we did. And now we can actually
go through some of these nodes over here. So let's zoom into here as well. The first one we've got
is texture coordinates. Now, basically this node tells Blender whereabouts to place
this texture on this object. So you notice that the moment is basically clubbed
in from the UV. Now, if we quickly
just go over to the UV and I grabbed everything, you can see this is
our UV map and this is how basically this
texture is placed on this. So for instance,
you can see that this one has been turned round. So it's going the correct way. Now let's go back over
to our shading panel. And if we plug in the
generated instead to the vector, let it load up. And you'll see now that
blend is trying to generate how this texture is actually
gonna go onto this object. This is useful when you create textures within blender
itself without maps, but useless if you're actually
bringing in your own map. So let's put it back on UV. Next one across is
called mapping, and this basically is how this texture is mapped
onto this object. So you can see here that
we can actually move the location of our
actual texture. And this basically is kind
of moving the UV map. Now if we call me, can
also scale this up as well as you can see so you can
stay lit smaller and bigger. And it gives you
a lot of control within actually the shader, to mess around with the
scale and things like that. Normally, I would actually
do this in the UV map. But if there's any small
details that I want to make, a little bit smaller or
something like that. I will do it within the shader. Moving across, you can see that all of these nodes over here, which are our maps, are
plugged into our mapping node. So let's come to the first one. The first one is color. And basically down on the
right-hand side here, I'm going to be showing you
exactly what they mean. And then if you want
more information, you can go onto the blender
website and find all of the rest of the
information out about all of these maps that
we're talking about. So as I say, the first
one is the color. And if we unplugged that, it's basically
what we can see is it's just the base color. Now, sometimes you
will get colors where they come in with
ambient occlusion. And I'm going to talk about ambient occlusion just
in a few minutes. So if we plug this
in, we can see, we can actually
alter the color with other nodes that we can
kind of slide into here. So I'm quickly going
to show you that. So if we press Shift a, do a search and we'll
just bring in a gamma, which is going to lighten
or darken our actual color. Now, I've put that in,
then you can see if I bring that down,
I'll bring it up. I can make it much
darker and much lighter. So that's something that
we can actually do. And then Node Wrangler
enables us to bring in a new node and just
drop it in there. So what we do now, I'm
just going to delete that and I'm going
to plug that in now to go on to the
next map is metallic. So I'm just going to head
on over where I've actually brought in a metallic texture. So here we are in
our setup now with our actual and metal
texture and material. So if we zoom in now, we can see that we have the next one down which is metallic. And we can see that if we call them and actually
unplugged that, you'll see that not a lot
happens and this is because this metallic is very close LI based on the metallic
that's already there, which is zeros,
quite dull metal. Now if we come in and
we turn upon metallic, you can see that it goes really, really, really metallic like so. And you don't have
to actually use a map to make
something metallic, or you need to do is
turn off this metallic. Now normally when we're
doing things like using this slider
here and no map, even something is metallic. So if I turn this down or
it isn't like so we don't really have anything in-between when we don't actually
use an amount. So if we plug this
back in now to all metallic and let it load
open, There you go. Now the next one
down is roughness. Roughness is basically if you
think of a sheets of glass, when you look at it, it's
not completely see-through. You might have certain
scratches on there. You might have
things like smears, Han mark, things like that. And basically that is what
the roughness map doors, basically the roughness is
determined by this map. So if I am plugged this map, you can see we've got
a lot of the kind of shinier parts and
dollar parts on it. So let's unplug this
and then you'll see that it's all
one kind of shine. You can also see if I
come in and actually turn the rough and
assault alternate down. I can make something like ice or I can make
something very, very dull. And this is why we use
this map because it gives us a lot of control of how much smearing and things like that and makes it look
a lot more real estate. So now let's move over
back to our wood. And what we'll do
is now we'll come down and look for
all normal maps. So if I double tap
the eight quickly, that'll just highlight this. And then we can just
zoom in a little bit and look what this
normal mount bills. As you can see, the normal
map always plugs into a normal map node and then we can mess around
with the strength. So if I turn this
strength right, you can see now
we've got a lot more pushing through of
that actual texture. Now, just be very careful
when using this node. You can turn it up
too high and it will, it will look, it
won't look very real, in other words, so
try and just get it somewhere where you're
really happy with it and it still looks realistic. For instance, you do get some
wood which looks like this, where it's really kind of
elevated from the base. But I wouldn't go
again to high witness. Okay. So that's the
normal map. And now let's move to the
displacement map. For displacement map,
I'm actually going to bring in a new material now, so I'll head on
over to that one. So here we are with our
cobblestone texture, which we're going to use for
our displacement example. So what displacement does is it basically gives this texture. It basically pushes it out. It's like using tessellation, as you'll see shortly. Well, the one thing is if you're using this displacement map, you really need to, well, you really need
to know two things. First of all, it
doesn't work in EV. Second of all, it really needs a lot more geometry than what
you would normally have. So here we can see we've got a flat plane and we can see that they're
slightly pushed off. And you can still
see that this is a, basically a 3D texture. So how do we create
displacement on this? First of all, we're going to
do is you're going to come over to our little spanner. So first of all,
we're going to do, we're actually going to sub-divide this a
couple of times. So let's press tab and
what we're gonna do is right-click and sub-divide. Right-click sub-divide. And now we're going to
do is I'm going to press Tab and we're going to
bring in and modify it. And what we've done
now is basically increased the geometry a lot. So let's come over
to add, modify it. You're going to come
down to where it says multi-resolution. And when a sub-divide,
sub-divide. And again and again four times. And now if you press Tab,
you'll see that it's still actually looks like this. So you can't really see all
the subdivisions on here. But when we finish this, I'll actually apply it and then you'll be able to see them. Next of all, what we
need to do now is we need to put this on cycles. So if we come over
here and we change it from EV and we put it on cycles. And then what we can
do is we can come down now to our material, which is this button here. Scroll down and you'll see
one where it says Settings. And under settings you'll
have one that says surface. And what you need to
do now is change this. It should say Bump only, change this to
displacement and bomb. Once you've done that, then
all you need to do is go to your cycles shader,
which is this bone here. And there we go. You can see now how actually
realistic that looks. Now you can actually
mess around with these. So it can really, really bump up the scale as you can see. And we can also change
the mid-level, like so. So it really pushed it out or you can rarely
pull it in as well. Okay. So that's a bit of
an explanation on there. Now as I said, I
will move over now to the actual Spanner
where a modifiers on, I'm going to press Control a to apply that, I
want to press Tab. Now you can see just how much geometry that actually taught. Now you can get away with a
little bit less geometry. So if I press Control
Z and just bring it back and just
bring it down one. So if I bring this
down one, like so, and you can see that
it's still looking quite good for if we put the viewport
level up a little bit, it's nowhere near
the level of this, so you don't put it on three, press Control, press
the Tab button. You can see now there's
not so much geometry, but we're still getting
a pretty decent effect. Okay, So the last
thing I wanted to show you is if we come back to our material shader and we put this back on EVs overcome
to our computer. I can't put it back on EV. And now we'll just
scroll around and zoom in to this word. Now what does ambient
occlusion do? So I'll pull a brief
explanation down the right-hand side of what actually ambient occlusion is. What we can actually enable it by coming over to our computer, putting this on EV, and you'll have one that says
ambient occlusion. When you click this
on, you can see already that we really, really get much more
shading on here, much more realism and
things like that. Now as I said, you can get
textures where they are. Ambient occlusion
already built in, but I find actually
doing it this way generally gives
you a better result. Now the other thing you can do is you can mess around with the ambient occlusion and
really bring it up or down, mess around with factors
and things like that. I'm really get the
shadows that you really want on the surface
of the actual object. So that concludes
the material and texture introduction
part of the course. And I hope you all got a
lot out of it and have a much better understanding of maps and materials
within blender. So with that said, let's
get on with the show. Welcome back everyone. I
hope you enjoyed that. And what we'll do actually on the next lesson now
is we'll actually start on our fire and light flicker, and I'll
see you on the next. And everyone, thanks a lot. Bye.
17. Creating Stylized Flame Transparency: Now the thing is
I've got this set up just so you can see what
it's actually doing. So if I press the space
bar at the moment, you will see again it's
based on an empty. And you can see that
this kind of wobbles. Now, the good thing is here, if we come to our
materials panel, press the space-bar, you can see exactly what
we're doing here. See if, you can see, we've basically got three
lots of colors in here. And if we also put this
onto our EV render, you can see that
we've actually got some glow here if we come in and we actually put
this onto blue, like so. Now you can see we've got
some real glow there. Now you can see the one
thing missing on here is where the light is
actually not flickering. I'm going to actually
do that as well. So this is basically
set up so you can see if you actually want to do this part of the
actual cost because we're actually just going to
quickly recreate this. It will only take a lesson
or two, so don't worry, it's not a long process
or anything like that, but it is used in a few of the nodes to actually get the
materials and, and things. But I feel like it's something
that we need to cover. All right, everyone, so
let's get started with that. So the first thing we want to
do is I'm just going to put this back onto my object mode. I want to come in, I'm going
to delete everything out. I'm hoping that that
Yeah, there we go. I left my actual empty in here, so I've got flame
driver, don't want that. Now, Let's pull this
cursor in the center. So I'm going to
press Shift S cursor to select it right
in the center. And then what I'm going
to do is I'm going to press Shift a and we're going to bring in a ecosphere. So if you come down, you've
got one that says ecosphere, like so I'm going to leave it
pretty much the size it is. We don't need to
change or anything like that because not actually working to a scale just to
show you what we're doing. Obviously, when you've got a Bezier or a torch or
something like that, you will need to scale it up. So now I'm going to do
is I'm going to come in and I'm going
to grab the very, very top of it like so. And then one Wednesday
is going to pull up proportional editing on presses, one on the act, on the number pad and then
just bring it up like so, make it a little bit smaller. And there we go, you
can see we've got that nice flame actual shape. Now let's press the Tab button. And what we're going
to do is we're going to control a or transforms. Right-click Set
origins, Geometry. Right-click. What we're going to do is shade smooth and then I'm going to bring in a subdivision surface. So add modifier, calm
down subdivision surface and then put it onto
or something like that. Now as we've done before, we're actually
going to bring now in a displacement modifier. So add modifier. Let's bring in a displays
and we'll click New. And this time we'll just
simply call it flame. Like so. Don't worry if yours
has gone like that, We will fix it like
we did with the fish. Sometimes makes it
look a bit weird. And now we're, the actual
first part of the magic happens is the
actual coordinates. If we put the coordinates
onto actual object, and then if we bring in another empty Soviet press Shift a, bring in a empty. So I'll bring in an empty, like so then what we're gonna do is we're
going to actually move this up to
something like here. I'm going to grab
then my actual flame. I'm going to put
the empty, sorry, the objects as my actual empty. Now if I move this empty opened down, nothing
happened yet. And that's just simply
because we haven't actually put in
our displacement. So what are we going to
displace this width? What else wants to
do is I want to actually put both the
ecosphere and they empty into my actual
fire and light flickers. So drop those in
there and let's call this empty flame movement. Like so. Alright, so everything's
pretty much set up. Let's also call this flame so
we know what this is like. So now let's come back
to our actual flame. And then what we're gonna
do is we're going to go now into our displacements. So we're going to click
on our displacement, this little texture
icon over here. Now what we'll do is we'll
actually come and we'll put this on Veronica. If I come down,
we've got one called Ronnie and you'll end up
with something like this. And then all you want to do is you want to come down and change the size to about 1.4,
something like that. Maybe a little bit less at 1.3, maybe something like that. Then what we're gonna do
now is we're going to come down to where
it says Color. And we're going to change the contrast to nought
0.3. And there we go. Now what if we actually
move this actual flame? Now, you'll see that we
actually have flame, which is really, really nice. Alright, so now we've got that. And now we're going to do
is we're actually not going to animate this
going up and down. We're actually going
to let blender animate this going down by going up and down
by using drivers. Now, drivers is basically
a way to tell blender to use a mathematical expression
to move it up and down. Now you can use
this in textures. You can, you can basically
use it in bones. You can use it on everything. It's just an easy way for
something to go so far, so fast and then reset again. And that's why we're
actually using them rather than
trying to keyframe every single part
of this actual MT going up and where do we want to go in up to and
things like that. Yeah, actually gives you a
lot more control and you can change it on the fly without actually
having to go in. And change all of those
individual keyframe. So that's why we're
actually going to use it. The way we're going to do
is we're actually going to click on our actual M2. When I come over to this little yellow box
over here, click on this. And the one that I want
to change is this set. So you can see already
mindsets actually moved. If I come in and I press, let's see, hashtag, where's
my hashtag but one? Not that one. Is it this? No. All right. Fine. My
hashtag and then we're going to do
is type in frame, like so, and then dash, and then ten, and
then press Enter. Now you'll see that
if I press space bar, that this will go up like so. And then when it will
happen is you'll get 200 and then it
will restart again. So there you go, you can
see it restarts and again. Alright, so the
next thing then is we can discourse
that for instance, if I want to come in
and change this now, you'll see I can't see it, but if I actually click on it, then you can see that
can actually change this to something like five, sorry, not 5065 or
something like that. And now if I press space
bar, you can see it's moving much, much faster. So you have got control of
how fast this actually moves, how far it moves, and
things like that. It's now called flame cell. Let's bring in some actual material swan
rents do is I'm going to come over to where I'm
going to click on my plane first come over
to my materials panel, click the down arrow and
we're going to call it flame, will call it flame, red. Flame red, like so. And then what we'll
do is we'll come over to our shading panel. I'm going to actually
pull this over like so, just so I've got a little
bit more room in here. I'm also, if I've got this on here, I don't
really want this here. So I'm going to do is
press the N bond just to close that off. Then I
went to lift this up. Now let's bring in a new. So let's press Shift a. And what we'll do
is we'll look for first of all, in fact, we've probably, if
I zoom out, yes, we have, we've already gotten
material output there. We need all material
output because that's obviously the output for
the actual material. I'm going to delete
the principled. And then what I'm going
to do is I'm going to bring in a emission. So shift day emission, like so. And then I'm going
to bring in a, we're going to bring in
a noise texture to kinda make it so that the flame looks as though it's
actually moving. And the one I'm
going to bring in, if you come to textures, you will see that you've got
all of these noise textures. The one I wanted to bring in
is called Verona texture. So I'm going to bring
that in and then going to press Shift a I'm
going to bring in a collar around just to give us control over the actual colors. So let's actually look for it. So we're going to put color on the Shelby one
that says color ramp. Alright, now I'm going
to duplicate this. We've shipped they like so. So now we're gonna
do is we're going to plug everything in. So you can see that we
need to plug it from the distance into the
fact of our color. And let's just pull
this a little bit over. And then the color goes
into fac of this one. And finally then the color
goes into our emission. I'm also going to
plug our mission into our surface so we can
actually see what's going on. Now the thing is we
want to put this one, this color ramp
here on constant. So if you come down, you'll see you've got one on constant. And now if we pull this
down a little bit, so if I grab this arrow
over here, pull it down. These are actually what
we're going to use for not all color. These are going to be
the ones that represent the actual parts in-between where you can't
actually see them. In other words, these parts are actually going
to be invisible. So I've got control now of
how I want my flame to be. Basically these are
going to be the hard edges that make up the flame. And as it's moving now you can see that at the moment
these aren't moving, but you do have an idea when these are moving up and down, how it's going to create
that kind of flame effect, which is what we're looking for. So now let's actually
make it transparent. So all I'm going to do
is I'm going to put my emission down here. And I'm going to bring
in a mix shader. So search mix shader. And I'm going to drop this here. And then one Wednesdays
I'm going to plug my emission into here. I want to plug the
mix shader then into the material output. And then finally I'm going
to plug the color ramp into the FAQ and when a
disconnected from here as well. So basically you've got
this sort of set up. Now what we want to make this transparent is obviously
a transparent notes. I'm going to press Shift a,
bringing a transplant so TRA, transparent the SDF like so, and then just plug that into
your actual shader, like so. Now, over on the
right-hand side of where your actual material
is, if you scroll down, you've got one that says
Settings and you just want to put this blend mode
onto alpha clip. Then finally, you just
want to invert this now, so I need to bring in an invert. So shipped a search
invert, like so. And I'm just going to drop
that in there like so. Alright, so on this lesson now we should be left
with actually this. You can actually see
through there now. And at the moment
we've got no color on, but you can actually
get an idea. What we're actually
trying to do here. What we're gonna do is
we're going to create three types of flames. We're going to combine them. And then finally we're
going to have the moving up and down basically along with a few more
drivers and then find them. What we're gonna do is
you're going to bring gain a point light and we're
going to have that point light flickering to give the
effect of an actual flame. All right, everyone,
so I hope you enjoyed that and I'll
see you on the next one. Thanks a lot. Bye bye.
18. Working with Graph Shaders for our Stylized Fire: Welcome back everyone to
the ultimate guide to Blender 3D rigging
and animation. And this is where we left off. Now the first thing
that I want to do is I want to bring it in a texture and coordinate. So if I come over to my actual Verona texture and I press Control T,
you will see them. We get two extra coordinates and mapping exactly what I want. I'm basically this allows you to change where this texture
is in space and time. If I move this, as
you can see now, we can actually move the actual texture along
and things like this. This is a very powerful way
actually then of actually changing our texture a little bit like we did
with the pumpkin, but this is taking
it one step further. You can also see that we
can base it on the normal, so the way that the mesh is facing or we can
base it on the UV, we can even base
it on the camera. And that's taking it
to that next level. Alright, so the other thing
I wanna do is I want to change the scale of the Ronnie. I want to put this on
something like eight, like so. And there we go. That's looking much
more like fire. Now we're gonna do is if
we actually zoom out, what I wanted to do
is I want to create a frame around these
actual three here. So I'm, Joel is going to pull my texture coordinates
a little bit away. I want to actually unplug this. And then one Wednesdays
I'm going to grab all three of these like so. I'm going to press the
Enter button then, and you'll see that
within the Node Wrangler, if I click on this, we
can actually frame this selected so I can add
in an actual frame. And I can also change
the name of it. So if I come up now
to the actual node, you can see that the label and the frame have
an actual name. If I put in something like
main flames are large flames. Let's see. So you can see now we've got a name
called actual large frame. So this is really
good because then it means I can actually make
ANOVA three of these. Yeah, two more of these. So if I grab this press shift D, I can bring it up and
then Shift D again, bring it up like so. And then I can come
into this one, grab it and change
the large flames to small claims like so. And then walking nose and
grabbed each three of these compressed ship date, drag them and drop
them in there. And actually, I need to
bring this down because I didn't think we would
actually do it like that. So I'm going to grab
all three of these now. I'm going to try. Yeah, No, no. I actually bring
them into there, so I need to take
this frame off. So what I'm going to do is
I'm going to come in and remove that frame by grabbing it and just
pressing Delete. And then what I'll
do is I'll, I'll make a nova couple of frames. So you can see here I've
got main, large flames. So while there is,
I'll bring this down. I'll bring this one
up and grab it. And I should be able
to move it like so. And then what I'll
do is I'll now I should be able to grab these three and drop those into there and you can
see that move them. Alright, so now we've got
it now we should be able to move this along like so. Alright, so a little bit fiddly, I made that a little
bit too hot myself. But anyway, we got
there in the end. I'm also going to
grab this one as well and move these up. They're just underneath
that nice and neat. Alright, so the
moment you can see that we can see through
this and the reason is because we need to reconnect or actual texture
coordinate soap. So I'm going to bring this into the vector of the large flames. I'm also then going
to bring it into the vector of the small flames. And basically what it means
is that these will be in the same space and
time as each of that. I'm also then going
to grab all these and just move them over
to vary slightly. And I think as well what we should do is
just unplug this. I'm going to unplug
this one as well because we need to mix
these together in some way. So I'm going to bring
in is I'm going to bring in a mix shader. So mix actually will it be
a mix shader or a mix RGB? Yeah, we'll bring in
a mixed RGB instead. So we've got mics RGB there. And then we're going
to do is you can see the small flames here. Very important that you do this. The small flames
she'll be underneath. So they showed come down. So this one here, and then the actual
large flames should come to the top of
this one here like so. Now I'm going to do is I'm
going to actually plug this, so this mix shader into
my actual fact now. And finally now I want
to do is I just want to duplicate this, this one here. So this small flame. So I'm going to do is I'm
going to grab it, going all the way
round, like so. Then I'm just going
to press Shift D. And that then means that the actual frame will
come with it as well, which is exactly what we want. Then we're going to
do is I'm gonna name this two mid-plane. So I'm going to grab
this and we call it mid made claims. Like so. Okay, and before
actually doing that, what I wanna do is I want
to come back down to my large flames and I'm going
to actually set this to, I'm going to leave
this actually on hate. And while wants to do
is I wanted to save this small claims to 16. So I'm going to change
the scale up to 16. And then I've got my mid planes, which I'm going to change
this to something like four. Yeah, let's change it to
false, something like that. Now, let's bring in
another mix, RGB. So I'm going to do is
I'm going to press Shift D and I'm going to
bring this over to here. And then we're going to
do is I'm going to drop this into the bottom of here and then put this
into the top of here. And then finally
grabbed this makes RGB and then drop that
into the bottom there. So you can see now,
we've got three. We've got main flames, small flames and large flames. And we've got the
two bottom ones mixed into the mixed RGB. And then this mixed RGB is
mixed in with the mid plane. So basically we've combined all three of these actual flames, which gives us a
ton of control over how this by actually
it's going to look how, what color it's going
to be, for instance, because the reason
we've done that is because if you
look at any fire, you've got the red, which is the very coldest
part of the fire. You've got them the yellow,
which is a bit warmer. And finally you've
got the white, which is the red hot part of it. That's why we've actually
done it in this way. Before we go on, this
doesn't actually look right. So I'm gonna do is I'm just
going to swap these around. So I need to grab this one
and put that into the top, and then that one will
go into the bottom. Okay, That's looking
much better. Now, let's come in and change
the mix to soft light. So we're going to go
with soft light and red is gonna do the same
one on this one. Oh, soft light. And then I'm going to
put the FAQ up to one. And I'm gonna do the same
on this one as well. Now let's just make sure that everything is connected
so we can see that we've got our texture
coordinates needs connecting up to our vector on this one
as well. And there we go. We really need to
do is have a look at the thickness of
each of these parts. So we've got mid flames and you can see as I bring
this down or up, we can actually control that. We've got the small flames then for bringing
this down again, you can see we control that. But the problem is
if I do this now, I'm not really going to see
what I'm actually doing, but it's good that you
actually understand how we actually control these
before actually going ahead. So the first thing
we wanna do is actually get these
things move in. And then finally, we can
actually bring in some colors. And you'll understand, Okay, I want my small claims
to be this big, this big, and you
actually understand how this whole of this
setup actually works. Well, let's first of all
bring in a gradient texture. So shift day, let's
look for a gradient. So, so gradient texture, Let's drop that in there. Let's also then
bring in a mixed, mixed RGB, sorry, mix RGB. Let's drop that in there. And then what we're gonna
do is I'm going to plug in the color from the
gradient into the top of our mixed RGB and then take the large flame so
where the color is. So we're going to pull
the color and drop that into our mix RGB like so. Then what we're gonna
do is we're gonna take the color from, which was originally
in this one and just swap it with this one here. Like so. Alright. Now we should have an actual
gradient that goes up and basically it
should get lighter or darker as they
actually tapers off. Alright, so what
do I mean by that? Well, if I come
into my gradient, I'm just going to pull this
down here along with this, I'm going to grab my
texture gradient. I'm going to press Control T. And they say I want to bring in a mapping and
texture coordinates. Now if I come in
and I change the y, I think it'll be, Let's
have look, change the y. Then if I bring the
local, bring it down. We can see now that we
showed and dope with some control over how
this actually is. Now, the problem here is you can see that this should
be a -90 -90. Turn it round. And then let's
try bringing this up now. And there we go. That's exactly what
I'm looking for. So you can see what we're
trying to do is we're trying to make it thicker at the bottom. And as it goes up to the top, they actually starts to
disappear like actual flames do. So flames are really
thick down the bottom, but as it goes up to the top, they're really thin, spindly and then eventually disappear. And that's the kind of result that we're
trying to actually get. Now, let's actually
get this moving. So how are we going to do that? Is we're going to come into, and we're going to
add in a drive. So let's come to our
large flames first. Now the thing is we're going
to add them to the z-axis, but you might actually need
to rotate them around. We would pull frame
and then you would put -30 or -60 or or whatever it is if it's
going the wrong way round. So let's do the first one first. So if I come in to the z, I'm going to press my hashtag. I want to press frame
for the driver. And then I'm going to
press forward slash. And then let's try first of
all 30, something like that. Now if I press
Spacebar now you can see that it looks as though my plane is
actually going the wrong way, which is what I said. But now for press minus the t, like so now you can see my
flames going the right way. So you're looking basically
for the flank going up. And you know now that
each time we do this, it's basically
going to be minus, not just there to
just take that into account and yours might
be the other way round, so just keep it on 30. All right, everyone,
so you can see now how we've got the
large flames moving. So what we need to do now on the next lesson
is we need to get the older actual small flames on the mid flames
actually moving as well, then we can actually
bring in some color. All right, everyone,
so I hope you enjoyed that and I'll see
you in the next one. Thanks a lot. Bye bye.
19. Animating Light Flicker: Welcome back everyone to
the ultimate guide to Blender 3D rigging
and animation. And this is where we left off. Alright, so let's get all
small flames moving now. So if we call them again
to the location on the Z, I'm going to press hashtag and I'm going to click on frame. I want to press forward
slash and then minus. And we'll put this
onto 60, like so. Now what we'll do
is we'll come to our mid flames.
Same thing again. So I'm going to click on
this Add and click hashtag, brain minus, sorry, forward
slash minus and 15, like so. And now press space bar, you should end up with
something like this, which you can see now
is really, really nice. You can already see exactly how this is actually
going to work out. Now the other thing
is if, again, you can come down and
change your gradients, so just don't forget you've
got a gradients on here. We can move it up if you, if you want your flames not to be quite so thick
down the bottom, I think I'm really
happy with mine. So the next thing we need to do now is we need to actually
bring in our colors. And then finally we can bring in our light flicker
on top of that. Don't forget as well. We can also speed up how
fast these are actually moving because it's based
on our actual, Where is it? There? It is this here. So this is also remember
had a driver as well. So if we want to change that, we just need to come to here and you can change your driver
from here, like so. Alright, so now let's go
back to our flame and let's bring in some colors
then let's come over, first of all to our
emission shader. Let's put it on a nice red, orangey red or
something like that. Then what we'll do is
we'll put the strength of it up to six or something. And you can see, am I
happy with that color? I don't think so. I
think you need to make a little bit orangey. Something a little
bit more like fire? Yes, something like that maybe. Alright, We'll start with that and then as we
work through them, we'll be able to change
them on the fly. Okay, so now I wanna do is I
want to grab my ecosphere. So I'm just going
to press shift D. I'm going to rotate it. Rotate it round. I'm gonna make a
little bit bigger. And then woman's isn't just going to come in and
press the tab bar. And I'm actually going to jaws make this a
little bit different. So I'm just going to
press G, bring it in. Like so this one is
basically going to be the hottest part of
my actual flames. I'm jaws moving it
around like so. And then one way to
do nice press tab, I'm going to come down. I'm going to change
this color to maybe a. You can see that I need to actually duplicate the
actual material as well. So I'm going to do
is I'm going to come over and when it comes
to where it says a flame red and I need to
change this to another one. So beta one Windsor is
going to click the Plus. I want to call this plain white, so blame white, like so. And then what we're gonna do
is we're going to copy this. So if I come down to this, it'll say copy material. And then if I come
to this, you can see pace material in now
we should be able to, if I give it this color. So I've come to
this one and just minus off this flame red. There we go. And now if I come in
and I put this on why we should end up actually. Okay, I remember now there's, there's actually an
issue where we need to, It takes a little bit of time actually to update
for some reason. So I'm just going
to unplug this. And there we go. We actually updated
now the thing is why did it take
so long to update? The reason is because what I actually did in the end is
actually minus the off. So basically what I did was I came to where it said flame, why I took it off. Then what I did was I
read, put it back on. So I actually come down
to the little arrow here and I think he's
just a little bit of a bug actually in Blender. Then I'm just going to put
it on flame white light. So now you can see
it's actually working. So now let's move
it over like so. And if I press space bar, now, there we go for double-tap. The a's where you've
gotten even better view of what it actually is
actually going to look like. Now the other thing
is the red one. I don't actually
want go in as high. So if I click on the red, so you can see this flame white. And let's try and hide
that one out of the way. Let's click on the flame red one I'm going to
do is I'm going to bring back the actual gradient. So if you come down to here
where your gradient is, actually then going
to pull this back. So you can see here, we can
pull it up or we can pull it back like so if I press Alt H now to bring
back this flame, now you can see it's looking
a little bit better. Alright, So now
let's make 1 mol. You can also see that they're
kind of moving a little bit the same if you want
to change that as well, what you can do is you can
come in to your mapping, click on it and just
put in something like, Let's put this on 60 or
something like that. And now if I press space bar, now you can see they're
actually moving very different if a
double-tap the eight, now, there you go. Alright, so I'm happy with that. Now, let's bring him 1 mol. Then we'll have this on a, maybe a real dark red
or something like that. So I'm going to grab this one. I'm going to press Shift D. And then one went to do is
I'm going to bring it in, make it smaller, like so, and I'm going to bring
it down like so. Alright, now I want
to do is I want to, I'm actually going to
pull this up as well. So I'm going to grab
the center of it. I'm going to press
Shift Spacebar, bringing the Move tool
and then just move it up. Like so. And then we're
going to do is I'm going to copy this again. So we've got flame, why? We've got blame,
whereas it flame red. Let's hide that.
Yeah, flame red. So let's have a flame, yellow as well. So
let's press Alt H. Let's come back then
to the center one. So I want to come back
to my center one, which is this one here. And then we're going to
do is I'm going to make a new one, new. And we'll call it flame yellow. Like so. And also, I want to be able to
change these as well. So what I'm going to do
is I'm going to also sort this out because at
the moment it's really, really hard to select them
and I really don't want that. So I'm just going
to put all these up just so it's nice and neat
for when we come back in. So it shouldn't take too long and it's
just an easier way then of dealing with it. Now, the flame, we should
have then the flame. So we've got flame
one, blank two, and then we've got blamed three, which are okay, so
let me just see. So flame red, plain white. And then we've got
the flame yellow. So I'm just going to again minus this off and then I'm
just going to paste this in. So paste material in. And then all I'm going to do, I'm going to come
back to this now. I'm going to make
it a yellow color. Now it's not going to change, of course we know why soap and minus that off now and
then bring it back in. So I'll click the
down arrow, blame. And then we're going to
put it onto flame yellow. There we go. Now if I press Alt H, Now everything comes in. Double-tap the a. There we go. We have blames. Alright, so these ones on
the outside that probably, probably going the wrong
way round at the moment. So the white ones should be the ones that are
on the inside and the yellow ones should be
with the ones on the outside. So let's change those around. So if I grab I think it's
this one here. Yes, it is. And then I'm going to press
space and I'm just going to bring these out a
little bit like so. And then one way to
do is I'm going to come to the inside. I think it's that
one. Yes, it is. And then come to the top one
and then bring that out. And there we go.
Now it's looking a lot more like an actual flame. Alright, so I'm really happy with how that flame
actually looks. Now the one thing that we
need in is our flame flicker. So let's come back
to modelling now. I'm going to press
the top button. And what I wanna do is I want to bring in an actual point light. So I'm going to press Shift a, I want to come down, I'm going
to bring in a point light. Let's move that over then. And you'll see that
once I put on this, which because it's on Evie, if I put this on now, now you can actually
see or point light, but we don't actually
get a lot of lights off it at
the moment because we need to actually bring
it out a little bit. So if I come to my light settings over here,
you've got a point light. And what I wanna do is I
want to turn up the power. First of all, I want
to turn up the color. So we want it on
something that's kind of the yellowy orange,
something like that. Let's turn it up a
little bit more. And that's also as well. You can turn up the radius, which gives you that kind
of now this movement. Now if I move this now you
can see that we've got, we can put it over here now. Now the thing is
when you put it, you don't actually want
it over because it will basically destroy your
light so you don't want that. So what you want is something,
Something like that. Okay, so now we've got
a point line, Tim, what we want to make sure is that first of all, you're on TV. Let's set the screen space. Reflections on. And let's also
turn on our actual render. And you should end up
with something like this. Now, this might not be bright enough at this
moment, believe it or not. So we'll just actually
find out if it is. So the first thing we're
gonna do is I'm gonna go over to my animation. I'm going to come back then
to my actual light here. And then what I'm going to
do now I'm going to set it on number one, frame one. I'm going to press I hovering
over the actual power. And then what I'm going
to do now is I'm going to come all the way over 200. I'm going to press again, and that basically is just going to duplicate it over there. Next of all, now
what I want to do is click on my actual point. You see we've got one
that says power here. And now if I come over to
this little arrow down here, I want to put it
onto graph editor. And now I'm going to
do is I'm going to press N. And you'll see now that we've got actually
all of these options here. The one we want is
the actual modifier. Now, don't worry,
you won't actually be able to see anything yet. And the reason you can't
see anything yet is because of the fact that
this is around 200. So if I call them and scroll up, you will see that we should, if we zoom in around, what is it, 270,
let's go to 270. There we go. There is our actual graph here. Now the thing is when
I first did this, I couldn't actually see where
they actually live, moles, but now I know that
we have to actually move around where it is. So like so I wanted to bring
these in a little bit. So I've actually got better idea of what I'm actually
looking at here. The way to do that is
simply come over to the right-hand side
and you can actually bring this down now much, much closer together, which is going to
make it so you can actually see a much easier now, what are
you actually doing? Because you can see these
much, much close together. Let's bring him down even small. And now we've actually
got a good idea. Alright, so let's bring
in that modifier. So click on Monday fire. Let's bring in the noise. And you'll see already now that we've got something happening. Now what you wanna do
is you want to turn up the strength of the noise. And as you turn that off, you can see now that we're
gonna be bouncing around 200-50 ish to around 300. So now if I put this arm, press the space bar, now you're end up with that
beautiful flame flicker. Now, obviously you can make
this a lot more extreme. You can make this a lot
brighter, for instance, all we need to do
then is if we go back to frame one and we put this on something like
500, for instance, Aldi. Other thing is I need to put
this onto rendered view. There we go. Now we can actually see much, much better what that's doing. Now, let's put this
on something like 1,000 on this frame
and let's turn it off. So press I. And you can see
we've got a big jump there. And the reason is because
we put it on frame 77, which is not something I want. So I'm going to press Control Z. I'm going to come to frame one. But at least you get an idea of understanding how
this actually works. And let's put it on 2000 likes. So let's press the eyeball on and then let's
come to frame 200. And again, we'll put
it on frame 200. So let's just move this up. Let's put it onto 2000s. So let's press the eyeball on. And now I'm going to have
to scroll all the way up now to say exactly
where we also, it's somewhere around here. And now if I press this, you can see you've got
that tiny flicker, but at the moment
I turn this off, so let's turn this up
even higher, like so. Now you can see it's very, very hard to see actually. We can actually
accentuate once you've got a few more actual
walls around the EU belt, say much, much more. But the higher I move this open, the more I pull this down. So let's pull this down
just a little bit. No, 0.7. And now you can see
flicker in a way like so. And that's exactly what we want. It only needs to be solved. Of course, you can
make this much, much more pronounced like so. You can make it Flickr much, much more like that. Alright, so that's
basically it for that one. Let's go now back to modelling. And let's have one more
last look at this. And there's your life flicker in a way with your actual flame. Alright everyone, so
hope you enjoyed that. I hope you learned a lot
from that bit of a long one, this one, but we got
there in the end. So the next one we're gonna be covering is Moss and lights. And we'll see how we
go with that one. Alright, Thanks a lot of Rom. Bye bye.
20. Creating Moth Animation Using Particles: Welcome back everyone to
the ultimate guide to blend the 3D rigging
and animation. And this is where
we left the all. Alright, so let's go to
the next one which is our malts and lights
over. Click on that. We will see that we have
one light, we have a mouth. All light is actually split
off away from our mouth. And this means that we can
actually animate this leg. So it's moving backwards and forwards or
something like that. That's the same
animation as what we went through in our
swing animation. So this one here you could use that I can
actually click on no, clicked on both. Let's
just pick that one off. This swing animation
is pretty much the same thing as what you
could do on this slide. So let's close that down.
Alright, so let's first of all get our moss actually
flapping their wings. So first of all, I'm going
to go into my mouth. You can see at the moment that the actual orientation is
around the actual center. Now this moth just
does a real basic, actual, just a material on it. So it's just very basic, but you can make it a bit more complex if you're
doing your own, make some biomaterials
and things like that. Alright, so let's come in then. What we're gonna
do, first of all, we want to give this
actually a shape key. So I'm going to do
is I'm gonna come over to the right-hand side. When my little triangle is, I'm going to click it twice. So first one is the base, and then the second one is
what we can actually alter. So let's come in. Then what we'll do is
we'll grab this fall wing. I'm going to press 0 on why. And I don't want to
pull it from there. What I want to pull it
Brom is this point here. So I'm going to do is
first of all Shift S because to select it, and then I'm going to
grab my wing again. But now if I play it, you'll see it's still
pulls from here. I don't want that. So
I'm going to press the little sideways V and
I'm gonna go to 3D cursor. Then we're gonna do
now is press Alt and y and I can bring it up. Now I'm going to go
across the left-hand side and down the bone
where it says rotate, just open this if it's not open. And what I wanna do is
I want to copy this, I'm going to select it, Control C, copy it. And then let's come
to the next wing. I'm gonna press L and then All, and why query all black. So then I'm going
to press control V and I'm just going to minus, get rid of this minus. So if I minus,
then it's going to be exactly the same as this one. There we go. Now if I press Tab,
you'll see that we have control over these wings, which is really, really nice. Alright, so now
what we need to do is we need to come
in and we need to give this some noise to
make them actually flat. So let's do that now. So the first thing
I'm gonna do is I'm going to come to layout. I don't want to make sure
that this is on one. So make sure it's on one. Press dot to zoom into
your mouth again. And then all I'm gonna do
is I'm just going to come in and put the value,
keep on zeros. So I'm going to press, I, put them Insert key comes to 200. Then let's put in another key. So i, and now finally we can
go over to our animation. And then what I
want to do now is I want to actually
animate these. So you can see here it is. Now if you don't say, it's probably going to be
up here somewhere. So just be aware that it's not on zero or anything like that. Well, from the via Flickr that we did before
with the lights and stuff. So just make sure
that it's scroll down sera and then
you should see that. Now because this is self
on the fire Flickr, you should already have on the right-hand side
your modifiers. So we're going to
bring in a noise. And you can see as soon
as we bring that in, we will end up, you can see a tiny,
tiny flicker. Now all we need to do is just turn up the strength of this. Then what will happen
is you'll end up with a flapping wings
of an actual mock. Good stuff right? Now. Let's actually turn the
interpolation to Bezier, I think it will be,
which makes it a bit more fluid than
what it was before. And now we've got our mouth. So all we need to do now, I'm just making sure
it goes all the way through which it should do. All we need to do now
is basically turn this into a load of malts
going around a line. So how am I gonna do
about, well, first of all, I'm going to go back
to modelling now. Then what I'm going to
do, I'm going to come to my actual light and I'm going to turn this into an emitter. So if I come over here, let's click plus,
and there you go. You can see that we can actually use this if I press space bar, you can see that we can actually
use this as an emitter. So we want these basically
bouncing balls to be our most though let's
actually solve that out now. So the first thing I'm
going to do is rename that. So I'll call it molts, like so when I'm renaming them, I always rename this as well. So I'm going to
put this as moss. And this is because sometimes when you click this down here, you'll see now that
it's called moss and we've got one called
pi equals settings. And I do this just to make sure that everything's going
to work correctly. I also make sure that this
little shield is ticked on. And that is because let's
say I say blend around. I don't have this emission
there to do that, to make sure that I
keep the emission regardless if there's
one in the actual scene. This means then if
I want to actually send through this emitter
to another blend file, I'm able to do that. So that's another
reason why I do that. I'm actually going
to come up and actually save that out as well. Alright, so now let's come in and let's alter a few
of these options. I'm going to pull this
up all the way up here just so I can actually
see what I'm doing. And the first one
we want to alter is this number I'm going to
parent and 50 just to make sure there's nowhere near as many officers that I'm
also going to come down. I'm going to put
the start frame and won the end frame and one. And then basically the lifetime
on something like 1,000. This make sure that these will stay around for as long
as we need them to. Alright, so the next thing then I'm going to
do is I'm going to scroll down and
I'm going to port. Where is it? Our display as? And then what I want to do
is where it says rendered, I want to change this from a low and I want to have
this on object. And the object is going to
be my actual moth, like so. And now on a press space
bar, when it restarts, you'll see that
these actual miles, well, they start bouncing
up and down like that, which is something
that we don't want. So what I wanna do now
is I want to scroll up and I want to come to where
it says physics types. I don't want to put
this onto boids and I want to make sure then that this is
set up correctly. So what I'm gonna do is
I'm going to pull the muscle naught point, naught 85, then going to put it
on 211.7 on here. And then going to put it onto, the minimum distance
is going to be nought 0.171, nought 0.458. And we're just going to
put these in for now. And then once we've done them, we can go through them and Traveloka what they actually do. Alright, so something like that. And then the air personnel
is going to be on zero. And now if I press space bar, there we go, we're actually starting to have
something happen. Now the other thing is as well, they can see that the way, way too small at the moment. So we need to make them much, much bigger than they are. You can also see that
the flying off all over the place and that's
not something we want. The reason that is happening is because this emitter
at the moment, we haven't actually told it
what we want to do with it. In other words, we've got
something here called Boyd brain and we've not told
him what we want to do. So I wanna do with this. First of all, is we want
to minus VO for these off, I want to click the Plus and I want it to be follow the leader. The leader is going to
be this lump like so. Now when I press Space bar, you will see that all of these are flying
around here, like so. Now all we need to do now
is actually make sure that the scale of
these things is much, much bigger than what it was. Hilbert's up the a, there we go. You have moss line
around the line. Now the best thing is
about this, of course, is that you can change
how fast they go. And also, as this
light actually swings, you will see that the mouse will just literally follow where
the light actually swings. So in other words, if I'm
rotating this like so, if I rotate it like
so you can see the most are actually
sticking to it. Alright, so you will
notice that the moment it looks really, really nice, bold,
there is a problem. Whenever we try and move this, you will see that they
just literally stake to the actual movement of basically
actually movement of it. So what we need
to do is actually show you another
way of doing this. So what I can do is I
can press shift day. In fact, what I'll do
is I'll just grab this. I'll press Shift D and just
make a duplicate of it. You can see now that they fly to the other one, which
is really great. Because then what that means
is now I can actually move this one and they won't
actually stick to it. So that means now we
can actually use this. So how do we use it? Well, first of all, if I grab it and make it a
little bit smaller, like so, and then a movie it actually into this other ones. So if I press space
bar and move it into the other one like so
and just hide it in there. That now means that
I can actually have them attached to this one here. So this lamp here, if
I bring this down now, come into my mouth
light and call it, let's call it lamp,
follow like so. And then take the
emitter off of this. So if I take the emitter off, so if I come back to my emitter, which is going to be on here, and then remove it offer
here than the emitter, then this should now be
on the one on the inside. In other words, if
I move this now, you will see that they actually
fly over towards this. Well, there's still coming
out of this, submits it. So basically cannot be omitted to whatever you want to be. So that means now when I put this back on here
and I moved this, for instance, with, let's say your bones or
something like that. So if I press pause and
I'll put it over here, Let's just get it in place and we'll just do a quick
movement of it. I'm just going to
put in place blank. So then what I'm going
to do is I'm just going to move it from here. So I'm going to grab, let's say Alt Shift, click, Alt Shift, click Shift S,
because to select it, and now I'll just
move it from here. So I'll just put it on to layout just to quickly show you. I love it onto one.
Whereas adults. And then what I'm going to do
is I'm going to press 0, Y, and I want to move it
from there, of course, so little sideways
V 3D cursor, our y. And then I'm going to move
it to 100 and then our y, I need to, I need
to actually put it. So what I'll do is I'll press I location rotation
scale, bring it to one. Then our y, like so, and then I location
rotation scale. And then what we'll
do is we'll just bring this one over now to 200. So if I bring this over here, Shift D, bring it
over here, like so. And now let's press space bar. And there you go. You'll see it moves. The eye. The moss actually follow along even though
it's actually moving. Now what you could do that
and it's from there is you basically put your
Emitter inside this one. Now I'll show you
one more thing just before we finish this lesson. If we come over to our political systems and we come down to viewport render, you will see we can
hide our emitter. If you come to render, you can also hide
the emitter like so. So now, now we've
hit that makes it, that means that I
can grab this one. So this one here needs to press the little
sideways V again, come to individual origins. And then what I can do is
I can make it a tiny bit smaller and bring
it in to this one. Like so. So let's put
it inside this one. Like so, small enough. Like so. And this could be a fear
or anything like that. Now if I hide this image, so I'm just going to click on this and we'll just hide it. So object, where does it show
emitter? Emits a hide them. It's a double top. The I press the space
bar and there you go. Nice. I've got moles. All right, everyone.
So let's come up, Let's save it out. And then on the next one, we're actually onto Clouds. So we'll pull up clouds. These are really
great if you want some stylized clouds coming out of chimneys and
things like that. But you really don't want
to use simulation because simulations in Blender and
notoriously hard to use, and they also require
lock the GPU CPU power. So this is another way
around of the gain, some really nice clouds
without using so much of that. All right, everyone's
hope you enjoyed that and I'll see
you in the next one. Thanks a lot. Bye bye.
21. Metaball Animation for Stylized Clouds: Welcome back everyone to
the ultimate guide to Blender 3D rigging
and animation. And here we are in clouds. Now, mainly this we'll be
looking at how to create smoke. Basically, that's what we're actually going to be doing here. And just exactly what is this thing I have
on the screen here? Well, if you press Shift
a and you come down, you have something
called metabolic. And if you click on the
one that says bowl, this is exactly what it is. So this is the best
thing because this can actually change in shape. And it's also really
good because it actually sticks together
with each other. So let's just delete
that out of the way. And what we're gonna
do is I'm just gonna move this
over to the side. And then one went to do
is I'm just going to bring game another plane. So I'm going to
press Shift a, I'm going to bring in
a plane and just imagine that this is the top of a roof or
something like that. I want to bring you a
little bit smaller. So you've got a
chimney stack here and these will be
coming out of it. So let's click on this plane. What we're gonna do is
we're gonna go into, go over to again
our physics panel. Just before I do that though, I'm actually going
to pull my emitter and file colleague
Cloud or smoke, let's call it smoke emitter, like so I want to grab that, drop it in my clouds, opened on my clouds now. And you can see this
one's already named. This is the plane here,
so everything is named. Now. Now let's come
to our emitter. Then let's come over and click the plus button and we're
going to call this smoke. Like so again, I'm going to
rename it on here to smoke, like so I'm going to click that little shield icon as
we've discussed before. And then the bone when
a presser you'll just see a load of balls
come out there, man, just drop on the floor. Now what I wanna do
is I want to change the brain start to -200. I don't want to
change the end 200. Now the reason I'm doing that is as you see as it
gets to the end, which still actually
golf balls there. Rather than if I change
this to frame start one, you will see that
as I put it here, it takes time for
them to build up. Once it gets to the end
here, they'll stop. And then it will take time
for them to build up again. As you see that, we
don't really want that because we
want our clouds to kind of mingle into each other
when it's starting again. So that is why we're
putting a -200 because that then gives the clouds start
time to actually start. Even though it starts
at zero again, it's still starting
off down here, which we just don't see. So all we see is the
clouds kind of midway through frame one or
something like that. That is a real handy
tip if you want to have a emitter that seems to be constant because the
problem with that is, is that they always start their life basically
at frame one. So you could have,
let's say a flame, the flame will get
bigger, bigger, bigger as the frames
are going through, but it will always
start at zero, so it will be nothing
there, frame zero. So that's why we
actually put that -200. Next one I want to do is I
want to put the lifetime at 195 joules people this
actual 200 for now, the lifetime randomness I'm
going to set to nought 0.116. Alright, something like that. So the moment, not
a lot of change, it's come down to the velocity, which is how fast these are
spouting out of our emitter. And let's change the
normal to nought 0.8, something like that
because we want them to flow up into the air. We don't want them to be like a fountain or
something like that. Now how do we get them
to float into that? Well, it's kind of
similar what we did with the bowl all the way
over L basic animation. If we come down, you will have one that
says field weights. And we're just going to
put the gravity onto zero. Now when we press Space, you will see that as
this thing restarts, all of the balls, them will just float in the air
really, really nicely. Now that's kind of
what we want already. The thing is we want to change
these to be this meatball. And also we want to, we want to be able to control the direction that
they're going in as well. So let's do that now. They can see if we
scroll up here, this is where the
aligned objects are. So if I press play
and I move this, let's say a little
bit to the side like so you will see now that
they're actually in Australia, I'm actually gonna put this on zero and I'm going to actually
turn it the other way. So I'm going to actually
have them going that way. Now it doesn't want
to be too much, it just wants to be
slightly like so. Yeah, something like that
looks absolutely fine. So you can see if
this was a chimney. You can see that they're
gonna go all the way up to year before they
actually start disappearing. Now this is the lifetime of how long our actual
particles are going to last. So you can make this a lot less if you put this on 50
or something like that. Now you'll see. They should die
off a lot sooner. So this actually controls how long your stream
of smoke here. So let's put it to 150,
something like that. Now the problem is why
I put it to 195 is because it's actually
based over 200 frames. So in other words, when
this thing starts again, you'll see that it doesn't it? Yeah, you can see it
just swaps over there. That is why we actually
put this then at -200. Can you see it's just a
slight swap over here. And that's exactly what
we're looking for. Alright, so we've
got that so far. Now we need to do is we
also need to make sure that this meat ball is
actually being used with this political system, which actually really
brings it to life. Now something else we
haven't spoke about so far is children. Now, if you want a
lot more particles, basically what you can do is you can actually add children. And what that does
is it makes more of these onto each of the
particles with already got. In other words, it's
actually better to use this rather than just turning
this off to like 100,000. It's actually better
and easier on Blender and your GPU if you
use children instead. So if we click
this on simple and a potluck display amount to
two or something like that. Now when it renders, they'll
actually be slightly more of these actual particles than what the world's before, as you can see now. Alright, so now for
the moment of truth, Let's go up to our
renders panel, which is this one here. Change it from halo and what we're gonna do is
pray on an object, and the object is going to
be our actual meatballs. So now if I press
on my meatball, I will have to probably wait to get it until it gets them. And I'll probably have
to scale it up as well. It's probably going
to be a bit small. So let's wait to get to the end. You can see the really,
really tiny there. But the moment I start
actually to scale these up, there we go. And you can see that is
moving like actual clouds. Now we do have one
problem in that. We can see it's got, it's a weird kind of color. It's just based on I'm pretty much how the light
shining on it. And that's not
something we want. So we do actually want to give this some color
and then it will, it will do is really, really accentuate how these
clouds actually a lot. But you can also change the
randomness of the scale. So for instance,
we can put that. All right, so, and
then turn this off. And there you go. You've got a bit more
realism in our clouds. You can also have things
like the rotation on here, so we can actually rotate
in as they come out. So sometimes that
actually helps make each cloud even more
independent code. They actually rotating. They are actual spheres though. You might not notice
that much difference unless you really crank
this up really high. Now of course, the best thing
about this is we can also alter how the velocity, so my velocity which is here, how this velocity
actually works. So for instance, if I comb, let's say to frame one, like so. And if you can't get it,
just click that on and then go over to where
it's aligned to. So if I'm putting this on, let's say put this on I, and then I come to,
let's say frame 50. And I want to have it
going the other way. So let's press that on I now you'll see that as
this comes out, that'll go short
on the next one. You can see now how
that's actually going and moving. As you can see. Now if I put this up to here, like so, and then press
the Space-bar again. You'll see now it
actually starts to have that little wiggle like so. Now the problem is you've got
to be very careful because obviously where it's
actually starting from. So normally if
you're doing this, you would actually put
these frames as well down into the -200 to make sure
that it's lined up a bit bad. But you can see if I
put this onto one, grab all of these, and then push them in, you'll see now that
if I press space bar, you can actually get
some real wiggle in the actual clouds, though. Again, that's just using a few key frames and
we're able to get that really nice effect of those clouds moving in the wind. And that's exactly what
we're looking for. Alright, so the next thing
now you've pretty much got everything you need to know about how to make these clouds. The next thing we
need to look at that he's just giving them some textures and we
just wanted to give him a simple texture just so
you know how to do that. Because if you don't
have to do that, then you clouds on
when to look as good as they should do. Alright, so let's go over
to all material best and we'll give it a
material, cold clouds. So new clouds you can see, you will see now that that
is actually disappear. And the reason it's
disappeared is because we haven't actually made it
into any type of mesh. So the moments of press play, nothing's going
to happen because we've actually gave
it a material. But let's take that material
off and let's restart this. So now let's give it
an actual material. Now if I come down to material, click New, you will see
that it kinda disappears. And that's because we just need to put on the render panel. And then what I'm going to
do is I'm going to call these clouds like so I'm
going to press space bar, let it actually come out. Just so I've got something
to actually work with where I can actually
see like so. And just let it restart again. There we go. Alright, so now let's come
over to our shading panel. When I press the adult bonds, zoom in, make sure they
actually own rendered. And then all I'm gonna do now, get rid of my principles. So delete all the way. Then I'm going to
bring in a cholera. So color ram, bring that in. I'm going to bring
in an RGB curves. And the reason I'm
going to do that is because that then
is going to give me full control over how
light or dark these all. I'm going to plug this
then into the color. And the finally going to
plug this into the surface. And then to actually give me control over how this
is going to look, I'm going to grab my color ram, press Control T, and then
we're going to get a mapping. And we're going to get an image texture which we don't want. So just delete the image
texture and then plug this in. So then what we're gonna do is we're going to base
it on the normal, so which way these
are actually facing. So I'm going to plug
this into the vector. And now finally, I
should be able to come in and alter this colorRamp. Now you'll see if we come
in and we alter this. So what I tend to do here is I will come to the bottom one and I'll put it
on something like a green, something like that. I'll come to the next
one and I'll put it on a blue something like that. I'll come to the next one,
then they'll put it on a pink and then I'll come to the final one and I'll put it on something like a read file, make it a different
color just so they're not quite as contrast in there. There we go. Now, why
have I done that? The reason is because now
I've got a good idea of how dog this is going
to be for wanting. So I know I need to
bring that down, but also I know now where
these colors are going to be. So I can see, for instance, this blue needs to be the blue right on the
kind of the outer, so the most brightest path. So I'm going to
put this onto why the moments do is I'm going
to turn this up like so. Then I'm going to
come to my pink now. In fact, I'll come
back to my green. So my green needs to
be the darkest part. So I'm gonna put this on here. I'm going to turn this down
a little bit, like so, then I'm going to come to
this one and the print on it all a little bit like so. And then finally I'll
come to this one. Like so. And there you go. Now you can see that
we've got some really, really nice fluffy clouds. Alright everyone. So let's
go back to modeling. And then Walgreens do is
I'm going to press Tab, I'm gonna go to File. I'm going to save that out. Like so. Then we're going
to do is I'm just going to pull that bill. I'm actually going to
close my clouds off now. I'm going to open up
my complex chains. So we'll let this load up. And then the next one, what we're gonna do
is we're going to animate this stone going up and down and these
chains actually moving along with it in
a realistic way. Alright everyone, so
I hope you enjoyed that and I'll see
you on the next one. Thanks a lot. Bye bye.
22. Bone Chain Rigging: Welcome back everyone to
the ultimate guide to Blender 3D rigging
and animation. And this is where
we left it off. Alright, so the first thing I
wanna do is I want to split all of these chains
off away from this, away from each other basically. So I want this center crystal in the center will not
split off as well. So I'm going to press L in it. I want to make sure that I'm
actually in Edge Select, so l p selection. And then one way to
do is I'm going to grab each one of these now. I'm going to grab them
into quick way instead of grabbing each one of them. So all I'm gonna do
is I'm going to is present, go into wire-frame. In fact, I'll make this
even easier on myself. What I'll do is
I'll see if I can actually hide those other way, hide these other way, unhide the stones
out of the way, and then all of this you'll
be left with now is my chain, which is going to
make it even easier. So now if we go into wire-frame, select this chain, I'm going
to grab just this one. I'm then going to
press B for box-like, grab all of this one, press Control plus just to
make sure you've got it all. And then I'm going to press
P selection, like so. Now I'm going to
grab the next one. So p selection,
and then next one, the control plus P selection. And finally the last one. So b, Gabrielle P
selection, like so. Alright, so now these are all
split off from each other. Now can just go to where solid among gonna do is I'm just
going to grab everything. I'm going to press Control lay, all transforms right-click
cell origin to geometry. And that means that
they're all split off all the
transformations or reset. And basically these are really, really good now for
actually putting in our actual armatures and bones. So let's call them two of those chainsaw come
to this one here. And what I'm gonna
do is I'm going to grab this edge around here. So Alt Shift and click Shift
desk because to selected. And then we're going to do
is bring in my first bone. So if I press Shift a and
now bring in, where is it? Armature, my bone. I'm going to call
this chain like so. And then what I'm gonna do
is I'm going to actually bring it to the edge off here. So what do I mean by that? First of all, though, I've
got to rotate it around. As you can see, this is not
rotate to the right way. So if I press R and Z, rotate it around like so. And then what I can do is I
can grab the top of this. So if I come in, make
sure the tops grabbed, press Shift Space, move
and you can see at the moment it's moving in the wrong direction.
I don't want that. So I'm going to do put
it on normal and then I can actually move it to
where it actually wants it, which is going to be here. So now I can line it up so that it's perfectly
in line, just in there. Now I can actually grab this bone and I can
right-click and I can come down and sub-divide,
sub-divide, sub-divide. And now you can see
I've got a lot of bones and I've got a lot
of control actually, how this change is going to move because of the amount of bones, the more realistic you
want your chain to move them all bones
basically you want in it. So I'm going to come now. I'm going to put
this song global, I think, and get
away with global. Now, I want to put my
proportional editing on. And then what I'm going to
do is I'm going to actually try and pull this out. So if I grab this, can actually use my proportional editing. I'm not so sure if I can or not. No, I don't think I can use proportional editing on
lab for some reason, but what I'm gonna
do is I'm just going to hold them down. Like so. Just getting them in
line with the actual chain. Making sure it's got that
nice curve, like so. And then just going to
check once I've done this and just make sure that they're all
actually lining up. So there we go. That's
looking quite nice. Going over the top
then I can see my actual bone's going
all the way along there. Alright, so I'm happy
with the first one. Now I want to do is I want
to duplicate this around. So I'm going to keep it at
the same basic armature. I want this ometer chains, which if I press Tab shouldn't
be cold chains or six, he'll be cold chain,
Omniture, like. So, there we go, that's better. Now I'll also drove die in my complex, the
armature as well. And now I just want
to make sure that this bone if I hide this, I'm just making sure
that's going to the right place where I want it. I think before I finish, I'll just bring this
back a little bit. So I'm just going to put it on normal and then bring it back. Just a touch because they are
all going to come together. Alright, now I've got that wall wants to do is I
want to make sure I rotate these going
round to my older chains. So what I'm gonna do
is I'm going to press Alt H, bring back everything. I'm going to hide these
again out of the way. I'm gonna hide these stones, just make it a little
bit easier on myself. And now I'm going to
come to this part here. Now. My rock here has an orientation so I can press Shift S because two selected. Now I can hide the way. Now I can come to
my actual armature. And what I wanna do
is I want to press Tab to make sure that
I'm in edit mode. And what that means now is I
can copy all of these bones. So if I go over the top now, I can press the little
sideways V 3D cursor and I can press shift D, then rotate it around there,
hopefully without normal. So have global on all that. I'm rotate it around to my next. Came and then Shift D, and then I'll rotate it around
this one and then Shift D. And then I'll zoom
and rotate it around. Now it's important
that you actually make sure that all of
these all lined up. So the first one
I'm going to do, I'm just going to come to these now and actually land them up. It's a bit tedious, but you want to make
sure that it's done. Because if not, it just makes things harder
in the long run. So you might as well make
sure it's done correctly. So now if I click the
little sideways V again, come to individual origins, and now I should be able to
move these bones across. So the first thing
I'm gonna do is just make sure that they're all
lined up properly first, you can see there
are quite a deal way out on some of them. I don't really want
that some Jaws going to line them all up like
so even on this N1, as you can see, it's
a little bit out. You can also see that because
we're moving in a normal, maybe that wasn't the
best way to do this. So I'm just gonna go back.
I'm going to put them back. And you just want to see
if they're lining up. Yeah, I think they
are. So I'm just gonna put this back on global. And I'm actually, I'm
going to pull them off actually first just
so I have a better, clearer view of how these
bones are going to look. Now luckily, with the chain, it doesn't matter too much. If they're not perfectly
rotated the right way. That was something like chain
doesn't matter so much. What does mother
always just that they actually follow in
the chain correctly. So you can see here that we
have a lot of that around. So I'm gonna go over the top. I'm going to press G because that's gonna be
even easier because it means it moves
along the x, y axis. So I'm just going to
grab this one, G, and then I'm going
to grab this part G, like so now that change
perfectly in line. Alright, so now this
end of this chain, I'm going to pull out
a little bit with G. And again, I'm going
to just use g Now. Make sure that all of
these aligning Nope, really nicely, like so. And then I'll go
in. And what I'll do is align them all up
then going the other way. So on the z axis line the Zope, think I've done the first one, so I'm just going to
put that in there like so then I'm just going
to check this one. This one's pretty much all
lined up except this one. Maybe I'll go around
this side now. And then what I'll do is I'll
start pulling these down. And what I'm looking for is
this where the links are. That's where I'm trying
to line them up too. You can see that one's okay. I'm just using g
now and I will go and check them as a final check. I always want the N1 as well
to come a little bit out. Like so you can see
this one's a mail out. So let's pull this down first. I'm going to grab
the whole thing. Whereas g let down and pulled
the end up a tiny bit. Now let's get them lined up. Like so. Then I'll go over the top. Now. Just check and make sure that they're all lined
up right over the top. You can see we've lost
a little bit of it, so they're a little bit out now. So again, I'm going to press G, goes to line them up like so. And I think that is
looking pretty nice. Alright, so once
you've done that, you should have
the same armature. As you can see,
this is all part of the same armature and they should all be lined
up really nice. You should have some
bones poking out of here. I'm going to move this one over just a little bit like so. You should also have some bones, fuels nearly poking
out of the bag. Some of them can be poking out. It doesn't matter
too much because we're going into
some rocks anyway, so don't worry about
that too much. Okay, so now before we finished, the last thing we wanna do is we just want to make sure that these last bones now a
not coming from here. We basically want
them kinda halfway in each of these links because these are actually
going to be IK bones. So if I go over the top
and when I press tab, I'm going to grab
this one first. I'm going to press G and just pull it to there as you can see, and then pull it halfway in this one and the
same on this one. Like so. And then the same while
this one is actually okay, I'm just going to move
that one a little bit to the side so we can
see what we're doing. Now I'm gonna do is I'm going to click on one of the bones. I'm going to press, Let's
press F2 and we'll call this IK bone one, like so. And then let's call this one's
at basically the same but IK bone to bone. And this just makes
it easier than for me to actually go in
and name the others. So not to name the other, sorry to go in and actually make sure I'm
actually on the IK. So IK bone three, then F2, IK bone ball. And I'm also then going to go over to my options and
we're going to put on, where is it, this one here and one to have
viewport display. And I want my name's
on. There we go. Now I can see these are actually IK plus when I go do
make these IKEA's, they will actually go a
different color as well. Alright, so that's it
for that one everyone. I hope you're
enjoying it so far. I hope you learned
a lot and I'll see you on the next
one. Thanks a lot. Bye bye.
23. Creating Inverse Kinematics Controls for Character: Now we've named all these
bones, so we've got IK. Now what we want
to do is we want to actually split them up. So I'm going to
come to this one. What I'm gonna do is press Alt P and we disconnect the bone. Now when I grab this bone now you'll see it's
still got a line there, but it's actually disconnected
away from this one. I'm going to now
come to all three of these 0 P disconnect bones. And I'm hoping that these for press dot will all be the same. Yes, they are. Okay, they're all done now. Alright, so now we want
to do is we want to put an IK on this one. We'll do this one first. If I come to this bone here, I need to make sure that I'm
imposed mode, so pose mode. And then one way to do now
I'm going to come down to my actual, this part here. And what I wanna do now
is actually put an IK. One thing I forgot though, ever come back to this one
and I click on my bones, I need to make sure that this
deform is ticked off on all four of these because
we don't actually want this deep Bowman or chain. So now if I grab this, you'll see that it
should just do that. And even if I'm in edit mode, that deforms should be off. So just you can do it in
either edit or pose mode. In other words, alright, now let's come to this one. And what we wanna do now is
come to add bone constraint. And we're going to add in
an inverse kinematics. I'll put down on the
bottom right-hand side what Inverse Kinematics do. But basically what
it does is it makes a chain reaction so they can control it from one bone
and it moves very loosely. So for instance,
when you're full, actually moves forward
with your leg. It always moves
together with it. You can't move your
leg and leave you fall behind or
anything like that. And also it kinda moves in
a certain fluid motion. And that is what inverse
kinematics does, is trying to basically corral
all the work and all of those keyframes you'd have to animate if you
weren't using these. Now the next thing we need
to do is we need a target. So the target is going
to be our chain. I'm armature. So if you just hover over
the, anywhere on the chain, you will see it comes up, click it on, and then
you'll see it's there. Now the reason why
we name this is because now it's really
easy for us to see which bone is the bone we're
going to be looking for is going to be IK bone to,
which is this one here. Now, now what should happen now is when I grabbed this
bone and I press G, you will see that all of this bone actually moves
with it in a really nice, fluid, realistic way, which is what we're
actually looking for. Now if you drop that
down, just bring it back. It's Alt G, as we spoke
about many times. Now you will notice
those really, really jewelry at the
moment and we don't want, but don't worry because we're
actually going to fix that. So to fix that, what we're
gonna do before we do anything else is we just going
to add in another bone. Now, this cursor right at
the moment is in the center. So if I come to Edit
mode and then I just press Shift a and
bring in another bone. I want everything basically
to move from this bone. So I'm just going to make this
one a little bit smaller. Then what I'm going to
do is I'm going to grab this and I'm going to
attach it to this. So I'm going to grab
this one and this one, press Control P, and then
I'm going to keep offset. Now if I go back
to pose mode and I grabbed this bone here,
well this one here. You can see now that
as I move this, it's not flicking
about everywhere. It's really, really smooth, and that is exactly
what we want. Now this is also
good because as all, if I press G and Z as our
stone goes up and down, the actual chain will follow
with our actual stones. So that makes it even
easier now for us. So now let's come and do the same thing on the rest
of these were in pose mode. We've got, we need to
attach all of these first, I'm just gonna go
back to Edit Mode. I'm going to grab
this one, this one, this one, and then
finally the center one. I want to press Control
P and I'm going to keep offset like so. Then what I'm gonna do now
is I'm going to make sure I think I've took the
form off of all of those. I've disconnected all of those. So if I grab this one, just making sure if
disconnected it, and now I can go into
pose mode and do exactly the same thing
for all of these. I've come to this one. I'm going to go now at a
constraint inverse kinematics, the armature is going to be our chain armature
and the bone on this one is going
to be IK bone tree. Now if you're having trouble finding it because
a lot of bones here just put an IK and then
you'll see IK bone three. Now let's come to the next one, which is this one here. Same thing again,
inverse kinematics are mature bone IK and because we've got names on
you can see IK bone fall. And then finally, this one which is here. Same thing again. There we go. And now the IK bone one. So IK for an IK
bone one, like so. Alright, so now when
I grabbed this thing, the center bone, sorry, I should have all the control over all of these actual chains. Hopefully. Now, let's actually go in
and actually wait these now so that we can actually turn our bones off now
we don't need those on. We'll also do that. We'll go back to Edit
Mode to actually do this. And then what I'll do
is I'll just press Tab, go now to my viewport display, not on there. Where is it? Fine that then up
the names like so. And now we need
to do is wait all these and then bring
our stone back, and then we can wait
out with it as well. Alright, let's do that now. So the way we're going
to weight these, first of all, I'm going
to save that my work. The way we're going to
weight these independently. So I'm gonna do is I'm
going to grab my chain. Sorry, my bones
grew up my chain. Sorry, that's the
wrong way round. So I'm going to grab my chain, then my bones Control P. And we're going to do with
automatic weights like so. And now you'll see happens is
if I come back to my bones, put it back onto pose mode, grab this, this middle one, press the G born. You'll see now this chain
moves really realistically. Now the reason I split
these up into do them independently is because
if I didn't do that, what would happen
is that it will try and put weight
onto each of these. So you might end up with this bone moving slightly
as this chain moves. That's why we did
it independently. So now let's come
back to object mode. Like so grandma got my bones. I'm just wondering which
one I actually did. Yeah. Let's go and check that again. I think I'm working.
Yes, I am okay. Working this way, round
object mode. There we go. Now let's grab this,
grab this control P, wrong way round again. Let's grab this, grab this
control P automatic weights. Let's work our way around now. So we'll grab our
chain, Guevara, armature control
P automatic ways. And now find, Let's
come around and grab this one and this one, Control P, automatic
weights like so. Now I'm hoping
that these all go. Okay, so let's the
moment of truth. Let's go to pose mode. We've got our
middle one grabbed. And if I press G, There we go. There is our chain moving
rarely, rarely nicely. Now of course it's not
going to be moving, it's only going to
be moving slightly because we don't actually want this chain to be stretched
or anything like that. No bendy bones this time. Alright, now the
final thing is we need to obviously bring
in our stone now. So if I press object mode, press Alt H, bring
everything back. I'm going to basically hide all of these
except this stone. So I'm gonna hide these as well, Just this 1 st. And what
I wanna do is I also want to have this weighted
to my actual chain. So again, I'm going
to grab this, I'm going to grab my chain. I think it's the right
way round. Yes, it is. And we'll give it
with empty groups. And the reason I'm
giving it with them two groups is because I want this center bone to be the only one that has some
weight bearing on this. In other words, I want to
now go to my armature, come down to bones in front. And this one here, this one here, I want
to be weighted to this. So what I'm gonna do is I'm
gonna go into edit mode. I'm going to call them. Actually, I'll come to this
and that'll make more sense. So this bone here, I will call this the root bone as well because that
makes most sense. So if I come here, we'll call
it the root bone. Like so. And then what we'll do now
is we'll come to our stone. And then what we'll
do is we're looking now for the root bone. So again, I think it's
gonna be down the bottom. There it is. Let's see me. There
it is the root bump. Alright, if I press Tab now, press a and then click Assign. I can also as well move this bone all the
way down to the bone. It's going to make it
much, much easier. If I do that, then I'll be
able to find it like so. Now if I come in and I grab just this bone
here, come to pose. So grab this bone
by press G. Now, everything will move with
this bone as you can see. Now, the moments of truth, all we need to do now is
basically gets animated. So if I press Alt H when I've
gone back to object mode. So now I'll teach,
bring everything back. And now again, let's come
back to pose mode. Like so. Let's go to layout so we can see what we're
actually doing. Let's put this
onto one, like so. And then we'll just zoom
in a little bit again onto pose mode, like so. And then what we'll do is
we'll start this on here. So I'm going to press
I will do I think we'll just do location
because we don't need to scale or
anything like that. So just location. And then we'll do is we'll
come to, Let's say 100. We'll do it over 200 frames. So come up, bring it all
the way up there, like so. And then we'll press i location. And then all I'll
do is I'll press Shift D and bring that over 200. Like so. I'm not sure. I'm going to zoom
in a little bit. Yeah, it's I think it's on 200. Yes, it's onto wondered. Now, if I grab this
Right-click interpolation, Let's put it on Bezier. Let's bring you over. Let's press the space bar. There we go. Realistic moving chains. Now the other thing you could do is you could pull these in. As this is moving. You just basically
put a bone in here, attach them to the IK, then they would move
in with it as well. But that's making it a
little bit more complex. I'm quite happy with
how this is working. It looks very realistic. And basically it's
something that you should have in your own arsenal for
when you want to animate. Not just to change. It could be ropes and
things like that, which are notoriously
hard to animate. Alright, so I'm gonna do is
I'm going to save that out. And then what we're
on to the next one is if I come down and
close this up, just close this chain's off, and I open up our guy here. You can see that we
finally that we're on now to the actual
character walk cycle. So I'm just going to
pull my materials, let the materials load up. And you can see that this, this one is out of
the Unreal Engine. So, and you can see there
we've got our little guy here. So this is the next
one that we're going to do our walk cycle. So I hope you enjoyed
that everyone, and I'll see you
on the next one. Thanks a lot. Bye bye.
24. Character Rigging: Welcome back everyone to
the ultimate guide to blend the 3D rigging
and animation. And this is where
we left it off. Now before we start off, I know that some of you
might want to start on this part of the course
from the get-go. And also, I recommend
you to familiarize with all the stages first to get
a better hang in animation, I'll make sure to
walk you through this with a nice pace and all the information
needed to understand more technical aspects
of these lessons. So this is gonna be broken
down basically into, first of all, Reagan or
a little woman here. And then what we're going to
do is we're actually going to do a walk cycle. So let's get started. The first thing you can
see is that this woman is absolutely huge in comparison to our little guy over here. So we should actually make
them much, much smaller. So I'm going to do is just
press S, make it smaller. I'm going to try and get
to be the right size. Now, if you're
creating something like a stylized character, you might be able to get
away with something. They cite, something like World
of Warcraft for instance, the characters are like seven
or 8 ft tall in reality. So you just have to take
into account though, if you've taken this through two games engine or
something like that, they're going to move much, much faster pace rarely. Plus if they are
much, much larger, then the movements
needs to be a lot more slower and a
lot more deliberate. If you think of
any movies you've seen when you're looking at giant things walking
around, it's very slow. It's very deliberate,
but they do walk a lot faster in comparison to
an average size humans. So all these things need
to take into account. So what I would recommend
is, first of all, work out how tall your
character is going to be actually based
on your scene, all based on the
games engineered, taking it into, is it
going to be a giant? Is everything in the actual games engine
that you actually creating the game for going to be much larger
than in real life. This all needs to be
taken into account. Plus not that as I said before, you take this in and it's not
actually the proper size, then what will happen
is it will cause problems a lot further
down the line. A lot. Some people might have to scale your human or you humanoid that you're taking in there or your dog or whatever, you'll have to be re-scaled. That will then will cause
problems with the animation, problems with the games engine
or something like that. So always bad, first of all, to get the scale correct. So the first thing I'm going to do is now I've got it here. I'm just going to make
it a little bit smaller. Like so. And you can see it's round
about the right size. Now, this OBJ human
here is 1.8 m tall, which is around the average
height for a human. So this lady robot on
the left-hand side, being a little bit taller, won't actually make
any difference really. Alright, so once
we've done that, I'm actually going to put
it in the center then like so then I'm going to
actually delete my human. Now I don't want if
I want delete them, I'll just hide him
out of the way. I don't need them anymore. Then I'm just going to
hide out this and this. And then I'm going to grab it. And what I'm going to do just to make this a little bit easier. I've called it called
the robot undo. It was going to be a male
robot from the film. The film is called now
while it was about a robot, but anyway, let's
just call her Andrew. So let's pray over it
down at the bottom. So I'm just going to
drag it all the way down to Obama thinks she's
gone into my actual camera. So I'm going to take her
out there and put her down at the bottom if
I can. There we go. Alright, so now
she's out of there, which means then I can control
up turning on and off. If I need to see bones
or anything like that. The third thing then
we're to do is I'm going to put my cursor to the center. So Shift S because
it's a world origin. And then I'm going
to press on my robot Shift S selection
to keep offset. And then we're
going to do is I'm just now going to polar up. This is going to
make it easy because when creating bones
and things like that, we want to be able
to mirror it from, from one side to the other, that, that makes it much
easier to actually work with rather than create every
single bone ourselves. Alright, so the first thing then we're going
to do is we're going to pull in our first bone. I'm going to do is I'm just
going to press Shift S. Now we're going to have shift
us because it's selected which is put my cursor
right where orientation is. Now I recommend when you're
starting to put the bones in, always start down here just where the hips
are as you can see, because then that's a great
start for going upwards and then you can work off
that coming down to the legs. So now we're gonna do is we're
just going to press Shift a and we're going to
bring in a armature. And I'm actually going to
make it smaller festival, bring it in like so. And I'm also going to turn on names and I'm also going
to put it in front on this one just so we
can actually get an idea of where they
actual bones off. Now the other thing you can see, it's slightly, slightly
above where the hips are. I want it realistically to
be around this hip joint, which is going to be
where this blue line is. So I'm just going to pull it
down just a tad, like so. Alright, so the
other thing is you might actually want to
change your bones to be, be bones or something like that. It might actually make it a little bit easier
to work with. I'm going to make it a
tiny bit smaller, like so. Okay. Now before we carry on, Let's
come over and rename it. So we'll call it a robot
rig or something like that. And then that makes sure
then as we spoke about, if it's being sent through to Unreal Engine or
something like that, then it's not going
to cause issues. Because if we don't
rename the armature, sometimes it causes issues. The other thing I
should point out here is we're only going
to do the main rig. The hands and things like that we're not
actually going to do. We're not going to create
a very complex rig here. This is all about giving you the basics to actually
create your own rigs. That happens pretty
much are going to be using the same
techniques as what you're going to learn throughout rigging this actual characters. So just bear that in mind. Now for me, I do
actually always liked working on octahedral bones. And the reason is because I like seeing where this bone
gets thinner at the top. It gives me a good
visual, for instance, of which way this bone
is actually pointing to. I'm going to do now is I'm going to grab the top of this bone. I'm going to pull it down to
the actual bottom of here. And then we're
going to do now is enjoys going to lift it up. Like so something
something like this. I'm also obviously
keeping in mind. I really don't want to
twist my bones or anything. I want to keep it as
straight as possible. And that is why I'm working on number one on the number pad, which is the front view. The next thing you
wanna do before moving forward as if you press three on the number pad, you
can come to the side. And what you wanna do is really, you want to align
this up so you want to line it up just
a little bit back, just so it's kind of
going up this way. We don't want too
much bend in it, so we don't want
to have it light coming down or
anything like that. We want it to be
relatively straight. And the main reason
for that is one, it's easier to animate. And two, it's easier than for Blender when we come
to automatic waiting. Actually wait it onto
this actual mesh. So the next one I'm going to do is if I come around
to this side, press one again, I'm going to come down to the bottom now. And what we're going
to do is I'm going to extrude out another bone. This bone is going
to be sort of like the main controller of
the, of the whole rig. So you will see sometimes you have rag dolls, for instance, when you're moving them around and all the actual
robots moving with it, that is what this
bone is going to be. It's basically it's like
the root bone but not quite the root bound the root
bone really should be done. The Bumble would discuss that as we go a little bit more into it. So if I now press E for Extrude,
I'm going to pull it up. So I'm going to press
the zed to actually tie it to the actual axis. And I'm going to pour it
joules there like so. Joseph below it, like so. Now that you've
still got this bone, the best thing you can do now
is bring in another bone. So I'm going to do
is I'm going to, I'm going to actually pull
it up just so it's worthy. Actual belly button is around here and then I'm going
to extrude it up. So E again, and this time I'm going to pull it up to
roundabout the chest area. And then finally I'm going
to pull the next one on Jaws below the neck here. So basically tying into where the actual
shoulders will come. This is basically the
same rig you'll be doing, no matter what kind of humanoids you're
going to be animating. If you keep these
points in mind, then you should be
absolutely fine. So again, if I press
now E and Z and pull it up yours to where the shoulders
are coming around here. We might move these
down as we work on or something like that, but that looks, that
looks fine for now. So now let's extrude
it up for the next. So if I press three, go to the side view, you can see them a little bit
out of the month. I went to fix all
these in a minute. So I'm going to press E and Z. I'm going to pull it up to where Joel's below where the head is, and then eat and zed and
pull it up all the way. So this now is the
actual head bone. Now I'm gonna do is I'm going to grab this one first
and I'm going to start pulling
these bank like so. And you can see, it's
a nice move on here, and it's actually following the actual contours
of this actual robot. So you can see now, when
we straighten that up, it's nice and smooth. It's not actually jogging, and that is exactly
what we want. Now honestly, I recommend you really take your time
when you actually doing this because if not and you just try and rush
it as something, you're going to make
mistakes and it's not gonna be in the right place, which is going to
cause you a lot of problems server
down the line. So this part of actually
creating our rig is the most important
part because that is where everything
kinda feeds off. Now let's think about our
actual shoulder bone. So I'm going to do
is in front view, I'm going to press
Shift and right-click. And I want it to be round about here because this is
going to be the shoulder bone. So I want it basically
coming from here up to here. So if I shift right-click
here and then what I should do is press Shift
a, bringing the new bone. I'm going to grab the top of
this bone. So grab the top. And then what I'm going
to do is move it round to my actual shoulder,
something like that. I'm probably going to pull it
back a little bit as well. Now I'm going to check on three. So sideview whereabouts,
this is in real time. I'm going to actually move it
back a little bit like so, and then move this
point back like so. And now you can see
that's fit in really, really nicely in there. Now what you wanna
do is you want to actually extrude this out. So we're trying to extrude this out all the way
down to the elbow. Now the thing is, a lot of
times you will actually have a character that
comes in a T-Pose. I'll put down the bottom
right-hand side here, what a T-Pose is. But honestly, when we're
actually creating characters, if you're a beginner,
it's quite hard to actually create that T-pose. So you probably more than likely going to get a character
that comes in like this. So as long as it's
got its arms out and not actually stuck at the
side or anything, All right, above it said or any kind of weird pose or anything or disarms different
from the other side, you should be okay
as a beginner, actually pointed rig on this, you can basically rig
anything but you need a lot more experience
if you were against something
along those lines. So now let's press one again. Among going to do is
I'm going to press E and I'm going
to drag this out. Now you can see it's actually
twisting at the moment. So what I tend to do is
I want to lock it first of all to the actual x axis. So bring it to here, and then I will pull
it down like so. This means that we've got
no role on the actual bone. Because if you have
that, it's going to cause you problems
in the long run. Now let's go to three again. Just make sure that this is where I actually
wanted it to be. So you can see the elbow is
coming round about here. Let's press one again. And I think in Let's
go behind as well. So control one that
then is fitting the elbow perfectly
as you can see. So if we take a look around now we're actually
down to the elbow. We've got actually
all the chest, the stomach, the head,
everything else done, and we're only going
to rig one side of it, as I said, and then
we're going to mirror it over the other side. I'm going to show you
exactly how to do that. And then a bit later on we're
going to put in IKEA's, and we're also going to
put in polls as well. Which means that the elbows and the knees and things
like that follow a certain direction because you don't want your
bones actually spinning in a weird way
or anything like that, but that's for a
little bit later on. All right, everyone. So I hope you enjoyed that. I'm actually going to
save this out like so, and I'll see you
on the next one. Thanks a lot. Bye bye.
25. Naming Bones for 3D Rig: Welcome back everyone to
the ultimate guide to blend the 3D rigging
and animation. And this is where we left off. So let's now carry on
down our actual arm. And now what we're gonna do
is we're actually going to extrude it out a little bit. And what we want to
do this next bone is you want to
come to the wrist. Now, even if you're rigging
hands and things like that, you still want to
have a wrist bone. So I'm going to do again, I'm going to go into front view. I'm going to pull
this out, then I'm going to pull it this
time on the z-axis. So eat and z again to stop
this bone actually rolling. And then what I'm going to
do is I'm going to pull it across and Pull it first of all in front
view to my actual wrist, which is around this point here. And then one wins do is
I'm gonna go into three. So side view. And then we're going
to pull this now to the actual wrist
as you can see. So now it should be
something like that. Then what we're going to do finally is we're going to pull 1 mol bone out to
the actual hand. Now the thing is, when you're doing hands like this
and you're not actually, let's say that he's got
no fingers or anything, or he has got fingers,
but you still want to actually just use
one bone in it. You might actually end
up with some issues which we'll cover a
little bit later on if we do have those issues where it doesn't actually
weight correctly. And this is because obviously
we've got a thumb out here. So when I recommend when you
bring this next bone in, like put it along
this finger here. So it's halfway between the thumb and the little thing I'm gonna do is I'm
gonna press one. I'm going to press E
and zed, pull it out. Like so I'm going to
pull it into place and I'm going to press
32, go to side view. I'm going to pour it around this finger,
something like that. And I think that's actually
probably going to work for us and get most of this
actually weighted. Alright, so you should end
up with something like that. That's looking pretty nice. So now let's come in and
actually do our hips. So what I'm going to
do is I'm going to grab around my hip here, which is going to
be around here. I want to press Shift and
right-click bringing my cursor. I'm going to press Shift a
and bring in another bone. And then what I'm going
to do is I'm going to pull this all the way down with a little blue Zed. Gizmo, pull it all the way down and we're gonna
go to, is nice. So somewhere around there. Then I'm going to go
into side view again. I'm going to pull all of
this back pretty much into the hip and then pull this
one back into the knee. Basically, when you
placed in these bones, wherever you weights in it, you don't want it to be out here. Because what you're
gonna do is you're gonna end up losing some
of the weights. So it's going to be really read around here and
as it goes back, it's gonna be kinda blue. We want to give blender a real good accuracy on where we're actually
waiting there. So now if I press one, we can see probably move
it a little bit over, get it right in the center
of that kneecap there. Alright, so the other thing is when you've got to think
about this as well, is that the kneecap
where this is going to be a bright
red strip over here. And as it gets further up to each parts of these is
going to get more green while it's gonna be yellow and get more green and
then finally more blue as there's less weight applied to that part of the rig. In other words, you don't want this part of the actual rig, this on the thigh bending when the needles that's
just not natural. So that's what you're
trying to avoid. So now let's actually
bring this bone down. And what we're gonna do is we're going to bring it down to basically the heel and
then create the fault. So we're going to press
E and Z, bring it down, pull it across a little bit like so three to go into side view. I'm going to pull it back
just a little bit like so. And then one way to do now is press E and pull it
along this side. So if I press Y, I
can pull it along, something like that
and then pull it down just to the
bottom of his foot. So you should end up pretty much with something like this. We know bones really
bent or anything. They're all facing
the correct way. So because we've actually
been doing it on front view and been using
the gizmo properly. It means that this
now is pretty much rigged the best we
could possibly do it. Now one thing I'm
going to do actually, I'm just gonna go over
the top and I just want to pull this out a little
bit, out a little bit. Just so it's following that
for a little bit better. I'm going to jump into three and just make sure I'm
happy with where it is. So it's following this line. Alright, so yeah,
I'm happy with that. Alright, so now it's time
to actually name our bones. Let's go down the center first. So I'm going to come
to the top bone. I'm gonna go over to the right-hand side
when my bones are. And we can also
as well press F2. So don't forget that you can
even name them over here. All press F2. If you press F2,
will call this head. And remember always
ports on bone after it. And the reason is because obviously because if
I'm searching for it, I want to be able to
see where my bones are through all of this here. It's a lot of the
parts in here now. So head bone, press
the Enter button. Okay, and let's click
on the next one and we'll call this neck bone. So Nick bone. So let's come to
the chest bone now. Chest bone. Then we'll have let's
call it stomach. You can call it whatever
you want as long as you'll see in a
minute when we do the actual arm bones
in the leg bones, they have to be named in a certain way. I think
of spelt stomach. I'm not sure if that's correct. Now, the one you want to
name here is this one here, not the downward one. And this one we're
going to call hip bone. Thanks. So now with the actual
arm and leg bones, what we wanna do is you first of all want to
come to this one. We'll call this the thigh bone. So I'm going to
call it thigh bone. But what we want to do
on the end of it is put dots because we're
frontward facing. And this is the Burroughs, this is the right side. So it doesn't really matter
if you name it.org or dot L. It doesn't really matter
because what Blender will do is it will put it over the
other side with dot L, or obviously the opposite to
what you actually put that. I'm going to have
it as thighbone dot all I'm going to come
to the shin bone. So I'll call it shin bone dot. And then I'll come
to the foot bone. So I'll call it fought bone. Dots are and then find them. We're gonna do the
right hand side now so we'll come to
the shoulder bone. So shoulder bone, the odds are and then we'll come to and make sure you capitalize it as well, because then it will
capitalize on the other side. Then we'll come
to the upper arm. So upper own dots are, and then we'll come
to the lower arm. So lower bone got R. And
then finally the hand, hand Bone got off like so. Alright, so now we should
be able to see that everything is named except
this middle bone here. So now we're gonna
do, is going to add in some constraints. And we're going to
do this now because then when we actually mirror
this over the other side, it means that we can actually
mirror these as well. So what I'm gonna
do is I'm going to come down to the bottom bone. I'm going to grab this large
one here, as you can see, I want to press three
and then Walgreens do is going to extrude it out along, I think it's the y. So along the y axis like so. Now while we're inside view, what we wanna do is we want to actually bring in another bone. This bone wants to be level
with the actual knee. So you can see on NI here, if we come across here, what we wanna do is
we want to shift right-click and put
the cursor there. And then what I'm going to do is I'm going to press Shift a. And what that's gonna do
is bring in another bone. Now I'm going to pull
this bone down and have it pointing this way, like so. It doesn't need to be straight
or anything like that. I want to make it a
little bit smaller. And the reason what we use in this bowl is basically
to make sure that this knee lines up perfectly
with this pole bone. So in other words, it's always going to be facing that way. If you don't actually
put these bones in when you come to move your
leg or something like that, you'll end up with
unique camps pointing outwards or something,
or inwards. And it will just look really
weird as he walks along. This actually just
make sure that everything is pointing
in the correct way. Which means that when
you do your walk cycle is going to be a lot easier
to actually do that. So what I'm gonna do is
I'm just going to grab this bone with L and I'm
just going to move it across a little bit like so making it in line
with that knee. Now we're gonna do
is we're gonna do the same thing for the elbow. So if I press 32,
go into side view. And then what I'm going
to do is I'm going to come behind it this time, overhear something like that. Shift right-click
and then Shift a, and then I'm going to bring in this bone like so bring it down. Again. It doesn't need to be
level or anything like that. I'm just going to
make it run about the same size as
the bone, like so. Alright, so now I'm
gonna do is I'm going to press Control three. Sorry, three. Not three, control one. And then there we go.
Now we can go behind it. And I'm going to do
is I'm going to align this up now with my actual elbow, like so. And now that means
that when he walks along, this will actually, while his elbow will be pointing at this at all times again, so we don't end up with his
arms crossing over m or something or his hands
flailing out like that. That's the reason why
I put it in these in, It's basically to show that
these two connecting bones here always follow
this elbow bone. Not want to do is actually
make a new hand bones. So I'm going to do is I'm
going to grab this bone here. I'm going to press Shift D. And you'll notice when
I've actually done that, it will have a line
pointing to it because this means that this one
is connected as well. I want to right-click to
drop it back into place. And then all I'm gonna do is
I'm going to scale this up so I can't scale it up at
the moment as you can see. So I'm just going to press S and just scale it up just so it's actually a little
bit bigger than the actual bone that
we already created. It's going to be in
exactly the same place. Now while we've got
this bone here, let's come in and name it. So what I'm going to
do is I'm going to call it hand dots. Right? Dots and control. Like so. Didn't put a dot there.
So I need to make sure that is dot like. So. Now let's come in and name all the control so you can
see it's got two shin bone, so let's call it let's
see what our ohms, sorry, this hand control. So we'll call it a leg
dot, right? Control. Like so. And then we'll also
come in a name there. So we'll call this knee. Alright. Don't write like so. And then we'll call
this one elbow pole. Elbow, pull. Don't write like so. All right. I'm just going to make
sure that they the same. So elbow, knee, poll, leg, right control and
this hand control. Alright. So we're pretty much done now with the actual rig. The only thing left
to do now is actually bringing a main control button, which is going to be
basically our root bone. So what we'll do
is we'll come on, put the cursor in the center. So Shift S because
it's a world origin shift a and we'll bring
in a, another bone. And then I'm just going to
pull this back a little bit. Like so. I'm going to
press 32, go inside view. I'm going to pull it
back and then just lift it up just so it's
along that line there. And this one we're going to
call it root bone, like soap. Alright, so now
we're, as I said, we're pretty much done
with the actual rig. We've got everything in there
that we're going to need. We just need to put it
onto the left-hand side. So what we'll do then is on the next lesson we'll
start parenting these bones up now before moving them over to
the left-hand side. For instance, they all
have to be parented up because if you
move the root ball and everything's
not parents adult, you're going to be moving it
and you're going to leave the pole bones behind
and things like that. So that's really important. All right, everyone. So I hope you enjoyed this. I hope you learned a lot and I'll see you
on the next one. Thanks a lot. Bye bye.
26. Creating IK Controls for 3D Character: Welcome back everyone to
the ultimate guide to blend the 3D rigging
and animation. And this is where
we left it off. Alright, so now let's
actually parents this one up. So I'm going to do
is I'm going to grab my elbow, pull bone, I'm going to grab my shoulder
bone and one wins do is I'm going to press Control P and I'm going to keep offset. And you should get
that little two dots. They're actually go into there, which means it's now connected. Which means that when
I move my route bone, this is going to move with the shoulder
bone and everything. Of course, he's going to
move with the root bone. That's exactly what
we're trying to get to. Now let's grab all
actual knee bone. And then what I'm going to
do is I'm going to grab the right controller here. Again, I'm going
to press Control P and we're going to keep offset and then the little dotted
line there should appear. Now let's come into the
main bone that we saw, the first bone that we're
actually start to web. So it should be the
one pointing down. And what we're going to
call this is torso control. So torso control, like so we don't
need to put it right on there because we've only
got one right in the center, so we don't need to
worry about that like the rest of them. Now we need to do is we need
to grab the hipbone and we need to grab the stomach bone. So this one here, if I click on this or the hips bone, sorry. So we've got all the thigh and the hips bone and then
we need to press Control P, We're going to keep offset. So again, we've got that
little dotted line. Now let's grab our
shoulder and we just need to attach this to
the actual chest bone. So I'm going to grab shoulder, chest control P and keep offset. And finally now we need a way to attach all the bones
to everything else. So now let's grab the
three control bones. So we've got our leg, we've got our elbow. We've also got our wears it, not the elbow, so
we've got our leg. We've got our hand, though, this one here, 0
handwrite control. And we've also got
this main one here, which is our torso controlled. Then what we're gonna do
is we're going to grab the root bone down here. Like so, press Control P, We're going to keep offset. So you should end up with
something like this. I think now if I,
if I pull this out, you can see where they're
actually connected. So just make sure yours are all connected to
that bone like so. Now it's time to actually
bring in our IK bones. And again, the reason
we're doing this first is because of the fact that when we actually obviously duplicate over
the other side of merit, we want to have all
of our IK is already in because then it'll
speed up your workflow. So you're not
creating to IKEA's. Well, actually for IKEA's. And this then is just going
to make it much, much easier. So what I wanna do is I want
to grab this shin bone here. And then when they come over to the right-hand side
and we're going to go to bone constraints, which is add up
Object Constraint. And it's not over here because
I need to be imposed mode. So let's go into
pose mode first. So pose mode, and there we go. Now we've got add bone constraint,
not object constraint. So let's come in and add in
an inverse kinematic like so. And the target, of course, he's going to be our actual rig. So anywhere on your robot you should be able to see it
says robot rig like so. Now the controller for this, so the bone folder, this is going to be this
leg, right controllers. So I can click on here. I can put in leg. And then what will
happen is you can see leg, right controllers. So this one here like so. I'm just making sure
that's the right one because they are when
two different ways. Hello. Yeah, it should be
this leg right, controller. So just make sure yours is
like bright controller. Now we're gonna do is
we're going to change the chain length to two, because basically we're
going to class this as one and then this is two. So don't forget, this is always going to
be the first one. We've got 1.2 because
we want this to control the actual shin
bone and the thigh bone. So if you put this now on one and then click it
again, you should have to. And you can see now that
there's a little line going up there and it's actually touching that actual
bone up there. Now what we have to
do is we need to tell this inverse kinematic that we also want on there,
a poll targets. So the pole target
again is going to be our actual robot rig. And then the bone is going to be this one
which we put here, which is the knee poll, so ni, so K and E Ni pole, right. There you go. You can see it actually
moves it out a little bit, and that's actually fine. Now you can see
that at the moment now that this is
facing the wrong way. So you can see what's happened. Is this, putting this to this poll as twisted
this around. So you can see that this fault, we no longer have a foot bone. So we need to turn this
around by 180, 180 degrees. And now you can see
that that's now facing the correct way. It always happens when
you bring in a poll. It will always spin it
around in some weird way. But as long as you've put your
bones relatively straight, it should be just
an even number. So 9,080, something like that. So now that should
be absolutely fine. You'll find that's
mostly the case. Every time you build a rig, every time you use a pole, you'll always have to twist
it around in some way. So now why have we gone to the
trouble of doing all that? Well, the thing is if I now grab this bone and
I bring this up. You can see that now is facing, is facing the wrong way. So I actually need to
rotate this around. So you can see it's actually
moving multiple bones. But the problem I have
is that this bone, for instance, is facing
the wrong way now. So how do we actually fix that? Because I mean, at the moment the leg can't really
move this way. So the first thing I'm going to do if you come
across this problem, I'm glad actually it's
happened because it means that I've come across a problem
which you might come across, which means I can show
you a fix for it. So the first thing you wanna do is look at the side of your leg. Now normally you can see that
this as it comes down here, is actually going slightly in, which means that blender
is thinking that this is going inwards or not outward. So in other words, we need to
make these bones a lot more obvious that the kneecap is
actually on the frontier. So let's now come in
and actually fix that. So first of all, I'm going to take off
the inverse kinematics, so remove that completely. Then I'm going to go to object
mode, sorry, Edit mode. And then one way to do is
move these bones around. I'm going to grab this bone
first one and press three on the number pad and make
them a lot more obvious. So I'm going to grab the top of here to where they're
actually going to go. So I'm actually
thinking of moving. I'm gonna hide this
bone out of the way when I grab it, press H, and then I'm going
to grab all three of these bones a moment
under his jaws, pull them back
just a little bit. Now you can see that
is a lot more obvious. I'm going to pull it back just a ton because I don't
actually want it interacting with I want it actually to wait
on the back of this, so I don't want you
going back to fall. Alright, so I think
that now looks bad. It's a lot more
obvious that this is the actual desired
way it's going to go. And now I'm going to do is
I'm going to press Tab, I'm going to press Control
a, all transforms. Not then he's going to put my
cursor right in the center. Now let's give that a try. So I'm gonna do is I'm
going to come to this bone. I want to go to my
pose mode first. So pose mode, I'm
then going to come to a bone constraints,
inverse kinematics. Let's pick the target
is again the rig. Let's pick the bone as the leg, our control, so we'll
put in control. And then the one
we're looking for is this one leg right control. And then what we're gonna
do is we're going to put the chain length up to two. Pole target is going
to be the rig. And finally then the bone of the target is going
to be that knee poll. So ni, poll, right?
And there we go. Now let's now spin this around. So I'm gonna go to pole angle, turn this around to 180, and now I'm going to grab
this leg, and there we go. Now it's actually fixed. So that is how you fix
it if you're going to come across a problem like this. So now you can see if I
pull this up and move this, let's say out to here, you can see how perfectly now that leg is actually moving. Alright, so I'm going to do
is I'm going to press Alt and G just to put it back there. And then that is the end for
this one on the next one, then we need to do the same
thing with the actual elbow. So we need another IK in there. Alright everyone, so I
hope you enjoyed it. I hope that you learned a lot
and actually found now to troubleshoot things with rigs just in case you come
across those problems. And I hope that you understand now how to actually fix them. All right, everyone,
So hope you enjoyed that and I'll see
you in the next one. Thanks a lot. Bye bye.
27. Mirror 3D Rigged Character Controls: Welcome back everyone to
the ultimate guide to blend the 3D rigging
and animation. And this is where we left off. So now what we need
to do is we need to do this with the
actual arm bone. And luckily for us because
our arm bone isn't straight, it's really obvious
where the elbow is. It's really obvious
which way the arm turns. We shouldn't actually have
the same problem on here, fingers crossed, but we might. So let's just say
we're in pose mode. We're going to go down
to click on our arm. And then what we're gonna do is we're going to come down and add bunk constraint and know the
inverse kinematic like so. So the target is going to be, of course, the rig again. So I'm going to grab my rig. The bone is going to be
the hand controllers. So if I put in hand, we've got one that says
hand, right control. The poll target is
going to be again the rig and then the actual bone is
going to be the elbow. All right. Like so. Now you can see that
we do have a few problems in that it's moved everything and we really don't want that. So again, we want to put the
chain length iterations up. Now let's turn it
up to two, like so. And now we can see that we do have a little bit of a problem. First of all though, let's see if this hand actually moves. So you can see all of the
actual arm moves correctly. The only problem we've got
is the elbow is not in line, so this elbow is not in line. So let's come back to it. Again. It means we're
going to have to mess around with the actual poll. So I'm going to do is
I'm gonna put it at -90, as I can see that
just pulled it back. And now if I actually move this, it should move correctly. So no matter where I move this, you can see the elbow is following the actual
poll targets, so that now is working
absolutely fine. Now again, if you
do have problems, just go and do the
troubleshooting that we did with the actual knee just
to make sure that your elbow is moving
in the correct place. Alright, so I'm really, really happy with how this rig is now. Now the moment all hand. So our hand bone in here is
not actually moving as well. So the problem will have is as we let say rotate this bone. The actual hand bone in there is not actually
going to rotate, so we need to actually fix that. So what we're gonna do is
we're going to come in, we're going to grab this
bone on the inside. So I've just hit that
one out of the way. And then one went to do
is I'm going to add in another constraint. And this time it's going
to be copied rotation. So we're going to
go copy rotation. The target of
course, is going to always be the actual rig. And the actual bone we want to copy is going
to be the hand. Bones control like soap. So now when I move that the, rotate it, this hand is actually
going to rotate as well. And we can test that out
by pressing Alt H now. And when I rotate this, we shouldn't actually
see anything because that bone behind that
is also rotating. Now, the easiest way just to see this in action as
if you press that, go into Wireframe, grab this bone now you will
see as I rotate it, this actual hand bone
rotates with it. Alright, let's go
back to Solid mode. And now let's think about putting this over
the other side. Now before we actually move
this over the other side, we can actually give
this a quick test. So if we come into
this main bone here, you will see that
as which one is it? This one here. You will see that as
I move this bone now, this tall so bone, you'll see that the whole rig
moves pretty much with it, so it can actually
jump up and down. The hands are moving up and down and everything like that. The problem we have
is if I rotate this, so if I rotate this on the x, you will see that all of this rig is actually
moving with it. And that's not particularly
what I want to do. I want sometimes the hips to move and not the actual chest. I want it to move,
in other words, in a more realistic fashion. So what do we mean by that? Well, when I actually
press Alt and actually can see how it's
all kind of bending forward. And if you think about
when you move your hips, you want to be able
to keep your chest in line so perpendicular, straight down without bending your hips and your actual
chest bending with it, we need a little bit
more movement in the way that we're
gonna do is we're going to click on our chest. We're going to come over to this little bone icon over here, and we're going to
open up relations. You just going to turn
off inherit rotation. Now if you come back to your torso bone and
you press an axial, see now it's actually moving in a lot more of a
realistic fashion. So now you'll see that as well. We have the same problem
for the actual chest, which if we press all in x now you'll see that all of
the rig actually moves, the head moves forwards
and backwards. And again, it's not realistic. So what we're gonna
do is we're going to come to the neck. We're going to come over and
turn off inherit rotation. And now when I get my
chest and rotate it, you will see that we get a lot more realistic
movement on the actual head. The head stays exactly
facing forward, which is exactly what we want. So now we can see that if
we grab our center part, everything is moving as realistic as possible
with this rig. If I press R and X now, you will see the
head stays fold, the chest pulls out and it moves just him in a much
more lifelike way. Alright, so we're
happy with that. So now let's move on. Now. The other thing that
you might wanna do peer rig is if we come
to this Bombay here and you press Alt
and why you can see at the moment
as we bend this. This part here,
the stomach part, if we bend this the other way. So if I press R and
X Men it forward, it might need a little
bit more of a bend to it. So what we can do to actually
fix that is we can come over to our little
running man here, put this onto B bones, and then what you can do is
you can come into this bone, go over to the right-hand side and you'll see that you've
got one called bendy bones. And if I turn this up or down, you will see now that
because we've got that on, if I rotate this now, can you see how much Ben
That's actually got now in it? Anywhere we want a
little bit more bend. You might actually want to
put that in another words, if I should just show
you this now you can see how much that is actually bending
and it's bending a lot more lifelike wave. For instance, if you
look at your neck, it has maybe like a few
bones in there which enables it to scrunch around
and things like that. With this rig though
at the moment, it's only actually
got one bone in there which is kind of
limiting it in some way. So just bear that in
mind if you actually want to actually do that for me, I'm going to put this back
onto my octahedral bones. I think I'm happy with that. And you'll see now because
of where it back on there, that we still got the same
kind of bend in there. Alright, so that's
covered pretty much most of the problems
you have with a rig. Most of the things that
you might actually want to change to make it better
and things like that. I think at this point,
if you really want to take this rig a
little bit further, print hand bones in or putting more foot bones and
things like that, then you're able to do that. Now, the last thing we
wanna do is if we come back to this bottom one on
here and I bring this up, if I rotate this, so let's say I put this here and I want to rotate my fault, then I want to do
everything from this point. So you can see if I press
Alt and x and rotate this, I'm actually just rotating this. I'm not actually
rotating the fourth. Now, if I actually copied the rotation on
this one of this, that means then easier
than to move the fault. So if I put this back to
where it was with Alt G, What I wanna do is I want to again hide this one
out of the way, Come to my fault. And I'm going to bring in
a, another bone constraint. And this time it's going to be, again the copy rotation, same as we did with
the actual hand. So now I want to copy the
rotation of this lake control. So my target is going to be the rig and the bone is
going to be the control. So five-point in control
here, leg, right control. And of course it's going to
spin it around the wrong way, exactly the same
problem we had before, but we need to fix this in
a different way this time. Now we need to do is
just change the target to local space with
parents on both of these. So local space with parents. And now when I actually
bring this in, so if I press Shift Spacebar, bringing my Move
Gizmo and alpha, bring this up, bring it out. And now when I rotate
this so all an x, you can see that the fault moves with it and the knee more
importantly moves with it. So if I'm pointing my leg down, you will see as you
push your foot down, unique kind of tries to
push out a little bit. And that is exactly what
we're trying to get here. Alright, so Alt or Alt G, Let's put it back into place now before we pour it
over the other side. Now, all we wanna do
is we want to come in and change all
of these bones. So the main bones, which are the control bones, the root bones,
things like that, and change them to undeformed. Well, takeoff deform because we don't actually want
those waiting with the rig and we also don't want those bones actually doing
anything with the rig. So in other words,
we want to move this controller here and
only move these bones. We don't actually
want to have it having read weight on it
or anything like that. So what I'm gonna do
is I'm going to come to this first control. I'm going to go over to
the right-hand side and you will see if we
scroll down here, we've got one that says deformed and we just
want to take that off. We want to tick off of
basically all of these. So this one, this
one, this one here. And also not
forgetting the hand. So turn it off. I think that's all we missed. One here, which
is this one here. Tick off deform. So I've got that one. No deform node form. This one, nobody phone. Alright, that's pretty much the check of everything
that we need to go through. Now. Now we're going to
do just before we actually put it onto
the other side. Is it so important that you make sure that this
all is at the end? So if I come to this now, I go to my bone where I'm
naming it and I just change this now to all
uncontrolled dot, right? Because if we don't do that, what's going to
happen is that this then will not actually be
duplicated over the other side. So just make sure that this
all is not in the center. So you can see it's
in here again. So let's just delete
that out of the way. And then there's polka
dots are like so. And now pretty much we're ready to put it over
the other side. I'm just making sure
that all the R's are on the correct side
going down the mall. They're not actually there. Alright, so now let's
go into edit mode. So go, go into edit mode. I'm going to press one
on the number pad. And then all I'm going
to do is and when should you use the
circle select. So I'm going to press C
and come over and grab all of the ones on
the right-hand side. So now I'm going
to just go around making sure I've grabbed
them all like so. And then one Wednesdays
I'm gonna press N comb-over to where
it says Tools. He shall have a new
taller open here, click on the X axis mirror, and then all you're going to do is right-click symmetrized. And that then is just going to put them over the other side. Now, you just need to
make sure that all of the bones now so you can see
there's two bones in here. They've all gone
over it like so. And then the next thing you
just want to make sure is that they all are
working correctly. So I've just put it in
pose mode and then just grab this leg so you can see that one's
working correctly. All the mesh is actually moving. The actual knee control, for instance, is
working correctly. Let's go to the hand and make sure that's working correctly. So you can see that
that's working. You can see as well that you
can control this as well. Let's have a look at the elbow. And there we go, pretty
much everything. I'm just going to check
this as well just to make sure that everything's working. And now let's bend this ECS and I'm only doing this
check just to make sure that everything works as intended before actually
wait this open, I think. Yeah, that is a really, really nice rig now. Alright, so now we've
actually done the actual rig. What I'm gonna do is
I'm going to come over to the right-hand side. And I'm going to where
is it, this one here? I'm going to turn off
the names because it's getting a bit confusing
with all those names. So you rig, if I
double tap the a, should look something like this. So now let's go to object mode. There we go. Now
let's think about weighting this to
our actual mesh. Now think as the time
is getting hot in here, it's probably better off that we do that on the next lesson. So at the end of this lesson
now you should end up with pretty much the rig dawn
and just waiting to be weighted to the
actual robot here. Alright everyone, so I
hope you enjoyed that and I'll see you on the
next one. Thanks a lot. Bye bye.
28. Weighting 3D Character: Welcome back everyone to
the ultimate guide to Blender 3D rigging
and animation. So now let's think about
weighting or actual mesh. So I'm going to do is I'm
gonna grab my actual rig. I want to grab my woman
and press Control P, and that's not the
right way around. I'm going to grab my lady
robot, grabbed my rig, Control P and with automatic weights and let
blend to think about it. And hey presto now with the
magic should have happened. So what we're gonna do
now is go to object mode, put it on pause mode, and hopefully,
hopefully everything should move really nicely now. So if I press G, we can say we have a fully hopefully
working mesh. Now you want to move them
both at the same time. You can just put X axis on, grab the hands for instance. And there we go. We can make a fly or whatever. Now let's check the other
things that we're looking at these pole points to see how the shoulder
joint is moving. You can see that you'd never move the shoulder
this much by the way, it wouldn't actually
be like that. You are going to get
some stretching. And the reason the
stretching happens if I come now to object mode and
I go back to my rig, you can see that the higher or more dense the actual mesh is, the better probably
it's going to move. Now you can see as well that
the way this mesh is Bill, It's got a lot of vertices and edges in
the actual joints, which is really important. Now if this had a few more
of these coming out here, you're probably not gonna get
quite so much stretching. The other thing is as well that you need to
take into account. Let me just grab my
bones is the fact that the more bones you have, the better the rig is probably
going to move as well. This is why when you look at
Disney characters and you look at their rigs,
they're extremely complex. Some of their rigs have like 100 bones in their
face, for instance, just for all those
tiny and muscles moving and things like that. You'll also see this if
you look at the rigs from the film for
World of Warcraft, you'll see exactly
the same thing. These very, very complex rigs
and then make them muscle actually move underneath the
skin and things like that, really, really complex stuff, but we're just doing
back in the real-world, we're just doing a basic rig. So now let's make sure all the legs move in the correct way which
they should do. So there's no problem there. Let's make sure the head, so if I rotate the
head, for instance, moving in a realistic way, Let's make sure as well that the torso or the
hips is also moving. You can see now she's moving
in a very realistic way, then that's exactly
what we want really. The other thing is as well,
you can see if she jumps now, you can see she also moves in a realistic way and that's
exactly what you want. So everything now is moving will check one
more thing as well. If I move this torso now, yes, you can see how she moves
backwards and forwards now, again, in a realistic way. So that rig is
basically perfect, Really good, really,
really simple, basic Rick. Now the next thing we want
to do then is actually do a very simple walk cycle. Because what's the
point in having a rig? If you don't know how
to do a walk cycle. Now you will find
online a ton of them walk cycle references
and things like that. I actually believe the very, very hard to actually follow along those actual walk cycle. So in other words, you'll
get your reference out and you'll move
her along and then try and actually copy the reference and
move in-between them. It's really, really complex. So we're not gonna
do that. What we're first of all gonna do, we're gonna go on to layout. We're going to zoom
into our little robot. We're going to take
this off and put it on object mode because
we really don't need to see what she
actually looks like. I should move along. You might as well
see that once you've actually done the
actual walk cycle. And then what we're gonna
do is we're going to put the star on zero. Sorry I'm one. Then we're going to
put the end on 32, walk cycle based from
frame one to 32. Well, the interesting thing is that we now
actually going to make the first actual
keyframes on frame one. What we're gonna do is we're
going to put it on to frame zero and make the first
keyframe on frame zero. This is because it will then
start on frame one go-to, to start on frame one again. And it's a much more
fluid walk cycle as you'll see once we've, once we've got it
actually working. Now the next thing to
discuss is the fact that we don't
actually need to stay all these bones actually
when we're actually doing the walk cycle because what it does is it just complicates it. It makes it a lot more
things to see on the screen. So what I'm going
to do is actually, I'm going to actually go into pose mode and I'm
going to hide most of these bones and when to leave the head bone just in case
you want to turn her head, ash is actually walk in, but for me, I'm going to hide. So I'm just grabbing these
bones and Haydn them all. You only really want one
of these bones down here. You don't actually want them
both because you'll see I can rotate and now
from this bone here, which is perfectly fine. Now the other thing is, do want to keep these
bones here, but, uh, certainly don't
need the arm bone, so I can actually hide those
out of the way as well. And I can also hide the thigh and the shin bone out
of the way as well. The one bone I do want to keep here is this one
here, the root bone. And that is because I might
need to move up and down. So I think pretty much with
these bones I've got here, I can actually work with this, apart from these
ones on the inside. Let's hide those as well. I'm just going into the inside
hiding those hand bones because the hands basically it can be removed from here anyway. So in other words, if
I'm rotating them, I can move them from here. Now the other thing is
you will see that if I come in and I press Alt Z, that, that is moving from here, straight up from the z axis. If you don't want that
and you want to move them from the axis of the bone
if you press all y now, you can say that we're
moving it from that axis. It will. It's basically guess, guess which axis is
because I'm never sure. I normally just go through it. Now. Is it said nope. Is it why? Yep.
That's the right one. That's normally what I do when
I'm working with normals. Alright, so let's
go back to global. And now what we can do
is we can start putting in the first part
of our walk cycle. So the first one we're gonna do is we're going to
work on the legs. I'm going to put on three. I'm just thinking of
a forgotten anything before we start?
I don't think so. What I'm gonna do those safe
out my web before we start, I suggest you do the same
because you've got everything set up now and you really do
if you need to go back to, let's say you screw up your walk cycle or something like that. You want to go back
to it so you've got everything set
up like it is now. Now let's focus on
our legs them first. So the first one I'm going
to grab is this bone here. I'm going to make
sure that my gizmos on with Shift Spacebar. And then what I'm going
to do is I'm going to move my leg in. I'm going to pick it up
slightly so we've got a tiny, tiny bit of a bend
there as you can see. And then I'm going
to rotate it back. So all x rotate it back like so. Then I'm gonna get the next leg. Oh, this one over here. I'm going to pull this
leg back like here. I'm going to make
sure there's a tiny, tiny, so I'm pulling it up tiny, tiny little bit of a
bend in the bone and then when the press all
NX and rotate that one. Now I'm going to do is I'm
going to make sure that my character is on the floor. Because if I come
around this way and press Control three, I can't see through there, so I just need to
put them in front. And now you can see the bones in front and I need
to drop it down. So I'm going to grab this one. I want to drop it down to the floor like so now
I'm going to make sure that she's actually probably tilting
forward a little bit. So you can see here that
this is not tilted, it's not in the right place. So in other words, I'm going to just put that back a minute. I want to come I'm going to bend the leg up a
little bit more. I'm going to bring this
one down because this actually is the most
important part of it. But if I bring it back now, tilt it a little bit. So our x, like so bring it up a little
bit. And there we go. Now we can see we're
getting somewhere. Alright, so let's tilt
it up a little bit. Like so, let's bring
this down now, just a little bit more. Now you can see it's Jocelyn, the floor there, and that's
exactly what I want. Now I'm going to do is I'm
going to mess around with this one, bring it down. Like so I'm going to try and
tilt it just a little bit. Like so when I move
it a little bit like so you're just going to stay how much I need
to bring it up. Actually have it bending. I think then I can come
to the center one. This one will be sent to
one in there. Like that. Let's go back now and
just recap so we can see if I bring this down
just a little bit more. Oldest soap, little bit like, so, make it go. Alright, so that is a
good start for the legs. So you can see we've got a slight tilt on
the knee going up. We've got a slight tilt
on this leg going up. We've got this fall
actually bending back this way and this foot
bend in this way. Now, don't worry because
in the end of this, we can actually go
in and refine it. So I will actually show you
how we go in and actually refine what we're actually doing here because it's
pretty complicated. Well, this is the actual
angle that you're going to want feel like you can of
course pull this back, pull it back a little bit, and that might actually
work out there. But this one a bit
further forward. Yeah, I don t think actually I think actually I'm
going to leave it alone then as a work on it a little bit more than
I'm about to tell rather than keep
fiddling with it in these in these stages. So basically just have your legs set up,
something like that. All right, everyone. So I'll see you on the next one. On the next one, we'll
actually start with the hands. Alright, thanks a lot. Bye bye.
29. Creating Character Walking Cycle: Welcome everyone to
the ultimate guides, Blender, 3D rigging
and animation. And this is where we left off. So now let's actually
do the hand. So the first thing I'm going to do with the hands
is I'm going to grab this hand and I'm going to pull it further back like so. And I'm going to rotate it
so an x rotate it like so. And then with this hand I'm
going to put it forward. Like so. Then I'm going to
rotate it just a tad. Like so. All right. You can see at the moment
she's walking really weirdly. So now we need to come in. Don't just go to the side first. So this is the angle that
you want it to start with. And now let's go to the front
and we're going to bring these arms and because at the moment they
look a bit silly. So let's bring it
in. And you can say, I'm going to have to drop it
down a little bit, like so. I'm going to bring this one in. And again, when I drop this
one down just a little bit like so now you can see that's looking a
lot more realistic. Now the other thing is
if I come to the front, you can see she's
woken at the moment, like John Wayne or something. So what she needs what we
need to do is bring this in and bring this one in. Just a little bit
closer together also, the gate is just too far away. Alright. So we've got the front. We're just going to
show you the front now. I'm going to turn this
a little bit more so all y this time just
turn it in a little bit. I want to turn this
one in a little bit. So our y, like so. And then I'm just going
to have a look round. Press three so you can see. So it's like that, like that, like this, and like this. Now the thing is, as I say, if you need to alter this, then we can go in and alter it. But for now what we're
gonna do is I'm going to press a and we're
going to press I, location and rotation
because we've actually done the
location and rotation, we haven't altered
the actual scale, so we're okay with that. So location, alright. Now if you hold down, you'll see that nothing has happened. And the reason is just
hold the middle mouse, pull it up, and there you go. There is all your keyframes. Now the moment you won't
see all the bones or anything like that,
which is understandable. And the first thing
we will do though, is we'll go to here
and click this on to make sure that we've got
automatic movement in there. So actually picks up every
time we move a bone. And then I'll just show you, if you come over
to the animation, you've got all of
your bones actually in here that we've actually
put a keyframe to. We're not actually going
to be working in here. This is for the more complex. So walk cycles when you're trying to really refine
it and things like that. We're just going through the basic walk cycle
in this course. Alright, so let's now
go back to Layout. Let's put this on pause mode. I don't know why
it changes every time a golf that but it does. And then what I'm
going to do now, I'm going to come to my bones. I'm going to press Control C. And then we're going
to do is I'm going to come over to frame theta2 and I'm going to in
the viewport press control V. And then one going to
do now is I'm going to come to the middle frame 16 and I'm going to press
Control Shift and V. And what that's gonna do is it's actually going
to put a keyframe, but it's going to invert. These are now you'll see
that we have actually got some kind of actual
walk cycle. As you can see. Now you can see that
we do have a problem. As I said, there will
be problems with this. So what we need to do at
the moment, as you can see, she's walking, hips
aren't moving at all. Our head is not moving
or anything like that. And that is something
that we need sorts out. Also, you can see that our legs, although they moving
backwards and forwards, they're clearly not
right to them on because they need to be this one. In particular, this
one's far enough, but this one you can see it needs to be
going further back. And I told you there
would be some issues and this is where
you can fix them. Now the other thing
is, of course, is that this is a
simple walk cycle. We've got a lot more
to do well on it yet. So don't worry too much if yours doesn't look very good at the moment or
anything like that. So what we're gonna
do is I'm going to go back to my first frame. Then we're going to
come to these frames. I'm going to press B drug and just delete them out
of the way at the moment. So let's do a little
bit more work. So I'm going to do is I'm
going to get this leg. I'm going to pull it
further back like so I did once a
little bit of a bend. So a little bit of a bend, let's press all and
acts and Joel's put it down onto the floor, like so. And then one we're
going to do now is I think we said Yaro, hips needs to move in. So as this leg's comes forward, if I select this bone here, this hip wants to be moving. So if I press all and z
will move this hip like so. Now the other thing
is, as I said, you might want to also have your head moving so
as she moves forward, ahead will actually go up. So you can actually
have a head going up. It's always a good
idea actually, if you have a head
going up and down, That's always a good idea. Alright, so I'm happy with that. Again, we're gonna do
the same thing now. So a Control C and
then go to frame 32. And then we're
going to interview pulp press control V. And
then finally on frame 16, and we're going to
press Control Shift and v. There we go. Now let's have a look at
what that looks like now. Alright, let it load up.
A knight can see much, much bad as she's walking along. I don't think actually
the head moving at all. Yeah, I think we'll solve our little bit later on
actually in the head. I'm just looking now. Think actually we need to
probably bring in another bone. So I'm going to put this back. I'm going to delete
those out the way. I would delete those. Let's press Alt H. And I think what I need is I
need to put these in from, I think I need this one. Let's have a look.
Which one is it going to be our z
naught the hipbone, I need to move. I think it might be this
one. Let's have a look. Yeah, there we go. We need the chest bone and we're going to have the
chest bone in as well. So what I'm going to do is I'm
going to come now and hide my other bones out the
way that I want to leave all of these. And the reason I
want to do that is because her body isn't
moving the way I wanted. So I'm just gonna go
in idle these bones. And I wish there was a
quick way of doing this, but actually you can't set these in a group or
anything like that. So we just have to come in them like so now if
I grab all of them, they should actually be there. Alright, so now we wanna do
is we want to grab this. And as the hips turn, we want to turn the, I think we want to turn
them that way a little bit. So I'm just going to
turn them like that. Yeah, I think that's
how we need to do it. Alright, so now what I'll
do is I'll grab them all. I'll press I location rotation. And then what we're
gonna do is I'm just going to promote over here. So 32 again Control V, and then in the middle 16, and then Control Shift V. And now let's have a quick
look what that looks like. That is looking pretty
nice for now. Alright. Now I want to do is we want
to come in-between the frame. So we're happy with this
because looking again, you can see it moving slightly
from side to side. Yes. Okay. I'm happy with that. Now, the other thing
is you can see that our knee isn't actually moving. So I'm just going to
come back to this frame. Instead of deleting them all, what I'm going to do
is I should be able to move or press one, move a knee a little
bit further out like so I move this one a little
bit further out, like so. Now I'll do is I'll
grab them all again. I'm going to press I,
location rotation control C. Let's go over now to 32. I'm going to press control V. And then what I'm going to do
now is I'm going to come to 16 and I'm going to press
Control Shift and v. There we go. Now let's see what
that looks like. So now we're knees. Once you start working. Now you can see it's moving
in a lot more realistic. Yes. Alright, that's looking
really, really nice. Okay, So now what
we need to focus on is filling in
these other frames. So we've basically got a near enough three
frames at the moment. We need to put one on a
frame 8.1 on frame 24. So we need to fill those
frames and we're going to do that on the
actual next one. Alright everyone, so I
hope you enjoyed that and I'll see you in the
next one. Thanks a lot. Bye bye.
30. Adding Detail to 3D Walk Animation: Welcome back everyone
to the ultimate guides blended 3D rigging
and animation. And this is where we left off. Alright, so let's
go to frame eight. So we're gonna go to frame
eight, which is here. I'm going to press three
and I'm going to look at how our rig is looking. And you can see straight
away that we do have some issues in that these are basically
floating in the end. We don't actually want that. We want to bring this
front for actually down. So if I grab this, I need to bring it down and plan my fault down to the
actual ground like soap. Now we're going to do with
this other leg is we're going to pull it back
slightly like so. We're going to lift
it up a little bit and we're going to rotate it. So our annex and rotate it. Like so no, sorry,
it's on the floor. Press Control three you can
see it's now on the floor, but it's like kind
of in-between. Alright, so something like that. And again, we can actually fix this if we're not
happy with how that looks. So just remember that as well. Now the next problem you
can see is that she's kind of tilted down too much, so we need to actually put
her up because when you think about when you're
on like the middle, so you mid stride, it's probably where you're
at the tallest. So if you actually walk along, you'll see That's probably when you actually pushing
up off your feet. So I need to do is I
need to bring her up. So I'm going to grab this one. I'm going to pull
a rope like so. Now you can see she's
got a full weight onto this actual fought like so, which is looking much better. You can just see, it just
looks a ton better as it is. Now what I'm going to do is I'm actually going to
just pull this down. I'm going to grab all of these. So a again, I'm going to press I and location and rotation again. Then while wants to
do is I actually want to come down
here and I want to make sure that I'm jaws
grabbing these ones here. So I'm going to
grab these like so. And then what I'm going to
do is I'm going to press Control C and then
come to frame 20 full. Then I'm going to press
Control V, like so. But I can't press control V. I need to press
control shift and V. So let's do that again. Control Shift and v, like so. And now we should
have it where she's actually walking along, like so. There you go. Now you can see that is
looking much, much better. You can see the leg is still
floating a little bit, but our arms are moving pretty
nice with the actual walk, so we're actually
getting somewhere. Now what we'll do
is we'll actually saw the handout as well. So if we go back to
wire frame eight, you can see at the
moment and our hands are pretty much
straighter sides, which we don't actually want. So we're gonna do the
same thing again, but this time with the hands, what we did with the feet. But what I wanna do is I want to come in and just
have this, whoops, I click on my hand and just have this a little bit of a lag like so and just pull it
back just a little bit, like so now a lot actually
what we're going to do that and then we're going
to do is I'm going to press a grumble my bones. I'm going to come down
here, grabbed just these, so be grabbed them all. And then what I'm gonna
do is I'm gonna go to frame 24 and I'm going to say
Control Shift and v. There we go. Now that lag, let's have a look. If it's still lagging a little
bit, there's that thing. Actually what I'm going
to do is instead, I'm going to come to here. I'm just going to delete
those off or delete like so. Then I'm going to come
to here and I'm going to press I location rotation. Then I'm going to come here, grabbed them all with Control C, come over here to 24, and then Control
Shift and V. And I think that then fix this. There we go. You can see the
hand now behind it. That's exactly what
we're looking for. Alright, so now let's
give this a try again. So you can see now there's a slight lag on a hand
actually being left behind. And that's exactly
what I wanted. And now you can see she's
moving pretty realistically. Alright, there's still
work to go to do though. For instance, head as
she moves forward. So you can see at the moment, the head is straight, straight
up and then Bob down. So what I'm going to
do is I'm going to put her head slightly up. So if I come to a head, you'll be able to
then turning up. So if I press R and X, she'll be able to turn it up. Like so. Yeah, I think that's
going to be as we want it. So I'm gonna do is
I'm going to press, I'm just going to grab this
one. I'm going to press a. And then what I'm going to
do is I'm going to press I location rotation scale. Then I'm going to
come to 32 now. And I'm going to make sure
that I delete these first. So I'm going to
grab them all with B elite and I'm going to
press Control Shift and V, and hopefully now should
have copied that. So have a look. Now once ahead, you can see that I had didn't
actually get copied. So the reason for that is
because I didn't copy it. I'm going to grab all of these, Delete and back to frame
zero again, Control C 32. And then what we're gonna
do is we're going to have control shift and v. There we go. Now ahead. You can see it's still actually going up and I'm
not sure why that is. So what I'm going
to do is I'm just going to copy this here. So Control C, then I'm
going to come back to 32. I'm going to have it control V. And there we go. That's what I want. Alright,
so now let's have a look. There you go. Now we need to make sure that
she's actually going down. So as we walk down, we'll just do a head. You can see a head comes down here and then it
should come back up here. So what we wanna do is
want to copy this again. So Control C, Let's come
back now to the middle. And then what we're gonna
do is press Control V. And there we go. Alright, so now
let's have a look. Another thing that mess that up. So Rob, all of these now. So all of these when I
grab all of these, right, so I think what I
did is I didn't actually take all of them. So I'm going to do
is now I'm going to grab all of these over here. So a, and then I'm going
to press Control C. I'm going to come
to the middle 16. And then when we introduce
now when to delete all these. So I'm going to press
B, grab them all, delete, and then
Control Shift V. And hopefully now we
should have fixed that. So let's have a look. Now. We're still not fixed it. So you can see that now
we need the opposite. I think this, this one
here is causing the issue. So let's go in. I'm going
to grab all of these. So be on Charles C. And
we're gonna go here, and I'm going to grab all
of these and delete them. So delete and then
Control Shift M V. And hopefully now let's
see how we fixed it. Now. We're still not fixed,
I think is the M1 now. So let's come in, grab the N1. That'll be Control
C, come to the end. And also I'm just going
to press Control V now. So I'm going to
delete them first, so delete then control V. Now I'm hoping that
yeah, there we go. Now she's walking fine. Ahead is bobbing. There we go. Perfect. Alright, so there you go. You can see as well
how you can fix that once you've
actually done it. It's basically the
first two frames. So basically these
will not frames, but two parts of it are exactly
the same as these parts, except that the
opposite way round the M1 being the same as
the first one of course. Alright, so that's that now
I want to do is want to do just a few more little pots to this just to make sure that
we've got it moving right. And what we'll do is we'll
do that on the next one. Alright everyone, I
hope you enjoyed that. If you struggle actually
following along, as I said, make a separate
copy of it and then just go and restart
to practice this a few times because it's
going to take a little bit of time just to get in
your head what we're actually doing here and getting that walk cycle
as nice as possible. All right, everyone,
so I hope you enjoyed it and I'll see you
on the next one. Thanks a lot. Bye bye.
31. Refining Our Walk Cycle: Welcome back everyone to
the ultimate guide to blend the 3D rigging
and animation. And this is where we left off. Now there's a couple of things
that we did forget about. First of all, let's come
to wear for a mate. Let's go and press three. And what we need
to do, we pulled this handbag slightly
on this one. Well, we need to do
is we need to pull this hand slightly
forward on this one. So if I bring it forward, like so Something like that, That's then press i
location or rotation. And then what I'm going
to do now is I want to grab mole actually
impressed I, so a location rotation. This makes it easier
actually because then I can do is
I can calm down. I can grab all of these then, like so press Control C, and then I can come to frame 24. I can come in then and grab
all of these, press Delete, Delete, and then
working versus control, shift and v and put them in. And now you'll see that that
hand is slightly behind. Now let's have a look of
what that looks like. So there we go. There you go. Now you can see
it's looking a lot more realistic than where
it was looking at before. Alright, so now we need is a little bit of hip
twist as well in there. So what we'll do is we'll
come over to frame again. And then what we'll do is
we'll grab this part here. And then I'm going
to actually tilt it a little more on this one. So I think it's going to
actually because she's bringing up right leg, you can see that we
probably need to tilt this to this way. So if I turn it this
way a little bit, so what I'm gonna do is
I'm going to press all and Z until this. Just a little bit like
so, very, very slight. Now press i, location rotations, scale grubbing all of the bones. Again, we're gonna
go with now select these. To select them all. Control C. Let's go over
now to frame 20-fold. Going to select these, be to grab the mole, delete and then what
you're going to press Control Shift and v
and then put those in. Now, she shouldn't have that little bit of a role that we're actually looking for. There you go. She's looking
really, really nice. Now the one thing I'm not
happy about is that head is, I think rolling a
little bit too much. So I'm just looking
homes down here. So I think on this brain now, it should be a
little bit too high. It's actually tilting
a little bit too much. So I'm going to grab
this, I'm going to press all an x Joules till, till very, very
slightly like so. And if you're unsure,
you can actually go back to this frame. And we can see that
our index is -0.119. Let's have a look at
where it is on frame 8.0, 0.11, 106, as you can see. So let's have a look
at the next brain. So back to 0.118. And you can see It's
here where the issue is. So frame 20-fold, we need to set that
as the same as here. So I'm going to grab
this one went to theirs, I'm going to copy
this, so Control C. Then one way to do is
I'm going to go to frame eight at 24 when I
press control V. And then I'm going to
press I location rotation. Now I should have fixed that. So frame 32 is 0.119. Darryl 0.119. Alright, I can see the head is going down
very slightly here. So minus 106, minus 106. Okay? So you can say it's moving
very, very slightly now. It's rarely, rarely so tiny. You can't really
see it, but you can see because we've done it. It looks really,
really realistic now. Alright, so now we need to
just refine it even more. So basically we're going
to refine it just a little tiny bit more and then
we shouldn't be there. Alright, so how are
we going to do that? Well, we're going to
come to frame bowl, which is in-between
0.8, of course. So what we're gonna do to refine this more is we're
gonna go to frame four. We're going to press three. And what we're gonna
do is I'm going to flatten this down. So if I come to
this backup here, I'm going to press all tall, blonde it down and
will need to do is bring it down very slightly. So if I've got it here, I can bring it down yours
very slightly like so. Now I'm gonna do is
I'm going to press a, I'm going to press I
location rotation. I'm then going to come up to now so it's fall before
which would be frame 28. I'm going to come
down here first. I'm going to press B
when a copy these, so Control C. And then
what I'm going to do is I'm going to come
now to frame 28, and then I'm going to
press Control Shift and v. There we go. Now let's see
what that actually looks like. That's not working out. Let's see where
it's going wrong. So it's going wrong here. So we've actually, I'm going
to actually leave that off. So I'm going to press
V, delete it off, and instead I'm going
to press control V. Now let's see if
that's working now. There we go. Now
it's working out. Now you can see that it's lifting up there and that's
not how it should be. These are the wrong
way round basically. Have a heel should be open this one and
down at the other ones. So what I wanna do is I
want to come to this one. I want to grab everything, like so on and then come
to here and press B, like so, and press Control C, and then come over to this one. And then I'm going to press
B and delete those off. Then what I'm going to do is
press Control, Shift and V. And I'm hoping now, thanks a lot everyone, and
I hope you enjoyed that and I'll see you on the next
one. Thank you. Bye bye.
32. How To Fix Animation Sliding: Welcome everyone to
the ultimate guide to Blender 3D rigging
and animation. And this is where
we left it off. So what we're going to do to
refine it a little bit is we're gonna come to frame full. The more Wednesdays I'm
going to press three. And this heel at the moment
is kinda floating in the air. So if I press space bar, you can see it doesn't actually come down and we don't
actually want that. So what we wanna do is
come to frame fall. And we want to press all tall, drop it down onto the floor. And then what I want to do now
is because it's already in there for us, is
grab everything. I'm press Control C, and then come to frame 20. And then what I'm going to press Control Shift V and
drop that down like so. Now if we actually
press the space bar, you will see he's walking along. Now that I'm really,
really happy with. Alright, so now let's
come in and let's put this onto object mode. Let's also save out
as work as well. Let's put it let's hide the rig. So H to hide the rig. And let's put this onto material mode so we can
actually see what we're doing. Let it load up. Now let's press the space bar and
it might actually speed up after we get
past the next one. Let's see. Yeah, We still lagging a
little bit in the frames. Let's put it onto this one here. We're lagging a little bit and let's have a
look. Are we on? We're on EV. Let's
pull the viewport. Let's put this on something like two, something like that. Let's see if that speeds
it up a little bit. And yeah, we're still not
getting a lot of speed upon it. It's a shame that we can't
look at it in real time. But if we put it
onto object road, now we can see pretty
much in real time, alright, so I'm really
happy with how that looks. And we can see we
all gain a little bit flicking on there. So it's always a good
job that we check this. I'm going to press Alt H and I want to fix this
actual flicking. First of all, I just
need to, first of all, they'll see where
it's actually on. So let's see where it's
actually flicking out. Let's have a look. Or it's flicking. From here. You can see probably theorem is, as it comes back here, you can see it's bending a
little bit too much here. What you can do to fix those, you can move it
very slightly on. Let's go and do yeah, we'll actually copy
it on the other side. So while there is now,
I'll stop this flicking by bringing them up
just a little bit. So if I bring this up, like so, which means that it should
be if I've got this on here and I'm going to
grab all of these. So let's press Control C, and then let's come to brain. Looks so this one here, I want to bring
her arm over here, though, I'm thinking
that's probably gonna be on frame six. So Control Shift and v, we go, there we go. That's actually fixed. Alright, now let's
see how that looks. Dope is moving much,
much more realistic. Alright, really, really
happy with that now. Alright, just not
tiny, fixing the end. Okay, everyone. I hope
you enjoyed that. Let me actually
turn this off now. So we'll go to object mode, we'll go back to modeling. And then what I'm
going to do now is I'm just going to press Tab. I want to hide my
rig out of the way. Now I've one more
look at it now. So here's our rig is
I'll let a robot. And of course, as
she's moving along, what you need to do now if
you was actually going to, Let's say render out, you would have a walk-in. So you need to actually
balance like where the actual root bone
is and how far she's walking along to get
rid of that sliding. Now you will see on a lot of
games character slide law. And the reason is
because they're moving too fast or too slow, It's a very, very fine line
and how fast they move, especially when you call them, let's say from flat
ground to going up hill, all going upstairs
and things like that. So the best games actually
slow the gate down, really, really fine tune it. So they actually look as
though they're not sliding. Let's finally press Alt H, bring back, we might as
well bring it all back. So if I press,
let's come to here. Let's go on to edit
mode, not edit mode. So pose mode, Let's press Alt
H, bring everything back. And now we'll do is
we'll go to frame zero. And we'll start this. Let's say we'll start
this over here somewhere. So I'm going to press I only
on this one I location. So then I'm going
to come up to 32. And you can see already
put that in for me. So let's see what
that actually looks. You can see way, way too fast, so we need to actually get
rid of all the keyframes. Let's have a look
where he moves to, where is it going to move? But it's going to be
up to what I wanna do. It's clear that is I want
to go to my animation. I don't want to call them. You can see my route bone here. Now, this is important
because I can actually come in now and
delete all of those. And then while happiness,
she'll carry on walking, bought there won't be
any root bone moving, so that's the best thing
we could have done. Now let's put it back on 010. And then what we'll
do is we'll press Shift Spacebar of
Shift space, move. And we'll start our over here. I'm going to press I location
just on the roof bone. And then let's go to 32. They should still
moving over here and I'm not sure why that is. We can see those root bones
being pulled in there. So maybe maybe if I put it here, delete all of those
so I can come in, be delete all of those. Now. Should be as as I want it. Now. The other thing
is I've still got this TikTok as well,
so that's not helping. Now if I move this now you'll
see that's not moving. All right, Finally,
let's put her over here. Let's press i location, and then let's
bring it over here. So 32, we'll have a walk-in maybe that fall
below eye location. Now let's put it back on here. Way, way too fast, so we don't want to
go in that fast. Now what I wanna do is I
want to call to the N1, want to press B, leads
all those out of the way. And what I wanna do
is I want to move in only maybe two here,
so i location. And then also in fact non
22 won't blame frame 32. I will move on now. Maybe to here I occasion. And then what we'll do now is
we'll grab all of these and we'll put it onto linear. I think it'll be linear. There you go. That's much better
as you can see. Now what you would do
to carry this on it, you will duplicate the frame is basically to make a walk
much further along, you need to duplicate
the frames. Now you see there is a
little bit of sliding. Now to stop there, you just
prompt frame 32 and just bring it back slightly
and then press I again. Occasion. I'll just restart it. There you go. Now
you can say she's walking much, much better along. All right, everyone, so let's
come back to modelling now. Let's press the tub born. Let's actually come in and
save that out. There we go. So on the next lesson, I'm actually going to put the
robot into my walk cycle. Now. I'm also going to put
Andrew into the walk cycle. So on the next lesson, and now we've done that one. We're actually moving on
to our actual camera. So we've got a camera
turntable on the next one. Then after that, we
actually get to rig our own large seem. All right everyone. So
hope you enjoyed that and I'll see you on the
next one. Thanks a lot. Bye bye.
33. Creating A Camera Turntable: Welcome back everyone. The Ultimate Guide to blend
the 3D rigging and animation. And this is where we left off. So we're on the actual
camera turntable now. First of all going to
do is just make sure we feel putting your camera
to go around something. Make sure that your cursor is in the center of
what actually you going around just makes it a lot easier rather than
messing around. Once, once you've actually brought in your camera
and things like that. So the first thing I'm going to do is I'm going to press Shift S. So too will the origin put my cursor
right in the center? And then what I'm going to
do is now I'm actually going to go into modelling because, believe it or not,
I actually don't need this on the bottom here. I don't actually have
to keep very many thin. So what I'm gonna do is
I'm gonna go to modeling. And then we're going to do
now is bring in a circle. So shift day, Let's shift a, let's press Tab just in case. Now shift a, let's
bring in a curve. We're going to
bring in a circle. And then what we're
gonna do is I'm gonna make this circle much, much bigger, like so. Then one wins. Do now is I'm going
to bring in a camera. Now I'm going to press Shift
a to bring him up cameras. So shift a, let's
bring in a camera. It's going to come
in the center. Then what I'm going to
do is I'm going to press Control Alt and zero. And I'm going to move my camera. It's where it was
looking at that point. Now the only reason
I've done that is just to move the camera
out of the center. Now I wanna do is I want to have this camera tracking
around this actual circle. So to do that, one way to do is I'm going to grab my camera, grab my circle,
press Control pay. And you're going to have
one that says follow path. The moment you click
on follow path, you will see now you
get a little line, go into your actual circle. Now, if I press space
bar now you'll see, well, my camera goes around it. It doesn't go very
far around it. He doesn't even go all
the way around it. But why is that? Well,
the reason is because if we come over to this
bond here, sorry, not this one, the printer, you will see that we
have a frame storm one and a frame finish on 32. So you need to work
out how many frames you want your camera to
move around this end. So how long over basically, now, I would say that anything less than 300 brains
for a whole turntable, anything less than that, you're gonna get a
lot of jaggedness, blurriness, things like that. So if you can, and I know it takes a long time, make sure that your camera
is at least 300 frames. So going around
turntable, but well, I'm going to do here
is I'm going to put this actually on 500 frames, which is what I
recommend you do. So 1-500 frames now. Now because I've
pulled down 500, you'll see my camera
goes all the way around to the
beginning near enough, it might even freeze there, actually, I know it's not. So how then do we make our camera and circle actually
line up on the frame. So if I click on my circle, come over to my frames. If I scroll down here, there's a little button
that says animation. How many frames do we
want this over 500? Because then that
is going to match the amount of frames
that we've got, you know, of the overall
actual blend file. So now if I press space, you'll see it's
much, much slower. Now. They're all some problems. Of course, if I press zero, go back to my camera view. We're looking like this. It's not in the middle
or anything like that. The camera's right up here and nothing's kinda making a
lot of sense at the moment. So how do we fix that? First of all, we want to
do is you want to come to your circle and
you want to find where these cameras
join the group because this camera line tells you
where the cameras should be. Now, if I press Tab, you'll see it near enough. Always lines up with one of the vertices on the actual Qu. So I've come to this part here, press Shift S because it is selected and then go
to my camera now, Shift S and selections cursor, our camera moves that. Now the other problem with
guys are Cameron now he's looking at nothing and that's
not what we want either. So I wanna do is
we want to bring in an empty to the
center of here. So if I press shift this person's world origin
and then bring in an empty, shift, a empty plain axis. And what I tend to do with my empty is I'm making massive. And the reason I do that
is because then I can actually see where
it is at all times, It's not going to get
hidden and I'm having to hide the hotel out of the
way or something like that. Alright, so now we've
got that we want to do is now want to point the camera. They actual empty. So if
I click on my camera, come over to the
right-hand side, object constraint, and
I'm going to track to, the thing I'm going to
track two of course, is going to be my actual empty. So I'm gonna come
over here empty. And now you'll see my camera is tracking to my actual empty. Now we do have
some more problems in the five-by-five
press space bar. Now, you can see, we can see
the bottom of the hotel. We can't see any of the
other parts of the hotel. So now it's just a case of splitting our screen
up and moving our camera nor empty and our curve to get the
perfect view that we want. So I recommend you come over
to the top left-hand side. You'll end up with a
little cross hair here. Although over now you'll see that you've got the
same view on this side. Now if I press N and
when to close that down, press T, I'll close
the other one down. And then it just gives
me the full view of what I'm actually looking at. Now if I come over
to the other side, press N, press T,
close them down. And now I can do is
I can actually mess around with my actual circle. So if I bring my
circle up, like so, you can see that that camera
is following this empty, which I don't really
want it at the moment. What I mean is I don't really want it falling all
the way down there. I want it kinda
something like that. Now we'll need to do
is make my circle bigger than five process, bring my circle out. And then what I'll do is
I'll bring my empty up. Now you can see
it's more in line. Let's say we want to
bring it more up. So I'm just going to
bring it up like so. And then we'll bring our empty
down just a tad like so. Now if I press space bar, you can see we've
got the perfect, perfect view of our
actual hotel going round. Now the thing is, you can see
it's right in the middle. The one thing you
want to check for is you don't want
these overlapping. For instance, we can zoom
into this by the way, we'll zoom into this like so. So we're looking at
this point here. As we press Space bar, we can see it's kind of
a little bit near there, and we don't really want that. So what we wanna do is
you want to come back to our circle and kind of play with that a little bit more
and then bring our empty down just a little bit and
now see what that looks like. Now what I'm looking
for now is the top. So I want to make sure
that my top is not actually going to disappear through the top so
you can see it, oh, it's a clash in there. We don't want that either. So I want to bring
it down just a tiny bit just so that
it's not clashing. Now what we're looking for is
to make sure that this bit is also not going out
of our actual frame. It might go out of the frame
here is what I'm saying. So what you might need
to do in that case is just make your circle a tiny bit larger and then
just play around again with your actual empty. Alright, something like that. Now you can see about
the perfect view. Now finally, the last
thing I want to discuss, if we put this to frame one, so let's go to Layout now. Let's put this on frame one, and let's look where our
camera is on frame one. So the moment all camera
is on here on frame one, and that might not be
something that you want. You might want to start on frame one view in the front of
the hotel, for instance. Now to fix that,
all you wanna do then is go to your circle, press zero to go back to your camera view and
then just press, sorry, then just press all
zed and rotate it around. So let's say we're
going to start from, I think that's the, that's
the, that's the side of it. So let's press Alt Z, Let's
go round the other way. So all zed. And then just move it round all the way
around to the front. So like so, and there we go. Now we can say that unframed want, we're going to start here. It's gonna go all
the way to 500. And by the time we get to 500, it should, should
actually just repeat. So you're going to have a
continuous now turntable going all the way around. Now, I also recommend
if you want to improve your compositions and things like that while
we're on this subject, that something like a hotel is normally bear taking
it from a low, an actual low angles. So if we go back to modelling again, I'm going to come in, I'm going to press
Tab and I'm going to do is I'm going to
grab my circle. I'm going to pull it down. And instead of that view, what I would take his more, this sort of view like. So because this is, you can see is a
lot better angle. Looking at something which a
building which is very tall. It's just gives you the sense
of just about composition, gives you the sense of
having to look up at something and
getting a good idea of the kind of scale of what we're actually looking
at here and things like that. Now of course you can see
there's some clip in there. So it's important when
you do that just to make sure that you
make your circle bigger and move your empty
and things like that. But not everyone is the
ease at which we can actually do a camera
its own table. So I'm going to do now is
just going to drop these in. My camera turntables. Dropped my camera
into my turntable, and then I can close that hole. So now this brings us to
the end of the course, but he certainly brings
us to the end of all the things that
we're going to learn in the next lesson, what we're going to
do is we're going to jump into our main scene. But before we do that, let's just go through
what we've learned. We've learned actually
will go to Layout. We'll put this onto a rendered view and
then we'll get rid of the of the camera and then
we'll just go to the scene. So we came right from the
beginning of learning the very, very basics of the barrel
and things like that. And then we went
through the swing moving backwards and forwards. So simple bone techniques all
the way down to things like animating our fish going round a pond and
things like that. And then finally, all the
way up to creating a chains, complex chains, the walk cycle, and finally a camera turntables. So you can see
we've learned a lot of things in a very
short space of time. And I'm hoping that this actual course you will
take away with you and you'll be able to reference
pretty much anything you want to animate in
the future in your own. Blend the projects
and things like that. Alright, that was the idea here. I hope I've achieved and
I hope you enjoyed that. I hope actually you carry on to the next
part of the course. We're really actually
becoming too, are actually Indiana Jones
scene. As you can see. This is the scene that we're
going to be starting on. We are going to
be doing a lot of different animations in here. Some of them will be using
noise and things like that. A bit more complicated, but it just gives you an idea. If you actually want to create your own
models and things, what it takes to
actually then go in and animate and bring your scene to life and things like that. All right, everyone,
so I hope you enjoyed that and I'll see you on
the next one. Thanks a lot. Bye bye.
34. Breaking Down Our Large Scene: Welcome back everyone to
the ultimate guide to Blender 3D rigging
and animation. And this is not where
we left it off, but this is where we
go into proceed to. Now, this basically is our actual Indiana
Jones themed scene that we want to actually come
in and actually animate. So what I've got here
basically is the actual scene, and this is what
it should actually look like once we've
actually finished it. So if I now press the
space-bar for play, you can see that we've got a massive boulder rolling down. We've got some spikes that are actually coming
out of the wall here. So going backwards and
forwards, as you can see, we've got some arrows
being fired out here. We've got some rubble
falling out of the sky. We've got a monkey
that's going to be moving up and down in here. Not sure why that's not
actually platelets. Just have a quick look. Let's put it back
and there we go. Alright, So it's
just because I've actually extended
the animation on it, I forgot actually to move
the monkey up and down. So we can see here
that this shakes, you can see it shake the
rocks actually dropped down. The monkey is actually
going to go into there and be replaced
by the sand bag. We've got overhear them. We've got a actual rope or whip. And you can see as that moves, the branch actually bends down with the weight and then
it flips back Corp, as you can see, again, the rock that we've got here. Let's actually take a look
as well. That's all arrows. So you can see the arrows of
this back now they are all starts off in these actual heads here, and then they get fired. Now they go to the
world, the drop-down, and then disappear and
then reappear back. And finally then we've got
actually the platform. So you can see actually
these, if I put this back, they actually breakaway, so drop down into nothing like so. Then they actually reappear. I think the reappear very
slowly on this one actually, there you go, they actually
pop back up like so. So basically that is the
aim of this and get all of these animations in using all the skills that
we've actually got. So what we're gonna
do now is we're going to open up a scene and we're going
to basically have no bones in there or
anything like that. We're basically
going to start from scratch and we're gonna go through each of these
processes one by one. Alright everyone, so
I'll open that up now. The way we are in
our huge scene. And the first thing
I want you to do is just come over to
the right-hand side. And what you wanna do is you
want to go to your cycles actual settings home
down to where it says simplify and
just take that off. Now what you're going to
do is you're going to come down and you're
going to turn the maximum subdivisions
down to zero. You're going to turn
the child particles to zero and you're going to put the texture limit on
something like 512. Now what this is going to do basically is it's going to limit everything in the actual
render view pole. So now you'll see if
I click on my render, what's going to happen is
it's going to reduce all of these actual textures
down to 512, so they're going to be very low. Res. It's also going to get rid of any child particles
that we might have. And the last thing of
all, it's also going to get rid of the
maximum subdivisions. Now this is important
because you can see it's a huge scene. It's got 500 polygons
and it basically, so we need to actually
reduce this down. So you can see now
I can actually come in and reduce
them down to 128. It will take a little bit
of time to think about it, but then you can reduce
that down even more. So just depending on
what cell you've got, you might want to reduce down your actual textures
and things like that, because this is what actually creates all
of that stuttering. You can see the frame rate once I go round is going to drop really significantly
depending on how complex the scene is, how many polygons It's got, how much, especially textures. I mean, if this has
four K textures in, it is going to really
slow it down drastically. So that's why we need to do
to start with the next thing that you should do when dealing with a large scene like this. As you can see, we've got one with a lot of
light in there. We want to be able to turn
off all of these lights. We've also got an
empty in there. I think that empty
can be deleted away, so I'm just going to delete
that out of the way. So delete your empty as well. Then what we'll do is
we'll grab all of these. And then what I'm going
to do now, I'm just gonna put this back
on material now. And then I'm going to do is
I'm going to grab all four of these lights and just drop
them into my light some plane. And now I should be able
to just close that all up, turn off this bond here. And now basically
it should be much easier to see everything
that you're doing. You might want to also get these spider webs and actually
put those out of the way. It's really up to you. But I think starting
out like this should be absolutely
perfect for what we need. Alright, so the first one
we're going to actually start with is going to be
this one actually here. So this is the actual spikes that are going to
come in and out. Now, the other thing is
we don't really want a basis over 620 frames. We want to actually
base it over 300. And the reason for
that is because I want it relatively small. I don't want to actually
deal with tons and tons of keyframes and
things like that. Because all we're doing is
just repeating the process. We have a cycle of animations. And then the longer
this goes on, the more we just have
to repeat that cycle. So that's quite important. The other thing is when you
come into animate anything, just make sure that
it's not actually got a animation on it already that's important in case you
actually get something in your own scene or you've got someone else's
work or something like that. So the way you check for
that is basically you can see we've got no bones in here, but that doesn't
mean there's not an armature attached to this. So if you come over here, you will see on the Modify
tab is a red armature here. Just click that off.
So basically just go round the parts that I
actually going to be animated. So all of these parts here
click off the armature. Same for the rock, like a tough thing for
the actual whip. Some Jaws going to
zoom in here like so. I'm going to click
that off as well. We're going to call them
then to the monkey head. Do the same thing here. We're going to come to this
big rock, click that off. And we're gonna do that
for the small rocks. So nothing should be on E
and now everything should be set so without an
actual armature on there. Now the next thing we're going, you should do is just make
sure that whatever you got actually going to animate is actually broke off
away from the scene. You don't really
want to be having to wait things when it's
part of the whole scene. So you can see, for instance, my scene here is broken
down into little parts, especially the things
I'm going to animate. You can see we've got
all of these here, which altogether with our
pillars and things like that. But because we're not actually going to animate them were only animating these
actual stones here. Then we can actually split those off away
from everything. They'll basically now, we should be actually ready to start. Now the other thing
is, although it's nice to look at
this at the moment, we can also come to our binds. You can see we've got
one that says vines here and actually turn
that off as well. We'll make sure that we've
got nothing in the scene, making sure everything
runs smoothly. Last of all, I tend to
work on object mode. So this one up here, rather than trying to
work on material mode, because you simply don't
need to see it until you're ready to have a look at what's being, actually animate it. So that's also really important. Alright, so that's
pretty much everything. And then what we'll
do now we'll, we'll stop this lesson here and then we'll
make a fresh start on our actual spikes coming in and out on the next lesson. Alright everyone, I hope you enjoyed that and I'll
see you in the next one. Thanks a lot. Bye bye.
35. Creating The Spikes Animation: Welcome back everyone to
the ultimate guide to Blender 3D rigging
and animation. And this is where we left off. Alright, so let's
come to our spikes. So I'm going to grab my spike. I'm going to press the
little dot born on the number pad just to zoom in. And then also, I'm going to set my key frame to
frame one, like so. Now what we want in this
first one is we want a real bone and we
only need one of the bone because it's
simply moving in and out. So that's what
we're going to do. While my actual
orientation is here, we might as well press
Control a all transforms right-click set origin
to geometry like so, and then Shift S
because it's selected. Then we're going to do now
is I'm going to bring in a bone and when to
bring in a root bone. So first of all,
bringing in an armature like so I'm going to make
this bone much, much bigger. So Joe's pokes out of there. And then while I'm there, I'm going to press tab
and then we're going to press Shift a and
create another bone. I'm going to also make this
bone really, really big. So I'm going to pull it
out with the S button. Hopefully I've grabbed it. I don't think I have. So
if you want to see you bone presses that
go into wire-frame. And now we can see our
bone is this one here. I'm going to rotate
it round as well. So all x 90 rotates it around so it's
coming out of there and then make it a
little bit bigger. Now if I press said go
back and solely mode, we should end up with
something like this. Now what I wanna do is I
want to rename my bone. So I'm going to come
to this first one. I'm going to press F2 and
we call it root bone. So root phone. And then press tab, come
to the next bone, F2. And we'll call this, let's call it spike,
something like that. And of course you can name
yours whatever you wish. Alright, so now let's come to
actually waiting this out. So like we've done in the
previous parts of the course, we're going to actually have our root bone way into
nothing except this one here. So just this bone is going
to be parented up to it. And then this bone here is going to be doing
all of the major works. So I guess the first thing we should do is we should
grab this bone, this bone, press Control P, and then keep offset. And now we should have
a little line that goes from here to here to our bone. Another words you
can test that out. If I grabbed this
bone, press the G. You can see that there's
a little bone there. Now also, if I go
to pose mode now, grab this bone and I press G, that bone should come with it. Alright, so far, so good. So now let's go back
to object mode. And then what we're
going to do now is we're going to
weight this up. So I'm going to grab
my actual armature, grabbed my spike,
press Control P, and it's not that way round, so it's going to be
the spikes first, then the armature press Control P. And we're gonna
do it with empty groups. So empty groups like so. Now we're gonna do is we're
going to come back to our bones, press the Tab button. And just on this
occasion what we'll do is we'll just make sure that
they're actually named. So you can see root
bone and spike bone. Now what we'll do is
we'll come to our spikes. Then we're going to do is
I'm going to come over it. So a little green triangle here. And you can see that
I've got a few bones on here that are not that
shouldn't be with it. So I'm gonna do is I'm just
going to minus those off. That is another thing
to check for what these bones are there
from the previous one. So like we deleted
with the armature than the actual one in particular has those two
bones from previously. So I'm going to do
is I want to make sure that I'm going
to delete those. So I'm gonna delete those
off like so then I've got my route bone and my spike bump thing is on
the rest of them. I have actually delete that
those off, so don't worry, it's just to show you what
actually might happen, why you might have more bones
than what your intended. So now finally, we
can get on with the task of actually
weighting these up. Now, if I come to my spikes, you'll see now we've got
a root bonus bite bound. Now if I press Tab
and grab everything, I want to make sure
first of all that my route bone has no weight, so I'm gonna remove
100 per cent of it. So let's remove that. And then what we're
gonna do now is come to our spike bone. And while wants to do is
make sure that my spike bone as everything bought
this part in it. So I'm going to first of
all, remove everything. And then what I'll
do is I'll grab all of this part in here. We can also as well
before we do that, actually isolate it out. So if I press Shift H, it will isolate everything
out, including my bones. But for this, I don't even
need to see my bones, so it doesn't really matter. So what I'm going to
do first of all is I'm going to call them,
press the tugboat. Now, grab all of this and press
H to hide out of the way. Now I know that everything
else that's left, she'll be attached
to my spike bone so I can just come in and press the a button and then comb and
assign 100% of the weight. So let's assign that now. Now let's go and
see if it works. So first of all, I want
to press Alt H to bring back the actual place where
all these spikes are in. I'm going to press Tab,
I'm going to press Alt H then to bring
everything back. And because we hid everything over here on the right-hand side
and our collections, the actual lights and the vines and things like that
shouldn't actually appear. So that's really great. Now you need to do
is just double-click the a button, and there we go. Now let's see if
this actually works. First of all, if I
come to my bones, home to my pose mode, grab this bone first
of all and move it. Everything should
move as you can see. So everything is moving except the actual part
which is in the center, which we don't need any way. Then the next thing we
wanna do is check this. And as you can see, the spikes now are
actually working. Alright, so now let's actually
start with the animation. So first of all, on frame one, I actually want it to be here. So what I'm going to do is
I'm just going to press I. Location and I don't need
to bother with the scale. I don't need to bother with the rotation or
anything like that. So I'm literally just
going to click location. I'm also, I'm going
to put this on, which is my auto keying. And then what I can do is I
think we'll have it coming in four times, over 300 frames. So that means that we basically just
want to do this once. And then what we'll
do is we'll copy it and paste it over 300 frames, rather than trying to use some
maps and work it all out, which is going to be
a little bit hard. So what we'll do is we'll
come to frame 50. Like so. Remember if you can't
brown frame 50, just put it in over here, then what I'm going to do is
I'm going to bring this out. So I'm going to bring it
out there where I want it, so something like that. And then we're going
to do is you can see it's already keyed in
forest, so that's fine. So now we should have just
going in and going out. Now let's press
shift D on this one. So to grab joules
this keyframe here, bring it over, press shift D, like so, so now what we
should have is this. For me now, I'm going back in like so now there is a point where I do
actually want it to pause. So when it's come out and
then I want it to pause, not quite like this. And I will also want
it to come out faster, but I do want it to
pause once it's here. So what I'm going to do is
I'm going to grab this bone. I'm going to put it
on something like maybe let's put it on faulty. So if I bring this
down for zooming more, middle mouse button
to zoom in more, Let's put this on 40, then Walgreen's to do
is I'm going to press Shift D and bring it up to 60. And now we can see there's
a line over there. Well, that means is it's
actually going to come out, just going to pause, like so, then it's gonna go back in. That is exactly
what we want. Now. We need to actually
make it come out much faster and go in slower. So in other words,
let's grab our star. What we're gonna do is
we're going to move this up to maybe bring 30. So let's give that a try. So I'm going to press space bar. There you go. Much, much slower going by kin. That actually probably
is the perfect. Actually perfect too, I want it. So now we're gonna do is
we're going to press a, we're going to
grab all of these. Then I'm going to
press G and move him back to my actual
stock, like so. Now what we wanna do is
we really want it to start from here and
exactly the same process. So we want it to come,
It's coming back in, and we want it to actually stay there for a little
bit of Mount of time. Now you can see at the moment, this is actually on 71. I don't particularly want that. So I'm gonna do is
I'm going to move that down then to 70, just to keep it a
little bit more even. Now I want to do is I'm
going to have it stay here for another ten frames. So I'm going to move it up to, let's say for a mate tea. Then I'm going to
press shift D, drag it over and drop it in there, like so now this
should then come out. There's going to come out. And then it's going to
stay for ten frames, and then it's going
to come out again. That is what I'm trying
to achieve here. So I'm going to do now is I'm going to grab all of these now. And I'm going to drag them over. So I've grabbed them
all. I'm going to press Shift D and bring
them over like so. So if I press shift D, drag them over and I'm going to drop this last frame in frame eight t. So now you'll see
that if I grabbed these, comes out, goes in, these in a bit, comes out. Now the one thing I'm
not happy with here, you can see it stays
there a bit of time, and then it actually comes
out really, really fast. Now I'm not sure that I actually want it
coming out that fast. I think I want a little bit of more time basically
between them. So I'm going to do is
I'm going to grab this, press B, drag along. And then what I'll
do is I'll bring this up to frame hundreds. So bring you up to
frame 100, right? So now let's see what
that actually alters. Actually think it's just Oh, yeah, that's exactly it. So there you go. That's exactly what we
want, something like that. Now we just need to
copy this again. So what I'm going to do is I'm
going to grab all of this. I'm going to press shift
D when a bright during, bring it all the way over to the last keyframe that we
had and drop it in there. Now for now, let's
just put it on 350 frames, something like that. And then we just
want to make sure that it's actually
working correctly. So if I press space bar now
you'll see it comes back. They said bit of time
comes out a bit longer. This time comes
out. There we go. Alright, so you can
see it's a little bit of randomness to it, and that's exactly what we want. Alright, so now
we're gonna do is we need it based over 300 frames. So I'm going to put
it back 300 likes. So I'm going to go down
then to frame one, like so I'm going to grab everything and then
we're going to do is I'm going to press
the S button and just shrink it down now
to 300 frames. So you can see, I've drunk all of those down to make them fit. And now for press
space bar comes out. There you go. That is exactly what
we actually want. Alright, so now we wanna do is I wanted to just put it
back to frame one. And then all the ones do now
is put this on object mode. And you will be able
to see now that even if I hide my bones
out of the way, which is what they will be now the way in the
render view anyway, if hide them out the
way you can see night working rarely really nicely. Alright everyone, so
that's it for that one. On the next one
then what we'll do is we'll actually look at, I think we'll do something, well actually come to our
arrows seen as we're here. So we'll have these arrows
firing now, hitting the wall, dropping down and then
basically coming back to the point of these
actual layer faces here. And what we'll also
try to do is we'll not try and get rid of
the randomness that we wanted random because
it's supposed to come out when
somebody is walking past it or something
like that with the arrows or don't quite
want them to be as random. I want it to be a
lot more linear. All right, everyone,
so I hope you enjoyed that and I'll see
you on the next one. Thanks a lot. Bye bye.
36. Invisible Animations: Welcome back everyone to
the ultimate guide to Blender 3D rigging
and animation. And this is where we left off. Alright, so now let's come back and I'll put that
back to frame one. And then what we're going
to do first of all, is we need to actually bring in a couple of bones
for our arrows. So three bones on this one. So what I'll do is I'll
grab both of these. I'm going to press Control a
or transforms right-click. So origins geometry, very important that
you actually do that. Shift S then cost, select it, and let's
bring in our first bone. So shift a will
bring in a armature. I'm gonna put the armature, but there again, this is
going to be our root bone. And then what we'll
do is we'll bring in our ANOVA couple of bones. Now the other thing
is, as you can see, what these arrows are not
really lined up, right? So I might as well
lined them up as well. There's no reason
why it shouldn't. So one wins is just grab
this one in edit mode, pressing L and just
put it back there. Doesn't need to be exact
in line with that one. Alright, so now let's
bring in another bone. So when I click on my bone, I want to press Tab
to go into edit mode, I want to press
Shift a, bringing another bone and then moments do is I'm going to
rotate it around. So L y 90, spinning around. And then what I'll
do is I'll come and grab this edge going round here. So I'm gonna be in
face, select Alt Shift, click to grab it, going
all the way round. That's because to select it. And yeah, I've grabbed that one as well,
didn't mean to do that. So Alt Shift click, there we go, shift us because to select it and that's going to put
exactly in the center. Then we're going
to do is I'm going to move this bone now. So I'm going to come
back to my bone, grab this bone with l.
Make sure you've grabbed the old Shift S election because keep offset and then that's going to put it
right in the center there. And then one went to make a little bit smaller
like so I'm going to move it along like so. And there we go. Alright, so now let's bring in another bone. So all I'm gonna do is I'm
going to press shift D. I'm going to move
that over any way. It doesn't really matter
because we're going to do exactly the same thing here. So I'm going to come
to this arrow here. Hold Shift click going all
the way round Shift S because the selected tab back to my bones now grab
this bone Shift S, selection, cursor, keep offset, and now you'll see
they're exactly the right place that we're in. Need them. Alright, so now we just need to weight them up, a name them. So first of all, when
it comes to this bone, I'm going to press F2 and we're going to call
this root bone. Then I'm going to come to
this bone and we'll call it a right arrow,
something like that. So F2 and right arrow like so. And then let's come to this bone and we'll just call it left out. So F2, left arrow. One thing I did forget on the other one is just
to put bone on the end, which is also really important. So F2, right arrow,
phone, like so. Alright, let's get
these weighted. So I'll grab my, I think it's this way around. I always get the wrong way
round, but we'll try this. So grab our arrows, grab our bones, Control
P, and yes it is. So with empty groups. Now again, what
we wanna do is we want to come in now and we want to put these two
bones to our root bone. So I'm going to grab these
two, grabbed my route bone, press Control P, keep
offset, and there we go. Now we can come in and
actually wait these up. So I'm going to do
is I'm going to come into my actual arrow now. Um, while wants to do is basically I want to
make sure first of all, that the root bone
doesn't have any weight. So I'm going to grab everything. I'm just going to
remove them all and just get into the
habit of doing that. Although it doesn't seem like it's actually doing anything, it's just in case that
the real bone has any weights attached to
it for whatever reasons. So it's just a simple procedure. And if you get into
the habit of doing it, you shouldn't actually
have any problems. Now it will do is we know
that this is the right bone, so I'm going to call them
now and grab this arrow. Like so I'm going to
come to my right bone. I'm going to click
Assign on 100. And then we're going
to do is I'm going to come to the left arrow, grabbed the left
arrow, grab this one, and then click Assign, like so. Now let's give it a quick test. So I'm going to press top
when I come up to my music, grabbed my bones first actually
come up then pose mode, and then I'm going to
grab this bone and all it should move is that
arrow like so. And that's perfectly
what we need. Alright, so now let's
come to frame one. As you can see
here, mall wants to do is put these right back. So I'm going to move these
right back into place. Like so maybe even a
little bit further. And maybe still a bit further, something like that. I think. Absolutely fine. I'm
just looking to make sure that this bone you can see it's not quite
pointed out as much, so I just want to grab
just this bone here. So I've just grabbed
it through that. If you can't see it, just press Add and then you'll
be able to see through that and then just
pull it out very slightly. Seven scroll to the top. Now you can see this one's poking out and this
one just wanted to be poking out goes
to slight bit like so. Alright, perfect. Now what I wanna do
is I want to come, I'm going to actually
press that so you can actually see what
we're doing here. So wireframe, I want to come to this bone so you can see
at the moment now that both actually got their location in there because we've
got auto key-frame on. But let's say, let's go
to frame faulty, like so. And I want this arrow to have traveled all the way to here. Now, the other thing is, I don't want my arrow to travel straight away out of the block, so I do want it to sit there. So let's put it on
frame 20 actually, and we'll have it sat in
that actual block. There. Then one way to do
is I'm just going to press I and location. And the reason is because I
have not moved it anywhere. Basically, it's actually
just sat in there. Now the other thing is
that it's really important because we know in
this that we're going to have to make
the arrows really, really tiny and then
bring them back. So it's also important before
we forget to actually press i location rotation scale
on this one because we know that we are going
to be dealing with some scale in further
down the line. I'm also then going to
come back to frame one. And I'm going to
grab this other bone here, this one here. I'm going to press I
location rotation scale. And then one Wednesdays I'm
going to come to frame 20. But no, we'll come to frame 30. And then what we're
going to do is press i location rotation scale. And the reason I've
done that is I want these hours to be split up. I don't want them coming
out at the same time. Now, if we come back to
this one now and we say, let's go another 20 frames. So let's say we go from
frame 20, frame faulty. And then what we're gonna
do is we're going to move it over to this wall. Now for this, I'm
just going to go back into solid mode and I'm gonna see my arrow striking the wall right there
as you can see. So actually going a little
bit into that wall. And now I want to do
is I just want to test and see how fast
this actually is. So if I bring this back,
press the space bar. That looks to me, although
it's not realistic, this is quite a
stylized scene plus one where animates and we
actually want to see something. So at the moment that might be moving about the right speed. So just make sure that you're happy with the speed
it's coming out at. You can also see it starts off slow and then it speeds
up and then it slows down. That is not something we want. So what we wanna do is we want
to grab both of these now. So grab both of these. We want to right-click
and we want it to be on interpolation
mode of linear. And I think now they showed, if I bring it back to
here, there you go. Now it's the same speed
all the way along. And now you can get
actually a better idea of if you're happy With
this being this speed, I think I need to speed it up slightly so
I'm going to bring it down by maybe a few frames. So if I come in now, that's
the middle mouse button. If you can't say I'm going
to bring it to 35 instead. And then what I'm
going to do now, I want to come in and
press the space bar. And there we go. I think I'm actually happy
with that speed now. Alright, so now we're
gonna do is we're going to come to the next one. So I'm going to
grab this one here. And then one went to there
is exactly the same thing. So again, we know if
we click on this one, then it's over 15 frames. So we want this one to be
over 15 frames as well. So I'm gonna do is I'm
going to come to frame 45. And then one wants to
do is I'm going to grab this and bring it
all the way up. Who? Here? Like so. Now, I also know
that if I come in now and then Right-click
interpolation mode Linear. And now I should be
able to come in, press the space bar. Like so. Now you can see
the bot fire out. Now, there is a problem in the fact that with
the auto key in, it's not going to, it probably is only going
to key in the location, so we just have to be a
little bit careful there. Another way as well, I mean, is because we're gonna be
altered in this scale, we really need to make sure
that we're actually keying in location, rotation and scale. Well, I'm going to
do is, I'm going to grab the last frame on here. I'm going to press I
location rotation scale. I'm going to grab this one then. I location rotation scale. Now you might be
asking me, well, why are we all turn the scale? But you're going
to find that out in a little bit as we
actually move along. Now finally on this lesson, let's have these dropped
down to the floor. But what I want to do is
I want to have this one. First of all, it hits the wall and then I wanted
to stay there a little bit. So maybe maybe five frames
or something like that. So I'm going to press I
location rotation scale. I'm going to click on this one. Then I'm going to make
sure this one stays here for five frames again. So I'm going to click i
location rotation scale. I'm actually gonna
just going to zoom in, make sure that that's
five frames there. Make sure that this one
is also by frames there. Now let's have a look what
that actually looks like. So nothing should
happen in the end, they should just post it there. So bang-bang, both
sit there and now I want to do is make them
dropped down to the floor. So I'm gonna come the brain 55 with this one because
this one came out first. So what I'm going to
do is I'm gonna make this drop down to
the floor from here. So I'm just going
to bring it down, drop it down to the floor so
that we can still see it. So I'm going to
press adult wants it to be on the floor, like so. Then all I'm going to press his eye location rotation scale. Now I'm going to
come to this one and then one going to do is
I'm going to have this one come to frame 60, let's say. And this one also dropped
down to the floor. Again, you can press the
little dot bond to zoom in, just make sure it's actually
sat on the floor. Like so. And then you're just
going to press I location rotation scale. Now let's actually check
what that looks like. So if I come all
the way back now, press the space bar, bang, bang, then dropped down exactly
what we're looking for. You can see one drop down
before the other one. That is exactly what we want. Alright, so on the next one, what we're gonna do is we're
going to actually get these. You go back to where
we started from. Alright everyone,
I hope you enjoyed that and I'll see
you on the next one. Thanks a lot. Bye bye.
37. Finishing The Arrow Animation: Welcome back everyone to
the ultimate guide to Blender 3D rigging
and animation. And this is where we left off. So now what we're gonna do
is we're going to come to our arrows and what we need to make them do is
basically disappear. So what I'm gonna do is
I'm going to come to, let's say frame 61 because
they've just dropped down. So if you look,
they dropped down. Now from here they can actually disappear pretty much
as soon as a dropdown. So let's say five frames. So I'm gonna do is I'm also, I'm just going to
check this one. You can see here
this is a frame 55, so we'll have them both actually on frame 65 disappearing. So how do we make that happen? So the first thing
we do is we come to frame, let's say 64. And then one more inch do
is I'm going to press I location rotation
scale and then click this one and click i
location rotation scale. And then what we're
gonna do is we're gonna go to frame 65. And then I'm going to do
is I'm going to press S and zero and then Enter. And the reason we're doing that is because we
actually want it to disappear basically
to zero, nothing. So we can't actually see it because you can't actually
turn it invisible. So the next best option to actually do this
is actually just to decrease the scale
down to absolute zero. And that's what we don't
want to go back or you can do is you can come
over Airport and 11.1, like so Enter and there you go. It's actually bike, but we don't actually want to do
that, of course. So S zero and then just press
location rotation scale. Now let's come to this one. We've already got the
keyframe in for our scale, so we're just going
to press S and zero, like so and put it back. Now, what we wanna do
is now we want them to come back to where
there was placed before. So all I'm going to
do to do that is I'm going to come and
grab this one here. So this is the keyframe weather right over here
in the beginning. I'm on, I'm gonna do
is I'm going to move that to frame 67. And the reason I'm gonna do
that is because we can see the scale of this
is scaled at 65. So let's bring it over. So Shift D, this onto 67, zoom in if you really
want to see it. So this is seven here. And then what should
happen is as you'll see if I press Spacebar now, it will come and disappear and be straight
back in there as you saw, bang straight back in there. That is what we're trying to do. Now let's come to
our next one now. This one will be
on the floor here. So if I can grab,
let's come out, zoom out a little bit
and all that one there. So again, we're struggling
now to see where this one is. So if I press B though, hover over it,
hopefully, rub this one. Now I can actually
grab it at the moment. So I'm gonna do is
I'm going to call them to the right-hand side. I want to see where my poses. We've got root bone and then
we've got two bones here. So we want the left bone here. So once I click on
that now you can see that we've got
this out again. So again, now what I want to
do is I want to put this. So what we've got this one
you can see on this one, we've got this bone over
here brought in to 67. So I need to now go
to my left bone and while I need to do is I
need to grab this shift D, bring it all the way over to 67. Now what you should happen is, as you can see on
67, it's back there. So now I'll put this back here. Both bones disappear. Then the back there
as you can see. So let's just run
through this now. But if I press baseball now, Q arrows go out,
drop-down, disappeared. Now you can see that we saw
the bone kind of go over. Now what I would
do here is I would just come in to our bones. So instead of doing
that would press tab, then go to object mode. I doubt my actual bones
out of the way now, so I'm going to hide
my rig like so. And then one we're going
to do is I'm going to press space bar and I'm going to look at it in real
time now without the bone. So if I press Spacebar, bang, bang, drop-down,
disappeared. Now we did see them
zoom back there. If you saw that, you
can see them zoom back. Now we don't actually want that. So what we need to do now is we need to press Alt H bringing our bones because
we don't actually want to see that we
need to fix that. And then we're going
to do is when it come to my bones again, I'm going to go to pose mode. And then one wants to
do is I'm going to grab this bone here first. And what's happening
is in real time. You can see that
as it comes back, it actually starts scaling up. And that is not what
something we want. So what we wanna do is
we want to press S zero and then press i location
or rotation scale. Then come to this one and
we're going to press S zero and then I location
rotation scale. Now there shouldn't be any, anything now because there's
only three frames here. And then going from this
place here to this place, and they're not
changing in scale. So now if I come round
and I just check this, now it's important that
we check this on this one because we're just
learning actually how to do it and then
hide this bone out of the way and now come back and
we shouldn't see anything. So what we're gonna
do now is we're going to find them down there. Bang-bang, dropped
down to the floor, completely disappear, and then go straight
back into that. That is exactly what we want. Alright, so now I want to
do is want to press Alt H, bring back our bones. And then while wants to
do now is the moment. We probably, we've got
this roundabout 70. So what we can do is
now we can actually come back to pose mode. And then one went to do is
I'm going to grab this one. And if it's on 70, we can get kind of full
lots of these out. What do we want to make sure
repeating all the time. I'll do we just want them
repeating twice in 150. In other words, I'm going
to grab all of these verse, so we've got the right bone. So I'm going to grab
all of these like so I'm going to
press Shift D and remembering them up to
150, something like that. And then what I'm
going to do now I'm going to zoom out a little bit. So we've got 300 frames. You all wanna do
really is I want to divide these up between. So I'm going to grab all this, I'm going to move
it up now, 300. And like that. Then one way to do now is I'm
going to grab them again. So Shift D, I wanted to place them somewhere in the middle. Roundabout there,
something like that. Alright, so let's see
what that looks like. So I'm going to press space
bar buying drops down. His back. Days they're buying drops down,
disappears back. There you go. Now what you can do is
you can come to this one, going to grab everything
with a not sure actually why why those
bones are in this one. I think it's from
the other ones. So I just want to make sure that I've not
got these bonds in. So I'm going to grab this bone when a hide it out of the way. And I'm left with just the
bones now from to this one. Now what I can do is I can
see it comes up to here. I should be able to, I think, delete these bones
out of the way. So I think what it is
is add the other bones grabbed when I actually copied it over and that's
not something I want. I only want to do
the left bone now. So I'm going to do is
I'm going to come in, grab all of these, just
delete them out of the way. Then I'm hoping that now, even though I've done
that, so have a look. Let's press Space bar just to make sure this one's working. So you can see fires out again, drops down, comes back, out again, drops down. And there we go. That's exactly what I want. But now just dealing
with this bone, the left arrow, I can
actually press a shift D, drag them all the
way over to 300, like so just make sure that they're around 300
and that's perfect. And then I'm going
to grab them again, Shift D, and drop them
right in the center. Like so now this should be pretty different
from each other. So now I'm going to do is I'm
going to double-tap the a. Yeah. When I make sure
I've got everything, I'm going to go to
object mode like hide the bones out of the
way, put it back to one. Now let's watch and make sure that's working
properly. Bang-bang. You can see before we actually
want to duplicate it, the main thing is, There you go, and actually in a
actual loop now, the main thing is that
we want to make sure the initial animation
is actually perfect before we
actually do any fun else. And that's the main thing. You don't want to be
duplicating things. If you've not sorted out
the keyframes properly, if you've not shorted out the interpolation mode
or anything like that. So everything wants
to be right now. The other thing now
as you can see, is that these actual animations are running independently
from each other. And the reason for
that is of course, is because we've got
separate armatures, which brings me
to my next point. The one thing we
forgot to do so far for bringing this back in
is renamed micrometers. Again, never leave
your armature is just called armature and
then armature one, it's not going to
work if you send it through to Unreal Engine, there will be a point
in time, I guess, when it does work, but
moment in time it doesn't. So let's come to
this armature face. And what we'll do is we'll
call it alright rig. And then we'll come
to this one and we'll call it arrow rig. Like so. Alright, let's
put both for those. Both of those are working now. And then in the next lesson, I think We will deal, Let's deal with these ones first because this is a
few bones on this. And then I think
we'll move over to something a little bit to
do with weight and maybe, or maybe even this
vibration on here, but we'll work on these
actual stone steps next. Alright everyone, so I
hope you enjoyed that. See on the next one.
Thanks a lot. Bye bye.
38. Weighting The Stepping Stones: Welcome back everyone to
the ultimate guide to Blender 3D rigging
and animation. And this is where we left off. Alright, so let's come
to the stone steps. As I say, this is broke off from all of the other
parts, so that's fine. And the first thing
we're gonna do is press Control a or transforms
right-click. So origins geometry. And then we're
gonna do is Shift S versus Selected Shift a. And let's bring in
our first bone. This is cost will
be the root bone. So what I'm gonna do here is I'm going to rotate it around. So all x 90 doesn't matter which way round its face
and I'm going to probably face it around that way
or something like that. And then I'm going to
go over and rename this so we'll call
it a stepping. So own rig, like so. Alright, so now we
need is more bones. So the first of all, what I'm going to do is
I'm going to bring 12345678 bones in there. So the easiest way to do
this is just depressed top. And then the moment
you bring a bone in, you just going to
appear here, of course. And then one we're
going to do now is I'm just going to bring them all in. So I'm going to press
Shift a and then Shift a and then shift a week. Hopefully, she'll be able to see now these bones
actually appearing. So we need eight of them.
We've got our main bone, which is the root bone, and
we need to know the rate. So we've got 12345678, like so. Alright, so now we might as well go and name them once we've
actually got them in place. So what I'm going to do
now is I'm going to come to my actual stones here. I want to press Tab, I
want to grab this one, press Shift S because
it's a selected. Come back to my bones now tab, grab this bone and then one
going to do is I'm going to press Shift S and
selections cursor, and there's our first bone. Now I'm going to come
to the next one. So again, it's just a
tedious way of doing it, but this is the
easiest way to do it because disliked it.
Back to your bone. Rubbing your bone, Shift S to elections cursor keep offset. And now the next one. So just
let's go through this now. It literally is point and
click at this, at this point. So this one L S to
this one S election. And the reason we're doing
it this way, by the way, is because we want these
bones to be independent. In other words, we want
these bones Paisley to be coming from each other. In other words, ones
have control over actually how they're going to work each of these
steps independently. If we wanted all the steps
coming up at the same time, that would be a lot easier. So, but we have gone
for the harder rule. And now we've just got to pour a little bit more work into actually doing
this because it's selected the bone if the S and selections because I mean all told it probably only took
a few minutes anyway, so not not too bad. Because to selected grab
the last bone I'm hoping so Shift S elections
cursor, offset. Alright, that's all
the bones done now the next thing we want to do is make these actually bigger. So I'm going to do
is I'm just going to kind of pivot myself here. I'm going to press B,
grab all of these bones. I want to make sure
that I'm making them bigger individually. And then we're going to
do is S, bring them up. And the reason I'm
doing that, of course, is just to make sure
that we're not losing. We can actually see what
we're actually doing. Now the other thing
is that I'm noticing is if I put this plane back on, I actually need this plane on. One wins do is I'm
just going to open up my light and plane. And the one I want
is this plane here. So I'm just going to
actually bring that out into my main rigs so I
want it Let's have a look. When I just pulled
it out and I want it to be out of here. So I'm just going
to bring it out now and just drop it in the
bottom of there, like so. And now you can
see that's there. A reason I want that
and I'm just going to move it up above this one. I'm just going to bring
it all the way down to the bottom of bring
it down there. I don't want it right in there, so I'm having a little bit
of trouble busy in there. Can we bring that down? One reason not to move it millivolt is the
one that says move up. Now there's not I don't know. Okay. I'll give up
on that for now. It's not that important, right? Let's come to our bones then. So what I'm going to do now, I'm going to come to our bones. I'm going to rename this
one to wear root bone. So root and then bone, like so. And then I'm going
to come to this one. I'm going to call it step one. So F2, we'll just call
it step one, step Bone. Then we'll just call it one. So what I'm gonna
do now I'm leaving that little space
control a, control C. And then coming to the end, pressing one, that then will
speed up your workflow. So now if you press
F2, press control V, and then just pointing
to, and there you go. You can see how easily
that is now to be sped up. So Control V or
Control V. So F2, F1, F2 control V. And then
all, let's keep moving along. So five. So Control V, five. Oh, F2 control V and 67. And finally the last one which
is F2 control V and eight. There we go. Alright,
so now we've done that, let's actually start
putting these together. So I'm going to
grab all of these. Like so I want to grab my route bone Control
P and keep offset. And there we go. Now let's
come in and wait these up. So what I'm gonna do is I'm
going to come to this now. I should have all my
bones named, but no, I'm not because I need to
first of all, grab this here. They'll grab my object,
grabbed my bone Control P and with
empty weights. And now if I click on these, we've got all of our bones
and including the real bump. Alright, so now we need to
do is just assign the bones. So basically first of all, I'm going to grab them all. I'm going to call them
to my route bone. So the top one and
I'm going to remove all the way up close like
we've done many times. Now let's come to bone one. So I'm going to come
to this one, press L, grab all of this, that
bone, one-click time. Let's come to this one
then that bone to click Assign and just work
your way down 39. I'm going to also if I can kinda pull this
down a little bit. Anyway. There we go. Now we can
see what we're doing. Now. Let's come to the fourth one. Sign 19619. Work your way down here. All of these like assign. Now let's see if they
work the moment of truth. So we'll come to our bones, form to our pose. Let's grab this one so that one, the Whigs just test them. All you're doing is
pressing G right-click to drop them back, like so. So just making sure they all work before carrying on because the worst thing is
that they don't all work. Then you've already
done all of this work. So let's press G, making sure they all move. Perfect. All right, That's exactly what
we want in the beginning. Now I want to do is we
want to actually come. You can see here it's
actually putting a keyframe. I don't actually want the end, so I'm just going
to grab them all, press delete because
I don't actually want a keyframe in on
something I don't want. So now what I'll do is
I'll grab this one. I'll come to frame one
and let's say they disappear every five frames
or something like that. Let's start with that. So in the beginning we don't
want any to disappear. So basically we want
them all to stay here. Now, I don't actually
want a keyframe, my route bone-in or
anything like that. I just want to
keyframe these in. So all I'm gonna do then
he's grabbed them all and press i location. So we're not doing anything with this Galea or
anything like that. Now I want to do is I
want to drop them down, Let's say every ten frames. So we've got ten, we've got 40. So the faulty of frame, I want this one to
have dropped down. So I'm going to
come to this one. I'm going to drop it down
below this point here. So let's bring it
down below, like so. And it's going to put
that in now frame 50. Let's come to this one, and we'll drop this
one down below low. Now let's come to frame 60. Got this one down below
the floor like so 70. Drop this one down
below the floor. Like so frame eight T
and you just basically work your way along in this
kind of tedious process. But when it's done, it's
going to lock that down. I'm going to look fantastic. And that's what we're
down below that floor. 90. Yeah. And that's gone to this 100. Bring it down. And frame 110. And bring it down below there. Alright, I'm happy with that. Now the moment of truth, Let's actually see
if that works. So it should be. You can see at the
moment that we do have a problem in that they're all going down at the same time. And that's not what
we want. But we will sort that out
because just me, it's really easy to sort out. Alright everyone. So I hope you enjoyed
that and I'll see you in the next
one. Thanks a lot. Bye bye.
39. Creating Stepping Stone Trap Animation: Welcome back everyone to
the ultimate guide to Blender 3D rigging
and animation. And this is where we left off. So let's come to our first one so we can see
if we click on this one, the problem we have is that
as soon as 20 is gone, they start moving in and
that's not what we want. And the reason for that
is because we need to grab this 20 on each one and decide how
fast we want it to move. So in other words,
do we want it based over five frames or
something like that? So all you need to do is
just step back five frames. So if I grabbed this one, press shift D, whoops,
not both of them. Let's just double-tap the
grabbed, just this one. So this one here, press
shift D, bring you up to 35. And now it should happen.
It should come up. Go, go, go, bang. There we go. That's
what we actually want. So we want it to
disappear like that. Now if it's too
fast, just reduce the amount of frames if you
don't want it like that. But I think for me, I'm
actually happy with that. Now all you do is you
just click on this one. You grab this keyframe here, and you're just gonna go
back to five frames again. So we've got five
frames on this one. So from 45 on this
one we've got 50-45. So on the next one, we're
gonna do the same thing. And all we do five frames again. So 55, you can see it's
actually shift D really, really quick actually
to do this now. So we'll grab this one, this one here, and shift
P on five frames less. Bomb. The A25. This one, this one should be. Then finally grabbed
this one and this one. And then Shift D. We go. Alright, so let's see
now if that works. So baseball, bang, bang, bang, bang, bang,
bang, bang, bang. Perfect, That's really cool. Now we need to grab all of these and basically invert them. So basically we're
going to put this at, let's say 120, like so. And then what I'm going
to do is I'm going to grab this one. And you can see that I needed to start coming back up from 120. So very slowly actually start
inverting itself by Coke. Not want to do is
we're basically when I copy this and have
it mirrored over to the other side now we can come
in and do it the hard way. Oh, what we could do is we can come to frame, let's say 110. What I'll do is I'll
grab all these, I'll press shift D,
bring them to 110. And then one window is going to right-click and you'll
have one that says here, mirror, and I'm going to mirror it by times over current frame. So click on that,
and there you go. Now I'll do is I'll mirror it backwards to the other points. So if I come back now, you will see if we notice this one Spacebar and then
it will start popping up. And there you go is
back to where it was, which is what we actually
want to leave this on 110. We'll grab this one
now and then one wins. Do is I'm going to press
shift D. I'm going to bring it up to 110 and
then went to control them. Because you can also
use that tomorrow By times over current
frame like so. Now we'll see if we come in, should pop up independently
from each other. And that is exactly
what we're going to do. 110. Now, let's go to this one. I'm going to press a shift D. I can actually drop
them around knee or still do the same thing
if a right-click. Now, I can go to mirror
overcome frames. There you go. You'll see, actually
does it all for you. So you'll see punk bank, bank. But you can say actually, I
actually came up before then, so I need to move
that a little bit. So what I'm gonna do is
I'm going to press G and just move it up 110. And then coming up
at the same time, which is not actually
what I want. So what I'm going to
do is I'm going to just delete that, go back. I'm going to actually
put it on 110, press shift D, drag it
all the way up to here. Right-click mirror,
overcome frames. Now it should actually work. So let's see if it
actually works. Ac, it's coming up too fast now I'm not actually
happy about that. So I'm thinking that
if I come to this one, it starts in over frame
hundred and have a look. Yeah. We need it from this one to be let's say 115,
something like that. So if I come to this one now, I can drag those up through. Let's say 110, maybe several. Yeah, They're coming
up at the same time as you can see over press G. Now. I'm bringing it up to there. Now it should be
bang, bang, bang. You see it's still
a little bit fast. So I wanted to do is I'm
going to put up 220 bytes. So, alright, so now we'll
move to the next one. And what we'll do is we'll
just put it onto 130. It's just going to make it
easier if I grab this one now, I'm going to grab all of these with a I'm going
to press shift D, bringing them up
to 130, like so, right-click then mirror over the keyframes and we see now I just need
to drag them all. Who didn't say, alright,
now let's have a look. There you go perfectly. Alright, so now
let's come to 140. And what we'll do is
we'll grab this one a, and then Shift D, bring them over all the way. I will have to move
these as well. Let's mirror it over
by value over zero. Maybe it's that one. Yeah,
maybe it's that one actually, I think that's actually you can you can see
what's happening. So that's not going to
work. So let's put it on the zoo where let's put it onto this one and then
we'll just mirror it the old-fashioned way
over current time. And then G, bringing them
up to frame one faulty, then we should have it working. Now, bang, bang, bang. Alright, perfect. Now let's come to
this one again. The same thing. So one was this.
Let's have a look. One faulty, so wrong frame, 51, 50 now, which will
be this one here. Alright, so grab this a
and then we're going to press shift D, bring them over. I'm 50, I'm gonna have to
move them again anyway, mirror over time and then
zoom out a little bit and G, bring them over like so. And then let's go
to this one now. So same thing again, a, if d, I'm just hoping that
I'm married that one over. I'm not sure if I did. We're going to actually
put it on 160 this time. So right-click over time
and G move them to 60. And then finally the last one I think we've just messed
up on one of them. I think that will do is now 170. Like so then I'll just grab all of this last
one and then a 50, bring it all the way over, right-click mirror
over time frame and then G all the way up. Like so. Alright, so now let's see what
these actually look like. So let's see if we've
actually missed one. So it should be
bang, bang, bang. The air actually
should work properly. There you go, The
pop in my cup now. Like so. Alright, so I'm really
actually happy with that. The one thing I'm
not happy with is how quickly they come back up. I'm going to do is if
I grabbed them all. We can see that from, let's say. Again, you can see that
they're starting to come up before even the last
one actually went down. So you can see this one here. That's not something
that we want. So what I'm gonna do
is I'm going to grab these and I'm going to move
these a little bit up. Now, the thing is
if I grab this, I'm going to grab them all from frame 90. That's basically it. So you can see as
this one drop-down, There we go now
it's dropped down. So I need to move this one. First of all mops, I'm
going to grab all these. Just move them. I'm actually going to move
them all the way over here because then I'm going
to have a better idea where they're
going to come up from, never come to this one. I can see that they're
starting from this frame here. So they're starting
to already go, look. Now, they start to come up. Now the stones pop-ups. And now I can see that if I grab everything from this
frame, I can move it up. So if I press a, grab
everything from this frame, Let's move them up to say 140. So I'm going to
bring them all up. 140, like so. Now what should happen is
the old should stay down. So all stay down,
bang, bang, bang. They start popping up. As you can see. Now I need to do is
I need to now grab these ones and put them in the right place so I
can see at the moment, we've got frame full T4, T5, and so on and so on. So now if I grab all these, I need to put them at frame 35. So I'm going to drag them
along when I press G, the main frame, 35, like so. Now what should happen is as these drop-down
bang, bang, bang. Now you can see the
pupil perfectly. That is exactly what you want. And what's more as well
as when they come up, we can see now they
actually wait there. Why a long period of time before they start
dropping down again. And we can base this already
over hundred frames. Now it might be that you want to actually have two of these. So two cycles of these
over the fringe of frames, which means that these
realistically need to end. Well, let's say zero needs to end around 150 mark and
then restart again. So phi com to frame
one, grabbed them all. And then I'm going to press
S and I'm going to bring it all the way
down to frame 150. And I'm all I'm gonna do is
I'm going to press shift D, bring them all the way over
to frame 300, like so. And now when we
press a bang, bang, bang, that will
just repeat itself. So now for me, that is too fast. I only want one of them, but I'm just showing
you how to do it. If you want them to
have another cycle. The other thing, of course, is if you put in this
on more than 300, then obviously you can have another cycle in there
or something like that. The thing is if you change
the cycle that you've got now from 300 frames to 600, let's say you are going to
have to go in and actually repeat the cycle on the
spikes and things like that. So there is that to
take into account. Now if you're doing a turn
table or something like that, I would say the
minimum amount you really want is around 500. They can just go in
and either repeat it or extend the animation. You should have the skills
now to do either of those. Alright, so what we'll
do now on the next one is we'll actually work
on the actual width. So I'm just going to come in. And when I press object mode, I'm just going to also
close that up now. And then what we'll do is
we'll actually come to the web and we'll actually do
the same thing on here, although we'll have to
use a certain amount of maybe some weight
painting on there. It's not going to be so
easy as what I'm saying. All right, everyone,
I hope you enjoyed that and I'll see
you in the next one. Thanks a lot. Bye bye.
40. Weight Painting The Branch: Welcome back everyone.
So the ultimate guide to Blender 3D rigging and animation, and this
is where we left off. Alright, let's come then
to our actual whip. So we've already in the
actual cost on a swing cycle, we need to actually mix that now with the actual
branch as well. So the first thing we're gonna
do again is I'm going to press Control a or
transforms right-click. So origins geometry shift
us because to select it. And then let's bring
in our first bone. So shift day, let's
bring in an armature. This is gonna be the
root bone. Of course. I'm gonna move it back
to something like that. Then we're going to do
is I'm going to press Tab and I'm going to press Shift a bringing
the first bone. So all why 90? Let's have it points
in the right way. I'm going to move it a little
bit, not with that bit, with this bit here,
like so I want to bring it out a little
bit as well, like so. And then just have it like so. Now you could actually use probably bendy bones here and
I've abandoned little bit, but don't think I'm
actually going to, but you do have the capacity now to actually do
that. So that's great. The next thing that
I wanted to do is the next bone is actually quite important because I
don't want these actual, these parts here moving. I just wanted to move in
with the actual whip here. So what I'm gonna do is
I'm going to come in, I want to grab than
these two here, so you can save a
grub these two here, then y should be able to do
is press Shift S because it's selected like so I'm putting
bang in the middle of there. Now if I come back to my bones, press tab when I
bring in a new bone, it should appear
right rail. Want it. So now I need to do is
our X hundred and 80, spin it around, make it
a little bit taller, like a little bit
smaller, like so. Now that should be right in the middle and I'm
just going to move it over there somewhere
just so it's a little bit more in line
with my actual width. Alright, so now let's come and actually name our
armature and we'll call it a whip rig, like so. And then we'll come
to this bone here, F2 and it's going
to be root bone. And then this one F2, and we'll call this one branch. So I'll just delete that
out of the way and call it branch bone, like so. And then finally I'll
come to this one, F2. And this will be
the actual whip, whip bone, like so. Alright, now let's
call them too. Our brunch. Let's grab our armature, press Control P, and
with them to groups. Now the other thing is of
course on each come in now and apply these to make the
parent of the root. So Control P, keep offset. And there we go. Now let's come in first
of all to our WIP. I'm just going to click
on my bone so I've not got that
highlighted as well. Come to my route bone. And then what I'm going to do, sorry, I've done the
wrong way round. I need to come to my brunch and then come over
to my route bone, press the Tab button, press a to grab everything and
just remove them off. Now let's come to the branch. Now the thing is
with the branch, this is the one that's going
to cause a little bit of issues and we need to make sure that we're doing
this correctly. So we're just going to
leave that one for now. What I'm going to come to
is the whip and I'm going to grab all of this
going all the way up. Make sure by the way
that you grabbing it in edge select just to make sure that if there's any
seams on there, as you can see, there's
a seam on there that you're grabbing
the old way. In other words, it's grabbing
the whole of the islands, not just one island and
that goes up to the seam. So very important
that you click on it with the edge select on. Now I'm going to do
is I'm going to click assign 100 per cent. Now let's come to this
middle bone here. So we want our brunch bone
and what we wanna do is one actually come in and put
this onto weight paint. And then what I'm going to do is I'm actually going to paint in where this actual bonus, so you can see I'm
going to paint it going all the way over here. It's actually in pull him up to a certain point that
this is all red. So you can also
see that these are also being highlighted red. And that's not something
I want I'm gonna do is I'm going to press Control
zed and bring that back. So controls alt said
Bring it back like so. And then what I'm
going to do now is I'm going to come
in and actually hide these out of the way because I don't
want those in there. And then what I'm going to
do is I'm going to grab this up to a certain point
so you can see brunch, I'm going to come in and grab
the first ones around here. So I'm just going to
press C, grabbing all of these like so. And then all I'm going to do is press Control and plus
on the number pad now, have them going all the
way up to here, like so. Then what I'm going to do
is I'm going to click, maybe have gone a
little bit too far, as you can see, it's
going around here. So Control minus to
go back as well. So something like
that seems fine. And then all I'll do is I'll
assign 100% of the weight. Now what I can do
is I can actually go in to my weight pain. I can actually
minus this off now. So the moment we've got draw, we don't actually
want it onDraw. We want it on to
lighten all subtracts, even bare light and you can see still kinda doing
the same thing. So we don't want it online, so we want it on to subtract. Now when I come in,
you'll be able to. Subtract it off. Now you will say
I'm just going to subtract these ones off, just rounded for now, just get rid of
most of that red, like so what I'm going to do is I'm going to subtract this off a lot less than where
it is at the moment. Now, wait, painting is based
on how the mesh looks like. If I press tab,
you can see we've not got many
subdivisions on here. So we're not going to have a lot of variation in the weights
or anything like that. Plus these are
triangles as well. And it's not actually the best actual mesh
to actually do this. But it can be gotten away with when we're dealing with
something like branches, if we were using them,
it's a character. The actual mesh, as
you can see from this, would need to be
much, much better. The topology of the mesh, which I'll put down on
the right-hand side actually and show you what good topologies versus bad topology. And then you'll actually have
an understanding of that. So now let's go in and
what we're going to do is turn the strength down
to something like, let's say nought 0.25. And now you'll see as a
command and click on this. I've actually got less strength
now as I'm going round, and that is kind of what I want. So I'm just going
to make sure I'm just bringing that down
just a little bit. Like so. Yeah, and I think
that's going to be absolutely fine like that. Alright, so that is what
you're looking for basically. Now the moment of truth then. So let's come in, put this
back onto object mode, and now we should be able to
do is come into our bones. Now, put this onto pose mode and the first thing we can
do is grab this bone. And you can see it's
grabbing all of those bones because they're the ones that are
actually with this. So there is a point on
this one, for instance, when you want this bone here
to be grabbing everything. But the problem is
you don't actually want it to be able
to move anything. So what I'm going to do,
I'm going to come to this, back to my branch here. So let's put it on object mode. Like so what I want to
do is get this rig, this bone, the root bone to be dragging all
of this branch. So I'm going to come
into my branch. I'm going to grab
all of this branch here and one runs do
is the root bone. I'm going to click Assign
with 100% of the weight. Now I'm going to do is I'm
gonna go back now to my bones. I'm back to my pose mode. And now when I move this bone, everything should move with it. And that on this occasion is what we actually want
because we didn't do that. It would just try and
move this branch here. And that's really not
something we want. Alright, so now I
want to do is I want to actually move
this width first. Now, as we spoke
about at the moment, you can see that these
have already got something in them because apparently
I've moved my timeline, so I'm just going
to delete that off onto this will make sure
there's nothing there. Come to this one, make sure
there's nothing there. Then we're going to do is I'm
going to go to frame one. And I'm going to
move the whip over, let's say over here. So 0 and x, move it over here, like so. You can see it's
already pulled out in. Now let's see how slow
we want it so well, tend to do is I'll tend
to come to frame 100, and I'll basically press 0 and x and move it all the way over
to the other side, like so. Now you'll see how slow that is. So if I press space bar, you can see it's pretty slow. But you can see another thing is the weight is actually
perfect on there. So now slow that down. I'm just going to
put it on frame one. I want to press S and let's
try putting it on something. It needs to be really
divided up between 300, but you really need
the other side going first and then
you can divide it up. Another way is if I put
this on, let's say 50. I know then if I grab this one, for instance, press shift D, bring it to the
other side, so 100, now it should be a
continuous loop up to 100. As you can see, that
actually looks really nice. Now why is that correct though? Yz every weight, because if
I press a to grab all these, right-click, go on to
interpolation mode. This is already on
Bezier, it's non-linear. So if yours is
looking a bit jagged, just make sure that
interpolation mode is on Bezier. And now I can simply do is I can simply grab all these shift D, bring them up to the next one, and then Shift D again and
bring them up to the next one. So shift E bring them up to
the next one to 300, like so. Now if I come in now,
press the space bar, you'll see a really
beautiful swing going backwards and forwards. All the way. Brain free Anja.
Now you will see that there's a little
bit of jaggedness there. And to fix that, all we need
to do is bring this one, G, bring it up to frame 200. Grab this one, bring
it back to frame 200. And now this should move in
a really nice flowing way. So let's just make
sure of that first. There we go, There we go into showed restart again
once we get here. And there we go, a
continuous loop. Alright, really, really
happy with that. That's that bit done. Now what we need to do is
work out from this one. Now when I move
this, as you'll see, if I press on why you'll see the branch
moves up and down. And you can see how gold dot control looks
now because the end of the branch is moving much more than the actual
backside of the plan. And the reason we wanted those
because it really is going to be much stronger around here than it
is on the end of it. So now we need to do is
we need to imagine that someone is moving from over
here. So the grabbing it. Moving through here, letting go, and that's when the
branch moves up. So let's try and
actually repeat that. So the first thing we're gonna
do is put it on frame one. And then we're going
to do is going to bend this plant down a little bit. So if I press Alt and why bring it down a
little bit like so. And you will notice we do
have another problem in that these actually should move a
little bit with it as well. So we need to actually
also bring that into kinda moving those with it. So let's actually fix that now. So I'm going to again
go to object mode, back to my plants here. And then one way to do is
I'm going to press Alt H, and now I'm going
to grab both of these warm reds
there is going to come into brunch and
just assign them. Now I can do is press tab, go back to pose mode. Away rays, gamma bones
that might help pose mode. There we go. Now
want to move this, so I'll y, here you go. Everything's moving
as it should do. Now. We only want this to
be very slight and subtle. You don't want any huge
movements or anything like that. I'm going to do is I'm going to basically bring this down. So I'm going to press online, bring it down, maybe to
something like that. And then this, this is
going to be over to here. Now, we already know
if I click on this, it's going to be a frame 100s, so frame or it's not, it's going to be at frame 50. There we go. Frame 50. So let's come over
now. While I wanna do now is at frame 50, which is on, I want this to have moved up
now you can see we do have a little bit of an issue
with these bones here. And the reason is I think
that they're actually also attached to this one here. So I'm going to come
to this one and I need to take them
off of this here. So you can see that
we've actually got weights on these
from this one. And what it's doing is
it's really stretching it out and that's really not something that
we actually want. So let's fix that before
we finish this lesson. So we'll go to object
mode, like so. And then what I'll do is
I'll come to my brunch. What I wanted to
do is on the whip. So I wanted to come
to my wit bone. I want to grab
both of these now, which are already grabbed
on to want to remove those. Now for press Tab,
you will see that still they're actually having
some weight from them. So I'm going to do now quickly, I'm going to go to
weight pain and see what's actually control
nodes and pulling down. So I'm gonna go to my
branch there on 100. Let's go to the root bone. And there you go. It's to
do with the root bone. So the root bone is actually not pushing
that down with them. So I actually need to make sure that it's coming
down with the root bonds. So all I'm gonna do now,
I'm going to press tab, go to my route bone, click Assign, and there you go. That is actually
fixed. The issue. The other thing I
want to do is I want to come to object mode now. I want to hide these out
of the way, like so, and just make sure
that my WIP still looks as though it's in the
places you can see now, is that whether it's
so-called down, it will still look as though
it's in in the right place, at least where another words what I'm trying to say is we're not having to move this whip
up and down with the branch. It should move with it. It should look natural the way it is without doing
too much work. All right, everyone. So yes, it's sometimes it can be a bit more complex
than initially thought. Sometimes you actually have
to go in and fix things, but it's good that we actually
go in and fix these things now because you will see
actually how to fix them. All right, everyone, so I'll
see you on the next one. Thanks a lot. Bye bye.
41. Shaking Ceilings With Noise Modifier: Welcome back everyone to
the ultimate guide to blend the 3D rigging
and animation. And this is where
we left it off. Okay, so let's now press Alt
H. Bring back our bones. Hopefully, I'll teach,
bring back my bones. There we go. Let's now
come into our branch bone. So I'm going to press pose mode. I'm going to come
to my pose mode. And now I'm going to do so. We know that it's
going to go from here. And it should bend
down from here. In other words, it should be
up here in the beginning. So as they're leaning
on to this now, then it should
start to come down. So I'm going to do is I'm
just going to all this up now we know a frame thick d
is where it actually ends. I need to pull this up, let's say to frame ten,
something like that. Then if I bring this soap, soap, sorry, frame ten. And if I pull this up to here, so from frame one, now I'm going to
do is just press Alt and then it's just
going to reset that. Now you can see that
as they come in, that actually drops down. Now you can see it should
drop down near enough, up to frame 50. So if I bring this over now, so if I grabbed this
as g, bring it over. And now we can say that as they come down, they pulls it down. Now that's probably a little
bit too slow as you've seen, is probably going to come to the lowest point much
quicker than that. So I'm going to do is I'm going to bring it
back a little bit. Like so. There you go. Still probably
a little bit too slow. So I'm going to
bring it down to 20. Have a look at that. Yeah, that's looking much, much better now has they
come over and they release. Now, there's somewhere around here they're going
to be releasing. While I wanna do is
probably around here. I want to keep it there. So
I'm going to press shift D, bring it over like so. And then as it
starts coming back, I want it to flick up now. So I wanted to press Alt
and let it go by cope. So now let's have
a look at that. Villanova. There you go. Now we want not to restart
now from this position here. So we can see that's
going to be on frame 100. So now I'm going to grab
all of these redshift day, bring them over like so. Then we're gonna
go to frame 200. And we're going to press
shift D again and bring them over to frame 200 likes soap. Alright, let's give that a try. Let's also come in object mode, hide our bones out of the way. And let's actually have a
look at what that looks like. So there you go. Drops down, legs backup. Drops down. Thanks, Bye cope. And then drops down.
Thanks, back up. So you can see someone grabbing
this thing bringing over, let's go. There you go. That's exactly what
we're looking for. Alright, so that's not bad. That looks really, really nice. But I'm going to
do now, I'm just going to go back to frame one. I'm going to press Alt H and
bringing everything back. Now I want to do
is I think we will stop on this bit
here just to give it some kind of movement. And then we can actually
base our rocks around that. So I'm going to come
to this ceiling here. Walgreens do is I'm
going to say that every, let's say we wanted to
shake in every hundred, let's say 100 frames. So we're going to
be basically wanted shaking twice in the 300. Yeah. So we wouldn't say if you
take the halfway mark, which is hundred and 50, you basically want it to
be I would say roundabout. Roundabout probably. So you can see we've got 80 from here, so there'll be 220. So the AT mark and 220 markets
when we want it to shake, I think we should base it around then I think it'll be fine. So while there is, I'll
come to the ATM arco press i location rotation and I'll just put it
down as location. And then I'll come
to what did we say? 220. Something like that. Location. Yeah, I think that should
be good. Roundabout that. Alright, so how do
we make it shake? Well, we want to actually
give it some noise. But what I want to
do is I want to come back to 80, maybe 75. We wanted to shake him
for, let's say 75-85. Now a bit longer than that. So I'm going to say 70. 70. Now let's come back
even a bit further. I'm going to say
6,160 to 60 to 100, so that's 20 each side of here. So we'll do that. Let's come over. And
what we'll do is we'll go into
animation this time. Like Don let it load up mine, take a little bit of time
because what it will be loading up if it does, is the materials and
everything like that. So those time you click on it, probably going to take a little bit of time
and then we'll, let's come in and put it on
object mode straight away. Now you can see at the moment, if I click on this, I've got actually some
animation already in there. And you can also see
that the moment I've not actually got a root bone or anything like that in there. Now the thing is if you're
taking this through to Unreal Engine or
something like that, then you're going to need
a root bone it in here. What I'm showing you is
the moment that we can actually do this
without an actually, without actually a root bone. The other thing is I can
actually click on that. There we go. It's highlights and just click this button on if
you want to have your highlights it
what I wanna do now is bring in a modifier. So I'm going to bring in a noise modifier like
a knight can see. It's actually shaking like so. Now we'll just carry on shaking. The reason why I've put
these in here is just have an idea of when I wanted to start and
when I wanted to stop. But now I can zoom in
either on here or on here. The move this, where once you see as I
move this timeline, this timeline moves as well. So now if I come in and I
said I wanted to start on 60, like so, and I want it to not be there after 100 for instance. So I'm going to put it on one. And now if you come
up here, you can see restrict frame range. So if I come on
here and I pulled brain starts to be on frame 60. So start frame 60
and end on 100. Like so. Now when I come in, I click on this, I
get to frame 60. There you go. It's thoughts actually
doing something. Now, I need to put this on one. Well, let's put this on one, and now we'll do that again. So frame 60. There you go. You've got all that shaken. Now remember too, you can
decrease the strength. It might be a little
bit too high. Let's put it on 0.7,
something like that. Again, we can do it again. So now you go. That's exactly what we want. Now we also want to make it
as well on where is it frame, so 20 frames, less, which will be framed
200, 200 and faulty. So let's add in
another modifier. So we're going to bring
in a noise, modify it. We're going to make sure
that this is on no 0.7. We're going to restrict them, the frames. So restrict frames. We're going to have this
starting on frame 200 and we're going to have a finishing
on frame 240, like so. Now we've got two lots here, which should be
exactly the same. So now let's come through. So it'd be on frame. Let's put it actually
also zoom out. Actually shake frame 60. Stop to wonder. Now, I think that this
should be I think actually, no, I think I'm happy with that. I think we can have our
rocks dropping down, coming back cope
in that timespan, and then we've got
a real big gap. The thing I'm worried
about is the gap. That's what I'm
actually worried about. Is the gap too long. I think actually
we should have a, let's say if we move this
one back a little bit. So from frame, full
T2, frame 18, bed, so afraid vol t to t. Now
let's see the gap so faulty. Are you going to
have a big gap where all the rocks of
kinda fell down? Another shake then nothing
that's gonna be okay. I think I've been
three and they're probably going to be a
little bit too much. But you can see how easy
it is to actually do this. Now the thing is you can
also animate bones with noise as we went through
in the rest of the course, though, I'm just showing
you with this one, we can simply just
grab the object and actually create
noise or shaken. Now we can also do that, of course, with
our bones as well. So if you all taking this into unreal or
something like that, just make sure you've given it a root bone and then
all you need is one single bone and then put this noise on and you'll
get the same effect. Alright everyone. So I
hope you enjoyed that on the next one then what we'll
do is we'll focus them, I think will actually focus
on these, these two here. So we'll have the
monkey going up and down and swapping over
with this actual sand bag. We haven't actually
got a lot more left now as you can see, rocks, we've got our Boulder
and we've got our monkey. Alright everyone.
I hope you enjoyed that and I'll see
you in the next one. Thanks a lot. Bye bye.
42. The Monkey Idol Animation: Welcome back everyone
to the ultimate guides blended 3D rigging
and animation. And this is where we left off. Now let's come
back to modelling. Let it load up and
not modeling layout. So we have all
timeline down there. And then what we'll
do, first of all, I'm going to hide this
roof out of the way so I can actually get to my monkey. And then one went to do
is I'm going to base my route bone around this here. So first of all, I'm
going to come in, grab this in Edge, leg, in breast, one by the way, on your actual keyboard or 2.3. To actually do this,
you don't want to actually come up here
and actually do that. I'm going to do then
is press Shift S because to select it. And then when I press Tab and I'm going to press Control a or transforms, right-click
origins geometry. And now we're gonna do
is I'm going to bring in a bone in the adult
bone as well just to zoom in so I can
actually move around here and see exactly
what I'm doing. So I'll do is I'll bring
in a root bone first. So shift day, let's
bring in an armature. I'm going to do is I'm
going to turn this around. So all y sorry, all Rex on 90. I want to make it bigger. And then woman's do
is I'm going to put this down on the ground like so. Now let's press Tab and
bringing on next bone. So shift day, this will
be the bone that actually controls this actual part
here going up and down. So I'm gonna do is I'm
going to spin this around. So I'm going to grab it all. And I stopped there
a little bit, so grab it and then all x 90
and then our hundred and 80, Let's spin it so it's
going around here. And what I'll do is
I'll put it more in line with it, like so. Now let's bring in another bone. I think first of all,
before we do that, what we should do
is put our monkey actually on the
actual slump here. So I'm going to press tab, go to my monkey and I'm
going to bring him to there. So I'm going to grab them
all in edge length so l, make sure you grab his eyes. I'm going to press Shift S
selection, cursor, key offset, and then I'm just going
to pull him up jaws so it's on the top where
it actually wants him. I'm going to also put in
more central, like so. And I think that
looks good there. Now I'll grab my
sand bag as well. Make sure you've grabbed it all. Again, shipped us because to selected, that's
not the right one. So let's go back shift
desk because to select, to grab me some bag shipped
as selections cursor. And then let's bring it up. Put it into place. Like so. Alright, so now let's bring
in another couple of bones. So I'm going to press Shift a
once I've grabbed my bones. So now grab my bones shift
day, bring in one bone. So L and S. Let's make this one a
little bit smaller. Now because we're only moving
our bones opened down, we can actually wait them. Still. We need to weight them
basically from the bone. In other words, I don't
really want them to be, I still want them to be
central is what I'm saying. I want to be central, but I can actually
rotate them around. So what I'll do is
I'll press X 90. And then what I'll
do is I'll make it smaller and then
just bring it up because this one I'll
say is for my monkey. And then what I'll
do is I'll press shift D instead of shift day
and just bring it down then. And that then can
be for my son back. So you can see I've got two
bones that have actually can grab a hold of
whenever I need them. Alright, so now what
we can do is we can actually grab all
three of these bones, grabbed my route bone,
press Control P, and then keep offset. And now we can actually
go in and name them. So come to this bone
first, now press F2. And of course this one will
be as always the root bone. So root bone like so. This one will be the slab bone. So F2 stone slab, we'll call it stone blob. Then we've got the
sand bag bone, so F2. So sand bag. Then finally this one, so F2. And we'll call this
monkey on key idle phone. What we'll also do
then is come over to the right-hand side and
we'll call this idol rig. Rig. Like so. All right, everything's done. Now we need to do is
put them together. So I'll grab my
monkey and my slab, I'll grab my bones,
I'll press Control P. And with empty groups, now we'll do is
we'll come in and actually attach some
weight into these. So the first one I'll
come to is my slab. I'm going to press the top. I want to make sure
that I've grabbed the whole image select and then Walgreens do is I'm going to
come now to i stone slab. Fine. Then I'll come to my bag. Oh, this one here,
handbag, click Assign. And then finally I'll
come to my monkey, making sure I grabbed
his eyes again. So don't forget about his eyes. Monkey, idle, click, Assign. And then finally we'll come
to my route bone base. I'm going to grab everything and then I'll just click Remove. Now, let's give this a try first of all, before
we do anything, so come to our bones, home to pose mode. Let's grab this one. This should just be the slab, which is the root ball, should move everything
which it does. We've got the sand bag. Then finally we've
got the monkey. Alright, so now we're
ready to rock and roll. Now again, we can see
that we've got lots of, we've got keyframes on here. We don't want them. I'm going to grab
everything calmed down, press Delete just to
get rid of those. Now let's come to
wire frame one. Now, on frame one, we want our actual
idle to be here. So this is this here. So this one, we're
going to grab this one. I'm going to press I
location rotation scale. Now it's over 300 and we
need to swap it over twice. So let's come in.
And what we'll do is we'll start bringing it down, let's say around frame 60. So unframed 60. I'm going to have it on I
location rotation scale. And then we're going
to do now on frame, let's say 80, we're
going to bring it down. So if I bring this down
to, let's say here, like so I'm going to press
I location rotation scale. Now let's see how fast
that actually is. So if I press space bar, you'll see stays there
and it comes down, which is really nice. So now we know we
can go on frame, let's say frame 100, so it's another 20 frames. I can grab this one then because I know that's the top one. Press shift D, bring
it over brain 100. Now I can do is I
can come back now, press the space bar and let's see how that's
going to work down. And then now you can
see it's too much of a gap there and coming up and I
don't really want that. So what I'm gonna do is
I'm going to grab this. I'm going to press G and
put it on frame 120. And then I'm going
to grab this one. I'm going to press
shift D and put down frame 100 just to make it stay down
there a little bit. So now you can see, I grab this, it's gonna go down. Stay there a bit
before moving up. That is what I actually want. Now we want this to come down, come up with the sun, and
then come down and up again. So that's basically
what I wanted to do, wants it to keep swapping over. So let's do that now. I'm going to grab
all of this, so a, and then what we're gonna do
is shift D and bring it over to frame 300 so you
can see the first one. So if I bring it jaws to here, as you can see, you can see now that we've got a gap of 40. You can see on here
we've got a gap of 40. That is exactly what
we want apart from the first one is going to be
obviously a little bit long. I'm just going to move
that off to frame 300. Now let's see if
that actually works. So it's gonna be Monkey. It goes down spots
with the sand bag, comes up, sand bags there now. And then it's going
to stay there. And finally it's gonna go down. What does the monkey? Monkey is going to sit
there, and there you go. That's exactly what we want. Now. The Monkey needs to
go down with this. So let's come now to
the actual monkey. I want to grab my monkey, want to press i location
rotation scale. And then one going to
do is I'm going to go now back to this one. And I can see on this one, this is a frame 60 before
it starts doing anything. So I'm going to grab my
monkey and a frame 60, we're going to press I
location rotation scale. And then what we're gonna do
is we're gonna go to 80 now. And that is when he said
The most bomb point, though, I'm going
to grab my monkey. I'm going to pull
him down into here. Now, if you're struggling, you can actually come in, put it on object mode and
hide this out of the way. So just hide the other way. And then you can have
a much better idea if that's actually sat on that. Now come back to you monkey, go into pose mode, then back
to monkey, bring him down. So he sat on there like so. But now if I, if you can see
it's already keyed the end. So now if I come down, so it's gonna go down, monkey drops down
with it perfectly. Now we've got a little bit of time now to swap those over. So you can see that
until frame, I think, of a low frame 100, but we need them to
swap now with the bag. So I'm gonna do is monkey bone here and went to grab
this monkey bone. And now I'm going to press, so from here to here is
where we need to shrink him. I wanted to say
at this one here, I'm going to keep him this side. So it should be for PSI
location rotation scale. And now by 85, I want
him shrank down. So S, the row rank now, like so. Now you can see that it comes down and it shrinks, disappears. Now I want to do is swap the sand bag over
now to this one. So I'm going to do
now is I'm going to do the same thing
with the sand bag. Apart from the sand bag, wants to not be starting
not be starting here, wants to be starting
down at the bottom. So when we come here, so the sand bag for now
wants to be invisible. So if I grabbed my son bag, I want to press S
and zero, like so. Then what I'm going to do
is I'm going to now come to frame or is it 80, 60, it starts going down. So again, we're going to talk
about my son by clicked on. I'm going to press I
location rotation scale. And now I want to do
is I want to bring my son back down through here. So I'm going to bring
my son back down. Now the moment of calls, we can't see whether
some, I guess. So we need to actually make it to be the right scale again. So if I press Alt S, we can actually bring it back, and that will make
the scale back. So now I can just bring it
down where the monkey is. I can then press S and zero and then I compressed
location rotation scale. Now as my monkey comes over, I want my son back to appear. So as I go up here from 85 here, now while my son
back to reappear, so old tests, some bug appears. High location rotation scale. The other thing is,
as you can see, it only pops up over here. And now as this goes up, we want it to stay there. So i location rotation scale, Let's go more than 220, and then now we'll
lift our sum by group. So bring all sung by gold
where I want it to sit, and then I location
rotation scale. Now let's see what
actually happens there. So if I press space
bar, monkeys there, goes down, shrinks over, brings it up, and
there we go. Perfect. So now what we can do
now is basically we can move this over to the next part. And they said duplicate that. And we should have
this sand bagging, this idols swapping over, just like on the phone. Alright everyone, I hope you enjoyed that and I'll
see you in the next one. Thanks a lot. Bye bye.
43. Weighting Our Falling Rocks: Welcome back everyone to
the ultimate guide to Blender 3D rigging
and animation. And this is where we left off. Alright, so now I want
to do is want to come to this part here because
we're going to look and use that to stay. This is where it's
going to start again. So you can see it
starts from here again. So basically we want
to go in and copy. We want to swap these over. Basically, we want to
actually invert them. So our monkey at the moment, as this comes down, it
should reappear around here. So it should reappear here. Now we could do this in a very sophisticated way
and say, hey, that's great. And swap them over and mirror
them and things like that. But we're not gonna do that
because if we do that, we're going to actually
probably not get it right. So it's easier on this occasion
just to do it manually. So I'm first of all going
to do I'm going to bring my monkey back her up that bone. And then as soon as now,
this pops back down. So I know once you see it, so it's 260, I know
on to 6055. Yeah. I'm gonna make my monkey appear. So I'm going to press all
tests, bring him back, and then I'm going to press
I location rotation scale now need and still be
invisible at this point here. So I'm going to press S zero and then I location
rotation scale. Alright, so, so far so good. Now I need my monkey to be
moving up when this comes up. So I'm going to
bring it up, up, up, up, up to 300. Let's move my monkey up. Frame 300. Let me just hide this one. We're just going to
take up this 1 s. I'm just making sure I'm a monkey now is sat
on there, which he is. So now if I press, I
occasional rotation scale, the moment I moved back,
back that sand bag, I'm gonna go back perfectly. Alright, so that's good. So far. Now we've got the
sunlight coming up. Then we need the Sandberg
going down so we can see from frame 240 bags here. So let's press i,
location rotation scale, and then down to brain 260, we need the sand
bag moving down. Like so. Let's press i
location rotation scale. And then within that six brains, we need to make that
some bug disappear. But we're gonna do
is now press S zero. Then I, occasional mutations
scale. There we go. Now you can see my monkey is going to move up a
little bit fast, and that's not something
that I'm happy with. Oh, I need him to be on
the platform down here. So sometimes you can actually go in and move the point
when the monkey goes up. Oh, you can actually add
in just some frames. So on this occasion, all I'll do is I'll bring
him down to here, like so. And I'll press I
location rotation scale. And now I'm hoping it will
actually move up with it. So you can see now it goes down, goes up, and then we go. Now you can see that
we could have this a little bit more accurate
if we wanted to. You can see it's
not quite accurate. So all we need to
do if we come up, you can see it needs to be
moved down a little bit. So I'm going to add them
down a little bit like so. And I'm going to listen, I'm going to press I
location rotation scale and now you'll see
that as the swap. So as we come on, He's near enough in
line with it now. Alright, so let's
give that a play all the way through
so we can see those down swaps
over there awhile. What we wanted,
because we wouldn't have that with the
monkey as well. Comes down, swaps over there awhile, then
comes down again. Alright, really happy with that. Now let's go in. And what we'll do is we'll press Alt H, bring everything back. We'll also then go back
into object mode, like so. Press Alt H, bring everything
back, doublets up the a. Now let's just hide the
bones out of the way. And now we'll do is we'll
just press space bar and let's have a look at
this thing shakes. And so they're a bit shake, drops down over a
monkey, comes up. There we go. Alright, really, really
happy with that. Now what we need to
do is the rocks. Let's do the rocks verse before the boulder will
leave the boulder to last. So first of all, these rocks, they're all in the wrong place, but we're not going
to worry about that. We've got a lot of
rocks here as well. Now, I would say we could
either tie these rocks to the same kind of tone or we
could just make more bones, maybe make more bones. Alright, let's grab them all. Press Control J, press
Control layer transforms, right-click the
origin to geometry. So now the thing
is as well that we could also use with this. We could also use
a gravity on this. But the problem there
is that you're going to still have the same problem
where using gravity, but you need them to
drop a certain time. So that's probably
not going to work, is probably actually
going to be bad to do this manually in
something like this. So now I've done that, I'm going to do is I'm gonna do the same thing I did
with these steps here, which requires a little
bit of tediousness. Going to do is I'm first of all. I'm going to press Shift S, I'm going to press
cursor to select it. And I'm going to bring
in my first bone, which of course will always be my root bone marrow bones here, I'm gonna go over, rename
the armature and we'll call this falling stones like so. Then what we'll do is now
we'll bring in a another one. So we've got 123, 456-789-1011. Actually, this is a bit
harder to count than a fault. So 245-67-8910, 11 121-314-1516. Alright, so we need 16 bones. So what I'm gonna do is
I'm going to open this. I'm going to then open this. Then what we're
going to do now is I'm going to press Shift a. Sorry, I'm going to press
Tab and then shift a. That's 1234567 bones. Now the good thing for
us on this occasion is I'm going to leave all of
these bones named this, except this bone here. So all I'm gonna do with this
one is I'm just going to call it I'm still going
to call it root bone. So I'm gonna go in
all it routes bone. Then what we're
gonna do, just leave the bone names as, as you want. Now the good thing is as well, that these are near enough in the same line as these bones. So we don't really need
to do anything with them. All we need to do is
move them sideways. So if I press seven, in other
words, I come over the top, let's say so I'll grab one, move it over here, and then I grab the
next one and move. Now the top of that, I just
need to press L on it. So l, and move this
one over here. Like so. Then I press L and I
move this one over here. Now the only problem
you're going to have here is the fact that these are gonna be hard to see where you
need to add the weight. That's the problem
you're going to have. We're going to deal
with that in 1 s and actually place them out. So, well, random over the
middle as you can see, I don't have to be too accurate, so don't worry too
much about it. Get them into place. Though. On open raise. That's great. Now we need to do is we need
to wait up to these bones. So what I'm going to do
now is first of all, we have to obviously
join them altogether. So I'll grab my rocks,
I'll grab my bones, then I'll press Control P, and I'll do it with
empty groups, like so. Okay, so now let's go
to, let's press Tab. And then what we can
do is we can come now to sorry, we need to go over, first of all to our rocks
like so then what we can do now is we can actually come
over to wait paint like so. Now what we can do
now is instead of doing it that way, we
can actually calm. Can we see if our bones here, I don't think I lighten them up. The root bones not
being highlighted. I'm going to ask to click
on each of these bonds. So instead of doing
that, what we'll do is we'll just come to Edit Mode. More we'll do now is
we'll actually come, actually we should just
easiest way to do this. While bones report
display, just turn on. There it is. So viewport display the
names, and there we go. The easiest way of doing it. Alright, so now we know
Bono two goes to this, this rock and things like that. Now let's go back to our rocks. And then all we can
do now is bone, our one, which is this one here. So we can come in now,
press the Tab button. Grab this bone, make sure
nothing else is grabbed. You can see another
bones grabbed day we don't want to
make that mistake. So we'll be NH select, we'll grab this
bone and it's 001. So I'll click Assign. Then we've got this
one which is O2, will click Assign and then beta will just
work our way down. So O3 sign, hello, full sign, and this is
the lazy way of doing it. So just make sure
you only do this if you think you can get
away with it. Don't do it. If you've got some complex movements
and things like that, don't do it then just if you
can get away with it over six also don't do it if you go into thinking
about selling your, your model or
something like that. Oh wait, that
everything should be named at that point
anyway, 0910. Now, so we've got this
one here which is 12. And we've got this one here. 11 will do that. Thanks. And we've got this
one here which is 15. And then this one
here which is 16. Down a little bit. Hold on. No, we've got 13
there, so 13, 14. And that is my phone. Now, let's come to
our bones again. Let's grab all of these bones. So I'm going to
grab all of these. I'm going to grab
my rule bone loss. I'm going to press Control
P and keep offset. Alright, now what
we can do is we can go to pose mode now and now we just need to make sure that they're all moving
at the same time. So if I press G,
right-click, G, right-click. And all I'm looking
for is to make sure the right bone is
moving with them. And as long as that's happening, be absolutely fine and be
ready to rock and roll. Okay, Hey, I'm the last two. There we go. Alright, that
didn't actually take too long. Let's give this a root bone, a test. There we go. Alright everyone, so I
hope you enjoyed that. On the next one, we will have falling rocks and we
will align them up when they actual the ceiling
shakes and things like that. All right, everyone,
So we enjoyed that and I'll see
you on the next one. Thanks a lot. Bye bye.
44. Falling Rock Animation: Welcome back everyone to
the ultimate guide to blend the 3D rigging
and animation. And this is where
we left it off. Alright, so what we wanna
do first of all is we need to get them in a place where it's
actually going to work. So first of all
though, I'm going to grab all of my bones, I want to press Delete and just delete any key frames
that we've got. That next level while
I'm going to do is I'm going to bring it
on to frame one. I'm going to bring
them down then into the place
where I want them. So make sure they're
in a place where you can't see him underneath
there or anything like that, then we can actually
leave them there now so we know that the just
going to stay there, if I move this timeline
all the way over, you can see the rock space. They stay there. Alright, so now actually we
can work on our actual rocks. Now one thing we do want to do is we want to make sure that the role in this position
every time this thing shakes. So from here, we're going
to grab all of these now. So be gribble of your bones. In fact, we can
actually hide this bone out of the way because we
don't need that one anymore. Actually, I'm going to
grab all of these now, like so, I'm going to press
location rotation scale. Now I'm going to do
is I'm gonna come over the moment
they start shaking. I want them all to be there. So frame faulty. I'm going to press I
location rotation scale and now they're
going to stay there. Then what we're going to
do is now we're gonna go over and look for
when it shakes again. We want all these bones
to be on frame 200. I location rotation scale. Now basically we've got
everything now that we need because we know
they need to be here. They're going to
shake down here and they see a frame 300. They're going to all
be back here again. So we've sorted out now
where they're going to be. Now the best thing is
we know that unframed, faulty and frame 200, that is when the need
stuff falling down. So we can actually come in now and hide this
part of the way. So if I come into object mode, I'm coming now, hide
this other way. Now what I can do
is I can actually come and start making
these drop-down. Well, let's come in and
put this on pause mode. And then what we'll do is
now make them fall down. So we're going to have this
one falling down to now, the issue is you've only got
a certain amount of time to let them drop
down before they need to be back up again. So that's something
that you need to take into consideration. While I wanna do is I
want to grab this bone. And let's say I wanted to
drop down to here now. So if I bring this
down to the floor, like so you can see it's
already a keyframe put there. Is that going to be there? And that one looks okay, Well the next what next
problem we have, guys? We can see that there's
going to be frame faulty brain 50, so ten frames. So now I want another
one to drop down. So we'll have this one, frame 50 also dropping
down to the floor. So and then we'll
pick another one, which is this one here. And we'll have this one
also dropping down to the floor like so making
sure it's in the floor. Now I want to do is we want
to move it up a little bit. So if we have it on brain 45, can see them frame 45, some
of them start to draw. I want to grab this
one, this one, this one, this
one, and this one. And then one way to do
is I'm going to press I location rotation scale because I want them to stay there. Now as these ones are
nearly dropped on the floor, frame 50, I want these now to
start dropping as well, but I needed to drop
again over ten frames. So we're gonna put
this on frame 55. Now what we're gonna
do is we're going to grab all of these, put them through
the floor like so. Now you should have is if we press Space Bar is you should have like so you can see the mall dropping
down individually. Now they are a bit
fast with each other, so we're going to
sell the house. So don't worry because
they're all too fast the moment are we
going to do now? They're also not
broken up as well, so we need to also fix that as well so we don't
actually want them to drop like so we need to
have actually some noise, but we're going to
create it ourselves. Now I'm going to do is
I'm going to make sure that when those have dropped. But you can see it frame 50
is when these should be here. So I'm going to grab
all of these now. So I'm going to press B,
grab all of these like so I'm going to press I
location rotation scale. And then by frame 60, I want them to evolve drop-down. So I want them all to drop
down now into the floor like so I location patients. Know now that over
these many friends, bam, bam, bam, like so. Now what I wanna do
now is grab them all and from frame faulty. So I'm going to grab
all of these with B. I'm going to pull these
out now a little bit. Let's say we love it over to frame AT. Let's
try that first. So you can see on here though, I only want to grab them
from here, from here, and then pull them out
with us for a mate to now, they should drop
much, much slower. And there you go, they
look absolutely perfect. Now the thing is though,
the role drop-in, weird and spills,
all you need to do now is you just go to
each one like this. Now you're going to
do is you're going to grab this middle one and you're just going
to move it randomly. And then you'll see it actually
moves in a random place. It just bring them
all back to all up to where faulty
grab one of them, hide it, grabbed the next one, where it's going to
actually drop the middle one and just move it. A few frames left are
a few frames right? And then we'll grab this one. When is this thing that
starts falling straight away? All I'll do with this
one is I'll move it. You frames this way. Now it's short, like that. I'm going to hide that one
out of the way from this one, times this way and
now the way, way, way down them and move
in the way, like so. And by the time you
get round to the, you know, the
beginning one, you've basically got them all done. Some of them you
can leave as well. You don't need to move.
Every one of them. Will move it. Yeah. Because what we can do then we've
got them like that. It's actually help you there. So it's just tedious. The moment, not too long. Once you've got them,
as I said, Brady, easy then the reason by the way, we're not moving
them by many frames. Because if we did that, it would be dropping
too fast or the eye. So that's why we're only
moving them very slightly. Alice of this. We'll leave that when
actually they're going to rub that one. Alright, let's press Alt
H, bring everything back. And now let's have
a look at that. There you go, falling rocks. Now the next problem we've got is the fact
that we need them also to fall on this
point here as well. So from 200, we need to see that is when the rock
is going to shake again. So what we can do now
is we've grabbed the, grabbed the mole is
grab it from here. So we're going to grab all of these females will just
press a to grab them all, Shift D and bring it
all the way over. Now you can see
we've got our frame here, which we simply, we don't want this, we don't
need to include this frame. So all I'm gonna do instead
of that is come over here. Instead of pressing a, I'm
just going to press B. Grabbed them all. And then all I'm going
to do is press Shift D and bring them all to frame 200, like so. Now they showed all down MLP than they should
fall down again. Like so. Now the
one thing we just need to check now
before we go on is just making sure that the level
with the shaking of the roof. So if I double tap the a so
thank roof should shake. Rocks drop, mop. And again, roof should shake. Rocks drop Humboldt. And as you can see,
they actually didn't come up them because we
didn't make them come up. But let's actually sold out now. So we know that
perfectly in line. Let's go to where object. Let's hide this out the way. Let's come now to
our bones again. Let's put this onto
where pose mode. And now we can see that we do actually need them
to come back up. So on here, little
girl down here, we need to just
grab this one here. So that's all of them hoping. So I'm going to press B, grabbed them all and press shift D. And hopefully if
I put this here, should make them all moved back. Cool, Perfect. That's exactly what I want. Alright, so the next
problem we've got is once the down on the floor, we need to make sure that
they're all in the philosophy. You can see ones lagging
a little bit there. It's already starting
to come back up. That is not what we want. So we need to make sure all of these rocks are
down on the floor. So we need to grab them all now and make sure
they're all in the floor. Though. I'm going to just
grab all of these. I'm going to make
sure I'm frame AT that every rock is in the floor. So I went to make
sure hold them down. I'm just going to actually
probably put it on. Yeah, I'm thinking
you and aid them in. I'm going to put it on A25. I'm going to make sure
they're all down thereby 85. 85, make sure they're
all down in the floor. Every single one of
them is in the floor like so you can see it's
already put that there. So now let's overload thing, thing, thing that they go,
they're all in the floor. Perfect. Now let's come to this side
now in the same thing again, they want to make sure by 145, the roll down in
the floor again. So I found in the
floor, there you go. Now let's try that. So bang, bang, bang, hold down on the
floor perfectly. Now what we want to
do is we need them to be all shrunk now. So also we can go
here to 91, like so. And then what we'll do is
we'll shrink them all down so we'll press S zero. Like so. Now what should happen
is as the payload stop, can you see them start
getting bigger there? That will come to here
and we'll just press S zero, like so. Then they should pop back. There we go. Now
what's going to happen is as the drop-in
coming back code, you can say they're all
invisible basically, and then they pop back up,
then they dropped down again. Now what we need to do now is
the same thing on this one. So as we get to 46, we're going to press
S zero, like so. And then as they come back
up and save the game bigger. So I'm going to
come to frame 2990. There we go. Now let's just see
if that wicks thing. Bang-bang. Drink my cope, hop back into place. Bang, bang, bang. Bring
on my skin's place. Alright, let's give that a try them before the end
of this lesson. So we're gonna go
to object mode. All teach, bring everything
back, double-tap the a. We're also going to hide
this rig out of the way. And we're going to come back. Let's press the space bar. This will vibrate.
Rocks fall down. We don't see any rocks. Vibrate rocks fall down. We don't see any rocks again. And jobs done. Alright, so now
at this point you could go in and you could alter, you could even start it again. You could come in and alter how fast the rocks are falling
and things like that. You can even add more
rocks and things. It's entirely up to you now you've got the skill
to actually do that. What we're gonna do now
on the last one is, of course the role in Boulder. So I've left the baby the
hardest one and till last. But you'll see exactly the way to actually approach
this and get done. Alright everyone. So
I hope you enjoyed that and I'll see
you on the next one. Thanks a lot. Bye bye.
45. Rolling Ball Setup & Location: Welcome back everyone to
the ultimate guide to Blender 3D rigging
and animation. And this is where we left
it off, all rock, boulder. So let's come in. First of all, what I wanna do is I want to we'll put our
rock into place. So we'll just put
him into place. Every is going to go maybe
and something like that. I'm going to lift
it up a little bit. Yeah, something like that. Alright, so what we're
gonna do is first of all, same as we do every time we're
going to press Control a all transforms right-click
origins geometry, Shift S because to
select it like so. Now let's bring in office
bone and it's going to be, of course, a root bone. And what we're going to
call this as boulder rig. Like so then we're going
to do is I'm going to come in and make
sure I'm on Edit Mode. I'm going to grab that bone
and I wanna make him much, much bigger poke canal there
so I can see where it is. Now I'm gonna do is I'm going
to bring in another bone. So we shipped a, bringing another bone and
I'm going to make this one also much bigger just so I can see what
I'm dealing with it. As you see, I can actually grab that new bone, so
I'm going to come in. I've the other one,
grab this one, process and bring that one. Now. Now what I'm
going to do is I'm going to rotate this one around. So all why 90, then our Zed hundred and 80, because I actually find
a better view from here because I can see actually rolling down there
and things like that. Alright, you can see that
this is kinda rolled over. Don't worry about that. It makes absolutely zero
difference on on this. If you want to turn it straight, you can turn it straight. Let's press Alt H then. And then what we'll do
is we'll name the bones. So we'll call this one
route bone as we always do. First of all, I'm going
to come in and press F2. Well, it routes like so. And then we're going
to do is this one I'm going to call it bolder bone or bolder own. Like so. And now
we'll do is we'll just wait them out with
our actual Boulder. Boulder bones Control P, empty groups. There we go. Now then let's say attach
this one to this one. So this is going to be
attached to our root bone. So Control P, keep offset, and now we can actually
put some weight on there. So we're gonna go in
now to our Boulder. We've got a root bone
and bone to bone. When I press tab a to grab everything because it
is just one mesh route, bone, click, Remove, folder,
bone, click, Assign. Let's go in now and
give that a try. So first of all, let's click all bones. Always mode. And then we'll grab
our root bone. Everything should move from this bone, everything
should move. Now, more importantly,
let's rotate it round. So if I press all and x, this is what we're looking for. That rotation is definitely
what we're looking for. Alright, so now I want
to do is we want to stop and put our
bones into play. So first of all, I'm
going to come over here and I'm going
to grab this one. You can grab, this will
be the easiest way to actually doing it with
the actual root bone. So I'm just going to press I, I'm gonna press location
rotation scale. And then all I'm gonna do
is I'm going to drag it across now on frame, let's say frame 120 on this one. So frame 120, I want
it to be over here. Let's say this might be
too fast or too slow, but we'll certainly see. So over here in there, like so. That's already done orals. Now the other thing is they
have a press space bar. Actually that's not bad peso. Now the other thing is that
we want it to actually start off slow and speeds up as
it actually moves along. So that's no problem. We also want to though, to kinda follow down here. So at this point,
as you can see, it's kinda floating in there
and that's not what we want. So what I'm gonna do is
I'm going to come to frame 38 and I'm actually going to pull
it down to the floor. So I'm just going to look making sure that it's on the floor. So maybe maybe there
something like that. And now I can do is
I can actually see, is it going to flow or is
it going to come down? So there you go. You
can see as a part of it where it's still floating, um, that's the point where
we have to fix these things. So is it floating here? Yes, it is. Kind of in the ground there, so we don't actually want that. Now let's bring it
down, down, down. Let's look at this one. Float in there. Is it following the ground? It looks pretty good there. Let's follow it all the way
down to here. Floating here. Yep, is a little bit. So what we'll do is we'll
bring it down very slightly. Then what we'll do is we'll now go dive a little bit
of jump up here. So as you can see, loads in a little bit that
will bring it down. I'm going to actually as well, to make this easier for myself. Oh man. I know all of these
aren't the way I know my walls out of the way. Now I can rarely
see what I'm doing. I'm going to also hide
the other way as well. Maybe this out of the way. Yeah, I don't want to hide that. So we'll just leave it as that. Alright, so now we'll go back to older pose mode. This one here. And now we're gonna
do is we need a little bit of a jump there, so we're going to bring it down. Yeah. And then as it goes up, it should lift up
a little bit here. So we're going to lift it up. There we go. Alright, so now let's see what
that actually looks. Yep, there we go. That's looking pretty nice. Alright, I'm happy with that. Now we need to actually
start rotating it. Though. I'm going to
grab this bone now. I'm going to press I location
or rotation and scale. And then what I'm going
to do now is I'm going to move it by here. And all I'm gonna
do now is rotated. So if I press all x and it needs to be
going this way round. So if I spin it that way, we can see it's a minus. But if I put this -90, now if I move this from here, you can see it actually starts
rotating, which is great. Now we've put this on frame 20, which means we can
go now to frame 40 and we can press all. Which one was it X, is it yep. -90, like so. And then we can go to frame 60, then all X -90, and then frame E T 0, X -90, and then frame 100, 0 x -90, like so. And then frame 120 where it's
actually stored in there. So we've just got to be careful that we don't do that too much. So in other words, it stops
around frame hundred and ten, which means that it's
only going to be half of 90, which is 45. So if I press R x -45, alright, let's see
what that looks like. So rolling, rolling, rolling. You can see we're getting
a lot of sliding. The reason for that
is, is because it's not quiet
rolling fast enough. So you can see in the
beginning, patrolling nice. And then from this point here, it should be sped
up a little bit. So all I'm gonna do, I'm
gonna grab all of these. So just these ones because we're happy with
the style of it. We're going to grab
all of these and just bring them in by ten,
something like that. So bring them to 100 instead and you can see
the movement from there. And now we'll just put it back. I'm going to have a look. So now you can see that it's moving on bare except the
point on the end now, which it needs to move another
45 because we gave it 45. So let's put it at frame 110. And then what we'll do is we'll
press all X -45, like so. And now let's see
what happens there. Nice rolling, rolling,
rolling, rolling. There we go. You can see
near enough perfect, except that last tiny little bit where it needs to roll
just a little bit more. So I'm going to actually put it again at 45, at one-twenty. So our x -45, there we go. Now let's have a look
at that. There we go. Narrow enough, perfect. So you can see now that's
looking pretty nice. Now the next thing we
need to do is we need to just refine this a little bit if there's
any refining to do so easily, go in and off. I actually don't think
that's about it. I'm thinking maybe, maybe, maybe it's slide in a
little bit from here. Let's say from this point here, move those by mistake. Slide in because it's not
quiet speed and enough. So from this point here, roundabout there, that's where we probably
need speed them up. So I'm going to grab it
from this frame here. And then I'm just
going to grab all of these and press the
S bone and jewels, bring them in just a little bit. Now let's have a look at that. There we go. That's moving much, much better as you can see. Now, the one thing
we've got now is we have a problem when
it gets to here. It needs to be rolling
a little bit more. So you can see it's
kinda slide in there. I'm going to do
is I'm just going to bring that went over. What that looks like. There you go. You can see now it looks
absolutely perfect. So I'm really, really
happy with that. Now we might as well base
this over 100 and sorry, 150 frames really, because then that will be
the halfway point. And then we can have
it starting again from frame 150 go into 300. In other words, I've got
to get rid of it now. I've got to somehow
on the next lesson, get it back to here and
get them rolling again. All right, everyone, so I'll
do that on the next one. I hope you've really
learned a lot. I hope you enjoy the
course up to this point, and I'll see you
on the next one. Thanks a lot. Bye bye.
46. Final Lesson Summary: Welcome back everyone to the
ultimate guides Blender, 3D rigging and animation. And this is where we left off. So now we're gonna do is
we've rolled it in there. As we can see,
there's all bolder. So now we basically
want it to disappear. So what I'm going to
do is I'm going to have it's there in frame 120. We're going to keep it here. So in other words, if I
grab my route bone folder, Let's grab the roots bone here. So this bone, then what
I'm going to do is I'm just going to press I location, rotation scale, like so. Now I know that this root
bone overrides this bone. That's why it's
called a root bone. So in other words, from 13131, I can now scale
this back to zero. Like so. Now I can do is I can grab all of these up to
this one-third, two marks. So I want to grab
them all like so. All of those grabbing this one here, then I'm
going to press shift D, drag them all the way over
up to nearly 300 marks. So somewhere like so. Now, if I come in now and I'll say,
right, Let's go there. You'll see that it disappears. And then as it starts to
get there, it starts again. It'd be that size. So we now want to say 169. Yes, there, there we go. Now let's see if that works. So here we go, here we
go, rolling, rolling, rolling, rolls into
there, stays there. Second pops back. There we go. It's going again. Now the thing is, as you saw, because I've copied
that over from here, I didn't actually
grab both bones. So the easiest way now is just to grab all of these bones. And then what we're
gonna do is gonna press a and I'm going
to bring them up. So shift D all the
way up to 300, like so now let's see
what that looks like. So rolling, rolling, rolling along, their peers reappears. And it should restart. Now we go. That ego animates a bolder. Now let's press Alt H,
bring everything back. So object mode, like so. I'll teach everything
comes back. Now what you should do if
you've done everything. First of all, let's take off the names of these bones because
that's kind of annoying. Then what we can do
is we can come in now and hide our long bones. First of all though, let's
put demand to their own rig, sorry, their own collection. So this is basically the part of the course where we just
tidy everything up. So we're gonna do
now is I'm going to right-click new collection. I'm going to call it rigs. Like so. Then I'm gonna
grab all of my rigs, drop them into there. And now I can hide all
those out of the way. Everything should still work, which it does now I'm free
to do is bring in my vines, bring him a light, some plane. And now we're going to actually
go back to our cycles. We can come back
to this simplify. What you want to do is put
this on six, put this on one, and then put this either at Orange and forth for k or two k, Whichever one your
machine can handle. I want to put mine on for K. And then finally won going to do now is I'm actually going to hide the lights out of the way because I
really don't need to see them. But you don't actually have to hide them out of
the way over here. You can just turn
them off on here. Now we can do is we can put this onto cycles and then everything
should be back there. In fact, we won't do this on cycles because you won't
actually be able to see. You can see if I
press Space-bar, things start to move, but
it's really, really blurry. We don't actually want that. So what we'll do is we'll
put it on material mode, let everything loaded up, and then we should be
able to press space bar. Now, I never written
work and so we get a real good view of how this
is actually going to work. Now the other thing
is that this point, you could also bring in a camera turntable and then you can see how you can
get a full animation. You've already done
the camera turntable a bit earlier on the course, and now you can actually
put it into action. So we can say, well
look at this first, so it's shaking
rocks coming down, monkey goes down,
somebody comes up. They can again, mall
rocks come down. As you can see, the
swaps over now for the monkey moving on them, we've got the width going down. You can see the little
branch moving up and down. We can see that we've
got a rock rolling along out of the vines,
disappearing into here. Then it will reappear here
and start rolling again. We can see a golf steppingstone disappearing and
reappearing. Like so. I'm wondering if I think
of head that plane, yeah, just hit that
plane, does the math. And finally then we've got spikes as well coming in
and out look like so. And then finally
we've got our arrows, which are going to be
firing into the wall here, disappearing. Fire
out some more. Hope. There we go. There's the arrows. Alright, everyone,
that basically brings us to the
end of the course. I hope you really enjoyed it. I hope you learned
a lot from it, and I hope you can
actually use this in the future for anytime
that you come across an animation we're
not quite sure about, or you just want to reflect on something and
actually use it too. Remember how you actually did
something. I do that a lot. So this is also behind me to me, just in case I forget. How did you do the morphine or how did you do the growing of
vines and things like that. So really, really handy
for in the future. If he caught a B,
really appreciate it. If you give us a nice review, then people know what they
thought about the calls, all the good things about it and things like that or everyone. So that's it from me. I hope you enjoyed it and
I'll see you on the next one. Happy modelling everyone. Bye bye.
 3D Tudor, The 3D Tutor