Transcripts
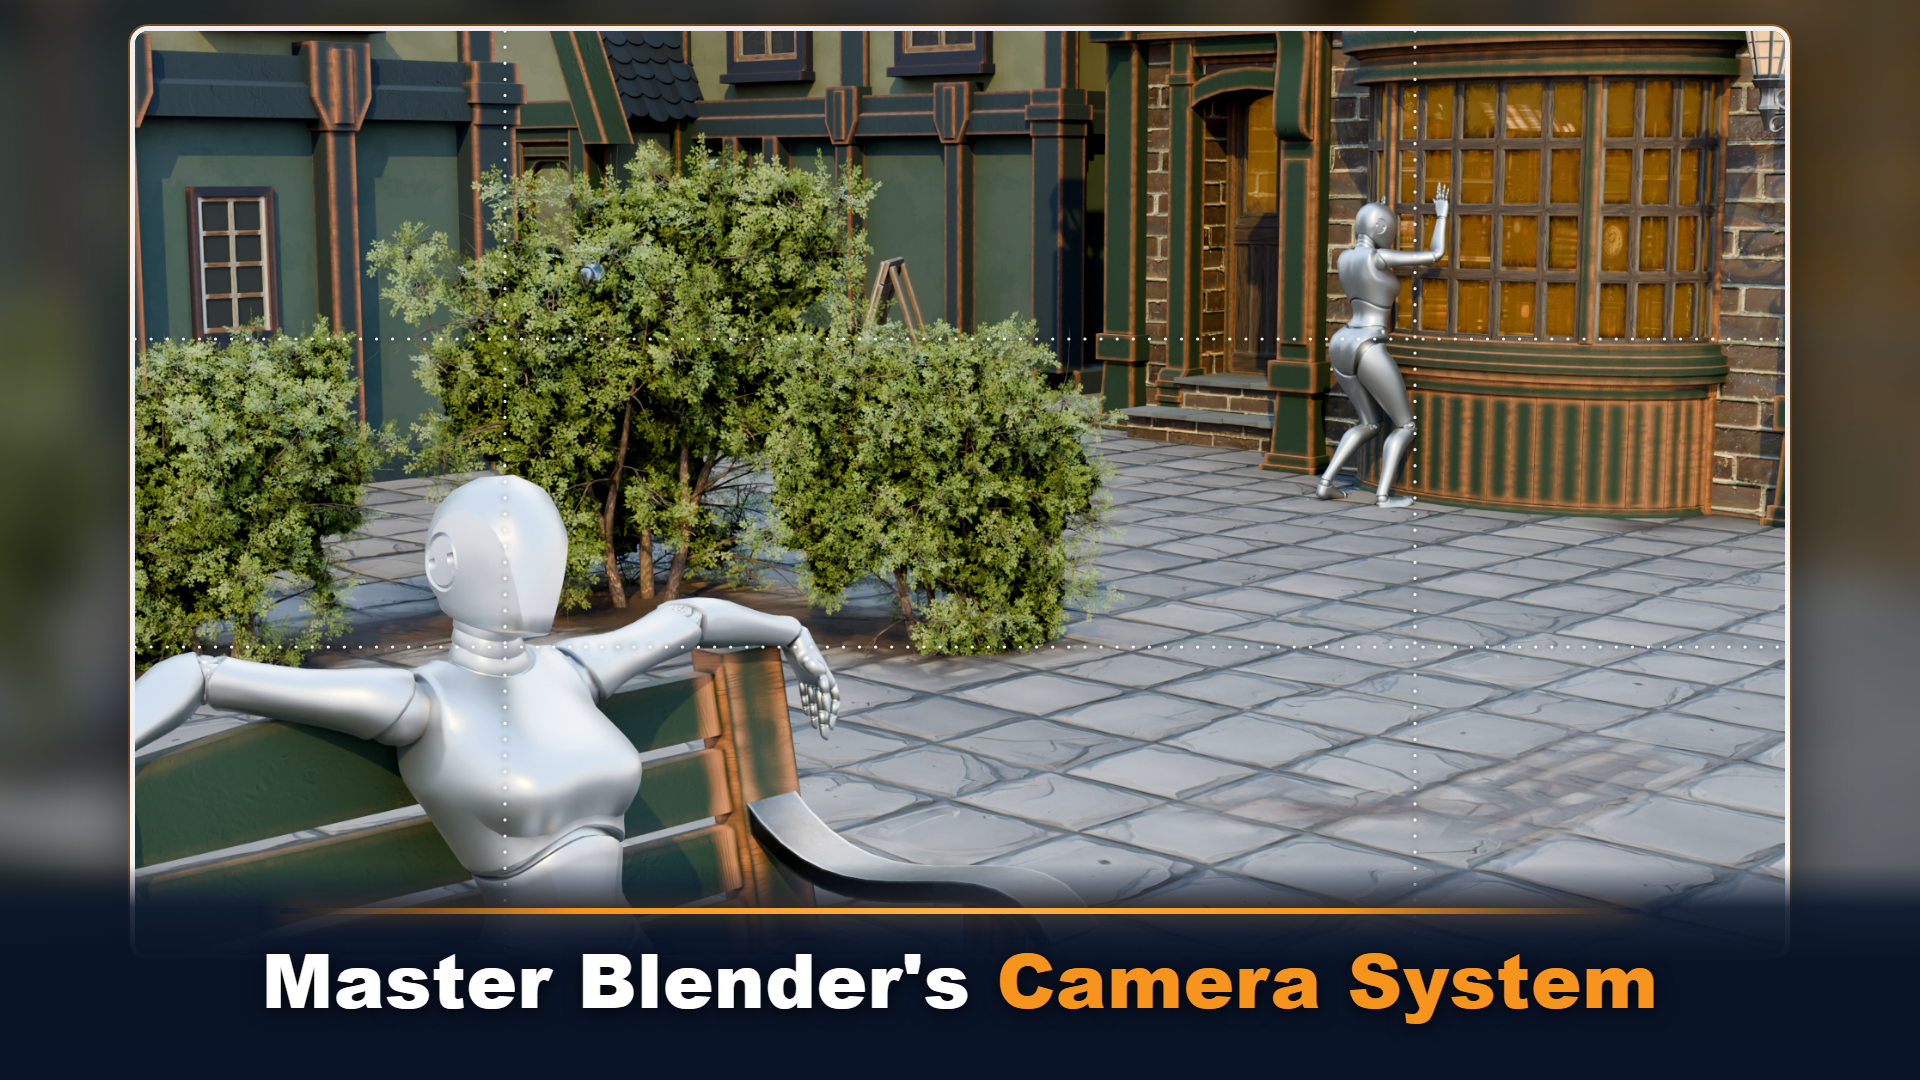
1. Master Blender Cameras Framing, Lenses Composition: Most Blender artists
spend hours building a great scene only to lose its impact with a
weak camera angle. In Blender essential
camera basics, we're going to fix that. This practical course will
teach you how to take full control of Blender
camera system from creating, positioning, organizing and switching between
multiple cameras. You will learn how
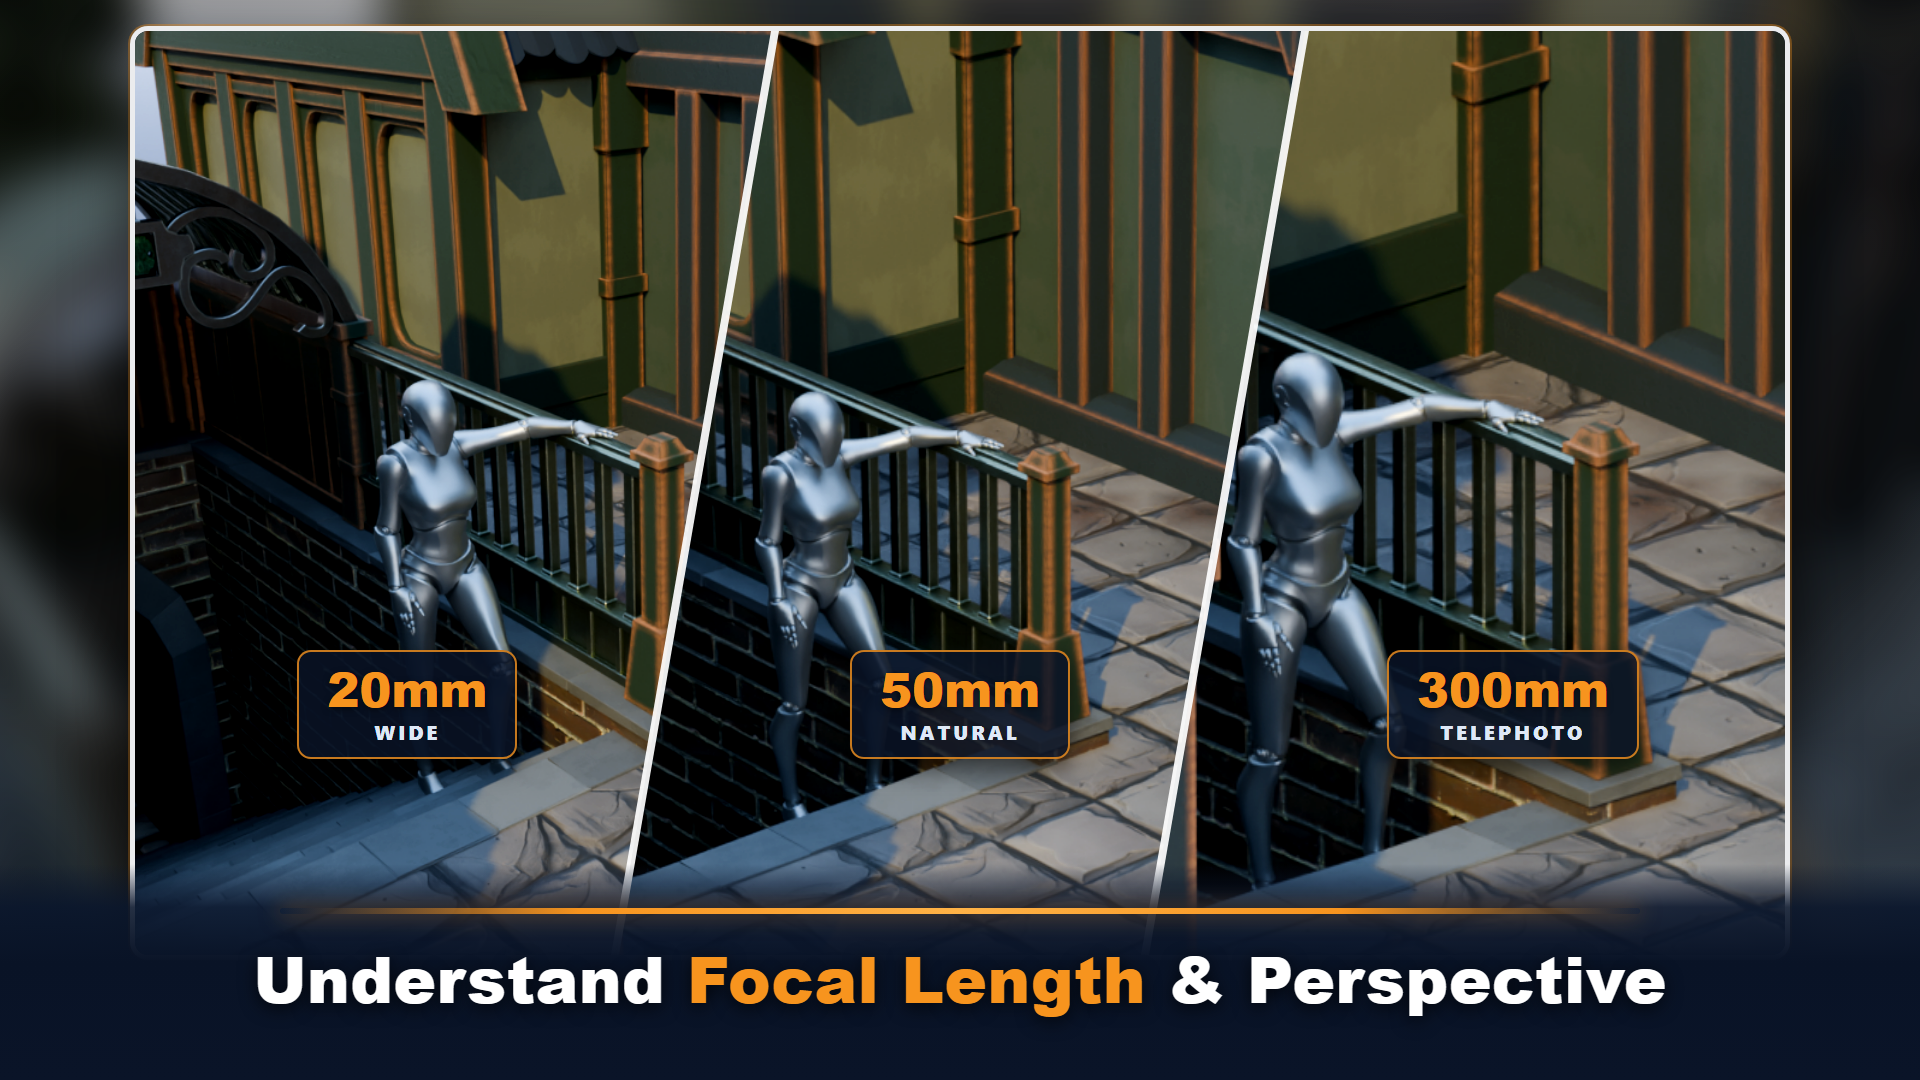
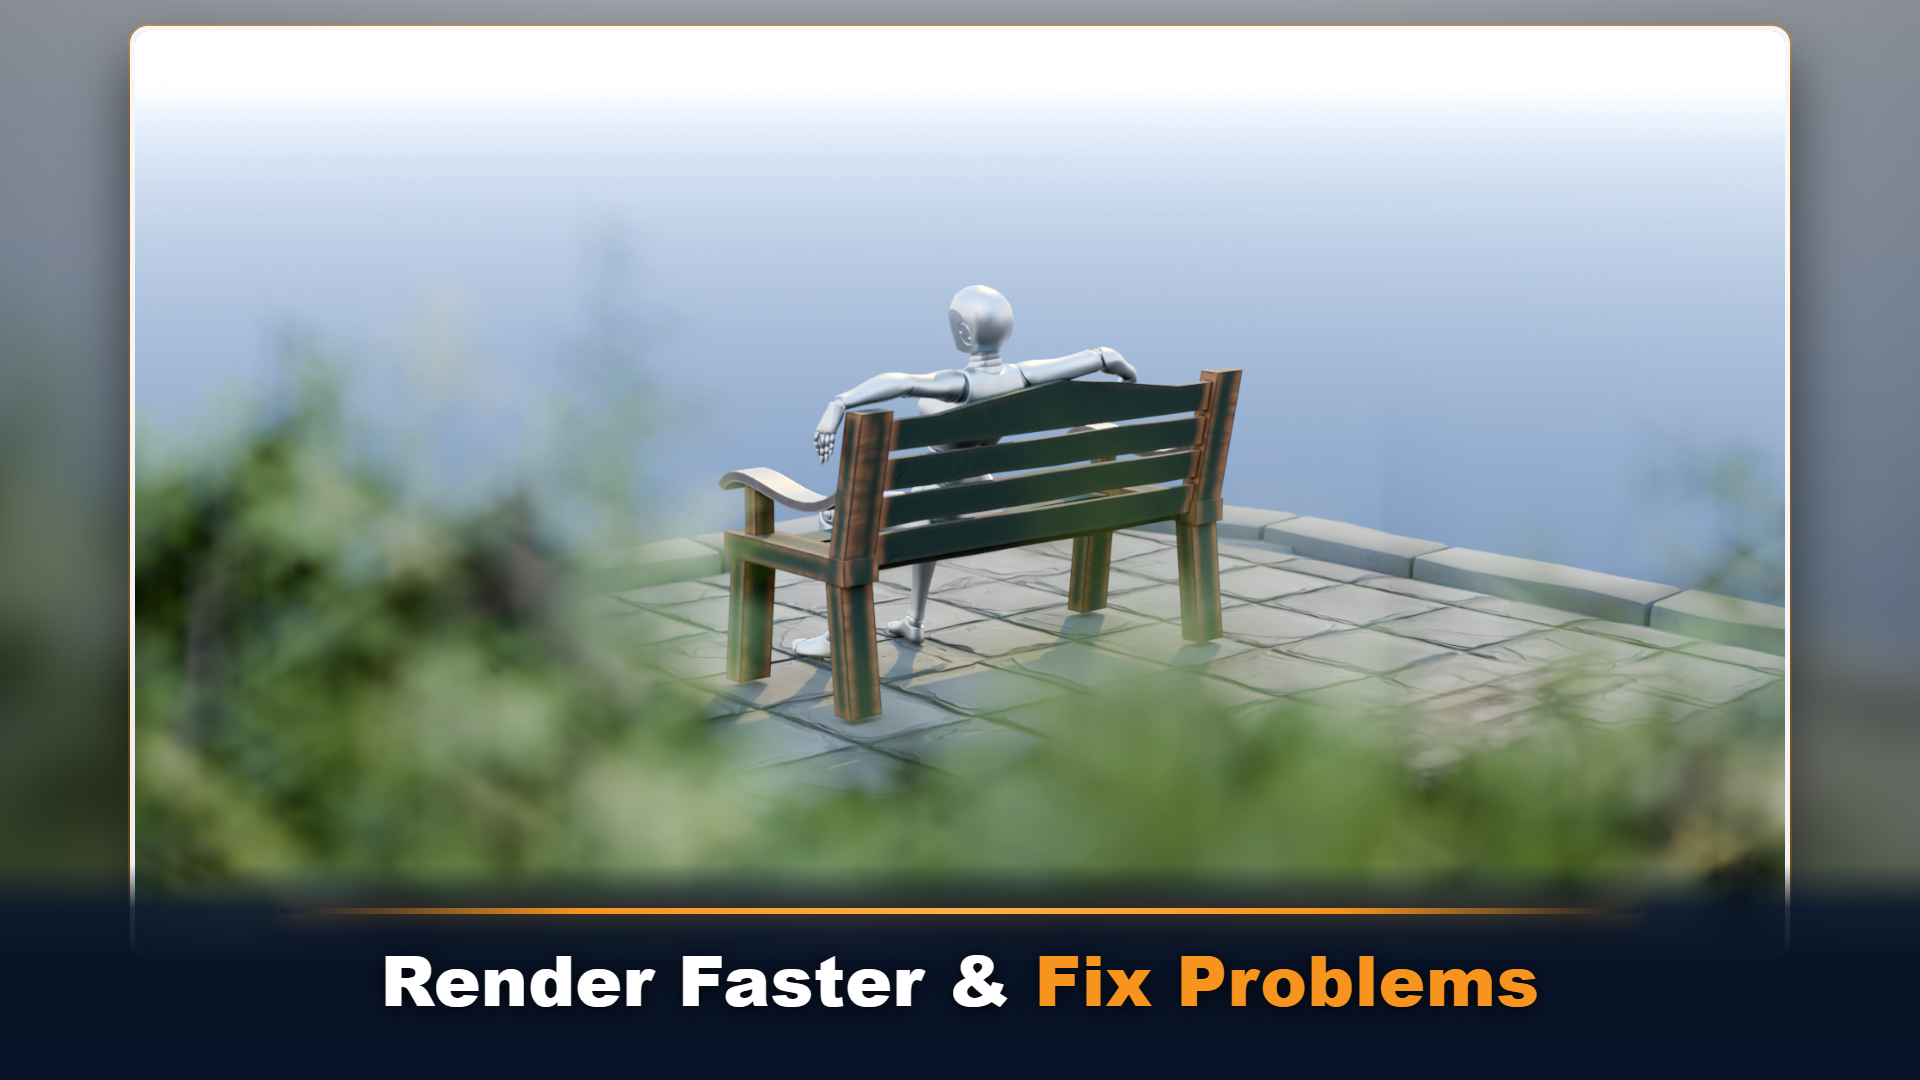
to focal length and camera distance
work together, how they affect
perspective distortion, depth, scale, and even
emotional feeling of a shot. We will compare
wide angle clos ups with more controlled
long lens views, so you can see exactly why two similarly framed images can feel completely different. We will also explore
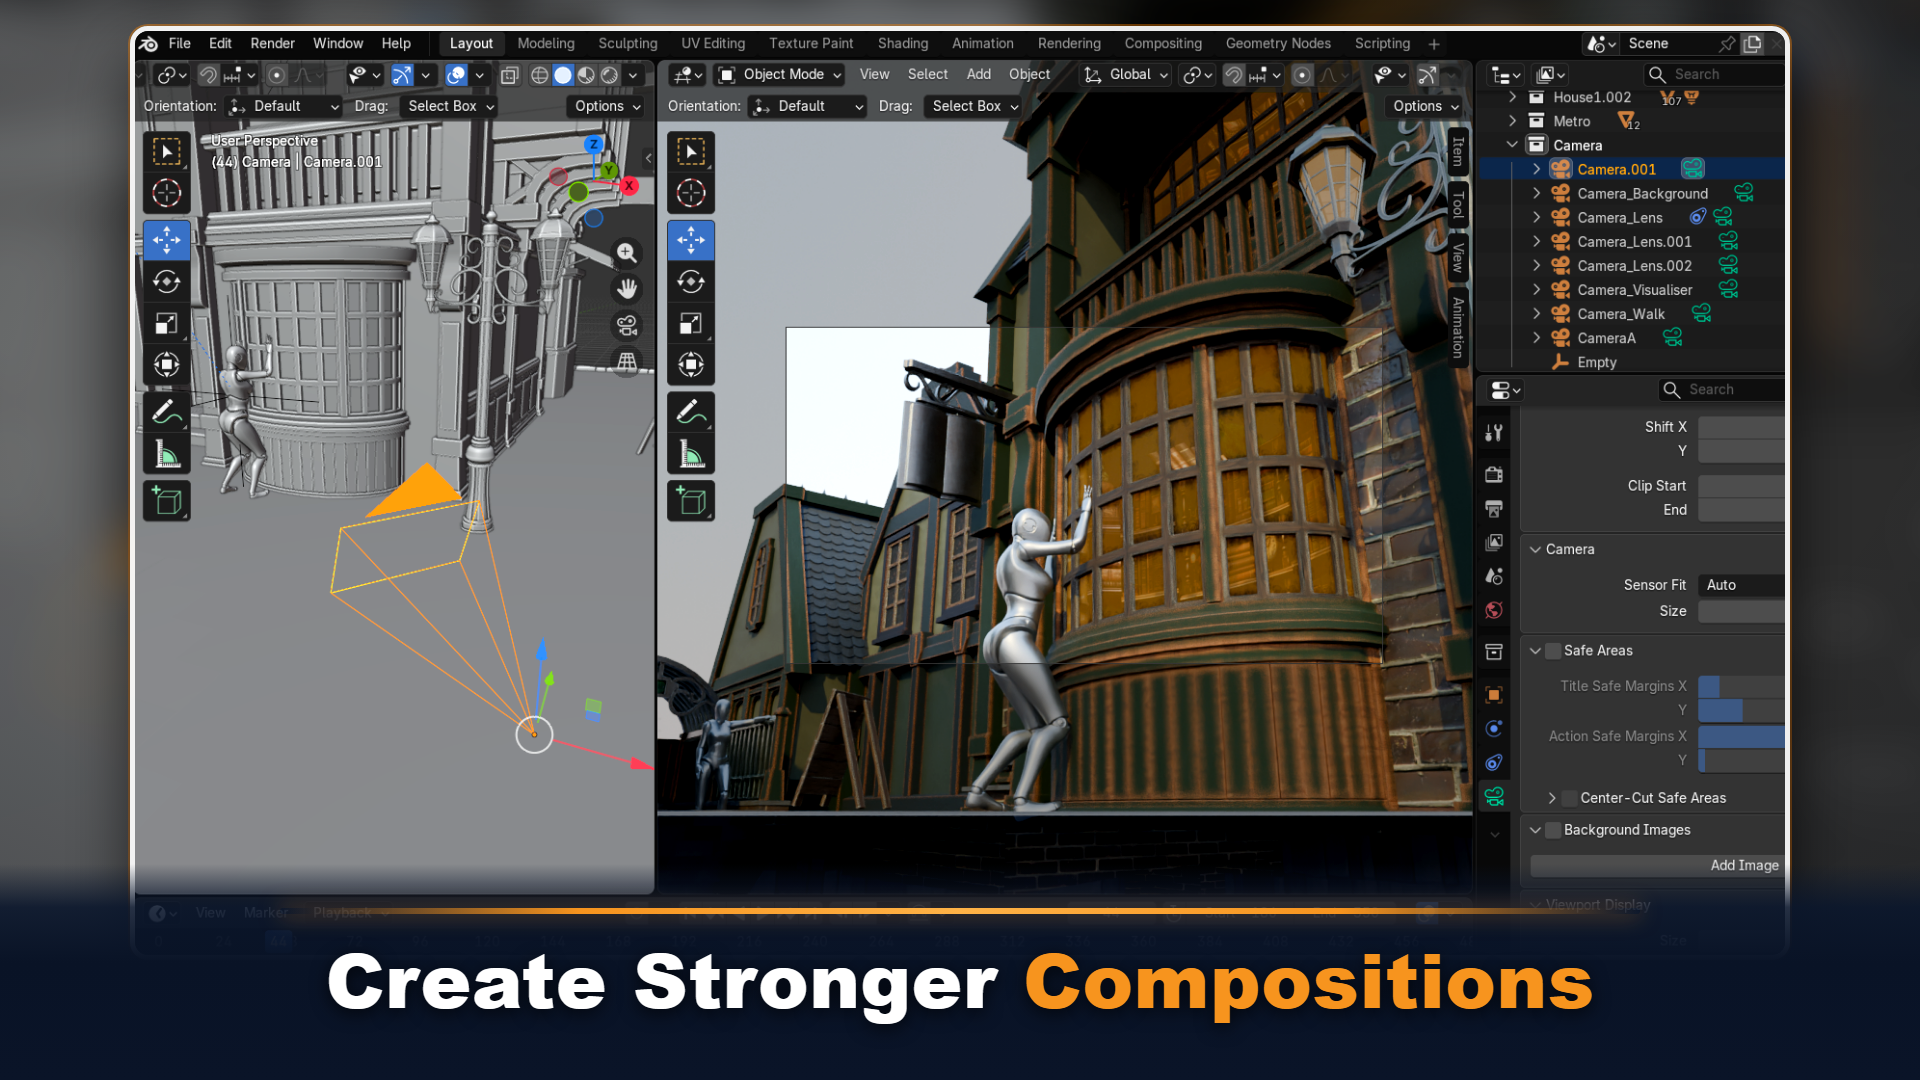
composition guides such as rule of words,
diagonal slum ratio, triangle guides, set of framing and safe areas
for wide screen, square and vertical content. To make the course practical, you will work inside a fully built Victorian
style environment featuring architectural foliage, street props, lighting, and
post Mannequin characters. The environment was adapted from our Blender Ultimate
Environment Artist guide with compositions remodeled
and selected buildings repurpres specifically
for camera practice. This gives you real scenarios for creating
environmental shots, architectural views, close ups, storytelling compositions,
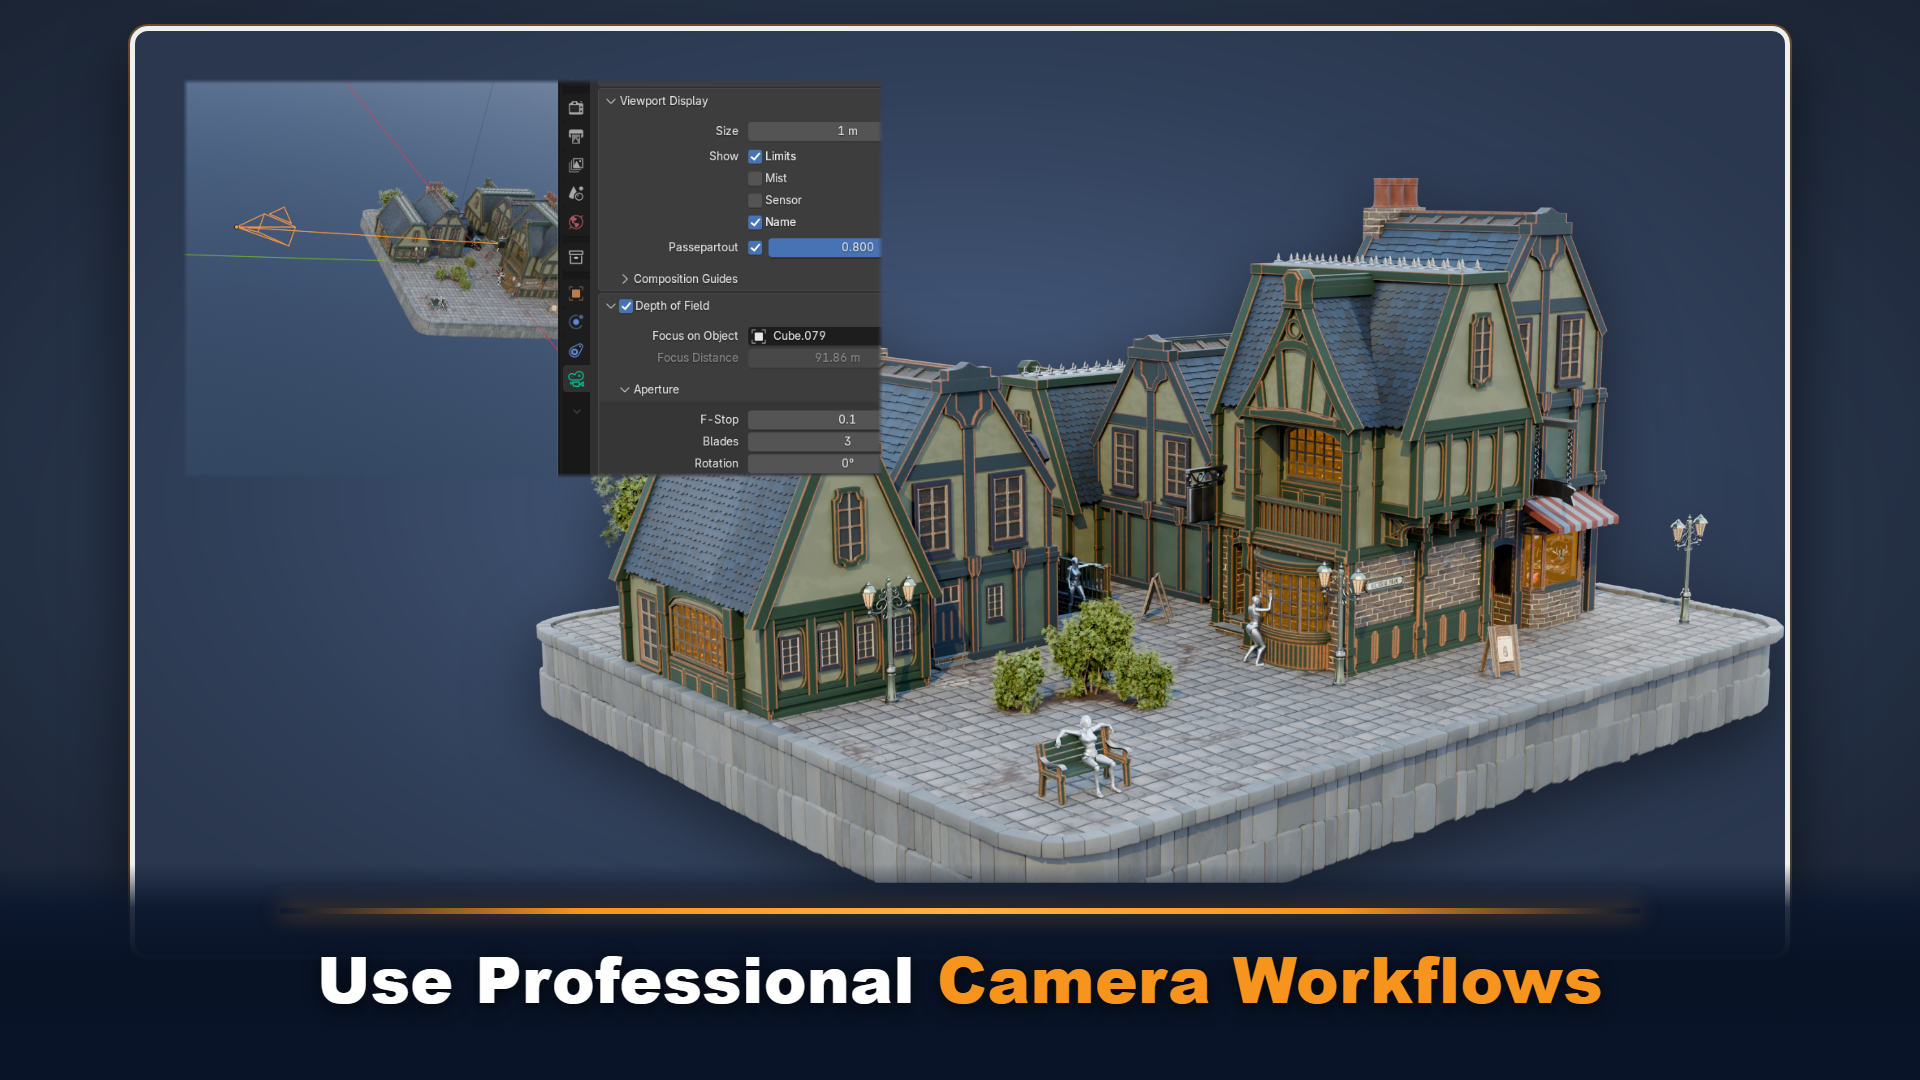
and depth of field renders. Finally, we will cover the problems that often
slow artists down, including clipping
missing objects, incorrect active cameras, broken depth of
field, blank renders, V settings, noising, render
regions, and exposure. So whether you create
environments for folio artwork, thumbnails, animations,
or symmatic renders, this course will give you the technical camera
foundation knowledge needed to present your work
with far more confidence.
2. Camera Basics & Scene Setup: Hello and welcome everyone to Blender Essentials
Camera Basics. Now, when you open up
a new Blender file, you'll be introduced
with three objects, light source, cube, and camera. Camera is what we're
going to be looking into within this course. You
make use out of it. All you have to do is
simply click F 12 on your viewport and it'll start
rendering out your scene. Three D viewport that
we currently see or Blender file in is
simply a working view, but camera view shows exactly what the active
camera will render. We can have multiple
cameras in one scene, but Blender uses one active scene camera
for the normal render. Let's go ahead and
open ourselves up with a resource pack
provided project. We're going to find ourselves
a little scene with characters and whatnot inside
a Victorian lovely setup. To make sure we can preview this in full glory before
using cameras, we're going to make
sure we go onto our render viewport shading. And before doing
that, let's just make sure that we click on
Render properties, and it's set to Cycles, GPU compute we are going
to go a little bit more in depth in regards to this in our troubleshooting
stage of the lesson. But that's going to be for now. This has the same preferences
as we had before, so OptiX is selected. After all of that,
we can just go ahead and go on to render viewport. So this will show you
how it looks like with tracing on
the entire scene, and the viewport is not
the same as camera. If we were to click
F 12 over here, it'll say an arrow that there's
no camera in the scene. So if you're using a default scene and you
have not deleted a camera, you can make use out
of that set camera. Otherwise, in order to actually make use out of the camera, you'll need to create
yourself a new one. So what you can do is you
can click Shift and A and use the camera
tab over here. By clicking on this, you'll spawn a camera on
your Fred cursor. If you're not able to see it, you can use the dot on
your numpad to kind of reposition the viewport
to where the camera is. So over here, we can see that the camera
is in the ground. I'm going to actually go onto
material preview just so we could see a little better
in smoother performance. Ray tracing is quite
performance heavy after all. So if this camera
still selected, we can click GZ and
just move it up, like so, and this is the icon that we
have for the camera. It is going to determine exactly what we see
with our renderer. So if I set my camera up
like this and click F 12, it will show you the exact type of an
output that we're getting. By default, it
might look a little bit zoomed into what you expect, but this is because we need
to scroll or mouse wheel outwards a little bit just to kind of see
the entire frame, like so, and this is what exactly we're
getting out of the camera. So you might be wondering
which way is it facing? How do we determine where is up, where is down and whatnot? And we're going to get
to that in a moment. But before that, let's
close down this tab and we'll be able to just
see where the camera is. I actually have
this camera spawn, but it's going to be in
one of the outliners. On the right hand side, we have all the items in the scene, including all the
meshes and all of well the lighting as well
as the camera setups. Because I had a collection
selected as a previous one, you might have the same kind of an issue where it's
in the collection. We know it's in a
collection because there is an icon over it that
has a camera icon. To see it further, with
the camera selected, what we can do, we can hover
our mouse over our outliner, and we can click the same dot that navigated in our viewport, and that'll show you the exact type of selection
that we have. So over here, we
have the camera. To move the camera out onto
the normal collection, what we can do is
we can hover over our viewport or our
outliner and click and then just use the moved
collection to create a new collection or just put it in default collection
just like that. But now we have the camera in our lovely
collection just like so. I'm actually going to
just simply click again, and the create
camera collection. That way, it's going to be in its own collection
just like that. And I'll make sure that this
collection is selected. So if we create new cameras, we'll have all of the
cameras in the same spot. So I think this is a good
place to end our video, and we're going to continue on with this in the next lesson. Thank you so much
for watching, and I will be seeing you in a bit.
3. Managing Multiple Cameras: Hello, welcome back everyone to Blender essentials,
camera basics. In the last lesson, we went over all the technical setups, and now we're just going
to talk a little bit about how to control
this set camera. So first things first, in
order to access the camera, what we can do is
we can just select this camera and we
can click zero. This will give us this framework that we can see
around our scene, going all the way
around just like that. This is what the
camera will see. And this is determined by the
resolution of the camera. As well as the perspective, the focal length that we'll be talking
about in the future. But what we need to know is that if you're
not seeing this, you might be zoomed in too much. So whilst we are in
that zero numpad view, we can use our mouse
wheel to zoom in and out, and we can still see
that the frame is there. So even though we're
zooming in a lot more, if we were to render
this, it would still render that said frame. So zooming in and out will
not change that effect. To leave this camera view, we can click zero again, and then we'll see that we
don't have a frame on our end, and we can just move our
camera around like this. And the other thing
that I'd like to mention is that if we click zero and we have this frame
and try to move it outside, we're going to be naturally flung out or ejected
from the camera. But there is a small
little option that we can use we make sure that we're bounded to the
camera whilst we're moving. So if we click N, we have
options for this selection, and if we go on to view, we can select lock
camera to view. This locks to camera, you can see the
toggle button over here that it basically
locks and unlocks. We can use this button
as well, by the way, and it's going to be located on the right hand side when
we are in the camera view, a little nice setup. So when it's locked,
we can then move our viewport around using the same controls as
the viewport itself, which is mouse button
to rotate around, using scroll wheel to
zoom in and out and using shift and middle mouse button
to pan the camera around. So it's going to be exactly the same type of controls that
you'd normally have. So with this, we're just
going to go ahead and zoom out of the view and just position our
camera a little better. Then we can just click
on this lock again and now move out from
it, and there we go. We're going to be having
this camera like zone. Now, what happens when you
have multiple cameras? What happens when you need
to use different frames and you just want
to make sure that they don't move around? Well, first things first, if you want to make sure that your camera
never moves around, you can go to items by
clicking N item Options, and in transformation,
you can lock down the location as
well as rotation. By doing this, by
locking this around now, we can just select it, click G, and it's not going to move. Same thing will happen
if we click zero on the Numpad and just simply use this lock
and try to move it. I'll be stuck to us. So that's just one
simple way if we have that perfect shot that we want to lock it down. We
can just use that. And afterwards, if we are
happy with moving it around, we can go back to this option
and just click and hold and drag it down these
logs to unlock it all, and then afterwards,
we can start moving it around just
like that again. That's pretty nice.
Alright. So next up is going to be adding
multiple cameras. Let's go ahead and
click Shift and A and add another camera. Now we have two cameras like So. But which one is going to
be used for rendering? If I click zero, it's still going to go back to
this old camera. Well, that is determined by
the scene camera option. If we go to the
scene properties, we'll see that we have
active camera over here set. So we have the camera
and camera 001. We can rename this camera, so we can just say that
it's camera A instead. I was able to just
select the camera, click F two and just rename it. And right away, you
can see that camera A is being used in the
scene by using camera A. We can change this by just
re selecting it over here. So now we're using
a number camera. If we click zero, we're going to go to this outer camera and the other thing that I'd like to mention over here to reposition this camera can click
on the frame itself. So on this visible frame without actually using
the lock button, we can just select this when we are viewing
from the camera. By clicking zero, we
can select the frame, and then it actually
selects the camera itself. So now I can click GZ and just move it as if I have
this camera selected. So we are selecting it. We are moving it as an object, but we're still
possessing that camera, so we're just moving
along with it, which is quite a
nice little feature. So going back to the selection
of different cameras. What I'd like to mention is
the arrow above the cameras. You'll notice that
this arrow over here at the top is darkened. It's a black little triangle. But the upper camera has just a highlight
around this triangle, meaning that this is
not a selected camera, but the one that has the darkened triangle is
the one that's selected. So if I was to just change
the camera to camera A, you'll notice that now it
gets that square back. So just like that, we'll
know which exact camera is the other thing
that I'd like to mention is that not only are you able to see
it via this icon, you're also able to see
it via outliner, as well. On the outliner,
next to the text, next to the camera name, you'll notice that you
have these green cameras. One is highlighted and
another one is not. These will indicate which
is an active camera. If you want to
switch the cameras, you can also just click
on that green icon, and it'll automatically change
up which camera is active. So just like that,
we're able to just switch between those items. So you've seen camera
A, and I click on this, and now it's the camera
001, just like that. A neat little
option for changing cameras easily as well as
once you have a selection, you can use Control
and Numpad zero, and that'll basically
do the same as zero as just clicking
without control, but it'll also change
up the active options, so you can see that
now it's active. So by doing that, we can change around
which camera we're possessing and which camera
is active right away. Control and Numpad
zero is going to allow you to basically jump
between the cameras like so. You might be careful
about it, though, because if you have an
actual object selected, you can click Control Zero, and it will try to possess
the object as well. So it'll try to possess
whatever you have selected. If I have this lantern selected, click Control Zero.
I'll try to possess it. So of course, it will also try to change the
active camera as well. So over here, you'll see that we're not using
the camera anymore, we're using an object, even
though when we select it, we don't have those options. So there we go. You can just go
ahead and just click on one of those
cameras to go back to. Speaking of moving
cameras around, I'd like to tell you a
little bit about it. So they are, as far as Blender is concerned,
an individual object. But when rendering, we are not going to
see those cameras. They are just icons
for us to see. What the render
sees is something that is without overlays
and without any gizmos. So if we have both
of them disabled, you'll see that this
is exactly what we see when rendering. Of course, with better
lighting and whatnot. We're not going
to see the icons. We're not going to
see the camera. So if we have one of the
cameras closer to the render, you won't have to
worry about that other camera is going
to be seeing it. So that's something
worth noting. This is purely for visual
sake in the viewport. When rendering, if I
was to click F 12, you'll see that the camera
itself is nowhere to be seen. So that's what I mean. There we go. So we can just click F 12 and it
will render it. All of that is lovely stuff. If you don't like the shortcuts, of course, you
have alternatives. So for example, for renderer, you can just click on the tab at the top and just
use Render Image. Then also for the camera, you can just select the object. View the cameras
in the same way. Instead of just using shortcut,
you have an alternative. If you were to click on
the View tab at the top, with the camera selected, you can just go on camera stab, and there are two options. Set active cameras frame
and active camera. So we can just go ahead, for example, use active camera. You can see that
we've been using these shortcuts over here, as it shows Numpad zero and control Numpad zero,
and there we go. We can just jump between
the cameras like so. All right. Feel free to familiarize yourself
with a camera. It is an object just
like any other, so you can click G
to move it around. You can click R to rotate it, but be careful whilst
rotating it like this. I recommend you if you have a global controls
orientation setup, just mainly use Z value. So R z will allow
you to rotate it, so this way, if I was just to
have this camera selected, we have rotation just panning around if we
were to try to use X, for example, it'll try to rotate it and not including the
angle of the camera. So it might get tilted view
going to be for next lesson. Alright, thank you so
much for watching, and I will be seeing
you in a bit.
4. Framing & Camera Movement: Hello, L one, welcome
back everyone to Blender Essentials
camera basics. In the last lesson, we went over the basic setup of
multiple cameras. We're now going to
make sure we go over exactly how to position
and frame the camera. First things first is when
we have the camera selected, we'd want to make sure we
adjust it and move it around. If we click zero, we firstly have the
frame setup over here. If we want to have
a different type of ratio for the frame, we are going to be
able to control this via the resolution. If you want to change the
aspect of this frame, what we can do is we can go
to the output properties, and in here, we'll find
ourselves a resolution. By changing resolution X and Y, we're able to basically
change up the frame. If we have X and Y, the same amount of pixels, 1080 by 1080, so we're just changing
X to be the same as Y. See that now we have ourselves a frame that is more square. So this is great for something like just general
renders and whatnot. But if we're doing
things like thumbnails for YouTube or setting up a general ratio of a video or just a render that would
be covering full screen, the general ratio is 16 by nine, and to get that, we can have just a default output
resolution of 1920. 1080. This will give you a
1080 P resolution, basically, you'd see on something
like YouTube, and it's usually the default setting that's
great for the use. Next step is the
actual movement. So previously, we
talked how we can select the frame itself by just clicking on the line to make sure that the
camera is selected. Then we can click G and
we can move it around. So by just clicking G, able to move it
around and pan it around based on
the camera angle. So we click R Z and have this
camera more to the side. Like, so by clicking
G, we'll be able to pan around now more
to the right side. Instead, if we have
the camera more to position more to
the side and click G, we are now going out
of the platform. So just like that, we're able to move
it out, like so. Other thing I'd like to mention is if we want to move it around, we can do it the
same way that we'd have the motion of
normal objects. So for example, this
sign over here, if we were to move it with
a global transformation, we could just click GX, and then it's going to move
it in the world position. GY will move it, again, in a world position, even
though this sign is rotated. But let's say we want
the sign to move it forwards based on its angle. By changing the global to be
local transform orientation, we'll be able to use Gx and now move it based at an angle,
as you can see over here. So let's say we move
it, we rotate Z, move this poster, and
now click G and Y. We'll be able to move it
even at a different angle. So it's based more
on a rotation. The same applies to
the camera as well. So right now, because our
camera over here is tilted, we'll be able to use Z. Oh, our Z will basically
give us the tilt, but our X will be able
to give us a nice angle. Now, as for the camera, if we were to click G and X, we'll be able to
move it around like. So if we click zero, we can use GX to just move it
based on an angle. GY will be able to move
it back and forth, and GZ will be able to allow us to go back and
forth like that. So my recommendation is we
can either just use the view. Option use a log camera to view. Then simply reposition
our camera. Like, so let's say we want to position this
mannequin to show us that we are having a person just looking
into the bookstore. So we have the book sign
over here on the right side. We have the person over here, and we're just
kind of getting it nice on position where it's more in the
center of this person, whilst the background has
the sign for the bookstore. So once we have the setup, we can then click back on the frame to make
sure it's selected. We can then do fine
tuning by clicking G Z to kind of go a
little bit further, a little bit closer, like so, then GY to kind of
move it up and down. So, for example, if we get too close to the ground,
we'll start clipping, but that's why we're
just at the moment, we're just making sure it's
not too close to that. And once we get the setup
that we're happy with, we'll be pretty much done. As an additional quick tip, if we have the transform
ortation set to global, we have the camera selected. We can click G Z, and then it's going to
move up and down. But if you click Z again, then it's going to allow us
to move along the local axis. So at the top, you'll
see along local axis. So the same goes for Y and X, so GX, and then it's going to be global
at the top, you see. But if you click X again, it changes to local. So we don't really
need to change the transformation orientation
to be one or the other. We can just double click GY, Y, and then it just changes to local to adhere
more to the camera. The other way to do it, Oh, let's not forget that
when we are moving our viewport with the
camera to view enabled, it's going to snap
it out like so, but we can click Control Z
and that's going to reset it. I'm just going to tick
off camera to view now to show you an
alternative solution. So another way to
move the camera around in a more
professional way, so we'd have more
control is if we were to set ourselves up
with foundational window. But going to the
top right corner and clicking and dragging
the corner itself, we'll be able to basically
get two viewports, and we have one on the
left and one on the right. So by having these two, we can hover over the right
one and we can click zero, and that's going to give
us the second viewport to be purely set for the camera presentation,
just like that. So for example, maybe over here, I don't quite like
the way the setup is. I can use the left
side of the viewport, which is split now
to just kind of slightly adjust it
the way I want. So I want the R to
be visible where the one lamp side is visible part of that
lantern is seen, but we don't need to
see the our side of it. And then you can use G Z to
kind of move it a little bit. R Z as well to just
rotate it a little bit and maybe a little bit more to the side. That'll be right. In certain cases
where, for example, we're using local
axis like R zz, I can give you a tilt. What you can do in this case, you can just click N, go to the transformation tab
and check for rotations. For example, Y over here
is slightly tilted. We can change it to be zero. Then I believe this yeah, we can just play around,
see what it does. This one is right,
and X rotation is also rotation for this.
So that's also right. Playing around
with these values, we can see what each
one of them does. Alright, and afterwards, if we want to see it
in the bigger view, we can use Control and space to kind of expand
the entire viewport. So it's a nice little trick to kind of see the
bigger picture and maybe do final
tweaks on the frame. Like so. And here
we go, something. So once we're happy
with the setup, I also just realized I move
this sign a little bit. I'm just going to
rotate it until we get the good view. There we go. So it wouldn't attract
unnecessary attention. And once we're happy
with it, we can just check real quick the output. So we have the resolution. I'm also going to lower the maximum samples
or the render. So if we go to
render sample rate, we can turn down
the max samples. I'm just going to use
200 as a preview. Then click F 12,
and there we go. We got ourselves a
lovely render preview. And there we go. We got
ourselves at the final render. All right, so we can now
go into image, save as, and just save this out
where we you like it. I'll just go ahead
and save it as one. Keep the rest of the
output Cs for now. We can go ahead and click
Saves image. Like so. And then we can
even just go onto the camera over
here and just kind of make some slight
little tweaks, for example, maybe
a little bit lower, maybe a little bit
more to the right. We can use the
Gizmo as if it was a normal object and just kind of slide it across, so as well. And just like that,
we'd be able to get the exact type of
shot that we want. What I would recommend
in this scenario, if you're having two
viewports open is that you can hover over your mouse at the very top
and just scroll your mouse. Like, so until you get to the point where you can
change the viewboard shading. So on the left hand
side, for example, I would have something that's in just a solid
viewpoard shading, so it would be less
performance savvy, and I can still control
it within my scene. But for the part where I want to make sure the
composition is right, I can change this to a
rendered viewport setup. And just like that,
we'll be able to have the best of both worlds
where we can control it on the left side and we can preview how it looks
like on the right side. Alright, so that's going
to be it from this lesson. Thank you so much
for watching, and I will be seeing you in a bit.
5. Focal Length & Perspective: Hello and welcome
back everyone to Blender Essential camera basics. In the last lesson,
we talked a little bit about the setup
of the camera. We're now going to
look into how to set up using the camera data itself. So previously, we did we
looked into object data, which stores transformation and relationship to the whole scene, how it rotates and whatnot, to get the right frame. But now we are
also going to look into the camera object
data properties. So with the camera selected, we're going to go ahead
and click on it and we have some options for the lens. Uh, first things first,
we're going to go ahead and just simply
create ourselves a new camera just to have
a different perspective. We're going to go ahead
and just create a camera. I'm going to go ahead and
quickly reposition this one. So clicking view to camera view. And I'm going to click zero on the one that we just created. So we just created camera, so we can just go
ahead and select it. There we go. We
can now just zoom out and reposition our shot. So right now, we're just
going to position our shot, so we are having the character
who is walking out out of the subway be more in the frame. We're going to go ahead and just quickly rename this camera so underscore lens so we know
which one is doing what? And we are going to
start playing around with the way the lens works. So if we look at
one of the options, we have focal lens. Changing focal length
changes the field of view. I'm then going to be moving camera to restore
the similar frame, and that change in
camera position is what changes the perspective
in relationship to it. You'll notice that even though the camera is not
moving, visually, we do have a nice preview of the setup showing where the
frame is going to reach up. So if we start increasing
this focal length, we're going to stretch this
out of the perspective, so from one end to another. And if we get it a bit closer, we get this kind of a field view that's more of a fish islands
view type of setup. And the perspective from
the dot to the frame in the viewport that we see from the side is
basically nonexistent. So the distance between
those two is there, the default, focal length is 50, so we can leave one as is. What's nice about having
focal length is that it controls the visible
relationship between the foreground
and subject, well, to the background itself. If we have this
camera as a sample, we can just make a duplicate. I'm going to click Shift D, then escape, and then I'm
going to click G and Z Z. So we have the local
push and we're going to push ano camera
wide a bit closer. Then we can click zero, so we can just select
the upper camera. I'm going to go ahead and just make the upper camera selected. Doesn't seem to want
to do the trick. Let me just go ahead and take off the camera to
view for Sarrus. There we go. So we
have the duplicate. I'm just selecting
the different shot. There we go. This one can be, for example, a much closer shot. But it can still give you the same frame that
we had previously, and we can even match these two. Look at the first camera
and see that it is right behind the duplicated one and it covers more of the frame, so we can see, part of
the window and whatnot. So we can go back to this
duplicate and we can just readjust it so it would
basically be the same shot. So now we look from one end, go on the other end and there
are basically identical, maybe a little bit
more, there we go. The only difference, though, you might notice is that if
we click controlled space, we have a little bit
more distortion. So when we have the camera a
little bit more to the back, we will have less
and less distortion. But when we have it closer up, we'll have more distortion. If we make this a little
bit more extreme, have this camera Gs, just kind of get a
little bit closer to the person and then try to
get the same amount of frame, for example, for
the window inside. We'll see that the
distortion that we're getting over here is going to be a little
bit more extreme. So the items that are
closer to the center, they're going to
be scaled upwards whilst the items are a
little bit more to the side. They are just kind of
skewed in perspective. I'm going to just
simply duplicate this camer again and this
time I'm going to click G Z Z and just kind of
bring it way, way back. G z, just to keep
on bringing it. Until we get to this,
I'm going to make the camera active again and
I'm going to click zero, and this is what we're seeing. So even more, I would say G Z. We can just bring
it out like so. And now, if we make the camera lens way more extreme zooming
into this section, we're going to get
something like this. So the further the camera is and more extreme the focal lens we're having the closer to an orthographic view we're
going to get essentially. This looks flatter because
the camera is far away, but it is still a
perspective camera. Orthographic projection is
a separate camera style, which we're going to be
learning in a later lesson. With the scale, whether it's further items
or closer items, they're going to be,
well, almost identical. So we have an object over here
on the side, for example, these pillars, we have the poster on the
side and the human. So they have different varying
distances, but even so, end up having them look in
exactly the same scale, even though in their position in the world is
completely different. So that's what I mean
by orthographic. Whereas in comparison, the one that we had
extreme close up, you can see that the
human and the sign, for example, are going to be way different in
terms of the scale. So if we bring it even
closer to the camera or this sign with a low lens, going to have an effect where it basically makes it seem that sign is actually way
bigger than an object, which should be given
the perspective, the extreme perspective, the relationship to the
closeness of your camera. And again, if I go back,
you can see that now the object human to the
sign are basically, there is no distortion because
the camera is so far away, the distance from the
camera is almost identical. And yeah, we're getting more and more to that orthographic. So just like that, by having three different
cameras in the scene, we end up having completely
different perspectives. To end it off, I just
want to say that there is no universally
correct vocal length. You have to choose the
position first for the spatial feeling that you want and then choose the type of lens and distance that
produces the required frame. For me personally, I want to use I like to use
more of a distance, a lens where I don't
want a distortion, I want the frame to look
more controlled and whatnot. And a close up shot gives a good indicator of
more panic, more chaos. So for example, let's
say this person forgot something back home and
he just kind of paused, you know, how would
we indicate that? Well, by having a camera be extremely close up to
the face like that and having the focal length
a little bit distorting the person even you could get some extremely
close up shot, and that would make
it feel like there is a sense of panic because
of that extreme close up. So that wouldn't quite work with another focal
length if it was from a distance because it
would just look too controlled to sterile as a shot. Something like that, again, is just a personal preference, and I'm sure there's
artists out there who would be able to get
some panicky with, especially some
background playing out. Or I can imagine like
a massive battlefield or something of that sort with, like, just a camera
from a distance and up up focal
length millimeters. It would definitely
be really cool. But as for now, the close up
shot that we're having here, if we were to render it, this is what we would
get, basically. Nice and up close and personal, and the distortion makes it seem like it's a little extreme. But, yeah, I think that's going to be
it from this lesson. Thank you so much
for watching, and I will be seeing you in a bit.
6. Orthographic Views & Shift: Hello, and welcome
back over on to Blender Essentials
camera basics. In last lesson, we
talked a little bit about the focal length
and how we can use that in our advantage to help us
distort some of the shots. Or vice versa, if
we bring it out, how we can just make
the distortion less and less visible almost like it
is an orthographic view. Speaking of orthographic view, let's go on to camera A, and I'm going to just
make it our active. And then we're going to
play around with the type. We have perspective type, which we can change
it to orthographic. So orthographic will essentially remove any of the perspective. You can have a look at the way it looks like on our setup, and it basically flattens out the camera instead of
giving us that distortion, a sort of a triangle coming
from a single point. Orthographic view essentially
gives us a frame, and that frame will have all of its pixels being rendered
in a straight line, meaning that there is
no difference in scale. We can have this
camera, for example, to be way up close to
this oh, this person. So with orthographic shot, it doesn't matter the
location of the camera, whether it's up close and personal to the
character or if we click ZZ and move it outwards
all the way to the back. I will not matter because
the same frame will be kept. It basically fires off the
render in the straight line. It doesn't, push it outwards. It just goes straight
into the scene. So no matter how
close or how far it is the same shot
will be visible. Um, now, if you want to
have more of the shot, what you can do is you can change something called
orthographic scale. In here, if you
were to change it, you can actually bring
out the scene to be much larger the frame
for the camera that is, and you can capture
an entire scene. And just like that, for
example, you could get a really nice visual effect
where nothing is distorted. The same scale is applied
throughout the entire scene. And you'll have a lovely
little setup just like that. So you can go ahead
and click F 12 and grab yet another shot. Now, one of the things that
I'd like to mention is that orthographic scale
doesn't have to be changed through this
parameter over here. You can actually grab whether you are outside of a camera
or inside of the camera. You can grab the frame itself, and using your
left mouse button, you can just move this
frame in and out. And I recommend you doing it whilst your frame is actually an active
shot because that way, and just have a really nice
control over the setup. By grabbing it and moving it
left, you're zooming it out, and by grabbing it
and moving it right, you are pinching it in. Basically, that's how it works. Now, if you want to use
the orthographic view for more of
architectural designs, sort of diagrams or just
isometric style presentation, you need to have a camera
where it is a perfect angle, sort of like this
angle so where you have angle where
it's just perfectly diagonal to the shape
of your environment. And to do that, we're going
to just jump back in. We can click N and we
can change the rotation. Rotation can be 45 degrees
X and 45 degrees Z. That way, you'll notice that the angle is now
perfectly diagonal, basically going
neither horizontal nor vertically, but
perfect in between. And it's also angled not in
X direction or Y direction. It's angled perfectly
in between. So now if we were to just move the camera a little bit higher we'll be able to get
this lovely shot where everything is visible
and it's so nice. I like this kind of a shot. It gives you, well, that perfect orthographic
type of a view. And then afterwards, we just
have to grab the frame and just kind of maybe reposition it to where we want it to be. For example, maybe we want
to grab the entire scene. We can just go ahead
and do that, like so, and then click Ftwelve and
render your next shot. Just like that,
we'll have ourselves a scene with a perfect orthographic view, which we can then save it out. Alright, next up that
I'd like to mention in this lesson as well
is that if you have, well, let's go ahead and just use camera
to view over here. If you have a setup
where you are, like, just constantly zooming in, let me just go ahead and grab
this camera and set G Z, Z, and just kind of pull it in. If you have a setup where you
are constantly zooming in, you might notice that
there is some artifacts, some bit of clipping going on. So what's going
on with that? Well, that depends on
the setup that you have. First of all, you
need to consider that the camera itself
might be in the scene. So that's very visible
with orthographic. If you are in perspective, you'll notice right away
that maybe you just are a little bit too
close with the shot. So where would I find
my camera that is? And if I zoom in, you'll
see that the camera starts going into I'm going to select
this character real quick. Click on the dot, and that way, we can just refocus our camera. What I want to say is that if
we have a camera too close, it'll start clipping
through an object. So it's obvious when it comes to I'll be obvious when
you come to close with the perspective because
you'll basically have a view that's just
partially blocked by something. With orthographic view, it's a little bit harder
to say because it grabs the entire shot
and you can see some of the parts are basically
kind of cut off. Be a cool effect, but one of the reasons that
this is happening is, well, maybe your camera is
overlapping with the view. And another thing is that
you'll notice that this, for example, part is not
actually overlapping. The origin point of the
perspective is not overlapping, so we should be able to see it. The reason we're not
able to see it is because we have something
called clip start and end. This is the range that the camera by default
is going to grab. If we lower this for
the clip start to 0.01, you'll notice that this clipping ends, which might be great. You might consider it
to be a great thing to just make this value to be 0.00, 01 or something like that, and you might be thinking
that this is a great, why would it not be
set up by default? Well, if the values are too extreme between a clip
start and clip end, the items that might be overlapping will end up
glitching out, basically. They won't be able to
determine which items end up being too close or
too far ton object. So for example, let's say
I have this bench that is, well, you can leave it as this. You can see that there are some black spots over
here, for example. If we start playing
around with value 0.001 instead will
cause some issues. So right now, maybe it's
not too extreme a value. If I was to change the end value to more of an extreme value, if you have the range between those two values too large for
what you're trying to get, you might start
getting some artifacts that are not meant to be there. So, for example, meshes might start to just start glitching out and whatnot. Obviously, you don't
want this to happen. The other thing, going back
to orthographic real quick, if we have it well, too close, like, so it might help you to
elevate some of that. So if we have 0.001, you can see that the clipping is slightly elevated, of course. It's not going to
help here because it's still overlapping
into the scene, so we need to push
this outwards. We make sure we fix it. But if the value over
here was too small, you'd still have some clipping, even though it's not
going into the scene. So it's just fine
tuning between that. The value, by the way, of end we have over here. It's something that's
going to help you basically tell how far or how close we have the
last object in the scene. If we have this something
set to 10 meters, you'll start seeing clipping. So even though orthographic view doesn't perceive perspective, it still determines where
the start and end point of clipping is, which in turn, well, causes some
really bizarre setups where you can't see,
for example, the back, but this can be very
useful in cases where you actually want specific
control over your scenes, so for example, I want only
the bushes to be visible. We can fine tune this
and maybe set it to 15, like so, and there we go. We'll have a scene
where it's just visible for the person and the bushes and just a
nice gradient background or even transparent background. That would also work. So it's a nice little trick
and feature to kind of bake what's in the
back if we were to render We'd have something like this, which needs a little
bit fine tuning. So of course, where
you'd want to use a high value for the end is
when you have large scenes. So for example, you're
working with, like, planets or something and you actually want to
have true scale. You don't want to upscale
the endpoint over here. Of course, clip Start
would then have to be way different as well, depending on the setup. But yeah, if you
ever have a setup where your endpoint
makes the scene go away, this is the reason why because the clip end point
is not far enough. The final thing that I'd
like to mention here is the shift X and shift Y. If we look at the
visualizer into our icon for the camera, when we are shifting
X and shifting Y, we end up just tilting
the entire camera, which is very, very
interesting result. Shifting moves the framing without rotating
the camera object. Shift Y moves the
projection vertically, allowing us to include more of the upper or lower scene while
keeping the camera level. This is especially useful for architecture because the vertical lines remain
more straightened. We don't get such as distortion. From a lower lens. Let's say we have this character over here. We could rotate the camera to get the right type of a shot, but you can see that it's just not while giving us feet
too much of the character, and it's not giving you the full context of the buildings. But if we set it up like so, and we start shifting y, we end up actually pushing the
items outwards and keeping the I was just selected and keeping the
character in proportion. By just doing that, we're able to grab more of the
items in the background, which I find it pretty cool. Or if you want the
opposite where you want more of the character, for example, in the frame, I ended up just tilting
it the opposite way. And now you see the
tilt being visualized, like so where it
basically tries to grab items more that's
in the front at the bottom and just
kind of pans out to the back in our camera, meaning that less of
the things are visible. And we can get some
interesting shots like this where one person
is chilling and another person is As a summary, lens shift changes the framing without tilting the camera. So for architectural work, it is a clean way to include more of the building
while preserving vertical lines or or
some more human shots. And this kind of lens shift changes is also great for
orthographic view as well, especially for architectural
work where it is going to give you a clean way
to include more of the building while preserving
the vertical lines.
7. Composition Guides & Safe Areas: Hello, and welcome back front to Blender Essentials
camera basics. In the last lesson,
we left ourselves talking about a little
bit about perspective, how to tilt our camera. And now we're going to move
on to another stage to help us visualize
camera composition. So first things first,
we're going to again create ourselves a new camera just to kind of help ourselves
a little bit. We're going to just rename it, call it a camera visualizer. Like so, and we are going to just make sure that it is
an active camera like so, click, well, onto
camera to view. Now with that set, we can just draw els out
towards like so. Alright, so what I mean
by camera visualizers? First of all, within the setup, we have within the data
objects properties, we have option four,
Pass part out. So this one is an
interesting one. If I was to make this
frame a little bit larger, we can see what's
going to happen. You might have noticed
that around the camera, it's a little bit darker. And the reason for that
is because it basically shows the highlighted
area of the camera. We can control this
using the pass part out. If we were to increase
this all the way to one, we would have an entire area outside of the camera
blackened out. Just make sure that if you
don't have this type of view, if you have the camera
to view turned off, you can just zoom
out a little bit. So if the entire frame is too close and you're not seeing
the frame of the camera, making it active
or clicking zero, you might have a
problem where you are just too closely zoomed in,
so make sure you zoom out. Once you have that, you
can control this opacity. So default value of 0.5 is
most other cases quite right, but having it as 0.8 in certain
cases is pretty helpful, especially considering
the frame setup. You can also turn that off. By default, this
should be turned on, but by turning it off, you have an entire view of the usual setup just
with the frame included. This camera frame is tied to
the output of aspect ratio. Content outside a frame is
not part of a normal render. So the pass part out helps us judge only what
the viewer will receive. And again, if you want to
go and change the frame, just make sure to
use the resolution in the output properties. Next up, we have
compositor guides. So these are the usual
rules for composition. We have rule of forts. We have a center to show
where the center is and diagonal as well to give us
a nice depth perception, golden ratio as well. As triangle A and B to just kind of help
us with the compositing. So if you're not seeing
these lines by the way, make sure you have the
overlay show overlay turned on because
if this is off, we won't be able
to see such lines. Now, going back to camera
to view to make sure we're able to move the camera
with the viewport controls, we can set ourselves up
with certain control. So for example, right
now, viewport overlay also shows the skeletal mesh. We don't want that.
Maybe we don't want any of the cameras
also to be seen. If it's getting in our way, we can always just go on
to overlay settings and just turn everything off
except for the camera guide. So this is what
controls basically the overline of our camera. If we have everything else
turned off, like, for example, set bones, we would still have the setup, that's quite nice. So how would we use
it? Well, for example, I really like the triangle A or triangle B to help
us with the composition. Previously, we already
did this shot boot. We could, for example,
reposition it where we are able to have our characters
perfectly placed in. Now, this will give you
a perfect composition. If you were to render
it, you're going to get a lovely setup. As it will basically help to direct the eye
through the scene. Now, next up is, well, rule of words. We had that already enabled, and I forgot to mention I
would recommend you to just have one compositor
guides enabled. So previously, we had
two of them enabled. We could have all
of them enabled, but I highly not
recommend because it just turns
everything into a mess. And if you want to see it a little bit better
with the setup, you can change the
color of your guides. You can make it, for
example, make them whiter, or you can even change
the color to kind of oppose to what the
color is on the screen. So, for example, if I
make it more pinkish, we could see a better contrast to this scene, just like Tad. So rule of Fort is great when we want to just make sure that everything is nicely
fitting in the scene. So we could, for example, get a shot from this angle
over here where the camera of a person is crossing
this corner and the other side is basically here for this house over here. So I think that would
be kind of a nice shot. Maybe we need to maybe re angle it a little bit, just like that. And that would be quite a
reasonable shot as well. Like, so we could
render it out and get ourselves the Fords compositor, as well here quite nicely. Story short. It can support balanced off
center replacement. So if we have a camera
that's slightly at an angle, it's a great use. And finally, the one that I extremely like
if we go back to the visualizer camera is going to be the
center or diagonal. So both of them are going to
be helping find the center. So if we have a scene
where, for example, we just want this
lantern over here, the center of the shot or
maybe just this corner, we can just position
our camera to be right in the center where it's between
those two people, and we get ourselves a lovely little setup
just like that. That would be quite
a nice random short. The diagonal version
helps us with symmetry. So these kind of shots
would be great if we have it in areas where
there is an alley, for example, over here. We could set ourselves
up with a lovely shot, and I'm just looking for a quick little example,
maybe on the other side. Or if we want to
capture up the shot of, for example, the character, going out of the subway, we can also have it
so where you can see the lines kind of matching
up the rail on the side. Maybe we just need to position it a little bit to the right. And just like that, it would
also be quite a nice shot except we are missing something
on the right hand side. If we look the left hand side
is quite clustered using the compositor lines
that also helps us to kind of determine what's
missing and what's not. But this shot, for example, I would say we
could, for example, put a bush on the side just
to kind of help us with, well, the entire compositor. And just like that, we'd be able to balance it off a little more, and if we click Render, you'll see that
the shot is quite reasonable, just like that. Now, what I really
wanted to show you as one of my final thing is, if we were to go over here, we can have let me
just go back onto the camera options and turn
off the composite guides. You could use for
most of the cases, it's actually quite
helpful to have that. But the main thing
that I wanted to show you would be limits, show limits. It's quite
an interesting one. If we have denabled, we'll see a small cross in the middle. It's not going to be quite as visible from the camera itself, but if we go onto our preview
from the side camera, we'll see we have some lines. And those lines we
are able to make use out of to see where the
limits of the camera. Which might not be quite
as self explanatory. So let's go ahead and just quickly talk a little
bit about that. So previously, we talked about
clip start and clip end. It shows basically
where the camera starts ranging from,
where it ends. So the limit will show you where it ends
and where it starts. If we have the clip start, just go out of it. Like so you can start seeing the dot coming out
of the camera. So it starts basically going
past this point and we basically start to clip
the item in the scene. So that's pretty
self explanatory. And the point at the end is also going to
be doing the same, which is going to
be at the very end. And if we start lowering it, we get it much, much
closer to the scene setup. So for example, maybe
for this type of setup, we don't really need to be
more than 100 coming out, but we could lower
it and fine tune it. No, sorry, 100. There we go. We could lower it
and find tunit. Doesn't have to be
perfect, but basically, you want the entire
scene to be between those two starting
point and endpoint. And the other thing that I'd
like to mention is that we do have this X in the middle. This X is essentially depth of field. We're
going to mention that. We're going to talk a little bit about that in the next lesson, but the depth of field
is this part over here. If we enable it, we can
just basically control the focus distance,
and that dot, that cross is going to be showing where exactly we
have the main focal point. Once we start blurring
out the stuff in a foreground background, we're going to have this
as its center point. Then the final thing
that I'd like to mention is if I was to turn
off the limits, and the final thing that I'd
like to mention is going to be safe areas. So above the viewport display, we have safe areas option. When we take this
on, this is going to give us small black outliners. And this will help us to, for example, set up a
safer margin points. There are two options
where it says, title safe margins,
action safe margins, but essentially they
do the same thing. We're able to control the ratio for the camera and
basically determine what can be more visible and
what can be less visible. For example, if we have
title safe margins, I would recommend
you just to kind of increase the Y value, so we could have some
base part at the bottom. So we would know where exactly we need to
maybe frame the shot. Let's say, we have
a human over here, and this at the bottom
could be left out part for, well, text and title, we'd know that it
would be harder to see and out of that composition. And as for X, I
would just usually keep it very close
to the border. So the default value
was actually quite right. And that would be great. The action safe margins, again, pretty much
the same thing, but we need to just
think of it as, like, if we don't want, for example, the hand to be cut
out or something, we need to leave a little
bit of a gap over here. So for that part, I would leave it more for X value increased. That way we could
position the hand to be ending where this frame
safe margin ends. And such, a setup is
actually really good, especially for modern
movies if you're making more modern movies
where the ratio is 16 by nine resolution, this kind of ratio over here. But let's say you want to create some shorts out of your movies
and you want to make sure it's able to easily transition
from horizontal type of frame to more vertical where it would be
more for handheld devices, for quick well,
clips and whatnot. Action safe margins
in that case would be quite a lot smaller. I think it would
be a value of 0.5, and it would show you a
vertical vertical setup. So that way, you could position your character to be always
in that vertical shot. And even though it's
set up with more of a setup like where it's 16
by nine ratio at the moment, you would still be able
to easily change this to a vertical shot for
those short videos. So in this case, for example, let's say we want both
characters to be visible. The up character is doing
something in the background, and this front character is
talking about something, but we want both of
them to be visible. We could, for example,
change up the camera where it's within this safe margin
point, and there we go. Now, both of the characters
would be visible even if it's in a short format. So that is extremely,
extremely good. Alright, so that's going
to be it from this video. Thank you so much for watching, and we'll be seeing
you in a bit.
8. Depth of Field & Focus: Hello, welcome back everyone to Blender Essentials
camera basics. Now that we went over
the visualizers, we're going to talk
about depth of field. Let's go ahead and select
the camera visualizer, the camera that we created. Let's click zero to
go onto the camera, and we're just going to move it out onto a bit of
a different angle, something like so for now, just to kind of help
visualize what it does. So if we have the
selection and we are in data object properties
for the camera, we can find ourselves
depth of field. Let's go ahead and enable that. And this will help us
basically to control which distance appears sharp and which areas fall out of focus. And it is often used to guide the viewer toward the
important subject and reduce the distractions. We're going to
exaggerate it first. So if we were to just have the
focus distance lower down, it'll start actually
blurring everything out, like making everything
out of focus. The reason everything
is being out of focus right now is
because we haven't properly set up the focus
distance with the F stop value. But as you can
see, everything is blurred out except for
the visualizer parts, but if you don't
want to see them, we can just turn off the show
overlays, and there we go. Everything now is Blurry. And it's not because of
the rendering issue. This is just because we have focused distance setting
on extreme value. But let's go ahead and actually put this to an actual use. So the easiest way to make
use out of depth of field is if we reposition the camera to where
we want, for example, over here by the trees, I think it'll be great to see this character
looking at the window. And right away, you
can see that it starts blurring out
the foliage part. So it's not actually going to
be sharpened up like this. It'll help us to lower down the perception of the
detail and help us well, perceive the
character over here, but we need to
actually have control over how much we want
this to be blurring out. So right now, by default, it does a good job, but
it's not quite there. If we were to, for example, want to do more of an extreme value, it will cause us an issue because it
blurs everything out. So the easiest way to fix that is to make use out
of focus on object. Focus on object will replace the focus distance and it'll
automatically allow us to, for example, select
this dummy over here. Now, this dummy is going to be the main focus in the shots, no matter how far
away the camera is, how close it it's always going
to be the main focus item, which is pretty good because
we can position our camera to be next to these
foliage items, and we can play around with the following aperture settings. So the main thing is the F stop. Lower F stop values create a shallower focus range
and the stronger blur. So once we start taking
this to a minimal value, we'll get a complete blur out of the foliage
that was next to it, but you can still see
that the character because he is the
center of the focus, that's the one that's going
to be still kept sharp. If we were to start
increasing the F stop value, we'll see everything
being sharpened up. So when I use it, generally, I use 1.4 A value of 1.4 is a low FtopGving stop strong and shallow
depth of field effect. Around four is more
moderate while high values keep more of
a scene that is sharp. And we can turn up the value to four if we want to make sure that, for example, the foliage that's
next to us is sharper, but not quite just
a normal sharpness without a depth of field
as you would see normally. So it still helps
us to kind of drag the attention to the character. And now we have
additional options underneath blade
rotation and ratio. These will help you basically
to fine tune that set blur. If I was to make this to a value of one, we
can see what it does. So blades will allow you to
kind of change the blades, change the shape of out
of focus highlights. More blades generally make
that shape appear rounder. We'll make the blurred
out objects rounder. So if I were to increase it, so the leaves end
up getting that more roundness that
we see over here. If you hover over,
it says that it's best to have it at least
free for the visual effect. We could potentially
keep it or we could just turn it off,
set it to zero. But a value of three will
help you do the trick. Then we also have ratio. So if we were to
lower the ratio, it actually starts
blurring out the values. Ratio stretches the blur shape from circular towards oval. So once we lower the
ratio to a value of 0.1, we start seeing it more
in horizontal lines. Rotation rotates the
aperture blade shape. And if we have less blades, maybe it'll be a little
bit more obvious. So just change the way it
blurs out the entire setup. All of that is quite
useful to help out with the type of exact focal
setup you want to have. And we could have, for example, The other way you could make use out of this
depth of field is, let's say we have let's turn off the
focus object for now, so we're getting our way. Is to kind of make it
seem like the setup is actually a miniature
version of the scene. In order for us to do that,
we could, for example, change up the length to be either 90 or 110, something
of value between that. I find that to be
working quite well. So it gives that same
result as we were talking about before where
it's almost orthographic view. You could imagine
that the camera lens is just zooming into like a miniature version
of the scene. And then going back to
the focus distance, we could manually tune in the setup let's say at
around 70 is quite right, and then we can just gradually increase F stop until we get some items blurred out while others kind of sharpened up
in the section in the center. And I think something like
that will make it seem like the setup is actually
like a miniature version of some sort of environment or something. And there we go. So I manually tweaked it, so it would be more to the
center of a piece. I kind of adjusted the
camera a little bit, and we got ourselves
setup where it's like, oddly sharp in comparison to the parts outside where
it's more blurred out. And it makes it seem like
it's actually a sort of a miniature world that we're seeing that
we're looking down on. It's quite nice and lovely. Alright, so that's going
to be it from this lesson. Thank you so much
for watching, and I will be seeing you in a bit.
9. Backgrounds & Transparent PNGs: Hello, and welcome
back everyone to Blender Essentials camera Basic. Then now that we've
learned a little bit more about the camera setup, let's go ahead and learn how to make use out
of background setups. So let's go ahead and create
a new camera for that, just to make sure we
don't get it mixed up. I'm just going to
select it and call it camera underscore background. So and just select it. So now we can click and
have camera to view, click zero on the numpad and just zoom out until
we get this shot. All right, so now that we
have this kind of a setup, let's go onto the camera
data object properties, and within here, we'll find something called
background images. So we can enable
this to help us with the reference on the positioning with the camera composition. So if we have this enabled, we can add an image and open
ourselves up with an image. So I'm going to locate an
image file that was prepared, and I will provide you with that in the reference as well. It's a simple background PNG. Once we open it up, we have this semi transparent
type of setup. Want to see it fully,
what's up with the image, we can just change the
depth from back to front, and that will show
us the full image. Of course, it's not visible just yet fully because we need to also change opacity
to be set to one. This way, we can see the exact type of image
that we're having. And even if we rotate a camera, nothing is going to happen, but this reference image is just going to stay
in the position. So what's nice about
reference images, the background images
for the cameras is that we can use that to
our advantage to make sure we just rotate and composite the camera with the
right position and angle. Let's go back and change this
back to depth to be back. And that's why everything that is modeled is going
to be in front of us. Then next up, we should talk about fitting the image itself. As you can see,
the left and right are not exactly fitting
within our frame. We need to make sure
it's better fitted. So for us to do that,
we have few options. First of all, we
have frame method. We can either use stretch or crop to have different
fitting crop. We'll just zoom in
until we crop out the parts that aren't fitted
in for a perfect fit. Or alternatively, we have
options for offsetting X and Y, rotation as well as scale. And we also have ability to flip and mirror basically
the image if we want to. But yeah, having a manual
scale, we can also do that. So once we have the image setup, we also need to probably have a little bit
better of a visualizer. Right now, it's a little bit of because we have the grid view. First of all, so
what I like to do is just simply turn
off the gizmo, so we wouldn't see anything of the selection that
would throw us off. And then when it comes
to show overlays, if we were to just disable it, it would disable
the image as well. So what I like to
do is just go onto the arrow and just
disable just the floor. That is more than enough to get the right type of a preview. So we can just zoom
in, for example, we can get it be faced a little bit more
like this, for example, and with the settings
that we have, we can just basically have
a preview where the angle, the rotation, everything lovely
like that is going to be a little bit more fitted to what we see with
the background. And now, once we are
happy with that, the reality of things is
that the camera itself, the background image
that we're using, will not be part of the render. Once we render this, it's just going to be removing
the background. So if we preview view as
the render, for example, but now here in the
background image stab, we can see that actual render itself is not going
to have that. So what we need to do here? I'm just going to go ahead
and click F and the camera to view the COV and zero numpad kind of
go out of the camera. What we need to do
basically is we need to enable transparency. There are essentially
two ways which we can add image to the background. One would be using
compositor tab over here, but we're not going
to go into that because that would be a
topic for another time. The other thing is adding a transparency and then just
using external software. You add in the image, after which you will be able to basically make some finer
tuning and whatnot, but we would essentially
need the render. So in order for us to do that, we're going to go on
to render properties, and within here, we're
going to locate film tab, and within a film tab, there's going to be
transparency tab. Once we enable it,
we'll see that the background changes and we're not going to be able to
see the background itself. The reason that
this gradient turns into transparency is because technically, there's
nothing there. The background itself
is not a mesh. It is not a sky cube. I know some people
prefer to, for example, create themselves up with sphere cubes and then
just making it larger. And then inside, you'd have
basically a sky sphere, then at an HGRI
image and whatnot. With this type of setup, it won't quite work as well. The reason the
transparency works with this type of
background is because the shader tab as this
set as a world texture. So if we don't have this, it would basically be this just a simple environment
with no shading. So that's something
worth noting. Another thing I'd like
to mention is that transparency just disables
the background itself. It doesn't actually disable the lighting coming
from the shader. So we're still going to have
all that lovely lighting from the ambience that we're getting from
our environment. And finally, one more thing
I'd like to mention here is if you are having some
issues, for example, with some parts where it's not giving you the
right transparency, there is some options
to work with. So first things first is that we have a transparent
glass option. If we have this enabled, so for example,
for this lantern, we would be able to
control how transparent the glass would be
with this setup. So if we have it as zero, it's going to be
basically almost solid. If we set it to one, the
transparency is going to be giving us more
of a transparency. So something worth
playing if you're not getting the right results
with something like Lantern, the default value of 0.1 would
work quite well, though. And also, the other thing
I'd like to mention is that we do have an
option for pixel filter. Pixel filter width will
allow us to basically control how sharp the edges
are around our setup. Default value is 1.5, but if we were to increase
it to a maximum value, it's just going to
blur out and soften up the edges around
this transparency. If we have it set to zero, it's going to be
extremely sharp. But a value of 1.5 seems to do a good trick if you're having some issues with focal and
depth setup in the camera, playing around with this
option will help you to kind of work around with some artifacts that you might get in areas where there's
some foliage and whatnot. So it's something worth knowing. Going back to the
camera background, let's go ahead and just
simply click F 12. I already have the camera setup. So it's going to
render out this scene. This is what you should have. If you're not seeing this
outcome in a render view, you need to make
sure that you go on to render output itself, and I render output properties, there is something called
color panel in the output tab. Within here, you need to
make sure you select RGBA. A stands for Alpha. If it's just set to RGB, it's not going to grab
that Alpha opacity. And if you're not having this, just make sure that you have
file format set to PNG. That way, you'll be
able to just save this out you can call it transparent. And there we go. When we open, we
have this scene. Now, if I bring this to
something like Photoshop, so we can put the background
just like we had previously. We'll just need to
upscale it a little bit, just like we had before,
just a little bit, like so, and there we go. We have ourselves a nice
little presentable setup. And we can even
check, for example, the transparency in the glass. Might be alright, might need to be retouched a little bit. But all in all, I think that
it turned out pretty well. With the help of the reference, we were able to get
just the right type of angle to make a perfect shot. And even afterwards, it doesn't have to be
the same kind of frame. We can, for example, move
this around a little bit. We can readjust it,
tweak it a little bit. But because the rotation
and the let's say, lens is in the right position, we have the right distortion, we're going to get the
perfect perfect setup. So, yeah, that's going to
be it from this video. Thank you so much
for watching, and I will be seeing you in a bit.
10. Track To & Walk Navigation: Hello, and welcome
back around to Blender Essentials,
scammer basics. Now we got most of the
things out of the way. Let's go into some bit of an extra troubleshooting
and additional tips. So first things first, when
we have multiple viewports, we can have more than that. By the way, we can extend
it from the corner. We can just right
click in between and join them up, like so. And all of which is nice. But let's say we want
to have the camera, this camera over here
to be the main shot, and we want to have
another camera to show us another shot in case we want to just compare it
directly in Blender. How can we do that?
Well, if we were to just select it by default,
we can't exactly do it. If we were to select
it and click zero, it's going to go onto our main camera which is
selected for the active setup. So instead, what
we need to do is we need to basically click N. We need to go onto
view tab over here, and there is an option
called local camera. Local camera by enabling it, you'll be able to tell exactly which camera to use
for this specific viewpoint. So right now I
want a 001 camera, so we're just going to go
ahead and search for that, and it's going to be
this one over here. And once we select it, click again, just go out of the way, you can see that this now is the main selected item
in this viewport. If I hover my mouse over
it and click Numpad zero, we'll get the other camera. So now we have two
cameras, one for one. A viewport and for
another viewport, which is pretty nice. Now, I'm just going
to go ahead and turn that off when
we don't need to, and we can just go back to
using just a single camera. The other thing I'd like
to mention is how we can use an object to track
the position of the camera. So we can either
use an item within the scene or we can create
ourselves an empty object. I'm going to go ahead
and click Shifting A and create an empty. Use either one of
those. Doesn't matter. It's just for a preview because when we have this in the setup, don't actually see
it in a render. So if I have the show
overlay turned off, you'll see that this
item is not visible. But what's nice about this object is that
you can use it again, as any other object, meaning that if you have
the camera selected, but it can be any
of the cameras. Let's go ahead and just make
sure it's set to active. Then we can use something
called constraint. So this is a whole separate tab. Let's go onto it, and it's mainly used for animations
and things like that. But the one that I
like to also use for help with compositing is
going to be called Track two. Track two is useful here because it lets us
choose both the axes that point towards the target and axis that keeps
the camera upright. If we were to select
it, it's going to right away apply it as a sort of
a modifier onto the camera. Now with this setup, we're just going to go ahead and we're going to use this pipette and select the empty object
that we created. This way, it's
always going to be where you are
having this object. So you can see me
moving around and it's always going to be in
the center of the scene. What I'd like to mention is that if you're not
seeing it the right way, it might be because the
track axis might be off. If you have a
different track axis, it's going to be a little
bit off to the side. And the way it works, basically, if I select something like, X, X will be good example. If I select minus X, it's going to be
basically to the side, so it can be used, I guess, as a way of a dolly option, so, but if you want to make
sure that it always looks into the camera looks
into that empty object, Z minus is the way to go. The reason for that
is quite simple. Previously, as you
remember, when we click G and then Z and Z again, we were using the local axis. So the local axis for
the frame is being Z, and minus Z is basically the
front whilst Z is the back. That's pretty much so
the other thing I'd like to mention is that when
we have the position, let's say we want to
position this to be exactly the center of our
character by the glass. So you might have some bit
of issues with the camera. The type of issues I'm
talking about here is that let's say it's
a little bit tilted. The option, the camera
is a little bit tilted. We have some actual
items over here. So up, if we were to
determine that Y is up, up axis gives Blender
and upright reference. Setting it to Y helps prevent
unwanted camera roll. Now with this setup, we
can basically move around or empty object to have
the right type of focus, and all works well. The other option
in this setup is that because the Y is always up, we're not going to
have that tilt effect. So previously, I've spoken
a little bit about clam two that it kind of is a new
version of Track two, but it doesn't work
as well with the tilt when the empty object gets a little bit
closer to the camera. That's what I find
it personally. This one, however,
seems to work much, much better when it comes to composition and
setups like that. We also have an option target Z, which makes a camera
use the target objects Z axis as its upright reference. So most of the cases, you can leave it off for a normal fixed
target and enable it only when you deliberately want the camera orientation
to follow the target. So if I have the item
selected with target Z, and then start rotating this, you can see that it also
follows the Z axis like, which is an interesting way
of controlling the camera. Speaking of controls,
this option, the constraint doesn't actually change anything in camera. If we were to hide this constraint using
this icon over here, the e icon, able to basically get the original
position of the camera, how we had it previously set up. And we can work
actually in between them with the influence
right now, it's set to one. We can set it to
zero and then we get the original setup or we can
have something in between. So maybe you want to
have multiple frames, like one being the original
one and one being the target. You can have the value of 0.5 and have the
frame in between. So maybe you're doing a
bit of a storytelling, for example, that would be
quite a nice use of that. Finally, one more
function that I'd like to mention is how we can make use out of walking
in Blender itself. If I was just to click zero on numpad or just
go out of the view, we can use shift and apostrophe on the keyboard like
next to escape. We could enter into a fly mode. You're struggling to find it,
you can just go simply onto view item on the tab navigation
and use walk navigation, that'll allow you to
basically enter this mode. If you want to exit it, you can simply hit Escape and
there you have it, which is going to allow us to basically move around in our
viewboard like that. If we hit tab, we're
able to enable gravity and now we can
actually walk in the scene. So this is actually quite
useful if I was to enable this option with a camera
being set on the viewboard. What I mean by
that is if we were to just quickly
create a new camera, let's go ahead and do
that and just use zero, let's make sure that
we enable this. We can also call this camera
real quick walk camera, and we can make sure that we have the camera to
view lock turned on. That way, when we use the
shift and apostrophe, we can either fly
around the view or we can use tab and drop
into the scene. And now, basically
having the POV shot, we can set ourselves up with an angle that would be done with an actual real camera and you'd get all the right
type of items setups. There are controls at the
bottom when we're using it, so all the buttons will be
found at the bottom bar. Again, if I was to click on it, you can see that we
have, for example, WASD, Q and E to go up and down. When we go into gravity mode, it's not going to work because
we are in gravity mode, but we can use
space to teleport. If you want more
controls on this, you would have to go
into edit preferences, and within the navigation, you have options
for fly and walk, which you can change
up if you'd like to. For example, you have
the controls for the walk speed and all
of that good stuff. And there is also a gravity
option for view height. So default human height
set for this scene is 1.6. If you want to make the
character taller or shorter, you have that camera at a
bit of a different angle, you are free to
change this option. Alright, so that's going
to be it from this lesson. Thank you so much
for watching, and I will be seeing you in a bit.
11. Fixes & Faster Rendering: Hello and welcome back room to Blender essentials
camera basics. Now that we went over all of the items for the camera
setup and composition. Let's go over a couple of
troubleshooting pieces. So first things first, what I'd like to mention
is that if you have multiple
cameras and you are planning to have multiple
renders in the scene, it can be a little
bit overwhelming, especially when trying to figure out which
camera is which. And if you especially
have multiple setups of different viewport for
the camera localization, as we talked previously, it would definitely be a little bit overwhelming with multiple
cameras being on the scene. You wouldn't be able to
tell which is which. So what I recommend you do is if you go onto
camera properties, there is an option within viewport display
called show name. By enabling show name, you'll be able to have a name at the bottom left of
your camera frame, which is very, very handy. Unfortunately, if you
go onto another camera, like so and then you'll notice that the name
is also disabled. You would need to enable the name for every single
one of the cameras. The easier way to do that is if you were to select all
the cameras that you want, you can hold Alt and you
can click on the name. If you had it enabled
for the first camera, you can just click it
again, and there we go. Now, all the cameras will
have that option ticked on, so you'll be able to
see exactly which type of a camera you are looking at. Whether it's like lens or
the one that we set up with the background or just a
walking perspective, camera A, all of that lovely stuff, we can easily see and
get ourselves reminded which camera we're
seeing on our viewport. Now, what happens
if you want to have a different type of setup
or placement of the camera. What if the camera ends up being placed into the ground itself. So, let's say we
create a camera and then just have it selected
as the main camera, click zero, and there we go. Every time this happens, it gets placed inside
of the environment. So my recommendation would be to either go for plan A or Plan B. A being just simply
using free Dcursor. Every object in Blender gets placed where
the free Dcursor is. If you hold Shift and
tap right mouse button, you're able to place it
on another surface area. You can see this little
dot right in our scene. So if I was to place it
somewhere on a rooftop, when we click shift in
A and place a camera, now we get the item
on the well, rooftop. It's still in the ground
though, so that's that. Maybe putting it on the walls
would be a better choice. Something like on
the side over here, then we can just place a camera, click zero, and there we go. I would be a little bit
better of the setup. Or if you use the
cursor icon over here, you can just tap
anywhere you want, and then just drag it onto
the screen, and there we go. We have ourselves
a floating free de cursor with which help, we can just place the
camera exactly where we want it to be in the
middle of the center of the environment or whatnot, all of that lovely stuff. Alternatively, instead
of using this method, what you can do for Plan B is if you create
yourself a camera, you can use a little
shortcut for it. Using Control Alt
and Numpad zero, you'll be able to basically
place your camera right where you had it
in your viewport where you had the
viewport, basically. So let's say I exit
the camera over here with this still
being my active, I can just put my
viewport at the top, use Control Alt zero, and it's going to
place the camera in exactly the same position
as you had your viewport. Set, which is pretty handy. Now, one thing we didn't
really talk much is, how are we going to deal
with the fact that if we don't have a proper
keyboard that has a nums, if you have a laptop,
you might not have that. So I would recommend you to just go on to edit preferences. And within within the input, you have an option
for emulate Numpad. So instead of using the Numpad, you'll you'll be able
to use zero to nine keyboard keys to basically do the same thing as if you
were to use the Numpad. Now, next up, what if you
end up rendering a setup, a scene, and one of the
objects is simply missing? Why could that be the case? Well, the most
obvious thing would be that if you have to sign
this sign, for example, selected, you can go over it by clicking a dot
over your outliner. And next to the name, you have a button for render. If this is disabled, you would not be able to see
this in the render view. So even with this being
visible in our viewport, it's just going to be invisible in a render
just like that. So make sure that this is on. And if you're not
seeing this button, you can go to the filter tab and just locate the
button over here. Once you have it enabled,
you should be able to just set it up, like so. Or vice versa, if you don't
have anything in the scene in that area and an object
randomly pops up and appears, maybe you ended up using height functionality
previously, using the button H, and you're just not seeing
it in the viewport, you can click AltnH
and that will unhide everything in your scene
that was hidden previously. Now, what happens if your
depth of field is missing? So let's say we have
this camera over here and your depth of field is
just simply not working. Let me just go ahead
and grab this camera. Let's say, your depth of field is just
simply not working. Well, first of all, try changing the focus
distance to something an extremely minimum value
until we get an actual blur. If you're able to see the blur, that's great. If not. I would say try checking firstly if you have
the same camera setup. And what I mean by that,
maybe the main camera selected is not actually the
one that you're looking for. So for example, right now, I have a different
camera being active, but I have a selected camera that's not the same
that I'm looking at. If I start playing around
with the our camera, obviously, nothing is going to happen. So that's
the first thing. The next thing is
check if you have the local camera turned
off on the viewport, because that would also be offsetting what you're
seeing in the viewport. And then finally, if
you're having issues, I would recommend you to try
using focus on object item first just to kind of allow
you to get the right item. And once you get the right
item, play with F stop. And this should
bring you back to the main item that's
being rendered. Next up, what happens
if you do end up rendering a piece and
nothing comes out of it? Well, you might want to
check at the render window. If it's not, and you have
another item selected, you might not be able
to see anything here. So just click on the button next to it and just
search for Render, and you should be able
to find render result. This will give you the
same render output that you see on your camera. Now, if you're still
not seeing anything, it might be something to
do with the render engine. Recently, Blender has enabled Vulcan into part
of its software. And if we go to
edit preferences, we can locate that. So if we go on the system, you'll see right now I
am using OpenGL since it's a little bit more
sturdier at this point. But by default, I believe some of you might
have Vulcan enabled. Vulcan, if you enable it, it's great lightweight and often a little bit faster in
rendering, I'll be honest. But sometimes it
doesn't quite work. It also doesn't always
work if you have Vulcan setup with a
Cycles render engine. So if you have Cycles render engine with EV render engine. So EV render engine is
a real time renderer, so more like a video game
type of a render engine. But Cycles is more for tracing, and that's a bit slower, but gives you better results. So if you're using
Vulcan and Eve, you might be in trouble. But since we are on this note, I would just highly
recommend you honestly use Vulcan and make sure
it's set to EV. Then the next thing, if you want higher and faster renders, I would highly
recommend you changing the device to be GPU compute. You're not seeing GPU compute
in your render properties, you might need to go
onto the systems and preferences and locate
the Cycles render device. If it's set to
none, you won't be able to have this
option selected. Make sure to select
either Opt x, CUDA or whichever option
you have available. If it's set to none, then
we won't be able to have That, but with any
of these options, you'll be able to select
your graphics card to be used for render, which is going to speed up
your render output, so much. And within the samplings, make sure to go into it as well. Renderer has a denoiser and
Deniser use GPU option. When you have used GPU for denoiser it's going
to be faster as well. For preview, shots
of compositor, I highly recommend you to
use lower MAX samples. Even like 50, 40 would be
reasonable for a preview, and then you can up in a
notch when you're happy, going up to 1,000 or even more in certain
cases if you're going for, like, a four K resolution. That's totally
viable. For preview, if you go like 5,200, it's quite a nice result. 200 is a good result
for render as well. And as for the noiser,
we also have options. So pre filter, if you set it to fast and quality
set to balanced, you'll be able to get
a much faster output when doing a simple render. But I'm just going
to leave these on because for final renders,
they're quite nice. Now, if you want
even faster render, you have an alternative option. And if you want to keep all
the default Mac samples, all the lovely great quality
denisers, you can do that. In our viewport, we can have once we have
the camera enabled, and we are the
camera, we can use Control B and just
simply select, let's say, part of the shot. You can see what it
does. It basically turns only for that setup. Control B allows you
to get basically just a tiny bit of a
scene out of your item, out of your viewport, which if you render it, you're only going to be
seeing that specific piece. So it's great for preview, it's great for getting
a quick cropped piece, as you can see
over here because, well, you're not going
to render anything else. And as you saw, it's
much so much faster. So that was real time render. I wasn't able to even finish speaking and was just
finished with render. And if you want to get it back, you can click Control Old B, and that will cancel
out that view. A view called render region. Now, if you have some
issue with the lighting, the easiest way and the best
way of sorting that would be if you have render
properties opened up, you can go all the way down until you have color management. Color management will allow
you to use some tweaking of the scene for all
the cameras overall. So if I was to
lower the exposure, we can darken everything, and you can see that
everything is now super, super dark, maybe for night scene or
something of the sort. But by default, if we had this set as something like free, you can see it actually very, very bright, extremely bright. When you have a day light scene. The default ambient lighting can be a little bit
overwhelming for you. So if we want to make sure we
get a nicer looking scene, I recommend you to
lowering the exposure, which again, will switch up how the rest of the
environment is being seen. And it's just a quick
and easy way to get some lighting
controls for your camera. But just keep in mind that
it is a scene setting, so every camera uses the
same current exposure. And that's going
to be it for me. Thank you so much for watching. I really hope you enjoyed these lessons and you
were able to pick something new and
interesting along the way to help you in
your future projects. Thank you so much
for watching and make sure to leave a
positive review or just a feedback in
general as it really helps us out with
our future courses. Thanks again and happy
modeling, everyone.
 3D Tudor, Bestselling Blender Author & 3D Educator