Transcripts
1. Introduction to Blender 3D Essentials: Hi there. My name is Dan Scott. And in this blender
Essentials course, I've enlisted the
help of good friend and master animator Robin Rudd. Now, we've worked hard together to make sure this
is up to the same, bring your own laptop
standards you're used to. So get ready, jump in and enjoy Blender Essentials
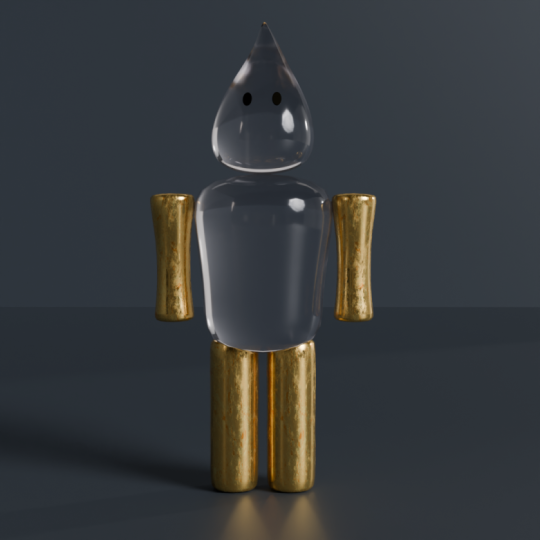
with Robin Rudd. Hello. I am a three D model of Robin made using
the very techniques you'll learn this course. Modeling, texturing
and animation. Welcome to Blender
three D Essentials. We are going to open Blender
together for the first time, and it's going to feel like the cockpit of an
alien spaceship. That's at least how it felt to me when I first
got into three D, but don't worry,
I got your back. My name is Robin and I am a three D designer and animator, specializing in three
D for graphic design. My software of
choice is Blender, which sounds weird because
it's a free software, but don't let the
price fool you. This is the best three D
software I've ever used. Can do almost everything from
charts to Hollywood VFX, but I've been told we don't have 1,000 hours for this course, so I paired down to the
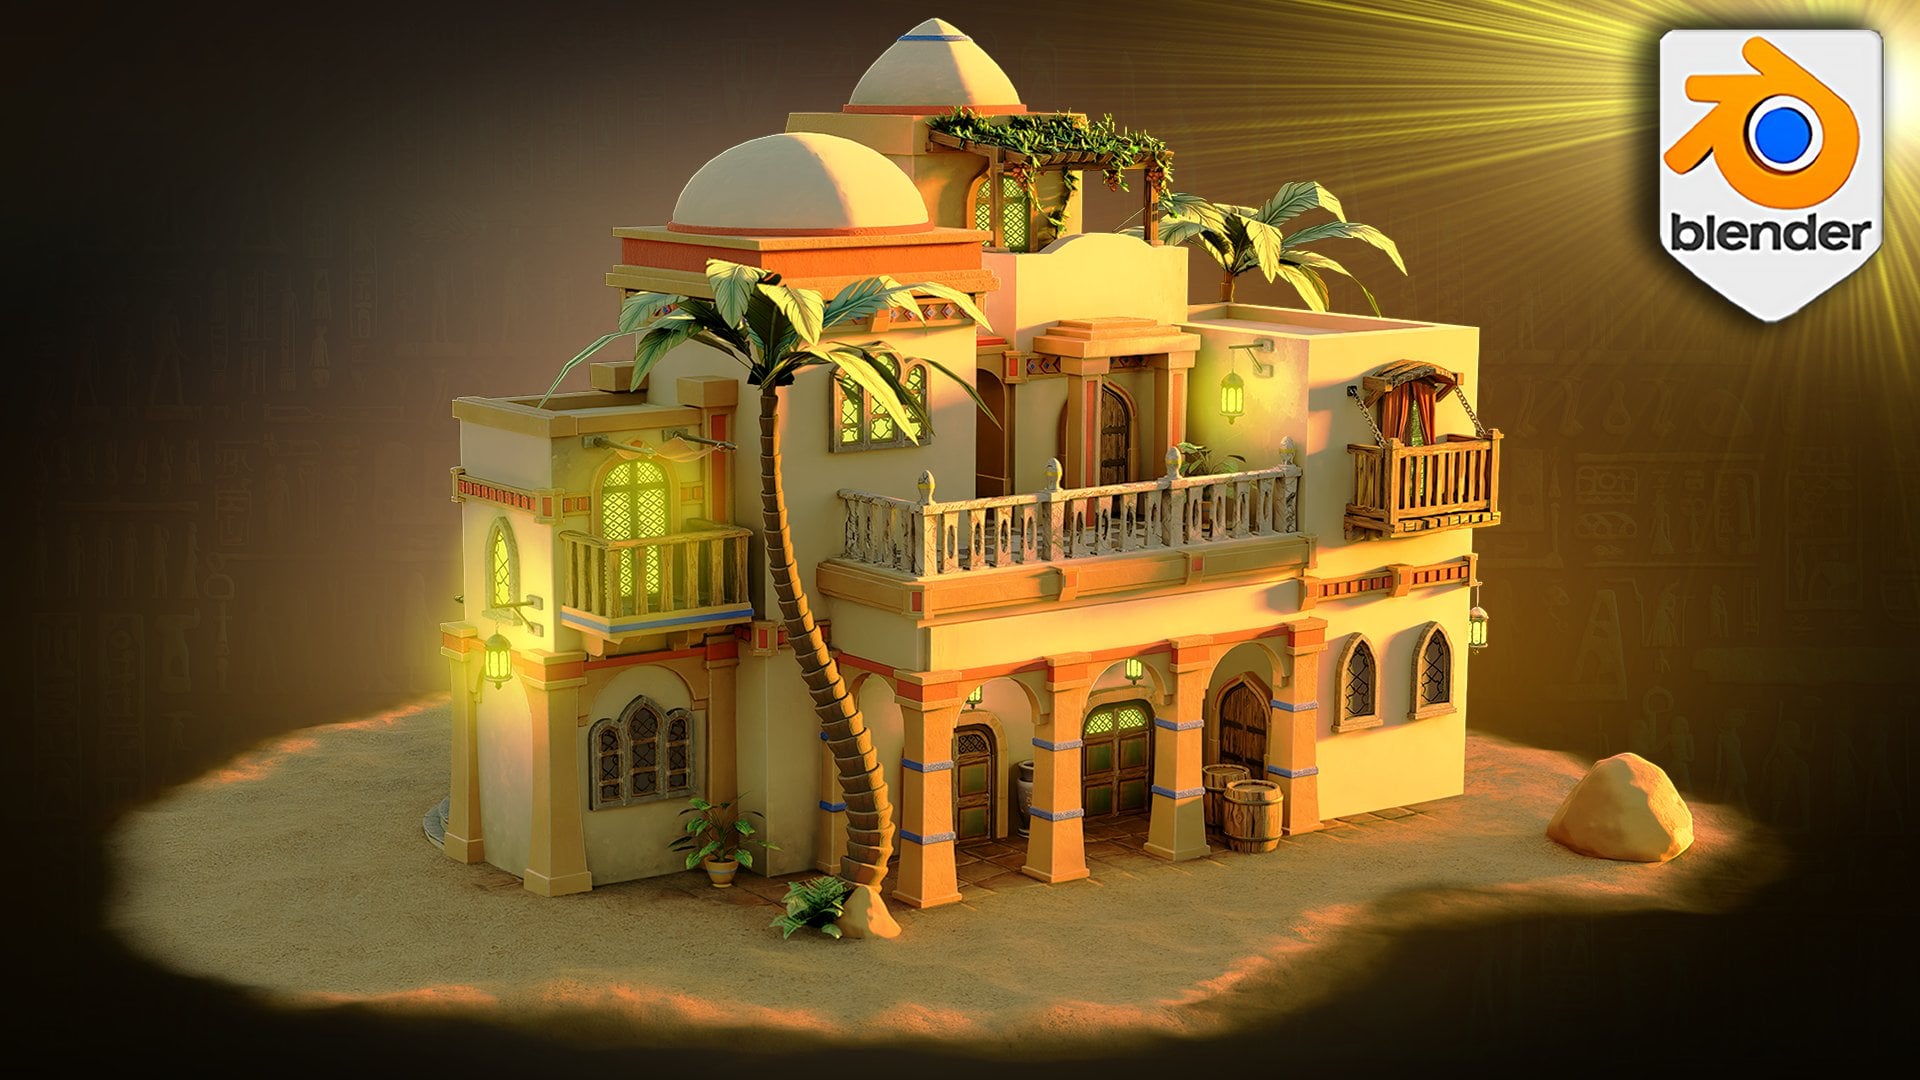
designer essentials. Like, no fighter
jets, no castles, we'll be making stuff
that is useful in design. And there are projects throughout the
course where you can practice what you're
learning and get some nice portfolio
pieces as well, and everyone gets their
own unique brief so that your projects will look distinct from everyone else
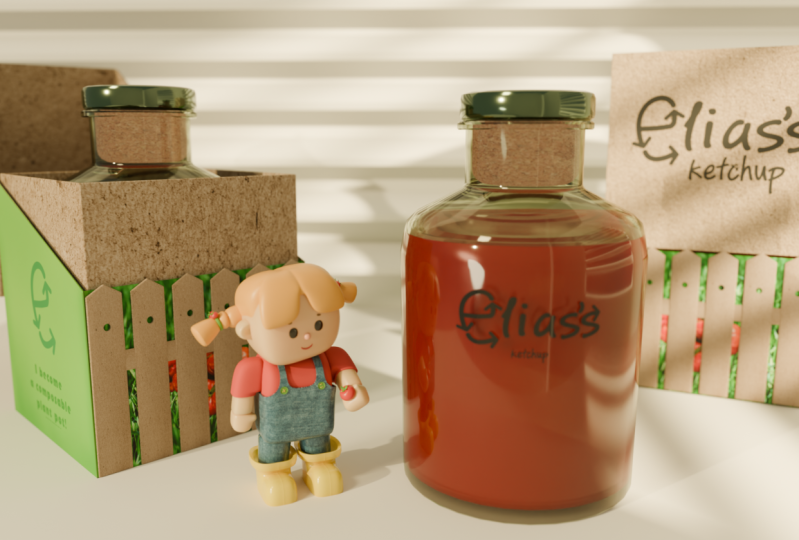
who is taking the course. Start with a tour around
Blenders unique user interface, and then we'll make
a three D bottle. You'll learn how to
make three D shapes and make them look like glass. You'll learn how to
make three D characters and how to animate them. We look at rendering, which is how you make images, and I'll show you
techniques of how to wrap a design around a three D model. The course is for anyone who
felt intimidated by three D, maybe you're a graphic designer or motion graphics artist. You just curious about how people make those
three D graphics. Whatever brought you
here, you will learn all the foundations to make just about anything in three D, and we will take
it step by step. So let's get into it. What
do you say, Tiny Robin? Huh? Well, you
have the sign off. No, I have the intro.
You did the sign off. I'll see you in the
first. Started with you. Of course. Smooth.
2. Getting Started with Blender: Okay, you're in the
course. This is it. I just a moment, we're going
to start to learn Blender or you're going to start to learn Blender. I'm
going to teach you. I think you're going
to be surprised by how capable this
software is because, well, if you've
noticed the price tag, it's free software. But I'm not being hyperbolic
when I say it is actually the most capable general three
D software that I've used. And how's that possible from free software?
It's a whole thing. It has we have many parties. It's the Blender Foundation, which is supported by
donations from you and me, but also from, like,
big corporations. And they big corporations, they like Blender being just this central
hub to build around. And so, companies like, I think it's Invidia is one
of the biggest sponsors, I think Meta and Google, as well, a bunch
of huge companies. And this is what's
keeping Blender afloat or more than afloat,
actually, it's growing. Like, it is growing really
fast as a foundation, as a community, as a software. I'm going to go out
on a limb here and say that in just a few years, I think blenders going to be industry standard for
most three D work. That might come back to bite me. That doesn't happen.
No, I think it will. So all that to say, I think you did the right choice in
starting to learn blender, but I'm done blabbering.
Let's get into the course. First things first, you
got to download Blender. So I am onblender.org, and at the moment of recording, we are on Blender version 4.3. But I wouldn't be
surprised if that number's gone up by the
time you come here. They come out with
a major update. It feels like every
other month or so. So you'll press the
big download button, and it's detected that
I'm on a Windows system. It'll probably
detect yours, too, but you'll find all versions
down here in the dropdown. So just press the
download button. So while that's downloading, also go ahead and download the exercise files that
come with a course. You'll find the download link
somewhere on this website. I don't know the
layout of the side. You'll find them. And also
remember that you can change the speed at which I talk
using the cog wheel, which is in the corner on one of these sides
of the video player. Some people think I speak fast. Some people think I speak slow. You know, tune me
to your liking. Be wary. If you go too low, I'll sound drunk. All right. When it's downloaded,
just install blender like you would any other software on your computer, and the first time you open it, it should look
something like this. You may get a window
asking you to configure some settings,
just press Okay. The defaults are completely fine, and then you'll be here. You'll see a splash screen in the middle and the rest
of the program around it. So just click somewhere in the three D viewport to dismiss the slash screen and
welcome to Blender. Alright, a little bit of
setup before we start. Let's go up here
to the edit menu and down to preferences. And under the interface
tab on the left, we have the resolution scale. When I click and drag that, that scales up the
entire program. Very useful for larger screens. Maybe you want to
shrink it down. I'll set mine to 1.5, I think will be a
comfortable size for reading. I'll enclose that. The only difference you should see between your interface and mine is down here in
the left hand corner. This little mouse icon. This is for showing you what
I'm clicking with my mouse. So when I left click, you'll see the left button light up. When I click my scroll
wheel, that lights up. If you're on a Mac, that might be a bit of a confusing thing. I'll get back to
that in a moment, but it will also show
my keyboard presses. So if I click B, you can see B shows up here. I'll right click to cancel that. C, that shows up. And if I hold down Shift, you see that button,
and if I press A, you'll see, Oh, I press Shift A, I'll try not to obscure it with the menus like I did just then. I'm on a Windows computer, so when IPress Control, that'll show up as
control slash Command. If you're on a Mac, you press Command when IPress Control. And when I press Alt, Mac users press Option. So Control A for you on a
Mac would be Command A. Okay, if you are on a Mac
and you use a Mac mouse, you we probably confused. Back when I said I
clicked my scroll wheel. Mac Mice typically don't have
a clickable scroll wheel. And this also goes for, say you brought your own laptop and you're using a touchpad. Well, so if you're
serious about three D, you should probably get
a three button mouse. But if you find yourself without
one, here's what you do. You go back to edit
and preferences, and down in the input tab, you have a button to emulate
a three button mouse. And while we're here, go ahead and check
if your keyboard has a number pad on
the right hand side. That's this grid of numbers. If you don't have that grid, then go up here to
emulate Numpad as well. That way, when I press, say one on my Numpad, you just press the
number one wherever it is on your keyboard. And that should be it
in terms of setup. I think we're ready to
start using this program.
3. Blender Overview: Program can make VFX for Hollywood and worlds
for video games. And that's why there
are a lot of buttons. But you don't need to
know all of them to make things that are
useful in design. In fact, you're
going to be using the same 5% over and over
again throughout your career. And those are the 5% we'll
focus on in this course. D is very different
from other tools, and it's a lot to take in. Like, there aren't
a lot of familiar looking buttons
or icons in here, and I get it. It can be overwhelming.
But I promise you, it is very much possible to learn by yourself online.
That's how I learned it. This video is going to be just an overview
of the software. I'm just going to
show you around to the different areas
that we're going to be visiting over and
over again later on. We're not going into
depth on anything. No need to take notes just yet. I just want to give you
a sense of the context, where are the
different things so that when we later go
into depth on each part, you have a bit of an idea of how it plugs into
the general whole. Just sit back for now,
let me show you around. So, welcome to the world
of three D. First of, how do you move in three D? Well, to turn
around your center, you'll press down on the
middle mouse button and drag. Remember, I have a little icon down here and you'll see when I press the middle mouse button. I actually, it turns off when I start moving. I think
that's a little bug. I'm still holding it down.
If you use a Mac mouse, you'll just use the touch sensor like this to move around. And if you're on a
laptop touchpad, you'll press down with two fingers and just
move around like this. Also it's called a track ball up here on the
right hand corner. If you press that and drag, you'll also orbit around
orbiting is what this is called. Second, we have zooming and
I'll just scroll in and out on my scroll wheel
that does that and you'll scroll however
you do on your system. Also, there's this button over
here under the trackball, which is a magnifying glass. The way to use it is
you click down on it, hold it down the click, and then just move up or down. That'll zoom in and out.
Then we have panning. Which you do by holding
down shift while clicking the middle mouse
button or the way I showed you how to orbit
around on your system. And there's also this
hand button which you use the same way you click
down on it and you drag, and then you can move side
to side and up and down. That's how you move
your camera orbit around with a middle
mouse button, shift middle mouse button
pans and scrolling Zooms. But how do you move the
object in the scene? Well, let's click it
with a left click and we can go to the tool
bar to the left here. This one, this is a move
tool with the four arrows. We'll click that and a gizmo
appears. This is a gizmo. If we either of the
arrows on it and drag, we can move it around
in three D space. You can also click the little
planes between the arrows, and that'll allow
you to move it on the plane of those two axis. So right now I'm moving it on the red and blue axis
at the same time. And you can also click in
the middle of the Gizmo and that'll move it free hand from
the camera's perspective. The next tool is the rotate tool that will give you a
different kind of gizmo. And if you move your mouse
over any of these circles, it'll highlight that circle, and that'll allow you
to rotate on that axis. If you hold down Control, even snap to I think it
is ten degree increments, if you want to be
precise about it. And if you just click in
the middle of the ball, you can free hand rotate it. If you're unhappy
with your rotation, you can like most
softwares control or command Z to undo and you can do that as
many times as you want. The next tool is the scale tool, the scale tool will
stretch out your object. You get another
gizmo and you can stretch it out on
either one axis at a time or uniformly from the
center or on each plane, which will stretch
it out two axis. And this final tool, this is a combination of all the
other different tools. If you don't want to go over here and click each
one each time, you have the move, you have the rotate and you have
the scale all in one. I don't want to, I
want something more exciting. How do I delete it? You delete it by pressing
Delete on your keyboard. And how to add something new? Well, that is in the
ad menu up here. If we click that, we get all the things we can add
to our three D world. And a lot of these things
you're never going to use. And most of the things
you're going to use are under the first
menu called mesh. A mesh is a three D object. So whenever you want a three
D object, you'll add a mesh. So let's go for, say, a cylinder, and you can add
as many objects as you want. Let's go back to AdMnu and yeah, let's do the funniest
one. Let's do the monkey. And we can go to the
move tool and we can move the monkey on
top of the cylinder. Maybe we'll use the
rotate tool to make it look like it's kind of
resting on the cylinder. Turn it around back
to the move tool. I'll move it down a little bit until it feels like
it's resting on there. Maybe I want to scale this out so it's more
like a platform. Scale it on this plane
that'll only scale it in the two horizontal directions and not on the vertical
one to just flatten it up. Now we have a little
platform for it, but you'll notice it's
all gray gray is boring. So let's add some color to it. Where do we do that?
That is in this window. This window has a lot of tabs. We'll visit a few of them. The one dedicated to color is the bottom one, the materialtab. So we'll go here, and with
one of the objects selected, we'll click New, which adds
a material to that object. And the material has
a bunch of settings, but the most important one
is this one, the base color. So let's give it a I guess,
like a kind of teal, nice teal looking color
for no particular reason, but we can't see it in
the three D viewport. What gives? The
reason is by default, the three D viewpoard only
shows everything in gray, which is very useful
for understanding three D shapes without
being distracted by color. But we have different
view modes, and those are all up here, the four little
balls in the corner. The first ball, this
is the wireframe ball. If we click that, we view our
three D in wireframe mode, and we can see through
our objects, very useful. The next one that's
the gray mode, which we were just in. The next one after that, this is the material preview mode. When you click that, your system might choke for a little bit. Like, it's not unusual that
it'll lag for, I don't know, ten to 15 seconds
while it's just loading everything it
needs into your system. That'll probably only happen
the first time, though. And with this selected, we can see the nice color
on our object. And we can go to the
monkey and we can add material to that as well. Now in this window,
there's no material here, so we'll click new. And this material,
we can make it a little we can make
it like dark brown. I feel like maybe desaturated a little, make it a monkey color. And the final view mode up here, this is the rendered view. When we click that,
we still see color, but we also see
lighting information. We see a shadow, and
we see highlights, and those are dependent on
the lights in our scene. And we do have a light object. Can't see it right now. That's because it's out of view, but we know that we
have one because it is in the scene outliner
on the right. This is a list of
all of our objects. And if we press this light, we have now selected the light, and we can now zoom out until we see that we have
the light selected here. Let's go to the move tool
and move that light over and you'll see the shadows and lighting information
react to that. So I can move it
a little closer, make it a bit brighter and get a nice reembrand
lighting on the monkey. This fine art we are doing
here on bring your own laptop. So let's say that we
are super happy with what we just did and we want to take a picture of this monkey. Let's zoom in and taking
a picture in three D, that is called rendering. And we go to the render
menu up here to do it. Now, don't be confused. There is a rendering
button here too. This is a workspace. If we click this,
then it'll change the entire workspace to be something different.
That's not what we want. Let's go back to
layout where we were, and this is the button you
want, render on the left. So we click Render and
we click Render Image. It does it. We do get an image, but it's from the wrong view, and that is because blender does not render from
your current view, it renders from a camera object, which we also have in scene. You'll see it in the outliner.
Click that and zoom out. We can see there's our camera. This is the angle that it
was taking the picture from, so we can move this over
to where we want it. We can move it
down a little bit, maybe rotate it back to, got to watch out, not to click on the frame
of the camera, that changes the focal length. I'll undo that and just click the Gizmo,
make sure to do that. It at the monkey, and then go back to
render and render image. This is a very difficult
way to get the framing you want because you can't preview it before going
to render, right? So the way most three D
artists prefer to set the camera position is to look through the
camera and move around. To do that, we go to the camera button over
here on the right. You click that and you
go into the camera. But you'll notice if you
start moving around, you'll exit the
camera right away. So there's a secret little
button that I personally think should be more prominent to get the camera to
follow you around. Let's click the camera
again and press this tiny little arrow up here to the right
of the track ball, which will open a new menu. Here, there are a bunch
of uninteresting things. Don't worry about it, but
go down here to view, and there's a view lock option, and we can lock camera to view. I know this is too hidden,
but now you know where it is. And now, if I orbit around our monkey by pressing
on the scroll wheel, the camera will follow me. So I can I can
zoom it in and get a nice looking composition
on the monkey and then uncheck camera to view so that
I can go out of the camera again and go to the
render Menu render Image. And now it renders from
that point of view. If I'm happy with this and I
want to save this picture, then I go to image inside
of this render view window. I go to Image, save as, and I can save it
somewhere on my computer as any type of
picture like a PNG, a JPEG, even things
you've never heard of like I go Targa, you probably haven't used unless you worked in three
D in the 90s. And crucially, clicking
this button is separate from saving your project file. If you want to save
this scene file and go back to it and
work on it later, you have to go to File, Save As, and that'll let you save a dot blend file which you can open later to keep working. Let's close this little menu here by clicking
on the edge of it. When our cursor becomes
a little arrow, we can drag it and just drag it all the way to the
right until it disappears, and that's it for
the quick overview. Now you know basically every step of the
three D workflow, and what we'll do next is just go into detail on each one.
4. Your Design Brief: This is random project
generator.com. The point of this
site is to generate a random brief for everyone who's taking this course so that when you follow
along with the projects, you don't end up making the exact same thing
as everyone else. Everyone gets a
slightly unique brief, although there are
commonalities, and when you follow
along with the course, you'll make something
that doesn't look conspicuous in your portfolio. So for this course, let's
click on Blender Essentials here and click
Generate My Project. And I got an industrial
and edgy chili oil brand. So again, yours will be
different from mine, although yours will
also be a liquid that's in a bottle so that we make
kind of the same product. But if you're not happy
with what you got, you can go down here
and click Retry, although you're not allowed to click it more than three times, okay? So let's read mine. You've been hired by Daniels, a new chili oil
brand with a Hmm. Guys, we got to amend this with an industrial and edgy style. As the resident three D artist, it is your job to help define the visual aesthetic and shape
language of the product. The shape language, that's basically what do three D
shapes of this brand look like? The same way you might
make a color palette, three D artist might
design a shape language. The client wants you to
have full creative freedom. They'll need your help
with social media content, the bottles design,
and the packaging. Additionally, they're looking
for a three D mascot to represent Daniels and an animation for
advertising purposes. So I'm happy with this, and
I'll click Download as PNG, and this will be
the project brief for all my projects
going forward.
5. Tour of the Interface: Let's talk about
the user interface and a little more detail. I'm now in a new file
and I got here by clicking File New in general. That opens a brand new file. And this window is where we
have spent most of our time. This is called the
three D viewport. This is where we do all
of our three D work. Down here, there's
another window. This is the timeline, and I
can play it by clicking Play, and the playhead
will play through, and you'll see your
animation if you have any. We don't, so it's
very boring now. I can drag that
back to the start. And by the way, I
know it's a lot when I'm going over it without
context like this, but I just want to give
you a general overview. Don't worry about the details. We're going to come
back to all of these buttons later on. I'm going to familiarize you
with what all of them do. But for now, it's
fine to just sit back and try to take
it in as best you can. Top right here, we have
our Scene outliner. Outliner is a list of all
the objects in your scene, and it's great for
organizing things. You can organize things by adding new collections as well. There's a new collection
button on the top right. When you click that, you get this box that you can
double click to rename, and I'll call this say Lights, and I can click this light
and drag it into the lights. It works like a folder. Under the outliner, there's
the properties window, and you can resize any window by clicking between them when your cursor becomes
a two pointed arrow and you can resize
them anyway you want. This window down here, this
is the properties window, and it has a bunch
of different tabs. The top tab, this
is the render tab. These are all the
settings for rendering, which if you remember, that
is how we made an image. So when it makes an image, it will use all of these
settings to do it. And that is the output tab. This is where you change
things like the resolution of your output image and the frame rate of your
animation, things like that. And then we can skip down
to this is the scene. And in scene, what's useful
here is to change the units. I like using the defaults, which is metric and meters.
That's what I enjoy. But I've heard some
of you guys out there enjoy imperial units,
and I won't judge. The next step after that,
that's the world tab. This is where we change. Well, the world world
What's the world? The world is everything that's around our three D objects. It's like infinitely far away. And we can see it if we
go into rendered view. Remember, up here,
the four balls, you can change the way you
view your three D world. If you click the rightmost one, we view it with
lighting information. The moment, it's very gray. Your light may be more
powerful than mine. But if we go to the World tab and we change the
color of the world, then we can change
the way it's lit. So now everything is blue and the box is lit with
blue from every side. And bring that back
to something like a dark gray and turn on
the gray viewpard mode. Let's skip over
the next tab which is not very useful.
You know what? We can skip over this
one too and this for now and this you won't use, this you won't use, not in
the course of this course. Can you say that the
course of the course? Not this, not this, but all the way down here,
we have the materials. This tab is only available
if you have a mesh selected. If you click on a
light, you'll see that changes and it
becomes a light icon. This is context dependent. So if I click a mesh and I
click the materials tab, this is where we
give our objects color and shading information. But when I click a light,
it becomes a light tab, and that's where I
change the power of my light, the
color of my light. If I click the camera, then
it becomes a camera tab, and I can use it to change the focal length of the
camera stuff like this. And this is the
default workspace. Something that does make
blenders user interface a little unique is that the
workspace is very malleable. It's easy to add
and remove windows, and that can be very useful. For instance, maybe we
want to be able to see our three D scenes from two
angles at the same time. What you'll do is you'll go to one of the edges
of the windows, say, the top edge, right
click and you can split it. Let's do a vertical split. Now when I move
around, I can move the split and click
to confirm it. And now I get 23d view ports. Do the same thing by moving the mouse to the corner
until it becomes a radical and then click and drag into the window and
that'll do the same thing. I can split that into as well. Maybe I want to use
this top window to see my three D
scene from the top. I can go over to the track
ball on the right and click the top pointing arrow, the blue one that says Z. If I click that, then I'm
viewing it from the top. This bottom one
maybe I want to view that from X. I'll click X. Now I have three separate views of my three D scenes
from different angles. This can be very useful. But you can also change the type
of window that this is. The type of window that
is on the top left, it's this little drop down here. And you'll see this
is different between this window and this window because this has
the outliner icon, and this has a three
D viewport icon. But it doesn't have to be. I can click this and you'll get a lot of
different options. There are so many
types of windows, but we'll only use
about I don't know, like five of them, and we already
know most of them. This is the three D viewport. And over here we
have the timeline, which is the same as below. There's the outliner and
the properties window. Those are the ones we
already have open. And if I click the outliner, now this window becomes
an outliner, too. So you can really start to screw things up.
And I mean that. That's what happens
to me all the time. I make a mess of
this whole window, and I just want to get back to the default. How
do you do that? Well, the trick to do it is to check the workspaces up here. These are basically
presets of windows. If you're doing
animation, you may click the animation workspace, and this is what
blender things are the windows you want open
when you do animation. And you can add a new one
by clicking plus over here, and let's add a new version
of what we just had, which is a general layout. If we do that, then we
get back to the default. And that is how to screw up your interface and fix it again.
6. What Are Polygons?: As is a little theory on how computers view
three D objects. But for one, it's not
boring and for the other, you're not allowed to skip it. We'll be very quick,
but this is extremely important to understand
for the future of our work in three D.
To demonstrate it, I'll just delete
everything that's in the default file and
add a new object. Remember, adding is up here in the ad menu under mesh,
we get all our meshes. And for this example, let's use a UV sphere. We get a sphere, but you'll notice it's not a smooth sphere. It's a sphere with a
bunch of little squares. And why is that? The
reason for that is a computer cannot in
three D, show curves. Curves are basically impossible. The computer only
understands straight lines, and the way to
fake a curve is to add just enough straight lines. When I add an object, I get a little menu
down here on the left. Now it says add UVsphere
because that's what I did. And I'll press the little arrow
here to expand that menu, and I get settings for it. The settings I'm
interested in now are the segments and rings. If I click the segments
and I drag to the right, I'll increase the
number of polygons. And you'll see the more I add, the closer it gets
to looking smooth. At least on that axis, let's add some on the
other axis as well. And you'll see I get
closer and closer to the illusion that this is
actually a perfect ball. But the problem is, the more
of these polygons I add, the more taxing it
is on my system. And if you get into
the tens of thousands of polygons in a scene and you really quickly can when you start working
with complex objects, then it's going
to run very slow. Is the reason why video games in the early 2000 looked
so jagged compared to today because you need more powerful computers
to display more polygons. And not only that, but working
with high poly objects. That's what we call it when
there are many polygons. It's difficult to model with, it's difficult to texture. Everything's trickier
with a lot of polygons, which is why there are ways
to fake having a lot of polygons without actually
having a lot of polygons. It's very common
when you're new in three D to just want to
add a bunch of them. But I want you to
try and refrain from that, and
I'll show you how. Let's reduce the polycunt
again to something close to where we started to
where it's very faceted. And not very high resolution. I'll right click on the ball
and click Shade Smooth. I think this is so cool because
the mesh hasn't changed. If I go into the
wireframe view up here, the first ball, you'll see
the polygons are still big, but there is a clever
algorithm to just fake on the surface to fake having
smoothness between them. You can probably tell from the silhouette that the
silhouette isn't affected by it. The silhouette is still pointed, but on the surface, we have a fake version
of that shading. I just think that's so cool. But you'll notice the menu
down here now changed from Ad UV sphere to Shade Smooth because the menu only shows
the last thing you just did. So you'll actually have to remember that when
you add an object, you got to change the settings before you do anything else, or the settings will be gone. So let's delete this
and add a new object, but going to add mesh, and I'll add a cone for
this just to show you that if I right click this
cone and shade smooth, this does not react in the
way we really want because it tries to smooth out what is supposed to be sharp
at the bottom here. Like this edge here is not
supposed to be smoothed out, but it's still trying
to smooth it out. And by the way, I'm drawing on screen by holding
down D and clicking. It's not useful for
you in any way, but it's very useful
for me for teaching. So if you have an object
that's supposed to have some smooth parts and
some sharp parts, you right click and you click
Shade Auto Smooth instead, which will try to maintain those sharp parts of the object. So if you take anything away from this video, just remember, try to have as few polygons as possible to
define the shapes.
7. Other Types of Objects: Let's talk about some
other object types. I'll delete everything
that's default, selecting it and
pressing Delete. And in the add menu here, you have a bunch of options. You have so many things that
you can add. So let's try. First, I want to add an image
because I have downloaded an image from online of a very sad looking dog
that I really like, and I want to put it
in my three D scene. The way to put it in
your three D scene is not to import it as a reference, and it's not to import
it as a background. It is to import it
as a mesh plane. That will give you a three
D object of the image. I'll click that, which
opens a file viewer, and I will go to the folder where I've downloaded
this picture, click it and click
Import Images as planes. And it's weird because the image looks gray and it's
gray on both sides, but that's, of
course, because we are in the wrong viewport mode. We got to go to material preview up in here, the third ball. And I'll just give you
a little tip here. If this takes a
long time to load, then chances are you haven't optimized the
threads in your CPU. You need to increase the Max Shader compilation
sub processes. And I know that sounds
like a Star Trek term. Like, Captain, what are the Max Shader
compilation subprocesses at now? It is critical. But no, it basically
means just Google your computer and
Google the number of threads that your CPU has and put that number
in the edit preferences. Go to system, and here
under memory and limits, the bottom one Max Shader
compilation subprocesses. My CPU has 12 threads.
I'll put that in there. That just means that whenever I click the material
preview button, it'll be 12 times as fast. Alright, this is a nice dog. I'll go to the rotate tool
and rotate it on the x axis, and I'll hold down
Control to snap it so that I can get it
straight vertical. And if I want to take
a picture of this, then I'll need a camera, and I deleted the initial
camera that was here, so I'll just add a new
one going to add camera. And we can see the
camera because it's added in the middle,
and we can see it. It's now behind the picture. So I'll go to the move tool. And move it over so that it
can look at the picture. And do you remember how we
look through the camera? We go to the camera button on the right to look through it. We click the tiny
little arrow above it and go to camera to view. And now when we move around,
the camera will follow us, so we can reframe
the photo of the dog to like a worse framing than the original
photographer had. And then I can
click off camera to view and move out of the camera. And now if I click the render
button and render image, it does render an
image of the dog, but it's very dark. And the reason for that is we
have not added a light yet. So let's go to the add menu, and I keep going back to the add menu and you
will working in three D, you'll go to the Ad
menu all the time, which is why it's very smart to learn
the shortcut for it, and that is Shift A, A for AD. And that brings up the same menu just where your mouse is. So let's go to the light, and we have different
lights to choose from. The most basic one that's
just a point light. I'll click that. Hard to see. You'll see it did show
up in the outline. We do have a point light, but it is in the center of the image. I'll move it out here and we can't really see the effect
of the light and that is because we're viewing our scene in material preview mode
and not in rendered mode, which doesn't take
lighting into account. Let's go into rendered
mode. Now we can see it. Now we can make a nice looking
vignette on our image, make it brighter in the center
and not around the edge. And I'll go back to Render
and press Render Image, which gives me a nice
reframing and worse lighting on the photo of the
dog that I downloaded. We have a text object that's going to be very useful for
you as a graphic designer, the text object, you edit it by pressing Tab when you
have it selected, and then you can write
whatever you want. And you'll find all the
settings for that text in its context menu down
here in the properties. There's a letter A, and
that gives you settings for things like you
have a font here. You can change the regular
bold and italic font. You'll just click on
the little folder icon, which will open
your folder view, and you'll navigate to
the folder where you have that font stored. And you can go to geometry here, and if you increase extrude, then that'll make the
object into three D. So you have a bunch of different objects
that you can add, but for the most
part, the things we'll be adding are cameras, lights, and meshes, which
are three D objects.
8. Class Project 01 - Collage: Hello, it's class project time. Class projects are
not scary for one. They are a way to embody what you learn because you
probably know this already, but you do actually
learn a lot better if you use what you learn
and don't just watch it. There's something
about doing it that makes it stick in your
brain a little bit better. So that's why we
have class projects. They are for you to learn
it a little bit better, and also as a bonus, you get something you can put in your portfolio right away. Find this document
which contains all the class projects
in the exercise files. So download those
and follow along. If you haven't done so already, download Blender using
this link and go to random project generator.com to get your unique brief.
I already did this. I got the industrial and
edgy chili oil brand, but you go get your own one. I'll use this project for
the rest of the course, and you use whatever
project you get. Our first project that's this. The collage project. You've been asked to
make a three D collage of images to show the
aesthetic of the brand. Download a few
suitable images from the web and arrange them in
three D, then render it out. The image will be
used on social media. You can download
free stock images from Unsplash or Pixaba. So what do I mean by collage? I'll show you what
I did, actually. So this is my submission
for this project. This is Daniel's Edgy and
industrial chili oil brand. So, you know, I went online. I looked up at Chili, I looked
up some industrial things, and I found this great Brazilian graffiti I used in
the background. What I want you to
practice here is putting things in three D space
and lighting them. So you'll see there's
a little bit of shadow below all of these. That's because I have a light
above it, casting shadow, and you're also allowed
to add text like I did, but that's definitely
not a requirement. Speaking of requirements,
there's only one. You have to use three or
more images in the scene. As for deliverables, render your scene and export
as a square PNG. That's to make it suitable
for social media. And then when you're
done, you upload it to the class project or assignment
section on this website, the website where you're
watching this video right now. And share it on your
own social media. It's a good idea to
share your work and show people how far you
come in your three D work. And if you want, you can tag at Bring Your Own Laptop on
Instagram and there's a link to the Facebook group and the LinkedIn group.
So I'll give you a tip. This is something I did for
this project is to open two separate three D windows
and use one of the windows to look through the camera and the other window to move
around the three D scene. And that way, you can
adjust things in three D and see in real time how it looks from the
camera's point of view. Look forward to seeing what
you guys come up with, but you won't get any critical
feedback at this stage. I'm not interested in critiquing your layouts
and colors and stuff. I really just want
you to get used to moving things
around in three D, getting familiar with the
blender user interface. That's what the point
of this project is.
9. Adding Color and Materials: Materials, let's talk
more about materials. I went to File New General, and now I'm in a brand new file. I'll add a material to this box. That is down here in
the material tab. Remember, you won't see
the material tab if you have the camera selected
or the light selected. You need a mesh selected, then you have the
materials tab down here and you can add a
new material to the box. You change the color by clicking on the big field
that is the color. Don't click on the
little round icon, click on the actual color, then you'll get a color
picker and I can make it red. The box doesn't
become red right away because we're not in
the right view mode. That is up here. We have to go to
material preview, and then it becomes red. But it can be a little confusing to work with
multiple materials. So let me just build
up a scene here so you can see how to work with
multiple materials. I'll delete the objects
that I don't need. Move the box up a little bit, Shift A to add a mesh, and I'll add a plane. The plane is kind of tiny
and it below the cube, so I'll scale it out a
bit using the scale tool, and I'll click the blue square to scale it on the
horizontal axis. Now I have a floor, and
I'll add another object. Shift A under mesh. I'll add let's do a cone. The move tool and move
it up here so we can see it on top of the floor and
let's add one more object, and I can do the Taurus. We haven't used a Taurus
yet. Move that over here. So, if I have the
torus selected, the material is gone
because the material only shows up here if I
have the cube selected, the thing that has
the material on it. But I can add the material
to something else, too, if I go to the Taurus and I click the little
dropdown menu next to new, and there's a list of all
the materials in my scene. So I can click that material, and that applies it
to that as well. And these two share the
same material as in whatever change I make
to the material on either object will propagate
to the other one as well. If I now click on the cube and I change
the color to blue, it changes the color to blue
on the doughnut as well. And if I later want
to unlink these, if I want to make them
to separate materials, I got to go to the material here, and there's
the number two. This signifies how many objects have this material
applied to it. And if you just click that, that makes a duplicate material. Now if I click the
drop down menu, I have two materials. And one of them is on the cube. One of them is on the doughnut. And if I change the
color of the one, then it doesn't
change on the other. And to keep things organized, it's a good idea to
rename your materials. And you can do that
either by double clicking here or clicking its name here, and this one can
be called green, and this one can be called blue. And now, again, if
I go to the cone and I go to the drop down and I give it the green material, those are now shared. So if I change it to red, it changes it on both objects. But color isn't the only
setting you can change here. Are so many sliders
to play with. These are the most
important ones. You have even more in
the rollouts down here, like a diffuse, you
have subsurface. You can play with everything
and see what it does. It's all fun to play
with. I'll show you the most important ones. If I right click on the cone
and click Shade Auto Smooth now it's smoothed out so we can tell that when I
decrease the roughness, it becomes more shiny. If I increase metallic, then it becomes a metal. Almost everything in
life has an IOR of 1.5. This is index of refraction. You'll generally not
want to touch this, but you can touch the Alpha. When you decrease that, that adds transparency to the object. So go ahead look through
all the sliders, play with them, and see what kind of effects
you can make.
10. What Is Edit Mode?: So far, we've only moved
our object around, but we haven't changed
the shape of the object. I mean, we have gone
to the scale tool and we scaled it out
on different axes. But that doesn't change the fact that this is
still a cubic shape. It can never become a
bottle if we do this. So that is where
edit mode comes in. We use edit mode to change the fundamental
shape of the object. Is how we start modeling things. Let's go up here to the top left where it says Object mode. Click that, and that brings
up all the other modes. Don't worry about these. The only one we're
interested in is Edit mode. These are the ones, those
are super niche uses, but edit mode will be
going in and out in and out of 1 million
times over this course, which is why there is a very handy and very easy
keyboard shortcut for it. And that is tab. You press tab and things change. We're now in edit mode. The object becomes orange. We get a bunch more
tools on the left, and now we're no longer working with
the object as a whole. We're working with
individual points. So now if I click a point, I go to the well known
move tool, I move it up. That moves just that point. And this is what we
do in edit mode. We change the shape
of the object. And we can change
the whole object at the same time if I
press A on my keyboard, that selects everything,
and I can scale, and I can scale it up. This is just as if I
scaled it in object mode, right? No, it isn't. And this is a very key
thing to understand, and it's so confusing.
I'm sorry about this. I've been racking my brain trying to find out
how to explain this. And I think I'll just show you the effect so you know what
happens. Here's the deal. I'll undo everything.
Go back to the cube. Here, this is just
a demonstration. Don't worry about the
things I'm doing. I'll teach you how to do
all of this later on. This is just to
show you a concept. I'll go to the Bevel tool. I'll click Edge. And I will drag this gizmo
to bevel that corner. This is what beveling does. It flattens out the corner and leaves a 45 degree
face there instead. Now, if I go out of edit mode, I press tab, and
now in object mode, I move the whole object around. This is where we've done
all our work up until now. And let's say I scale it on the blue axis just up
and down. I scale it up. This is no longer 45
degrees because, you know, I scaled it, and now I go back into edit
mode. I press tab. I select this corner
and I bevel that. It no longer bevels
at a 45 degree angle. It actually bevels at
the same angle this is. And why is this? The reason is when I scaled it
out in object mode, I didn't actually change
the position of each point. I didn't just told the program, whatever shape the object is in, stretch it out across
the top to bottom axis. It's as if you
print a design onto a T shirt and you stretch
out the T shirt, right? You haven't changed the design. You could go back
into the computer. You could change the design,
print it on a new T shirt, and stretch it out
just the same, and now you will have
a stretched version of your design. That is
what's happening here. So, in fact, what I did just do is I made a 45 degree
cut on this edge, but then it stretched
out right afterwards. And we can see that
that's happening here in the object tab in the
properties panel. Here you can see all the
transforms of the objects. It has no changes on location, no change in rotation, but in scale, we have a one, a one, and a 2.159. That's the z axis that's
up and down, right? That's what I changed. So
if I drag this further, you'll see it
stretches out further. And if I pull it back down, I can click it and type one
so that they're all one. Now we're back to a cubic shape, and that second cut I made is, in fact, 45 degrees.
It always was. I always did a 45
degree angle cut, but the shape of the object
was stretched afterwards. And don't worry if none
of this makes sense. It's totally confusing. Only thing you really have to know is that when you work in edit mode on an object that is stretched out differently
on different axes, things may start to behave
a little bit weird. If you have scaled it out
on just the top axis and then you go into edit mode
and you try to make a bevel, for instance, it won't be 45 degrees like
you think it will. But let's say you have made a shape that you've
stretched out like this, you feel really bad now, but you didn't remember you made a mistake and you're like, I hope Robin doesn't see this. What can you do? Well, there is something you can do
before I find out. I'll put the object down here in the corner so that you can see it right next to its scale. You'll see the scale is now one, one and about 2.5. The object is stretched out,
so that's what we can see. If I go to object, apply scale. This is when I'll
click, but I'll move the camera down there so you
can see what's happening. Pay attention to the shape of the object and its scale
values when I click this. Ready? The shape of the
object didn't change, but its scale did. It now has a uniform scale. So what happened now was we applied the scale
to the object. It maintains its shape, but the scale is uniform. So now this is the
new default shape. And if I go into edit mode
and I bevel any corner, it'll do so at a 45 degree
angle exactly as expected. So when you're in doubt, when things start
to behave weirdly, go to object, apply scale.
11. Mesh Selection: Selecting things in Edit mode
can be a little bit tricky. So let's go into Edit
mode by either clicking tab or this button here
and go down to Edit mode. And to start, let's do
something that I know will excite you to no
end, some glossary. This is a vertex or a point. This is an edge, and this is a face or a polygon. I'm really starting to
wish I didn't write this out by hand and just
chose a font instead. I typically switch a bit
between the terminology. I might call it a vertet.
I might call it a point. Now you know what it means,
and we can interface with each type up here with the three buttons
next to edit mode. This first one
corresponds to vertices. If we click that, and
now we can select different points or vertices and we can say move
them around separately. Second one is for edges. When I click that, now
we can select edges and move those around moving
two vertices at a time. We can not only move it, but we can also say rotate it. And scale it. Don't worry about non uniform scaling when
we're in edit mode. If you'll remember the scaling
issues from last time, don't worry about scaling
when we are in edit mode. Third one, that's
the phase selection. Now we can select whole
faces and edit those. If you want to add
to your selection, you can hold down
the Shift key on your keyboard and click another
face, that'll add them. And if you click one
that's already selected, that will deselect it. One kind of confusing thing
if I go to the top tool here, which is the box select tool, let's say I want to select
all four top vertices. I view it like this,
I drag a box over it, and you'd think that it
selects all of them, but the back one isn't selected because it wasn't visible. Blender only selects points
that are visible to you. Meaning, if you want
to select things that are on the backside
of your object, you need to go into Xray mode, which is one of the
view modes up here, the leftmost ball,
which is wireframe. You click that, now you can
see through your object. And if you now drag that box, it'll select the
back one as well. So remember, these are the fundamental building
blocks of your object. You cannot make changes on a
smaller scale than a vertex. You cannot take a point
inside the middle of this face and drag it out
because there's nothing there. The face must always just be a face edge must always
be a straight edge. So if we want to make changes that are smaller than a face, then we need to add more
vertices to the object. And that's the
start of modeling, which we will start
in the next video.
12. What Is Modeling?: Come to probably the
most important part of the course, and
that is modeling. Modeling is making
three D shapes, and it's beyond the
things you find in the ad menu like the
cube and the cylinder. It is adding more
details to an object, making your own custom
objects, you can say. So in the next few videos, we'll be modeling house, and by the end of it,
you'll be able to model most objects for real. So first off, we have
to go into edit mode, which is up here where
it now says object mode, and we can go down to Edit mode, or we can press
the shortcut tab. When we're in edit
mode, the toolbar expands to show us all
the modeling tools. And in fact, on my screen, the toolbar even goes
outside of the screen. So if yours does that, too, just move your cursor
to the edge of that window and
drag to resize it, and you'll get two
columns like this. Now, these are the most
common tools for modeling. They're not the only
tools in blender, but if you know how
to use these tools, you can model 98% of all models. Like, these are what
you need, basically. And in fact, we'll
even skip over some because not all of
them are that important.
13. Extrude Tool: Let's just start at the start with the extrude region tool. So extrude region
works best with faces. Now, remember, we have
different selection modes. Up here, we have vertices, which are the corner points we have edges which are lines connecting
the corner points, and then we have the faces, which consist of four
lines making up a plane. And when we have the
extrude region tool selected, we get this. It's called a Gizmo. It's a big plus sign. And if we click that and drag it, that drags out the face. But crucially, this is different
from moving it because it leaves the original geometry from the cube going across here. Hadi, let's just press Control
or Command Z to undo that. Had I used the move
tool and moved it over, we would not have that line
going through the mesh. So when you use extrude, you add detail to the mesh. And that's important because if we're going to make a house, then we need to pull
up in the middle. So I will go to Edge select
mode to select this edge that I've made and use the move
tool to move that up. Now I have a house shape. And if I had moved the
face to begin with, I wouldn't have that mesh
detail to work with. This is what's crucial
to understand about meshes in three D. There is
nothing for me here to click. I can move the whole face, but I cannot split it
in two unless I have a line going there.
Let's undo that. Extrude this face, press
the edge select mode, the move tool and click
this edge and move it up. That gives me the base
of a house shape.
14. Inset Tool: Let's add a window
to this house. When I want to add a window, I face the same challenge
as with the roof. If I go to the face select
mode, I click this face, and I want to say
extrude it inward, I have to do the
whole face at a time. And yes, the Extrude tool does work inward on a mesh as well. I have to do the whole wall. I guess that's common
in modern architecture, but this is a classic house, so I want to do a little
detail in the middle. And that's where the next
tool inset comes in. I click that, which gives
me a yellow circle. That's the gizmo for this tool. And if I click it and I drag, that moves the
pace in on itself, and it creates a little pace in the middle of the larger phase. Not only that, but it connects every corner to the
outside corners. Now, in time, you'll get a sense for why
blender does this. To summarize it, every
point has to be connected to another point using a
line and using a face. And so had we just had
floating points in here, that would be an incomprehensible
mesh for blender. And that's why it added
these corner lines for us as well. Now, okay. I've inset this face. I released it a
little bit too early, so my window is a
little bit too big. But remember, whenever you use a tool or a
function in blender, you get a little menu
down in the corner, which lets you refine
what you just did. So if I pop that open, I can change all the
settings for that inset, and it does have quite
a lot of settings, and you'll be using
these later in modeling. But for now, let me just change the thickness by
dragging this liner, and that lets me redo
the size of the window. Let's shrink it down
to a more window size, and then I'll collapse
the menu so I don't obstruct my shortcuts. Okay, the window
has a weird shape. It has the shape of the wall, so I need to move
this point downward. To get to move only a point, I can't do it in
face select mode. I can't even do it
in edge select mode because that would require
me to move the whole edge, but I can't do it in
vertex select mode. So I'll click vertices. I'll click that corner and I can move it
down individually. And now now that I have a
nice shape for my window, I can extrude this face inward
to get thickness to it. So we'll go to
phase select mode, select the face in the middle
and using the extrude tool, I'll extrude it in a little bit. Nice. And I can use the same technique to
make, say a chimney. We can go up here, select
this face and inset it. To a chimney size. And
then extrude that. Now, it does extrude diagonally, making the house look like
it's from Alice in Wonderland. Well, I'm in a
boring mood today, so I want a more
realistic chimney. If something like this
happens, then remember, you can use the tool to add
geometry without moving it. Let's undo this.
Let's drag it up, open the menu, and look at
what the options are here. I can, in fact, reset
all the movement axes. If I take this bottom
one, I set it to zero, and that moves back down
to where it started, but there is still that
extra geometry there. It is extruded. But imagine it was extruded and
then moved back, so it's perfectly overlapping
with where it started. Well, now I can go to the move tool and
move it straight up. And that gives me a little more control over where it goes. I can also flatten this top. It's worth actually
trying to figure out yourself how you would
flatten this out. What would you do? There are
a couple of ways, right? You could go into
Edge select mode, press the bottom or the top one, and then move it so it's flat. That's perfectly reasonable. It would be in hard to get it right at that point where
it's level, so maybe not. Maybe you would instead
use the rotate tool. You'd go into face select mode, click the middle face, and then rotate
it, so it's flat. But now it's very subtle, but you may have seen
the whole chimney kind of expanding at the top. When I did that, it changes
the thickness at the top, which is, again, not
entirely correct. So in fact, in this case, I would use the scale tool. I would scale this face
alone down on the blue axis, which flattens it,
and I'll have to refine that in the
settings below. So the scale of one
means do nothing. So the X and Y are
both on one and on Z, I want a scale of zero, which makes it completely flat. And I can keep refining
this chimney by, say in setting it a little bit, give it thickness,
and then extrude that metal down. Nice.
15. Bevel Tool: The next tool is bevel. Bevel is the example I
used in a previous video. It cuts a corner
and makes it flat. So if I go up to my
edge select mode so that I can click the
corners around my roof, I'll click that giving
me this stick gizmo. And when I pull that
out, that flattens it. It flattens that corner out. The only thing I'd be
wary of when using the bevel tool is how many edges you bevel at the same time. All of these tools work even if you have
more elements selected. If I undo that, I can
select this edge, this edge, this edge, and the back edges, and I can bevel everything
at the same time. Had I done them one at a
time, let's undo that. Had I done this first, and then this you see, I get a strange looking
corner over here. So this is something to pay attention to when
you're beveling. Oftentimes, you'll want to bevel large sections at a time. So let's do the whole
roof in one foul bevel.
16. Loop Cut and Slide Tools: Next let's add a door because a door poses another
new challenge, I know. What a coincidence. The house makes me have to use all the tools that I want
to teach you in this video. Let's try to do the same
thing as with the window, just so I can show you that
it's not going to work. I'll click this
pace, I'll inset it, and then you might
think, Okay, well, maybe I can just
move this down to the ground to be more like
a door. I'll move it down. But once this, this little face goes past its
containing larger pace, it starts to bug out. This is not an acceptable mesh. This will confuse blender to
no end because, in a way, this pace is within
this other pace, but in this area, it's outside. This is no Bueno, not allowed. Don't move things outside.
They're containing faces. And don't worry about moving
it in and out like this. It'll still connect correctly
to everything else. This is what's not allowed. Okay, so let's undo everything. What am I trying to do here? I'm trying to make a
shape that's like this. I need to add a line
that goes like this. I need to add a line
that goes like this, and I need to add a line
that goes like that. And for that, the
next tool is great. This is the loop cut. When I click that and
move around my mesh, Blender will try to draw
lines around my object. That's when I hover
over another edge. It'll kind of draw a line going across that edge and all
the way around the model, if I click now, that edge is now cut into the mesh and I have more
detail to work with. If I like what I just did, then I can go to the move tool, select only these
top faces by holding Shift and clicking each
one and moving them up. And now I can change the
profile of my roof, right? Well, in this particular case, I just undid that with
Controller Command Z. I can add a loop cut going across
the whole house here. This is that top
line on my door. It's skewed, which is not great and can be fixed by
scaling on zero again. Remember, if I go
to the scale tool, I can kind of
flatten everything. Let's go into wireframe view, so I can look through
the whole house and see that the loop is jagged because it's
trying to stay in the middle of every
single line going across. But if I scale it
on the blue axis, I can either increase
that jaggedness or decrease it by
going close to zero. And it's hard to get exactly
zero by using the Gizmo. So I'll go down to the menu and type in zero
manually on the z. That completely
flattens out that line, allowing me to move it up and down where I feel like the
top of my door should be. Now I can start adding more loop cuts going
across like this way. So I'll click here to
add one vertical loop, and let's move that over. But oh, no, I start breaking everything I've already
made on my model. Can I move this line over
without breaking everything? Uh huh. That's the next
tool I want to show you. In fact, I'll skip
over a few for now and go down
here to Edge slide. Edge slide lets me move edges without changing the
shape of my object. When I click the
gizmo and I drag it, you'll see the edge moves across the faces on
which it's attached. So I'm not moving the points farther than they can really go, and I can move them
over to the side here. We can go back to
the loop cut tool and another loop going here. And in fact, I think this is in the right spot,
but if it's not, I can go back to
the Edge slide tool and move it to where I want it. And now I have the detail
necessary to make a door. I'll go back to Face select
mode, and you know what? You'll go up here 1 million
times while modeling. So it pays to learn the shortcuts for
these selection modes. And those are simply
one, two, and three. That cycles through them. I'll press three for
face selections. Go to my Extrude Region tool, click on the door and using
that extrude Region tool, I'll move it in a little bit. That's it for making a
door with a loop cut tool.
17. Knife Tool: Okay, let's get
weird. The next tool I want to show you is the
knife tool, this one. The knife tool is similar
to the loop cut tool, except it doesn't
constrain you at all. The loop cut tool goes all the way through your
model no matter what, but the knife tool lets you cut anywhere you want.
You can cut from here. To here to here to here
and crossing itself. And you can really start
to screw up your mesh. When you're done,
by the way, you press Return. How
do I know that? Well, when you have
a tool active, you can see all the shortcuts you can press to change how it works down at the very
bottom of the program. You'll see left mouse is cut
over there to the right. You have stop with right click. Some of these can be
handy at some points, but you'll also see
return to confirm. And now I have a bunch of
ugly lines going across my house if I want to make
some weird modern art. But in fact, I just want
to use it to make a heart. So let's draw a heart
here on the roof. Remember, there
are no bent lines in three D. Everything
is straight. So if you want to add
the illusion of curves, you're going to have to
add a bunch of points. So I'm just clicking
for every single point. Trying to make I think
this is probably the most beautiful heart
I've ever drawn in three D. And when I'm done,
I'll press Return. Again, it added a couple of lines going across
to the edges here. That's just because
Blender has to do that because it can't have a floating face inside another face. And now I can go
to Face Sex mode, select this new face
that I've made, and that is a heart
shape and extrude it. Gorgeous. But Uh oh, I forgot I wanted the
heart to go inwards, not outwards. How can I fix it? Everyone viewing asks, Well, if you go to the move tool, you can start to move it,
but it's a little tricky. Like you can move it downward, and now it's skewed a little
bit, so I'll move it over. But how do I know
it's exactly right? Well you can know if you use the shrink slash fatten Tool. Shrink and fatten does what it says on the tin.
It fattens things up. If I use it on my whole house, let me just press
A on my keyboard, which is the same as going
to Select All, selects all. And I drag this gizmo. Well, I can fatten up my
house or I can shrink it, which makes it look
very strange, indeed. It's doing is it's moving every single face along
its own facing axis. What does that mean?
Well, for the heart, it is facing this way, the exact way that the
stick is pointing. When I drag the stick, it'll move that heart
across that exact axis, allowing me to move it into
the house instead of outward. Had I done it to this face, then it would move straight
out from the ceiling. This face moves straight to
the right or to the left, depending on if you
shrink or flatten.
18. Shear Tool: H, the final tool I want to
show you is the shear tool. The Shar tool has the weirdest
looking gizmo of them all. Let's just prepare
to use it here. I'll go to my move
tool and select all these back faces by holding Shift while selecting each face. I'll move it out a little bit. And I'll show you that
what the shear tool does is you can kind of
skew the whole thing. So if I press this little
line and I drag it to the left, That slopes it. And you can skew in any
which direction if you want to skew it to the
side like this. It can make some weird results. Again, if I select
everything by pressing A, I can make Alice in
Wonderland house by what say skewing it a bit to
the left or the right. Skewing it over. You can make some very strange
shapes for this.
19. Modeling Shortcuts: So these are the main
modeling tools in blender. These are the ones
you'll be going back to over and over and over again, and it's fine not to remember what all of
them do right away. I'm kind of just shoving all this information into
your brain at the same time. And, you know, I
know it's a lot. I know, but we will be going back to these
over and over again. And I think that when
you watch me use them, your brain kind of
implicitly learns how to think about
moving three D meshes, like how to add detail
where you need it and how these tools can be used to
make the shapes that you want. Just kind of want to plant the seed of each
tool in your brain, and we'll be coming back to
these over and over again. And so mostly as an excuse
to repeat each one, I want to show you the
shortcut for them. It really does help to learn the shortcut for each tool if you're going to
be using them a lot. And as a quick reminder, there is a shortcut sheet sheet in the class exercise files, which I would recommend you
print out, have in your desk. And if you just get that
into your muscle memory, it'll be so much
quicker at modeling. So first, selection modes, the three buttons up here, those are one, two, three. And remember, everything I press shows up on the
bottom left there. One, lets you select
individual points. Two, lets you select edges
that connect the points. Three, lets you select faces. To extrude something,
the shortcut for that is E on the keyboard. When you press E,
the new extrusion will be attached to your cursor. So when I move it, I'm not holding anything down.
I'm just moving it. I'll stick to my cursor and I can confirm my movement
by left clicking. Inset, that is I I I press I and I move my cursor,
that'll inset it. I can left click
to confirm that. Beveling. Let's add some
details to this chimney. I'll go to Edge select
mode by pressing two. I'll select each
corner going around, and I'll make it into
a Sci Fi chimney. Beveling is Control or
Command B, B for Bravo. And I'm moving my
cursor outward, and that bevels the corners. Left click to confirm it. Loop cuts, those are
Control or Command R, I think, R for Ring. That's my best guess. Hey, notice that it's not going across the whole mesh
when I have it here. It does so some places, but not all. What gives? I'll get back to that
in just a second. But first, let's just
click there, I guess. And now Blender actually moves automatically to the
edge slide tool. That is to speed
up your workflow. So if I move my cursor, that new edge
slides up and down. Usually, though, I want to
cut right in the middle, so I will cancel the
sliding with right click. So, okay, looking at my house, you'll see that almost all
the faces have four corners. This face here has
one, two, three, four. This face here has four corners. This one, four corners, four corners, four corners. A couple have fewer.
These have three. All these here have
three corners. And over here, we have some
monster faces which have, I don't know how many corners. Like, there's one here,
there's one here. Like 20. It's got to
be like 20 corners. These faces have
special names because we are scared of them and
we want to know our enemy. So these are simply
known as triangles. The four sided faces,
those are polygons. And any face that has
more than four sides, that is called an Ngon. I'm sorry about
the jargon, okay? I didn't make up these names. An engon that is
our worst enemy. Very, very rarely want to see an gon on your mesh because
they are hard to work with. Why is it called an gon? It basically comes from algebra, where N is the substitute
of any number, right? So it's basically
whatever number gone. And that is gone as in pentagon, hexagon, meaning a two D shape. An engon that's a face
with more than four sides, and they make it hard to model. Because if I use the loop
cut tool with Control R, Blender knows to draw a line through every single
four sided polygon, but it stops when it
comes to an engon. It has no idea what to do. And with triangles,
similar things happen. If I want to cut an edge loop through
this triangle, it also, it doesn't quite work
like in this area, the mesh is a lot harder
to work with now. But like, triangles
are kind of bad, but you can't
completely avoid them. Sometimes you'll just get them. But engons stay away from
engons as much as you can.
20. Deleting and Refining Mesh: Let's talk about deleting stuff. Deleting stuff is
something where I feel like it should
be easier than it really is because you think you just press delete
on the keyboard, right? And you can. Let me show you. I go into Edit mode
by pressing Tab, and now I can edit this
house that I made in a previous video and say, I no longer want the heart. The heart is a bit too
much to have on a house. And so, okay, I go to my vertex selection mode and I just drag a box
around that heart. Remember, it doesn't select anything that is behind a wall, so I have to go and check that. Oh, I didn't quite
see this vertex, I'll hold down shift
and press that. And now I have every
vertex selected, let's just press Delete, eh? Okay, it brings up a menu. It asks, What do
I want to delete? You might think this
is a bit redundant since I have vertices selected, and I guess it is, but
let's click vertices. Okay. I have a hole
in my roof now. Now, sometimes you want a hole. Maybe you want a hole
for the window, yeah. So I'll go to Face select. Hold Shift while selecting all
these faces, press delete. And in this case,
let's delete faces. Okay, that's a hole
into the house, which is fine, but I don't
want a hole in the roof. So how do I reconnect this? Do I build this up again? As in all programs, there are a myriad
of ways to do this, but the easiest one
is to bridge loops. Here's a quick example just on the side to explain
what I'm talking about. Think of it like
making a bridge. If I go to my edge
selection mode and I press this edge
and I press this edge, I just want to make a
bridge between them. And the bridge loop
function is not found here. It's under the extra tools, which you find across
the top bar here. They are the mesh vertex, edge and face menus. These contain all
the modeling tools that you can ever want. And this one, since
we're working with edges at the moment,
is under edge. And it's the third one from
the top bridge edge loops. When I click that,
they're bridged. It creates a new
face between them, and this is what we want
to do with our house. So going back here, which
edges do we want to bridge? Select any edges that are on the opposite
sides of each other. So either this and
this or this and this. Go up to edge mode and bridge edge loops
and filters in the face. You can also kind of skip
this step if you delete the right way because
there is another way of deleting that I'll
show you by deleting. Let's see what do
we want to delete? Let's delete the chimney. I will again go to vertex selection and
drag a box over that. Doesn't select everything.
And instead of going around and
manually doing that, I'll go into Wireframe view, and I'll select it
using wireframe. And since I can now
see through it, I can also select through it. So back in solid mode, when I press Delete,
I get another option. I don't have to delete,
I can dissolve. When I dissolve vertices, it'll try to delete
them and then reconnect automatically.
Let's click that. Fantastic. It did it. It deleted everything
I had selected, and then it filled in the face. But there is something
terribly, terribly wrong here. Do you see it? We
have created an NG. Don't believe me,
This face here, how many points does it have? One, two, three, four, five, six, seven, eight. Terrible. Okay, but
don't worry about it. This is easily fixed
using the knife tool. I'll go over here to knife, and all we need to
do is to see, Oh, I have a line going
straight across here, and then it terminates, and then it kind of continues
on the other side. Let's just connect that. Let's click this point, drag it over, and click
this point as well. Press Return to confirm that
and do the same down here. Click, click Confirm. Now I've turned my endgon
into 34 sided pass. This is the kind
of mesh management that you have to get used
to when working in three D, especially if you
want to keep working on this because the engon again, it's going to make
stuff difficult.
21. Modeling Circular Objects: Not really obvious how
you model round things. Like, you now know how to make, cubic shapes and stuff, but I want to equip you to be able to model around
bottle because, Shack surprise
you're going to need it quite soon for a project. Let's just look at some of
the challenges that will arise when you want to
model a round thing. The first one is that the cube is not a good starting point. You can start with a cube. You can start with
anything, really, but you'll save time by
starting with an object that kind of looks like the
thing that you want to make. So let's just delete everything
that's here already, and I'll press Shift A
to add something new. And under the mesh menu, I'll choose a cylinder, which is much
closer to a bottle. Now let's go into edit
mode by pressing Tab. And one thing that's pretty common with bottles is
that at the bottom, they have a little divot
that goes up like this. Let's see how we
could make that. Well, I'll press three on my keyboard to go into
phase selection mode. Also up here, I'll select
the bottommost face. And do you remember
what the tool was for adding details
within a phase? It's the Inset tool. So if I expand this here, you'll find the Inset
tool right here. Let's just inset this
to about halfway. That gives us another phase
within the face, right? We can the move tool to
move it up a little bit. And what's wrong here? Well, it's very sharp. And how do we add roundness to sharp corners?
What tool is that? That's the bevel tool,
this one here, bevel. So let's start by beveling. Yeah, let's start by beveling
this sharp corner here. And so we have to go into
Edge select mode to select the edge and hold down
Shift to select the edges. Now, this is tedious going around like this to
select all the edges. There are a couple of
other ways to do it. One of them that you
might think of is to go into wireframe
view like here, and then go into
point selection mode. And drag a box over
all the bottom vertices and then go
into Edge select mode. That will indeed
select all of them. Another way to do
it is to hold down Alt or option while
clicking on an edge. That will select what's
called an edge loop. And a loop is just this. It's like a line of edges
going around. That's the loop. So now we can bevel this And maybe we'll want
to add more segments, and that's in this
little menu here, increase the segment
amount to make it smoother and then
close that again. That looks more like the
bottom of a real bottle, and we can do the
same with this. In fact, if I go into
face select mode, select the middle face, I can bevel this and it will
bevel everything around it. So I can increase
this until it fills almost the entire bottom of the bottle and add a couple
of segments to that, which will round off
the entire bottom. If I go into X ray view, you can see this is now the
shape of the underside. Another common thing is you
will want to add a profile, maybe a little indent
for holding it properly. And what you can
do then is you can add more extrusions, extrude, extrude and using, again, the loop select mode, now we want to select a loop
of faces, all of these here. Again, we can go
into wireframe view. And just make sure that
we're right on the level. We can even click one
of the axes here on the track ball to go into a straight side view and select
all of these faces here. Go back into solid mode, and how do we move all these inwards to
make a little indent? Because if you try to move
them in any direction, you can make it like an S shape, which you might want to
do. It's pretty cool. It's a cool effect.
Control Z to undo that. But how do you move
all of them inwards? You do that by scaling, which might seem a
little counterintuitive, but I think you'll understand
it when you see it. If I scale all of these inwards
now towards the center, that creates the
indent that we want. We can also scale it outwards
to make like a bulge. What if we want a
sharper indent? You might want to have a solid little seam line or
something going around. Let's add that
here. Well, first, we need to add a loop
that we can use, and we add loops with
the loop cut tool. Can click here, and then here's a really clever trick for just adding thickness
to this loop. We can now go to bevel, and if we bevel this
loop, watch this. It's like it expands
the loop outwards. So now we've added a ring of
faces, super handy trick. And what I want to do
with these is I want to extrude them inwards. Or you can extrude them outward. We go to extrude
region and we drag it, but it doesn't work. These extrude this way, these extrude the same way. And again, we get
the weird S shape, but now much sharper.
Let's undo that. Control or command Z. There are a couple of ways around this. One that you might
think of is to extrude, and then in the settings, just extrude them by zero. So now they are extruded, but they haven't moved at all. So we just added geometry that's now in the same space
as it already was, and we can go to scale. And if we scale those
extruded faces inwards, now we have this sharp
seam that we wanted. However, this is such
a common thing to do that there already is a tool designed for it.
So let's undo this. And you'll see the extrude tool has a little arrow
on the bottom right, and that signifies that there are variations of this tool. And if we hold
down on this tool, we get other ways of extruding. For example, we have
extrude individual, right? If we do extrude individual, they will not be connected, and we get this kind
of gear like shape, which is pretty cool. The one we want to use now is called extrude long normals. Wait, what does that mean? Extrude along normals. What's normal about this? Well, I am so sorry to
have to tell you this, but normal in three D doesn't have the normal
meaning of normal. In three D, normal, it means outward, which
is a it's a strange word. Don't ask me why they use
that word to mean outward. But it's a useful
concept in three D. We will come back to it later in the course as well when
we start shading glass. Normals are very important
to understand in three D, and they mean outwards
from the mesh. So whatever direction
is outward. And if we use this extrude along normals, meaning
extrude outward, and we drag, every
face is going to look at what direction am I
facing and extrude that way. So those are some tricks
for modeling round things. I think you're equipped now
to start modeling bottles. To summarize, we start
with a cylinder. We used in setting to add detail on the top and
bottom flat faces. We learned to select loops by holding down Alt and
clicking on something, either clicking on
an edge or a face. Remember to click on the edge that you
want along the loop. Don't I click this edge, then it's going to select a
loop in the other direction, and we learned to extrude a long normal to extrude everything
outward or inward.
22. Class Project 02 - Modeling the Bottle: Alright, class project
to the bottle. This is my favorite one. It's like the core
project for this course. Like, this project here, this is the reason that all the brands are
bottle related. So we're all making a bottle, and it's important not
to skip this one because later projects will
build on this one. So it's a core project.
Let's read it. You've been asked to design a custom bottle for the brand. Your job is to model
the bottle and its cap, choosing a distinct style that
fits the brand's identity. Remember that on the
random project generator, you got a product and you got a brand identity,
a style for it. Focus on exploring shapes to make a unique bottle
for your brand. And I used the word bottle, but it doesn't technically
have to be a bottle. Like, you can make a
soda can if you want, and it doesn't have to be glass, although a glass bottle
can be super beautiful, but you can also make plastic. You can make it out of metal. Feel free to experiment.
Make something weird. If you want, you can make it
look like laundry detergent. Although, now that I said that, everyone's going to do
it, so don't do that. So the requirements are model, a bottle, and it's cap. Again, you don't have to
have a cap specifically. I really put it there
just to remind you to put a cap on it if
it should have one, but it can be a tab, it can be a cork, whatever
fits your container of choice. And keep the polygon
count reasonably low. What do I mean by
reasonably low? I mean something like this. Try not to make your polygons
much smaller than this. The rule is as few
polygons as you can get away with and still
define the shape. And you will thank me for this because it's
much easier to work with a model that has few polygons than
one that has many. It's not a requirement, but
it's a good idea to go online and look for some reference
before you start modeling. I mean, just looking up
bottles for similar products, looking up reference for
the style of the brand. It really helps when
you're in there making concrete shapes to have
some reference on the side. The deliverables, screenshot
your finished model both in solid view
and wireframe view. In here is wireframe view. I pressed wireframe and I
turned off this toggle X ray. When X ray is on, you can
see through the model and it's kind of
hard to evaluate how big the polygons are. If you turn that off, then you can show off your hard work, and you can show
us this is called the edge flow of the object. So screenshot this and put
it in the project section on this website and also go to Solid View and screenshot this. And don't forget to show
it in the best light. You can right click and press Shade Auto smooth and that'll
smooth out your polygons. You're very welcome
to post it on social media and tag at
bring your own laptop on Instagram or post it
on the Facebook group here or the LinkedIn
group here. That's funny. It brings up a little picture
of Dan looking macho. In the next video, I'll do
this project for myself, but I do encourage you to model your bottle
before watching that. I've taken this kind
of course myself, and I promise if you do
the thing yourself first, you'll have a much
better appreciation of all the little
things that I do. Like, when you've stumbled over something that is hard to solve, you will really remember it once you see the
solution to it. And it may spark new ideas
where you can go back and do the project over again
and do an even better job. So I'm really looking forward to seeing
what you guys make. And now I'm going
to go make my own. I have a killer idea for it. I think you're going to like it. I'll see you in the next video.
23. Completed - Class Project 02 - Modeling the Base: I went to the Random
Project generator, I got an industrial and
edgy chili oil brand. So what I did is I went online and I looked
up some oil bottles, and the one on the right here does stand out a little
bit because I thought, Hey, it's industrial
and it's kind of edgy. So wouldn't it be fun
to put the chili oil in something resembling this
kind of mechanic oil can? To me, it fits really well with the chili oil
because it feels like, oh, it's kind of too dangerous
to put in a regular can. It needs to be this
industrial looking thing. And I also really like the
shapes of these other ones, and I'll pull some
inspiration from those as I model and texture
my bottle as well. It's a good idea to find references like this
that inspire you. So I'll move those over
to the side and I can still see them and they'll
inform my modeling. So let's start with
a clean canvas. Let's just select everything and press delete to delete
everything and Shift A, let's start off with a cylinder. Now, we have to make a
decision at the start here. How many polygons do we
need around this cylinder? Remember, if I pop
open this menu here, right after I have
added the cylinder, I can add more vertices
or fewer so let's do 64. Let's press tab right
away to get into edit mode and start
defining the shape. So looking at my reference, looking at this oil
can on the right, this is my main inspiration. So let's try to replicate
these kinds of proportions. So I'll pop over to the
tool bar and move it out a little bit so I can
see everything all at once and go to
the scale tool. Let's scale everything
out on the blue plane, meaning in both the
horizontal directions until I get some proportions
that I'm happy with. Something like this. And let's start at the bottom
and work our way up. So at the bottom,
I want there to be a little divot that
looks like this. Because I feel like all
bottles kind of have this. I don't know why.
I think probably it's so that they
overcompensate, so it absolutely doesn't go like this and
starts wobbling. But there's probably
some international regulation that
I'm not aware of. Let's do an inset, and I'll inset these
faces according to the international non
wobble regulation law to 0.64 meters, which is what the UN
specifies and move it up. When I move it up, it's
a good idea to go into wireframe view so that I can see exactly how far up it goes. I feel like something like that, maybe even shrink it
down a little bit. Yeah, that's good. Remember, you will see this because
this will be glass. So you have to or I making
something in glass, have to pay attention to how
it looks inside as well. So I'll round off this
edge here by going to Edge select mode
and Alt or Option clicking on this ring when
selects the whole thing and going to bevel and
pulling down to bevel this. And again, I'll pop up this
little menu on the left to specify exactly how much
and how many segments I want. So let's click on
segments to add a couple. How many do I need?
Let's stick to as few as possible. Probably
something like this. And I'll drag this slider
to adjust the width. And if I hold down shift, then it'll be even slower, so it's easier to really refine. And I feel like the
size of the bevels really helps define how
big the glass looks. Do you know what I'm saying?
Because if you're making, like, tiny little bottles, the bevels will be huge compared to the bottle and
vice versa, right? So it's a good idea to really get in your mind. How
big is this thing? And I feel like in my mind, the size of the
bottle is something like this makes sense. Then let's do the same
thing with the interface. Let's select faces, select
this and bevel it all the way to basically just round out the whole thing by
adding more segments, and you can even see
in Y frame view. When I had nothing,
it was just sharp. And then when I start
adding segments, it rounds it off. Great. That's the bottom taken care of, let's also add an
inset on the top. Where the cap will
be in my case and move that up a little bit
to make a little trapeze. That's not a trapeze. I really like looking on this
reference how flat it is. That looks really
industrial to me. So let's keep it quite flat, although it will hinder pouring. And let's extrude that up again and then round
out pressing two to select edges and alt or option clicking these and
then beveling that. Again, adding a
couple of segments. Let's see. Let's keep it quite
similar to this down here. Something like this
and do the same here. Maybe a little bit more. I still want it to look
like glass, not metal. Good. One thing I really like in my reference is this
lip going around here. This looks industrial to me. Let's try to replicate that. I need more detail here, going around here. I'll
have to add a loop. I do that with the
loop cut tool, move over here until
I get a yellow and click and then I can
move that up and down. In fact, it's probably better to slide it instead of moving these because while
in this case, it doesn't really
make a difference, sliding is a good habit
to get into to maintain the shape of your
bottle no matter what it looks like after
you've added the loop. The move that up here, and this is the
trick that I really like for adding stripe details. Beveling that on a flat plane
just gives a loop of faces. And I'll have to extrude those along their normal,
meaning outward. And then I can select this loop by holding Alter
option and clicking it. And then if I additionally
hold down Shift, so I'm holding down both
shift and Alt on my keyboard, I can add another loop to it, let those go, move around, hold them down again,
and add these two loops, and now I can bevel them
all in one fell swoop. Make sure not to overdo it. Like, you can make these move past each other and really
break your mesh real fast. One way to stop
yourself from doing that is you can release, and in this menu, you
can press clamp overlap, and then it won't allow
you to go too far. So let's add a
couple of segments. And that looks good to me. Let's go out of Edit
mode by pressing Tab, and that's a good base.
24. Completed - Class Project 02 - Modeling the Cap: Now I do want to add a cap, and I want to do that
as a separate object. In three D, it's a
good idea to keep your objects separate if they would be separate
in real life. So the cap is
technically removable. So let's also make it a
separate object in here. Shift A at a new object, a new mesh, cylinder, keep it on 64, same number
of vertices as the base. Let's move that up here. Go into edit mode,
three to select pass, top one, and using
the move tool, I'll move it down until
the cap covers the glass, I'll take the bottom and move
that up a little bit, too. In fact, I'll press A
to select everything. And then using scale, I'll scale everything
inward a little bit, looking at it from below, holding down shift to do it more sensitively to define kind
of thickness of the cap. It's just a plastic capsule. Let's keep it fairly thin. Then remember, this
is going to be glass, so it's a good idea to work
on the inside as well. I'll have to add
more details here. Let's inset until the
cap meets the glass. Then looking at it
through wireframe mode, I can extrude that
upward, making it hollow. In fact, if I go up
to the outliner here, I can turn off the first
object that I made by clicking the little I and I can work on this alone and see that
it is, in fact, hollow. Let's turn that back
on for context, and I'll go back into
Edit mode by pressing tab and let's add the nozzle. I'll shrink this in add another phase in
the middle of it. And how big should
the nozzle be? My main reference for
that will be this. I want to kind of replicate
this kind of thing. So I can see that it does
taper in a little bit, but I want to see how
big is it at the base. And I think for mine,
that's equivalent to maybe something a
little bit bigger than this, maybe here. And then extrude it up. How far do I want
to go? How far? Let's scale it in a little bit, scale and not out like that, but in a tiny little bit to
give that oil bottle feeling. Let's make it longer. I feel
like it should be a bit longer. Yeah, like that. And this should also
have some thickness. So let's inset that. And how thick is plastic? That's an insane question to
ask how thick is plastic. Let's extrude that down as
well and look at it through wireframe mode and move the new phase all
the way down here. And in fact, this is a
very common challenge in three D that I'll show
you how to deal with. Like, for me, it doesn't really matter what
happens in here. This is going to be
opaque plastic anyway. But I want to show you
this because this is a challenge that you may
have faced in your model. And that is, let's say I have a hole here that I want
to connect to this hole. I want this to be well,
like the cap would be, I want this to be a
doughnut with a hole here going all the way
up. How do I do that? Well, first off, I need to
add a new phase inside this one and I want that to be the
same size as the one above, but it doesn't really
matter how big, but I'll go into wireframe mode so I can see a
little bit better, and then I'll inset this until it's more
or less the same size. Not exactly. This is fine. And then I'll delete this phase, pressing Delete and
then delete faces. I told you never to do
this, but it's fine. We're going to connect them
again in just a moment. Let's do the same with this
phase. I'll delete that too. Delete pass. Now I have two open loops. I have holding Alt to select this loop and holding Alt to
shift to select this loop. I have both these loops and
I want to connect them. Looking at it in wireframe mode, this is what it looks like
now. They're both open. And I can connect them
using bridge edge loops. Pressing that, that
connects them. And now, in fact, this
top loop is superfluous. It's not really doing
anything to define the shape, and I don't really need it. I I press delete on that and I decide to
dissolve those edges, dissolving means deleting and then reconnecting what's left. If I just delete edges, that'll leave a huge,
huge stinking hole. And if I press delete
and then dissolve edges, that'll reconnect
both sides of it. So now we have the hole going all the way
through and then reconnecting at the bottom. And I can start to
adjust the sizes now. So I press I want to alt or option click this loop
here and I can move it up using wireframe
mode to a good spot, somewhere around there and then do the same
thing without a loop. Something like this. And now let's add a little
bit of a handle. Everything feels so symmetrical. Like, everything here is
perfectly symmetrical, and I think it's really nice to add some
asymmetry to a design. So let's go here and select
a couple of faces here and pull out a little bit of a handle that will look
something like this. So what I'll need, I'll
need another loop. So we'll go in here
and add a loop right there and then
slide those upward. How thick do I want
this base to be? Something like
something like that. And then using Face select mode, I'll try to select
the middle ones. How do I know what
the middle ones are? Let's just try those two.
Are those in the middle? Well, let's click the Z
on this track ball here, and I can actually see everything
straight from the top. When I press wireframe now, I can see the X axis
running straight through here and I can see that I didn't actually select
the middle ones. I have to go one to the left. So these are the middle ones, and maybe I want one more
on each side like that. Let's extrude those out. And the end is now bent. It has the curve coming from
here, and I don't want that, so let's scale those down
on X, scale them down. And I want it to be
completely flat, not just almost completely flat. So let's go into this
menu and make sure that that scale is not
0.1, it's zero. But in this case,
I wanted to have a 45 degree angle
looking like this, and I can specify that I actually want an
offset of exactly one, which will give that
45 degree angle. And then I can extrude
let's extrude it out. And since I don't
want it to go out, I'll extrude it by zero
and just move it down. And then I can scale
that final phase on zero on the z axis. Make sure that's actually zero. That's the shape I
want. Let's move that down a little bit more. Maybe, I want you to be able to fit your finger under here. So maybe I'll go out of Edit mode just into
object mode and move the whole thing up a little
bit. Yeah, like that. Go into tab and I'll click on this edge
to select the whole loop, and I'll bevel this to
add a 45 degree angle. I feel like it's a bit
too thick, isn't it? Let's thin it up. I'll select
these faces and move those over here and maybe just select these edges and move those up. And these here should move over. That's better. And now with the general
shapes blocked out, I can start smoothing things. So the biggest candidates for
smoothing are going to be this loop and this
loop, for sure. So I'll bevel those
going quite far. Rounding it out quite
a bit, I feel like. Unless I want to keep that. Maybe I want to keep that
like 45 degree angle, maybe just a little bit,
something like that. And then smoothing
out the intersection between the handle and the rest of the cap,
that's going to be key. Like in three D, all edges
are completely sharp. In real life, no edges
are completely sharp, feel free to just
round out everything. That will make it
more realistic. Now let's select this loop
and this one and this one. No, not that, but this and just go over
everything, every corner. Everything needs to be beveled. A, let's just keep it going. Let's just go all the way
around like that, like that. All of this can be
beveled all at once. And finally, this one. I think that's all. And then bevel. Let's turn on clamp overlap so I don't make any mistakes
without seeing them. And then add a couple of
segments. Not too many. I feel like that's probably
enough. And I'll bevel this. The plastic can have a
little smaller bevels than the glass, I feel like. And let's bevel this and this. And the top as well.
The top should also be beveled.
Everything gets a bevel. And to finish it off,
a little bit of a cap. So I'll shift A, add
another cylinder. Remember, separate
object in real life means separate object in
three D. Move it up here, tab, and scale everything in. And how do I want to do this? Maybe actually, I'll go to this object again and I'll add a little bit
of a lip here too. This is a good candidate
for edge slide. If I now just start
moving this up, I start changing the
shape of the nozzle. But if I loop slide it, then it's going to
move along the edges. Up here, add a bit of a bevel, a little bit, extrude
it along normals. Select all these edges
to round them out. You can see I'm only
using the same few tools, all the same tools
over and over again. If you get used to these tools, this is what you use
to model everything. So let's go into this one again. Edit mode, scale it out. And move it up, so it's just resting on that
new lip that I made, and then move the top face down, so it covers everything.
That's a good cap. Inset the top. Move
it a little bit, give it a bit of a curve, and then do the same thing
with the bottom as we did earlier where I
select the bottom, I inset and then I extrude it in Xray mode to the point where it would cover the bottle and then start
rounding things out. Let's try a little
experiment with this. Just to make it more reminiscent
of this mechanic bottle, let's try and scooch this
tip over a little bit. I'll have to edit both
the cap and the Caps cap. Wait, what the right
terminology here? Like a nozzle on a cap. Let's select them both and press tab to
go into edit mode. Yes, you can edit multiple objects at the
same time and then go into wireframe vertex selection and select all the
vertices at the top. Now looking at it from
the perfect side, let's just click on let's see, click on the Y axis, and that'll view
everything from the side, and then I can move
everything over a little bit and then rotate it to
something along the same. Maybe hold down
control to snap it to some logical increments and then move to match that increment. No, that's a bit too much. Something like that. Then rotate it to align with that new angle. And let's see. Do I like that? I do. I do. I think that's hilarious. Okay, I'll finish it off
by selecting everything, right clicking, and
press shade Auto smooth. And this is my finished bottle.
25. What Are Render Engines?: It's time to level
up our rendering. Rendering, that's when
the computer takes all the lights and
the shadows into account and calculates
like a finished image. You can think of it like
taking a picture of your three D. And in our industry
in the three D industry, we have two main
technologies for doing this. One is used for video games. The other is used for movies. And in blender, we
get access to both. The one for video
games, that's called EV and the one used in movies,
that's called cycles. And these are known
as render engines. Now, IV is really fast. It can turn out about
20 images per second. EV is what we have used
so far in the course. When you've gone
to Render Image, click that, the image
appears instantly. But that's speed. That speed
comes at a cost, so watch. This is an image
rendered with IV. This is that same scene
rendered with cycles. You may not be able to tell exactly what the difference is, but somehow cycles just looks
a whole lot more realistic. That's because cycles is the
technology used in movies, and it is a more realistic way of calculating light and shadow. Not only is it more realistic, it's also easier to use. Like with EV, you
need all sorts of little tricks and hacks in order to make it
look halfway decent. Cycles just works. It calculates light
in a realistic way, no matter what you do, it'll always look pretty good. It looks good, and it's easier. What's the catch?
Cycles is slow. It is very, very slow, at least compared to EV. When you press, render image, you'll be presented
with this a noisy mess. Then gradually it
cleans up over minutes, sometimes hours, but
it is so worth it. For serious design work, I really want you
to understand this. Cycles is the only real option. That's why we will be switching
to cycles going forward. Rendering takes time. That's just a fact of the matter and something
we have to get used to. Unless you get a good computer. I'm sorry to say it, but this is the problem that
money can solve. If you are serious
about three D, then what you'll want
to get is a good GPU. You can find guides out there on what kind of GPU is
good for your system, but a GPU, that's the component
you want for rendering. I'll do my very best to tune all the projects
in the course in a way that anyone
can participate, no matter your system and
it's going to be fine. But just know if you are
on an older computer, then you're going to be
waiting longer for results. That's just part of the game. Don't let that stop you. I got into three D
roughly ten years ago, and that was on a computer that was slow even for the time. I'll never get those hours
back. You'll be fine.
26. Setting Up the Cycles Render Engine: Et's set up cycles
on your system. Turn on rendered view and
then go into this tab, the Render Properties tab. And at the very top, you'll see a drop down menu that says Render Engine EV and click
that and move down to cycles. Don't worry about workbench. They've just put that in
there to confuse you. Click cycles instead, and if
you are in rendered mode, you'll instantly see the image
turning grainy and weird. And when you move
around, you'll see the characteristic
noisy cycles render. One thing to note is that when you move to Shaded viewport, it'll still use the EV renderer
to show you the shader. So that will still
be nice and quick. But back in the rendered view, there are a couple of
things that we can do to make it faster. The main thing is to set
up the render device. It's going to get technical
for a little bit. I will simplify it as best ten, what I'm talking about is here. Under the cycles drop down, you have a device
and you can choose between CPU and GPU compute. These are basically two
components of your PC. You have a CPU and you
have a GPU, and the GPU, typically, is much faster at
this kind of calculation. Unless you have a really
bad GPU and an insane CPU, you'll want to go for GPU. But when I turn that on, it turns gray, and that is because I haven't set
up my rendering hardware. I haven't told Blender
what my GPU is, so it doesn't know
how to use it yet. But we can set that up
by going up to edit preferences and moving down to system and at the very top here, we have cycles render devices. And I have a bunch of options. You may have fewer options, and which one you choose depends on the hardware
that you have. And so on the screen,
I'll just put a list of what to choose depending
on your hardware. So you basically have to know
what company made your GPU. I have an Nvidia RTX card, so I click Optics. Then possibly you get a
little list of items here, and it's probably a
good idea to check all the checkboxes you have here to enable all your
devices for rendering. Like if you have multiple
GPUs, for example, then you can click all
of them, and in my case, it can even use the CPU
as well as the GPU. And in my case, you'll see that makes it render a
whole lot quicker. It's much faster at
resolving the image. Another thing that you can do. This is just a
little visual hack. It doesn't make
you render faster, but you can turn on AID noising, and you do that over here, right below where you
see the render engine, you have sample and then you have a viewport and a render. You can turn on denoising. For me, it's on by
default in rendering, but it's not on by default
under the viewport. But if I turn that on, you'll see the image turns
completely smooth. The noise is gone. That is not because it suddenly
rendered a lot quicker. There's still the noise there, but the denoiser tries to
remove it after the fact. And you'll see the effect of it a lot better if I turn back to CPU for a moment to slow down my rendering to make
it very grainy. And then maybe I'll just make a little bit more of
a complex scene. And you'll see in here for one, it takes a moment to
update each frame, making it a little laggy. And you may see that
the edges blur out a bit and they wash out kind of like they're
slightly liquid. And that's what
happens when it's very noisy and the AI denoiser
tries to fix it. So if I turn that off, this
is what it really looks like, and this is what the
denoiser has to work with. But it's doing a
very decent job. This kind of thing can sometimes smooth out fine detail
if you have that, which is why I
typically keep it off. Aesthetically, it can improve
your image quite a bit.
27. World Lighting: Alright, pop quiz, which
one of these cubes is reflective and
which one is mat? Don't think about
it for too long because it's almost
impossible to tell. There are no clues here to tell you which one is reflective
and which one is not until I add a third object.
I can add a monkey. And now suddenly, you can
see, you can see that the monkey is reflected in one
cube but not in the other. So what makes
something reflective? I'm almost embarrassed to ask, really, because it's
pretty obvious, and it is that it has something to reflect that shows up in it. But in this gray void
that we have in three D, there is nothing to reflect. And so we don't know that this is reflective, and
that's a problem. If we're making a product render that's supposed
to be reflective. We need something
for it to reflect. Have basically two
solutions to it. One is to build up things
around it for it to reflect. That's a lot of work, and there's a much simpler solution. We can take an image and wrap it around the world so
that wherever you look, there is an image
for it to reflect. That is called an HDRI. It stands for high
dynamic range image. Really only means that
it contains a lot of information both in the shadows and in the very highlights, meaning that it can
actually cast light. And you can get
this kind of image for free on plyhaven.com. Plyhaven has a bunch
of three D assets, and among them,
you can go up here to assets and choose HDRIs. Get this list of
weird looking images. They look this weird
because they are 360 degree images that we
can wrap around our scene. Let's go over here
to the filters and choose a studio for this, and you can see a little preview
of what the lighting and reflections will look like on these little balls down here. I like the look of this
one, Studio small nine. So let's click that and let's download it. This
is the size of it. It says four K. Take an image and you wrap it
around your whole scene, and then you photograph
just a part of it, you'll very quickly
start to see the pixels. So you don't want to go
below four K, really. And then the format can be either HDR or EXR,
doesn't matter. So download that. And
then back in Blender, we want to set up a world. Now, I've already
shown you the world, and that is over here
in the World tab, but it gets quite complicated. So we want to interface with these settings,
not as a list, but as a node graph, and that is a very important
concept in blender. And we'll use node
graphs later on as well. So we may as well
get used to it now. I'll open a new window by
moving my cursor up here to the corner until it turns
into a little radical, and then pulling over to
split the window in half. And this window here, I'll
turn into a shader editor. I click this little icon, and I move down
to Shader Editor. By default, the shader editor is editing the material
of an object. Can choose to edit a material here or you can
choose to edit the world, and you choose that up here
in a little drop down. You can choose Object or world. Let's go to world now and
we get a couple of nodes. Let me just close this
little window to the right. We don't need it. And in here, we can move around just like we do in three
D. We can scroll to Zoom and we can pan
around by clicking the mouse wheel or however I showed you how to do
it on your computer. Let's talk about
what a node even is because if you come
from adobe programs, that's not a concept
you'll be familiar with. This is that same node
graph, and in here, you can choose between an object and world
and a line style. In a moment when I
go back to the HDRI, we're going to go into world. But for now, I'm
going to stay in object just to
change this object. So I'm changing the node graph on the left of this
object on the right. So let's look at
this. In this window, we have two nodes, these little squares, and
they each have a task. So the leftmost node that's
called an image texture node, and this contains my image. On the right, this is the
material output node, and this tells the object
what goes on the surface. And on the right,
I get the result, which is an image because
these two are connected. If they are not connected, if I click the surface of the material output and I drag,
then I can disconnect it. I just let go and it turns black because nothing's going
into the material output. I want something else to go
into the material output, I can do that by adding,
say, another node. You do that with
the same shortcut as everywhere else in blender. Shift A, and I want an input and I want a
texture image texture, or I can just search
image texture. That gives me a new node. This is the same type of
node as the one I had here. And by clicking the open button, I can select another
image from my computer. Say, for example, this one. Now if I take the output socket of this node, which says color, that's what's going out of
the node and plug it in here, we get the new
image on the right. This way, you can
have different images and switch between them. But the beauty of nodes is that you can insert things into this line so you can change the image before
it goes to the output. Let's do that with, for example, a brightness and contrast node. It's the same as the brightness contrast adjustment
layer in Photoshop. If I just hover over
the middle here, I can insert that in between. Now the image coming out of this node goes into
the brightness and contrast, something happens and then it goes out to the
material output. You can see on the right as I change the brightness
and contrast, that also changes the image. I I plug the other image into the brightness
and contrast, so then the brightness and contrast is applied
to that image. Nodes have input sockets on the left and output
sockets on the right, what data goes in and
what data goes out. This is what we're
going to use to get an environment texture
around our scene. Have a node that
says background, and we have a node that
says world output, and then we have a line
going between them. That line can be disconnected. We can click here and we can pull it out of the world
output and release. And what happens? The
whole world turns dark because we're not putting
anything into the world output. Let's take this
background node again, pull it into the surface
of the world output, and then maybe we want to change the color of the background. So we can click the
big color swatch here and we can change it to
red, and that changes it. We can also pull on the strength and that changes
the strength of it. Ever we do to this node is going to be output
into the world. Now, this node itself
has a couple of inputs. These are input sockets, and we can put either
a color into the color or maybe we put an
image in there, right? So let's add a new
node to this graph. We add new things
just like we do in the three D
viewport with Shift A. What we want is a texture, and you get a lot
of options here, but you'll get very far with just the environment
texture, which is here. Click it and click
again to place it, and this node here has
a couple of options. Add a new one. We can open one. What we want right now is to open the image that
we downloaded. So let's click Open and move to the folder where
you've downloaded it. Here I have my
downloaded studio. I'll click it and
press Open Image and then I'll take the output of this node and pull it into the input of
the background node. That connects them.
And in our world, you can see that image wrapped
around the whole world. How cool is that?
And not only that, it's so cool because if
we add a plane as well, I can delete the three
D light that I have, and there is still
lighting here. Like, these boxes now still have a shadow because this light here is actually casting
light onto the scene. I think this is mind blowing, but the most important thing is that you can see reflections. Let's delete our cubes
and add a sphere instead, which I will right
click and shade smooth. I'll give it a material that
is metallic but not rough. And then we can
see the reflection of our entire scene
in that ball. And make sure for this
workflow that you are in the cycles render engine. In EV, it looks a whole lot different and it doesn't
quite work. I'll do its best. But for proper image
based lighting, you have to use cycles.
28. Creating Glass: Because a lot of you will
be making glass bottles, let's talk about
transparent shading. For transparent
materials, you will want to add a special
kind of shader. So when you click your object and you go to the shaders tab, you press new Blender has automatically chosen a
kind of shader for you. It shows the principled BSDF. What's a shader, it's
a way of describing the surface of your object in a way that the
computer understands. And the principled
BSDF is fantastic. Or making any kind
of opaque surface. But once you're moving
into transparency, oftentimes, you'll want to
change that into a glass BSDF. So let's click it and you'll get the entire list of
all possible shaders. Let's move up here to the
glass one and click that. We can't see any change
because we are in solid mode, so let's move to
material preview mode. And here we can see a preview
of that glass material. But importantly, this
is just a preview. This isn't really what
it looks like because the material preview mode in Blender uses the
EV render engine, and the IV render engine is
not physically accurate. So even though you have chosen cycles here as
the render engine, this tab will still use IV. And for transparent materials, IV isn't going to work. It's not showing you what
it really looks like. IV is fine with
most other things, but transparency, not so much. So let's move over to
the rendered mode. This is what the surface
actually looks like. I still have the HDRI lighting my scene
that I set up before. And you can see when I move
behind the glass object, you can see it kind of has
a frosted glass effect. You can see the
light through it. It looks kind of nice, actually. If you want to make
it less rough, less frosted, let's go
to the materialtab. We don't have many settings
for the glass actually. The only two worth mentioning
is roughness and IOR. So if I turn down the roughness, now we get shiny glass. Use the glass BSDF
for liquids as well. This works very
well for liquids. What we have here is a
solid chunk of glass. This is glass all
the way through, which is why it's refracting
the background so much. You can see the
background if it's warping around inside this, and it wouldn't do that
if this was thin glass, and that really
matters in rendering. Cycles knows the
difference between thin glass and thick glass. So you want to keep that in
mind when you're modeling. You need to give thickness to things if they
do actually have thickness and leave air inside if there
actually is air inside. Rule of thumb
really is just make it as it is in real life. Cycles is remarkably good
at replicating real life, there is a very easy way to turn a solid object into a
thin object in blender. Let's do that with
this. Let's modify it. So I'll go back to solid
view for modeling, and I'll press tab to
go into Edit mode. And for this example,
I'll just select all the top faces by
going into sideview, wireframe View, and selecting all these faces and
just pressing delete. I told you not to
do this, and you shouldn't we're going to
add thickness to this, so we won't leave the infinitely thin surface
as we have it now. So right now, we haven't
done what we need to do. Blender still doesn't know
that there's air inside this. Is it that stupid?
Yes, it kind of is. If we go into rendered mode
and we look through this, it still refracts quite a lot. The reason for that
is very simply put, imagine the light coming
in from this side. It hits this wall, and then it warps
around in here, and it's warping right until
it hits a wall going out. And remember, this is an
infinitely thin wall, so it never hits
an outgoing wall, it'll keep refracting
and bending and being weird until it
hits this outer wall, and then it'll go
straight out again. What we need is for it to hit an outer wall right after it'll warp and then hit an
outer wall here as well. And to do that, we
have a modifier. That is one of the
tabs over here. It's the little wrench. And modifiers are
really quick ways of changing your geometry. You can add details. You can add the surface
characteristics of your model. There are a bunch of
very helpful modifiers, and the one we want to use
now is called solidify, and it is under generate here. Let's move down to solidify. And just so you can
see what it's doing, let's increase the
thickness a bit on that. And look at that. Let's right click on
this and shade it auto smooth to be able
to see what it's doing. It added thickness. That's what this modifier does. It adds thickness to the model. The really interesting
thing is it doesn't do it permanently like this is
done after you've modeled. The model is still flat. And if I change
something about it, let's say I select this loop. Let's extrude this
loop along normals, extrude edges, and then
I'll scale it out. And you'll see it
kept the thickness all the way around. And
I can turn this off. If I click on the little
computer monitor icon here, I can turn it off in
my three D view port, and you'll see that the
model is still flat. It's completely flat up here, but turning it on adds thickness
to wherever it's flat. And now, if I go
into rendered mode, it refracts as if it is hollow. You'll even see the
bottom of the glass. If you have a
completely solid model and you add a solidify modifier, it'll add thickness to
it, and that's very important for
transparent materials. You'll see a real
big difference.
29. Creating Liquid: In a lot of cases, you will also want to fill this, and I'll show you a
technique for filling it. Let's go back into solid mode, and I'll turn off this
modifier just for working, and I'll go into
tab to edit mode. Let's add a bit of
a loop in here. Let's add a loop.
And then I want to select everything
that is below that loop. One nice way of doing that is
instead of the box select, I can use the circle
select, which is nice. If I click on the faces, now I can select those by
just dragging over them. And while holding down
the left mouse button, I can scroll in and out
to increase and decrease the size of that circle to make it very easy to select
all the faces I want. Then I'll just move back
to the select Box tool, which I like having
as a default. Let's just take this part of the glass and duplicate
this geometry. We can duplicate by
going up to mesh, duplicate or the
shortcut is Shift D. Shift D is now
attached to my cursor, so if I start moving around, it moves the duplicate
around as well. I'll right click to
cancel the movement, but it's still duplicated.
It's still here. And now without
doing anything else, I want to take this mesh, and I want to separate it into a separate object because
looking at the outliner, we still only have one
object called cylinder, and we want two objects. Let's go to mesh. Separate and separate the selection,
what we have selected. Now we have two objects. We have cylinder and
cylinder OO one. And if I turn off Edit mode, we're now selecting objects. We can select that object
or the other object. Let's select that new object. In fact, I'll give
it a new name by double clicking and
let's call it liquid. And I'll turn off the
cylinder for now. So we're only working with
the liquid. Let's press tab. And what we want is now
to fill this top because, remember, we don't want
things to be open. We want them to be
closed in some way. So we can either add a solidify modifier
or we can close it. At the moment, it does have
a solidify modifier on it. I've just temporarily
turned it off. But this is not the way we
want the liquid to behave. We don't want it to be just up around the corners.
We want to fill it. So let's delete that
modifier by clicking the X. And go back into Edit
mode. Let's close this. We can close it by going
to Edge selection mode and holding Alt or Option and clicking on the top loop
to select all of that. And we can go up here
to the face menu and fill with faces. We can either fill or grid
fill doesn't really matter. I'll just fill it,
and it'll fill it with random lines,
but that's fine. That at least fills it up. And now that it's
a solid object, this will read more as a liquid. So I'll go out of edit mode
and back into rendered mode. And it kind of looks like a
drop of water, doesn't it? If I unhide that glass
object up in the outliner, you'll even see it here, but
it looks it looks weird. So one thing is I need to re add the thickness to the glass because I turn
it off temporarily. Remember, click the glass, go to this modifier and
turn it on in the viewport. So that makes the
glass a little better, but why is there this
faceting down here? There are two things to keep in mind when you're
doing this workflow, and both are very important. One of them has to
do with normals. You remember normals,
our good friend normals, meaning outward from the mesh. I'll give you an example
using just a plane for now. Every single phase has an outward pace and an inward pace, and we can see which one is which by going up to
this little icon, which we haven't
touched yet, which has our viewport overlays, and we can move down here
to phase orientation. If I click that,
everything turns blue, meaning I'm just viewing
the outside of everything. But if I look at the
bottom, there's the red. There's the red of badness. If you see red normals, that means that you have
the back face of something. And again, everything
has a back face. If I add a cube and
move it out here, all of it is blue, but inside from the inside,
everything is red. And you remember I told
you never to delete a face and leave it open?
Well, here's the reason. If I go into Edit mode
and I delete one face, we will be looking right
into the red of badness. When you did this workflow here, when you separated out part of the glass
into its own object, roughly half of you will
have turned this red. Let me just do some
movie magic and boom, this is what you are seeing. You're seeing this
whole object as red. Sometimes this happens. Sometimes when you model stuff, some of the faces turn inward, but there are ways to fix it. Once you know what's
there, you click on it. You go into tab into Edit mode. You select everything
that is red. If some of the faces are red, you'll just select those, but in this case, everything is red. So I'll press A, just select everything
and go to mesh, normals recalculate outside. When you click that, it'll
recalculate all the normals and everything will be facing outward properly.
It's the first step. The second step is
to make sure that no faces are perfectly overlapping. So
here's the problem. Some of these faces
of these two objects are perfectly
mathematically overlapping. And we can tell which
ones if I only turn on transparent mode here without the wireframe just transparent. I click the water inside, and you'll see that the
edges are perfectly aligned. Can probably guess why. It's because we duplicated one object which became
the other object. Therefore, it is
exactly the same. It's perfectly overlapping. And that really confuses
the render engine. So all we really
have to do is to just barely offset this
either outward or inward. Now, it makes sense
in this case, to do it inwards, doesn't it? So that we don't have
water on the outside. But this would even
be the case if our glass solidify modifier went the other way, and
I'll show you that. I go to the solidified glass
and I go to the modifier, and I change the offset
from negative one to one. Now it's no longer adding
thickness inwards, it's adding it outwards. If I turn that off, you'll see it's adding to the outside. Previously, when the
offset was negative one, it was adding to the inside. Let's add it to the
outside instead. And now looking in transparent mode and clicking the water. You see, we no longer
have the problem of the water touching the
outside of the glass, but it is still touching the
very inside of the glass. And I'm no betting man, but I would bet that if we
go to rendered mode now, it's still kind of funky. Yes, it is. It still has
this weird faceting thing. So as I said, to fix that, we just need to offset it
just a tiny, tiny little bit. So let's go into tab and
press A to select everything, make sure that
everything is selected. We can even go into wireframe to make sure that's the case. And let's either
shrink or fatten this using the Shrink
fatten tool, this one. Now, do we want to move all
of this inward or outward? Well, I happen to know
that if we move it inward, we will be leaving a
tiny little gap of air. And that gap of air shows up
very obviously in renders. So whenever I do this workflow, I always make sure to move
it outward a little bit, basically moving
it into the glass, but that's better
than the opposite. And it'll look very nice once
we go into rendered mode. And now this looks like a
glass of water should look. So that was a lot of technical information just to make something look transparent, so I'll summarize it now. First thing, you need thickness to stuff for
it to render properly. So think about, do
you want it solid, like the water here
or do you want to add a thickness using the
solidify modifier. Second, you want
to make sure that all the normals pace outward, and you can check
that by going to the Viewpoort overlays and
turning on face orientation. If anything is red,
go into edit mode, select everything, and go to mesh normals and
recalculate outside. Third, if any faces
perfectly overlap, then shrink or flatten them just to offset it a tiny little bit to not have that weird alignment that
the computer can't handle.
30. Repairing a Bad Shell: There's a problem you may
face with fancier bottles. Not that this is
particularly fancy, but it's a really
good example of a problem you may face when
using the solidify modifier. So I've made a section of this pretend bottle so
that we can see inside it, we can see what happens when
I add a solidify modifier. So let's look at this
detail right here. As I turn the
solidify modifier on, it adds thickness to this thin wall, which
is what I want. But allow me to just turn
off the edge for a bit, so we only see the outer
face and the interface. And watch what happens as I increase the thickness of
the solidify modifier. It gets thicker, thicker, and we're starting to get a weird shape doubling
over on itself. So this face coming in
right here, it's coming in, it's doubling over and making this strange star
shape, which, honestly, it's pretty will
create all sorts of problems once it becomes glass because glass is
see through, right? So you look through this
glass and you see this mess, and then you see further
and it'll not look good. And there are a couple
of ways we can fix this. There's an easy way,
and there's a hard way, and sadly, the hard
way is better. The easy way is right inside
the solidify modifier. Under thickness clamp, we can drag up the clamp
and watch what happens. It kind of tries to fix
that area, and it does. It does fix the
problematic area, but the thickness slopes in now. So this is going to
give you variable thickness throughout your glass, which is typically
not super realistic, although this is
the easy solution. So for many cases, this
is what I would do. However, let me also show
you the hard solution. The hard solution is
to apply the modifier. So if we go into Edit mode
now, select everything. This interface
doesn't really exist. It's just a modifier. When I click the dropdown menu, and I click Apply, got to go
out of Edit mode to do that. Apply and go back
into Edit mode. Now I can select everything. And now we can go in
and fix this manually. So what I would do is
go into Edit mode. I would press three
for face selections, then I would click on one of these vertical edges here
to select that entire ring. Then I would press
delete, delete the faces. Make an incision
above the problem. Do the same below the problem. So Alt click this or option
on a Mac, delete phases. And now we've cut off
the problematic part. The problematic part is no
longer connected to anything, meaning we can select
any phase inside here, any phase of the
problematic part, and go to Select,
linked, Linked. Shortcut is Control
L. Look at that. That selects everything
that's connected. And since we split it up here, it only selects the
problematic part. So now we can hit Delete,
delete the faces, and now we can reconnect
these two faces. So I'll go to Edge
select mode and Alt or Option click on
this and then Alter option click on this while holding
Shift to add that selection and go to Edge
Bridge edge loops, which bridges those two. That gives me a smooth inside while I keep that
detail on the outside. This is the best solution for most problems caused by
the solidify modifier.
31. Class Project 03 - Shading the Bottle: Class Project three, we're really chugging
along, aren't we? This is really the final
step in making an object. Like, we're finishing
our bottle now. This is shading, which is more
or less adding materials, but you'll also have to
probably model a little bit, if you remember, when you
add glass to something, you also have to add s.
Maybe you have to add some extra things inside your bottle if it
is transparent. Remember, your bottle doesn't
have to be transparent. It doesn't even have
to be a bottle. Now it's completely fine. So let's read the project. To finish the three D model and make it ready for rendering, add materials to it. Experiment with
different colors, roughness levels, and metals, whatever best suits your brand. If your bottle is transparent, fill it with liquid. I just finished making mine. I put it in a lit environment. I used an HDRI to
light my scene, and I'm currently in the
rendered mode of cycles, which you kind of have to be when working
with glass stuff. And I've added materials to it. So when I click the nozzle, for instance, and go
to the materials tab, you'll see the plastic and I experimented with some
roughness and the colors. And I added thickness
to this object. If I show you in solid mode, this object now is
not completely full like it has an interior,
and I did that. Not only that, but I also added this liquid object inside of it, which represents the chili oil. So the requirements are use cycles while
working with materials. Just remember that.
Don't use IV. Apply an HDRI to your
scene environment, which I did and add materials
to your model. Be creative. The deliverables are screenshot your result in the Render view. And what I do with
that screenshot, upload it to the
class project or assignment section
on this website. And again, share it
on social media. At Bring Your Own Laptop, Facebook group, LinkedIn Group. I want to see what you make. And in the next video, you'll see how I solve this project. But again, you should probably
do it yourself first, because the way our brains
learn is to try it and fail and then try to really jog your memory to see
if you can figure it out. And if you're just
following along, your brain's not really making the right connections that it
needs to quite learn this. So do the project, then watch how I did it. I'm looking forward to
seeing what you make.
32. Completed - Class Project 03 - Shading the Bottle: Depending on your model,
shading was pretty hard. It was pretty easy. Like,
you can give yourself a hard job with many objects
and sub objects and whatnot. But I'll show you how I
would approach shading mine. So first thing, we got to
go into rendered view. Textured view is fine
for some things, but as I said, not really
for transparent materials. So we should go into
rendered view for this. And my render engine
is set to EV. I should definitely set
that to cycles and set the device to GPU like I
show you how to set up. To begin with, the first time, you know, it may lag a
little bit, but that's fine. So now seeing this, we're
seeing it in rendered view, but it's completely gray. It's like, dark gray because
the environment is gray. So let's import an HDRI to get some realistic
lighting and reflections in here to be able to judge the surface accurately. I will open a new
window by going up to the corner until
the cursor turns into a little radical and drag it over until
it adds a split. And then with this
little drop down menu, I'll go into the shader editor. By default, the
shader editor shows the material on the
current object. However, I want
to see the world. So I'll go from object
to world up in here, and I don't need the side panel. I can just close that up. In here I want an
environment texture. So I'll do Shift A
to add something. And then actually instead
of finding things here, I prefer searching, and you don't even have to click
the button for searching. You can actually
just start typing E and V. That brings up
the environment texture. So I'll add that, plug
it into the background, and it's going to turn
pink because pink is it's the warning color
of blender textures. If something turns bright pink, then you know that you don't
have a texture plugged in. So let's open a texture, and I'll use the same
studio HDRI light I downloaded from
Plyhaven earlier. Open image. Now let's see.
That looks about right. I can close this window
right up and let's see here. First thing, most important
thing is the glass material. Let's add a glass material
to the glass part. I'll go over to the
materials tab and press new. I can rename this material to glass and go into the surface
here and add a glass. Now thing is, this is now full because the
ray is entering it, it's warping around
and then it's exiting. That was a terrible drawing. I need to add thickness to this. So let's hide everything else. I can actually it's
a good idea to start renaming objects
once I have three here. So this is the glass part. This is this is the
cap or the cork, maybe in this case, and
this is the nozzle. So I'll hide the cork
and the nozzle for now and view just this. In fact, why not have two
windows open at the same time? I'll open another window again, and this can be my solid view. So in here, I can
start modeling stuff while I see the results
over in this window. So in here, we need to go
into Edit mode with a tab, press three for face
selections and click this top face or press Delete to delete it
and click Faces. Now it's completely thin, which Blender
doesn't understand. So this is an illustration
of the problem of completely thin shapes
that I mentioned earlier, that you can see, it's still warping a
whole lot in here, and that's because any light
ray that's coming from, say, this lamp here is
coming from the lamp. It's entering the object, and it's going to warp
until it finds an exit. And even though I
have opened up here, this ray doesn't know
when to exit anyway, so it thinks that the shape
is still completely full. And so we need to
add a modifier. The modifiers are
here in this panel. It says modifiers when you
hover over it, it's a wrench. It already has a modifier, which is smooth by angle, and that is because earlier I
right clicked and I pressed Shade Auto smooth and
that adds this modifier. But we'll add
another one as well, and that will be the solidify.
I can search here, too. SOL solidify and press that. And that did add
thickness to it. So now I have very,
very thin glass here. How big do I want this
to be? Let's see. I'm pressing thickness and
I'm dragging to the right, but while holding down shift, that means I'm
changing it slower. I feel like how big do
I imagine this being? I imagine this being maybe
10 centimeters tall, maybe even a little less. So this kind of thickness
feels right to me. So if I go over to the modifier, I press the little
drop down next to it and I press Apply. Now if I press tab, I can, in fact, edit this. First thing, I want to add a little bit of
beveling to the top. So I'll press this loop, hold Shift and alt,
and press this loop. And then the shortcut
for beveling, that is Control or Command B, and I'll drag out and I can add more segments to it by
scrolling on my mouse wheel. I'll just scroll to add a
couple and then hold Shift to more sensitively change that profile.'s do
something like that. Now I think I'm noticing is
some weird shading issues. Suddenly it becomes sharp here
and it's smooth around it. Why? That's because of
the auto smooth modifier. It's trying to smooth
any edge that has an angle that is higher
than 30 degrees, but apparently the edges here are very close
to 30 degrees, so some are over,
some are below. And if I just increase this, watch what happens to
the shading issue. Disappears. So I actually prefer an angle here that
is a little higher than 30. I prefer probably 60 is
more sensible to me. And if I pull that far too low, then suddenly on C, nothing is smoothed out anymore. If I pull it a little bit up, you'll see it only smooths out the very smoothest
part already, but these sharp angles
here stay sharp. And then as I increase it,
more things get smooth. Oh, 60 for me. Let's fix this weird
shading issue down here. What I'll do is I'll press
Tab to enter Edit mode and select this loop of faces
and this loop of faces. Then I'll delete
them, delete faces. And I want to delete everything that's in between them as well. Now I can select everything
that's linked to this phase. It's important to
hold your mouse over this area and then press L, L for ink. That is selectinked. And that is select
the whole thing. Now I can delete
that. Delete phases. And then I'll reconnect these parts with the operation
that you already know, which is bridge edge loops. So I'll go into edge
mode by pressing two. Hold down Alt and select this
edge and select this edge. In fact, loop of edges, and then go to the edge menu and down to bridge edge loops.
That bridges it right up. Regarding the liquid, let's go into face select mode
and circle select. The shortcut for circle
select is actually C. So I'll use the
C button instead. Press C. I'll scroll out
to increase the size of that and then select
everything on the inside. Right click to Cancel
so that I can move around and select
this side as well. You accidentally select
too much like here, if I touch that by accident, I can remove it by clicking
the scroll wheel over that. Okay, how high level do
I want for my liquid? I want to fill it up
to the edge, don't I. Let's expand my selection. I could go around
and select all this, but I can also go to select more or less and a
little bit more. Control Numpad plus
is the shortcut. I'll click that, but let's
add a little bit more. Control Numpad plus
adds a little bit more. That it grows the
selection, right? That's a good level to
fill it up, I think. So I want to separate this
out into a new object. So first off, if I separate
it out right away, that's going to remove
it from this object, making it thin again. So I need to duplicate it. The shortcut for
duplication is Shift D, D for duplicate, or you can
go up to mesh, duplicate. So Shift D. Now I'm
holding that inside part. It's attached to my cursor, but I can right
click to detach it and move it right
back to where it started because that's
where I want it. And then I need to separate
it out into its own object. And I can do that with
mesh, separate selection, or I can press P, separate and press selection. Now, if I go out of Edit mode, you'll see I have
two glass objects, glass and glass 0.001, and when I select this inner
object, that selects that. So let's rename
that into liquid. That's great and the liquid, in fact, needs to be closed. Let's hide the glass and
work only with the liquid. I'll go into tab and I have
to close this top part. I'll click on this edge with edge mode
selection turned on, that selects the
whole loop and let's close it up with face fill, fills it with pass. That looks good to
me. But shading wise, it too looks a little strange. Let's see if the
normals are correct. Remember the
normals, normals are very important for
transparent objects, and I suspect that those
are wrong in this case because these faces here
used to point inward. These faces here used to be the inside faces of the glass
and then I detach them, they're still pointing inward. Probably. I would
guess let's go to the viewport overlays button and turn on face orientation. Indeed, everything is red. Let's go into tab and
face select mode, select all, select everything,
and then go to mesh. Normals and recalculate outside. Now they're blue, and
the shading is fixed. I can turn off the face
orientation and turn back on all the other objects
to see another thing that was problematic that I
showed in an earlier video, and that is with faces
perfectly overlapping, it creates some bugs. So let's also fatten
everything up in here. I'll press Shift Z to go into wireframe mode to see my
selection in the object, and then go to shrink fatten. Then I'll have to fatten this up to go just a little bit into the glass. Just a little bit. And I can give it a
new material, as well. I want this to be chili oil. So let's go into
the material sab and remove the material
that's on it right now, press minus on that
and add a new one. This will be chili
oil. And instead of using a principled SDF, I'll use a glass BSDF
for that as well, turn down its roughness, so it's completely
glossy, but make it red. Maybe I can make it a
little darker, even. Not black, but a little
bit. Make it feel rich. Alright, cool. And that
looks dangerous to me. Let's add some plastic, as well. I'll go to the nozzle, add
a new material to that, and that can be like a dark. Just pull down this value. You don't ever want to
go completely black. Blender allows you to
go completely black, and it allows you to
go completely white. You kind of want to stay away
from those because nothing in the real world is
really completely black. Like, this is that vata black that you may have
seen which is like, it's an experimental paint that just absorbs all light, right? And you don't really want to go there for realistic materials. You kind of want to stay
above like 0.01, at least. And so this is black
enough for me. And let's call this plastic. I think maybe keeping
this rough and then the cork above it a little glossy
maybe a nice contrast. But let's see how rough? Maybe something like
that, and then go up and add a material
to the cork as well. This is glossy plastic. I'll make that dark as well. Something along the
same tone as the nozzle and then decrease the roughness to make it a little more shiny. Moving around to see how the light reflects
off it makes it a lot easier to get an
intuitive understanding of how the surface
actually looks. I am pretty happy with this. One final trick that you can use to more
accurately assess your object is we're not really used to light
coming from below. So it can help to add a floor. Shift A, mesh plane, and I'll move it down
and scale that out. Try to make sure that it's
actually touching the bottom. I'll use the modeling
view on the side here and move it up until it touches the
bottom of the bottle. And that makes it feel
a little more grounded. So once I'm happy, I can make the viewport look a little nicer but by going
to the render tab and down to the viewport
sampling and press denoise to turn on denoising and make things a
little more smooth, and then I can screenshot
this and post it in the project section on the website to share
my work with everyone.
33. Combining Scenes: Often we model
things separately, even if we want to
combine them later. So in this example, I've
modeled a wine bottle, and I've also modeled a glass. Looking at it now, I don't know why I didn't make
it a wineglass. Hold on. There.
Wineglass. So I've modeled a wine glass and
I've modeled a wine bottle. And if I want them in the same
scene, that's pretty easy. I've opened blender twice, and in each one, I've
opened a separate model. So I have one blender here
and I have one blender here. And getting an object over is actually as
simple as clicking the object in one and pressing Control or Command C for copy, and then clicking
the other window and doing Control or
Command V for paste. But this will happen a lot. Things are not modeled
at the correct scale. So in this case, the
bottle is too small. The glass is too big,
whatever you want to say. And so it's a good practice to model everything at the
right scale to begin with. So to check the
scale of something, there are a few ways to do it. One is you can use
the measure tool over here while you're
in object mode. So clicking the measure tool, you can just drag a line
from the bottom of, say, the bottle to the top, and
it will tell you that it is, in this case, 2.9 meters. Press delete to delete that typical wine bottles
are not 3 meters tall. I don't know how tall they are, but certainly not that. So a trick I use
to model things at the right scale is at some point during
the model process, I'll add Shift A, a mesh cube, and in its settings, I'll just set the size to the height I want
the object to be. So A is a typical wine bottle. Is it like maybe 20 centimeters. So I can type in
two 0 centimeters. You can also type in feet or stone or whatever you use.
Stone is weight, isn't it? And that is the actual
height of a wine bottle. So I'll click the
wine bottle and I'll scale that
down until it fits. I'll scale the glass down as well and then move it down here. I can actually move the box up so it rests on the
floor of the scene, and then move the wine
bottle down here, scale it in until it's
roughly the right size. Now I can delete the cube and just use the wine bottle as a scale reference
for the glass. Because I know that
wine glasses are maybe like this size
compared to a wine bottle. Now, when you scale
things down like this, if you want to keep
working on them, you can run into
some scaling issues because when I look at
the model tab here, we can see that the scale
is 0.025 for this object. And I've talked about
weird scales before. Typically, we want
the scale to be one. So if we click an
object, we go to object, apply scale, then that
scale turns into one. So this is now the default unstretched state of the object. That's a good
practice again to do. However, let's say that you, for instance, let me just
mock up a quick example here. Let's say you've made
a glass like this and you used the solidify
modifier, right? It was thin, and then you added a solidify modifier
to make it thick. Okay, let's scale it down. Everything seems to work well. And then we want to apply the scale when it's
the right size. Let's go this size, move it over, and go to
object, apply scale. It turns into an
igloo because the solidify thickness
is 0.1 meters, and at this scale,
that is quite thick. Now I have to turn down
the solidify size. Something more
like 0.004 meters. Now, this didn't matter
when the object scale was shrunk because I'll
just undo all that. The object really is still
big when I scale it down. Like, Blender says,
This model is big, but let's just show it as small. So now the big solidify
value doesn't really matter because Blender still thinks
that this glass is this big, and then it adds a little
bit of a solidify. But once we apply the
scale, going to object, apply scale, now it knows that the glass is small and this
thickness is too big. So this kind of thing sometimes happens when you have
to scale things down, and then you're
just going to have to go into the modifiers and change the values
in the right scale. This is one of the reasons why it's smart to start modeling at the right scale to begin with so that you don't run
into these issues.
34. Camera Settings: When you want to make an image, you hit the render button. However, sometimes
when you go to render, you'll get an error message. No cameras found in scene. That's because you need a
camera to render out of. That's a camera object, and
it is in a scene by default, but I've deleted
it from this one. So let's add back a new camera and talk a little bit
about how to use it. So press Shift A and go
down here to where it says camera that
adds a new camera. The camera's origin is here. This is where it's
viewing things from, and this rest of the camera shows the view
width of the camera. So you can tell from
this square here how big of a portion
of the frame that these objects now fill from the point of
view of the camera. I'll open a separate
view to show you. And in this view, I'll press the camera button on the right hand side to go into the camera. And you'll see these objects do indeed fill that
size in the frame. And looking at the angle here, we can tell that
if something moves closer to the center of
the camera or I move, indeed the camera
closer to the object, then it becomes bigger
in the field of view. Like, in this case, I
can tell looking from the side when the objects will fill the entire frame by
when it touches these lines. Once that happens, you'll
see on the left hand side, they do indeed fill the
whole size of the frame. Now, this field of
view, as it's called, of the camera is changeable, and it's called
the focal length. You can change that along
with all other aspects of the camera here down
in the camera properties. And here, you can change
the focal length. So if I pull back
the focal length, you'll see it changes
the field of view of the camera and the
objects become smaller, even though they are still
close to the camera. This is just how the focal
length works in real life. This is the Zoom of the camera. And aside from this, you don't really want to change
many of these parameters. Shifting, for example, shift X, shifts the camera to the side, and this is known as
a tilt shift effect, and you generally
don't want to touch it unless you know how
to deal with tilt shift. This is advanced stuff that really only architecture
photographers use. But down here, there's a
button for depth of field. Depth of field can be very nice. Let's increase the focal
length here and have my glass close to the camera and I'll move my bottle
a bit further back. And then I'll go
into rendered view. Hold down the scroll
wheel on this bar to move it over, go
into rendered view. And in order to see
anything at all, I really need a light. So let's just shift A, add a sunlight for now. I'll rotate that a
bit to the side. This is just an example, and everything works
better in cycles. Let's change from EV
to cycles. All right. In the camera, I go to
the camera properties, I turn on depth of field. Suddenly, things
become a bit blurry. We now have to focus the camera, and we have to choose a focus. We can either choose
the distance to focus on down here or we can choose to focus on a specific object. Let's do that. Let's
focus on an object. I'll choose the little
eyedropper in that field, click that, and then
click on the glass. Now the camera will
focus on that glass, and the bottle will be
blurry in the background. Down here, you have
different settings that you'll be familiar
with from cameras. The F stop number is what
controls the blurriness. The lower this number,
the more blurry. When I pull this down, now that explodes the bottle
into full blurriness. And when I pull it up, it
becomes a little sharper. Now, what if you want the
image to be square, say, maybe you're posting on social
media and you don't want the 16 by nine aspect ratio
that's common in video. You will not find the aspect ratio in
the camera settings. That's because the image size is a global setting in that it affects your
entire blender scene, not one particular camera. Every camera has the
same size because it's a file setting and you find it here in the file output. Here you find the resolution
X and resolution Y. That's the width and
height of your image. And if I set both
of them to 1080, now we have a square image.
35. Light Types: When it comes to lighting, you have a bunch of
different options. If I press Shift A and go
to the light menu in here, you'll see I have four
different lights, and let's just
take them by turn. The point light can be argued to be the most basic
form of light. If I click that, I get a point in my scene
that lights up. Let's move it up above my ground plane and
over a little bit. The point light,
it emits light in all different
directions, and it is, as the name suggests,
a point in space, meaning it is
infinitesimally small. And small light sources
create hard shadows. The reason these shadows are hard is because it
is a point light, and that is just
a fact of light. It's the same in real life. The bigger your light source, the softer your shadows. But it doesn't have to
be a point in space. If I go over to the right
hand side of the software, you'll see at the
bottom of this row, there is a light tab. This is only here when you
have a light selected. And in here, you have all
the settings for the light. So I can, for example, turn down the power a little
bit by sliding the slider to make it a
little less overexposed. And I can warm it up
by changing the color. And I can indeed
increase the radius. The radius is
currently at 0 meters. But if I increase that, pitenino the orange ring around the
light as I increase this. You'll see it increases as well. So now the light is this big, and you can see from the shadows that it casts that it is bigger. It casts softer shadows. So this is small and big, small. Big. See the shadows react? All right, that's
the point light. Let's go over to Shift
A, add another light. Let's do the sunlight. Sunlight's peculiar
because the precision doesn't matter for the sunlight. I can move it around and
absolutely nothing happens. The reason for that is the
sunlight isn't actually here. It is infinitely far
away in a direction, kind of like the real sun. And if I click the little
yellow circle here, I can change the direction of it. They can move it around. And you'll see in
the left hand view that changes like the
angle of the sun. The sun now comes from
a different angle. You can also rotate the object itself to change
the angle of the sun. And in the light settings, there is an angle slider, but this angle slider is not actually the viewing
angle of the sun. This is how big
is it in the sky, which is measured in angles. And about 0.5 is how big it
actually is in real life. So this is the hardness of shadows from
the real life sun. But if you do want to simulate
maybe an overcast day, you'll increase this angle, and that increases the
softness of the shadows. All right, delete that. Next light is the spotlight. Spotlight looks a bit like
a spotlight, I would say. Basically, it's a point light that is constrained
to a specific area. So this point light, actually, all lights are interchangeable. In the light properties
across the top here, you have all the different
lights and you can click each one to change the
light to that type. But the spotlight has
all the settings of a point light like the radius
to change the softness, but it also has down
here a beam shape. And if I drag that,
you can see I can narrow the beam or widen it, and I can also smooth out
the edges of the beam. Very useful light.
And the final one is my favorite kind of light. It's the area light. The area light by default
is a giant plane. Let's scale that down because
it's too big for my scene. And it doesn't have to be a
plane. It can be any shape. And you can change
the shape in here from square to say, disc maybe. And this is the equivalent of a soft box for you
photographers out there. What's really cool about
this is, well, for one, it is soft by default
because it is so big, which means it casts
very soft shadows. Let me turn that down.
It's a bit too bright. Very soft shadows, but unlike a point light
or a sunlight, it is very easy to control the direction of it because by default, it is directional. If I turn this right hand viewport into a
rendered mode as well, you'll see it only emits
light in one direction, which makes it very easy to control where you want the light and where
you don't want it. And in fact, there's a slider
to make that even easier. This is very overlooked by
blender users in general, and that is down here,
it's called spread. And if I turn that down, see, I generally narrow the
beam coming out of the light until if
I go down to zero, it becomes completely straight. All the light rays are parallel to each other as if
it's a sunlight. But if I turn this up to
say maybe 90 90 degrees, this will be an angle that's akin to a soft box with a grid. It's very useful for constraining the area that
the light is lighting up. I generally don't
deal in favorites, but this is my favorite
form of light.
36. Rendering with Cycles: Once you're happy with
your composition, you'll want to render the image. And now that we're in cycles
instead of IV set here, rendering is a tiny little
bit more complicated. There's one more thing
to consider than when we render it in IV and that's
because it's slower. So when I go up here into render and render image like
we've done before, the image shows up, but it's not finished once it shows up. It will gradually remove the
noise that's in the image. You'll see up here, it's
a sample 65 out of 4,096. This number keeps on climbing. That's as it calculates
the image as this goes up, the amount of noise, say for example, in
this area goes down. At the moment, this
is quite slow because I've set my cycles
device to CPU, which is a slow render device. That's just to show you
what it looks like. Rendering will stop once the sample number hits the final sample
number, which is 4,096. You set that down here
in the render settings. Under render, not
under viewport, viewport settings are just
for what you see here. But when you click Render, uses the settings that
are here under render. And you can change
the Mac samples. This is when does
it stop rendering? And when it hits that number, if you have denoising turned on, it'll denoise your image. So let me close this
and change my device to GPU compute so that there's
a chance that it'll actually finish and then go
to render and render image. You'll see now,
the sample number climbs a whole lot quicker, and you can actually see it
calculating the noise away. If I zoom in here by scrolling, you can see that it gradually removes the noise
and smooths it out. Now, for some computers,
this happens fast. For some, it happens slow. It also depends on the
scene in question. This is a very simple scene, so it actually renders
pretty quickly. And I just skipped
some time here, and now it's finished. This number froze for a second
and watch the image as it denises and there we go. Now it's done. This is the final rendered image,
and it looks nice. I can go to Image and save as and save this finished image. Now, you're going to have to experiment with your own
scene and your own computer. How long does it take
to finish rendering an image versus how good
of a quality do you need? I can go down here and I can set my max samples to 100.
Let's just do that. And then I can
render render image, and the sample number
will climb until it hits 100 and then it'll denoise. So the noise level is this. It's pretty extreme, and it's gradually
trying to denoise this, and it looks fine. For a simple scene like this, you can actually get away
with a lot of noise, and the denoiser will fix it. But the more fine
details you have, the more the denoiser will smooth out details that
you actually want to keep. And the way to
mitigate that is to actually increase the
number of samples. Realistic character
like this one is the perfect example of this. If we zoom into it, then we can see all the details
and pay attention, especially to the skin
detail on the cheeks. So the left image
was rendered with just 50 samples and the
right image closer to 4,000. They both have a little
bit of noise in them, so let's denoise both of them and see what
that looks like. They both clean up nicely, but when you look
at the left one, it's lost a lot of detail in the cheeks
compared to the right one. You have to get as
close to a smooth image before denoising as possible
to get a high quality image. And once we start
rendering animations, that's even more important. We have to have a clean
image before denoising. So you're just going
to have to experiment for you that trade off. This MAX samples number, it's individual, for your
computer and for your scene. You're just going to
have to experiment with how long are you willing to wait for a finished image versus how good of a
quality do you really need? And in this case, 100 was fine, but a good default is actually 4,096, which was the default.
37. Class Project 04 - Product Render: It's class project number four, the Product render Project. Time has come to photograph the brand's bottle
in a digital studio. The client wants a simple
but visually striking setup to showcase their bottle. Design a stage using geometric shapes and
experiment with lighting. Have fun exploring
different compositions, lighting setups and shapes. The reason I wrote
that last part is because I never nail
it on the first try. I always have to try
different compositions, different arrangements of
geometry and lighting. I recommend you do
the same. It's very easy in three D. Move
some things around, save a new version, try different things and
see how it looks. The requirements are, build a studio using objects
from the ad menu. That is the cube, the cylinder, the sphere, et cetera. Copy the bottle into the stage. That means opening the bottle
file where you made it, pressing Control or command C, and then opening a new file and pressing
controller command V, that is copy and paste. You may use an HDRI, but the main light has
to be a light object. The reason I wrote that is one, I want you to experiment
with lighting setups, and using an HDRI won't
allow you to do that. Those are baked in, right? But also HDRIs are
infinitely far away. That is a feature of meaning you won't be allowed to
experiment with light fall off because fall off of the light depends on the
distance to the light. It's a key feature of lighting, and I want you to
see how it works. How far away is the light to the object determines
what it looks like. So the main light has
to be a light object. Keep the design simple but
effective less is more. So don't clutter your frame with a bunch of objects
everywhere all around. Really just focus
on the composition, light and shadow, making
some few interesting shapes. It's really true that for this kind of stuff,
less is more. The deliverables render
your scene in cycles and save a 1920 by 1080
PNG or JPEG file, upload it to the class projects or assignment section
on this website. In the next video,
I'll go through my solution to this project, but I would recommend you try yours first, and
then if you want, after watching My solution, if you're inspired
to make any changes, you can go back and do it then. Good luck. I'll see
you in the next video.
38. Completed - Class Project 04 - Product Render: All right, so I started by
opening the file where I shaded the bottle
and an empty file. I just want to copy
all this over. So actually, I'll
go to the outliner, click the top object, and then move down
to the bottom, hold down Shift and click that, which sights
everything in between. And then I'll move the cursor over to the three D view port because shortcuts are dependent
on where the cursor is, and then press Control
C. Then in my new file, I'll move over and press
Control V. Which pastes it, and then I can start
working on the stage. So first off, let's
just select everything, and I want to move it
up so that it rests on the floor because I like working in that kind of space. And it feels logical to me. I'll also make sure
that I look over on the gizmo and I work in an
axis that makes sense to me. I usually work with the X
stick pointing to the right. So I'll be viewing everything
from this angle here. Click this ball, Y minus now to view it from
that angle and then move up everything until
it rests on the floor. I'd rather have it
poke a little bit below the floor than
floating a bit above. Just so I make sure that
everything's in contact. All right. And then
I'll add a camera. I'll move the camera over to that area that I
first talked about. No change the focal
length, but move it over. I just clicked on the camera, which changes the focal length, but let's move it over here. And when you create a camera, it's looking in
the same direction as you were looking
when you created it. And I want to define
that completely for myself because I like having
it point straight at it. So I'll go over here
to the object data, and here, I'll zero out
all the rotation values. And this is so cool. It's a thing that
blender does that I don't think any
other software does. Where if I click the
top number and then I move my cursor
straight downwards, I can select all three numbers and edit them at the same time. So I'll press zero and return, and that zeros out
every rotation, and then I can use the rotate tool to make it point at a 90 degree
angle this way, I'm holding down Control. That's command on a Mac to move it over until
it's 90 degrees. You can even see that
over there on the right, where I just zeroed
everything out, the X rotation is 90. Great stuff. All right. Let's move it a bit back.
And like a previous project, I want to open another window. I'll move my cursor up to the left hand corner until it turns into a little radical, click and drag to get a split. Now I have 23d viewports, and I can press the camera
button on the left hand one. Which gives me a view through
the camera so I can work in the right view and I can see what the camera sees
in the left view. Let's precision the
camera. Let's see. I think what I want is I
want a long focal length, so I'll go to the camera, and I think I want at least
100 millimeter. That's when I usually use
for high end products, 100 plus maybe 200. I usually looks a bit premium. Then I'll just move it
back, and let's see. Maybe I'll have it
kind of small in the frame because I
can also shout luxury. And then I'll rotate it with a rotate tool to just place it. See, now I can rotate
it on the right and I can see where it
ends up on the left. Now, it's a bit too
sensitive for me, so I'll hold down Shift, which makes it a
little smoother, so I can really place
it where I want. And maybe I'll even move
it a little more back. And okay, let's build the scene. So I will shift a add a mesh, and I'm thinking cubes for mine. It's the most industrial
looking shape, I think, maybe some cylinders. Remember, my project is
an industrial chili oil. So I want, like I want it to
be reminiscent of industry. Let's see, let's start
with just a cube. And let's scale that up. To make it pretty big, and I can move it down
so that this will be the platform that the
bottle stands on. Now, it's come to
the point where I can't really zoom in on this. Like, for some
reason, the camera is stuck somewhere else, so I can click off
and click on it, and I still just it won't
quite let me zoom in on it. If this ever happens to you, then that means that the camera is centered
around something else. And in this case,
it's the camera, so zooming in wants
to zoom in on that, and I can't really go past the camera in any
other direction. And so to center the
three D viewpoard on another object, there's
a shortcut for it, and that is coma or
period on the num pad, and that zooms in
on another thing. I think probably if you've
turned on Emulatenumpad, then you'll just press period wherever it is on your keyboard. Okay, so I've zoomed into this, and let's move it a bit further up so that
you can actually see when it crosses
the boundary off the floor because you can see
the grid poking through it. I just want it just above. And I can even hold down shift to make it more sensitive or to make it slower and just get
it right on that floor. Just to give me a bit of a
head start on the next object, I'll just start by
cloning this object or duplicating with Shift
D, D for duplicate. I can move it around,
but I'll just right click to reset its
location, to move it back. And then I can scoot
this over a bit. And I just want, floor
below this platform. So I'll scale it
out on two axes, I press the blue square here, scaling it out and maybe more horizontally because I
think I want a wall as well. And I can move that over a bit to make this like
a platform poking out. I'll try to make that
an even thickness so that this thickness here is the same as this
thickness here. And then to add the back wall, I'll just shift D, right click and then move
that up and back. And how much space do
I want to leave here? Maybe, maybe
something like this. Can always refine it later and then scale that up to
fill the whole frame. Got to make sure everything's
filled on the left side. And why not go a bit higher. Let's turn on rendered mode
on the left hand view. Rendered mode is
out of view here, so I'll just click
on this bar with my scroll wheel so
that I can drag it over and then click
the rendered view. Now, it says compiling
EV engine shaders, telling me that I'm in
the wrong render engine. So I'll move over here
to the render tab and switch the render
engine to cycles. And that's great.
Now, in this view, I didn't show you this earlier, but I like to clean
this up quite a bit to make it as close to the
final render as possible. I'll grab the edge
of the toolbar, I'll move it in so
that it disappears. Now it's collapsed into this tiny little
arrow right here. I can expand it again
or collapse it. Then up here, I have a toggle
to show or hide gizmos. If I click this, look at that, cleans it up quite a bit. And then also the overlays. And when I click that, all of
this will disappear. Watch. And now it really looks
like the final image. But one more thing that
I kind of want is, let me show you by just going to the world and
increasing that color. You can see a bit better. You
can see around the camera, and I find that often that distracts me from what the
image actually looks like. So I like going to the camera, clicking the camera, going
to its camera properties. And here under viewport display, there is a pass part two slider. And if I slide that
all the way down, then we're going to
see everything around, and if I slide it
all the way up, then we're going to
see nothing around. It just turns black,
and I like this view. Okay, back to the World tab. Let's give ourselves, again, a bit of a head start
by just adding an HDRI. I'll keep using the
same studio HDRI as I've used up until now. So I'll turn this window
into a shader editor. Close this tab over here
and go to the world Shader. In here, I'll shift A,
add environment texture. I'll just start
typing ENV shows me the environment texture.
I'll click Open. And here I can select that
HDRI I downloaded and plug that into the background
color. That loads it in. Now you may have the question,
how do you rotate it? Like I it's wrong, if
it's the wrong rotation, if I want shadows on this side, oh, you can't see my drawing
because I turned it off. What if I want the shadow on this side and
not on this side? Yeah? Let's add a mapping node. This mapping node lets you move and rotate to this texture. So I'll plug this vector
into the vector input here, and it all turns gray. The reason for that is I just is that this vector input
expects a coordinate system. All gets very technical. But basically, it's asking
where is the world? What does it look like? W I
just plugged into it is zero. It's just empty. So it doesn't know what to
do and it just turns gray. When specifying a vector
through the mapping node, we need to give it an
actual world vector. Let's shift A, add a
texture coordinate node. That is also under input
and texture coordinate, we want the generated output of this into the
vector input of this. This is just one of
those strings of nodes that you have to kind of
learn texture coordinate, into mapping, into
environment texture. I would say this is probably the only string of nodes
you need to memorize, but you kind of need
to memorize it. So write it down on a
posted node or something, so that you have it for later because this is super useful because now I can
slide the z rotation. This is the only slider I care about in the
mapping, actually. Actually, this will be much clearer if I turn on
the GPU rendering. So I'll go to render
here and change it from CPU to GPU makes it
a whole lot faster. And then I'll slide
the z rotation. Look at that. That
rotates the light around. But the project brief
specifies that I'm not allowed to use this
for my main lighting. So I'm really only looking for the reflection details here. So I'll scroll here on the left hand side to zoom
in on the reflections, and I'll just rotate it until I see a reflection
shape that I like. And I ended up not liking
any rotation on that HDRI, so I went and downloaded
another one and another one. And finally, I found
one that I liked. Let's go back into the three D view port and add some materials
to the scene. I'll just click one
of these objects, and in the materials tab, I'll click New and
give it a color first. Let's go for some
green looking color like maybe a yellowish green and decrease the value of it to make it darker and maybe the
saturation as well, because I feel like
dark grayish or muted colors usually
look pretty high end. Something like that. Then pressing one of
the other objects, I can select that same
material in that drop down. See also that all
the bottle materials are here now in the scene. I'll click that and go to the back wall as
well and click that. Looking at this now, I feel like it should
probably be even more desaturated and
maybe even darker. And I need some dynamic lighting on this. And I have an idea. What I want for this image
is I want a streak of light coming in from the left and going like this and like this, hitting the back wall, giving us a nice rim light over
here on the bottle. And maybe you can even
see through the bottle. Like maybe it'll
shine a bit through the glass and through the
liquid. That's my idea. And the way I'll accomplish that is by adding a sunlight first. I think I'll use the sunlight. So let's go down to sun and
let's at least try it out. So move it up. The movement, again,
doesn't really matter, but I like having it
roughly where it's coming from and then rotate it to come from the side and
then a bit towards the wall. And then to get the streak, I need to obscure it. So let's shift A,
add another mesh, a cube, and let's move
this up and add a ceiling. So I'll scale this out on just the horizontal
axis to make it flat. And look at that. I'm getting close already
to getting that streak. Shift D, right click
to duplicate it and move it over so I can open
up just a little streak. Maybe I'll rotate it a bit down to get that angle that I want. Let's see what happens if
I increase the strength. Yes, that's nice and increase the angle as well to
soften it out a bit. I think that's nice, but it needs more shadow
in the foreground. So I'll do another
duplicate of the ceiling, shift D, and then move that over here so that I can put
the foreground in shadow. That looks very nice. Now, I do not like the
brightness of the shadows. It's way too bright, and I want a very
high contrast image. So let's go back into
the shader editor into the world and decrease the
intensity of the background. Zero makes it completely dark, so let's hold down
shift while dragging to gradually increase that to
a shadow level that I like. Maybe that is good, and I'll go back into the three D view and click the light and
increase that even more. Let's make it more intense. Let's type in 20. And I don't like how much of the bottle is actually
showing because of the light, and that is because of
the angle of the light. So I will rotate
the sunlight away from the wall until I like
the definition on the bottle. And I can't really get it to work because I like
something like this, but on the wall, I like this. So what I'll do actually
is I'll hide the bottle with the ceiling so that
it is in complete shadow, which kind of looks
nice in itself. And then I will shift A, add another light that can
be a spotlight because spotlights are pretty
easy to control so that they don't spell out everywhere. And then I'll use this to light the bottle. We'll move it over. And again, period on the num bed to center
on that object. Let's move it down
a little bit and over increase the intensity
of that to 20 as well. Maybe it has to be even
higher because it's so small, so maybe 100, multiply by two. Multiply by ten. There we go. Only at 40,000 watts,
I start to see this. So these numbers are you may
have to make them real high. So let's move it back so that it's kind of
behind the bottle, rotate it to point
at the bottle. That's very nice. And now the radius will determine
the softness of that light. So if I increase it a
lot, then it's very soft. If I decrease it, then it's
going to be very hard, and softness usually
equates to luxury. Let's make it quite soft. And what I'm seeing here is that the reflection here is circular, which doesn't look great to me. I prefer squares. So I'll actually turn this from a spotlight
to an area light, and I'll increase the
size of that area light. And then decrease its spread, which makes it more
like a spotlight. And this aerial light
can be stretched out, so I'll actually scale it
on the z to make it taller. Then maybe a bit out and even taller to make sure that the reflection goes
all the way down the side. Then to make sure
it doesn't spill, decrease the spread on it to really make
it hit only that. I'll move it even further back. And this is too intense. I'll have to decrease
the intensity of it. Maybe divide by ten, and I can even move it in because what I'm seeing is
on the left hand side here, it's spilling onto the floor, and I don't quite like that. So I'll move it in so you
can't really see that. And that is a nice rim light. Let's also add a bit
of a refraction light, one that lights up
the interior of it. And for that, I think, again, I'll try a spotlight
first and move it back behind the bottle and point it at the floor
below the bottle. And what happens if
I increase that to 40,000? That's kind of nice. Here, you can see the
before and after if I find it in the outliner
and click the I icon, and you can see that's
without, and that is with. It does light it
up quite nicely. Let's do it even stronger. Maybe try multiply by four. Let's try the extremes. And I do like it. I'll place that light
there, but then I'll go into the object itself, click the liquid, and maybe
I'll make that darker. To get a nice looking
contrast in the liquid, a dark liquid with some
strong highlights. Let's refine the color
of the background. I'll go there and find
just a hue that I feel fits better with
the look of the oil. And since it's starting
to get quite noisy, I'll also go to the
render settings and turn on the denoiser
in the viewport. To get a better sense for what it'll look like when it's done. I feel like maybe this needs
a bit of a wrap light. Let's duplicate this.
I want to show you, this is not planned. I want to show you
the process that I'm going through as
I think about this. I never hit the final
result on the first try. I always have to try
multiple things. And I'm seeing here that I think maybe I want this light
to wrap more around. So I'll try it. I'll shift D, duplicate this
light, and then move it over and rotate it. And this I can decrease the
size of. And let's see. It needs to be constrained
more and even lower spread, and it has to be a lot weaker. Maybe I'll even add a bit of a tint to it, a little blueness. Let's see that's before and after zooming in
before and after. I could do with it.
I can do without it. That's fine. That's fine by me. But one photographic trick that I really like is the
use of negative fill. So I'll add just a new object, and this can be a
plane. A plane is fine. And then I'll move it over to the opposite side
of the Kelte side. I'll scale it up
and then rotate it. And right now it's working
as a bounce light. Light is coming in from
the left hand side, it's hitting it, and
it's bouncing into here. That's the beauty of using
the cycles render engine. That would not happen with IV. It's not realistic enough. But I want this to
do the opposite. I want it to absorb
all the light. So I'll give it a
material, a new one, and I'll call this NAG
stands for negative. And in the color, I'll
just give it a pure black. Let's make it
nonreflective as well. Just pull the roughness
all the way up. So now what it's
doing, watch this. If I increase the size of it, and then just zoom
in on the bottle, watch what happens when I hide. Brighter, darker. So it adds a lot of
contrast. It's a nice trick. So I'll just rotate it
over a bit and move it back to just add some
contrast to that right side. So that's before and
after, before and after. Looks very nice
to me, but I feel like the background needs
some more interest. It's not quite
interesting enough. And in fact, you know what? I'll refine the composition
a bit because I feel like if I rotate the camera
a little bit to the left, I can place this at a more interesting location in the frame, something like that. And then let's add some
interest to the background. I'll start with this, actually, and just shift de
duplicate it and move it back and into the wall. And I think maybe
what I want for this is I'll scale it
up and skill it in a bit for it's two
be reminiscent of a girder or a column to give that
industrial vibe, right? You can't really
see the edge of it. So let's rotate it a little bit to the side so you can kind of catch the highlight
on one side of it. Then I'll place one right behind the bottle
and then shift D, move that copy over. And the distance kind of depends on the angle of the shadow. Like, do I want to
fill in the gap between them with shadow?
And I think I do. So shift D to another one where I fill in that entire gap
with a shadow. And then Shift D again, get one to the other side. That's quite nice. But actually, I'll select
all of them holding Shift, and I'll scale them all at the same time to get
them to be a little thinner so I can fit
them all right inside. Like that and maybe
add another one to the right and another
one to the left. That's a little bit more
interesting, right? Let's add even more
highlight on the back wall. I want that sun to
be very strong. Instead of 20, let's do 40, add more contrast to the image, making it more interesting. And this, I feel like is getting very close
to what I want. Actually, you know
what? Let's delete it. I feel like it adds more to
the drama if I don't have it. Feels even more premium. Now the brief specifies
that I should render in 1920 by 1080. I'll go to the output
tab and type those in if they're not already there
and they are in my case, so I'll just go to
the render menu and render image when
I feel like I'm done. And it'll start out noisy, and as the samples increase, it'll get less and less noisy. And the more complex
your scene is, the longer this will take. The faster your computer
is, the faster it'll go. But once it in my case,
hits 4,096 samples, which I specified here in the
render settings right here, then it'll denoise and
it'll be finished. So when I clicked out,
it minimized the window, but I can just get that back, and I'll just edit out
the rendering for you. It is done, so I'll go
to Image and save as. And I'll save mine as a JPEG called BYOL product
chart Version one. Always at a Version one because there will
be a Version two. Probably. You will never
be happy with Version one. Save As image, and this is the finished image that I can share proudly with the world.
39. Movement Shortcuts: I'm going to level up
your movement skills. I'll be honest, I've been
holding back a little bit because I've been using
the gizmos to move around, and there is a quicker way. Now, you may be thinking maybe rightly that I
am kind of insane, claiming that using the
tool and the gizmo is slow, like you just click
it, and then you move. But you're going to
do this thousands of times per project,
moving things around. And moving over here,
clicking the icon, and then finding the Gizmo
and clicking the right axis, the seconds actually add up. I mean, they actually do, and there is a quicker
way of doing it. So I'm going to
familiarize you with GRS. Those are the shortcuts
for grab, rotate, scale. So I'll go back to
the Select tool, and these will work
with any tool selected. I usually just keep
it on the box select, and if I press G on my keyboard, remember that the shortcut
shows up in the bottom left. The cube is now
attached to my cursor, and I can click to
place it somewhere. So G, move it around, click. And this works wherever on
the screen my cursor is. So say I'm working
on something over here and then I want to
move the cube somewhere, I can just press G
and then move it, and it's still going
to be attached. If I move my cursor out the edge of the
screen on the left, it'll wrap around on the right. How cool is that, and
I'll just keep on going. I can right click to cancel, and that'll move it
back to the start. You can even constrain this to axis just like with the Gizmo. The way to do it is to press G, and then press the
letter of the axis. You'll see the letters
here up in the track ball. I can press X on my keyboard and that'll constrain
the box to X axis, press Y to constrain
it to the Y axis and Z to constrain
it to the z axis. I'll make it real
quick to just G Y, move it over here, G, X, move it over here, and this is the preferred method of
everyone I know using blender. If you go online and
you start looking up tutorials, no one's
using the tool. Everyone is using G to move. And I wonder because
it's not only faster, but it's also more precise. So let me show you if you
want to move it, say, I want to move this cube diagonally across
the floor here. I don't have to do
one axis at a time. I don't have to GX and then GY. I can do G, shift Z. Shifts means all
other axis then Z, meaning X and Y axis
at the same time. So now it's moving
across the floor. G, shift Z that's that. I can also do G shift X, which constraints it on
every axis but the X axis. If I want to be precise
about my movements, say I want to move the cube
1 meter on the Y axis, I know that this is the plus of the Y axis because
of the track ball, the Y is pointing
in that direction. And I can I can move over
here and I can go to the Y axis and I can type
in a number I can say, Oh, two instead of the 1
meter than it was before, but I can also do G, Y, and then write one on my
keyboard and click the mouse. If I want to move it 10
meters up, I press gz10. That moves it 10 meters up. And rotating works in
exactly the same way. If I press R on the keyboard, that activates rotate mode, and I just move my mouse
around, and it rotates it. Now, it kind of matters how
close you are to the center. You'll see the little line. If I'm right up against the center and I
start moving, like, it's going to be
super sensitive, but if I move far away, then it's going to
be less sensitive. And if I again, hold down shift, like we've always done
when we want it to be slower, that slows it down. Can also move the cursor out of the edge of the
screen on one side. I'll wrap around
visually on the left, but it's as if it's
even farther away. So I can just move
it super far away, and now it's going to be
very slow at rotating. It's the same thing
as with the move. I I press R and Z that rotates
it just on the Z axis, R and X rotates
it just on the X. And what's very common is
to rotate it by 90 degrees, so I can do R, z90, rotated 90 degrees and scale, that's S, press S
on the keyboard, then move it out, scales it up, move it in, scales it down, hold down shift,
makes it slower, pressing two, scales
it up by two. This is what allows me to
work at the speed of thought. If you're serious about three D, then you should get used to
using the keyboard shortcuts. If not, it's fine
to use the tools, but it will be a bit slower because you won't
be able to move, rotate, scale this fast if you're going back and forth
between these all the time. Going forward, I will be switching to this
kind of movement because I'm tired of being
constrained by the tools. But if you don't feel like learning a bunch of weird keyboard
shortcuts, that's fine. It's not for everyone, but
I would recommend that you try to transition if you really
want to get into three D.
40. Subdivision Surface Modifier: We were modeling, we added
bevels to everything, like little edge bevels to
make everything smooth, right? We went into Edit mode
with tab, press two, select edges,
clicked on an edge, and then we used the Bevel
tool, which is over here. We used bevel or we pressed Control or
Command B to bevel, and we moved the cursor out. And then sometimes we added
more segments by scrolling. You know, we added
more segments, and that smooths it out. And typically, we did this
with many edges at a time. So maybe I press everything, A to select everything. Control B to bevel that, hold down shift to make
it easier to control. And this is how we
made curved surfaces. There is another way, and it's called
subdivision modeling, and it is a very
common way to model because in contrast
to this method, where you start out with
a boxy shape and then you smooth it out with
subdivision modeling, you start out with
a smooth shape, and then you sharpen it up. So basically, if most of your
objects going to be smooth, then you probably want to do
subdivision modeling for. It's very fun to use. I'll show you let's delete this cube and add
a new fresh cube and the core of the subdivision
workflow is a modifier. Modifiers are here
under the wrench icon. We press Add modifier
and you'll find the subdivision modifier under generate and
subdivision surface. You can also go up
to the search bar or just start typing SUB, and it's here
subdivision surface. It's actually so
common that it also has a shortcut that is
very easy to reach, and that is Control
or Command one. So that adds the subdivision
surface modifier, and the shape of our
cube completely changes. So the modifier, it added more faces to the object
and smoothed it out. What happened was I'll actually
illustrate it for you. We had a box going like this. It was just one
pace from the top. Then what the subdivision
surface modifier did was it split this
pace into four phases. So it added a line going through here and one going through here, and then it moved the corners in to smooth it
out a little bit. I moved this corner over here. It moved this corner over here. That way, it now
resembles more of a ball, and we can make it do that
again to all of these phases. So right now we have a
phase that's like this. And when I add
another level here, levels viewport, it's going to subdivide that one more time, and it's going to
add a line going through here and one
going through here, splitting that phase into
four new phases. Watch. There we go. Almost exactly. If I add more, one more,
one more, one more. It's going to gradually
become more like a ball. Now, if I press Tab on this, we can still see the cube. This is what the cube
really looks like. We can still see the cube
unaffected, as well, if I go to the
modifier and I click the little monitor icon
here that hides it, and so we can work on our object without seeing the modifier. Turn it on and press tab to
edit our object and say, I want to move this face up. So I'll press the face, and then I'm going to use
the shortcut, so G, Z to move it up,
and then move it, and that affects the
smooth shape as well. It's still smoothing
out that cube, but the cube is now stretched. And what happens if I
add more geometry to it? Let's say, for instance,
press this face here and I extrude
it E to extrude. That's going to extrude
the smooth phase as well. What about this? E extrude. And now I have kind
of an L shape. It's really cubic. If I turn off the modifier. It's a cubic. It's
like a stair step. But when I turn it on, it's
a very, very smooth stair, and I can start to
sharpen up the edges that I want to be sharp. Think
about it for a second. If I want this here
to be less smooth. Say I want to keep
this sharp corner here, what would I do? Well, the modifier splits all the faces and then
averages them out, right? So this giant face here is
split into smaller faces, and then all the corners
are moved in, yeah. So if I add a loop going
across, well, say, here, then this corner here is not going to smooth
all the way over here. It's going to smooth only
to here. So let's do that. Let's add a support loop
with the loop cut tool, which is here or the
shortcut Control R, which adds the loop cut, I'll click, and then
I can slide it over. And see, that's
exactly what happens. Now, this part is more sharp because we added what's
called a support loop. A support loop tells the subdivision
surface modifier to keep this more sharp.
Let's add another one. Let's say I add a support loop going across here
and then move it up. Try to pause the video for
a second and imagine what's the object going
to do when I add this loop and move
it up? You got it? I'll click and move it up,
and this is what it does. It sharpens up all those
edges going across the top. But it's still bent
in this direction. Why is that? Why is
it bent like this? Well, that's because
nothing's going across here. But we
can do that, too. Control R, click across the object here,
and move it over. And that'll square that up too. And now we have a square top. And it's never going to
be completely sharp, but it can get pretty close. If you move the support loops
really close to the edge. So you can slide support loops. Do you remember
that? You can use the slide tool or you
can use the shortcut, which is G, and then G again
slides it across the mesh. Then if I move that very,
very close to the edge, I'll select this entire loop here by holding Alt
and clicking on it, GG to slide it. Up like this. Now, it still has a few small polygons to make that shape not entirely sharp. Like, it's not
mathematically sharp. I'll still keep that
slight little bevel. And that's why three D
modelers love this technique because you're never going
to get super sharp corners, you'll always get
some smoothness, which is very natural and very aesthetically
pleasing as well. Now, you don't have to feel constrained by the
loop cut tool. You don't have to use the loop cut tool to add support loops. You can use any tool. The inset
tool is also very useful. Shortcut for that is I. So let's do it with this face. If I press I on
this face to inset, that'll add a couple of
loops going across the edge. And unlike if I added
a support loop, like if I did this and
then slid this over, it would go across
the entire object. But with an inset,
I can keep it to just this little face and keep this kind of sharp while
everything else is round. So when adding support loops, in general, stick to the
loop cut, control R, and slide things around by either sliding them right
away or pressing GG, to slide them after the
fact, to sharpen things up. Sharpen the attachment
point here, for instance, or use inset by pressing a
face or multiple phases and pressing I. I don't know
if I showed this already, but let's delete this and add a new cube and make
the same kind of shape. Insetting is very useful
on multiple phases. So if I click this
phase, this phase, and this pace, and
I inset it with I, then it's going to inset all those at the
same time and add a support loop across the
entire side of the object. And so if I do a Control one, or I can do a
Control two, three, or four to instantly
add more levels. So I press Control four and that adds four levels in the
viewport by default. So I'll just do five for now. I want this entire side sharp, but everything
else smooth, then I can inset this and hold down shift to make it slower. And that'll sharpen
up that entire side. And if you haven't noticed yet, when there's a support loop only on one side of the main edge, this is the main edge going across here, main defining edge. And here's the support
loop going across. There should be a
support loop on the other side as
well, because if not, then we get a super
smooth ramp going in and then kind of a
sharp turn going out. So I'll also add a
control R edge loop across the other side here. And that adds a super
sharp side to this shape. It's a really fun way to model because it's very easy to
start defining curves. Like say I don't like the
way this curve looks, this one going across like this. I can just press two to select edges and
select this edge. And actually, you
can't see the problem now because the objects
obstructing the view, but I can go into X ray mode. Now I can see, Oh, there's another edge that I
haven't quite hit here. So I'll actually press Alt
while clicking on this, which selects the entire
loop going across, and then I'll go
out of X ray mode. And if I move this
loop around, say, I press G and then shift Y to
not move on the green axis. Now I can start moving
this around and very, very easily define the
curve that I want. Say I want it like this. It's a really fun way to experiment with shapes
and to get, like, wacky, smooth shapes and
also to get sharp shapes. And this, the
subdivision workflow is the one we'll use to
make the character.
41. Modeling Symmetrically with the Mirror Modifier: I want to get ahead of myself, but I think you're going
to love this video. This thing blew my mind
the first time I saw it, and it's a way to
make something really complex looking very easily. And it is the mirror
modifier for adding symmetry because oftentimes we're making symmetrical objects in three D, and we don't want to
have to work double up. We want to automate that, and we do that with
the mirror modifier. So with this cube selected, I'm going to add a modifier to it in the modifier tab here, it's the wrench and then
go to modifiers and add, I'll just start typing
MIRR mirror modifier, and now it's added. Now it is mirroring this cube, and it's doing so on the x axis because the X axis is
selected in the modifier. We can work out which axis that is by going up to
the track ball here, and we can see that
it is the red one. So across this red line, it is mirroring our
object currently. Anything we do to
one side of it is going to be copied to
the other side of it, across the center of the object.
So let me show you that. I'll go into Edit mode and press three for Phase
select mode up here. I'll click this face
and I want to inset it. I can do that either
with the inset tool or by pressing I on my keyboard. And I'll move that in
and then extrude it with E and then move it
out, and look at that. It comes out the other side as well. Let's just keep going. I'll extrude this again, maybe scale it in
and extrude it. Scale it out. Extrude it. Like, how cool is that? You can so quickly make something look
pretty interesting. I'll even I'll move this up, and maybe I'll loop cut right here so that I
can extrude this out. And now here's
something interesting. What happens if this crosses over the
center? I'll show you. So let's move this
up G to move it, and then Z to constrain
it on the blue axis, so I'll move it up
and then extrude it. And when I cross
over the center, it looks pretty good. If I move it outside
the other side, you'll see it does so
over here as well. So not only does it copy
from left to right, but it also copies
from right to left. Anything I do to either side is going to be copied
to the other side. So in edit mode,
if I press Select, this orange is the only
geometry I've actually made, and everything else is just added on top using
the mirror modifier. But the thing is,
I typically don't like geometry intersecting
with itself like this. So going into itself
and out of itself like it's doing in this area
is typically no Bueno. So what I almost always do
is I want to cut it short. I want it to mirror across just from one side to the other and not from this
side to that side. And to do that, we need to
turn on bisect for this axis. So again, we're
working on the X axis. So here under bisect, I want to turn it
on for the X axis. Let's do that. And
something weird happens. It becomes a super
strange object. And the reason for that
is when we bissect, we need to choose one axis
to copy over to the other. And I was modeling
on the left side, and I wanted to copy
it to the right side, but Blender, by default, chose to do it the opposite way. If I go into tab, let me just do this axis a
little bit better. Anything that's to the
right of this center line, that's just half
a cube down here, and this rod over here is being copied over
to the other side. And that's why we're getting
this strange looking object. So let's flip it by clicking
flip for Xaxis as well. So now this is the
result I was after. I'm taking what's on the left
side and duplicating it to the right side without having that thing poking
out the end here. So anything that crosses over the center line
is just cut off. So if I turn off bisect
for it for a second, you'll see, we get that
line going across. If I turn it on,
then that's cut off. And anything I start
doing on the right here, if I extrude it,
extrude it again, none of this has any effect. The only thing that
has effects is what I do on the left
side of the object. This is how I typically work. Now, we're not constrained to only doing this
on one axis either. Right now we are doing
it on the red line, but we can mirror on the
green line at the same time. Let's turn on the Y axis
and start modeling on, say, the side here. I will inset this and maybe extrude it
inwards a little bit. And what I can see here is that when I'm
extruding inwards, it's really hard to
see because it's duplicating the other
side over here. I am making a hole
and moving it in, but it's adding a face
on top here because it's taking this face and it's
mirroring it over to this side. So let me turn on bisect already and see if
I move this in, and this is the correct
side to bisect, it's doing it on the
other side as well. If I didn't see an effect, if it were like this, everything is flat, then I would know that it's mirroring
the wrong side, the sign I'm not modeling on, and I would have to flip it. But in my case, unflipping
is the correct thing to do. Let's inset it again,
maybe move it out. And it's moving
out on that axis. Let's add a loop here. And since I'm also
mirroring on the X axis, I can start modeling in
the X direction as well. So I can add geometry going that way and add a
loop going like this. How cool is that? Like, you can so
quickly make something that looks pretty intentional. And that's the weird thing
because let me just disable this modifier for a second by clicking the
little monitor icon. Like this, this is
the object I made. It makes absolutely no sense. It's just random geometry. Once I start symmetrizing it, suddenly, it looks like it's
supposed to be that way. Okay, let's just go all the way. Let's add the z
direction as well. Duplicate it downwards as well. And let's bisect it. And since it's looking good, then I don't need to flip
it had it looked like this, then I would need to
flip it because it's deleting all my detail. So how cool is that with
just a few operations, just a few little modeling
tricks that you already know, you can make something
like this super easily. I absolutely love this tool, and we will be using it for our character before we do that, I need to explain a little bit of how it
works under the hood because you need to know how blender decides
where the mirror is. And if I move this object, let's just hit G and X to
move it on the X axis. You can tell that it's not mirroring over the
center of the world, which is here because then
the object would change now. It is remaining its shape. So what's happening
is the mirror is looking at the
object's origin point, and that is this orange.in the middle. I think
you can see that. The little orange.in the
middle of the object. That is the point at
which Blender looks at what's to the left and right of this and where to
mirror it from. Now, if I move my
object in object mode, which is where I am now,
I'm in object mode up here. Then that origin point moves. However, if I'm in edit mode, the origin point doesn't move. Let me just turn off
the modifier for now. Go into Edit mode. I'll go to select all I've selected
all my geometry and watch the origin
point as I move it. I'll hit G and X to move it
on the X axis. Look at that. The geometry moves, but
the origin stays put. So now the origin is in a completely different
area of the object. And let me just turn off the Y and Z axis to make this next part a little
easier to understand. Try to imagine what the object will look like when I turn this mirror back on. Know that Blender will look
at what's to the left of the X axis of this origin point and mirror
it to the right side. What will the final object
look like now? What's C? This is it. Now, if I go
into tab, look at this. It took everything
to the left of the little orange point and
it mirrors it to the right. Now, what is super cool, and I think you're going to
love this is you can move stuff around with the
mirror modifier enabled. So if I now hit G
and X, look at this. We're seeing it update live. And if I turn back on
the other axes as well, I'm just holding down my button while moving the cursor over to
enable all of those. Go into tab and then
start moving this around. Look at this. How cool is that? So I can move this down and find interesting
looking shapes. I can move this over,
make this really big. I can even rotate everything
and look at that. It is so like, how would you even
make something like this without the
symmetry? It's crazy. So you can tell that I
obviously love this. Usually, you won't be making
stuff like this with it. We will be using it
to make our character so that we can make
just one half, and the other half will
be made automatically. But have fun with this. This
is such a powerful workflow.
42. Separating Mirrored Objects: Go into a little bit
of detail on how to detach objects
from each other. So one very common example
of this is with arms, let me just make an arm and go into edit mode
to move it so as to not move its origin point and then mirror that
over its Y axis. That's the green axis,
and now it's mirrored, and we're also
probably going to have a subdivision surface modifier on it with a couple
of support loops. And an inset on the
bottom and top. Now we need to detach
these arms from each other because at the moment,
they are one object. If I click the box and click one arm, both of
them are selected, and if I start rotating, they rotate together,
which is not animable. If you want to animate one arm separate from the other,
you need to detach it. But the way we typically detach something isn't available
to us right now. That is, we go into tab, and then we go up to mesh and separate and
buy loose parts. Le is there is only one
part here, and that's this. This is the only real
geometry we have. This one is a ghost R made
by the mirror modifier. So what we need to do is to
apply this mirror modifier. So click the little drop down, click Apply, and now that
has become real geometry. Whatever that modifier
did is now real geometry. Now we can go to mesh, separate by loose parts. And because these are not physically connected
to each other, that makes them loose parts. They are now separate objects.
43. Drawing: Lot of people will want to draw on their model
in the beginning. Like, in a moment, we're
going to model a character, and a lot of you are
going to want to draw maybe a mouth
onto the character. I want to challenge you to try and shape it in three
D most of the time. So if there's an open mouth, trying to actually sculpt that cavity in three dimensions instead of just drawing
it on the model. The more you can push
yourself to do that, the more professional in
general, it's going to look. In a lot of cases, you don't really want
to add much volume. Like in my Mini Robin example, I have the mustache and
I have the eyebrows, and those are basically
drawn onto the model. So I want to show
you how I did that. So I'll start by just shift A, adding a mesh cube to begin, and this can be my head. So I'll go to the modifier stack by clicking modifiers and add modifier and search for
subdivision surface at that, and I'll increase the
number of divisions in the viewport to say maybe
five that's a good head, and then I want to
add an object that can be like my drawing object. So I'll shift A, add, and it's still a mesh, but I want a two D object. And the most basic two
D object is a plane. The plane is not
a three D object. It doesn't have volume. It's completely flat, but it's a good start.
We'll add volume later. So I'll press tab to edit this, and then I'll move it up by
pressing G to grab it and then constrain it to the z axis by pressing Z on my keyboard. Then I'll move it up
and click to confirm, then scale it down by
pressing S and moving it in. How do I conform
this to the surface? I want to draw on the
surface with this plane. Well, to do that, I have to
use the snapping settings. And those are up here in
the little magnet icon. I'll click that and
turn on snapping. Now, by default, it snaps to
increments, not to surfaces, meaning that if I press G to
grab it and I start moving, nothing happens for
a while until I move it far enough that it
finds an increment of 1 meter, and then it snaps
to that increment. Oh, this is not the
behavior I want, but I can change it by clicking a little drop down
next to snapping. And instead of increment, I'll go down to face project. Let's press G now to grab it and move it over the sphere
and see what happens. It now conforms to the sphere. It's very hard to see right now, but if I click and
then move my camera, you can see it is
actually conformed. You can't actually
tell that it's happening while I'm moving it because it doesn't change shape from the perspective
of the camera, but it does, in fact, stay
conformed to the sphere. Now let's undo all that, bring it back onto the top and snap it straight down by
viewing from the top, pressing G, and
then just clicking. And that snaps it
straight to the surface. Now I want to start
modeling on it, but it's very hard to see because it's inside
the other object, kind of, and it's very hard
to tell what I'm doing. So I'll also go up here to the viewport settings
and turn on X ray mode. Now I can see what I'm doing. Regardless of where
I'm putting it, I can always see where it is. I'll view everything from above
again and then just click Edge select mode up here
and click on an edge, and then I'll extrude
that edge by pressing E to extrude and then
move it out and click. Now, what happened in three D? If I move and view
it from the side, this new part is still conformed to the sphere.
Let's keep going. I'll go up, and I'll press E to extrude, maybe
move it over here, R to rotate it,
maybe S to scale it in and look at that and
it's still conforming. And it'll keep doing
that. This is how I made facial here on my model. E, extrude that, scale it
in with S, R to rotate, G to move E S, R. And that's a
pretty good base. Now let's give it thickness. We do this with a modifier
and you've already used it, it's the solidify modifier. So SOL solidify, add that, and that adds thickness. It's going the wrong way. So let's change the offset
from negative one to one. Now I can turn off X ray mode. That adds thickness to it. And it's still pretty easy
to edit because remember, if I go into Edit mode now, I'm not editing that
three D object. I'm still editing
that two de ribbon. So I can still press that final edge and
press E to extrude, move it over, and the
thickness will be added to it. We can also smooth this out by adding a subdivision
surface modifier to this. So minimize this modifier
and add a new one, subdivision surface, and that stacks another one on
top of the solidify. So I'll add a couple
of levels to that. And maybe I even want to now make it a little
thicker so I can see it. And that's pretty nice. Maybe I even want to
offset it to zero so that it offsets down and up at the same time like it's in
the middle of the object. Then I can stack
one final modifier onto this and that will
be the mirror modifier. So MRR, mirror, add that and
bisect it on the x axis. Now I've given the
sphere a mustache.
44. Modeling Clothing: Let's talk real quick
about clothing. I've mocked up a
quick character here. It has blocky shapes just like the character you're
supposed to make later on, and I want to give this guy a T shirt. So how do I do that? Well, let's start with the shoulders because those are going to be key to
making a T shirt. Right now, I have a model here with a bunch
of modifiers on it. So the model itself
looks like this. I just entered Edit mode by pressing Tab and
it's quite blocky. On top of that blockiness,
we have a few modifier. Let me turn off the bottom two, you just see the
first and that is a subdivision surface modifier. Without that, we
have the blockiness with the subdivision
surface, it smooths it out. Then there's a mirror
modifier which mirrors it over to the
other side of the body, and then there's a
smooth modifier, which is automatically added by right clicking and
clicking Shade Smooth. We can just ignore that. That is just for making
it look smooth instead of facety if I did a shade flat, then you can see
that it's faceted and then shade smooth,
smooths it out. When we are adding clothing, we have to be mindful of
the order of the modifiers, because let me just mock up a very quick demonstration
here with a plane, moving it over and
another plane over here. So on the first one, I will
add a subdivision surface. And add a couple
of levels to it, and then a solidify. Solidify adds thickness. So I'll set the
offset to one and increase the thickness.
So that's what that does. Now, what happens if I
add these same modifiers, but in the opposite order
on this other plane? What do you think
is going to happen? How do you think this
is going to look? If I first add the solidify and then the subdivision
surface? Well, let's see. So solidify, offset one, add some thickness to it, about the same, and then
a subdivision surface. But with a few levels. Look at that. So why
is this happening? It's because the object is reading the modifiers
from top to bottom. So this one first smoothed out the flat plane into a flat circle and then it
added thickness to it. And the solidify just adds
this one straight thickness. For this one, we first added thickness and
basically got a cube, and then we smoothed out
the whole cube shape, so we even smoothed out that
thickness that we added. This is very important to understand when
we're adding clothing. Because we're going to do it based on the model that we already have. So let's do that. Let's press Tab on this and
go into face select mode. I want to select all the faces that I want to become clothing. So I think I wanted to go
down to this line here. So I'll Alt click on this edge
to select the whole ring, and then Alt Shift
click on this one, to select this ring as well, and then hold Shift to
select those two top faces. So now all of this is selected. And then I will
separate out this into a new object. We've
done this before. It is mesh, duplicate. That makes a duplicate
of what we've selected, just brings it out, and it's
now attached to my cursor, so I'll right click, which brings it back
to where it just was, but we're still in
the same object. It just has multiple elements. So let's separate it out
into a new object by going to mesh, separate selection. So that gives us a
separate object. And if I press tab now
to go out of Edit mode, we can see that we
have one object here and we have
one object here. And this is my clothing object, and I want to add
thickness to it. So let's do that. Add
modifier, solidify, set the offset to one, and then let's adjust
the thickness. So that is the start of a shirt. Now, again, be mindful of where in the stack
the solidify goes. So at the moment, we have
subdivision surface, then mirror, then solidify. And this is good. This is fine. You can reorder them by dragging the dots on the
right side of the modifier. So I can drag it
to the very top, and that will smooth out the
entire piece of clothing. So the edge will
become fairly sharp, actually, because the edge
of it is smoothed out. So counterintuitively,
smoothing actually makes it look more
sharp in this case. So make sure that this is after the subdivision
surface modifier. Let's add an open shirt so
you can see me do that again. I'll go to the body
object, go into tab, and in this case, I don't have the
geometry I need to separate out. So I'll
have to add that. We'll control R at a
loop cut and click here, and then Control R, click here. I know that I'll need
one on the side as well, so I'll click here too. Because now if I hide the other object and I've done a terrible job naming
my object here, I'll just click the
head and hide that, click the shoulders, hide those, click the arms, hide that so that I can
see what I'm doing. Going into tab, let's select these sides
going all the way down. Select the side of the object and select the very back,
everything on the back. I'm just holding down shift
while clicking every face. And on the top here, I want
an opening for the head, but I'll select a U
shape on the back. And leave the bottom open. Then I'll duplicate
it by either going to mesh and duplicate
or clicking Shift D, that separates it out,
right click to cancel, but it just cancels the movement and brings the duplicate back. It's still here. If I press G to grab it, it is still here, and then I'll press P to
separate or we can go to mesh and separate P selection. That gives me a separate object. So now I have two objects,
the original body, and the shirt on the side, and I'll add a solidify
modifier to it. Set the offset to one and
increase the thickness. Now, it looks like it's
smoothing on the side here, but that is because I
have shaded it smooth. So right clicking
and shade smooth. Remember, that kind of fakes
a smoothness to everything. The mesh is not smooth here. It is completely flat. So if I go to my wireframe
view and turn off the X ray, you can see that it
is, in fact, hard. It's not smooth, but there is this smoothing fakery going on. So if I right click and
shade Auto smooth instead, it'll try to keep
that sharpness. Then I can unhide all
those objects that I hid earlier and try to match the thickness of the
clothing on the right. Now he kind of looks
like he's wearing a shirt open in the front. So this is one way of modeling clothing that I think
you'll have good use for.
45. Class Project 05 - Character Modeling: It's the character
modeling project. Time to put our subdivision surface modeling skills
to the test, eh? It says, The brand is
looking for a fun, recognizable mascot to use
in marketing materials. Your task is to design and model a cute three D character that fits the
brand's personality. For an extra challenge, you can make the
character an animal. That means if you feel really comfortable with the
subdivision surface workflow, you can try to make an animal. Animals are quite a lot harder than the blocky character
I'm going to be making. But if you're feeling
confident, go ahead and try. So focus on creating appealing shapes with
simple blocky objects. Don't try to do any realistic, round organic shapes just yet. We will be using subdivision
surface modeling, which you learned in the
previous few videos, which means that things
will be rounded out, but try to keep
them fairly blocky. One good reference is
my mini Robin model. This guy is blocky, but he still has some
appealing shapes. So try to just focus on proportions and don't worry too much about trying to create, interesting curves and stuff. You can get pretty far
with just blocky shapes. So the requirements are
use subdivision modeling. That means use the
subdivision surface modifier and add support loops
to sharpen up edges. Separate limbs so they
can move independently. Is going to be
very important for the next section where we
animate this character, and you need to be able to animate all the lens separately. And when you're done, just screenshot your
character again. No need to render just yet. We'll do that later and upload
it to the class project or assignment section
on this website and share it on social media. That's at Bring Your Own
Laptop on Instagram, and the Facebook group is here and the LinkedIn
group is here. And in the next video, I'll make that robot character, but try to make your
own character first, see what hurdles you meet, and then we'll work
them out together.
46. Completed - Class Project 05 - Modeling the Head: Okay, I'm in a new file and
time to make my character. Mine is going to be a
robot because I have this industrial chili oil brand, and I think having an
industrial character being, like, a robot guy,
that's going to be fun. And I want to give
him a movable mouth because in my animation later, I want him to be able
to drop his jaw as if he's eating very spicy food.
I think that'll be fun. So let's start with the head. I'll add Shift A, a mesh cube. And then let's round
this out right away, going to the modifier
stack and adding A. Subdivision surface modifier. I'll add a couple
of levels already. So maybe four. And then let's start
defining the shape of this. I want it to be a
bit wider than it is tall and maybe less deep. Kind of like that. And let's start sharpening up the edges. Actually, you know
what? I'll press control R to add a
loop in the middle. And while I'm in
edge slide mode, I'll bring this
over to the left. And then at this point, I'll just add a mirror
modifier so that I can work on the left hand side and not have to worry
about the right hand. So I'll add a modifier.
Mirror is right here. Click Mirror. I'm working on
the green axis right now. So let's turn off X and turn on Y and then turn on bisect, and it's copying the wrong side, so let's flip that. And the reason it's
going down like this is because when I add this loop
only on the left hand side, look, if I turn off the mirror, it is going kind of down because it's smoothing the
right hand side so much. So to fix that, I'll have to add
another loop over here. Control R, add a loop and
bring that over here, which straightens that out. Now I will add another loop going across here in the middle. Click there and right click
to cancel the sliding. Then I want to select
with phase select mode. This, this, this,
this and this pace, leaving that one, and then extrude those down by parsing E. That extrudes it and leaves a hole for my mouth
that I want here. Now, I need to sharpen
this up because it doesn't look
very robotic to me. So let's add some more loops. I know I need a loop going across here to sharpen
up that a little bit. So control R, click the loop and bring it down,
sharpening that up. And then let's also
sharpen up this, bring it over, and
have one here, too. Everything is automatically
mirred, which is nice. I'll also add one going across here and here to
sharpen up that. I that looks pretty robotic. But again, we get
this weird seam because I'm not working
on the other side, so let's just add another loop over here to get
rid of that seam. That's nice. But I have
made it a little bit difficult for myself up
here. But that's fine. I'll just press vertices and select every single
one of these up here, and I'll bring
those down a little because I'm not liking
the profile of my face. That looks pretty good. Let's sharpen up this top side, control R, bring this up
to make it more boxy. And do I like the backside? I think I do. Although this bottom
here could be rounder. So I think the reason
it's not round is because I have a support
loop going here and here. So it's basically smoothing
out between these two points. So if I move those farther apart, then that'll
smooth it out. Now, if I just move
this whole thing up, then that'll mess up the front, so I can do just the back. Let me select this
loop and just go across all the way to the end
and do the same with this. Then I can move them
all up by pressing G, and then lock it on the Z axis by pressing Z and move those up. And that rounds out the
backside a little more. That's nice. I can
do the same here. And this time, I'll do a shortcut to select
this entire loop, and that is hold
Control or Command on a Mac and click the end, that just selects the whole row from the start to the
end of where I clicked. And then I'll move these down. Great. Let's give him
some big round yes. I'll shift A, add a
mesh, and this time, I'll do a cylinder, and this cylinder can
rotate on the Y axis. R Y, 90 to rotate at 90 degrees. And then I'll go into edit
mode and start scaling. I'll scale it down
and move it over. I can just move it free hand. No need to constrain.
Move it to here, something like that, and then I'll add a mirror
modifier to it. So mirror. Now, it says that it's
mirroring on the X axis, but it added on the
top. Why is that? Well, that is because I
rotated in object mode. And when you do anything
in object mode, it just rotates
the objects axis. So this is no longer correct. But I think probably Y is still
correct. Yes, yes, it is. So doing it over Y now is fine. Let's press tab and just
work on the scale of these. How big do I want my eyes to be? Something like that. And I'll bring them closer to the head. And I'll press I to inset
and E to extrude in, give him some goggle like eyes, and then I to inset again, and then E to extrude out. This looks fine, but
the project says that I have to use the
subdivision workflow. So let's do that. Let's add a subdivision surface modifier. I'm tired of going over here, so I'll press Control five, which automatically adds
a subdivision modifier with five levels on it
because I pressed five, and it looks a little bit funky. So first thing is it's
bending on the inside. So that's the same
problem as I had before. I need a support loop over here. So press tab, Control
R to add a loop, and I can't see anything. So I'll go over here
and turn on Xray view. I'll have to cancel
that actually, and then turn on Xray view. Control R, add a loop. Over here, that
straightens it out. Now, another weird thing is
it's kind of like a star. It's like folding in on itself, making this tire shape. And I'm not a huge fan of that. The reason for that is a problem we have
touched on before. This here is the
dreaded end gone. It's one face with
very many vertices. So all of these vertices are
connected to this one face, and that confuses the
subdivision algorithm. It's trying to smooth it out, but it doesn't know what
to do at this spot. Now, that won't be a problem if you're smoothing
out a flat surface. But in this case,
it's trying to bend here and going in and it
doesn't know what to do here. So all we have to do is make sure that the gun is
on a flat surface. And how do we do that?
It's very simple. We just inset it one more time. I to inset and bring it in. Now the gon is on the same flat plane as these faces, and
these faces are fine. These are all four sided
polygons. Gon is fine. It's flat, leading to
no shading issues. Now, I want to sharpen
up some of this here. I'm not a huge fan of
how smooth this is. So I'll add another
ring going across here, slide it over and sharpen
that up a little bit. Can do the same on
the inside, actually. Bring this over here, and I'll sharpen up the
inside here too. Add at least one in
the center there. Which looks more robotic now. Very nice. Let's
give him some ears. So same thing, mesh, cylinder, and I've learned from last time, so to not screw up
my mirror modifier, I'll go into Edit
mode right away and not start rotating
in object mode, and I'll rotate on the x axis, R X 90, and then G,
Y to move it over. I know it's a lot of letters. You can still use the gizmos, you know, I will become
second nature at one point. So S to scale it down. And I'll just move it
into place free hand. This, I think, I'll
click the X icon in the track ball to view
it from the very front, and then I'll move it over
until it actually barely touches because then it will smooth out here and it'll look kind of
like it's attached instead of being welded in, which I think is
going to be cool. Click this G Y to move it in, maybe S to scale it
down a little bit, G Y and let's control B
bevel it and press faces, go into this one, I to inset, and maybe E to extrude that. And that's a good
start. Let's control three at a subdivision
surface modifier. We have the same
kind of problem. It's making the
weird tire pattern. So tab, and I can
hide this head. I'll click on the head and up in the outline or I'll
click the icon. Actually, let's start
renaming stuff. So head. And this is eyes. This is ears. I'll hide the head, click
the I icon on the head. Then I can see what
I'm doing. Press tab and this part needs to be inset, I to inset it. It's still doing the star thing because we need to
inset it one more time, I to inset and that
removes the star. It's doing the star
thing over here too, click that I to inset it and it's doing the
star and inset it again. I'll turn back on the
head to see the context, and this is pretty cool. Let's sharpen things up here. Let's add some support loops. So control R and bring this over until I like the
curvature on this side. So probably something like that. I want it to be quite sharp, and I want this to
be quite sharp, add a loop there and
add a loop here. I'll do the same
here to sharpen this up. That looks mechanical. Let's also add line
going through it. So one loop here, Control B to bevel it. I'll hold down shift to make it small and then I'll extrude it inwards using the extrude tool
and extrude along normals. Or as I prefer to do, to use the shortcut that
is Alt E for extrude, and then I get all the
extrude options and I can do extrude faces along
normals move those in. That looks nice. Right click, Shade auto smooth on that. And I'll do the same on the
head, shade auto smooth. Did I do it on this? I think so. Shade auto smooth.
And on the air, I'll add a modifier. I'll add the mirror
modifier across the Y axis, turn off X and turn on Y. That brings that over, and I'll move it down so it's in
the middle of the head. And that looks fun.
I like him already. Let's give him the mouth
that he so sorely needs. Shift A, add a cube, and this cube needs to
just fill the mouth. So I'll go into X ray mode
and just from each angle, I'll try to put it
straight inside the mouth. So I'll start from
the side, press tab, and then G to move everything over until it touches
the corner here, G, move it here. And then I compress vertices and select all
these vertices and GX move those in and then select these vertices
and GZ move those up. And then look at it from the
front by clicking the X, and I can select everything, select, and scale them in. S Y, scale them in until if it. Then go out of Edit mode. That's pretty good. I'll probably have to adjust
a little bit, though. Once I add the
subdivision modifier, subdivision surface
at a few levels. That makes it completely round, so this needs a
lot of sharpening. Going to tab Control
R. And in this case, I think I'll just
work symmetrically without adding a mirror modifier just to show you how to do that. Control R, just click
that in the middle. I right click to not slide it, and then I can control B bevels, but I can bevel it quite far. I can bevel it until I get to the point where
the curve starts. So I'm looking at the
curve of the head, and I feel like
it kind of starts there and ends up
kind of like there. So that's where I wanted
for this object too. So Control R, do the same
here, click in the middle, and then Control B, increase it until I feel like the
curve is pretty similar. Then I'll do the same here. Control R, and this is
quite smooth, in fact. I feel like maybe I need to smooth it out more
than is possible. So maybe I'll take this
whole edge, this, this, and this and move that
over on the X axis to round it out even more than what's possible
with just the modifier. So it follows that
contour. I like that. Okay, let's add one
more support loop on the back to sharpen that up, not that we'll see it a
lot. And then let's see. I think those top faces need
to come up a little bit. I'll hide the head, go into face select
mode and select all these faces then unhide the head and G Z to move those up so they
fill it a little better. It's fine if it
intersects. That's cute. I want him to have a
thicker mouth, though, let's edit this
and this together. I'll click both of
them, go into tab, and then looking from the front, I'll go into Wireframe View in vertex selection and select everything on the bottom here. Everything this far down. I'll go out of wireframe
view and then G Z. Now I can adjust
those two together. And how thick do I want it? Something like that.
47. Completed - Class Project 05 - Modeling the Body: A let's do the body next. I'll just select everything
here and move it up G Z, move it up above so that when I add something
new, add cube. I'll add below. Feel
like that's nice. Let's go into Edit
mode right away and just scale it in on X. How skinny is this guy? What do you feel like?
Something like this. And then on Y scale, Y SY. I want him to have a tiny body. Then G Z to move it
down, G for grab. Let's scale him
down again on Z, S, Z, scale down, and
GZ move them up. His body should probably grow
a little going downward, so if I'm just looking
at it from the front, I can go into
wireframe view again, select these bottom vertices
and scale them out on Y S Y. Scale it out a little bit, and then view from the other side, scale X a little bit, making him a little trappizoid. Control four to add a
subdivision surface. How am I choosing the levels? It's basically on intuition. I know roughly how big I want these to be to kind
of define the shape. I know that three is going
to be way too little. Five may be too much, so
I just started with four. So going into tab.
And by the way, at one point or another,
you'll probably add too many levels and it'll
start lagging quite a bit. Just turn down the levels,
and you should be good. Because when you start
adding geometry, right, if I add a loop going here
and one here and one here, you start to add a
lot of polygons. The subdivision surface modifier
adds a lot of polygons. So it kind of grows exponentially
with each loop you add, and I saw that happening
with the ears, especially. Just let's look at
the wire frame. And it's not actually showing
me the new polygons that it's adding because optimal
display is turned on. But if I turn that off, you'll see how many it's
actually adding, and it's quite a few
polygons. Those are tiny. So if you can get away with
two, then turn it to two. And in this case, I can. The
mouth is still shaded flat, so right click,
Shade Autosmooth. That's good. And
let's go back to the body and sharpen
everything up at. It's all sharpen up the top, control R, drag this to the top. He's pretty boxy, so I want
these to be fairly sharp, and I want this
side to be sharp. Let's add a mirror modifier. Mirror on the Y axis and bisect, and the other way, not that way. So let's add another support
loop on the other side. Very nice and one back to front. I can just keep
one in the middle, I think. I like that roundness. And then let's give him
a separate hip section. Just close to the bottom. Control R to add a loop
somewhere something like this, and then do that same
trick as with the air. Control B to bevel it, and then I'll extrude this in with extrude along
normal this tool, to E for me, extrude faces along normals, then
move these in. It gives me a separate
section for that. It's very nice and I can sharpen that up by adding some support loops around it. Good. He needs a neck, Shift A, mesh. Let's do a cylinder for the neck and just go into edit
mode and scale it down. And it's attached
at a weird place. Let's select everything on the head and just move
it forward a bit. GX so that it actually attaches to the
head and not to the mouth. And then on the neck,
I can right click, shade auto smooth,
smooth it out. And I'll press Shift A again, mesh, cylinder, and I'll work
on the shoulders next, tab. And the shoulders
should be fairly thin, so I'll actually go into
X ray mode again, tab, scale it inwards, but I will only scale on
the X and Y axis, so shift Z as in not z, and that kind of
makes it more skinny. Then I'll rotate it
R on the X axis, X, and right 990. Go out of edit mode, go out of X ray mode, and move it down. Now I can scale those
in a little bit. S Y Nice shoulders. Right click Shade Autos move. And let's give him some arms. Shift A at another cylinder, go into X ray mode, tab, scale on not Zs or Shift Z. Move it in. How big
do I want this to be? Maybe a little less. And then viewing
everything from the front, I'll move it over to
here. It's way too big. Scale it down, G to move it. How big are arms? I feel
like maybe like that. For this guy. And he needs
two arms, obviously. So mirror on the y axis. And since I moved everything
in edit mode, the origin, the little orange dot
is still in the middle, meaning that it will
mirror over the middle. Right click, shade Autosmooth. But yeah, the arm definitely
needs a subdivision surface. Subdivision surface modifier, add a couple of segments to it. It's really bad because I don't have any support
loops and it's so long. Let's add a support
loop at the top. And an inset at the
very top because it's doing the weird jagged thing. So I. That's good. And at the bottom,
I'll do the same, Control R, drag it down. Press this face and press
I. Rounds that out. We're still getting the star
shaped, so I once more. And hell, I'll even
extrude it in words and press I again just
to add some detail. And it's still doing
the thing. I once more. Whenever it's doing the
thing, just press I. Cool. And I want a separate
segment for the hands. Let's add a new loop going down here and
how big are the hands? Something like that and
Control B, beveling it, and Alt E, extrude faces
along normals inwards. And I can actually go
just a little bit, and then a little bit more by Alt E extrude face
along normals again. Because if I turn off the
subdivision surface modifier, you can see what I
just did is that first round added this loop and the second round
added this loop. I basically added my
own support loop. But another way to do this is
if I undo this undo, undo, I can alter, extrude
phases along normals, go the whole way, and then Control R,
add a loop going here. That does the same
thing. Control R, at one here, two to sharpen it. So go into Edit mode and
add another support loop here and here. Very nice. That's my hand, and
that should be deeper. So I'll select this ring. I'll use the shrink fatten tool, which is here, which is
also Alt S, so Alt S, which shrinks it in, makes it an even bigger
segment change, and I can scale it up. So I'll view everything from
the front in wireframe view, select vertices,
select all of this, then S Z to scale it up. Oh, I wasn't in X ray mode, so I didn't select
the backsides. So do that again,
select all that. S Z, scale it up. That's better. I'll add a segment
for the shoulder too. Control R, drag it up here, Control B, and tE extrude pass along
normals, bring it in. Control R, support
loop, support here, and here, that's good. Fun. The legs are
obviously no different. Shift A, mesh, cylinder. I'm just doing the
same things over and over again
here, going to tab, move them down, scale them in, view from the front to
position it correctly. Do I want short legs?
Yeah, short legs are cute. Move these up. And right click Shade Auto
Smooth, Control four, add a subdivision, then add some support loops
here and here, and inset on the top. I don't even have
to see what I'm doing because I know
it's going to work, I and I on the bottom. And let's add a
segment for the knee. So click in the middle, Control B, bring those out. Now I have two new
loops that I can Alt click, Alt Shift click, and bevel both of these at the same time and Alt E
extrude faces along normals. You know what? At this time, I like that it's going in and then bulging out
and then going out. Yeah, I like it. Mirror it to the other side on
the Y axis, bisect. And give him feet.
What shape or feet? My feet, in this case,
will be cylinders, too. Add cylinder, move it down. Scale it on z axis and scale it on the Y axis
to elongate them. Scale down, how flat? Kind of kind of like that. Move it over X, GX, GZ, to move it on the Z, and S to scale it out. GY, OGX to move it forward. And Control four. Subdivision surface modifier. Got to inset the top and bottom at the same
time this time, I. And then add a support
loop in the middle. That's a foot. It
needs to be shorter. Tab, select everything
Bpressing A, scale with S, X,
and shrink it down. GX, move it over. That's cute, and then mirror. Although, did you see that there's still
the weird pattern, so got to inset once
more at the top. Cute. He needs
thicker feet, though. So tab A to select everything
and then shrink fatten, alts, thicken them up. And that's pretty good. Now, I want to give him an apron because this
is a cooking robot. He's working with oils. He needs an apron, and
I need an excuse to add some sort of clothing just to show the technique I've
shown you before. So let me just go through and rename everything real quick and then I'll add the apron. Cool. Got to hide the
head and the mouth. Oh. Didn't rename that. Mouth. Hide that. Keep the neck and hide
the eyes and the ears. Good, good. Right click
Shade Auto Smooth. That wasn't on. Then let's select the faces I
need for the apron. So go into tab and remember, I used a mirror
modifier on this, meaning that I only modeled one side and it mirrored
to the other side. Now I've kind of lost
track of what side I was working on and what side
just support loops. And if that ever happens to you, it's fine to just apply
this as real geometry. So I'll go to the little
arrow and click Apply. But it's gray out
because it says this modifier operation is
not allowed from Edit mode. Okay, so I'll go out of
Edit mode into object mode. Click the arrow, apply, and go back into added mode,
and now it's symmetrical. So it's a little
easier to work with. And what do I need
for the apron? Let's select this face at least, and this and this and this. I think I want the apron
to cover the whole belly. So this as well, this part. And these two corners. And at the top, I guess, it can go across as
two straps here. And down on the other
side, go across like this. But I do want just a
little cut out here, and I don't have the geometry
for that. So what do I do? Well, let's just bring
it along for now, and I can add more geometry to the new object.
That is fine to do. Shift D to duplicate this part and then right click to move it right
back to where it was, and then P, separate selection to get a new object and then
tab to go out of edit mode. So now I have this
new object that's extracted from the belly and
I can hide the belly object. And just edit this. If I go into tab, I can add that part that I
was talking about. Control R, add a loop
here and a loop here. Add a loop here and a loop here, and then I can delete these, delete faces, which
makes a hole in it. And I think I can
delete these to delete faces. Yeah, that's fine. And in fact, I think
clicking these, I can dissolve those,
delete Dissolve edges. Dissolve just removes
them and reconnects. That kind of looks
like an apron. Maybe I don't need this back
part, click this, Control, click this to select everything
between delete pass. That's more like
it. Let's unhide the body to see how it fits. It fits snugly like it should. So let's add a
solidify modifier. Set the offset to one, so it goes outward
and not inward and just add some thickness
to it a little bit. Very nice apron. I kind of
want it to be more round at the bottom low so
that you can see his body behind
that little bevel. And the reason it's
not showing right now, let me just hide the solidify
in the Viewbard is because we have a support loop going
across here and one here, making it very, very sharp.
Let's bring those in. Let's actually maybe I can
dissolve this. Let's try that. All click on this, delete
and Dissolve edges. And yeah, that's fine. That's fine. So let's
do the same here. Alt click, delete,
dissolve edges, and then dissolve this as well. That rounds it out, and
let's add one support loop, actually, to give it
a nice roundness. And then turn on the solidify
and we have our apron. Turn on the ears, the eyes, the head, and the mouth, and I think
this is my character.
48. Completed - Class Project 05 - Separating Mirrored Objects: Let's go through and just
separate everything that I need to separate in order to animate this because
at the moment, the arms are one object, the legs are one object. Everything that's mirred
is one object. Let's see. I don't need the
eyes and the ears, those are going to be
attached to the head, those don't need to be separated. Those
don't move, really. The mouth is one object, and I want this to
move, so that's good. The neck is one object. The shoulders, I don't
need mine to move, you may need yours to move, so we may be different there. The arms though, those
need to be separated. Let's apply the mirror modifier. Lick the little drop
down and apply. That makes them
both into objects. Let's select everything
and select and all, and then mesh, separate
by loose parts. So that gives us two separate
objects in object mode. And I even think that I may
want to rotate the hands. So let's also separate
out the hands. I'll select both of
these and go into the front view and
press tab to go into edit mode and then
go into wireframe to look through it so I can
select backsides as well, vertex select mode, and select everything
belonging to the hand. I'll do the same over here. And then P to separate and then selection separate
just the selection. That gives me a separate hand here and a separate hand here. Good, good, good. Let's
rename everything. I may want to detach
the hips from the body. Maybe I want to rotate
around the hips. Let's do the same
thing there. Go into the front view, tab, go into wireframe and vertex
select and just select the bottom part, P
separate selection. That gives me that
as a separate part. And it's open, though. So if it does rotate, you're going to see into it. So actually, let's
close that hole. I'll hide the body
and the apron. Click this and go
into Edit mode, and I just need to
close this hole. So I'll select all of
these edges on this side, and then same thing here. And I'll take these edges, too. And go to face and fill. Fills everything up.
And that's good. And maybe I'll do
the same thing to the body just because
I'm a completionist. Tab, I alt click
on this, actually, which selects the whole
ring and go to face, fill. I'll separate out the legs. Tab, too early, I can only select this part
and this part isn't real, go over here to
the mirror, apply, tab, select everything with A, P, separated by loose parts. That gives me these two separate objects and the
same with the feet. Apply tab P by loose parts. And if I needed
the legs to bend, I would also need to
separate out these into three separate segments. But in my case, they're
not going to bend. And once I'm done with all that, I can screenshot my model like this and post it to the assignment section,
and I'm very happy. I think this is a
cute little guy.
49. Working with Multiple Materials: You may want to add different materials to
different areas of your object. Is that possible? Of
course, it's possible. Anything's possible in
three D. So the way to do it is you first have to
go to the Material tab, add two new materials. I'll click New. And that
adds my first material, and then I'll click
the little plus up here to add a new material slot. Just adds a space for the
object to hold the material, but there's no
material in here yet. To add one, we either have to pick a
material that already exists from the drop down or click New to add
a new material. And the first one
that can be skin, in this case, and maybe I want a different
material on the eyes. So the skin can be a dark brown. The eyes can be a completely
black creepy void. Now, on my object, I have a subdivision surface
modifier that smooths it out. So if I hide that, it's
kind of easier if I shed it flat to see the
actual mesh I'm working on. Another thing you
can do actually, instead of turning this off
every time you want to edit, is you can turn off
little box beside it, which disables it
when in edit mode. So if I go into edit mode now, you can see both
the smooth version and the unsubdivided
version, the actual mesh. If I turn off this, then going into Edit mode
hides the smooth version, allowing me to edit
the original mesh, which is very handy. W in edit mode, I'll go to phase select mode and
select one phase on each I and then go to
select Linked Linked, which selects everything
that's attached to that. Since eyes are
separate elements, they're not separate objects, they're still in
the same object, but they're not
connected to anything, meaning they're
separate elements, that selects the whole I. Oh, let's go to material, and to be able to see
what we're doing, let's go into material preview
mode in the view port. And we can see that. Well, first of all, it's flickering a bit. That's just because
I'm in edit mode, but in any case, my whole object has
the skin material, and to add the eyes, I just have to select this mesh, click the eyes,
and click a sign. Now when I go out of Edit mode, you can see the eyes have a separate black, creepy material. Now, it's worth running
over again just the different selection
modes that we've learned. So we know that clicking
one face and then shift clicking another allows
us to select more faces. We also know that clicking
one face and Control or command clicking one far away selects a whole
line between them. I haven't shown you yet
is that you can also select a rectangular area
of the mesh by clicking one corner of the rectangle
and holding both control or command and shift and
clicking another. And that selects a rectangle
selection on that. We also know that with
this tool selected, the select box tool selected, we can select a box. But that won't select the
backside only what we see. So if we want to
select the backside, we got to go into
wireframe view, and then we can drag a box and select all sides of the monkey. That's handy for
selecting stuff. And also, we haven't
used it much. But there's the
circle select tool, which I prefer by accessing
using the shortcut C, which gives me the
little circle. And when you do that
with the shortcut, you can scroll out
to increase the size of that circle and then kind
of paint your selection. Then right click to Cancel
so that I can move around. If I hadn't done that,
then clicking on my mouse wheel would
remove selection. This, however, is a
little different if you select the tool, if
you select the tool, then you can move around
using the scroll wheel, and you have to click and then scroll in order
to increase the size. And in order to remove
from that selection, you got to go up here and
click on subtract mode. Zano can add different materials to the same mesh, very handy.
50. Advanced Shading : Do a deep dive into materials because there are a couple
more sliders that you should know when doing character modeling because you can make almost every material with the values that I've shown you, just the color metallic
and the roughness and at least if you also
use the glass shader. But there are three more like
slightly advanced things, and those can help you achieve a couple more materials that
I want to show you now. And to do that, I have some
interesting looking objects. Go into rendered mode. And you can see that I've
set up an HDRI image. This is one that I've
found online with a strong light source
to show these examples. And the first one, that's
this object right here, and that is an ear. Because what we're
going to do on this one is to add subsurface scattering, and that is what you
can see on my ear. When I'm back lit by the sun, they start glowing a little bit, like the light goes into the
ear and it mixes around. In my flesh, I'm sorry for
getting nasty for a moment. And then the light
exits with a color, and that is called
subsurface scattering, and we can do it
with a material. So let's go to the material
tab and add a material to this and go down to subsurface. These are the settings
for the subsurface. So to set this up,
let's first get close to my skin with this. So I'll give it a color that's
close to my skin color, which has to be
very pale, indeed. And then decrease
the roughness a little bit to make me
a little more sweaty. Then I'll go down to
subsurface here and I'll increase the weight
0-1. That means it's on. You can do half on, half off, but in general, keep it fully on if you
want to keep it on. We cannot see a huge
difference here. The reason for that
is because the scale is very small and
this ear is very big. If I go to the measure tool here and drag from
top to bottom, we can see that my ear
is 1.5 meters tall, and that means that I'm
going to have to go outside of regular values
for the subsurface. I'll increase the
scale from 0.05, which would make sense for a realistically scaled ear,
and that's much better. Now, if I look at the ear from behind and let the
sunshine through it, we can see that it lights up. Let me turn that off so you
can see what it looked like before and then on
how cool is that? Now, everything in the
subsurface is set up to mimic skin because that is the most
common use case for. And the radius is
one such example. So the radius consists
of three values. Those are red, green, and blue, and that is how much of
each color is scattered. Now, these values
correspond to skin. If you're doing anything
other than skin, you should click the top one, drag down to select all
and set them all to one. That just makes the
subsurface white. So for most other use cases, just do white, and
you can start mixing. Like if I do no green, just zero on the green, then it's going to
become purple, right? And you can start messing with
basically RGB values here. But in general, yeah, stick to one or the skin color. And mess with the scale
until you're happy. In my case, I needed
something like four. If I set it to one, then it's
going to be less prominent. Now, not everyone is
going to want to use subsurface because subsurface takes a long time to render. You can see that it is very noisy compared to all
my other objects. You can especially
see that if I go to my render settings and
I go from GPU to CPU, which is slower on my system, you can see that this left object resolves a lot
quicker than the right one. So subsurface is
notoriously slow to render. So it's kind of prohibitive
for some projects. But if you can, then it can add liveliness to your object. So use this for skin, use it for translucent plastic
like legos, great slider. The next one I want to go
through is the sheen value. And for that, I have
a cloth object here. So we'll go to its
material and add a new. And to prepare for this, I want to do something
like a denim color. So make that kind of
teal and quite dark. H. And then add some
roughness to it. Denim isn't very shiny. Now at the moment, it kind
of looks like plastic. It looks like rough plastic. The reason we can
tell fabrics apart from plastics is because
along the edge here, you can see that fabrics
light up a little bit. They kind of catch the light, and that's because of
tiny little fibers or hairs sticking out, and those catch the light. And you can simulate that
with the shen value. Down in the material,
here's sheen. And as I increase that, watch. Edge of the material lights up, and that's even more
prominent if it's back light. I this is without
sheen, with sheen. Increasing it to max make
it look more like velvet. If I do more like 0.2 0.3,
that's more like denim. And also, you can mess
with the roughness value. If that is low, then you see that
shrinks the effect, and if it's high, then
it grows the effect. You can fine tune that,
fine tune the weight. You could even do tint
messing with the tint, that will give you
some wacky effects. I can make a green
sheen around it, and that's unrealistic, but can be fun for
some materials. So that hen, very
good for fabrics. And last but not least, I've built a torch, and that is to demonstrate
the emissive value. So let's add a new
material, and in fact, let's add another new material because I want this last
one to be emissive. And I want to add
that only to the top. So let me go into Edit mode, and I'll go into
Face select mode and Alt click this ring and Shift Alt click this and
this and this and this and go up and up
and the last one. Oh, that didn't work. Let's use the circle select tool then. And with add mode
selected, click. Then go to the emissive material and assign that
to the selection. Nothing happens because the
materials are identical, but let's make something
happen by going down to emission and turning
up the strength. To, let's do ten.
Now it lights up. And not only does it, light up for itself, it lights up the
world around it. So if I move this with G, grab it and move it
over to the fabric, and I'll turn this up to 100
so we can really see this. You can see that this even lights up everything around it. So it's like it's
become a light. And unlike a light, you can assign it to just
part of an object. And that is very cool. We can make that more
of a torch fire color, like a dark, like this.
That's interesting. Let's see how that plays
with the subsurface. Let's put this on this side. Look at that. We can
even see the subsurface. So those are three
interesting values you can play with in a material. You have the
subsurface scattering for skin and for plastics. You have sheen for fabrics, and then you have a missive
for things that glow.
51. Class Project 06 - Character Shading: Alright, shading time. Class Project six. Now that you've modeled
your character, it's time to bring them
to life with materials. The client wants the
mascot to feel friendly, simple, and in line
with their brand. You guys know this.
Always stick to brand. Use materials to differentiate
parts like skin, fur, clothing, eyes,
and any accessories. Think about roughness,
metallic accents, and how to create
interesting contrasts. And also remember what you've
learned about subsurface scattering for
skin and plastics. Machine for fabric and emission for anything
that's glowing. Requirements regularly
check your materials with a cycles render. You're allowed to use EV
when working on this. Some computers have to because cycles just
isn't feasible, but you should regularly check in cycles because the
final render is in cycles and it's a good idea to check
in there occasionally while working so you don't make any huge mistakes that'll
show up in the final render. Use an HDRI when rendering. Don't worry about advanced
lighting at this stage. Just find an HDRI that you like. You may want to build
a little backdrop, just an even color that can
really help with readability. The deliverables render
your character with cycles. I will not accept EV renders,
not for this project. Save it as a PNG or JPEG, upload it to the class projects or assignment section
of this website. And if you want, you can
share it on Instagram, tag at bring your own Laptop. Facebook group is here and the LinkedIn
groups right here. Get these links in the
project guide document.
52. Completed - Class Project 06 - Prepping Your Character: Let's finish this character. We'll give him some
material, some color, and get him to the stage where we can start
showing this to people proudly showing
people this gray model. Not as cool as showing something that's like a final
finished asset. First thing we have
to do is decide, do we want to work in rendered mode or material preview mode? The two balls on the
right on this line because I want to work
in rendered mode. Rendered mode is what
we're going to do. At the end, we're going
to render our character. However, working
in rendered mode is not very fun on
a slower system. So I can do it because
I have a very fast GPU. I can work while
in rendered mode. Not everyone can,
and that's fine. That's why we have
material preview mode. So material preview mode
works in real time. It uses the EV render engine, which is a real time render
engine. In the viewport. Even if you have selected
cycles as the rend engine, which I'll do now, I'll go
to cycles and turn on GPU. And when I go to
material preview mode is going to start up IV, and I'm looking at my
character through EV. It's going to give a
preview of your materials. Not exactly the same way they're going to look in rendered
mode, but pretty close. So working like this
is how most people, I would guess would
have to do it. I, however, I'm
going to boast about my system and turn on rendered
mode and work like this. Now, he's very dark because I have no
lighting in my scene. So let's open a new window, go to the shader editor, and turn it from
object to world. So I'm changing
the world shader. And in here, I'll
add an HDRI image. We add an ENV
environment texture. Here, I'll just open
my file browser. And I think I'm going
to probably blur this. I mean, I don't know why
people blur it exactly, but I fear that
maybe some of you techies out there may be able
to hack me or something, if you can see my
details. I don't know. Let's go for this one. This is an HDRI that I downloaded
from the Internet. And it has a strong lighting
from the side, which I like. When doing shading,
I like using strong, harsh lighting because it allows me to see surface
detail more easily. If it's soft, I mean, it can be more
aesthetically pleasing, but it's harder to tell little details because
it, smooths it out. So the light is
coming from behind. Let me just close this.
Light is coming from behind, and that's not the best. I don't want to work
on the shadow side, so I need to rotate
my character. However, rotating it can
create some problems. So if I select my
whole character and I press R and Z to
rotate on the Z, and then I type 90, 90 degrees, press return, then he
does indeed rotate. However, he rotates around
the middle point of his body, and the middle point
of the body is here. The middle point of the head
is like here, probably. So it averages out and it rotates around the
front of the neck. Meaning, if I want to
continue working on this guy, he's going to be off center now. Like, he's not exactly in the
middle of the green line. So while we're
working on the guy, try not to do this. Try not to rotate the guy
without re centering him. And the way to do that is, I'll undo do all my drawing,
get him back there. And I'll go over here to
this little chain link. And this is where do
we rotate around? We can rotate around a
bunch of different things. For the moment, we'll just
turn it to three D cursor. The three D cursor is this life buoy kind of thing
in the middle of the scene. This was the middle
when I modeled this, and it's still going
to be the middle. This is the middle
of the entire scene. So let's rotate around that. So I'll press R and
Z and 90 again. And now when we look
at it from above, he is actually in the
middle. That back. And then I want another
background for him. This is a distracting
background, and I want to be
able to see what I'm doing in the right context. So I'll shift A, add a plain G Z to move it down,
and then scale it out. Let's do that in edit mode. Scaling an object mode
is always a bit iffy. So press S and drag it out. To give him a floor to stand on. And then just for the back part, let's press two to select edges and select this
edge and this edge and E Z to extrude on the z axis
and get him a backdrop. Then I'll smooth out the backdrop by
selecting these edges, Control B to bevel and drag it out and scroll
up to add some segments, and that smooths out
the backdrop and then I'll right
click shade smooth. Now I have a nice, nice, even backdrop to work on. And I'll give that a color. So I'll go to the material, add a new one, call it back. I want to work in the context that it's
going to be shown in. I have to decide what kind of background I want
to put this guy on. I just kind of green background
color for the bottle. So maybe I'll add that
same background color for this guy so that I can place
those in the same scene, and I know that it'll
work. So let's do that. Let's give it a greenish
color. Slightly dark one. If I really cared about this, I would go back and sample the exact color that
I already used, but I'll just do it from memory. It was something
like this, I think. And then let's
increase the roughness to get rid of that shine
in the background. It was like this, but
let's just increase that, make it matt, and this is
a good place to work from.
53. Completed - Class Project 06 - Shading Your Character: Start with, like, the main material that I
want across most of the guy. And I feel like that should
be a kind of plastic. He reminds me of a
little toy robot and I don't want
to make him metal. I want to make him plastic, and I want to make him
look small and cute. So let's just click the head at a new material and call it main. I don't like naming
materials after the color they have and rarely after
the materiality of it, so I don't name it green and
I don't name it plastic. I name it main because then if I ever go back and change it, always going to be
the main material, but if it's called
green metal and then I make it into
black plastic later, then that's going to be awkward. So I'll just call it main. And let's select a color that vibes well
with a background. I immediately go to, like, red because that's the
color of my chili oil. I think that kind of works.
What about a yellow? It does, but it's
not quite the vibe that I was going for in
my earlier color scheme. You know what? I
just decided that I've already taught you
how to bring in images, so I'll bring in that
render as a reference. Shift they add an image. In this case, we can actually
add a reference image. We don't need a mesh plane. A mesh plane will pick up
lighting from the scene. A reference image will not. Then I can open that
image that I rendered earlier and get a much
closer, see, look at that. The color of my
background was way off. Let's bring it closer
to where it was. It was more like that. And
then the color of the oil. That is more deep
red. More like this. Are you screaming at
your monitor right now? Are you screaming that there
is an eyedropper here? Why not just click
the eyedropper? I should have explained this,
but I'm going to do so now. I generally stay away from the eyedropper when
working in three D, and there are a couple
of reasons for that. Let's just use it now
to see what happens. If I click the eyedropper,
and then click the red. It doesn't sample,
and that's because a reference image isn't actually in the three
D scene per se. It's just like an
overlay display. And therefore, we just sampled the ground right behind it. But let's delete that and let's instead add an image mesh plane. Now it's added as an actual mesh in the three D scene. But
notice what happened. It's now affected by
the lights as well, and it's right now
in the shadow, meaning that if we sample it, it's not going to
be the true color. It's going to be
some modified color, which is also not what we want, although now the
sampling will work. But we're going to
get the wrong color. This is not right. Okay,
there is a third option, and this is the best if you really need to sample a color. And that is, you can
open a new window, open an image editor. And here you can open the image, or I've already imported it so I can find it
in the dropdown. Here is the image with no
lighting modification, and here I can sample
the exact color. But it's still weird because
of a couple of reasons. One, this is that background
green refracted through red, meaning it's not the pure red. Also in this three D view, we're still lighting it, meaning that this color
looks different from this color and because
of all of these things, whenever I want to select
a color in three D, I eyeball it because I've
just learned that over time, eyeballing is the quickest way
to get to the right color. And now we can just
move this to the side. Let's just hide it
in the outliner. Click the eye icon
and the guys gone. So for this material, let's work on its materiality. We don't just work on color, we work on these other
sliders as well. So the roughness I think maybe a glossy
surface can be fun, and then I want to add
some subsurface to it. Subsurface is good for
skin and for plastics, any translucent material, and it's most visible
in back lighting. So I'll just move to the
back so I can see it with back lighting on and
turn up the weight to one. It's not visible here because I'm working
in a huge scale. The guy is probably very
large. Let's measure him. The head itself is,
yeah, about 2 meters, so I definitely need to increase the scale
of the subsurface, say to maybe 1 meter. It's nice. That's adds some translucency. And let's change
the radius because it's now a skin value, and let's change it just to one. Generally good idea for a
plastic. So let's see that. That's before and after. Before and After. Just as a softness and a toy like one.
Let's actually see. Like if I increase the
roughness instead, an increased roughness
with a bunch of subsurface is also
pretty beautiful. Reminds me more of rubber. And you know what? I really
like that aesthetic for this. So let's add that material
to other parts as well. Let's add it to the ears. And to the body. To the arms, legs and for the
other parts here, I want an accent color
or an accent material. Let's add a new material to the shoulders or where do
I want to work on this? Maybe I want to work on it on the mouth because
it's more exposed, easier to see what I'm doing. This new one will be accent. And oftentimes, I feel like doing a contrast in
roughness can be very nice. Maybe I'll do a glossy
material for this and make it like a dark
blackish color. Zalmat shininess plays
against the roughness. That's a very nice contrast, but in some cases, maybe it should be similar, which makes it even more
friendly in this case. Let's check subsurface
on this too, set the radii to one
and turn up the weight, and then the scale
to one as well. That's before and after. I can't actually see
any difference on this, probably because it's so dark. So I will turn it off. Having it on just increases the render time unnecessarily. So in general, keep it
off if you don't need it. But I'll add this material
to the neck, as well. Accent. I can always go back and change the way it looks
once it's everywhere. I really like just scattering my materials everywhere before I start refining them because then I get to
see them in context. And I definitely need this
accent material more places. So let's add it to. Let's start at the top
here and add it to the ring that attaches
the ear to the head. I can open a new editor, a three D editor that is gray, and I can work in this one while seeing what I'm doing
in this left one. So let's go to tab into Edit
mode and select this ring, and then I can grow my selection with select more or less. You can see the shortcut for
that is Control Numpad plus. That just expands the selection. And expand it one more time, Control plus on the numpad. And in fact, let's hide
the head for a bit, just to make sure I've
selected everything on this side, and I haven't. So let's select this ring two with Shift Alt and click here, and then shift click here to
add that to the selection. Alt was to select a
ring shift is to add, and then I'll add a
new material to this. I need another
material slot here to be able to have two
materials, add a slot. And then in this slot, I'll
in the drop down menu, select the accent
material that I made and then assign it to
this part of the mesh. Then I can unhide the head
and look at how it looks. Luckily for me, the error was
mirrored to the other side, so I didn't have to do the work double up, and I like that. So let's do it to the
shoulder as well. Go into tab, select
the top face, and then just Control
plus and expand it until I've gone down to
the bottom of the shoulder. Add a new slot in there, I'll put the accent
color and assign it. That looks good. Do the
same on the other side. Tab, press the top one
plus plus plus plus plus, and sign the accent. And let's do it for
the knees, too. Great. Now for the eyes, let's start actually with the accent color just to
separate it from the rest. And then since it's a robot, I would really like
these to glow, but I have a feeling that
if they glow in the middle, he'll look a little
crazy. Let's try it. Let's add a new material
called emissive. And in here, I'll just add
some emissions of strength, say five for now, and I'll select this. Let's do the green
background color and go into tab and assign
that to the center. Click emissive and assign. And yes. Yes, he
definitely looks crazy. Not only that, the
center has a star, and that is because of the subsurface modifier working on that final face in there. If I wanted, I could
inset it one more time, and that would get
rid of that star. But he does look fairly
creepy at this point. So let's not do that. Let's
instead add the emissive to the ring around here and then some glossy
black to the center. So Alt click on this ring
and shift Alt click on this ring and assign the
emissive to that instead. And let's add a new material, which will be black. And going no roughness. Reason I want to go
completely black is your pupil is a dark hole, so it can actually go
to complete black. So let's click this center
polygon and then Control plus on the numpad to increase it to be that whole section, and add this material, which I haven't
given a name yet. I'll call this pupil. That's much cuter,
much, much cuter, although Feels like he's really scared or
surprised or something. Let's change that. I mean, you are allowed to start changing the model
once you're at this stage. Never feel like you need to only add materials once
you've come to this stage. When you see the materials, you can make more
informed decisions about other things like maybe where the pupils are. And
that's what I'm going to do. So I'm going to go into tab and just select the
pupils like this. Look at it from the very front by clicking the Gizmo up here, and then I will, let's see. Let's scale it down. S to scale and scale
it down a little bit, and then I'll move it with G. Over here. That's a
little more cute. Let's move it even more. That's better. And
then you know what? Wouldn't it be fun
if he looked like he was wearing glasses?
Let's do that. Let's shift A, add
a mesh, UV sphere, and in edit mode, I'll move this because I want to
mirror it later on, and I need the origin
to be in the middle. So I'll move it in edit mode and just G, move it over here, S to scale it, GY, move it on the Y axis. And I just want to fill the I. And then I'll right click
and shade smooth to make it less faceted and
add a mirror modifier. Mir it on the g.
That is correct. It's mirrored over, and
then add a material, a new, I'll call this glass and
make it a glass shader. Right now, it's frosted. Frosted is not what I want, so let's decrease the roughness
to something near zero. I can actually go zero for this. And now he looks
even more dorky. That's hilarious. You know, I really do like that. But for the color
of the emission, I'm not sure I like
that, actually. So let's go to the emissive
and look at the color. Let's increase the value to Max so that it's really
clearly glowing, and then maybe decrease the strength so we
can see the color. Increase the
saturation, perhaps, then increase the
strength again. See if that looks better to me. What happens if I do
20 here just to see? Oh, I can see two
things happening. So one thing is I
kind of like it. So maybe I'll turn
it down to ten, but I'll show you the
other thing I noticed, and that is it's lighting up
his face. Can you see that? You can see it around the eyes. It's adding glow to his face. So if I turn it off,
it looks like this. And if I turn it on,
it looks like this. The reason for that
is fascinating. It's because of the
way I modeled this. The eyes go into his head, meaning that glowing side, this side is actually
glowing into itself, and then it's not hitting its back wall, it's
hitting the face first, and then it's
scattering through the subsurface scattering in the
face, which is fascinating. And the way to fix it, because I don't really like
the way it looks, is to just bring
this backside of the eyes outward to be able
to block the lighting. So if I press tab
to edit the eye, and then I can hide the
head while selecting. I'll have to fix this
side, the star shapes. You remember how to
do that with I inset, and then I'll have to
do it one more time. I can see on the
right that it's still there. There we go. And then Control plus and plus to select the
entire backside. And maybe I'll probably need to bring this part forward too. So let's do plus one more time. And then I'll unhide the head so that I can move in context
and see what I'm doing. G, to move Y to constrain
it to the Y axis, and then move it forward
until at this point, I can see that this first line is hitting the other line and I don't want to
move it past there. So let's press there and then control minus to
shrink the selection, and now I've only
selected the back part, and now I can move that forward. So GY, move it forward until
I can actually zoom in on the left hand side and
make sure that I keep it as far in as I can
without it lighting up. You can see that
as I move it out, suddenly it pops and it's
no longer lighting up. Great. That fixes that issue. And then for the
apron, let's see. Let's try just accent material and see what
that looks like. I mean, it's nice, but I feel like it's covering
a bit too much, isn't it? Let's change that model as well. Let's go into edit mode. And since this is made
using a modifier, it's very easy to change, but I will hide the
modifier in edit mode. So in here, I'll go
to the solidify and then turn it off in edit mode so that I can
see what I'm doing. But I'll keep the
subdivision surface modifier on Edit mode so I can see
the way it's curving. And with this loop selected, let's press G twice
to loop slide it. That's the same as this tool. And then just slide it up. And then I'll do the same
with this loop, slide it up. Cover maybe just
half of the torso. Yeah, that looks better to me. And now that everything's
basically where I want it, let's go back to the
first decision we made, which was the main material, and let's change that to now fit the entire context because I feel like maybe it's
a bit too dark now. Maybe I want it to contrast
with the black even more. So I will try just increasing the value for it, which
is the brightness. And I feel like that's
going the right way. It feels brighter, more
toy like, and I like that. Let's see how big of a scale
I want on the subsurface. I see now that apparently I wrote the wrong number
when I did it earlier. I'm pretty sure I tried
to type one, didn't I? And then I probably missed
it and typed four instead. Let's go back to one, and it's
now a little less intense. Let's see here. On the
back, it's clearly visible. You can see it in the arm
that it's lighting up. Let's see that. That's without
subsurface and then with. So it's clearly doing something, but it's not that
visible from the front. Maybe increase the scale to
two. That fields pretty good.
54. Completed - Class Project 06 - Rendering Your Character: Let's set up a
preliminary render just to be able to share
this in its best light. What we can do is
shift A at a camera where I can reset all the rotation values
because as I add it, it's pointing in the
direction where I add it. I'll just remove all
of the rotation data by typing zero for every
rotation value and then G, Y, move it over here, and then I can rotate
it like RX 90, press Return and then R
Z 180 to turn it around. And then in this
window, I'll click the camera button to
go into the camera, and then I'll move it back and maybe this should
be a square image. So I'll go up to the
file output tab and type 1080 for both X and Y, and then I'll zoom
back in on the camera. What do I want the
focal length to be? Let's just zoom it
in. And then GZ, move it down a little. Let's clean up this
viewport, yeah. So let's go up here and turn off the viewport overlays to really be able to see what this is without any visual clutter. Let's also see what it looks like with denoising turned on. I'll go to the render tab and in the viewport,
turn on denoising. I'm not sure how well the noise shows up in
the video compression, but it was quite noisy,
and now it's not. And I really like how it looks, but one more pro tip is to try it in a couple of
different lighting settings. So I'll even open a new window. I'll split this one again in
two make it a shader editor, and then go to the world And then here I'll just select
another HDRI that I have. Let's maybe do this one. It's like a sunset. Now you really see the
subsurface, don't you? And for this, I feel maybe
the emissive is too bright. I was thinking that in the
previous HDRI, as well. So maybe turn it
down just to half, like two. Let's try it. And one more lighting scenario. Let's try this and
once I feel happy, and I do with this, I'll go to render
and Render Image. It'll open the render window, and if I expand it a bit, we can see 22, two, two that it's on sample
roughly 100 out of 4,000. Why does it say 4,000? Well, in the render
tab, I've set my MAX samples to
4,000 and something. And once it reaches that,
it'll stop rendering, and I can save the image. And this is the image that
I'll share with everyone on the assignment section
on the website and, you know, on your
portfolio and whatever, if you're proud, which
I think you should be. Like, you've completed
a character. This is a lot of people's main goal with TD is to be able to make
a character like this. So I'll go to Image now that
it's done, and save as, and I'll save it as a PNG and call it character shading
version one. Save Image.
55. Parenting: Before we can animate anything, we got to attach
objects together. Imagine just moving your torso forwards and the arms stay
behind, that's no good. So to demonstrate how
to attach things, I've made a cube man. Now, if I were to
move this body over, like walking, none of the other objects
come along, right? But we can change that with
a process called parenting. It's a weird word to use, but it's basically
a reference to the new hierarchical structure
in the three D program. Like one object kind of
reigns over other ones. And that means it's
parenting them. So, the top object
is the parent, the ones attached to it, are the children, and that's
the terminology they use. I actually got me into a weird situation once when
I was learning blender, and I was Googling
stuff related to this. And so I started
typing into Google, how to remove child blender. I caught myself like, I'm not sure I want that
in my search history. Like I'm moving child. Anyway, so the way
to do it is to click one object and
then click its parent, the main object that you
want to attach it to. And you can see that in Blender, when you have multiple
objects selected, one of them is selected with a darker orange and one
with a brighter yellow. So in this case, the arm is the darker orange highlight and the big cube is
the brighter yellow. That means the big cube
is the active object. It will always be the
last one you selected. So now the head is that. And
if I click back to the body, holding shift still, that
is now the active object. And you can also see
that in the outliner. The active one is the one that's more highlighted
than the other ones. And so I click the arm, and then I click the body, and I go to object down to
parent and you get options, just ignore it all. You'll learn what
these do in time. But for this course, we only care about the
top one, which is object. We want to parent one
object to another object. That's what it's
called. And now, what happened is we
don't see a difference, but the one cube is removed
from the hierarchy. And it is now inside
the other one. If I now click the
little drop down, we can see the main cube
and the arm is inside that. That means this is the parent
and this is the child. Now, in real life, if one
object is attached to another, then that other object is attached to the
first one as well. That's not the case in three
D. When working like this, it just goes the one way. Now if I move the body around, if I move it forward,
arm follows along. And that's good. That's
the behavior we want. But the arm itself,
if we move that, the body does not follow along. And notice also the little line going between them that
indicates a parenting. So that means this
is parented to this. So just bear that in mind that the order that you
select things in when parenting matters because it is only the active object which
will control other objects, and this one will not
control the main object. That is actually good because
if we rotate the main body, we do want the arm
to follow along. But when we rotate the arm, we don't want the
body to follow along. That is what we want.
Let's just go ahead and click all the other objects
and parent those as well. You can do it with
multiple objects at once. Make sure to click the
body last and then go to object, parent object. Now in the outliner,
all the cubes are inside this main cube. When I move the main cube forward, everything
follows along, but we can still rotate everything independently.
That's great. But there's one more key to making this rig as it's called. When you attach things
together and make them easier to animate,
that's called rigging. We're making a rig here. That last point is, where do things rotate from? It's very weird to rotate the arm from the middle
because it's attached here. We could, of course,
when we animate this, we could rotate it and then move it and then
rotate and move, and that would be possible, but we can make it
rotate from this point. That goes back to
something we've talked about before regarding
the mirror modifier, and that is the origin point, this orange little dot here. Every object rotates
around its origin. And you remember if we move
something in edit mode, the origin stays put, right? So if I go into edit mode with
tab and then move the arm, the origin point doesn't move. It's now in the top left corner. And now when I rotate the arm, it rotates around that point. There's an easier way to do it. If we model like this, we can actually just
move the origin point. We can do that by going up to options and then
effect only origins. We have three different
options there all useful in their own
right, but origins, if we click that, we see an axis and we move
only the origin. If I press G to grab, I no longer move the object. I only move the origin. And to do this, we can
also use the Gizmo. So we move this up and over. And then go to options and
turn off affect origins. Now the arm rotates around the point that we want
in every direction. Make sure to think about it in every direction, by the way. Don't just look at
it from the front, look at it from the side, look at it from
the top, make sure that the origin is
in the right spot. And we can do this
for every limb. So go to affect only origins, move it down, move this up. Up and up, go back to options, turn off only origins. This thing can confuse you if you leave it on
and nothing happens. You just start moving the
origins and not the object. Anyway, now we have a
puppet that we can move. So I can move the whole
thing by clicking the body, and then I can start
moving the legs back and forth and waving the arm. I understand that it's not always obvious what
gets parented to what. Like, in some cases, you know that the
hand, for example, should be parented to the wrist, meaning that moving the hand
doesn't move the wrist, but moving the wrist does
move the hand, right? But what about the body
and the hips, for example? Well, as a general
rule of thumb, the center of gravity
is your source. So in humans and most animals, that will be the hips. You start with the hips and everything else gets
parented to the hips. So the legs get
parented to the hips, the body gets
parented to the hips, and then chaining out from that, you get the neck
parented to the body, the head parented to the neck, and so on and so forth, going down the leg as well. But, like, the top point in
the hierarchy, if you want, you know, this diagram, at the top, you have hips. And if I ever want to remove something from its
parent, I can do that, too. In a couple of ways, I can
either go to object and parent and clear its parent or I can go inside the outliner and I
can find the object. I can drag it and look at the little hint that comes
up above the cursor, it says, move inside collection, control to link,
shift to parent. Meaning if I hold down shift, drop it, that unparents it. It moves it outside that cube. Now when I move the cube, the arm is no longer parented, and I can drag it back inside
the cube by holding Shift again and dropping it on the
cube, and now it's parented. So that's the basics of rigging.
56. Keyframe Animation: Now we're going to learn the most fundamental building block of making animations in blender. Now, animations, many people actually don't know
what animation means. Now, animation just means
making something move. Actually, it comes from giving
life to something dead. That's what it
etymologically means. So animating in blender
means making stuff. Move. And that's the reason many people get into three
D in the first place. The fundamental building
block of an animation, that is key framing. Now, if you've
used after effects or another animation software,
you know keyframing. Keyframing is the way we
animate on a computer. Typically don't animate frame
by frame like they did in the old days where they had
to draw every single frame. We make the computer do a
lot of the work for us. So we just say we want an object here at the
start and here at the end, and the computer
figures out what to do in between.
Those are key frames. You say the start and you say the end and the computer
figures out the movement. So your keyframes live
down here in the timeline. Let's expand that a little bit so you can see
what we're doing. Timeline can be scrubbed by clicking the playhead
dragging it over. We can play it by
hitting play, pause. We can also play it by hitting Space Bar on some computers. But when you set up blender, it asked you, what do you
want to use Space Bar for? For some of you, when you
press Spacebar, this happens. You get up a search bar instead. For those people, you will
play the timeline with Shift spacebar
instead but you can change that by going to edit and preferences and going down to key Map and set the
space bar action to play. Then Spacebar will play
and pause the timeline. We can also over here, set
the start and end frames. So if we don't want a timeline
that's 250 frames long, we can go to end and we
can say 50 instead, say. So I'll just click on
my scroll wheel to slide this over and
then scroll in to Zoom. No, a keyframe is only for
a single value at a time. What do I mean by value? I mean, the sliders over here, like the location sliders
and the rotation sliders. And every single slider, almost every single slider in blender can be animated with keyframes and you do so by clicking a little
dot to the right of it, where it says animate property
when I hover over it. Let's animate the location X. Location X is location
on the red axis. When I drag it, my ball
moves left to right. Let me click that little dot
and the number turns yellow. Yellow means we've
set a keyframe. The dot turns to a diamond, and if we click on the sphere, we also get a diamond in the timeline. That's
our keyframe. And remember, we had to set one for the start and
end of our movement. So let's say we want our
movement to end at frame 50, so we go to frame 50, and then where do we want the
sphere to be at frame 50? Let's say we want to move it over this far and see
the color changes. This means you have
changed the value, but you've not set
a new keyframe. So the keyframe
symbol is now empty. We don't have a keyframe here. It's orange to tell you
you've made a change, but you haven't saved
it as a keyframe, so we have to click
the little diamond to now save that as a keyframe. That puts a keyframe
in the timeline. And if I hit Play, we can see the sphere
moves from left to right over the course of the
timeline. This is great. Like, I absolutely love this. This still feels
like magic to me. And also notice when I pause in between them,
the number turns green. A green value means there
exists keyframes on this, but you're not currently on one. So if I move it over to a
keyframe, now it turns yellow. So green means it is animated, but you're not on a
keyframe currently. So that's a way to know if this value is actually keyframed
where you currently are. And it's not obvious
necessarily. You might think, well,
you can see it down here, but say you have multiple
values animated. Let's say we animate
the Z value as well. So the Z value
starts at one here, we click for little diamond. Move it to frame 50, and then we move it up, and then we click
the diamond again, and now our animation
looks like this. At one point, it just lifts off. And so, okay, we
might think, well, we can see the z value is
animated because it's green, and it has a keyframe here. Yep, it's yellow, and
it has a keyframe here. Yep, it's yellow. But
at the first one, it's not yellow because we only have a keyframe
for the location there. So I hope that makes sense. You can see where the
different ones are. But I'll go over a way to get another overview over what
is animated where later. Now, if you're unhappy with a keyframe, you'll
want to change it. Say, we don't want
it to start here, we want it to start
here instead. Well, then we have to
go to that keyframe. We have to change it. And then this is a little
quirk with blender. If you now hit the diamond, it's not going to
set a new keyframe. It's going to remove
the keyframe, and then we click it again and it sets a keyframe
at that point. That's just a quirk you
have to get used to. If you want to
change a keyframe, you have to change
it and then turn it off and on to
set a new value. While the most common form of animation is locations
and rotations, don't forget that
anything can be animated. So if I add a camera, the camera has a
bunch of values, too, and say, for example,
the focal length, the focal length
can be animated. I can start at seven,
keyframe that. At the end, we can go
to 166 keyframe that, and then the camera
changes its focal length. And what does that look like? Looks like this, looks
like it's zooming in. You can keyframe light strength, and you can keyframe
just about anything. Let your mind go wild with this.
57. Graph Editor: This wouldn't be a
proper animation course without doing a bouncing ball. Like, everyone does it. Everyone does the bouncing ball, and there's a good
reason for it. So we're doing the
bouncing ball. And the reason I'm doing the bouncing ball is to teach you about another
animation concept, which I think you're
going to love. It gives you much
more control over how things move compared
to keyframes. But let's start with key
frames and build up to it. So what I'll do is I'll
click on this ball and I'll go to its object properties where I can see its transforms. And if I slide the
location X slider, it'll move back and forth, left to right. That's good. So let's add a keyframe for
that on frame one down here. I'll add a keyframe
on location X, and then I'll move my playhead
over to say frame 50, then I'll move the
location X slider over to, well, say here. You don't have to slide
the slider, by the way. You can also move it
using say the Gizmo. You can move it like this, and the location slider will
change like that as well. So you can move it in
three D viewboard and then click the diamond to
add a keyframe down here. Now if I play the animation, bring it back to start
and press space to play, it's going to move from one side to the
other. That's good. Actually, I'll even shrink
down my timeline because I'm playing and
then it goes past this and then there's a
whole bunch of nothing. So over on the right here, I'll change the start
and end so that the end says frame 50. Now it's going to loop
when it comes to the end. I'll just click on
my scroll wheel to slide this over and
then scroll in to Zoom. And that's good. Now, what if I want the ball to move
faster? How would I do that? Well, for one, I could say that it goes farther in the
same amount of time, or I can make it go the exact same length in
a shorter amount of time. So if I click the last keyframe
and I press G to move, or I can just click
and drag it and I move it to the halfway
point on 25 frames, you'll see it moves faster because it moves the
exact same distance, but in just 25 frames
instead of 50. First idea to remember is you can change the
timing of things by just moving the keyframes closer or farther
away from each other. But we want control over how
it moves between the points, and we don't get that
control in the timeline. We need a different
kind of editor. And that different kind of
editor is the graph editor. So let's expand the timeline
even more, just bring it up. And over here on the left, where we can change
the window type, we'll go to the
animation section and then go down
to Graph Editor. This looks a little confusing. But let's just hide
this right hand panel. We do not need it for the
entirety of this course, and then scroll out and
see what's going on here. You already know this if you've worked with animation in
another software before. This is the animation graph, and it shows you visually the change you made
on this parameter. So we can see from
this that there is a keyframe here and
there is a keyframe here. Those are the same ones
as in the timeline. We can also see on
the left hand side that we have some values. We have zero, we have
five, and we have ten. Those correspond to
a location value. So we can see just looking
at the graph that it goes from zero to just above five. And looking at this, we can see, indeed,
it goes to 6.4. So we know that this ball
moves from X zero to 6.4 in 50 frames just by
looking at the graph. Not only that, but
we can tell that there is a slight
easing curve to this. That means it's not
a straight line. It may be hard to see, but
it's not quite straight. It's curving like this. It's called an S curve, and we can change the S curve
by clicking on the handles. Every keyframe has a handle, and this is the handle, and we can click
this and drag it and change the
profile of the curve. So we can say, for example, bring this down, and now
it has a new motion. Now we can see that it stays
close to zero for longer, and then it changes
more quickly. And the way that looks in the three D view
port is like this. It starts very slow and then it speeds
up towards the end, or we can do the opposite. We can bring this over like so, and move this over like so. And now it moves over fast
and then it gradually stops. And not only that, we
can actually see it overshoots a little bit because this is now pointing upwards, so we can make it go up
and then down again, and up and down in the X value
means right and then left. So this is super powerful. Let's make another graph, an S curve but much more sharp. So let's move these
handles past each other to really sharpen
up this S curve. Make it quite steep. And the way that
looks is like this. I gradually starts, and
then it moves quickly over, and then it gradually
stops again. You can see how
powerful this is. Just with the two keyframes, we can completely change the way the ball moves
between the two points. Now, there are a couple of ways to change where the handles are. As I showed, you can
click them and drag them. You can also press
G to grab them. Or you can click the keyframe there on
and rotate it with R, rotating like this and
scaling S like this. You can scale them in
and rotate them around. Also bear in mind,
let's say we have a keyframe here on
frame 25 as well. Let's add a keyframe, which as a keyframe in the
graph editor two. Every keyframe actually
has two handles, one on the left and
one on the right. So let's delete that
middle keyframe by clicking it or dragging over
it and pressing delete. Let's talk about different
types of handles. So these are Bezier handles, the same kind of handles
you have in Illustrator, and when you're editing a Besier curve in blender, as well. If I right click
on one keyframe, I can choose the handle type. Have a few different
handle types. The pictures really explain what they look like
in the graph as well. The vector is just straight. If I click vector,
then it's straight, no matter what I
do to the right. Let's do that with the
right keyframe as well. Right click vector. Whatever I do now as
I move these around, they're going to be
straight no matter what, and straight means completely
abrupt start and stop. If I right click and I set
the handle type two free, then I can change the left and right hand side
independent of each other. If they are not on free, if they are aligned, then the handles are going
to change according to each other to kind of
mirror on the other side. If I right click, set the
handle type to automatic, it's going to try to smooth it out no matter
what it looks like. So let's move these back to where they were
and select everything with A and right click and set the handle types to
automatic for everything. Now it's going to have
a smoothing curve. And if I go over here
and I add a keyframe in the middle and I right click and set that to
automatic as well, as I move it around,
you can see it adjusts to try and make it
smooth no matter where it is. But that can lead it to
overshoot sometimes. So at this point
here, I've decided, I want the ball here and then
it overshoots a little bit. So if you don't want that,
then you go to autoclamped. In which case, this
is the default. I'll try to
automatically smooth, but it won't ever
go past horizontal.
58. Animating a Bouncing Ball: Let's actually define the
motion of this ball now. I'll delete the center keyframe and I'll just leave these two. And what do I want it to do? I want it to kind
of be as if it was thrown from the
left hand side and then it slows down
toward the end. Meaning I need this
first keyframe to be fairly abrupt,
not too smooth it. So I'll rotate this
around like this, meaning it'll change fast and then gradually come to a stop. That looks good to me. Now let's add another axis as
well of animation. Let's not animate
just the X location. Let's animate Z two
to make it bounce. So I'll press G and
then Z to move it up and how high do
I want it to start? Maybe start up here
around Z eight, I can tell, and then add
a keyframe on frame one. Now we can see two graphs here. We can see the blue
graph and the red graph. We see them overlaid
on top of each other. This is completely fine when
we're working on two axes, but it can get pretty
messy if you're working on like ten
controllers at the same time. So over here on the left, you can use the drop down menu and see everything
you're animating. Hide different channels
and show them and click them or double click to
select everything in there. So if I double click on X, and it selects all
the X keyframes, stuff like this makes
it easier to handle. But for now, I'm pretty fine. I'll animate this, and
what I'll do is I'll set the second keyframe at a point where I feel like it should
have hit the ground. So I'll start playing
my timeline while here, and then in my mind, I'm imagining how fast
I want it to fall. So I'm just playing,
and then as I feel like it should hit the
ground, I'll pause it again. So play pause. That's how fast I feel like
it should hit the ground. Around frame 18. So I'll add another keyframe there where it falls
to the ground. So I'll move it
down to the ground. And in my case, it hits the
ground at around 1 meter, and then I'll click
the keyframe, and that adds another
keyframe here. And if I look at that animation, this is what it looks like. That's fine, but it
doesn't look like it's dropping because
it's easing out as well. It's like dampening
before it hits. It's like it's
anticipating hitting the ground and it doesn't
want to hit too hard. So let's change this bottom
keyframe to a vector. Right click, handle type, vector, meaning it's
completely straight. And then let's look
at that again. Much more realistic. But we want it to bounce. So let's see how far do I
want the second bounce to be? Let's play it and check. Bounce there. I pause
it at this point, and I want it to land there. So I'll press the z location again to add another
keyframe there. And in between those
halfway in between, I'll add another z
keyframe where I bring it up a bit.
Add a keyframe. I need to zoom in a little bit, but I want to zoom in only
vertically, not horizontally. I want to bring this keyframe up here and this
keyframe down here so I can see just how tall
this is compared to this. I can do that with a little
scroll bar to the right. I can either scroll
it up or down, or if I press the edge, I can compress where the top
is and where the bottom is. Although I prefer using a
different scroll method, which works both
horizontally and vertically, and that is holding
down control or Command on a Mac and clicking the scroll wheel and dragging. And that lets me zoom in
independently on X and Y, and it may look a
little confusing, just looking at me doing it, but I promise it's very intuitive once you
do it yourself. I'll frame all this and
then make this keyframe also a handle type
vector, so it's bouncing. And then how high do
I want it to bounce? Maybe about half as
high as the first. Let's play that and see
what it looks like. Not too bad, but
not great, either. For one, now in context, it feels like it's dropping
too slow the first time. Let's move that first keyframe
over so it falls faster. That's better. And it feels like it's climbing on
that second climb. You see that? Oh, I
kind of drags up, meaning I feel like
it needs to be more abrupt. So
let's do that too. And one good rule of
thumb is you want the angle coming into this keyframe to be the same as the angle
coming out of it. And that happens when I put
the keyframe about here, then I can adjust it up and down until I feel
it's exactly right. And then I'll move this keyframe over to make a nice
parabolic arc. Let's look at that. Fine. I feel like the second
jump is too high. So maybe bring that down. That's better. But it feels like it kind of slams into the ground on the last one. Like it's dragged down. So maybe expand that
just one frame. Better. And for the next bounce, instead of adding the
keyframe manually, I'll just copy what I have here. So I can take this
keyframe and I can shift D to duplicate, and then
I can move it over. And that just
duplicates the frame. And I can move that
maybe to here to start, and then duplicate this and
shift D and move it over. This I don't want to move
the up and down axis. In this coordinate space, that means Y. I'll just press X, which constrains it on
the X axis in this space. It's weird to talk
about axis, both. We're moving the ball's axis, and we have a different
axis space in this graph. But what I mean
is in this space, do I want to move it
horizontally or vertically, and that means X or Y. Even though we're animating the Z location of the ball,
I hope that makes sense. Let's take a look
at the animation, bounds bounds and bounds. The last one it feels like it's slamming
into the ground again. At last keyframe
needs to go over one and I feel like it's
also a bit too high. Let's move it down a bit. Let's try that again.
Great. And then one more. I'll zoom in using
that technique, and then Shift D,
duplicate this over, and shift D,
duplicate this over. And try maybe like this. My last one feels
a little too long. Let's bring both of
these keyframes in just one frame and see what that looks like. That's better. First bounce is a
bit too high to me. Let's bring that down. And it feels like it's climbing. What I mean by climbing? I feel like when it's going up, it's going so
against the gravity. Like, it's pulling up more than it would
if it were bouncing. And that tells me that
it's going up too slow. So I'll bring it over
one frame as well. Great. And then everything else has to be brought along with it. One frame. For me, animation has always been about just adjusting until
things look right. I'm sure some people have an intuition for where
the keyframes need to go. I don't, so I need
to just look at it 1 million times and
adjust accordingly.
59. Exaggerating Motion: So when I'm happy with how it bounces and I'm
pretty happy now, let's add some
cartooniness to this by making it stay in the
air for a bit longer. We can do that by scaling
out the top keys. So if I press S on this, I can scale it out
and move it out so that it stays in the air
longer. Look at this. And then it slams
into the ground. And what effect this
will have is for one, it'll make it look
more cartoony, more exaggerated, and for the
other, it'll look heavier. So let's do that here
too, scale it out, scale this out, and also this. It looks much heavier
now and more cartoony. So let's just go all in on
the cartooniness, yeah. Let's add some
squash and stretch. This part I love stretching
it out as it speeds up, and then squashing it down
as it hits the ground. So to do that, I'll look at
the scene from the side, just click the Gizmo, and then I'll go into
wireframe view so that I can see the rotation of
the ball more clearly. Now, if it rotates, I can
actually tell that it does. Had I been in solid view, you can't really see, can you? So the way to add a squash
and stretch is we look for the impact keyframes where it hits the ground like
here, right there. We want to squash it
down at this point. So let's animate the scale z. That is this value. It's fine to just try the different ones
and see which one is right. So I can find out that
scale Z is the one. What I can do is I can
drag this down and I can squash it on this frame
and add a keyframe. Not only that, but I need
to move it down a bit now because it's now hovering
above the ground, right? So I need to G Z,
move it further down, and then update the key
frame of the bounds. So the Z location here you can see over here
that it's now orange, meaning there's a change here that isn't saved in a keyframe, meaning I have to click the little diamond
and click it again. But what happened, I changed the handle type because
I added a new one. So either you can
right click and just change the handle
type again to vector, or you can bypass that
entire thing by just clicking that keyframe and
moving it in the graph editor. So I can zoom in on it,
and then G Y to change it and move it like
this. I prefer this. Now it touches the ground again, and then a frame after this, I want it to stretch out
in the opposite direction. So what I need to do then is I need to first scale it out, stretch out on that direction,
and add a keyframe. And then I need to rotate it so it kind of follows the
direction it's traveling. So we need to animate
another value, and that is one of the
rotations. Let's check which. So if I turn X,
that's not right. Turn Y, that's it. So I want to turn it like this. Let's add a keyframe at this
point where it was correct. We want to keep the rotation on this point where it's
just straight up and down. Keyframe there, then
on the next frame, we'll turn it like so. And then a couple
of frames later, we will add a keyframe
to scale it down again. So just scale it back to one, which is completely round and
then add a keyframe there. So if I double click
on the Z scale, you can see what the scale
graph looks like if I zoom in. At the point of impact,
it's at this point, and then it scales
out to stretch it, and then back to zero over
the course of a few frames. And we should do the
exact same thing on the other side
on the mirror side. So on the frame before, we want to stretch it out
in the opposite direction. So we can duplicate this
stretch frame, shift D, and then move it over
here, constraining it to X. I don't accidentally
move it up and down. Then like this, now it's stretched out the
exact same way, but we will rotate it
to point this way. Add a keyframe. So the rotation, if I double click that and
then zoom out to look at it. Oh, it's huge. So let's scale the graph to be able
to see that a bit better. The rotation gradually swings
from one side to the other. That's the rotation.
Okay, let's go back to scale. Zoom in here. And then a few
frames before this, I wanted to go back to one. So just press one
and add a keyframe. So what it does is it comes
in, round, stretches out. As it hits the ground,
it squashes down, then it rotates
around and stretches the other way and gradually
goes back to round. Let's see what that
looks like in real time. Go back to frame one, go back to solid
view, and look at it. It is very hard to see. You don't really
see it, in fact. You just kind of feel it, but we can exaggerate them a little more if we want to
see it a little better. What we can do is we can keep it stretched
a little longer. So we can take this
frame and this one, and we can scale those out
X to scale on the X axis, and we can scale them out
a couple more frames. Let's see what that looks like. I feel like that's
good. Just keep it stretching a little longer. Great. And then let's do the exact same process for
the next bounce. So on the impact, we scale it down on Z, not as
much this time. Scale it down on Z.
We add a keyframe. We need the rotation to be zero so that it's scaling
just straight down. So zero on the rotation,
keyframe that. And we need to move it down. So I'll take the movement
key, grab it with G, and then Y to constrain
it up and down, and then move it so that
it's actually impacting. Then the frame before,
we scale it out a bit, not as much as last
time because we don't have as much speed
going into this, right? So add a keyframe there and add that same
keyframe on the other side, so Shift D, move it over. And the handle here is a bit weird like the
handle is super long because it was copied from here where long made sense,
but it doesn't anymore. So let's select this
and this and right click and set it to
Autoclamp to update. So now it's stretched,
it's squashed, and then it's stretched again.
But we need to rotate it. So the rotation is correct
here, but not here, so rotate coming in, add a key, and then
rotate going out. Add a key. And then a
couple of frames going in. How many did I choose here? We had one, two,
three, four, five. So let's do the same
here, one, two, three, four, five, and then it's
back to one on the scale. Type one, and add a key. Same on the other side.
One, two, three, four, five, scale back to
one, and add a key. So now it's stretching out, it's coming in, squashing down,
and stretching out again. Let's look at it by
playing the animation. That looks good to me.
And for the final bounce, what I'll do is I'll
just copy what I did over here so I don't
have to redo it again. So as to not copy things
that I don't want to copy, let's hide the location. X location is the ball
moving from left to right. We don't want to change
that. We don't want to change the Z location,
either, which is the bounce. We just want to change the
scale and the rotation which contribute to the
squashing and stretching. And then I'll scale out
to see all the keys, and I want to take everything
around this bounce, everything that contributes
to the squash and stretch, and I'll copy it to
the next impact, which is on frame 37. Shift D X to move
it only on the X. If I hadn't pressed X, it would move around freely, but pressing X
makes it just move horizontally and then move it so that it happens on
the next impact, it comes in, squashes
down, and then goes out. But in this case, I needed
to do so less intensely. I'll zoom in again. I'll take that squashing and I'll
decrease the intensity of it. So right now it's going
down all the way to here. So let's G Y to
move it on the Y, squash it down less intensely, just a little bit
this time because it's not bouncing very high. Then for the stretching, let's bring those keyframes down. Let's not stretch it very much. Then again, we have to
correct the Z location. So let's turn back on
the Z location and just move it down until
it hits the ground. So now we kind of automated the squash
and stretch for this. And then for the final hit, I'll just squash it
down a little bit more and then gradually
bring it back up. So on the final, I'll
squash it down to scale 0.95 and add that and make sure
the rotation is zero. And before that, I'll
stretch it out a little bit, just the tiniest bit and
rotate it coming in. Oh, I forgot key
framing the scale, so let's scale it out again. Key frame it. Then it comes in, and then it rolls out and it gets back to scale
one over time. And I need to adjust
the Z location. So it impacts, goes
back to the ground, and then over time, it expands a bit and so it has
to go up again. So increase the Z
location at this point. So that as it expands, it stays on the ground.
I think it's done. Let's look at our masterpiece. That looks like a cartoony
ball bounce to me. Now, that seems very complicated
for just a ball bounce. But I promise, for one, you will become much quicker
the more you do this. But for the other,
I can assure you that the ball bounce is
actually quite complicated. It is deceptively complicated. If you can master this, then it can master just
about any animation. So I'd encourage you to try
this exercise for yourself. You can follow along and just do exactly the same as I do, or you can try to give your ball another
character than I did, maybe make it more
bouncy or lighter or make it go farther if
you're up for a challenge. I would encourage you to do
this to get comfortable in the animation graph
because that is the key no pun intended to all animation in blender
and in almost every software. Like, the graph editor
is such a core skill. So try this exercise and
make your own ball bounce.
60. Rendering Video: And now back to rendering
because rendering an animation is not the
same as rendering an image. I've just set up
some lights here, two lights and a backdrop and a couple of materials to the
ball and the background. And I'm in rendered
view on the left here. I'm rendering with cycles, not with Evie, but we'll actually have to
discuss that for this video. But for now, I just have this
animation that we made in the last video where the ball bounces and I want
to render it out. Let's just go to a frame and go to render
and render Image. It will render the image
that your playhead is at, and you can save
it in the same way as you would any other image. However, this is not an easy way to render out an animation, like going to every
single frame, rendering, and then saving
the image. No, no, no. We want to automate it and maybe not even just automate it, but maybe save a
video file out of it and not just 50 images. So first off, we have to
tell Blender where to save everything because it
will do so automatically. And that is in the file
output tab where we set the output resolution
and the frame rate. We also set the output path. And by default
minus set to temp. Let's just define that. Now, if you keep it on PNG, is going to save out 50 PNGs. But I want to save a
video out of Blender, and you can do that
because Blender will render each frame
and then at the end, combine them into a video. You can do that by changing
the file format to a movie, and the only movie
available is FFMPEg video. We just need to change one
thing about this because the default is WAC and that
is under the encoding. Nobody uses Matroska. Click that and choose MPEG four. That's
all we have to do. Now I can go to render
instead of rendering image, I can render an animation. When I click that, no matter what frame I'm
on in the timeline, it'll jump back to frame one, and it'll start rendering, it'll render every single
image and then at the end, combine them into
an FFM BC video. It just completed frame one. It now says on the
left ear frame two, and it tells me how long the previous
frame took to render. Previous frame in this
case, took 14.8 seconds. Meaning if I just bring
over a calculator here, I have 50 frames, so 50 times 14.8 or let's just
round it up to 15. That's going to be 750 seconds divided by 60 to get minutes. It's going to take 12.5 minutes to render the
entire animation. This is where the other
render engine comes in because it is
so much quicker. If I close this out and
I go to the render tab, I change from cycles to EV
and then I do that again. Render render animation. And look at that. It does
multiple frames each second, and it's getting
close to finish. Now it is halfway finished. So this is the situation in which you might want
to use IV for animations, where you have to render 50
frames and not just one. But again, cycles is
going to look better, and I render all my
animations in cycles. And sometimes I have
to render all night. I set my computer to
render when I go to bed, when I wake up the next morning, it's been rendering
for 8 hours straight or depending on how many
hours of sleep I get, and then it's finished
in the morning. That's not entirely uncommon. It's a really nice excuse
to go out and get some sun. But if you're in a
rush, you can make your scene so that you
can render it with EV, and then it won't take as long. So let's go and check our
output now that it's done. Here is the folder
where I saved it, and we have a video indeed
called ball bounce, and it says the frame range, so one, two, Oh, 50. Well, let's double click it, and that's my rendered animation. So it really is as
simple as that. You render the same
way as an image, but it'll take much longer. Now, one more trick that
I want to show you, which will really help
with realism in animation. This goes for both EV and cycles is to go down here
and turn on motion blur. When motion blur is turned on, it's going to kind of
blur out as it moves. So if I go to render
and animation now, you can tell that it's blurring out and that it looks much nicer when you're
playing back the video. It's probably hard to see any
difference, but trust me.
61. Rendering an Image Sequence: You're dead set on rendering
your animation in cycles. You're like, It's going
to take 10 hours, but I don't care. I want to use cycles. It looks so much better,
and I would agree. I typically render in cycles, even for long animations, and I render for ten plus hours. I'm actually right now
waiting for a render that's taking me 120 hours. When you do that, you have to render a
little bit differently, or you have to save a
little bit differently. So let me switch to
the cycles render engine and go to final output. Last time we rendered
an FFMPEG video. That's the easiest way to do it. But the problem with that is, let's say you render
for 10 hours, and then your program crashes
on hour number eight, speaking from
personal experience, do you get 80% of a video? No, no, no, no. No, you get no video. If you don't complete
your render, you get no video. That is why the
default is not video, but rather a PNG. Although I prefer JPEG,
takes up less space. But if I press render now, let me switch to
EV just so I don't have to wait so long and render my animation. It renders it out. And if I go to the
folder where I've set it to save, this
is what it's doing. It saves 50 images, and it's going to be like a flipbook if I go
to the first one, then I can just hold
down the right arrow key and it kind of play
through like a flipbook. But how do I compile
this into a video? Well, you can do it in after effects or
premiere or Resolve. That's the most
common way to do it, but you can also
do it in blender. So I'll just show
you how to do that. Let me copy this file path so I can use it in
blender in just a bit. Then in blender, I'll
open a new file new, general, and sure
I'll save this. Then I'll go up here into my workspaces and
I'll make a new workspace. Click the plus, go
down to video editing, and press Video Editing. That makes Blender into a
video editing software. Bet you didn't think
that was possible, huh? Actually, Blender can
do a lot of stuff. Like, you can even do green screen stuff and
motion tracking, and it's crazy what
you can do in Blender. But I just want to
compile a video. So up in the left hand corner, I'll put my file
path that I copied. And now down in the timeline, I can hit Shift A to add, just like in any other
window, Shift A, add an image or sequence, which opens up that
folder that I have here. I'll select the first image. The order is important here, and then press e to select everything in here or
just click the first one, go all the way down and shift, click the last one,
add Image strip, and when I hit Play, that
just puts it into a video. I'll have to crop it, set the end frame to 50, just
like in the original. Then I can go to my file output, and now I can save an FFM
Peck video anywhere I want. Like here, And in the encoding, I'll set it to MPEG four and
then make sure at the bottom here under post processing that the sequencer is turned on. It should be turned on, but the sequencer is, this
is the sequencer. If this is off, it's not going to render
whatever's in here. And then we can go
to render animation. It'll go through real fast because it's not actually
rendering the three D, it's just rendering
the images as a video. And now in this folder, I have all of my images
and ball bounds the movie, Return of the ball. I
62. Class Project 07 - Character Animation: You've leveled up from the ball. It's time to do a
full character. I'm excited about this
one, if you can't tell. This is like, I know there's
more course after this, but I feel like you're
kind of graduating now. Character animation
feels like to me, like, the pinnacle of Breed animation. Like, if you can do this, if you can make a character,
you can shade it. You can animate it
and render it out. Basically know three D. Like you're so capable
when you can do this. And so, Okay, let's
just get right into it. The brand wants
to see the mascot come to life with a
simple animation. You'll rig your character using parenting and animate a
short idle animation. Just a few seconds, a subtle motion to give your
character some personality. Have the character
stand in one spot. Think of breathing,
blinking, swaying, waving, or any small movement that adds life without being over the top. For an extra challenge, make the animation loop seamlessly. So what I'm thinking of here is just don't try
to do any walking. Walking is, for one, a lot of hassle to do, and for the other, we don't
really have all the tools. We need to do it right yet. So if you want to move your
character around the screen, I've kind of set you up
for difficulty unless you have a butterfly character or something that doesn't walk, you're going to have to
make a decision about this, but the project is, have your character stand
still and just blink, wave, wag its tail, you know, whatever
fits your character. The requirements are use parenting to attach
body parts together, animate a two to five
second idol animation. You may render in cycles or EV. And this extra challenge is making the animation
loop seamlessly. So you know how when the
playhead gets to the end, it comes back around
and plays again, you can copy all your starting
key frames to the end to make it kind of loop as
if it doesn't skip back, but it just kind of continues. It's very handy for
a lot of things, but not necessary for now unless you want
an extra challenge. The requirements are use parenting to attach
body parts together, animate a two to five
second idle animation. In the output
panel, here we have the frame rate and
mine is set to 24 FPS. I think that's the
default. W 24 frames per second and we want two to 5 seconds. Let's
see what that is. 24 times two, that's
48, minimum 48 frames. That's 2 seconds and
maximum five frames. 24 times 520. 120-48 frames. You may render in cycles or EV. Again, I recommend cycles. Looks better, but if it takes way too long and you just
knead it out, I get that. You may use EV, which is going to
be a lot faster. And the deliverables
say that the output resolution
to a square format that's either 720 by
720 or 1080 by 1080, and then render your
animation either as an FFMPEG video with mbeGF compression or save an image sequence and
compile it into a video. Easiest thing is to just
go straight to video. But if your render takes
more time than half an hour, I would suggest rendering
an image sequence just in case crashes during renders
are not unheard of. I speak as a man with countless rendering
hours lost in my career. And then you know
the rest uploaded to the class project section of the website and share
on social media. And here's the Macho picture
of Dan to inspire you to join the Facebook
group. Have fun animating.
63. Completed - Class Project 07 - Parenting: Alright, my robot is just
begging to move around, so let's give him a dance. I really want the guy to kind
of flail his arms around, open mouth, like, turning around as if he's eaten
something really spicy. Maybe. Oh, you
know what would be fun if the eyes were flashing. The setup in the
left hand viewport, I've set my mode to
material preview mode, and I've set the scene world on so that it's receiving
lighting from my HDRI. The reason I have
material preview mode on and not rendered mode is I want to be able to see
my animation in real time. And when I play my
playhead, if I press Play, you can see in the
top left corner of any viewpoort that has
the viewport overlays on. This one doesn't.
I've turned off the viewpod overlays,
but in this, we can still see it that
it says it's like flipping 24-25 frames per second.
That is what we want. In the file output, I've set my frame rate to 24, meaning I'm getting
real time playback now. I am seeing this as it
actually is supposed to be. A quick aside here
about frame rates. My animation is 24
frames per second. Now, when you play the
timeline with space bar, you get a number in the top left showing the speed
you're playing at, and that number should be around the same number
as the frame rate. But sometimes your
computer can't play the timeline at
24 frames per second. Maybe the scene is
just too awesome. Then this number turns red because you're not seeing
the correct speed. The whole animation
is slowing down to calculate every frame
to animate correctly, you want to see the animation at the correct speed.
What do you do? The first step is to
turn off modifiers. This button here in the modifier turns it off while working, but it goes back on when
you go to save an image. Remember also that
subdivision surface modifiers have separate levels for
viewport and render. Viewport is what you work with, render is what you save. And finally, if all else fails, you can go to the
timeline and switch from play every frame
to frame dropping. And that lets blender skip over frames so that you see
the correct speed. And as a second point
of preparation, I'll just show you
another little trick. So what I want to do
with this is to make it unselectb, kind of lock it. To do that, I have to add another icon to the right in
the outline. We have an eye. We have a camera. But if I go up to the what's
this called a hopper. Go over to the hopper, can
turn on some more icons, and for this, I just want
this one selectable. If I click that, now I can turn selectable on
or off or anything. So if I click it for this, now I cannot select it in
the Viewboard anymore. Very handy. Let's do the
same for the camera. Press the camera, go up
here, turn off selectable. And now I can start
rigging my character. First off, I'll set the
origin point of everything. Origin point is the
little orange dot. It's where everything
rotates around, and I can move it by going up to options and effect only origins. Now I can move the origin
where I want it to be, press G to move it, and then make sure it doesn't move on the side to side axis. Shift X, no X, and then
move it down here. Or where I want it to pivot
from maybe from the front, G Y, from the front here. And then the mouth,
I'll view this from the side. Other side. Then I can alter Z to
go into X ray mode, also this button here, and then move that origin down here to where it would
realistically pivot. And what else? If I want to
pivot the neck, this is fine. And the apron, if I
wanted to slide around, that's where it would
slide around from. The body I'll put at the
bottom near the waist. And for the hips, I'll
put it in the middle. That's the most
common way to do it. The shoulders, I feel
like this is okay. This arm here should pivot
from this point, I think. And looking at it from
the side, it looks good. I'll do the same with this arm. Should be around here. The hand. Now for this, I don't feel
confident really because I really wanted to spin around
perfectly on this axis. So what I'll do for this one,
actually, I'll right click, I'll press set origin and
do origin to geometry. That puts it in the
precise middle. And if I turn off
the effect only origins now and try to
rotate it on the Z axis, it should look like
nothing's happening. Had it been a little off center, say I just put it like there, just a little off center. Say it looked right to me,
and then I start rotating it. Is not going to look right. Although you know what? I mean, that may be fun, but let's not. So right click Set origin
origin to geometry. Same with this. The legs, viewing it from the front. Oh, turn on affect only origins, and it should
probably pivot around here and this as well. Foot around here
and the other foot. And for the hands,
I'll bring that up now that it is in
the perfect middle, so it pivots around the wrist. You know, another thing
I thought of is if you have low frame rate
playback rate, I do have 25 here, but if you don't it can also help to let me just turn
off the effect origins. It can help to go to the
modifier stack and turn down the levels of the
subdivision in the viewport, because this can also be
taxing on your system. So just going down from
definitely don't need five for the eyes just enough
to see the shape, then this can drastically improve your viewpoard
performance as well. Don't forget to
occasionally save file, save, and I have to attach
everything together. So first, let's start
from the hips, yeah? Everything's attached
to the hips. So the legs and the belly are
all attached to the hips. I'll select those, and the
hips last and then control or command P to parent and
parent to the object. In some cases, when you do this, things will skip around. That's because you have
uneven scales on things. Like you've scaled
things in object mode like this and things will
kind of skip around. In that case, go in and
object, apply scale. Let's do that again. Parent
everything to the hips, and then parent the
feet to the legs, the shoulders and the neck
and the apron to the body, arms to the shoulders.
Hands to the arms. I feel like I'm singing
a kindergarten song. Hands to the arms,
arms to the shoulders. Is the neck attached?
Let's check. Yeah, I did attach the neck, so let's attach the
head to the neck. And then everything on
the head to the head. Now let's check, move the
hips, everything moves around. Move the body, move
the shoulders, the neck, the head, legs. Everything looks correct to me. So we can start animating.
64. Completed - Class Project 07 - Animating: So again, I want the
guy to be like crazy. First off, I want the head to go back and forth like this. So let's set my frame range. Let's start with 120 and
see if that's too long. That's the max allowed
for the project, and then I know I
need to animate. Let's see. That's
the z rotation. We can check it by
doing it, right? We can do the rotation and then look down here at
what value changes. So we know it's the z rotation. Let's see let's start
him looking over here. That's 60 degrees, and
then add a keyframe. And then how fast do
I want him to turn around swing like ten frames. Let's go to frame ten and do plus 60 and then add
a keyframe there. So now he turns his
head like this. And then I can just duplicate that first keyframe, Shift D, duplicate it over to frame 20, and then duplicate this
keyframe over to frame 30. And you know what,
I'll just keep going. Let's see what
that looks like. I think the timing is good, let's go in and refine on
the graph editor, the graph. So I can't really
find it anywhere, but I can go to view
and then frame. That brings the view to the keyframes, and
then let's see here. Let's expand all the
keys a little bit. Instead of doing this, another trick I
like is to go over here and let's close this menu. In here, we can decide
what the pivot point is. Where do we scale things from? And we can scale from
individual centers. That way, if I select multiple
keyframes and scale them, and that scales them
each individually out. Had I been on the
bounding box center, then it will scale like this. So this is a really cool way to edit multiple frames at once. Let's look at that. It's a little faster. Scale
down this was a bit uneven. I like that and I
think let's go back to bounding box scaling
and scale everything. Let's just move the last
keyframe to frame 70 and set the frame range in
the timeline to frame 70. Let's say that's the
length of my animation. And I kind of want it
to loop perfectly. So actually, let's add
one last keyframe on frame 80 and see how that looks. That loops around. That's great. Let's add some arm flailing. Let's do this arm here. And let's see what axis is that? That's probably going to be
the Y axis. No, it's not. Not for this because the object is rotated, but that's fine, because I want it
to flail about on this axis. And look at that. That doesn't quite
work. When I'm rotating around
that pivot point, it's exposing the
axle underneath. So actually, these pivot
points need to be higher up. So I'll select both of
them and then go to affect only origins
and then move them. Or, no, they need to be
lower down, don't they? Oh, and look at
that. It's moving the hands with it because
the hands are parented. So now we have a problem, but it's not really a problem. We can fix it going up here and affect only the
parents as well. Don't affect children.
That's my PSA going out to the bring
your own laptop community. Don't affect your children. So now I can move this down. And now, turn these
off going back, if I rotate now on the X, yeah, it's going to hide the
axle all the way through. I think that's going to
be the way to go for me. Even though obviously, it's
not a realistic movement, but, you know, it's
a stylized thing. So rotate on the X. Let's start out with the arm kind of upward like
this. Key frame that. And let's also go into
the graph editor already. And find this, go
to view and frame. I want this keyframe on
the last frame as well. So shift D and just make sure that the
last frame is there. And how many times
does he flail? Like, Oh, it should probably go pretty
fast, shouldn't it? Like maybe five frames. And so it flails down. And that went very, very high up because I framed selected on just one frame
so I zoomed in a lot. So let's go again to
view and frame all. So it goes down. And
then I'll shift D, duplicate this frame over
to frame ten and up again. That goes very fast.
Let's do that again. Just shift D, all
those, move them over. Select everything. Shift D. That's good. I feel like they should
be a little more varied. So maybe some of them
should go even lower. Some of them should go higher. Then Shift D, duplicate
all this over. And I needed to be
down on frame 80. So right now it seems
I'm out of phase. That's fine. Can delete
this keyframe and move this to frame 80 and then just nudge the
previous ones a little bit. I'm cheating. That's fine. Let's see. Yeah, that's
fun. That's very cute. Let's do the same
on the other arm, so I'll copy all of
these keyframes, Control C, and add them here. I need to keyframe the X first, so go to the X channel, click that and Control V.
That does the same here. Obviously, it's not quite right. But I can scale all of these on negative
one on the Y axis. S to scale them, then Y to scale only
on the Y and then do minus one. That inverts. Then just make sure
that at the start, it's up and then
it goes down. Yes. Great. I don't only have
to do it on one axis. I can do it on multiple axis. Let's go back to the Y rotation, and that doesn't look
quite right, does it? Z rotation. There we
go. That's better. So you can probably do a
little bit of this, too. Let's play it and then
just preview that. I can kind of look
like it's swimming. Maybe I'll just move those permanently a
bit to the front. I think that's probably fine. Let's make him drop his jaw. What rotation axis is that? Not that, for sure.
It's this, yes. So he should have it around 27 and then maybe
quiver a little bit. Let's just start with this, and I can shift D
duplicate this somewhere. And then shift D duplicate
it the other way. And now that I have my range, I can just randomize this. And then the last one will be
the same as the first one. Let's. It looks like
he's panicking. Oh, you know what? I feel
like cheating a little bit. I think I'm going to do it.
I think I'm going to cheat. So I told you that everything attaches to the hips,
and that is true. But right now, I think I want him to kind
of balance on one leg. And for that, I can parent
the hips to the leg instead. So I'll actually unparent
the leg with Alt P, clear parent or go to object
and parent and clear parent. And then I'll parent
the hip to this leg. And I can set the origin point of the hips to that same point. Oh, don't affect children. Only affect parents,
PSA. Come down here. And now I can rotate the whole dude over that point and kind
of make him balance. Oh, that's nice. That should be fairly
slow on the X rotation. So let's see. Let's say that is the default, about
three degrees. Shift D, duplicate that
keyframe over to the end, and then maybe tip
over at a keyframe, tip the other way,
at a keyframe. Let's see what that looks like. Not quite. Maybe we put this in the middle. That's better. And then on the Y axis, should I do anything there, too? No, I feel like that
should be just zero. But what I do want is the eyes just so I
can see the eyes. I can't see them right now because I doesn't let
me see through glass. I'll find the eyes under here. You can see that I've
selected something parented to leg right by its
selection here. So I'll click that and
then it's under hips, and then here under body,
and then under neck. And then we get the head. We're deep in it
now, and then glass. Let's just turn the eye off
so I can see underneath. Let's make the eyes
flash as well, because you can animate, as I said, any value, so you can even animate the
strength of the emission. You can make the
flash like this. Oh, that's going to be
nice on frame zero. Let's have a strength of two and on frame 80,
a strength of two. And what's the
highest I want to go? Let's actually check
this in rendered mode. I want to see what it
really looks like. Yep. Yep, 50. And then what's the lowest I
want to go? What about zero? Zero is good. I'll go back
to material preview mode and hide the glass and see
what does that look like? It would probably turn on real quick and then kind of fade out and then
do the same again. No, it should turn off quicker. See that? And in more
of a rapid succession. Yep. That's the thing. Shift D. Hilarious. I don't like the quivering
of the lip, actually. I think it's too much. So
let's scale down those keys. Select everything, scale on
the Y, scale those down. It's still a bit too
much. That's better. Should the arms be out
of face of each other? So if I take one of them, and I just shift it over. That's more chaotic.
That's fun. That's fun. I like it. But let's make sure that it ends on the
same frame as it starts. He should spin his head
completely around once. He is a robot. He can
do that after all. So for that, I have to
make sure that the start is like the end is the
start plus 360 degrees. So 60 plus 360 plus 360. That is the end. So that's
all the way up there. And that final spin,
I can just delete that middle keyframe and
see what that looks like. Yes. Yes. I like it. I like it. But it's kind of weird how, you know, he spins
around and then stops here and then continues. You see that? So
he spins around, then stops and then continues. That's kind of weird, meaning I should probably
maintain that speed. So I'll rotate this
first key to point at this angle where it follows the curve and
then do the same here. That's better. And then you can
have some randomness in the amplitude here, too. Bring some of them down,
bring some of them up. Let's not be too rigid about it. This guy just ate a
serious chili pepper. Let's check the other
rotation axes on the head just to make sure
that I don't want him to, like, nod or anything. Maybe he's facing
a little bit up. Yeah, that'll be good.
And the other like the tilt. Oh, that's good. Yeah, you should probably tilt. Definitely. Okay. Starting here, tilt that way. And let's see. If I go to view and frame
A, that's the X tilt. Let's tilt over the other way. Yeah, let's kind of
synchronize it with the other head tilt
to make it follow. Look like it belongs. And then prepare to spin all the way around by
just going to zero. And then it spins around. Oh, good, not good because the first frame is ten degrees and then it ends
at zero degrees. So we need that ten degrees
at the very end too. But he shouldn't spin
around at ten degrees. He should spin around at zero, so I need to bring those down. That's better.
65. Completed - Class Project 07 - Rendering: Okay, let's say I'm fine with
this. This is pretty good. I'll turn back on the glass. I don't actually
have to. I'll still render because it's
on in the render. That's the camera button, but I do want to keep it
on. And then let's see. Is it okay to go EV for this?
Let's see the difference. This is with cycles, and this is with EV. And obviously, not.
Doesn't look right. I got to do cycles for this. I'll turn it to GPU compute. Go down here and
turn on motion blur, which is going to make
a difference in this. Lots of fast motion, then
choose an output place. I want to save it as
an image, but let's do JPEG and save it. I've got a path here and I'll call it Oil boot version one. Then underscore and leave
some space for numbering. Remember, Blender will add
frame numbers after this. And then in my render
settings, let's see. Do I want 4,000 samples? Maybe I can do
with half of that. So divide by two brings
me down to half. Remember that samples are, how long will
blender render for? How long will it work to
remove noise from the render? And my experience tells me
that I don't need this much. I can do with about half. But if you're ever in doubt,
just try on your scene. How many samples do you
need to get a clean image? My resolution, I
have 1080 by 1080, which is what the
project specifies. Let's turn off this render to save some resources on
rendering and then go to render and render animation and see how
long one frame takes, and then I'll calculate how
long 80 frames will take. Here we see the motion blur
coming in very strongly. So the last frame
took 28 seconds. Let's just round that up. So I have 30 seconds per frame, and I have 80 frames. So it's going to
be 2,400 seconds, divide by 60 to see
that that's 40 minutes. So that'll just keep rendering for 40 minutes and
then it'll be done. And so it's time for what we in the industry call an
extended coffee break. I'll edit it out and I'll
see you when I'm done. Oh, that was a lovely break. It's now 40 minutes
later, and it's finished. It says frame 80.
We've finished. We've saved all the images in
the folder. Here they are. And it's time to
compile them into a video in a fresh
version of blender. So I'll open a new blender. And here, just go to the
plus and video editing at a video editing workspace. Down here, I'll shift A, add an image sequence. I go to that folder,
press the first image, press eight to select
everything and add image strip, and I'll trim the end
to 80. And let's check. Looks about right, but the
aspect ratio is wrong. So I'll set the
output resolution up here to 1080 by 1080. And lovely. Okay, let's
rend route a video. Go down here and in that same folder.
I'll just paste that. Call it Oil bought version one. Select an FFM peg
video, under encoding. I'll select MPEG four,
and you know what? I'll even up the quality from medium to
perceptually lossless. I really want this to look good. So render and render animation. I'll run through real fast.
I didn't speed that up. And now in here, we have
a movie, finished movie. And that's my
character animation. Now, let's just go
over again why we did it this seemingly
very tedious way of first rendering just still images and then going back
and making it a video. Just remember that, if you
render straight to a video, it'll break if you crash. Problem really is only
you may just crash or maybe you need to cancel
the render or something, and you cannot pick back up if you're rendering
straight to a video. The video needs to
go on rendering from start to finish in order
to not be corrupt. But an image sequence, you can start and stop
whenever you want. If one of the images fails, you can re render
just that image. And that's why we render
a bunch of images first, and then we go back and we compile that into
a video later on.
66. Procedural Modeling with Modifiers: Video, I'll introduce you
to my favorite modifier. We'll do a couple new modifiers, and among them is the Boolean modifier.
It's the coolest one. I'll show you that using
a plane to begin with. Shift A, add a mesh plane,
and then immediately, I'll go into Edit mode with
tab and then scale on X axis, X and drag out to make an oblong shape because
this is going to become the basis
of my staircase. And what we're going
to do is to model a complex looking staircase
using only modifiers. Modifiers are so *******
powerful and with them, you can create stuff
that you would have no chance of making
without modifiers. We've already
touched upon a few, and we'll use all of them
to make this staircase. So first off, we'll go
to the modifier panel, and then we'll add
a modifier and we'll start with solidify. Lladify we've used before, it makes a two D plane thick. So I'll add some
thickness to this. That's a stairstep to me, and
then I'll just close down this modifier to make some space so that I can see
the next one that I'll add, which is the bevel modifier. Bevel. That does the same as
beveling something by hand, except it does so
with a modifier. So if I decrease the amount
or increase the amount, you can see it bevels all
the edges on my object. Let's add some segments to this. So one is a bit too few. Let's add one more and one more and another and then decrease that to just
have a slight bevel. But it's a little faceted, so I want to shade this smooth. I'll right click the object
and shade Auto smooth, which adds another modifier, a smooth modifier, and
this one is pinned, meaning it's going
to stay at the end of the modifier stack
no matter what I add. So just bear in mind, this is going to remain at the bottom, because as I've
discussed before, these are all
calculated in order from top to bottom,
and that does matter. So we got to be mindful of that. Now, the next modifier I'll add that's the Boolean modifier. It's my favorite.
So EOL Boolean. Why is it called a Boolean? Boole is the name
of a mathematician, and a Boolean value is
either zero or one. That's what Boolean means.
It means on or off. And the Boolean modifier
does that with the geometry. So when I add it,
nothing happens because this modifier needs another
object to use as a guide. So let's add one. Let's
add Shift A a cylinder. And then I'll go back to my staircase with the
Boolean modifier. I'll use the eyedropper next to the fields and use that
to select my cylinder. And did you see what happened? If I go into X ray mode, you can see that the cylinder
cut a hole in my staircase. And if I move my
cylinder around, the hole moves with it. That is so cool to me. So if I hide the cylinder now, there is a big gap in
cylinder hole in this, and we have a couple
of settings in here because this may not work. Like, if you're
following along for you, this may not work, depending on the details of your objects. You got to switch between the
solver type, fast or exact. Fast is faster. Sometimes it doesn't work,
so you got to use exact. Sometimes exact doesn't work,
so you got to use fast. And in this case, fast leaves
an open mesh on this side, but a closed mesh on this side. So in this case,
exact works better. What I typically do with my Boolean objects is
I turn them on here, but I click the object and I
go to its object properties. And down in the viewport
display section, I go to display as and
I switch that to wire. That way, it'll always
show as a wire, so I can see through
it while modifying it. So I can still see where it is, but I can also see through. And also I go up to the outliner and I turn
it off in the render. So I turn off the camera icon, meaning when I render, this
cylinder isn't rendered. It's just like a cutter
object, a cookie cutter. Now, I'll do you
one even better. Look at this. I'll scale
down the cylinder, maybe scale it up on the z axis so that I can scale
it down even further. I'll move it over here. Scale it even further. Make it small. Oh, and what you saw
there was it was moving just halfway into my object
and just cutting halfway, but I wanted to cut
all the way through. And then I'll go into
the modifier stack of this cylinder object. It doesn't have
any modifiers yet, but I want to add one. The one I want to
add is called array. Array duplicates the
object in a straight line. I'll add array, and you see
we get another cylinder, and this also cuts a hole because the Boolean object is referencing whatever
this object looks like, and that's with
modifiers and all. Let me change the factor X from one and I'll slide it
over to negative one. And then I'll up the count too. Say, six. Let's increase that
number a little. Look at that. If I hide that, I've now made a bunch of
holes in my stairstep. But I will add another
array modifier to this. So not only will I array
this object along this line, I will take all of this and array that in a
different direction. So add one array. And I don't want to
do it on the X axis. I'll type zero there, but I want to do it on the Y
axis, all type one. Then let's do a little bit more than one and
add a couple more. So now we've made up
perforation in the stairstep. Let's look at it from above and just position this in a
place that makes sense. Now, it's very slow
to move around, and that's because it's
calculating the Boolean modifier, and the Boolean
modifier is very slow, but it is faster if we change
it from exact to fast. If I now move it around,
it's much quicker. Doesn't lag as much. Okay, so we've added the cylinders.
I'll hide those. Now, here's an interesting
point of order of operations. The bevel modifier is now
before the Boolean modifier, which is why it's
beveling this part, but it's not beveling
these edges. Because it's beveling and then it's doing
the cookie cutter. If the bevel comes after, then it's going to
bevel those as well. But the bevel modifier does not like the
Boolean modifier. And that's why we both get some strange shading issues like here, where you can see it, it looks kind of like
bumpy or lumpy in a way, and the bevel won't go
as large as we want. That's just a thing
to keep in mind, the Boolean modifier makes weird geometry that the
bevel modifier doesn't like. So I'll move that
back to before. And then let's add
another modifier. Let's add a mirror modifier. You know this one. And we'll mirror on the X
axis and bisect it. And we've obviously copied the wrong side because all
our holes disappeared, so I'll flip, that
mirrors the whole thing. And then on this object, I'll add an array modifier. Array, which duplicates
that whole thing, but not on the X axis. I don't want anything on the X, but I will move
it over on the Y. I'll move it one object over. And then add a couple more. And not only on the
Y will I move it, but I'll move it on
the Z axis as well. Which raises all those. And we have an
interesting staircase. I think what's amazing
about this is we started with just a plane
and added modifiers, and now we have a whole
freaking perforated staircase. And this kind of modeling is
called procedural modeling. Procedural, as in it follows a procedure from start to finish to know how
to build the object. And this is a very common
workflow for stuff like this is a very handy tool
to have in your tool belt. Often, you won't build
something using one, two, three, four, five, six modifiers like I have here. That's not very common, but it's good to know these. What I love about
procedural workflows is you can always go back and change
your mind on something. So at this point, I've
completed my staircase, but let's say I want a different
pattern of perforation. I can do that. I can go
into the original cylinder. I can unhide that, go down here, I can now move this
over here and I can change I can change the factor on the first
array to bring those over, increase the count,
decrease the count on this maybe, bring those up. And that new pattern updates
over the entire object. I think it's really
cool just to move this around and see it update
across the whole staircase. And at any point, if I need to realize the modifiers to go in
and edit something, I can do that, and I can do it with all of them
or just some of them. But it's a good idea to start at the top and go down
with your applying. So in this case, if
I go to the first, first modifier
solidify and I apply that and I apply the bevel
and I apply the Boolean. Now all of that
is real geometry. So I can actually go and delete the original cylinder,
not need it anymore. And if I go into edit mode, this object now actually
has that geometry. The geometry is kind of
weird, but it's there. And had I not applied those
if I undo and go back, then going into Edit
mode just gives me that original plane without
the hold, without anything. And if I start adjusting
that, I can do this. And now that is the
new base object that is replicated
across everything else. I'll have to decrease
the z offset here. And in order not to
pinch this corner, I'll have to go
into the solidify and turn on even thickness. So procedural
modeling for making really complex things very fast and make them
editable after the fact.
67. Spline Modeling: Other modeling type I want to show you is spline modeling. We introduced splines
early on in the course. Shift A, we have curves, as they called Bezier curves.
Don't worry about the rest. Let's add a Bezier curve and we edit this the same way
we edit anything else. We press tab and that gives
us the Bzier handles. These are the same as
in the graph editor for animation and it's the
same as in Illustrator. You can grab the handles and you can change the
profile of the curve. Now be mindful that you're
still working in three D. So now if I look
from the side, I can drag this down
and I can drag this up. And it's very easy to not really know what axis
you're working on. And it can start to
look really strange, really quick. So be
mindful of that. And if you ever want to flatten everything down, just
select everything, A, and then scale
it S on the z axis. Which scales it on the blue
axis and then just type zero, which scales everything
down, and now it's flat. So it can be smart if you
want everything to be flat to work from the top view. Now everything you
do will be flat. So you can rotate these,
you can scale them. You can grab the handles. You can even right click
on a point and change the handle type just like in the graph editor
to say vector, which makes it straight. Right click vector, and
now they're straight. Or like I like to aligned. If you want to add a
point in between these, you also select both of them, right click and press subdivide, which puts a point
straight in between. And if you want to extend
one, you can press E, which is the same as extrude on a mesh and then
drag out a new one. E, drag it out, E, drag it out. And if you want to
connect the ends to each other, in other words, close it, you can right click
and press Toggle cyclic. That makes it cyclic
in blenders language. But this curve is not
visible in any renders. This is just a guide
curve at the moment. If we want to be able to see it, we need to make
it into geometry. We can do that in the curve tab over here in the
properties panel. And here we can change
a couple of things. We can change the
resolution as well. If I turn that down, it
becomes very jagged. If I turn it up, it becomes
smooth and under geometry, I can change the bevel. So if I increase the
depth of the bevel, that adds a thickness to it. And the resolution, that is the circular resolution
going around. How many segments are
there going around? If I go into wireframe view
and turn off X ray mode, you can see how
many polygons are around there and
if I decrease it, you can see it becomes
much more jagged and if I increase it,
it becomes smoother. And this object is renderable, if you want to make ropes or tubes, this is
the way to do it.
68. Intro to Texturing: You've learned several keys
to realism and blender. You know to use
cycles instead of EV. You know to add little bevels to corners to enhance realism. And now comes the final piece
of the puzzle for realism, and that is textures
because so far, our objects have been
one flat uniform color over the entire object. Now it's time to wrap
an image around it. But plot twist. You can't just slap it on. Oh, no, blenders not that easy. If it were, they'd
call it Figma. No, it's not
actually obvious how to add a two D picture
to a three D object. You have to make decisions about where parts
of the image go. And to prove how hard that is, I brought a visual
aid. Chocolate bunny. So the wrapper is two D.
The bunny is three D, and you have to find a way to, like, get the wrapper
onto the bunny. And the wrapper can be applied
1 million different ways. You can apply it like this.
You can apply it like this. But there's one way you want to apply it. You
have to get it right. And this is the problem we
face in blender, as well. Now in Blunder, we solve
the problem in reverse. Instead of wrapping the
picture around the model, what we do is we
unfold the model. We make little incisions in
the model and fold it out, and then we glue
it onto a picture. Then when we fold the
model back together, the picture sticks in all the right places.
That's the way we do it. Unfolding the model, sticking the image to it, and
then reversing that. Obviously, this
is in a computer, so it's all instant. This process is called
unwrapping and good news. In this course,
we'll let blender do it kind of automatically. There's another aspect of texturing, too,
because remember, color wasn't the only slider we had in the materials panel. We had stuff like
roughness, too, and it turns out that you can use images for
roughness, as well, because the roughness
slider, if you remember, goes 0-1, and that is the
same as black to white. So on an image, black would be completely glossy while
white is completely rough. And if you take a
black and white image, you wrap it around
a model and you tell Blender this
is a roughness map. Then the black parts become shiny and the white
parts become rough. That's pretty cool, huh? The good news is you do not have to make
these from scratch. This is so common in three D, that there are huge libraries of materials with a
bunch of maps online. And the cool thing about
these signs is you get a complete material
with matching maps. So, for example, I found
a nasty swamp material, which has water
and it has sticks, and you get a color map. But you also get a roughness map and when they're put together, then the water becomes glossy and the
sticks become rough. They align perfectly and they combine to become one
cohesive material. On these sites, you get
more than two maps. You don't just get
color and roughness. You can get up to
ten different maps. You only really need
to know about four. These are the four that
create almost any material, any material you can find in the real world can be described, almost every single one, can be described using just four maps, those are color, roughness,
metallic and normal. Color is the image that you
actually see roughness. We've talked about
that's shininess. The metallic describes where
is the object metallic. In this example, the copper frames around the
tiles, that's metallic. And then there's normal, and this one's a bit
of a mind bender. It looks the most groovy, and what it describes
is bumpiness. So your object can
be completely flat. But when you add a normal map, it kind of looks like
it's undulating, like it's not flat anymore. And when you look at
the edge of the object, you can tell that it
still is completely flat. It's just that on the surface, there's the illusion
of bumpiness. So this one's
really interesting. And these four maps go together
to create any material. And you get them on
different websites, I can recommend two. I will recommend polyhaven.com, which is free and also where
we got our HDRIs from and polygon spelled with two Is and that is a
premium service, but they do have a lot of free materials that
you can use as well. Another benefit of using professionally authored
materials is seamlessness. So when you take an
image and you want to replicate it across a surface that can look really stupid. But these are made
to be seamless. So when you tile
them side by side, they repeat without
showing a seam. Seamlessness is key. But you don't need to
go to these websites yet because in the
exercise files, I've put some materials for you, download those and
in the next video, I'll show you how
to put them to use.
69. Texture Setup: Know what? I think you're ready. I think you're ready
for the Shader Editor. We've already used
the shader editor. I don't mean to be too dramatic. We have opened a new window. We've already gone
to the shader editor and we've already
switched to world. What we didn't hear was we
added an HDRI image, right? But let's go back to this step
where we change to world. Let's go back to object. You may have already
glimpsed this. What you see here is the
material on my cube. If I click the cube and I
go to the materials tab, there is a material on it, and that is the same material
you see here in node form. This list has the
same parameters as this node does, and
they're even synced up. So if I change the color, say to red, then it changes to red on the
left hand side as well. This window syncs with whatever material you have
selected on the right. So if I add a new material, press new and make this green. Then you see, we see the
green material on the left, and if I click the red one, we see the red one on the left. So we can edit any material
in the Shader Editor. And you might think, What's the big deal when
they're exactly the same? Well, the big deal is in here, just like we did
in the Worlds hab, when we added an HDRI texture, we can add textures
here as well, and those textures will
map onto our object. So let's do that. Let's add a node to this window
by pressing Shift A, and we get a list of
all the possible nodes that we can add in this window, and there are a lot of them, but don't be intimidated because
we'll only use a couple. And the first one is under
texture and image texture. Stay away from the
image sequence, we want to use the
image texture. Add that, we get a
node that's very similar to the one
where we pick the HDRI. And what we do is we click Open. And I will go to a folder
where I have a material saved. So here are all the maps that
come with this material. We have a base color,
we have a metallic, we have a normal, and
we have a roughness. Let's just click
the base color for now and press Openimage. And now we have
that image loaded into this node. And where
do we want to put it? We want to put it in
the color of this node. So pulling out of
the color here, we drag it red, and we plug it into the color of the shader. Can't see anything
yet because we're not in shaded mode,
so let's do that. Let's scroll over here by
pressing the scroll wheel and clicking material preview
mode. And here we go. The material has been
mapped onto the cube, and this is how we make
our materials realistic. Like, up until now, they've
only been flat colors, but now they can be anything, anything you find
a material for. Not going to take long
until you feel the need to change the mapping
of the material. Say, for instance, in this case, that the squares are too big for the cube, we want
to make them smaller. How do we do that? Well, we
can do that too with nodes. The image has an input
of its own a vector, and that is where you tell
it how to map onto the cube. Let's add another
node to tell it that. Let's shift A, add a
texture coordinate node, press return to add that, and we have a bunch of
different ways to map it. We only care about one of them, and that is UV but I'll
show you just for fun, what happens if
you pull a window into here because I
really like this one. Now it's mapping from
the point of view, you're looking at it, no matter where you're
looking at it from. It's super strange, very trippy. I never use this, but
you get the idea. This node tells this node how to put the image
onto the cube. And so let's just use UV. And what happens then is we
go back to the way it just was because if you don't
plug UV into here, it's going to assume you
want to map with UV. UV is the most
common way to map. And so Blender will just
assume that's what you want, and we'll go over what UV
is and what it means later. But for now, just know UV is how you map an image
onto the object. Blender already assumes we want UV, why did
we add the node? Well, because in between these, we can change the mapping
with another node, and that is the mapping node. So MAPP mapping. I can insert this automatically by just clicking on it when
it's between these two, and that'll put it
into the noodle chain. This allows us to
change the mapping. So if I pull on the
X location here, you'll see the mapping changes
in the right hand side. It's jittery and weird because
it's changing really fast, but if I hold down Shift, it'll change a little slower, and you can see
probably that I'm actually sliding
the texture around. I can do that on different axis, and I can even rotate it. When you rotate a texture, you want to do that
on the z axis. And then we can say align
the lines with the cube. So it's no longer a diamond, but it's more like squares. And then we can change the scale by clicking the
first scale value, dragging down to select all the scale values
and now I can drag those back and
forth holding shift to change the scale
of the texture. All right, we know how to map an image onto the object now. Let's do it with more maps. So in this folder, we
have multiple maps. We have, for example,
the metallic one. So let's get this one in. And my preferred way of
getting an image in is not, in fact, adding a node and
then opening an image. It is clicking the image
and dragging it in. For me, that's much easier. Now for this node, we need to do a little bit
of preparation. If I zoom in here, you see, it has a color space, and the color space is SRGB. This drop down tells Blender
how to interpret this image. Like, what kind of
an image is it? SRGB basically means it's color, and this isn't color. This is metallic. So we have to change that. We have to click it, and
we get many options, but the one we care
about is non color. If an image is not for color, we set it to non color,
easy to remember, that goes for everything that's
not used for base color. But we have to remember
it or else Blender isn't going to interpret this map right, and it's not
going to look right. Let's plug this output
into the metallic input of the shader because it's the
metallic map, and it's weird. And the reason it's weird is this image isn't mapped the
same way as this one is. Remember, we moved
it, we rotated it, and we scaled it, and we
haven't done so with this. So let's do that with this too. What we can do is we can
select these two nodes, and we can press Shift D to
duplicate, move it down, and plug this node into
the vector input here, and that maps the metal onto exactly where we want it
onto the interstices. But doing this isn't
utilizing the power of nodes. So let me show you
something cool. Let's delete what I just
did and instead drag out a second noodle from this mapping node and plug that into the image, and
it does the same thing. And now, if I change
the scale of this node, it changes the scale
of both the images, so they stay aligned. That is so cool. You can really start
to see the power of nodes when you can hook one thing up to two other
things to control both of them. This is one of my
favorite windows in Blender. All right,
let's keep going. Let's complete this material. I'll go back into the folder. For now, I'll skip
over the normal and add in the roughness map. We'll do the same thing
with the roughness map, zoom in and change
the color space from SRGB to non color because
roughness is not color. We'll add the mapping
node to this, as well, so it maps the same
way as everything else. And let's look at this at a grazing angle so you can see what happens
when I plug it in. I'll plug this node
into the roughness of the shader and boom,
Roughness applied. We get some interesting play
of light on the surface. Really cool. Then finally, let's add the normal map. Back into the folder,
drag in the normal map. Same thing with this, zoom in, change the color
space from SRGB to non color and plug the
mapping node into this too, so it also follows the same
mapping as everything else. And hold on a second because
we need one more node in between this image and the shader to tell
the shader that this, in fact, is a normal map, and the node to do that is conveniently called normal map. There is also a node called
normal that looks like this. This is not correct, delete that. What we want is this one. We plug the color into
the color and we plug the normal into the normal and we
get the normal map effect. It's subtle in this case, but it raises up the metal bits. Let me plug this out so you can see this is without and this is with and we can even exaggerate this effect by pulling the strength
up over one. Let's go to ten for now. You can see that really enhances that bumpiness effect. But
I'll go back down to one. So that is how to map every single kind of
map into the shader. The color has a
color space of SRGB, the other ones have non color, and the normal map goes
into a normal map. To map them over, we use a texture coordinate node with the UV socket
going into a mapping, and in here we
change the mapping. And this is how we
make any material. Any material is made in
this exact same way. So to give you some
practice with that, you can download
the exercise files, and in here, I have six materials for you
to set up on your own. You know everything you
need to set this up, but there is a
challenge here still because most of the materials don't have maps for
every single slider. If you only hook up these maps to their corresponding
spots in a material, it's not going to look right. Because some things are missing. You don't always get
a roughness map. You don't always
get a color map. And in those cases, you have to set a color or
roughness manually. So what I want you to do is
download these exercise files and set up all of these
materials to look like this. This is my version of
every single material, and try to make yours look as
close to this as possible. You should be able to do
that, but do remember what we've talked about before
using the glass shader. Remember what we
talked about Sheen, think you'll be able to
set it all up on your own. And when you're
done, you can open the materials dot
blend file where I've set everything up and you can
see how I did it on my end. And then when you're done, these materials
are yours to keep. You can use them for any
project going forward.
70. Projection Mapping: Let's look at how we can wrap
an image around a model. I have a simple
house model here, and I've applied
a material to it. That material, if we go
over to the Shader view, you can see has an image plugged into
its base color socket. Otherwise, it's a completely
regular material, but we have an image texture
plugged into the base color. And we can see what that
image looks like if we turn this into a UV editor. Remember, UV editing is the process of mapping a
texture around a model. And then in the dropdown
menu at the top, we can select that image. And you can see this is
an image of a couple of roofs and a couple of
windows and some doors. And I want to apply
these to the model. And to do that, we
first have to be able to see an image on the model. And right now we're
in grayscale view, and we can turn it over to
texture view or rendered view, but you can also view a single
texture in the solid view, which will be faster
and less laggy. And that is you can
go into the drop down of this viewport
shading menu, and under color, we
switch to texture, and that'll show
whatever texture is selected in the material. But we can't see anything yet, and that is because I
haven't started UV mapping. This house has no UV data. It doesn't know what area of the image to put on
what area of the house. So let's start adding that. Let's go into Edit mode and select just a
side of the house. I'll select one corner and then Control Shift click on another corner to
select that whole side. Then I'll go up to
the UV menu up here. And we have a few options. Let's ignore unwrapping for now and just look at
project from view. Project from view will take whatever shape you see in this
viewpoard and put it here. So if I'm looking
at it at an angle, it'll project at an
angle over here. If I'm looking
straight on, it'll project straight on onto here.
So let me show you that. Press UV and then
project from view. This is what we get. This
exact shape over here. And to demonstrate, if
I go over to the side, UV, project from view, you see, we get that
perspective in here as well. And if I just get it
exactly from the side, I'll even click
the ball over here to go precisely from the side, press UV, project from view, and now I can start moving
it over in this window. You have the tools over
on the left hand side, but I prefer using
the shortcuts, which are the same as in
the three D viewpoardG to grab and look at what happens on the right
as I move this. It's like this is a
window onto the texture, and we can see that
exact texture over here. It's not entirely unlike the clone stamp
tool in Photoshop. If you think about the shape on the left as the source
where you're cloning from, and on the right where
you're cloning to. So if we want a door here, then I'd have to move this over to the door, and
that would show up. If I want a window, we
move it to the window. We can even scale it down and see when I scale
it down on the left, then it scales up on the right because the window fills
more of that shape. So this is how we
start UV mapping. Let's see what we
can do to the roof. Let's look at everything
from the very top, select it all and see, did that select
anything on the sides? No, it didn't. Only the tops. And then from the
top, I will go to the UV menu and project from
view that gives me the roof, and I can move it over
to the purple roof here. And that gives me
the roof texture on the roof of the house. However, it's not
exactly as I wanted. For one, it's pointing in the wrong direction for
a lot of these tiles. Like, on this side here, we can see the roof tiles
be going the right way, but on this side, they're
going the wrong way. So how do we fix that? Well, we can select only this roof here. And in the UV editor,
we can rotate it. So as I press R and rotate it, watch what happens on the
roof. It rotates around. So if I hold down control, I can snap that to
increments and get that exactly on 180 degrees. And look at that. Now it's pointing in
the right direction. We can do the same thing with
these two smaller roofs. So rotate this until it's
pointing the right way. Same with this. This
one and this one. Everything's pointing
the right way. And if we feel like
the tiles are too big, remember what we do
we scale up the UV. I'll select this polygon, and then I'll go to
Select and select Linked Linked that's
Control L for me, and that selects
just that island which is disconnected
from the rest. It is not connected to anything
and I can scale it up. I don't want to scale
it too far because then the second texture starts
creeping in on the side. So I'll have to do
something like this. That makes it smaller.
So let's see. What can we do with
this part here? Let's go here, click
the track ball. I'll press the shortcut
for going to the UV menu, which is fittingly,
and project from view. I'll move this over to one
of these round windows. Get this round window here, and on the other side, I'll
get the other round window. Project from view,
move it over here. That's nice. And let's
get a door in here. So let's do these four you project from view and line up the door to
be on the bottom. Now, what you can see here is this part is lighter than this. The reason is this part has UV coordinates pointing
right over here. And this part
doesn't, meaning it takes an average of
the entire image here. So the average color of the image that is
applied to this part. So if I want to just get
a section of this color, then I'll have to UV
map it to that area. So let me Alt click
on this loop and I'll shift click to add
this loop and this loop, and then I'll deselect what
I've already UV mapped. I want to UV map, all of this. I can do a project
from view again. But if I do that when I have
selected a three d shape, then you'll get this. As you can see, the side walls
get squashed a whole lot. So if I try to map anything to the sidewalls now
like this window, then it'll be stretched
out and look really weird. So a better option in
these cases is to press U, and then under unwrap, we have a couple
other projections. We have cube projection, cylinder projection,
and sphere projection. Let's use cube projection because this is
more like a cube. And that is like projecting
from view from this side, this side, and the top. It's like projecting
from all three angles. What we get is every single
wall laid on top of each other and each of them map the image
without being stretched. I'll scale that down
and just place it in an empty area of the image
where it's just blue. Now it's blue all
the way around. Now I can map those sides again so I can select this side, you project from view
and move it to a window. So to summarize, you can project these three D shapes onto
a two D plane over here, and where you place them is the area of the image that
that area will pick up.
71. Intro to Unwrapping: Looked at how to select polygons and then project
them individually. But what if you want
a continuous texture that isn't broken up? That isn't quite possible with the technique
I've shown you, like in this example, with a strip and a
checkerboard texture. Let's see how we can do
this kind of effect. First, I'll delete the UV map
that I've already applied. Clicking the object,
going to its object data, we haven't really
used this tab yet, but this is where
you store a bunch of metadata for the object. And under here, we have UV maps, which brings up a list, and this is the UV
map that I've made. Let's just click minus to remove that and start
UV mapping from scratch. So I'll open a new window
and open the UV editor. Then I'll press tab and start
by projecting from view. So project from view. This is what it does. We get the checker texture on there. We get to see the
ring from this angle. But as soon as we
move from that angle, it stretches out,
which is weird. Let's also try the other
method we learned, which is U unwrap
and cube projection. That seems to do the
trick a little better, but we still get some stretching like the corners of the cube. That is cube goes like this. And it's projecting
from each side. But on the corners, it's like it doesn't
know which side to pick, so it picks some from
here and some from here, and we get stretching. Now, in the case of a
perfect cylinder like this, we can cheat because
you may have seen that if we go into
Edit mode and press again, in this menu, we have a
cylinder projection as well. And if I press that, well, it doesn't it
doesn't look great, even though it is a cylinder. That's because of the settings. We get a little pop up. Down on the bottom. And in here, we have a couple of
different settings, and you can just tweak
these until it looks right. I happen to know that line to object typically
works really well. And in this case, we do, in fact, get the UV
map that we want. It's a little bit stretched, but that just means we need to stretch it out in
another direction. So in the UV map, I can press S for scale to change the scale, but I'll constrain
it to the Y axis. And that way, I can shrink it down and get the
checkerboards square. It is fine, by the way, to go outside of this square. That just means it'll bring it back around. It's
like it's tiling. So if I scale this up, and that'll shrink the
entire texture. Get back to the place
where I started. Let's look at what
the perfect UV map for a cylinder looks like. It's just a strip. And the reason this
isn't connected to itself like the strip is in three D is you can't really lay a three D strip
flat on a table, like you can try, but you'd have to bend it
and it becomes weird. So what you have to
do is you actually have to cut at some point, you have a place to cut it, and then you can lay it flat. So that gives us a hint
as to what we have to do. So let's remove this UV
map and do this manually. To do that, we have
to select everything, press U, unwrap and
just press angle based. What that does is it takes this three D
shape and it tries to squish it flat as best as
it can in the UV space. In this case, we haven't told
Blender to cut anywhere, meaning it just tries to
flatten it as best it can and the result looks
predictably weird. But if we go in here and we select someplace where
we want to make a cut, say, I just want
this edge to be cut. I can go to the UV menu or
press and click Mark SM. A Sam is like a cut in UV space that highlights
that edge as red. Now, we know that that's a seam. We can now select
everything again. We can hit U,
unwrap angle based. And now blender knows to
cut that and then lay the whole strip flat and we
get the result that we want. And this is how we start UV unwrapping with connected spots.
72. Manual Unwrapping: A let's unwrap this simple house together in a way that makes the checker board completely
square on all sides. And so that we get checkers that flow across seems unbroken. If I try to be lazy about this and I go into
here and I press U unwrap cube projection
and just make a cube, and then let's go
into textured view to see what that looks
like with the checkers. Then we see that the checkers don't really flow
across corners. It kind of looks like they do, but they're squished
down and they're weird and it doesn't
work up here either. So let's try to
unwrap this properly. We first have to make a decision
of which of these faces of the house do we want to
be the front of the house? Which one is most important
to not have any cuts in it. And I would say, let's just say this is the front of the house. So let's select this,
this, this, this. And let's say this here,
this is the front. Want this to stay put. Well, that means that we want this roof tile to be
attached right here. We want that to be
attached to this side, meaning this is not a seam. And now we have to start
imagining a little bit. What happens if this
is connected to this and this phase is also
connected here and here. Well, it won't work because
this phase kind of wants to fold out this way and this phase kind of wants
to fold out this way, meaning we're going to need
a seam going across here. So I'll press Mark Sam and then I'll select
this face, this, this, this, and also all the
front faces and try it out. See what Blender does with us. Unwrap angle based. And here's what happens. Let's rotate all this so
that it makes more sense. We get exactly what I described. We get these two roof
tiles pointing out in different directions
because they're attached to the
top of the house. Now, that means that
the checkerboard flows perfectly
over to the roof. This is often the way
you want to texture. You want textures to flow
over without a visible seam. Let's see how we can
do the same thing with the walls on the side. We want this to be
attached along this edge, meaning we're going to have
to cut up the ones beside it. This and this and let's do the same for the other
side, this and this. You mark seam and then let's select all the front faces and just press C to bring
up the circle select tool. Let's select everything
we want to unwrap and hit unwrap angle based.
And that does that. So now we have that front face with the walls
attached to the sides. And what does that
look like in three D? Like the checkerboard
pattern continues perfectly. Let's do the same at the bottom. We want it to be attached here, but not here nor here, meaning it's actually
correct now so we can just add this
to the selection. Hit unwrap angle based, and I think we should be
good. It looks great. Now, this means that
the checkerboard cannot flow perfectly
across all edges. This is just a fact
of UV mapping. Making a three D object two D is if this face perfectly
flows with this, it cannot also perfectly flow with this. That's just a fact. And the checkerboard pattern is a bit forgiving with this, but you can see that it is
actually squished here. Now, what happens when
we come to the backside? What do we want the backside
to be connected to? Well, in the UV space,
we want the backside to be connected to either
this wall or this wall. It'll end up either
here or here. And it doesn't matter where, but let's just make an incision. At this point here.
You Mark Sam. And then again,
select everything. You unwrap angle based. Oh, and what happens? Everything everything breaks. When everything
breaks, that means that you're missing
a seam somewhere. Something doesn't work. And I can tell what
doesn't work in this case. Now, Blender won't tell
you what doesn't work. Blender will just screw it up. But the reason this
doesn't work is because the backside was supposed
to just come out the side, but it is also connected
to the bottom and the top. So I need to disconnect
it from those as well. So I need a seam on the
top and on the bottom. And that looks about right. Let's try that again. Press and unwrap angle based,
and now it works right. Now we have the back side of
the house on the right here, connected to this wall,
and it looks right. Let's just finish this up with those flanges on the side
where do I want those. I think what makes most sense is they're connected
to the roof, so the flow goes across
here and down the bottom, meaning that I have to cut
out the sides here and here, and here's already a seam. So let's see if this
works. First try. It's always a bit of a gamble. You kind of have to
imagine what it'll do. You, Mark seam,
select everything, unwrap angle based.
And I did it right. And the whole house
is now unwrapped. Now, you might say, that
was a lot of work, Robin. And, yes, yes, it is. It is quite a lot
of work, which is why Blender has an
automatic option for this, which I'll show you
in the next video.
73. Exporting a UV Map: Make blender, unwrap the house
automatically this time. Really wanted to
show you the logic behind unwrapping because
in a lot of cases, you're going to have shapes that aren't possible to
unwrap automatically, and you're going to
have to do manual work, and you've got to
understand how it works. So now that you do, I can show
you the automatic method. And that is you press U, you go to Unwrap, and you
just press Smart UV project. That is going to do
the process that you've learned, making seams, projecting things from
different angles in the way that blender things
is best. Let's click that. You have a bunch of options. I'll just accept the defaults, hit Unwrap, and this
is what it does. Every face is unwrapped
and it looks decent. I mean, it's not great. Things aren't connected in the best way that they could be. The roofs are a
little bit stretched. Those would have to
be stretched back. Scale on the X,
stretch them back. Do how they're supposed
to be. But all in all, pretty good. And now, if I select everything, I can go into here and see
that those roofs now kind of overlap a little bit with other parts,
which I don't want. I don't want them to overlap with other parts of the model. So I'll move this up here and do the same
with the roof down here. Move it up And what
I can do with this now is I can
actually export this and open it in a photo editing
software like Photoshop, or I'm going to use
Affinity Photo. So I'll go up to UV and
down at the bottom, you have Export UV layout. This is going to be so
useful for making packaging. So export UV layout. Put it somewhere on my computer
and then I'll open that. In my case, Affinity Photo. You can use Photoshop or any other image editing software and now we have that UV layout, meaning we can start to
design on our house. Let me just do a
real quick job here with the brush
tool and I'll make a smiley face on this
face of the house and then a really angry face
on this side of the house. I think these are the
roofs, aren't they? I'll do a little roof pattern. And now if I hide
that background and just export what I just did, export that as a PNG. Now, back in
blender, if I import that image into
the shader editor, instead of using my
checker texture, I add an image texture and I open what I just
made in affinity, and I plug that into
the base color. Look at that. It perfectly maps onto the house in the same
way because in the UV editor, everything lines up and I drew onto the UV as it was
when I unwrapped it. This is the way you can make
designs onto three D models. You export the UV map in a way that is the same as
a label template. Then you design onto that and you bring it
back into blender. So now you know how
to do it both ways. You can either map
your model onto an existing image or you can unwrap it and then make
your image on top of that.
74. Class Project 08 - Product Packaging: Yet another project. This one is for packaging. You may say, didn't I
already do packaging? No, you made the bottle, but the bottle needs a box. In fact, that's the way
the project starts. The bottle needs a box
to seem more expensive. Design a box that will contain the bottle you've made and
render an image of it. You may think that this seems a little contrived and it is, but this is a very
useful project. So focus on simple shapes. Most boxes are cubes, so there is no need to
make it more complicated. Focus instead on
visible seams in the cardboard and
variation in textures. So I just finished making
this box, and as you can see, it is nothing more than a cube, but you can see visible
seams going across here. And the separation between
the box and the lid, these are the kind
of details that really shine through
in product renders. And also notice that I didn't do any custom
texturing for this. I didn't export a UV map and
then made a design for it. I simply used two textures, a rock material and
a tiling pattern. Map them onto different
areas of the box. That is enough for this project. And as it says in
the project guide, you can download free
textures from polyhaven.com. If you want text, you can make your own custom
texture or use three D text. The easiest option is
to use three D text. That is a three D model of
text. That's what I did. In this case, I went to
Shift A and pressed text. Then you can edit
that text by pressing tab and then just start typing. So the requirements are, UV unwrap the box,
however you want. That means you can
Smart project, you can cube project, you can project from view,
however you want, but you will need it because
the next requirement is to use textures as part of the challenge of
this project and then render out in EV or cycles. The deliverable is a JPEG
or PNG image that you upload to the class project or assignment section
on this website. I think you're going
to nail this one, so have fun and good luck.
75. Completed - Class Project 08 - Product Packaging: My packaging is going to be square because I want to
make it easy on myself. So add a cube,
press G to move it, Z to move it on Z, and press one on the keyboard to
move it just 1 meter up. That way, it's sitting
right on the floor. Let's just go into tab and
select the top face and G Z. Move that up until I have a
nice nicely proportioned box. I feel like I should probably put my model insign here
just to check that it fits, but I'm sure it's fine. Let's say this is my box.
And you know what I'll do? I'll duplicate this, Shift D, and move this up till
it's resting on top. And this can be like
the lid on top of it. That's probably good,
although I should probably now go into Edit
mode on both of these, select everything
that's on top and then move it down to keep those
proportions that I liked. And then here's what I'll do. I'll go into each of
them, hiding the other. Actually, I'll start
renaming stuff. So this is the box, and this is the lid. Let's go to the lid. Move it up. I'll edit both of them, and I'll select this pace
and also like this pace and I'll inset them by
pressing I holding Shift, and let's see how
much about that much, then I'll extrude both of them. I'll go into wireframe you actually so I can see
that what I'm doing. Extrude on the z axis upward, so they're both extruded
the same amount. And that may have been a
bit redundant because, in fact, I want this extrusion. Let's view it from the side to go all the way up like this. That makes more sense for a lid. And then on the bottom, I'll actually delete this,
press delete, and then faces. And then this one can
get a solidify modifier. So I'll add a modifier, search SOL for solidify
and then just increase the thickness until I
feel like this should be the thickness
of the cardboard. That looks about right.
And then let's add a bevel modifier, BEV, bevel, because no corners are
completely sharp in real life, so let's add a few segments to that and just remove
the weird faceting. I'll right click and shade
Auto smooth and I'll decrease the amount until I feel like it's a good beveling
amount for cardboard. That's for me at 0.02 meters, and I'll actually copy
that value because I want to use it on this as
well, the same value. So I'll add a bevel and add
that same amount to this. Add a couple of segments, right click, Shade Autosmooth,
maybe one more segment. And that looks good.
Now, I can see here that the solidify is actually slanting
inwards a little bit, and that's because I didn't
set it to even thickness. If I turn on even thickness, then it goes straight
down. That's good. Now let's UV map these so
that when the lid is on, the UV map kind of flows
from one to the other so that the texture will be
continuous when the lid is on. First, I have to add a
material to both of them, and I'll call this
material pattern because I'm going to add
a pattern texture to it. And in fact, I'll go right into the shader editor for
this. Shader editor. And I'll import a
pattern that I've generated using AI to
fit with my theme. And in order to see it, I'll go into textured
view, and this is it. So I'll add that same
material to the lid pattern. I'll open a third window. I'll split this one in two
and go into the UV editor. And selecting both of
them, I'll go into tab, select every single phase, and I will for this, not bother to UV
unwrap it properly, although that would be nice, but I'll just go into
unwrap and cube projection so you don't sit here
watching me unwrap all day. And it's actually unwrap them
at different scales here. So the top one has a smaller
scale than the bottom one, and I think that's probably
because I have to go to object apply and scale. That's usually why that happens.
So let's try that again. Set everything. Unwrap
cube projection. And that fixes that. So now
let's try to line these up. I'll go to just the
lid, select everything. And in the UV editor, I'll select
everything here, too, and I'll just press
G to move it, and then Y and then move
it up until it lines up. And I think that's
roughly there. Let's zoom in. I think I kind of nailed
it. So that's nice. Now at this point, I got
to choose which side is the front side because
I want that to be slightly better
than the other sides. I'll just do a
little bit of work. So let's see. Let's do this one. Let's choose this
side as the front, and I'll select this face and see where it
is on the texture. And actually, I'll just draw a little mark by
holding D and drawing, just to remember
where that ends. Then also like the top face, and I'll move that up to
start where those marks are. And that means that those will
actually line up as well. Now it flows continuously
from bottom to top. Let's make it a little
more realistic by adding a paper material
to the insides. So I'll add a new material, new call it paper, make it quite rough, and then go and select these
faces on the inside of the lid and assign those to the paper so
that that becomes white. And I'll do something
similar on this side. But here I think I'll
actually just add a new mesh, a cube, shrink it down, move it up and
delete the top side. And I'll make that paper, too. Select the bottom face of that. Go into wireframe view, viewing from the side,
and I'll move it down. Shrink it in a little,
and move it up. So now that's kind of
lining the inside. Now let's make this
a little funky. I really want to use
the Boolean modifier. Let's make a Boolean
cutter with a cube, viewing it from the
front, then move this up. I'll go into Wireframe
Vew and press tab to edit it and
make this slanted. Move it up to say here. I'll use this to
cut this object. So on this, I'll add
a Boolean modifier. I'll set it to fast just
so it's a bit quicker, and then I dropper
that slanted object, which should cut it in two,
that's a little hard to see. So I'll go into this object, go into its object
properties down to viewport display and set
it from textured to wire. That way we can see through it. And that's really cool. And then here comes
the cool part. I'll duplicate this object, the object that is cut, shift D, duplicate it and right click to just place it where it was, then go into its
Boolean modifier and instead of setting
it to difference, I'll set it to intersect. And that way, it only shows up where the Boolean object is. So this now can adjust where the cut happens between
the two objects. Now we got to be
mindful of where in the stack this Boolean
modifier happens to go. And I actually think, let's see. Let's hide this for a second
and hide this as well. And see the different
options we have. So the boolean modifier can come after everything
that looks like this. It can also go before the
bevel. What happens then? Well, then the bevel happens
on top of the boolean, meaning that this won't be sharp anymore. Rounds it out a little. And if I put it
before the solidify, then it cuts the object
before it solidifies, meaning it adds a face here, and that just fills it in. So in my case, I actually
want this after the solidify, but before the bevel, so
I get the bevel effect. Let's do the same for this
top part after the solidify, but before the bevel, because then I get it a little
bit of a rounding here. And this bottom section, I don't want to have
the pattern material. I'll add a new material to that. I'll just remove the pattern. Add a new and this
I'll call bottom. And for this material, I want to use a material that
I downloaded from online, which is a slate material. Drag in the image of the slate, plug it into the base color, and see what that looks like.
It's pretty interesting. Let's adjust the size of
this light a little by going to tab and just
adjusting the size of the UV, scaling it down so that we
see more of that texture. Even a little smaller, then I'll bring in the
other maps as well. So this is the normal map. And remember, the normal
map should always be set to color space non
color and go into a normal map node, not into the strength,
but into the color. And then I'll drag
the normal into here, and that gives us some
bumpiness on the surface. I think this is cool, then I'll just increase
the roughness. To something a little
more believable. That's pretty interesting. Let's finalize this
by adding some text. Shift A, add some text. I'll press Tab to edit the text, and then delete what's there
and just type Daniels. That's the name
of the brand, and go into the text settings. And under font, I'll select the brand font that I selected randomly for the
very first project. Open that font. It's just
then I'll give this text some thickness by going
into its geometry. And turning up the extrude, that gives it some thickness, and then let's also
add some bevel to it. Just a little bit. And it's
material that should be, I think, just a glossy black. So turn down the roughness, make it very dark. I rotate this on the
X axis, 90 degrees, scale it down, move it up, and let's align it
from the front view. And just bring
that into the box. G Y to move it on the Y, holding down shift
to make it slower, and then bring that into there. That looks pretty sweet. So let's say this is it,
and I want to render. Well, there's one
thing we have to remember when rendering
things with booleans, and that is, if I go
to render view now, that boolean object, that shows. And even if you turn
that off in rendered, it's still going to show up
in the viewport renderer. This year, it just won't show up if you go to render
render Image, but it'll still show up
here, which is annoying. So the easiest way to deal
with this is to go into each Boolean object and go to boolean modifier
and apply it. However, remember, if we apply
this and still solidify, then it's going to Boolean
and then solidify, which gave us that bad look where it just
connected at the top, so we need to actually apply everything above it, as well. That is very typical when
you apply modifiers, you got to apply
from top to bottom. So go this, apply,
and this apply. And then this as well, solidify, apply, and Boolean apply. Can be a good idea to save the project before doing
this so that you can always go back and edit
before you apply the modifiers because now going into edit is going
to be a little harder. Now we can just delete
the Boolean object, delete, go into RenderView, and it's going to render fine. Let's change it
from EV to cycles, GPU compute and add a
nice light, a soft box. Increase the power.
Add a camera. Go into the camera in
another three D view. And bring that camera back. Set this viewpoard to
render this to solid. This is how I like to work. And then I'll just make a quick backdrop by adding a plane, going into tab, scaling it up, extruding the back edge,
clicking that edge, Control B to bevel, making that smooth
by scrolling up. And let's bring that light out so it's not in
the camera view. Got to increase the power again. Right, click Shade Smooth
on the background. And in this case, let's
just make it dark. Render Render Image. This is an image that I
can share on my portfolio. I went fairly quickly
on this project, and that's for two reasons. One, I think you can
follow along because it's just repetition of
things we've already done. And two, I wanted
to show you how quickly you can actually whip up something like a
decent product shot. This is the kind of
stuff that looks just mind blowing to someone
who doesn't know three D, but you know all the steps
involved to make this. You know that it's
just basic modeling. You got to do some automatic UV unwrapping and
maybe a couple of modifiers and you get something that is
actually half decent. So well done getting
to this point and completing the
packaging project.
76. What's next?: And that's a rep. You
survived the whole course, and now your brain is full. So I'll let you go
digest all that. But first, let me just shove a couple more bits of
information in there. You can handle it. So
next, it is on you. You start using blender
in your own projects, and sooner or later, you are going to hit a roadblock that I didn't prepare you for. But that's fine. You now know the terms. You have a search engine. There is a bunch of answers
about blender online. And bring your own
laptop also has courses where you can learn stuff that jams really
well with blender. I want to highlight
the Photoshop course in particular because I consider a T D artist who doesn't know Photoshop an
incomplete TD artist. And the equivalent for
animation is after effects. So if you want to
dive into animation, focus on the after
effects course. And what also jams really
well with animation is the animation for
beginners course. It's not focused on
blender specifically, but everything is
transferable to blender. But no, those are
just my suggestions. Go learn everything. Everything is valuable and bring your own laptop has
courses on, you know, Illustrator, Premiere Pro, Light Room, Canva,
Figma, Webflow. Like, if you can think
of a design soft, why don't bring
your own laptop has done a course on it, probably. And I would love to see you in any future course I make, too. So thank you to
the team for doing their job and to
you for learning. And in the course
of your learning, you have made projects. I would recommend and
I've said this before, I will recommend that you
share your projects with others on maybe this
platform or on social media, maybe both and get some feedback on it and
give feedback to others. Like this is a really key part of developing as an
artist. I'm serious. That's the end of the
course. Well done, sticking through it,
and now off you go. Those models aren't going
to make themselves.