Transcripts
1. Introduction: Hello, and welcome to a
Blender animation class that's truly out of this world. I'm Harry, a season three D
artist with over a decade of professional experience
and the privilege of being recognized as a top
teacher on Skill Share, specializing in
Blender tutorials. In this class, we'll embark
on a cosmic journey together, learning all the
basics of creating a fun spaceship animation
featuring a rigged character. Whether you're brand new
to character animation or you followed some of my
previous animation classes, there should be something for everyone to learn in this class. My blender classes are well regarded for their
clarity and ease, thanks to a step
by step approach that's perfect for beginners. In this class, we'll start with a premade starter file as the foundation for
our animation. The starter file comes fully
modeled, lit, and textured, so you won't have
to spend time on those aspects before you start
animating the characters. This class will focus
entirely on animation, allowing us to dive into the basics and explore
some advanced techniques. Please note that Blender
version 4.2 or later is required to access the provided files and follow along. You can download the
latest version of Blender completely
free from the website. By the end of this class,
you'll be amazed at how fun and easy it is to create charming character animations in Blender. So if you're ready
for an animated and character driven adventure, I invite you to
join me in class. Let's jump into our
first lesson together.
2. Starter File Exploration: And In this lesson, we'll begin the class with
exploring the starter file. If this is your first time
taking a blender class, I'd highly recommend
you start with my complete beginners
guide to blender first. This class was designed
for the absolute beginner to blender and three
D art in general. We cover every single
necessary topic in order to get you up to
speed and running and blender. We'll accomplish this with
short and focused lessons that cover each topic from
a beginner's perspective, utilizing a well
organized starter file. We end the class with an
easy project where you set up and customize your
very own cozy campsite. With that out of the way, let's
continue with the lesson. As I mentioned in
the class intro, we'll be using a premade
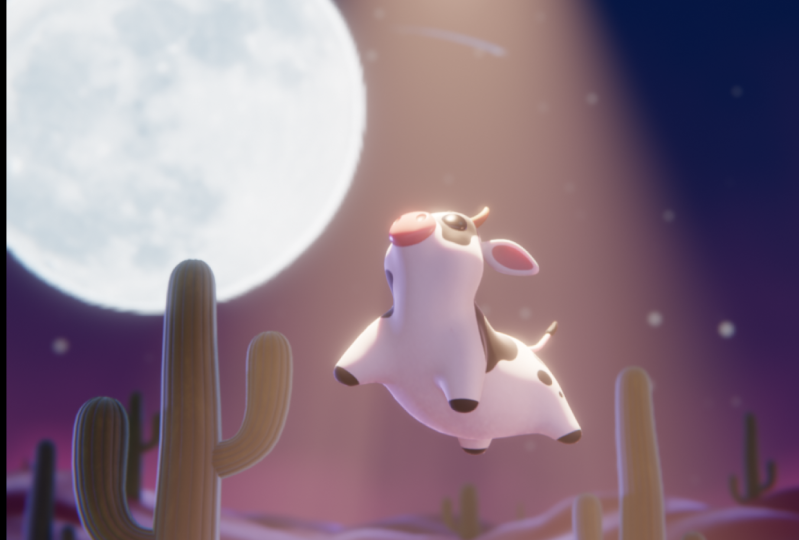
starter file for this class. This will allow us to focus entirely on animating
the UFO and the cow in this file
without having to worry about modeling or
texturing them first. With everything nicely
lit for us as well, we'll be ready to
render our final video as soon as we're done
animating the characters. Before we start
exploring this file, let's make sure that you have
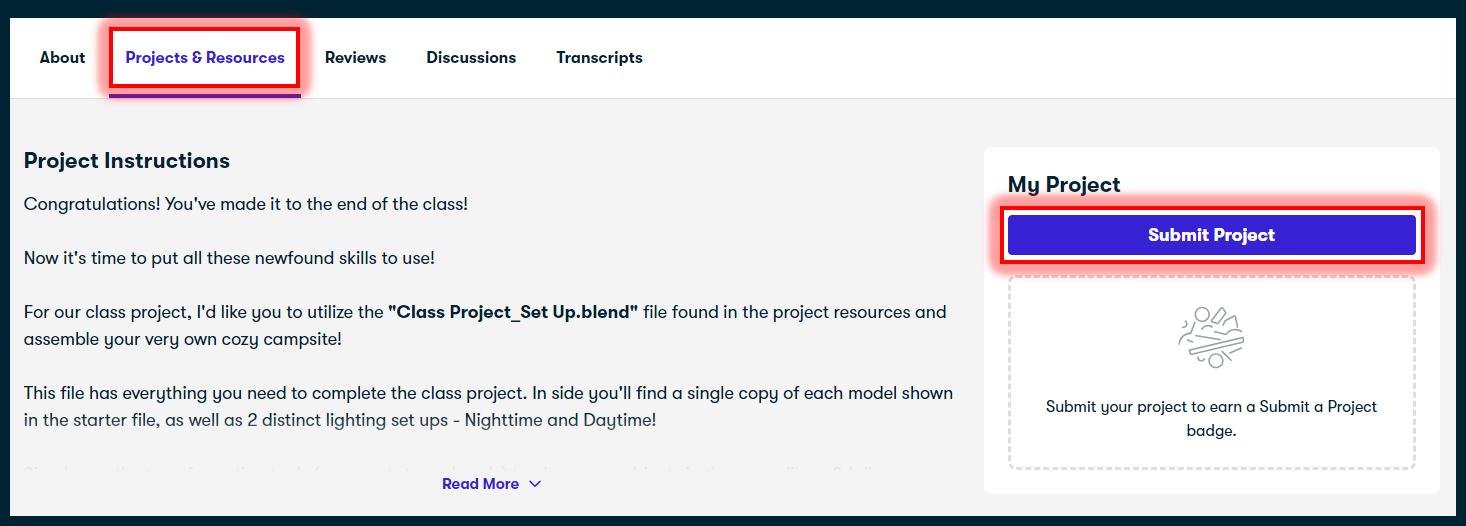
it downloaded and opened in Blender version 4.2 or newer. First, download
the starter file, underscore UFO animation,
underscore 01, Blender file from the
project resources. You also need to download the
texture zip folder as well. Now save both of these
files in one location, such as a folder in your
documents or on the desktop. One additional step
we'll need to take is to extract the textures
from the zip folder. For example, on a Windows PC, you can simply right click on this zip folder and then
choose extract all. This will make a new version of this Textures folder without the little zipper icon on it. You can see an example
of that here at the top. With our files downloaded, let's open the starter file in Blender version 4.2 or newer. This file has
everything we need to complete the class set
up and ready for us. Over here on our left viewport, let's switch our viewport mode to the rendered viewport mode. We can do that by
going up here to this top bar with all
these tools on it, clicking in our middle mouse
button so that we can pan this to the left to reveal these buttons
here on the right side. We're going to click
the far right button to switch it to
the rendered view. It might take a moment as the textures load up
for the first time, but after that, it should
be relatively fast. This will allow us to
see a rendered preview of all the lighting and
textures in our scene. You may notice on your
computer, however, that there are a
lot of bright pink or black textures
all over the place. This is because Blender
doesn't know where to look for the texture
images that we downloaded, even though they were saved in the same folder as
the starter file. Luckily, for us, this
is a really easy fix. To solve this
issue, simply go up to the file button
here at the top left, go down to external data, then go down here
to the bottom and choose find missing files. Now navigate to
wherever you save the Textures folder that
we extracted earlier, the one without the
zipper icon on it. Double click on this
folder to enter it, and then go down
here to the bottom right and choose
find missing files. You should now
notice that all of the missing textures have been relinked and everything
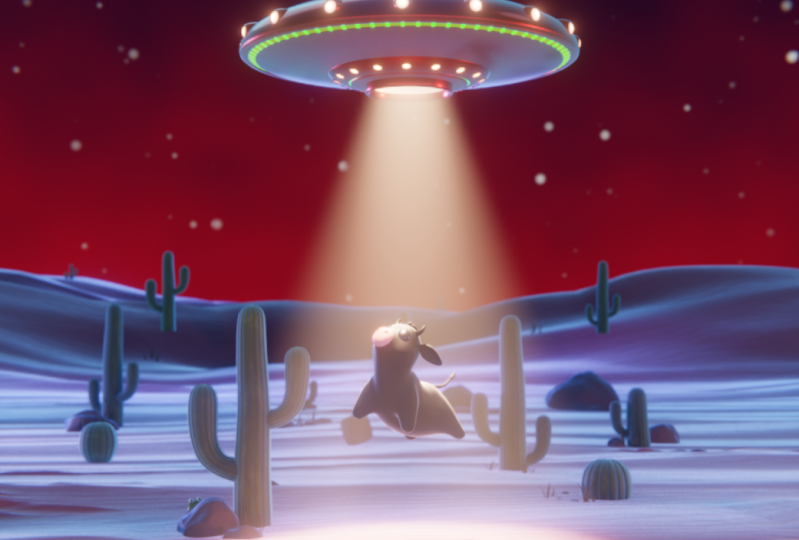
looks as it should. With our file prepared, let's talk about what it
contains for a little bit. First off, you'll notice that we have a pretty complete
looking scene. If you really wanted
to, you could just render a steel image of this
scene and call it a day. However, our goal is to
make it look even better by adding some life to the UFO
and the cow with animation. If we rotate around in
our right viewport, we'll also notice
that the cow has these black lines across
its body and on its limbs. These lines are
called controllers, and it's what we'll use later on to control how the cow moves. So it looks like it's being lifted off the
ground by the UFO. Another thing that we'll notice is that if we zoom
out a little bit, and we go down here and hit the play button is that I've already added
some background animation, such as shooting stars or this tumbleweed rolling
across the background. I added these small background elements like the tumbleweed and shooting stars to breathe a bit of life into
the world for us. This makes sure that
when we're done with the animation
of our characters, we also have a background that
isn't static and lifeless. Now we can go down
here and hit pause, and then lastly, all of our render settings and output
settings are done for us. We can see an example of
that by going over here to the render properties
and clicking on this tab, and here we can
see the settings. We'll be using the updated EV render engine to
create our animation, which means we should have a
really great looking video that also doesn't take too terribly long to
render when it's done. Also have some simple
output settings preconfigured for us found
here on the tab just below. That way when we're done,
all we need to do is pick an output location and then we're ready to
render our file. Before we move on
to the next lesson, let's make sure we
save our blender file so it remembers where
those texture files are. We can do that by
going up here to file, and then choose Save. With this quick
exploration completed, we're ready to move on with
the rest of the class. In the next lesson, we'll
begin the animation process by animating the UFOs
location. I'll see you there.
3. Animating the UFO - Location: In this lesson, we'll begin
the animation process by animating the UFO's
location. Let's begin. I plan on making each lesson in this class focus on a specific aspect of
animating the characters. This will help
keep the length of the lessons as
short as possible. We're also providing a nice guide that you can reference in the future to see how each aspect of this
animation was created. We'll be focusing on the
most basic movements of the UFO in this lesson, which is the horizontal
and vertical movement. Even with such simple movements, we can breathe a
lot of life into the spaceship. So let's begin. We'll start by selecting the
UFO and the right viewpoint. This will allow us
to start placing location keyframes to
control its movements. Now switch to the
object properties tab found here on
the right side. It's this orange square. We'll be controlling
the movements of the UFO and setting
keyframes from this tab. First, let's discuss the
intention behind the movements. This will help you
better understand what we're doing and
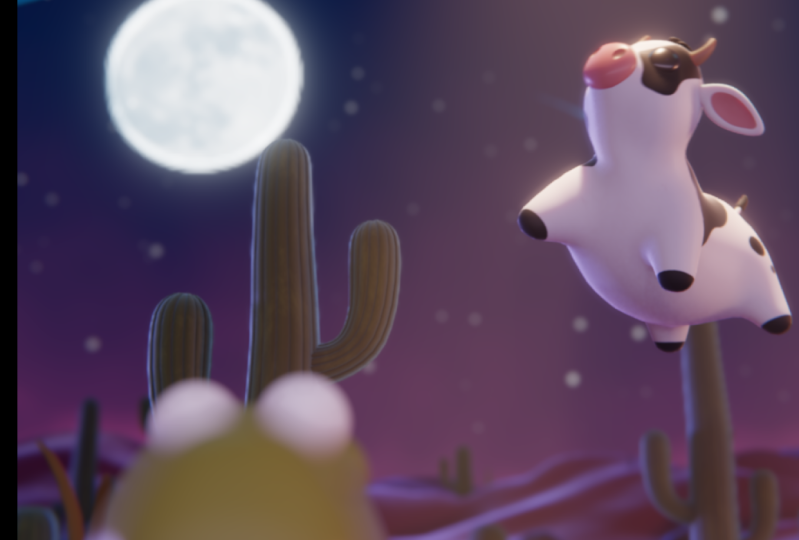
why we're doing it. You can see from the on screen example that our goal is to have this UFO fly in from off
screen on the right side. Stop for a moment
over top of the cow, then struggle to lift it up before dropping it
back onto the ground, then flying off screen
on the left side. We'll be accomplishing
this movement through a combination of both location and
rotation adjustments to make it look like it's
struggling to lift the cow. But the first step is to
get the movement handled. Let's start by moving
the UFO off screen. To do this, we'll be adjusting the X location found here on
the object properties tab. First, let's drag the playhead, this blue icon down here to
frame 15 on this slider. We can see it's on frame 15 by the number listed here
in the blue square. This is where we'll be
placing our first keyframe on the object properties tab
over here on the right side, we're going to send our
X location to 8 meters. I'll just type in eight
and then hit Enter. With 8 meters typed in
here for the X value, we'll go over to this white dot, and we're going to
click on this white dot to place a keyframe. We can tell our keyframe was successfully placed a
few different ways. First, this little white dot
turned into a white diamond. The location value here is
now highlighted in yellow, and also down here
on our timeline, we'll see a little yellow
diamond on top of frame 15. All three of these
different signs mean the exact same thing to us. It's just letting us
know that we have a keyframe placed on
frame 15 in this case, and it's set to 8 meters. With our first keyframe placed, we can now begin placing
new keyframes to tell the UFO where to
move and when to move. Let's drag our playhead here to frame 50 found right about here. We can tell again,
we're on exactly frame 50 by looking at the 50 at
the top of the playhead. Now we'll go back
to the location. This time, we'll type
in zero and hit Enter and we'll see that the UFO has popped directly to the
center of the frame again. However, we can't forget to
actually place our keyframe. Just by changing this value, we haven't actually
placed the keyframe. We can get an indication of this by seeing that it's orange
here on the number. To place the keyframe,
we need to go over here to this now empty
diamond and then click it to fill
it in making this yellow and also placing
the keyframe down here. If you ever notice that the
number here that you've just typed in is
highlighted in orange, that means that you
have yet to place your keyframe, don't
forget to do that. Now that we have two
keyframes placed, we can move the playhead
back to frame zero. Then we can hit Play to see the movement that
we just animated. Now, in this case,
it's pretty simple. It just goes from off screen
and then goes to the center. There's not a whole
lot more movement because we haven't added
any more keyframes. So we can hit pause here. While we only have two keyframes placed and the movement
overall is pretty simple, it's still exciting to see
the UFO move all on its own. For the rest of the keyframes, we're going to go a bit
faster through the process, as it's largely the
same thing over and over again just
with different values. I'll explain little
nuances as they arrive if there's something
worth explaining, however. For our next keyframe, we're
going to drag the playhead to frame 57 and then we're going to set our X location to negative 0.5 and then hit Enter. Again, don't forget to
place your keyframe. You can do that just by clicking this little diamond
here on the right side, making sure that it's filled in and this number turns yellow. Now, this keyframe that we just placed might seem
like an odd movement, but the goal here is to
create a slingshot effect for the sudden stop the
UFO is about to make. The small bit of
extra movement helps imply a sense of weight and
inertia to the spaceship. Which adds both character and
realism to its movements. Now let's move our
playhead to frame 74. And again, for our location, this time we'll type in 0.25, not negative this time, 0.25. Hit Enter. And
then go over here, click the diamond to
place our keyframe. Again, this is another
slingshot movement, as I referred to it before, that's just a bit smaller
than the last to show that it's losing some of the inertia that it had from stopping. You can also think of this
as a rubber band effect. A rubber band wouldn't
just stretch out and then snap back exactly
to where you left it. It would kind of
bounce around and then eventually settle back to
where it's supposed to be. That's what we're
mimicking here with these small movements
and over corrections. Now we'll go to frame 84. Place a zero meter
keyframe here, so type in 0 meters and
then place a keyframe. Now we'll go to 94 down
here on the timeline, go to the location. Type in negative 0.1. It enter, place a keyframe, and then lastly, frame 106, go to our location. Type in zero, hit Enter, and then place a keyframe. We're not quite done yet, but
now is a good time to watch the animation play back and see what we've created so far. So let's go down here, drag our animation back
to frame zero, and then we can hit the
play button found here. We can now see that subtle slingshot effect
that I was speaking about as the ship flies into frame from the
right side of the screen, then bounces back and forth subtly until it comes
to a complete stop. May be wondering
how I decided on these specific frames to
place our key frames. This starter file is set
to 30 frames per second, meaning that it
takes 30 frames to equal 1 second of
real time movement. With our current animation, we have this whole
movement occurring in a little over 3 seconds, which doesn't sound like much. But we want it to have
a pretty fast movement, so we don't need to
devote much time to it. For really quick movements like the slingshot effect
that we added, we need even less than a second. Somewhere around
five to ten frames is plenty for a quick
movement like this. That's only one third
of a second or less. Now we can go down here and
we can pause our animation. Let's go back to finishing
the X movement for the UFO. We're going to drag our playhead
all the way to frame 140 and then we're going
to go over here and we'll leave our X
location set to zero. All we're going to do
is place a keyframe. This keyframe is important
as it tells the UFO to remain stationary
from frames one oh six, all the way to frame 140, which is a bit longer
than 1 second. We can get an indication
that these keyframes are identical because there's this
long line connecting them. This is letting us
know that nothing is changing between
these two keyframes. Now we'll go to frame 155, go to our location
and type in negative one and then hit Enter
and place our keyframe. Now we can go to frame 180. Go up to our location, type in one for 1 meter,
not negative this time. At Enter, place our key frame, frame 190 now, place a
keyframe at 0 meters. At Enter, place our keyframe. And then lastly, we're going
to go all the way to frame 225 found all the way over here. Go up to our location and
type in negative eight, hit Enter, and then
place our key frame. And that's it for the
location animation. You can go ahead now and hit
the Play button to see what this entire animation looks like over here in
the left view port. The last thing we need to do
is animate the Z location, which controls how high the UFO is flying
from the ground. The last thing we need to do
is animate the Z location, which controls how high the UFO is flying
above the ground. There's a bit less key
frames for this parameter, so it should go a bit faster. The main thing we want
to accomplish with the Z location keyframes
is to have it look like the UFO is trying to lift a heavy weight and then dropping it when it
becomes too much to hold. This will help tell
a small story in our animation of a UFO that just isn't strong
enough to carry the cow away and has to drop
it and then fly away. Let's go down here and
pause our animation. And now we're ready
to jump right into the key framing process. We won't stop to play
the animation again until we're finished with
all of the keyframes. Let's drag our
playhead to frame 110. And then this time,
we're going to be adjusting the Z location. However, for this
first keyframe, we're just going to place an initial keyframe set to 1 meter, which is what it's already at. We'll click this
little white dot to place a keyframe here, just locking it into 1 meter. Now go to frame 140 and
then for our Z location, we're going to set this to 0.5. Hit Enter, and then
place a keyframe. Now frame 145, just a
short while afterwards, we're going to set our
location for the Z to 1.25, hit Enter, and then
place our keyframe. Then lastly, one more keyframe, we'll go to frame 155. Go to our Z location
and set it back to 1 meter, place our keyframe. And that's it. The Z
location is now animated. Now we can go down here,
hit our play button and preview animation one more time before finishing
this lesson. The Z animation
that we added makes the UFO sink down as it
struggles to lift the cow, which we haven't animated yet, so you'll have to use
your imagination. Then it springs
upward as it finally drops the cow and then flies
off screen to the left. While this is overall a
relatively simple motion, it's already looking
pretty cool. We'll continue building upon this animation in
each lesson by adding new keyframes that affect
different types of motion for the UFO
until it looks perfect. And the next lesson,
we'll continue animating the UFO by making it
spin. I'll see you there.
4. Animating the UFO - Spin: In this lesson, we'll continue animating the UFO
by making it spin. One of the things people
think about when they picture UFO is the constant slow
spinning of the spaceship. This might seem like a
pretty easy thing to accomplish and it is if you only want to
spin on one axis. But it becomes a bit
more complicated. If you want the ship to spin, while also tilting
back and forth. Blender has difficulty
maintaining a local rotation, such as spinning on the Z axis, while also tilting
on the X or Y axis. You can see on this
simple example that the object no
longer spins like a spinning top and instead rotates the whole object
around a singular point. Luckily for us, there's
a relatively simple fix for this issue and it only
requires a few tools. To start with,
make sure you have the small white collection icon selected next to
the UFO collection. Simply click on this white box
here next to the word UFO. This will make sure
that any new objects are added to this
collection by default. Now let's create a
new empty object. To do this, hover over
your right viewport, hit Shift and A to
bring up the ad menu. Now go down here to empty
and then choose plain axes. This object will be
completely invisible in our render and is simply used as a reference
for other objects. In our case, we'll use this
empty object to spin our UFO. Before we do anything
else, however, let's rename this object
over here and the outliner. We'll just double click on
this word empty and then type in UFO, spin controller. Now let's move this empty
object upward in the Z axis. We just need it to
be above the UFO. Roughly 4 meters or
so should be fine. You can move it
roughly 4 meters, or you can move it a little
bit and then just type in 4 meters down here in
this move option box. With this empty object
created and named, now let's go back
to the UFO object just by selecting it
here in the Viewport. Then we're going to go
to the Constraints tab found down here and it's this little blue
icon that looks like two gears with a belt
wrapped around it. On this ad Constraints menu, we're going to
select this and then we'll choose Copy rotation, which is found here second from the top on the second list. On this new constraint, we're
going to choose the target. Just click on this black
box and we'll type in UFO. And then we want to choose
UFO spin Controller. We'll go down to
this axis section, and we're going to
uncheck the X and the Y as we want this constraint to only
look at the Z axis. With this constraint added, we're ready to begin animating. To animate the spin of our UFO, we'll actually be animating
the empty object we added. This is because we've
made the empty object the controller of the
UFO's Z rotation, which is what this
constraint here does. It's telling the UFO to copy the rotation of
this empty object, but it's only looking at the Z axis because we've
unchecked these two. So whatever we do to the
rotation of the Z axis on this empty controller will
be reflected on the UFO. So first, we need to select
the spin controller from either the list here or you can select it here
in your viewpoard. Now we'll go to the
object properties tab, this tab here with
the orange box on it. Then on our playhead, make
sure you're set to frame zero. And for the z rotation, we're just going to
place a keyframe here with zero degrees set. So we're not going
to change the value, we're just going to
place a keyframe. Now we're going to
drag the playhead all the way to the very end, which is frame 240, and then we're going to
change the z rotation to 90 degrees and then
place a keyframe. Now we can play the animation to see the spin that we added. We'll just hit the play button down here and see what it did. Well, notice our UFO is now
spinning, which is awesome. However, it also starts spinning really slowly
at the beginning, then speeds up in the middle and finally slows down
again at the end. This isn't a huge issue, but it would look better if it's spun at the same
speed the whole time. Luckily, this is
pretty easy to fix. So let's pause our
animation down here. Then on the bottom,
if they're not already selected in yellow, you can simply drag
select over top of both keyframes to highlight
both of them again in yellow. And now that we have
them both selected, we can adjust the type of keyframe this rotation is using. I'll explain more
about the differences between keyframe types
in a later lesson. But for now, I'll let you
know that we're currently using a Bezier keyframe
for this rotation, but we'd rather be using a
linear keyframe instead. To switch it to this
linear keyframe, we just need to right click
down here on the timeline, then go to interpolation
mode found here in the middle and then we're
going to choose linear. Now if we play our
animation again, we'll notice that the UFO
continues spinning at the same pace the entire time with no slowdowns or
speed ups in the middle. This is a relatively
small difference, but we'll use this to a greater effect later in the class. For now, our UFO is spinning
and it looks great. In the next lesson,
we'll continue animating the UFO by focusing on its
tilt. I'll see you there.
5. Animating the UFO - Rotation: In this lesson, we'll
continue animating the UFO by focusing on
its tilt. Let's begin. Now that we've got our
UFO moving and spinning, it's time to add a
little bit of tilt to the animation to really sell the story that we're
trying to tell. Our main goal with the tilt
that we'll be adding is to further reinforce the
inertia of our movement. Then have the UFO wobble as it struggles to lift the
cow off the ground. As always, let's select
the UFO to begin with so that we're ready
to place some key frames. We can do that here
in the Viewport or over here in
the outliner list. Next, make sure that you're in the object properties
tab found here, which is this little
orange box tab. We can see our timeline below is getting pretty full
of keyframes by now. In the next lesson, we'll
explore a new view that allows us to get
a better view of the things happening to our UFO. For now, though,
we'll continue using the smaller timeline to
place our keyframes, even though I know it's getting a bit hard to tell
what's going on. I promise it'll make more
sense in the next lesson. For the rotation of our UFO, which will control its tilt, we'll be animating on both
the X and the Y parameters. This is because the axis
that we need to rotate on our UFO changes as the UFO spins from the animation we did
in the last lesson. As it continues to spin, we'll need to switch to
the new axis to make it look like we're still
rotating on the same axis. We'll be starting
with the Y rotation. So to start with, we'll go
to frame zero found here. And then over here in the
object properties tab, we're going to go
to the Y rotation and set this to negative 15. Hit Enter, and then place our keyframe by clicking this little white dot found here. This will have our UFO
start out tilted forward, so it looks like it's flying
really fast into the frame. Now let's go to frame 50, and then we'll set the Y
rotation back to zero. Hit Enter, and then
place our keyframe. Now we'll go to frame 61, go to the Y rotation and
set it to five degrees, then place our keyframe. This keyframe begins the
slow slingshot effect that I've mentioned
in previous lessons. These small over
corrections are meant to imply a sense of weight and
inertia to the movements, so it doesn't feel
quite so robotic. Now we can head to
frame 84 and then set our Y rotation to negative 2.5. Hit Enter and then
place the keyframe. Now frame 101, go
to our Y rotation, set it back to zero, hit Enter, and then
place the keyframe. At this point, the UFO has
settled in its movements and is ready to
begin the process of lifting the cow
off the ground. This is where the X rotation is going to be used
to make it wobble. However, let's
finish the last few Y rotation key frames
before we move on. We're going to head
to frame 200 near the end and then place a
zero degree keyframe here. This is just meant to keep the tilt stationary for
this length of time. And then one last Y keyframe, we're going to go
to frame 225 and then set the rotation for
the Y to negative 25, it enter, and then
place the keyframe. This last keyframe makes
the UFO again tilt to match the speed in which it flies
out of the frame. All right. So before we move on
to the exportation, let's play the animation and get a good look at what
we just animated. We can do that by
hitting the play button and then get an idea
of what we did. As we can see, these
subtle movements really help sell the
speed of the UFO. We're also removing a bit of the robotic nature of the
movement that we had before. Now we can go down here
and pause our animation. Now we're ready to move on
to the X rotation animation. We'll start off by heading
to frame 110 and then going to the X rotation and
placing a keyframe here, 10. So we won't change the value. We'll just place a keyframe. Now let's head to frame 120, and then we'll go
to the X rotation, set it to five degrees, and then place our keyframe. Now frame 130, and then this time we're going to set
it to negative five degrees. Place our keyframe. Now
we'll go to frame 140, set it to five degrees. This time not negative, so just positive five degrees. Place the keyframe. We can see if we go down here and just
drag this playhead back and forth that we've
added a little bit of wobble to the UFO as it
struggles to pick up the cow. That's what these
back and forth, five degree incumbrants
were doing on the X axis. Now we're ready to make the
wobble more intense as it finally drops the cow and
pops back into the air. We'll go to frame 145 and we'll set the X
rotation to negative five. And then place our keyframe. While the X rotation
is the same as before, you'll notice how much
less time we give it to transition from
each of these values. This makes this rotational
change much more abrupt and adds a lot
more energy to it. This is perfect for
showing the release of weight from the UFO
as it drops the cow. Now let's go to frame 155, set a rotation to
zero for the X, place our keyframe,
now frame 170. This time we'll set the X
rotation to eight degrees, place the keyframe.
Now frame 195. We'll set the rotation to negative eight,
place our keyframe, and then one final
keyframe we'll go to frame 211 and then set the rotation to zero and
then place our keyframe. Let's give our
animation a play to see our hard work and motion
before we end this lesson. We can do that down here
with the play button. These last few keyframes
that we added make the UFO appear tired or dizzy after
lifting such a heavy weight. Just a few key frames can
add a lot of character to your UFO and make
it feel less like an object and more like
something with a motion. We're nearly done with
animating the UFO. Just a few more steps to go. And the next lesson,
we'll finish up the UFO's motion by
adding some modifiers. I'll see you there.
6. Animating the UFO - Adding Modifiers: In this lesson, we'll finish up the UFO's motion by adding
some modifiers. Let's begin. With our base
animation completed, we're ready to begin adding some variation to the
motion using modifiers. If you already have some
familiarity with blender, you might recognize
the term modifiers. However, this is a
little bit different. We won't be adding
typical modifiers that alter the UFO geometry
or other properties. Instead, we're
going to be adding modifiers to our
animated keyframes to change aspects
of their motion using some randomized values. To see the modifier
panel for our animation, we'll actually need to switch to a completely
different workspace. This workspace is what I
alluded to in the last lesson. The animation workspace
will allow us to see a much more detailed view of all the keyframes on our object. Let's switch to the
animation workspace now found here at the top. You can find this tab here, and then we can click on it
to switch to that workspace. This animation workspace is an entire workspace devoted to making your life easier
while animating. I have it preconfigured
with a few of the viewports
already set up for you. Let's discuss what each of these different
viewports is for, so we're a bit more
familiar with the layout. First up, we have the top left viewport here showing
our three D viewport, and it's currently locked
to the camera view. This should be a pretty
familiar looking viewport, as we saw in the last workspace. On the top right side here, we have something called
the graph editor. This is a really
useful window for adjusting the pacing
of your animation. We won't be using the
full functionality of this window just yet, but it's also where we'll
find the modifier panel. More on that in a
moment. Lastly, we have arguably the most
important window on the bottom of the
workspace down here. This large timeline
at the bottom is also known as the dope sheet. Here we can see all of the
keyframes apply to our object, and they're broken
down by parameter if you twirl open the drop
downs on the left side. So if we go over here and click this little dropdown arrow, we'll see all the
different values and types of things that we've keyframed and where each of these individual
keyframes are at. This is super useful if
you have multiple types of keyframes all placed on the
same frame of the animation. We can tell from
this simple example here that we have
a keyframe placed for the X location and the
Y location at frame 50, but we don't have anything
placed for the Z location. This would be really
difficult to see without the extra information that
the dope sheet provides. Now that we have
a better idea of what each of these
windows is for, let's start
discussing modifiers. The first step is to select
a category of keyframes. In this case, we'll
start with the location keyframes by selecting the
name here on the left side. We'll just select this and it'll highlight only
these X keyframes. Now we'll head up
to the top right viewport featuring
the graph editor. This viewport is where we'll
find the modifier panel. By default, this
panel is hidden. But if you hit the key while
hovering over this viewport, we can see here that
this menu disappears, and then if we hit it
again, it'll pop it up. You'll see a few
different tabs here on this side menu when
you pop it open, but the one that we're
looking for is in the middle called modifiers. Now let's add our
first modifier. Click the add modifier drop down menu found
here at the top. We'll be using the noise
modifier for our animation. However, all of
these modifiers can be super useful for
different situations. As a quick example,
the cycles modifier allows you to loop
a repeated motion such as the flapping of wings, and the limits modifier
allows you to put hard limits on an animation to prevent it from going
past certain values. You're also able to
layer these modifiers, so they work together to create some really interesting effects. For now, however,
we're going to add the noise modifier
to our animation. So we'll just select
noise from this list. The noise modifier
is meant to add random variation to the
movement of our key frames. This allows us to create a
somewhat rigid animation, then add this modifier to create some more
natural variation. Will make the flight
of the UFO have a bit of floatiness to it
and make it feel like it's affected by things
like small fluctuations in the wind or the power
of its own thrusters. We won't notice a whole lot of change in our animation
on frame zero, however, let's head to frame 140 so we can
actually see the UFO. We can do that down
here just by dragging the playhead to 140. Now let's go through each of
the important settings on this new noise modifier and get a better idea
of how it works. First, let's zoom into
the graph editor on this top right
window so we can get a closer look at the red line that represents our location. Can use your mouse wheel
to scroll in and out on this window to get a closer
or further look at this line. For now, we're just going to
zoom in a little bit here so we can see more
detail of this red line. We'll explore this graph editor in more detail in
a later lesson. Now we can go
through the settings found here on the
modifier panel, starting with the blend type. Right now it's set to replace. If we click this, we can
see different options. This drop down allows
you to change how the noise modifier is affecting the motion of your objects. In general, the
default replace mode works fine for most animations, but you can try out
other modes to see how they affect your
animation in the future. For now, we're going to
leave our set to replace. Next up, we have scale. This slider changes
how spread out the noise effect is across
the entire animation. We can get an example
of this by just clicking and dragging
on this scale here, and we can see the
larger the number, the more spread out
these waves are, and then the smaller the number, the tighter the waves are
and more jagged it looks. You can think of
this as the speed of the noise effect or how long it goes between each
of its changes. We're going to significantly
increase the scale value here for our animation
by setting it to 28, so 28, and then hit enter. We can see this
really large number makes for a relatively
gradual change. As an example, a really
small value such as 0.5, will make it really jagged
and bounce around a lot. So we can see over
here on the left side, if I drag this back and forth, it's starting to jitter back and forth because these
values here are so closely tied together
by making it much larger, like the example of 28, which is what we're
using for ours. When I drag it back and forth, this bouncing back and forth
is much more minimized. It's not as jittery
as it was before. Our next setting is the
strength slider found here. This slider changes how strong the noise effect is across
our entire animation. As we raise the strength,
we'll notice the waviness of the line increases and the randomized movement of the UFO is significantly
amplified. So if we take this slider
and we drag it really high, we can see that it's really
moving it back and forth a lot because this noise
pattern is much larger. We're going to set our
strength value down pretty low down to just 0.2, as we don't really
need a whole lot of randomized movement for our UFO. Next up, we have the offset
value here just below. This slider allows us to shift the noise pattern left and
right on the timeline. So we can see an example of that just by sliding this value. Now, we won't notice a whole lot of change on our animation because our animation is using
such a small noise value. But if our noise was stronger, this would be a more
obvious change. This lets you fine tune the movements if
you want to avoid a specific randomization from happening during a crucial
moment of your animation. So if we were using
stronger values and we wanted to avoid, say, the noise randomizing during the dropping of the cow or
when it's flying into frame, we could use this
offset value to shift that randomization left or right to avoid it
conflicting with anything. In our case, we're just going
to leave this at zero as our values are relatively small and this really isn't
affecting too much. Next, we have the phase
slider found down here. This slider allows
us to randomize the noise pattern used
for the modifier. We can see an example of this just by sliding it
back and forth. We can see that the line is moving and changing the
pattern that it's using. If you find that the
noise pattern has some weird bumps in it
that you're not a fan of, this slider allows
you to randomize the pattern to hopefully
find a better look. Our noise pattern works
fine for our purposes, so we're just going
to set this back to one and leave it there. Lastly, we have the depth
slider found just below. This slider changes the
smoothness of the noise pattern. Higher values will
introduce more detail to the noise pattern and make it look a little
bit more jagged. See an example here on ours
just by turning the value up. Now, it would be a lot more
noticeable if we were using more increased values for the strength or a smaller scale. In our case, we're just
going to leave this set to zero as it looks fine
for our purposes. The rest of the sliders on this modifier have much
more specific use cases, so we'll leave those
alone for now. With our noise modifier setup, let's hit the play button found here at the very bottom of the screen to see what it
looks like on our animation. We'll notice a really
subtle waving to the UFO's horizontal
movements now. This effect is intentionally subtle as we don't want it to overpower the animation that we crafted in the previous lessons. Let's pause our
animation for now, and then we're going
to set up one last noise modifier for our UFO. This time, we'll be selecting the Z location found
here on the left side. So again, make sure you
select the Z location name, and that'll highlight
just these keyframes. We'll be going through this
process a lot quicker than the last one now that we
know what each slider does. So we'll go up here, go to add
modifier and choose noise. We're going to leave the
blend type set to replace. Go to the scale, set that to 28. We'll set our strength to 0.3. We can leave our
offset set to zero, our phase set to one, and our depth set to zero. Again, you'll notice
that we chose pretty subtle values
for this modifier, so we don't overpower
the original animation. We can play our animation now to see what the
final result looks like by hitting the play button
down here at the bottom. So this subtle Z variation
that we added just makes the animation of the UFO bobble around a little bit up and down. So it's now randomizing a little bit to the
left and right from the X modifier and from the Z modifier
that we just added, it's kind of floating up and down slightly more erratically. Due to these modifiers
being editable, feel free to adjust these
settings to make them stronger or even more
subtle if you'd like to. Don't be afraid to experiment. And the next lesson, we'll
move on to animating the UFOs spotlight.
I'll see you there.
7. Animating the UFO - Spotlight: In this lesson, we'll move on to animating the UFOs spotlight. Let's begin. The last
thing we need to complete our UFO is animating the
spotlight used to lift the cow. This spotlight is our
representation of a classic tractor beam seen
in so many sci fi shows. Right now, our spotlight is on the entire time and has no
fluctuations in brightness. Let's animate the brightness to match the motion of
the UFO and then add another noise modifier to make it waver in its
brightness during flight. First, we'll need
to switch back to the animation workspace if
you're not there already. You can find the animation
workspace here at the top just by clicking
on the word animation. Now we need to switch
the top left viewport, showing our camera view
to the rendered mode. This will allow us
to actually see the illumination of the light
while we're animating it. To swap this view to
the rendered mode, you'll likely need to
pan this top option bar by clicking in your middle
mouse button while hovering over it and then dragging it to the left so that we reveal these buttons here
on the far right. We want to click the
far right button here. Next, we need to
select the spotlight. We can find that over here on the right side inside
this outliner list. So we're just going
to hover over this, scroll all the way to the top, and then we're going
to look for the object here called UFO. And then you may
need to twirl this open if it's not open already, so you'll just click this
little arrow next to it, and then you'll scroll
down, and you want to select the UFO
spotlight right here. This spotlight is located
inside the UFO object here in this list because this spotlight
is parented to the UFO, meaning wherever this UFO moves, the spotlight will follow. Now with the spot
light selected, we can go down here to the
object data properties, which is this green
light bulb icon here, and this is where we can find all the settings
for the light, such as the color or the brightness controlled
by the power value. Now let's start
getting some basic keyframes placed
for our animation. First, let's make this dope sheet a little bit
easier to work with by using our mouse
wheel to scroll in on it and making
it a little larger. This will let us see more
increments in the view. We can also click in our
middle mouse button, so click in the mouse wheel
to pan it to the right, so we can center it a bit better and then zoom in a bit further. Now we can head to frame 40 by dragging our
playhead to frame 40. And now on the UFOs power, we're going to set this
all the way down to zero watts because we want
the light to be turned off. After typing in zero, we'll just click this
little white dot next to it to place our keyframe. We're going to start
our animation by having the spotlight
turned off entirely. This will make it even more impactful when it
finally turns on. Now let's head to
frame 70 found here, and then we're going to set
our power back to 80,000, which is what it
was at by default. 80 and then three
more zeros, one, two, three, 80,000, and then we're going
to place our keyframe. 80,000 might seem
like a huge number, but the watts value on
these lights aren't exactly like the watts you see on light bulbs you
buy in the store. For this reason, our value
needs to be really high in order to achieve the super bright light we want
for the animation. Now let's head to frame 110, and we're going to
leave the power set to 80,000 and we're just
going to place a keyframe. This is meant to hold
this brightness value between this keyframe
and this keyframe. With this last
hold frame placed, we're ready to start fluctuating the light brightness to match the struggle and wobble the UFO is experiencing when
lifting the cow. We'll go to frame 120, not too far afterwards. And now we're going to
switch the power from 80,000 down to just 20,000. So just replace the eight with a two in the beginning and
then place your keyframe. Next, we'll go to frame 130, and then we're going to
set it back to 80,000. Again, just delete the two
and replace it with an eight, then we'll place our keyframe. And then the last keyframe
of the fluctuations, we'll go to frame 140 and then set this back
down to 20,000. So again, get rid of the eight, replace it with a two,
place your keyframe. Now that we have the
light fluctuations done, we're ready to finish
up the animation. So we'll go to frame 150, set it back to 80,000.
Place our keyframe. Now go to frame 190. And this time, we're just
going to place a keyframe, leaving it at 80,000 to
make another hold section. And then the very last keyframe, we'll go to frame 220 and
set this back down to zero, so that it turns the
light off as it flies away and then place
our keyframe. With our last keyframe placed, let's give the animation
a quick play so we can see how these keyframes
affect the overall look. We can do that down here by
hitting the play button. We can see now that
the light's brightness reflects the struggle the UFO is having and it turns on and off as it flies into and
out of the frame. Let's add another modifier
to this animation to really make the
light look like it's flickering and
having a hard time. So first, we'll
pause our animation, and then we'll go over here
to the left side and make sure that you have the power
parameter here selected. It's more than likely
already selected for you, but if for some reason
you clicked off of it, just make sure that
you click on it again to make sure
that it's selected. Now we'll go back up here
to the graph editor, and then make sure
you can see this modifier panel here
on the right side. If not, hit the key to bring it up and then make sure you're on the modifiers tab found here. Now click Add modifier
and then choose noise. In your graph editor over here, if you hover your mouse
over top of it and then hit the home key found above your arrow keys
on your keyboard, it'll zoom in so that you can actually see the entire line. This isn't super
important that we see it because I'll be
giving you the values. But if you're doing this on
your own for another project, you would want to see
the line here so you can see what these values are
actually doing to the values. We're going to go
through a few of these first sliders here quickly as we already
know what they do, so I'm just going to give
you the value that we need. So for the scale, we're
going to set this to five. And then for the strength, we're going to make this
really strong. So we're going to
set this to 50,000. So 50 and then three more zeros, one, two, three,
and a head enter. We want a really strong
flickering effect for the light, so we need a high strength
value to make it do that. The offset phase and depth can all be left at
their default values. A new setting that
we'll be using is this restrict frame range
checkbox down here. Let's check it on for now, and then we can twirl
open these option boxes here to see the values
that we can adjust. These settings will allow us
to limit the influence of the noise modifier to a
specific frame range. It will also allow us to blend this transition of
the noise pattern. We want to limit this
flickering effect to just the main portion
of the animation. So we're going to have it
start on frame 40 by typing in 40 for the start and then we'll
have it end on frame 190. So we can see from
our graph here that even though our animation goes
all the way to frame 220, this noise effect stops
at this last keyframe, and then it goes back to being smooth for this last segment. Our last step is to set up a transition for
the noise modifier, so it's not so abrupt
when it turns on and off. We can do that here with the
blend in and out values. So we're going to type
in 20 for both of these, which means that it
will give 20 frames of transition before the effect either completely starts
or completely ends. It just makes this
transition a little less abrupt and smooths it into
the rest of the movement. Let's play our
animation now to see the final result of this noise
modifier we just set up. We'll go down here and hit play. The effect is a little
bit hard to see in this low resolution
preview render, but it will be a really
cool and subtle effect when we finally render
out the full animation. It'll make it look like
small fluctuations in the UFO's power are making the light below it also
change in its brightness, further adding to the
struggling feeling that we're trying to give
with the movement of our UFO. And that's it. Our UFO
is fully animated, and we're ready to move
on to the cow character. In the next lesson, we'll start exploring the
cow character's rig. So we're familiar with how it
works. I'll see you there.
8. Exploring the Cow's Character Rig: In this lesson, we'll start exploring the cow's
character rig, so you're familiar
with how it works. Let's begin. If you're
new to animation, you've likely never worked with a rigged character before. Luckily, the next part of this class will focus
on teaching you the basics of working with a rigged character and
how to control it. The short lesson will primarily be a discussion
and demonstration. So don't feel the need to follow along if you'd prefer
to just watch. I'm going back to the
layout workspace, so we have a bit larger view
for this demonstration. We can do that by
going up here and then clicking the word layout. Now I'm going to Zoom in down here so we can get a
better look at the cow. The first thing you'll
probably notice is that the cow has black lines
all over its surface. These black lines are the
control rig for the cow. By selecting and
moving these lines, we'll adjust
individual body parts that each of these
lines represent. When we select the control rig, it's going to turn it all
orange instead of black. This cow character is
what is known as rig. This means this model
has bones placed inside of it to control
and deform the geometry. In simplistic terms, I've
built a skeleton inside of this cow character that
allows us to control its movements kind of like
a doll or an action figure. Typically, the bones
of a character aren't quite so smooth and
nice looking, however. I've converted the skeleton into a control rig and gave it a more pleasant and
less obstructive shape, which is what we're seeing now. So as an example,
if I hit Alt and Z, tensor my Xray mode
and then hit tab, you actually see what the
character rig looks like. Each of these colorful
bones we're seeing here controls an individual
part of the body. In this case, this yellow bone here would control
its front left leg. You also notice that when I go into Edit mode for this rig, the cow goes back
into the neutral position in which I modeled it. So its head goes back up and its tail is now
perfectly straight. So now I'm going to hit tab to exit edit mode and then hit Alt and Z to
leave my X ray mode. And we can see here the cow goes back to the position
that I had it in before. Now that you know a little
bit about what I've done to make this cow's
movements controllable, let's learn how to
actually move them. Again, this lesson is meant only for demonstration purposes, so don't worry about following along with me. Just
sit back and watch. So the first step to
moving the cow is to select the control rig,
which I've already done. However, if it's not selected, you'll see here the
lines were black. When I select on
one of these lines, it'll turn it orange, letting me know that
I've selected it. Now we need to switch
from object mode, which is what we're
currently in to pose mode. The easiest way to
do this is to go up here on this option
bar at the top, and you may or may
not need to use your middle mouse button to pan it all the way to the left. So we can see this drop down
here called object mode. So we're going to
select this and then choose pose mode instead. Pose mode is what allows us to control each of these lines, which now all have unique colors to control individual
parts of the model. To choose which body
part we effect, all we need to do is select one of these colorful
controllers. If we select any one of these, we'll see that it switches to controlling that
part of the body. For example, if I select this
red one around the eyes, it'll allow me to
move the head around. You can control
all of these parts utilizing the rotate tool, which I currently have on now. We can see that here
on the left side. If I use my rotate tool, it'll allow me to
move the head around. Now you'll notice if I move
too far in one direction, the head behaves a
little bit unexpectedly, and that's because this rig
has some constraints on it. We'll explain more
about that later. In any movement we
make, we can also hit Control Z to
undo the movement. You'll also be able
to keyframe each of these different body parts to make them animate
individually. This will be important later in the class when we
animate the cow. This same rotation process works on each one of the body
parts, such as the legs. So if we select the
yellow leg down here and I begin rotating it, we can see here, I
can rotate it around, and if I rotate it too far, it'll snap back to
the other side. So if I rotate to the side here, so I can get a better
profile view of the cow, and then I begin
rotating it again. We'll see here that
the leg kind of stops once it reaches
so far forward. This is because I've placed constraints on many of
these bones to prevent you from accidentally
rotating it past what a normal
movement would be. This means you don't have to
worry about spinning the leg the wrong direction
or too far in or out. I've basically
limited the movements to what would be natural
for this character. You can get a glimpse
of these limits on the bone constraints
tab found down here. It's this little blue bone icon. So we'll select this, and
we can see here I have a limit rotation constraint as well as a limit
location constraint. In the case of this front leg, you can see that I've
allowed the leg to rotate in the X and the Z
rotation here and here, but I've prevented
it from spinning on the Y direction as that
would look pretty unnatural. However, you'll notice that
these limits on the X, the Y, and the Z are based
on local space, not the global space that
we're currently using. This is an important thing to consider when animating bones. You'll almost always
want to be animating your bones using the local mode. You can change to
the local transform here at the very top
by using this drop down that says Global and then instead switching it to
local found just below. We'll see after switching
this that the orientation of a rotation Gizmo now better
aligns with the actual leg. By default, your tools are
usually set to global, which means that your tools will follow the world's orientation. You can find the
world orientation up here in the top right, which is what the
rotation tool was using before we
switched it to local. Now that it's on local, it's
looking at the actual leg. So in this case, it's
looking at the bone inside the leg and then orienting the tool based on that instead. This is significantly
more useful for rotating these bones as they now logically follow the
direction of the limb. It also makes the limb and rotation found over
here make more sense. So you can see here that
I'm allowing it to move in the X 30 degrees
forward and backwards. I'm also allowing it to move in the Z 20 degrees in and out. But I'm not allowing
the leg to rotate around the center, so
we can't use this. It won't do anything. You'll
see as we move it too far, it's going to snap to
either the X or the Z, but it's not actually
rotating on the Y. So before I proceed here, I'm going to hit Control Z to get the leg to go back to the original position
that I was in. I'll just spin around
to double check, make sure it's going
straight down. And then we can go back up here and just make sure
that it's set to global transform orientation
instead of local for now. Now that we understand
a little bit about how this
character rig works, we're ready to proceed with
the rest of the class. In the next lesson, we'll learn more about the
two main methods of placing key frames on our
objects. I'll see you there.
9. Exploring Keying Methods: In this lesson, we'll learn more about the two
main methods of placing keyframes on our
objects. Let's begin. Up until this point, it might not have been obvious
that there are actually two main ways artists place keyframes for their
animations and blender. The way we've placed
our keyframes in the previous lessons has
been largely manual. For each of our keyframes, we've gone to the desired frame, typed in a specific
value for the keyframe, such as the location, then click the keyframe button to
manually lock in the value. There's obviously nothing wrong with this method of working. However, it does have a
certain rigidity to it. This works great for more
mechanical animations, such as the UFO
that we animated, but it can lead to a
rather tedious workflow for organic animations
such as the cow. What's the alternative?
The other option we have is a setting
called auto keying. The setting will allow us
to automatically place a keyframe as soon as we
make a change to the model. We do still need to choose which frame we want the
keyframe placed on. But beyond that, you just move the model and it
adds your keyframe. As with the last
lesson, you don't need to follow along with
this short demonstration. So just feel free to watch
the video for this portion. So the first thing I need
to do is make sure I'm not in the pose mode for
the character rig here. So I'm going to go
back to pose mode and then choose Object mode instead. Now I'm going to zoom out a bit. Then I'll hit Shift and A, and I'm going to make
a new object and I'll just make a cube
for this demonstration. Then I'll move it out
of the way over here to the side so we have
a better view of it. Now that I have the cube
moved out of the way, our next step is to turn on
the auto keying setting. We can find this
setting down here next to the play buttons
we were using before, it's this one here
on the far left, it's this open circle. We can just click
this to turn it on. I'll also make sure that I have this object properties tab
open here on the right side, so I can get a better idea of what keyframes it's
actually placing. Now that we have auto
keying turned on, any object that we
make changes to, such as the location,
the rotation or scale, we have a keyframe placed
automatically on the timeline. As a quick example, if I move this cube
slightly to the side, you'll see that a
keyframe is placed automatically down
here on the timeline. We can also see that it's
keyframed the locations. Now if we drag our playhead forward to a new time
on the timeline, and then again, move our box, we'll see that it's
placed more keyframes and then if we drag our
playhead back and forth, we can see that it's animating
between these keyframes, just like the normal
keyframe process would. To make adjustments to either the keyframes that
we just placed, all we need to do is to move our playhead over top of
one of these keyframes. So in this case, say,
the frame 160 keyframe, and then just move our cube to the new location
that we would prefer. Now if we drag it
back and forth, we can see it animates to the new location rather than the old one because
we've updated it. Another thing we can do is to move to a new place
on the timeline, say, frame 170, then
instead of moving this, if we wanted to keep
it exactly in place, we can just hover over
this viewport and then hit the Ie key
on our keyboard, and I'll manually
place keyframes. Well, notice,
however, that unlike the last two keyframes that only keyed the location
when we moved it, when we hit the I key, it places keyframes on all
three of the properties. Now we have keyframes
on the location, but we also have them on
the rotation and the scale. This isn't necessarily an issue, as it still accomplishes
the same goal. However, it does make for
a slightly messy timeline, as we have a lot of keyframes that aren't really
doing anything. We can limit what kind of keyframes are placed when we use the eye key by using
something called keying sets. A keying set is essentially a filter that will
prevent you from placing a keyframe
on a parameter that isn't part of
the keying set. We can see all of
the keying sets that we have access to by clicking on the keying button found here on the far
left of the timeline. We can click this, and then we can go over here to where
it says keying sets, and then we can
click on this field and see all of the
different options we have. And then it's up to us to just choose the one that
best fits our need. For this example, I'll choose the rotation keying set
found here at the top. This means when I use the I key to manually force a keyframe, it will only key
the rotation and it will leave all the other
properties untouched. So I'll select
this for rotation, and we can see that
reflected here. And now let's move
to a new frame. So I'll move to frame 180, and now I'll hit I while
hovering over this viewport. We can see here after hitting I, it's only keyframed the rotation instead of the location
and scale like before, that's thanks to this keying
set that we set over here. This interaction is really
useful when you want to use auto keying to make your life a bit easier as you animate, but you also don't want to
worry about keying a bunch of unnecessary properties when
you place a manual keyframe. There's another setting
and Auto key that works with this keying
set that we just enabled. If we go over here to
the auto keying settings by clicking on this
drop down menu, we can see a checkbox here
called Only Active keying set. So I'll check this one for now. What this checkbox does is limit the auto
key setting from placing any keyframes
on properties that aren't part of
your active keying set. This means that if I
have my keying set on the rotation only
setting like it is now, and then I move to a new frame, and all I do is move my cube
without rotating at all. Well, notice that
it won't actually have placed any keyframes. We can see here that there are no new keyframes
placed for this. It did, however, place
keyframes only on the rotation. And in this case, all it did
was simply lock it in to the consistent zero degree rotation that it's
had the entire time. So this means if I moved it up and then rotated it as well. Now if I move my playhead, we'll see here the cube snaps back to where
it was because it didn't actually place any
keyframes for the location. And instead, all it did was
place rotation keyframes, so it just rotates in place. While this can be a somewhat
complicated interaction between the keying
set and Auto key, it does make a lot
of jobs really easy if you know exactly
what you want to keyframe and you want to lose any keyframes that don't fall into that
active keying set. For now, I'm going
to go back over here and turn off my keying set. I'll turn off through rotation
just by clicking this X. If you were following
along with me, I suggest you do the
same thing as well. Again, you didn't have
to be, but if you were, you can click this to
get rid of that and then we'll go over to
our Auto key settings. Twirl this open and then also uncheck only active keying set. Then lastly, we can turn off auto keying by clicking this
button here to turn it off. Also make sure I
delete this cube by just selecting it and
then hitting delete. Hopefully, at this point,
you feel a bit more educated about the main differences
between these keying styles. This was the last of our
discussion based lessons, we're heading back
into animating now that we've got
the groundwork laid. In the next lesson, we'll
begin animating the cow by focusing on its location.
I'll see you there.
10. Animating the Cow - Location: In this lesson, we'll
begin animating the cow by focusing on its
location. Let's begin. The first step to
animating our cow is getting the overall
position blocked out, so we can build off of that motion in the
following lessons. This means we'll
simply be animating the cow's position
up and down to match where it should be based on what the UFO above is doing. We'll focus on the
detailed animation of the cow in following lessons. Animating the location will be a very similar process to
how we animated the UFO. We won't be using auto
keying just yet as it's not really necessary for this basic part of the animation. First, let's select the cow by clicking on the Control
rig surrounding it. So we can just
click on any one of these black lines on
the surface of the cow. Now let's switch to the
animation workspace so we have a more detailed
view of what's going on. We can find the animation
workspace by just clicking on this button here that says
animation at the top. You'll now notice that on
the top left viewport, that the animation
workspace has automatically switched us into the pose
mode for the cow's rig. We can get a clue to this
because the cows bones on the control rig are all multi colored rather than being
orange like they were before. Normally, this would be a useful little shortcut for us if we were planning on animating the individual limbs of the cow. However, in our case, we
actually want to start by animating the entire
cow in object mode. So to switch back
to object mode, we're going to go back up here to this option bar at the top, click in our middle
mouse button, and then move this
whole bar here to the right so we can see this drop down where
it says pose mode. Then we're going
to click on this and switch it back
to object mode. This will allow us to animate the entire rig without focusing
on any one specific bone. Lastly, make sure that you're in the object properties
tab on the right side. So we can go over here
and then click on this little orange box for
the object properties tab, and this is where
we were doing a lot of our animation before. With everything set up, let's begin placing our keyframes. We'll start by
locking the cow in place so it doesn't move
before we want it to. So we're going to
move to frame 50, and then we're going
to place a keyframe on the Z location where
it's currently set, so we won't change this value. We're just going to click this little dot to
place a keyframe. Now we can move to frame 110
and we're going to change the Z location to negative 6.25. Enter, and then
place our keyframe. This keyframe
determines how high and how fast our cow
will lift into the air. We'll come back to this frame in a moment to adjust its pacing. You may have also noticed
that both of these values, the initial keyframe
and then this keyframe we just placed here are
set to negative values. This is simply a cork of this specific scene
that I created for us. The UFO in this scene is set to roughly 0 meters,
whereas the cow, which is below it is roughly negative 8 meters
below this zero point. Of course, these measurements
are all relative. So for our animation, it still looks like it's lifting
off the ground, even though it's technically
a negative value. As our Z value gets
closer to zero, it's actually moving
up in the air. With that keyframe placed, we can now go to frame 120. And we're going to
set the Z location to negative 6.4 at enter, place our keyframe, and then the next few
keyframes will be the gentle wobble up and down as the UFO struggles
to lift the cow. So we can move to frame 130, set our Z to negative 5.9, place our keyframe,
go to frame 140. So we're just doing ten
frame increments here, we're going to set
that to negative 6.6, place the keyframe. Frame 148, so slightly
less this time. And we'll place that at negative 5.25 and then place
our keyframe. And now we're ready for the last keyframe
of this animation, and we're going to place
that on frame 160. For this keyframe, we
need to set the cow back to the exact same
position that it started at, as we want it to land back on the ground after it's
dropped by the UFO. We have two different options we can use to place this keyframe. We can either just go over
here and then type in the exact value negative 8.06
in keyframe that is normal, or we could copy the original keyframe and place
it at the end. For the sake of
example, let's use the copy method to
show you how it works. First, we're going to go to this first keyframe we placed
here on the Z location, and we're just going to click
on this to highlight it. Now we're going to
hit Shift and D at the same time to begin
duplicating this keyframe, and we're going to
drag it all the way over here to frame 160. And then left click to
place it. And that's it. Now we have an exact copy of the keyframe placed at the end, and the cow returns exactly
to where it started from. Before we play our animation, let's go over here
to the left ePort, click and drag on
this option bar with our middle mouse button. To the left. That way we
reveal our rendered button. We're going to
click on this so we can actually see the
lighting within our scene. Now we can go down here and hit the play button to see
what we've animated. Our cow starts to
slowly rise up into the air as the UFOs
spotlight turns on, then it wavers up and down as the UFO struggles to hold it up. Then it drops to the ground as the UFO gives up and flies off. While the basic animation
looks pretty good so far, there are some simple
changes we can make to have the motion
look even better. To make these changes,
we'll need to start using the graph editor on
the top right viewport. Let's start by pausing
in the animation. Before I explain what the
graph editor is useful for, let's zoom in on it to
make it much more visible. The easiest way to do this is to first make sure that you have the Z location keyframe category selected over here
on the left side. So we're going to
twirl this open so we can see Z location
and then select it. Now we can hover our mouse
over the graph editor here on the right and then hit the home key to zoom
into this line. You can find the home key above your arrow keys on the right
side of your keyboard. After hitting the home key, Blender will zoom
into this graph line and make it as large as
possible to fill the screen. With our Z location
graph line visible, let's discuss what we're
actually looking at. The Z location is a perfect
example of how to read this graph as it reflects what
our cow is actually doing. If we look at this line,
we'll notice black dots along the line and then subtle curves
that attach each of them. The black dots represent the
keyframes that we've placed, and the blue line
represents the speed at which the cow transitions
between these keyframes. The steeper the
line, the quicker the cow is moving to get to
the next keyframe location. You can see here at
the beginning of the animation that this
line is not that steep. However, we get to the end and the cow drops from the
air down to the ground, this line is a lot more steep, which means it makes this
change much more quickly. Another way to
interpret this is that the cow slowly lifts
into the air over time, but then quickly drops from the air back
down to the ground. So if we imagined our cow traveling along this line as
if it was a roller coaster, what could we do to make this
animation look even better? The best candidates would be to focus on the
very beginning of the animation as well as the very end
of the animation. Let's start by making the
cow lift into the air really slowly to start and then speed up as it reaches
the top of the movement. To do this, we'll need to adjust the handles on the
first keyframe. First, we'll select this
first keyframe just by drag selecting over top of
it in the graph editor. Now that we have it selected, we have a few different
things we can do to any of these keyframes. Now that we have it selected, we have a few different
things that we can do to any one of these
keyframes that we select. Now, you don't need to follow
along with this just yet, but as an example, we could hit G to move the placement
of this keyframe. We could hit R to rotate the
handles on this keyframe. And lastly, we could
hit S to scale it, scaling up these handles, changing the curvature of
the line it's attached to. Now I can hit Control Z to undo these changes and set
it back to where it was. For our animation, we'll be using the last option, scaling. Let's drag the playhead
either down here or up in the graph editor closer to the beginning
of the animation. Right around here is probably
fine. Around frame 70. And with the first
keyframe still selected, we can hit S on our keyboard
to begin scaling this, which will start increasing
the size of these handles, changing the curvature of the line that are attached to it. Now let's begin scaling
these handles up to make the graph much more
gradual to start with, but steeper and
faster at the end. After hitting S, we're just
going to scale this up, pulling it towards
the right side. Until this little handle
here on the right side, you'll see that
there's three dots. We want the right most dot. To go all the way to this darker black line,
right about here. Then once we're happy
with the scale, we can just click to place it. We were visually just
scaling it up until this orange line met
this black line. But we also have an option
down here to twirl up in this resize and then we can change the scale here
manually if we'd like to. You don't have to worry about
having this exact value, but anywhere around 2.5
roughly would work fine. For now, I'm going to twirl this back down so we
can get a better view. Now let's drag the
playhead back to zero. And then hit the
play button to see the animation that
we just adjusted. With this subtle change made, we've slowed the initial
lift off of the cow, but made it speed up quickly as it eventually
leaves the ground. This gives the animation
a bit more life as the pacing isn't
so consistent. It makes it seem like
the UFO spotlight needs a moment to
reach full power, so it lifts the cow
slowly as it charges up. It's also important to note
that this change we made didn't change how long it takes for the cow to reach
the first keyframe. It takes the exact same
amount of time, in this case, 60 frames or 2 seconds, but we've redistributed
the speed of the animation during
those 2 seconds. So even though it starts
moving slowly to begin with, it speeds up to compensate for the slowdown
in the beginning, meaning that the overall
time spent lifting into the air still remains
the same, 2 seconds. Now let's pause our animation, and now we're ready to work on the last key frame
of the animation. Our goal for the last
keyframe of this animation is to make the end of the movement
as abrupt as possible. Right now, if we look
at this line here, we'll notice that
there's a subtle curve right before it reaches the end. It goes down and then slowly curves and
then flattens out. This means the cow
is slowing down slightly right before
it hits the ground. This would make sense if
the cow is a different type of animal like a bird
or a winged insect, as they can use their
wings to slow the fall, but cows don't have wings, and our cow wouldn't
be able to slow its fall just before the
end as it hits the ground. We'll make the change
for this keyframe using a different method than the
beginning of the animation. This time we're going to change the type of keyframe
used at the end. To do this, we'll again need to drag select over the keyframe, so we're just going
to drag select over the last keyframe
in this case, just found here at
the bottom right. And now with our mouse still hovering over top of
this graph editor, we're going to hit V on our keyboard to bring up
the handle type menu. This menu allows
us to change how the handles on these
keyframes behave. By default, all of our keyframes are using
the aligned setting, which is what they default to
when you create a keyframe. This aligned setting is great for making subtle
curves between each of the motions to
make the movement start out slowly and end slowly. Generally, this is
a good place to start as it works great
for most situations. But in our unique case, we need to use a
different handle type. You can see here next
to the option vector, that there's a symbol
that looks like a line with no curve at all. It's just two straight lines
running into a keyframe. This is perfect for
our purposes as we want to eliminate the
curve in our line as well. This is true of all these
other options here. We can look at the
symbol next to them to get an idea of what
they're useful for. However, as I mentioned, vector is the one
we'll be using, so let's click on that now. The handle type
switch to vector, we can see the handles
have turned green, and the line now has
a sharp corner at the bottom of it with
no curve at all. So this line goes straight down, hits the keyframe, and
then goes horizontal. There's no subtle curve
like we had before. Let's drag our playhead back to zero and then hit the play button to see
the new animation. We can see now that the
cow quickly falls from the air and doesn't slow down at all until it finally
stops on the ground. This has removed
that slight slowdown and floatiness that
we had before, making the animation have a
lot more weight and realism. These last two changes
that we made using the graph editor might
have seemed pretty subtle, but it's these little changes that can have big effects on your animation and really improve the polish
of the overall look. In the next lesson, we'll
add some modifiers to the cow's location to give it some variation
in its movements. I'll see you there.
11. Animating the Cow - Adding Modifiers: And In this lesson, we'll add some modifiers to the cow's location to give it some variation
in its movements. Let's begin. Up to this point, we've only added
animation modifiers to movements that we've
already keyframed. Obviously, this is the
most common way to use these modifiers, but
it's not the only way. What if we want our cow
to slowly waver left and right as it floats
using a noise modifier? But we don't want to hand animate this basic
movement first. We can't apply a modifier to an animation or a keyframe
that doesn't exist. As you might have
guessed already, I have a simple fix
for this problem. All we need to do is add a single keyframe on the parameter that we want
to apply the modifier to, and that'll solve our issue. This method works because
a single keyframe on a parameter that
already had no animation won't cause any
issues for us as it simply locks in a parameter
that already wasn't animated. All this does for us is give us a place to attach
our modifier to. We have three different
parameters that we want to do this placeholder
keyframe process on. So let's set that up now. First, make sure that you're in the animation
workspace found here. We can switch to it just by clicking on the word animation. Next, make sure that you have the control rig for
the cow selected, and you're in object mode. So if you're not
selected already, you can just hover
over any one of these black lines and select it, and then to double check
that you're in object mode, you can either look here
and see if the rig is shown in orange or you can
go up to the top option bar, click in your
middle mouse button to pan it all the
way to the left. Make sure it says object mode. If not, it'll more than
likely be on Pos mode. You'll want to switch
it back to object. With everything set up, let's begin placing our keyframes. We're going to go down here and move our playhead to frame 50. We'll be placing our keyframes at the beginning of
the cows animation. It really doesn't
matter where we place these single keyframes. Frame 50 is as good
as any other place. Now we can go over
here on the right side and make sure you're in
the object properties tab, which is this little
orange box and then we're going to go
through and place three different keyframes. Our first keyframe is
going to be the location, so we'll just click this little
dot to place a keyframe. Now we'll go down
to the rotation and place an X rotation keyframe, and then lastly, a Y
rotation keyframe. And that's it. We don't need to change any of
these parameters. We simply need the keyframe. With all of our
keyframes placed, all we need to do is
add our modifiers. Let's start with the X location. We're going to go
over here and select X location from this
list on the left side. If you don't see all these
different parameters here, you might need to twirl
open this option menu here. If that's the case, just click this little arrow
and then I'll twirl it open and you
want to have just the X location selected. Now we'll go to the
modifier panel, and if you don't see this, just hit N to bring
up the modifier panel and then make sure you're in the modifiers tab
here on the right, and now we'll go up to add
modifier and choose noise. This process will be largely identical to previous
noise modifiers. Going to go pretty
quick through this. So to start with, we're
going to go to our scale, type in 40 for the scale. For the strength,
we'll set this to 0.6. We're going to leave these
three parameters as they are. So offset phase and depth
will remain at third default. Now we'll go down to restrict
frame range, check this on, twirl it open, and
then for the start, we're going to start
this on frame 50. For the end, we'll
type in frame 155, and then for both the in and the out value here
for the blend, we'll type in 30
for both of these. With these settings, we've added a slow movement left and right that starts when the
cow lifts off the ground. And then ends just before
it falls back to Earth. You can either give
your animation a quick play to see what we did, or you can simply go down
here to the playhead and drag it back and forth to see the
slight waiver that we added. You can see our
cow here just kind of floats back and
forth left and right, a little bit thanks to
the noise modifier. Now it's time to add a
modifier to the X rotation. So again, we'll go down here
and we're going to select the X Euler rotation
found just below. As a quick note, there are a few different types
of rotation methods, but the most common
one is called Euler, which is named after
Leonhard Euler, a Swiss mathematician
from the 1700s, just in case you were curious. Now again, we'll go up here to our add modifier and then
again, choose noise. For our scale, we'll
set this to eight. Our strength will set
to point to four. We're going to skip the
next three just like last time and then check
on restrict frame range, twirl this open, and
then for the start, we're going to start
this at frame 100. We'll end it at frame 155, and then the same
thing as before, we're going to type in 30
for both the in and the out. If you're curious to see what the X rotation line looks
like in the graph editor, we can just mouse over this and then hit the home
key on our keyboard. And here we can see
it at the very top. Well, notice that if
we drag our playhead, that this randomized
wobble that we added on the X rotation
begins right around the same time that the
UFO begins to struggle. The rotation on the cow
that we just added helps connect the movements of these two characters
and sell the story. Feel free to give the animation
a play or just drag that playhead back and forth to see the rotation
that we added. And then lastly, let's add our modifier to the Y rotation. Again, just like before, we'll go down here to the bottom left, choose the Y rotation, go to add modifier,
choose noise. Now we'll set our scale to 16, set the strength to 0.4. We'll skip these next three, go down to restrict frame range, turn this on, twirl it open, and then we'll set
the start to 110. We'll set the end to 155. And then again, set the
blend in and out to 30. Just like the rotation
modifier that we added, we've limited the influence of this noise modifier to only the time when
the UFO is wobbling. So let's drag our
playhead back and forth here to see
what we've done. So we can see now
that it's rotating on two different axes, as well as hovering
back and forth left and right thanks to the location
modifier that we added. We can also drag our
playhead back here to the beginning and then hit the play button to see what
it looks like in real time. Well, notice that the
movements of our cow are a lot more varied
and lifelike thanks to these simple modifiers. The movements of the
cow also better reflect the story that we're trying to tell with the UFOs struggle. This is the last time that we'll use modifiers in this class. However, if you wanted to
learn more about them, I'd recommend my animate a cartoon bumblebee
class where we use the cycles modifier
to make wings flap. In the next lesson, we'll begin animating the bones
of our cow rig, starting with its spine.
I'll see you there.
12. Animating the Cow - Spine: Hi. In this lesson, we'll begin animating
the bones of our cow rig, starting
with the spine. Let's begin. This is it. We're ready to begin the
animation of the cow. This is where we really make
the cow come to life with expressive movements and
subtle secondary motion. We're also ready to begin using the auto keying setting that we discussed in a
previous lesson. This will allow us to keep our animation process a bit more organic and fluid and less
focused on exact movements. Without further ado,
let's begin animating. As with the previous lessons, we'll be working in the
animation workspace found here. You can get to that just by clicking on the word animation. Next, make sure you
have the cow rig selected here in
the left view port. If it's not selected already, just hover over one
of these black lines and then select it
until it turns orange. Now it's time to switch
from the object mode that we're currently in to
the pose mode instead. To switch to pose mode, we're going to go up here
to this top option bar, and you may or may
not need to click in your middle mouse
button to pan this bar. So we're going to pan it
all the way to the right so that we can see
the furthest left and then we're going to click on this drop down here which says Object mode and then instead
switch it to pose mode. Then lastly, to make our
lives a little bit easier, we'll be switching this
top rate viewport from the graph editor
which it's currently on to the three D
viewport as well. This might seem like an
odd change because we already have our camera view
port here on the left side, but it's really
difficult to actually rotate the parts from this view. It'll be much
easier to work from a regular three D viewport and simply look at the left side to get an idea of what it looks
like from the camera view. To swap this graph editor
to a three D viewport, we'll go up here to the very
top left and then click on this drop down and
now we'll select this top left option
three D viewport. We'll likely switch back to the graph editor
in later lessons. But for now, three D viewport is going to be a lot
more useful to us. Now we can reposition this view over here by zooming in and out. Then we can also
rotate this view, so we have a better
view of the cow. If you'd like to
hide this side menu, assuming it's up on yours, you can just hit N to hide that side menu so you
have a better view. Before we begin animating, we'll also need to switch our
transformation orientation from Global to Local. We can find that here at the top center of the
right view poort. So we're going to click
on Global and then switch it to local instead. This will swap the
orientation of our tools, such as the rotation tool
that we'll be using to orient themselves with the bone rather than the overall world. This will make our lives
significantly easier when posing the cow and
placing our key frames. Our last step is to
enable auto keying. This process will allow
us to be a bit looser with our animation
process to achieve a more organic movement without the need to worry about exact
values that we're using. We've got two different
settings that we need to turn on, so let's
handle that now. First, we'll go down here to the bottom and toggle
on auto keying. We can do that simply
by just clicking on this button here with
the empty circle, then it'll turn blue to
let us know it's on. Now let's enable a
keying set to make sure that we only key the
rotation of our bones. This will prevent us from making unnecessary keyframes
on parameters we have no interest
in effecting. To add the keying set, we're going to go over here
to where it says keying, and then click on
this drop down menu. Next, we'll click on this
field here where it says keying set and then we're
going to choose rotation, which is found here at the top. This rotation keying
set means when we use the eye key to manually
place a keyframe, it will only keyframe
the rotation and not the location
or the scale. With all of that set
up out of the way, we're ready to begin
animating our cow's rig, and each of the following
lessons will be focusing on a different
part of the cow's body. This will allow us
to keep each of these lessons as
short as possible, while also providing you
a good reference point if you wanted to rewatch
a specific section. This lesson we'll be focusing
on the spine of our cow to start getting a baseline for the cow's overall movement. That's because the
spine of our cow is the foundation for the
rest of the body parts. All of the other parts,
such as the head or the legs are connected to
the spine in some fashion. That makes this a really
great place to start. We'll start by animating
the lower spine. This is this green
ring that we can see here on the back
side of the cow. We can select this
bone by simply clicking on this green
ring to highlight. We won't be animating
this bone until frame 50. So let's drag our play
head here to frame 50, and then we're going to
place a manual keyframe. Now we can hover our mouse over this right viewport to where we see our cow
on the top right, and then we'll hit the I key to place a manual
keyframe on this bone. If we go down here
on the dope sheet, we can twirl this open to
see that we've keyframed all three rotation values by placing this manual keyframe. Now we want our cow to extend its back slowly as it's
lifted into the air. This will help the cow look
more weightless as it floats, and it'll give the
cow a bit more life as it reacts to the environment. It takes the cow
until frame one, ten to fully lift in the air. So we'll have the
cow extend its back fully over that amount
of time as well. So let's drag our playhead all
the way to frame one, ten. Then we'll need to reposition our view so we can
see the cow still, and then the place
our key frame will be simply rotating the cow's
bone in the viewport. The only parameter that we'll be animating is the X rotation, which is the red circle
on this rotation tool. We can see that here
if we rotate around. The only one we'll be
animating here is the red one. So to begin moving it,
we just need to click on this red handle and then
pull it back and forth. One thing that
we'll notice while rotating this bone is that it doesn't rotate very far and
stops after a small amount. This is an intentional
choice I made for this rig, as I wanted to prevent
movements that would otherwise break or make
the rig appear incorrect, such as bones rotating
in unnatural directions. While the movement
of the spine is locked at the angles
that I specified, we're still technically able to key frame values higher than
the limit I determined. This means we'll still
only want to keyframe rotation values within the limited range
that I determined. The reason for this
is that if we rotate this all the way back
well past where it locks, we can see at the
top left, we're still changing this
rotation value. It'll actually
make the movements faster than they should be, and that's because
it's trying to rapidly move to a value outside its range and then being stopped at the value
that I located at. The cow won't move any
further than it's allowed to, but it'll move faster
than you're expecting. For that reason, we'll be using these limits that I am put in place as guides for where we should be
placing our values. Can make the process of
rotating these bones to their locked values easier by holding down the control
key while we rotate. So if we begin rotating this bone and then hold
down our left control key, we'll see these little
white lines pop up. This is showing five
degree increments. So we can see as we move it snaps to each one of
these little white lines, moving it just five
degrees each time. So while rotating this bone on the X axis and holding
down the control key, let's move it until
it just stops moving. So once we notice that the cow is no longer
moving backwards, that's the last
place we're going to rotate it to. So
right about here. Then we're going to let go
to solidify the keyframe. This ensures that
our keyframe isn't trying to move the
cows back much further past where the limit is thus increasing the
speed at which it moves. The process of using angle snaps and moving your bone
to the limit of its rotation will get a little bit more second nature
as you do it more times. It might seem a
little fiddly right now, but it's
really not too bad. So now that we have
this keyframe done, we're going to
move to frame 160. And then we're just going to hit the eye key while
hovering over top of this view port
at the top right to place manual keyframes. These keyframes here that we just placed are just meant to keep the rotations locked as it's flying
around in the air. Now let's move to frame 164, so just four frames
after the last. And then in our view port here, we can go down a little bit so we can see the cow a
little bit better. And then frame 164
is the frame where we're going to return the spine
to its original position. This is the moment that the cow comes crashing down
to the ground. So this movement
also needs to be rather abrupt as the
feet make contact. So we're going to
simply just grab this red controller here again, hold down control to enable snaps and then rotate it
until the feet make contact. We still have the upper spine to animate, but before we move on, let's clean up these
excess keyframes that we created using
the I key down here. So we can see by
the dope sheet that both the Y and the Z rotation aren't
really doing anything, even though they have keyframes. So the first keyframe and the last key for
AM are identical, meaning they're not
really actually contributing to this animation. So let's just delete them
so that they're not there. To delete them, we're just
going to drag select over these bottom two lines and then hit the delete
key to remove them. This cleans up this
view down here, and it doesn't affect
our animation at all as those keyframes
weren't doing anything. Now that we know
a little bit more about this process
we'll be using, let's move a bit quicker through the upper spine animation. The upper spine will feature
a bit more movement. So we'll be key
framing more than just the X rotation this time. So our first step is to
select the upper spine, which is this blue ring here
right around the shoulders. With that selected,
we're going to move back to frame 50 like before, and then we'll hover
our mouse over the top rate view
port and then hit the I key to place
manual keyframes. After placing the keyframe,
we'll go down here, twirl this open so that we can see all the keyframes
we're placing. Now we can move to
frame one, ten. Adjust our viewport so we
can see a little bit better. And now we're going to
rotate this bone on the X axis backwards to its limit while holding
the control key down. Sold down control
while rotating, and then we're going to rotate
it until it stops moving, and then just back
it off one so we know we moved it just
until the limit. If you're the type of person
who strongly prefers knowing the exact values
that we're rotating each of these bones,
I understand. If you'd like to see the values
that we're rotating here, we can both hit RN key to bring up this menu
here on the right side, then switch to the item tab
found here at the very top. And then you can see
the X rotation we did here is 20 degrees. I'll try to make sure
I have this side menu up for anybody that like to
see the values we're using, but I won't really be
calling out these values as the goal of this is to be a
little bit more free form. But if you'd like
to try to match my values a little bit better, you can look at
this menu here to see roughly where
the bone is placed. Now we can move to frame 126, and this will be our
first keyframe that targets more than
just the X rotation. This time we'll be
rotating on the Z. So let's rotate around so we can see the top of our cow to
get a better view of it. And then we're going to
rotate on the Z so that the cow's body moves to the
left roughly 20 degrees. So right around here. Again, you don't have to worry
about the exact rotations that we're doing here. You just want it to
visually look like mine. If you do have your
side menu up over here, you'll notice that
this doesn't actually make the Z rotation 20 degrees, and it also affected the Y rotation due to the interaction between the diagonal movement and all of the other axes
that it's turning on, but it's relatively close. Just try to remember that in this portion of the animation, we're focused less on
the exact degree values and more on what the actual
movement looks like. It's also worth noting that
down here on our dope sheet, we didn't keyframe the
Y or the Z rotation at frame 110 along
with the X rotation. So the Z and the Y rotation takes place over a longer period of time and overlap the
movements of the X rotation. This is actually
completely fine. It helps the animation
by overlapping movements and not having everything happen at
the exact same time. Now let's move to frame
144, and this time, we're going to again
rotate on the Z rotation, and we're going
to rotate the cow the exact opposite direction. Mirror the movement that
it had before except to have the body rotate to the
right instead of the left. This will help give the cow some life as it appears to look around confused as it's
shaken by the UFO mid air. Now let's move to frame 160. We can reposition our view so we can see the cow
a little bit better. In this frame, we're going
to lock the X rotation of the spine just before it makes contact
with the ground. It's important that we only
keyframe the X rotation here as we want the other
values free to move for the next
round of keyframes. The easiest way to
do this is to use the I key to manually place three rotation keyframes and then delete the Y
and the Z keyframes, leaving only the X behind. So make sure you're
on frame 160. Then we'll hover our mouse
over our top right viewport, hit I to place our
three key frames. Then we can go down here,
we're going to click off any of these keyframes just in this empty area
down at the bottom. Now we can drag select
over the bottom two, which are the Y and the Z, and then we're
going to hit Delete to remove these keyframes. This allows us to keep the X rotation locked
to where it's at, but freeze up the Y and the Z to continue animating
to the next frame. And then for our last keyframe, we're going to again
go to frame 164. This is the last frame
of the movement, and it's where we need to
set everything back to its original position from the beginning of the animation. You'll remember from
a previous lesson that we can duplicate
key frames. So that'll help us easily set the cow back to
its correct spot. To do this, we're just going
to go back to frame 50, drag select over the
bottom three here. So we're selecting M X, the Y, and the Z rotation of
this bone from frame 50, then we can hit Shift and D to begin duplicating
these frames. And we're just going
to place them over here on frame 164. After left clicking to
place these keyframes, we can see our cow snaps back
to its original position. And that's the last
of our key frames. Before we play our animation, let's go over here
to the left side, and then we're going to
click on this button here that has these two
overlapping circles. When we click this, it's going to hide the viewport overlays, so we can hide the view of
the bones on top of the cow. That way we get a little
bit better view of it. With those bones
hidden visually, we can go down here and hit
Play to see our animation. So after playing your animation, you may notice that your cow
has a little bit of a pop at the end where it's resetting
back to the beginning. This ideally shouldn't occur. We can see an example of
that here on my animation. This has happened
because the first and the last frames of this cow's
animation aren't identical. So if this has also
happened to you, we're going to go ahead
and pause our animation, bring it back to frame 50, and then I believe the problem
lies here on the backbone. So we're going to
select the lower spine, and then we're going to
drag our playhead from 50 all the way to the
end where it says 164. And we can see over
here the rotation for this X should be zero, however, it says 1.5, which means that the
beginning of our animation, and the end of our animation
are not identical, which is why we noticed
that quick pop at the end. To fix this, we have a
few different options. So we can just go over here, type in zero if we'd like, and that'll fix that rotation. Or alternatively, you can use that duplicate method
that we had before. So we can just simply drag
select over this keyframe, hit Shift and D.
Duplicate it over here, and then just click and
place it directly on top of the other keyframe to replace it with an identical copy
of the first keyframe. Now that we fix this issue, we can go down here and
hit the play button. Well, now notice that as
the animation starts over, the cow doesn't
have that quick pop showing us where the beginning and the end of the
animation are. This is exactly what we want, as we want a seamless transition from the beginning to the end. We don't want to
really know where the animation is starting over. And with that small
problem fixed, that's it. The spine for the cow
has been animated, and it's already looking
a lot more alive. One important detail
of the way we animated the cow landing
is we waited for the feet to make
contact with the ground before letting the back reset
to its original position. This subtle timing really
makes it feel like the cow is rapidly
falling from the sky. Then it hits the ground
with its feet first before the rest of the body snaps back down to the surface. Small timing
differences can make or break the realism and
weight of your animations. So be sure to keep them in mind when animating
your own projects. Always consider how
these motions would affect your own body if you
were in their situation. Now that we have a
basic understanding of how to animate
using auto keying, we'll proceed a bit quicker through each of the
other body parts, slowing down only to call out the important details or tips. In the next lesson, we'll continue animating the
bones of our cow rig. This time focusing on the head movements.
I'll see you there.
13. Animating the Cow - Head: In this lesson, we'll continue animating the bones
of our cow rig, this time focusing on
the head movements. We'll be continuing
the animation of our cow in this lesson. Let's make sure that you're
ready to follow along. Here's a quick checklist to
make sure that you're ready. First, make sure you're in
the animation workspace. Next, make sure you have
your cow rig selected. Then switch from the object mode to the pose mode instead. Your top right viewport
should be set to the three D viewport rather
than the graph editor. Your transform
orientation should be set to local rather than global. You auto keying should be
turned on, and lastly, your keying set found over here should be set to rotation. This checklist is going
to be pretty much the same for all of
the following lessons. I'm not going to
mention it each time. I will, however, include a little on screen
reminder of all of these items at the
beginning of later lessons just so
you don't forget. With that out of the way,
let's jump right in. We're animating the
head this lesson. Let's select the
red head controller found here around
the eyes of our cow. While the controller
for this bone is wrapped around the eyes
at the front of the head, you'll notice that
the pivot is actually placed at the base of
the head near the back. This means the head will
pivot and rotate from a natural place regardless of where this controller
is located on the cow. Let's begin our
animation process now. A lot of the emotion for our cow is going to be coming
from the head movement. While the face isn't
animable on this rig, we can still show
a lot of emotion just with the head movements. Let's start out by moving to frame 20 down here
on the timeline. We'll be starting
the animation of the head a bit sooner than
the other body parts. As we want it to look like
the cow begins to notice the OFO prior to being
lifted into the air. We're going to start
by just placing some placeholder
keyframes by hovering our mouse over the top
right view port and then hitting I to
place the keyframes. We can go down here to the
bottom left and then twirl open this menu here so we can see all three key
frames that we placed. Now let's move the
playhead to frame 80 and our next goal is
to have the cow turn its head upwards to look at the UFO with the added benefit of looking towards the camera. This will let us
get a good look at the cow's face from
the camera angle, while also having the cow react to suddenly being
lifted off the ground. In our top right viewport, let's position the cow so
we can see it a bit better. We're going to first
start by turning the head backwards so it looks up on the X axis
all the way to its limit. So we'll grab the red handle
on this rotation tool. And then hold down
Control as we rotate it, and we're going to rotate
it until it stops moving, and we'll move it
back just before it stops. So right about there. Now let's spin our view around so we can see the
head from the top. And now we're going to
rotate it on the Z axis. So let's begin rotating
it to the left on the Z axis while
holding down control, and we're going to
rotate it until it just starts clipping
into itself. We don't want to
move it so far that the head starts turning
downward like this. Want to move it to
right about here. So the base of the neck contacts this blue line on
this controller. Don't worry about getting
the angle perfect. Just get it to look
somewhat like mine. Now we can see over
here on the left side, the cow is now looking upward and it's facing
towards the camera. Now let's move to frame
126 on the timeline. Then again, we're
going to reposition our view so we can see the
backside of the head and the now let's begin turning
the cow's head in the opposite
direction to make it feel as if it's leading the
movement of the shoulders. By having the head move
prior to the upper body, it gives the movements
an almost snake like appearance to add to the organic and interconnected
nature of the body. So our first movement
here is going to be rotating the head
downward a little bit. Let's turn our camera a
little bit to the right here, and then we're going
to grab this red handle and then
move it downward, so it's not looking quite
so high into the air. Right about here is fine. Again, don't worry about getting an exact, just
something similar. And now we can rotate
around again to the back. This time, we'll
grab the blue handle here to rotate it on the Z, and we're going to
rotate it towards the right right about here. So now the overall head position is a little less extreme. It's not looking quite
so far into the air, and it's turned its head
over to the right side. Now let's move to frame 145. At this position, the cow
is nearly at the peak of its movement upward as the
UFO prepares to drop them. We're only going to be animating the X rotation this time, as we want to prepare it for a quick snap upward as
it falls from the air. Up in our right viewport, we're going to rotate around to the side so we can
get a better look. And now we're going to rotate
it just on the X axis. Grab the red handle,
hold down control, and we're going to rotate
it down as far as it goes right up to the limit.
So right about here. This movement downward helps illustrate that the cow
is moving upward so quickly that it's having a
hard time keeping its head up due to the G forces
that it's experiencing. Heavy body parts
such as the head, tend to move in the
opposite direction of the overall body
movement because the inertia wants
to keep them in place rather than rapidly
moving them back and forth. So they sort of lag behind in their movements
that make them appear to move in the
opposite directions of the predominant
movement of the body. You can notice this effect in real life if you put
your arm straight out in front of you and then quickly raise your arm
straight up into the air. You'll feel your
hand angle itself downward and lag behind
the movements of your arm, just like the cow's head has. Now let's move to frame
154 on our timeline. This frame starts making
the transition from flying upward to now
falling downward. This is when the UFO finally
drops the cow from the air. We'll be using the
same principle as the last keyframe to
animate this one, meaning that if our cow is
traveling downward quickly, that means our head
should snap upward quickly as it doesn't want to move as fast as the
rest of the body. This will really
sell how quickly the cow went from
rising to falling. This head position will look largely similar to the
first head position, looking upward and to
the left at the camera. First, let's rotate
it on the X axis, and we're going to
make it look upward. We'll grab this red handle, hold down Control, and
rotate it up to the limit. So right about here. Next, let's swing our view around so we can see the
backside of the head, this time we'll grab the blue handle to rotate it on the Z, and we're going to
rotate it to the left. We're going to stop just
before it starts clipping into the body, right about here. Basically, once the backside of the head makes contact
with this blue ring. Now we can move to frame 160 and then reposition our view. And just like the last lesson, when we placed a
keyframe on the spine, just as the cow made
contact with the ground, we'll be doing the same
thing with the head. So we can see down here, our feet have now
reached the ground, and we're ready to make
that locked keyframe. To do this, just simply
mouse over the top viewpoard here and then hit I to
place our manual keyframes. We'll also be going down
here to the dope sheet, clicking into this empty space here to unhighlight
the keyframes, and then we're going to drag select over these bottom two, the Y and the Z, and we'll be deleting them
just like the last time. That's because we
really only want to lock in the X movements. And the reason we only
want the X keyframe in this case is because that's
the one that will control the quick snap downward
as the cow's front feet finally make contact and the head goes back to
its original position. Now we can head to frame 164 when the feet finally
make contact, and now we're ready
to set the head back to its original position. And just like the last lesson, we'll be duplicating
the first keyframes to make our life a bit easier. So we're just going to go
over here to frame 20, drag select over these
three keyframes, the X, the Y, and the Z, hit Shift and D to
begin duplicating them. Then we can drag them over to 164 and then left
click to place them. And now we can see
here, our head is snapped back to its
original position. With this key frame placed, let's give our animation a quick play to see what we've animated. So we'll go down here and
just hit the play button. Now, over here on the left side, we can see the heads, turns up, notices the UFO, looks
around a little bit, and then falls and snaps
back down to the ground. This helps give the
cow some emotion, as well as give it a sense
of weight and inertia as it's flying around and
falling at great speeds. If we wanted to, we could stop here and have a pretty
cool looking animation. But there are a few
more things we can do to make this animation
look even better. The first thing we
could do is add a little extra head movement
after the cow lands on the ground to give
it some extra character rather than just remaining
completely stationary. We're going to
have the cow shake its head quickly
back and forth in confusion and
general disapproval of being tossed
around by this UFO. So first, let's
pause our animation, and then we're going
to go to frame 200. Now let's rotate a review up here so we can see the
back side of the head. These movements that
we're adding will primarily focus on shaking
the head side to side on the Z axis and tilting it slightly on the y axis,
which is the green one. So let's start by rotating
it just on the Z axis. So we're going to
move it on the blue, hold down control,
and we're just going to move it about
five degrees to the left. So about one or two snap
points to the left. Right around here is fine.
So five to ten is good. Now we can select
this green ring here, and we're going to rotate
it to the left, as well. We're going to rotate this
one somewhere 8-10 degrees. If you'd like to, you can just go a full
ten, that's fine. So now the whole head
is turned to the left, and it's also tilted
towards the left. Now let's move to
frame two oh three. So only a few frames afterwards. And now we're going
to swing the head in the opposite direction
to begin the head shake. We've also left very
little room between these key frames to make
the movement really fast. Three frames is only
a tenth of a second. So we'll start by rotating
it on the blue axis, the Z. We're going to rotate it
holding down control, and we're going to move it about 20 degrees from
where it started. So we're going to
move it 20 degrees to the right, so about here. And this time, we're not
going to touch the Y. We're just going to leave
it rotated as it is. Now we can move to
frame two oh six. So again, another three frames. And this time, we're
going to swing the head back to the left. But this time we'll also
tilt the head as well. So we'll start by moving
it on the Z again. So grab the blue handle,
hold down control, and then rotate it towards
the left 20 degrees roughly. And then this time
we are going to use the green handle to move
it on the Y as well. So we'll grab the green,
hold down control, and this time we're
going to move it about 20 as well,
towards the right. Now the head overall is
looking towards the left, but it's tilted
towards the right, which is the opposite
of the first movement. This will help make this
head shake feel like it's throwing the
head back and forth. It's a little bit of
a more wild movement. It's a little less controlled. The head is just
shaking back and forth and tilting
as it's doing so. Now we can move our
playhead to frame two, ten, so a bit further
apart than the last one. And this frame is going to use an identical head position
to frame two oh three. This means we can just use
the duplicate method that we've used before to
copy the keyframes here. We can find frame two oh three keyframes
here in the middle. So we'll just click
down here to deselect, then drag select just over
these middle ones here. So these keyframes,
hit Shift and D, drag them to frame 210,
and then left click. The main difference here is that we've slightly
increased the amount of time between
this head movement and the last head movement. This means that the head
begins to move a little bit slower here as the head
shake comes to an end. If you've ever seen a dog
shake after getting wet, you'll know that when
they start to shake, it's really quick and then it slows down as it
comes to an end. That's what we're
mimicking here. Now let's move to frame 216. So again, even slower
than the last one. You can tell that it's
getting slower because these keyframes are going
to be further apart. And this will again use an exact keyframe position
from a previous one. This time we'll be
copying frame two oh six. So first we need to just
click off the timeline here, then we'll highlight
these keyframes. So the ones to the right
of this grouping of three, hit Shift and D, drag them
here, and then place them. Then the very last frame
of this headshake, we're going to go to frame 222. And this is the last
frame of the headshake before the animation loops
back to the beginning. So we need the head to go
back to its default position. To do that, we're just going to copy the frames from frame 20. So we'll drag select over
these keyframes here, shift D to duplicate them, drag them to the right, and then click to place
them on frame 222. And then before we move on
with our last adjustment, let's just drag our
playhead back a little bit, right around frame 180. Then we can go down
here and hit play to get an idea of what
this headshake looks like. So we'll just hit Play to see this so we can see if
we drag it back here. And watch the headshake. I just shakes its head back and forth a little bit to show it's disapproval and also possibly being confused about what
just happened to it. Now let's go down here
and pause our animation. With the headshake finalized, we have one last
thing to adjust. This next change will
require us to switch this top rate viewport back to the graph
editor for a moment. So to do this, go up to
your top rate viewpoint, go to this dropdown menu found here in the
top left corner, and then we're going to
choose Graph Editor. Now we can go down here to the bottom left of the dope sheet. We're going to select our
X Euler rotation category. Then we'll hover over
this top right window. Then we can hit the home key to focus this line here
in the graph editor. So we'll just hit
home found above your arrow keys so we
can see the entire line. Our goal now is to adjust
the pace at which the cow initially lifts its head as
the UFO flies over top of it. So it's this movement here in the beginning when the cow lifts its head as the UFO flies above. This is the movement that
we'd like to effect. Right now it's a slow
and gradual lift of the head, which looks okay, but it would be a bit
more expressive if the head movement starts
out really slow and then quickly snaps upward
as the cow is startled by the UFO
lifting it off the ground. And you'll remember
from a previous lesson that based on the
steepness of this line, that's what controls the
pace of the movement. So right now it's a relatively
smooth and gradual line. We want it to be a bit more
steep here at the top. That way, it snaps quickly, and it'll start out flatter and more smooth
here at the bottom. We'll start out with the
beginning of the movement first. So we're going to drag select here over top of this keyframe. And then make sure you have
your playhead here set to frame 80 to use this
as a guiding line. Now we can hit S on our keyboard to begin
scaling this keyframe. And we're going to scale it
until this orange dot here on the right side crosses over
just over top of the blue, this blue line here of the
playhead. So right about here. This has made the beginning of this movement slower and more gradual as we made this curve
smoothed out a good bit. It starts out relatively flat and then starts to get
more steep further in, which means the
movement will start out slower and then
speed up as it goes. Now we're ready to effect the top of the
movement found here. But this time we're
only going to select this left handle. So we only want to select on this dot here to the far left. We don't want to drag select
over the entire keyframe. Again, just collect on
this, just the left handle, and we're going to hit S
to begin scaling this, and we're going
to scale just the left side of this curve, leaving the right side
of the curve untouched. We're going to scale
it until this dot passes over top of this 50 line. So just pass the 50
line right around here. By doing this, we've made the beginning of
the animation slow. We've made the
middle really fast. You can see the line
is almost vertical, and then we again slowed
it down here at the top by widening this curve and
making it a bit smoother, which means it'll slow down quickly before it reaches
the top of the movement. Now let's go back
to frame zero and play our animation to see
the changes that we made. We can now see that the
movement starts out slowly, but once the cow
notices the UFO, it quickly snaps its head upward in surprise as it's
lifted off the ground. This is a relatively
subtle change, but it does add a
little bit more expression to the
cow's movements. Before we finish here, we
can pause our animation, and then we're going to
switch this top right viewport back to the
three D viewport. So we'll click on this
drop down here at the left and then choose
three D viewport. Hopefully, you're
enjoying watching this little cow come to
life one step at a time. It's really exciting
to watch all of these seemingly disconnected
movements blend together into a lifelike
reaction to the environment. In the next lesson, we'll continue animating the
bones of our cow rig, this time focusing on
subtle ear movements. I'll see you there.
14. Animating the Cow - Ears: And In this lesson, we'll continue animating
the bones of our cow rig. This time focusing on subtle
ear movements. Let's begin. Now that we have some
of the more important parts of our cow animated, let's add some more
subtle motion to the elements, such as the ears. Before we begin, take
a moment to look at the One screen checklist to make sure that you have your
file ready to animate. Once you're all set
up, let's begin. This process will be largely the same as the previous body parts. Both ears will have basically
the same animation, but we'll start by selecting the controller on the left
ear to animate the first one. We're going to
select this ear here on the left side of their head, which is this pink ear. We'll save the
green for the next. Now we can move our
playhead to frame 50, and then we're going
to hover our mouse over top of this view port at the top right and hit I to
place our manual keyframes. Now we can go down here to roll it open so we can see
all of the key frames. As always, this
is simply to lock the rotation in place prior
to its next movement. Now we can head to frame
one, ten found here, and then we can reposition our view so we can see
the head a bit better. Now's the time to lift the ears upward to
make it look like the UFOs beam is pulling it up along with the
rest of the head. We're going to use the X axis to rotate it basically
up to its limit. So we're going to grab the
X axis, hold down control, and then rotate it
until basically it stops moving, right about here. The ears are a relatively small and subtle part
of the movement, so we don't really need
to animate more than just the X axis to sell the
effect that we're after. Now let's move to frame 160, basically near the
end of the movement. We can fix our view up at the top so we can see
the cow a bit better. And then we can just hit
the eye key over top of this three D view port
to place our keyframes. This is meant just to
keep the ears locked upward during the entirety
of this animation. Now we can move to frame 164, right as the head
snaps downward, and we're going to be resetting the ears back through
their original position. As always, we can go down here, drag select over the first
set of keyframes and then hit Shift and D
to duplicate them, and then place them here by
left clicking at frame 164. That's it. The simple animation for the left ear is complete. Now let's quickly
animate the right ear to match the movements of
the left ear so we can rotate around select
the green ear on the other side of the head, and now we're ready
to begin animating. We'll go back to frame 50, and then we'll hit I to place our keyframe while hovering
over this top rate viewport, twirl open the keyframes down here just so we
can see everything. Go to frame 110, reposition our view so
we can see the ear. And again, we'll rotate
it just on the X axis. All the way up to the limit,
we're holding Control down. So right around here. Now
we can head to frame 160. And again, we'll just place a manual keyframe using the
eye key to lock it in place. And then one last
keyframe, when frame 164, we're going to drag select over the initial three keyframes, hit Shift and D, duplicate them, and place them here at the end. Now we can swing our view down just to make sure that
the ears look correct and that they're both roughly in the same position.
Everything looks good. With the final keyframe placed, we're ready to hit
the play button and get a preview
of the animation. We can see the ear movements
are relatively subtle, but they definitely
help reinforce that floating feeling that we're trying to capture
with our animation. In the next lesson, we'll continue animating the
bones of our cow rig. This time moving on to
the back leg movements. I'll see you there.
15. Animating the Cow - Back Legs: Hi. In this lesson, we'll continue animating
the bones of our cow rig. This time moving on to
the back leg movements. Let's begin. We're nearing the
end of the body movements for our little cow. We're going to start moving
the back legs around now. While the legs don't make
a huge difference in the overall position of the
body while it's in the air, they do have a large visual impact on the
movement of the cow. The legs will help us
show that the cow is obviously not too familiar
with the feeling of floating, so it's not sure what
to do with its legs. As always, before we begin, take a look at the
onscreen checklist to make sure that you have
your file ready to animate. Once you're all set
up, let's begin. We'll start by selecting
the back left leg, which is this red
controller here. Again, both of the
animations for each of these legs are going
to be pretty similar, but we've got to
start somewhere. So let's begin with
the back left. We'll start by
going to frame 50, hovering our mouse over here
on the top right viewport, and then hitting I to place
our typical lock in keyframe. Now we can go down here
to the bottom left and then twirl this open so we
can see all of our keyframes. Now it's head to frame 100. This frame is our first
opportunity to get the leg into a new
extended position. Let's go up here
to our top right and get a better
view of our leg. Let's start by rotating
the leg outward on the horizontal
using the Z axis. So we'll click and drag on
the Z axis, hold control. We're going to spin it
outward to its limit. It's not very far, but we'll move it to the
furthest it can go. Now let's rotate our
view to the side so we can get a better
view of the X axis, and we're going to
extend our leg back about half the
distance of the limit. So we'll drag it back
holding control. Let's get an idea of
where the limit is. So it's all the way out here. We're going to move it back
some about half the distance. We want to save these
really extreme movements, moving it all the
way to the limit from when we actually need them. Now let's move to frame 130, then again, we can fix our view so we get a better
look at the leg. Then this time we'll
be having the legs wiggle back and forth during the floating portion
of the animation to help illustrate the
confusion of the cow. For this specific movement, we'll be moving
the leg forward to make it seem like the
cow is trying to walk, even though it's off the ground because it's so confused as
to what's happening to it. So the only thing
we need to move here is just the X axis. So we're going to
rotate the X axis until the leg is basically
back to where it started. So it's basically in line
with this other foot. It can be a little
forward or a little back, but we want it mostly
up and down like this. We can leave the Z
rotation where it's at for now as it looks fine being
rotated outward a little bit. Now let's move to frame 148. Then again, we can go up
here and fix our view. And now the up and down
movement of the cow is getting more erratic due to the UFO
struggling to keep it afloat. So we want to make
the leg positions a bit more extreme as well. Let's start by moving it
backwards on the X axis. So we'll rotate to the side
so we can see a bit better, and we're going to
rotate it backwards until it's just
about at the limit. So not quite at the limit. We can go backwards
just a little bit, but much closer to the
limit than before. Around here should
be fine. Now let's go back down to the dope sheet. We're going to click
off the keyframe so we don't have
anything selected. And we're going to
drag select over this keyframe here
one frame 100. So we want specifically
the Z rotation. Now we can hit Shift
and D to duplicate this rotation all the way
over here to frame 148. This will prevent the
leg from rotating back towards the body before
we're ready for it to move. So it'll keep it locked being kicked outward
a little bit. Now we can go to frame 160
and then reposition our view. Is the last frame
for the back leg, as it needs to be ready
to make contact with the ground as the cow
falls back to Earth. This is the same process
as the other body parts. So we're going to go back
to frame 50 over here, drag select over all
three of these keyframes, Shift plus D, duplicate them
over here to frame 160. This ensures that by the time the cow makes contact
with the ground, the legs are ready to catch it. At this point, we're done
with the left leg animation. So let's move over
to the right leg. So we can just select the
green controller here on the back right leg and then rotator view so we
can see a bit better. Let's head back to frame
50 on our animation. And as always, we're
going to go up here to our top right view port and then hit I to place our keyframe. Go down here to the bottom left, twirl this open so we can
see all the key frames. Now let's go to frame one, ten. So a little bit after the first keyframe for
the other leg, can go up here to fix our view, and now we'll be altering
both the rotation as well as the
timing for this leg. So it doesn't feel too
similar to the other leg. They're generally reacting
to the same forces, but we want the legs to act
independently of each other. That way, they don't feel like they're attached to each other. So our first movement
will be on the Z axis. And we're going to rotate this
one outward a little bit, but not quite as far
as the last one. So the last one we
moved out to the limit, this one will just pull
back a little bit. That way, it's just slightly different
than the left side. Now we can rotate to the side. And again, we're going
to move the leg in a similar direction
but not quite as far. So we're going to move the
leg backwards on the X axis. And instead of
moving it basically half the distance
like we did before, we're going to pull
it back slightly, so it's only slightly backward. Right around here should work. Our goal here is to give
the leg some movement without having it mirror
the other leg completely. Now let's move to frame 130. And for the same reasons
as the last leg animation, we'll be moving this leg forward again to make it feel
like it's trying to walk. So we'll be moving it
just on the X axis, and we can rotate down a little bit so we can see the other leg. Now we'll rotate it forward on the X axis basically in
line with the other. We don't have to worry about them being too different here, as we want them both
to move forward. Now let's move to frame 148. Then we can adjust our view, moving it up so we can
see the leg better. And now we're going to
rotate the leg backward to display the same extreme
movement as the other leg, paying special attention to vary its rotation a little bit
from the opposite leg, just so they look a
little different. So we'll start by moving it
backwards on the X axis, rotating it here, we
can hold in control. And instead of moving it
to the complete extreme, we're going to move it a little bit less than the other leg. Right around here
should be fine. So we can see they're
both move backwards, but not quite as far
as the other leg. And then for the z rotation, we're going to move it
inward a little bit. So instead of being
kicked outward, this time we're actually
going to move it in just to help vary them. And then lastly, we
can go to frame 160, the very end of the animation, at least for the legs, fix our view so we can
see it a bit better. And then we're
again going to copy the key frames from frame 50. We'll drag select over
these keyframes here, shifty and then place
them here at frame 160. That way, the legs are back in position when it
hits the ground. With both of the back
legs fully animated, let's play the animation to get a better look
at what we've done. We can do that down here just
by hitting the play button. While the front legs
still aren't animated, we can see just
how much more life the cow has thanks to
the back leg movement. It really feels like the cow
has lost its bearings and is confused as it's lifted
into the air by the UFO. It also further contributes to that feeling of floatiness
that we wanted. In the next lesson, we'll continue animating the
bones of our cow rig, finishing all the
leg movements by animating the front legs.
I'll see you there.
16. Animating the Cow - Front Legs: In this lesson, we'll continue animating the bones
of our cow rig, finalizing the leg movements with the front
legs. Let's begin. We're ready to finish
the leg movements of our cow by getting both of
the front legs animated. I won't mislead
you and claim that this process will be all that different from the last lesson. But nonetheless, it's
still an important step. Obviously, make sure
you've double checked the on screen checklist
to make sure that you're ready to animate.
Then let's begin. We'll start by
selecting the front left leg with the yellow
controller on it. Now let's move to frame 50. And then on the
top right V port, we'll hit I to place our
manual keyframe as always. Now we can go down here
to the bottom left. Twirl open so we can see
all of the keyframes. Now we can head to frame 110, fixer view so we can
see the cow better. And then for our front legs, in general, they're going to
be rotated towards the body, they'll be rotated on the
x axis inward towards the body to make it
feel like the cow is floating and its
legs are dangling. Before we rotate
the legs downward, first let's rotate
around to the front. And then we're going
to kick them out a little bit on the Z axis. So we'll grab this
blue handle here, Hold down control
while we rotate, and then just rotate them out about ten to 15 degrees
somewhere in here, just to kick them out away
from the body a little bit. Now we can rotate
around to the side, and then on the X axis, we're going to move this
basically down to the limit. So this red handle hold control, and you can move it
basically down until it stops or just before
if you'd like. Now let's head to frame 130. And this time, let's rotate the legs upward to make it seem as if the cow is reaching for a solid surface to hold onto, even though there's none to
be found high off the ground. This further reinforces
that sort of confused look and movement that we're trying
to give the cow. So we can start by just
rotating it on the X axis. So we'll just grab this red
handle, hold down control, and we want to rotate it
a little bit further out, not quite to the limit, but a bit further than it
started at the animation. So it may be about here,
about 15 degrees or so. And then let's spin
our camera around, and we're going to rotate
it on the blue axis, the Z, all the way
out to its limit, which isn't much further
than what I had it, but yours might be a
little bit further. So I'm just going
to rotate it to about here and then let it go. Now we can head to frame 148. And then this will be the
last frame before we reset the position of the leg so that it's ready to make
contact with the ground. So we'll start by
just rotating it backwards towards the body, all the way to its
limit on the X axis. So we can just rotate it as
far as it possibly can go. And now we can spin
around to the front, and we can move this backwards, so back into the body on the Z axis until
it's about here. I just needs to be a
little bit different. That way, there's
some movement on the Z axis as it's
moving on the X as well. And then lastly, we'll
move to frame 160, which is where the cow
finally makes contact. And as always,
we're just going to go down here to frame 50. Drag select over the
X, the Y, and the Z, hit Shift and D to duplicate, and then we'll place
them here at frame 160 to get the legs
back in the position. And rather than playing
or animation right now, let's just handle the other
leg while we're at it. So we're just going to
select the other front leg, which is this purple controller. Now we can head to frame 50 over our mouse over
this top view port and hit I to make our keyframes. Now go down here to the bottom left to roll it open so we
can see all the key frames. And then this time,
we're going to go to frame 100 instead. And then we can
adjust our view so the cow is back in sight. Just like the last lesson
with the back legs, we'll be altering this
leg's rotation and timing slightly to help differentiate it from the other front leg. So we can start by rotating in outward when the Z
axis, the blue handle. We'll just rotate it out
a couple of ticks here. So maybe about five
or ten degrees, and then we can spin
around to the X axis, and we can rotate
it back towards the body a little bit
less than the other leg. So we'll leave it a
little bit further forward than the other leg is. So maybe only about five or
ten degrees in this case. Now let's move to frame 130. And this time, we're
going to swing the leg upward and outward for this
quick upward movement. So we can start by
rotating it on the Z axis, outward, all the
way to its limit. So not too much further, but can rotate it
until it stops, and then we can
rotate around until we see the X axis a bit better. Then we're going to rotate
it up on the X axis, basically, just one or two
ticks before it hits the end. So you can rotate it all the way to the limit if you'd like, or you can stop it just shy. We just want it to
be a little higher in the air than the
other front leg. Now we can head to frame 148. And let's get this leg more
in line with the other. So we'll start by rotating
it inward on the Z axis. We can rotate it in
just a few degrees. Then let's spin
around. And again, we're going to rotate it
down to match the other leg, but we'll have it
just a bit forward. So we'll move it down,
and then we'll stop until it's just in
front of the other leg. It's right about here.
And then lastly, we'll go to frame 160. And then we can copy the
first keyframes here, hit Shift and D,
drag them to 160, and then click to place them. And that's the last of them. All the legs are now
animated on our little cow. Let's play the
animation to see how all these legs now work together with the movements of the body. The flailing and somewhat
disorganized movements of all these legs help give the cow a confused and slightly
worried feeling. Of course, we know that
the cow will safely be brought back down to earth in just a moment, but they don't. So it's important to show
that in our animation. In the next lesson, we'll
finish animating the bones of our cow's rig by animating
the tail. I'll see you there.
17. Animating the Cow - Tail: I miss lesson, we'll
finish animating the bones of our cow's rig
by animating the tail. Let's begin. This is it. The last bone that we need
to animate for our cow. This won't be a particularly
complicated lesson, so let's just jump
right in and finish it. As always, before we begin, take a look at the
onscreen checklist to make sure you have your
file ready to animate. Once you're all set
up, let's begin. Let's start by going up to
our top right viewport, rotating around so we can
see most of the tail here. Now let's select the
base of the tail here, which is this yellow controller. This controller
will have the bulk of the movement applied to it. Still animate the other
parts of the tail, but the movement of the base
of the tail will be more complex as it dictates more of the movement for
the rest of the tail. So we'll spend more time here. So let's start by going
to frame 50 as always. Then again, we'll hover
over our top view port, hit I to place our key frames. Then we can go down here, twirl it open so we can
see all of them. Now let's move to frame
100, adjust our view. Now this is where we're
going to begin animating the X rotation to cause the
tail to raise and lower. We'll start by lifting
the tail on the X axis, about half the
distance to its limit. So if it's limits
all the way up here, we're going to rotate
it about here. So it's about halfway. I'll actually need to move mine up just a little bit more, so it's pretty
much perpendicular with this angle for the back. So I think somewhere
around here it looks good. Now let's move
over to frame 130. And this time, we're
going to rotate it down, so it's pretty much in line with the flat part of the back. So we'll just rotate it down. So it's a nice straight line with the rest of the back here. Now we can go to frame 140. And then we can again rotate it upward to make it match the falling that the overall body of
the cow is doing. We're going to
rotate it basically back to the position
it was at before, maybe a little bit higher. Next, we'll go to frame 150, adjust our view, and then we're going to
rotate the tail downward. So again, it's pretty much
in line with the back. This time, it'll be
a little bit further down because the
back is more curved. So somewhere around
here is probably good. Now we can add to frame 160. Adjust our view and
then this time, we're going to rotate it all
the way up to the maximum because the cow just finished
falling out of the sky, so its tail would have flew
up into the air with it. We're going to move it up to the maximum rotation
for the tail. Then once you have
that positioned, we can go to frame 164, and now we're going
to have to drop it back down to
where it was before. As always, we can
just go back to the beginning of the animation
over here on the left, drag select over just these three key frames at the bottom, Shift D, and then click them
over here to place them. We'll see that if we drag the animation back and forth here, that the tail waits for a
second to flip back down, similar to the upper body. Because once the feet make contact, the tail
is still in the air, so it needs a moment to fall back down to its
original position, just like the front
half of the body does. And that's it. The bulk of the tail's
movement is handled, but it still looks odd because the tail is currently bent
over the entire time. Let's fix that now
using the other bones. Now let's select the
middle bone here, this light blue one in
the center of the tail. We'll go to frame 50, hover our mouse over
the viewport and hit I. Now we can go down
here, twirl this open. Let's move to frame 100. Then we're going to
rotate it on the X axis upward to its limit. W until it stops,
right about there. Now you can see we're
getting more of an upward curve on the tail. We can head all the way to
frame 160, and then this time, we're just going to hit I to lock in the position
for the keyframes. So we just want it to remain
upward this entire time, and then we can go to frame 164, drag select over these
first three keyframes here, hit Shift and D, and then place them here to reset it back to its
original position. Now let's finish
the last part of the tail by selecting the red
controller here at the end, going back to frame 50, hitting I in the top right, twirling this open to
see our keyframes. Now we can go to frame
100, adjust our view, rotate this tail upward on the X axis, all the
way up to its limit. Now we'll go to frame 160,
just like the last time. Hover our mouse
in the top right, hit to place our
lock in keyframe, and then we'll go to frame 164, drag select for the
beginning keyframes, shift in D, and then place them at the end
to reset the position. With that last keyframe placed, let's give our
animation a play so we can see the result of
our tail animation. The tail movements are another subtle but important detail that makes our cow
not only feel alive, but also like it's
being affected by the overall environment. Hopefully, you feel a
bit more confident in your ability to animate a
simple rigged character after animating every
single little bone in this fella's body and breathing
new life into the render. In the next lesson, we'll finish the cow's animation by
adjusting its scale. I'll see you there.
18. Animating the Cow - Scale: In this lesson, we'll finish the cow's animation by animating
its scale. Let's begin. Adjusting the scale of our cow might seem like an
odd thing to animate, but we'll be using it in
a creative way to mimic a principle of animation
known as squash and stretch. If you've ever paused
a cartoon during a particularly
movement filled scene, you've likely noticed
that the character could look distorted during
these quick movements. They might look like
they've been elongated or stretched out as they move
quickly in one direction. Or they might
appear squashed and flattened if they've
come to an abrupt stop. These distortions
you're seeing are meant to exaggerate the movements
of the character, provide a sort of elastic or bouncy nature
to the character. The squash and
stretch might seem a bit extreme, but in motion, they simply blend
together with the rest of the movement and make it
a bit more expressive. Since the vast majority of our cows animation
occurs on the Z axis, meaning it's predominantly
moving up and down, we'll really only need to adjust the Z scale to get the most
results for minimal effort. So before we begin animating, first, make sure that you're
in the animation workspace. You might already
be there already, but if not, go ahead
and switch there now. Now make sure your
top rate viewport is set to the object mode
rather than pose mode. So in this top bar here
on this left dropdown, we're going to switch
it back to object mode. We want to be object mode to
make sure that we're scaling the entire cow's body rather than just individual
bones one at a time. Then lastly, make sure you're on the object properties tab found here using
this orange box. Okay, so let's get this
scale animated now. We'll start by dragging
our playhead to frame 130, then we can adjust our view up here so we can see
the cow a bit better. This is the first frame that we're going to need
a keyframe on, and we simply want to
lock it in place for now. To do this, we're just
going to go over here to the right side where
we see Z scale, and we're just going to
place our first keyframe. Now let's move to frame 140. And now as the cow
begins to drop quickly, we're going to
increase its Z scale to stretch it out
vertically slightly. This will help display a bit of extra speed in its movements. So we'll just go over
here to our Z scale, and we're going to
type in 1.1 it enter, and then don't forget to click the keyframe button
here to the right. So now if we drag
it back and forth, we can see that the cow just barely elongates as
it begins to drop. Now let's go to frame 148. And now is the time
for the first squash. The cow comes to a
pretty abrupt stop as it flies upward and
then begins to fall. This is a perfect time
for us at a squash to accentuate this change
in direction and speed. So we'll do this by going over
here towards the E scale, and this time, we're
going to type in 0.9. So we're squishing it slightly, and then we're going to go over here and place our key frame. So again, if we drag
this back and forth, we can see as the cow
begins to drop at elongates and then
it flies upward, and it squashes slightly as it begins to stop here
and then fall. Now we can move over
a two frame 160, and this is where
it's pretty much made contact with the
ground at this point. So now is the time for
the most extreme stretch because the cow is falling
at its fastest speed. This will really help
sell the speed at which the cow is
plummeting back to Earth. So over in Z scale, we're going to type
in 1.3 at enter, and then place our keyframe. So as you can see, this is a
pretty extreme stretch here. The cow is pretty obviously
increased in size, and it's mostly in the
vertical direction. So as we drag it
back and forth here, we can see that the cow kind of squashes and stretches
based on its movements. And then it really stretches out here because it's
moving the quickest. Now let's move to frame 164 when everything comes to rest, and it kind of resets back
to its original position. Just like the last
frame, now it's time for the most
extreme squash. Our cow just came to a very abrupt stop when
it hit the ground. So let's accentuate that
with a really big squish. So we can go over
here to our Z scale. We're going to type in 0.8 for the Z and then
place our key frame. And now our cow has gone
from its largest size to its smallest size here just
in a matter of few frames. Before we end our
scale animation, let's add a little
bit of a bounce as it comes back to
its original scale. Now we can go to frame 169, just a few frames after, and we're going to return it to scale just a little bit larger than the original to
spring back into shape. This will add a
pleasant bountiness to the end of the movement when it makes contact with the ground. So we can go over
here towards scale. We're going to type in 1.075. I enter and then
place our key frame. So you can see
here it's not very much larger than the original, which was 1.0, but it is
a noticeable difference. And lastly, we're going
to go to frame 172 here, and then we'll type in one for our Z scale and then place
our very last keyframe. And now our cow is back
to its original position, pose and scale ready for
the animation to loop. And with that last
keyframe placed, our animation is 100% complete, which means that the
entire animation of this class is complete. Let's give the
animation a play to see the culmination of
all of our hard work. We can do that down here
with the play button. Scale animation is honestly one of my favorite
parts of the movement. It adds so much bounciness and just general cuteness to an already pretty
adorable little fella. We're just about
done with the class, but we do have a
few more things to take care of before
we say our goodbyes. And the next lesson we'll render our final animation.
I'll see you there.
19. Rendering the Animation: In this lesson, we'll render our final animation.
Let's begin. Most importantly,
we need to render our final animation so we can actually share it with
our friends and family. Luckily, this will be a
relatively easy process, as I've already set up the
starter file for rendering. First, let's head over to
the rendering workspace found here at the
top of the screen. We'll just click on here
where it says rendering. I've customized this
use slightly for us to give us a look at our
camera here on the left side. This isn't 100% necessary, but it does allow us to scrub
the timeline at the bottom and get an idea of the exact frame that we're
about to render. So let's drag our
playhead down here at the bottom to frame 130, so we're right about in the
middle of the animation. Now let's render a single
frame of our animation. We can do this by going
up here to where it says render and then
choosing render image, or you can just hit F 12 on your keyboard. So
let's do that now. Should notice that the image
renders pretty quickly. In my case, it only
took about 2.5 seconds. This is thanks to
the EV render engine that we're using
for this project. This is a good sign for
our full animation. The faster each frame of
our animation renders, the quicker the entire
video will render. This is because an animation
is really just a series of still images played together in sequence to create the
illusion of movement. So if our individual images
render pretty quickly, that means the entire video will render also pretty quickly. Before we render our
final animation, however, I did want to
point out a few things. First, let's head over here
to the compositing workspace. So we can get to
that by clicking on the word compositing
here at the top. And now on the right side, we can see our render
that we just did. And then if we zoom out on the left side using our mouse wheel, we can see a few notes that sort of look like
the material editor. I won't be explaining all of the details of this workspace, but as a brief overview, this is where you can add additional effects
to your image, such as glowing
around the lights or distortion around
the edges of the frame. After zooming out on
the left port here, we can see that we
have a glare node, as well as a lens
distortion node. This glare node is what's adding this bright bloom around
all of these bright lights. So as a quick example, if I bypass this glare node
and plug it in here, we can see our image still
looks pretty much the same. However, it's lost all of that nice glow that
we had before. And then if we add our
glare node back in, but we leave this lens
distortion unhook, now we can zoom in down here to the bottom left of the frame. And then when we plug in
this lens distortion, we'll notice that
we now have this blurry chromatic aberration
effect on the edges. The image is being broken into different
channels of color, separating it and giving
it a rainbowy effect. However, if we zoom out, we'll notice that the center of the frame doesn't
have this effect because the lens distortion primarily only affects
the edges of our frame. So around the edges here, we'll see it in the center we won't. Now that we know a little bit about the effects that I added, let's go back to
the rendering tab. We can get to that by going to the rendering word here
and then clicking on it. The last thing that we
need to take care of is the output location
for our video file. So to do this, we're
going to go over here to the right side and switch to the output tab if you're
not there already. It's the third tab
from the top here that kind of looks like a
printer printing on a photo. Now in this menu on the right,
we're going to scroll down until we see the option
for output here. It might not be twirled open like mine is, so if
that's the case, just click on this little arrow to twirl it open so you
can see the options. Now let's tell our animation where to save once
it's done rendering. To do this, we can go
over here and click on this white folder icon
to choose a location. I recommend saving this video in the same place as the blender file that we're
currently working on, just so everything
is in one place. After you've found the location that you'd like to
save your video, we can go down here
to the bottom bar, and this is where we
can give the name. So just as an example
for the name, I'm going to use UFO animation. Underscore final, underscore 01. I like to name my files with
a number at the end here just to make sure
that I can go back and change the version
number if I'd like to. As a final step for videos, I also recommend putting
another underscore at the end beyond
your file number. This is because Blender will add the frames of your
animation at the very end. If you don't add an underscore at the very end of
your file name, you're just going to
have a bunch of numbers run directly into
your file number. You need this here as a space. With your name set,
you can go over here and just click
the accept button. And that's it. We're ready
to render our animation. I've already taken care of all the output settings for you, aside from the location where you're going
to save the file. But if you're curious, I've set this file up to render
as an MP four video, as it's a pretty
universal video type, and we'll work on
most platforms. Now we can go back up here
to where it says render. And then choose Render
Animation and it'll begin rendering the animation from frame zero all the
way until the end. So we can just click
this button here. This will more than
likely take a few minutes for your computer to
complete rendering. But hopefully you
won't be waiting for more than five to 10
minutes for it to finish. I'd recommend that you
pause the video for now as you wait for your
animation to finish. Then start it back up
when you're all done. I'll see you in a few moments
when my render completes. I'm back and my animation
has finished rendering. It only took my computer
about 5 minutes to finish. So hopefully yours wasn't
too much longer than that. Now we can navigate
to where we saved the file and then double click on it to
play the animation. Everything in the animation
looks pretty good. However, if you're on
the Windows player, we can go down here and
click on this repeat button. And now when we
play the animation, it'll continue looping without
stopping after each play. So now we can see that it
loops seamlessly as it goes from the beginning of the animation to the
end of the animation. This video file is ready to share with all
of your friends and family on pretty much any
platform that you can think of. While this animation
is finished, we're not quite done yet. In the next lesson, we'll discuss different
ways that you can participate in the class
project. I'll see you there.
20. Class Project Ideas: In this lesson, we'll discuss different ways that you can participate in the
class project. Let's begin. While we finish the main animation
for this class, there are still plenty of
opportunities to learn. The best way to
continue learning is by making your
own class project. By customizing this
animation with your own ideas or coming up with something
completely new, you'll reinforce the
skills you've learned over the class and possibly discover
new things along the way. Customizing the
animation doesn't have to be super involved. It can be as simple or as complex as you'd
like to make it. Even small adjustments
to this basic animation will still reinforce
your knowledge and allow you to
express yourself. For this lesson, I'm going to give you a few quick tips on different ways that
you could create your own unique version
of this project. We won't be going too in depth
into any of these methods, as this lesson is really
only meant to give you some quick tips and get
your imagination going. Before we begin making any
changes to this file, however, first, make sure
that you've saved this animation as
it is right now. This will ensure we don't
make any changes to the class example that
can't be easily undone. So again, to save your file, we can just go up here, to file, and then choose Save. Now let's make a new version of this file that we have
some freedom to change the parameters in
without having to worry about messing up
the original animation. To do this, we can go
up here to file again. And then this time, we're
going to choose Save as. Now down at the bottom,
I'm going to change the name of this file so it's not the same
as the original. I'm just going to add the
word test in all caps and then an underscore
at the beginning to make sure I differentiate
the name of this file, so it saves us two
different versions. We have the new name set, we can go down here
and hit Save As. And now that we've saved
it, we're actually working in the test
version of this file. We don't have to reopen it, it'll automatically switch
to the Save As version, which in this case, is the test. This will allow us
to play around in this test file without
messing anything else up. Okay, so now that we have our file ready to play around in, what kind of things can we do to our animation to customize it? Well, to be completely honest, the possibilities are endless. You can do really
anything you want. But let's focus on just a few obvious changes
that we can make. The most obvious change is to simply adjust
the camera angle. This doesn't require us to
change the animation at all, but it still gives us a
different perspective on the motion of both
the cow and the UFO. The environment for this
animation is relatively limited, but we can still find a new interesting view
for our animation. So first, let's switch over to the layout workspace
found here at the top. Now over here in
the left view port, we're going to click on
this little lock icon. So it looks like a padlock,
and currently it's open. So when we click on it,
it'll now be a locked icon. This will enable the camera
to viewport setting. This allows us to
reposition the camera just by orbiting around
inside this view. It's now using just the normal viewport navigation controls, we can move around, and
it will actually adjust the camera for us.
Let's find a new view. Let's go back to frame zero. So we can see what the
cow looks like when it starts that we make
sure it's in the frame. We're going to zoom
in here, maybe try to get these grass and
rocks here at the bottom left. Something around here is fine. Again, you can adjust
your view as you'd like, but this is just an example. I think of you somewhere around
here looks good for mine. One of the main
things to consider when picking a new
camera angle for this scene is to avoid showing the edges of the world or
the end of the animation, such as the shooting
stars in the sky. We can just drag
our playhead here and see where the shooting
stars so we can see there. Just make sure that it starts and end outside of the frame. Same thing with the
tumbleweed and also just not showing the edges
of the world that we can see here in
the right viewport. In my case, this
view avoids both of those issues, so I
think it works fine. So one of the most
important steps here is once you've found the
camera angle that you like, don't forget to uncheck this lock icon because
we don't want to accidentally move our camera once we found the
position that we enjoy. With a new camera angle come
some new issues, however. The first issue is that
the depth of field for our camera isn't
configured for this view. So if we zoom into our cow, Notice that the cow
is really blurry. Luckily, this is
relatively easy to fix. So our first step is
to select our camera, which we can find
in the lights and camera collection down
here at the bottom. So we'll twirl this open, scroll down until we find
our camera here, and then we can just
select it from the list. Now let's go down to the
object data properties, this green camera
logo right here, and then we'll go
down to the depth of field settings found here. You might need to twirl
this open if it's not open already, so you
can see the settings. We need to adjust
this focus distance here to make sure our
cow isn't blurry. So first in your left view
port, zoom into your cow. You want to be relatively close. That way we can see
this blurred edge between the nose
and the white fur. Now we can adjust
this focus distance. So for my specific camera angle, I'm going to need to lower this focus distance because I've moved my camera
closer to the cow, so I needed to focus a little bit sooner rather than later. Know from my view, a value around 12.5 should
get us pretty close. And then once I have
12.5 typed in here, I can move it back and forth and see if I need to
further adjust it. So in my specific case, moving it to about 11.15
is actually a better view. Now, again, this completely determines on what
your camera angle is. So if your camera is a
completely different position or it's just closer or
further away than mine, you'll need to find a number here that matches
better to your view. It might be smaller or
it might be larger. Also, when adjusting
this focus distance, you'll either need to be
in the rendered view, which I'm currently in now by selecting this
far right button, or if you're in the solid view, you need to twirl
down this option here on the right side, and then make sure you have
depth of field checked on. If you don't have
this turned on, you won't actually see any
depth of field in this. So we can see if I
turn it back on, now I can actually see the
blur in this gray view. Can either work
in this gray view or you can be in the
rendered view here. Now let's zoom out a bit so I can see my full camera frame. And with our depth
of field fixed now, maybe I'd like to change the position of the moon
or make it a bit larger. That way, it fits
the frame better. To do this, first, you're
going to definitely want to switch to your rendered
view for this as this moon really only
looks like a moon and not a square when you're
actually in the rendered view. I can just click on
this moon to select it and then hit S to scale it. I'm just going to make my
moon a good bit larger. I really want to have it
prominent inside this frame. Maybe I'll scale
it to about here. Once the moon's size is correct, I can hit G to begin moving it. I'm just going to
move it up a little bit so it's not contacting the top of the cactus and
I'll move it about here. Feel free to place
your moon wherever you like and make it
as big as you like. I think this looks better for my camera, so I'm going
to leave it here. With our view adjusted
and our moon resized, another easy step we can take is to adjust some materials. By adjusting some of the colors, we can really change the
look of the animation. Let's make this environment
feel a bit more alien by changing the colors
of the sky and the moon. We'll start with the moon first. So we'll first go over here to the shading workspace
found here at the top. And now we need to switch
our top viewport back to the rendered mode found
here on the far right. Now I won't be
explaining exactly how the shading system
works in this lesson. However, if you'd like
to know more about it, I'd recommend my magic
of materials class, where we discuss
everything you need to know about how to create
your own materials. So to change the color of our moon to something
a bit more alien, first, let's make
sure you have it selected in the viewport above. We can go over here
and just simply select it in the viewport
by clicking on it. You can tell that
it's selected because the material name here in the center of the
screen should say moon. Down in the bottom viewport, here we have our shader editor. We can zoom in and out of it with our mouse wheel and we can click in the Muswheel to pan it back and forth so we
can slide the view. Now we need to add a new node to adjust the color of our moon. I'll hover over the bottom
viewport down here and then hit Shift and A at the same
time to bring up our ad menu. Now we can go up here
to the search bar. Click on this and
then type in color and then hit R afterwards
to see color ramp. So we're going to
choose color ramp, and then we'll move this new node that's attached
to our mouse right now over top of
this top yellow line. So the yellow line that's going
from color to base color. So we'll hover it over top
of it until it turns white, and then when we
click to place it, it'll automatically
connect it for us. Now if we can click
and move this, we can see that this line now
runs through this new node. Now that we have our new
node attached to the system, we do need to connect
one more line. So we're going to
zoom in a little bit, and then we're going to click
from this color node here. We're going to click
on this little yellow dot and then drag this wire down here to the
color inside the emission. This will allow this new
color ramp node to color both the color for the base color as well as
the color for the emission. This emission color is what's controlling the
glow of the moon, which is why it looks like
it's self illuminated. Now with this color ramp node
setup, we can zoom in here. And now we're ready to begin changing the
color of the moon. Now let's select this
far right slider, the white one by clicking on the top triangle
above this white box. We'll know that we
have it successfully selected because the bar at
the bottom will turn white. Now we can select this white bar to bring up the color picker, and then we can just move
this dot anywhere we want on this big circle to
change the color of the moon. In my case, I'm going to
choose a bright orange color. Maybe somewhere around here. Feel free to choose
whatever color that now that we have the
color of our moon changed, let's also change the color of our sky to something a bit
more colorful as well. This material is a bit
different, however, as we can't select the
sky in the viewport. When we select the sky
here, nothing happens. We'll need to go down
to this object tab here on the left side and then switch it to world instead to see the sky texture. In this bottom
viewport, we can scroll out to see the entire
material for the sky. We can see here that
this material is a bit more complicated
than the moon was. Luckily, we don't need to
change too many things on this material to actually
change the color of the sky. If we zoom into this blue and pink color node
here in the middle, We'll see the main node that's controlling the
colors for the sky. Let's adjust both the pink and the blue slider on this node
to make our sky a new color. First let's change
the left slider, which is currently pink. It should already be
selected, but if not, just click on the
little triangle above the pink box
to change the color. Now we can go down
here and click on this pink bar and then
pick any color we'd like. I'm going to make mine a sort
of reddish orange color. And now if we move our
mouse to the side, we can see that my horizon
here is a bright red color. Let's change the
main night sky color as well by going over here, clicking this triangle
above the blue slider, clicking the bar at the bottom. And then I'm going to make
mine into maybe a green color, sort of a bluish green color. Again, feel free to use
whatever colors you like. This is just the
color that I think kind of works well with
this orange color. Also adjust the position
of these sliders to change how much of each
color is present in the sky. So if we go down here and grab the green slider and
move it to the right, we're going to allow more of
this orange into the sky. So if we move it
really far right, now it's mostly orange, and if you move it really
close to the orange, we're going to get rid of pretty much all of
it because we're allowing less of this orange
to bleed into the green. So for my case, I'm
going to move it to somewhere around here. That way, the orange just starts touching the
bottom of the moon. You could also adjust
this orange slider, left or right to change the intensity of the
color along the horizon. So if you wanted a
really intense orange or whatever color you chose, you would move it
closer to the right. Or if you wanted to make it more subtle, you can move
it to the left. Now that we have our
sky color changed, let's not forget to
switch back from the world tab here on the left, back to the object tab instead. This will allow us to change the color on most of the
objects in the scene. Really, only the sky is
handled with the world tab. The color changing process is pretty easy on most
materials in the scene. You'll either be
changing the colors present on the color ramp
node like we just did, or you'll simply be changing the base color directly on
the principled BSDF node. So as a quick example, in this top view
port, I can rotate the view so I can
see the UFO instead. And then we can select the UFO, and we can see here that the UFO metal material is really simple. So all I would need to change is just this base color,
this bar here. So if I wanted to make it red, I could just move
it down to red, and now we can see
that the metal on our UFO is red instead of blue. If an object like the UFO has more than one
material applied to it, we can switch through
the different materials applied to it through
the slot menu here. So we click on this drop down. We can see all the different
materials applied to this, such as the bright glow
strip underneath the UFO. And here I can switch
the base color to maybe a bright green, and then also the
color and the emission because it's a glowing
object, also to bright green. Now all these little lines, as well as this ring here, are green instead of orange. To easily get back
into our camera view, we can go over here and click this button that will show
the on screen controls, and then we can click
the camera button here to jump back
into our camera view. As a final note
on the materials, in order to change
the cow model, you'll need to select it
over here in the outliner. You won't be able to
select the actual model inside the viewport as you'll
be selecting through it. That's because I
have it locked from selection here in the outliner. The only way to select it would actually be from this list. So to select the cow first makes you have the cow
collection twirled open. Then you'll also need to
twirl open this armature cow. So we'll click on the
arrow to twirl that open, and now you can select cow body. After selecting it
here in the list, we can go over here to
the slot and we can switch between any
of the materials that are currently
applied to the cow. I have the cow locked
from selection in the viewport to
prevent you from accidentally selecting
it instead of the control rig when
we were animating. Now that we're done
with the materials, we can head back to the
layout view found up here. If you make significant changes to the colors of your scene, you might also want to adjust the colors of your
lighting as well. I won't be going through
that process right now, but you can find all the
lights in the scene inside the lights and camera collection over here in the outliner. And then to change the
light, you would just simply select the light from the list that you
want to change. And then down here in the
object data properties, this green light bull icon, you can change the color or the brightness
if you'd like to. The last change that we'll
discuss in this lesson is altering the animation of
either the UFO or the cow. This will likely be the
most impactful change that you can make
to your project, but it will also be
the most involved. As a simple example of what you could do for
your own project, we'll add some extra time
to the end of the timeline so you can fit in a little
bit more UFO animation. So to add more time
to the animation, we can go down here to
where we see start and end. And we're going to change the
end time 240-360 instead. Now, let's zoom out in the right Then we can select our UFO so we're ready to
begin animating. For the sake of simplicity, let's also turn on
auto keying so it can be a bit more loose with
the keyframe process. We can do that by just clicking
on Auto keying down here. Then lastly, to make
sure we can see the entire timeline down
here at the bottom, on this scroll bar, you'll see a little black dot
here on the right. If you click and hold on that black dot and drag
it to the right, we'll scale our timeline so
we can see the entire thing. Now let's drag our
playhead to frame 225. And then we'll switch to
the object properties tab here on the right by
clicking on this orange square. We're going to place a keyframe
here on the Y location. That way, it doesn't
affect anything else aside from the positions going
forward on the timeline. I'll leave everything back
here locked as it is. With that setup complete, let's go to frame 250, and then in our right viewport, we're going to zoom out a bit so we can see most of the scene. And now let's switch from
the local transform, which we're currently
using using this drop down here at the top, and we're going to
switch it back to Global as that works
better for our UFO. Now let's move our
UFO backwards on the Y to about half the
distance. So right around here. Well notice that at
least in my view, the UFO is still
visible in the camera, so we're going to need
to move it outside of the view so that
it's not visible. So we're just going to
move it on the X axis here so we can do
it in the camera, which is probably the
easiest place to do this. We're just going to
move it to the left until it's outside the view. Then lastly, we'll go over
here to the right side, and we're going to place
a keyframe here on the Y rotation to lock
that in place as well. So if I go down to my timeline, if I drag it back and forth, we can see our UFO flies off the screen just
like it normally does. And then once it flies
out of the screen, it quickly flies back to this new position ready
for the new animation. But it's doing that
all out of frame, so we can actually
see it move to this new position,
which is what we want. Now let's head to frame 300, and then in our right viewport, we're going to move
it just on the X axis over here to the right side. This will allow it to fly from the left
side of the screen, all the way over to the
right side of the screen. And again, we're going to
move it all the way until it's just off frame
on the right side, so we can't see it here
on the other side. This will make it
look like the UFO is circling back to try to
pick up the cow again. We can also go over
here to the Y rotation, and we'll set this to
five degrees to make it look like the UFO is spinning as it's moving through
this direction. So now if we drag our
playhead back and forth, the UFO flies off screen. Quickly moves back there
to loop around again, and then flies across the
screen as it turns slightly, getting ready to pick
up the cow again once it reaches the beginning
of the animation again. The last change we
make could be to swap these last two
keyframes that we placed to vector handles so the movement doesn't
have any slowdowns in it. To do this, simply click on your timeline
off to the sides, you deselect all
of your keyframes, then drag select over just these last two
keyframes that we placed. Now right click on the timeline, go over here to
where it says handle type and then choose
vector instead. Now let's go over here and play our animation to see the
change that we made. We can now see in
our left view port that the animation
plays as normal with the OFO flying in from the right and then
flying off to the left. However, now it looks like it flies back in space and then loops around getting ready for another round of
picking up the cow. With this last change made, we've reached the
end of our lesson. When you're ready to render
your own unique animation, I recommend that you
convert the final video into an animated GIF using
a free online converter, such as easygif.com slash MCR. In Lesson 16 of my cartoon
bumblebee animation class, I explain the entire
process to converting your video file into an animated gif using this
free online converter. Animated gifts are much easier to share on
some platforms, such as Skill share or other
social media websites. So it's a valuable
thing to know. The tips and tricks I shown
you in this video are by no means the only ways you could customize this animation. But hopefully, it gives you an idea of where
you could start. Don't feel pressured to make massive changes to
your animation. Even small adjustments
can give your render a unique look and help you
practice what we've learned. I can't wait to see what
you all come up with. As a quick example
of what taking this scene a little bit
further might look like, this is my class project
for the UFO animation. I simply continued making changes similar to the
ones that we discussed in this video until I had this really colorful and alien look for the cow in the desert. And the last lesson,
we'll end the class with some conclusions
and farewells. I'll see you there.
21. Conclusion: Congratulations on reaching
the end of our class. I wanted to take a
moment to express my heartfelt gratitude
to each and every one of you for being
part of this journey. Your participation
and excitement for learning is incredibly
rewarding for me as a teacher, and I can't thank you enough. I hope you had fun learning the basics of character
animation and blender. It's been a pleasure guiding
you through the basics, and I hope you found
this experience both fun and valuable. Now that you've got some awesome new skills
under your belt, I can't wait to see where
your creativity takes you. I wish you the best
of luck in creating your own charming character
animations and Blender. If you like this class, let other students know
by leaving a review. Your feedback really helps me understand what you found
most valuable in the class. You can leave a review easily by going to the Reviews tab just below this video and clicking
the Leave a Review button. I really appreciate the support. After leaving a
review, you might want to follow me here
on Skill Share, as well. You can follow me at any time by clicking the follow button above this video or by going to my teacher profile and clicking
the follow button there. Following me is the best
way to get notified when I release a new class or make
an important announcement. Don't forget to check
out my teacher profile for more classes just like this. You might find something
else that interests you. Lastly, I want to thank you
all again so much for taking my class and supporting me by participating in
the class project. I can't wait to see what
you all come up with. Farewell for now, and I hope to see you in
another class soon.
 Harry Helps, Professional 3d Artist