Transcripts
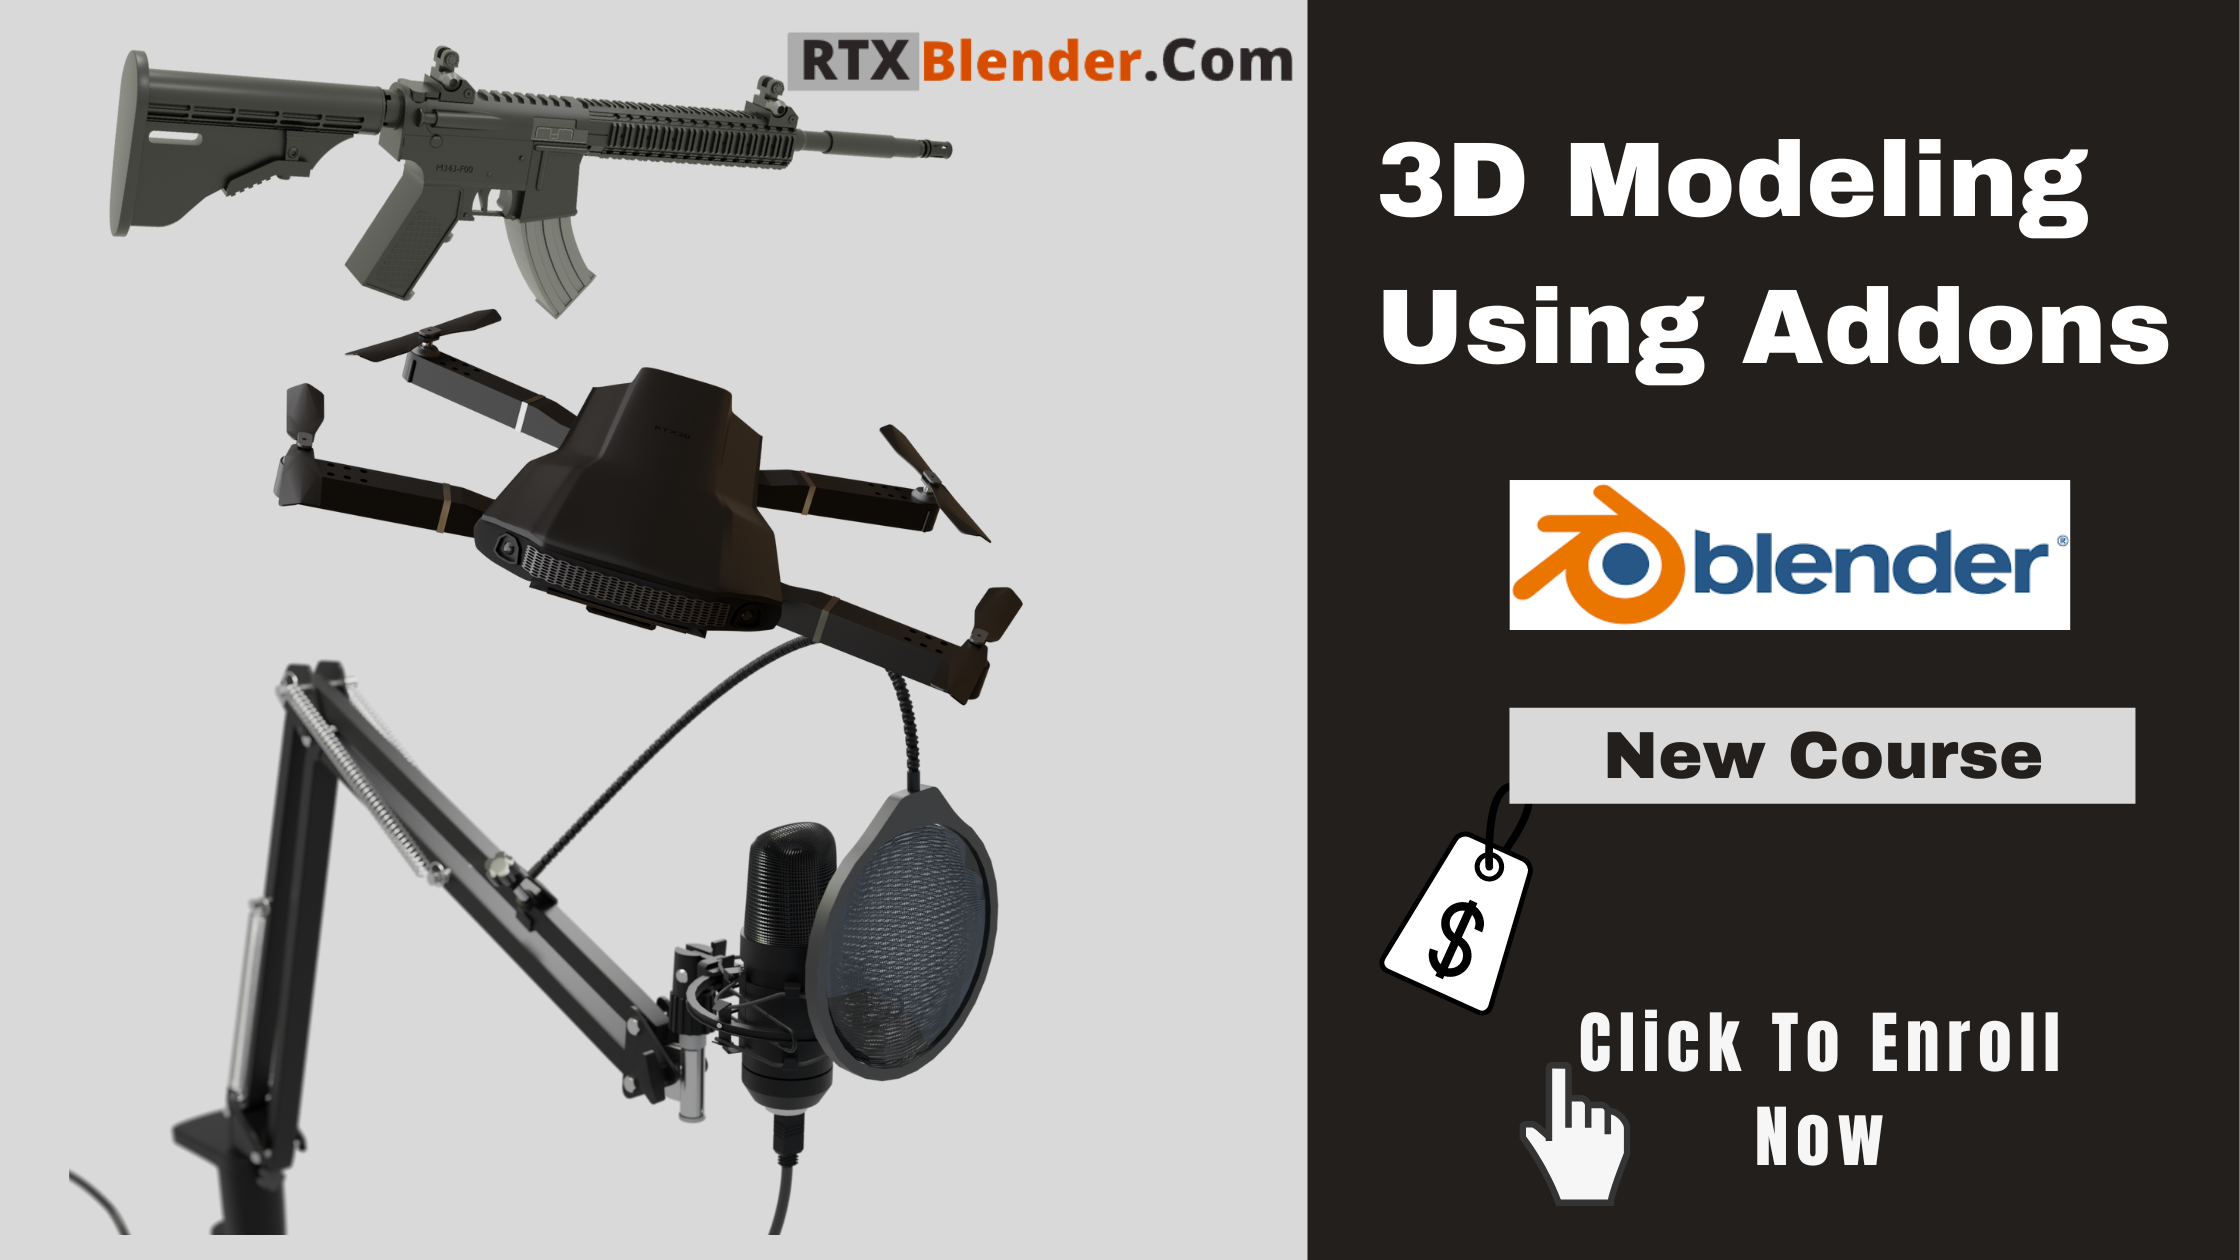
1. Introduction: Hello students. My
name is from India. Welcome to completely new
series of 3D modeling in Blender using
add-on features. By profession, I'm a
mechanical engineer. I love to create 3D
content and want to explore the maximum possibility
of Blender application. In this course, I will discuss the basic 3D modeling process and the best use of add-ons. Main aim of this course is to minimize the time
required for 3D modeling. With the help of add-ons, both free and premium. In this series, you will get a new 3D model object
lecture every week, which you can understand
in very simple language. After completion of this course, you will be able to
model any object. The best, smartest way you can. Duration of this course
is less than six hour. Course is systematically divided
into four major section, especially focused
on topic which are only related to 3D modeling. Language and pronunciation
is loud and clear, which will help you to get each technical term
understood properly. Anyone who is familiar with the blender interface and just having the basic knowledge of 3D modelling in Blender
can join this course. Any experience blended user who want to gain more
technical knowledge in 3D modelling in Blender can also be the part
of this course. If you want to become the best blender user N1 to
extend your imagination in 3D modelling role this course for the excellent way
of learning today. Finally, blender is speak. To achieve something big. First step is to start. So see you in the class. The course is divided
into four parts. Important tools for 3D modeling. Core properties,
modifier, an add-on, 3D modeling using add-ons. First section. Importance of tools
for the 3D modelling. You need n measurement, selection tool,
transform, period point, and flapping can have total
extrude, insert, spin, etc. These are related to the basic
fundamentals of a blender. It tests any revisions part. You can skip this section if you are well aware of
in all these tools. Second is the core properties, which includes curve detail, curve property type ops, course, add-ons
and three rounds. Section is most important
because the car is an useful pitch fitter, which involved in
many design process. Third section,
modifier and around, which include barrel Boolean, subdivision surface modifier, skin solidify, screw, volatile adults,
Boolean tool cabled. I don't. Full list top free blender add-on used
in modelling process. This is the important
part of the course. In this section, we
will see the modifiers, an add-on which are used in the basic blender
modelling work. Last section, modeling
using add-on. In this section, we
will practice to model all possible object which will get the daily update
in this course. We will try to keep it easy and fast mode of
modelling practice, also with the use of add-ons. So you must follow each
lecture and try to work on it, which will help you to be the best user for a
blender application.
2. Materials: Materials, as this course is all about 3D
modeling and add-ons. So we are not talking about the materials because
material itself is an, a big and separate topic which required a full
series of lectures. Maybe next time I will prepare
a good and easy tutorial. How to use material
or create in Blender. For this course, I have used a free add-on name blender kit. You can download it free
from Blender kid.com, which includes many
free materials and objects which you can directly use in
blended application.
3. UNIT AND MEASUREMENT: In our first lecture is on Unit and measurement in 3D modelling, unit and measurement
is very much important because it defines the oral
proportional visual ratio. Let's see it by an example. You have it to steam
on your screen. Objects include a car, a man, and three. Both the images have
the same object. But you can clearly
see the difference. Because in the first image, all the objects are
proportional in size. The first car height is Audit three-fifths
and standing man, average height is six feet. And the house I, height is about 25 feet. Also, the three are proportional
to an ornament and sin. But in the second image, all the objects are randomly
skilled and position. Following our eyes. It's hard to believe the
object reality in the scene. Sometimes it is good
to start 3D modeling, considering the
actual measurement of a real-world object to make
a bilirubin Render Output. Blender has got a good
measurement and unit system. It will help us to learn the professional 3D
modelling process in blended right side
of the property tab, here is the scene property icon. Click on it. Here, you
will find the unit menu. First option is unit system. By default, it is set to metric. That means the 3D object in
the viewport can be defined. Rotation in degree, meter, mass in kilograms,
time in seconds, and the temperature in Kelvin. Second unit system after
the metric is imperial. For the imperial system, rotation in radians,
length in feet, and commands in pounds. You can even manually change the parameter from
the given list. And also you can use
the separate unit, my clicking here, both metric
and imperial unit system. Our physics verified them. In every country has different
units system. Are you? So please get know about your country's standard
unit measurement system. How do you object
dimension or measurement? First in the viewport
on the right side, here is the object property tab. Here you will see that
transport section, which includes location,
rotation and scale option. At present. Length shown in meter and rotation,
shown integrity. To view the mass
of one KG object, go down here in
the Physics step, click on digit body mass of
the selected objects shown. That is one key. Next shortcut to view
the dimension of the object in viewport
is capital L. Select Object, press
N on the viewport. The menu appear from the top. It has all
transformation option. And at the large dimension of the octet shown
in the form of x, y, and z, that is length,
width, and height. Second, we can even manually
method the object dimension. That's like we use a
measuring tape in real life. On the right side of the
viewport is the meso icon. Click on it, hold
the lip click of a mouse and move
anywhere in the space. You will see the
dotted line created, which shows the distance
between the two points. In the same way, we can take the measurement of an object, hold the leftmost
button at one end, then move the most
to the other end. But it is not showing
the exact value. Because if we rotate
the viewport, you can see the middle line and objects not matching
to each other. The exact value hold
Control to snap at one vertex and Moon most
near to the other vertex. Now, we can treat the true value between
the two vertices. Use Control to snap
the cursor point. You can also measure the angle. Just create a method line
between two are tests and hold the third and move towards the third
vertex of an object. In this way, it will show the angle between the two edges. Finally, in this way, we can measure multiple
parameter in the viewport. This method option is for
general visual purpose only. Because when you switch
back to Select mode, all the measured value and
the lines will get hidden. And also they will not
be visible in the render of such a mechanical sheet
like output in blender? Yes, it is possible. In Blender there is a default
add-on called misery tool. Using this add-on, we can
take output of object, including their dimension
in very customized way. Let's see it. Go to Edit, click on Preferences here. Such method. Then click on here to
enable the add-on. Now to view the add-on in the viewport,
select the object. Press N. On right side of your menu. Here, click on View tab. Down at launched, you will
find the method that tool. Click on Show to enable the metadata and then
tap to go to Edit mode. Let's select two
vertices holding Shift. Then in misery tool,
click on segment. It will show the distance
between the two points. We can also measure the
angle in vertex select mode, select three, what does this? And click on angle. Last for the art. Select three vertices. Then click on Arch. It will show all the dimension. Now the interesting part is that we can customize
the result. For example, length. If you look at the bottom, first decimal, we can assign
a decimal point to be count. You need display, can be changed to meters centimeter
int, or fit. From this add-on itself. We can also change the color of the middle line setting tab. You can include the
size and reposition it. It can also change the type
of line. I'll throw it. We have an example
of this 3D geometry. Let's apply a damage and
music major. I don't. To generate this type of output, I will sit Render Output
To cycle and press F2. Render image is generated, but no dimensions are visible. We need to do a few
more setting before generating the same output
as shown in the viewport. Now the first option is, is simply to take a screenshot
and say read files, but it will compromise
the quality. The best quality result
first go to render property. Fine, freestyle. Enable it. Now, if you render, you can see the outline
in your object. Second step in Madrid add-on. Look at the last option. Here is the Render button. Click on it. Then
press F2 for output. Then here you will find
the two separate images. Firstly, the main and second is the transparent
dimension image. Now we can see both of them
and edit in Photoshop. But in Blender, we
can match this board. The images go to the
composite section. Enable notes, then drag this dimension
image to the node. Setup, then search Alpha node and join the board the image. Note that alpha. Finally connect this
alpha to the composite. And then press F2. Here is your output dimension. I hope that you have got all the details regarding
unit and measurement. Also provided a systematic
documentation in PDF format. We'd consider some of the important topic
related to this lecture. You can download it
from resource section. Thank you. See you
in the next lecture.
4. Selection tool: All select, all select
shortcut is a risk. It will select all
the objects in the viewport for de-select, press Alt plus a left-click
most on empty space. Second, inward, select
from the name itself. It is self-explanatory. Select this face and
press Control I. It will select all the phase of the object except
first one selected. Let's try something
interesting In the spirit. Select a human
face pattern area, and then press Control
I and extrude. In this way, we
have a simple face using the invert selection. Circle selected, I can select is a very simple and useful press C and the mouse cursor will
convert it to circle. Now holding the leftmost
button over the object. And for the de-select
hold Shift, you can increase or
decrease the size of the circle from the mouse
middle scroll button. Select random. Select
random in edit mode, de-select everything, and
then click on select random. It will randomly
select any number of phases of the object. You can control the amount of selection from this tone option. It worked for both
vertex edges and faces. De-select in edit mode, select all, then click
on ticker deselect. You can see the test
pattern has been selected. It worked for all objects and useful for creating
unique object button. Select sharp edges. We have a queue. Click on the sharp, it select. It will select all
the edges of the cube because all edges
are about 30 degree. Now let us apply to
one of the edges. Again, you select sharp edges. Now the biggest portion
is less than 30 degree. It is not selected. You can adjust the value
of the degree from here. Select more or less. Shortcut on the keyboard
is hold control and numpad plus or minus sign
button in the plane, select any phase, then hold Control and press Plus
button on an unpacked, it will gradually
select the portion. Same if control
plus minus button, it will deselect in
the same manner. Loops selected in
edge select mode, double-click on the edge. It will select the first select, double-click on the feces. It will select the phase 34. The edges between the loops, hold control and
double-click on the edge. It will select all the
surrounding ring vertical edges. Select loop, inner reason, select any two edge loop. Then click on select
loop interaction between select the inner
portion between the two rings. Same rewards. Select the loop, and then
click on select quandary. It really select the face ring and outer ring will
remain selected. In this lecture, we have
discussed the most of the tools used in the
3D modeling process. Yes, there are much more at
once mode of selection tools, which we are going to see practically in upcoming lecture. Stay connected. See you
in the next lecture.
5. Transform Pivot Point & Snaping: What is pure point? Pivot point is the reference
connected point where an octet transformation
depend on such as rotation
scale and moments. For example, door
peered point is here due to which it's able
to open in right-wing option. In Blender default cube, pure point of an object is at the middle of an object that
is octet for each gene. We can rotate and scale with
reference to origin point. If we change the position
of the origin point, then it will work according
to origin location. But when we are working
on more than one octet, then we need to use
the transform point. The viewport top menu, you can see transport
pivot point icon. Click on it. Here we
have five options. Bounding box center, 3D
cursor, individual origin, median point, and
active element, bounding box center and
medium point center. In the viewport, we have to cube place away from each other. Let's check our first option. Bonding box center. It means pure point will be at the center of the
selected object. Select both the queue
holding the Shift and click on bonding center. Then press R for rotation. Now, you will notice
that the Q are rotating with reference
to point at the center. Both objects same, it
will work for scale. Let's add some more
cubes to viewport. Reposition it. Now select
all then 2s, median, center. If you rotate, we hardly
notice the difference between the bounding box and median
point center in this example. Third period point is
the active element. Let's add phi object
in the viewport. We normally select all
the objects by default, period point is at the center
of all selected objects. Now we will switch
to E2 element. If we rotate all object now, Period point is shift to
last selected object. Or we can say active element, which is also highlighted
by a green color. Once again, shift
and select objects. The last one is monkey head. Now click on E2
elements from top. Then rotation scale, and
movement will be followed with respect to pure point of
the last selected object. In this way, the selected
object is our pure point. You can also check by randomly selecting the object,
individual origins. It means each object
has its own pure point. Let's see by example. Previously, if we select the
old object in the viewport, Let's set the pivot 0.2
bounding box or active element. Now, for rotation,
you can see that the object rotation or
a transformation depend on the ACT to
element pivot point. If you want that, every object must
rotate separately. For that, we need to rotate
individual object manually. In such case, select all and
apply in doodle or a team. Now, rotation applied equally to each object with
individual origin. Let's see The best example
to use individual origin. The viewport, add a cute
and apply array modifier. Repeat the array until
you get such a structure. Now select all set period
point to quandary box. But when you rotate or scale, period point is
not at the center. It is on the first
queue which we used to array the object. Same. It will work
for median point e2 element and a noodle origin. Because if you can notice that
only one object is having origin or a pivot point and all other selected object
not having origin point. We need to enable the origin
point for every object. These are the simple step. Select all, go to the Edit
mode in the Mesh menu, click on separate, and select
Separate by loose spot. Back to object mode. Now, we have separated all
the objects individually. Then the large tip to
add origin, select all. Go to the Object
menu on the top. Click on Set Origin. Then select or the
gene tool geometry. It's done. You can clearly see that all the objects having
its own origin point. Finally, select all and
apply individual origin. Then if you rotate or scale, each object will
follow its own origin. 3d cursor period point. By default, in Blender, all object origin points at
the center of the object. By using 3D cursor point, we can manually
shift the beauty of an object to other locations
to use the 3D cursor pivot. First in open space, hold Shift plus right-click
the most pointer. It will locate the 3D
cursor to that location, then go to the Object menu, click on Set Origin, then select origin to 3D cursor. It will shift the origin
from object to 3D cursor. Now, on the transformation
of the object will be followed by 3D
cursor point location. In edit mode, you can apply a 3D cursor period point
in a more precise speed. Let's add a 3D cursor to one of the vertices
of the objet. Hold Shift plus the
mouse right-click. And in object mode, set origin to 3D cursor. This is a very useful tool during all the
workflow in Blender. Snapping tool. In Blender, when we are
working on 3D space, it becomes difficult to manage
the object location and placement with reference to other objects in the viewport. Snapping tools are
very much useful tools during such workflow in lender. On the top part desk, top third transform pure, there are stepping tools. It has seven option. We will see one
by one in detail. Increment or a grid increments. Let's see how it works. First animal, the increment
from the top menu, then select the object, press D to move. Now if we move the
object using the mouse, it's normally and snapping doesn't work to enable snapping, but as T and hold
Control on the keyboard. Now you will see
that the cube is snapping one meter of
increment on the grid. The blender grid, you'll
see in the viewport has such a square pattern that by default the area
is one by one. We can chain these
square value from here. Unit menu by default, it's one. Let's enter the new value two. Now, the grid box is two-by-two. One important point
is that the increment is not actually
snapping the grid. Let's change the position of the object offset
to the grid lines. Now d plus control
and move the object. Still snap and
increment by one meter. But object not
touching the grid. To precise the
snapping increment the grid from the top menu, we need to enable the
absolute grid snap. Again, D plus holding
control and move the object. The object origin is snapping
exactly to the grid. If you don't want to hold
the Control or snapping, you can click on this icon to
enable always on Snapping. Now, just to move and the
object will snap to grid. Snapping function also worked
for rotation and scale. From slapping menu, click
on mode, rotate and scale. If we rotate the object, the object will rotate
by the increment of five degrees and the same
for scale of an object. Finally, final tips
for increments. You can hold the ship for
more precise clapping in which objects snapping
increment by 0.1. Just to zoom in and see the next slapping menu
is vertex snapping. In vertex snap, the
object will flap to the other object with
reference to the vertex point. Let's see how it works. In the wing port, we
have two objects, a plane and a cube. First, enable the vertex
clapping from the top menu. Below it. It is default
set to closest point. It means that the
object vertex will snap to the closest vertex. Another object.
Now select the Q, press G to move and hold control for snapping
mode object. Closer to the plane. You will see the small circle
appear at vertex indicating the snapping point of contact
and leave it in this way. Object what TTX gets slapped
to the closest vertex point. You can try on the different
object for snapping. Again, there are three
options to slap, center, median, and E2. For centers slap, some object will snap to the
center of the object, to the vertex point
or another object. To use it, select the center
and in the transform menu, set pivot point to the box, normal to the object
holding control. It will snap to the center
point of the object. Next in the snapping menu is
the edge and faith snapping. They all work similar
to the vertex snapping. Just an attribute change. When we set to the edge Snap. Object will snap to the
edge of other objects to the closest center
median are active. It will work same for
the faith snapping. Just remember the basic and you can play around
with the options. To use the H snap, go to the top snap menu
and select edge option, then set it to closes. Now move the object
holding Control, and it will now snap to the
closest edge of other object. Same for the fist
clap, select the face, snap from the top
and move the object. Holding control. It will snap fifth to the
other object nearest face. Let's see one of the
interesting feature in the face snapping. I personally like it
and use it a lot. Let me explain using an example. The viewport, we have this plane which has some angle geometry, and just above it, some cylinders are placed. So we need to snap the cylinder on the
plane using phase snap. Go to the top and select
the snap to the face. Then select any cylinder, press G to move, holding control to
enable the snap. You can see that
cylinder got snap to the nearest face easily. But the problem is
with this cylinder, it is not getting snap as accepted because a
surface is inclined at an angle and object supposed to be snapped in an angle with
reference to plane. But it is totally getting wrong. To solve this problem, we have to go to the
snap menu at the top. Then in the fifth
option at bottom, here is aligned rotation
to target. Enable it. Now, try again to snap the face. This time, it exactly snapped
to the angle to the fifth. Now we have many
cylinders and we want to snap all the
cylinder on the plane. Select all enable snapping, and also enable align
rotation to target. More the object holding control. But this time it's not working. So again, go back
to the snap menu. Here. You will find the second option, project in neural
element. Enable it. Now selected all
cylinder, press 74 top. You then press G and controlled. It will automatically snap all slender into really
on the plane perfectly. During phase angles snapping, please check the few
thing such as axis up an object and a plane must be positioning in
same direction. Select the object, go to the object property
tab at right here. Viewport display, enable axis. Now you can see that z-axis
palsy similar to each other. At launched when quick example for phase snapping at
angle in Viewport, one pipe is shown and we need to snap these three weight
on this metallic surface. Select the object. Go to the snap menu and
enable both align, rotation to target and
project individual element. Then select all the rivets. Press seven, top you. Then press G and press
Control to snap. Here is our result. The perfect angles snapping.
6. Knife Tool: Hello and welcome
to another lecture on 3D modelling in Blender. In this part, we are going to
quickly look at knife tool. Can I project? And by thick, these tools are interesting and might be useful
in the process. Can I have to? Tune
is used in edit mode. It is placed on the left
side of the viewport. Clicking on this icon to
enable the knife tool, the most concern will
change to knife shaped. Use the knife tool
is just to create and extra it over an object. And the shortcut to
use a knife is K. K. And holding the left mouse, drag the line over the object and press
Enter to complete. Done. In this way, extra created or the objects. If you rotate the object, you can see that the tool only created the edge on one side, not on the other side. If you want to fully cut through out the octet using a knife. Again, please, K,
shortcut C. Then draw. This time at is formed on
the backside of the object, also kx plus C shortcut for cutting throughout
the object. Slapping, by default, Clive
snap to the edge, vertex. But by holding Shift, pointer will snap to the
median point of control. It will disable
all the snapping. Angle constraint. We can even apply a knife tool at an angle. Just use k plus a on
a keyboard shortcut. Then a cutting, it, constrained to an angle. It rotate at 30 degree
interval. Only selected. If you notice that while
using a knife tool, it considered a full
object to apply a cut. But what if we want that the knife cut should apply only to the selected face? Then we need to
enable one setting. Go to the edit. And in K-map menu
such Clive tool. Here go to Mesh
property, open climb, topology tools, and
enable only selected. Then back to the viewport. Select any face of the
cube and use knife tool, which result in knife tool work only over the selected face. This function maybe
useful sometime. So remember it. Can I project? Project is the simple
tool to project profile geometry
to another object. First we need the main object, then add a profile ship. Let's add a cylinder as a main object and
profile as a circle. Now from blended 2.9, the process of prediction
has been changed. Select the main object, cylinder, tap to go
to the edit mode. Now switch to front view. Then in the scene collection, right-click and
select the circle. Finally apply the client
project from the mash menu. Here is the desert circle got projected over
the main object. And as we all know, that type predict depends upon the angle of the view between the profile
and the main object. By a different angle
to get the desired is. Also you can create your own profile to
use in the prediction. Bisect. Bisect is an interesting
tool in Blender. Bisect simply means
that an object can be divided or separated
into two equal parts. And it work in Blender, but in more advanced mode. In edit mode, Mesh menu
here you can find bisect, bisect, select it, and just
drag the mouse or the object. It will create a line
or an H on the object. And also a circular toggle
will appear on the screen. This circle has
the pointer arrow. If you hold it by a mouse, left-click and move up and down, you can control the position
of the biotech portion. Left town site. The sub menu for Python. First It's fill. It will simply create the
phase over the bisected area. It both clear inner and
outer fill is selected. Then it will only show
the basic profile reason. And you can also manage
the bicep function precisely using this
transformation controller. Bisect also work for a
selected portion of an object. Let's see. If I select these
two faces and apply bisect. Then it will delete the
remaining fifth and bisect the selected area. Thank you for watching. See
you in the next lecture.
7. Extrude: Hello and welcome to another
lecture in 3D modeling. This part, we will
discuss some of the most used tools
in 3D modeling, such as extrude,
insert, face, spin, grab, Ben, shrink and
pattern, and much more. We will just overlook these
tools very fast because any printer user is primarily familiar with
all other functions. So let's start. Extrude is one of the widely
used tool in 3D modelling. It work in edit mode
and shortcut is simply select in any phase
and press E. By default, it extrude to the
normal direction of the selected portion. But you can press X, Y, Z to extrude in the
required direction. To transform the Extrude. We can extrude face
and vertex also. Left town site. We also have an extrude sub menu to control transformation. From here, you can
precisely manage extruding at x, y, and z-axis. Here you will find
proportional editing. I like this option very much. Let's see how it's work. Extrude 1 fifth and then
enable proportional editing. Now F2 twill, also considered
the nearest remaining h. Let's try something
different in this option, select alternate H and extrude, then enable proportional
edit option. And here you can apply depends
on file set from submenu. You can create variety of shape using extrude
proportional editing. Have a look, summing sample. Extrude individual phase. If we select two-fifths
and tried to exclude the result
is not as accepted. Now press Control F. Click
on Extrude individual phase. Now, each phase will
extrude separately. Second, extrude
face along normal. Again, take the same example. Control F. Now select
extrude fifth along normal. This time, different
result from the previous. Make it geometrically correct. Select offset, even. Now, we have better deserted. These two examples show the basic difference
between the extrude in doodle faith and
extrude face along normal. Let's see When example, cylinder, Alt, left-click,
select all vertical fifth. Control F, click on
Extrude individual 5th. Now just enabled
proportional editing. Here is the different results. This way you can use this extrude function to make
interesting shaped object. Extrude spin. Extra pin basically extrude the selected portion into
spin or a circular pattern. Extrude spin option can be
enabled from the Mesh menu. Let's select the
face and apply X2 to spin the result 100
unidentified object, which is difficult to judge
what exclude spin does. Make it simple. Go to the
left downside sub-menu. Here we have steps, angle and transformation
controller. If we visualize the
AX2 spin geometry, step is the number of extrude followed
along the spin part. Angle is the degree of
rotation of extrude spin. And other to control
transformation. First, reduce angle
to when 80 degree. Now, just play around with the transformation numbers
to unfold the geometry. After filled try,
you will be able to see the extrude spin
pattern properly. Now set an angle to 360 degree to complete
the spin extrude. It also gets auto merge. Now if we enable use duplicate, then geometry will show the x2 portion separately
desk like an arrow modifier. You can change the step
count to see the difference. Extrude spin works
on both full octet. Individual adults. Dig that, missed it. The spin tool in edit mode, spin can be E2 from the left vertical
menu of the viewport. It is similar to
the extrude spin. Let's try. We have an object
in the viewport. In edit mode. Select all. Then apply spin. And here we have a
spin control handle. Just hold it and move. It will create a duplicate
opposite selected object in circular pattern. We also have a same geometry and transformation menu as
you've seen in extrude spin 1 to be noted that the spin depend on the position of the 3D cursor
in the viewport. Let ship hold and
right-click Copy most Petain the cursor
position, then try spin. Now it will work. Different. Spin tool is best used
for profile geometry. Let's create the glass shape
profile using a curve. Then convert into the mesh, integrate mode, select
all and apply spin. Then finally rotate
it to 360 degree. Here we have our perfect
result of a class. Sprint tool is an amazing option to create a complex
shifts very fast. You must practice it to
get a desired result. Is a very simple
and easy to use. First at octet. Also sub-divide, add some edges for
meter, isn't it? Now just change the
3D cursor position slightly away from the object. Holding Shift and nightly. In edit mode, select
all and apply bend or shortcut Shift W.
Just move the mouse, an object will bend. Note that the object bend
with the reference to the 3D cursor and view angle. Now we are in the front
view and bend. In this way. If we switch to the side view, the bend work differently. Yes, you can change
the 3D cursor position anytime to manipulate the paint, sink and fatten by the name. It is self-explanatory. In edit mode, you
will find Xing and fat and at the left
side, vertical menu, or you shortcut plus S, Select All and apply
string and fatten. Just move the mouse and
the object will get fattened or can be
stink. Look cool. Let's try on other
object, cube plus F. It's not working wet before applying the
string and frightened, you must add some sufficient
age or subdivision. I will subdivide it. Again. Try. Yes,
it's working fine. Reason. Shortcut is V a very simple function.
In edit mode. Select any age and press V, and then move the mouse, the selected edge along
with the face, get detach. It also depends upon
the view angle.
8. Curve Details: Curve, but it's shipped a, we can add curve. Let's add first
curve called benzyl. It's a simple pen line on the viewport for better
geometry detail, switch to edit mode. Now you can clearly see that the curve is made
of two vertices. The two vertexes, how
the lines called handle. This handle again have three vertex which can
be individually control, such as moon, rotate or scale. This handled
transformation result in change in shape of curve. Extrude tool work the
same for the curves. Select the handle
vertex and press E, it will get excluded. We can also
sub-divide the curve, select any two vertices,
and apply subdivision. Then extra vertex
added in the middle. With the handle. By pressing the X, we have
the option to delete, dissolve the vertex from
the top or lay menu. If we are able to handle
normal direction, it will show the path. It will show the path with the arrow following
the direction. This segment math direction can be changed from the top menu. Also, we can till or rotate the segment direction
by pressing the shortcut Control T. Now move the most or you can individually select
the vertex and press Control T, four
segments rotation. This function is very much
useful during path animation. We will take it later. These handles are used to
give shape to the curves. And by pressing V
on the keyboard, it showed the types
of Handel we can use. By default, the
handle is straight. We can call it in
automatic mode. Automatic handle is useful for a smooth curve shape and
very easy to handle. But to create a straight
line, It's difficult. Select the handle and
press V 2s vector. Now, curve will convert it
into the straight line. And also we have a sharp angle at every
correcting segment. In vector mode, both handles of an individual vertex can
be controlled separately. Also, we can change the
handle type anytime. For example, we will generate this rectangle shape
using the curve. It has a four state line and a curb round shape
at four corner. First add a curve in edit
mode till it fun vertex. Selecting the single
vertex, press E2. On x-axis. Press a distant at a one meter. Then the extrude to
the y-axis at it to meter curve form
between the two vertebrae pressing V and
change it to vector. Now it will be straight. Follow same step. Last, selecting the two vertex, press F to fill the geometry. We have a rectangle shape. Now we will make a round
shape at a coordinate. For that round portion, we need a two vertex
at the corner. At present, we have
four vertices. Select all and subdivided. No, just bring the two
are close to each other. I didn't 90 degree. Select
the corner vertices. X2. Up to the board. You will get around ship. Repeat the same for
all three corners. Now finally, we have got a complete rectangle
shape within down corner. You can also add a geometry to the curve from the right
side of the curve property. We will see this part in
the next lecture in detail. You can easily
convert this curve to mesh and then apply
any object property.
9. Curve Properties: Property. In this lecture, we will discuss some
details of object property. We can call it curve properties. After adding the curve in
W port side vertical tab, you will find this curved
shape icon. Click on it. It will open the
object or property. Here are some terms are
mentioned, such as shape, geometry and active slide, which are mostly
used in 3D modeling. Functions are for
animation purpose. First, look at the shape menu. Here are the two options
mentioned, 2D and 3D. By default, curved shape
property is set to 3D, which means that handled
can be operated in all x n direction. If we switch to 2D, then tie formation
is constrained to the x and y-axis only. Z-axis is restricted. Below it. A resolution preview.
The more number, the smoother the curve, lower the number low poly
curve will temperate. Second in the geometry tab, bevel menu, options,
round object, profile. In round. Increasing
the value of the depth, you will get a round
profile around the curve. The depth value define the diameter of the
round profiling. Resolution value, manage it, the smoothness, lower the
number, less smoothly. Fill cap will close the
end of the curved profile. Second in the Bible
is the object, which means that the
curve will get beveled. The French to another object. Example, we have a curve
in a viewport object mode. I will add a circle curve, moves slightly away
from the curve, then select the curve
to go to the edit mode. Now, in the bevel menu, click on Object and select
recently added circle. You will notice that
test after the election, the curve has been converted to the round circular profile. Now back to object mode. Select the reference
circle, curve. Go to Edit Mode. Now, the
interesting part is that if we move or modify any vertex or a handle
of a circular curve, same will uptake to the, our mean curved profile. Let's select any handle
and set it to vector. Now, it will be squared and the same will be applicable
on the main object. In this way, we can create a number of profiles
very easily. Let's see another example. I will add a curve as
a reference object, also selected in
bevel object type. Then you can simply create a school curved shape
on the surface. Adding a simple nerve line, then curve will be
as the plane road. Here. We can modify it slightly
for a better result. Next in the variable part
is the profile option. It is similar to the
object car type, but instead of objects, it has a graph where the reference vertex of a
bevel profile is plotted. Here, you can do to really
move to chain the German tree. Sometimes it becomes difficult to understand the
transformation. Some preset also loaded, which you can use for reference. You can create your own. Next is the active supply
function is simple. If we have it to open
end of the curve in, at two spline menu,
select cyclic. You. Then the end will
be get connected. We can use select all
and press F to fill. Now let's see the tilt or a twist function
and also radius. In edit mode, select
any handle of the curve and press
N. On the right top. You will find the
transformation tab here is that tilt increase the
degree of rotation. You will notice that
the twist movement appear on the profiling. If you switch to
the wireframe mode, you can clearly see how
twist or a tilt works. About tilt is the radius. Select the n vertex
of the handle. Increase the radius. Effect that the diameter
gradually get a large. Second, Let's select to what
texts handle and apply TDD. Here, we get the variable itself for better periods at
just the resolution.
10. Types Of Curves & Addons: Types of codes. And I don't by default, when we press Shift a to add
the curves in the viewport, very few codes types
are available to add. Using this primary curve
we start designing. But Blender has some
inbuilt add-on which can be used to add more curved
type in the viewport. Just go to the Edit
Preferences, Add-ons. And third girl, here, you will get many add-ons
related to the curve. Right now, you must only enabled
the extra object add-on. Done. Then back to object
mode, shift a girl. Now you will see that the curve type list
has been extended. The new items, this new
curve types are nothing but the pre-made shapes which are required
to start any design. First is the angle curve. Shift a and add it. Angle curve by default
is at 45 degree. So if you are designing
need an angle. You may add for the normal
curve and convert it to ankle. Then move towards the next step. It may take few minutes, but using the extra
object add-on, you can directly start with the preset curve I
will able to use. Along with that, you can
also get the extra control. Your curve design
from the left down. Sub-menu. Here. Adjust the length, the
degree of that angle. Very precise key. With the custom shortcut to sit, bullied nerve or Bezier. And also with the easy
transformation Controller. Next we can add our CTL. Also, we have an
easy control menu. From here, we can manage a parameter related
to arch curve, such as numbers, radius, start angle, and an angle. This function help us a lot
to fast forward our work. Next on the curb
types, our circle, ellipse, polygon,
rectangle and much more. All these are the basic
shapes of curves and also how customized control
option for modification. Explain all this
curve individually. We'll take much time. I suggest, try yourself for a better understanding from
the sub-menu here also, we get a list of
available curve to add. Using this, we can switch
or replace the curve in the viewport curb profile. Let's move towards
the new curve type. That is profiling depths
are the same shift. A desk below the curve type
here is curved profile, which has linked with the different type
of advanced curve. For example, let's add the
arch from the current profile. Now this art is different
from previously reviewed. It has got a full 3D profile. We take connected,
linked to each other. Also, we have the
same control menu with extra option suggests
inner radius and outer radius. So you can clearly
see the difference between the normal curve
and curve profile. In this way, we have
caught a couple of interesting curve,
such as arrow. Adjusting the value, we
get even more variation. Next is the coke will curl. This is the wheel with
the teeth profiling and freedom to control the number
of teeth, bevel and radius. It's very much useful during
the complicated modeling. Third, it does cycloid
curve profile. It is simple cyclic curve
with a design preview, playing around with
its parameter, you can get creative output. Same. We have the flower
shape profile also. Now add helix 3D. It says simple vertical curve. But if we added the height and increase the
degree of protection, it will form a
spring-like geometry. Also changing the
variable value. It will modify the curve design. Next is the noise 3D. By the name itself. We can define its geometry. Night 3D is a curve with no
perfect shape or design. The sub-menu here are
many parameter using it, you can create a such
undefined curve shape. Now, few things are remaining in the spiral is logarithmic. It can be spiral curve, horizontal and vertical also. Then we also have
the spear curve. It is the speckle pattern. Last is the total score. It is very interesting curve
formed in the torus pattern. The last type of the
curve is k naught skirt cannot is located at the
last term in the Curve menu. This other result shown using the keynotes to you, The cannot. We cannot add curve directly
on the empty viewport. Some object required
to apply cannot. Let's add a cylinder and
scale it to vertical, then select the octet shift. It cannot. First in the list is Taurus
cannot plus selecting it reference to the
selected object it has created
around its diameter. The same. It will work for clink
and grade cannot. Another one is pyro fit. And my personal favorite, select the object. At pyro fit. That spiral curve created with the same diameter of
an object around it. You can manage its
geometrical value. Also. Lashed is catenary. Select the two objects
and apply catenary. It will add the curve between the two selected octet with reference to the origin point.
11. Tree addon: Godly girl. Last type of a curve, if Cathy. It's a pre-made
simple design curve. From the sub-menu, ranging
value from one to ten. It will show the
variation in pattern. Next in the curve
is surface curl. You can add it same
using shipped a. Here we have many
types of curves. In edit mode, the curve does not have any handled to
control the geometry. It has the connecting frame. And by selecting
the vertex point, we can modify the design. You can also assume like
a subdivision of a curve. It also has some
pre-made surface like cylinder,
sphere, and doors. Selecting each of them you
can modify in edit mode. Finally, the launched free add-on sampling tree generator. It's a free add-on
inbuilt in Blender. Using it, we can quickly add a general tree
structure like this. These three add-on use core property to generate
three very easily. In Edit Preferences, add-on, search, curl, and enable
sampling three generators. These are the some
of the example of trees we can template
using this free add-on. Yes, they are low
poly model that can be modified with
the easy controller. But if you try to model a tree
using the curves manually, it will take a lot of time and may not be perfect as original. So it is better to use such an add-on for
low poly models. There are many more advanced. We will see in upcoming lectures how to use treat
generator add-on. After enabling add-on,
the curved section, at last you will find the
sampling tree, then Ritter. Click on it. Then the sample tree-structured will be
available on the viewport. It has stem and
Prentice, but no loose. Also in the left town sub menu, the advanced modification
tools are available. Let's take one-by-one. First shape. We can choose any shape from the list that tests
clinical hemisphere. Or you can set it custom, then manage the value to
get the desired result. Also it has caught
it good and easy way to manage branch
distribution. Then scale up or scale down. Here are some preset available to chain the
tree type completely. You can choose any of it and start modifying according
to requirement. Now, let's add a loose
top setting tag. It is set to determine tree. Click on it and select leaves, then select, Show The lose. It will automatically
show the width, geometrically correct
over the brand. Yes. Then there are lots of
options to manage the loose, a test quality, size,
shape, angle, etc. Similarly in the setting tab, many other terms
related to tree can be used to manipulate
that twist. This way. Sampling, tweet generate the, allow us to create the fuel random tree with the freedom of
flexibility in design.
12. Array modifire: Array modifier is the most
commonly used modifier. Its basic function
is to duplicate the selected object in a
series at a specific distance. Select the object, go
to the Modify tab here. In the first column. You can see at selecting it right side up your
viewport menu appear. First term mentioned
is fit type. There are three types of feed, fixed type, length,
and curl. By default. First is fixed type. Below it does count, which define the number of duplicate objects in the array. Now in the fixed
type object will get array to the
x, y, and z-axis. The relative offset value
control the distance between the two array object. If y and z are set to 0, then array will work in
the x-axis direction only. If we set x and that value 0, then area of work on y-axis. We can even use all three
axes combine to generate, create 2D array output. Just below, it is
a constant offset. It works similar to the
relative opposite in x, y and third axis. Then Object Offset. First, add a plane object
as it offset Reference. Then Object Offset, select
the recently added plane. Now the magic beginning, select the plane and
try to transform it. It will seem effect
on the array object. Let's rotate, scale or move. It created such a design which may be difficult to do manually. Launched is the fit to curb. Object will follow with
reference to the edit curve. Let's add the first curve. Any shape, then add an object. Align the object to the curve. Before applying
the fit to curve, please take that the axis of both the object curves are
facing the same direction. Also apply the scale to the
object by pressing Control a. Then select the object, apply a modifier, chain, fit Type II curve. Select Edit curve. Now you will see that object array with the
mapping length of the curve. But it is not
following the curve. It is still in the
x-axis direction. So we need to add
one more modifier that is formed deform
section curve. In this modifier also select the same curve which result or object is now
following the curve. Select the object,
moving the x axis. This way, object follow
the curve direction. In edit mode. If we
extend the curb or extrude it's the same object
will follow its count. This model show the
perfect example to use the fit to curve. Tucker also work great
for a circle curve. Left plot, added circle, then add the object and
apply it at a losing fluid. Also, deform modifier, sell it Car object
in both of them. And here is the result. The object follow circular path. Array modifier can be
used as a spin tool. Let's add an object, then add an empty
for a reference. Apply array, de-select clay to opposite and constant offset. Now select object opposite. Here, click on empty.
One more thing left. Set octet origin to 3D cursor. Then select Empty and
rotate to that axis. Opposite will spin in
the circular pattern. Previously we have
seen in edit mode, select the control and
Bevel can be applied. Now we have a separate bevel
modifier in object mode. Select Object, choose
Bevel modifier. Right vertical tab here, bowel control menu appears. In this modifier, bevel can be applied to the full
object selected. Before applying the Bible. Makes sure to enable
auto smooth in the object data property
tapped first is width, which define the area
covered in bevel. Second is segment. Segment in the smoothness value. More than number, better than
Bill will finish appears. Third is the limit method. Default set to 30 degree. The age greater than
30 degree, bevel. Other options in the
limit method can be applied according to
wait and vertex groups. And the width of the
Bible can be changed to upset with percentage
and absolute. You can check all of them. The slightly variation
can be noticed in each. They will also work
great on the vertex. In this cube has
a fourth vertex. After applying the
bevel modifier. From edge to vertex, then adjust the width, amount and segment for
smooth and better result. Switch to wireframe mode here for what texts bubbles
visible clearly. Second term in bevel
modifier is profiling. Super ellipse. Its value
range from 0 to one. If we said to the
higher value one, then bevel get dissolved. And if value is near to 0, then b will get inserted. The opposite side. Next to the super
elite is cached on. Here are some of the
Bible protect profile, which can be applied instead of brown bevel test below it. The graph is
provided with vertex point D presenting
the bevel pattern. Adjusting this vertex. We can even create our
own custom provided. Next in the Bible, that geometry tab two
options, outer and inner. This top portion is the outer, and this one is inner and
outer type, sharp and path. These options are
available, same for enough. Switch to wireframe mode. Now, if we select the arch
sharp and then you can notice the difference between them and also shedding
effect change. It weren't for inner region, also launched in
the limit method. By default, we are using the
pebble limit to 30 degree, which means all
the edges greater than 30 degree get prevent. What if you only want to pay? Well, this one single
edge selected. You can use this limit method
called limit by weight. Go to the Edit mode, select the eight, then press N, the top item tab, increase the pebble
weight to certain number. Now back to object mode and
apply that pebble modifier. Then in Limit Method,
select limit by. Now adjust the width
and segment value. Then bevel will only
affect it on the selected by the rate number. Again, we can even select the multiple edge and also set a different
value of the wet, then apply the barrier. Next in the bevel limit
is by vertex groups. In edit mode, if I select
the three vertex and assign what takes
group, then the name. Back to object mode. After applying the
bevel modifier, select the limit method
to the vertex grouped, and select the recently
added vertex groups. Then you can see that the
bevel is only applied to the selected three
vertex group portion. Only. Next is the Boolean modifier. Most simple and widely used tool in 3D modelling processes. Simple. Select the object, click on the Boolean modifier. Here at three dipole balloons. Fastest differences. Object use to balloon, create the cavity
on the main object. Second is union. It's joined the boat
object and make it one. Last these intersect. It removed the portion which is not part of the developed you. If you want to apply a multiple Boolean at the
same time to an object, we can use the
collection type option for multiple pavilions at once. Here we have a cube. Let's add more
objects to be used as a Boolean. Arrange it. Then in Scene tab,
Add new collection. Make sure to move
the object added up to the cube,
the collection to. Then select the main
object cube and apply Boolean from operand and
type select collection. Here is the list top collection which are available
in Scene tab. Select collection
to apply Boolean. It showed the quick
little boolean applied by the collection of an
object at a one tick.
13. Sub divison surface modifire: Subdivision surface modifier, we can call it hard
surface modeling. It is the one of the
best Blender tool to create amazing and
complicated design. This study is all about
3D modeling using add-on. So I'm not going in
detail the old look how subdivision surface
modifier work and its supporting teachers. Basic principle of
subdivision modifier. First, you must decide what
you are going to model. Then make it rough sketch. Assume the edges required
for the geometry. Now, viewport, add an object. Then in edit mode, freely match your geometry to your drawing by adding
sufficient edge loops. Then select all and apply
subdivision surface modifier. It result, our object suddenly
get completely changed. Its geometry. On the right side, you will. It's menu with two
important terms, levels, viewport and render. More than number of the level, smooth the surface finish, then set a value which
your system can handle. Now. Next. Now next is to shape. It is simple. In edit mode. Death select, Edge Loop, and try to adjust scale. Rotate to get a desired result. Yes, you can even add
more loops if required. Actually, this hard surface also can be compared
with the scripting. The process of designing
anything using surface modeling is
the main leader skill, which you can gain
only by practicing. So you must do daily
practice on it. In this way by
addressing the couple of edge loop if we have
created our object. Finally, you can also
apply a shade smooth. Subdivision surface modelling
is an amazing tool. Using it, we can
convert this type of object into another object. Subdivision modifier,
how certain limitation, and I don't want it also, which can be fulfilled
if it manually, but it will take much time
and may not be resolved. Using some add-on. Going to help us a lot. From section five, we are
going to see in detail. So stay connected.
14. Skin,Solidify,Screw Modifier: Skin modifier, by
the name you got it. What this modifier can do, it simply added skin to
the link or an H profile. You just need a
vertex or an edge. And in edit mode,
extrude or more. Then create this
skeleton life that can then apply skin modifier. It will show the result that skeleton is covered
with the skin, has a depth. Yes. You can compare it with the curve property but
with less features. First option in the modifier
is a branch smoother, which makes slightly
smoother effect at the connecting branches. Then symmetrical. First set to wireframe mode, then two symmetrical
axis from x, y, and z. And notice the difference. Our domain tree is on x-axis. So 32 symmetric and below
is the smooth shading. Below is the smooth shading. By enabling it, it converts the whole structure
from sharp to smooth. Next, switch to edit
and x-ray mode. Here, inner skeleton with
a vertex are visible. Then selecting each
vertex we can apply transformation and
scale or a shrink. Selecting each vertex we
can apply transformation. But to scale or shrink, we have to press Control plus a. Now, the most you
can able to Q shape to the link or constraint
it to X, Y, and Z. Now our model is
almost complete. It may look like an alien. Next in the skin
tab is make lose. These three vertex closely
linked to each other. If I select a
common link vertex, then click on make it, lose it result that the geometry will expand
up to the previous vertex. And if you don't
like this output, you can remove by
clicking on clear loose, it will get back to format. Last is the make group. It is the vertex point where a whole body is considered
to be its origin. Let's select this middle vertex
and click on Make group. Then it will be focused
with the dotted circle. Finally, you can easily
convert the skin mesh to the armature dust by
clicking on this button. Then the rest of the portion. For posts and animation. After completing all the
steps, apply smooth, shady. Then finally apply
skin modifier. Switch back to edit mode. You can see our skin structure has been converted to
mesh successfully. Then you can apply
subdivision modifier and refine the design
for a better look. This was a short description
on skin modifier. Yes, you can create
much more using this. Also. Also, we are
going to see more advanced you solve such
modifier in upcoming lectures. Solidify modifier. It simply add a thickness
to a plane object. Taking an example, we will overlook the
most of it function. In this viewport, they read
the hop cylindrical portion, which they did not
have any thickness. Just plain object. Select the object and
apply solidify modifier. The right side, we
have a couple of options related to solidify. First is thickness. If you increase its value, the thickness of your
object can be controlled. Second is the upset, which offset the thickness
German tree with the reference to the
origin point next to it. If even thickness. Let's have a plain
shape at a 90-degree. If we applied solidify modifier and increase
the thickness, you can see that the thickness
is not in uniformed way. But as we enable even thickness, we can clearly see that the
octet got UN thickness. All site. Third, eStream by
default is enabled. If we take the three, then it will remove the
end connecting limb or a portion and only
thickness portion remains. Second, if you select only rim, then it will select
trim and remove. The A-B-O thick surface. Now adjusting the thick lift, it fill followed differently. Take this last is the vertex group
thickness in edit mode. Let us what takes group
to this portion only. Then back to modify
and select what takes group and try to
increase the thick lift. It result gradually decreasing the thickness over the object. Flip Normal, an object
applied solidified. And if enable flip normal, there is no change. Then we need to
click on only rim. Now, flipped normal work. It changed the normal plane
two opposite materials. First at three materials
in material properties. Then back to solidify modifier. If we adjust the material
offset value and REM value, then it result that
dream outer portion and in an area all three surface
caught different material. It was a simple mode. Let us see the complex mode. We have an object
using a simple plain, but it has fins, which make it a little complex. First apply simple
solidified result, not look so good. Switch to complex mode, which result in perfect an
even thickness or full object. Also adjusting the offset
value for the better result. Another example is
conical object. After applying solidified,
the upper age appear sharp. To make it flat, switch
to complex mode. In 100 type set to flat. It will correct the geometry. Screw modifier, or
we can call it spin. Its basic function is to extrude an object or a profile
in a circular pattern. We have already seen such a function
previously in edit mode. Now, here is the
dedicated modifier with some extra features. So first example, we have this profile made
up of simple edge. Select in object mode. Then apply screw modifier
before it makes sure that origin point of an
object is aligned at the center of revolution
or at a world origin. Now after applying the screw set suitable axis and
it forms an object. If we said 360 degree, then enable the mud. It's join an object as a full. Next, let's add a
circle and then slap the origin to 3D cursor
and apply screw. Now a distinct the screw value, it will deform or
expanded German. Iteration value will increase
or decrease its length. Below it is the axis object. We can add extra objects which can be able to coordinate
with the screw pattern. I will add a empty. Also select the same
in the axis object. Set the axis to the debt. Now, if you move the empty, then it will reflect
the screw pattern. Also below it is the object
scream, but enabling it. And then selecting empty
and CO2 object property. Now at just the axis value, you can deform it like
an actual spring.
15. Bool Tool: First, I don't bull tool. We can call it a
Boolean modifier. By the name itself. We can perfectly come
to the conclusion that it's going to be used for
a billion operations. It does not differ much
from the Boolean modifier, but slightly make
the process faster and create you without
wasting much time. Let's begin. Yes. It's a free add-on
in Blender, inbuilt. Dust go to the Edit Preferences and in add-on section,
search bull tool. Just click on it to
enable in description, it showed that we
can assess it in the viewport right
top menu by pressing N. Then it will be
indicated as edit. Back to viewport in object mode, select object, and breath. Here, just the bottom is
the Edit. Click on it. Here are all related term to Boolean operation
such as differences, union, intersect, and
the new one is slice. Again, this section
are divided into two-part auto Boolean
and brush Boolean. So let's see one-by-one how this full tool is
better than previous. To use a bull tool. First, you need the mean object. Second, another
object which will be used as a balloon on
the mean objects. First, setup the second object to the required balloon portion. Then select small object
and holding Shift, select the main object. Press N, and select the
first option differences. Quickly it will show the result. And also the Boolean object
will get a totally paid. Let's try second. That is union. It joined the both the
geometry intersect. The common portion,
remain attached, get eliminated. Last, slice. First. It will keep the common
portion and also make the cavity of the same
portion on the main objects. All the APOE Boolean types are called auto Boolean
tool in this add-on. Second in the bull
tool is William. It's similar to
the previous one, but very interesting and
useful. Processes same. Select both objects and click on differences from
the brush Boolean. This time it showed the result, but the object used
for the Boolean is shown in wireframe. Now the interesting part
begins in object mode. You can move or scale
the wire-frame object. And at the same time, the Live Boolean effect
on the main object. So it is very useful for an instant modification
in a more precise way. If we switch to edit mode, here, we can add or extrude
the Boolean object. Then it had the same
effect on the main object. In this way, it becomes the most productive tool
in very simple way. It works the same for the
union, intersect and slice. One important feature
is that we can add multiple object and apply
different type of Boolean. Then according to our design,
manage it individually. Finally, from that menu, apply all work done. If you are a beginner or just one to speed up
your initial work, you can use this free. I don't stay connected for the upcoming
lectures and example, we will try some more
premium add-on to make our 3D modeling process
more simple and fast.
16. Advance boolean Tool ABT: Welcome to second
lecture on Add-ons. In this lecture, we have another add-on related to Boolean, which is almost
free and its name is at once William or ABT. You can download it from the link provided
in the description. Make sure to select
the latest version. And then the price offered
is up to user choice, which means you can pay any dollar and proceed
toward download. After downloading
to get a zip file, please do not expect it. Go to the blender, Edit
Preferences section. Click on Install and find your last Download
File and select it. Then click on this
small box to enable it. In the description it showed
that we can assist this add-on using the only
shortcut alt plus x. So what do you embody
in object mode? Select the object. Press Alt plus x to view the advanced pull in tool
on first impression. This add-on along with
the Boolean operation, show many other options, also. Lets quickly or loop the menus. First is the Boolean. Here you will find
all the Boolean tool except intersect desk
to flip side of it. Is it bevel menu with
some preset term? Is the shortcut to
the shading type. Then let site, normal tool
and Bevel preview option. Downside is the mesh tool
and quick modifiers. Better than calling
it an add-on. I'm at referred to it as
a shortcut to Modifier. Let's see. By examples, we have
a two objects in the viewport holding
Shift select all. Then for the ABT plus x. Now we will apply the
Boolean from this menu. Click on the differences. Then the result show the
Live Boolean action desk, like previously used in the
bull tool, brush million. We can perform the
same action on the main object to
modify the design. After conformation. Select both the object
and press plus x. Then test below it is
the quick modifier. From here, you can
apply the Boolean. It showed the least OPT
modifier you want to apply. And also, we can remove
the all applied modifiers. In this way, we can
easily use this shortcut to assess Boolean tool
such as different depths, slice, or a union. There is a new option
called box William. I'll select the box million
and it will simply show reference box with you can scale decides to use
as a Boolean tool. That option on the top. So attached ceiling
shortcut can be used for a object preview as a
wire solid and texture. After death, we also
have a shortcut to enable auto smooth
than normal by weight. Sometime it is handy to use. Finally, the last
useful shortcut in this add-on is Beverly. Flip the object x. On the left side
here is the bevel. To apply, click on this. It will instantly
show the bevel on the octet to manage
its function. Same from the right Modifier
menu. On the right. More function related to bevel, such as set higher
than edges are soft, then auto hard edge. You can use them if you want to increase the speed
of your modelling.
17. Cablentor Addon: Welcome to this
amazing series of 3D modelling in Blender
using add-ons. In this part we will see
the most premium and useful add-on called
cable operator. It's a paid add-on. You can buy and download it from the link provided
in the description. First, let us know
what is this add-on and why we should use it in
our 3D modeling process. During 3D modeling,
creating a cable, rope or a wire is sometime become the
time killing process. Because geometry
add generated using curves and managing
a curve property may affect your designing part. Caple return. We can also call this an upgraded
version of a curve. Using it, we can quickly
create cable or a rope between two octet and utilize its
various other features. Download the add-on cable rater from the blender market.com. After I downloaded the zip file, open Blender application,
add-on section, install it. And also antibodies. In the add-on section, the cable knitted description
looked like this. It has a big theta of
least for customization. Do notate it anything. Keep it as it is. Only one thing you
should remember. That is a shortcut to open
cable later in the viewport, which is mentioned Shift plus c. This is the
default shortcut. The viewport. If you select any object and
press Shift plus c, then it will open
cable return menu. You can also edit
this default shortcut Shift Alt plus c. If you
find it long to praise. Then click on here. Let's set alt plus c. You can set any
button on your keyboard. Now, our new shortcut is
Alt plus c. By using it, we can enable cable
rater in the viewport. Viewport we have two
identical object. Let's try the first feature
of cable later add-on. Press our custom shortcut
for cable threat, that is ult plus C. Here,
add-on menu appear. And the first option is to
create a cable, click on it. Then a mini menu appears
related to creating cable. It showed that the
two points are required to create a
cable that is 0.1.2. In our example, let's
consider these 2 as a reference and this type
of connection is required. Now, move the mouse and
mark the 2 on this object. By clicking, right-click. It instantly show the result. In the perfect way of connecting cable
between the two points. After that, we are free to
edit as a normal curve. Edit mode. And also in the curve properties such as
bevel, twist, or resolution. But this add-on also made the edit and modification
part very simple. And handy. Plus c create the cable. Now we have the mini
Create Table menu. From this minimum value, we can edit the
current property. It suggests width,
tension, fill, cap, twitch type
or SATA profile. In this mini menu, first is the width. Using it, we can control the bevel profile to use
press and hold Shift. Then roll the mouse
middle button, which allow us to increase
or decrease its size. Second is the tension. Defined the strength of a cable more than number
straight the profile. Let's number the cable get loose effect plus
t and hold Shift. Now roll the middle
mouse button. The tension value can be managed from the
viewport itself. We can set the object
profile to the curve. Let's add some curved profile. Maybe flower shape. Then create a cable to set this flower
profile to the cable, press a and select the profile. Now our cable profile
has been changed. Let's decrease the size. And it's okay. If this mini menu disappear. Select the cable which
you want to edit. I'll plus c and select
the Edit cable. Then we have the Edit
menu in the viewport. Last, if you want to
change the position of the connection and
select the cable. Open edit cable menu. Here is the option
to move the point. Then keep the mouse
cursor close to the one-off wit's
end and press B. Then you are able to ship the end position of the
cable by moving the most. It will auto snap to the surface and able to connect in the
best diametrical correct way. There are some preset
profile which can be applied automatically without adding any object profiling. Create the cable and press B. It changes the
cable profile from single cable to double plane. Try cable will temperate. Keep pressing the
B for ten years. It is very handy and useful many times to insert the cable. And right now we are
using a custom shortcut, alt plus C. But cable operator can also be
active by pressing Shift a, which we use to add a object in the same menu at last,
cable rated link. By clicking on it,
the same function will appear on the screen. Physics simulation in cable. Let's understand. Normally we create a cable. It may be straight or having a certain loop due to
the tension value. But in the actual world,
gravity also affected. Which means if the cable length
is more in-between the 2, then by the physics gravity, it must be looped in such a downward direction,
creating a ship. In the cable return add-on. We held a small option
to simulate the cable. Let's see. Create a cable
between the two points. Not the appearance
is just a split, not actually believable to ice. To add a physics simulation, select the cable plus c. In this menu, you will
find the simulate cable. Click on it. Small
window will appear. In that. First is
to expand length. Or we can assume the
cable length also. Let's set it to 22nd is the
curve point multiplier. It's a vertex point on
the curve in the middle. We'll keep the
value to one only. Then press OK. And it showed the result
which is physically correct. If you notice that the
downside loop is more, then try to reduce the length and increase
the corner 0.23. Then press Okay. This week by trying
the different numbers, you can play around
with this simulation. The simulation menu, accustomed and frame option
is mentioned by anybody. We can choose our required frame where the simulation get. Pause for the best result. Click on it and enter
any frame value. Now press Okay. The results shown, the
result which appear, you can clearly see
the differences. Physics simulation in cable also work with other
objects interaction. Here is an example. We have two objects with the optical in-between,
create the cable. The results to tender
connection type between the two objects. But it is practically
not correct. Let's apply simulation
to the cable. It result good. But it is not. Taking middle object under consideration must be like this. Again, we will try to
simulate this time. Select capable and breath shift also select the
middle obstacle object. Now apply the simulation
result perfectly as accepted. Slight correction you
can do in edit mode. This function is
very much useful. Let's see another example. In this example, we
have a simple setup and we will create a cable
between these two points. Practically. Cable must
follow the spot and hang our, this object coming in contact. Plus c create a cable. Now we help to obstacle object. First, select the cable, then hold shift, and
select both the object. Again, I'll plus C.
Select Simulate cable, set the desired length point, and use a custom end frame. Finally, press, Okay. And here is the perfectly
simulated cable interacted with the object. Any correction needed to be
managed in the edit point. Now the second method
of creating a cable is draw using a mouse cursor, but it's alteplase C, select Draw cable option. Then mouse cursor to
the pencil shape desk. By holding the
left mouse button. Draw over the object. It will create and
cable instantly. Sometime it is not usable because the geometry
generated is not good. It is mixed up with each other. Do two mini vertexes. To solve the problem, we can use the 3D cursor as a
reference. Let's see. Select draw circle. In this mini menu, the last option, mood 3D
cursor to most is mentioned. And the shortcut
is number three. So three. Now 3D cursor set by
the mouse, cursor. Draw the cable or the object. This time result is better. Again for the new location, but as three and draw Kibera. Next option in draw
cable is Ben depth. You can find this
in mini menu and the shortcut is d. By default, pen depth is set to the surface, which means the cable is
generated using a trial is over the surface
only by pressing D, it changed to the cursor. Now in this queue, the 3D cursor is
inside the cube. If we draw the
circle and test D, it result that cable
generated from inside the 3D cursor
to the outer surface. Again, press D to set the pen dip to the surface,
brought the cable. This time tabled generated or the surface option in drug payable is curvature
shortcut if you by default, it is set to curvy, which means a cable generated
are curved in shape. But if you press U, then it changes to street. Now, if we draw cable, then it will be straight
in the geometry. Next method in creating cable is Create Mesh from
selected face. How it work, we have two
objects in a viewport. Select both of them, holding Shift, press, step, switch to edit mode. Now here, let's select
these two phases. Then I'll see and click on Create Mesh
from selected face. Option. Results showed that
a bunch of cable are created between the
selected face in a report. Using this option, we can select any two fifths and create
a group of cables. In this small menu, here is the option to
set the number of cable. By default, it is set to ten. By pressing shortcut ZI and rolling the
most middle button, you can change the number
of count by pressing Q. The result can be random. Nice. All functions
such as weight control, simulation, what the same
for a group of cable. Also. Next in the creating
the cable option, instead, create cable from. In edit mode, we have some edges selected and by extruding
the vertex, make any shape. Now select all plus
C. Click on Create. From. Its results show that the edges are converted
into bail profile, or we can say a cable. We can even select a single eight and convert it
into cable profiling. Last is the Creator capable
using a selected object? Previously, we have seen
the cable can be created in edit mode between two predicted
with here in object mode. If we select both
the object plus c and select Create
from selected object, the cable is generated. Both the endpoint are connected to both objects or digitally. Now by pressing D and
ruling most middle button, adjust the tension in the cable. You can press N to randomize
the tension effect. Here is the another example. We have an electric pole
like octet in the viewport. Now our aim is to create this type of hanging cable
connecting to the each pole. Let's add an empty. Please add a required position, then copy each empty
and cheap to eat a lot. Now go to Select, click on select
all type to empty. It will select all empty
in the viewport plus c and click on Create cable
from selected object. Continuous hanging cable is created connecting
to the IIT empty. Next in the Cuban
later add-on is the insulation and rope. The function is simple. When the group up cable is more, then we provide a
support at a 1plus, which may be referred
to insulation. In cable rater add-on, the two term mentioned,
insulate and row. Select the cable to be
insulated by holding Shift. Then plus C, click on insulin. Then holding the mouse, left-click or drop, a line. Portion of insulation. Insulation will get generated. Or that portion, if
you observe closely, it is the layer of a profile
on which solid modifier is applied in the modified sex git diff its thickness
to desired level. Let's try it again. Similarly, rope
option also work. Deselect the cables. Alu plus C. This time select row, mark the position and it created rounded cover
over the cable. Also we get edited
the thickness value. Next is the adding geometry. It is one of the best part
of the cable rated add-on. First is adding connector, in which a reference
object can be used as a connector point at the
both the end of a cable. To use this function. First create any
reference object, design it to any shape. Now make sure that
reference object applied to scale and rotation. The last check that the z-axis
facing upward direction. Both the cable and the optic axis position
in the same in all axes. Now, first select the
object and hold Shift. Select the cable.
Switch to edit mode. Now here select the board, the end point of
a gibbon add-on, and select Add connect. The results showed that
selected octet get snapped to the both the
endpoint of the cable. From the small menu, you can adjust the opposite
position and also scale. Second, add or edit segment. It is similar to
adding a connector, but has some extra function
feature to manage. Let's see how it works. In viewport. The same
reference object is used. Also. The object is applied to the
transformation scale and rotation axis facing upward. First select the object. Then holy chip select the cable. Open the add-on menu, click on Add or Edit segment. Result that the
reference object gets snap to the end of the cable. Now in small menu, first option is absurd the object by pressing D and rolling the
middle mouse button. Then object will
follow the cable path. If you want to duplicate the
same object to the parts, you can use at a
pressing and pressing. See in green the account opposite the value
of the array object, press S to manage it. Distance. The last one is convert. To make it simple and useful. The link that offense hold, Shift and select the gibbon, open add-on, click
on convert CO2. It result that cable geometry completely covered with
the selected octet. And we have option here
to control offset value. Also. The last section of the cable return
add-on is the helper. This downside of the adult menu, you will find it. Click on it. Here is the list
top the thumb of the useful terms which can be used with the
cable modification. First is add or remove Bezier
point at a mouse cursor. In edit mode, the cable has only three vertex with tender. If you want to add more
vertex, sub-divide it. But by using the add or remove busier point
at the most cursor, dragging cursor
created on the cable. Using it, we can add vertex at any point of the table without
stopping determined very. Next is the cut busier. In edit mode, select any vertex and click on busier curve. Result. A cable gets separated
from the selected point. In this way, it is useful to cut a cable in a different part. Last is the drop cable. It's the gravity-based function, w port cable, and below it
some obstacle are present. So select the cable
and apply drop cable. Results that the cable fall physically correct
in the position. In edit mode, adding
different vertex, the position can be defined
for the perfect view. Finally, it was the
short description of cable retail add-on. Next section by practicing
various other example, we will explore the more detail on this add-on and tried to make maximum utilization to enhance 3D modelling workflow.
18. Free Blender Addons: Welcome to another
lecture on adults. In this lecture, we will use some of the free
add-ons in blender, which which we can
use in modelling process to speed
up our workflow. This add-on, our basic
but very effective. Learning how to use an involving in 3D modeling process
is very handy. And trust me, you will fill the pro user when you
start practicing it more. First free add-on
is extra object. As we know by pressing shift. Here is the list of the object which we can add
to the viewport. And using it as a base object. We can model our
required design. But at some point, this default object
may not be enough. So we have one free add-on name, extra object, which is inbuilt. This add-on has
some extra object which are very useful
in 3D modeling. To act to go to
Edit Preferences. In add-on section type, extra octet. Click to enable. And in description. We can assess this add-on
from AD object section. First in the list is
the rock generator. Click on it and undefined shape generated
in the viewport. We can call as a rock
or a stone because Iraq orange tone do not have any specific shape or design. On the left side there
is a lock control menu. It contain various option to modify an OK chip and structure. Explaining each of
them will be Lindy. You must try manually adjusting the value to pick the
right toys for your thin. At the bottom of the menu, some preset are
available showing the types of products
such as ice. Sense don't reverse
tone asteroid, except the blender file
provided in the description showed a few possibility to generate different shape
of a stone or a drug, or you can download it. Next in extra object
is a single vertex. Shipped a mesh at a single vertex vertex will
be added to the 3D cursor. In edit mode, a single
vertex can be extruded into the edges and helpful to
create a profile for a design. Next is the round cube. It generate a parallel
square shape cube from the control menu at
just the ship. For a design. Also, some presets are available
may be useful some time. Here are some example possible shaped generated
using your own ship. Seo this file from the resource section
for future reference. Next is the tortoise object. It is again three type, super bright and dark, not editing the
various value you as the interesting shape
and design which may be useful in many
3D modeling process. Extra object. Next is met function object. Shift. Click on math function. Here for different
terms are mentioned. This all math function used
to generate many kinds of shapes which may be
difficult to model by itself. Inside the object. There are many more
presets available, explaining each of
them separately. We'll consume lots of time. Thus, check-out. Some of the example shown
in the viewport. Gifts in extra object add-on. Most useful is we can add two types of
kids in the viewport. First with a normal good, with the second is the
vertical warp gear. The sub menu, it all the
gear terminology present which we can use to modify
the required design. This is the best way to use the explicit in our
modelling process. Pipes in extra object setup pipe is present such as
T-shape turned, Y-shaped, cross-shaped,
and adults. These all are very useful object while working on pipe geometry. In a sub-menu of
very handy menu, I will able to
control a pipe tone. Audiometry suggests length. Angle and smoke test value. Diamonds in extra octet, these three type of
diamonds can be edited. Diamond German tweet
appears very complex. So it is good to use
this preset object and modify its geometry
from the control menu. Launched option in
this add-on is extra. These aren't
appalling extra octet that can be added
to the viewport. First is beam. It's like a bleed or an
octet used for construction. Yes, from this menu, we can modify its
geometry such as height, width, and thickness in pre-set different types
of beams available. Tests, D profile, C, type, I type, and adults. Next is the one factory. It's a pre-made tall
structure with Greeks, which appears rented audit
ancient architecture. The control menu, various
terms, value mentioned, which allow us to manage many
factors related to volume, such as while sight, block count,
thickness, and mortar. Also a build step. There can be thin
completely from vertical to radial curved shape. So please remember it because
this wall factory is very much useful to add a quick
structure to our scene. At launched, a few common
octet can be added. Set S, starts, parameter
structure, and honeycomb mesh. This object might be useful
in certain modelling process. Bolt factory is another
free add-on in blender that is used to add different
types of bolts and nuts. It is very useful
and easy to manage. Go to Edit Preferences in non-fiction
search bolt factory. Click on it to enable location
is at mesh, adding menu. In the viewport, shift. Click on the mesh. At last, you will find
a board selected. Then when default
bulb will be added to the viewport on the left
side of the viewport. At least top industrial
standard term mentioned, consists of all the
terminology of bolt, which we can easily control
to modify the bolt. Also, a decent list
top preset available, which show different types of
nuts and bolts can be used. Next free, I don't
in the blender it the loop tool to act to search, look tool in the periphery
and step Click to active. Its location described that the loop tool only be
used in the edit mode. In the viewport, select the Object tab to go
to the Edit mode. Press N on the right side. The edit mentioned here
is the loop tool menu. In loop and loop
tool mini option mentioned that yet
Bridge, Circle, curve, flattened and much
more in edit mode by the right Most click Loop tool appears on
the top of the menu. From here also, we can assess. First in the loop,
tool is breech, be all known the
function of the breach. Let's clap in edit mode to
object close to each other. Select Edge Loop holding
shift in both dogs and then right-click and select bridge from
the loop tool. It will create a connecting loop between the two
selected portion. Theme. It worked for other
objects such hip circle. Also in sub menu or twisting
moment can be also at this. Next in the loop tool is circle. The most important
and widely used. In edit mode. Here is the plane
mesh with subdivided. In their top, you
select the center four-fifths forming a square. Then press Control plus to gradually increase
the selection. Then right-click and select
circle from the loop tool. Selected portion will get
converted into circle geometry. Now, we can extrude it, scale it are inserted. In this way, it becomes
the fastest process to add circle
geometry on the mesh. And applying subdivision,
you can define your results. Let's try on different
objects. Same process. Select the fifth following
the square shape. Apply circle from the loop tool and it is perfectly
formed a circle geometry. Let's try in the inward sweep in the same plane in
vertex select mode. Select the vertex
forming the square chip, then apply circle, it result the circle
Geometry automation. Now we can extrude the circle edge loop
from the geometry. In Luke tool. Next is cuddle. It is most interesting part. Using it, you get enhance
your creative skill. Let's see how current
in the loop tool works. First is here, the plane. I will select any two vertex
and most likely away. Then right-click and select
the car from the loop tool. It result that the
curved portion created from the
selected vertex. Again, the same pattern. But now is to talk to vertex. I will select the three vertex. Firstly, both sides vertex, and then this middle one. Now apply the car. It is a debt. The curve is created, but in the inside way. It was the basic difference how to work in vertex select mode. Let's try on different object. Here is a cylindrical
ship with open end. From the top. Select
two vertices, move upward, right-click
and apply it. Result that a good God geometry created supporting
the cylindrical ship. Now, if you notice
that the curve is not smooth enough
on all sides, it has some sharp what
textbooks at the corner? To fix it, select the loop
by pressing Alt and mouse. Left-click. Then right-click
from, then press right-click and from the loop
tool, select, relax option. With debt all selected what test is not
equally distributed, forming a nearly smooth loop. Same, it's going to work
with the square cube. Also. Try the same process
and take the result. Next in the loop
to list flattened. In the Viewport.
Here is the plane with a zigzag pattern geometry. In edit mode, select all and right-click and select
flattened from the loop tool. It result that the geometric
get flat or a plane. This option simplified
the geometry and make the object flag. Let's plot on a
different object. Suggests beer, select
all, and apply flattened. This time. Spear get
flat like a circle. Same, it will work
for the cylinder. You can use this flattened tool to correct the geometry also. This is our previous example. Select the loop, right-click
and apply flattened. This time it generates a better result for
your observation. And T landscape, or we can call it another tool for landscape, which is used to generate a procedural landscape
in the viewport. Landscape or a mountain
land is a beak geometry, which does not have a
specific shape or size. To creating it manually. It's and really
time-consuming tasks. It is better to use np
landscape add-on for free, which provides a
number of preset of landscape which can be
easily use in our theme. In Adam section. Such landscape and active in the landscape can be
assessed in the object mode. From the right side
of the viewport. Create tab is mentioned. Click on it, then sell IT. Landscape. In a view port or default landscape
will be added, which appeared mountain
like structure. On the lip site of the viewport landscape
sub-menu present. Here are all the
controlled option available to redesign
or modify the result. Literally, there
are number of terms mentioned which cannot
be explained by worth toward you wish Try your
skill and take the result. If you are a lazy enough to try, then take the number of
landscape preset available, which can be easily
selected from the top menu. There are more than 50 combination
of landscape or label. I hope I've added some
opposite on the viewport. If you want to explore more
potential of this landscape, are down, go through one-by-one.
19. Free addon part 2: Mesh tool is another
plaintiff add-on. Mostly used. And I like it very much. It has got very few features, but very effective in
the adult section. Third, mesh tool and activity location describe
that work in edit mode, located at right-side-up
the viewport Exactly. Second to the loop
tool. Click on it. You will find the
fourth section. What text tool? First
tool and utility. First is the vertex tool. Again, the vertex tool
has a four functions. First is vertex jumper. In the view port, we
have a grid plan. Select all breath, then click on vertex a jumper
from the Mesh Tool. Results showed that
attained in the geometry to the camper pattern
left-hand side, a small sub menu present here. Adjusting the distance or the size of a
jumper can be done. If you untick remote option, we can displace the temporal
portion upward or downward. Let's see some practical
example. At SPR. Select all and apply
voltage jumper. Just the value until
you get a set pattern, which reminds us
like a golf ball. So by using the vertex temper I, geometrical sector
can be generated. More example, please tick. Finally, this is the possibility of a pattern which can be generated using the vertex
jumper on the mesh surface. Second in the mesh tool is H2O. If we select it in
the mesh and to offset the selected
edge, get separated. Next, select all and
select, Fill It, it, it will be get rounded corner desk
like vertex pebble. After that, again, select
all and click on floor plan. It will convert the mesh to
the wireframe like structure. But in a more extrude pattern. From the sub menu, you can change the frame
into two types. Launched intermeshed
tool is faiths tool. Select all and click on
fifth, insert, fill it. It will insert all the
faces with violet value. By adjusting a few
value in the sub menu, you can get a rounded shape. Also. We can apply a fifth insert fillet
to single-phase also. Next is multi extruder. Select randomly any faith, and click on multi X2. It excludes the selected
fifth equally height in sub menu at guessing
the variable value, then it will randomly
adjust the extrude level, height and also
rotation and scale. Next, either split and solidify. If I select 1 fifth and
click on Split, solidified, it result selected face get removed and also get solidified. In sub-menu. A thickness
value can be controlled and also has the option to keep the remote portion
and delete it. Getter object if the
free add-on in Blender used to scatter the
selected object or the surface optimization. Active it from the add-on menu. We have a plane and small q, which will be used to
scatter or the object. First, select the cube, then shift and select the plane. To apply the scattered. Press F3 and type Scatter
object. Click on it. Then hold the mouse cursor
and move or the surface. You will see that
a cube object gets scattered randomly
over the surface. Press Enter key to conform. Then press N on the right side. In the tool section. A scatter I don't will
appear. From here. You can manage its quantity, scale, and random output. Let's try again in a
different example. In a viewport, add a landscape. Using landscape add-on. Add some rocks. Holding shift. First, select the
rock, then landscape. Then press F3 and select
scattered object. Now, just move the mouse
cursor holding left-click over the landscape and press
Enter to confirm. This way, any object can be
scattered over the surface. Next three, I don't render, which is named as
add-on section, set, our activity it. To use add-on switch
to front view. Select the object,
press shortcut, Control, Shift plus x. Now if you click the
most rectangle created, which cut through
the main object, we may call it table type. Work best for a
front top side view. But if you randomly
set a object position and apply Carver add-on,
then maybe weird. By pressing the space button, a rectangle switch
to circle or a line. This add-on may be
useful sometimes. Next, in the free
add-on is align tool. One of the best huge
tool in 3D modelling. Just activate from
add-on section. It is located right side up the viewport in the atom section. Let's understand
it by an example. Here is a set topic. Men standing on the plane. All of them are placed
away from each other. We want them to be aligned
to the single straight line. Select all, press N,
open, align, add-on. In the first aligned location, turn, click on X. It result that all men get aligned to the y-axis
in a straight line. If you want that. All the main should be
aligned to the y-axis. Click on y. If I rotate one of the men and chain it's looking position. Now, others are looking straight and single men looking
to the other side. Now, we want that all
men should follow it. Same within Angular. The intellect
one-by-one, Atlantic, select our main
person in Align tool, rotation aligned term,
click on that axis. Results that their desktop, the person viewing
angle also matters too. The last one, person, tame it worked for the skill. If one of the object scale and
apply it aligned to scale, it will have the same
effect to the object.
20. 3d model Gun: First example is this smart
looking deadly military can design look
complicated to model, but we will simply use an
easy modeling process. And also with the help
of some of the add-ons. You start modeling an octet, first observed the design, then calculate how many parts used to complete this object. Because in actual
manufacturing process In the product is met separately
and then assembled. If you follow the same
technique, workflow become easy. First we will start
with this portion. It is cylindrical
in shape and has a rounded shape holds
in this sequence, we don't need to add
all holes one-by-one. We will just add though the
first portion then at a. Also note that it is
a symmetrical object. That means design on one side
is same to the other side. First step is to delete the heart section
of the cylinder. Second. Second, create a space for this holds by selecting
alternate age, press X and dissolve it. Now, the bottom side is flat. Select two phases. Using the Loop tool, click on, flattened the three phases, and use the mesh tool add-on, in which face tool option. Click on faith, insert, fill it. It will create a
rounded with insert. The sub-menu at just the
distance to make it more round. Then press X and
delete the fifth. And then the basic
structure is, okay, now, next step, let's apply a solidify modifier
to add a thickness. Then select all
these inner loop of the whole set a bevel bit. In object mode, add a bevel modifier and set
limit method to wait. In this way, only round it. Hold will get bewilder. To add more detail, add some extra edges and
most slightly outward. Then Control P, and then then apply mirror
and add it to five count. Our cylindrical
part of that gun, if really just slightly extrude from the both
side of a cylinder. Next, the second object
for a back support. It is very simple to
model and just add a circle curve at just some
handles to kill the ship. Then convert to mesh. In edit mode, press
F2, fill the portion, extrude the selected
face to add a thickness. Then place that the
right position. Select the eight, add the pebble bit and apply
bivalent modifier. Now, lower support of
a cylindrical object. It is again a simple design. Add a rectangle. In third, 1 eighth
using knife tool. Selected 23 count. Now select the last to move up. Also adjust the middle edge
to match that geometry. At the end position, it is Kurt chip. And the arch convert it to miss, extrude it to solid object. Reposition to the end part. Then apply Boolean. We have our curve shape
applied to the main object. Now to apply the detail, select the fifth,
press I to insert. Then from the menu, select the outer edge and
increase the depth. Not to add a cylindrical
hole. Added Qb. Add a bevel to a round ship. Pollution the rounded object in the middle, and
apply Boolean. Know this part is also done. Now for the small assembly, includes nut and bolt with
horizontal attachment. Added cute, just edit and
do slightly variation. Then Beverly bolt. Use bold factory
add-on. And a bolt. Select any suitable
bolt from the preset. Now to snap on the position. Go to snapping menu. Enable paste snap. And also enable aligned
to rotation, to target. And project in doodle element. Scale down, hold, control, and Moon nearer to the target. Second, add a cube for a horizontal attachment.
Basic shape. Then the vertex
from the Mesh Tool, apply bevel vertex. Then apply solidify. And it's done at bottom. Added net from olfactory
holding Control located to location. The next tip at a cylinder. Inside the first part. At some geometry tweet. Now, this part is circular
and has IV for gaps. Or it add a cylinder, reduced its height. Apply solidify. Then add a cube, scale it down, position
it to object diameter. Now we will apply to it. First select the cube, then set object
origin to 3D cursor. Click on add a modifier. Click on Object Offset, then, then add an
empty in the viewport. Object, upset such
empty and select it. Eric count to four. Also set X, Y, and Z value to 0. Then select the empty
and rotate tool z-axis. The array object will be
pleased circular on the object. Now apply at it. Then select both objects
and apply Boolean. It's done. Now just know that partition
it to slight location. Up till now, we are
going step-by-step. Result is looking good. Next is the main part which combined,
joined the assembly. The general design
is looked like this, which can be easily
modeled using a cube. The cube. Scale it to
match the geometry. Then add some extra q. Just it position such a way that it generates our
required shape or a design. Then apply Boolean at
last to fill the shape. Select the edges,
control B2, bevel. Repeat the Bible were required. Now our shape is done. Now. We will model the handle, grip, select the corner edges, breath, ship, tea
to separate it. In edit mode. Select the vertex and extrude it to
do the handle ship. F2, fill the fifth
and extrude it. For this grip portion shape. Select this fifth inserted
Shift D to duplicate. In edit mode. Just the vertex. Select all. And Bevel vertex. Then for the grip pattern, add a grid plan. Sub-divide from faith
section for the fifth, and press I to insert the fifth. Now in a control menu at
just the offset value. Then pattern is done. Bringing the pattern in
front of the handle. Then extrude the rounded profile that it passes through
the grip pattern. Select both the Bowl
Tool, select Intersect. Just the Boole object. Retain exact thickness. Done. Place the grip to
the handle. At launched. The rest of a detailing does
not require any explanation. A few more detailing required. Philic, the upper loop, Shift D to copy in edit mode, press speeds and separate
it by loose parts. Its position and site
to match the Geometry. Select the extrude and
tried to do a curved shape. Then select the vertex
and the vertex. From the front view, delete the hub portion, select all and medullary. Extrude the n fifth. Then solidify the object and
apply the mirror modifier. Last at a bolt from
the bolt factory. I don't give this
snapping setting on. Now select the bolt. Hold the control on the stepping
and munoz, the location. And scale down the object. Theme. Theme do for the
middle portion also. At last, Burwell,
this rounded edge. Low polygon is getting built. Still it looks near
to the perfect. The next part added
cute basic shape. Then add edge loop
at the bottom, scale it, and apply bevel. Theme for the top portion. At the interloop,
select 1 eighth and move inward slightly. Then for this cylindrical
geometrical covering over the surface, ATC curve, ship. Then in the geometry tab, increase the round
profile depth, depth, its location,
touching the surface. And the curve for a
vertical portion, test moon near to the top. And it's okay. Now, leave it. The rest of the detail we will add at the end of
the full design. For a top base portion
added Qb, skeleton. Method geometry location,
selected two edges, controlled P beveled it. Don't add much
edges. Keep it low. Then select the bottom two
vertex, bevel it slightly. Then the trigger
assembly is simple. Just by adding a cube, divided it by edge loops. Apply bevel. Then
same for the trigger. You the basic shape using
the loop at this moment, bear will eat where required. Then our second form, located to right
position, it's done. Next important part of
the gun is maximum width. You can see it is slightly
curved shape pattern. So first AD curve. In edit mode, shape it like matching geometry
to our example. Then added q in object property, enable axis to check that
the z axis of the object facing upward and try to make certain geometry
shown in example. By adding loop cut,
select alternate 5th. Control F. Click on
Extrude in doodle fifth. Now we will use
cable rater add-on. The shortcut is Shift plus
plus C. Select the object, hold Shift, and
select the curve. Then Shift plus
Alt plus C. Here, gabled later add-on appeared. Select Convert curve
to Mitch cable. It will instantly add our
custom geometry to curved path, then convert it to miss. Scale it or resize it to fit. Then the small detail work and apply Shade
Smooth and bevel. If we look at the
practically at this portion, it is a separate part. For that, we need to create
the cavity in-between. Add a cube and in a bull tool, theta, a Boolean
type two different. Now select the wire-frame
object and in edit mode, edit it to form the
required ship board tool. We'll show the live effect
on the mean object. Once conform applied. No space between the
object is empty. We need to fill it at a duplicate copy
of the same object. Make sure to also duplicate the object and keep it as light. Select both, and apply Boolean. Result, a result
of that portion. Get premade, then get back the main object
at this location. In this way, we managed
to set required geometry. Atlanta, select the
sum of the fifth on the top from the loop tool. Flattened. Now, most complicated
and also be the easy part of the gun
battle outer portion. It has fins and holds. It can be easily model
using the middle. And let's start at a plane. And scale or with ice. Just extrude the math the
example to the geometry. Then apply some thickness
using solidify. Add some details by loop cut. And the fifth, extrude it. For this whole, we need
a separate object. Add a cylinder, give
it the desired shape. Then place at the
right position. Select both and apply Boolean. It's done. Next, we need to meter it empty. Then select the object, open mirror modifier,
offset object, empty. Click on it. In edit mode, select all and adjust the position to match
the immediate object. Then apply meter
to require x is. Now select the object and apply add a modifier
to required count. After that, the same process of emitter to
downward direction. And finally it is ready. One thing we forget, there is also hold in front. Add a fill in the three fates
and scale it to horizontal. That it pass through the object. And position it. Then apply at a two cylinder and set it suitable
value of opposite. Apply Edit, select both objects and apply Boolean. It's done. Now, let's add it to
this flat portion. Select the edges. X2, dissolve it. Then add edge loops. Select alternate
fifth, and extrude it. Part of this gun is better. It's a cylindrical shape
object with a minimum details. Part of the battle is Zell. According to common
terminologies. Again, it is in a three-part. First is not tight at it
from the bolt factory, can resize it and
put it to location. Then middle one is
connected at a cylinder. Insert a couple of edge loops, Extrude and Bevel it. Last end of him, muzzle is a cylindrical
object with the oval shaped holes around it. Add a cylinder, delete
both of the fifth. Apply, solidify. Then add a new slender, give it an ownership position in position it to 4-part
around the cylinder. And apply Boolean. Then add some more detail, Shade smooth, and it's done. Next part is forward
assistant assembly. It is a circular
part which overlap the adult surface at a cylinder. Slightly rotate it in
such a way that debt, some portion of a cylinder
undergoes third geometry. Forming a conical
shape from outside. Then apply Boolean so that
only cut portion remain. Then shade smooth to
the board the surface. It looks good, but not the
perfect edges appear outside. We can correct this issue
by following this step. Select the cylinder. In edit mode, select outer edge loop and
scale it slightly. Then add three loop cut and
open vertex grouped menu. Here. Create vertex group, name it. Now see it carefully. Select the outer loop. Then look at the
vertex group menu. Here is the weight
is mentioned one. Then click it to assign. Then select the next loop. Wait to 0.8, and assign. Select another
loop, 0.6, assign. Then select another loop, 0.4, and assign at last, select the loop 0.2 and assign. Now we have successfully created the vertex group for
our scaled portion. Now select the cylinder in object mode at a
shrink-wrap modifier. Here, select target object. Then select the recently
created vertex group. But they're still determined
to be not appearing clean. It is visible. Now to fix it. Added data transfer, I
don't hear also theme, selected source,
object, vertex group. Then click on faith corner. And from mapping, choose
nearest fifth, enter politics. At lunch. Go to the viewport,
shading menu. Outline. It result seamless
object combination, looking better than first. In this way, using this tip, you can fix the shading issue. Now make remaining
cylindrical part and insert it into assembly. Now the, some of the details
are still remaining. Let's see this dashed goer. It is very simple. Test added Qb, delete some
fifth, added, solidified, and recites too small one, and then place at the position, duplicate it, apply
shared and Beverly to it. And that's it. Then the gap between these two
portion, again, that cube delete some fifth, solidified and apply balloon. In this field, this
portion is the symbol for our example shown
in the German tree. Last is the top portion, which is easy to model. It does not need any
detailed explanation. Just follow the
steps and continue. Upper complete. Duplicate the
same assembly to the front. Finally, our low poly rifle
is 3D width materials. It may not be perfect, but if you follow the process, you can create much
better than this. Overall conclusion is that a constant adopt the new
technique of modelling to enhance workflow and
explore creativity level. You can download this
model blend file from the resource section.
21. 3d model Mic desgin: Next is the condenser mike. Here is an image. Show the example with
reference to it. We will start 3D modeling. The image showed that the mic is combination of various part. Most of the part
appear easy to model. So less typed object which hold the whole
assembly is that clamp. It is such type of protector
which can be easily built using subdivision
surface modifier. Add a cube. Just kill a basic shape by
adding some loop cuts. Then select all and add a
subdivision surface modifier. Viewport value to three. Now the work begins. After adding a modifier, the geometric good think. Then try to add
some edge loop and addressed so that you can
retain your basic shape. Then the next tip is all about
your skill and practice. Because working on hard surface modeling might be difficult. Adding or removing
any male adult. Big difference in its geometry. Just keep the loop cut minimum. Try to get the desired
result close enough. One thing you must maintain that should not be
overlap with each other. It is difficult to explain each step by step in
hard surface modeling. Just absorb and try
manually to get used to it. Next, add a cylinder on top, do a shape, then
select E2 and skill. Added three loop cut. Then in vertex group, add a new vertex group, give it a name. Select the outer edge loop assigned to the vertex
groups by Wait 1. Second edge loop,
set a bit to 0.8 and assign to the same vertex group again with a decreasing order. Select third loop with 0.6. Assign. Next, next
loop, 0.4, and assign. Now for a seamless joining
between two parts, select Top Object and
shrink wrap modifier. Here, select the base object and in vertex group click
on recently added. Good. Also shade smooth to the board. Still not done. Add another data
transfer add-on. Select the same object
and vertex group. Click on faith corner data. In mapping, click on near, nearest faith in politics. Also in the viewport shading
menu and click Outline. Then adjust it, scale it result. Seamless object joining. Let's complete the
clamp assembly. Add a bolt from the bolt
factory add-on type to counter, increase the length of a threat. Now select the down
portion, diluted. Select the loop, extrude it
to extend the shop length. Then create a hole
using Boolean, cylinder, scale it and
insert in the whole. Finally added spear Union on the both the site
and also shared smooth. Next in the clamp assembly
is this small nut. It has a thread and a flower
shape like structure. First. First create a
hole using a Boolean. Then add a bolt
from the add-on and reduce its upper part so that it completely
get eliminated. Then from the extra curve, add a flower shape curve. Here, do this following setting
to get the perfect shape. Then in object mode, convert it to miss, select all and extrude
it to the depth. Then Shade Smooth and move it
to right location property. Now, the top portion
of the GLAM, its geometry is simple plane, having some variation in edges. Also with nut and
bolt attachment. Last cylindrical
portion at water. Add a cylinder and explain
just the plain sight, and then start wing
the edges to get the matching geometry
like shown in example. Also by selecting vertex, we can precisely designed it. Add the edges where required
and proper bend portion. After complete the basic shape. Apply solidify modifier
for thickness. Then be well the corner
edges according to design. Next, add a ball to this table type of
bolt from the preset. Increase the length operation, increase the shock Clint, so that it covered the required connecting
area, position and scale. Then position it. After that, the small gap in the geometry
to attach this spring. We will create by Boolean. So add a cube in edit mode, shape of a cut. Then apply boolean differences. Now select the plane, duplicate it, and meter
to opposite site. Finally, add in net, position it to both the bolt. To complete the Assembly. First select the plane and bold, then Control J to join. At-large, select the
top assembly, scale it, or resize it to match
tangentially to each other so that the edges will not
appear and Control J to join. In this way, this complete set of bottom has been created. Next part is the handle. It is nothing but
an vertical cube which are placed
parallel to each other. Then the important
part is the spring, which we can create
using screw modifier. First, add a circle. Just keep slightly away
from the 3D cursor. Then select it and add
screw. What do you fire? It's not working. Let's add an empty,
scale it down. Modifier, axis, object
tab, select Empty. Now it's appeared like a spring. Then increase the
iteration value, which helps to increase the
length of a spring extension. After setting a suitable length, position it to location. Now, we need to connect the spring clamp assembly
for that circle curve. Matching Down profile depth. Then convert the spring to mesh. Also convert the
circle curve to mesh. Then till it some portion
of the circle objet. In spring also select
Edge Loop press Control plus to include the selection
and delete some portion. Now match the geometry. Set that both the object
overlap with each other. And selecting both conforming
matching apply union. In this way, connecting
portion made. Now repeat the same process for the top and duplicate the
spring to the other side. Finally, use the cylinder. Make a holding sharp between
two parallel handled. Now the joining
portion for a handle, it is a simple just by adding plane and adjusting
couple of edges. You will get a design. Then solidify for the thickness and beveled edges where the quiet just copy the
same parallel handle from the bottom upwards, then place
horizontally inclined. Then the same at some
bolt and nut from the ball factory and place
that day, right location. Now for the spring connection, copy the same shop
previously used, placed at the handle at the top. Forest spring. We will not copy the same spring because
in the spring is in tension and tread geometry for this spring with empty
and screw modifier. Place that location. Now, look at the
screw or the fire. Two important option,
screw and iteration. Iteration value will
increase the length. Screw value will stretch
the spring with attention. So addicting the both opposite, we will select the best
results for our model. After confirming, just duplicate it on to the opposite side. This part is the Nope, too tight the handle. Easy to model, just
adjusting the few edges. You will get a design. Also apply bevel to required
edges and shade smooth. Triangular connecting
assembly for the handle. It just like the
previously to section, it created a simple plain. Just the vertex into triangle, solidified at Pebble
two edges then copy the nut and bolt and located
to all three points. Next is this portion which support the main Mike assembly. This sharp, it's still
divided into four parts. For a bit supporting
shopped at cylinder. In edit mode. Select for vertical fifth. Sit at the flattened
from the loop tool. Add a loop, cut at
the board the end. Then select the alternate
phase and extrude it. Then bevel the edges of the extruded
portion by Control B. After that, select
the vertical phase and delete it to form a gap. Then position it to
support a family. After that, rotating
shopped at a cylinder. Added loop cut at the top
and small at the bottom. Then select the face. Control F. Click on Extrude
faith alone, normal. Shade Smooth. For a
grip portion. Cylinder. Select bottom edge loop. Scale it slightly. Then the face edge loop. Go to Select menu. Click on checker B, select. Then Control F. Click on X2, face along normally. Bevel it. Select the top face,
extrude to upside. Then add a cube, please at the middle and apply
Boolean to create a gap. This portion also
how it tightening? Nope. Add a cylinder,
select three-fifths. Set as a flattened, extrude it. Same for the opposite side. Also, apply Beverly to the
edges and shade smooth. Next step for him,
Mike older assembly. Add a cube, scale it
to fit in the gap. Loop, cut and extrude it. Again, add a loop
cut to the front. Select alternate
fifth, and extrude it. At last, bevel all the edges. For a circular thing around
the mic, added cylinder. Skill down and position it to
location. Select the fifth. Deleted and applied solidify. Then add a loop
cut in the middle. Select it, Control P to separate two loop
equally distance. Select both the
corner of fifth loop, extrude it slightly
and apply a bill to full object assembly. Next, it does small
support objects, which is easy to model,
doesn't need explanation. Just to make it using a plane
and duplicate in four-part, then place it to inner
end of the ring. Now, the main important
part is the mic. It's designed is cylindrical with top metallic net portion. Let's start at a cylinder, scale it to meeting ship. Then from the bottom, select face, extrude it twice. Select the edge loop,
slightly scale inward. Select Loop, Control P
to bevel with two loop. Select the face loop, scale insight that a gap
appear between both. Select both the edges, right-click and mark as a sharp. Then shared school. Bottom side is a metallic
cable connector, cylinder and Beverly to group. Then the top portion is why CDC, which is made open net pattern, add a cube, scale
it to basic shape. Then create the inward gap
to fit the above portion. By inserting they'll face. Then select the cube. At subdivision surface modifier. Now start queuing it required shape by adding some
edge loop and adjusting. Result may be different
if you practice more. Because working on
hard surface modeling, maybe confusing. Here is our object
getting desired shape. I think it is. Okay. Now after conform, make it duplicate of the
object and keep a society. Then now for the net pattern, use wireframe modifier, which convert the
mesh to the wire. Width refers to the subdivision. As we use surface modifier. Here is the sufficient
to form the net. Then wireframe modifier. Adjust the value
of the thickness. Tried to keep low until Ms
satisfy with the pattern. It's okay, done. And apply modifier. Now, bringing back
there duplicate, object to the middle. Scale it small inside the net. And after applying material, it is closely looking. It's closely look. Perfect. Next part is this
vertical plane, which hold the threat
attached to the mic. Just add a plane, extrude the edges
and solidified. Then duplicate it to four count and place
it around the mike. Now, design some surrounding
part of the mic. First is the clip, which used to hold
the mike family. And it is attached to
the circular portion. Addict curve. At test. It handled vertex point tied
to use that C type of ship. Board, the end of the curve inserted in this
whole type assembly. Then around thickness
and copy the same code. Adult site also. Now next is the thread
pattern of wire, which is tied between this hook in such a way
that it format W pattern. Add a car, just
give it a V-shape. That three vertex point get
linked to the three hook. Then bewilder round profile. Also duplicate the same to the remaining
hooked around the mic. Also duplicated the all
three thread wire to downside of complete our
mic assembly design. Let's start with the
condenser holding a family. First is the clamp. Design is like this. The plane. Just the editor extrude it and make
it simple design. Apply, solidify and
barrel to a deaf. Then at cylinder, scale and
position it to an angle. And apply Boolean. Now here is the screw nut, which is similar to the
previously used at bottom. Copy it and place it
at this location. Now, for the condenser at a
circle, extrude the edges. Apply, solidify, then select three-fifths
and Theta as a flattened. Same applies for interfaces. Select outer flat fifth, move it outward slightly. Then, then bevel the required
edges and shared smooth. For the condenser net portion. Add a circle. He decides to fit into the ring. Then press F3 and search
grid fill selected. It will add a grid
pattern fifth in circle. Also apply subdivision to the certain number so that
geometric become dense. Then apply wireframe modifier and sip thickness to minimum. After confirmation, copy the wireframe to slightly
distant inside the ring. And then now this cable connected to
handle and condenser. We will use cabled rate an
add-on to create a cable. Shortcut to cable, read
or add-on is shipped plus Alt plus C. Click
to create cable. Then select two-point. Curve, will get added. Don't set any
thickness or round. Then add a cylinder, scale it to small size. Extrude third two phase q. Then select curve, shift. Select object. Again, let's ship plus c. Now click on
Convert mesh to cable. This result will get displaced
by the selected object, which follow the curve. In this way, we get a nice grip pattern cable or
the condenser and handle. Nonetheless, is the USB cable. Usb connected, it's
very easy to design, so I will not explain the steps. Just follow the sequence. Now, the last object in this mic assembly is the
cable connecting between these two USB connector shipped plus Alt plus C To open
cable, return add-on. Click on Create cable. Select two points. First, Mike. And they can, USB connector. Curve will be created
between two points. Now, we will adjust the
connecting point location. Select the cable,
ship plus Alt plus C. Open cabled. Later,
I don't click on Edit cable to move
the connecting point. D. Move the cursor to the end
0 p. Select the endpoint. Now, drag the mouse
cursor over the surface. It will automatically
snap to the location. Same for the other end. Also. After connecting cable. At Down profile, be able to eat gibbon
is added successfully, but it is not looking
practically perfect. At simulation from the
cable rater add-on. Select the cable
shift. Let's see. Click on simulate cable. Small window will appear that
set length to any value and use a custom frame to
keep low value and press. Okay. Now it will follow the
gravity method a look, appear to the cable. Also make any
correction if needed. In this way. Finally,
we helped create it full setup of Mike. These are the some of the
output after the render. I hope you will practice it and make better than this example. Also provided a blend
piled for this example, which can be downloaded
from the resources section.
22. 3D model Drone : Brown in this modern era is the popular
gadget in the world are used by the professional and also treated as a dollar. Today, we will try to design
such a drone in Blender. Here is an example showing
the full component of prune. Let's start with the
top cover up the drone. Design from the top view
look something like this. First, add a cube, scale it to rectangle and
keep thickness too low. In edit mode at some loop cut. Then adjust the edit settings that are basic geometry
match to the top view. After confirm. Now set a
subdivision surface modifier. The first tip is to add
edge loop and Control P to bevel and rolled the most so that it split
into two parts. The most in such
a way that edits get closer to the
top edge loops, which will look like
sharp pencil gardener. Whenever we apply subdivision
modifier to any object, the actual shape get shrink. To regain it shape. Adding a loop cut
and bevel edges into two part will result in the object getting
back to the ship. Then we can do further
adjustment. Same here. In our drone model, try to gain its original
design by adding loops. After its basic shape appears. Let's move this back
portion, it slightly upward. Now our design almost matches to the example we have
taken for a design. Finally, addressing
few more edges to get the sharp pivot effect and scale it to decrease
the thickness. We are done with our first part. Whenever we take any image
as an example to model, sometimes we do not
have enough detail to design in such condition. Imagination and
drawing is necessary. Now the next part is the bottom portion for a
battery and other ethnicity. This drawings showed that the bottom view may look
like this by adding a cube. Let's try to match same process scale to
match dimension ratio. By adding edge loops and
adjusting it QA, basic shape. Once it's looked near to the perfect ad
subdivision modifier. Again, it loop and edges it
to retain the original shape. After that, selecting
the required faith and edits, you design. Like an example shown. Working on hard surface modeling
is difficult to explain. You must try the live
who practice on it. Once the design look complete, then stop the portion
holes and gaps remaining. It is the battery
location portion. For this, add a cube shapes which form the battery or
a T-shaped like structure. Then select the edges and bevel it slightly
for a smooth effect. Select the object. Then from the Bowl Tool slides. Now only this portion will remain moving it
slightly outward. And then now for the fan assembly connecting
gap on both sides. Use a cube, scale
it to rectangle, then provide more detail
and beveled edges. Duplicate and mirror
it to other side. Also. Select both objects and shift select the main
object from the bull tool, select the defensive
and apply Boolean. At large. Fins gap
at a downside. Add a cube, set a rectangle, bevel the edges to
the countertop six, Select All, and apply Boolean. Using the simple step, our second object of a drone created in the main body. The last portion is almost done. But front area
appears complicated. Because with the image example, we're not getting the
actual design properly. So let's try to
draw then design. I hope created this
front view line diagram. But assuming it, we will
start creating attitude. Scale it to rectangle. Adding a loop cut geometry
to the top portion. After confirming shape. Apply subdivision modifier. Try to regain the basic shape. As shown in the image. This area is for the light
which is slightly down. It loop and select it
and move downward. Yes, working on hard
surface may be difficult, but once you get used to it, then it will be easy to manage. Now create a gap for a light. Do it hexagonal shape to cube, then insert it two main
object on the site. And apply Boolean. Now for the net shape in front. Shift from the extra object
add-on, click on extra. Here you will find
honeycomb geometry. Selected. This shape
honeycomb structure will be used as a
net to our object. Submenu adjusts its diameter
and length or width. Then in read mode, extrude it so that it can be inserted into the main object. Then select both
from the Bowl Tool, click on slice. It result. Honeycomb geometry will get
perfectly aligned and cut to the main object, moves
slightly outward. And it's done. Now for the bottom
part, it is simple. Just add a cube shape and
apply subdivision modifier. Now for the camera assembly,
one thing we forget, first we need to
add some details, make this solid layer, then duplicate it,
and select both. From the Bowl Tool. Click on slice, move
it slightly outward. What I'm also some details remaining create
using Boolean tool. It doesn't need explanation. For a camera first AT support, objects, duplicate
on both sides. Then adding queue using
subdivision modifier. We can create a
solid camera module. Then for the lens at a spear
and play satiety center. Next is the main part of the tone is the fan
blade assembly. From the example,
assuming some details, I hope created a line diagram. Observing it, we will
start making it. First tip is to give you
the basic shape as shown integral by edge loop
and Bevel the corner. It's shaped, get generated. Now for the motor part, dust add a cylinder, insert to the handout, extrude the fifth scale down to gild the
motor like geometry. Then for the fan holder, create a rectangle shape
and beveled corner. Duplicate upward slightly. Now for the fan blade, add a plane, scale down
to the rectangle shape. And by a2 and small adjustment easily
the basic shape created. Now selecting the older
vertex from the vertex tool, bevel the vertex skewed a
nice smooth shape later. Applying five cute
little thickness. After confirm, duplicate the
blade to the opposite side. Launched some more detail, like holes and others with
already self-explanatory. You can do it yourself
and apply it. You can even add own
imagination to add a detail. To go the extra depth
to the modelling. After all the work complete, test copy, copy the fan, full assembly, duplicate, then locate to all
three remaining points. In this way, we have created the slow polytropon model
using an image example. Yes, it may be not
perfect because it does take practice session
for me and student also. I hope you will try it and
create much better output. So see you in the next
lecture with another example.
 SUNNY K., Blender 3D animation