Transcripts
1. Introduction: Hello, and welcome to this
advanced watercolor class. Today, we're going
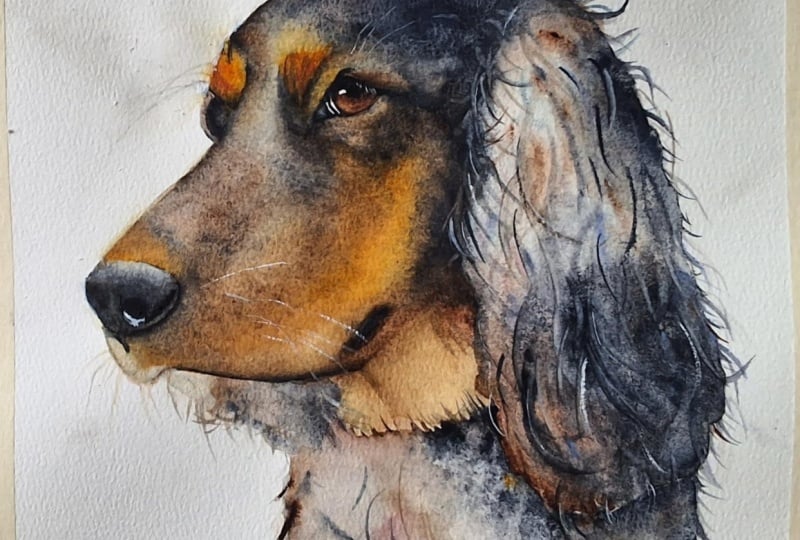
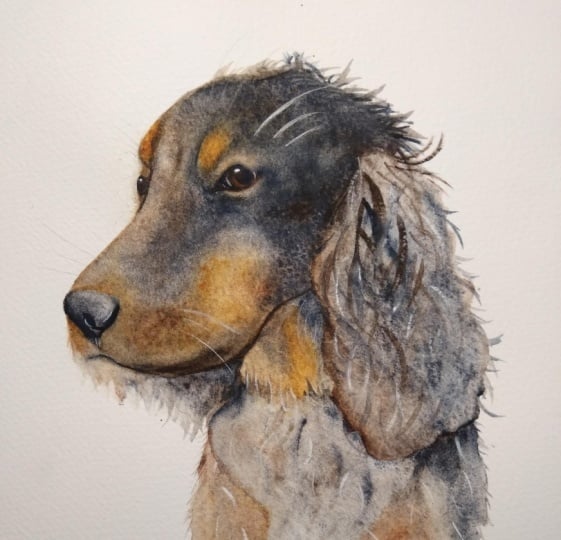
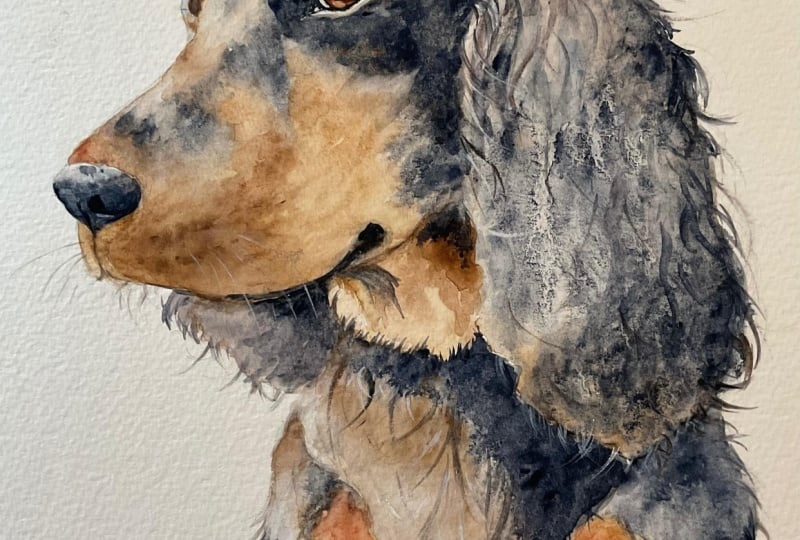
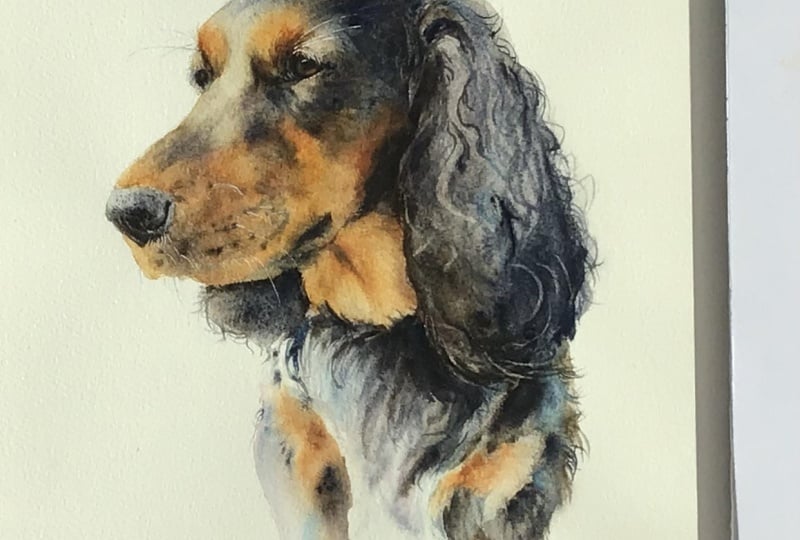
to be painting my beautiful black and
tan dog called Twig. Get ready. This is
a full on class. And if you find painting black
dogs in watercolor tricky, then I'm going to
show you how to tackle this scary subject. As always, this is
filmed in real time, featuring my free flow
watercolor technique, and there's no black
paint involved. I'm Jane Davis. I live, paint, teach, and walk my lovely spaniels in the beautiful South Downs
National Park in England. Over the last 20 years, I've taught myself the free flow technique that
you see today. Not having been to art school, finding my own way has been
fun and sometimes daunting, but has allowed me to
develop my own style. This has led me to teach others either on a
one to one basis or as part of a group in a wonderful studio in the
heart of the South Downs. I also run a successful
art business where two days are never the same from the thrill
of exhibiting to painting pet and
wildlife commissions in my own home studio. In all my classes, you will follow
along in real time, where I can guide you
to keeping your work loose and fresh
without overfussing. If you're just starting out, my three beginner classes
will guide you with your first masterpiece
painted in only 15 minutes. Then you'll find dozens
of my master classes available covering a wide
range of beautiful subjects. In each one, I share the techniques I use in
my own professional work. We'll have a lot
of fun together, and you'll gain the
understanding and confidence to
incorporate everything you learn into your own work. You'll be amazed at how
easy watercolor can be. I provided you with a lovely reference photo of twig and a
downloadable template. The template will make drawing stress set free so you can
just enjoy the painting. I will show you how to
be bold and loose at the beginning to create that lovely sense of
ease we all love to see. We will be painting
multiple layers with many different colours to create that all important depth needed on a black
subject in watercolor. I'll then show you how to paint that critical eye so it sits naturally to give
character and life. We will also look at the importance of taking
your time at the end. And, yes, there is
quite a lot of fiddling and pondering to get those
final details right. If you'd like to learn
more about me or my work, then please pop over
to my website at Jan Davis watercolors.co dot k. This can be found
on my profile page, along with links to my
Instagram and Facebook pages. I love to share my
art and adventures, especially on stories
with many ideas, works in progress, and
tales of judio life. I really hope you will share all your paintings on the
projects and resources pages. I love seeing your masterpieces. And don't forget
I'm here to help if you get stuck or
have any questions. I want you to experience
that buzz of painting in this liberating wet on wet loose style. So
come and join me.
2. Twig: Well, I thought, as you're
going to be painting twig, it would be quite fun for you to know a little
bit about her. Twig is a 5-year-old
working cocker spaniel. And like all spaniels, she's very loving and
also very energetic. She lives with her 12-year-old
pack mate Scarlet, who you may recognize as being the face of Jane Davis
watercolors in the past. Twig had traveled quite
a lot for her young age, spending three months
with us in Spain. And in 2025, she also
traveled down to southern Italy when I hosted their art retreat with
the lovelostokes. She's also had holidays in France and visited the
Highlands of Scotland. I guess Twigs claim to fame would be her great
scent work abilities. We went to regular classes and even completed
her level one, but she found the
classroom experience just a bit stressful. But we still love to do some
practice in the garden, and it helps to engage
that brain of hers. But generally, her days are
spent on lovely long walks on the South Downs
and lazing around the house and sometimes
helping with filming.
3. Materials: So let me run through
all the materials you're going to need to paint our
lovely cocker spaniel tweet. So I'm going to start
with the paints. Now, there's a few extra
that I've grabbed, as I've gone through the class. So when you start, you'll
see these two are missing, but I think I go on
and explain why. I say, this class is a
little bit more free flow than the normal one, as I've really wanted
to paint this more as I would paint it and how
the process of that. So it's slightly different. Right. So let me run through them that I actually did
use for most of the class. All Daniel Smith as normal, and I've got Vandyke brown, transparent brown oxide, Tiger's eye genuine,
epis lazary genuine. Quack dome deep gold. So like, genuine. Of course. How could I not? Luna violet, gothte, lavender, and potters pink, and a tiny little bit of white gouase which is
just for the highlights. So only need only use that
very, very sparingly. Now, the paper is an Italian
brand, magnaniO magnani. I'm probably pronouncing that horrendously if you're
Italian, so apologies. But it's a lovely paper, and I will put a link
on the projects and resources page where you'll
find all these materials, so no need to try
and memorize them. And it's also been stretched on a perfect paper stretcher. Again, I'll pop the
link on there for you. As normal pot of water, I've got some salt. I did use it, but
it hasn't really worked on this just because of the granulating
paints, I think, but maybe if you were using
something slightly different, it might help, but not by
no means an essential. I got my little trusty heart, which just helps tip the paper. It's about an inch high if you haven't come across
my lovely heart. I have kitchen older paper
towel, a magic sponge. Now, I only really use this
for tidying little spots up, but I do mention it, so
I've popped that on there. A pencil, any old pencil. And I have got two traveling Torinto Brushes,
which are lovely. And again, I'll put the link
in those. They're lovely. What else have I
got on my table? Hair dryer off camera again, just for drying in between
layers right at the very end. So you don't
necessarily need that. I would strongly
suggest having an iPad or something to put the
reference photo on, which, again, is all
on the projects and resources pages, that
would be really helpful. And yes, there will be
a template on there. However, you find
the best way to get this image onto
your piece of paper. So don't be afraid to use that as it's quite important
to get the shape right. And I think that's it. But I know I'm going to have a few
questions about the colors. As you can see, she is predominantly a black
dog with tan markings. So I've used a good
array of colors, but I haven't
actually used black. So if you don't have
these exact colors, find some good substitutes. There will be a little
color swatch there again on the projects
and resources pages. So you can have a little
gauge to see what I've got. The gold I only
use a little bit. The pot is pink.
It's just I like it. I like the little paper pink, although it's very, very subtle. I don't use some of the
blues, particularly, but it's like genuine, really, and the Vandyke I use
mainly, and the gothte. So they would be
the three main ones to try and marry up as
closely as you can. So yes, let's go
and sketch her out, and you can start painting her.
4. Sketching Out: So before we take the plunge
and start adding some color, we obviously need the
sketching out part. So it's super important
to get this sketch right because we're
actually dealing with a particular dog
rather than a generic, say, horse or what
other things we've done penguins or puffins. You know, we can
be a little bit, um what should I say, liberal with the sketch. It doesn't matter so much that that penguin actually looks
like that particular penguin. But obviously, we're
painting twig, and twig needs to
look like twig, so take your time with this one. As ever, there's that
reference photo on the projects and resources
pages and a template. And I know there's
many ways that you can get an image
onto the paper, but if you're unsure of
doing this freehand, and I haven't done this
freehand hands up, I rarely do a freehand sketch. I I either trace it out or actually have
a projector these days, so I project the image
onto my piece of paper. That way, I know I've
got the image right. So when I start painting, I can just be a
bit more freer and looser because I'm not worrying that if I put this brush here, maybe I can sort
of correct it by doing a certain movement
with a brush or something. I know what I've got
down is dead right. So yeah, super critical. I won't go all over the
parts, particularly, 'cause if you can get this if you can get this sketch down right, then you're there. Just take your time. No
hurry at this point. And I always, always, without fail, will sketch
it out and then step away. And it might only be an hour. I might go walk the dogs,
do a bit of housework. Who knows? Then come
back and just check. I've actually got that
right even though you can do maybe a light box or a
projector like me or trace it, it's still down
to the individual having to put that sketch
onto the piece of paper. So yeah, definitely
worth taking your time. So I'm not sure if
there's any great hints apart from sorry,
taking your time.
5. Ear: So before we actually add
some paint to the paper, I know I've already gone
through the materials. For this class, I have labeled
it as an advanced class, so I'm going to be a little
bit more like me painting. I will do my very
best to guide you, but I will also be
a bit me, as well. So if I think there's a
color that would help this painting as I work my way through
it, I will grab them. So what you see here
may be slightly different than what you've just seen on the materials list. Right. Before I continue
gabbling away, let's start. And it's always a bit
nerve racking starting. Even though this
is now class 57, it's still a bit scary
when that camera goes on, and I'm having to start, and it's that blank bit
of paper, isn't it? So we're going to
start with the ear. I normally start with the ear because it's a safe
contained area, and just then you've started, and you've got some
color on the paper. So I'm actually going to
give this a little tilt. So my little trusty heart, giving this paper a tilt. And I will, as I paint this ear, give this paper a proper tilt, and I'm actually
going to let it dry almost at a really strong angle. Obviously, that's not so
great for the filming, so I will try and keep
it at a gentle angle and we'll work our way through. So I'm going to, let's do this because I think
it's a helpful thing. I'm just going to wet.
We'll be up to here. So, nice and yours is nice, clean water, so don't
put the lavender in. And just wet all that area. Lovely wet. Don't be scared
with the amount of water. This will allow
the paint to flow because if it's not wet enough, it will just stick
it and your brush. Make sure that's good
and wet as well. Right. Hopefully, you've got that reference photo
opened up in front of you. If not, try to get in some way, try and get that reference
photo so you can view it because it's a really
good thing to go back to. And you can see the lights
coming from sort of this side. It's actually outside
on our patio. But she was obviously in a
quite quiet subdued mood. She's normally a little
bit more hyper than that. But you can see the colors
coming in from here. So we're going to try
and keep this side a little bit cooler
and bear in mind that try and get that juxta between the cool and
warmth, it's always nice. So I'm gonna pop
that lavender down. I'm gonna have so light
genuine in my hand. The Van ****, these are probably going to be my staples for most. The other colors are just
there to sort of help. So let's start. Let's start with
so light genuine. I'm just going to
place. Just allow the beauty of so light genuine. It moves wonderfully. And bear in mind, this has got to come up to
the top of the year. So, you know, don't be shy. Put plenty of color
and just drop. So make sure if your painting
isn't moving like mine, just make sure your brush
is wet enough, as well. It's often a case you haven't
got your brush wet enough. So we're going to
make sure there's plenty here. Keep
on just dabbing. There's no brush strokes, trying to keep the so
light genuine more to the right hand side and Van
**** more to the front. And she's actually
quite a van Dike color, and I see her in some lights. She's not black black. She's she's got this sort of
lovely, yeah, Vandyke color. Again, keeping adding the moment we're gonna wet that and that color's got to then go up there. And we can always add to
it, as well, so right. Brush. And we're just going to wet the remaining
part of the ear, just allowing that
color to come up. And if you find
something that just looks awesome and you love it, Yeah, don't worry. Let it be. And that might be all you
do use in another layer, we will go back over the ear, so we can add more
strength if we need to. But to get the light, it's very hard to
reclaim the light. So it's always nice
if you can get it. Yeah, if you can keep the light, sort of scrub colors out,
but it never works as well. Now, we're not going to do
any flicks on this layer. Because we'll do
them at the end. The flicks are always best
done in your very last layer. That way, they will look
as natural as possible. You can see I must have a
little dry patch there. I'm just going to go
over that. I don't really want a hole in her here. Now, I can. In's actually
looking really nice. I'm not sure if I
want to do that. But if it's not running, you can load your brush up with water and just drop some water. Just be mindful if
you've got it on a tilt, it starts to gather at the top. So actually, I might leave
that there for a minute. I'd like to give it a bit
more of a tilt because it these paints running over the texture of the paper gives
a nice um a nice texture, and it also also pushes,
so pushes the color out. Um, I did warn you I might be concentrating
a bit more than normal, so if I suddenly stopped
talking, you know, why. So at this stage,
as long as I've got this is forming
quite nicely. But if it hasn't
got enough colour, I can add a little bit more
colour on the bottom here. As long as this is
still lovely and wet. It's starting to dry, leave it because we can always add
it to the next color. Sorry, the next layer. I'm quite pleased with how
that's forming, actually. I don't really want to do much more. So I'm going to leave it. I won't tilt it at the moment, but I'm going to leave it to dry on a not quite horizontal, but it's going to be on
a really steep angle. I say that will encourage this paint to run to
the top of the ear. And yeah, hopefully form some
nice just as it dries and pushes over that textured
paper. Just go to make sure. But you might want to
just when you tilt it up, just stand with it for a few
minutes just to make sure you don't I'm gonna leave
this flat for a second. That doesn't gather at there
and then obviously run off. But that will leave us a nice, darker area at the bottom, and obviously you see it as
a lot lighter at the top. Yes, give it a good old tilt, and we will allow that
to dry on the tilt. So while I'm
standing here having this tilted at a
really steep angle, it's been probably been
for about two or 3 minutes if you have a look,
I lay it flat now. That's got a lot of movement. So what I
actually gonna do? I'm gonna lay it with
just a little tilt. If you lay it flat,
there's always a risk of any top
paint coming back. So it does continue moving, but maybe not at
that extreme speed because that's gonna give me
a little bit too much umph. And then whatever you do
at this stage, touch it. If you drop some water in here, or try and think, Oh, no, I need a little bit
more color in here, you absolutely ruin it. So be patient. And if there's something you wanted to add or color you wanted to add, just keep that in mind, and you can do it on the next layer.
6. Body: So once your ear
is lovely and dry, we're going to lay
our board flat again, and we're going to do these
sort of side portions. Let me Is it a very rough one. The proportions are
out a little bit. It's a very rough,
very rough draw. But we're going to
do these side parts. And you see on that
reference photo, she's got some lovely
sort of chess hair, and she's also got
the main body here, and we're going to be
doing the main body and leaving the middle part
for another section. So, let me put a little
bit of lavender in, so again I think it's helpful. But make sure this
ear is lovely and dry because we're going to
go right up against it. So keep your water
nice and clean. You don't want the lavender.
This is just so you can see. Well, I'm wetting down. I'm gonna come somewhere
sort of the ish. Now we're only going to
do one layer, I think. As I say, this class
will be a little bit more how I would paint. So if I feel when I get to the end it
needs another layer, I will add another layer. But my thinking is that we'll
just need the one layer. So we're coming down here, and I'm saying that because
we also want a sort of a nice shape because I'm not
going to be doing the leg, so I just want a
nice tailing off. And you can see here. I've
just poured down a fraction, and we've not really put
much color in there. So yeah, it's more This is more about almost the shape
and just subtlety. We don't want too much going on. Alright. Let me pick up. So like Genuine, and I'm
gonna pick up the andyke. What else? And I'm gonna have a little bit of
the Tiger's eye, I think. I'm just thinking. No, we're gonna stick with these
for the time being. Let me see how I
go on with these. So again, it's the same ear colors really, and we're
just going to tap. I'm not going to put this
on a tilt at the moment. I'm going to see how it feels. I could. But as I say, I don't want it really
witting down too much. I want to keep it
stay nice and light. This is just tiger's eye, not burnt tiger's eye. It's very soft color, but it does split
colors up quite nicely, and it's very, very granulating. I say, I want to keep this a
little bit cooler this side, so I'll keep again, keeping
eye on that reference photo. But not being too much of a
slave to it on this part, but we also need
to do the flicks, I say, I'm hoping this will
just be done in one layer. And again, if you get
something you like to look of, then Oh, I'm going to really emphasize
this on this class. Just leave it you get
something that's pleasing. That's a little bit
of lapsi Lazarus. Say I'm just after the shape more than I
am concentrating too much on colors and
yes, colors, really. If I'm after something nice. So you can do one line or
something like that and we do these flicks and I'm gonna
pick up my little brush for. Wet, get nice point.
Always start. If you haven't followed
all these classes, always start a little way in. I always say this. But don't go right to the edge because it's
so easy to go too far out. So we just want
to do a few here. I had a little bit
of tiger's eye to keep that lovely and soft. Yeah, hasn't she as
well. So, it doesn't. If you want to put a few
more on or not as many, you know, the coat
could be blowing. I think there are
some parts, you know, that she could have just done one step further forward
or wind could have blown, just blown that hair back in. So don't be too worried by
adding you know, adding bits. If you think that
would add help, like when we do the
flicks and the ears, then do cause it could be
a moment when she's just say something's blown
over, it's not showing. And that's also with
the nose, actually, but I'll hopefully say talk to you about that when we
come to do the nose. I'm quite liking that, I
quite like the minimal look, but I am aware there's
a nice dark part here because the
actual chest hair is going to be quite
light, as well. So I'm going to put a
little bit of so generate. I actually a little
bit of anyc together. Get a little bit
of strength here. It's always tricky to know what you're going to incorporate in the chest hair and what we will incorporate in the body part. Okay, I can add a
bit of water just to get that moving a little
bit, if it's a bit sticky. And we also got that
her markings, as well. So I'm gonna pop those
down for the time being. Let's pick up the gothit. I'm just going to stick
with gothte actually, 'cause I want this to be
a bit cooler this side, so we might add a little bit
of orange on the other side. So I'm just gonna try and
emphasize a little bit more the warmth and dark than
on the reference photo. It's just coming in
there, isn't it? We're just gonna add that now shouldn't move quite as much we get a little bit more
control, hopefully. Just tapping. Adding a bit
more water if it's sticky. Getting take brush
away, I know there's not too much to sort
of guide you somehow, but as long as you've got that
yeah, a marking in there. That same applies
to those flicks. You, you could have
moved a fraction more and those markings would have sort of changed their shape. So if you get
something that's sort of moving nicely giving
you a nice shape, don't worry if it's not
quite the same shape as what's shown in
that reference photo. I think that's quite nice. So I'm gonna leave
that there for now. I put those back again. I'm
going go to the other side. Actually rewet that. I should have probably
done that separately. So yeah, make sure
that's nice and wet a we we did that a few
minutes ago, didn't we? Probably starting
to dry a fraction. And again, I'm gonna keep
this even lighter, actually. And I am going to just grab just say this is gonna be I'm just gonna grab a couple
of other colors. I think I have a Luna violet. Okay, I'm going to do a
little bit of lunar violet. Don't ask. Sometimes
you just have this feeling. You
think, Oh, that color. That colors gonna
be just perfect. Lid The lids not very clean. Normally, I clean with these, so it looks a bit
nicer, but you can see. That's my normal state
of my paint tubes. I think somebody did
message me once. How do you keep them so clean? I say I just washed them before
I'd feel So this is nice. This is a lovely
granulating color. It's soft. It's a little bit. Obviously, it's got
violet in the names. It's a little violety. I want to try and keep this
warm and quite subtle. Let's go, nope, Gfte's
going to be a bit too much. Let's have what you're going
to have so I've got Vandyke, tiger's eye, and
the Lunar violet. I'm going to use those, I think. Let's say, I want to
keep this nice and subtle and almost disappearing, that'll give us that lovely
sort of lost and found look. So it's ever so gentle. If you put a lot
of colour in here, it gets a little bit
stilted where you finish. So if it's lovely and light, you can kind of tail it off. But if you put a lot
of color in here, you're going to have to
drag that down to lose it. So I always like to keep this
lovely this one back again. I say, excuse that it's not
the best dimensions, but. Yeah, it's gone
lovely and light. I haven't added actually
that much color. So I want to try and keep
that in mind with this piece. Right. Let's have a little
bit more Vandyke up here. Vandyke's a little like sepia. It's quite a sticky colour. You can see that's
not moving much, but if I clean my brush, pop it in the luna violet, and I think if I
put that on top, so goes the thought that normally pushes
it out a little bit. It's not going to
do that for me, so let's add add a
little bit more water. Ear coming in here, so we
don't want to go into the ear. Keeping actually, I think actually I might
have just gone into the fraction could have gone
in I think I've actually started going into
the chest hair, so it doesn't matter too much. I had a little bit of
tiger's eye and Van **** here we need something to hold our eyes so
there's something there. But I don't say I want
to keep it nice and nice and nothing nothing just
gonna pull that down. So if I wet that right down, that pulls that color down, but long as your
water's nice and clear, and you can see that's
pulling it down, and hopefully that will
give us something again, it's just disappearing. Right? We need to put that um so I'm running out of
space now these paints. This is normally how my table looks when I'm doing
pet portraits. All these array of colors. So again, we want to
do those markings so we can pop that
straight on top. And I might actually put I have got a little bit of
that quaodm deep gold. If you have got this, go careful 'cause it's quite
a punchy color. We don't want to
add too Spready. That's probably enough. It comes out a bit
more, doesn't it? So if we can eke
that out a bit more. I'm gonna use this to go tht. It's quite sticky now. Lob I didn't really want.
Take your brush away, have a little look. Yeah, I think that's
doing alright, actually. Mike, you can just see
underneath that dark. So underneath the tan marking. There's quite a nice
bit of darkness there. Let's have there's
too many tubes on your desk is finding
the one you want. So I've got so light
genuine and found **** so I don't want to lose too
much so light genuine, but I just want a little
bit of just a little bit of something darker there. So sometimes you have to go with your gut instinct
something Niggling you to put something something in a certain place, go with it. Because as you get more
experience and paint more, I think you do a lot of things automatically
and subconsciously. So that's the ultimate goal is to paint without
even thinking. And actually, I
quite often paint, listening to audio books, and I feel that quite often sort of stops me overthinking things. Yeah, I'm liking that, so I'm going to just put those down. A little brush. Just go to
do a few tiny little flicks. Make sure this was a
thing I would often do. I'd be so careful
concentrating on the head. I'd forget about the body and
not pay so much attention to some of the shapes and make sure you get
these shapes right, use that can sometimes
you have a beautiful, accurate head and
eye, it's all that. And then you look down
and you've kind of fudged the body or
the body shape. The way I have gone
into I haven't. Yeah. I think that's enough
because there's not actually that many
showing is there, but I do know she did a
little bit fluffy on that. So I have the advantage, 'cause
I know her. Sorry, guys. So it's always going
to be helpful for me 'cause I intuitively know
what she looks like. Right, I am actually going to
lose it there, cause again, I can keep fiddling and not really help the
picture at all. So let's say, once you've got
something you like, stop. And if you get to the tricky stage where some
parts are starting to dry, where you fiddled
a bit too long, allow it to dry although I'm thinking I would
only do the one layer, you can add another layer, and we can add another layer. Theoretically, when
we do this gap here, we can then come out and add more color to the chest,
which we may well do. So I'm going to
just say it's all going to be a little
bit more how I paint, a bit more spontaneous. And yeah, more how
I would do it. So I don't ever have a goal. This wouldn't surprise
my husband at all. There's never a set goal
when I start a portrait that I'm going to be
doing in a certain way, it will evolve as I go along. So yeah, it's a
nice way to paint. And yeah, don't get too worried because if you're happy that things will evolve
and you may change your ideas on how maybe
you're going to do that here. And, you know, if you were
very set in your ways, no, that's going
to be one layer. That's only ever going
to be one layer, and I'm not going to change my thoughts, then it's harder. So it's again, let
everything be free, I suppose, and your
thoughts be free. Right, before I
carry on waffling, because it's gonna
be a trouble I'm gonna waffle a lot today
if I'm not careful. Right, allow that to dry and we'll crack on with
the next layer.
7. Head First Layer: So next up, we're
just going to get sort of the base color of the
of her tan markings down. So we're going to
wet the entire head and also a little bit down here, and we're just going
to put the browns on. So in the next layer, we then
add the dark colors on top. So quite
straightforward, really. So you're going to miss
out the nose and the eyes. Everything else is nice and wet. I don't really want to put any color here
because it's going to make my painting
look a bit odd, but just take your time,
go around the eyes. And actually, let's,
we're gonna miss out this tiny little section here where the second or
the back eye is. You can see a little
where the angle is. That's obscured, isn't it? So we're just going to
come down here and wet. Does that make sense?
So keep that bit dry. Down here around the nose.
Don't go into the nose. It just keeps the nose nice and sort of crisp at this stage. We don't really want doesn't need to have any
browns in there. Coming down underneath.
Be careful. Don't that back ear, so don't get confused with that. It's easy done. So come
round up to the muzzle. Under the lips. Coming down. And up. Touch the ear. And if we get any sort of bleeding, that's
absolutely fine. I say, we'll we'll wet the ear down again
another another layer. So then back fill it. I tend to go around the
outside then back fill. Make sure it's larva and wet. Again, the old thing. Just bobble your
head up and down if you just to check you got no dry patches of
the way it runs around the paper and go
right up against the eye. I'm leaving the little
there's that dark dart, isn't it? It's not
actually the eye. It's kind of what would it be? Aye. It's not quite
eye socket, is it? But anyway, the dark bit. The dark bit beside the eyeball, I'm leaving that out, as
well. So that's not wet. So it's it's quite a
gentle way of doing this, so we are just going to
add the tan color than the dark over the top on the next layer. And
I'm going to use. I'm going to go quite
sparing with the deep gold, but she is a really lovely
goldy color as well. And the gothtes
just a little dull. But if you have other colors,
you think, You know what? That will be the
perfect color for her. Go for it. I've also
got transparent brown, which kind of helps as well, and I'm going to have
this tiger's eyes. I'm gonna have those four
tubes in my hand one time. I think they're a comfort
blanket, as well. If I've got enough
tubes in my hand, I feel confident. Um, right. I'm not actually going to
put too much color over the head 'cause obviously she's not there's no brown there,
so it doesn't matter. But the reason I've wet
the whole thing down. If I only wet the portion
where the red is or red, the tan is, then there's a risk of having a
line, a water line. And when you do the layers, you may well still
see that layer. So we're not actually going to put brown on the head
'cause there's no need. So we're gonna start
with transparent brown, and let's have a tiger's eye. No reason if I'm honest. Just somewhere to
start. Again, just pop it down and allow it. And this is only moving because I've put enough
paint on my brush. The paper's wet enough. And it's just
flowing beautifully. Let's have a little bit
more tiger's eye in there, 'cause it's a bit tiger eye, isn't it? I sit. Is that lovely granulation
at tiger's eye, and you can see it pushing
the colour out as well. Well, if I add color here,
it's encouraging that. Is coming here a little bit. Just give it something there. It's very light
there, isn't it with the lights catching,
but just something. A little bit of gothite. Again, when we do
the darker layers, we can also add brown as well, so it doesn't know, if you don't get it, it's
quite dark enough. Okay, I'm just popping it down, really, squinting my eyes. I think I put a tiny
needle, I'm telling you, tiny needle a bit of the crackdm deep cold and a little bit of the gothite and brush
at the same time. Orange sometimes
can be a bit dotty. If they dot, just give
them a little wiggle. Again, if you get something that started to look lovely
and it's got enough color, then yeah, don't over
flog don't over flog it. She's got some nice bit trans
Brown brown I would like to be she's quite
mottly not mottly. There's a real mix of browns and blacks here underneath the eyes. If I got enough brown
then when I put the black on top or the dot, we won't use black,
but the darker colors, then you'll hopefully get that mot but a little
bit of color down here. That's lovely to leave
almost without any color. Just this front portion, I can give you a really nice an idea of some lovely light. And you can see it's really
dark down here, but again, that will be added into a add
that dark on another layer. Again, take your little brush
away, have a little ponder. I can see where I
put the orange and actually my though I've
stretched my paper, it's just bucking a tiny bit, and it's running
into that puddle. I'm never the best at
stretching my paper. I always get a little
bit of a buckle. Even with these perfect
paper stretches, which seem to minimize it, but so I'm just putting
something there, but I want to keep that almost. Yeah, almost where there's
hardly any paint there. Just when that's finished, there'll be a nice
idea of light. Come up here. So, if it spreads over the black,
it doesn't matter. I'm just not actively
gonna put a lot of dark. So a lot of the brown there. And again with the eye, the little dots on
the eyes, I will add. It's tricky there's always several ways of doing
all these things. But I will actually add
a tiny little bit there. And, gosh, you've got this lovely one here as
well, hasn't she? So I will put that
in now. We'll work. We'll work around that on the next layer, and
I'll show you how. I used to find this so hard. I remember having a
Doberman to do when I sort of one of my
earlier portraits, I struggle so much. It's a hard combination. A black animal with
tan markings is, it's probably even harder than just a black dog on its own to be kind to yourself if you feel this gets away from you a little right, a
little bit of a squint. This is beginning to dry. I don't I can see there's a little slightly darker
patch coming up here, but I'm going to add
that a little bit later because this
is starting to dry, let me add this and
see if I can make it do what it doesn't
really want to be doing. The paper's been
kind to me, but it can make it a bit
dotty and a push these other colors
away and you don't want or I can add because
it's big and is dry, it leaves quite a strong line. But I think because I've used tiger's eye
it's quite soft. But anyway, that wasn't a great demonstration,
either, was it? This is how to ruin
your piece of paper, piece of your work. Heaven. But keep everything
lovely and light. I think that's if you
can keep things light, your paper, your
painting will be light, feel very heavy and
sort of scrub around, it will look like
you've done that, so keep your actions how you'd
like your painting to be, if that makes sense. If you want it loving
and light, keep all your movements
loving and light. She's got a nice bit of
color top of her nose, and if it runs into nose, it doesn't matter
so much because the dark's gonna
be a bit darker. I think I'm there.
Again, because we have the advantage
of adding extra layers, we can always add to this brown, but I think I probably
fiddled enough gonna make sure I've
gone right up against that eye and make
sure you do the same. You went right up against it. Don't leave any lines. Fab. Right. That really does need to
dry all the main elements are sort of touching the brown. So yes, there's quite a lot
of stopping and starting. So I would I would probably say if I
didn't at the beginning. Yeah, do this over several days. I rarely finish a pet
portrait in one sitting. One, it's always useful because we will spend quite
a long time painting. You almost get blind to
what you're painting, so I will say without fail, I will never do a pet
portrait in one sitting. It will always be
over several days. So I think I will when
I'm filming this, it'll probably be over
several days, too, just to just to allow me to see what I'm doing and
not to rush and feel rushed because it's
quite a complex piece. And if you were to do
that in one sitting, I think I would feel quite pressured to try
and get it all done. And that's where you rush and you do silly mistakes as
time goes on as well. So it's always better
to give you time, plenty of time to
do it and enjoy it, cause I think if you're
rushing, you don't enjoy it. So anyway, that as to dry. I.
8. Head Second Layer: So once this first layer
is thoroughly dry, we're going to do the next. Now this is quite a
big layer coming up. So make sure you've
got plenty of time. Don't feel if you're tired
or you've had enough or maybe you've only got a few minutes before you
got to go and do something, I would allow I
would give yourself another day or give yourself a bit more time because this is, as say, it's a fairly big layer. We don't want to
really be rushing it. So, pick up your big brush, and we're going to wet
down all this area again. So exactly what we
did with the brown, but we're going to go back
over it again. Go gentle. If you're ever doing when you
start building up layers, you want to go nice and
gentle because what you don't want to do is
potentially pull up any color from the first. Some pigments pick up
easier than others. So good careful around the eye. And I was thinking 'cause
I've just stopped and had lunch while I
allow this to dry. I always do the eye
and nose later on, but I know it doesn't
always I think I'm in a slight minority. So if you're watching this
through before you paint, then if you're more comfortable doing the eye and nose first, there's absolutely no
reason why you shouldn't just eye I don't yeah, there's no other
technical reason other than I like doing the East. I think it's suddenly this Dada, and they come to life. So yeah. If you like doing the eye first, there's no reason why you can't. So come right up
against that ear. I think we will wet down the
ear again on this layer. It's gonna be a little bit. I'm going to see how it goes. I I I feel like I'm gonna
need another layer, which I quite often
do with black dogs. Obviously, we've got to
get a lot of depth here. So some workout that you've been bold enough you can get enough color
down on the first, but sometimes it's
easier just to say, No, I'm just going to be gentle. I'm going to do two dark layers. So I think we actually
might do that, and then we won't
wet this ear down. So let's be kind to ourselves. Right. Make sure I
can see a bit there. Make sure this is
lovely and wet. No dry patches. I see
one of one there. I have this lovely disc light, which is beautiful, and it
really diffuses the light, but I can't always see one of my little dry patches. Right. So, again, we're
gonna bear in mind, we're trying to kind of
keep this a little bit cooler and a little
bit more bluey, and we're going to go
a little more brownie, as well, towards the front. So let's start with the bigger sort of
aes to cover first. So so like genuine. I'm gonna have Luna
violet and Vandyke. And I think we'll do the
subtler sort of blues. Um I might even use a
little bit of pink. I've got this sitting
off to one side, so I might use the
pink, as well, but we might do that on the
last layer, last dark layer. So for the time being, we'll stick to the
bigger bolder colors and I've just realized I
need to put the glasses on. They always help, don't they? I'm quite new to
wearing glasses, although a complete
game changer. Who would have thought? Yeah, I'm not used to wearing
them. Oh, that's better. Look, I can actually
see properly. Right. So, like, genuine, una violet on my brush
at the same time. Let's go. Let's start here. There's no No, great
plan or wed start, only that you want to
find the places that need as much sort of ground covering
somehow as you can first. So, that makes sense. If you've got a lot
of, trying to say. So this is, if I
put the color down, there's a lot of dark
I need to get down, so I'm going to start
this I'm starting here. Just tapping. Let's
have a little. Shall I tell you
what we do 'cause it's tiger's eyes one of the reasons it's quite
good cause it does push the color around. You can see how it's
making that move. And that's partly, only
partly tiger's eye. It's the tiger's eye. Just giving it a push around. So I still, even though I've
got a big area to cover, I still don't do
many brushstrokes. I still do, W I don't
use the phrase much now, I still dibble and dabble. So if I'm still tapping, it's that so, Jenny, look at it. It's a magic color.
It's just my favorite. I see we can get that sort
of shape of the ear in. You can see she's got a lovely
dark patch here as well. We'll try and get
that in, as well. Again, just allow it
to allow it to move. Say we will do another
layer, so don't panic. If it isn't all covered, it all looks a little bit bed. She might look a little like
she's got bald patches, but don't worry about
that at the moment. Keep your paper nice and wet. Just gently. Let's go a little
bit of tiger's eye there. I want that. I don't
want it too blue there. Let's say, so we will do the
flicks on the next layer. So let's don't worry
about the flicks, either. Just allow it to
bleed and blend. Even if it ends up in
slightly wrong places, we can always just like
that, pull it back. There is doing this, there's a nice you can
see that nice lump of light that goes over
the top of our eye, so it's worth
keeping that clear. Actually, I should have
reserved this area, so I won't I just won't
put too much paint there, but there's obviously
that little eyebrow. Uh, let's have a
little bit of squint. Let's go to the Van **** and start tapping
some under here. So, I want to try and keep this it's not
completely covered, 'cause she's got those nice sort of browns, which I can then. Add a bit of brown in
there as well now. Just to keep that
color coming through. You see how that gothte works by pushing the other
colors around? A lot of the time I use or choose colors because
they do a certain thing. You can see that's almost taken the push those dark
colors away, hasn't it? And again, some papers
react in certain ways. So I know this papers quite um it allows a lot of nice flow, actually, although it's not quite as nice mark making
as my beloved Bockingford. And I have done something
on Bockingford, but I decided to
use this one today. Right, where should we go now? Let's but I like genuine, a little bit of lunar art. Let's try and work our way
down here a little bit. It's quite light
there, so I don't actually actually
want too much there. Coming up, let's reserve
those eyebrows a bit, so I'm just not
painting over them. I haven't I haven't
sectioned them off, which I could have done, and
maybe I should have done. But there's no not always
a right and wrong. Let's come down. Make sure
you keep that shape right. This is really important
is the shapes, especially, like I say,
with a certain dog. A certain dog will
have certain shapes. I be mindful of that. A bit of a dark apache
and she's red there, isn't it or tanned. So let's go into
that tanned area. Walk our way round.
Squint. You can see where those
dark apaches are. I did pencil them in, but I've kind of
lost them anyway, so I'm just going to keep an
eye on that reference photo. So I'll probably put some blues in here on the next layer, but for this layer,
I just want to get some of the
darker colors round. Now, what I would say now, this is beginning to
dry on me, anyway. So I'm not going to
go I wouldn't I'm not gonna add any more painting there because it's
beginning to dry. This is still loving
wet so I can carry on kind of working on this. Um, a little bit of a mixture of van
**** and so like genuines I kind of come
a bit more to the back. Tapping lost, you can see,
well, I've had that buckle. Pg sat in there, pull that aside just to keep
that tan reserved. But all just say, just keeping things nice and light
and not panicking. She says, Take a big
deep breath myself. Keep flicking your eyes up
to that reference photo. Let's get a little bit
tiger's eye in here. Keep wanted to say
burnt tiger's eye 'cause I don't often
use tiger's eye. It's normally the burnt variety. I won't do this mouth area quite yet because that can
all be done a bit later. I try and get that that little very subtle
line there, isn't it? Which we did on, well, I began to show you
on the last layer. Take your brush away,
have a little ponder. It's just there's that line
there, keeps appearing. I'm going to see if I can get
that dark patch in there. Gonna use Van ****, 'cause it's actually on
her tanned marking, it's very dark, so I don't want to add too
much blue in there, 'cause I know it's a
say, 'cause I know her. I know that's It's actually
it's not that is tanned. But it's got a very
deep shadow in there, so I don't really
want to put the blue in there to indicate, it's a dark, it's a brown area. It's Sorry, so I'm putting
getting myself muddled. So I'm putting the brown in here because I know this
is a tanned section. And if I put blue in there, that's sort of indicating
that it's a darker coat, part of the darker
coat, which is not. So again, I'm just tapping. I keep flicking my eyes back and forth to
my reference photo that's set in front of me on my iPad, and
I'm just tapping. Again, just keep
taking pressure away. I don't think we need to do
really too much to here. Um, might. Let's
have a little bit of transparent brown in here. Let's try and build up some
of this into that, as well. Say, my paper is
still lovely and wet. You can see how things
are moving still. But the minute you start, you
start to feel a bit gloopy, and it's not moving, then it's time to sort of down your brush. Maybe a little bit of tan here to keep it a
little bit warmer. I'm getting to the stage
where I need to stop, really, 'cause I've probably done enough, and
that's creeping down. You can see that's losing that shape 'cause it
actually arcs round, doesn't it? So I
just push it back. Maybe suck up a bit
of the painting. It might be It's quite
a lot sitting there. Just gently suck some
back. Draw some of it. Down. Probably add Luna van and Van ****. I still see it's quite wet, so I can still add a
little bit of color. Just tapping, keeping
an eye on that photo, just looking for
the darker areas. Eyebrow, I will it's quite
has quite a strong edge, so I'm not going to start
really putting that in because the flip side of
it here is very light. So probably I'm
filling with it now, I'll leave it because that will be better done
on the next layer. And with every layer, your
paint won't move as much. So the exact amount of paint that we've maybe put on
here on the next layer, it won't move as much, you know, and as you build up the layers, you'll find it they
don't move as much. But I used to do a lot
more layers on dark dogs, black dogs, especially
like labradors, but I try to be a bit bolder these days because it
can get muddy if you're not I think that's
looking quite good, and I feel I'm getting that would be awful to start playing
around with that now. It would just make nasty marks. So I need to I need
to leave that there. And it just comes
with confidence and just time spent painting.
There's no real magic. Um, there's nothing magic.
I can tell you, really. It's just you get to know
your paper and your paints and your style and how
your brushes work almost. And you just something just tells you to go,
No, that's enough. Put those down 'cause, you know, you know you can put another
layer over the top of that. So I'm gonna allow that to dry because I don't want
to do the flicks, I want to do those
when it's nice and, um, on the last layer. Again, I'm going to run the
next layer into this ear and just build up a little bit more on depth and
do a few flicks. But for now, that needs to dry. I can't really do that chest because I don't want
this color running in. So, so, yes, allow that to dry. Oh, as I say, you can use a hair dryer, which I
haven't really mentioned. And I do use hair dryers. And I would leave that
until it's almost dry. So it's just you can just
see it's a little tacky. If I was to put a hair
dry over this now, sorry, I'm probably repeating
all my classes, but it just blows
the pigment around. And if I put a hair dryer there, you can imagine that
we'll just blow it around and muddy it up.
9. Head Third Layer: Righty ho. Let's get
that third layer. Over. So again, go
ever so gentle. It's probably more important each time the layer builds up, it is to go really gently. We will be going into the ear, but not quite yet, so let's just go around. Same area. Very, very gently. And sometimes you have to add quite a lot of
water to be gentle, and you just need to
then suck that up either the edge of
the kitchen roll or the edge with your brush. We'll do all these a
little bit separately. I just keeps a nice defined
edge around the nose. Keep nicely within your lines. You don't want to us
as you do layers, it's quite easily to go
over the little edges, and it gets a bit scraggy
so take your time. Duck your head.
Seeing where you are. I'll tell you what I will do. Actually, I'm going to section
that little red part off, if I can see it in
a little light. We will just join it
up before it dries, but hopefully we'll keep a
slightly crisper edge then. All right. I think that
is all wet. Lovely. So all we need to do now, again, is just to build up more
depth and strength. And this is always the hard
thing with black dogs, 'cause they need a lot of
layers to get that get them. The color and the depth, really. So, still working with
those similar colors. So I've got the
so light genuine, vandyke and the lunar violet. Again, I'm gonna start
at the back there. And actually will
start to incorporate, like I said, some of
these other colors. Let's I'm gonna run through the pink therefore I drop
my brush on the painting. Bull or the lid, even. I'm gonna have that
pink, as well. One side, so that's
potters pink. So let's start with them. So light genuine.
Again, just tapping. And it's more
important probably to tap as the layers
build up again, 'cause it's the same
thing when you're adding water to their layer, you don't want to upset
what's already there, and we need to remember
those flicks, as well. So another big layer
with lots of things going on. And what we got here? Is helpful if I have
it that way round. Let's see what I've
got una violet. I'll have this a little bit more to the front as we
come round, keep that warm. Go, keep our eye on
that reference photo. You're looking for the docs. Got a nice sort of halo
of light there, isn't it? And hopefully by sectioning
that little part off, we should have the
shouldn't go into the into the red, sorry. Concentrating and talking,
is not always as easy. There's a nice little
line coming off there, let's try and tap that
little line in there. I need to strengthen
this one up. That needs to be Van ****. And if you can stand, even if you're just
for a short time, it's just so useful cause
you can get away from it. It's very easy at this point to then sort of cover the
whole lot in a sort of mono saturated color, and before you know it, you've just like I say, covered it all and
you've lost the light. So by standing, I
think you just get above it a little bit more
and see what you're doing. So a tiny bit of
lie, sorry lavender. Obviously, she's got
no lavender on her. So this is just where you're
starting to incorporate some some nice color. Just
to make it interesting. It's where the I suppose to
wear painting and a picture, it's not a if you wanted
a true representation, you'd take a photo,
wouldn't you? So this is where the artistic
bit comes in, I guess, and you do something nice
that you find pleasing. It's obviously captured her, but then it's got
another essence to it. Let's grab that tiger's eye, and let's let's do Vandyke
and tiger's eye together, and we should get the nice
combination of the two. So that hopefully splits
the tiger's eye up, sorry, the Vandyke up a bit by adding
the tiger's eye with it. If that makes sense. You can see that's separating it because
I'll mix the two up. Be careful. I'm not
going to do that. I'm starting to
edge into that red. Now, there is quite
a defined edge, so I might I might This little area here I
might add in on dry paper, actually, and then I
can get that neater wise it's gonna keep
spreading on me. So I'm trying to
carry on just gently observing those dark
areas. Keep squinting. Let's pick up that pot's pinks because it's a
lovely lovely color. That's over the top there. Again, that spreads, and
that's nice and warm. That would add another sort of slightly different dimension. Keep that more to the front. Down for a minute. I'm
gonna have 2 minutes gonna go splat on my on my paper. That's how a luna violet. Nice patch underneath
there. You come down. See how that spread
down there, hasn't it? I'll tackle that in
a minute. Alright. It's a bit spotty. So if it starts to go spotty for any reason, just
give it a rustle. Gently touch the middle of where the spotter is spotter splute. Bit of van ****. It's a little
bit darker here, isn't it? I try and build up a
little bit darker. I have muzzle, as well, so I'm gonna have Tiger's
eye and Van ****. Again, hopefully
getting the best of the two. Tiger's eye. All those whisker marks can be put on later, so don't
worry about those. We need to start building
up some of this, as well. Very gently. Let's have
the Van **** again. It's a bit like the CPA. It
doesn't move quite so much, so you can start adding that in. So we can strengthen this up. And it looks a bit wrong, doesn't it? Soften that a bit. Bitar. A little bit of an ****.
And we are so like genuine. Just tap that in there. So I'm just as we start to work our
way through the class, which is always the case, we all start to start differing. So really, really
observe your own piece. Just look for the, look
for the darker areas and just keep applying bits of bits of paint, bits of color. So this is where you can
start getting a little bit more individual, but
we haven't used any. There's no need the
lapsi Lazare either, so that's a lovely blue. It's very soft. Not too much. We have to remember
to do the flick h I'll do those flicks now
while we think of it, because they really
need to put those down. They need to really be applied while that paint
is nice and wet. So I got my little brush, and I again start in a little
bit and just flick out. It's a bit scary, I know, 'cause your painting's probably
getting quite good now, and you're like,
Oh, I don't want to ruin that now doing flicks. I have a good friend who was a student but a
lovely friend now, and she's petrified
at doing flicks. 'cause they are a bit. And if in doubt,
you could always do these with pencils
really freaking you out. Alright, that's probably enough. Alright, let's have
a little look. Let's take my brush away. Still need a bit of color there. Getting a little bit washed out. This is still lovely and wet. I don't want to quite
go into that ear yet, because if I wet this ear down and allow this
color into the ear, I'm going to start dragging some of those colours I've
carefully put in there. So let's do the
getting a jane muddle. Hang on, it. Let's put
the some vague order. I've got Tiger's eye, what
have I got so like genuine? And let's pick up the the vandyk actually might have a
bit of transparent brown that might be useful as well. I did warn you Is me just
grabbing all my colors. So the transparent
brown is a nice rich. It's not quite the orange, but it's quite her color. So let's try and tap that in. Mind you, I must admit
I've had lunch, well, before I did these
darker layers, I was looking at
her in the garden, thinking, actually,
she's not that. It's actually not
that red in color, but it just depends
on the light, doesn't it catch her
in the photo lights. And that's probably
actually worth mentioning. Obviously, the iPhones and do a very good job
at enhancing colors. So sometimes you get a
slight unrealistic color, so it's always worth
bearing that one in mind. There's a nice
little flick here, but I'm going to do that
a little bit later, so it's a bit more obvious. If I do that now with, you know, a wet brush, it's just
going to disappear. So where was I now? I want a little bit more
color there, didn't I? So let's do a little
bit of so genuine. A little bit of van ****,
a little bit of tigers. Need a bit more something there. Almost coming
round. Touch there. Now if you starting 'cause it's actually not
too warm here today. But if yours are starting to
dry on you, just be careful. But if some of the areas
are still nice and wet, you can always just clean your brush and just add
a bit more water in it. It gives you a bit more
time just to carry on. I was gonna say fiddling,
but adding more color. Let's have a bit more dark here, actually. It's getting a bit. I think the lap tends
to push colors away, so I really want to get
that nice and dark up here. So you've got a good contrast between back her back, her head. And the sort of front, so you're getting that combination. I don't want to I want to make it I want to get it
'cause she is black here, but also van dike. And because the
light's coming in, it's warming it, as well. So all these things you
have to bear in mind. It's almost a bit too bluey. Take your brush away a
little bit too blue. Let's put a bit more van ****
on the top. Warm up again. That's why I think
it's always great to sort of step away
'cause it's sitting. I just can't I'm not very
good at sitting, either, but you just can't get on top of it and see what's happening. I get the impression you
stand up and then go, Oh, no, that doesn't
look quite right. This might actually be
sliding down a bit. So what I'm gonna
do a bit of gothte. They're gonna put
some govite in here, just push that color away. I think some of this
dark is beginning to slide down here
in this direction. You see how that gophte
pushes the colors away. You know, I jump
if you can see me, my eyes are flicking
back and forth to it. I've got my iPad on a
stand just in front of me. And I'm flicking my
eyes back and forth. I want to make sure I reserve
that tanned marking there. Take my little brush away. Let's have a little
a little look. I think it's doing, actually. Touch of dark. Van ****, a little bit of a hard
line quite that hard. I'm up against the tan
marking, isn't it? Just there. Try and make this a bit redder as well. I'm actually going
to close that in. And I'm going to put the
gothite and transparent brown, and it's going to
have a little dot. Pick some bit of white
a little bit thick. Just constantly back
and forth from my eyes. Van **** dipping stuck
to build up this. As it begins to dry, you can
see it's not moving so much, so then I can start to build up some of this definition
now, very gently. A lot of this color we
can take off as well. So there's a lovely lump
that always generally sits under the eye socket,
catches the light. That's normally best done. Just by taking it out rather
than trying to reserve it because the paint would
always if it's a small area, it's quite hard to control
where the paint flows into. That's not on too bad. And again, I can take colour out as it begins to dry as well. The front portion it's a
bit lighter, isn't it? Again, just being gentle,
try not to panic.
10. Continuing into the Ear: I think that's looking right,
actually. Let me see how. I'm going to start putting
some of that into the ear, 'cause the ear is a bit drab
now when you look at it, compared with the rest of it,
and I've managed to cover myself in so genuine. Just wipe that off. Right, I'm going to
start by wetting the ear a bit further back
here if it's wet, I I should just do some sort of random sort of sweeps, as well. And if it's wet
further back here, if I start wetting here
and then pulling out, it's going to encourage it
to come further out quicker. But if it's wet here, so it's got a barrier
of water in some ways. So if I start
adding that now in, it won't quite so quickly, but we'll get a bit of softness 'cause if we're not careful, there's going to be the
real obvious junction, and the ears gonna look
like it's been stuck on. So now we can sort of
have a little tease out. Again, keep an eye on
that reference photo. Let's have a little bit,
where's my lunar violet. A bit luna violet, I think
would be quite nice. But what I don't want to lose I have no idea what
your ear looks like, but you've probably got
some nice little markings, and some let me
show you this one. This was actually done on a different was done
on Bockingford, but you can see how
the Bockingford has reacted to the paint, same paint, and it's just
reacted differently, because this is, you
know, 100% cotton, so it's reacted differently. So I haven't got quite the
same amount of texture. So I need to sort of
add something in, so that's why as
the lunar violet. Make sure that's strengthened
at the back end. She's got a lovely. You can
start adding some sweeps in They will say dissolve, but they will soften, especially if that papers ever so wet. It won't be very obvious. I don't It's this combination. I don't like putting too
many individual flicks in, and it gets a bit
staged, doesn't it? So it's trying to it's just
trying to capture something, isn't it, without doing
every individual strand. Let's have a little bit of
potters pink pop a little bit. Bit careful. I'm
losing this again, so I want that to
be really strong. So before that, I forget. Let's have that the
Vandyke and the violet. That's quite an
important part, I think. I think it's where
we wet the ear down. It's obviously gone into
some of that ear color. It's worth assessing, I say, some color gets dragged into
the ear when you do that, so it's worth going backwards and checking not too
much colors disappeared. I can see a tiny
little dry patchy. Okay, let's have a little look. Flicks are good, so we can start to do
some of the flicks. Before that dries, I've got the vandyke and the luna
violet still in my hand. Come in a bit, try not
to go right to the edge. Before you know it,
you'll be having had right across your paper. It's a nice flick up here. And again, you may want to put a few more in
that aren't even there, so don't worry too
much, you say, a breath of wind and the
whole lot will have changed. So But be careful. I don't do too many because
they can get addictive, and it's really fun
to put them in, but too many and you're ruin it. Right, I'm going to stop
there I quite like that. But you can see where
I put that wave in, how that's disappeared now. I'm trying to get a
few more in here. I don't want to tilt it because all this will move
around, so this is flat. You can see some of the dry
patches I've left where I've, you know, wiggled
it to start with. I think that's looking
right. We will put some white gash. Let
me show you this one. It's quite a good example. I think it's a little
bit white gouache. We've taken colour out. You can see that without me
dropping into my painting. Um, so yeah, there's always
little bits to take out. So don't overwork it. You can always add more, and we can do some dry
brush marks, as well. But let's not What's the saying? Don't overreg the custard. I think that's alright. I'm just gonna pour
that out a little bit. Ah, I might have gone. Just get the shape
bright a month. Got a bit too much into the
ear, one of those layers. I'm not sure. Okay, I think
that you're looking right. Again, I'll get into
that tricky stage. I can't really do
an awful lot more. Um, what we can do I think
as it begins to dry, as long as it isn't
got a definitely got a puddle here where the
paper's walked a little bit, but let's With the
vandyke see if we can start to build up that mouth because you can do
it when it's dry, but it's quite nice to do it
while it's soft, as well. While it's wet soil and
you get nice softness. It is very wet there. Actually, I might do. As that again begins to
dry a little bit. If I could take some
of that water off. Where is the transparent bran. A little bit of
transparent brown. I don't do that flick
there. You can start. There's a very
obvious line there, but again, that can be done. Oh, little finishing off bits where you can actually
paint it into dry paper. At the moment, it's just
getting the color down, really and making it short. I've lost some of
the brown sister. Disappearing there. I don't
know what I will do gothte. I haven't used the
orange much, have I? A little bit earlier on,
but stick a little bit of that gothte there to
losing that brown there. Again, it wouldn't matter
if this was a generic dog. You would just say,
No, it does it's fine. I'll just leave that as it is. But because this is twig, it kind of wants to be
a bit more accurate. If you were doing this as
a portrait for somebody, it needs to look like their dog. So that's a very distinctive
color marking on that dog, then you need to
keep that there. Start start to take a color out. There's a lovely
light bit here where that It's too wet here. You can see that's just
disappeared again, but while it's wet, I can take colour out
just very gently. Okay, keeping your
brush, ella soft. Don't try to scrub, 'cause you lift it all out. Try to keep that little
bit of light there. It'll all come together
when we do that, the bae always helps
as well, actually. Obviously, we need
to do the side. And yeah. But the moment, it's just trying to say, just trying to build
up enough color. Still could do a bit over here. I think because we've
building up the layers now, I should be able to get
away with this, I think. Come, with this very
soft light over the top, it's quite hard to judge
how wet the paper is, but as long as that's still
nice and wet, add a bit more. She looked a bit bored
on the top, sir. That down. A little
bit more color there. Runyke so don't get too
bluey towards the front. The thing is not to add.
Ideally, you want to have your paint brush
as wet as your paper. So if you add a very big
wet brush onto this, you're wetting the paper
a bit too much again, and you'll find the
paint starts spreading. So I know you can't
exactly know, but it's nice if you can just roughly judge
that your paper is that wet and your brush
the same sort of wetness. And then you add the paint. It's starting to
get a bit spotty 'cause it's starting
to dry I feel it. It's probably not You might not be able to see
it, but I can feel it. Let's have I look down here. I just build up a little bit of that strength
though I buy that year. That's looking
alright, actually. Strength there. Feel a potters pink and. This is quite orderly
for me, by the way. If I'm say I'm painting by myself,
there's tubes everywhere. Potters pink and the gothte
just make sure that looks. Strong enough, let's have with the tiger's eye
Tiger's eye as well. Tigers are very soft
and quite weak, so you need to get a good
amount on your bush. Build up a bit over there.
So you'll probably be fine. You probably haven't got that
puddle like I have there. I'm going to start to need
to be careful 'cause I can say I feel this is starting to dry now down
this part as well. To make sure I got the
nose a good shape. Right, I think I need to down my brush and allow that
to completely dry. And then we can get on with sort of really sort of firming
up some of the detail. We'll probably do this side,
get the nose in there. Obviously, get the eye, and that will make a big difference. This is best Left,
almost to the end. Then we can flick up and
flick it into this part here. That will give you
the impression there's hair coming down. Um, But yeah, allow that to dry. I haven't used any salt yet, you may be seeing it
sitting on the side there. I did some of them
and some I didn't I will probably put a little
bit of salt on the chest. I did ponder with the
ear, and I might do. Let's let's put that in there. Because these paints
are very granulating, you quite often don't
get a lot of difference. But some of them showed up. And a tip, if I might
have said this already, be careful your salt
doesn't get wet, and I probably had
it in a bad spot. If you drip water
into your salt, then your salt is already
doing its job if it's wet, it feels a bit tacky already. Actually, I probably done exactly
what I shouldn't have done. Or your fingers. So yeah, make sure your salt's lovely and dry to get the best effect. But I'm not holding up much hope that it would make much
difference to say, the patets quite granulating, and it's the second
layer as well. So right, I shall I
leave that to dry.
11. Eyes and Nose: So I'm actually starting
this the next day. And it's interesting.
Again, I've just come back and walked into the studio. I can see more clearly the
stuff that needs to be done or maybe actually
not to be done. This is a little bit chunky
here in its color here. I like the rest of it. The ear. If I do too much more, I can see I'm going to lose it, but it does need a
bit of detailing. So I think what I'm going
to do at this stage, I'm going to get
these eyes in and the nose and make
it more of a dog. And then I can assess
these sort of other areas. But if I my mind is probably
to do another layer, but if I do another layer now, I'm increasing the complexity and sort of finishnss
of the head, but not even starting this. So I think there's a risk
of overworking the head, and really the important bits
are particularly the eyes and the nose and other things
sort of almost fall back. In its, um, in its
importance, I suppose. So I'm gonna do eyes, fill in this little
bit, the nose. I'm gonna then assess probably do this little bit,
'cause there's no reason. I'm happy with this little area, 'cause what I want to do
is some flicks going up. And if I have to
re wet this again, then I'm also diluting
those flicks in. So I'm going to start with it might be
a bit more methodical. I'm going start with the art of the two eyes and
the little bit here, while I'm not kind of going over the nose area of my fist. So very straightforward.
She says. We're going to very
carefully see I've done a good old spluge there of
paint while I was painting, so it doesn't matter. Hopefully Ys is nice and clear, so I'm going to or it down. Now, I'm only doing the eyeball. If you scroll into
your reference photo, it's quite complex in there, but she has got
very deep set eyes. So there's not that
much eyeball on show. And the other these
little bits here, obviously, the eye lid. So the bottom eye lead and like the third
eye that dogs have, and then you're going
into the tier ducks aren't you here. This
little bit here. Sorry. So we just gonna whip. Down and I'm going to use. Where's the transpant
bra. Trans baat bram. A little bit of
where is the sepia? No. The Van ****. Where is the Van ****?
Hold on a minute. It's just probably
packed it all the way last night and I obviously haven't put that back out
on my table. Bear with me. All right. Here he
is. Right. Where were we? No, I'll put that down. Okay. Transparent brown, and we're just gonna
dip that color in. She's got quite dark
eyes, actually. Well, probably quite typical
dog's eyes, I would say. They're very rich in
color. The brown. Not overly dark, but
not overly light. I said they're quite
a quite a normal eye. So I would just do that
for the time being. And then with the Van ****, it's always lovely to
get shadow over the top, other than if I did, even if it doesn't show
it, but she does, particularly as I say, she's
got very deep set eyes, so they're going to be quite
gonna be quite shadowed. And you can see
eyelashes, can't you? A gonna plot that down again. It's just dibbling and dabbling. There's no sort of bus strokes. I go to start putting
a bit of dark there as well on the
front cause there's always a nice area dark there. I'm just going to leave
that that Nisa dry. I can't go into the tear
duct because obviously, that's gonna the
color from the eye will run into the tear duct. I'm actually just gonna
brush your salt off cause's underneath my fist.
It feels weird. If for some reason, you've
done this and you've carried on straight and you haven't broken large I have for
that time duration, just make sure
it's nice and dry. So hoover that up later. Great. So I can start. On the other little area. Now, what I'm going to do first? I'm actually going to do the eye first. But there's
not much there. You can't I think all you
can actually see is the eye, the very dark sort of
inner part of her eye. Well, not even eye, so
the sort of socket. You can't actually
see much eyeball. There's there's not
an awful lot to do, really, so we're just
going to white that down. Air on the side of caution. Don't make it too big
or too prominent. It's just a sort of
it needs to be there, but we're not going to
make an awful lot of it. So I just got that's
a bit of van **** so. That's my small brush as
well, but here still. I'm just gonna circle it around. We can always fiddle
with it afterwards. I don't really want to do an
awful lot more than that. It's just to say, it's
just going to be there. I will obviously paint
this in in a minute. But while that's still wet,
I'm gonna hang fire on that. This is still wet. And so, yes, I just need to let
the little eye dry, but we can crack on
with the nose, I think. So nose is, again, it's actually notes I
wouldn't say they're simple, but they're they're quite fun to do. So we're
coming down here. I'm not sure what
this line is here. Unsure what I've done there. I'm always very
good at telling you to be really careful
with your drawings, don't always do the
same to myself. So nice and wet. And I'm actually going to use that burnt tigers tigers eye, not sorry, not bunt tiger's eye. And they're so genuine. Let's see how we
go with these two. And I was saying,
I think I said, sees ages goes, it's
yesterday filming that. But I'm just touching the bottom and just
allowing it to run up. Noses can be sometimes problematic when you take
when you look at the photo. Because they kind of
wiggle their nose around. It's always on the go, isn't it? So sometimes you have to kind of judge where
the nose maybe should be, and maybe you just caught
the camera or if, you know, a client, you're doing a client. Um, pet portrait. If the nose looks a bit weird and something's telling
you that's a bit weird, just have a good look at it, it may be that it's shifted. You know, they've given
it a little wiggle at the time the camera's
taken the shot. Um, so, yeah, you may have to sort of straighten it up to
make it look right, or it can look very odd, and I know I've definitely
been caught up by that. So I'm just adding the blue of just allowing mania that to
sort of travel up on its own. And I've incorporated
the lower part, the nostrils gonna be painted
and then that sort of um I sort of say, call it a vent I think have
a feeling they breathe in. A lot of this air comes
out of this slot, doesn't it or slit or vent
or whatever you call it? I'm sure there's a
technical name for it. Right, I'm gonna leave it there. It looks quite big and
clunky at the moment. I think when we do
the another layer, which I think will do, actually, we can then come into this nose and just
soften all that down. But that's the first little
bit of the nose done. Now, I have a look at this eye. Yeah, I think we can go
back to that eye now. Let me just give it
a little hair dry, and so I know it's
completely dry.
12. Eyes Part Two: Actually a thing
worth mentioning, which I haven't really
experimented with, but I was just watching
that nose, the hair dryer, I was just touching some of
the, some of the pat on here, because it was
blowing it slightly, it pushes it across the grain and gives more of
a nobly effect. That is amazing for noses. Again, it's not something
I've particularly played around with the idea, but you can see
how that's worked. Anyhow, let's go
back to that eye. So I'm going to
put another layer. So just going to very gently, again, layering, always make
sure you're very gentle. Wear that back down
again. And because sometimes you're very gentle, you can end up with a
bit of bobble of water, and you don't
necessarily want that cause the paint just
sits then on top. Back to transparent brown, we're going to build up a
little bit more strength. That's on the lower part, and then I'll pick up. Actually, the so light
genuine is good cause again, it's a nice blue,
nice cool color. I'll put that
underneath the eye. Again, I could put the van
****, but it's warmer. It will just depend a
lot of it on, you know, the reference photo I've
got in front of me and how I sort of see it. And again, it just
comes with a bit of confidence and time spent
painting, I suppose. Let's have a good look at
this, see how we're doing. I might put T better go on top. Getting a little dark now. Okay. Just very dent.
There's no great hurry with eyes, being gentle. And again, I'm probably a bit more
confident with her now, but they used to muddle me and you get into
such a muddle, and all the paint
starts moving around and you almost can't
see what you're doing. So leave it to dry, I would say, and then reassess
the paint's dry, and it becomes a bit
more clearer, I think. I think that actually
looks pretty good. But while I'm here and
while it's still damp, I can take out a little
bit of the color. As you can see she's got a
nice chunk of light here. Very gently, just
wiping some of it away. When it comes, just go
gentle because you're wiping back sort of
theoretically, almost two layers. And it's quite nice done while
the paper's damped 'cause it doesn't leave 'cause
when it's completely dry, sometimes you can get left with, like, a line where you've
dragged it across. And the last thing to do, I think I'm going to
do it at this stage. Again, it's one of those things. I'm probably judging I probably about the time to
do the eyeball, but I could have
done another layer, but I think I've got it dark
enough already, actually. So this is so genuine, and I'm just going
to very gently tap an eyeball in sorry the pupil
in there, eyeball pupil. Again, just take the brush away, have an assess,
see how it feels. You can always add one of the
other colors back in again, just to soften it. You don't really
want that pupil, and they don't they're
not very obvious. That's a nice thing
about dogs eyes. It all merges into a sort
of a lovely brownie. I think that looks alright. Again, once it dries, and I feel so I've just
picked up a bit so genuine there a bit more something
a little bit darker. If once it dries, I feel like it needs something again
a little bit more. Then I can always add more. Van dike. I want to emphasize the nice ring of dark. And I think once we start to
pull this out, which I can. She's got a tiny,
tiny chink of light. So let's I might be a
bit risky this now. What if I can leave that
tiny white line just there. Then we can fill
in this tear duct, and sometimes that helps
gauge what the eyes looking like because it's obviously
all part of the same thing. Just using so like genuine. Again, there's other little bits of light in there as
well, isn't there? But we can always add that in with a little bit
of white gosh that can I normally end up
finishing with that. Just touch the tops that kind and sort of starts
running into that. And actually, I can see I
haven't quite got this. A turn there that little needs to become a
little bit more forward, if I look at my
reference photo, say, you've got ever
such deep set eyes so the eyeballs probably here, and this is a wall around. Bring it out a little bit more. Yeah, I think that
looks alright. I'm gonna leave that
for now and just allow that to dry causes gonna change
slightly once it's dried. So I said what we can do now Yep, I'm gonna
hang on to these. Just be careful with your fist. That's Doi little part
of the eye eyebrow. On the other side, hopefully
make a bit more sense then. There's not an awful
lot of color there, but we will go with a tiny
little bit so light genuine. I just pop it underneath there. Maybe a little bit of lavender, see what the
lavender looks like. I'm touching the top of the eye, as well, so it just
gently blends. I kind of want this
to almost, I say, not disappear, but I don't
want to make too much of it. Maybe a little bit of van ****. Okay, keep looking
that reference photo. Yeah, that helps, doesn't it? Makes a bit more
sense to the eye. You see this needs to be, obviously, made a
little stronger. There's a nice dark patches
in there that comes off here, but that will be done
in another layer. I don't think it's part
of this area here. So I'm going to
leave that there. Again, there will be
a bit of fettling. I can see a bit of
colours being lost. S's a bit of a streak
there close that in now. Sometimes, if it
looks too weird, when you're painting it, you
can get a bit disheartened. There are times you
need to sort of rectify something
just to make you feel a bit better about
the whole painting, 'cause if it starts
to look really weird, you're working on
something that looks like. Oh. Um, you can easily drop
your morale with it all. Right. We are weird. That's still wet, and
it is still quite wet, so I'm gonna leave
that, but what I can do is just do this lower ear.
13. Lower Ear and Chest: That's gonna be fairly
straightforward, actually. All we have to do. I'm gonna just do it a wet band. Wet. I'm gonna put, I think, just the van ****
for the time being, and we can always add a
bit of so light genuine. Vandyke tap it in. Sure, we'll use a little bit of sol genuine into the corner. Bush. I'm just gonna
whip that remaining bit down and do some nice flicks. Okay. I think that's almost
there, actually. I can do a few coming into here. So then it looks
like the chest hair is coming out. That makes sense. Cool. Easy peasy, that bit. If only it was all that easy, right, while this
nose is still drying, I think we'll do
this chest area. So with the chest, I'm going to, and I don't think it's gonna
matter too much. Even if his nose is still a little wet, if I
put it on a tilt, I'm only still encouraging
that to run down, so, and that's not
going to be a problem. So we are thou going
to. Pick a bush again. And we're going to come in
here, be a little bit mindful. We've just done that here, so be careful you don't
touch too much. You don't want the ear color
running into the chest area. I'm gonna come right up
underneath here under the ear. We're gonna wet. Let's do
halfway down somewhere. It doesn't have to be exact. And then we're gonna
Van ****. So genuine. Let's have a little
bit of lavender. I'll put so light genuine again, right into that into the
cooler side. Cool mount. Always looking at
reference photo, even if it's just, you know, it's still, you know, it is obviously quite a
loose impression of it, but you still need to
keep your eye looking for the cooler for the
sort of shapes and shadows and where
the dark areas are. I'm going to use a slightly watered down version
of Van **** here. I say, I don't want to add
too much. Sort of color. And 'cause that's quite light, you can see it's catching
the it's catching the light, and I just You could
drive yourself mad, trying to catch all
those little flicks and, um, coat parts. I'm trying to think
how to explain it, but it's trying to
let me just give you this buff again. I
haven't caught any of that. But I hope from a distance, it's given just a
nice sense of light, and I haven't got too
caught up with, say, trying to capture capture all
the intricate coat details, which is so easy
to try and Well, yes, it's very intriguing to
try and cat her, isn't it? But it get yourself a
bit crazy with it all. Right, so I'm starting
to wet further down now, so I'm going to try and trail
this out as much as I can. I'm going to leave that
to dry a little bit. It's quite wet at the moment, so it's running quite a lot, let's put a little bit of
lavender in there a why not? Probably touch that top now.
I do need to be mindful. I've spent all this
time reserving this until the end is
to do those flicks. Let's actually do those now. It's quite a nice part,
and it stops this looking like a chunk of brown. Okay, I'm not getting
too worried where all those exact
little flicks are just gonna try and
break that line up. Come up here. Get brush
away, squint your eyes. I always find it's quite hard to see it from the other angle, which you're trying to trying to give the impression of the
brown coming into the black, but I'm not always very
good at seeing that. Gonna get a bit too
uniformed if I'm not careful. It's come up a bit. Yeah, I think that's
right, actually. Pretty. Drop a bit of water. Allow that to run
a little bit more. I'm going to assess whether
I then wet all this, as well to incorporate
it in to stop it looking too much like
it's a sectioned off area. I think I am, actually, so wet brush very gently. I'm going to come in. Be a judge. If you've
got a lot of colour and maybe if it looks
right to you, don't. It's just one of
those things I would judge and see what
I've thought about it. The problematic thing is,
I've done those flicks, but see how that panned out. And again, if you feel some of these edges are a little hard, then you can give it a bit of a rustle just to
break that line up. And we can put some flicks
in here in a minute, either with paint like this or with white paint in a
minute. We get that out. Let's try to darken
that area so we get a bit more contrast. It's quite dark under
there, isn't it? Again, if it starts
flowing too much, I have got this on the tilt, but, if yours is
flowing a bit too much, then pop it flat again. Bit dark up there. I
don't want to make those. Yeah, I think that's
doing alright, actually. I think I might lay
it flat for a minute, see how it goes. So I'm going to use this
little wet patch here. I'm just gonna do
some small brush. Just dried it off a bit. I don't want too much water,
it's really quite wet here. So let's see if we can
just run this out. So the eyes got those nice
flicks that she's got. But I don't want
to start getting into where the body is and where the legs hit and all that cause it all gets a bit complex, and I don't think necessarily
helps the painting. It's just a head and
shoulders as it were. I think that's alright. Actually, what I am going to do, it's well with a clean
bit of kitchen roll. This would be quite fun. So you get a kitchen roll. You get the edges of it, and then you just
dab it in the paint. You can get some
sort of creases. If you've done some
of my other classes, I think the eagle, we
did this quite a lot. It's subtle, but it's quite sometimes just
breaks the paint up. Some of that impression
of the coat. Now, while this is still wet, if for any reason you felt
some part could be stronger, then you've got the
opportunity opportunity now to add a little
bit more something. I'm not sure if I need
an awful lot more, if I'm honest, but let's
for the sake of it. Let's put a little bit of luna. Yeah, touch a lunar
violet in there. Just maybe quite bluey there. I probably only use so light genuine there and
it's quite blue. I can do that a bit. And you do a few flicks. And so as it begins to dry, then your marks will
be more distinctive. Um, et meth else. I'm quite happy with that side. I really wanted that to
be quite nice and light, so taking my brush away. Let's have a tiny bit. Where is it going
tiny bit of van ****. I don't want to warm
it up too much, but now I'm going over
my nice kitchen rolled. Mx, but It's got quite a nice bit of movement in the coat coming down there, and they're doing some
of these flicks now while the paint
the paper is damp, then they're very soft. You might even find
they disappeared, but, you know, we do them now, we've always got the
opportunity to add more when it is dry. You can come across
that junction, as well, those two sections. Just to break up if it looks
a bit segmented still. That's sometimes useful. Thing fingers always
useful if it gets a bit too stuck looking. I just a little bit. Haven't we used Well, we're not users have a
little bit of potters pig. We used that much.
Just tiny bit here. I think that's nice. I'm
going to leave that there. I want to keep it ever so light. Some of my earlier
practice pieces, it got quite heavy and actually
liked the lighter look, even though it's it's a tricky thing because obviously
she's a very dark dog, but we want to keep some light. So this is where your sort of interpretation
from what's actually, you know, a realistic
painting, I suppose, and then an artistic painting from want of a
better expression. So try to get that lovely
juxta. Position, isn't it? Between Yes, that is twig, but no, it's not a very
realistic painting. So yeah, I'm going
to leave that there. I think the whole lot, there's
lots of little sections. This is still wet.
The eye is balls. Sorry, the eye is
still a little wet. So I'm gonna leave this
to dry for a minute. I might do a few more kitchen
all marks there because they've disappeared a little
bit as that begins to dry. But yeah, allow
yours to dry and we will crack on and start
finishing it all off, really. But we're definitely
getting there.
14. Head Fourth Layer: Right, then, let's have a
little assess where we are. This is nice and
dry. It's coming to the sort of
finishing off bits. So what I'm going to
do, I'm going to take a picture with my phone. And then I will stupidly
look or maybe just stupidly. I don't know, but I can see
problems or things that need altering more on
my camera than I can actually looking at
the portrait sometimes. So I think I'm going to do
another layer over this head. One where I can get the phone. You probably I'm
looking at the phone. I'm we can section this
area off so we get a more defined area between
the face or the muzzle, shall I say, and the chests. That'd be quite nice to do.
This has got quite light, and it'd be quite nice
to get this a bit more defined here, though, yeah. So just a few things. So I would err on the
side of the caution. If you think yours is done and you've got enough strength, let me show you I did many, many versions of
this on many goes. This, I think,
although a lot bigger, I think I only probably
did in two layers. So this is this stage here. Sometimes I must admit
when I'm practicing, I'm probably a bit
bolder than when I'm actually filming it. I'm probably a
little more timid. So, yes, you can
see the difference. I just need more color
there, more depth. But like I was
saying, if you feel you've got to this stage and
you've got enough color, then don't do the next one
because it can easy muddy. So if you've got enough strength,
don't do another layer. But if you're like me
and you think, Yes, no, I do need a bit more,
then follow along. But yes, if you
aren't going to do another layer, let
me just show you. So I would probably just do a tiny little
section here 'cause it's just quite nice
to section this off. So this is just for you guys who aren't going to
do another layer. And then you can put a tiny
little bit of color here, just along that jaw line. Being a bit wimpy here,
let's be a bit stronger. So then you get a
defined draw line. That's not the
mouth, particularly. It's just on the
reference photo, you can see where the mouth is. Just beyond that, there's a nice there's a defined
area, isn't there? So that's just to get that
little bit of an edge. So you can see that's just
helped to break those two up. But if you're doing
another like me, then just very gently, we're going to wet
the whole area down. Miss the nose out and
miss the eyes just as we did in all the
previous layers. Coming round, Nating that
little bit up there. Come down. We'll get
that mouth in, as well. I will help. Gain
ever so gentle. Really, super, super gently, so my brush is just
touching the paper. Come right up against that eye, touching the top edge. And any other edges that touch, just so that can gently blend as well, so that's
always helpful. Coming up. Round. It's a shame we've done the flicks,
but it doesn't matter. We'll do a few more.
Hopefully break that up. I don't think I'm going
to go into the ear, just because I feel my
ear is strong enough, but yeah, again, this is sadly, as we start to depart, sorry, as we go through the painting, then we all start
to differ slightly. But if you found your ear is still a bit washed out as well, you could add that into this layer as well by
wetting the ear down. But I would even if you're
just hold on a minute. I would just do let's just
concentrate on the face first. I'm gonna section that
bit off again still, so I'm not going to go
I'm actually going to go up to the I'm not
gonna do the eyebrow. I'm going to see if I can get this line a bit more defined so I'm just that's
dry. This is wet. Right. Let's see if everything nice and wet inside, as well. Actually, what I will do, let's get this edging, as well here. So I'm going to keep this
eyebrow dry as well. What? Fab. This is actually a nice
yeah, I like this stage. This is where it's just
little bits and pieces. You're not having
to be too bold, and you'll find your
paint won't move as much so it's not
so much whizzing. You feel like everything gets a little bit
more controlled. And actually, just
by wetting it down, some of this area will
have softened into here, and I may have been adding
too much paint too late on, so that's why that blue just looked a little
bit stuck on. So just the mere fact of wetting it down
sometimes softens. So that it's worth sort
of bearing in mind. If it suddenly looks a lot softer and you don't think
you need more color, then don't or just put the
merest of hints the color. I'm trying to see
if I can get that. There's a little bit of a line
going up there, isn't it? See if I can soften
this blue in. I'm not going to scrub too much. I'll just get a little
bit of a rustle. Okay, keeping that eye
on that reference photo. That's actually. Well,
that's nice and wet. Let's just do a
few little flicks. Even if you sort of try and copy the ones you've
already got in there, just so they don't look stuck. Just be careful if you did
a lot of flicks beforehand. Yeah, maybe just touch
where they join and to soften those edges. What we don't want is just that line and then the flicks out. So we'll look like you've
just stuck them on. Let's have Just try
and incorporate a little bit more color now. This is where it's to say,
we can be really gentle, really soft and just add little bits of nice
gentle colour. I think this is what
makes makes it all pink. Just gives it something
a little different. Bit of pot of pink, going to the front to try and get this area here a
little bit more filled in. With a big white patch here, and I think mainly, yeah, this eyebrow bit
hasn't been filled in, but it still needs a
little bit more something. Bit of lapis there. A little bit of Luna violets. A bit stronger. I have to be careful cause actual that section
is quite light, and this is the eyebrow
bit that's dark. And this actually is the lighter part I'm fiddling
with now, so be careful. It's a tiny little minute
line coming down off here. So you can get that in. Not
that strong. Clean your bash. I don't know if you
can tease that out. Keep looking at reference photo, see where that line
disappears to. It's not there there, is it
comes up here a bit more. Yeah, that's subtle
enough. It just doesn't actually want
to be a line line. What have I got in my hand? Let's have stick with Lunavt I think for the time being put a little bit more over
the top of the muzzle. Say, it's very small very
small bits and pieces now. It's only little taps,
taking your brush away, having a little look, be
mindful that it starts to dry, so you're somewhere warm, then you can just add
that water again. Just to make sure it
gives us enough time. I look white it's not quite
nice and wet still, but yeah, just tap a bit more watering. Um, I've got Tiger's eye. Be being random again. I'm going down to the muzzle. Just go to try and
darken that bit up. But be a little pink. Have I got pink?
No, pigs e pink. I don't always know. I'm just thinking in my head what
would be useful to say. Um, I don't actually know why
I pick that pink up there. It's just a feeling that
I want to pick the pink. So there's not, I'm not going, Well, that would gently
contrast with that, because that's up there. It's, it's just a
feeling a gut feeling. I know, not very
helpful for you, but I have no other
way of explaining it. Come over here a little bit. Now, if your nose does
look very stuck on, we can always wet the nose down in a minute. I'm not
sure if I want to do now. It's still quite wet, but I will try and do that, actually. I'll show you. This still looks like it needs
a bit more strength. Let's put some of these down. But that. Let's hold on
to the lunar violet. Don't know that one.
Got the van ****. Don't sure if I want so genuine. It's very grainy, quite
bluey, obviously. So let's just do I'm gonna
do a bit more van **** here, a bit more strength. I want to try and keep that
little patch of red there, so marking, coming
up a bit more. Loose some of the
green in this is the so light genuine.
Coming down. Not gonna go directly
underneath that eye, 'cause that nice bit of light we need to take
out in a minute, but quite ready to do that yet. Just tapping capping and looking at photo. Still need a bit here. This is just me. So, we all start to differ on what
parts we need to work on, so Bearing in mind, this is going to be the
darker section in a minute, which will probably be
painted on when it's dry. I want to lose. She's got that nice tan coming
up here, hasn't she? I think I've got a slight
dip in my paper here, and it's running, and I'll
keep losing it, didn't I? So let's put a bit
of gothte in there. It's a nice pushy color. Again, I can take color out. She has got we need to get that mouth a little
section in, don't we? But it's a nice bit of
lightning down here. Okay, that's looking a bit
more cohesive now with that. We are now third layer, fourth layer. Losing count. All right, I'm gonna whizz
into this nose, as well, just so it looks
all a bit softer. So I think I'm at
the right time. I'm gonna say the beauty
of doing lots of layers is they don't merge like they would have done on
the first layer. I'm just trying to soften
that a little bit. So the nostriuls have
still got to come in. All those yummy little bits like that that pull
it all together, but I say we're still kind
of working on that color. Brush. Yeah, I'm trying to keep everything
really light still. Just checking up here. I
think that's looking right, actually. Checking the flicks. All right, put. More
strip down the nose here, see if we can not make that run into the body too much, but So training on the top, a bit more Van ****
coming a bit higher. Try to keep that that
lovely bit of light on top, so try and not go into
that reserve that. Say, we've still got a nice
line to put up into here, so the nose looks a
little big at the moment. It's only because it's trying to incorporate
the lower part. So I'm just going to try and soften that a little bit again. Taking the brush away
so have a little look. I think we're doing right. I think that might be it. I'm going to start if I'm not
careful. He's overworking. But what I will do just to
put a few mi luminoviolet. I might just from the head, I was just coming into the
ear just to try and, again, a little bit break up that ear, stop looking like it's stuck. Maybe you need a bit more
extra strength, let's say, some flicks going in to give the incorporation
that the hairs coming down. Else. Think there's what we can do actually
while we're here. Just a few. Careful,
don't do too many. Again, you can change
your brush size or how big you make those sweeps. And we've got the white paint and to take color out, as well. So we've got those
options to come up to. You can see some of these
lines were done when it was the papers nice and so the
paper was a bit wetter, they're nice and soft, so I
don't want to lose all those. E flick out there, isn't it? All right. Yep. That's enough. Get carried away. Okie doke. That's looking. I'm
more pleased with that. So we definitely need to do the last little
bits and pieces. I think the bones
of that are there. Actually, Wow, this is, it'll be in quite a
nice time, actually. Let's do this before
that completely dries. Let's get the mouth in. So we're going to got
Van ****, smaller brush. I just comes in
there, it runs out. I think the further
back their mouths go, it's almost like
they're smiling. So yeah, if you draw
the mouth back, it's definitely like a dogs grin and they pull their
chops right back. And if it shortens, it's quite a mean look, so keep it keep it a
little bit longer. Let me see how that's changed to look that and I think
that's enough, actually. Let where's that? Oh, I
know it is tiger's eye. I put a little bit of tiger's
eye in there as well. 'Cause that's
really, really soft, that would just give that she got a little bit of mottling around the around
her mouth, the line. Oh complete with one of her
dog hairs attached to it. It's made where doc had
to get to, isn't it? Yeah, that looks good. And we can, again, as this begins to dry, get some of those lines
in of the whisker. I've always hated doing these. So I tend to do them, while
the paper is a little damp, then they spread a bit more. So I've got tiger's eye, whether that's
quite dark enough. Yeah, I might need something
a little bit more. Let's do a little bit of vanike. Make sure you head them
in the right direction. Again, it's just an impression. You don't have to do
every single one. It's just that you can see
there's those whisker marks, which are quite nice. Yeah, that's enough,
I think, for me, 'cause they're one of my things I'm not overly
confident of doing. Fab, I think this
is looking right. I always have to feel
them when I say that. I just his noses got a
little bit big here. I just close that down a bit. Yeah, that looks a
little bit better. Right. I think that
actually does need to dry without me
fiddling. I will. Just 'cause this is puddling, I definitely have got a
little bit of a buckle here. I'm just gonna push that back
and say, This is just me. This is mine because
I've got a slight warp. That's why I'm losing this
lighter part up here. So I'm being really gentle. My brush is just a little damp. I just like to get that tan
marking in the top there. Got a bit of go
thigh. Tap that in, I say, the gothte I
know is a pushy color, and it will push
other pigments away. Yeah, that's reclaimed that. Actually I lost some of
these in here as well. We were trying to keep just tapping some of that
gothte in there. This might not be
relevant for you at all, so bear in mind these
things I'm doing. Yeah, I think I'm right. I am there. I'm gonna
leave this to dry. I'm gonna leave it to dry
as naturally as I can. So I may put the hair dryer over it right at the very end. But I will, I will wait
for it to almost be dry, cause again, I don't want to
blow any pigments around.
15. Finishing Off Part One: Okie doke. Oh, I think this layer is lovely and
dry, and I think I'm there. I don't want to do anymore. There's, I say, always a risk. The more layers you do, the
more you risk muddying stuff. And that would apply to
a complete black dog. I've done exactly the same
just always keeping an eye on the darker areas
and just tapping that colour in until you're satisfied that
you've done enough. But, yeah, I would always
err on the caution of layering too many because they will end
up looking muddy. So I think we are almost there, so it's just the
finishing off *****, where there's quite
a few bits to do, but really there's lots
of little inkery stuff, so not one big component. So I'm going to
start with the eye that's always nice
to finish off. Now, I'm pretty happy with
all that shaping there. I don't think there's an
awful lot I want to do, but I will say this will sit for probably a day
when I finish, and I will always reassess when I come back to come back to it, and there's usually
something little I do, but not always. So, you know, I do keep
that in mind that there may be stuff I will, you know, tinker with a little bit a little more
at a later time. But I've got my white gase here. I'm just gonna
start putting we've already I've managed to actually keep that little
white line there, which is right, actually. It's not a bad place. There's also that little line
down there, isn't there? I don't need to do all of them. But there is a nice catch light, and I can actually see I've
scrolled into the eye. There's actually me there,
taking a picture of her. I wouldn't me. Um, I'm not going to
do the eyelashes. It's a little bit
tweet and small. If I was doing
this a lot larger, I could probably get
away with doing it, but I think for the
time being, I'm not, so I'm just going
to put that white dot there, that catch light. And if I feel as, you know, we finished finishing
this painting, that would help, then
I will put them in, but the moment I will leave
that, that's looking nicer. Wouldn't use that much more now. But there is this lovely bit
of light to take out here. That's quite strong there, and that will give
that structure of the I guess it's the
eye socket, isn't it? Just gently. You got, you know, a few layers to wipe
away, but just go gentle. This is almost like
sculpting at this point now, and when we're doing these
last finishing off *****, you can kind of think
I might have gone a little bit too
long there, maybe. So I can just take the end off there and just
soften that back a bit. That's probably better. I can see there's a nice
bit of light there, but we need to darken
this little section here. But there's a nice bit here over the top, where
the lights catching. Again, the eye socket.
She's quite deep eyed. So yeah, that's nice. So let's get that
darker area in. I'm gonna pick up the so
like Genuine, I think. Let's have the van
****, as well. So I'm actually going to
literally just paint this in. Coming down here, isn't it? It sweeping sweeping up. Very gently sweep into that
those tan markings, as well. And then quickly, 'cause
we don't really want it to look like we've literally
just painted in like we have, you can then soften the edges. Comes down a bit further, doesn't it stick with van
**** act for the moment. We sort of gauge things
at the top of the eye, and you can see that
probably comes down a bit. I probably swept
up a bit too high, so dabble with my finger. The nice thing about this paper, one of the reasons I
chose it, it's very soft. So if I put lines in or paint things in like this,
it's very soft. It doesn't leave so
many watermarks. So it's a pretty paint for that. A nice paper for
that, shall I say. Maybe extend that down a bit. Us. It's just about observing observing that reference
photo. A bit darker there. Probably will soften
that top line, actually, 'cause that is going
into the shadow. So having that very stark white at the top is
probably not ideal, so. Just wetting it just very gently and the color
will run into that. Yeah, that's that's good. Let's just scrab up my pad. So let's get this.
We haven't done. I quite like to get this a
little bit more defined. Let's wet this down and pick up the goth and actually a
little bit of that orange. Although, like I said,
earlier, the yesterday, the camera does tend
to emphasize colors, but she is quite she
has got quite bright. Marking especially
over her eye so very, very small little flicks. Coming out. Very
tiny. Be careful. Again, you can do
that with a down pick up the luna violet. Cleaning my brush, tiny
little bit of my brush. If you've got dinky
little brushes that you think might be helpful,
then you can pick those up. Again, I'm just
gonna just emphasize a little bit of eyelash. Yeah. It looks a bit
hard, bit stuck. You can always just tap the
far side to soften it down. I might then just
wipe this portion. I really decide I don't want to make too much of this area here. So I want it to blend
as much as I can. Strengthen that up
again a little bit, get that darker area back in. All the while, keeping an
eye on that reference photo. So these might not necessarily
be relevant for you. Yeah, that looks good. What I will take out, just because I'm looking at this, it's looking
very obvious. Is this line here? I'm
just trying to soften it. I think we've done, obviously
quite a few layers now, it's kind of pushed up against the edge and
left quite a hard line. Soften that very gently. Don't use kitchen
roll or anything like that. That's
probably enough. Very gently tinker it out, 'cause there's it's
nice and light here. It's real nice bit
of light falling. Fingers sometimes quite good
and scratch backward in. We get a little bit of sense of light hanging getting there. I'm almost losing the edge. I could have due a few
more flicks there and it's going against what I say. Don't put the flicks
on afterwards. But that's do what
I said. Don't do. And if you're scared,
you can always do some of these in pencil. Yeah, use that looks
alright. Wedge there. All becomes quite
picky at the end. I say, the beginnings, lots of flowy paints all quite bold. But the end, it's very tiny little movements,
little bits and pieces. It's sort of sculpting, really. Take brush away. Yeah,
that's looking nice. Again, I can do that.
At the top of the nose, you can see there's a it's
really light on the top there. So I'm just trying to
take that edge away. And that's the thing
with doing layers is you can end up
quite hard edges. Paint forms you know, the edge of uh, But be careful. Some of these Daniel
Smith paints are lovely, and they lift out ever so easy. So if you're not careful, you end up taking the paint out and you
end up with a hole, so it'll go very, very gently. I think that's probably enough. I can see it lifting
up quite easily here. That's probably quite a
lot of that tiger's eye, and that's, say,
a very soft color and comes out very easily. Tiny movements. Really, really tiny gentle movements.
Take your brush away. Yeah, that's definitely enough. Right, let's get this nose
in because I've lost, where we wet it down again
and it will merged in. I will now paint it in, I got some unfortunate block there. That's get rid of that. We'll paint it in again, so it will stay it will be softer because we've
already let it merge once, but it's disappeared
too much now. I might have a little bit of liking the violet
at the moment. A little bit of violet in there. And then we can start to bring that nostril
line up there. And sometimes, if it's
if they're very dark, you almost don't need to put
a nostril in, but we will. And they usually have a slight
curve here off the nose? She had just very gently. Squint your eye. Yeah,
I will paint that in. Dry in a minute. I'll stats dried again. Okay, kind of working my
way round that mouth. So I've squalled in my iPad. So, let's got the Ludoviolet
and the van ****. We're trying to paint that
mouth in a little bit. C we round. Come off
here. C we round. 'Cause we did on
that last layer, we put lots of tiger's
eye around here. You could almost
get away with just painting that straight
on and not softening. But if it looks a bit
stuck, in your brush. Then just soften the
edges very gently. She's just tapping
the softening. Really, really gentle 'cause I don't want to be
lifting those layers up. Or, you take your brush
away, have a little look. I think that's almost
enough, actually. There's that nice line
there we haven't got in, so a bit of van ****. Maybe a little bit of violet on your brush
at the same time. Again, we can do a
couple of flicks. I might go th as well with it. Don't want it to be
too. Yeah, just enough. Again, you can do a
few sweeps in there. Lovely. Alright, so I to
look at this head again. Take a tiny bit of
colour out here. Quite light up there, isn't it? Yeah, that's probably enough. There is a line coming out here, but I think I've managed to
sort of capture that already. So I'm gonna put that in
there. That's got dike enough. Yeah, I think I'm sort of
I think I'm getting there. Just a little bit
of Van **** here. I go know shape a
bit better. Yeah.
16. Finishing Off Part Two: Okay, let's sort of have
a look at this here. Now, I definitely don't want to put any more
painting there, but again, I can
take a little bit of colour out so I can lose
some of these edges. Sort of scrubbing a little bit. Again it up the top here. Did you lets that light in? I don't know, I can actually
start taking a little bit of color out to get a coat
so we can come in. Let me just go grab a
bit of kitchen roll. Clean dry piece. So
I've cleaned my brush, taken the excess moisture
off, give me a bit of squidg, so it's a little
bit, an edge edge. I used to have an
eradicator brush, which if you've watched
all the classes, I used to use quite a lot. So this would be lovely for it, but it's um I got a little worn out and
I haven't replaced it. I is a shame, 'cause this would have
been quite nice for this. But this brush you're
doing all right. Just take out a little
bits of colour bit. Careful date too much. That's a nice sweep down here, so it's just I'm just going back over the same little area. Sometimes I won't use the
kitchen roll it takes, it takes the lump color out,
and it looks a bit odd. So I will, some I won't try to make them as
random as I can. And if there is, there's not a very obvious
curl there, is it? But sometimes it's
a very obvious one, you can see, then quite
nice to pick out. Let's do one here. It's
quite nice to come in. Into the um, main body, even if there isn't
one, just a little bit. It just breaks up that line
between the ear and the body. And the body, the um head. Yeah. To do a little bit here. Gain one actually going out. Let's gain breaking
up that line. And you can change
sizes and brushes, if I do a little
one, then in theory, we get a slightly smaller. You'll flick So you can kind of work your way
around doing bits and pieces. And we also use just a
little bit of white. Gosh, it goes on quite
strong and you're like, Oh, my goodness, that's gonna be too much, and
then it lightens. So just a few just a few
flicks coming in here. Again, just breaking up
that line of the ear. You can see how
quickly it's fading. It's all getting a
little bit light where you feel like
you need a bit more a few more definition. Be careful. You
don't do too much. It's so easy just
to overdo this, do lots of little flicks, and you lose that lovely
wash that's underneath, and you've made it a
little bit a bit too much. Again, you can take
a photo of it, so that's a really
useful thing, Still. Um, so I can have a look and judge it from my photo and see
what you think on the photo. Well, that's upside
down that way round. I just find it such
a, a useful tool. And then you can I think I could do another
sort of sweep there, I think, looking at that photo. Which way seems
really odd to me. Fab. Yeah, I'm definitely
nearing the end of this. I'm unsure whether this is
a little light. I like it. Obviously, she's a black dog, and we've made this
ever so light, but you look at the
photo, it's very light. There's not a lot going on
there, but it makes sense. And it's so I just don't want it clumpy. I'm
sure I've got one. This never really got
finished any more than that, but you can see there's
a lot of color, and I tried to do some legs, and it just it loses any sort of lovely ethereal look where it just disappears. Where's that? And
the moment is nice. It could potentially be
a little bit too light. But what we would
do a few flicks, which might help just to
kind of strengthen it up. I quite like the lunar
violet for this. Maybe we'll have the van
Dike in my hand, as well. So same as we did with the ears, we can just do a few flicks. What's she got coming out
this way, haven't she? You keep your You know, you have a lot of
paint on your brush, obviously, they kind
of come out strong. If you don't they're kind
of come out quite soft. So a few few sort of sweeps. Salt didn't work
particularly well, did it? But I didn't have a lot of
high hopes for the salt. But sometimes that's quite
nice. It breaks it up. And we can do the
same thing. We can take out little bits of color. But I don't want to take
too much out because I don't want to make it any
lighter than it already is. But if you've got a very hard
junction between the two, then you can do some of that. There's that piece
of cam kitchen rock? I stuck it in my back
pocket. Ah, it's there. I can kind of come
over those two, that that switch up brushes. Sometimes you just need
one great big chunky, chunky thing, and it just helps. I'm going to leave
that there. I'm seeing it's all looking a little bit
flicky if I'm not careful. I'm losing the nice
lights and ease of it. So I'm going to, like I say, I've been I've been doing this for the
last couple of hours, probably, and I'm
losing what I'm seeing. If that makes sense, I'm just I can't almost see what
I'm painting anymore. So I will definitely
assess this the next day, and see if things
need adjusting. But like I say, I think
I'm almost there. It's a little bit here. Just just make sure we finish I've finished
as much as I can. We haven't gotten
nostril in yet. Is it dry? I think it's dry. So I tend to use so like
genuine just to do the nostril. I've made this quite
dark, so it's not very obvious where
the nostril is, but it comes up light
there, don't we? I got a bit of a
sheen from the light. I can't quite make that
out how dark that is. And usually there's a nice bit of light that can come out. Between he's there. Sometimes the other
flip side of it. And if you found too much colour has gone onto the
top of your nose, you can very gently
wipe that away. I've got quite a nice
lot of light there, so managed to reserve that, but that's a very easy easy do. You just literally
just wipe it away. Whiskers is the only thing, so I'll put a couple of whiskers they're always
quite nice to put in. I'm gonna just used the Vandyke. A little dumps down
there still, isn't it? Or you can do it with a pencil. Pencil's always quite fun. She's got a mixture of um of dark and light whiskers. So let's put chemo bush. I mean, you can turn your paper so you can
get a nice sweep, but I don't want to
turn to my painting. But I tend to sort of
get that movement, and you can always practice
it on a piece of paper. And I will slowly come down until I'm actually
touching the piece. And hopefully they
don't come out too thick, a bit more water. I think you can always soften
any that are too stark. Bear in mind, they
lighten, so don't panic. Oops, that's my
traveling Excuse that. My traveling brush. That's it. Tops come off. You see how light those flick white flicks were and how they,
how they faded. So a couple more in there. Right, I'm going to call that
done for the time being. I shall reassess this. It may be, you won't know the timespan,
but I will reassess this. And if I feel that there's other little tinkers
that I've done that I think would be
helpful for you to see, there will be another little
lesson following this. But I think I'm about there. I can see where I was trying
to lighten this area. Oh, no, I've put paint there. There's a little line on top of the nose, so I would
need to tidy up. Actually in a magic sponge, which if you've
come across them, there's a tiny
little section here, but they come in a little block, and they're great for taking all these little splatters
out, I show you. So they come in a square. I've just ripped a
piece off, but they are amazing for taking color out, especially on little specs like this and
somewing like this. I don't use it for taking
color out on the main piece. It just takes it out too well, and you suddenly left
with a great big hole. And that's incredibly
hard to patch up. So yeah, I would avoid doing
it on the actual painting, but you can see that's quite neat for doing
things like that. And again, that little top bit. Well I've taken the color out, you can see that
there's a little line, so I'll just, again,
just rub that out. Try not to go into
the main head itself. Say, fantastic for getting
a little blobs that out, which always helps sort
of clean up the painting. Yeah, I might do it on
edges just to lose edges, but not into the main body. Yeah, as I say, if I do a lot
of other little tinkerings, I will definitely re film
another lesson for you. Other than that, I really I really do hope
you've enjoyed this. It's been a long time
coming a black dog, 'cause they are a bit
hard to do, aren't they? Especially in watercolor.
It's always a bit of a thing. Um, and all that, if you've got a black,
let's say, labrador, which is always
slightly scares me when somebody comes and gives
me a black labrador to do, it's exactly the same. I know she's got tan underneath, but I would have used
instead of the tan, I would have used the gentle, you know, darker
colors that I've used. Actually, Van **** is
great for black Labradors, rather than I never use black. Um, take all these
sort of lunar violets. I sometimes use some violets I haven't done in
this because she doesn't she's not Black
labradors are very dark. Oh, they're very
dark. They're black. But they have more of
a raven color to them. Was she's a little, she's
more van dike to me. But so you can kind
of judge your colors. I'm starting to waffle on it. I'm not sure if
I'm being helpful at this stage, but, yeah, it's just subtle layers and observing your
piece and taking the time to sort of step
away and assessing before you go onto another layer
before you muddy it. Anyway, yes, I really, really do hope
you've enjoyed this. And thank you thank
you for joining me. And please, please share these on the projects and
resources pages. I really look forward
to seeing these, and I think there'll be
quite a few questions. So please don't hesitate
to sort of reach out if there's something you're stuck
on. I haven't made sense. You want to post
your picture up onto the projects and resources
page and, you know, pop a little question underneath if there's something
you're stuck on as a what happened here or what could I do to
improve this area. So don't be afraid to do that, 'cause I try to be quite good
at replying to everybody. Um, right, I shall wind
it up there, and say, you may have an extra lesson following this as there's
lots of little tinkers I do. If not, then I'm done. Thank you very much.
17. One More Layer: So after reassessing
my Twig portrait, I'm going back in again, and I think I'm going
to do another layer. I still looks a little
washed out here. Um, a little top bit here. I'm looking at the picture on my phone bizarre
in front of me. Yeah, so I'm just going to carry on, do
a little bit more. This almost too much here
and not enough here. These I need a little bit here, a few chinkrings, but I
think the best way to achieve it is going
to be to rewet it. Now I'm going to have
to be really careful. And I think I also
did this line down here a little bit too deep, and it made her it just
doesn't quite look like Twig. So we're going back in again, which is a shame
because I've got some of these nice flicks in here, so I might try and go
around those, but again, going to be super careful
right up against that eye. I think at this point, it is probably just
something for you to watch because I'd imagine at this
point, we're very different. So unless you feel your dog needs more layers
or more adding, then I probably
just watch this if either you and I maybe
won't talk quite so much and just concentrate
on the painting because it's quite yeah, it's quite hard to
do it all, and, uh, I think as I'm not quite as
bold as I normally would be, if I was just
painting for myself. So I would have probably
wrapped this up, I think, had I been
painting for me. Not that I'm blaming
you at all, of course. Right, that's nice and wet. So I have to be careful
not to overmuddy this. I've gone around the nose,
gone around the eyes. I've actually incorporated
this little area here as well, so if I
can strengthen it up. Come across here. So almost
I've got too much here. So I'm just going to
try and wipe this away. It's the joy of having
wetting this down again. I can move it around, but I won't be
taking this was dry, and I scrubbed
that away, I would leave a very obvious line. A little like this, you probably see I've taken color out there, and I've scrubbed it away and you can see that line there, which is not that pretty. So we can gently
gently just maneuver that color but maybe where
it should be, a little here. So I can pick up. I think I'm going to use the
very soft colors. A little bits of lavender, little bits of potters pink. I've got the Luna Violet. And let's have that. I'm not gonna do a tiger's eye. I think that's
almost too spready. I think this is
part of my problem. It's spreading too much, so I want to get this a
little bit emphasized. And this a little more
in the right place. I think when I put that got on, it pushed the car
out too far out. So let's have a look. So this white grouse where you put the
whiskers on or I put the whiskers on will just
gently blend away, really. There's a little bit more
Luna Violet up here, I think. Why defined edge. I think
where I took the color out to show you how you
take colour out, I lost. Just somehow got a little messy. I want to emphasize
that a bit more. I think this color here is
lost the I squint my eyes. I can see there's
more color here. That's a bit of potters
pink and Lavender. See if we can a little
bit of lunar violet. 'Cause obviously, where
the shadows fall, it's all creating you know, it'll be the bone structure underneath that's
causing the shadows. So if you get something out, you can be changing the
structure of the dog. Let's keep that colour away
here and just wipe that away 'cause that's a
nice part of light. And again, bone structure. I think I'm missing
something over here as well. So if I put a little bit of lunar volet Just
above the eye. If I squin my eye, there's
just something there above. So it's really it's amazing. I don't know how I
think I must have painted this five times. I thought they all come
out slightly differently, but yeah, they all do
come out differently. You have your own individual
problems on each painting. I Van **** 'cause the vandyke a little
light CPA doesn't move quite so much and get a little
bit more color in there. That's another hair
there. That's not gonna be very helpful. Keep keep doing wetting layers so wetting the paper down again, you lose that light, as well
that you may have found. So you have to keep wiping
that away, as well. And be careful not to do the dreaded muddying.
This is white down here. Let's try and move some of that away 'cause there's
ever so light here. Cross the top of the
nose. We weren't tapping. I think they're probably the last black
Labrador I ever did. That probably had five
layers, if I'm honest. 'Cause every time
I look back at it, I'm like, Nah, not quite
right, still needs more. See, I do what I'm doing here. You go back over it again. And try to be careful
not to muck it up. But the good thing about
these very gentle layers, you are only adding a
little bit of paint. The risk is not to say is not
to muddle that underlayer. I might add. Add a little bit more here as well. Doctor user. It comes down. I don't want to wet the
lower part of this, but I'll drag some
of the paint down. As we get that nice. Dark area, it's very
prominent on that photo. Actually, if I squint, I can see sorry. It's in the light here
as well, isn't it? Just pushing the paint away. I squint. There's always a
line coming across here. It's just gently trying get a little bit
of light going to step away. Am stepping away. So it'd be highly unlikely you've got exactly
the same problems as me, say, at this point.
This is just really me. Et me go about the flicks. Only do the flicks on
the very last layer. And you never quite
know, do you? Let's see if we
can make them not look like they're
actually stuck. So, it's trying
to keep the light while adding the dark
when you're doing the layers because what you don't want to
lose is the light. My little line
disappeared, didn't it? You how bold that was
when I put that on? Let's see if we can get
back down in there again. I'm going to do this as well. Excuse me. We into this as well. Just so I stopped that very obvious line that
seems to be appearing now. Perhaps a little bit
of credente gold. S. The joys of doing
layers is you can see how little that's
moved, actually. Ways you'd have put
that on the first one. I have been all over the page. Little bit there. So, I suppose this is classic
fiddling, isn't it? But there's nothing wrong with fiddling as
long as you can do it hopefully mindfully
and not to ruin it. How's that look? I think
that's looking better. So now it's
emphasizing down here to me that this needs
a little bit more, again, a bit more umph. So I'm going to gently re
wet the hair, as well. I love the light. I think this
is a bit of a strong line, and this almost needs to be dark and just to
emphasize those two. So I'll up the van ****. Just go to strengthen
this a bit more. Just under here,
'cause actually, that ear is lighter, isn't it? We can flick up into the ear. And then a bit
dibbling and dabbling. I could put this on the tilt, but I don't want any
of that to be moving, so I'm going to keep it flat. Oh, to paint a black
dog but keep the light. What a thing. A little bit of the quincond gold there. Be Come up here a bit more again. I love the light here. That looks good. But we'll have to do some
flicks in although again, they're going to look
like they're detached. I mean, I'm just gonna very gently all this again and again. Really gently. I say, I want to try and get
away from this line probably I'm not sure what I probably did. I've even forgotten my
train of thought, so it? That's softened some
of those flicks. I think I got a bit carried away by doing
the flicks there. That softened those down. Again, this is just what
I like to see, as well. So this is say, it becomes very personalized. I like things ever so soft, so it's definitely
by no means right. I would hate to say this is
the way to paint watercolour. It's just the way I
paint watercolour. And, uh definitely no
rights and wrongs. That would be
boring, wouldn't it? That looks a bit better to me. I've got my photo opened up, I say, on my phone off camera. I've got my got the photo of her on my iPad
in front of me as well. So I'm just looking between the two and
then at the painting. The other thing I notice is
the ear here. I can see that. Again, it looks starkly
obvious on my phone, but not actually in front of me. I think I need something here. It's gone a little
bit pale here. And also, obviously, if you
do the it's not that obvious, but it's not obvious
at all on her photo. But to get the waves that
some spaniels have on a here. Then obviously, the darker and the light will indicate
sort of the waves. So I'm going to put gonna put a little bit so light genuine
just in the back here. So I've wet a portion down. I go to tap a little
bit in there. There are a bit of something
dark at the back there, 'cause I think it's
all too light. It wouldn't be so
light at the back. Its again, we're slightly
making things up from the photo because the
photo doesn't really show that great
difference, does it? It's darker. I want to sort of emphasize the fact that it's darker behind her and
lighter in the front. I think that's helped. Let's put a little
bit of vandyke. I'm clinging onto
these for dear life. Let's put these down. A
little bit of van **** there. Mindful not to do
too many flicks because we ready got quite
a few flicks going on here. And not to do the
dreaded overworking. Right, I can see this is
creeping out a little bit. I enjoy my boss at, so it's not adding more
water, you don't need to do. Just gonna push that back. Use the Vandyke Vandyke. Get that jaw line
in that was a bit higher up than I had it. I came back and thought, Well, she looks a bit a bit chunky. I think it's to say that little tiny line was just
a touch too low for her. Though most people do
assume that it's a male. She is a very large
female cocker spaniel. Um, I think she weighs 18 kilos. Well, she's a fair size for a working cocker
spaniel, especially a girl. Alright, it's
taking a little bit of light out of the
front there again. A bit squig my finger. I've also lost the nostril lined, as well. I didn't really. That's not very,
very well shaped. So I can either you
can either take take color out to leave the nostril or you can put the nostril in. If we can just get
a sense put touch touch low a Vandyke to confess, I'm slightly struggling to see. Here's a sheen on
it from this light. So if that alters
a little bit on the photo when you see
the finished painting, that's why I probably
need to suck that out. Of camera when I can see. I can see it clearly. Right. I think
that looks better. And again, it's beginning. Yeah, it's beginning to dry. These little areas
are going off, and I don't really
want to add more water again because they're gonna
tie the whole painting out. And you can. Yeah, you can end up. Obviously, it did end
up overworking things. But you tire your paper big
gets tired, as well, I think. Soy, that's a little bit of I said I wasn't
gonna use tiger, I. Yeah, no, that's not
quite right for that. Bit of lunar violet. It's been
pushing other colors away. Such tiny movements. It's getting a bit spotty, isn't it I'm going into
dangerous territory 'cause I'm playing while the
paper is starting to dry. This would definitely
get into, say, dangerous territory of fiddling and not helping the painting. You can't help
yourself, can you? You kind of want it to
look right, and you know, so But, I am going
to have to stop, 'cause I am super dangerous
of fiddling that too much. So as I say, I hope that's just been
interesting to watch rather than solving any real
problems necessarily, because, I say, we're probably quite different
to where we are. So I hope this little
bit has helped, maybe, and given you a
little few more insights. Um yes, thank you very much for
watching the last little bit.
18. Final Thoughts: So I hope you enjoy
painting twig. This is a class
I've been wanting to share for a very long time. How did actually starting
your painting go? I always find it
the scariest part, but try to be loose and
at ease, if you can. Did you enjoy painting
as multiple layers? You can see how it
brings you depth, subtle color change,
and interest. How about the eye? It's
so important to take your time and not to
hurry or feel frustrated, as it does take a little bit of time and tinkering
to get it right. As I always say, it's
worth stepping away, coming back and looking at your painting with a
fresh pair of eyes. And this is especially relevant for something
as tricky as twig. So we look forward to seeing
you in the next glass.
 Jane Davies, Professional Artist and Teacher