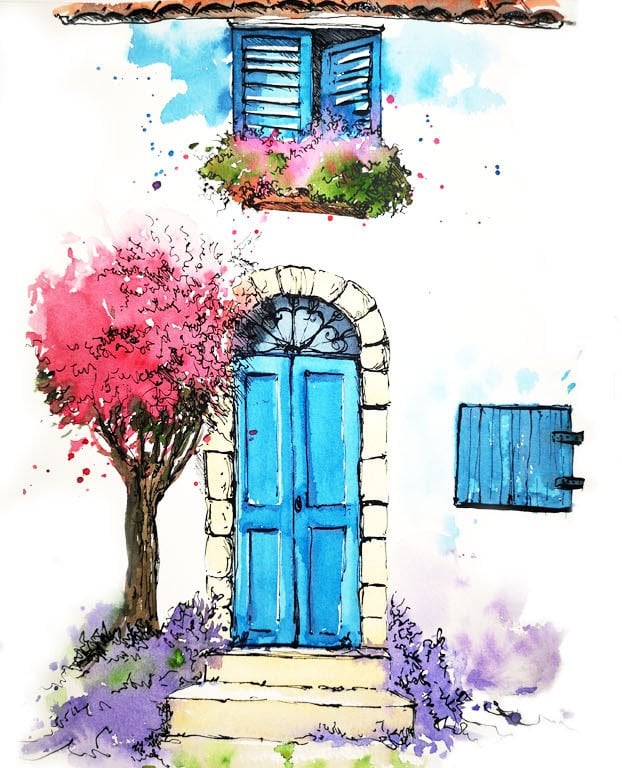
Transcripts
1. Introduction: - Hello and welcome to my watercolor course. I'm Suzanne, and I'm an artist. I love to inspire people to paint in watercolors on, and I showed simple anything to follow techniques through. Michael's Watercolor is a great medium for artists, designers and hobbyists in this class, unsure you hard to create a split painting off a vibrant birch tree landscape. I have used colors from all four seasons that is spring, summer, autumn and winter. I personally enjoy watching the colors mix on the paper and create beautiful effects without much effort from us, The vibrant colors of watercolor is always a pleasure to look at. It is a therapy for our mind and soul as the magic of watercolor unfolds. If you'd give it a try, you may agree that there's nothing more beautiful than painting with this medium. I hope you will join me to create this beautiful painting and have lots of fun along the way.
2. Materials Required: in this video. I'll be talking to you about all the materials that you require for this project. So let's start with watercolor paper. I'm using a fab Brianna cold pressed 300. You some paper you can use any brand you like, but I would suggest that your paper is meant for watercolor on the week is at least 300 Judson. Anything below that can buckle and fold in areas where it can create problems while you do a wash, I will be using watercolor cakes or pants for this project. The paint that I have here is Windsor and Newton Partner Range Watercolor Cates. You do not have to use the same brand. You are free to use any water kind of materials that you have, including paint. There is also an option off watercolor tubes onto the pain in it are much fresher than water again. It's your personal choice and what you're comfortable. This here are all the watercolor brushes that I will be using for this project. 1st 1 is a flat two inch brush, which is mainly used for washes for larger areas. The next one I have is a pure squirrel hair Windsor Newton pointed more brush size one. You can also use a normal round brush for this project. Sides. They're not world. I also have a small round brush side. Six for details. This is purely optional. You can use your point of drones or mark brush size 10 or 12 for details if you're comfortable with it. I also have a record brush, which is mainly used for fine lines. Let me show you how it looks. Once it's done, you can see it has a fine point on. At the same time, it can hold a lot of pain for duties as its Sehgal hair. Don't worry if you do not have a rigger brush, you can always use a small round brush for details. I'll also be using some tissues to wipe out extra paint or walker. And for sketching. I'll be using a pencil andan, a razor here, 1/2 opportunity razor, which is in need. Herbal Raisa. And it doesn't leave any residue while you want. But don't worry if you don't have one, because you can always use the normal Raisa. I'll also be using two jars of torture, one for washing the brushes and the other one for fresh clean water on important material that will be using injuries. Class this the masking fluid I have winds were in using masking fluid. Andi on applicator. This is a normal brush with while silicon chip at the end, you can also use a ruling pin or a normal brush to apply your masking fluid. However, make sure you use an old brush for this purpose, as the masking fluid can damage the bristles off your process. Finally, I also use a little spray bottle to spray my watercolor cakes or pounds Andi dry paint on my pilot to activate them before painting. This is completely optional. You can always use your brush loaded with water. For that, I also soak my brushes in water five minutes before I paint just to make it done on bond. Ready for painting. Make sure that you did not soak your brushes for more than five minutes. Asked the clue that times the prisons together can come off on dure brush can be damaged, so it is very important to note that you soak your brushes only for five minutes before painting
3. Watercolour techniques: Sonett speaking by practicing some techniques will be using for this class. 1st 1 is a wet in wet wash, where we begin by wetting the paper first and then dropping in some color into that wet area. So here I'm using, buried in green for my palate on Essen. As I drop in that color into the wet area, you can see how it spreads. Andi feathers out. Now I'm going to drop in another color into this wet area right next to the green. So this time I'm going to use some orange, and I'm going to drop it right next to the green and let it blend together. Next, I'm going to do a wet on dry wash where I'm going to paint on dry paper. I've used the same Carla so we can do a comparison now. If you compare this with the first wash we did, you can see the different straight away. The wet in wet wash has feathered out with soft edges, while the wet on dry wash has more sharper edges. Now I'm going to use some orange with the green, and you can see it's blended in nicely, just like the fast wash because the greenest still. But while we're waiting for these two washes to dry, I'm going to show you how to create texture with dry brush. For this, I'm going to take out all the excess water from the brush with the tissue, and then I use very concentrated pigment, making sure I take out the excess pigment on a tissue using the belly side or the body of the wash. I'm going to gently move it over the paper, since I watercolor paper slightly textured or off the brush Duchess. The area of the paper that stands out that's creating a nice texture on this is great to show foliage in our project. Another way to show texture is to flick the brush. For this. I load the brush and hold it near to the paper. I use both my hands to flick the prisons of the brush. You can see that the paint has strayed across the paper in a certain direction. You can change the direction off this pray by flicking the brush from another direction. Now, first your washes us semi dry. Now the wet on dry wash has dried a little bit more than the wet on wet wash, Obviously, because the first wash has got more water in it. Now I'm going to give some value or darker shade to the green on our wet on dry wash. For this un preparing, I'm much concentrated green now, using the tip of my brush. I'm going to dob in this color, and you can see it's not spreading anymore because the first wash semi dry but at the same time it's creating a nice tonal value. It's the same color, but in a much concentrated form, and it's already creating a beautiful effect. The edges are quite soft, and they're not standing out because the first wash is still not completely dry, so it's still blending in a little bit. If you can see next, I'm going to show you how to use masking fluid. It's a very important step in our project. Today, I'm using Winsor and Newton masking fluid on by masking fluid applicator with the silicon tip. So I dipped the applicator into the masking fluid, and with the tip, I can make little shapes or marks on the paper. So here I am attempting to do a little bush shape. After I finish, I leave it to dry completely before I do any more painting over it. Now that the masking fluid is completely dry, I'm going to paint over it. I'm going to use um green. I have mixed this using lemon yellow and Prussian blue, but you are free to use any green that you may have. So now you can see that it's leaving out the areas where I have a slight masking fluid so the paint is going on Lee around the area, I have also used some deeper values is green just to show yet now, once this is completely dry, you can Pugh the masking fluid off. If you run with the edge of the mask, include it may start coming off. Or you can even use a rubber or cloth if you like. And once the edge feels off, you can just feel it off completely. And Italy's or white area, where the masking clean it has seen. Another technique that you could be using for this project is stamping where we can use the whole body off the brush to stamp down on to the paper, and it creates a lovely texture again now in a project will also be during some details and fine line for this. I'm using a rigger brush. You can also use around pointed brush. If you have it doesn't matter what brush you'd use as long as you get a fine line with it. So here I'm just going into some pains. Great to do some fine lines. So I'm starting off with a nice brunch and you can see the type of ones that I'm talking about them off created a flying lunge. With this regard brunch, it is possible to do the thing with a warmed wanted brush. I'm also doing a little example off silver Bartsch tree will be painting with all its groups on its white silvery bark. Andi, this is all possible with a pointed to brush. Sometimes I've also used my fingers, just spread the paint and create texture and tonal values on the barge tree. The last thing I wanted to show you is a dry brush technique on a wash. I know we've already done the drivers technique already. Andi, I am going to use the same technique, but on the first wash that we did, that's the Western whitewash. The reason why I left it to the last is only because I wanted it to dry completely. Only then the dry brush technique will work on it. So this time I'm going to use crimson Red. I used the same steps by taking out the extra paint on a tissue paper. Andi, Using the body off the brush or the belly of the brush, I'm going to gently move it over the paper and creating a texture on it. This is the same technique that we did a while ago. The only difference is that I am doing it on a wash. So that's all the techniques we will be using an arm landscape painting today. Please feel free to use the discussion section if you have any doubts or ever get stuck.
4. Class Project: Taping the paper: before we start painting, I'm going to show you how we take the paper down. Since we're doing a split painting, I have three sheets of paper, all about a three size. It doesn't matter if you like to paint a larger painting or a smaller one, as long as all three sheets are the same equal size. I laid them out and I take them first at the back so that they looked like one large sheet . Then I flipped them over on DTI. Take them all around to hold it down onto by table. I also take them in the middle where the papers joined. This is so that I get a clean edge around each painting. One once it's done. Now that we have taped them, Weaken begin to sketch.
5. Class project: intro to initial sketches: this video explains all about drawing barge trees. It is for anyone who would like to give a co drawing urination sketches. So let's start with true article lines short squiggly lines for site branches, Andi Crude's. You can also add in a few more side branches to the street. Now I'm also going to draw another burst re right next to it, with a different type offside branch. Again, I repeat the grooves on the site branches for the tree. I also shade one side of the tree, just a short depth. I'm going to do the same for the other tree as well. Now let's look at some perspective, drawing where I'll be sure knew how to draw trees in the foreground and the background. So I started with a nice wide birch tree in the foreground. Andi, I will do all the details on the birch tree because it's in the foreground, and that's the one nearest to us. If I wants to draw a birch tree in the background, it will be slightly more sinner as it's going away from us. The father, it gets away from us. The details will be very less I'll be much thinner. Let's go back and give some more details to the trees in the foreground. So I go in and do all the side branches on DL The groups. I can also show some depth by shading one site off the tree doc, but DACA compared to the other side. Also, if I hired a room off large trees, I would shade the same side of all the trees so as to indicate light falling from the other side. Now that I have drawn to birch trees in the foreground with a lot of details on it, I'm going to add in a few more blocks trees in the background. Now, as I go along, you may see that I've given very less details to the ones in the background, and it's sort of fades away with lesser details and lighter shading. I hope you found these simple tips helpful, so why not go ahead and give it a try?
6. Class project: initial sketches: sketching out the birch tree landscape is a fairly easy task. All we need is a silver it off a few birch trees on some slight indication off bushes. I will be providing you with an outline sketch, which you can print and trace if you like, depending on the size of your painting. Or you can also give a go at sketching. I hope the simple tips that I provided you in the last video will help you to draw your own landscape. It will not look like mine in the end, but that doesn't matter as long as you draw your own personal burst re landscape, you can also refer to my line drawings that I have provided in the Projects and Resources section. I hope that will help you as a guide like to draw your landscape. But if you're not very confident with that, you can always use those line drawings to trace your landscapes. So these are the line drawings there have provided in the Projects and Resources section. I have numbered them as 12 and three, with number one starting from the right hand side. This is only because I am a left hander, and I'm very comfortable drawing from right to left. If you're a right hander, you are always free to draw from left to right how you would normally do for drawing off for writing. But for left handers, it might be easier to draw from right to left as you can see what you're doing. If you wanted to trace your line drawings from the line drawings that I have provided, I'm just going to show you how to transfer this sketch onto your watercolor paper. For that, I flipped it over and with a three B pencil or any pencil that you have shades the back off the paper. Once you're done, flip it over to the right side and place it on top off a watercolor sheet that you would like to transfer the drawing on. I would such a stupid to small tape at the top so it doesn't keep moving. While we're tracing the picture using a pen or a pencil, I'm going to trees over the birch trees that I've drawn with a pencil, making sure that I'm not pressing down too hard. But at the same time, we need some amount off pressure so that the graphite underneath the paper will get transferred onto the watercolor paper. It's always best to keep checking by flipping over the sketch so you can see if the drawing is being transferred onto the watercolor paper. This way, you do not damage your watercolor paper and can easily transfer the painting. Now I've finished transferring the sketch onto the watercolor paper. I'm sure you may not notice a lot at this point. It's very faint, but however, when you transfer your picture at home, you will notice the famed lines on your watercolor paper on. This is all we need to start the painting if you're using this method to transfer the sketch. I was such a stew. Stick on three watercolor papers together on then transfer the sketch so you may be able to adjust the sketch accordingly so that it looks like a country news landscape composition. If you'd like to use my sketch for your painting, I have uploaded it in the Projects and Resources Section
7. Class project: Applying masking fluid: After you have successfully transferred or drawn your sketches, we can start applying the masking fluid. What I have here is a winds around you turn masking fluid Onda masking fluid applicator, which is a normal brush with a silicon tip at the end. Andi, this is the end that we used to apply the masking covered on to ask it. The other end, which is a normal brush, can also be used for mosque imputed application. It is water for your comfort global. You can also use a holding pen or any normal rush that you have. I would suggest you use an old brush as the mosque included can damage the bristles of your brush. Also, does that bicycle to apply a lair off so onto your prisons before you dip it into the masking fluid. That way, it is easier to clean your brushes once you finish using the masking. So let's start applying the master pivot onto our barge trees. We're painting only the birch trees with the mask included now because I do not want the initial washes of the background to go on top of the box trees. Once you've finished applying the mosque include all such as that you leave it too drunk. Complete me, but at the same time, Mr Not legal for Madam. I don't walk too. That's again. Get stuck onto the paper. And when it comes so it can damage to If you apply the first ones too quickly before the mosque included wants out, there is a chance that it can come off on the areas where you want it to be. White can get staying. Also, it can go on to the prisons off your brushes on it can still damage your personals. It's very easy to clean your masking fluid applicator assets, a silicon interest. All you need to do is wash it and wipe it out, and it will be very clean, okay?
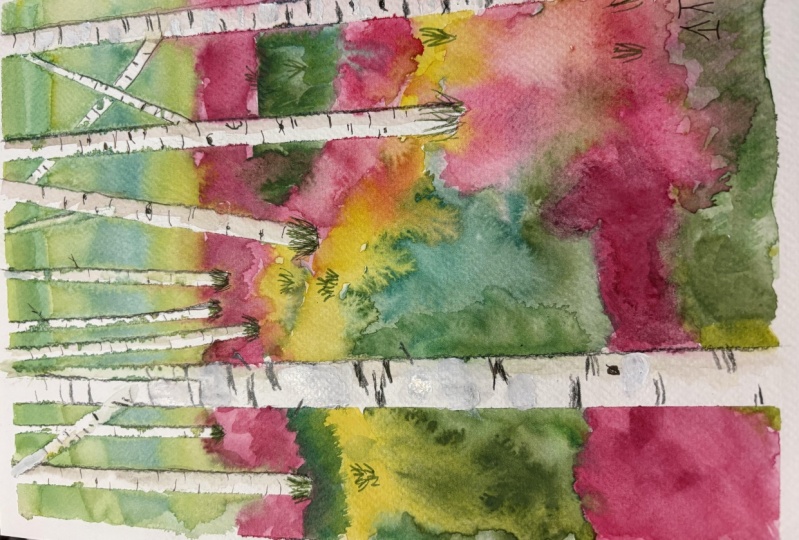
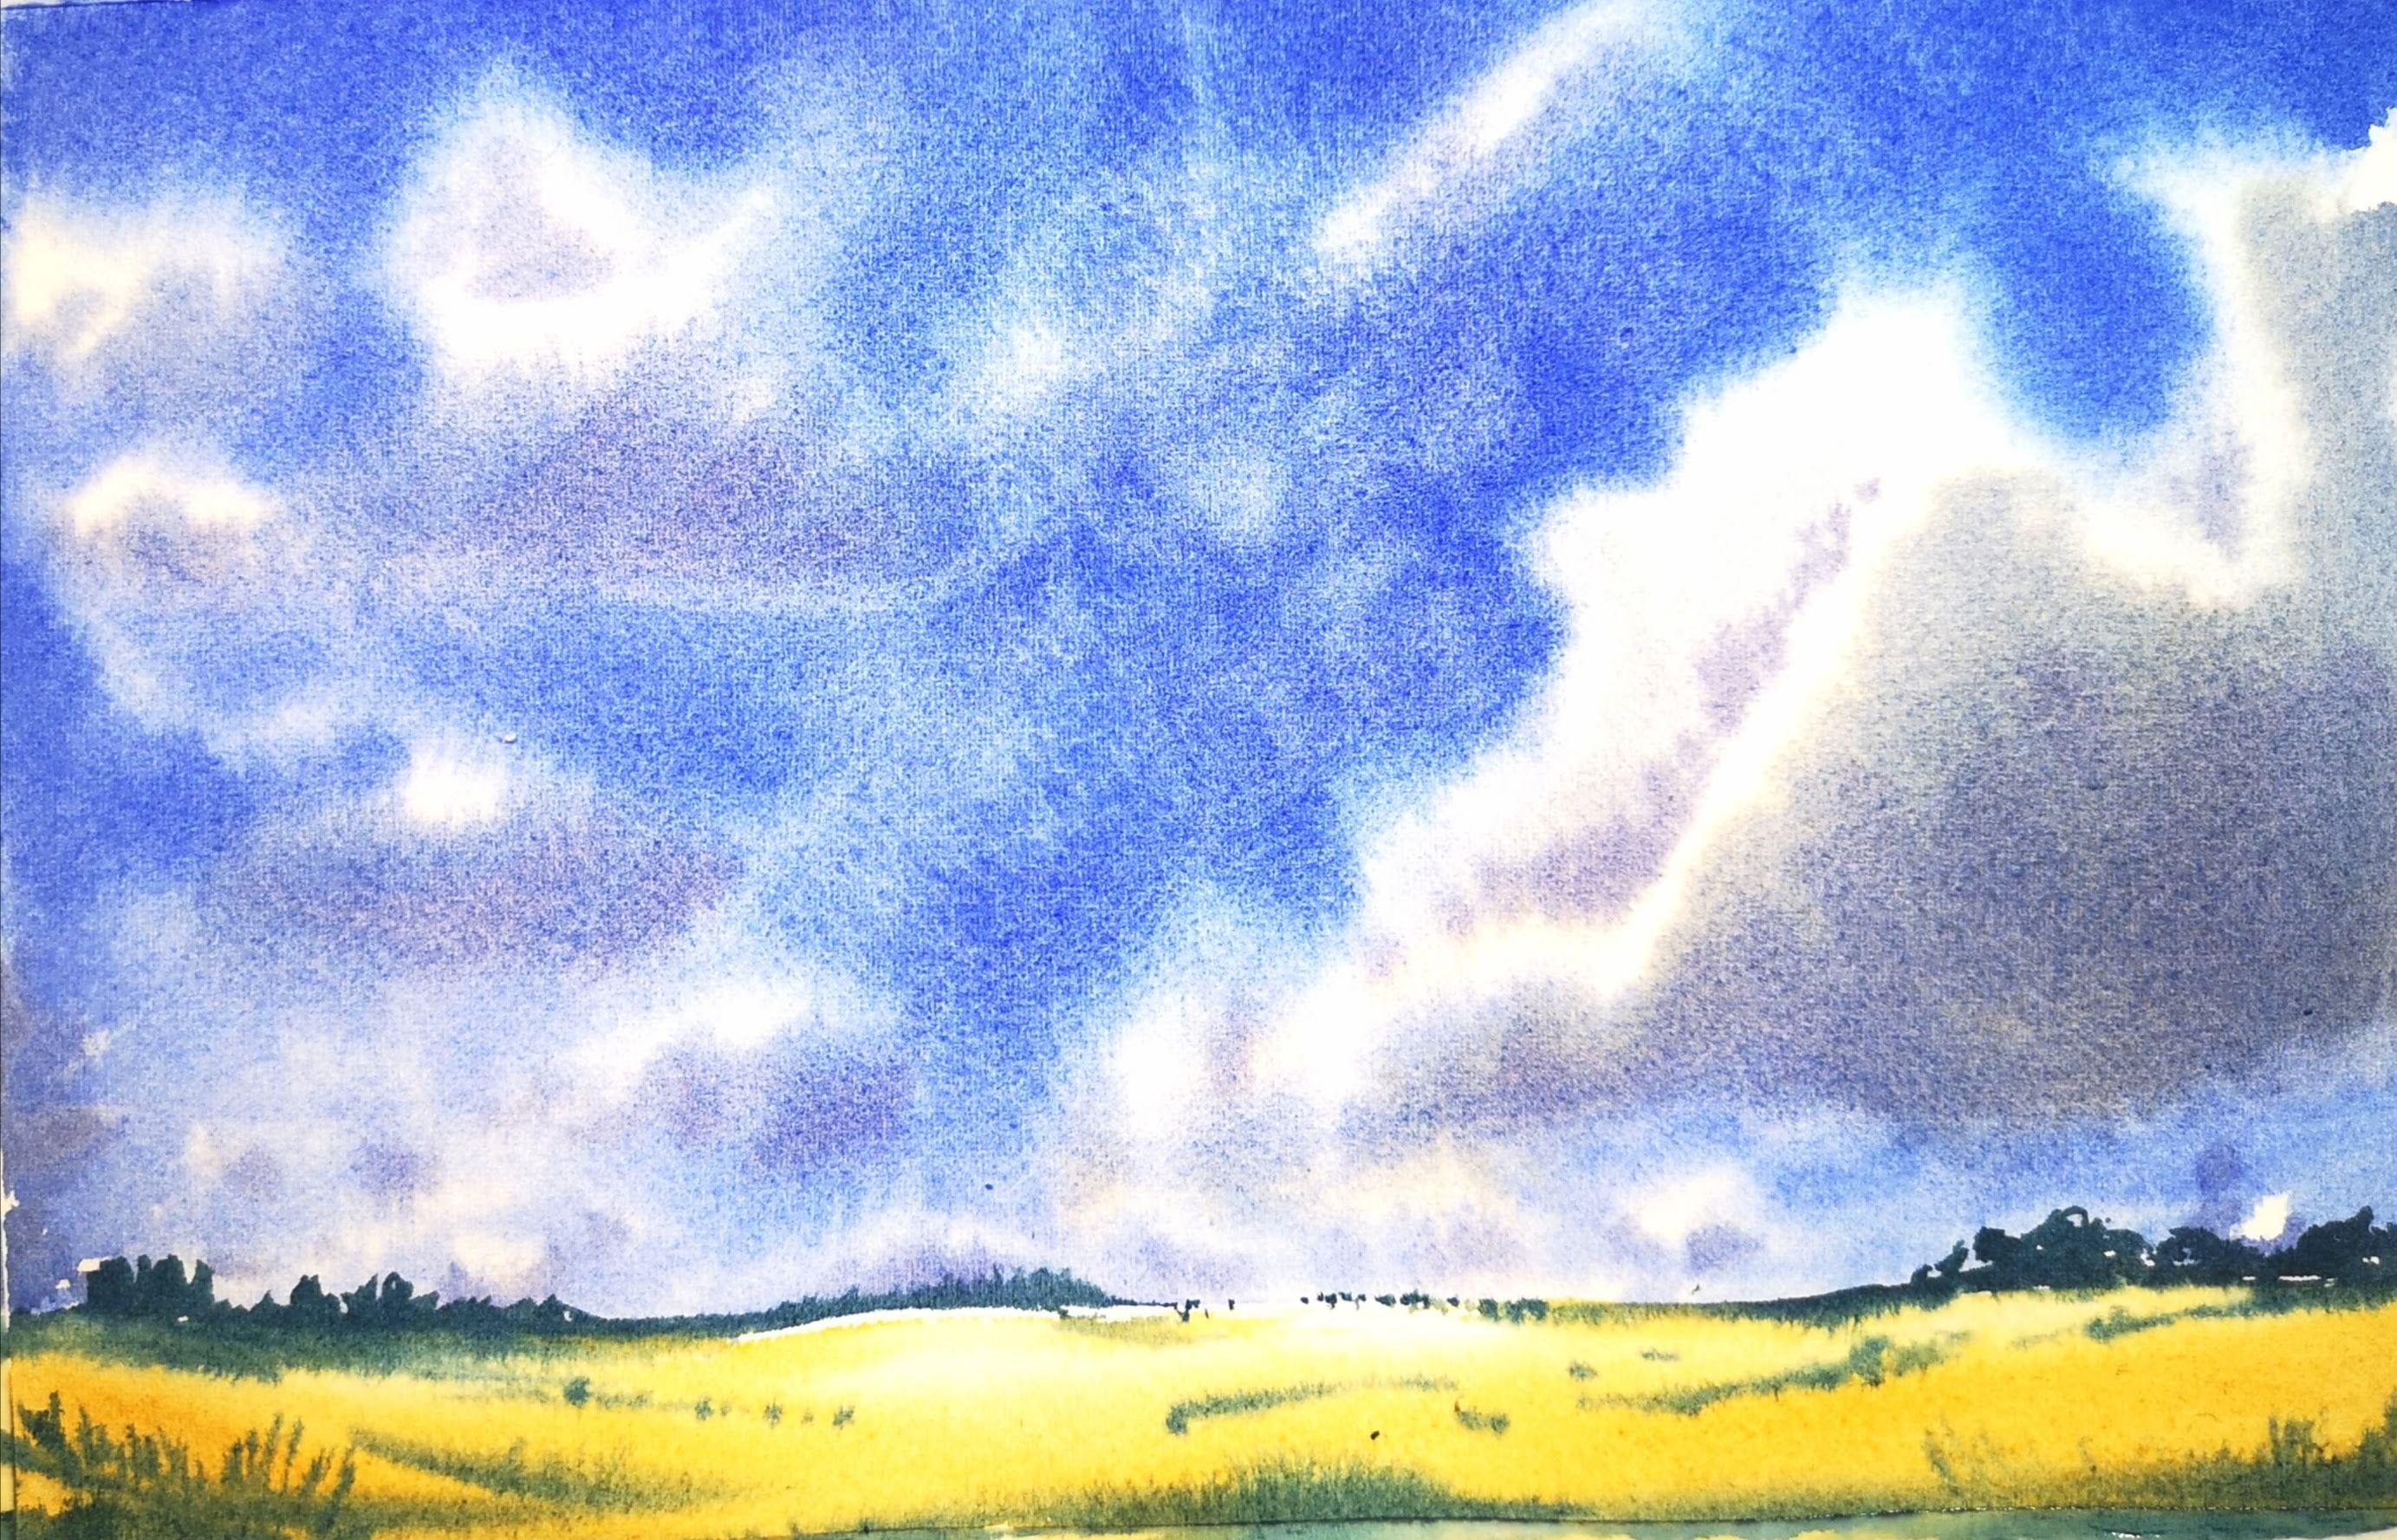
8. Class project: background wash: Now that my masking fluid is completely dry, I'm going to start laying down the first washes I'm using. Vincent Nugent, Cotman Range. What color patterns for this. So about 10 just a stream Minutes before I start trading by, spray all the watercolor plans just to activate the paint. Well, I'll leave it for about 10 minutes until it becomes nice and self. I use my flat, two inch brush to apply playing water on to my sketches. We have three different sections for this split painting. Since it's quite huge, Fan does not fit into the frame. I'm going to show you in little sections. I have started off painting from the right hand side only because I'm a left hander, and it's always easy to paint from the right to left. You do not have to do the same if you're a right hander. You I'm sure you're more comfortable painting from left to right so you can order your paintings starting from left to work. Now, when I off like water off to the paper, I make sure I do not have big margins, and it does not flow on No, As you can see, a slight glistening on the paper. It's only a very thin layer off water. For my first wash, I'm going to use a squirrel hand mark pointed brush. As I mentioned before. This landscape will have colors from or four seasons, so I'm going to start off with a spring section. For that, I'm going to use some crimson red since the paper. Based on what you can see that as I apply the color, it blooms and feathers out without leaving any hard edges. Now I would like some green as well in my spring section. For that, I'm using a mixture off lemon yellow, Andi Ultra marine blue. This gives a very vibrant green, which I can use along with the rights since the paper Eastern What? When I paint the green in between the reds, it will blend together without leaving any hard edges. At the same time, you can see the greens and the red. Separately. I can feel the home section what's right on green as a background Walsh showing for you. Jim, you may notice that the barge trees are left untouched. This is because of the mosque in fluid that we applied before, while the paper is still wet on. I've already laid down the first wash I can go on and out of it. More value to the phone, huge for that, amounting a bit more concentrated right? You can see that is creating a death in the painting already to give more value to the green. I'm going to use very concentrated lemon yellow and Prussian blue this time because I would like a little bit more darker green and a combination off. Yet lemon, yellow and Russian mill gives a very deep green because the paper is still quite them from a previous rushes. When I drop in the green, it's still going to further rock and blend in. But because it's a darker value and a more concentrated pigment, it's going to show out, showing a sense of depth in the painting. Now we're going to start off with the middle section off the split painting so that I'm going to wet the surface with plain water, just like how we started the first section. Even though this is a split painting and it's going to be three separate paintings, we still would like a little bit of continuity in these three paintings, So I'm going to start off with a little bit of the colors that are used in the last section after Saturday to use the same green that I used in the spring section As I pained, I'm using a mix off lemon yellow as well just to depict spring leaves, which is quite fresh and you know we so for that you don't need to mix it with ultra marine blue. You can apply lemon yellow straight from your plan. Andi. It will gently mix with the green nearby, as the paper is still right. I cover the whole of this side with green and yellow again. The green is a mixture of lemon, yellow and ultramarine blue. I haven't used any sap green or any other ready made greens, as the mixture of lemon yellow and ultramarine blue gives up very vibrant green, which is what I prefer in my painting. However, you are free to use any green that you like. It doesn't have to be the same colors that I use. This is only a guideline painting, and I hope you will try your own pigments if you're using lemon yellow and ultramarine blue . You can also very the amount off yellow and blue that you use for a darker green or a lighter green. So if you need a darker green, you would be using a lot more off ultra marine blue on less off lemon yellow, whereas if you need a lighter green, you would use a lot more of lemon yellow and very less off the ultra marine blue. Moving on to the second half of this section, I will be used in a bitch more do probably that's Russian blue, this time with the lemon yellow house. This will give me a deport green that came deputy to someone. I can also very the consistency of the paint. So if I need a lighter wash, I can use more water and less pigment on where I need a darker wash. I can use more concentrated equipment and less water when I'm using a deeper green on creating a lot of depth in the painting. As you can see here, they're not leaving any hard edges because the first wash system went so the Jocko pigments are blending in with the washes in the background at the same time, leaving a darker area showing doctor in the painting. Moving on to the last bit of this section. I'm going to use the richest cadmium yellow light as I'm going to get picked the beginning off autumn in this section for the open colors. I'm also going to use a bit of cadmium orange blended in with the cadmium yellow. Make sure that the paper is still wet and it's not dry, because if it's dry, it can leave harder. Just I'm going to use a bridge US college, right as well, along with the orange. So we're moving into the autumn season now, and the comments is slowly changing that more off yellows and all in just 100 even the greens off the autumn Arabic more darker and deeper, so amusing little bit of lemon yellow, a lot more off Prussian blue and a tiny bit of pains. Great to make the green a bit more deeper. The greens and the autumn season are usually green leaves. Andi, you may know just that it's quite a Jeep green, so I have added pains. Great, Andi, I'm going to drop in the color. We're not using a lot of green as we would still like the vibrant yellows and oranges and reds for organ on. If you add a lot of green on top off it, it could all go very muddy. So make sure you only dropping little bits here and there. I'm not faint to finish off. I'm going to give a little bit of cadmium yellow and scarlet red as well, along with the deep green, and you can see that the red and the green are slowly blending together to give me a nice drone, which is fine as long as we're not painting. Ah, HoliMont every way we're going to move on to the intersection. That's the third section off this thinking. Now we're going to start off by wetting the paper, just like how we did for the 1st 2 sections. Once we're done with that, this section of the painting is going to be slightly different, as I'm not going to contribute the autumn colors at the moment. But I'm going to start off with the winter colors first. This is only because the winter colors are a bit more brighter and lighter than the organ colors, which are very, very strong, and it's always best to start with the lighter color so you're being thing will not look muddy by the end of the day. So here I'm starting off with a little bit of cobalt blue. I have left some space to complete the autumn colors after I finished with the window colors. So when I do the cobalt blue, I make sure I leave a lot of white space in between because we are depicting a winter scene , I'm also going to drop in some more. Or if you have a blue violet mixture, you can always use that again. The paper is quite damp still, and when I drop in the color, you can see that is blending in nicely. And it's not leaving any hard edges now. As I go one, you can see that the cobalt blue and the more has blended in to give me a very nice blue violet shade, which is perfect for winter. Once you're done with the winter section, you can now move on to complete your autumn section. Now, for the autumn section, we're going to start using the same colors as be used in the second section off the whole painting So I start off with some cadmium yellow light just the same. Asked the second session. Now we also need to make sure that we show a little bit of continuity from the middle painting to the last painting. So I'm trying to mira the same collars as suffused in the second painting, So I started off with cadmium yellow light on enough moved on to some cadmium orange. Now I'm going to mix a little bit off Cadman red. With it, you could see that the colors are getting a bit more deep. One. Now, Make sure you do not paint a lot near the winter scene because the autumn colors in the winter colors can mix a lot and make it look a lot more madia. So it's always best to just drop in the colors and let it blend naturally. Now I'm just going to finish off the bottom corner with some deep green that's lemon yellow , Prussian blue on a tiny bit of pains. Great to give him more deaths to the green before I finish off this first layer off wash. I'm just going to add a bit more deeper values off orange and red in a few areas, so not painting a lot, but just gently dropping in the deeper values of the color into the already wet area. And you can see how it blends in nicely and feathers out and creates a really nice depth to the painting. No, I'm nearly done with the first wash. I'm going to leave it to dry completely on in the next video, I can show you how to do texture in foliage.
9. Class project: creating texture: Now that the first layer is completely dry, I'm going to start off with the second player. That is to show some more details in the for huge. For that are floating my brush with deep green, which is lemon yellow, Prussian blue and a little bit off pains. Great. I'm just going to add in a few leaf like shapes with the flick off my brush. As you can see just to show some details in the foliage, I'm going to use a dry brush technique to depict textures in the foliage well, that I lowered my brush with very concentrated green on. Then I'm going to use a tissue or a paper towel, and I'm going to roll my brush across the paper tone, just taking out the extra equipment so it's pretty dry. And then I moved the body of the brush on top off the paper, and it creates a very different texture. Comfort to painting with a damp brush. It also depends on how you called the brush. If you hold brush flat down, the whole body off the brush touches the paper, and it creates a lot more texture, rather that just using the tip off the brush. You can use the same dry brush technique to depict texture in college in the autumn and the winter section again. We're going to use very concentrated sick thing, and we take out the extra paint on a paper tower on. Then we moved the body of the brush across the paper wherever we need texture. You can also damp your brush instead of painting, and it creates a different type of texture. You can do what pleases you and what makes you painting with more, please into your eyes. Once you're happy with the outcome, you can stop and then leave the whole thing to dry. Now the next step is for us to take the masking fluid off so we can start working on our birch trees.
10. Class project: removing masking fluid: Removing the masking fluid is a pretty easy job. If you get the edge off the mosque included, you can just hold it and pull it street out, and it comes out very easily. It's best not to leave the masking fluid for more than 24 to 48 hours or can stick onto your paper and damaged a paper after a while. However, if you remove it in within the 1st 48 hours, this shouldn't happen, and you should be able to remove the masking filled with east by just pulling on them. You can also use uh, towel or a tissue or the edge off a brush, anything that makes it easier to pull out and find the edge off the masking fluid tape.
11. Class project: Birch details: after I have finished removing the masking fluid from the painting, I'm going to start painting the birch trees. I start by giving a little bit of depth to the tree box, so that is a standout. So I'm going to paint one side off the barge tree with a darker tone. For this, I'm using pains. Great so you can see that started painting the right side off the tree box with Payne's gray leaving the left side white. This is to depict that the light is falling from the left side, leaving the right side in the shadow. Once this layer drive, I can then go on and find some details to birch trees, mainly the site branches and the groups. For this, I'm using a rigger brush size three. You can also use a smaller round brush size 608 Or you can even use the more trust that you have been using if you have appointed tip to it. What we're looking for is a wanted to that is small, controllable for small details. So I'm going to start off with the details. I load my rigger brush with pains. Great this time slightly more concentrated form than the first wash that we have given on the barge tree on with the tip of the brush, I slowly add in little groups on the bus tree. As you can see, they're smaller shot lines across the barge tree on both corners, some of them nuke a bit more triangle like you can also make the group's look a bit uneven . As none of the groups pastorate lines again, you cannot side branches with the same color. When do you continue doing it Until you have pulled Got botched tree after you happy with your birth tree? Let's go one for the next one and do the same things over again. And let's complete almost the bus trees in the similar manner with this bus tree in the background that I'm working on right now, I have painted it with a little bit more deeper, thrown off pains great, and you can see that it's much darker compared to the butchers in the foreground. This is a way off depicting that it's away from us and that we don't see a lot of details by painting it a bit more darker than the ones in the foreground. It goes into the shadow off the painting, and it creates a sense of depth to the painting. I'm also going to add in a few more barge trees in the background with just very diluted pain. Scream so you can see I have painted some very thin lines in the background, and it shows a sense of dick to the horn painting. While you're painting the details onto the birds trees, try to explore the movement of the brush and your hand and how it can create a lot of details. Different people have different ways of depicting details on it's completely fine for you to discover something on your own. Another way off, depicting details on my birch trees for me personally. Waas to use my finger to spread the paint. This created a texture similar to the dry brush technique we used earlier. Each person will have different ways of depicting it, so go on and play with the paint and the brush is. You can use your fingers. You can use kitchen towels. You can use sponges, try different ways and see how exacting it is to create extras with different materials. You may also have noticed that some amount of color has gone on to the birch trees. That was probably a mistake that happened in the beginning, where I started painting before the masking fluid had completely dried out. However, I like the way the color has bled into the Bar street box. It has created a sense of continuity to the whole painting. So even if you don't have any pigment on your barge trees, only if you do, it doesn't matter because it could still create beautiful effects.
12. Finishing touches and final thoughts: Once you're happy with what you have done, you can leave it to dry completely on. Then take off the masking tape. You will be left with three beautiful paintings, which can be framed separately. I hope you have enjoyed painting this little painting with me. What have demonstrated here is small skills training, but you can go one and do a largest field thinking things on you can also change colors according to your interests.
 Suzanne Abraham, Artist