Transcripts
1. Welcome to Class!: [MUSIC] Hello, floral friends. Thank you so much for joining
me in this class today, where you'll learn how to paint five beginner loose-style
watercolor florals. Now, trust me when I say, anyone can paint these flowers. As long as you have
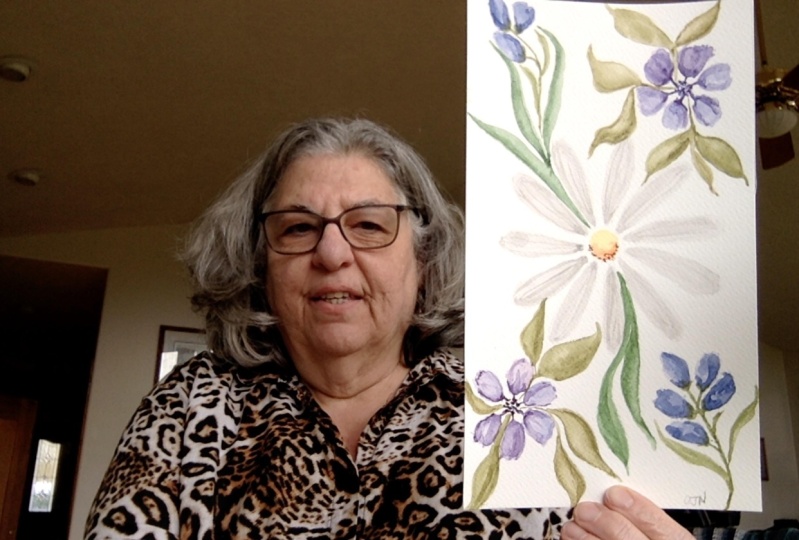
some paint, paper, and a few brushes, you can do this. My name is Priya from Petals by Priya Watercolor Designs, and I'm an artist based
in Honolulu, Hawaii. Loose florals were the very first things that
I learned how to paint when I started my journey
with watercolors in 2018. Now as a full-time artist, I create unique tropical
and floral designs for products that are sold in my online shop and in retail
stores around the US. Since taking my
creative business full-time a few years ago, I've been able to
teach thousands of students the ends and outs of watercolor and share my love of florals to artists
around the world. What started as an evening
hobby for me is now my career and one of the
biggest joys in my life. It all started when I decided to take a beginner
watercolor class. Whether your goal is to be a professional artist one
day or you simply want to learn how to paint florals to relax and unwind
after a long day, you're in the right place. Each lesson in this
class will include simple step-by-step
instructions, so you'll be able to follow
along easily and add new florals to your painting
tool belt in no time. The lessons will start with
a thorough supply list, including my tips for
finding materials that will work well for you no matter
what stage you're in, from beginner to advanced. We'll then learn to
paint five types of flowers in the loose style, including six-petaled
flowers, roses, daisies, lavender,
and flower buds. I also included a short lesson on painting watercolor leaves, so you can add some
beautiful greenery to your flower arrangements. This class is perfect
for a beginner or intermediate artists
who want to dip their toes into the
world of loose florals, start building up
their muscle memory , and most importantly, gain confidence in
their watercolor skills one one at a time. Well, this class teaches five
specific types of flowers. The techniques and experience
you'll gain from it can be applied to anything you
decide to paint in the future. Even if you're not a
floral fanatic like I am, you will still walk
away from this class with valuable watercolor
skills and growth. For the class project, you'll be painting a
beautiful floral composition using the skills and techniques you'll learn in the class. The flower and color
choices will be up to you, and I'll give you some tips
and tricks for creating floral compositions so you
end up with a piece you love. A lot of people get intimidated by painting
loose florals, but once you learn
to let go of control and just let the magic of
watercolor take the lead, you'll be surprised just how easy and joyful the
process can be. Gather your supplies
and get ready for a fun-filled crash course in
loose watercolor florals. Before we get started, if you'd like to learn more, you can find me on
Instagram @petals.by.priya, on my website,
petalsbypriya.com, or on YouTube
@PetalsbyPriyaWatercolor. I also have more
beginner resources and freebies on my website, including my personal watercolor
supply guide and color mixing guide that I linked down below in the class description. Once you're ready to start
painting, let's get to it. I'll see you in the
first lesson. [MUSIC]
2. Class Project: Today's class project will be a simple and easy
floral composition where you can put your new
watercolor skills to use. My main goal in this
class is to inspire confidence in yourself and
your watercolor practice. For our final project, I want you to feel free to use your own color palette and
choose one or a few of your favorite florals
from class to create a piece that
feels uniquely you. I'll give you a few tips and examples to help
get you started, but the rest will be up to you and your artistic intuition. Next step, we will talk about all the supplies
you'll need for class.
3. Art Supplies: Let's talk supplies.
In this video, I'll walk you through the
supplies you need for class, and for your convenience, I also included a supply list with links in the
resources section, so you can download
that as well. First and foremost, you'll
need watercolor paper. There are tons of
different types and brands of paper out there. For beginners, I'd recommend either Canson XL or
Fabriano 25% cotton paper, as those are more
budget-friendly options and they're pretty easy to find at most
craft stores or online. For higher-end paper, I
personally like to use either Legion Stonehenge or Arches 100% cotton
cold press paper. These brands are more
expensive but they perform much better
for layering, blending, lifting, and other more advanced
watercolor techniques. But as this is a
beginner-friendly class, I want you to feel free to use whichever watercolor paper
you have available to you. For paint brushes, you can use any round brushes you're
comfortable working with. I recommend round brushes for this class because
they typically have a fine tip at the end for creating pointy
leaves and details, but they also have a nice
round belly for absorbing water and layering down
those loose fluffy petals. My go-to brushes for
loose-style painting are the Neptune round brushes
sizes two through eight. But again, any brand of round brush will work just
great for this class. For your watercolor
paints really, any brand or type of paint
will work just fine. Some of my favorites include Art Philosophy watercolor
confection palettes, Winsor and Newton,
and Daniel Smith. For beginners, I'd
recommend starting with either the Art Philosophy
palettes or the Winsor and Newton Cotman tubes of
those are more affordable but still provide vibrant
pigments and great quality. If you're looking for a
professional grade paint, I like to use either Winsor
and Newton professional tubes or Daniel Smith. As for the colors, I
want you to feel free to choose any colors you
like for this class, my priority is teaching
you the techniques and the brush strokes to
create beautiful blooms. Of course, in the real
world the plants and flowers come in all
different colors and shades. So don't stress too
much about choosing the perfect colors or
color combinations. Other supplies we'll
need for the class include a jar or
bowl of clean water, a mixing palette, and a paper towel for dabbing excess water off your brush. Once you've gathered
your supplies, I'll see you in the next video
to start painting flowers.
4. 6-Petal Flowers: We're starting with the
basics, six petaled flower. I call it a six petaled
flower because that's how many petals I
usually end up with, but it doesn't have to be six, so I don't want
you to worry about getting that exact
amount of petals. I like to start with this type
of flower because it uses the simplest
technique and there's nowhere you can really go
wrong with this method. Even if you've never picked
up a paintbrush before, I bet you'll surprise
yourself with just how beautiful your
flower looks in the end. Here's an example of what this flower will
generally look like. We have a dark,
pigmented center, and loose style
petals around it. For this lesson,
I'm going to use a deep maroon color
that I mixed using a combination of
dark purple and a medium brown to tone
down the vibrancy. Before we start, let's
take a quick look at the three main steps to
painting this flower. Number 1, we'll tap down dark, pigmented dots to create
the center of the flower. Number 2, we'll use a clean, wet brush to drag out each of the petals using the
pigment from the center. Number 3, we'll go back in and tap in darker pigment
into the center to create this beautiful bleeds and blooms that are my favorite
part of using watercolor. Let's start by
loading up your brush with a very pigmented, concentrated mixture of
whatever color you're using. I'm using a size 8
round brush here. We're going to start by
using the very tip of your brush and make
sure you have lots of pigment and lots of
water in your brush. because, again,
that's where we're going to be using
all the color from the center of the flower to
use into each of the petals. You really want
to make sure it's loaded up nice and full. We're just going
to gently tap down some dots to create the
center of that flower. They don't have to be
perfectly uniform, but just make sure
there's plenty of water and plenty of pigment. Now that those are
down on the paper, I'm rinsing off my brush. I'm getting rid of almost
all the pigment on there, dabbing some of
that excess water out onto my paper towel. Then we'll be painting the
petals by using the tip of the brush to gently drag out some of that
color just like that. Then you'll just lay
your brush down on the page just like that. You're simply just
applying pressure down on the page to
create the petal. I usually do this two
times just like that. Again, I'm rinsing off my brush, making sure I have plenty
of water in there, pulling out some of that
pigment from the center, and then just
applying pressure so that the belly of
the brush lays down, and creates that
nice, thick petal. I'm working quickly
here because I want to make sure that the
center doesn't dry up. Using the tip to drag out the color and then
laying my brush down just like that. I'm going to continue doing this all the way around the flower. [MUSIC] One thing I want you to keep in mind here is your petals don't have
to be perfectly uniform. You want to generally keep
the size relatively the same, but they don't have
to be symmetrical. You can have some be
a little thinner, you can have some
with less pigment. It's really up to you. While these are still
wet, this is why we have to work fairly quickly. The center is still wet unless
the petals are still wet. I'm going to load up my
brush with that dark, pigmented color that
we started with. I'm just going to
gently tap that in again in the center
and you can see that color just bloom into
the petals just like that. I don't have to ton in
my brush because I don't want it to overtake
the whole petal. I just want it to
gently bleed out into it by just gently tapping it in. There you have it. Let's
start to really build up that muscle memory with this
technique and let's paint another flower just next to
the one that we just did. Starting with a very pigmented
mixture of your color, plenty of water, using the tip of your brush just
to place down some dots, and create the center. Again, these don't
have to be perfect. They can be different sizes. Just make sure there's plenty of pigment and plenty of water. Now I'm rinsing off my brush, making sure almost all
that pigment is off of it, gently dabbing it
on my paper towel just so there's no water
falling off of it. I still want my brush
to be pretty wet, but I don't want
it to be dripping because then it just
gets out of control. Using the very tip of my brush, drawing out some of that
color from the center, and then laying my brush down, applying pressure to
create the petal, and doing this twice. I'm rinsing off my brush
in-between each one because your brush picks up that pigment when you
draw it from the center. I like the really light
floating vibe of those petals, so I want to make sure
it's nice and transparent. Grabbing color from the
middle and dragging it out just like that. Again, rinsing off my brush, using the tip, pulling
out some of that color, and laying it down. I can see that some of this has dried up from the center, and I still want to
be able to pull out plenty of pigment from there, so I'm just going to
tap in some more. If you're dealing with
that issue and it's drying up before
you have the chance to paint your petal, just add a few more, and
you'll be good to go. Again, rinsing off my brush, tapping off any excess water on my paper towel, and repeating. If you start to get
bleed like that, I personally liked that look. It's a nice characteristic
of loose style painting, but if that bothers you, you can just rinse
off your brush, make sure all the
excess water is off, and then just let your bristles soak up some of that excess. It just cleans it up a bit. It's one of my favorite parts of watercolor because
it's very forgiving. Pulling some of that color out, applying pressure
down onto my brush, and creating those petals. Now that that's still wet, I'm just going to load up some more pigments and gently
tap it in in the middle, so I can see them bleed
out into the petals. You don't have to do that
step if you don't want it to be the super loose
blooms and bleeds, but I personally
like the look of it.
5. 6 Petal Flower Variations: This technique is really my secret weapon
because you can create so many different
variations of flowers by simply changing how
you paint your petals. So this one technique
can give you hundreds of different flowers
that you can use all across your
watercolor paintings. And I'll show you an example of what I'm talking about here. So here we just created a
nice big, fluffy petals. But if you make one
small, simple change, you can entirely change
the look of the flower. So we'll be using
the same technique, but instead of creating
these large fluffy petals, I'm going to create more petals that make them
thinner and longer. But we'll use the
same basic technique. So I'm loading up
on dark pigment, tapping in those dots. And because I'm
painting smaller, thinner petals on this one, I've moved down to a
size six round brush. And what if the center down, I'm rinsing off that pigment, dabbing off some of
that excess water. And then I'll start
painting petals. But this time I'm just
going to make really thin, longer petals like that. So I'm applying a little
bit less pressure than I did and the last one. And just dragging
it out like that. They're dragging out the
color from the center, laying down my brush
and pulling it out. So I'm going to
go ahead and work my way around the flower, doing the same exact
technique all the way around. [MUSIC] Alright, and so just by making
that little change, I mean all the petals
thinner and longer. It looks quite a bit different than these initial
ones we painted, but it used the same
exact technique. Another example of
a variation you can create with the same
technique is just creating a whole new look by
rounding out the tips of your flower petals instead of
having these pointy petals. So I'll go more into that when
we get to the daisy lesson because we'll be using rounded
petals for our daisies. And one final way that I want to show you how
to use this technique, but to create a whole
different flower is by using a few
different colors. So I use just one color just to simplify the initial example. But this time I'm going
to add in some dark warm yellow into the
center of the flower. So I'm starting by tapping
in some yellow dots, keeping it nice and small. And then I'm going to go
in with my dark purple, maroon color and add in
those dots around it. And you can see some
of that blending and bleeding of colors there. That's totally fine. Again, we're going for
the loose style here, so a little bit of fleeting, it is perfectly fine. So I'm adding in
that outer circle, rinsing off the pigment. I'm going to switch
back to my size eight brush for the pedals. And doing the same technique. But in those nice
transparent petals, I'm going to drop
in some of that yellow that we used
in the center. I'm loading up some
of that yellow and just gently tapping it into the petals like that, which gives it just a
nice to tone effect. So I'm going to
continue working my way around creating this petals, making sure I have the
deep maroon color that I want to be the focus, but then also just tapping
in some of that yellow. And I'm going to continue
working my way around [MUSIC]. And there we have it. So these are just small and
simple changes that I made, but every flower looks
completely different and that is why I just
love this technique. So it'll be for moving
onto the next lesson. I really encourage you to keep experimenting with
this technique. Try using a bunch
of different colors and seeing all the
different variations of flowers you can create just by making small and simple changes. And when you're
ready, move on to loose watercolor roses
in the next lesson.
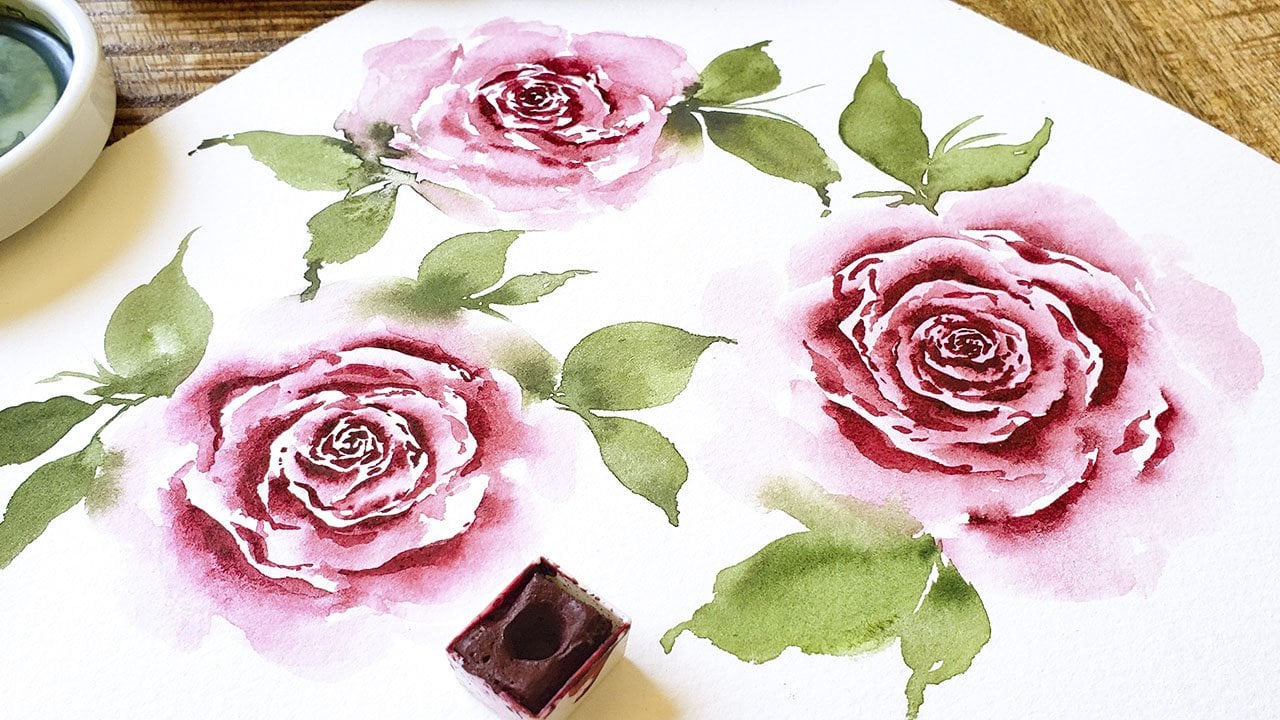
6. Roses: Time to get started
on our roses. Before we jump in, I want to
quickly mention that I have a whole other in-depth
class that is all about painting
watercolor roses. You'll learn effect and easy
technique in this lesson, but if you want to dive deeper
into more detailed roses, you can check that
class out next. Now let's get started. There are a few basics
of roses to cover first. Number 1, your petals will
always start smaller in the center and expand bigger as you work
your way outwards. Number 2, your center
petal should always be darker and then get lighter
on the outer petals. Now for this lesson,
I'm going to be using this nice burnt orangy red color from my Art Philosophy Watercolor
Confections palette. But again, feel free to use
any color of your choice. I'm using a size 5 round
brush here and I'm loading up a pretty concentrated pigment of that color that
I just showed. I'm not using a ton of
water on my brush here, I'm mostly just
using pigment here. I'm using just the
very tip of my brush to make tiny little C strokes. Just the very tip of
my brush and just gently laying that down
in the shape of a C, and these will make up the
very center of the rose. I usually start
with about 5-7 of these C strokes just like that and then I'm going to start adding more water onto my brush. I'm rinsing off some
of that pigment and just letting my bristles. I've got some more of that water and then I'm going to be
making that same stroke, but just applying
more pressure down on my brush to create
thicker petals. You're always working from thinner petals in the center of the rose and growing thicker
as you work your way out. Just laying down my
brush in the shape of a C with a pretty watered
down mixture here. One thing to keep in mind is to leave a little bit
of white space, otherwise, your
rose will just turn into a blob of color. Now I'm going to move
to a size 6 brush, just slightly
larger so I can get those nice big fluffy petals
with the very outer part. You can actually barely
see these outer petals, which is just how I want it. I want it to be really light. I'm just working my way
around the outside, applying pressure
in the shape of a C until you're happy
with how it looks. Now I'm going to take my
size 5 brush again and I'm loading up a little bit
more of a darker value. These petals are still wet, so I'm going to just
gently tap some on the inside of those petals and you'll see the
color bleed out, and that gives it a really
nice soft floating effect. Just gently tapping
it in and you can see that pigment really expand
out into the petals. This is just giving
a nice second layer to help to find those
petals a little bit more. That first layer was just about getting those
initial petals down, and then second layer is just
adding a bit of definition. Too much liquid on
my brush there, so I'm just going to
dry it off and let the bristles soak up
some of that excess. I'm not adding too
much extra detail on the outer petals
because I want to keep those nice and light, but again, make sure
to maintain some of that white space
or the rest will just turn into a blob of color, which we definitely
don't want to happen. Just finishing up
some final details here and then we can go
through this process again. Now it takes a little bit of practice to get the hang of it. Adding in a couple
little details here. I'm pretty happy
with how that looks, so let's go ahead and
practice one more time. Starting with my
size 5 round brush, I'm getting a very
pigmented color on there; barely any water
because they're in the center of the rose
is really defined. There's not bleeding
and blooming going on, you want to maintain
the integrity of those little C strokes. Let's do another one right here using just the very
tip of my brush for the direct pigment and
just gently adding in some little strokes in
the shape of a C. Again, I typically make between 5-7 of these strokes for the
center of the rose, and these are the only
ones that I really care about being very defined. I always think the center of the rose is the most important, whereas the outer
petals can be loose and messy and it looks beautiful. Now I've rinsed off
some of that pigment, I have more water
loaded up in my brush. Then I'm applying
those same C strokes, but just putting more
pressure down on the brush. It's still the shape of the C, but I'm just allowing my brush to press down on
the paper like that to create a more
loose-bloomed petal. You're just working your
way around in that circle, making sure to maintain that
white space in between. The white space is
really important, especially when you're first
learning how to do roses, because that I feel is the most frustrating thing when I was first learning roses, I didn't leave enough white
space and then my whole thing just turned into a blob of color and I would
get very frustrated. I would error on
the side of leaving too much white space than not enough because you can always go back in and add more details, but you can't always
take away color. Again, those outer petals can be really light, barely there. Then once that first
layer is done, I'm getting more of
that dark pigment and these petals are
still barely wet. I'm just going to use
the tip of my brush, tap in some of that pigment
and then you can see it bloom out into the
rest of the petal. That's my favorite part
of doing these bruises; so relaxing and fun to watch. You just have to be okay
with letting go of control, especially when you're
painting in loose style. Watercolor is going to do what watercolor
is going to do, and if you try to control it too much and you lose that
nice loose affect. Water control is still important but fun once you have
a handle on that. Let it do its thing
for the rest of it. Again, I'm not adding
too much pigment here or too much detail around the outer petals
because I want those to stay nice and
light and loose. I'm just adding a little
bit more definition. This just really takes practice. I've been painting roses
for several years now. I'll get too discouraged if
yours don't turn out right. Add just a few more
details in there , then we'll be done. I like using colors like
this too because it allows you to have a really
deep pigmented center, but then have a stark contrast between these really
light peachy petals. If you're starting out with a really light color on its own, it can be a little tricky
to I have that contrast. If you have one that can get nice and dark and
deep like this, then you can water it down to get a nice light
effect on the outside; it really achieves a
nice contrasted look. Just to experiment with
different colors as you go. I'm just filling
in some gaps here. Not enough definitions, keeping the color nice and
light here on the outside. I'm just brushing out some
of those outer petals. There you have it, that's
a basic loose style rose. Feel free to just
wet your brush, dance on the page. Don't try to control
your strokes too much, and these will really start
to come together once we get into the leaf
lesson in this class. Once you add those
nice deep leaves into the outer petals, it really looks lovely. Feel free to keep
practicing your roses, try not to get too frustrated. I know this can
definitely be one of the more frustrating flowers to learn when you're
first starting out, but remember to keep
that white space, remember to go from
dark to light, and just keep practicing.
7. Lavender: Now it's time for the lavender, which is one of my
favorite flowers to paint. The technique we'll be using
is super simple and easy. These are great for
adding filler flowers to larger floral bouquets
or compositions, but they're also really
beautiful on their own. Before we get
started, let's review the three main steps to painting this loose
style of lavender. Everyone will use
a very light value of purple to lay
down the petals. Number 2, all those
are still wet, we'll gently tap in a bit of darker purple value at
the bottom of each petal. Number 3, we'll use the very
tip of our round brush to paint in the stem and a couple of leaves
coming out of it. Just a quick note
here on the color, of course, you can use any
shade of purple you like, but if you want to achieve a more smoky lavender like the one I'm using in this video, try mixing in a touch
of dark blue or black. That helps tone down
the vibrancy of the purple and gives it a
really nice natural shade. We're going to
start by loading up a really light
value of lavender. I'm using a size 4
round brush here, and what we're going
to do is we're just going to start laying down our brush to create
the lavender petals. We're not going to be
dragging it out or painting in big petals like we did
earlier on in this class, we're just going to tap down our brush to create that
little tiny lavender petal. One more note here
before we start, we want the tip of
our brush to be painting in towards the stem. Right now the stem is invisible, but you can imagine
where it's going to be, and you just always
want to make sure that when you're tapping
down your brush, the tip is always facing
where that stem would be. Again, I have a very light
value of this lavender color. I'm just going to start
tapping in those petals, you can see here I'm just gently tapping down my brush
just like that. We're going to work our way
down where the stem would be, leaving a little
bit of white space. You don't want to have a bunch of petals jammed in there, and just tap all the way down. We're going to want to
work fairly quickly here, because when we tap in the darker shade of
purple here in a minute, we want this to still be wet. You can see tip of my brush is always facing where
that stem will be. That's looking pretty good. Now I'm loading up my brush with a darker value and
I'm just going to gently tap in that darker shade, just at the very
base of the petals. You can see it starts to bloom and bleed out into those petals. That's exactly what
you want to see. Just gives it a nice contrast. That is looking pretty good. Now I'm going to move
to a size 0 brush. If you don't have a brush that's small, that's totally fine, you can just use the very tip of your round brush that
you were just using. I'm loading up a dark green
shade onto my rash and the green that I always like to use is a mixture of sap green, indigo, and Payne's gray. We're just going to
use the very tip to draw in that stem. I'm working my way up
through the middle of these petals, just like that. Then I'm adding a few, going off to the
side to just connect some of those petals that
are a little further out. Since these are still wet, you'll see the green just
gently bleed into the purple. Which I like, it's one of the key characteristics
of loose style painting. But if you'd rather
prevent the bleeding, then just make sure
your purple areas are dry before you add in the stem. That's looking great.
Now I'm going to use that same green color and just add in some leaves coming out. I will be going
more in depth into leaves in a couple of lessons, but for now I'm just going
to lay down my brush, just like that, and just add in a couple of dainty leaves
down at the bottom, and then I'll probably
do one or two coming out of the lavender. I'm happy with how
this one looks, it does take a little bit of
practice and a little bit of water control to not let those bleeds get a
little out of control. But let's practice it again to start building in
that muscle memory. This time I'm going to
make my lavender stem with a little bit
more of S-curve. Let's do this again,
I'm going to start by loading up a very light value of my purple color and then first start tapping in those petals just like
we did on this one. Just gently tapping them in, making sure to leave white
space in-between them. You don't want
every single space to be filled up with a petal. You want to have
some white space and also room for the
stem and the leaves. This is again why I
really like round brushes because it just creates
the petal for you. You don't have to really
draw anything out, you just apply some pressure, and there's a nice petal there. Some got to be a
little bit taller too. Now once that layer
is good to go, I'm just gathering
a darker value of that lavender and tapping it into the bottom
of those petals. That's really my favorite part, it is watching the
colors bleed and bloom, I'm just gently tapping this in. If you find that
your dark purple is overtaking the entire petal, then try working with a
little bit less water. You want to have
just enough water to let it bleed and bloom, but not too much to where it just fills in that whole petal. Now that that's looking good, we can start with our
stem and the leaves. I'm going to stick with my
size 4 brush here because this one's a little bit bigger
than the last one, but again, I'm just using the very tip
of my brush loaded up with my green and I'm just going
to paint in that stem. I always start by
going straight up through the middle
of the petals, and then once I
reach to the top, I start branching out just slightly to connect
those outer petals. Again, if the bleeding of colors makes you uncomfortable
then you can just wait until that purple is dry
before you go adding these in. But I personally love it. Now, just like we did
on the last one month, the stem is good to go, I'm just going to apply some
pressure down there with my brush to create
a couple of leaves. As I mentioned, we'll go
more in-depth into leaves. Towards the end of class, so if you're struggling,
don't worry.
8. Daisies: Moving on to daisies, the process for painting the
daisy petals will be very similar to the six-petal flowers we painted earlier in class. But we're going to be painting rounded petals instead
of the pointy ones. Before we start, let's
take a quick look at the four main steps
we'll be completing. Number 1, we'll paint the base layer of the
center of the daisy. Number 2, while that
base layer is still wet, we'll add depth and
dimension to the center by tapping in some darker
values at the bottom. Number 3, we'll use a very light gray to paint the daisy petals, making sure to round out the edges to get
them a softer look. Number 4, we'll tap in a
slightly darker gray value and add a few wispy lines to give some shadows and
texture to the petals. I'm going to start by loading up my brush with a really
light value of yellow. I'm using a warm yellow almost
with orangey undertones, and I'm using a pretty
watered down mixture. That's very light. I'm just going to paint
the center of the daisy. You can see it's very
light because I wanted to tap in some darker
yellow shadows. I always like to start wider because you can always
add in more color. This first layer is still
wet and I'm going to go back in with a
darker value of that same yellow and just tap in some of that down
here at the bottom. You can see it's starting to
expand out into the circle, with just gently
tapping them in. Then I'm going to
grab a little bit of brown just to make
it even darker. I'm going to be careful not
to overtake the yellow. I still want to
maintain the yellow, but I'm just going
to lightly tap in some brown here at the bottom. Then grab a little bit more. That just helps give
the illusion of some depth here on the daisy. It makes it just look
a little bit more 3D. That's looking good. I'm
going to use the same brush. It is a size 6 round brush. I'm going to load up
a very light gray. I have a pre-mixed light gray from one of my art
philosophy pallets. But if you don't have a
light gray already mixed, you can just use either black or Payne's gray and just
make sure to water it down a lot because we don't want our
petals to be too dark. I'm just going to load
up some of that gray. I'll use the same method I did
for the six-petal flowers. Starting with the
tip of my brush, applying down some pressure. But instead of
coming to a point, I'm going to curve my brush. It's a little bit more rounded, and I'll do my
second stroke here, and do the same thing. You can see these daisy
petals are nice and round. I'm going to work my way
around starting with the tip, applying some pressure and making sure to round
it off at the end, starting with the tip. Again it's okay if
you pull some of this yellow or brown
from the center. If all just adds
about this style. I'm just going to repeat this
process all the way around. [MUSIC] Now all of my petals are drawn, but I've lost a little bit of that definition in the center. I'm just going to go back in and add a little
bit more of that yellow down at the bottom. It's dried out quite a bit, so I want to make sure
it's still wet enough. I've got color blend a bit. I'm just tapping in some of
that darker, warm yellow. Just like that, and then dropping a
little bit more of this brown just to barely tap in
down here at the bottom. Again, it's okay if some of
that bleeds into the petals. It's looking great so far. The last step is
going to be adding some wispy lines and a little bit of
shadow to the petals. But for this part I
want to make sure that the petals are
completely dry, so I'm just going to give it a couple of minutes to dry out. Now for this last step, these petals are dry now and I'm just going to go
in and add some of those lines to the petals to just give it a little
bit more texture. For this, I'm going to
be using a liner brush, which just means it's super fine and comes to a very sharp point, which is perfect for adding
these tiny little details. But no worries if you
don't have this brush. I just got this recently. So up until I have those, I just used the very tip of a round brush. Just like this. So these are the brushes I've been using throughout class, but they come to a
nice fine point, especially when they're wet. It will achieve the same effect. This is just taking a shortcut. I'm going to load
up this same color of gray that I use
for the petals, but just a little
less watered down, a little more concentrated. I'm just going to barely add these little wispy
lines to the petals. Just like that, so you
can barely see it. But it adds a bit of
that realistic effect. You don't have to do this part if you're happy
with how it looks, just very loose style, that's totally fine too. I'm just going to work my way around adding lines to
each of these petals. A little bit too much
on it, but it's okay. You can just wipe some of that excess off on your paper to off and continue on. [MUSIC] That is looking really great. I'm happy with how
it turned out. Again, let's do it one more
time just to really build in that muscle memory and
nail this process down. I'm starting with me yellow base and just painting
in that center. Making it a little more of an oval shape than
just a plain circle. While it's still wet, I'm taking a darker value of that warm yellow and just tapping in some shadows there
down at the bottom. Not worrying about
blending it too much, I'm just letting it bleed
out into that base layer, just like that, and
then adding my brown. When I add my brown, I'm
not adding too much water because I don't want it to
overtake the whole base layer. I just want it to
be really subtle. I'm using mostly pen here and just tapping in some dots here
down at the bottom. It is still bleeding a bit into the center, which is fine. You just don't want
it to bleed too much. They still want to
maintain that yellow. I'm going to soften those edges just a bit by
taking a clean damp brush, just blending a tiny bit. Now I can start
adding the petals. Again, I'm using
my size 5 brush, using a very light gray mixture. Starting with the
tip of my brush, I'm just laying down
a light gray petal, making sure to keep
the tips rounded. I want to make that one
just slightly darker. I'm repeating that process, starting with the
tip of my brush, laying it down on the page, dragging it out and
creating a rounded tip. Again, if you don't
have a pre-mixed light gray and you can always just use a really
watered down renin of either Payne's gray or black, or even a really washed
down yellow would work too. I'll just repeat this process all the way around the daisy. [MUSIC] Then of course, the final step is adding
those detailed lines. But you have to wait until the petals are dry
before you add that. Because if they are still wet and you start adding in lines, they're just going to expand
throughout the petal. But for this part you have
really thin defined lines. Just give it a couple
of minutes to dry. Once they're all dry, you'll take the very
tip of your brush or a script liner
if you have one, get a slightly darker
value of the gray and just start adding in your very
thin lines on the petals. Just a nice finishing
touch to give it a little bit more
of a realistic look. I'm keeping them
very nice and thin. There we have it, too
beautiful daisies. As I always say, muscle memory is extremely important in improving
your watercolor skills, so I encourage you
to practice a few more before we move
on to the next video.
9. Flower Buds: Finally, we'll paint
some flower buds. These may not seem like an important type of flower
to know how to paint, but trust me, they
always come in handy when you're painting
compositions and bouquets. I'm going to be using the same burnt orange that
I used in the last lesson. One thing I want you
to keep in mind in this lesson is you definitely
don't have to paint the exact same amount
of flower buds or use the same colors I do
in the demonstration. The main point of learning this technique is to be
able to use these as fillers to help complete a
larger composition or bouquet. You can easily tailor
your flower buds and stems to fit your
compositional needs. Now let's take a look at
the steps to painting a stem with multiple
flower buds, which actually is a very
similar process to how we painted the lavender
earlier in class. Number one, I will
paint a few base buds, making sure to keep
them nice and round. Number two, we'll tap in that darker value at
the bottom of each bud. Number three, while
it's still wet, we'll paint in the stem
and a few wispy leaves. I'm going to be using a
size four round brush here, and I'm just loading
up a very light value of that burnt orange. I'm just going to start by
placing my brush down on the page and creating a nice round button
shape. Just like that. I'm probably just going to add maybe four or five of these. Like I said, very similar
to how we did the lavender, but instead of just tapping our brush down to
create the petals, we're actually applying
some pressure down here and using a few strokes to
create each of these buds. Remember, you don't
have to paint the exact same amounts
of buds that I'm doing. Feel free to make yours as
big or as small as you want. I'm going to start with
that and while it's still wet I'm going to load
up a darker value. The same burnt orange color
but just a little more concentrated, less watered down. I'm still using my
size four brush. Just like we did
with the lavender, I'm just tapping in some of that color right at the
bottom of each of those buds. All of these lessons are
really good exercises for improving your
water control. If you have too much of that
dark value on your brush, then it's just going to
overtake the whole bud. But you still want that base
layer to have enough water that it has these
bleeds and blurs. But you don't want it to be
pulling up on your page. I'm going to be
switching to a size two brush and I'm just going
to load up some green. These are still wet, which is exactly how I want them to be. I'll use the tip of
my brush to draw in the stem just like that. Then attach the buds. You'll see a little bit
of that green blend into the flower bud. Again, if you don't
want that blending, then just make
sure your buds are dry before you do this part. I personally love this look. Now I'm going to add just a few little wispy lines here just by applying some pressure down on the brush and lifting back up. In the next lesson,
I'll be going over a few more methods
to painting leaves. If the first part is hard
for you, don't worry. Seizing the tip applying some pressure and
lifting back up. There you have it.
Flips, do this again. This time I'm just going
to do two little buds. That's what I really love
about learning this technique. Once you know how to do it, you can really create so
many different variations. If you're in the middle
of a floral painting and you just see a spot that has a little too much whitespace or it feels a little empty, you can add a couple
of these and it really helps make
it look more fluff. I'm just going to
do two this time. Starting with a light value and then switch back
to my size four brush. I'm going to create
another flower bud right there and one
just slightly below it. That's a little bit smaller. Again, another note
about water control. You just want when you're
going back in the top in a darker value like
we're doing with this and like we did
with the lavender. You this first layer to
have a nice sheen of moisture so that that color
can bleed and expand out. But you don't want it to be pooling up on your page because then it's going to just create some really harsh drying lines. If you have too much water
and that is pooling up, then just clean off your brush, dry it off and let your bristles soak up
some of that excess. But right now it's
just a thin layer of water so that I can easily tap in that darker value and it just gently bleeds. These are really great
exercises in water control, which you can really
use in any aspect of watercolor painting,
not just flowers. It's a really handy technique
to get the hang of. I'm going to do one more on a little bit more
of that color in there. I'm just gently tapping that in. Now I'll switch to my
size two brush again, load up some of that green. Just using the very tip
and painting in that stem, the green bleeds into
the base of the bud. There you go. You can leave
it like that if you're just filling in part of a bouquet or a
different painting, or like I did at the last one. You can add a few leaves
coming off of it. That looks really
beautiful on its own too. Now think I'll leave it at that. I really encourage you to keep practicing this
technique and try modifying the amounts and the size of the
buds on your stem. Once you're done practicing, meet me in the next
lesson to learn a few of my favorite ways to paint loose style leaves and greenery.
10. Leaves & Greenery: Now that we know how to paint a bunch of different flowers, I'll show you a couple of easy ways to paint
watercolor leaves, so you can add some
beautiful greenery to your floral paintings. For this lesson,
I'm going to use my favorite deep green mixture, which is a combination of
sap green, Payne's gray, and a little touch of indigo and I'll be using a
size 6 round brush. I know we painted a few leaves
in some of the lessons, but this will just dive
a little deeper and explain the process for
creating these leaves. Again, I'm using a size 6 brush. The way I like to explain just a basic leaf using watercolor, is starting with the tip, applying just a little bit of pressure and then
applying more pressure so the belly of your brush spreads out and then lift back up. It's really a cadence
of light pressure, heavy pressure, and
light pressure and that creates a really
beautiful basic leaf shape. There's lots of variations
you can do with that as well. If you want a longer
skinnier leaf, like a leaf that you'd
find on a palm branch, then you just apply
less pressure and drag it out for longer. I'm starting light applying just a little bit of pressure
and lifting back up. Or if you want a
thicker, a rounder leaf, like if you are
painting eucalyptus, then you'd not drag
it out for as long and you'd really apply
a lot of pressure down. You start light, push
your whole brush down and lift back up
so that light pressure, heavy pressure, light pressure
really can be modified in a lot of different
ways to create a ton of different
leaf variations. This also plays into the muscle memory that
I've been talking about. It's really nice
to maybe warm up before you start painting by
just doing light pressure, heavy pressure, light, light, heavy, light, light,
heavy, light. It may feel repetitive
and it is repetitive, but it really helps build
your confidence and your muscle memory and just helps you get more familiar with how your brush works. Now another technique that
I use very frequently, and this is actually
very similar to how we painted the leaves in the first lesson of this class and I call this a
two stroke leaf. I'm starting off the same way. Light pressure, heavy pressure, light but I'm doing that same thing again
right next to it, but I'm going to
leave just a tiny bit of white space in between there. Starting right here, light
pressure, heavy pressure, and light and that creates
a really beautiful leaf that I tend to do coming
off of flowers like this. Sure, let's do that
again. Light pressure, heavy pressure, light, lift up and then that
same thing just leaving a tiny little white space there and connecting
again at the top. The last very common method
that I use when I'm painting, especially in the loose style. I just call this an
organic wispy leaf shape, so very official name for it. [LAUGHTER] But for this method I just let my brush
do its thing. I'm still going to do light pressure, heavy pressure, light, but I just give my rest
a little bit of movement and that helps
create these really nice wispy organic leaves. Starting off light,
applying some pressure, squiggling my brush
and coming back. Light pressure,
heavy, getting in a bit of a curve and
lifting back up. It's the same essential
cadence as this, light pressure, heavy
pressure light, you're probably sick of
hearing that by now, but that's really the
easiest way to paint leaves, the same technique
that I'm just being a little more and loosen
freestyle with it. Light, heavy, light. You can even do the two
stroke method with this too. Light, heavy, light. It just looks a
little bit more loose and expressive than a
standard one like this, so both are great
and it helps add some dynamic interests to
your paintings as well. Those are a lot of the
very basic techniques I use to add leaves to my floral arrangements or even if I'm just painting
one flower at a time. But I wanted to throw in a
little bonus lesson here. I just recently got a
size 4 script brush. This is still the
Princeton Neptune brushes that I've been
using throughout class. But the script brush
is a lot longer and it has a finer tip
than the round brushes. I've really been enjoying
using this brush to paint those organic wispy leaf
shapes that I just showed, so let me show you
how that works. I've got that color loaded
up onto my script brush. I'm just going to do the
same light, heavy, light. You can see it really creates
these beautiful thin, long leaves really easily. We're going to do another
demonstration of that. You can still achieve
the same effect with a round brush for
this is just, again, a shortcut brush and I've really enjoyed
using it lately to add some dynamic flowing
greenery to my compositions. Light pressure, heavy and light. You can see a little bit
of streakiness there, that's just because
I didn't have enough water and pigment
loaded up on my brush. If you're running
into that same issue, just make sure you
have plenty of water and plenty of pigment. I'll also show you how you
can do in a leaf stem. I'm going to do
light, heavy, light. You can also use a round brush for this too, that's
perfectly fine. Then I'm just adding
a few more of those coming off of
that original stem. Similar to the flower buds
that we just painted, this style of leaf
stem is also really helpful if you just
need to fill in some extra white-space
on a composition. Next step we'll get started
on our final class project, which is the floral composition but before we get to that, I really encourage you to try
adding some of these leaves that we just learned
to the flowers that you painted
earlier in class.
11. Project: Floral Composition: Now it's time to get started on our class project, the
floral composition. As I mentioned earlier in class, I want this project to be a reflection of
you as the artist. I'll share some
tips and examples for how to create a
floral arrangement, but I want the painting
and execution to reflect your own
artistic choices. Your final painting
can be as simple as a flower with some
flowing leaves around it. It can be a floral wreath or
if you're feeling ambitious, you can even paint a full
page arrangement with a variety of flowers,
leaves, and buds. Here are a couple of
tips to get you started. Number 1, it's best to
have a focal point in your composition to draw the viewer's eyes to the
main element of your piece, which is typically your
larger florals and then the leaves and the buds are just supportive elements. Number 2, try to convey movement
and dynamic interest in your painting by composing your flowers in a zigzag motion, adding flowing leaves and greenery to the sides
of your flowers and by making sure to leave enough white space between
your flowers and your leaves. Those are just a few
of my composition tips that generally apply to
larger scale compositions, but it can also be helpful if you're just planning to paint a flower with some leaves on
the side, like this example. Even though there's
just a few elements, the piece still has
movement to it with the greenery coming
out on each end. Pick out your color palette, decide which types of flowers
you want to include in your painting and go
ahead and get started. Don't forget if
you feel stuck or unsure about your next
step that you can always ask questions down below and I'll do my
best to help you out. In the next and final video, I'll share some
additional resources and we'll go ahead and
wrap up the class.
12. Resources & Final Thoughts: [MUSIC] Congratulations,
you've finished the class and I'm
so glad you joined me as we learned to paint these beautiful
beginner loose florals. I truly hope you
enjoyed the process and feel much more confident in
your watercolor ability. What was your favorite
part of the class? Was there a specific flower or a technique that really
resonated with you? Be sure to share your thoughts down in the discussion below. My personal favorite
flower to paint has always been loose
watercolor roses. I love how they look different each time I sit
down to paint them, and I just fall in love with those wispy little c strokes. To review what we learned today, we started with an
introduction to the basic watercolor flowers
with the six-petal flower, and learned how to create
an endless variety of them by making simple
changes to the petals. We also learned to paint
roses, daisies, lavender, dainty flower buds, and a few different methods for natural-looking
leaves and greenery. With all those skills in hand, we finished with a
beautiful composition of florals using colors and
flowers of your choosing. Now that you've mastered
the basic loose florals, I have a variety of
additional classes to help take your painting
to the next level, from intermediate floral
classes to seasonal projects to creative skills like
learning how to digitize your artwork and turn it into greeting cards or art prints. There are plenty of options for continuing to master your craft. With these new floral
skills in your toolkit, you're creative
possibilities are endless. I've said this before
and I'll say it again, the key to improving your
watercolor technique is truly by practicing and
building up your muscle memory. So make it a priority to set
aside some time to paint and practice and try your best not to get too frustrated
along the way. You're not always going
to like what you create, but it's all part
of the journey. I want to thank you
again for joining me today and I hope to
see you again soon. Happy painting from
me to you [MUSIC].
 Petals by Priya Watercolor, Watercolor Artist & Teacher