Transcripts
1. Introduction: Have you ever received
a handmade card and kept it long after the
occasion had passed? Hi, I'm Madhu. I'm a watercolor artist,
a published author, and I love teaching watercolors to complete bignur step by step. My brand fees is known for
its playful, fun style. In this class, we're
going to learn how to paint handmade
greeting cards. It's more than just
paper and paint. It's a personal gift
and a small piece of art that can
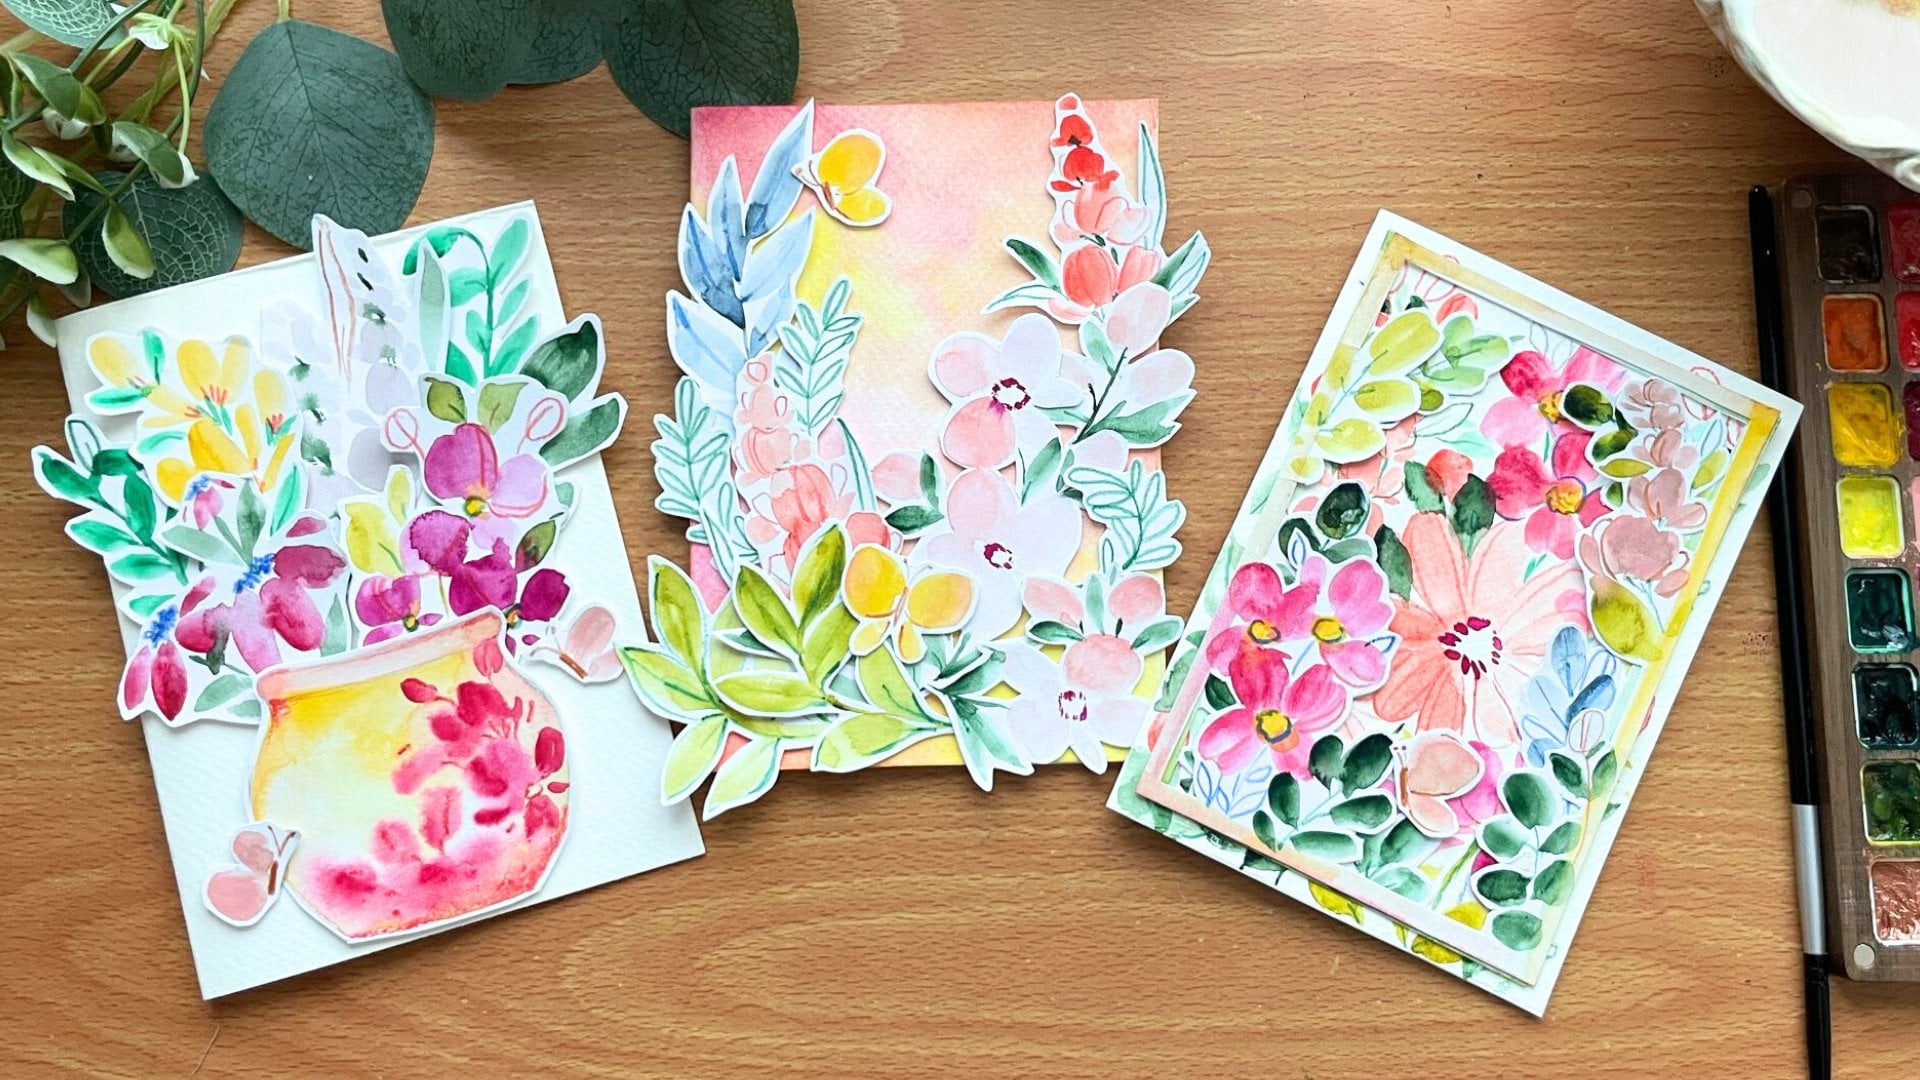
brighten some days day. In this class, we'll be creating four beautiful wildflower
inspired greeting cards. We'll dive into the
different materials, learn to paint simple
wildflower step by step, and then put them together to create some interesting,
unique handmade cards. Also show you how to make
envelopes to match your cards. What's also really special
about these cards are the fun little pop
up elements that can add an extra touch of
charm and surprise. Even if you're completely
new to watercolors, by the end of this class, you will have a collection of beautiful handmade cards and the confidence to create
many more of your own. So gather your supplies, settle into a cozy
creative space, and let's paint some beautiful
wildflower cards together.
2. Materials: Let's talk materials.
To start off, you're going to need two
different sheets of paper, a watercolor, thick
300 GSM paper. This is what we're going
to make our card on, and that's our main sheet. We're also going to add in some watercolor painting
florals on top of it. The next sheet is a
slightly thinner sheet. It's about 100 GSM. It also can hold
watercolors because we're going to do all
our florals on it. So we want something slightly thick, but it's
going to be perfect, especially for the folds and different pop ups that
we're going to add. Next we're going to
need our paints. I'm using the terrain
set from art philosophy. They have a nice
range of colors, lots of greens,
which is going to be perfect for what
we're creating today. And then we're
also going to need a brush I'm using a basic
round brush of size, I would say four or six. It depends on the
brand I've noticed. This is a size six
and a basic brush, we're also going
to need some glue for us to stick down
our various elements, as well as double
sided foam tape. Now, the double
sided foam tape is especially useful for
elements that we want to place on top to create
a three D element. You can see here
that little patch of writing is on foam tape, so it pops a little bit
higher than the rest. Finally, some tissues, pencil, a scale, and water cup. For the envelop,
we're going to use some craft paper and then add in some
handmade painting to it.
3. Card Template: Before we begin, let's
prep our greeting cards. Now, I'm making custom size. So they're basically
an A five size that's been folded
into an A six. So I've taken my A four sheet. I'm dividing into half, and then I'll be
folding the other half. If you have ready made
watercolor cards, you can use them, and I'm going to give
the measurements accordingly so you
can change it around. We'll also be making
custom envelopes to fit your cards in so you don't
have any problems on that. Now that I've divided my sheet, I'm just marking the other half as well so I know where
I want to fold my card. Now, you can use a cutter. You can use a scissors,
you can draw a line. It's really up to
you. I'm going to use a cutter so I can
get my line straight. First, let's cut
our A four in half. And for the other half, I'm going to use the back of my brush to just mark
it for the fold line. I found that this is easier to fold than me trying
and struggling. So just having that
fold line really helps. So I've placed it in the center, and then I'm using the
back of my brush and just marking that point, that line. Now, very easy, I
can fold it over. We're going to have four of these cards ready
for us to work on in this class. Y
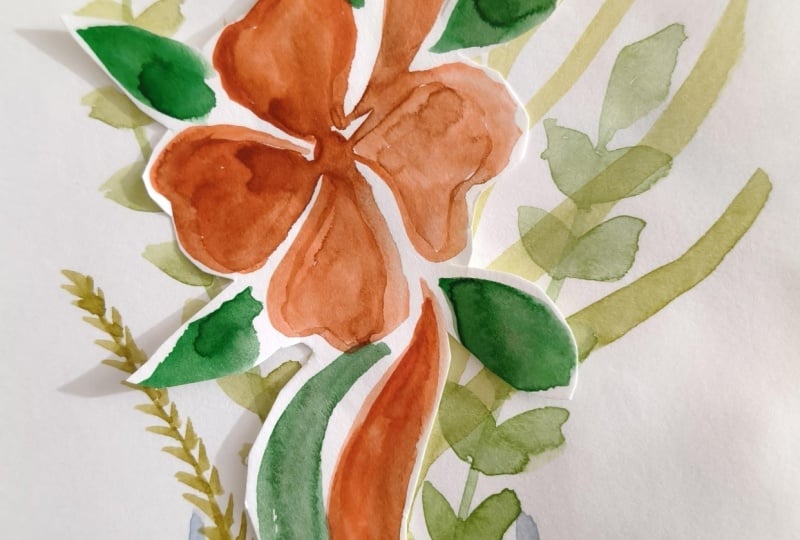
4. Crimson Meadow: I'm so excited to start with
our first greeting card. This is so pretty, and I love how this
inside just pops. We're gonna start with
some simple florals, or poppies, and create
something very interesting. For our poppies, I'm
going to start with a simple circle in the
middle of the page, and then I'm going
to take my red, add a little bit of water, so it's very soft and subtle. And then we're just going
to add in our petals. Notice how the
layer is very light because we're going to stack up a second layer that's
going to be brighter. We want to make sure
that this is very light. Add in a very big petal, and then a second one. R fill up the space. While this is drying, let's add in some more flowers. I'm going to add
in one big petal. This is going to be
a side view flower. We can add in some buds and then connect
everything to a stem. So let's wash our brush
and take in green, and we're going to start at
the bottom and just add in a thin line connecting
to the flour. Let's add another
one that branches out and connects to
the smaller flour, and then we can
add in some buds. The interesting
thing with poppies is the buds generally
falling down, and so we're going to use that. And remember that your buds
are always smaller in size. Now, I'm flipping to the back of my brush and using the back to add in some thin in
lines for the buds. This adds a little texture without really needing
to do too much. Time to add in some leaves. We're just going to
pull through our brush, and then we're going to
add some quick lines from longer lines to thinner
lines forming a leaf. Notice how I do this. After completing the step, we're going to move on to
drying our base colors. You can use a blow dryer or a craft trier or just
let it rest for a bit. And once everything is dry, we can go ahead and add
in our second layers. So my painting is dry. I'm going to go in with red. And this time, I'm
not adding water. I'm going to just take
the red as it is, and I'm going to
add in a layer of petal between what I had painted before.
That's really important. You can see the previous
layer show through. Let's add three
petals this time, and then you're going to
use the back of your brush to add in the veins
for the flowers. I let's repeat this for our smaller flour, adding in two smaller petals and then using the back of your brush to
add in some lines. And here we have our
very simple poppy. We still need to add the
center of the flour. You can let it dress for a
bit or while it's still wet, add in a drop of
purple to the edge. You can see how I'm just
gently tapping my brush, so a little bit of that
purple spreads around. Just wait a couple of seconds, and we're going to add
another layer in the center. Or you can use a black pen to get in those center details. A One of the key features of poppies is their
center because it's so bold and interesting. So we want to make
sure that we get those details using the
black, just adding dots. Now we're going to do
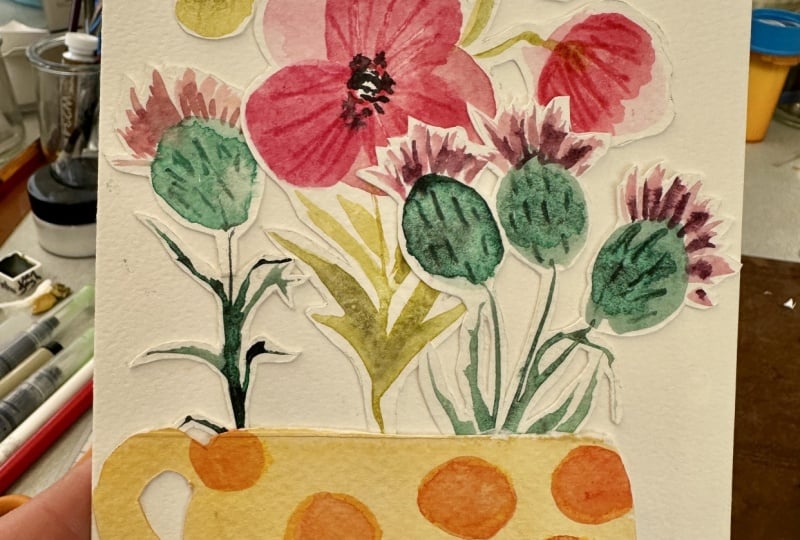
a secondary flower. This is our thistle. Thistle are very
interesting to paint. So you start with green circles for the base of the flower. Let's add a couple of them. And thistles are generally really small
compared to poor pi. We're keeping it the same
size for our painting today. Now, what I'm going to do is
with the back of my brush, I'm adding thin lines, small short lines along
to create texture. Notice how I'm doing that. I already love how
when it dries up, it's all going to
settle through, and you're going to
be able to see these lines a lot more clear. Time to add in a stem connecting all these
little flowers. Add in some leaves, quick lines connecting
to the center point. So you have a big line and
then add some smaller lines, and you've got your leaves. Now, we're letting
everything dry. And once it's dry, I'm going
to mix a little bit of peach or cream to the red so
you get a more pink colour. And then I'm adding
thin lines to the top of the green
circles we painted. Wait for a bit, and
then we're going to add in some more thin lines. You can even go in with red and directly add in the lines. For our greeting card, we're going to repeat the same thistle just one more time, just a single strand, so it really fills up our card. It depends on what
size you're doing. As I discussed before, if you want to make
a bigger card, you can add more poppies, more elements or keep it simple. As discussed before,
remember that your flowers that
you're painting right now need to be smaller, so they need to be
above 3.54 " in height. Keep that in mind so that
they fit our greeting card. So added one solitary flower, and that's going
to be perfect for what we're going to do next. Are you excited? If you've
gotten this far. Good job. I can't wait to
assemble all of this together to create our
interesting greeting card.
5. Card Front 1 Crimson Meadow: Cut up the different elements. Try to get as close as possible, or if you want to keep a
little bit gap, that's okay. I try to go a little closer, so it looks really great. I take this time to just
enjoy the process of cutting, painting, and just enjoying getting excited about how
this is going to turn out. I skipped ahead, so you can see I have my
different elements. Now using a cutter, just being really careful, we're going to cut the spaces in between of some of the elements, so you can see through them. This is going to be great for our next step where we're
going to add in a background. And through that, you'd be
able to see the details. So as much as possible, we don't have to get everything, but the bigger portions
like something like that, it would really help
if you can just use a cutter to get really close. Ready with all of your elements. Let's get started with our card. This is the front of the card, and I'm just putting everything together to see how
they can fit together. So you have your poppy
right in the front and the thistle towards the back or just behind it a little bit. It's good to place it so you have an idea where
everything goes. And what we're going
to do once we have that idea is we're going to actually paint the background, so we're going to
have some more leaves at the back that are just there as an add on to our card. Before that, the first thing
we're gonna do is paint a little cup in which the
flowers are gonna sit. So I'm taking my other sheet, and I'm just gonna
draw out my cup. Add in a little
handle for the cup, and then we're
going to just paint it with a very simple design. If you want, you
can add in more, you want to add in
flows. That's fine. But I'm keeping it really simple because I want the poppies and our flowers to pop
right out of the card. Once that's done, let's
paint our cup orange, a color that works
really well with the reds and pinks
that we used before. Once you have that painted, we can drop in a little bit of yellow and a little bit of
a darker orange as well. Let all of this dry up, or you can use your
hand craft dryer. And once that's done, we can
go in with a second layer. This is the part you
can just have fun with. I'm adding in a little
orange layer right on top and just painting
everything out. Next, using the
back of my brush, I'm going to add in a thin line. And then I can add in a small
little flour in the middle. Very, very simple. We
can now cut out the cup, and we have our different
elements ready. Let's go back to
our greeting card. And we're going to
get into painting a little background before
we paste everything. Just repeat your leaves
in the backdrop. And using a secondary cream, we can add in some quick lines. All starting from the center. So you can see how it's kind of flailing out, which is perfect. That's exactly what we want. Time to add in a little splatter by just tapping your
brush gently filled with orange to have a
great background, and we're ready to
move to the next step. Let everything dry up
before continuing. Use your glue to stick
everything down. I might have gotten my
hands a little messy here instead of using a
different technique. I just got glue
all over my hands. Not a good idea. So but
it's always fun to do that. For the cup, to give it a
little bit more height, we're going to use
double foam tape, so it has a little foam
and glue on either side. That's going to make
the whole thing lift up a little bit more. Start by placing your
smaller elements and then the poppy
and finally the cup. How cute is this? One of the things you can do is even write a message instead of the flour for the middle of the cup. That works out great. I'm also going to use a
black pen and just add a little leaf to our cup
to balance everything out. And we're done with the front
cover of our first card. How cute is this? It's so perfect for any occasion, whether
it's a birthday, whether it's
congratulations, whether it is good job, anything. I think it's so heartwarming
and so heartfelt. Now that we've completed
the front of the card, let's move on to the inside. We're going to add
a little surprise by adding some fun
pop up elements. This is going to be so great. I'm so excited to get started.
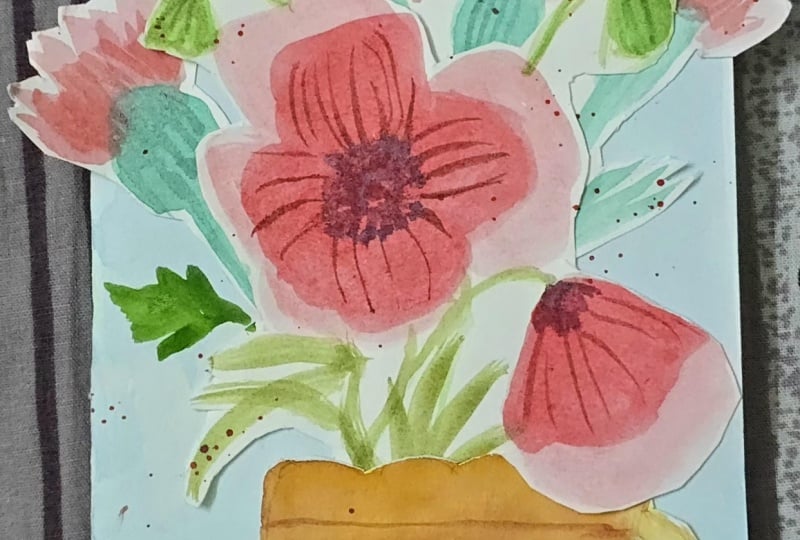
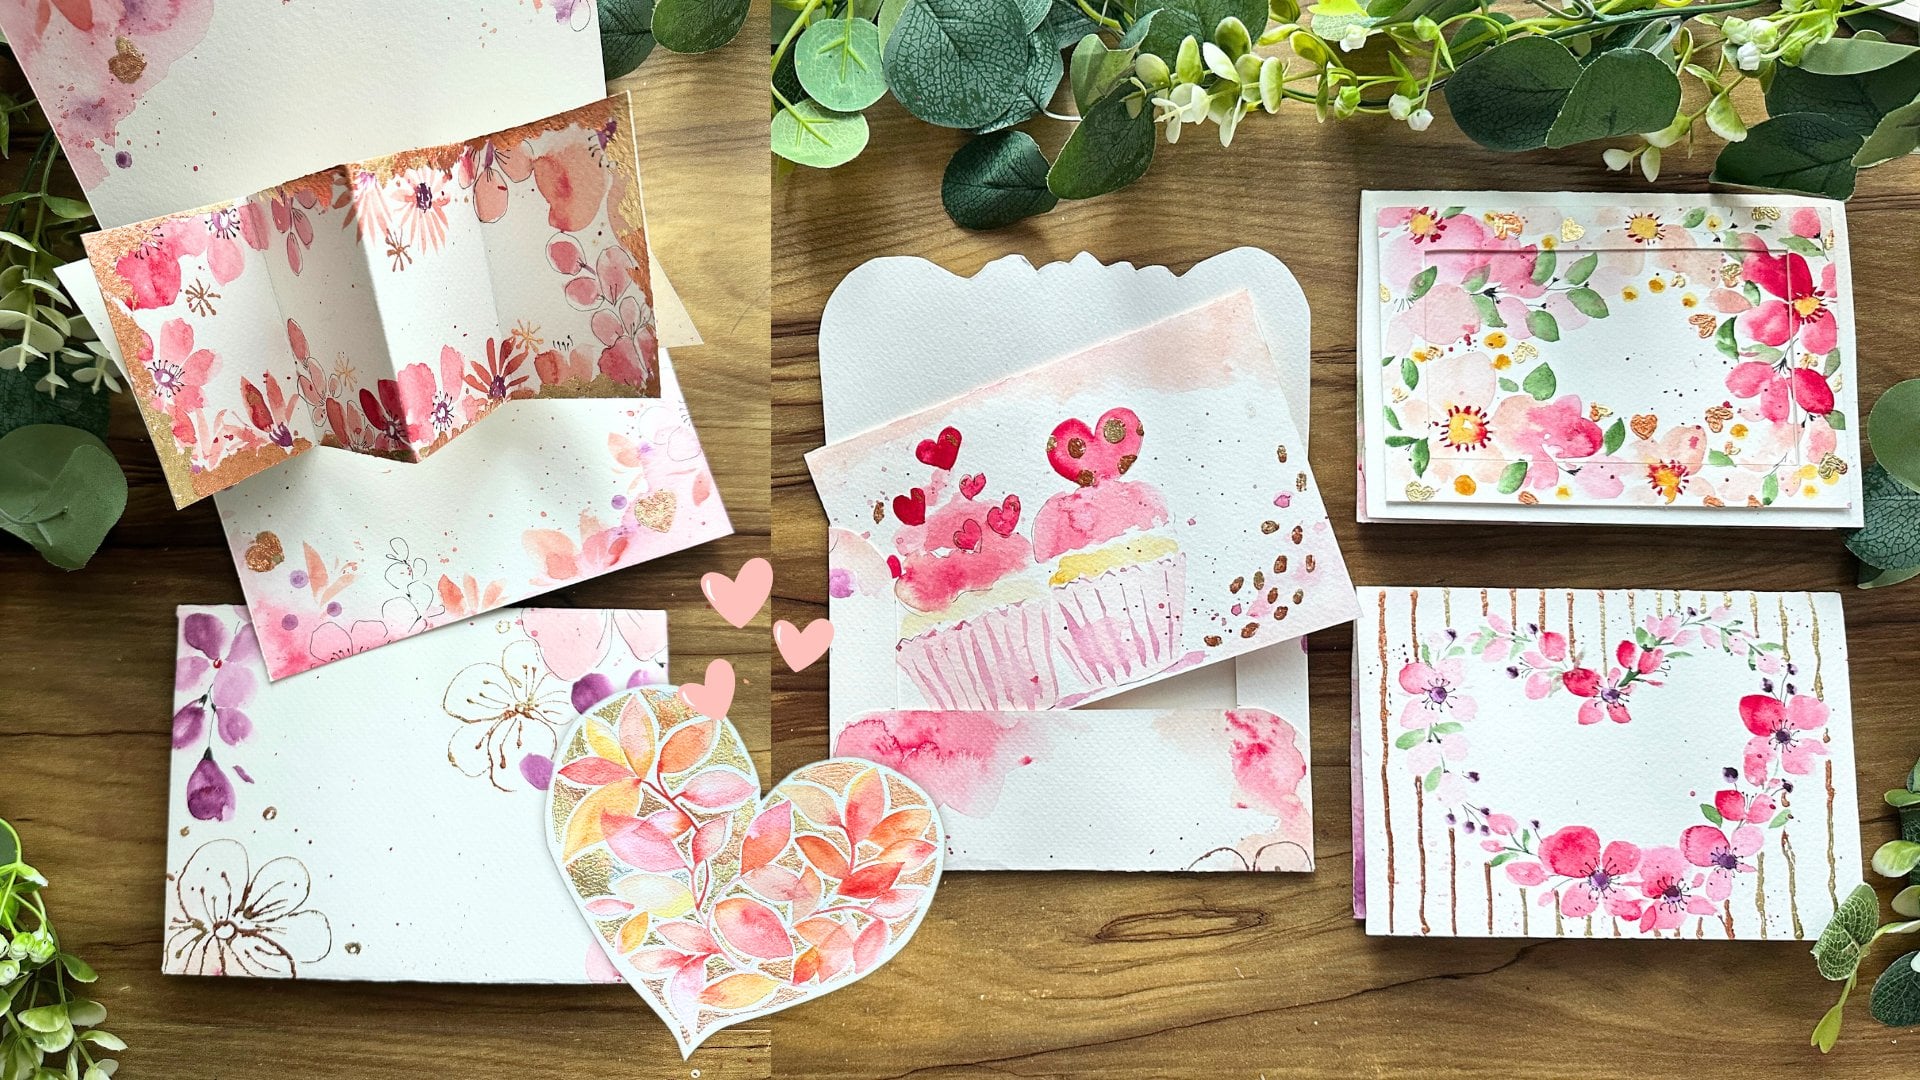
6. Card Pop 1 Crimson Meadow : Pop up cards are so special. I have been enjoying
creating pop up cards for my friends and family
anytime there is an occasion, and they always love it. So let's get started
with our card today. I'm taking my secondary
sheet, the thinner sheet, and I'm just placing my
card on top of it so I can mark out the
size of the card. What we're trying to do
is have elements that are the same length as the card. And it's important that you
mark it so you can actually fold and prepare it. You can see how I've
got that ready. And I'm just checking if it's
the middle of the sheet. And then I'm going to mark the
midpoint to that midpoint. So I found a really
cool thing to do with my cutter, as
I mentioned before, is to use the same point as
a way to mark the folds. So I use the back of my brush
and just go over the line, and that creates a little bend, which makes it easier
for me to fold my card. We're going to do them in line
all the points we marked. Time to fold our cards. So first, we're going to fold it all the way in the middle. And then the smaller parts
that we just marked, we're going to
fold them outward. So you have a little
wave that we've created. You can use a pencil to kind of press it
down or a spatula. I'm just being very simple with my tools that I have
just lying around me. And you can see how
we've created this. And this is going
to be our pop up. Now, I made a little
mistake here. I should have flipped over
my paper, but it's okay. It's not going to
really affect us, so you can just follow
along what I'm doing. So I'm going to take the
bottom of this paper. I'm not going to
paint the entire thing, the bottom section. I'm going to add a nice
lineup of poppies, following the exact same
technique that we did before, adding our big bold petals in a very soft red
translucent layer, letting it dry, and then
adding in some darker petals. So we're going to just
fill up that entire bottom almost the middle mid portion of the card with
these little flowers. You can add in
some side flowers, maybe some buds, little
details to add to our pop up. I like how this is looking. Everything is dry now. We can go ahead with
our second layer of petals and then use the back of the brush
to add in our lines. Use your black lines
and circles and dots to add to your flowers. And you can see how
vibrant that looks. That's so great. I
like how this has turned out with the
little grass elements. And I also try to tie it in
with the front of the cart, so it all comes together. Now that we have this,
we're going to let it dry and we're going to go
onto our second layer. I moved my paper around, and at the bottom, we're going to add in
another layer of leaves, and this is just
going to be different leaves that we can
play around with. You can use a different shade
of green if you'd like. But this one, we're going
to make it really short. And you can see how
I'm playing around. I'm adding a leaf that has little branch, it's
splitting ways. And you can follow
along for this, and then we're
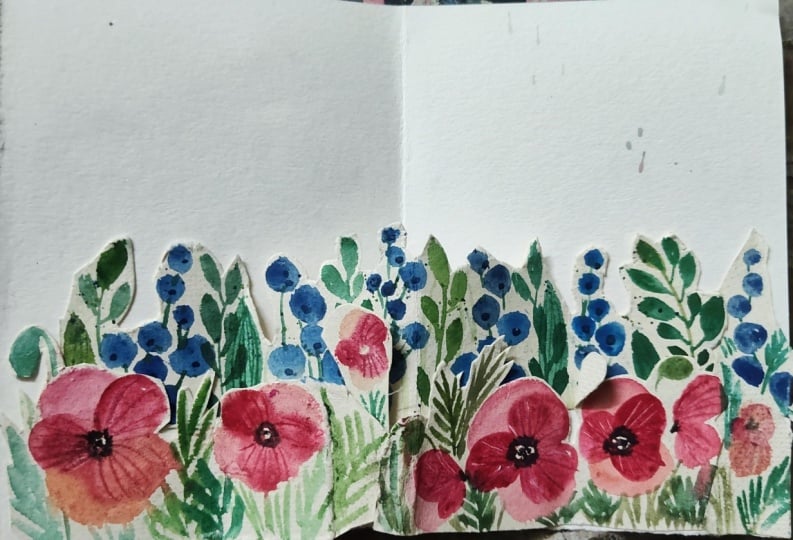
going to just fill up this little piece as well. While we're at it, let's add in some berries.
I'm using purple. And then I'm just going
to add some berries. The purple and red work
really well together. And we're going to let
the berries dry for a bit before we add in
some more elements. Okay, now let's
use our black pen, and we can just add in a
little detail to our berries. You can add some
circles in the middle. This is the edge of the berry. N. Add some long cross with green and just
complete this layer. To finish it all up, let's use some slaters and we have two little elements
that are ready. We're going to cut the
two different elements and then we can move
on to the next step. Looking at these elements, I'm so excited to
put them together. So I have turned
around the folding. What we want to do is the center pops up and
the two layers stay down. You can see how that looks. Make sure that your two borders or two elements look like this. So when you fold it,
it folds outwards. Keep it at the center, and we're going to
just stick down the two ends of our element. I didn't want to keep too
much gap between these two. So you can see that the
berries are just going to pop up behind the poppies. If you want, you can add
a little message on top. You can add in
some more flowers. It really is up to you, so I
left that space for you to get creative or to add in a
message to your loved ones. Once you have that ready, glue it up, and
we're almost done. Time to have a quick look
if this whole thing worked out and you gently fold outward. And there you go. We have our really cool pop up
card ready to gift. You can place this underneath
a stack of books overnight, so it completely flattens out. And let's move on
to our card too. Okay.
7. Black Eyed Susan and Fireweed: A Story in Bloom. This card is the perfect card
for anyone who you know, loves tuning, loves
reading books. It's so perfect for them. We're going to start
off with painting some wildflowers that
we're then going to assemble into the card and then continue with
our inside pop up. The first thing we're
going to learn to paint is black-eyed Susans. Use purple to add in some dots for the
center of the flowers. This is a practice painting. We're going to practice
the different elements, and then we're going to repaint them for the front of the card. After getting a little
bit of that purple, we'll move on to adding
some yellow petals. Use yellow to drag your
petal one at a time. We want to have at least six
to seven petals per flour. Now, what you can do additionally
is turn to the back of your brush and use the back
to add in some thin lines, marking your petals and
giving them more detail. Continue this process as
you continue painting. Let's paint another flow. Exactly similar technique. For this little flower, we're going to do a side view, so we're just going to do a
couple of petals downwards. Et's add apt right on top. Then we're going to use green to connect the stems and
connect everything together. Paint in few more buds and some leaves to complete
your black-eyed Susans. The next flower we're going
to paint is fireweed florals. So this one has a long line. So we're going to
start by drawing out a pencil line so we know where we want to
place our elements. And we're starting in the middle or a little bit lower than that. Start by adding in
some basic flowers. Now, the important thing to note is that this flower
that we're painting is shorter than the card because we want
to fit within it. I'm gently painting
four petal flowers, putting them together
in a cluster. So we have one, adding
another one right on top, another one close by. And then we can add in some buds just by gently
tapping your brush, and then we continue
upwards, adding in buds. These are the flowers
that haven't bloomed yet. So little buds along the
side on either side of the stem as we go upwa bringing the distance
between them closer. Now using green, we're going
to connect the main flower and connect all the
little elements together. Add in some long leaves. Wildflowers are so fun to paint. They're just so
interesting, unique shapes. And so I try to get really creative in this class
where we're learning different type of flowers
instead of the basics. And this way, you get to
experiment a bit more. Now, using a dryer, I'm going to dry
the entire thing, so I can go ahead and add in another final layer for the flowers to
complete our fireweed. Using red as it is, add in some lines
between the petals. We're now going to take a
black pen and just add in some filaments to the flowers. So little dots and
then connecting them together to the flour. And there you go. We have
our fireweed that's ready. The next element that
we're going to paint is maybe we can do some berries as well
as a butterfly. So all of this is going to
become the front of our card. Berries are fairly easy to do, add in circles and connect
them with a main stem. And then we're going to add the little bottom
part for the berries. Let's try a butterfly now. We're going to use our red, add a little bit of water
so it's lightened down, and then we're going to add
the wings for our butterfly. Just a simple circle and then connect it to a
main body with a deeper red. We're going to let
this dry completely and then we move on
to our lower wings. While it's drying, let's
try a side view butterfly. I'm doing the exact same thing, but I'm just not going
to do it on both sides. The top wing, add in the body, and then wait for it to dry. Once it's dry with
the same color, we're going to add in our wing, and you can see how it overlaps
and looks so interesting. Let's do that on both sides. Using purple, add a little circle on the
top wing for the butterfly. We're going to repeat
the same thing for the side view butterfly as well before we continue
with our main card. H. Now that we've practice all these elements, I'm sure you're ready to
start painting our card. Take a plain card and then
we're going to dive into putting all these cute
little elements together.
8. Card Front 2 A Story in Bloom: I'm sure you guys
are so ready to start with your car. We're
gonna dive right in. I'm going to speed
up the process because we have our practice, and I'm sure you can paint
beautiful florals together. We start by painting
black-eyed Susans. Don't forget to add the marks with the back of your brush. We're going to also add in
some side black-eyed Susans to make it look more natural. Once we have that, we can add in our fireweed flour, as well. This is going to
give it some height and create a really nice
bouquet of flowers together. I'm sure you know how to paint fireweed flowers.
We just did them. Start by adding your
smaller flowers and then your buds one
at a time in a line. Add a stem and then connect
everything together. Continuing with our
flower bouquet, we're going to use some berries
in purple on either side, connecting everything
together with a main stem, some leaves, and then using a
black pen to add the little detail at the
bottom of the berries. Once we have all this ready, let's add in some splatters and we're almost done with
the front of our card. I wanted to add a little pop
up three d element to it. What I decided to do is take my butterflies that I painted and cut them into
separate pieces. Now I'm going to place them
on my card with foam tape, so they have a little
bit of height. We're almost done. I
realized I didn't add the little red details
for the fireweed, and then we're done with
the front of the floor. The inside is going
to be so stunning, and I'm so excited to
dive into that next.
9. Card Pop 2 A Story in Bloom: Of all the cards in this
class, this is my favorite. I love the pop up inside. It's just so special. So clear of everything
from your table. We're going to start
with our other sheet that is thinner, that is going to be
easier for us to use. All I'm going to do to
make it easier is to recreate the same card
measurements on the sheet, and then I'm going to paint and make sure everything fits. Now, right at the
center of the sheet, we can add in our open book. But adding in some curve lines for the top and bottom and
straight line for the sides. Once we have the open book, I'm making sure that I keep enough of space
at the bottom, sides and on top. That way, even when
I do my pop up, they all fit into the card. Once you have that overall
shape of the book, we can start by
painting our flowers. We're going to do some
different flowers, not like anything that we've created in the practice session, just simple but using
the same techniques. First thing to begin,
let's start by painting the inside of our book with
a very soft pink colour, add in a lot of water
to blend it together. Y Now I'm going to paint in some
yellow circles for the center of our flowers, spreading them across
the top of the book. Let's mix Crimson with our cream or if you have
white, you can use that. And then we're
going to get a very soft pink shade that
we're going to use. I'm using the same
technique that we did for the black-eyed Susans for
each petal at a time. The only difference
is instead of keeping the edge straight or curved, I'm going to have a
little wave on top. You can see how I did this. It's the same process
of adding each petal at a time and then
using that top wave. Now, you can switch and turn
around your brush to add in some mark lines to add
more detail to the flour. How adorable is this? So great. Now we can continue
adding lots of different flowers with
the exact same technique. Maybe you can do some smaller
or bigger or the same size. Just have fun with it and just fill up the top of the book. Now we add in some
side flowers by just adding a little
semicircle with a wave on top and then using the back of your brush
to add in some details. Next, I'm going to use a
black pen and then add in circle around the
center of the flowers, as well as just
outline the book. We then are going
to add in, like, some berries to make the
entire thing feel very summer, very fun, and also fit any occasion that you'd
like to give this for. Now, adding purple around
the edge of the book, and then we're going
to use a black pen to outline the
pages of the book. Time to add in some leaves, connect the stems, and
bring it all together. I decided to mix in
a purple with blue and purple to get a darker
blue colour for the berries. This also ties in
with the front of our card with the
same blue colour. Then we add in some berries through this beautiful painting. You can get really creative
with this if you'd like. There's so much of possibility with greeting cards
that sometimes I feel like I can
give you option A, B, CD, all the way to Z because
there's so much you can try out with card making
with just a few techniques. So the same flasks can
be placed differently. Different colors can look
completely different, and that is what is so fun. And also, the bonus is it's handmade and perfect
for gifting. You can also create
these for little tags. If you want to add
in a thank you note, so many possibilities,
as I mentioned. Amazing. We're done
with our piece. Let it dry completely, and then we're going
to cut around it. You can get as close as possible so you get
a better effect. I'm going to skip ahead
after cutting my piece. This is really important. We're going to now cut
a small strip of paper, and you can see the
measurements are above. I've also added it in the A section as part of the
templates for this class. So we're starting off with 1
centimeter height and then going into 1 centimeter
three, one, three, one. And then you can cut this really two pieces like this
for our pop up. Once you have the two pieces, we're going to fold them
in the same direction. And then we're going to
create a little box with it by adding glue to the end. I'm going to see
this in a second. All I'm doing is just folding it And then I'm going
to add glue to the last piece and connect
it to the first piece. So you get a little box. Press it down so it
completely sticks. We're going to do the same thing for the second piece as well. So you have two pieces
exactly the same. A Now for the next step, we're going to connect the
two small ends together. You should be able
to fold it and completely press it down. This is our pop up element, and we're going to place it
in the center of our card. To stick it down,
we're going to add glue to the longer sides. A completely press it down so it fully flattens out. Then we're going to
add a smaller piece, our book to this as well. I'm making sure that rolly has pressed down and got stuck. Now we're going to add
glue to these two sides. Y. Place your book
element at the center, and then gently close
down your card, hold it for a couple of seconds so it completely gets stuck. And then when you open, you should have a
beautiful reveal. If you'd like to play some books over it,
you can do that. So it just completely
sticks down and alla we have our final pop up. How pretty does that look. It's such a great gift. I
10. Northern Wildflowers: Are you ready to dive
into another card? And I wanted to label this one Northern Wildflowers
just because it's so special and just feels
like a pop of fresh air. The colors are beautiful. So let's get started and
begin with our painting. As we practiced before, we're going to paint
our fireweed flowers. I used the sample that I had created before, my
practice exercise. You can go back to
the previous tutorial to have a look on
how we created this. And once you have it ready, we can cut it into a separate piece and
use it for our project. Don't forget to add in your thin pink lines
for the flour. I love how this looks. And remember that also the
height of this flower that we painted is a little bit
lesser than the card. For the next one,
we're going to be painting flax seed flowers. Flax flowers are so pretty, and I thought this was the
perfect fit for our project. So what I did is take
a little bit of blue, mixed in with a little red to get you this nice warm purple. Start by just adding
in your petals. In a triangle shape, use the back of
your brush to add in some lines for details. I have two little buds at the bottom or two little
side view flowers, and then a full flower
on top, as you can see. Flax flowers has
about five petals, and that's where
we're going to be painting one at a time. Time to connect everything to
our main stem using green, I'm just going to connect a thin line to the little flowers as
well as the main flower. And now we can add in
some buds, as well. We're going really
small with the buds in a little triangle shape
and some very long leaves. Go ahead and add another layer of purple for some more petals. And you can see how
that looks so pretty. We're ready to just add
in the smaller details, which is just the
center of the flower. This is a bonus tip. If you want, you can use a black pen and then just
outline some of the flowers. Finally, let's paint
some simple berries, leaving a little bit of space so we can cut up
all these elements. I'm using orange
to add in circles, clumping some of them together, changing the size as I go
higher, making them smaller. I then use a black pen and connect all of
them together with a little dots for the
end of the berries. Okay. For the final step, we're going to add
in some long leaves between the berries to
complete this element. Now, after this, we're going to paint a butterfly just to add into our card because I think
it's the perfect add on. Butterflies are
so easy to paint. So we start with one color, add a little bit of water, so it's very
translucent and paint in your triangles
with a rounded edge. Once that's done, take
color directly from the pan and paint the body and two little
circles for the antennas. Using a black pen, you
can connect the tube. Now we're going to let it dry. Once it's dry, go
ahead and add in the second win using
the layer of color. Keep it as transparent
so it is see through. And what we can do is add
in two little circles with a contrast color or a matching
color on the top wing. This is an easy way to add in a butterfly without getting
into too many details.
11. Card Front 3 Northern Wildflowers: Time to put together all of the different elements
to create a card. I've cut down everything so that we have three
different elements, four different
elements, the berries, the flowers, and the butterfly, and we're just going
to bring it together. What I wanted to do
is instead of just having it on the sheet, I wanted to add a little jar where all the flowers
are sitting in. For that, using a pencil, let's just mark out where
these flowers are sitting. Just make sure you have the
width of all these elements. And then we can proceed
with the next step. This is going to be such
an easy way to add in little details so that our
card just really pops. Let's start by gluing
everything down. I'm just using a basic clue and pasting all of the
different elements, and then we can
paint what we need. Now, using purple, let's add
our vase or bowl of water. One step at a time, add
your elements together, place them in a way that
you feel makes sense, that you really enjoy. You can add in more elements or if you want to
do a bigger card, you can really play
around with that. And I think the colors match, which is why this is so great. Yes, some of the elements
are popping out of the card, and that's very intentional. I am so in love with
how this looks. It's so pretty. It's got all the fun vibes. It's perfect. It's
handmade, so special. We just have a couple of little details that I like adding into all
of my paintings, so we're going to add
a quick splatter, just to bring
everything together, and you can add in some circles. If you want to add
in some stars, it's really up to you. And we've completed the front of our Northern wildflower card. Are you ready to dive into
the inside of the card?
12. Card Pop 3 Northern Wildflowers: Let's have some fun. Shall we? For the inside of the card, we're going to create a amazing
pop up that's just going to surprise anyone that you give this card to something
special and so unique. So the first thing we're
going to do is take our card, and we're just going
to add in some lines. This is for the background
of all our elements. I wanted to keep it
contemporary, fun, and friendly, and also using the
same purple that we used for our flax flower. So it's all in theme of this
beautiful, luscious purple. A continue this process through the entire cart. We're going to let
everything dry, and then once it's dry, we'll continue with
the various elements. This is almost similar to the first cart we
made with the poppies, but we're layering
it up and going into the second stage and making it even more
making it pop up more. So are you ready to get
started, excited to begin? Well, I am so excited to start. So I'm just going to
skip ahead to this step, and we can just dive
right in to our pop up. So what I've done is I've taken my other sheet,
the thinner paper, and I've just picked a width
of it, following the card. So it's the same width sorry, the same length of the card, and I'm folding
it in the center. And then once I have it folded, I'm going to bring it the
other two sides to the middle. You've got your first
layer of pop up. This is exactly what we
did for the poppies. Now that we have
our pop up ready, let's begin painting
our various elements. You can get really
creative with this if you want to just
add in a message. If you want to add
in some flowers, it's really up to you. I wanted to keep my
entire cart flows. So I'm just going to fix on the same details that we've
already been playing with. You can even try smaller flows, bigger flowers, like it
really opens up your choices. And now that you have the tools, it's really up to you. But let's follow along, and let's create something
pretty together. So starting with flax flowers, I'm adding in a set of flowers using the same technique
of turning around my brush and using the back
of the brush for some lines and details.
Continue this process. You can add little varieties of these flowers, so many options. Now that I have a big flower, I thought it would be really
fun to do a smaller one, just to create some interesting
contrast in the peeps, make it look pretty. With the intention of
bringing it all together, adding in some
side view flowers, you can even add in some buds, and we're going to do this. So we're filling up
this entire sheet with all our little details. Et's use yellow for the center of the flower
and paint them out. The next step is to add in our leaves with our
various greens. A Don't forget to add in some buds while you're in this process and then use a black pen to
just outline them. Continue adding leaves
across the entire border. I decided to switch
to a different color, a lighter green and using
that to add more detail. I really want to fill
up the bottom part of the flour of this element. Let's add in some splatters and we're done with our piece. Now, make sure to cut it
up as close as you can get and then we can move
on to our next element. I didn't really want to get
into how I'm cutting it, so I'm just going to
skip ahead so you can see how it looks in the end. Now that we have this, we're
going to take another paper, and we're going to add
a smaller element. This is going to come behind
what we just created. So we want to make sure that
it's maybe the same height, but we're making sure that
whatever we paint can be seen. This is really important. Now for the next piece, instead of folding
it half and half, like we did before, I'm going to actually make it
a little smaller. So just on the meter
smaller and then fold it. You're going to understand
what that means in a bit. So here you can see how the fold is smaller than
the previous one. And then, based on that, we're going to get
into our painting. We're going to add in our
flowers and really fill up this sheet as well for
our second element. So we're having two
pop ups for this card. What I decided to do is
add in some pink flowers. It's just some very
simple flowers following similar techniques, just making the
petals more rounded, just for some variation. H. Use the back of your
brush to add in some lines and details
for the flour. Continue this process.
Let's add in a side view, which is just four
petals, maybe some buds, and then we can add in more of the purple blue flowers that we painted before to
connect everything together. Y Use green to connect all of the stems, add in some these, and we're
finished with this element. Notice how I did go all
the way to the edges. I kept it more to the center. So this piece is going to be smaller than what we did before. Using a black pen,
I'm going to add in some dots around the
center of the flowers. Maybe we can add in
some curly elements. Just have fun. I just
thought of this randomly, and I thought it just kind of added some
movement to the painting. Once we have this,
we're going to cut. Now, what I'm going
to do is I'm not going to cut close to the fold. I'm keeping a little
bit gap as you can see, and then cutting the two sides. Once I have that, I'm
going to cut across. It's much more clear on the
other side when I cut it. And then you can cut around all the different elements
like we've done before, getting it as close as possible. I'm going to skip
ahead so you can see what I've created,
what I've cut. We have our long paper, and then we have
our smaller paper that stacks on the top behind. And that's exactly how our
card is going to look. You can place it in a way
that it sits really well. So if you want to have that white or if you don't want to, you just have layers
of flowers together. Now, you can see
how I've kept it in the center of
the greeting card, and just the edges, the foldable areas are
going to be stuck down. If you want with a black pen, you can add a line like
a pot for these flowers. Times I stick everything down. So we're going to take our glue, and what we're going to
do is those little flaps, we're going to first put glue on them and then flip it and add glue to the floral
elements that have folded. On either side, remember
to not put any glue in the middle part because that is where it's
going to pop up from. Very, very important. And then once that's ready, you can spread around
the glue a little bit. So it's not just dots. And then carefully,
we're going to just fold those two edges and then keep it in the center of the card and stick
everything down. Just make sure those
flats turn inward. And then you can make sure that the flowers stick down as well. Now, let's fold the card and just make sure that it all
flattens out a bit more. We're going to do the
next layer as well, and then you can actually place the whole thing under
a stack of books, so it really flattens down
before you gift it to someone. So again, with this layer, we're going to just add
in glue on either side. If you want, you can actually cut a little bit off the bottom. I felt like the
whole thing was a bit too tall when I placed it. So I thought it might be nice to actually bring it
down a little bit, so it doesn't take up
too much off the card. So you can do a little bit
of trimming at the bottom. It's going to look
really nice as well. And then once that's done, we can move on to just taping or sticking
down the two sides. Spread the glue evenly
on both sides and then place your piece in
the middle of your card. Make sure you flatten
down everything. You can fold the card
to test if it works. If there's any element that
went off, press it down. You can even keep it
under a stack of books, so it really flattens out. And Walla, we have
our greeting card. Do you know who you
would give this to? I was thinking about
it. I have a friend whose birthday is coming
up and she loves flowers. I think this would be so
great. She'd love it.
13. Card Front 4 Fields of Gold: Since the response for this
class has been so amazing, I wanted to add a bonus
tutorial fields of gold, and we're going to create
this incredible card that just pops right out. So we're starting by painting
our black-eyed Susans, keeping it really simple, adding a little purple for the center, and
then using yellow. We did the same flow
previously for our card two, and we're following
the exact same thing. So I'm just skipping ahead, so you can just
see the painting, but I'm not going into too
many details because you can refer to that step by step. Just adding in those yellows, adding in the different
layers of flowers, and we're trying to
bunch them together. The height of this
entire thing is almost half of the cart
size that you're creating. Once we have the flowers, we can add in a
little bud and then connect everything
to a main stem. Add in some more green
buds and leaves. I love the idea
of using the back of your brush to add in details. Once you have this flour, let's cut it and we've got
one of our elements ready. We're going to take
a brand new card, and we're going to
start by adding in some backdrop greenery. Using a green, I'm going to start by adding
in some leaves. The leaves I chose to do
here are more like grass, so they kind of extend, start with the main
line and then add in some more smaller branches and then we're going to add
in leaves at the end of each. A Have fun with this process. You can add as many leaves
as you want, as few. You can change around the kind
of leaves you want to do, but I want to keep it pretty
consistent with our theme. So using the same green that we used for our
black-eyed Susans, I'm going ahead and adding
these rounded leaves, adding in another stem, and just filling up the space. I'm keeping all of these details
to one side of the card, so we have a little of
empty space on the right. Let's switch the green
and we're going to add some long lines, long cross. Next, we can add in some
splatters with green. Add in some circles
if you'd like. I love everything you try, and we're going to place our
yellow black-eyed Susans on top of the section, adding a little piece of sheet at the bottom for a special message that
you'd like to add. Now use glue and
stick it all down for a very simple front cover
for our greeting card. For the little note area, instead of using normal glue, I'm going to add
double sided foam tape so that foam is going to
give it a little height, and that's going to be
perfect for our car just adding a little bit of detail. And we're done with the front, you can paint that section
out if you'd like, or keep it as it is. I decided to paint
the subtle pink.
14. Card Pop 4 Fields of Gold: 's now work on our
pop up inside. Are you ready to create an incredible fun pop
up for your card? We're going to start
by taking our card, and we're going to take
our secondary sheet and replicate it. So it's the same size
and the same fold. So it's the exact same card. And now that we have this, we're going to mark out
two different elements. We have one that's
going to be taller, so the height is more
and one that is shorter. We can also mark how big
we want this piece to be. So the first one is
going to be wider, so it's going to
have a bigger width, and the other one
is going to have a smaller width because they're going to stack
on top of each other. Now that we've marked
our two pieces, we can cut them out and we're ready to move on to the
next step of painting them. Et's recheck this again
so we have one piece, and then we have a second
that is much more smaller. That's going to stack up. Now that we're happy with it, let's get into painting. For the bigger piece, we can get some bigger flowers,
bigger elements. I'm going to just play around
with some random flowers, as well as some
black-eyed Susans to match the front of our cover, really filling up this space
with these different flows, starting with yellow circles to mark out where I want
the flowers to be placed. And then using red, I'm just going to drag out my brush to add in
each petal at a time. You can use the back
of your brush to add in some thin lines for
each of the flowers. Repeat the process
for this entire part. Let's add in some low petals
for the side view flowers, continue adding in
some main flowers. You can vary them in size or you can see how I've
added a deeper red, so it just pops up
a little bit more. Now using green, let's
connect everything together to the middle, add in some leaves. Using black pen, adding some dots around the
center of the flowers. Next, we move on to
painting Black Eyed Susans. If you've got in
this far, good job. I'm so proud of you
for continuing on. And you can imagine
the happiness in your loved ones faces when
you give them this card. They're going to
handmade is so special. It beats anything
that you can buy. There's just
something so nice to receive something handmade
that a person has painted. So I always value it a lot more because you can
always buy something else. You can always buy a good gift. But to make something,
it's so unique. We're really covering
up our bottom card, bottom element with a lot
of these black-eyed Susans, adding in some buds, some leaves, and really
filling up the space. Take some paint on your
brush and gently tap it for some splatters of green. Once we have this, we
can cut this around. We're going to cut it all
the way through the edge. So we have one separate element. I'll skip ahead as I cut this. There you go. Look at
how great that looks. I already love it, and
then on top of it, we're going to place
this smaller piece. For the smaller
one, I'm going to change it up instead
of doing flowers. I'm just going to do
a variety of leads. And I think that's going to
look really interesting, as well as add in a little
bit of that green that would just add a pop of
color to our card. Using different shades of green, we're going to add
different type of leaves. I've got a simple leaf here. I'm going to add one
that is maybe circular. You can add something that
is long, variety of leaves. Turn your sheet around and
continue this process, building on this detail. Now gently tap your brush
and add in some splatters. Now we're going to cut the
edges of this element. And then we're prepared to
move on to creating our card. There you go. So our second pop up that's smaller in size, and you can see how
that looks so nice. I really love the look. Great. We have everything ready. Now let's make our
pop up element. I'm taking one of the sheets
that I had lying with me. And the first thing
we're going to do is create two little boxes. You're going to
see how I do this. So the measurements are
all there in the A tab. I've actually added in a link, so you can download that, and it has PDF instructions
of the measurements. So we start by adding 1
centimeter, three centimeter, 1 centimeter again,
three centimeter, and then 1 centimeter. Et's repeat the same
thing on the other side. You have one, three,
one, three, one. We're going to
have two different strips and once we have that, we're going to
create a little box. Fold a sheet along
those marked points. Be a little careful to make
sure you get it right on that marked point and
continue all the way through. I This is how it should look now. Cut off the s, and
we're going to repeat this for another paper. Same exact technique. By the end of it, you should have two little
sheets like this. We're going to add glue to
the edge of just one section. Next, connect the two ends
together to form a box. Move it to the
right to the left, and this is what
you should have. Let's repeat this for
the next piece as well. Now we're going to
repeat the same thing for the second pop up. For the second pop up, we're
following the same thing, but we're just going to change
the measurement because I wanted to pop up a little bit higher than
the previous one. So we're going to
have a little change in the measurements
because of that. So we're going to
do 2 centimeters, three, two, three, two. So instead of the 1 centimeter, we're switching
it 2 centimeters. This is going to make it taller. We're going to make
two different sheets of this and repeat
the same thing, fold them along, and
then glue the ends. And we've got our two papers and time to create our little
I'm calling them boxes, but I guess they're squares. Sorry, rectangles. But
you get the point. You can see what I'm doing here. Great. And now we're
ready to proceed. So what we're going
to do is start with the smaller ones for the first layer
that's at the bottom. Now, I'm going to connect
the two small ends together. So let's add glue, and we're just going to
connect the two of them together. There you go. You can again fold it because it's going to be easier
for you to press it down and so it sticks
really well together. Now, this end is
what is going to be attached to the
greeting card. Do the same thing for the next one where you're gluing up that two centimeter section with the other pieces
two centimeter. By the end of it,
you should have two different pieces like this. Let's start with the first one. What I'm going to do
is I'm going to glue down the two longer
ends to our card. So ardent glue to
the longer ends. Make sure to spread
the glue around. I made this a little
bit too messy. And then we're going to do
the other side as well. And we're gonna place
it in the center of the card and fold our card down. Hold it for a couple of
seconds so it gets stuck. And when you open it, you should have something like this. Once you have this, we're
going to place our painting, our painted element
right on top of this. It's glue the top. So, have a look. And then gently press
down your entire card, making sure it's
right at the center. You might have to
hold it for a bit, and then we can move on to
our second layer of pop up. I wanted to stop for a
bit because, oh, my God, how pretty is this? Oh, so pretty. So we're doing the same
thing for the next layer, gluing the longer edge, placing it in the center of
our previous painted layer. Fold on the card
to make it stick. Hold it for a couple of seconds, and then you can lift up the
card and just have a look. Yep, we've got a second sheet that's popping right
out of our card. Like before, we're
going to add glue to the longer edges
and then connect our next element in the middle. Spread around the glue, so it sits better. And then just place this in the middle and then
close your entire card, hold it in place for a couple of seconds till
it completely gets stuck. You can even place
it under some books, so the whole thing flattens up, and this should be
the final look. What I wanted to add in is a little bit of backdrop because I felt like the whole thing
was really just white. So using a little
bit of light green, just go over the edge
of your card and add a very soft backdrop. Just pushing your brush
around and adding a very soft colour to
just fill up the spaces. You can add in some
splatters, some circles. A a there you go. Another card completed. Perfect. So fun and so playful.
15. Envelope: I'm sure you loved making
these lovely cards. So how about an
envelop to fit them? We're going to custom make
our envelop because obviously the size of our card was
a little bit bigger, some of our elements popped out, so we can choose an
envelop that fits it. So I'm going to
take a color paper. You can use a normal sheet, but something that really folds
and is easy to work with. I'm placing my card
in the center so I know exactly where I
want everything to be. So let's keep it a
little bit down, and then we're going to
just fold it right across. So we leave a little bit of space for the cart
to sit within. Let's check it again.
Once I put my card. Yep, it's covered. Perfect. That works really well. I've also left some space on top for any of the elements
that are popping out. And I'm going to
keep some space on the sides as well for some
of our cards which have elements that are coming
up or coming out. Now, I'm just going to fold
the sides of my sheet down, keeping both ends equal. Now that we have the measurement
of where the card is, just remove the card, and we're going to
fold the bottom and top of the envelope. Now that we have this, we can
proceed with the next step. Check it again. I've checked this multiple
times just to make sure it all fits in and folding the top Make sure you press it down so
it creases completely. There you go. We have the basis. Let's flip the enlop to the
back and we're going to use our scale to add in diagonal
lines along the edges. For the top flat, we're just marking out our point
and again adding in diagonal line moving inside. The template for this
is in the PDF that I've attached in the A section as well as in the
discussion section. So please have a look. And
if you have any questions, feel free to ask me. We're also going to
add a diagonal line for the top flap. You
can have a look at that. Let's flip over our envelope
to the front again. You can see when I folded, you have those showing
through, which is perfect. Now we're going to make that
front a little bit shorter. Time to open up our
paper and we're going to cut our envelop. I'm starting from the
back, moving to the front, cutting all the way through as I make the
front section shorter. You're going to see it in a bit. I know it's a little
confusing when I say front side top is just what
I'm seeing at the moment. It can get confusing. So let me finish
the whole thing, and you're going to
see how it looks, and that's going to give you
a clear idea of what to cut. I've also mentioned
in the template, the sections that'll
be cut and not cut. So again, more
clarity around that. I'm also adding in
a little drawing here for you to have a look. A This is how your piece should look. Now flip it over and fold
your different elements. The little flaps on the
side will go underneath. So we're just going to add in some drops of glue
and stick it down. And that's how it works. Isn't that really cool? So you can pick whatever
measurement you want. Let's add drops of glue
and stick it down. A Now, let's add in some
little detail since everything is handmade
and we're making this greeting card handmade, let's make the envelope
handmade, too. Let's paint some simple
leaves across the paper. I'm using very little
water so my paper doesn't really get ruined
and keeping it very light, I'm not going over
multiple times, small leaves to add a
little bit of handmade. You can add as much or
as little as you want. I'm just adding a couple of leaves in the front and
then some at the back. I think this ties in so
well with the painting, adding in some splatters, maybe some circles to
bring it all together. Keep it really simple. And look at how that works. You can have a from message or a quick
note if you'd like, and our envelop is ready. Let it dry for a bit, and then you can place
your card inside.
16. Thank you for Watching: I'm sure you enjoyed this
class and were able to create something so special for your family
members and friends. I have a range of
classes on Skillshare, and if you would like
to learn more for me, you can find them
on my main page. I have some 30 day
challenges, floral workshops. I have gouache
techniques as well, as well as a range of greeting
cards that you can dive into with the same theme of
pop ups which I truly enjoy. If you enjoy this class, I would highly recommend my
joyful watercolor cards, four cards that pop. There's a lot of information, fun techniques that you can try. I would also like
to request that if you've tried the
different projects, please upload them to the
class project section. This will encourage more
students to join the class. Also, I'd love to
hear your review and feedback from this journey. And if you have any
questions or doubts, leave them in the
discussion stab so I can answer them immediately. Thank you so much, and I hope you enjoyed this
creative journey. Congratulations for completing
this class successfully.
 Femvisionary / Madhu S, Watercolor Artist and Instructor