Transcripts
1. About this Class: Hello. My name is Shari. Welcome to my class. This class is designed
for beginner artists who are eager to dip their brushes into the world of watercolor. My goal is it to make the
learning process easy, enjoyable, and most
importantly fun. So I encourage you to let loose experiment and embrace
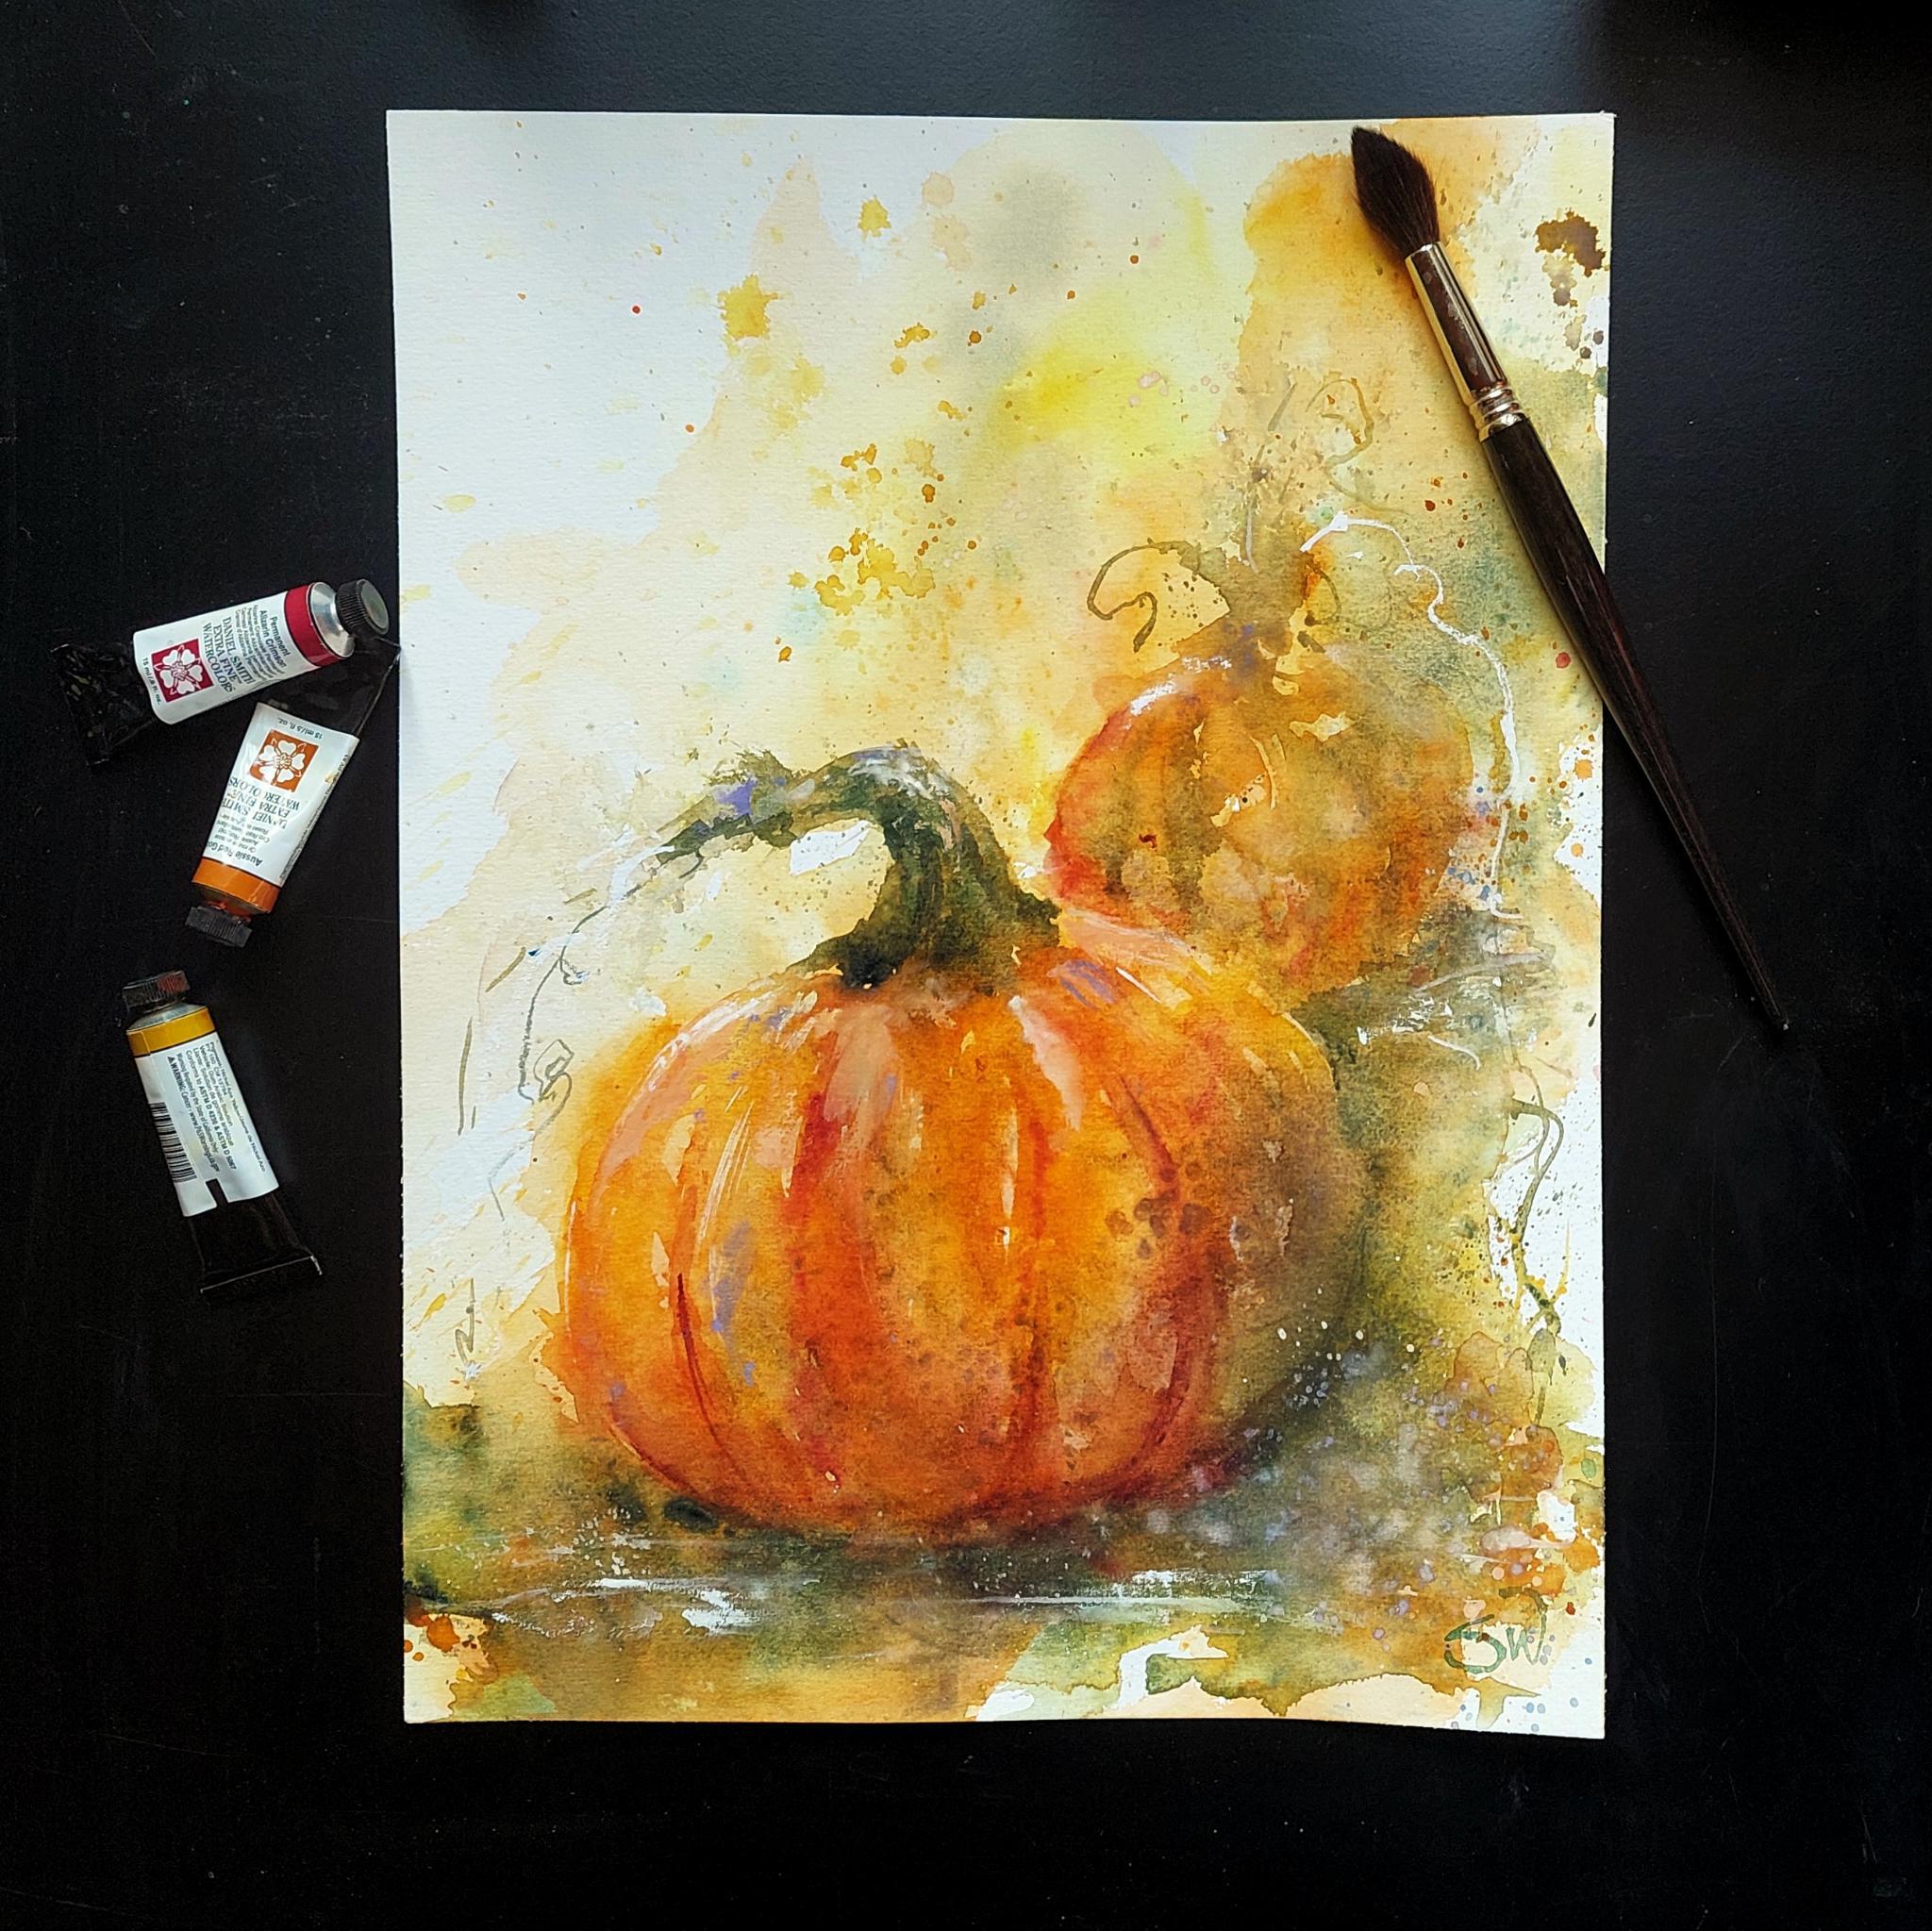
the joy of painting. In this class, you will create
a loose pumpkin painting, learning how to make a wash
to start and then painting a pumpkin or two on top of it with beautiful
watercolor paint. After finishing the class, I hope you gain some new
skills and confidence in your artistic abilities for next projects.
Let's get started.
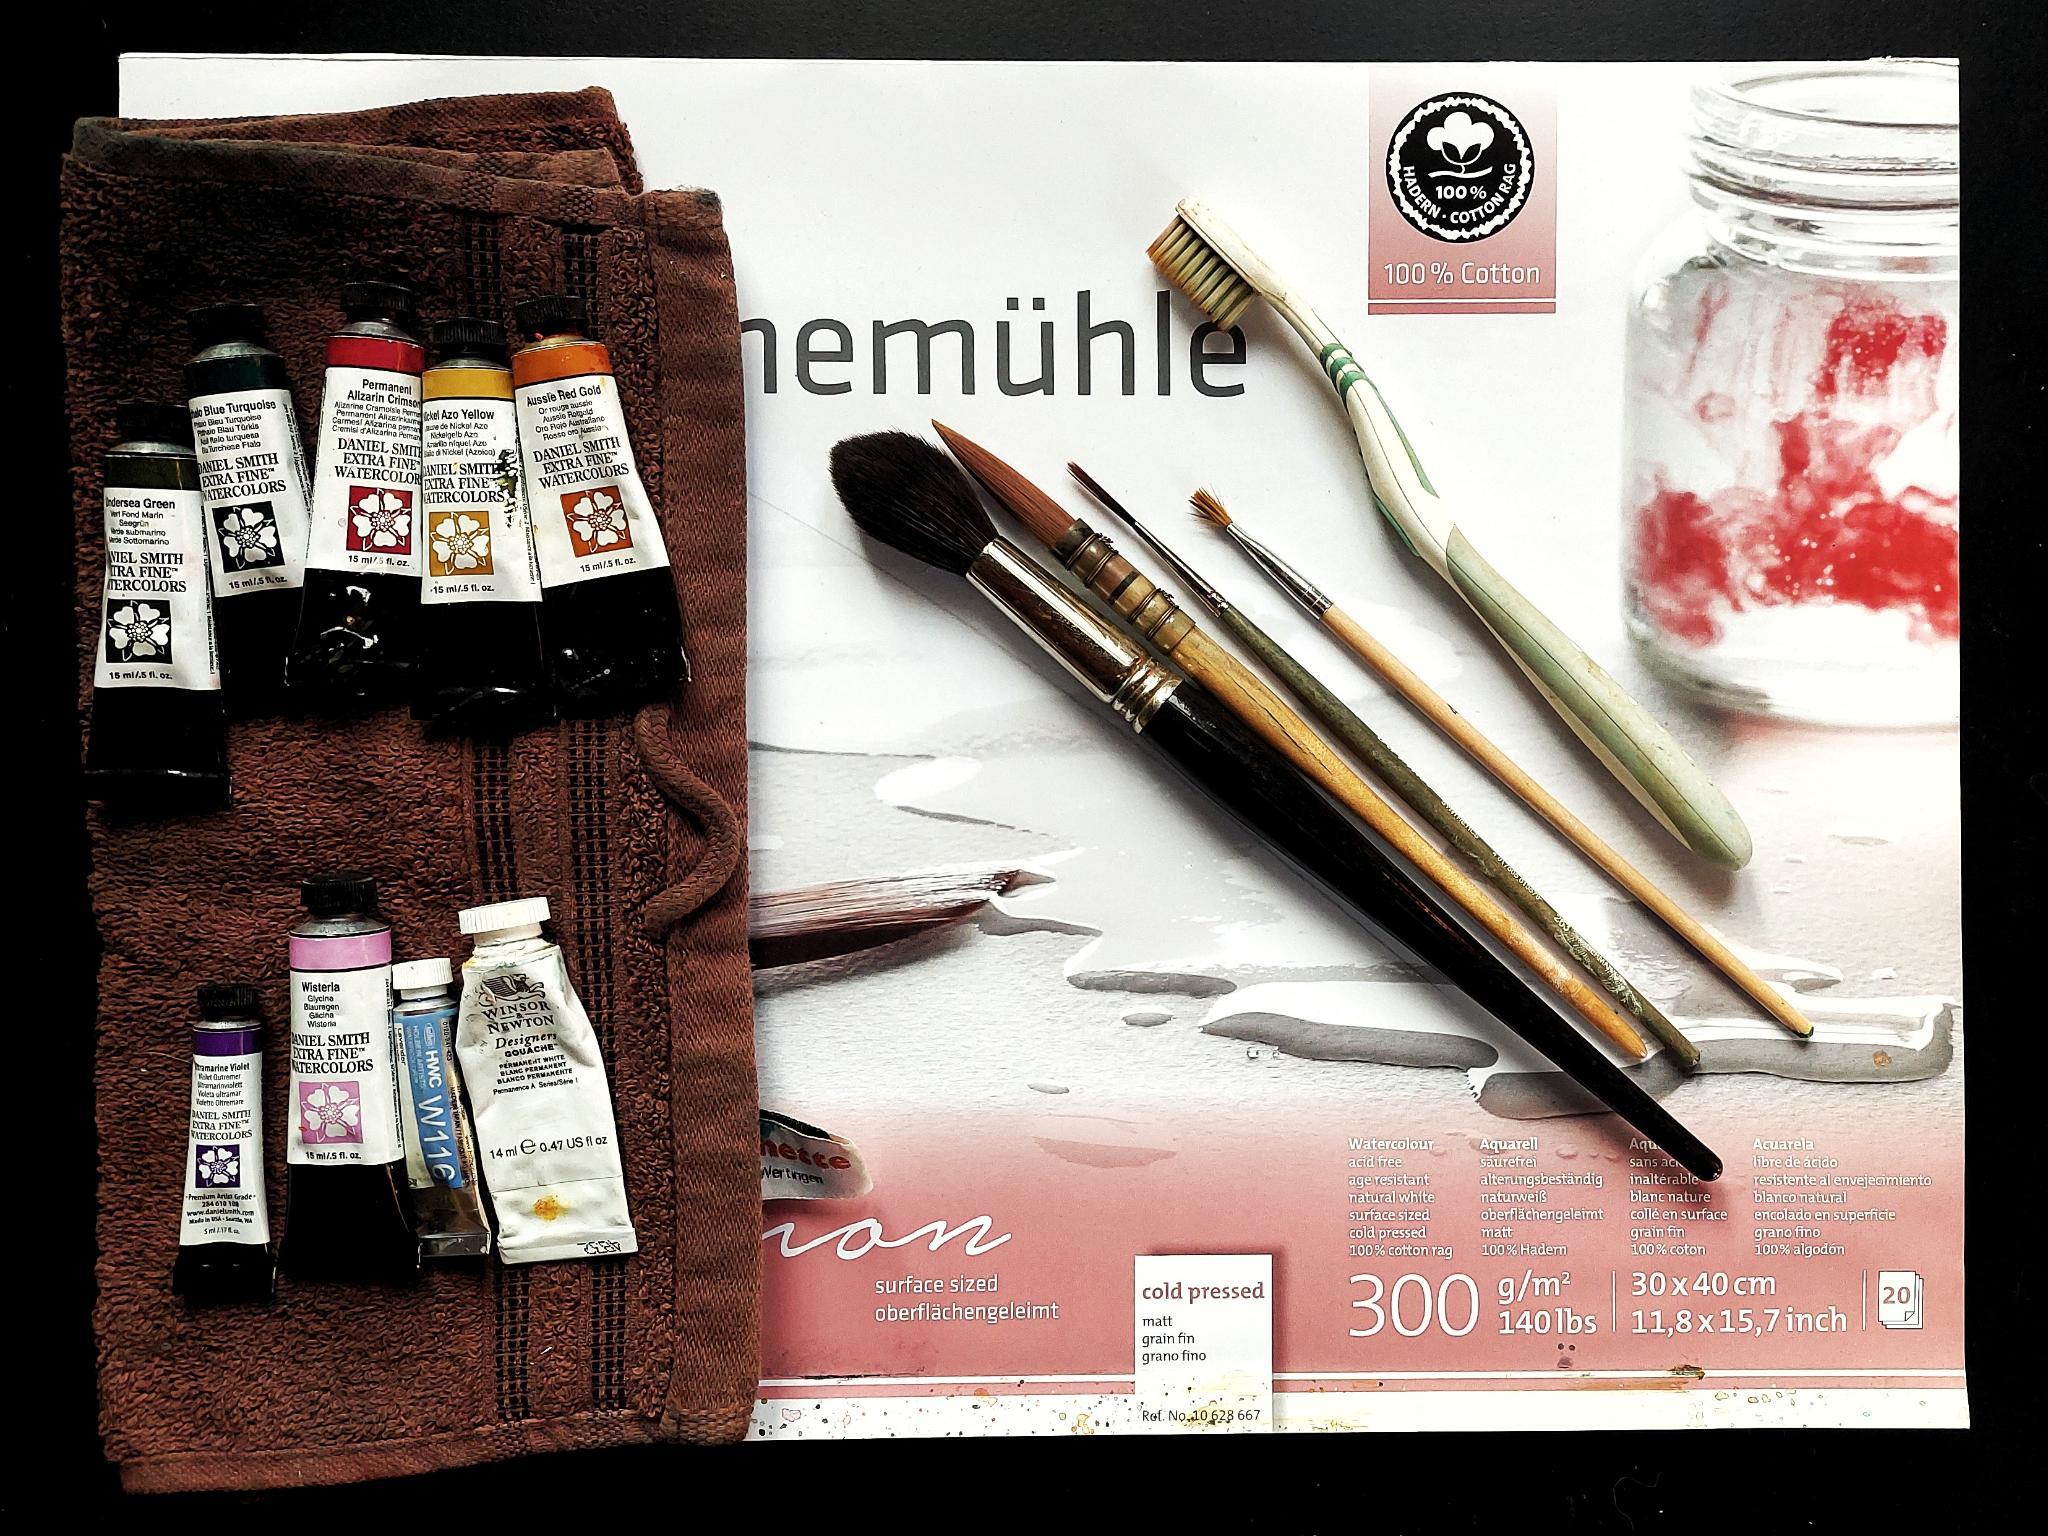
2. Materials: The paper I used is the hamul cold
pressed cotton paper with the dimensions
30 by 40 centimeters. For the colors, I recommend a bright yellow, an orange tone, maybe a dark red and also
a purple for shadows, a green and also a blue
and white gouache. The colors I used were Nickel Azo yellow
and Aussie red gold. Alizarin Crimson
and Azamin Violet. Undersea green and
so blue turquoise. And for the accent colors, I used wisteria
and lavender and, of course, white wash. And also a bit of
blue proof white. Use brushes you are
comfortable with. I use synthetic
brushes like this one, and you will need a
pointy brush or a iga and a wash brush if you have for effects, I recommend a toothbrush
and a well used old brush, but feel free to experiment. You will also need some salt. It doesn't really matter
what kind of salt. Whatever colors you
will use in the end, I always recommend to
try them out first, how they will react
with each other. Some colors will get
unsightly muddy when mixed, and it could ruin your
painting in the end. But now to the fun part,
3. Watercolor Wash: Now, grab your main colors. I have my paper on an angle
to let the paint flow better. I will start with just plain
clean water on the page. I put the water in the direction I want the
colour on the paper to go. Leave some dry paper in between. Begin with your brightest color. I have my nickel
Azo yellow here. After that, I will go in
with my orange color. Let the colors flow on the page and see
what is happening. Try to have a loose
grip on your brush. If you don't want harsh edges, just wash them away with water. Just play around and let those beautiful autumn
colors do their thing. I'm not quite sure where
my pumpkin will be, so I try to not plan my marks. If you already see the
shape of your pumpkin, try to preserve it. Don't put every color in the
same amount on the paper. Here, I use more orange because we want to
paint a pumpkin. A azarin crimson is in
the same color range, so I drop it in
quite generously. Try to make different marks with your paint like splattering
it on the paper. You can use your brush
or the toothbrush. If there are any
marks you don't like, just wash them away. But try not to fill
too much or you wash every nice texture you
already have also away. I go in with my green now. I will keep it on the
right side because I decided that my pumpkin
will be on the lower left. Because she's not to
muddy your colors now. Don't bring in too much
of green and blue now. The green is where my
darkest area will be, so I drop some violet in. As you can see, the colors are mixing together
in some areas. But because I tested
them beforehand, I know that they produce a nice brownish color which
suits the autumn theme. You can leave the other
colors for the next layer if you are unsure to
paint them in yet. With blue, I will
use very sparingly, just as an egg in color. If you're ready to
put the brush down, throw some salt on the wet
paint and leave it to dry. My paint was already quite dry, so I decided to go in and throw some more paint on so that the salt can work its
magic a bit better. And instead of throwing a lot
of paint with water on it, I use the toothbrush, also to make more texture. Wow, I tried to make a rhythm with the green
and blue paint a curve from the right upper corner to the left the lower left corner. Please don't overwork your wash. Better to stop before
you think it's finished, than let it become may. I start to fiddle. That's an indication
that I should stop now. So leave that all to dry. Because of the salt, it
can take quite a while, but I would refrain from
using a hair dryer to dry it. You would lose a lot of texture. Be sure that
everything is really dry before you remove the salt.
4. First Layer of the Pumkin(s): Be sure that you have
removed all of the salt. Now, look at your wash and find out where to
put the pumpkin. I see a round shape here, and maybe I will put a smaller
one in the back behind. We will take the colors that we already
used for the wash. Find the edge of your pumpkin. I will begin with a darker side. So I take some of
the green paint and paint a negative shape and also put it
where the ground is. Nothing is set in stone yet. You can always change
the position of form. I want to have a bit of
green in my pumpkin later, so I don't mind if it runs
into the pumpkin shape. I try to figure out
where the outline of the pumpkin is and where
I want to put the stem. Don't rush. Take your time. I want to let the green
dry a bit for now, so I want to work out the form of the
pumpkin with its ribs. I want to get a feel of
how they are shaped. I want to establish
a bit more of the outline so I get
in with the proper Yeah, I go in with more green to establish the
outline a bit more. I don't want to get too dark on the brighter side
of the pumpkin, so I mix up some
yellow and orange. But you can also paint the negative shape
with these colors to preserve the
brightness even more. That would have made the
shape pop out even more. You can always
take up paint with a damp brush if you want
to carve out the shapes. Loosely paint the ribs. We are not making a riddle,
little, little little. Take some dark red
paint to darken the pumpkin where
the shadows are and green where the ground is. Because I put a lot of paint on the texture is
lost in the process. To get some back, I
will sprit some water on the wet paint and hope it
will make some nice marks. I loosely tap the handle
of the spray bottle so fewer and bigger
drops come out. I use palo blue turquoise to darken the green
area further. Mix in some alizarin
with a turquoise, and it will even get darker. I have to move from that
spot so it can dry a bit. I decided to put a smaller
pumpkin behind the main one. I let them overlap a
bit to create depth. I try to work out the ribs more. And again, if you're unsure, just take your reference photos. Now, I take my rigor and try to make the
shapes of the ribs. If you are unsure
about anything, just put the brush
down and step back, evaluate what you
have on your paper, what you like,
what you not like, and then pick up
the brush again. If I am unsure, I mostly wrap the toothbrush and they're fun sprinkling
some paint on. I want to have a bit more orange and yellow showing
through the green, so I take my toothbrush
and sprinkle some on. Paint some more details
on the smaller pumpkin, but not enough so that it
competes with the bigger one. Here, I hint at the stem and also paint
in some wispy tendrils. It should just read as Pumpkin
without too much detail. I pick a brush with
a pointy end for the stem to work out
the shape better. Again, look at reference photos
to see how it is shaped. I hold my brush so
that the pointy end touches the paper where the stem and the
pumpkin rind meet. Twist your brush at the end
to have some nice texture. And if you want to
paint in some tendrils. The stem should also have some
darker and lighter areas. So go in with more
paint to darken it. To set the two pumpkins
visually apart, I darken the edge here. And because I'm not
sure what to do next, I grab my toothbrush
and play a bit. Again, don't overdo it. You can also just let it
dry for the next layer. I decided to paint
some tendrils and And before the layer's dry, I want to get some of
the accent color in. I have a lavender here. I don't put it on the palette
because it is white in it, and I don't want that to mix
in with the other colors. I just splatter it a bit in the dark areas and
leave that to dry.
5. Second Layer and Details: Now, take your white gouache
or white opaque watercolor. And let's start on
some highlights. Wow. I will try the fan brush and see if we can make some interesting
marks with it. Wow. Keep in mind that the pumpkin
has a round shape, so the highlights
should reflect that. You can make use of
your finger, too. I think the fan brush
was not a good choice, so I try an old broken brush. You can also put some highlights on the
pumpkin in the back, but restrict it to just a few. The stem needs some
highlights, too. D You didn't have to use plain white. I use lavender and
wisteria together. If you have gouache colors, you could use them too. I just want to make some
accents with those colors. So test out your
color if it fits the painting and
use it sparingly. It Wow. Wow. I decided that the shadows
needed some more color, so I use zarin crimson and
palo blue turquoise for that. We are at the stage where we can overwork a piece very
easily, so be cautious. Wow, wow, wow. I want to warm up the shadows, so I use my red and
orange for that. Next, I want to work out some details of the
ribs and the stem, too. If you think your painting
is finished, then just stop. You don't need to
paint any further. Wow, Wow. Yeah, I try to mix some
of my orange color into the white so that there is a
variety of highlight colors. Wow. Wow, wow, to bring back a bit of light and
variety into the shadow, I splatter some
white in that area. I could very well stop here, but I still want to play a bit. Again, if you are really
unsure what to do, take a step back, let it sit for an hour or even a day
and evaluate again. W. Wow. The last thing I will do is to make some white tendrils and
markings here and there. Wow, wow I know I should stop, but that would mean the
fun would stop, too, so I have my difficulties
laying the brush down. Yeah, I try out another tool you could use to make markings. I. Now, finally, let it try.
6. Outro: Thank you for watching this
class. I hope you enjoyed it. If you have questions, feel free to leave them in the
discussion section. I'm excited to see your
projects and comments, and I hope you will see
us in the next class.