Transcripts
1. Introduction: Hi, everyone, and welcome. I'm really glad
that you're here. In this class, we're
going to create a loose expressive
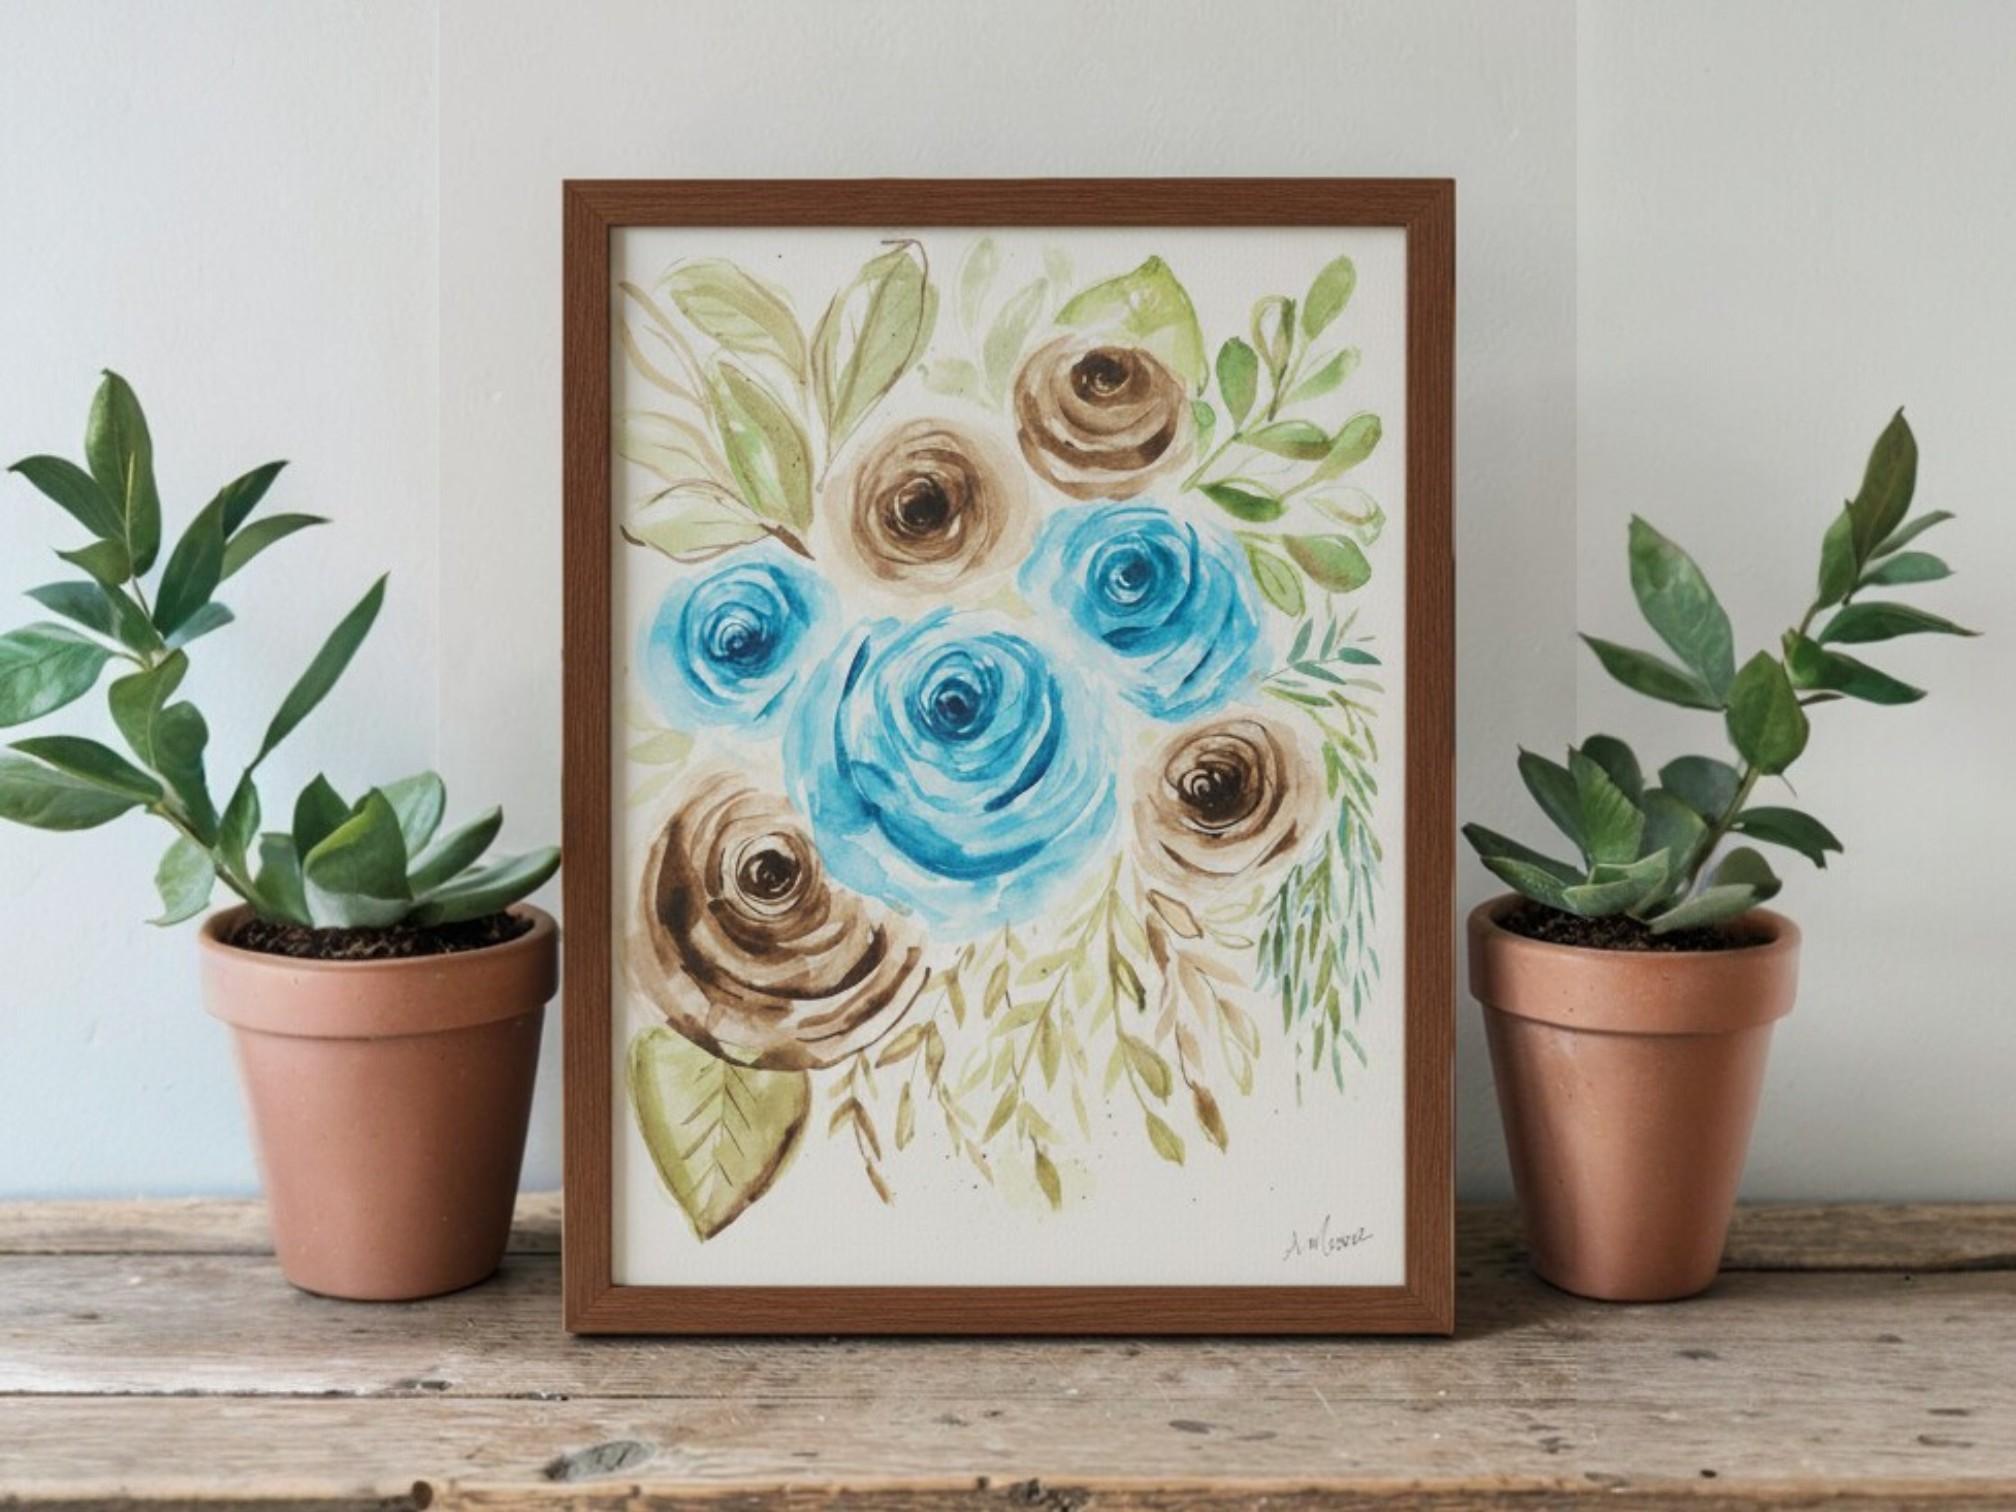
floral painting by just using three colors. We will use olive green. Marne blue and sepia. This class is perfect
for beginners, but if you are experienced and you just want to loosen up your painting style, this is a class
that's also for you. It's a very simple process. We're not aiming for
perfection here. This is all about building confidence and
enjoying the process, and letting the paint and water really do some of the work. We'll start by going
over materials and how I set up my workspace. Then we'll practice
getting comfortable with your paint brush by doing some
fun exercises with water, acrylic ink, and
your paintbrush. Then we will move on to
practicing how to use those techniques and make flowers and different
types of greenery. We will then try to figure out your best way to
map out your project. It might be drawing in
pencil first or using some washes to kind of map out where your flowers
are going to go. By the end of class, you'll have a completed painting and a
better understanding of how to create beautiful results with a limited color palette.
Let's get started.
2. Materials and Supplies: In this lesson, I'll
walk you through the materials we'll be using and how to set up
your workspace. For this class, we're
going to keep it simple. We are going to use three
acrylic ink colors. The first color I'm going to
show you is the ooliveGreen. The second is Marne blue. The third one is the sepia. Using a limited palette
helps take away decision fatigue and lets you
focus on your techniques. You'll also need
watercolor paper. So something that can
handle water well, I recommend using 140 pound. My brand that I
usually use is artisa. The size I usually use is nine by 12 for
most of my artwork. Doesn't have to be this brand, doesn't have to be this size. Just make sure it
can hold water well. For brushes, a couple
of round brushes and different sizes
work really good. So don't buy anything fancy, get something that
holds water well, and you want to make sure
they come to a nice point. I have a size six and a
size two round brush. You'll also need a
jar of clean water, paper toweling for blotting and a flat surface to work on. I also keep extra paper
toweling on the side, and I have my paint
palette up here. I like having it above my paper. You can have it wherever your
space feels comfortable. You do not need a big
ceramic paint palette. But in my classroom, my students will use a cover
for an ice cream container. Really, whatever's available to you will work as long
as it's nice and flat. Try to give yourself a little space to move
your arms freely. That really does
help when you're painting loose and
expressive shapes. Once you have everything set up, we're ready to start getting comfortable with our brushes.
3. Getting Comfortable With Your Paintbrush: Before we jump
into the painting, our flowers and leaves practice, we're going to
spend a little time getting comfortable
with our brush. So I'm going to it doesn't
matter what color you use. I'll just pick my green, put a little little puddle of green or any color you have. And we're just going
to get comfortable. If you are not comfortable
with your paint brush, then you're going to stress more when you do
the final painting. So it's nice just to
play a little bit. I'm going to use I'm also
going to use the brushes that I am going to use
for my final painting, so I'm getting comfortable with the ones that I'll
be using later. I'm going to just get
a puddle of water. Do tell my one is a good
thing to mention is I do tell my students to make sure you hold it
past the no touch zone. So if you look at
your paint brush, we have the bristles,
this metal part, and then the rest is handle. I call this the no touch zone, so it makes it a little easier to get
loose brush strokes. As I paint, if you pay attention to how far back I am on
my paint brush handle, you'll notice that I'll do that for different
parts of the flower. The looser I want it,
the higher up I am. But if I want smaller brush
strokes and more precise, I'll be closer to
the no touch zone. Now that we loaded up
some water on our brush, then I painted a little
bit of a puddle here. I'm going to put
my paintbrush and load up some of the green, and I'm just going to do a
couple of different things. It's kind of fun just
to see what happens, see the water move, see the paint move in the water. Maybe I'll paint right up to it. This is always the part that
I say, do the what ifs. So if I want to see how thin or thick this
paint brush can go, I will practice right now. I will practice doing
all the what if? What if I put my
paintbrush down? How thick can it be? How thick can it go if I go
even further down? So I can see there is
a difference when I hold the angle of the
brush differently. I can get different size lines just by changing the
angle of my brush. So that is really useful when we go to do flowers and leaves. So I did the circle.
I did it around. The puddle dried up a little bit as I was talking
about the paintbrush. So I'm going to get a
pretty decent sized puddle. And then I'm going to dry my
brush off so I can when I load up my paintbrush
with this acrylic ink, it won't dilute it immediately. So I'm going to try drying
it first. I usually do that. But, again, this
is our what ifs. What if I don't if I do? Let's see. So definitely
makes a difference. Dry it when I compare the two and how
it goes into the water, if I have more
water, maybe just do some dots. It's interesting. Now, as I play, I'm going
to still kind of think of this idea here of how I'm going to stare
just at the bristles. How does it look when
I do a straight line? What about from this angle? What if I go down in the middle
and go straight back up. So if you are doing
lines like this, keep drawing your
line the same way, but push down and lift up. I think that is the
hardest part for beginner painters
is lines like this. So I recommend just
keep practicing that. And it seems like when I teach
these lessons in person, it helps most students when
they are looking right at the bristles because otherwise you kind of go like that and
not really pay attention. So if you're used to doing
these straight lines, then you won't be worried about going in this
direction anymore. You'll just be worried
about the bristles. So I'm looking at
it. It's going down, and then I slowly lift it up. Once you feel
comfortable doing that, I recommend doing Cs, like the letter C or U, whichever direction
you're going in. And what does it look like if I go this way and I
do it at an angle, so my brush is more of an angle. So I'm just doing sea curves. That's going to help
you when it comes to doing the roses
in our painting. This is all about
getting comfortable. So I put trying different amounts of
water on my brush and see if it goes from that
line to my other lines. So just play. Once you feel really comfortable with
that brush in your hand, then you can move on
to the next lesson.
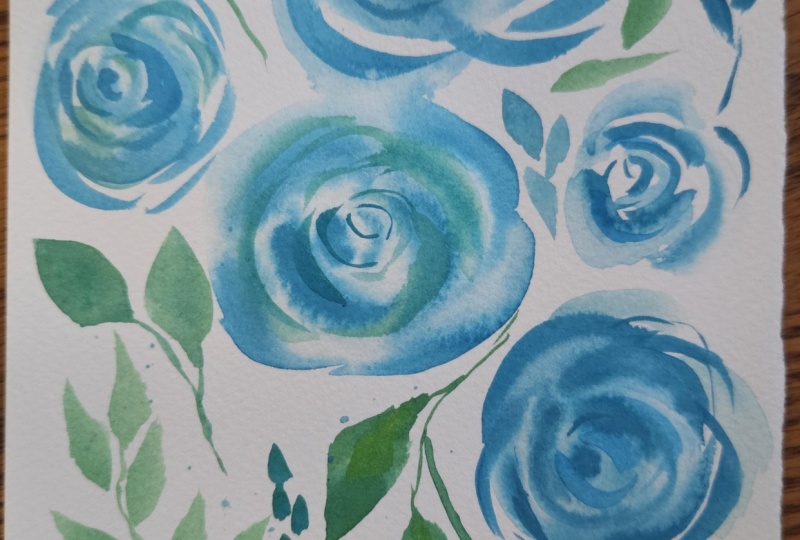
4. Practice Flowers: In this lesson, we're
going to start practicing, painting some loose flowers. After you're done with
this, you're moving on to the flowers because you are feeling comfortable
with your paintbrush. I'm going to continue with
green for my practice just because it's already on my paint palette and I don't
want it to go to waste. So we're going to do a couple
of things for the flowers. We are going to make a circle, and I'm holding it my hand a little higher
on the paintbrush, which tells you that I
want this really loose. So in my mind, I'm
kind of thinking, I don't want a perfect circle
because we're making roses. I put my head to the side, and then I look at the water, it's hard to see in the
camera, dry off my brush. If you look at the bristles
of the paintbrush, like a ballerina foot, if we keep on our tippites
for this process, you'll get nice skinny lines. So I'm just going to do like a little spiral
right in the center. And because I have just
because I have water on there, it wants to spread, and it's going to make
it nice and light. So I'm gonna keep going. This is just to get
something out there. So I'm just start with a
tight spiral, and I go out. I like starting with
a wet wet technique. So that means my paper is wet and I'm adding
wet paint to it. So this way, when it dries,
it'll be even lighter. So it's going to definitely
get lighter as it dries. That's what watercolor does. And that'll be a nice start to my flour, and I
can make changes. I don't have to absolutely
love this first flower. This first layer. Okay. So moving my hand up on to the center
of the handle again, and I'm going to
do two of these. And then once I get a
circle, I try to, like, like I said before,
I don't want it to be this perfect circle
because it's a flower. So I make it look a
little more bumpy, but I do it quickly. I
don't want to overthink it. Dry my brush. Then I'm going to do a spiral. Sometimes I'll just
drop my brush, too by pushing it down. So like I just push it down sometimes to get those
little bit of thick lines, but I usually do it once
I get to the outside. You don't have to
do that if you're not comfortable doing that yet. As these two dry, I want to do our other flour. So we're gonna start with
kind of like a gum drop. Kind of looks like
a gum drop to me. I always think it
looks like a gum drop. And just do that with my water. We're doing the wet
on wet technique so we get a light start. So I'd like to start at the
bottom of our gum drop shape. And I'm just keeping a little bit of lighter area thinking on the
top of the flower, it's going to be sun hitting it or whatever
light source is hitting it, so I can I can keep
that pretty light. Once you put paint
there, it's there. So I can always put paint
there if I want to later. So for my cone flour, I'm going to add a
little bit more at the bottom right away because
I'll take a clean brush, and I'll do those
lines that we were practicing and try to pull some of that
green into the petal. So while it's still wet, it'll follow the water, and the water from my
brush is going over here. And then at the ends,
I just kind of do some wispy lines with the
ballerina on her tippy toes. And I don't like how it
looks like a straight line, so I'm just going to with water, I just kind of go on
little circles to blend it into the top of
the part of the flour. Okay. So if I do this
to each of these, they still feel a little cold, which means they are
still a little wet. I can I can wait longer. Maybe there's something else you want to do and
come back to this. Or you can get a hair dryer. The only reason I own a
hair dryer is for this. I use this all the
time on my paintings. It helps the drying
process go faster. If this is pretty wet, make sure your hair dryer
isn't too close to your paper. I usually start pretty high up. And then as I go down
with my hair dryer, if I see any water move, then I lift it up just a tiny bit because I want it
to stay where it is. That's where I want it. Thankfully, these
don't have puddles, but if yours does, I
recommend starting up higher. If you go really low fast, it might squirt out of the lines where you want it to
be. So just be careful. Now after using the hair dryer, I go like this with the back. I don't want the oils in
my hands on my paper, so I'm using the
back of my hand, and it doesn't
feel cold anymore. So it works. Now that
I have my light layer, I want to do more
of a medium value, and then after that, I'm
gonna do my dark value. So let's get our clean I
always I teach kids as well, so I'm used to telling them clean and every time you
pick up a paintbrush, and that's just a good
habit for adults, too. So I'll wipe that off, so it's not super wet. And then I'm going to start with loading up just the very end, kind of looks like a
pencil of my paint brush. I'm going to stick to the
center and then clean my brush and then use the
water to spread it around. If I don't, it'll be light
and dark and no medium value. So I'm going to just do a couple of lines going still in our
circle motion for a spiral, then having the
not enough water. That's definitely something
that can happen a lot. I'm very careful. So I put my water on the
rest of the flour. So I want this to be a little darker because it's the inside. Now I can add. The next layer. So still with my medium value. If you notice, I have
thin and thick lines. I really try not to
think too hard on it. I also get when I get
to the thin lines, I try to barely touch
the paper to get some skipping on there so that those line doesn't
connect right away. This is a flower. You know, this practice is
helping you relax, and it doesn't have to be
a perfect little circle. This is our flower. So light's
hitting different spots. This way, it seems a little
bit more natural when it skips like that and then
sometimes gets thicker. I'm going to do that
with my next one. Load at my brush just the very end. So it
looks like a pencil. And then I'm going to
do just ice spirals. Don't feel like you
have to rush it. This one I went a
little bit wider with the center and a
little bit thicker. So I'm going to just loosen
up these hard edges with some water because I did those little bit thicker
areas a little bit of water. When I do that water
to the outside, it's not very wet. It's just to get it I just don't want it to
get too dark right away. If you just gradually get
more paint onto your flower, it really will help you think and sit back a
little bit and be like, Oh, I do like this or
I don't like that. If you go too fast
when you're not ready, then you may not like it. Sometimes just putting your
head further back and looking at it from a distance can help really decide if you like
how this flower is going. While these two are drying, I want to do one
more layer to these. So while those two are drying, I'm going to go to
this cone flower. Now, I'm doing this
practice right with you. I don't normally use this brush. I want to use these
cheaper brushes just to show you don't
need anything fancy, and I'm just having to do
things a little different. That's why this
practice is good, too, not just for you
but for me, as well. This just shows you that
using different materials can change the outcome
of your project. And if you practice, you're going to love
how it turns out because you can figure
out this brush. Like, this brush is a
really sharp point. I have other brushes
that I like to use that don't have
such sharp points. Let me gravel in here. Still comes to a point, but
there's a big difference. I have a lot of different
brushes with different ends. So it's good to practice, even for experienced artists. So for this, I put
some dark there, keep my ballerina
on her tippy toes, and just put some
lines that you would see in a flower petal. I have just a little
bit off to the side. I had too much water
on my brush before, so I just took some from
here and moved it over. You can always go darker.
It's hard to go lighter. So I like at the end, having just a couple of lines where it's not fully
attached to the petal. So these are dry already
because we didn't put that puddle down first like we did
for the first layer. Nice dry brush for
this darker value. I'm really loading it up, so I can kind of tell on here if it's too dark or too
light or just right. Now, when I get that last layer, it's really hard lines, and
it's really noticeable. So like this little
section here, I'll just add some water to the inside of that
that brushstroke, just to kind of look
like it's blending in there, but not
to the whole thing. If you blend it too much,
then you kind of get rid of that really interesting
rose layered look. So just like, if
you look at this, I just blend it a
little bit here, but I cut that hard
line over there. So I'll try this again. It's all about, you know, this practice is going to really decide for you how to
approach each step. So I don't want to I try not
to do a pattern, either. I don't want to go
thick thin, thick thin. I just try not to go too fast,
but not too slow either, because then you kind of get in that natural instinct where we want to make things
into a pattern. There, I really like
how those look. Sometimes, at the end, like when these are all
dry, I'll make the center, the center really dark by
adding another color to it and maybe do a couple just tiny little
lines on the outside. We can try it. This
is our practice. But I'm going to move
on to this cone flower. And with my dark, I want to do some I can with my dark, I'm going
to do some more lines. So the reason why I put my
paintbrush back in there, I can tell my paint wasn't
sliding and gliding. It was pretty thick
and it didn't want to move the
way I wanted it. So when you do
these wispy lines, I have my wrist
right on the table, and I'm just bending my hand up. So this is and see how close
I am to the no touch zone. This is giving me these
nice controlled thin lines. But just be careful because
we want it to look loose, and we're doing
these control lines. I try to barely touch the paper, and it'll help create that loose color or
that loose line. You can always add. I can tell this is also getting really watered down,
which is okay. This is part of our practice. So I just kind of did a little I made them a little
bit bigger here, just like I'm shaking
my hand a little bit, but really thin lines, I
did that on there to help bridge that gap between the
dark medium and light area. I'm just going to put a
little sepia over here. And seeing that I'm
coming to the end of my practice for the flowers, I'm going to add some of
the sepia to the green. And just like I
was saying before, kind of, play around with it. Do I like it? Maybe not. I didn't I think I
put too much sepia in that green. Totally fine. What would it look like? So I did a little
bit further out. What would it look
like if I just did just the center with
some whiskey lines? What about in this area? If I add it down here, I just don't want any of
that paint to go to waste, and I always try to use that up, and then that's when I discover new things because I'm more concerned about
using up my paint than really what's
going on here. I'm not really stressing out.
So if that works for you, then try to make that
a habit for you. Whatever works for you might be different than
how I do things. So just try new things and then decide what works best for you. In the next lesson, we will
practice just some leaves, which should be a little easier now that we've
done these flowers, but give yourself some practice. See you in the next lesson.
5. Practice Leaves: Now we'll add leave
the greenery to our practice paper to kind of
bring everything together. I did clean this
up a little bit, so I have my olive green
back here on here, and then my sepia is right here, and I'm going to
mix those colors. So if I try to mix a
little of the sepia with the green,
it'll create darker, more muted tones, like
we saw in the flowers, and it just helps create
depth and variety. Variety is huge in these
kind of paintings. So it's okay that
your flowers and your greenery don't
look too much alike because variety
is interesting. So vary the direction of your leaves too
on your practice. Don't worry about symmetry. This is loose and slightly
uneven shapes are going to just create that
more interesting look. So let's start with the sepia, moving that a
little bit up here. So not only am I
practicing the flowers, I'm practicing the
variety I can get. I like doing this kind of
thing when I'm only using a select amount of colors.
Like we're using just three. Now we have this
green and this green. This is beautiful.
I love this color. Now, I'm going to hold it
close to the no touch zone, and I'm going to I
haven't done a lot of lines going down and up. So in my bouquets, I like to have some flowers
that kind of fall down. So this is good to practice. So I'll do a line like this. And then just kind of like our sea curves
and our flowers. And if you watch
your paint brush, and it's like we're making
those lines like we did in the first practice, I go down and then up. Or you can go down
right away and then up. I did the thin
line, went down up. This is what our
practice is about. I'm doing the go down and
then as you lift it up, you can bring it to your stem. So sometimes I will have the
paint on my brush and paint, or I will make a
thick line like this, but a lot more paint to it, and then I'll just add water for my leaves and it'll soak in. So we'll practice
doing that, too. I'm going to have these go
in different directions. I just maybe smaller. I just really want to have a variety of things
I want to practice. We've been using this
size six this whole time. So I'm going to switch
now to the size two. So this is loaded up
more than my big brush. You don't need as much paint
to load up this tiny brush, so it's interesting to see that. So I'm going to get a
whole bunch on here. And like I said before, get this nice and thick, not wide thick, but, like, loaded up with a lot of you could see these
little puddles here. So this is just by
having the tip of the brush touch the stem, and it's pulling that
paint into the leaves. This is a nice way, like, we started with the flour
to have light leaves, and then you can
always add to it. You want it to dry
first before you add any more detail because
it'll just keep soaking in, and you won't be able to
add any details on top. So I'm just gonna let that dry. It was dried pretty fast. So I'm going to add a little
bit more seavia to it, and then see what happens. So if I just very
gentle and I put that line down
there for the stem, here's how I get
variety in my leaves. Sometimes you can even
just have a couple leaves that don't have anything
in it. Looks interesting. If you keep on the way it is and change other
things, be careful. I just put my hand
right into that. So this is also good
practice for that. I'm right handed,
so I should work this way and come onto this way. But that's okay if you don't. Now, I like these leaves, but I want to try
some other leaves. So we practice all,
ones that are hanging. Let's just I want to loosen
this up a little bit, so I'm putting it over here because I don't want
to add water to that. So if I go up, try different angles
in different size. So now this is
starting at the tip of the brush starts at the stem,
and then I work my way out. So just keep practicing. Try different
leaves, go outside, look at different shapes,
look on the Internet, try different shapes and decide the kind of
leaves that you want, what you think would
be interesting. Don't be afraid to try
some big ones, too. And then you could
take the back end of your brush and put a
little dent in there. That will help the
variety piece of it. All the watercolors will go into that dent and make
it look a little darker. Well, it's still wet.
Draw a nice little line. It's already starting to mix, but I'm going to add some
color or some water to spread the color a little
bit. While it's still wet. This is all still wet. Just see what happens. I could play doing this all the time. As you go, you'll start to
think of ideas. Who cares? If any of, if I didn't like this and I thought it looked
terrible, who cares? 'Cause you are just practicing and still trying to get
comfortable with your paintbrush. I'll see you the next lesson.
6. Final Project: Now it's time to create
our final painting. Start by lightly painting your composition or
drawing your composition. So you might want to place
a few larger flowers first. That's what I did
in this drawing. A few larger flowers first. My main flowers are
going to be the roses. I put a couple of cone flowers
in there for a variety, and I have some
greenery in here. I have a couple of
the big leaves, and like I said,
in the practice, I like to have
some hanging over. Now, I drew this
pretty dark for being something that I would
paint over with watercolor, but I want to make
sure you can see it. You do not have
to draw it first. You can just lightly map it out where you
want things with pencil or just kind of go with what feels right and
where you want to put it. No. So I'm glad I mapped this out with pencil
because looking at it, I really want to
focus on the roses. So the cone flowers, I'm super glad that
I practice those, but after I see it together and when it's all
together like this, I think I'm going to just
stick with the roses. So let's stick with the
roses and the greenery. You might have a different idea, maybe different flowers or maybe you like the
cone flowers in there. It is totally up to you, but I think I'm going
to leave those. So that's what's important
about mapping out your artwork and practicing because I'm confident in doing all
these through practice. But when I map it out like this, I really enjoy how these leaves are coming
out of the roses. I like the different sized
roses all bunched together. Kind of looks
interesting. So I'm going to leave the
cone flowers out. And I'm going to do roses
in greenery. So here we go. We're going to do the roses. I'm going to do a big
one in the center. I like to start with my puddle. I have my head to the side. I try to make it a
little smaller than I think I'll want it because I
can always make it larger. So I'm going to do what it looks like a pencil it's little harder to tell
with a dark color, but it's just on the end. Then I'm going to do my spiral, because this blue is
so dark and beautiful, but I don't want my first
layer to be that dark. So now I just kind of
went into that and I'm spreading it around with just I just had
water on my brush, and it just dilutes it
and makes it a little bit bigger without getting too dark. So just no plans. I know I want that bunch. I don't have to have it exactly the way that I did the pencil. If you want to do it right on top of your pencil, you can. I just like to see how it goes and just work
my way through it. But if you don't
feel confident in doing that, like I said before, just go with your pencil
and go on top of that. I would recommend lightning
up your pencil mark. So maybe just erasing
it a little bit, so you can still see the lines,
but it's not super dark. I do want to remind you
that we have the sepia, too, so don't forget about that. If you don't want
to use two colors for your roses,
you don't have to. I just like to
have that variety. Students hear me say variety all the time, but
it really does. It really does make
a big difference. You don't want it to be boring. Like, I'm noticing
it gets me thinking, so I'm noticing these
are all the same size. So maybe I'll dilute
this a little bit and make this flower
a little bit bigger. That's why it's nice,
starting with light. I'm going to keep mapping out different variety
of size flowers and placements and
even my greenery, I'm going to lighten them or
I'm going to map them out, too by mixing my colors
like I did during practice, but keeping it all light, don't feel like you have to
put in the same spots I do. Just have fun. Have
fun mapping this out. If you don't like it at the end, just know that painting
process is really therapeutic and it just
should be relaxing. So you can always do this again if you don't
like the placement. I've restarted paintings
multiple times, and then eventually I like what I've learned
from each mistake, and I'm happy with the results. So there's nothing wrong
with starting over. I'm going to do a
variety of, like, where the hole or the center where it's the
tightest in the flour. So they're all very centered, and I move this one
up a little bit. I think I'm going to move
this one down a little bit. So here's that variety again. As I'm working around here, I do want to kind of fill up spaces that have
feel off balance. So I'm going to do some of these leaves down here because there's
a big space. And I kind of just playing around with
different colors too. Put a little bit of
every color in it. I really like how there's different green here makes it feel different than this one. So that's nice using
the skinny one. I want to do some
wider leaves up here because these
are very similar. But if I keep doing
these, that variety won't be as obvious. It'll just be a little boring. We don't want that. So I'll
get some of the green. I mix the blue and
green right here. I like that, but
maybe not as much because it's pretty
blue right there. When I add water, I'm just a
tiny bit of water because it doesn't seem like it wants to
slide and glide very well. If these flowers, sorry, these greenery leaves are
going to be sticking up, I'm thinking they're not
going to be as fragile, so I want to make them
a little bit bigger. Because otherwise, it'll look
a lot like the other ones. I'm going to have that
round look at the end. So I'm starting at
the stem and going out This one looks like
it's going behind it. So I have a variety of
how the leaves look, some completely solid
and some not solid. So maybe I'll do some
that are just outlines. I find if you pay
attention to the variety, too and you make
mistakes, it's like, gives you that permission
and that reminder, Oh, should I should be doing this to make it look
different anyway. So that mistake is happy. It's a happy accident, right? So while it's still wet, if I want to add a little
bit something else to it, so it blends in nice. We kind of do that at
the end of our practice. I like that. I feel like
there's always something new to try and you
never stop learning. I really Here, I feel like it seems
pretty good balance. I'm trying to get
different types of leaves. I feel like I don't
have a singular leaf that would just come
out of the flower. So maybe I'll just add that. I don't want to worry about having too much because
it's getting to the point where
there's quite a bit of migraine going all around. It's nice to have some
negative space too. S. I just want to add a little
bit something else to that. So now, as we work
around the painting, it gives dry time to
our flowers, too, and I'm really happy that I
decided to do all just roses. Like I said, this
looks nice, too, but I'm going to do if I want to play around with all
different types of greenery, then it starts to
get to be too much. So that's one thing I noticed
this is working, I think, but once I add more greenery, then it gets to be too many
different flowers, then too. So trying to have
that nice balance I just know speaking of balance, I just want to have a hard time just
putting one of these. I want to have it
somewhere else, too, but it doesn't
have to be as big, like I said, we have
so much going on here. We're gonna get
to have too much. So this is the perfect
time to go to the flowers, not only because
they're dry, but because these will
have a chance to dry, and then I can add
layers to the flowers. I'm sorry, to the
greenery. This is a good that will be a
good time to be like, Okay, there's too much up here, so I'll keep this light
and add detail here or add detail to some leaves
and not others because we're just trying
to balance at this point. We mapped everything out.
Now by adding details, it will start to come
together all at once. So each layer, we're going to do fewer details to pull
it all together. Somewhere diluted
just a little bit. I pulled it away from the pure blue over here is
this blue is quite dark. Remember, we don't want to
go too dark right away. So I added some water. Now, I felt like I
wanted to keep going, but then it'll get overworked. So once you start to feel like you want to
just keep adding and fixing and just hold off a
little bit, come back to it. I'm going to add second
layer to my leaves. I'm going to so I'm going
to start with my big brush. I want some of these stems
to be a different color. And then I like
to bring that in. W make that round.
Not a big deal. These had a little
bit more brown in it, so this is just helping adding a little extra detail that
will pull them all together. I don't want to change
too many leaves to be I don't want them
all to look the same. If I change them all, then they'll start
to look the same. This one has a little
bit more brown in it, Marsepia which is a brown color. So to give that I just
like having the stems a different color
or darker value. I'm just looking for places
where it looks too similar. Do I say just so I can make them look a little bit
more interesting. I really like how
these look already, that there is a lot of
variety right there. So I probably won't
change too much, but I am going to add a couple of stems to bring
some of this in. And then it has that blue in it, so it kind of ties
it all together. Before I add details
with my small brush, I'm going to do just a little
bit of splattering on here. I think I'm going
to stick to, like, this area and maybe up here. I want to use the
colors I have already. I'm using a bigger brush. I do have it quite diluted up here, so I'm going
to try that first. So I have my brush loaded up with watered down acrylic ink, and then I'm use the handle
of the other brush. Oop. Totally fine. Lift
it up. There we go. I'm just going to add a little bit a little bit
more paint on my brush, and then with back of the
handle of my other paint brush, I will just hit you
hit the paintbrush. So now I don't want
it on the roses, so I'm touching it
and lifting up. It maybe not so dark over here. So if you let it sit
for a little bit, and then you pick I started
there because I wanted that gone so you don't
see it very well. Then I'm going to go back and
just you can see them now, but they're just a
little lighter than the other ones like
gives it a variety. So I'm gonna do that
again, but maybe this time I'll add a little bit more
green to that mixture. So you want it diluted, but
you don't want it too much. If it's too much water in there, then it's gonna be too light. And if you don't put enough
in here, it won't come out. So it doesn't work,
you'll just do it on your practice sheet first. Right? It's a little higher
up to spread out the dots. Let it sit f a little bit. I do like it on these leaves. So I think I'm going to keep it a little
lighter over here. I'm not going to
push down as much, so I want it to be over here, but not as dark. I'm not going to push
down on my paper as much. There. I do like that. I think that looks cool and
it kind of balance this out, and there's a little
bit of light ones here. Good. So use my bigger
brush for that. So I'm switching
to my number two, my smaller brush, and I'm going
to do the darker details. Let's start with the
brown, the sepia. I'll start up here
because I am also being careful where
I put my hand. Do that sviiral I just want it to be super
dark in the center first. I'm just going to sweep
my paintbrush around. Flow there. I'm going to use
my thin brush to add just a little bit
extra details, but barely. So I kind of have an idea of how I have this
pretty light here. I might add just a
little more definition to that leaf coming out. But I have to be
careful on this one. I just don't want to do
too much because the star of the shout are the roses. So we want to do probably one more layer just to
really pop them up. And the details I put in these leaves are going
to be a little lighter. Just have some skinny details. It's really up to you
how you want to do that. But just keep in mind, what is the star of the show, which is the Roses. This is going to
be my final step is to make these pop out more. And I play with
the idea of having another color added to having in the center or to not do that. So we played around with that, and I think I'm going to keep
it very simple with these. So these are all mixed here to really make them stand out and they just have these
pure colors here. I'm going to keep that going just so there's
some separation. I look at this flower. I feel like it needs a
little separation from that. I feel like this is standing
out more than this. So I got to be really
kind of thinking of those things as I
add this final touch. Still using my smaller
brush, which is size two. I'm going to get this wet so I don't want to
use a dry brush. It doesn't slide and glide
if I have a dry brush. So I'm just adding the extra
details, the final touches. This one I won't blend as
much as the other layers. I'll just do it here and there, d like what we talked about in our practice. All right. So without overworking it, I do want to stop here. I like how the roses kind of
stand out a little bit more. Now it feels like
there's less detail. And most of the used flowers, I feel the greenery, I feel like this is
standing out more, just that simple
line over the leaf. And it is done. When you feel like you want to just keep
adding more and more details, just kind of stop,
take a deep breath, and come back to it, and then decide if you want to, but I'm going to stop here. I always tell my students
when you're done, don't forget to sign your work. I like to use a black pen. Now, just enjoy the process
and have fun with it. If you don't like
how it turns out, try it again or try it
in a different way. We did all of our practices, but maybe you need to practice a little bit more before
moving to this, or just map it out with pencil instead of
paintbrush or vice versa. Do what works best for you.
7. Conclusion: Congratulations on finishing
your floral painting. This class, we started
getting comfortable with our paintbrush and our
materials by practicing, creating all puddles in different directions and
thick and thin lines. Then we moved on to practicing
different types of leaves, different types of flowers. So this way, we can
get comfortable using the colors,
the techniques, all of that that we learned here we put into here to create
these beautiful flowers. We also learned how to
map out our project, whether it's done in pencil
or to do light washes. I love to see what
you've created, so please upload your project
to the class gallery. Feel free to share your
practice pages too. I love seeing how the
process went for you. If you enjoy this class,
consider following me for more lessons and thank you so
much for painting with me, and I'll see you
in the next class.
 Ashley- Water Bloom Studio, Art Teacher