Transcripts
1. Introduction: Hello, welcome to this skill Shack calls for those of you that are not familiar with my classes. I'm Kelly and I have here in my studio on the family's day with Baum were based in the northwest of England, in the county of Korea. Where I enjoyed teaching, became as join and painting. And I enjoy teaching online heroes Skill Share, and also on YouTube. In today's class, we are going to be token about composition in very simple tens and looking at it from a business perspective and just knowing the absolute basics as a starting point. So we're gonna go through basic composition in very simple terms. And at the end, you would do in a little project, putting together some compositions of your own in a small drawing. So I hope you're going to find useful if there's any questions along the way, please do feel free to ask me. You can contact me here on skill share or if you go to my website, you can contact me through that. And alternatively, you can easily come tapped me on Instagram three, the messaging survey switches a very handy way of getting in touch with me as I use Instagram quite often. Okay, so we'll go ahead now and have a look at compensation.
2. What is composition ?: To begin with, we're going to look at what is composition. And I think this is a bit of a stumbling block with beginners is the terminology that we use because it's actually very, very simple. And it's a very simple definition. It's just that when we first start drawing, we panic when we're here all these words and terms that we're not familiar with. And we think there's an awful lot to learn. And really there isn't a lot of people when they first decided to take up drawing and painting as a hobby. Something very simple, like an apple or an onion where it's an observational drawing and what your concentration on days, getting a lightness and actually practicing your drawing skills, making sure that the apple looks like an apple. So you're really not thinking about a composition of the whole picture or you're concentrating on, it's like I say, the lightness. It isn't until later on that you start thinking about doing a whole picture, the whole painting, but in a lot more things, in not painting, a lot more objects. Maybe when you come to do a still life of an apple and a bottle of wine and a gloss, et cetera. And putting them all together, that's when you need to stop thinking about composition. So it's a very new beginner really. We put it to the back of our mind because we just think worried about getting a lightness, getting it to look like the object it is. And then we're quite pleased when it doesn't let that object. But we need to also think about the composition of the whole painting, especially if you want to later go on to start exhibiting your work. Or if maybe you want to frame it and put it in your own home, you want to have a pleasing picture or to call old told. Sorry, I'm stumbling over my words. But what I'm trying to say really is it's no good looking at objects in isolation. You've got to look at the whole thing together. So concentrating on drawing one thing correctly and then moving across the painting and drawing another thing correctly doesn't bring the whole thing together. You've got to think of it as one painting, one artwork that will help you with your composition. So we'll just begin by talking about what the word actually means. And this is why I'm saying it's very, very simple. So hope you don't mind. You've got mofo now here. And I've just gone onto the Oxford dictionary definition. And the Oxford Dictionary definition is the different parts that something is made of, the way in which these different parts are organized. And that's it. That's all we're talking about is the way that we put things together on the picture, on the paper. So if you think of composition in music is the way that the notes go together, in a way the Vs to go together. And similarly in poetry, you putting those words into VS into lines and then putting them all together on one page and the way that they look together. So it's all about bringing a whole painting together and making a painting not just drawing one object and concentrating on that. So that's very simply it really, it's not something that we want to be worrying about. And it's actually something that comes quite naturally. Particularly if you're naturally good at observing and you're naturally good at seeing what you're like in a landscape or something that you look into anything, yes, that would make a nice picture if you enjoy photography, for instance, if you enjoy taking snaps on your phone, you'll be sort of drawn to that subject and that composition of what you see. And that's quite a natural thing. And sometimes I think people within Kate, if something looks pleasing to the eye and the eye isn't jarring, because often must look at the picture and think something's not quite right, it's not balanced, it's wrong. And that's not anything we can define. Its just our eye and our mind is saying it's just a little bit off. If your mindset and that's nice. I like how law holds together, perhaps a pleasing image to me, then it's probably a good compensation. Now will go on and have a look at some very basic beginner's compositional rules and techniques. But as with everything I teach on here, rules come with that to be broken as well. So always keep that in the back of your mind as well. If it's a nice picture to you, then that's really what matters.
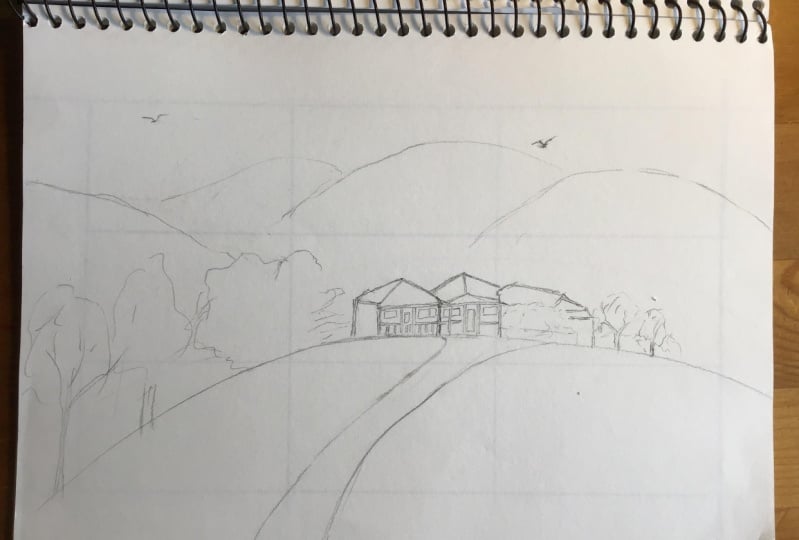
3. Rule of thirds: Whether you are an absolute beginner or you've been painting and drawing for a little while. I'm sure most of you will be familiar with the term the rule of the, again, it's nothing to worry about. Again, it's very, very simple. All it means is that you're breaking down your canvas or your piece of paper, whatever you're working on into three sections, and both vertically and horizontally. So I've printed off some sheets. One I got ready to work on. So we can say here you go, put a marginal such as they normally outside of the US. And this is the, where you're going to be doing a painting. And we've got to sectioned off into thirds either way vertically and horizontally. And where the lines cross is, where we've got some nice focal points. So I put in an interesting object or scientific interest in these focal points, we can end up with a nice composition. Now I'm gonna just leave out an alert and show you a few simple compositions using the rule of thirds. Ok, so I've just drawn out here on this part and this shape of the picture and split it into thirds. Like I said before, I'm, we've got those focal points here. And I've just printed off a few more from that. You don't need to do that. You could just do a few more in your part and have a look at it, but this was just to make it quick and easy for me showing you today. So I'll just pop that to one side. Now, don't forget you can move your picture this way as well. It doesn't have to be horizontal, it could be vertical as well. And you might want to do a square, you might want to do different shapes. So that is something else that helps with the composition, is look at your subjects and think what shape canvas you want to start off with. Again, as beginners, we tend to get our drawing pad out and start drawing without thinking too much about which direction you want your part in. Or whether you want to make it slightly smaller. Whether you want to use it to make a margin, to make a different shaped canvas that you might want to be a long, long, narrow picture for seascape or something, etc. So just have a think about what's gonna look good in the shape of your picture. You, the shape of the painting before you start. So we've got these four focal points. But we've also got these lines, which are also sort of focal points, are good places to put things. So you might be doing, let's imagine we're doing a seascape and we've got the sea. Meeting the sky on the horizon will possibly want to put that there. Or we could put it here. We wouldn't want to put it here down the center of the picture. If you put it down the center of the picture, you really chopping, you picture in half. So either have 1 third sky to two thirds water or the other way around. Okay, that makes sense. So we'll do one on another piece of paper Musei. This one, we're doing it this way, OK. And we're going to put the horizon here. And we're going to have 1 third. Water and two thirds sky. And then you can be doing a very dramatic sky in here. Okay, so if we go back to the swan, once you've done that, then you might be thinking about adding a boat or something. And you might want to think about where you're gonna put your boat. And here would be a great place to have your boat. A bit of a wonky sale. Or here. And there might be an island in the distance. So you might want to hear, don't do them in all the sampler. Don't do all of these. Do one or the other. You know, if you've got about a, perhaps don't want one on the same line that's gonna make it look a bit boring. Think of these as good places to position objects or to lead the eye. So maybe if you are having, if this was a lane going towards zip, so if this was ground rather than water, you might have a road finishing, whether tes. Okay, so let's think again, like I said, about something like a lane. So we'll think about a landscape. Again. You might have your hills, but here on this line landscape. And you might have a road disappearing off. And it's quite nice to have them start, have things start in these points as well. And you can see how that could all start to come together. Now, just pop that to one side and get some plain pieces of paper because actually you don't need to start by doing that grid that was to show you. And obviously that over-complicate things and it's starting to look a bit messy and you forget which lines you need to rebel and everything. As you go along and become more confident you really won't need to do to do this. What I sometimes do is make a little mark down the side that you've got it in your mind. But you don't need to be doing the whole grid out and put in your vocal points and things in life that you just need to be aware of this and aware of where those third lines and where these focal points are going to be. So on here, just set off with, although it's a blank piece of paper, I can sort of think, well, this is a third OPE and a third in Swan know that there's a focal point around this area somewhere. So you don't need to be over worrying about getting your ruler out and measuring. Your eye can tell where third is down. So you can see that that's about a third. And again, you can see that's halfway down and that's going to chop the picture in half. So when you set off with your initial drawing and some pencil guidelines, just be aware of where these points are going to be. And the more you do it, the more you get used to it. And that might you might not be putting anything in there, but just be aware that that's where the i is going to settle. If you're leading the eye around the picture.
4. Directional lines: When I talk about lead in the eye around the picture, this is something else that you might worry about any clue. Ok, she's on about really. She's just that and it's done with lines. So your eye tends to naturally follow lines. And then it settles when that line becomes bigger and more focused, more detail. So something like languages didn't on here, a road really takes the eye. And then perhaps if there was a house awesome thing here, then your I would stop and think, well, look at the detail in that house and your eye would settle there. That's all we're talking about is when we're talking about leading now around the painting. Painting. So they, I would come in, look at this road lead he took there not quite naturally as that happens. Then with this line of these hills and this line here of the base of the hills. They, I might be taken out of the picture. And this is something we want to avoid is taken out and I out of the picture and they're not leading it back in again. So you could put something down here. And it could be a row of trees or another lane in another road and hill. But you could put something to bring the eye back-in. Similarly on this side. So you don't want the AI to be zooming out of the painting. So let's just imagine you've got a road setting off here. And you take the road all the way over to here and it just goes off in this direction. The i is completely gone out to the picture. It doesn't matter that you've got something beautifully drawn over here because it's disappeared out of air and is not a great composition. You take in the eye away from your painting and the focal point in the things that you want people to be interested in. So some of these lines can be imaginary. So if we've got, I don't know, a field, the horizon up here, and this is a field and you've got some thin center of interest over here somewhere. She drawing anything. And you want the AI to be taken in that direction. It might be an empty field down here that might not be much going on in this field. So you can just put imaginary lines and these could be lines of tractor tires. You could put a line of rocks. And they don't have to be there, but they just taken your eye in. And if you've got reversed graph that you work in from and it's got something there. You might want to alter it. So it might have a line like this and you might just angle. It's slightly different to take the eye into the picture. I'm hoping that makes sense to you. Like I said earlier, please do ask if any of this isn't really making sense and you want me to clarify anything, it's difficult sometimes knowing how much detail to go into an also if I'm getting the point across clearly. But that was really regard in bringing the eye into the painting using some imaginary lines. And this is something I do a lot with my own painting, especially with rocks, with hills. You can move them around. Don't worry, reliance on doing the photograph exactly as it is. Things like trees, fencing, poster, a great one. You know, you could do a row offense in post. Going smaller and smaller into the distance, puts a bit of wire on. And that's really going to take arrived towards where you want to lead the eye.
5. Balance & Focus: I've just swapped to a pen because I think that'll show up better than the pencil, but focus unbalanced. This is something I've talked about in a previous skill share costs when we're talking about the elements and principles of design. But again, like I said earlier in this course, if you, if you're, I see something off balance. It tends to pick it up without you really thinking about it. So consciously you look at something in your eye, thinks that doesn't look just right. Imagine you all sat down in a restaurant and one of the paintings on the wall is crooked. It's slightly off. It really jumps out at your eye. And some techniques, some people can live with it and some people can't live with it. Some people want to get up and immediately level of that painting. So your eye really picks up things that are off balance to you. So if you're painting as a whole isn't balanced, the viewer's eye will pick that up. So balance can be both visual and actual. So actual balance would be that the painting was hanging like that on the wall and it wasn't properly leveled and the framing was all wrong, et cetera. Maybe the picture itself is wrong in the threatened output straight in the frame, something like that. That's actual balance. Visual balance is where the eye thinks that that painting isn't balanced. So just imagine that you have an enormous object here. That's very solid, very dark, perhaps very blocks in, in color, very heavy locking. And then everything else is really wishy, washy and delicate. This area is going to own balance data area. The way to balance it is to make this area much larger than this area. If that makes sense, you can also of balancing with color, particularly if you don't put the similar colors throughout the painting. And focus, focus, again is where you draw in the I two. And again, if you put the focus in the wrong place, then that can also lead it to be off balance. The only reason I'm talking about these two terms again, is because if you get focused on balance, right, you composition is going to be right. Your composition is going to look good. If it's looking focused and balanced to the i. Some you might want to look back at that previous skill share costs that are did talking about all those terms there.
6. What not to do: Now as well as talking about what we should be doing with our composition, we also need to talk about things that we really shouldn't be doing and things that make it tricky to make a good composition and things that you can avoid. Again, as always, exceptions to the rule. And some people might be able to successfully make a very dramatic painting doing some of these things. But as a beginner, These are a few things that you want to avoid. So putting the focus right in the center of the painting, your eye goes to the center of the painting and it stops there. It's not moving around anywhere else. So that just means it doesn't mean there's anything wrong with it. It's balanced. It's got focus, but it's boring. And we don't want to bore in painting. So putting something your focal point there is going to make it boring. If it's the Mona Lisa that's there and it's painted absolutely beautifully. You can see how there's exceptions to the rules there. But in general, that's going to make it look quite boring composition. So don't put your focal point right in the center. The other thing is, as I've talked about before, is splitting in your painting in half. Now, you might not have drawn an horizon in half. But you might have made it that perhaps you back ground here. So if we call initially background, perhaps that's painted. And you've done some distant hills and you've used some blues and grays and everything. And then in the foreground, you completely change your color palette and Geuze, lots of different bright colors and you don't bring those blues and grazed down here. You could end up with it looking like you've drawn to separate paintings and that you've got one page in here and another here and the NOT together. So bring those colors down into the bottom and think of it as being a one thing, same. Similarly, you can do it this way. If you split your painting in half that way, maybe over here you have a street saying something. Over here you have a ward. And there's just a road in the middle, which is a really bad place to split your painting into. You're gonna look, you've got to separate paintings plunk together. So avoid splitting your painting either down, down the center or across the middle line that. So the other thing to avoid is unworthy thing thinking about your edges now, and this comes back to taking it out of the paints him when you draw a tree or something on the edge of a painting. So this is a tree. It doesn't cite one, but there you go. That's a half of a tree. We can call this a stop. And when we talk about taking your eye out of the painting, when it hits the tree, it stops. And then if you have another line coming here that can bring it back in again. So that's actually quite a good thing. Boat, it doesn't look great if you cut the tree exactly in half. So either more, more of your tree on. So let's say you've got a tray that so you've just got a little bit of the tree disappearing off the edge or just have a tiny few branches coming over the edge. So something like this. So again, it stops the eye and brings the eye back in. But it's not, the tree hasn't been caught dead in half, and it doesn't have to be a tree, it could be a person, it would look very silly if you've got a person and you've just got 11 leg that right on the edge of the picture. So just think about what's on the edge. It come form a stop. But it can also look very silly and not a great composition if you just chop those things exactly in half. If you were just kicking his leg in, taking the tree, whatever it might look a bit interesting and a bit quirky. But don't just have a person, they're chopped in half and the same with a house, whatever else it might be. Also for a good composition is not a great idea to go into loads of detail right on the edges of your picture. So reserve you detail for this kind of area. As you go outwards. Just fade off the detail. Less strongly colors, less detail in your actual drawing. Because I and everything wants to be again brought into the painting. So just leave these less detailed around the edges.
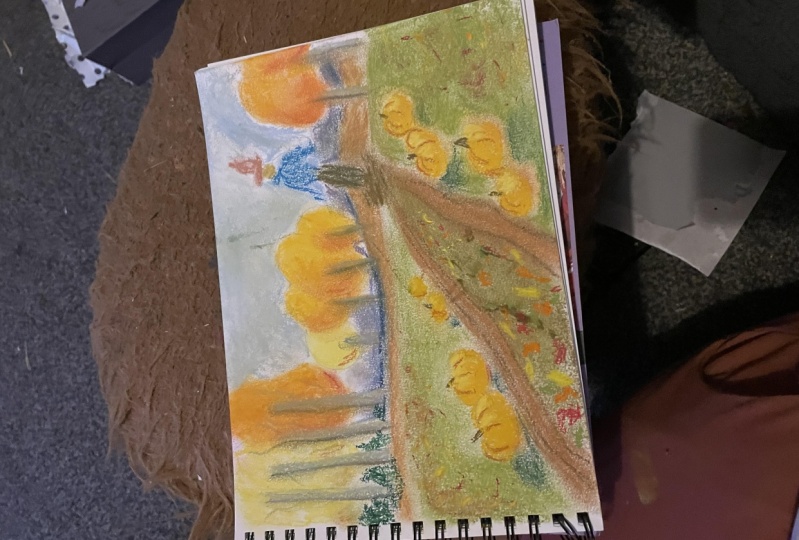
7. Course project: Now for your own projects, taken into account everything I've already said. And you may want to go back. And really since it acts and I've said quite a lot in a short space of time. You might want to just think about it for a little bit longer before you start your projects. But what I want you to do is to do at least three. It can be more than three, but at least three pieces of paper where you're doing a different composition of this using the same objects. So with each one, think about perhaps using your paper in a different direction. May be using a different shape piece of paper. And then thinking about the rule of thirds and putting objects in different places and putting focuses in those rule of. So. And I want you to use the same objects in each one that you do. So first of all, I want you to draw a line of trees. So that's the first object that you need in each painting, and it doesn't have to be highly detailed. It converges very simple, very abstract, but the same in each painting. It needs to contain a line of trees. It needs to contain an horizon. And that can be either see you all and it doesn't matter as long as it contains a horizon. Probably won't be saved because the third object I want it to contain is Elaine or a drive or a road or anything like that. So just those three simple objects. You cannot additional things to that. If you want to go more detail than you want to spend more time out additional things if you want to. But for year three or more pieces of paper that you're gonna do, I want to see lots of different ways that you're going to compose those three things together. So if we go back to that Oxford Dictionary definition, all composition mains is the way that we put things together. So thing, you've got your trees, you've got horizon, you've got your lane. Where am I going to position those three things to make a place in composition and do it differently each time. Because there's lots of ways of making a nice composition. It doesn't have to be the same every time. So think of the rule of thirds. Avoid those don'ts of splitting your painting in half and you should be okay. And I will look forward to seeing what you do. So you can upload those when you're finished. I'm sorry, I'm not doing an example for you to follow today. And a lot a lot of you that come on with skill share causes liked to follow what I'm doing. But I really do feel now and again, it's very important to do things from the imagination and not just to copy someone else all the time as well. So this really is an imaginary painting of your trees, your horizon, Angeline. But you can get some reference photographs offline or wherever you want to, just to think about what, you know, if you want to add color and things like that and extra detail. Okay, so I will look forward to seeing those num will of course give you feedback on what to think about your work. As I do with almost skill share courses.
8. Conclusion: To conclude this course, the main thing that I wanted to say throughout it really was, it is actually very, very simple. Don't be frightened by terminology. The word composition, as we heard earlier, was just the way we put things together. There are lots more ways we can put the paintings together then the rule of thirds, the rule of thirds is just a really good starting point for beginners. And as you go on, you'll think of other ways to deal with things. And you have to think of things that you want to do yourself as well. And that may be outside of the box, but as long as it looks pleasing to you, just avoid those few don'ts that I mentioned to begin with, as with all my skill share classes where I look forward to the, to the most is seeing your work and it's lovely for me to see you wherever. It's also lovely to look at each other's work. You learn so much from looking at other people taking the same class and the different approaches that you take. You might get ideas from each other and do talk to each other as well, which, you know, you can't comment on each other's work and have a bit of a chat later if you want to. So I really look forward to seeing all that. And as I've said before, please do get in touch if you want to ask me anything at all. I'll be back again with another skill share costs as soon as possible. Sworn law in detail with another landscape or something or know a lot of you do light landscapes if there's anything particularly wrong, which a paint or draw for you here on skill share, please do. Let me know. Thanks very much for taking part in this course and we'll be back again soon.
 Cally Lawson, “Paint like no one is watching"