Transcripts
1. Introduction: Hello, everyone, and welcome
to Bear Spine Beauty, Master the Art of
Coptic bookbinding. This workshop is designed
to introduce you to the beautiful and versatile
Coptic bookbinding technique. Known for its exposed stitching
and flat laying design, this method is
perfect for creating functional and visually
stunning handmade journals. Throughout the
class, we'll cover every step of the
process from preparing your materials to sewing the signatures that hold
your book together. You'll learn how to
craft gorgeous covers, and I'll show you how to
add some unique flare by incorporating vintage
and decorative papers into your pages. I'm Denise Love, an artist
and creative educator, and I'm excited to
bring you this fun and exciting dive in the
handmade art journals. Together, we'll
create two journals, one with your
favorite watercolor papers and another featuring a mix of watercolor
and specialty papers for an eclectic creative look. Whether you're a beginner
or an experienced crafter, looking to expand your skills, this class will leave you with a beautiful finished journal and the confidence
to design more. Let's get started, bring your artistic vision to life
through coptic bookbinding.
2. Class Project: Class project, you'll create your own handmade coptic
bound journal with exposed stitching and your
unique artistic style. Start by choosing
your materials, painted papers or
handmade papers for the covers and a mix of
pages like watercolor, vintage or decorative
papers inside. Design your covers, and then bind your journal with
the coptic stitch. Add personal touches to make
it one of a kind and share your finished project and creative process in
the class gallery. I can't wait to see your
beautiful journals.
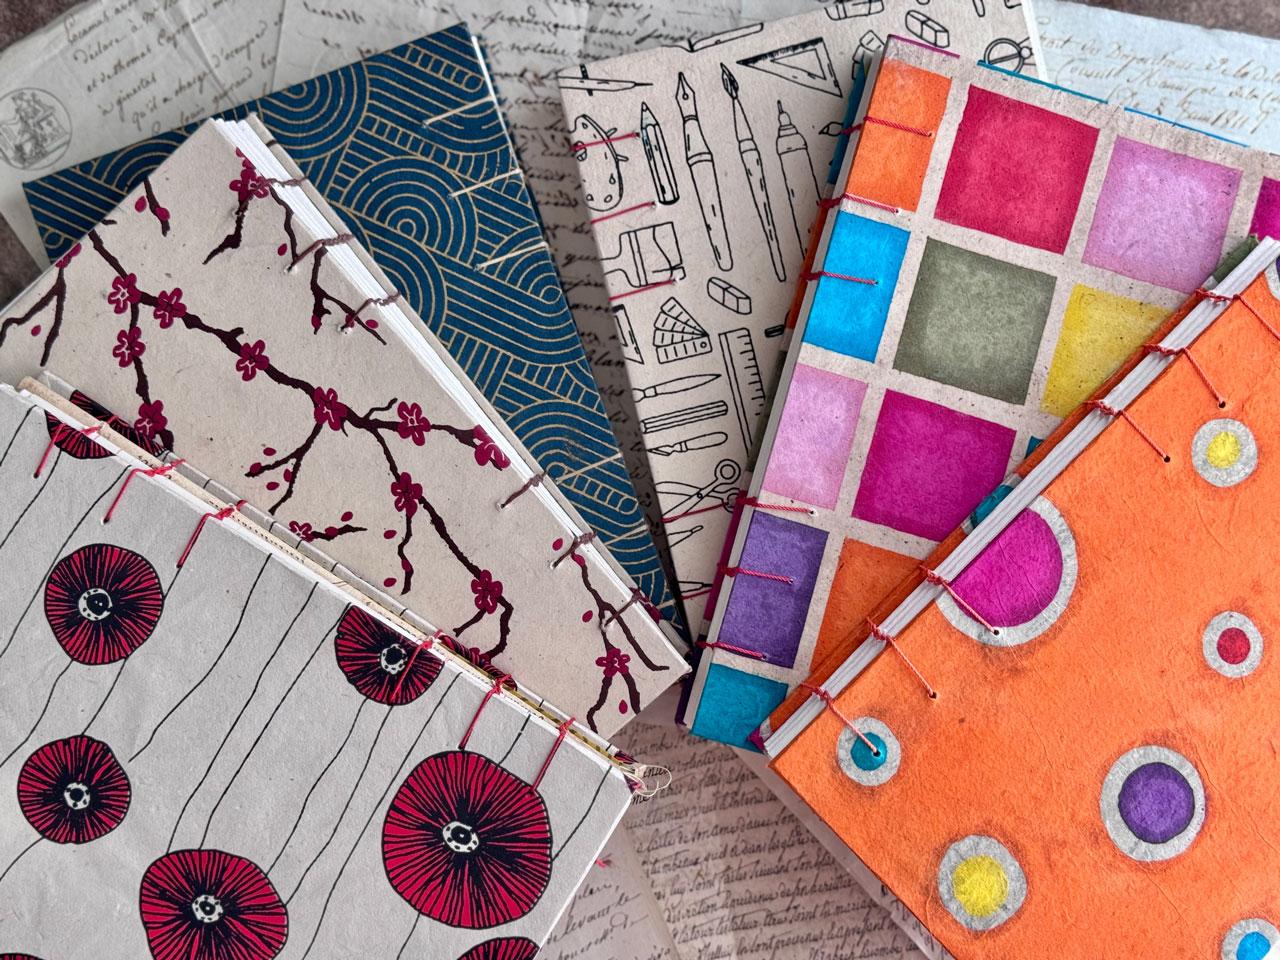
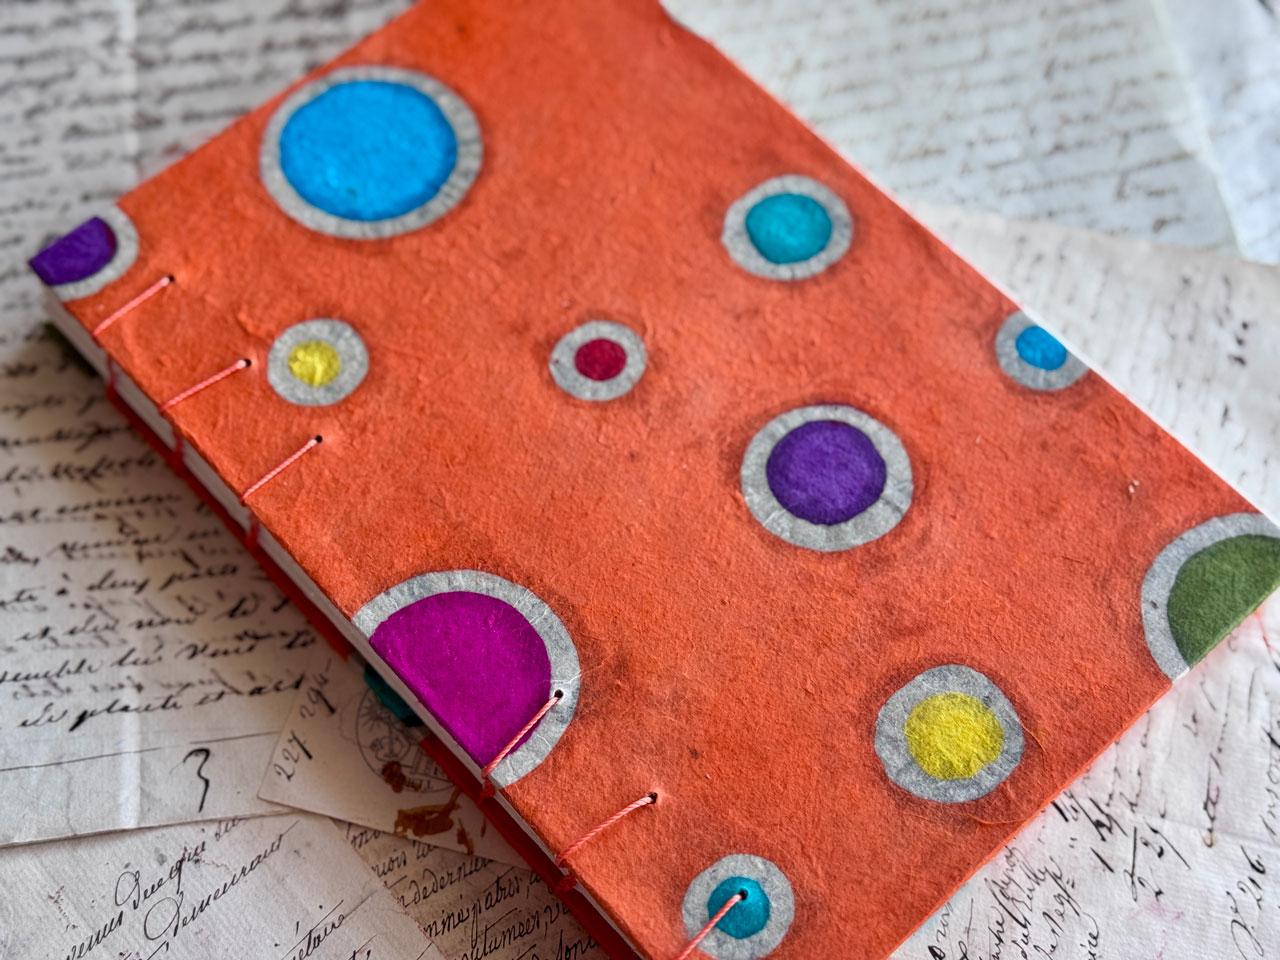
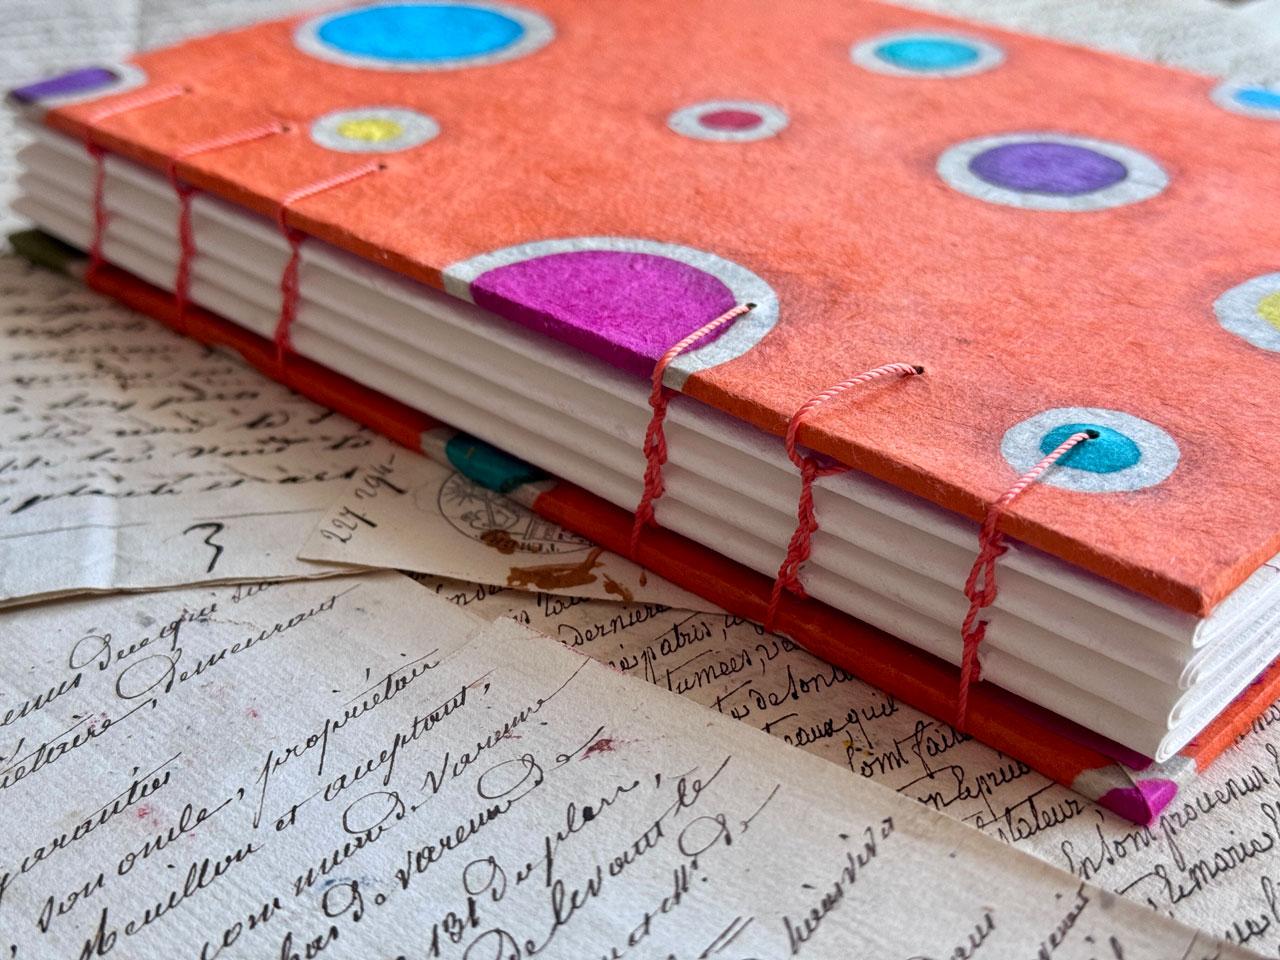
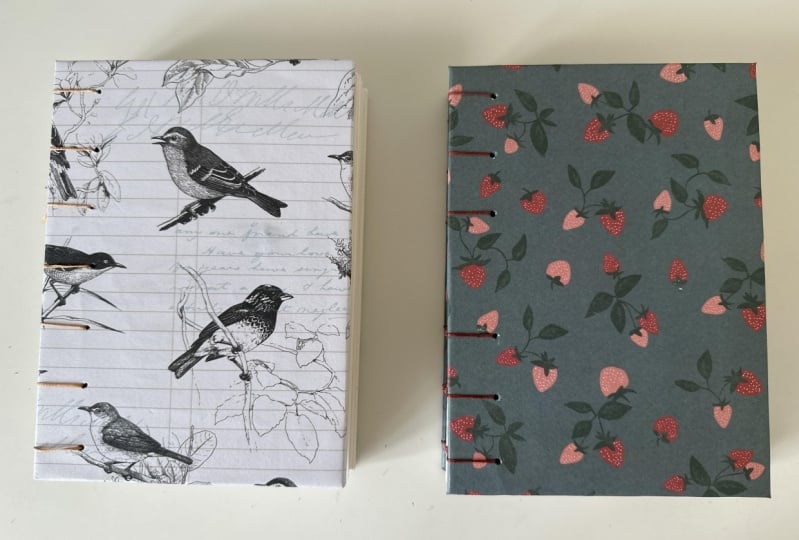
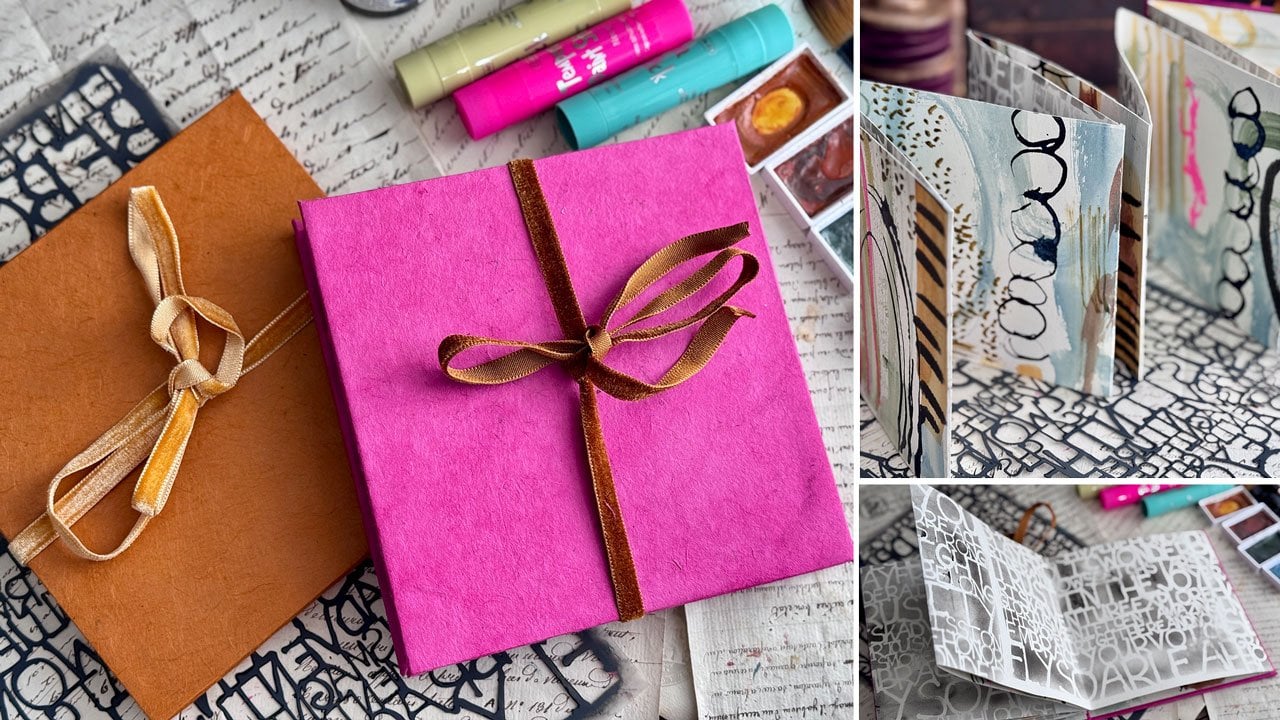
3. Supplies: Take a look at the supplies that we'll be using in class today. We're going to be making a
couple of the coptic journals, and we'll be making them
all in the same way, but I want to just
give you some ideas. These are some ones
that I have previously made and just love. And what I love about these is they lay flat as you
start working through them. The each section will lay flat. I'm using really thick
watercolor papers, so even though they lay flat, if I'm in the center part here, I'd probably still clip them
with a binder clip just to pull them down
because they're springy. But I do love them because they're gorgeous
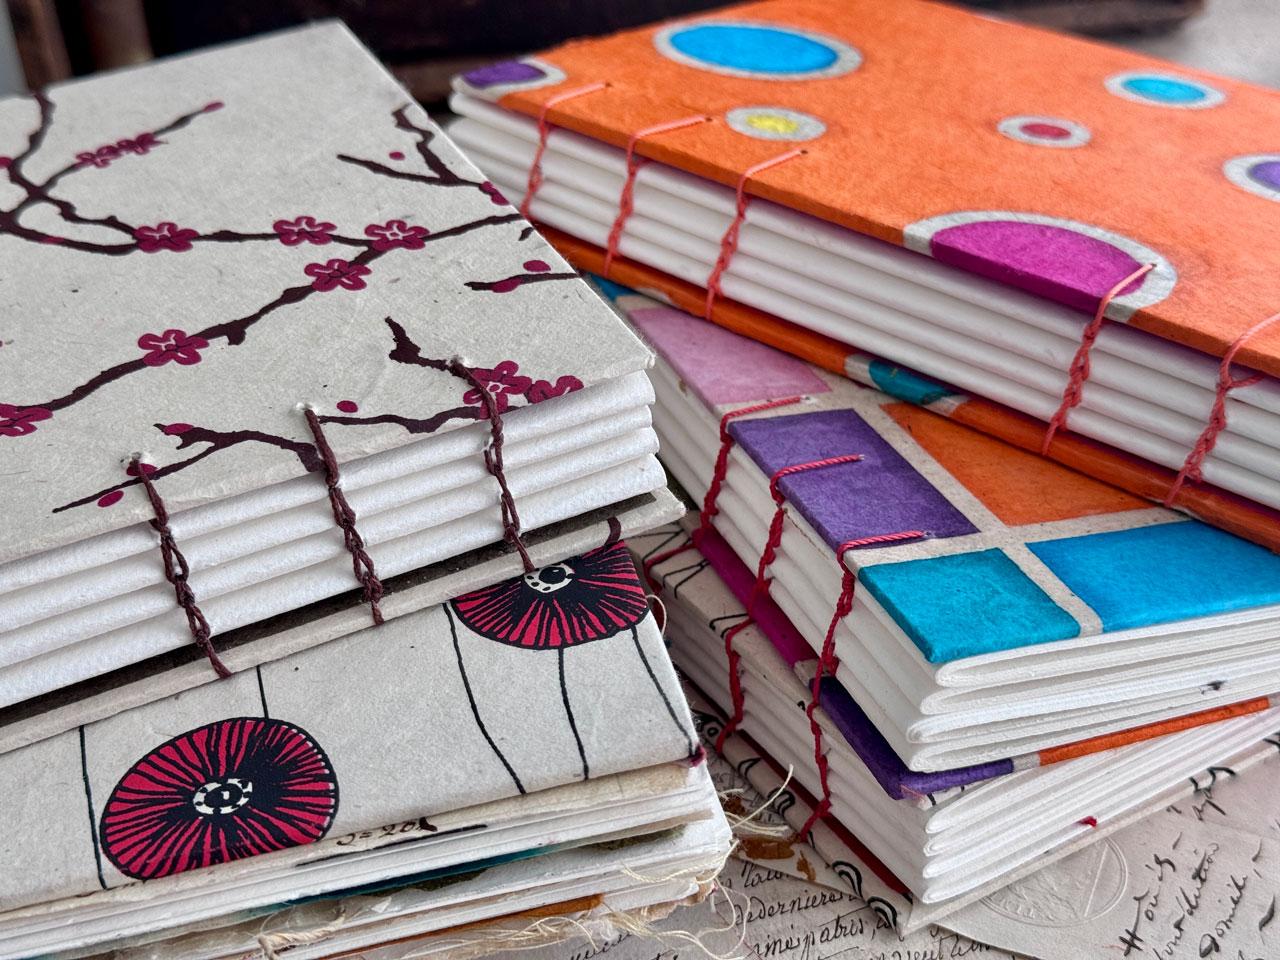
when they're done. What I particularly
love about these versus the other journals that
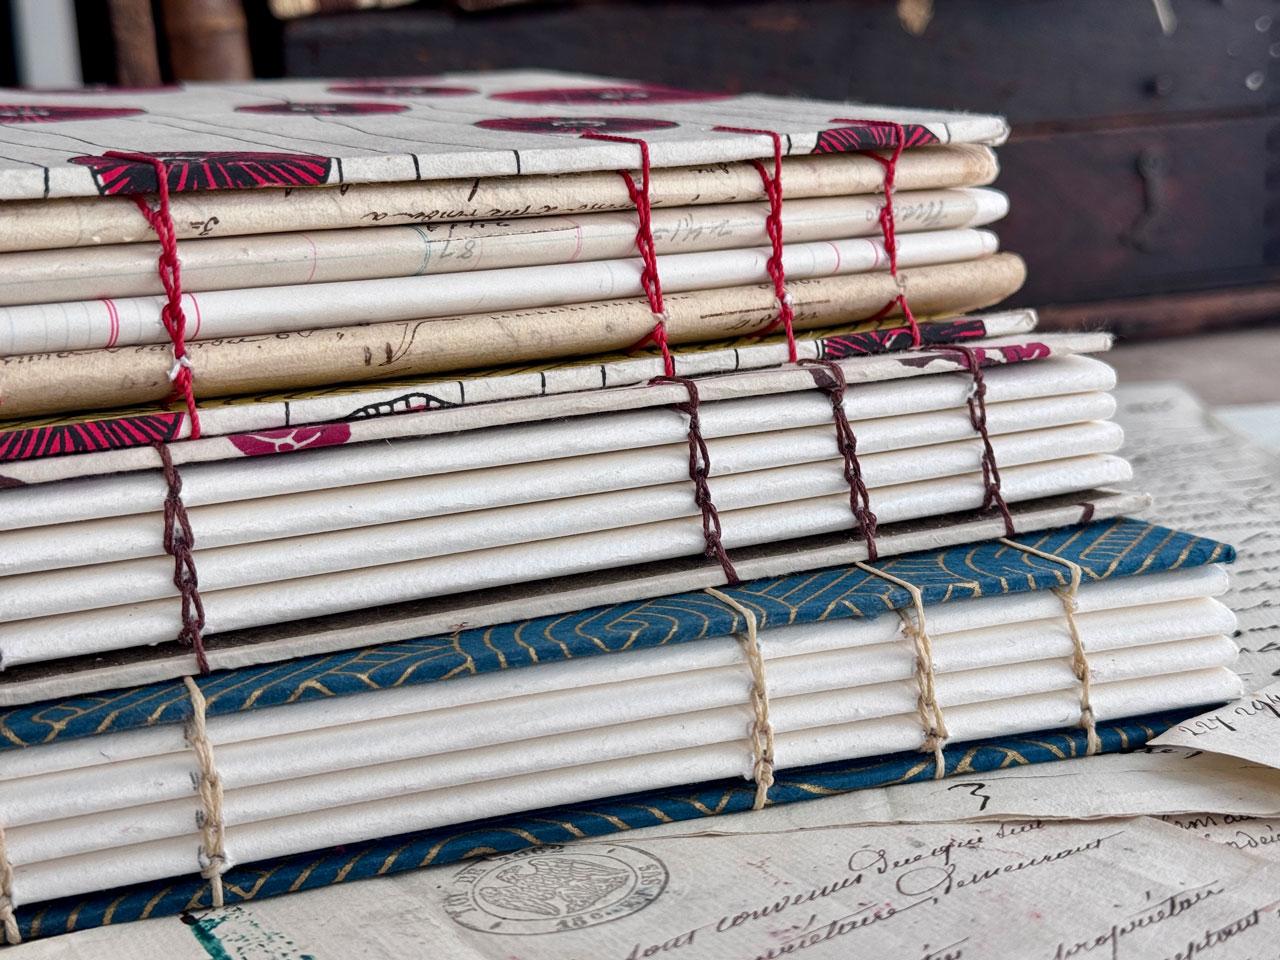
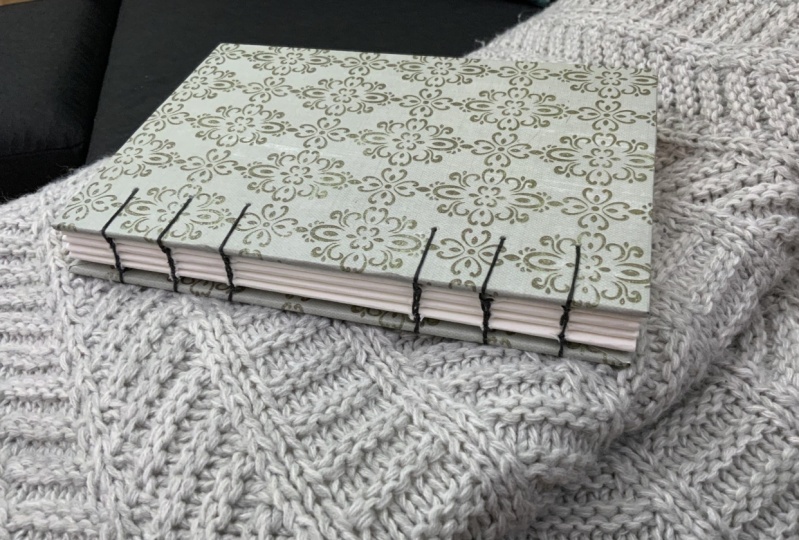
we've made is the spine. On the other ones that I've
made that I've been using, I've got a really pretty built in spine where
everything is enclosed, whereas these have all
the inside showing and maybe some pretty stitching and a fun color holding
the book together. That's what I really,
really love about it. The cover, the exposed spine, and then whatever
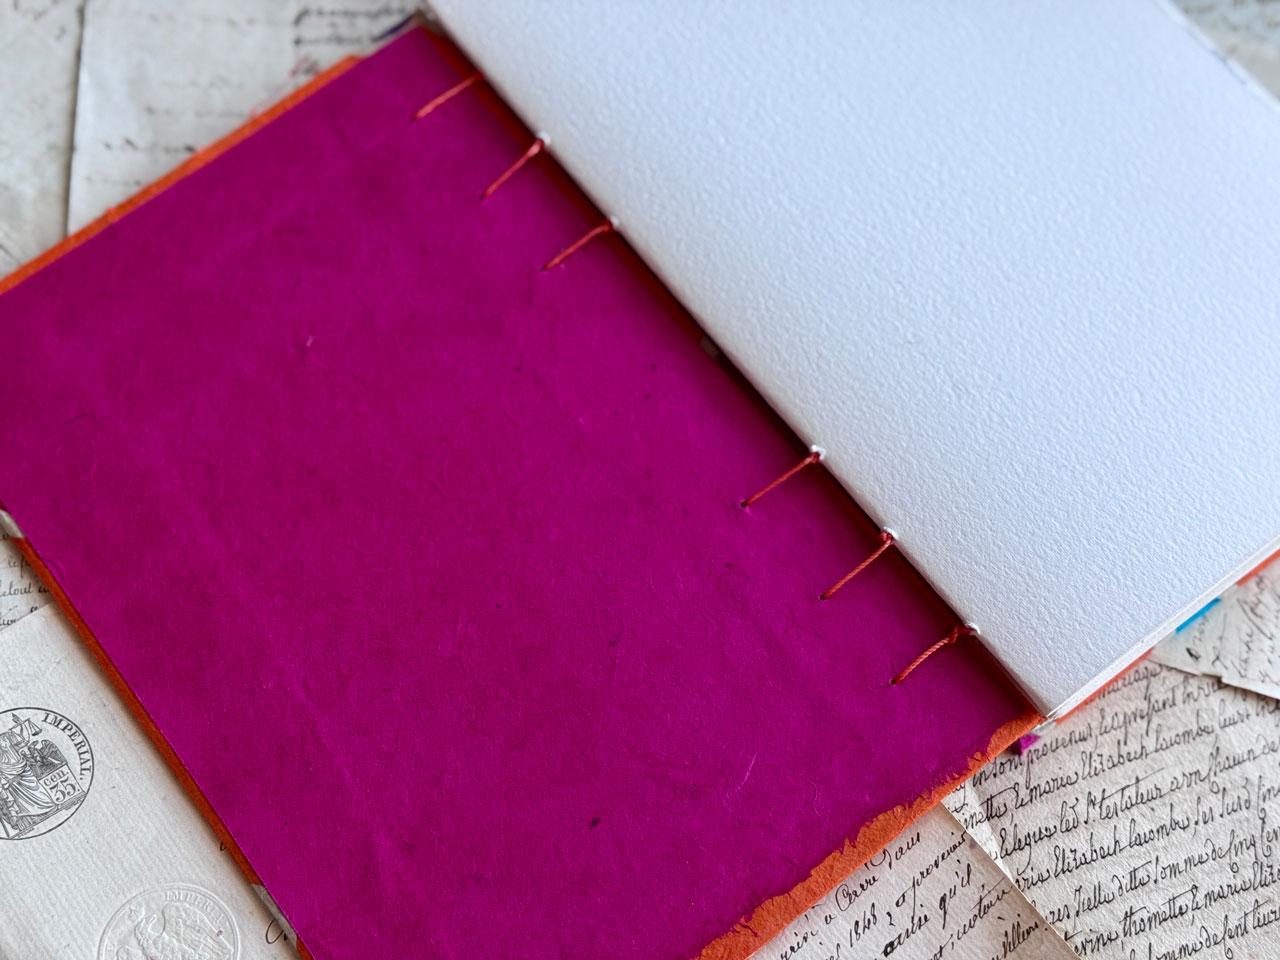
your favorite paper is to work on inside. This is one that I made with a super fun inside
there with the red, and then I made a pretty blue
one with the inside being a blue and a tan colored thread. And this one is I love this paper of a Japanese
cherry blossom. That's what that
reminds me of anyway. And then pretty paper
there on the inside. And these are all made with my favorite watercolor paper because I like
working in books now. For doing my work because
then I don't have to store the pieces
of art in a closet. Here's another one that
I've made with the fun inside and the watercolor paper
because now I've decided, why store things in the
closet when I can put them in a book and the book
itself is a piece of art, and then all the finished pieces in the book are pieces of art that has become my
favorite way to create. Now they're stored in a lovely bound
journal that I can take down and share
and take with me. I don't have my art
sitting in a closet. So I have made these
with the intention of using one pack of your
very favorite paper. That's where I
want you to start. One pack of your
very favorite paper. So I'm using in class the Hnomle cold press
watercolor paper. I picked nine by 12 because
that was a good size. That is what this size is. It's a nice size to paint on. It's not too big
and overwhelming. But I can accomplish
quite a bit in here. I'm also going to make a few of these even larger for myself, but I did start off with the nine by 12 and one book
requires one pad of paper. What I really love
about this and here's one that I have cut up and ready to go is our front cover
that we're going to be doing is the back cover
of our pad of paper. That back cover is a
super thick piece of cardboard that is perfect for your bookboard for the
front and the back. And so you just cut that
in half and now you have the perfect size bookboard for the paper that you've
pulled out of that pad. This pad has 12 pieces
of paper in it, which is perfect
for four sections. Each section has three
pieces of paper. It's nice and thick paper, so the sections, I wouldn't want them to be really
any thicker than that. So it's absolutely a perfect
size to then bind together. That is my goal for you, pick your very favorite paper, and one pad of paper
will make one book, and then you don't have to
feel so bad about using a better quality paper because you've made an entire
book out of one pad. This pad, I've been
getting these off Amazon for around $18, maybe just a tad less. I thought that was
super reasonable. So all the components there for less than $18 plus whatever you finish your top
with and your book tools. I mean, for, you know, as cheap as $20, you could have an
amazing book to work in. I love that. So your
favorite paper, I'm using the Honamule. You'll need a ruler. I like a big metal ruler for
measuring and cutting with. So that's what I'm using. And a utility knife. I like these with
the breakable blades because as soon as
that one gets dull, I don't have to take
the whole blade apart. I can snap off the one section, but I do use these to measure out the back part
and then cut the back part. The book plate, this
piece right here. That's what I used to
cut that in half with. So you do want a cutting
board on your table. If you don't want to use a pad of paper because you've
already got paper, you can get bookboard for
your front and back covers. What I like about the back
of these watercolor pads is they're thicker
than the bookboard that you can get as sheets. A nice thick cardboard
will be fine, or you can order
the bookboard which is flat sheets that
look just like this. Then you'll need
some book tools. I like the waxed thread
that's made for book binding. I have that in several
different colors and sizes and I really like
the colored threads. I am purposely looking to make my books a little more funky and fun and so the colored
threads do that for me, but this was a good
one for that one where I needed basically a gold. In that blue book. A book binding thread
that is waxed thread. You can wax your own thread. If you're more comfortable
with book binding, you can use embroidery thread, if you want to get that
and wax it because you have a special purpose
for it or something. But in general, I like the book binding waxed
thread the best. You'll also need some
big embroidery needles. I'm using a straight
needle in class, but you can certainly try the curved needles
that they have for um working with
the embroidery and stuff so that you can loop
through the different things. I find that I'm clumsy. My hands don't do what I want
them to do all the time. So even though I have these, I have just figured out that that's not my favorite
needle to use, and so give it a
try if you want, but I will not be using the
rounded needles in class. It is certainly
an option though. You'll need a bone folder, you'll need an all because
this is what we poke our holes in for our
signatures, our sewing things. I will be using an hu glue stick for the paper to
glue onto my cover. I have found that
that works fantastic for the handmade
papers that I'm using. You can use PVA glue, you can use tacky glue, you can use any glue stick
that you've already got. You could use probably
a thick matte medium. If you've got the thick stuff, I wouldn't use the thin stuff. That's not going to hold
your paper very well. You could use yes paste. Lots of options
there on your glue, I'm going to go the easy
way with a glue stick. I have a pencil,
pair of scissors, and then in addition to your favorite paper
for the inside, for one of the books, we'll be using some
vintage paper. So one book is all
watercolor paper. One book has other
options in it. And so any kind of
vintage papers, scrapbook papers,
handmade papers, any kind of options there. And I have already kind of thought out my book
that I'm going to make. And you'll see that here that
I've got four old papers, old ledger papers that I've just collected through the years
with my photography props. And I had multiples
of some of these, which I have never been
brave enough to use in anything other than a photo
shoot that I thought, This is the project that I'm not afraid to use
some of these with. And I had duplicates
of all of these. You could also just scan
them in and make a copy of your old papers
if you don't want to use the actual old paper. I thought I'm making a class, and I'm not afraid
to use these now, and I have multiples of these, some of these are 200-year-old
vintage French papers, but I had several,
and I'm willing to make a book with
them now that I'm going to be extremely
proud of because I love these art journals
that I've been making more than most things
that I've ever made. I love them. I've used these
papers to show on the spine, so it's not just plain paper. Then other papers tucked in
here, different options. So scrapbook papers, some old
bags, some handmade papers, just to give myself some
options because some of the very favorite parts of all the other
art journals that I've made and been
working in has been the decorative papers that
are in the book that kind of separate different pages and they're interesting
themselves. I love that aspect of these other books
that I've created. So I want some of those interesting things
in some of these books, and this one is going
to be the one that I include some of those
lovely options in. And we'll talk more
about that when we get to this book project, but I want you to
just start thinking, m how to level up from just the plain paper in subsequent books that you might get
interested in making. Collect together any old
papers, scrapbook papers, any papers that you want to scan and print and
use that instead. That's your choice. I've also personally using
handmade papers. I get all of these at the **** Blick and
you can get them at blick.com if you don't have
a Blick store near you. But I've pulled some papers. These are the ones
that I've used in that one that I just
showed you that's coming. But these are some papers
I haven't used yet, and I'm like, oh, I
want to use these. And so I'm going to
go super funky on one book and do a cover
and an inside maybe. And then on the second book, maybe this would be
the vintage paper one. Because I can see
all the vinag papers coming out next to these. I don't know what
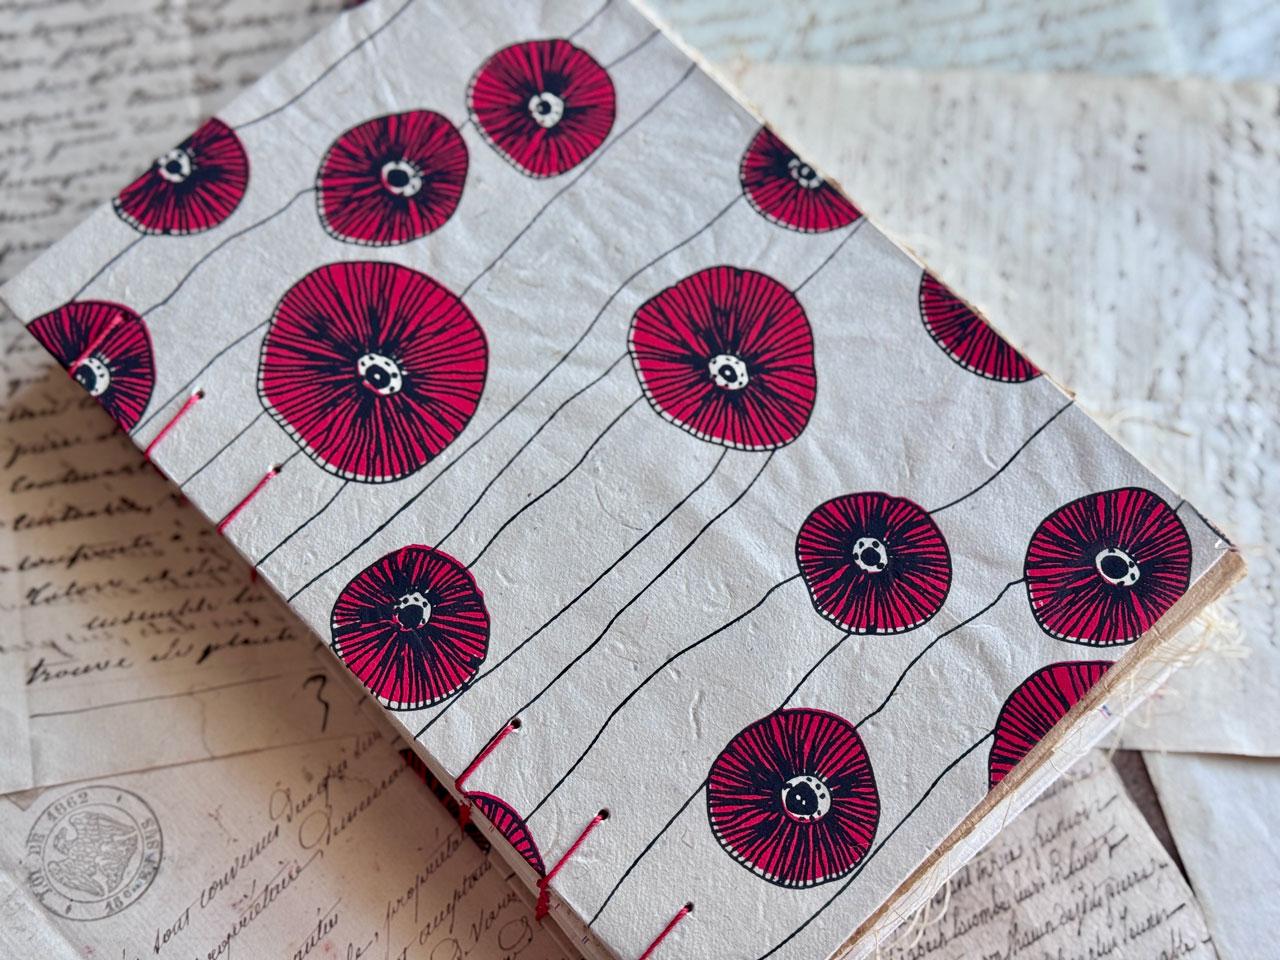
they are, but they look like maybe
poppies or something. So we'll call them Poppies the poppy paper.
Then the other one. But maybe this could be
the vinagePaper one. Look at this. We're going to be
doing that orange and that pink, and it's crazy, so we'll decide as we
go along in class, what papers I'm going
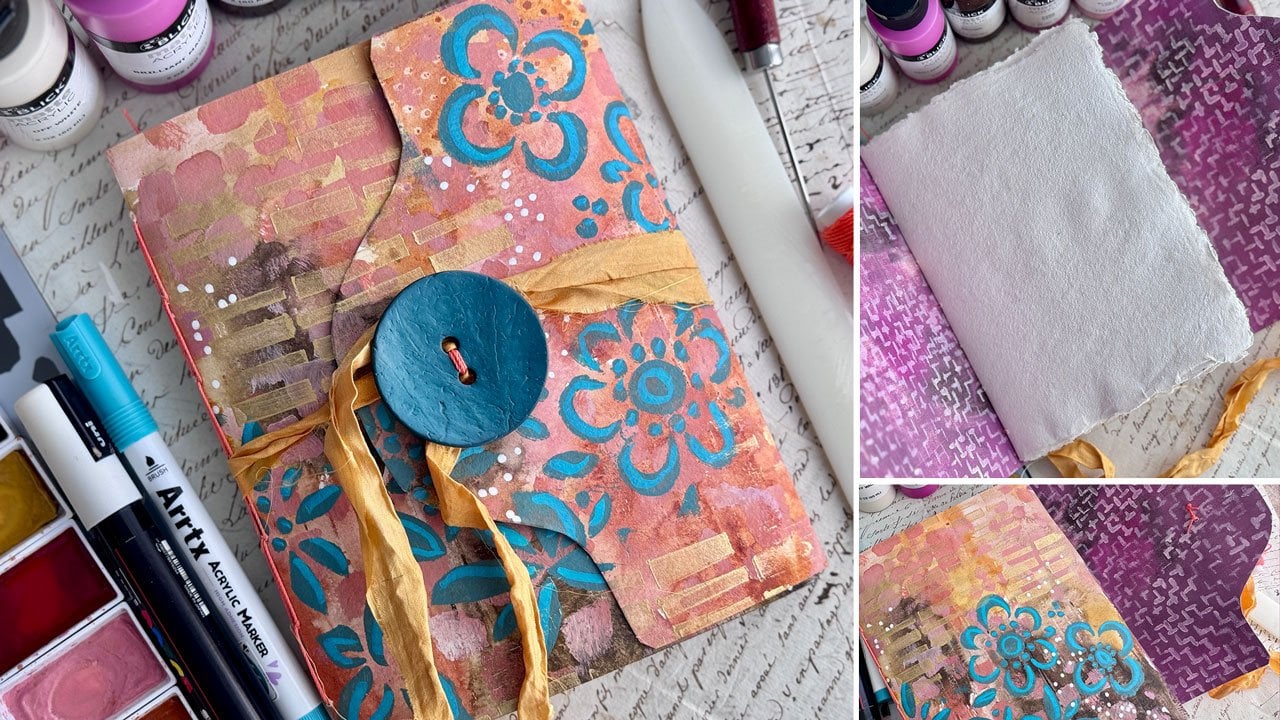
to use on my covers. So that's one option. You can use handmade
papers from the art store. You can get these online. If you don't have an
art store near you, you can also paint
your own papers, and you could use
craft paper would be a fine base to paint
your own papers. Then use those as your covers. You could use a piece of
your artwork as the covers. You can get creative here on
how you finish your book. I'm going to make handmade
papers as my covers. That's the basics of
all the supplies. This is probably the
least amount of supplies for book binding
that I have used. Because we're not
getting into sewing and fabric and spines and
all the other stuff. This is one of the
very first methods of bookmaking that appeared
hundreds of years ago. The Egyptians started
binding books like this and I just
find that the beauty and simplicity and the artistic look that you can create in
that simplicity, super fun. I can't wait to get
started with you guys. Here's most of the supplies, gather at least a
pad of paper and your bookmaking pieces and then I will see
you back in class.
4. Cutting Cover and Punching Holes: Alright, so let's get started. So I'm using one pad of
paper for my first book, and I'm using the Honamule paper because it's my favorite
watercolor paper. And what I like about using
one pad of paper is it's an inexpensive way to get an entire book made with
just one pad of paper, which I think is
kind of amazing. And this paper is very thick. The only thing I
don't like about the Honamula one is when you pull these out of the pad, you got the glue
stuck to the edge, which normally wouldn't be a
problem except it's black. So I will have to pick
the glue off the edge, but it is still my
favorite paper. I have large sheets of
paper that I could use if I wanted to cut those into a
size to make a book out of. I wanted to keep this
simple and we will go with one pit of paper to make one book as our first
book that we make so that you can get your feet wet and see that this doesn't
have to be expensive, even if you use nicer paper and I'll work on
those edges later. First one I tore out of here, this whole glue thing stayed. And I'm like, Oh, that was nice. And then these are just tearing
with each sheet of paper. So tear all your pieces out, and now you get lucky
and have white glue. Clear glue has the edge. But I've got 12 pieces, and then I will later work on getting the
glue off of the one. I don't want the
glue on the edge. All right, so once you got
all your paper torn out, this one comes with extra sheets on the front
and the back, we end up with the back
piece and the paper piece. And basically, all I'm going
to do is tear the cover off, and I'm ready to do my back. Paper. So basically,
you want to measure this in half and then
we're going to cut. There's the glue, but you want to measure it in
half and cut it. What I'm going to do is because I've already done
that with this, I'm just going to make it
easier on myself and just go ahead with a pencil and
draw the halfway mark. So we'll pretend I just measured that with a ruler and
marked it with a ruler. Then I'm going to take
my big ruler and I'm going to line that line up. Then usually standing up. I'm going to try to stand up
without knocking stuff over. I get it right on the
line and then with my knife because you
can't just cut this once. The goal here is to
come on and line up. There we go. The goal here is to just score it many times
until you feel it cut. Once you've got it lined up, just go ahead and several
times, take your time here. And cut that until you get
to the very bottom of it. So just be careful. I like this ruler that I'm using now because it's got this
real thick side here, so I feel less like I'm going to cut this way accidentally. There we go. So just a
little bit of strength there and you'll eventually
get all the way through it. I've got several
little scragglies there that I'll just tack
off. And there we go. Now we are ready with our bookboard and we are ready to here's our
front and our back. Doesn't have to be perfect. If you've got any little
scraggly pieces like that, I just pull them off from
where we squirted a lot. Then if you got any
glue stuck on there, go ahead and pull that off. Then our paper on our paper, we're going to now make
our sections real quick. So we've got one, two, three sheets of paper. And here's where you
want your bone folder. So I go ahead and
fold these in half. With all three pieces stacked together because then
they'll all kind of get back into the fold instead of if you fold each
one individually, they stack out and they don't
lay as good in that corner. Then once you do that,
you want to take your bone folder and just
really press that down good. That's what that's
going to look like. And if the papers
are even or not, I don't even I don't even care. I like the uneven nature
of a handmade book. I really love it when you have a paper where the
edges are decled. And so what I do there is if I'm using
a big sheet of paper, I keep those hand torn
edges. I really love that. But because I'm using my
Honamule, pad of paper. We're not going to have
the decled edges today, but I'm just throwing out some more ideas for you
to think about. As you're bookmaking and
looking around and thinking, Oh, what could I do to
make it even better? Decled edges, hand torn edges. So a larger sheet of
paper all torn down into the right size
would be gorgeous. And I have some bigger sheets
that I'm going to do that with for a book, but I
haven't done it yet. Lots of times I collect
supplies with good ideas. And sometimes it
takes a while for me to get the good idea done. Now what I do is I'm going to punch our
holes for our paper, and I got to measure that off. So I'm going to go ahead and mark our holes and
punch our paper. This paper is approximately 9 " this way because I used a
nine by 12 sheet of paper, so it's six this way
and nine this way. Then what I do is I
go ahead and take my pencil and I will just
mark where I want the holes. You'll notice on the books that I've already made previously that I've made three
holes here and three holes here and I've
left a little bit of a gap. That's a decorative option
that I decided to do. For my books, you could do
more than what I've done. I've done three at 1 " apart, 1 " from the end,
and then 1 " apart. You could also do one
here in the middle. You could do fewer if you have a book where
you don't need as many. I do think because these feel a little bit less strong
per se, they move around, they don't feel as sturdy
as a book with a spine, that I feel that
you want to have enough to keep it all together and usable as you're using the book and to
stand up the test of time. I think at least on this
size that the six was good. I'm going to go ahead and
continue with this 1 " over and then you'll notice that this has
about an inch in. That was one option that I
did on the books that I made, but also on these other ones, I did a little bit
less than an inch. If you want less
of an inch there, you could do about a half inch. That was another
fun look on there. Choices. Once you see
how we make these, I think I'll do similar to that. You could make yourself
a cutting guide, but I've never out of a
piece of watercolor paper, you could make a punch guide, but I have just marked these with a pencil and then you can erase
the pencil later. But I've just come in and did
my marking just like that. Then I can take my ruler and make sure these
are straight and where I want them lined up
because this is going to be my order that I'm doing. I'm going to put a number on
the edge of each piece here. That'll keep them in order of how I punched them and
drew them and that will also keep me from flipping them backwards because as I'm
moving all around creating, I just loses the front? What? What's the order? How did I get these
lined up to begin with? I lose all that as I'm going. I number the front to keep
them all in the order I intended them to be in and then get them nice and lined up. Then I just take
a pencil and very lightly make that mark all
the way up on the papers. I've got one extra line here. If you get one marked wrong, that's what a
pencil is good for. You could just take an eraser and just erase the
line you didn't want. And now we're ready to punch
the holes on these pieces. To punch the hole, I do have some whole book binding
hole punch things, but I want to keep
this one simple. I just fold it backwards, which gives me the outside
point there to our book. Then I'm just going to
take the all and go in at the angle in between here. I'm going in at a
slight angle and I'm doing that because when I pull this out on
the other side, I want that to be on that angle. I don't want it
to be to the side of that if I can avoid it. I will say though, not
all of them are perfect. I just don't get upset. If they're not perfect, I just go with it, I
just roll with it, but you see I'm
already flipping it around and it's already backwards from
where I started and that's why I marked
the little one, two, three there on our pages. Once you get all those punched, that's what that looks
like, and then we can fold it back to
where we had it. And then I've got the
number one right here, and then I can take
my bone folder and flatten that back so that
it's nice and ready to sew. I'm going to punch all four of the other ones in
the exact same way. Fold it backwards, go in at the slight angle to make sure you're coming
out at the angle. It gets easier once you punch
one or two of these and you see where that is,
it gets easier. Just consider the first
book as your practice book, and then all the other
books after that will be where you've mastered
it and you're ready to go. Because my very first one, the first two that I did, both have a bobo on them.
Don't get discouraged. One of them, let's see, what that one is correct.
This one's correct. No, this one, I did not tie
off an extra loop right here, so you have they look a little bit looser.
Maybe it's that one. This one, I missed a stitch on one of these, I
missed a stitch. It's not obvious and
it's not a big deal, but I missed a stitch
on one of them. Oh, here we go. I missed
this stitch right here. Because this is one of the
earlier ones that I made. I missed a stitch and then
there was a couple where I didn't tie that loop
on that last one, so it looks a lot looser. It takes one or two books
before you're like, ha, I got it. Then you're tying each one
where you should tie it. You're not missing a stitch and they're all looking
like they should. Don't get hung up
on the first one. The first one is not going to be perfect, and that's fine. We all got to learn
on something. Once we get our holes punched, then we're ready to
mark them on our cover. Here we go. There's that
one. There's number two. Number three and number one. Now all of those are ready. Now I want to mark them on
my book page, my book here. What you might do with
this is you could draw a line where you
want these to go. For instance, I could to keep them even or you
could make yourself a little punch hole
cheat thing like a piece of cardboard with a little piece
punched out of it. I but what I think I'm
going to do is just say I wanted a right there and then I'm just going to
draw myself a line. Then I could actually
take these and mark those holes with my pencil, then I don't have to
remeasure everything. Then if this is the front
and this is the back, I could flip it to make sure. I wrote front and back on that. I could flip it to make sure that we're mirroring it basically is what I'm
trying to think there. It should be the same,
but you never know. You could just go
ahead and do that. Because now I got the
front and the back. Basically, the back
is going to look like this because of
where I stuck it. But don't get too
hung up on that. Then what you're going to do
is right where those match. Go ahead and poke your
hole. Be careful. This is sharp and you're just going to come out the back side. And then just punch all
of them in the same way. So I get started on the paper, and then I pick it
up because I've got this cutting mat on my table, so I'm not worried
about the table. But I'm worried about
if I was holding it up, stabbing myself. It's because these are
sharp and I'm clumsy. All right, so now we've got
our holes punched there. And again, if it's not perfect, then don't get too stressed
about it. It's an art book. A little bit of
creativity is fine. It will be close enough for
the book that you're making. And as you make more books, you can perfect your techniques. You can see how other
people do things. There's a couple of different
ways to do everything. I'm just showing you the way
that ends up Al working for me and the way that making the books and I've made
a bunch of books now and I want to enjoy the process and not worry too much
about how we got there. I want to have fun. Okay, so once you've got all
your pieces cut, that's basically
where we are at. Back, front, and
all the pieces cut, and then we will be ready to
start assembling this book. I'll see you in the next video.
5. Assembling Watercolor Paper Book: Right, in this video,
I'm going to make the cover here on
the watercolor book. So what I'm going to do is use the handmade paper that I've got here and I'm going to
cut my covers out. And on these, it does
have a front and a back, and usually the
sticker is the back. So what I want to do is just
take a pair of scissors. I'm going to just
cut these and give myself about an inch overhang because we're going
to loop this in. And then I'll have the paper
for the front and the back. Now, if there's a pattern on here, that placement matters, then decide that before
you start cutting, and then you can
cut appropriately. And these will be these will
be hidden on the inside. So it doesn't matter if
it's perfectly straight, that will be hiding once we get our pretty paper for the inside. So now that I've got
two pieces of that cut, I want to cut the inside, and I'm going to use the inside, let this be this
bright paper here. And basically, what
I want on these, so I'm just going to
use my exacto knife because I want to kind
of line it up and then I'm going to
move it just a little bit where I've got
about a quarter of an inch right here and a
quarter of an inch over here. See if I can move this
where you can see this. But I want this overlapping where
there's about a quarter of an inch short and about a quarter of an inch short because that will then allow us to have this inside page. Now we've got that slightly
short with about an eighth of an inch all around and you can play with that. I'm
just eyeballing it. It's not exact, and that's what we're looking for
for our inside cover. That's the size I want that and I might just line
that up right there. I'll cut the second piece. Again, it doesn't
have to be exact. I'm just going for
an approximation of, like, a quarter inch or so. You can always
trim it again with your scissors if you think, Oh, I made that too
big or what have you. Now we've got a second sheet. There we go,
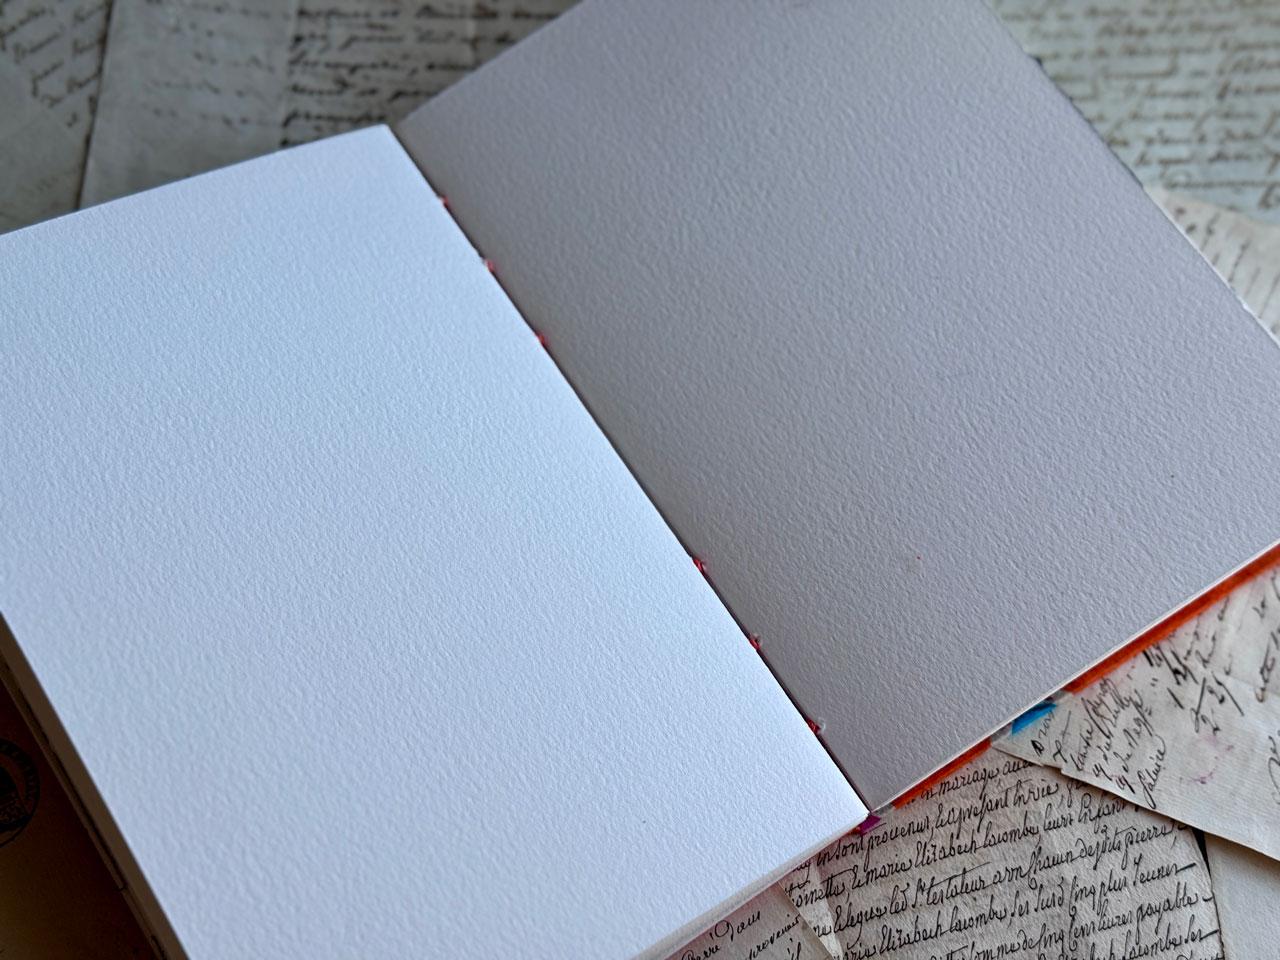
approximately the inside. Now we are done with that paper. And now we have our pages. Now we have our
book cover ready. So so this would have been the inside and that would
be the outside because I cut it with the face down. I've made my book marks, but I didn't do it
with the paper. Now that I've done
that, I'm going to glue the paper
down and I'm going to go ahead and punch the
paper through this part. Usually, I punch these after I've already
glued this together, but I didn't on this
one, so that's okay. I'm going to glue the
whole thing down. Then I'll just punch through this book binding to the paper since I
decided to not do that. There's something funky
that I do on every piece, and if I start filming, then I completely forget where
I was going to go. Once we've got all this covered, I got the edges, just not
some big doll up of glue. Don't leave a big doll up. It makes a lump under your
paper I have discovered. Once you've got all that,
then you can just center that and stick it down and just wait a moment
and then that'll be set. And then I'm going to take punch your holes after
you glue your paper on, but at least you
know how to do that. And while the paper
is glued right here, I'm going to cut a Y
out of each corner, and I want to leave a
little tiny extra space there at the corner. I don't want to cut to
the corner because I want to wrap the corner
and not leave it raw. Leave about a
millimeter or so of space to it but not all the way. I want a little bit
of paper at the edge. Not too much because
then you end up with a paper fold that's weird and I cut it
in a y so that I make sure I'm not shorting
myself when I do this here. Then after you get
that on there, we are going to go
ahead and glue that. So you can glue the spot. You can glue it on the board or you can glue it on the paper. If you glue it on the paper, then I recommend you have something that can
be a glue catcher, like a piece of paper, and then you can glue the
whole thing there. I work from side to side, edge to edge so that
I'm not pulling any of the paper in a
way that might shift it, if you're using a fabric or
something, it could do that. I can feel the holes, so I'm just going to recreate
them since I can feel them. Because the bookboard makes a little mountain
when you do that. So it's easy to feel it. If you do accidentally do it all before
you make the cover, this is how easy
that is to fix that. There we go. Now I got all six
holes punched in. Otherwise, wait till you get all this glued together
and then punch the holes, but that was easy enough to fix. Sometimes it's fun to
make mistakes on camera. Because then I can show
you how to fix it. And when I'm talking, this
is like when I'm driving. When I'm driving, I
was taking a trip with a friend of mine years
ago and she was like, we should take a detour.
I'm like, I'm driving. We probably will. We're just chatting away and
we're having some fun. And we're driving down this
is before GPS has existed. I'm just making sure I definitely have a
mountain on this side. This is before GPS has existed. And so we had road maps in
the trunk and we're driving and we're having fun and
we're talking and she's like, should take a detour
and I'm like, Yeah, I'm driving, we probably
will accidentally. Not even on purpose. And so we're driving
and we were in, um we were in Alabama or something
going towards the ocean. And then it was when we
were heading back home. And we were like, Where
are we at some point? Because we had been just chatting, chatting,
chatting chatting. And then we came across this gas station that had a sign that said, Sasquatch Zoo. I'm like, I don't
know, but it was worth it to come to
see the Sasquatch Zoo. And so we're laughing and laughing and we get out the map, and we realize that we
missed a turn 50 miles back. I'm like, here's your detour. So, oh, my gosh. If I'm talking at the
same time that I'm doing, we might get to a
different destination, even in art, even when I've
made something 50 times. As I'm talking and
explaining something, we may get to a
different destination. But then you know how to fix
it when you do that thing. So it's just not
something I worry about. We'll get there. Not only do I wish that glue on this
pad of paper was not black, but I also wish that this
board itself was not black. I wish the board was
concrete colored, cardboard colored, like
the front side of it, because the black,
depending on what you choose to cover it
with, could show. It would be nice if it
were not the dark color. But I'm sure there's
plenty of other people that are like, I like it black. Then nice tight like you're wrapping a
present. There we go. Let me find my little holes here and we'll just punch
those back through. There we go. Quite a bit easier even than I expected to refind them after I
realized what I did. Look at that. There we go. Now we got our holes for our stitches. Not
going to get us. Now we're going to
glue this part on, and it doesn't matter if I've got to punch through
with a needle because it's thin paper and
it'll punch really easily. Definitely have more
than one glue stick available if you're making more than one book because
it'll definitely do, one glue stick, and then
it'll go into a second, maybe even a third book. But at some point,
it'll definitely run out right in the middle of you gluing something
like that just did. Make sure you have some extras. I just go all the way around and I'm going
almost to the edge, the glue will dry clear, so I don't even worry if I
get a little on the edge. Because it'll dry clear. And then there's our inside. Look how pretty that is. Lovely. All right.
Let's do the other one. And like I said, you
can use a variety of glues that you may have on hand if you don't want
to do a glue stick. I just found this on these
papers to be super easy. To use the glue stick.
Then it dries clear. Once that's dry,
those will be set. There's our cover,
which I think is really cool. I'll
just move this. Now that we've got our cover
and our holes punched, we are ready to start
sewing this together. Let me get my needle and
decide on my thread color. Now that we've got our book
ready to sew together, I'm going to go with
an orange thread. And I'm going to thread the needle and I'm
going to sew this with a single thread because
it's thick paper. This is really thick thread. If you're using a
thinner thread, then definitely
double thread that. But this is really
thick paper and really thick thread, two, three, four, five, six,
seven, and a smidge. So what I do is I count
out how many I've got, one, two, three,
four, five, six, and then I count out
those many links, and then I add an
extra length or two, an extra length, length
and a half or two links. Then I'm going to be sewing with it mostly doubled,
but in the end, I'm keeping a single thread as what I'm actually
keeping in the sewing. I tie a knot here in
the end of the thread, and then I tie that
knot a second time, so it's a double knot, and then I'm ready to start
and I've got the number one, I've got a cover, and I've got number one,
two, three, four, actually going to start
with section number four, and I'm going to
thread that into that first hole sometimes you got to get it lined back up as many times
as we've moved it. I'm just getting
it lined back up. Through the first hole and then it's going to be a
long piece of thread. I'm going to basically have it doubled up until
I get to the end. But let me just pull
that through so that on the inside you can see that's
holding that in there. Then we've got this coming
through on the outside. I want to have as
much thread as I can doubled so it's a
little not as long, but I got some at the
end that's single. I'm going to keep it
single. We're sewing the cover and the book
at the same time. Once this comes through, I'm coming through to
this side of the book, and I'll go right into that first hole and
we'll bring that right through to this part right here and pull that
all the way through. So that it comes to
about right there. Then I want this to be on the right side of that
thread because I'm going to loop this around
and create a loop. You're going to loop
that around and we're going to create our
first little loop there. That'll make sense as we're
going when I say loops because we're creating
loops on the whole thing. I'm going to pull that taut because it didn't have
it. It was pretty loose. Then I'm going to
go right back in to that first hole and then we're ready to go
to the second hole. I've got the knot there. So we got to get in around the knot. There we go and pull
that nice and taut, you don't want to pull it so
tight that everything ends up not wanting to open and close and do what
it's supposed to do. So you just have to judge that, but you don't
want it loose. The goal is not
to have it loose. So through the second hole
and that's easier to pull it firm when you've got that second hole going,
gets easier as you go. Then we're going to go right
through the back of that. And then there we go. Pull that all the way through. Sometimes the threads make
a knot of themselves. So let's unknot
that. There we go. Then right through to the front, and I've come through on the right side of that piece
of thread, pull it taunt, and I'm going to loop under that thread just
making a loop there so that it'll tighten itself there. Loop right under that loop. And then you can pull it firm. So you can see now I've got two, and then we go right back in that hole and right
up to the third hole. Now we're ready
for the third one. We're going to do
that all the way down until we get to the end. And then write around to
the back of the book. And then pull that through to the right side of that piece. Pull it firm. You can now loop through that one
and back in the hole. Then we're ready to go
through the next hole. Loop around to the back of
the book, through that hole. And then loop it in to the front side of that and to the right
side of that thread. And I'm just pulling
it taut as I go. Pull it too tight, your book
won't line up correctly, but if it's too loose, then it feels weird. So I'm just trying
to keep up as I go, not having any
super loose areas, but it's hard when you're
moving the book all around to keep everything tight. But the wax thread
does help with that. It's just awkward
as you're sewing. So don't get discouraged
if you're like, Oh, it's not tightening up or
it's too loose or it's not doing what I thought
or what have you. It's just a little bit awkward. So through the
backside, there we go. Again, loop it back through the front there to
the right side of that thread and then loop it under the thread
and pull it tight. Then back inside, and we're
up to the very last one here. Now we have the back cover and the fourth signature
sewn in the book. What we want to do
to the back again, hang on I got my fingers
clumsy to the back. Coming right through the cover, go back to the right
side of that thread. Catching on all the edges. Then we are going to loop this through again so that we've
still created our last loop, get it all lined up
where you want it. Now we are ready to start
sewing signature number three. We've got four, three, two, one. I'm going to take that straight
from where we just left off and go into that first
hole of that next signature, and then we are going to now sew this signature to
the one that's there. Now you come right
through that next hole. Pull it tight, and then
we are going to take our needle and this is where the half looped needle
might be easier for you. But I find if I
hold it like that, I can loop it through that
thread without a big deal. I'm just going to loop that
right through that set of thread and then
we've made our loop. We're going to go right
back into this hole. Pull it firm, and now we have a loop and we have this
one connected to this one, and we're going
to go all the way down and do the same thing. So right in here. And then I
just kind of hold the book. Loop it right through
that thread right there. Now back in that hole. This is basically
the same stitch that we use when we make
the books with the covers. It's just the stitch on the front and the
back where we're attaching the book cover
itself, that's different. If you've already made
some of the other books or you're interested in
some of the other books, we're using the
same binding method here on these signatures. Now, if you have the needle, try to go through that piece
of thread that's in there, pull it back out, don't let it go through
the center of that. You'll get stuff and it
won't pull tight for you. But this is exactly how we sewed all the other ones together
for the center part. The only difference is the
cover stitch that we did. There we go right back in there, right back through the last one. Then what we're going to do here is we're going to loop it right through that one
just like we did. And we're going to now
attach number two. We're going to take that thread. Instead of going back
into the one we were in, we're now going to
go into the new one, and this is how we get
the new one started, right through there
to the inside. We're going to work our
way back down that way doing that same technique. We're going to come
right through here. Now we're going to attach. We're going to loop through the second loop that we just made, not the first one, you should
have that original loop, and then you should have
the second loop and we're going through the second
loop that we just made. We're moving down each time and not going back
to that first one. We're going into the
second one and the next time we'll go back in to this loop that we're
creating right now. Right there, and again, find the second loop, not the first loop,
and then back in and I actually went right through the
center of that one. So you don't have to
pull everything out, but what you do need to
do at this point is pull that thread out of
that other thread. So to do that, I'm glad I'm glad that
some of these pop up. Just so I can show
you how to fix it, unthread your needle and then pull the thread
out so that it's not still locked into
that thread so you can pull and then thread
your needle again. That's what you do if you get that stuck in the
center of a thread. You don't want to leave it there and you don't necessarily
want to try to unsew it because you might not get the needle back
through the other way. I just doesn't work out
as evenly sometimes. So we got our needle
threaded again and we got our thread separated where we
sewed in there. All right. Back down to the fourth one. And then We're going to
sew this right here. And then back inside
after we loop it. Then we'll loop the second one. But on this one, we're not
going back on this one, we're not going back in to
that loop on the last one. Now we're ready to
attach this one. Some methods show you how to attach this one and the
cover at the same time. I find that confusing, especially if you're
just learning the different book techniques. I'm going to attach
the cover separately. We're going to go
through and attach this layer just like we
did all the other ones. Go in, sew it through your loop you know,
pull it tight. Loop into the third one now, not the first two that we did. Now, if you find
it really hard to push this through and not
get snagged on the paper, what you could do is go
right through the center of those two sections
that we're trying to get and you'll see we've got
the needle come right here, and then you can just push
the needle back through. That is how you can get those if you're having a hard time getting
your needle in there, just stick it
through the center, open that section and pull
it through like I just did. Then that caught there we go. And you're looking to have
a tight even stitches here, but you don't want
them so tight that you permanently pull the book where it wants to pull open. So you do want there to be
a little tiny bit of give. As you're sewing,
it doesn't have to be so tight that then
your book doesn't close. And so, you know, once you sew one or two books, you'll kind of get
a feel for Oh, that was too tight
or what have you. Trying to grab in the center here because
I'm going to go right here and pull that through
from that right there. But yeah, if they're too tight, your book won't close. The goal isn't to make
them super tight. It's to make them firm and
hold the book together, and I just sewed through
that thread again. But the goal is to not make it so tight that your
book won't close, and that's just going
to be a little bit of experience after sewing
one and you figuring out, Oh, that was too
loose or oh that was too tight or oh, I
did that just right. I just going to
take some practice to kind of get that feel. 'cause I know people are thinking, Well,
what is too tight? Well, sometimes you're
just gonna have to sew one and be like, Okay, I got it. And then too, you
might be thinking, does it matter if
I go in my loops this way or if I go
in my loops that way? No, you're just making a loop. Not a big deal if
you are going from the right or to the left
in making that loop. Alright, so we're
to the last one where we want to make our cover. So I'm going to sew that
loop through there. And now I've got my cover. And just like on the back side, we came to the outside of
the cover and got that loop. So I'm gonna go to the
outside of the cover here. And then I'm going
to come back in on the side that is
not the open end, just to give myself a
little loop de loop here. Then that gives me a nice
tight loop here at the end, and then I go back into that hole that we came out
of in that fourth signature. I'm going to go
right back in here and you're going to have
a double line here, which is why I like
a single thread of the thicker wax thread so that double line isn't super
obvious and looking weird. I come right back out that hole. I go right back into
the book cover. Then I'm going to bring this
over to the right side of that piece of thread and
loop it underneath it. So just go ahead
and make your loop. Pull it tight or tighter. I can see now I've got this
loose here right here. If you've got one that's loose and it didn't pull
tight for you, you can go back and pull
that one a little tighter. So as you're moving
down the line, you're pulling those where they're more even.
Pull it as you go. Don't wait until you get
to the end to say, Oh, I didn't get that tight enough on that one because
that'll happen. Because we're doing the
little double loops around it to give
it a finished edge, it's harder the further you get. If you've got one
that's super loose, pull those a little bit
before you get to the end. We've got this one looped. Let's go back in here. Which one did I just
go in. There we go. Here we go. Come back through that third hole
and do that again. Through the top of the book. And then I'm coming
right into the side of that right there. And then we'll
just loop it right around it so we
can pull it taunt, go back into the third
hole and continue down the line. All right. Now we're to the very last one. What you're going
to do is loop it around and back into
that last hole again. You'll notice at this time, if you did your threading
of the needle like I did, you've got to the end
with very little waste. You didn't have to cut and add more yarn more thread
to your thing. I'm basically going
to loop it underneath that center and then pull
this through the loop, and that is going to make my
knot and so loop it through. And then go through that
loop and then pull it. I always double knot personally
and it's wax thread, so that'll keep that for us. That is our finish. Now we have our book. You can do this a little bit
and really get it lined up. We've got all of our stitches. We didn't miss any
thread there and we are ready to see our book
and use our book. We'll have these little
sections here that are open because we
have an open spine. Now, if you're using
thinner paper, the gap here between
your pieces will be a smaller gap because we
are using such thick paper, you can't really
make that gap any smaller because if you did, then the book wouldn't
close because that is the minimum
amount of space that that that loop needed
for your book to close there when you were
done. And there we go. Now we have our first book made. How cool is that? Oh, my goodness. I can't
wait to see yours. So I'm gonna make one
more with a bunch of extra papers
included in there. So let's go take a
look at that project.
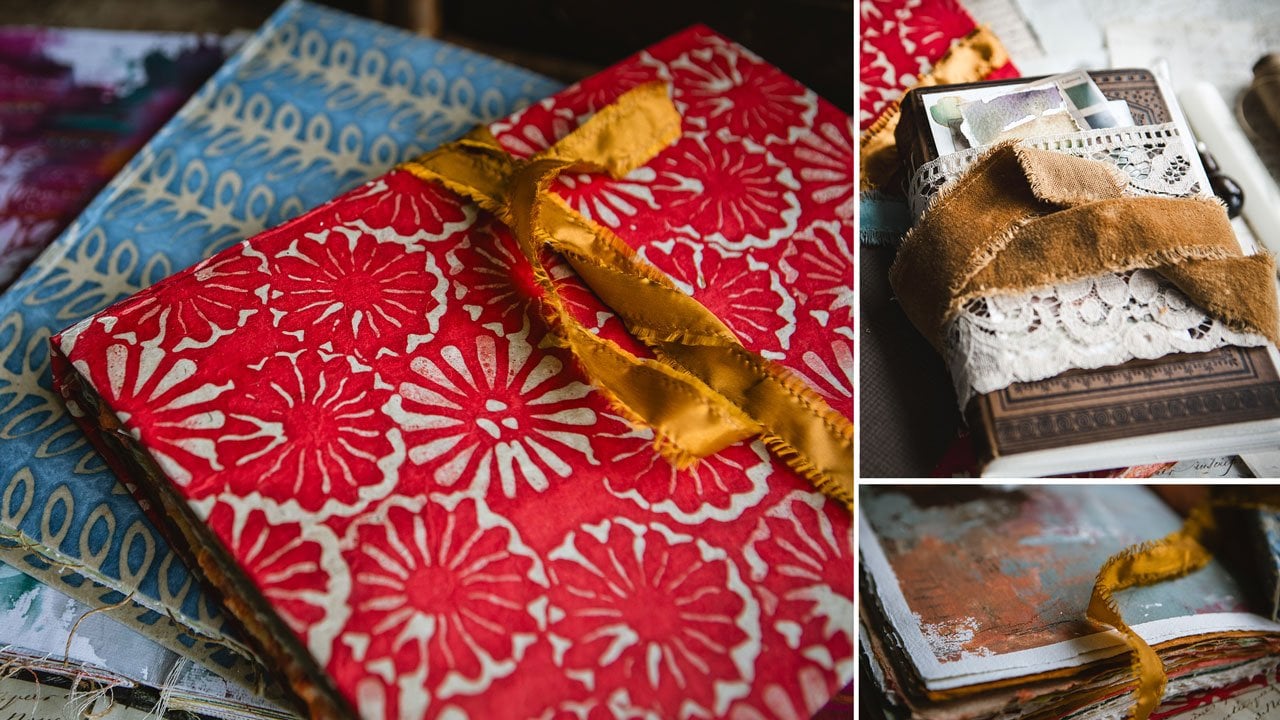
6. Bare Mixed Paper Book: All right, so I went ahead
and punched all my holes in my signatures the same
exact way that I did before. I just flipped them inside out. I measured them, I marked lines, I flipped them, and I folded them inside out,
and I punched the holes. And then I've got each
one marked one, two, three, four, so I can keep
them in the same order. The thing about these that
makes it a little more challenging is if you've got pieces in here that
are not full width, you want to make sure that
they are aligned exactly where you wanted them before
you punched your holes. You don't want to tap everything down and have everything here at the end and then flip through your page and these be
in the wrong position. That is the most
challenging part of using different papers
in different sizes. Then I made myself a punch card. I just used a piece
of watercolor paper. This one, cut off an edge and made myself some
punch holes so that I could then easily
mark where I want the holes on the book plates that I've already glued
together with the papers. And now I can just take this and go all the way through the whole thing exactly
where I want it. And to keep it from
moving around, we could take a bull clip
and just clip it in place, and now we are ready to
punch all the way through. Making a template is
a little bit easier, which I'll admit, was. Then go ahead and
just measure it out and punch holes in
the piece of paper. And now you have a
little template. And if you're making
all your books the same size and you're
making multiple books. Now you have a book thing, ready to go and
this is the front. I'm just going to flip
it over because it's the front side and it'll
actually be facing this way, whereas this will be facing the back will be
facing that way. If I flip it over, it should be, it should be the
same either way. But I read one somewhere, flip it around because
it's the other side. I just do that out of habit more than really knowing if it's
going to make any difference. If you forget to do
that, don't even worry. But it does give me
the same distance because there's two
different distances here. So it does make sure that I'm using the same distance on this. I hope. Oh, you know what
I probably read? I flipped I probably read. That's what I probably read. Here we go. Okay.
Got the last one. I might have said that wrong, but what I meant was
if that's the front, flip it this way so that you have the same
amount of space here and here because it's
two different spaces if I didn't flip
that over like that. That's what I meant. I
said that backwards. Now we've got a
front and we've got a bike, we're going to
call that the back. We're going to call this
the front and we've got our four sections
when we're all done, that's what we'll have together. We're going to
start with the bike just like we did on the other one and we're going to thread our needle and we are going
to sew our book together. And I'm kind of thinking,
what do you think about that? Oh, that's kind of no, I
don't think I like that. I said, That's kind of crazy. But in my mind, kind of thinking a red. Or we could do a brown.
Brown's kind of fun. I thought I had a red red, though. There we go. Hiding in the book
boox. Do we want red? I think I want the
red. I like red. I'm going to grab my needle and thread that
I'm going to read. I'm going to pull. I got five, one, two, three, four,
five, six elements. I'm going to pull myself about eight links
or 7.5 to eight links of this thread
so that I've got enough thread for the
whole book without splicing it together or tying
it off and starting again. H. All right. And then a double knot here
on the end to get it started. Well, that double knot
in a different spot. I don't want it in
a different spot. Let me just get it
in the same spot. That's why we have
extra length anyway. So let's be more careful
about pulling that tight. I mean, you could try to pull those out, but what
a pain. All right. And we're going to start
from the back just like we did with the other one. And now I've got so
many different pieces of paper in here that I'm just hoping that we get
it all coming back out the same way I intended. All right, so
through the inside, got her knot right there, and then we're going to sew our cover so we're going to loop it on the back, and there we go. Got this coming out the
right side of that, and then I'm just going to loop this around so that I've got the first
started with a loop. And there we go. And then back on the
inside and up coming back through the second hole until we've got the cover attached. Yeah. And then back through that loop, just kind of pull it back around so that we tie
that first one off. Then again, right
back through it until we've got the
cover attached. Man, I did a good job getting those holes in the right place. You'll pat yourself on the back the more of these you
do, and you're like, Oh, got it where I
intended. Good job. There we go. And I'm just going to push that back in right there and then loop that around from the other
side just like that. There we go. And then back in that loop. I don't want to be
on the right side. I just want to be consistent. So I always come up with the
thread on the right side. So I just looped it back under to get
it on the right side, and then loop under
that to make our loop. Alright. I got the
last one there, and now I'm just going to loop around and kind
of pull it taut. And now I'm going to start attaching the other
signatures in. And I've got that
one nice and tight, and then we'll just go
from that first end And you may have to when you got this many
papers in there, you might consider clipping the papers so that they don't
move all over the place. That might be an option to at least keep them
where you want them. If you've got multiple
kinds of paper like I do, um, you just kind of
do the best you can. It's not doesn't
have to be perfect. Don't worry about if you've got a mistake or something that's off. Just do
the best you can. And then come back through, and we're just looping these
through the loop that we had to get that attached
to that one there. And then back through the
hole, and we're gonna continue to do that
all the way down. Okay, so before when you
get to this last loop here, I just almost stuck it back in. We don't want to do
that. We want to attach the next section. Let's see if I can
keep that in place. And these might move
around, you know, as you get everything going, so you may have to
get it lined back up with your original
punch holes again. So you might just
work your way through the stack to see, like, where is that hole if you've got as many papers as I've got
to get them correctly. Back in the correct lineup here. Hang on. There we go. Now we're back in
the correct lineup, but I do have a short piece in here that I think I have moved around.
I've jostled around. So I just need to make sure I've got that one back down where the holes
are. There we go. You just to take your
time on these that have multiple different types of paper and different stacks here because they might move around on you and
you just might have to realign them if you've
been jostling them and not not keeping them
perfectly in the same spot. So once we get back to that, we're going back through
the second hole there, not the first loop,
but the second loop. We're attaching this one to
the one that we just did. And then there we go.
So I'm gonna continue all the way down on
this one doing that. So once we get to that
one, make your loop. And then we'll grab
our last section, which I feel like it's
moved a little bit. There we go. Now we've got
the fourth one attaching. And on some of
these, if you just have to force it
through and it makes a slightly different
hole, it is what it is. Don't beat yourself
up. Not a big deal. It's your art book. It will be fine. And
I could go through. I just I don't want to. I guess we're going
to. Alright, we're gonna find the
inside of this one. Pull it through one side and push it back through
to get our loop. There we go. And then in
side to go to the next one. Right in the middle of
the thread on that one. So if you pull the thread
a little bit to the side, you're less likely to go through the center of
it because, again, we want to be able to pull
those tighter as we're going. So if you'll do that
as you're going, you'll be less likely to have
a loose spot that's weird. That one went through
rather nicely. That's another thing you
can do to use your all to kind of keep it from going
underneath the next thread. If you don't want
to keep opening and closing the book, trying
to find the middle. Always looking for, like,
how can I make it a tiny bit easier
on myself without as much opening and
closing and doing all the extra dts always
back and forth and what? Last one. Ha ha. Alright, now we are ready to attach that
go through that loop, and we are ready to
attach the cover. So we're going to again,
just like we did the back, go over the top and do the
book, and then come back down. And again, I'm kind of coming over to the right
of that thread, and then I'm going to
loop under that and make that loop there,
tighten it up. Then we're going to go back into the loop that we
were just in right here and then back
out the next loop. And through the loop on
the cover Loop hole. I think and loop the hole
through the hole on the cover, and then back through on the left side on the
right side of that, and then just come through
and make a loop with that. And then we're ready
to go back in there. Come out the next hole
and do that again. That last little
loop there really does make a difference
to your finished book. So I did one where I forgot to do that each
time and then noticed, oh, I've forgotten that
little extra loop there. It makes a difference
in holding that cover to the book and
it being a little bit less all over the place
because these books are a little bit loose feeling compared to one that's
got a full spine. B Okay. Once we get the last one, they're ready to
do a double knot. So loop it under that loop and then back through the loop, pull it towards the end, and I do a double knot there. And there we go. There we go. Oh, my gosh. Look how
exciting that one is. So now we've got a finished book with a red
spine, and sometimes, too, if they're still kind of thick, I might set some
heavy books on top of it to really flatten it
down for a day or two. But for the most part, that's
exactly what I wanted. Now we can open it and
see our fun, flirty, playful inside, and all the different
papers that I included. So let's just take a look
at some of these papers. So this was the handmade
paper making the cover. And I love that. You can
decide at this point, is this the front? Or
is this the front? I like this is the
front because right now there's no up
and down in mine. If you use some kind
of writing or text and there's a definite direction
to the writing in the text, then you need to decide
before you get to this point, which is the front,
which is the back. Until I start painting in here, I can probably change my mind. But here we've got
pretty paper inside. Nice and playful. Got a
piece of vintage paper. Now, if I decide
to paint on this, I will put clear go on
the top of this paper. Then paint on top of that. I'd use the liquitex clear gesso on any of the old
papers like this because they're
very delicate and the paper may soak through and do what you
don't expect it to do. So if you'll just gesso it,
it's ready to paint on. Now, I probably
won't paint on that, but I certainly could add some
paint touches or something or maybe a little pattern
or stencil or flour on top. So if you're going
to do any of that, the clear gesso will
help you out there. Then I've got some watercolor paper and the reason I chose to put my favorite watercolor
paper in here and I could have done one with
decled edges if I used a bigger piece and tore
the edges is that I can now paint this and I
have a good surface to paint on and then it can then blend into the
other surfaces. Then I put some fun
papers in this one just because this is something
you can slip something inside of this was just pretty. I like the butterflies and
we could do some type of flower garden or something fun with a little tack in with that. It's just things to be creative. I liked this paper because it was very thin
and tissue like. So that was fun. And
then another tissue. That's the other side of that. And then the other side of that. Now, this one is the
bottom of the bag, but I could cut the bag, and then that's another
tuck in if I wanted. And then back to the paper. And then we get to
the center parts where I've got the next paper. And then in this one, I put a
fun paper in the middle and then a beautiful
handmade paper kind of flanking it just for
fun in different sizes. And then we get to
the end of that one. I've got another old paper that I've centered because it's not the whole width of the book. Center those if you have
something like that, and then I have an old paper and a piece of handmade
paper in there. So I centered those
and then a piece of wallpaper and a piece
of textured paper. I like including different
elements that are unexpected, and then they make you think uh, what could I do with that? You know, I like these
things that give you a creative challenge. Here's a piece of
handmade paper, another bag that I
could cut and make tuck ins or just be creative
and do some other stuff. Now, that one not
completely centered, so I must have got it off a little bit and didn't realize, but I don't think it
detracts from the piece, but I just wanted
to point that out. Um, if you meant to
have it centered, look, I've got one
that wasn't centered. Not a big deal. And
then a little tuck in here on this
side if you wanted. Just include things that you think you would
like to work with. Maybe you don't
want to work with the same things
I'm working with, but I just thought
it'd be fun, and then there's the back of the book. And then, you know, when
we look at the spine, we've got the yummy papers
in there instead of just white paper
there in the center. And so super fun. Hope you enjoyed creating
a second book with different papers
in it compared to the first book with just
our watercolor paper in it, and then super fun
variation on that. And I hope that got
your creative juices kind of thinking like,
Oh, what could I do? All right. I'll see you
guys back in class.
7. Book Recap: We might do just a little wrap up of what we created
in class today and kind of take
a second look at just some different options
that you might consider. So I have chosen all the books that I made, the
two I made today, which were these two and the two I had
already made previous to that just because
I wanted some of these for myself, and
then I thought, oh, I should just show you how to make these two and
then you can have some lovely handmade sketchbooks and watercolor books to work in. I I want you to
consider on these, using your own
artwork as the cover. That's one option I have used on these handmade papers that I got from the art store because I love them and I've
collected them. And when I was making
the other books, I had a whole bunch
of them that I had gone and shopped
for and collected. I'm like, Oh, let's
use some of these that are just hanging
out in my studio. Waiting on their next project, and now I'm thrilled that I
saved them for this project. I want you to consider
getting fun and playful with your thread colors
on the bindings. I also want you to consider. I've used a white
watercolor paper, and that's the white showing. But I want you to consider
after you make a regular one, making a more complicated one where you have other
papers that flank the outside and maybe that you include inside your book so you have other
things to work with. Um, you could use any papers that you
want to create these. It could be mixed media paper, it could be watercolor paper, it could be paper that you tear. It could be all kinds of different papers and
no watercolor paper. I could have had craft pages in here and fabric pages in here, and handmade papers and old
papers and scrapbook papers. I mean, there's all
kinds of things that you could consider including in each of your sections to make a book that truly is
uniquely your piece of art. You could also consider
attaching buttons or things like that
that I've done in previous books where I've
attached a piece of fabric. You could glue the
fabric down and have a little belt loop closure
or little button closure, and you could consider including a closure
on these books. I did not include a closure
on these books currently, but that doesn't mean
I can't go back and add something to this, glue the ribbon to go all the
way around and tie it off, or I could just
have a long ribbon that I use as a tie off. Consider, do you
want to closure? I could also have some
decorative elastic and I could make one of the elastic
bands to close it off. Consider that. Just throwing
some ideas out there at you. I do like the playful edges
that you get on these, which is why I wanted to make
some of these for myself. I like reds and oranges
and stuff like that, but you can see on all of these. I've got some different
options there. That I've created. I hope you have fun with
this technique. It's a little easier
than the full on bound ones that we did
in the other classes. You can get very creative. I like that these
can open up and lay flat and I like that
the edge is exposed. That's what really
draws me to these. I hope you have fun creating
some of these yourself. Consider too, another thing, you could create the front and the back cover to be
completely different. They don't have to match,
even though I've made them machi machi here on mine. You can have two
different covers for the front and
the back like we did in some of these other books that I've
made in the other classes. So consider that also. You could have fabric on these, as well as pieces of
art that you created. You could just cover it with
a piece of watercolor paper. You could do anything
that you could possibly imagine
with these covers. So get creative. Can't wait to see what you end up making, and I'll see you
guys back in class.
8. Final Thoughts: Congratulations on
completing this class and creating your own
coptic bound journal. I hope you enjoyed learning this beautiful
bookbinding technique and discovering how to
make unique journals that showcase your creativity. Remember, each journal you make is a one of a
kind piece of art, and you can experiment with
different materials and papers and designs to make
each project uniquely yours. Whether you're using
your journal for art, writing or as a special gift, I encourage you
to keep exploring this craft and letting your
imagination guide you. Don't forget to share your work in the class project gallery. I'd love to see
what you created. Thank you for joining
me in this workshop, and I hope you feel
as inspired to get creating and making art in the
things that bring you joy. Happy bookbinding, and I'll
see you in the next class.
 DENISE LOVE, Artist & Creative Educator