Transcripts
1. Class Introduction: And everyone, welcome back. I am here to show you my brand new course with my
Skillshare class number six. Now, this is one of my shortest classes that I've ever done, and one of the reasons I wanted to make sure
this class was under 20 minutes
because we are not dedicating ourselves
to a huge drawing. Instead, we are using
a tiny sketchbook and using cheap black
ballpoint pens, which all of us usually
do have at our homes. It's super easy and
convenient to use. It's going to help us improve our realistic drawing
and our eye for detail, with the emphasis on getting started with
detailed drawing, if you will feel
intimidated to do so. Because as artists, I know that sometimes it can be
intimidating to start a realistic drawing
because it feels like sometimes we
might not be ill enough to start off doing
something with pencil and going all in on something
like a human drawing, an animal, a pet, Anything that involves
a lot of rendering. I created this course
specifically for you. So, my name is Ivan
Florentino Ramirez. I graduated from California
State University Fullerton, and I do have experience
with life studies, life drawing and painting, sketching with various mediums, like pencil, pen, filic, and oil paint, and also a
lot of digital work as well. And I also combine both traditional and digital
in my courses as well. And so for this quick course, we are going to be drawing
an animal, a spider monkey. And we're going to be using
a black ballpoint pen. And we're going to focus on
light and shadow and detail. We're going to cover up any mistakes because
we are using pen, we're not going to be
able to erase at all. We're just going to go with it, use our observational
skills to get as close as we can to
likeness and realism. So are you ready
to experiment and sketch your way to improve
your drawing skills? If you're ready,
let's get on with the materials needed
for this course.
2. Class Summary: So for this lesson, we literally need only around two items, a tiny sketchbook and some
cheap black ballpoint pen. Now, this tiny sketchbook, this is a pocket sketchbook. This one is a tiny, tiny size. This one is only 3.5 by 5 ", and this is a perfect
size because not only are we able to dedicate
ourselves to a tiny surface. We don't have to draw
something large, and it's going to
be a quick one, especially for a fast
course like this. And not only that, the paper
in here is not pure white, it has a bit of a
tan tinge to it. So if you can find one with a little bit of a
tan, that'll be fine. But something that's white
is perfectly okay as well. An type of tiny
sketchbook that's maybe around 5 " is
perfect for this lesson. And same thing with our pens. These are big all point pens. It's nice to have a combination
of a new and older pen, and I will explain that
as the lesson continue. Oh, yeah, this is all we need
to get this lesson started. O. Are you ready? Let's
begin with step number one.
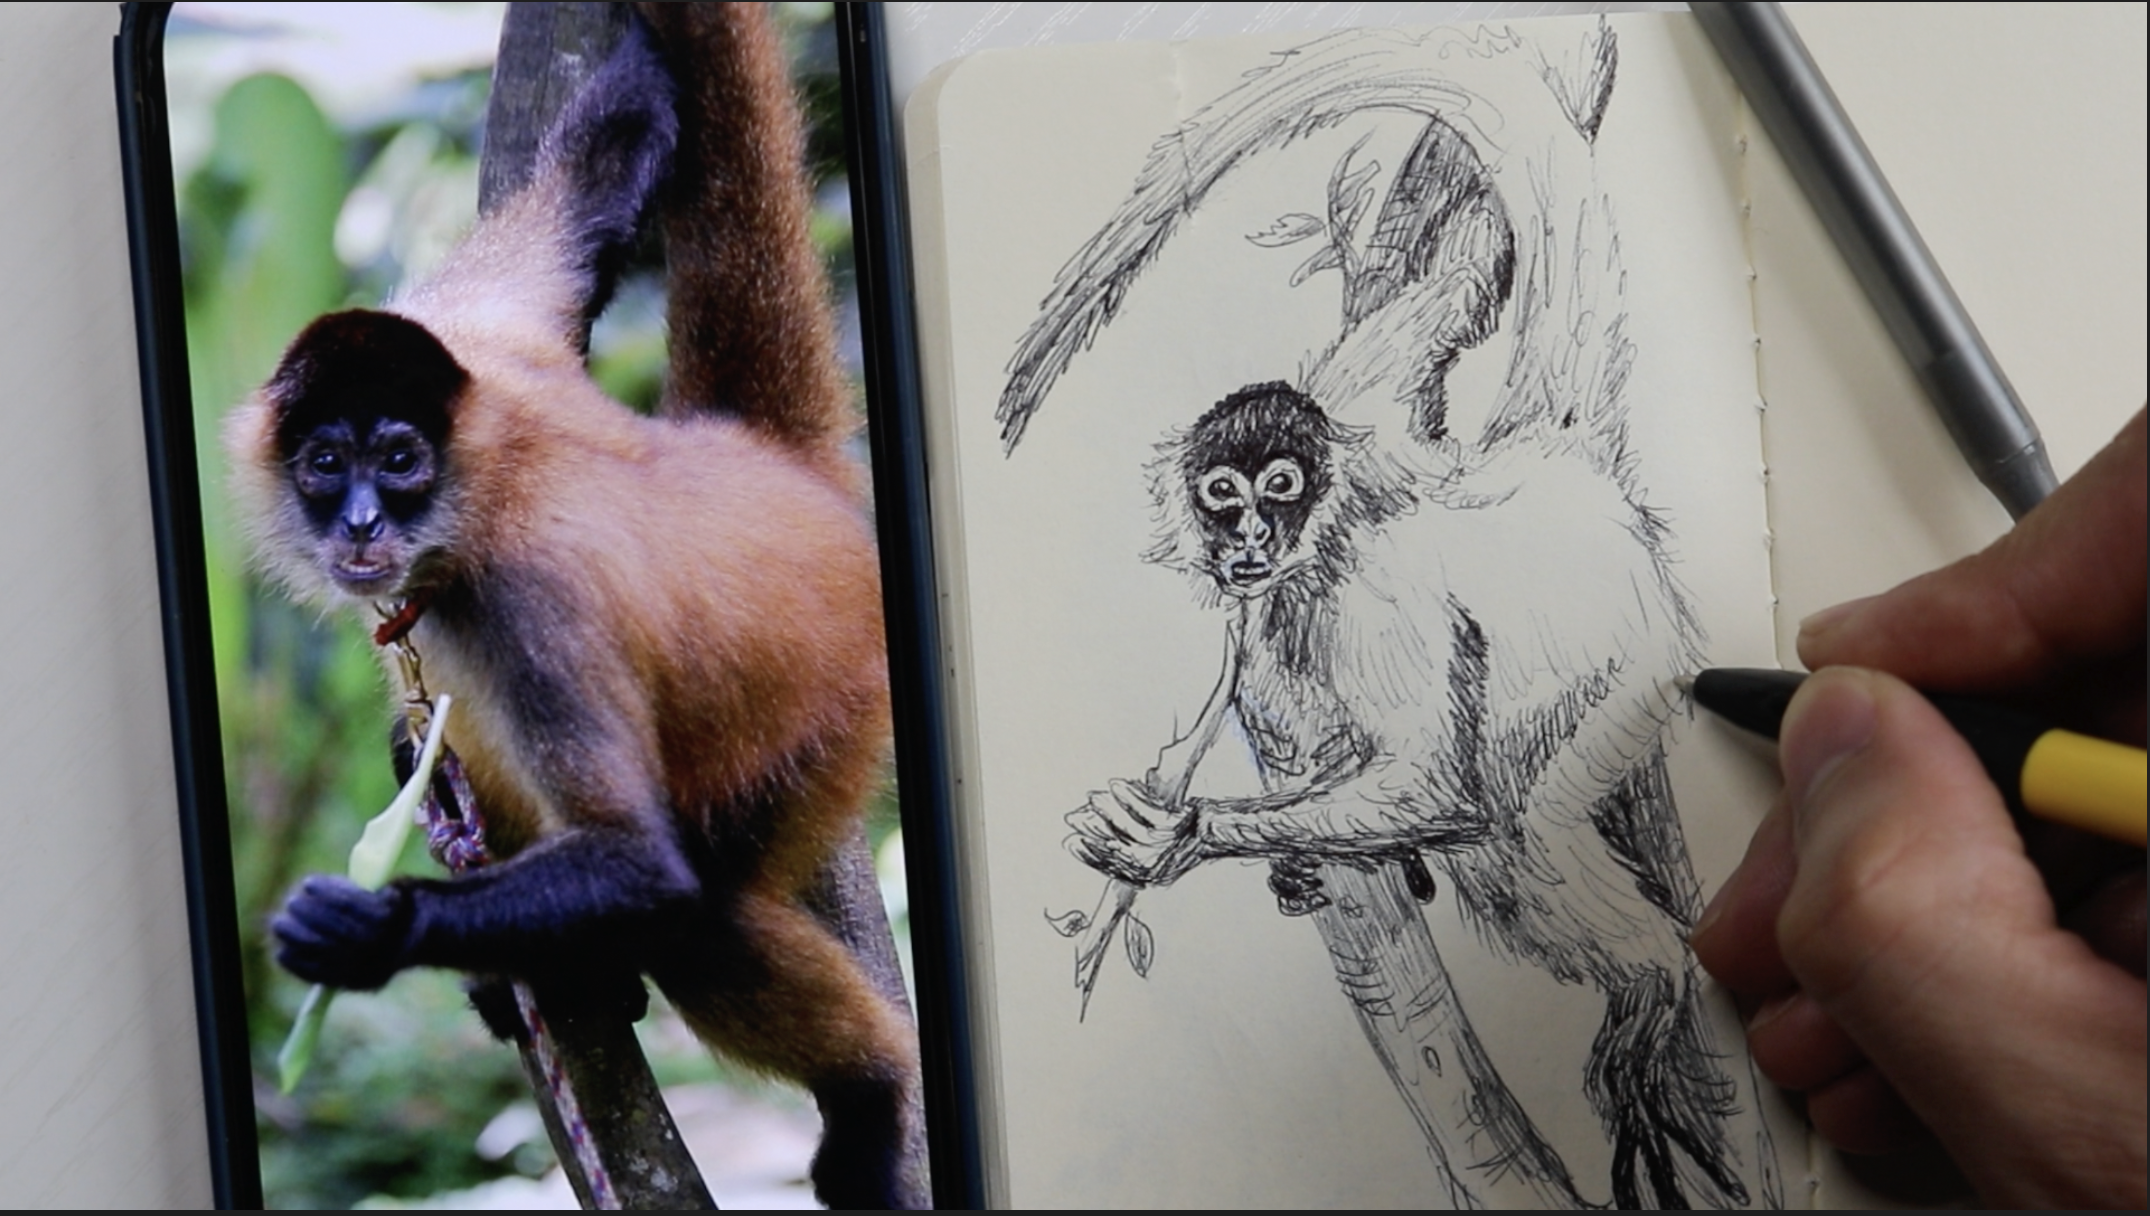
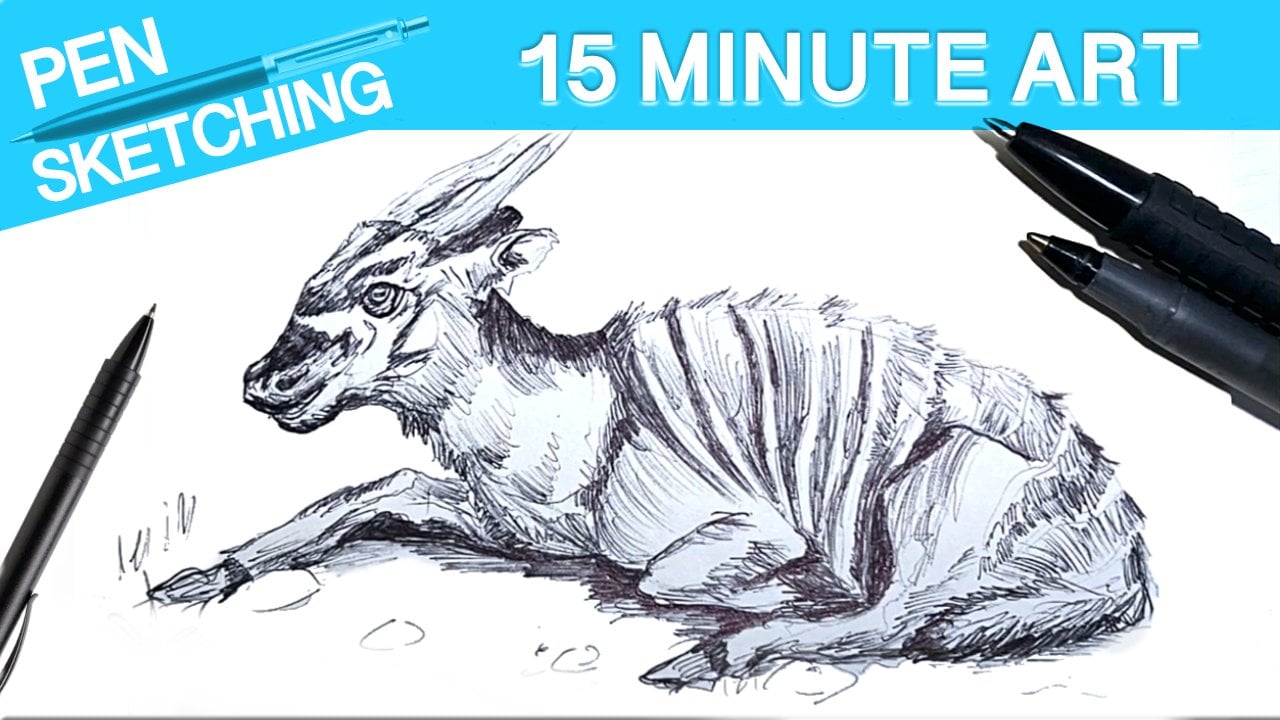
3. Spider Monkey Pen Sketch: Okay, everyone, let's get on to the first sketch where we
are drawing a spider monkey. And just to quickly
summarize why I chose a spider monkey or just
an animal in general, is that as artists, sometimes we do have some
fear when it comes to thinking that realism
is way too hard, it's way too difficult, and that we might never get to the level
that we would like. Because we don't have to
commit to a large drawing, a sketchbook is the perfect way to draw things that
may seem difficult, like, for example, drawing
animals with lots of fur. And this way, we can tackle things like the
anatomy of an animal, the way fur works, light and shadow, the contrast
between light and dark, and because we are just using cheap ballpoint pens
specifically with a black color, we can tackle those things, and we don't have the
luxury of erasing, so we just cover up our
mistakes and work around them. So one of the easiest
way to approach this animal drawing is to
start off with its head. And because I do have
my reference photo right next to me on my phone. I'm going to do a very
light gesture drawing of a circle and just start working my
way around it by drawing the fur and creating an outline and just
working my way out. So as I'm sketching its arm holding onto
the tree branches, I'm also not going into full detail just
yet with the fur, but I am kind of
doing an indentation like a shape of the fur, and I'm drawing the
branches as well. Again, we can get into
the detail later. Right now we're looking for a basic shape of
the entire figure. So as I'm drawing its tail, I'm giving a suggestion
of where it can go. And as a reminder, let's put less
pressure right now just so that we can
have the pen ink, not be so harsh,
not be so black, so that we can almost
think of putting less pressure just like we
do with when using a pencil. We're starting with
a light sketch. And eventually we'll
put more pressure to create those
shadows, dark details, and create some nice
contrast and challenge ourselves to a realistic sketch. And again, because we
are drawing small, we don't have to commit
with something so large, and this is one of the best
ways to improve realism. As you can see, I
started with the head. I drew the arm, the tail and worked my way down
to the other arm, and now I'm working on the leg. As you can see, this is
almost looking like a shape. I'm just shaping the animal out, and now I'm just creating
the fingers on its toes, its arms, and because we
are working with pen, and we're going to be layering and covering up mistakes if
we do happen to make some. Don't worry too much if some of those proportions
are a little off. Sometimes I do
tend to make heads of animals and humans
a little bit small. But Because we are
drawing light, we can always adjust
later as we go. So continue to draw a
light, work your way up. I'm drawing the fingers around the monkey and the
tree branch as well. And as you can see
here, I made a mistake. I drew the other hand wrapped
around the tree twice. I was not paying attention, but I'm just going
to cover that up. And because that is
in the background, it's going to be
part of the shadow of the tree branch anyway. So that's one way of
covering up mistakes. Now I'm drawing its mouth, working my way up the nose, and then into the eyes. Again, not only
are we challenging ourselves into drawing a
detailed smaller drawing. We also have an
added step of not having a luxury
of using erasers. Even though some pens do have erasers that
can erase pigment, this will also help us to judge our drawing and use
our observational skills. Just like in all of my
skill share courses, we do use our observational
skills so that we can estimate the
object that we're drawing with an artist's eye
and and attempt to get as close as we can in drawing
the likeness of the figure. So now, like I did say in the beginning of this
course with our materials, it's always great to
have several black pens, some that are fresh and new, some that are kind of older
and about to run out so that we can have a variety in dark middle tones
and light tones. And you'll notice that you'll be getting a lot more
comfortable to draw with pen due to the way
that the ink flows from the pen and the way
that it applies on paper. And you'll notice
that you can achieve a lot more expressive
lines by being able to vary the line weight
and the thickness of the line whenever you're
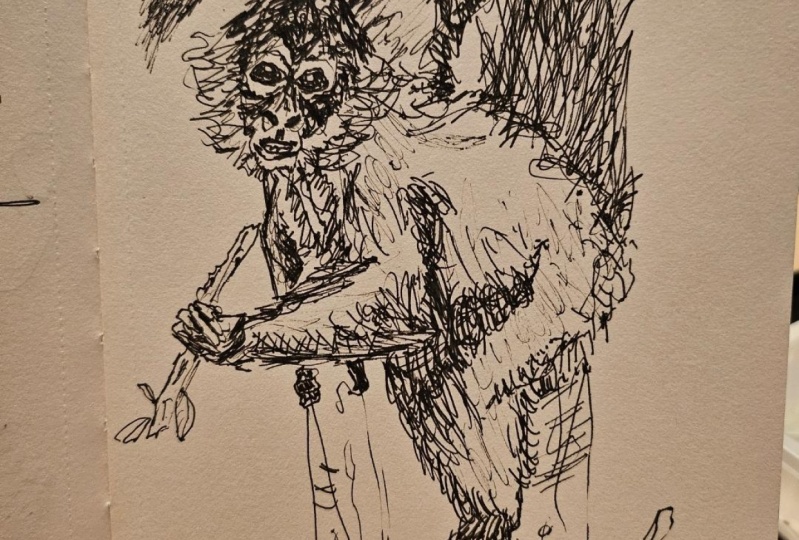
applying this to your subject. So for example, I do have
a brand new pen here, that I'm going to start adding the darker pigmentation in
the spider monkey's head, and you can see that in around its eyes and the top of its head where it's
completely black. So that's where you
want to start using some pressure and your
darkest pen that you have. This is going to
fill all of that in. Now we can slowly start creating those nice details
with the fur with some nice shadows,
some nice contrast. And you can see that you can push this as far as you like. Because drawing
hair is something that is difficult
when it comes to drawing heads and animals and even humans with
different hair textures. This is one way as an artist
to see how fur works, when it comes to its patterns, drawing huge pattern
sections and adding quick curved lines or straight lines to
resemble strands of hair. This can give the that
we've completely covered the entire animal in fur without actually drawing
every single strand. That would actually
be impossible. So we're trying to suggest
that a monkey is covered in all its fur and having a
combination of shadows, some detailed strands and larger areas with zig zag
lines will do that for us. Now, because I am
using my darker pen, I'm just going for
those dark areas where it's in complete shadow. For example, where the monkey is holding that branch, that leaf. Most of it is in complete
darkness because of the two toned or three
toned that it has, where it goes from
dark to light brown, all the way around its body. This is one tip that I
actually like to do is go for the shadows first and
then work your way up. We go for the shadows first, we can determine where
our middle tones are. Again, I'm working
on the fingers, the arm, and I'm
working my way down. The branch is also
covered in shadows, so I'm going to go for
the branch as well. Again, zoom in and out with
your reference photo so that you can get
into the details that you're working
on at that moment. Because we are working with fur, all I'm doing is
quick curved lines, quick pen strokes, and this is going to give
us the illusion of fur. You can even hold the pen
on the paper and just do squiggly lines or
zigzag lines as well. Or just put lines
quickly together in succession to also resemble
small strands of fur as well. So as I work my way
under its stomach, where it does have shadow,
I'm going in for the tail, where it does happen to have some darker areas right next to its darker brown
tones in the tail. And when we're using these
cheap black ballpoint pens, think of this as a
repetition and layering. We are layering and
layering the ink on top of each other in succession
in repetition form, repeated lines very quickly right on top of each
other so that we can cover more of the paper and make things as
dark as we like. And because the ink flows
smoothly and quickly, we have greater control in
the amount of pressure we would like to place
on every pen stroke. I'm using fairly light en
strokes for the thin hair, and I'm alternating between heavy layering and light layering for the entire
part of the monkey. And don't forget,
just like I'm doing, Zoom in and out of your reference photo because it will help us
familiarize ourselves with the overall
anatomy of what we're drawing and where all of the lighting sources are
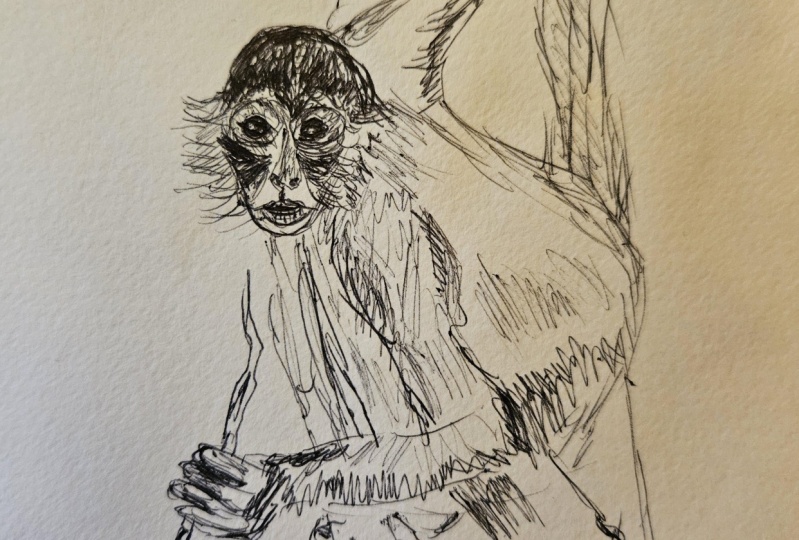
creating those shadows. And now, I'm going
back to one of my older pens where the
less pressure that I place, it'll create a lighter and
mid tone and more of a gray. This is what I'm using for
most of its entire body. I'm going to where you can see the middle brown and light brown and almost leaving some of that paper color where it comes to the lightest
color of its fur. And this is one of the
great things about a brown or a toned
paper sketchbook that also helps us
to have some of those light range colors be the part of the
paper and our drawing. So I'm working my
way all the way on its tail and also darkening
where I need to be, just putting in a
lot of pressure. And this is where you can take your time and be as
detailed as you would like. Notice that I'm going with
the flow of the body. For example, in
the monkey's tail, I was using curved lines, and this also helps
the illusion of the three D effect
or create realism. Curve the lines where
it needs to be. For example, on the tail, I'm using curved longer strokes. I even use that in its arm and the monkey's leg
and foot as well. And as you're working with
the tree branch as well, you can also add small
details that are also random that kind of resemble tree bark or just scuffs and shadows
in the leaves as well. Because again, we are trying to create dimension and realism, and because it is
a small drawing, you can push it as far
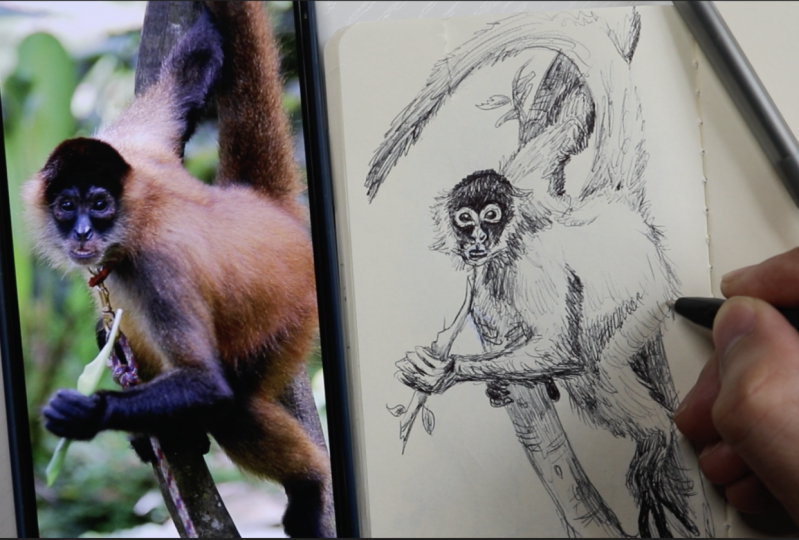
as you would like. And I even made the
artistic decision that you can do as
well by removing that leash that the
monkey has on its neck and just adding a few
leaves here and there, where they weren't before,
just to kind of add the environmental background and more of its habitat
into the drawing. And because this
is a small sketch, this will not take
us a long time, and we are more
than halfway done. I'm alternating between my pens, and as you can see, at the
very end of my sketch. I pushed it as far
as I wanted to. I like the outcome of this
sketch where it's detailed enough to know that I was trying to go for
a realistic look. I added some shadows. I left some of the paper
white to resemble where the light is coming from and hitting the monkey in its fur. But again, you can push
this as far as you like until you're comfortable with the outcome of your drawing. And now if we take
a step back as I'm zoomed in all the
way into my sketch. You can tell that these
type of drawings, these type of small sketches. It's real fun to add some
textures with these pens, with these quick strokes, and using something like
a black ballpoint pen can make drawings a lot more
interesting compared to pencil when we don't
want it to be so smooth. Although with pencil, we can add different varieties
and textures, we can do the same
thing with Pen. But I feel like Pen also
gives us a bit more of a richness because of
the ink that we're using. As you can tell right here
with this arrow pointing, I decided to leave
some of its fur the hand tone of
the sketch book, and it just fits very well. Not only am I using
the tans, the ink, or the blackness in a little
bit of everything and with our great
reference photo with all our lighting done for us. This is our complete animal
sketch of the Spider monkey. Another important thing that we accomplished was a
detailed drawing in under 20 minutes. T
4. Final Thoughts: So now we completed our spider monkey that
you can see right here. I think it turned out very well, but what I'm most excited for is when you guys
upload your versions of it and how you approached this ballpoint pen or the
Spider Monkey sketch. So, what did you think of this lesson where we
drew a spider monkey? This was a great introduction to drawing animals, your pets, and just kind of tackling realism with a tiny
sketch and just improving our every
day skills if you want to go super detailed in the
future with a huge drawing. I had fun teaching this shorter course
compared to my other ones, and there are way more to come. So stay tuned and
don't forget to upload your drawing in the upload
section of this course. And if you can, leave a review for this course, once
you complete it, and I'll see you all in the
next one and later, bye bye.
 IVAN RAMIREZ, Artist, Painter & Youtuber