Transcripts
1. Antelope Class Introduction: Hello. Hello, everyone. My name is Ivan Florentino Ramirez, and I have a brand
new Skillshare class. Now, for this course, there's a special challenge for you, where it's going to be
all in about 20 minutes. We're going to be drawing
a sitting antelope, using a ballpoint pen only
and a tiny sketchbook. So this is for all my
students to help with your confidence in drawing
a realistic animal, you won't be able to erase
because we are using pen only. It'll help with
landing proportions, using a reference
photo for likeness, going into detail
without committing to a large drawing. This
is only a sketch. This is going to
be a step by step all the way through
in just one video. Now, I graduated from California State
University Fullerton. I am a graphic designer,
digital artist, painter. I work with fine art with
mediums like graphic pencil, watercolor, acrylic,
and many more. Now, this class will
pair perfectly with my shorter 15 to 20
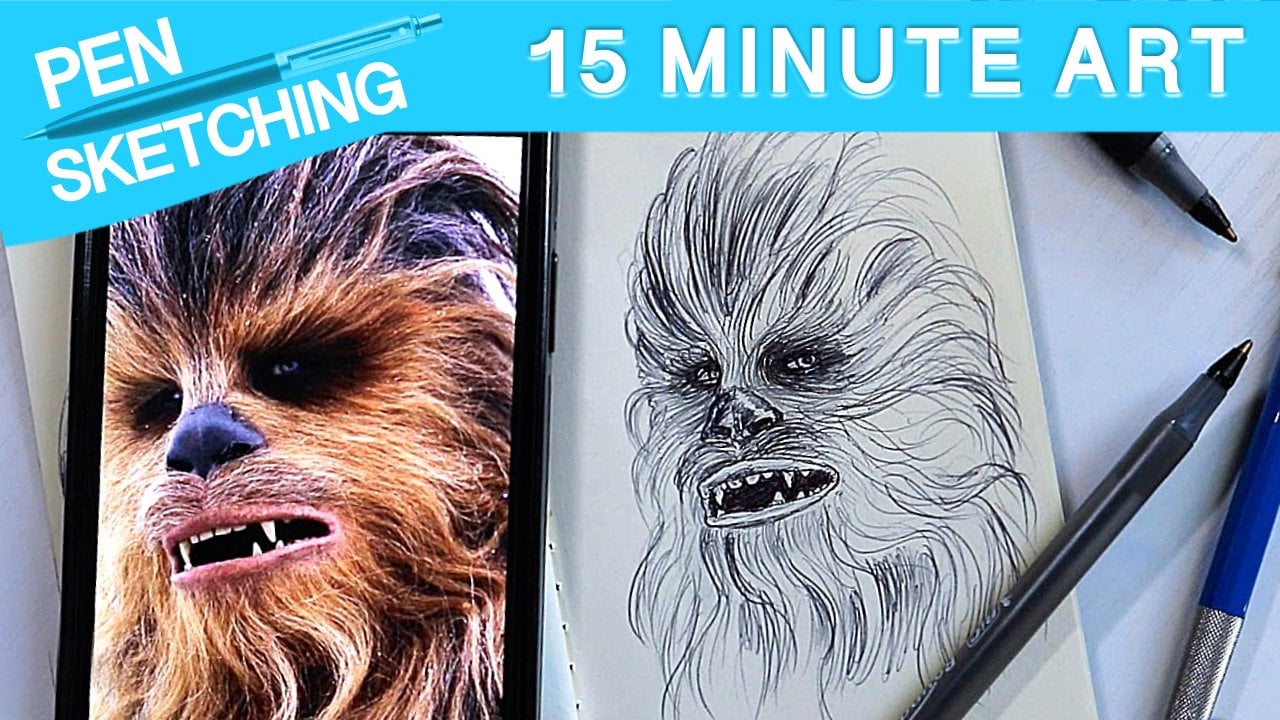
minute courses from drawing a monkey and even pop culture where I drew Chu Baca
using ballpoint pen only. And if you're looking for
a longer form course, I also uploaded
where we're using watercolor paint on
a small canvas board or a beach planer painting. So, are you ready to begin this quick challenge?
Let's begin.
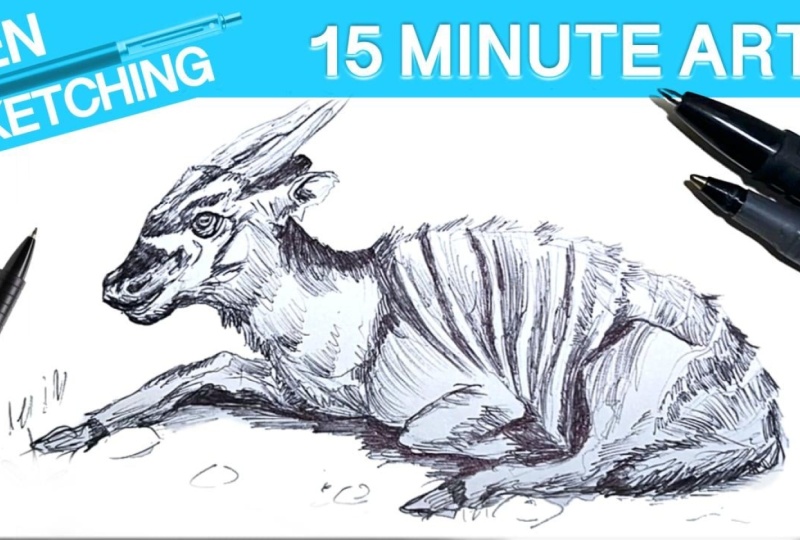
2. Class Summary & Materials Needed: Hello, everyone, and welcome to the summary for this course. So this sketch was inspired
by the photography and videos that I took
when I went to Honolulu, Hawaii, to the Honolulu Zoo. There were so many great
animals to look at, but it was the resting
Bogo antelope that really drew me to it because it looked like it was at peace. It was resting, and the day
was sunny and pretty warm. So it kind of matched the
vibe that I was going for. It was in a great pose, and I wanted to draw more of a larger animal and flip my sketchbook in a
horizontal position. So this was a great choice
for this 15 minute sketch. Now, I did upload two different reference
photos that I found online, but I couldn't find the original reference photo that I used, but I found two poses
that are very similar, but you can't freeze frame
this video that I took when I was there and find the
pose that you like the most. But when it comes to materials,
you don't need much. You need a tiny sketchbook,
anyone that you have, and several ballpoint
pens, black preferably. But if you have blue
ink, that is fine. And part of this
challenge is using a confined space like
a tiny sketchbook, so you don't have to commit to something large while still pushing yourself to go fully
detailed with realism. So this sketchbook
is five by 7 ". But if you don't have
a sketchbook with you, you can cut up small
pieces of paper in horizontal format that will be perfectly suited for this
15 minute challenge. So I hope this inspires you to keep on pushing when
it comes to drawing, taking your sketchbook
everywhere you go. And specifically, if
you do happen to go on walks on trips, on
your next vacation, this challenge will push
you to people watch, draw animals, and just sketch
anything that you like. We can draw our M
everyday lives, have fun, take a challenge to draw things
we've never drawn before, and also challenge
us to draw quickly and help fill up that sketchbook that
you've had for a while. So these are the perfect
challenges and ideas to do so. So are you ready to
begin? Let's get started.
3. 15 Minute Ballpoint Pen Sketch: Alright, everyone, welcome to this creative momentum
challenge with this fast one sitting
project that you can do very easily all
in under 20 minutes. The focus of this teaching is to practice
drawing an animal. In this case, we're drawing a Bogo antelope
that's sitting on the grass in a tiny sketchbook
just using ballpoint pen. Now, this is a short, simple
class that anyone can do. It's a great challenge
for you to just keep on drawing and improving
drawing details and animals. Here are some practical
tips for the ballpoint pen. We're going to
work from light to dark because you cannot erase. We're going to use
multiple passes instead of pressing too hard. Again, rotate your sketchbook to maintain natural
hand movement. You don't want your arm
to be uncomfortable, and we're going to
keep details slightly simplified due to
the small format. This is part of that challenge. Since we're not committing
to something large, we don't have to go
overly crazy with detail, but just enough to put
everything that we've learned, drawing animals, doing shading all with my courses
here on Skillshare. Now this approach will give you a controlled and detailed
drawing even at small scale. All right, so let's start
by drawing the head. Now, let's establish
the gesture. This is going to be using
light pressure with the pen. We're going to start very
light with the pen pressure, barely grazing the page, and we're starting
off with the head. And you can somewhat do
this outline to kind of know where you're going,
starting from the left. We can draw simple
curved lines to show the elk's relaxed seated
posture for its spine, at a rounded rib cage
or oval or the neck, the mouth, and the horns,
and even the ears. And usually I do this with some gesture drawing in
various shapes, but because we're drawing so light with very
light pressure, I'm doing a very thin
outline that we're going to be going over with
to add shadows eventually. So we indicated the head
position with a small oval, ankle slightly upward, and then I'm sketching loose
lines for the neck, the body, its legs, the tail, and one part of the leg forward while the other one
is curved under its body. So that's how you
build the form. So you might be wondering why we're creating a silhouette. It's very important
for readability. And with that
combination of using loose lines with your pen and not putting in
so much pressure, this is going to help
us in the long run. By creating a silhouette, we're drawing a strong and
instantly recognizable shape. And because the elk is sitting, this is a very long
horizontal shape that goes all across
our sketchbook. So doing this in the
beginning is very important. Keep it light, simple and loose. And don't forget to zoom in and out of your
reference photo. You want to make sure that
proportions are correct, even from close up
and from far away. Now, what I'm doing
is going back and it looked like I made the
mouth a little bit too small, but I started with
making the nostrils, the mouth a little bit bigger, and working into those eyes. And again, I'm using
curve lines for the eye, indicating the pupil and
part of those cheekbones and even indicating those shapes for those white spots that
it has against the brow. Now that we focused
on silhouette, it should clearly read
even without much detail. Now, let me give you a quick
tip on drawing an eye, especially for an animal. So when drawing animal eyes, we need to prioritize capturing a precise outline
and shape first, and it has to be
specific to the species. So adding sharp
white highlights for that glassy effect
and even using deep contrasts between
the dark pupil, the iris, and the
surrounding eyelids is important because
as you can see, there's a distinct
white stripe underneath the eye and black on the top. The eye is a sphere, so focus on the eyelids wrapping around
this spherical shape. And notice that I started
drawing it as an almond shape, and I made my way outward
now onto the antlers. And if you notice on
the reference photo, the eyes are really
high up kind of close to his antlers
and the ears. So as long as you
notice those features, continue with the antlers, the ears, and overlapping
those loose lines that we created previously with
a little bit darker ones. Now these are more controlled, precise and confident
lines that we're tracing over our loose
silhouette of our elk. Now we're in the
defining phase and detailing those features
that make this recognizable. I'm shaping out those
white first stripes, starting from the
back on the top, all the way down and leaving those pure white from
the paper itself. And these particular
white stripes, I'm also keeping them loose first, because in between those, as you can see that
the reddish brown fur is going to be filled in with a little bit of the
scribble type of overlapping that we'll do
with the pen later on. I don't know how dark I
want to go in for it yet. So it's important to go loose and very light in this stage. And again, make sure
to follow the form, to keep the elk rounded, keep it from looking
flat because we're still thinking
in that three D form. So now we're going to
suggest ground and weight. So we're going to add a
few horizontal strokes beneath the body to
indicate the ground. We're going to darken that area directly under the elk
to create a cast shadow. This is very, very important. Alright, so now as we're
building the form, we're going to
refine the structure using slightly firmer lines. And we even indicated
how it's sitting with a little bit of
blades of grass and rocks. Now that we have established
that the elk is sitting, we're going to add
a little bit of shadows underneath
that it's grounded, and this is going to give us the opportunity to start playing with value and adding pressure with the ballpoint
pen to add shadows, medium tones, and light tones. The only thing that I'm
doing are using overlapping scribble lines directly
underneath the elk, just using quick back
and forth motions. The more and more you layer,
the darker it becomes. So if you go right up
to the elk's tail, the belly, the folded legs, that's where you want
it to be darker. And as you go outward, create
middle tones by using less. This is how we're going
to create variety, and it really will create that
nice shadow that we like, and it helps with the realism. And so we're going to shape the chest with
a gentle outward curve. Elk have a strong
deep front torso. And to define the folded legs, the front legs are bent and
tucked under the chest. The back legs are
folded to the side, forming a triangular silhouette, but with just one leg sticking right in
front of its head. Now, this is the part
where we're going to start the ballpoint pen
shading techniques, starting with the ear. Now, inside of the
ear and the horns, we're adding these shadows underneath because
with this photo, it's clear that the light is
coming from the top left, meaning the shadows are going
to be on the opposite side, underneath, on the right side. And adding in all those darker
shadings and layerings of the fur on top of
the forehead and the muzzle area with the nose and nostrils
where it's darker. Now, adding the neck mass, it's thicker on the base and
tapering toward the head. Now, we're keeping everything
light and simple at first, blocking in those antlers
and the ears as well. So I drew the eye as
a small almond shape, placed slightly
forward on the head. I indicated the muzzle with a rounded, slightly
squared shape. I added subtle lines for
the nostrils and mouth, which eventually will be colored darker and filled
in with the pen. So out of the entire
body of the elk, you'll notice that
this is where we're going to use the most pressure, the most overlapping with our ballpoint pen to create
those dark fur areas. In comparison to
the red brown fur, that'll be more of
the middle tone. And those designated areas
and shapes that we created, those are going to be the pure
white from our paper only. Doing this from the
very beginning will save you on time and
will keep you from any type of overcorrecting
if you don't leave some of that paper as is for those highlights
and white spots. Oh Now, in order to suggest fur, we're going to
draw short strokes in the direction
that it's going. A little bit of the
short strokes are going to go up and they're
pointed almost like triangles. You'll definitely see
this on its back. We're going to see this right
underneath the neck and the chest area where usually
elk have thicker hair, and we already indicated
the fur on its tail. So we're going to
be using layering rather than heavy pressure. Lots of layering to
create those shadows. So I'm applying hatching
and parallel lines to create shadows
under the body, the neck, and the legs as well. Now, this is the part that
might take the longest because we are going to be
covering the entire body. You're going to
see me going back and forth between the legs, underneath its
belly, on its back, and in between those white lines that we created as shapes. Go sparingly, you do
not have to cover every inch just enough
to suggest the fur. This is where your artistic
choices come in hand. Notice underneath the
neck where I'm doing these squiggle lines where
I go from medium and very loosely feather it
out and even following the form to create
that nice rounded look using medium to short strokes. Again, in the darker areas, make sure to overlap them and create a little
bit more pressure. And I'm also using a lot
of scribble shading, sparingly for organic
fur texture as well. And most important, leave
the highlights untouched. The ballpoint pen relies on preserving the white
of that paper. And because this
particular sketchbook is somewhat tanned, this also helps with having varied tones that go
from light to dark. Now, remember, when we
created that silhouette, I left some shapes
like the stripes on its back to indicate
where we're going to be shading the medium tones
and leaving things white. This is definitely going
to help us with that. And now I'm doing
that scribbling to indicate the fur
all on its body. And again, it doesn't
have to be perfect. This challenge is
to keep us drawing, create some realism confined within a small space
of a small sketchbook. We're just trying to improve anatomy nailing
proportions while having an eye out for
detail and accuracy. Now with this pass with
the ballpoint pen, we're going to
reinforce key contours. That being the neck, the
back, and the antlers. I'm going to be selecting a few darker accents for contrast. So as you can see, where
the cache shadow is, that's going to be a lot darker, a lot more pressure,
but also layering. While I'm using those
scribble lines and also following the form with
some curved stroke lines, I'm also rounding out that form. You can see that on its back where one of the legs are bent, the neck area to keep
it from looking flat. And even as we're
adding this detail, try to avoid
overworking some areas. Ballpoint pen builds quickly, and too much layering can
also make a drawing muddy. So purposefully leave some of the white area from
the page as is. Use the cast shadows by
looking at the reference photo and make artistic decisions
to push it far enough, but not overwhelmingly
so. So there you have it. We created a sitting
Bogo antelope in about 15 minutes using
ballpoint pen only. No pencil, no erasing, just a reference photo, and lots and lots of
layering with the pen. Hopefully you
enjoyed this course. This was a great challenge. This will really
help you improve with your speed, your accuracy, proportions, and also realism
in a small confined space. Make sure to upload
your drawing in the project section
of this class, leave a review, and
thank you so much, and I will see you in
the next one. Bye bye.
 IVAN RAMIREZ, Artist, Painter & Youtuber