Transcripts
1. Introduction: Trust me. I think that's oh,
please don't trust her. But hi everyone, and
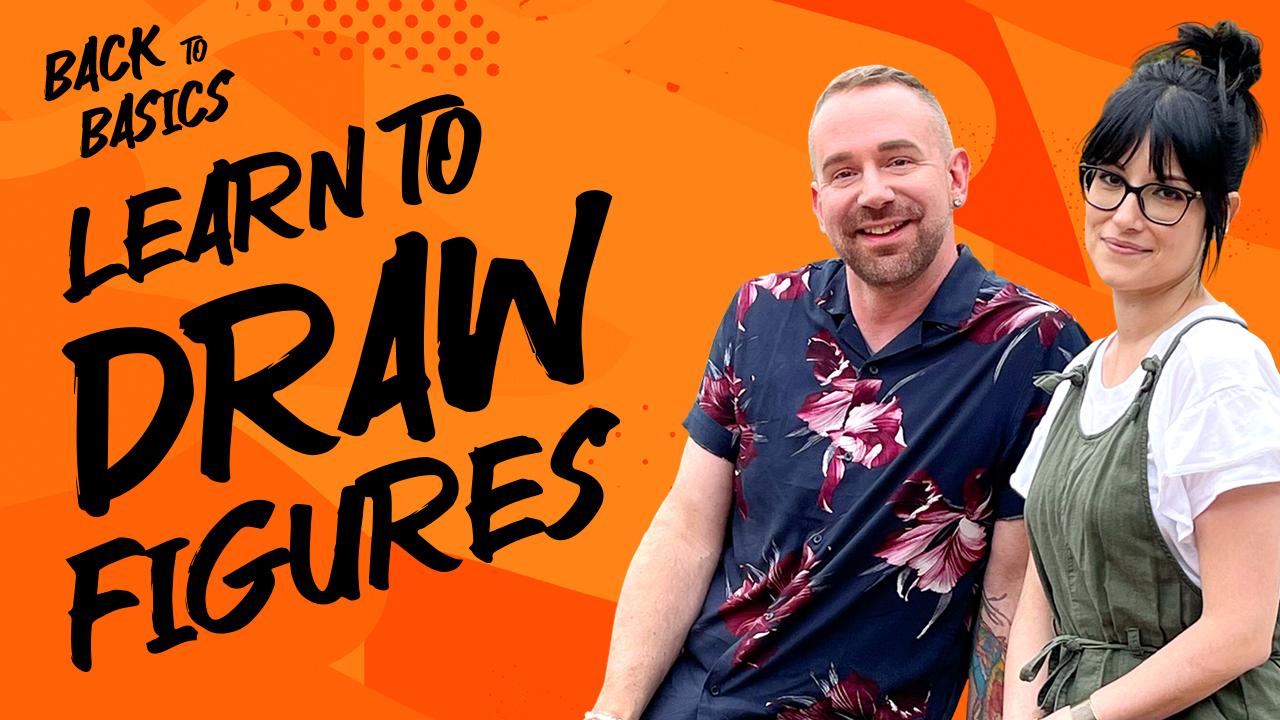
welcome to Back to basics, Learn to Draw the figure. I'm Paul Richmond and
I'm Melissa Foreman. In this course, we are going to take you
through a variety of different ways that
you can go about practicing figure drawing
from gesture drawing, which is one of my
favorite approaches. That means drawing really quickly and just
capturing the essence of the figure to more
detailed drawings like what Melissa likes. I do love my details. And we'll break it
all down for you in short ten minute
video lessons. So you can practice
whenever you want. And as often as you want, you'll have a chance
to do some things that are a little bit more loose and some things that
are a little bit more tight that you can spend
some more time on. So we'll go over
different exercises and different ways of exploring
ways to draw the figure. This clause is great for
artists at all levels. If you are an absolute beginner, this will be a
great introduction into drawing the figure. Learning a little bit
about anatomy and how you can create the form on the page. If you're a more
experienced artist, this is an opportunity
to go back and practice the fundamental skills because you can never get
enough drawing practice. That's true, you really learned through practicing drawing. And we'll go over
different techniques and different options that you can explore that might make things a little less
stressful for you. Although Paul loves
to stress me out, so you'll get the
experience that as well. That's part of the fun
of this class too, just watching me annoy Melissa. In speaking of which, Melissa
and I have known each other for a long time, over 20 years. We met in art school. And I kind of latched
on to her because she was so incredibly talented. And I was like, well,
I'm going to be friends with her and
then I'll be cool too. Oh my goodness, you're really
talking me up here now. I'm just going to
disappoint everyone. And Melissa is
annoyingly humble, which she just
demonstrated for you. But why don't you
introduce yourself, Melissa, and tell them a little about you
and what you do. Well, my name is
Melissa Form and I have been an artist for as
long as I can remember. I've always loved to draw
and paint and create things. I went to art school with Paul where we both majored
in illustration, and now I am an art director for a large printing
card company, and I also create my
own Shalist portraits. I like to explore a very
realistic approach, a very tight drawing
and painting approach to creating artwork. But I love exploring
different ways to create art. And Paul and I created this experience for all
of you because we love creating a community of
artists where we can all join together and do the things
We love make art together. We've always loved hanging out and making work
with each other. And I love being around as
many artists as possible. So this is a chance for you
to join our little art party. I'm Paul Richmond. I am an artist in California. I do primarily large
expressive oil paintings. I paint a lot of figures. There's almost always
a person in my work, but it is a bit more expressive and loose
than Melissa's style. So when you take a
class from both of us, you get to learn from artists who see things
in very different ways. And I think that's very
valuable because in art there is not
just one right way. There are so many
different options and we want to show you some of what we know and share some of our knowledge and
experiences and techniques. And then let you take what
you want from that and kind of form your own approach
and find your own style. Because your approach
might be totally different than either
of us. But that's okay. You might find things in what we're both showing you that you can use
in your own work. And we would love to
see what you create. So be sure and share it with us. Send us some of your best images that you create in this course. And as always, just keep practicing because the skills
that we're going to share with you here can be applied to anything that you might want
to do down the road to. I'm kind of excited to get
started. Are you Melissa? I am so ready. Let's
move forward, Polly. All right, let's start drawing.
2. Projects: These are the
projects that we are going to be doing
together in this course. First, we're going
to start with what we call gesture drawings. And gesture drawings are
really quick loose sketches. They're studies of what
you're looking at. It's an overall
impression of the body. It's a very quick, informal way of getting used
to figuring out the structure of
different bodies and how shapes work together
in different proportions. We'll do a few different
variations on that idea. I'll mix things up a little bit for you have to take me
out of her comfort zone, then once you are my favorite, and then once you're
all warmed up, then we're going to do two
longer drawing so that you get a chance to really dive
in a little bit deeper. But we will encourage you, especially in the
first one that I'll be leading to start
with that gesture, with that kind of quick
essence of the figure. And then through the
process of learning how to measure and compare proportions
and look at alignments, you'll learn how to
refine the drawing and then add more detail and make it into a more finalized
drawing after that. And then I'm handing it
back over to Melissa. And then I'll take you through the last drawing
and we're going to do approach to what
Paul was talking about, but we're really going to focus on proportions and forming a grid to start and then measuring our figure that we're
drawing against our grid. And seeing how things relate to each other, the
different proportions, the different sizes, the
scale within the body, and how everything
fits together. It's going to be a
very longer process, measuring and comparing
different aspects of the body and how
everything fits together. We're going to explore
something maybe a little bit looser in the beginning and something that gets
gradually more tight and a bit more analytical. In the end, we're going to go through a whole
different group of exercises and a whole range of different ways of approaching
drawing the figure. That sounds great. It sounds
like we have a lot to do. We'd better get started here. Can I be so busy? All
right, let's go do it. Alright, let's call everybody.
3. Materials: Let's quickly run through the materials that Melissa and I will be using
in this course. You do not have to have
everything that we are using. You're welcome to use
whatever materials you have available. So first of all, you're
going to need some paper. And I am just using paper
that I have in a sketchbook. We will be doing
a lot of drawing, so you'll want to
have something like a sketchbook or a stack of
paper that you can draw on. The next thing that would be
helpful would be pencils. You could use one pencil for all of these
exercises if you want, or if you have specific
drawing pencils that you really like to use. You can bring those.
You don't have to have a whole set of specific
drawing pencils. You can use a regular number two pencil if that's
what you have on hand. Don't need anything special
if you want to get fancy, we will be doing a few of
our drawings with pin. Also, I'm using a micron pen, which is just a special
kind of drawing pen. But you can use any
sort of ink pen that you have and it's
totally optional. You can also just choose
to stick with pencil to. I also like to use charcoal. So I have what's called vine charcoal. It's
a soft charcoal. I like using this for my gesture drawings because I can't go back and
erase anything. It makes a really
strong dynamic line, so I use that. If you want to use
charcoal and try it, feel free to buy any type of charcoal. Anything
would work really. And then if you really
want to be like Melissa, then you will also want to grab a ruler because for
one of her lessons, she will be showing
you how to use a grid. And last thing you might
need as an eraser to clean up your drawings After doing
something more specific, adding more details, your gestures might
get a little messy. If you want to
clean them up, you might need an eraser to go in afterwards and just get things
a little bit more refined, go gather up all your materials, and then once you have
everything, let's get started. Yeah, we will meet
you back here.
4. Gesture Drawings 1: Hi everyone, welcome to you. Back to basics. Learn
to draw the figure. We are here, ready
to get started. The first thing
we're going to focus on is some gesture drawings. And gesture drawings
are just really quick, loose studies of what
we're looking at. So we're going to start with
some simpler ones here, give you a little bit more time. So we're going to start
with 4 minutes per drawing. Hopefully, that's not scary for anyone, it's
going to be okay. We'll get through it together. Paul, how are you feeling? I'm excited. I can't wait. I look. Gesture drawing. Okay, great. We're excited. We're ready to go do this. Let's go. Okay, let's get started on our
first gesture drawing. And I think, Melissa, you should do this one. Of course you do, Paul,
of course you do. Show us the way.
Here's our model. Oh my goodness. Okay. Yeah, this is the photo we're going
to be working with today. You can see this here, Paul. And I'm going to
start with gesture drawings because
we feel like it's just a good way to get
an overall sense of the figure and just start
practicing some lines and some shapes and proportions before we get too much
into the details. I think what's great about
a gesture is it's quick, it's somewhat easy because you're not worried about how everything fits together yet. You're just getting the
overall style sense of the way the body works and
the dynamics of the pose. I think this is a good
place for us to start. I am using charcoal today. I just have a sketch
book in front of me so I can flip
through the pages quickly as we go through this
gesture drawing exercise. We're going to spend about 4
minutes on this first one, and I have a piece
of charcoal with me. I like using charcoal because I can't go back and erase
easily with charcoal. I get nice dynamic
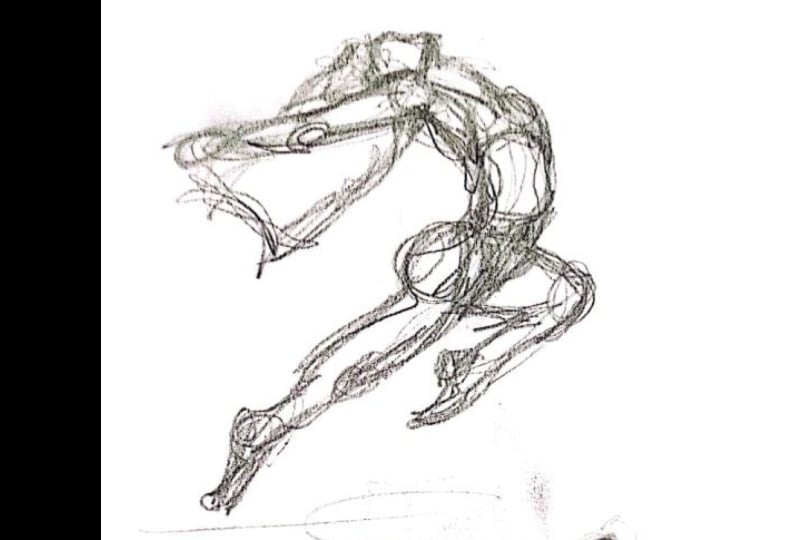
strong dark lines. I feel like that's
what you need to get the overall gesture or impression
of what you're drawing. Are we ready to get started, Paul, to start the time. Starting the timer
to look at do it. Okay. So the first
thing I do when starting a gesture is just get the overall
impression of a pose. And I want to draw
just some strong lines that I'm seeing. One of the major lines I see is just how that leg is
pulled out a little bit. So I want to draw
a strong diagonal. I'm going to put some lines
in there for the waist, for the arms, anything
that stands out to me. First, I'm going to start putting a line down on my paper. And I'm not worried too much about how things
fit together yet. I'm just drawing lines.
I'm not going back. I'm not second guessing. I'm just drawing at this point. I'm starting with those legs. I'm adding the arms,
shoulders, head. Just work your way
through the drawing. Just adding things as
you're looking at them. You're doing a lot
of back and forth, looking at the photo,
looking at your drawing. You're just trying
to get a feel for what you're looking
at on your paper. What should I do? Melissa,
if I started drawing and it does not seem to have the
right feel of the model, things feel way out of whack. Any suggestion Not
talking about myself? No, never. Just in general. Just, I would say with the gesture drawing
especially, just keep going. You know, I wouldn't
stop and think like, oh, that lines aren't right. Oh, I didn't put that
in the right place. I would just keep
drawing more lines. Yeah, I like that eventually
one of them will be right. Eventually, yeah, there's
to be something in there. Hopefully not
distress anyone else. But we are halfway
through with this one, now two more minutes left. But I think what
you can do is draw some major lines first and
then refine as you go. If we have 4 minutes, use the first couple to just get some major lines
drawn on your paper, and then use the last 2 minutes to start refining
some of those shapes. If you feel like something's
not in the right place or something's too long or
something doesn't feel right, just go back in and fix
it or add more lines, or attempt to get things
moving in the right direction. With those last 2 minutes H, this should not feel
like a finished drawing. When you're done,
it will feel like an overall impression of
what you're looking at. It's meant to be quick,
it's meant to be dirty. There you go. That just does
not even sound like you. I know it's totally
not me at all because I always like everything to feel finished and perfect. But one thing to get used to figure drawing is not everything's going to be
perfect in the beginning. You're going to have to try
and refine things as you go. Change things as you see them. And a jaw definitely. We have about 25 seconds left. Plenty of time, right? Okay, one thing that's nice about drawing
a closed figure, some of the clothes
actually give you some of the dynamics of the pose. If you look at the
wrinkles on her pants, that actually show you
where the body's moving. And some of those lines
might actually help you. All right, we may answer
the first one. Look? Yeah. All right. Now it's my turn and we are going to draw
this sassy lady. The pose is not super
different from the last one. We wanted to start with
some poses that were not too convoluted and
twisted and crazy. And then, but don't worry,
we'll get crazier as we go. Are you ready to start
another one? Melissa? I think Poll's got
charcoal everywhere. My right here. Just go with it. Okay, I'm going to start the timer
and let's draw now. I'm just using a
pencil for this one. I like to start with
very simple shapes. I'm doing an oval for the head, then I use line a lot
when I'm starting, like, I'll draw a line that represents the central
axis of the body, or you can think of
it as the spine. Because that helps me to make sure that as I add the
shapes then on top of that, that they're going in
the right direction. I noticed that she
is doing a twist. It's almost like
her body is making a little bit of an S shape. Drawing that line
helps me to see that. Then I also will draw horizontal lines at some of
the major points of the body, so I can pay attention to
how those angles are going. Especially when someone is doing more of a little
twisted pose like this. I noticed like here at the waist line would
angle down on the left, the shoulders the opposite. Anything that you
want to do that helps you to understand
what you're seeing. It's all about just
laying a foundation. Like Melissa said, we're not
going for realism or detail. You shouldn't be drawing eyes and nose and stuff until you get the overall just structure of
the body roughly laid out. I like to use lots of scribbly, sketchy lines because
like we were saying, if you draw a bunch of lines, one of them will
probably be right. And then you can
just emphasize that one by going back over
it and making it, and that makes the other ones disappear a little bit or
just not seem as important. Okay, her arms are interesting. We see where the elbows are, then the fore arm comes
up almost vertically. A little angle there, you don't see too much
of the upper arm. There we go. We have about a minute
and a half left. Is yours looking
magnificent. Melissa? I wouldn't, I wouldn't call it magnificent at this point, Paul. Yeah, that's what
Melissa says every time she makes a
magnificent drawing. I don't think so, but you're stuck looking
at mine right now. Too bad for you. I like to
vary the line weight a lot, not just for emphasizing
the lines that are right, but also because I
think it just makes it gives a little
more energy to it. And it lets you draw
attention to certain things. You can think about
where weight is or where there might be shadows or more contrasts that
you want to show. If you're only using a line, use the line to the
full potential and use as much of variety
in there as you can. Most importantly, do not
stress out if what you have drawn at the
end of the time isn't perfect or
doesn't even look, you know, remotely
like the person. This is something that takes
a while, it takes practice, and we're going to keep going
and practice more together. But that is it for this one. All right everyone,
you did amazing. Thank you for doing
some gestures with us. I think that was really fun.
Paul, did you have fun? Absolutely, yeah. Hopefully you
learned a little bit about different proportions, different ways of
drawing the body. A quick start, just
to get your feet wet, you get ready to draw
the rest of the figure. For all the lessons coming up, we have so much
more to teach you. Yeah. All right.
Let's keep going. Let's do it.
5. Gesture Drawings 2: Welcome back everyone. Okay. It is time to keep going with some more,
just your drawing. This is an awesome way to warm up and just kind of get comfortable making
lots of drawings. So, are you ready to
do some more, Melissa? I am ready, Paul. Okay, sharpen your
pencils. Let's go. All right, so we are
back with more gestures. Right, py, let's do more. And I think you should go
first this time. Melissa. Oh my goodness, that's a change. Okay, let's do it. I'll set the timer.
Here's our model for you. Okay? And we're doing a little bit of a shorter
gesture this time, right? We're less time. Three faster. Yes, yes. But again,
same rules apply. It's just practice. Don't second guess any lines you put down. If you don't like
the first line you put down, just put
down another line. If it just looks like a bunch of scribbles and lines at
the end, that's okay. At least you're
drawing and you're practicing and you're looking at the figure and you're trying
to understand the shapes. All right, here we go Polly, you ready and Okay. I'm going to start the same
way I did with my other. I'm looking at the major
lines in her body. So one of the first things I notice is that arm
up over the head, the arm on the hip, then the way the hips
come out a little bit and the one leg
is jutting forward. I'm just starting with
those major lines. If I don't like the way
things are coming together, I just draw on top of it. And we're looking at how
the shapes fit together, the way the leg comes down to
the foot shape of the leg. Just putting that
in very quickly. I'm doing a lot of glancing back at the photo as I'm
putting lines down. Yeah, that's a good, that's a
good thing to remind us of. Yeah, constantly
adjusting and shifting. If I need to, I do like to
look at some major points. I like to look at the waist or the hips and see what
direction that's going. I like to put that
down, that helps me. I like to look at the so line of the shoulder where
that's coming from. Usually the head is actually one of the things I draw last because I'm so worried about
the structure of the body. Interesting. Do we approach
that one differently? Okay, well the choice is yours. Everybody on that,
what works for you? Yeah, I think that's, you know, if you had ten different
drawing instructors, they'd all have different
things that they do. So it's kind of a nice benefit
of the class like this. You take what you
want from each of us. Oh, and we have 1 minute left. Oh my goodness, this
is a lot faster D. You might only have the basic shapes by the time you're done,
but that's okay. That's just giving you the overall impression
of what you're seeing, which is really the
point of this is just to start seeing shapes and proportions and
get your hand used to drawing those where
they're going to go. Yeah, exactly 30 seconds. Okay. If you have
some basic lines, just start resolving
some of those. Putting those in
the right place, looking at those again, deciding
if it's working so far, changing anything.
If you need to. Yeah, and do all of that in
the next 6 seconds because time is about De. Yeah. And, um, how was
that for everybody? Take a breath. Relax, get ready for another
one. All right. Remember to relax. This
shouldn't be stressful, it should just be fun. We're just playing
different shapes. Easy for me to say, I'm sure. Yes. It's always
easy for Melissa. No bitterness. I used you as an example
with a student yesterday. I told them, well, I
said I was telling her, nobody gets everything
right the first time, it's okay to make mistakes. And then I said, well, I do have that one friend who ruins
the curve for all of us. Oh my goodness. Okay, ready. Here's our next model and we're going to do
this in 3 minutes. It's my turn now.
Start the timer. Okay. One thing I
was thinking that I wanted to tell you guys is I look at it when
I'm starting out. Adjust your drawing as A matter of prioritizing
things because obviously we don't have time to draw everything that we see. You have to make some decisions
about what is important. And I think that's very helpful, especially if there are any of you who might have
some, I don't know, perfectionistic tendencies, not talking to anyone
in particular here, I don't know what
you're talking about. But yeah, it can be difficult if you are
more wired that way to be able to see the
big picture sometimes because you get so interested
in all the details. This is really about looking
at the image, the reference, and prioritizing what is essential because you
only have a limited time. Then doing that,
I think helps you to lay a really nice foundation. If you were to go
in and be able to do like a longer
drawing or painting, even when I have unlimited
time to work on something, if there's a figure involved, I like to start it as a gesture drawing because then
I get that energy, the essence of the figure
on there right away. And I can build on top of that
and add as much detail as I want with more confidence that things are going in
the right place. Otherwise, if you
start with detail, you aren't always sure
if things are where they need to be and
you end up having to erase things that you've put a lot of time and energy into. It's a good technique, even when you have unlimited
time for something, at least as a way to start. Now we have about 1 minute. Your time is limited here. My does not even have arms yet. I think that's something I might want to
prioritize right now. There's some interesting
foreshortening happening on the
arm on the left. It looks like he's just got this tiny little arm
peaking out there. But it's because the
upper arms hidden. We have 30 seconds look for what shapes you can use to represent different parts. Like I tend to go a little
bit more angular with things, I make things a little bit more geometric,
straighter lines. And then I can soften it as I
go if I have time for that. But it feels more
structural that way. If you go too loose
and flowy and curved, I think it can maybe
lose a little for me. Okay. Oh gorgeous. Beautiful time's up. Okay. We did it. We did, we got through it. Everybody, last one
from this lesson, and this one's all you, Melissa. All right, let me
flip my paper here. Okay. See how we are
getting a little more interesting with
our poses now. Mm hm. Okay. All right. I'm ready. If you are, I'm ready. I'm starting with
the timer and Okay, this one is a really
interesting one because there's a real strong line here, There's a really
strong curved line. I'm just going to
start sketching some lines that I feel like represent the overall
impression of this pose. Because I think this one, it can be very
tricky if you just start drawing the
individual elements. Like if you start drawing
an arm, you be like, oh gosh, now I don't have
room for those legs. Yeah, I do think drawing an overall curve or shape that you're
seeing can really help, especially if you
have something with a lot of foreshortening,
like this one. Foreshortening is just a way of explaining the way the body changes depending on how
you're looking at it. If something's moving towards you, you're not going to see it. In the same way if something
is straight out to the side. Yeah. It ends up making things sometimes look very much like how you would
expect them to. Yeah. Proportions can change a lot when you're not
seeing them straight on. We are halfway through this one, a minute and a half a. Okay. So use the same techniques
that you've been using the whole time to get to
a place where you feel like you're drawing somewhat represents what you're seeing. This definitely is a tricky one. And try not to get frustrated if things aren't going
the way you want them to. Yeah, just say, oh, I meant
for it to look that way. That's art, best to
experience and it's all good. Yes. You have to make
a lot of bad art before you get some
good ones sometimes. Yeah, trust me, I
think that's pant, but it's especially true
of gesture drawings. I feel like you have
to warm up a bit first if you want to do
more beyond this course, even there's so many great
resources available online, even just watching videos of people doing yoga or dancing, and then pausing, It gives
you some great gestures. Hm, okay. And time is O, right? Good job everybody. Awesome work. Okay,
well, guess what? We have more gesture drawings to do in our next lesson only. We're going to mix it up
a little bit next time, so get ready to
try something new. Are you ready for that, Melissa? I think so, Paul. I'm
a little bit scared. Oh good. That's
just how I like it. See you soon.
6. Gesture Drawings 3: Hi everyone. Welcome back.
It's me and Paul again. And we're going to do some
more gestures this time. We're going to do things
a little bit differently. We're going to do something
called continuous line. And then we're going to turn
our figure into a mummy. And I know that
sounds really weird, but just stick around,
it'll make sense. I swear. Paul, are you ready? Yes, I am ready. Let's
do it. All right. Let's have some fun taking Melissa out of her comfort zone. That's my favorite game. Are you ready, Melissa? Yes. This is going to be a
challenge for me as well. So we're all going to
be learning together here who I love it. Okay, here's our model piece
of cake already, right? But then we're going
to do something a little different
with this drawing. Why don't you tell
them what that is? I get to tell you all what Paul has told me that I
need to be doing here. We are going to be doing a
continuous line drawing. The only thing that
means is you're not allowed to pick
up your pencil or your pen or your drawing implement whatever you're using. I'm going to be using a pen. I have a little permanent marker here just because I feel like it will flow nicely on the paper and you'll
be able to see it. But the idea is to create the overall impression
of this one. The gesture through
just lots lines, you can scribble lines, you can do curves, you can
do whatever you want to do to create an impression
of this shape of this pose. One role, just don't
pick up your pen. Okay. If you do, the art police are going to come and find you. Come after you. All right. Are you ready? I think so. We have
3 minutes this time. Is that We're doing
3 minutes. Minutes. Thanks. All right.
Here we go everybody. I'm just going to be
concerned about some of the major lines here
and I'm just going to be going over on top of anything I draw if I don't like it similar to what
we've already done, but I'm going to be less
worried about the overall I guess look of this and just
capture look a little crazy. Yeah, it might look
like scribbles by the time we're all
done, but that's okay. I love this technique.
Oh my gosh. Of course you do. Can we just make this the whole It's just like everything. Like everything we
do from now on? No, no. Just like the rest
of this particular lesson, can we just do two more of them? Two scribbles for everything. Yes, I love it. Oh, it's finally
something I'm good at, scribbling and Melissa
gets to teach it. We have a minute and
40 seconds left, so keep on scribbling. No lifting up those pencils. Hm. Or pins or whatever it is hard once you get started,
she's like, oh, I really want to
go back to this, but I'm not allowed to just
pick up my pencil and do it. Really what this
teaches you is to get used to being
uncomfortable first up, but just to look at
what you're drawing and get it quickly
onto the paper without worrying too much
about what it looks like. And I think that's a
really good lesson, especially in gestures, because sometimes you can worry
so much about what you're drawing and what
it looks like that you're not actually looking
at what's in front of you. For me, I think
another benefit of this particular technique is that all the lines that
you end up drawing, all those scribbly lines, end up giving it more of a feeling of
movement and energy. It's a lot different than
when you draw normally, like more controlled lines. It's like I feel the action
of those 30 seconds. Something that might help. Just holding your pen loosely
or holding it further down? Yeah, I mean, further up on the pen and then you won't
have as much control, so you really can't go back
and change a lot of things. Mm hm. You really
have to work quickly. Okay, 5 seconds and time's
up, how did it turn out? Oh, gorgeous. Nice job. Job, everybody. Thanks
for suffering with me. That's what we love
here, making you suffer. All right, now I'm going to do a different
exercise with you now. Here's our model for this one. We're going to do a five
minute gusture drawing. We'll start out spending
the first half, let's say 2.5 minutes, getting it roughly sketched out, just like you have been doing. Then for the second half, we're going to do mummy
lines across the figures. I want you to imagine that he is a mummy that's been wrapped
up over and over again. And we're going to
draw the lines, but they're not just
horizontal lines. It's not like a cartoon mummy. We want to think about how
would those lines curve and look along all the different
contours of the model. The purpose of this is
not just to torture you, it's to torture Melissa. Exactly. The purpose of this
is to get you thinking more about the figures of
three dimensional form and how it would
almost be sculpted. And I think that's
really helpful when you are doing
just your drawings. You want to remember
that we're not looking at something that we
want to feel flat. I'm going to do the
drawing and pencil, and then I'm going
to go back in with a pen to do the mummy lines, just so they look different, But you can do
whatever you want. I'm going to start the timer now. Let's get started on this. Okay, Start out just
like how you have been. Whatever works for you.
Get the figure down there. In 2.5 minutes, we're going
to start mummifying him. If you don't get
the whole figure done in that time that
we have, that's okay. We can just focus on
whatever part you drew. That's also a good
thing to keep in mind with any of
just your drawing. You can always choose to just focus in on a certain
area and then let the lines just dissolve or fade out as they move
away from that part. I want to know what
he's looking at. He's very into it, whatever. What is inspiring, very focused. I love his outfit. I know the danger of
drawing clothed models. You want to spend all
your time drawing their outfits into fashion. But it's, you can definitely
do that if you have time. But it's good to understand just what the body
is doing first. And I think that's very
especially helpful because when you look at
art from art history, like back in the
time when before were allowed to
draw nude models, you can really tell
they had no idea what bodies look like or
how they function. That it was just
like these heads floating on top of
these formless blobs. Understanding a little bit about the structure of the body definitely helps
make the clothing have something to lay on. 30 seconds left to get
the basic form down. Don't bother with details since we're going to be doing
those mummy lines anyway. We're just trying to get
the main contours here. I'm going to lower his
head a little bit to high. Okay, now it's time to start mummifying this
dude, are you ready? I'm going to switch to, I'm
just using a micron pen. You can use whatever
you have. You can even just keep using
your pencil too. Don't worry about
making the lines perfect or anything like that, It's just about getting
the feeling of it. Since we are working
with a cloth model, you can look at some of
the folds in the fabric that can give you a nice idea of how those curves might go. Especially like right
here on this arm, that's where I'm starting. You can see the lines in the fabric really
help with that. Same with the shirt in the
front, his chest, stomach. The way that the lines curve
tells you a little about the perspective to how
you're looking at the model. The curves might be
different if we were really up high looking down or
down low looking up. Okay, I'm going to wrap them around this leg and see how just getting
those lines in there, it makes that leg suddenly feel more three
dimensional on the page, there's more of an awareness
of it as having volume. That's a very helpful thing to carry over into your other work. Not that you're going to wrap
everything up like a mummy, but you can use lines. Or if it's a painting, you can use brush strokes to not just apply them randomly, but to actually
follow those contours and it will make the figure
feel more dimensional. Okay, we have about 30 seconds left with our little
mummy friend, you use the whole time.
If you finish early, go back in and try and add a little more detail somewhere. Bring out because there's
always there's always more. That's true. I can
testify to that. Yes. If you're not sure what, then just call Melisa. She'll find it for
you. All right. And there we have it. Time's up on that
one. That was fun. Yeah. Beautiful,
great work everybody. We figured out continuous
line drawings. Hopefully, hopefully you feel like
you understand what that is and we made mummies
out of our figures. And hopefully that
gave you a better idea of how to create volume. How to create shape
and sculpture, drawing into something
that feels like it has structure to it,
like it makes sense. Does that makes sense, Paul? I make sure totally. Okay. Hopefully you're still with us and we will see
you in the next one.
7. Project 1: Rough Sketch: Hi everyone and welcome back. So now we are going to
start on a longer drawing. We're going to
spend three lessons working on a drawing
that I'll be leaving and then
I'll hand it over to Melissa and she can do a
drawing with you as well. So, are you ready to let
me take charge, Melissa. Oh, Paul, I think I
think I can do it. Okay. Remember you have to do whatever I say for
the three lesson. Mary's. All right. Let's go. Okay, let's jump into our
first longer drawing Now, just because we have more time
doesn't mean relax, ready. We're starting with
the stress already. Stay stress. That's my motto. Kidding. Joking. I
hope I'm not joking. I'm going to start just like how I did with
all of the others, I'm going to do a
gesture drawing to get the essence of the figure on the page and
then we'll go from there. Since we do have more time, that will give us
the opportunity to add more detail and look. Maybe even doing some
shading and all of that, but it still starts
with a gesture drawing. Got the head, I'm
working my way down. What did you say this
pose was called? Melissa, this is proud warrior. Or warrior three.
Nice. Oh lovely. Mm hmm. Okay. So would you suggest maybe drawing
a little bit lighter for this gesture than
maybe thoughts? Are we going to be
adjusting? I'm assuming? Yes. Press lighter
with your pencil. And like Melissa had suggested
in a previous lesson, I like holding my pencil
farther away from the tip too. That helps me to not
press too hard and also not try to overly
control it too soon. But yes, drawing
lighter is great because then it'll let us do the more refined lines on top and then we can erase away anything
that we don't want. We also use this opportunity
to talk a little bit about how you can
check your proportions. Also, let's get the essence
of the figure on there. Just very loose, without a
lot of commitment at first, not too attached to it. And then we're going to
do some measuring to see if things are where
they're supposed to be. Before we start detailing it as I'm even just
doing this gesture, one thing that is
helpful to me is looking at the shapes
of the negative space. That's the space that is around the figure stead of necessarily just looking at it and
drawing the person. I look at the shape that the negative space
makes and that can help you to get things
proportioned correctly also. Okay. Just about got
the basics down. Just get his legs on there, then we're going to
do some measuring. Well, there's many
ways to do this, but the way that I'm going to show you involves
using your pencil and holding it up
as like a ruler. Take a moment once you have the rough gesture on the page. And hold your pencil
up vertically, so that the point aligns with the top of
the model's head. And you're going to want
to close one of your eyes, that will help you to not
have it be too out of focus. Close one eye, then
slide your thumb down that it is aligned with the models
chin on your pencil. The tip of the pencil
is that his head. Your thumb is marking
where the chin is. You basically just captured
the measurement of his head. Now I'm going to count
down to see how many heads it takes to get to different
increments of his body. If I go down 12, it's about 2.5 heads to get right here to bottom of his
pelvis or the crotch area. I'm going to measure
the head on my paper. And see if I got it right
and if not, I'll adjust one. It was 12, it was 3.5 I wasn't counting
that initial head. I was like, wait a
minute, it seems small, 123.5 I'm close but I think I made his torso
just a little bit too long, which is something that I often do because I have a
long torso myself. We tend to draw people and
make them look like ourselves. That's something I know I do. So that's why I always
try to check going to erase the legs and
scoot them up. Don't be afraid to make
adjustments to your drawings. I think so many times people
will notice a mistake, but they feel like, well, it looks okay. Maybe I'll just
leave it. I don't, I'm afraid I'll mess it up
more if I try and fix it. But it's always better, especially at this stage, to go ahead and try and fix it. Get it as close as you can before you start adding
in all that detail. Now I'm going to
see how many heads it takes to get
down to his feet. 12345. A little past five before
I even redraw his legs. 12345, we're about right here. You can see I have those a
little bit too long as well. I did that on purpose so that you wouldn't feel bad
if you have mistakes. I don't know why Melissa
is laughing right now. She knows what a kind, generous person I am. Yeah. All right there. That does
feel better. All right. And we're going to go, the feet pretty much
align horizontally. I know that this one is going
to come to that same point. You can also use
that technique to check horizontal
distances to same thing, I'm going to capture the head, then I'm going to see
how many heads it takes, if I turn my pencil sideways to get from the shoulder to
the tips of the fingers. It's 12, little less than three. Now, let me do that. I'm here. 123, I got that one right. Who? Now, let me just
check and see if the other arm is the same like you would think
they should be. And I'm guessing they
probably are here since there's not a lot of
foreshortening happening. But it's always good
to check anyway, 12, that one's the same. Let's check here. 123 thing. Got it? Okay. Now I feel more confident that things are
where they're supposed to be. The other thing that you can do is check vertical alignments. We might not get
much farther than just this rough gesture
drawing in this lesson, but I think it's
worth taking the time to check some stuff. If you hold up your
pencil vertically, I want you to align it with the tips of the
fingers on the right side. And close one of your eyes. Make sure the pencil is
straight up and down. And notice where the foot is
in relation to the pencil. It's a little bit to the
left of it, isn't it? That means the foot
doesn't go out quite as far as the fingers do. Now, take your pencil. The same thing on
the paper and minds. Right? Okay. But if yours
isn't adjust it, these are all things
that you can do to just check and make sure everything is where
you want it, Okay. I am pretty confident
now in my drawing. I'm going to just take
the next minute or so and start
refining the sketch. And then we will
continue that in our next lesson to get the shoulders laid
in a little better. Here I'm noticing where they are in relation
to each other. The shoulder on the right is a little bit higher than
the one on the left. We always want to draw
things very symmetrically, but we think the body is supposed to be
symmetrical, which it is. But there's always different
shifts in how we're positioning ourselves for
shortening and perspectives. Don't draw what you
know, draw what you see. All right, awesome
work everyone. Okay, we have that figure
laid out on the paper. So now in the next lesson, we are just going to work
on refining the drawing a bit more and adding in
some additional detail, which I know will make
Melissa very happy. Does you've given me
something? At least? Yes, have to throw her a bone. All right, we'll see you then.
8. Project 1: Refine Sketch: Hi everyone and welcome back. In this lesson, we are
going to continue working on the drawing that we started
in the previous lesson, and this time we'll be adding some more detail,
sharpen those pencils. Are you ready for detail? So ready, Paul? Yes.
Give me the details. I knew she would love that. Okay, let's get started. Okay, let's get back into this warrior pose.
Is that what it is? Clearly, I'm not a yoga master. You need to work on
that. All right? Yes exactly. That would be fun. Can you think you can do
art while you do yoga? It might be difficult,
but I'm sure we try. I'm just going around now
and refining my lines. Obviously, when you do a
quick gesture drawing, you're not really
paying attention to all the subtle nuances
that are there. This is a chance now to go back. We've taken the time to
measure, check our proportions. We have some level of confidence that things are pretty much where
they're supposed to be. Now is a great time to add as much refinement to
your drawing as you want. There's no right or wrong. Some artists styles are more
loose, some are tighter. But take it to the
place where you want it to be. That's what
I'm doing now. Then after I get all of
the lines worked out, we will finish it up
by doing some shading. That's the master plan. Are you in for that? Yes. That's what you
have signed up for. Whether yeah, whether
you knew it or not, it's going to be
magnificent. Let's see. One other suggestion
as I'm getting started here on this part
is as you draw, you might want to also
consider drawing some of the interior lines and not
just the outlines of the body, but where you see
shadows are usually an indication that there's
some plan shift on the body that can be an
indication of maybe a muscle or just a curve or a turn or something
different is happening. Sketching that in is helpful
for a couple of reasons. For one thing, it
just gives you, it gives you more lines to start comparing things against. I feel like it's
often the hardest to get the proportions
and to get the details right when
you're working in a big, open, empty area. But if you're thinking about
not just the outlines, but also breaking it up
with the interior stuff, just gives you
more things to use as ways of comparing parts. Do you do that much? Do you draw interior shadow things or
do you wait and shade them? I do a little bit
of both, I guess. Hm, yeah. I like to give myself a guide
for when I start shading. Yeah, yeah, I do. I find helpful. The
shadow areas can help. That's one way to
approach gestures too. If you just approach
the way that light is hitting the body, that can be really helpful. Hm. Yeah. Because it's hitting the body that
way for a reason. It has something to do with
what the body is doing and how it's position,
overall structure. It can help you define
different areas. And the way we did the mummy, it almost helps
sculpt into the body. I do miss our figure drawing class in college.
That was the best. It's always wonderful if
you ever get a chance to, well, you are taking
one right now. You're taking this one,
which is the best. But if you ever get a chance
to take in person one, I would suggest that especially
from a nude model live, there's just nothing
quite like it. You can just see
things so much better. It really is a wonderful way to improve your drawing
skills very quickly. You'll notice the improvement. If you're nervous about
working from a nude model, it becomes very mechanical. There's nothing like live
drawing, I would say. Yeah, drawing, fude model, you're going to notice different parts of
the body and the way. Different structures fit
together a lot easier than you would working from a photo
or from a closed model. Yeah. It really
is so beneficial. And like Melissa said,
you're just looking at shapes and you stop even
thinking about what it is. What you're looking at.
Yeah, like drawing. Anything else? Hm. As someone who has
been a nude model, I can tell you that their job is actually the
hardest of anyone. Sitting still for a
long time is not easy. Well, especially not
for you, Paul, right? That's true, yeah. Maybe
for others it's easier. But you really have to think
about what position to get in so that you're not
going to be like hating your life in a few minutes
or anything like that. It is work to stay. You learn more about your body doing that too,
it's interesting. And then you walk around and see how everybody drew
you and it's like, wow, is that what I look like? Don't worry, I will not
be posing for you today. Good. It makes me feel somber. Unless Melissa annoys me,
then I might have to. Oh my God. All right.
This is coming together. And see how once
you start getting those more detailed lines, it comes to life. It takes shape. It really feels less robotic and
more like a person. I think that's why
it's so tempting to want to go for detail early on so that you can get
that feeling life person. If you don't have
the structure there, it's really not going to come together. It's hard to wait. I know you shouldn't
have your dessert first. It's like building something. You have to have the
structure right before you can put anything
on top of it. Yeah, Melissa and I are not rule followers and we're not
rule enforcers either. You can honestly do
whatever you want, but I do tend to
follow that rule. I just think that it the work
come out so much better. And it makes it less
stressful if you're trying to draw details and
at the same time trying to figure out even if the proportions and if things
are in the right spots, that's a whole lot to
think about all at once. Right now, what I'm
drawing is fun and almost relaxing because I've got my
guidelines already there. I know that it's
basically right. So I can just focus in on all
those little details now. It's okay as you start
adding the details. If you find things that are
starting to not make sense, feel free to, at even now, don't feel like
things have to be exactly perfect
before you start. But I do think it's helpful because once you
start putting the details in, if the drawing isn't right, you're going to start getting
frustrated because things aren't going to start
looking the way they should. Yeah, exactly. You're going to be spending
all this time and it's going to not be as rewarding
as you hoped. I find that that's true. No matter what medium
I'm working in, I do mostly paintings myself. And I should start
out by saying, if I'm doing something where I'm going for realism anyway, if I don't have the structure
figured out initially, the whole process, it just makes the whole process harder
and less fun for me. I want to be able
to just play with color and shapes and
lights and darks. You can't really enjoy
that part if you're like, wait, is this elbow where
it's supposed to be? Yeah. If the details start not lining up with each other as you're starting
to put them down, you will figure out really
quickly that things maybe aren't as structurally
sound as you thought. Yeah. If that
happens, don't panic. Use some of the tools that we've shared with you.
Start measuring. If you find something
that doesn't feel right, measure, find something
that does look right and use that as the
basis for measurement. We use the head, but you can use that same technique
with anything, any part of the body,
whatever you want to say, this part is right
and I'm going to build everything
else around that. Then it'll work for you. You just have to commit to
have to draw one thing right, and then start it. Could be whatever thing it
you want, doesn't matter. Get that one thing on there and then build the rest around that. Yeah. It's probably easier
if it's something larger. Like if it's a finger you
might have a hard time Yeah. That would take a while to build an entire drawing
around a finger. That All right. I'm just going to
draw in a little bit of his hair and head shape. And then that's going to be
it for our drawing stage. We will come back in the next
lesson and do some shading. Now, if you need more time, that is totally okay. You just pause the video, take all the time you need
until you get your drawing worked out before you
move on to the next part. Because you will want to have it pretty well sketched out
before we start shading. Okay. But that does it for mine. Great job, everyone. Okay, we're almost there. One more lesson to finish
up this drawing before we start on our next one that
Melissa will be leading. Are you ready to
finish this one up? I'm ready, Polly.
Let's finish it. Okay, I'll see you then.
9. Project 1: Finalizing Drawing: Welcome back everyone. Okay, it is time to
finish up this drawing, and we will be adding in
some shaving this time, working with a little
bit of value to create even more form and
structure in the drawing. You ready to do some shaving? Let's do it, Polly. All right, let's go. All
right, let's finish this up. I'm going to jump right
in and start shading in some of the darker
shadow areas because we've already got the white of the paper that's giving
us the highlight, the most extreme highlight
that we can have. I like to go the total
opposite direction and get some of
the darkest parts. I like to squint my eyes because then I'm not getting
distracted by all the details. And I can focus on
just where I'm seeing those real dark shadow
shapes where the areas with the most contrast. That's what I want
to start with. If you have more
time, then you can always go back in and find all of the more subtle
variations in value. But if you have a limited time and you want to do a
little bit of shading, go for the extremes, look for the most contrast. Because if you can get that in, then you'll have a
really good sense of how the light is hitting, then you can always
refine it more as you go. The nice thing about this has that extreme contrast
from the sun, which makes it a little bit easier to find
those darker darks. It's a good idea if you're
looking for reference photos, to look for images that
have strong lighting. Because then you
get to see more of those shapes of the
musculature and just the form, if everything's too washed out, it's really hard to understand
the dimensionality of it. I'm using a two pencil for everything that is
a nice soft lead. Vary the pressure to make, make it darker or lighter. There are different
techniques for shading, if you like, using a
variety of pencils. You could use the harder leads for your lighter values and then the softer
leads for your dark. But I'm too lazy for that. I'm just going to do
it all with one, okay? Jumping up here to the
arm now you can see how the shaping of that
shadow really does add a lot. It makes that arm feel
more, more dimensional. And you understand a little bit more about the musculature, which is helpful for me since I don't really
even have muscles. I just sit inside
and draw all day. I'm not out here
doing warrior poses on the beach like this guy. Maybe I'll start,
then this would be so surprised if he came home. That's my husband.
If he came home, If he came home from work
and this was happening, oh, I thought maybe he
stopped coming home. Well, not yet. And actually, I guess I should say, probably nothing really surprises
him at this point. Yeah, he's used to by now. We've been together
almost 18 years. I think he kind of
knows what he's in for. Yeah, for sure. That's crazy. 18
years by the way. Yes. Yeah, we're old. Melissa, I know that happened, Paul. I don't know. Okay. Getting some I'm not
doing details on his face. I'm just kind of looking
for the shape again, the shapes of the shadows
because that will at least give us some structure and make the face feel more more resolved without getting
too detailed with it. Yeah, there's usually a strong
shadow right underneath the brow covering the eye and then underneath the
nose down to the lips. Yeah, I think that U. It's very interesting
and helpful to be deliberate about how you choose to put detail
into your work. Different approaches. You
could decide that you want one particular area to be really detailed and put a lot of
emphasis and detail on that. And then let it fade as you
move away from that part. Or if you're doing
something that you want to feel more resolved. The approach I'm taking here, then I think the main strategy is to make sure that you're dealing with
everything in a similar way. Even though it's tempting you
think, oh, it's the face, I want to, you draw all those
little details of the face. But if you're not going into that level of detail
everywhere else, if we're not drawing
the fingernails or toenails and things, then we probably aren't
going to be seeing eyelashes or things
like that on the face. Either having a
consistent approach to the whole drawing will make it feel finished no matter how detailed you
decide to go with it. Hey, I'm getting this arm. I'm still just focusing in on the darks for the most part. Right now you'll see there
are a few places where I'm letting it grad a little bit by lightening up on
the pressure as I move into an area
where I want it to be more of a middle value. But I'm still starting
with the darks, just working my way around. I'm going to do the clothing
last because I want to make sure we get all the body first. That's the most important part. Once you start really
looking at the shadows, you realize there's
a lot going on. Yeah. This is a complicated, the
body is such a complex thing. It really is. Yeah. And I
think that's what scares most people away
from drawing it. But I think if you start with the basics and you
understand the shapes, you don't have to worry as
much about the details because things will fall into place if they are
structured correctly. Or you can just still be afraid. But do it anyway. It sometimes, sometimes
fear is a good motivator. What's the worst thing
that can happen? You might make an
ugly drawing to. Yeah, that's life. We've all done that. Yes. Well, yeah, it
happens to all of us. I love win. Melissa lies to, you know, it's relative, right? So somebody else might look
at your drawing and think it looks great and you might
think that it's awful. Try not to judge in
your case harshly. My mom likes everything I do, so I must be she All right? Actually, no, she can
be quite a critic. Did you mean to make
it look like that? Come on, mom. You do
have to be careful. If you're a beginning artist, this is a little off topic. But whatever, we're
just dating now, who you show your work to, you can get discouraged
very easily. You show it to the wrong person who's just super
critical for no reason. Yeah. Make you question things. As long as you're
enjoying yourself and learning, it
really doesn't matter. I try and emphasize
that it's always about the process more
than the product. Yeah, if you're
learning from it and it's a good challenge for
you, then it is worth it. Yeah, It's like learning
to play an instrument. It's not all going to
be beautiful music in the beginning. Oh no. Especially not when
I tried to learn the trumpet when I
was in middle school. I can't imagine you
playing the trumpet. You just couldn't even
stand to be in my house. It was so terrible. This is not such an inspiring
story because I never got better and the band teacher just asked me to pretend like I was playing during the concert. So that's when I knew that perhaps this was not my calling. But I'm sure if I had been passionate about it and
if I had stuck with it, I would be on some jazz
festival stage right now. All right. I'm just doing the last few shadows
here and then we are going to be all finished with this one and then it's
going to be your turn. Melissa, are you excited? I am thrilled. Paul Y. Oh, I like Melissa's
thrilled voice. Okay. Just putting shaded in the whole shirt and shorts
with a pretty dark tone. But I'm just going back
in and adding a few, like super dark shadows in there so it
doesn't feel so flat. And because as we
saw with the mummy, that those kinds of
lines do really help make the form become
more three dimensional. And this is definitely
something that you could spend a lot of time on
if you wanted to. So feel free to take
the time that you need and get as
detailed as you want. Yeah, absolutely. Some
of the drawings that we did in figure drawing
classes would go on for hours. They give the models breaks. Sometimes they'd even come back for several weeks
and hold the same pose. This is the thing where there's
advantages and benefits and I think learning
opportunities to all the different approaches, whether you're going
really fast and doing just your drawings or going
slower and doing more detail. All right. There is my
little warrior dude. All done. Beautiful
job, everyone. Okay. You did it. You took the
drawing to a whole new level, but you haven't even
seen anything yet. Wait until you experience what Melissa has in
store for you next. Are you ready to
be in charge now? Oh, no pressure.
There's a reason why I chose to go first. I'm letting Melissa
close this out. All right. Well, we'll see
you then. Ready or not? Oh my goodness. Here we go.
10. Project 2: Grid and Start Sketch: All right everyone,
welcome back. It is my turn to take over. So I am in charge here I
am piloting this plane, which is a little scary for
all of us to be honest. So the first thing we're going
to actually make a grid. So I'm going to make Paul use a ruler and draw straight lines, which he is not a big fan of. But it will help, I promise. I know it sounds super weird, but we're going to
draw a grid and we are going to start sketching, and Paul is going to
love it, right? Paul? Absolutely. Okay, here we go.
Let's everybody. Okay, here we are
at the next lesson. So we're going to do things
a little bit differently. This time we're going to use a measuring technique similar to what Paul taught us in the
last couple of lessons. But this one we're going to start with measuring
out our paper, and then we're going to
add our figure within the square that we draw on
our paper. I have a ruler. You don't necessarily need a
ruler, just a straight edge. You can mark off a piece of
paper, piece, cardboard. However you want to do this and whatever you
have on hand will work. I'm just going to measure
out my paper here. Your square will be a different size depending
on what size your paper is. I'm just going to, I'm measuring out 8 ". I'm going to do an eight
inch square and I'm putting a little mark in
the center at 4 ". I'm basically drawing a grid. If anyone has ever used
the grid method to draw anything to transfer a photo
or anything like that, it's very similar to that, but we're going to use
this with figure drawing. And you can use this on
a live model as well. Just drawing my vertical lines here to my horse. I free handed my grid
because that's how I roll. You can do that too. I mean, if if that works for you, it's a little less
precise but that's okay. Not mine. Melissa.
Mine is 100% accurate. Sure. Is Paul. Okay. I'm
all about precision. It makes me feel
more comfortable. It helps me relax. It stresses me out. I know Paul, the opposite. Okay. I had my grid here. I drew this fairly lightly. This is something where if you're going to do
a finished drawing, you probably want to
keep this pretty light because you are going to
want to erase it at the end. It's a guide for you. I've drawn my grid here. Now I'm going to use a
similar technique to measure my figure that Paul
used to measure figure. And I'm going to hold up
my pencil and I'm going to where the center point is. You're going to look at the
main vertical of your figure. That is probably
starting at her head, going down to that foot
where all of her weight is. I'm going to decide
where the center is. Just try holding up your pencil and then
moving it down to the bottom part
until you figure out exactly where the
center of her is. To me, it's right around where her shirt is tied at her waist, and I'm looking at the
very top of her hair. I'm measuring down from
there to that bottom foot. Yeah, right where that knot is. Then I'm going to look
at the horizontal. I'm going to measure
that distance that I just found from the top
of her hair to that, not in the center. I'm going to measure
out horizontally. Try to figure out where the center of her
is horizontally, as well as vertically, That will essentially match to
the grid on your paper. You're going to start
lining things up based on what you see in
your figure here. Obviously, she's taller
than she is wide. That's going to help me orient her within the square that
I've drawn in my paper. It looks like horizontally her center is probably
further left than it ordinarily would be
because she has her foot out and her arm out on the
one side of the left side. Well, it would be
her right side where her waist meets her leg. That's at my center point here. I'm going to start
with that in mind. I'm going to start drawing
her within this grid. I'm going to imagine
that grid that I just measured on
top of this photo. And I'm going to start laying out where I think everything's going to
fall within my grid. Do you even know how
happy you're making all the detail oriented
people out there right now, they are in heaven. This is, it's a very
mathematical way of drawing something
that makes me happy. But as you keep going, you have that center
line figured out. As you keep drawing, you can start looking at
different relationships. Look at how wide her waist is. Depending on that center line, it's like maybe half
of what she is tall. Actually, it's a little
smaller than that. It's like one segment of that, half of that top part. Let's see, I'm just going to keep looking
at relationships. How tall is she? Where does that fit as far as
that vertical line? It's interesting
how, whether you use your technique here
or the one I was using. It's similar to things
that you're looking for, the relationships and things, but yours is a more precise
way of measuring it. Hm, yeah, I'm still looking at how things connect his relationship
between things. I'm measuring first
and then sketching, and then continuing to measure
as I continue to draw. It's a bit of a slower process. You might have a slower started drawing in
the beginning and that's okay because you
might have to do less adjusting as you
go because you're measuring before
you start drawing. I think one thing
that helps too, is once you have a grid
drawn on your paper, you start to see what
parts of her body are truly horizontal and
which are truly vertical, and maybe some are more
angled than you think. If you look at that bottom leg, there is a definite arch
to it and you might not notice that as much
if you didn't have a vertical drawn on your paper. So much of what we
think we see is not always exactly right. It's really about slowing down and paying closer
attention to those things. As you start to get more
shapes in your drawing, you can continue to measure the relationships
between things. If you want to know how wide her legs are compared
to her waist or how long her arms are compared
to the rest of her body, How far out on the side
of her body do they come based on the size of her waist or the
length of her torso? You can measure all
those different things, then you can measure them
versus the whole height of her. I think you can get a
pretty good idea rather quickly based on this grid if things are starting
to make sense. If the height of her makes sense with the width of
her as you've drawn it, sometimes it can be tricky to decide how
long those legs are. I think it can be easy to
make them too long just based on our perception
of what people look like. It's nice to have
something to measure it against, check yourself. You really have to just
stop thinking of things by their labels like I'm not
drawing a leg right now. It's just a shape
that helps me a lot. If I focus too
much on the label, then I just draw what I think that looks like
instead of what I see. Hm, Okay. All right, I think I
got part of this drawn. We're going to continue the
drawing in the next session. Just continuing to measure, continuing to look at the relationships between
different parts of her body. So we will see you
in the next one. Okay, you did a great job. You got through that.
We drew our grid. We figured out
different proportions, how to fit our drawing
within that grid. We got a good start, but let's keep going
in the next one. I will see you then.
11. Project 2: Continue Sketching: I read everyone. We are back and we are going
to keep sketching, we're going to keep measuring, making sure we're getting all
of those proportions right, making sure the scale
is making sense. We're going to look at all
the different relationships between the different
parts of the body. So Paul, are you ready to get started
on all those things? That sounds like a lot but Okay, let's It's a lot. It'll be cool. We got
this, we got those. We're back. Did you miss those? I hope you did. Because we are back and we're not
going anywhere. Not here we go. All right, So I have
a half of her drawn, so I'm just going to
continue drawing her, thinking about the different
shapes that I'm drawing, the scale of things
as I'm drawing them. I have her legs
established here. I understand where
the center of her is and I'm continuing to think
about that as I'm drawing, starting on her torso here. Helpful thing is
always to measure, visually measure
things are landing. Let's see, shoulders are about
about halfway up in that, in the top section of my grid. I want to keep that in mind. I feel like this method would be especially helpful if
you were also like drawing the environment to or things that are
happening around the figure so that
you are thinking about the whole image. H. Yeah. When I draw the live figure, I work this way too. So I will draw grid on my paper first and I will figure out where the center is of the
model that I'm looking at. It really just helps orient me like I get very stuck
in thinking, oh, her waist is halfway, or this must be half way, and I think it's easy
to assume things. Hm, yeah. It gives you like an
external measuring device that's not connected
to the person. Yeah, I think something
about drawing live too. It's like easier to get
stuck assuming things. Yeah. Because sometimes it's
harder to sit and focus on what you're
really seeing. We tend to use visual
shorthand when we're operating in real life. I think it's good to sit and really study something
before you start drawing it, and it really makes you think about what you're looking
at in a different way, then you wouldn't do that if
you were just sitting and talking to someone
or interacting with the environment
in a different way? Yeah. As I'm drawing her arms here, I'm looking at the elbows and I'm looking at
the relationship between where they're hitting her waist or the
rest of her body. Because her body is
tipped to one side, one elbow is going to be a
lot lower than the other one. Another thing you
can do is just hold your pencil up horizontally
or vertically, like Paul was talking
about earlier. You're going to check yourself based on horizontal
lines or vertical lines. Where is the one elbow
compared to the other elbow? That really helps you see the
difference between the two. And then as I'm
drawing the hands, I'm going to look at where
are they hitting as far as that boot or the
heel of her foot, How far out do they come? I'm just looking at
everything and how it compares to
everything around it. And I think that's a good rule when you're drawing
anything is just looking at the relationships
between objects and shapes. Mm hm. So you don't just default to your generic settings that
you have in your head, which in my case
means I just draw them and make them
always look like me. Yeah, I think that's
everybody's tendency. You go with what
you know, you know. Yeah, Yep. Or what
you think, you know. Great, especially if
you're a narcissist. Then you stop and think, well, maybe the world would be better. Doesn't look like me.
Everybody looked like me. I guess that's one
way to look at it. But that is not the way
Melissa is teaching. No, that's not really
the goal for today, but I mean, you do you
I guess literally. Okay. As I'm trying to draw
her head and her hair, I'm just checking
myself to make sure that this is working
well within my grid. So is the top of her hair
at the top of my grid? Is everything lining up the way I intended
for it to line up? And I'm sure the answer is yes. So far it's working out, but I'm changing things as I
go adjusting if I need to. Yeah. That's just
that's so important. Yeah. Don't be afraid of that. And
it doesn't mean you're bad, it just means that it's totally It means
you're paying attention. Yeah, honestly
it's a good thing. If you can edit your own work, that's ideally where
you want to get. Yeah. If you can see what's
wrong about it, that's a huge stepping stone. Right. And it helps you avoid those awkward moments where you show it to your mom
and she's like, what is this thing? Okay? So I almost have all of the
contours of my drawing done, just adding in that the shape of that shirt coming
off her waist. Every shape that you draw
forms a new relationship and forms something else
that you can use to measure, to see if everything is
coming out correctly. Hm, I do remember
a little story. Paul and I were
teaching a workshop, a drawing workshop,
a painting workshop, at Cornell University. A lot of the
students at Cornell, or science majors,
or economics majors, or business oriented,
they're not necessarily artists, I guess. Creatives don't really recognize
themselves in that way, even though I'm sure they
are very creative for them. Showing them this
method where they could compare
relationships between different objects and think
about things as shapes and almost like math was
very pleasing to them. Oh yes, they loved Melissa. Yeah, I remember working with
this student and I spent forever just sitting next
to him and he would look at every relationship and measure it and then
draw it again. And then measure it. And draw
it again. It's just like. Mm hmm. Yeah, Yeah. I love that because that
really is what it's all about, Whether you're
literally measuring or you're just looking
and trying to evaluate those relationships
More free hand, it's still the same idea, measuring everything and not
assuming anything, right? Right. Okay. Well, we have her drawn, so in the next step, we're going to add some details. All right. Great job everybody. We've got a figure drawn, we've got a nice outline, we've got some
things figured out, We know what the
proportions are, we know what the scale
is, we're feeling good. Good job everybody. We will see you in the next one.
12. Project 2: Refine Line Drawing: Welcome back everyone. We are back to finish up this drawing. We're going to add some details. We're going to refine our
drawing a little bit. We're going to make sure
everything is looking great. So are we ready to get started? I'm ready. Let's finish this up. Okay, let's get finished by. Okay, we're back to
finish up this drawing. So we have a basic contour
drawing here and I'm going to go back and I have
a slightly softer pencil, so I'm going to go back in with this and add some details, sharpen up some of those lines. Really, this lesson
was more about paying attention to scale and
size and proportion. So it's more about
practicing that and getting used to the idea of how different pieces of a drawing relate to other
pieces of a drawing. If you didn't get very
far with your piece, if you're really focused
on measuring and getting everything feeling like it makes sense together,
that's okay. Yeah, I think that we started with a more general
approach and it really makes sense that we're
finishing up with this tighter, more focused study. If you feel like your
drawing is working out, you can start erasing
some of those grid lines, giving yourself a
cleaner drawing here. Actually, gonna go
to my two pencil and I'm just going to use
line for this drawing. But if you want to
go back and you want to add some shading like we did in the last drawing with
Paul, feel free to do that. One thing I like about
drawing clothing is it can really help add
structure to the body. It's almost like
the mummy exercise that we did because it will give you shapes that wrap around
the body and the way the clothes wrinkle will help give volume to
what you've drawn. Mm hm. How do you keep, since you do really pay
attention to everything, every detail, how do you keep from getting
overwhelmed by all of the complexity of things and how do you just
or do you yeah, you might be asking the
wrong person this question. How do you decide like, okay, this is what I'm going to focus on right now because
there's like 20 other things nearby that
could need to be checked to. Yeah, I mean, I think
if you get into this exercise of checking
every single little fold or every single little bend in her legs or curve and seeing if everything
lines up exactly. You almost get to
the point where you stop trusting your
own instincts. I think you have to get to this place where you're
measuring the major parts of the body overall essence and
shapes that you're seeing. And not get stuck in measuring every
single little detail. I tend to measure
in the beginning and I use it to help me get the basic structure or the overall outline or
contour of what I'm drawing. And then I will just my own instincts as far as adding all the
details and the smaller things. Because I feel like what I've
built is a good structure. I think it's actually
similar to what we did in the last exercise where we used certain parts of the
body to measure other parts. But then we added the shading, and we added the details
just based on what we thought or what we saw within the image and didn't measure every single part
and didn't overthink it. I think you use it as a tool to help you get the basic structure
and then you let it go. Okay. Because it's funny,
when we taught that workshop at Cornell, I, once I taught the
student how to do that, I almost couldn't get
them to stop, right? Yes. I've experienced
that with other students where it's almost like
with anything, right? The more you learn, the more you realize
you don't know. I think as I have taught
people how to start looking for relationships
and it could be between proportions or it could be with color. It
could be with anything. Because everything's in art
is so relative at first. It's really exciting
to them and it feels like it's really helping
them to break things down. But then they start realizing, oh my gosh, but then I could even break this down further. 20 other things right here that all might be wrong now
if I'm doing that. So I think that's helpful
to remind people. It's a tool, but it's
not like required. Yeah. Yeah. Yeah. Your own artistic interpretation is still important
and I wouldn't let that go to make sure
that everything is perfectly aligned and,
and perfectly structured. I think there is a point where your own interpretation
and the way you see things is more
important than getting it on 100% accurate. I think I would use the tool as far as
it's helpful for you, if it gets to the point
where you feel like you are stuck having to measure
every single little piece. I think it's time to let
it go. Time to stop. Starts making it too.
Like not fun then. Yeah, you're done. It's like that analysis
paralysis thing. Mm hm. Yeah. Where you're stuck thinking
about something so hard that you actually
can't do anything. Yeah, that's very real. Hm. I mean, I imagine
I don't ever Paul, Not an overthinker. No. Which is funny
because I totally am. Yes. But it's a good thing
it takes both kinds because you catch things
that other people would miss, other
people like me. I think you could use a
combination of both methods, like Paul's gesture method and this more structured
measuring method. Maybe you draw your grid and you do a quick gesture
within the grid, but then you use that structure to refine what you've drawn. I think you can use it in
whatever way works for you. Yeah. And you might not know
what works for you yet, and you just have
to try some stuff. That's why we like
showing you options because we say this a
lot in our classes, but it's so true, there's just not one right way to do
anything as an artist. There's so many
different approaches. You might ultimately decide that realism is not
even what you want. And you might want to draw
figures that are really stylized and stretched out or exaggerated in
some other way. So all of this won't necessarily
matter as much then. But I think there's
still a value in learning it because
then you can decide for yourself what you understand
the form and then you can decide to customize
it or stylize it. Yeah. You learn the rules and then you decide how you want
to break the rules. Yeah. That's the fun part. The Paul and Choice. I think you have to know
something before you really know what's
right for you. I think you got to
try a little bit of everything in the beginning. Yeah. For sure. And also just look at other artists as
much as possible to see the different styles and approaches that
are out there. Because there are
so many Mm hmm. Yeah. You can use this method for drawing specific
parts of the body. If you're drawing the face
or if you're drawing hands, You can still measure
things and there's still relationships between
whatever you're drawing, if you're drawing is still life. You can use something like this. Yeah. Okay. Well, I have a finished
line drawing here and everyone else has
a finished drawing. I think we're done. All right. Amazing
work everyone. You stuck with us until the end, and your drawings, I'm sure,
are looking beautiful. I hope that you learn a little
bit more about proportion. That you learn a little
bit more about scale and different ways to make all of
those things work together. Absolutely. It was so much fun.
13. Closing Thoughts: Closing thoughts. 123. Did you clap? I totally
clapped. Just for you. All right everyone. Great job. That was a lot of fun. Did you enjoy yourself most? I really did, Paul.
I had a lot of fun. I think we did a
lot of different drawings today with a lot of different ways of exploring,
drawing the figure. And I think it was
really helpful for me. I know I love practicing and
hopefully for all of you, and no matter what subject matter you like to draw
or paint or whatever, whatever kind of art you make. Practicing figure drawing is such a great way of just
refining your skills because it makes you use all of those different things
that will apply to any other subject matter that you might choose
to work on later. Drawing the figure can be really complicated and there's
a lot to think about, but I think it's a good process to go through in order
to draw anything. If you can draw the figure, you can draw anything you want. Keep practicing, Take
that sketchbook and go out into the world.
Spy on people. When you're in coffee
shops and airports, they've got just your models
all around you all the time. Or if you want to be a
little less creepy about it, you can just watch
things on your computer and pause it when you find a
pose that you really like. There's so many great resources
out there so that you can continue practicing
even after this course. Yes, and we would love to see all the drawings that
you came up with. That's your favorite part
of teaching classes, is seeing what all of you draw, what you learn from what
we've presented to you. So please share
your work with us. We would love to see
it subscribe and come back and take more
classes from us because we have so many different
courses that we've already made and we have a lot
more in the works. So get ready if you enjoy this. There's a lot more
coming your way. And we will see you
all again soon. Because Melissa can
never get rid of me. I cannot as much as
I've tried. Nope. All right. Everyone will
see you next time by the.
 Paul Richmond, Everyone is an artist.