Transcripts
1. Intro: Autumn reminds us that letting go is also a beautiful
part of life. Just as trees shed
their leaves, we too, must learn to let go of the things that
no longer serve us. Let's welcome the
beauty of autumn through colors, textures,
and reflections. In this class, we'll
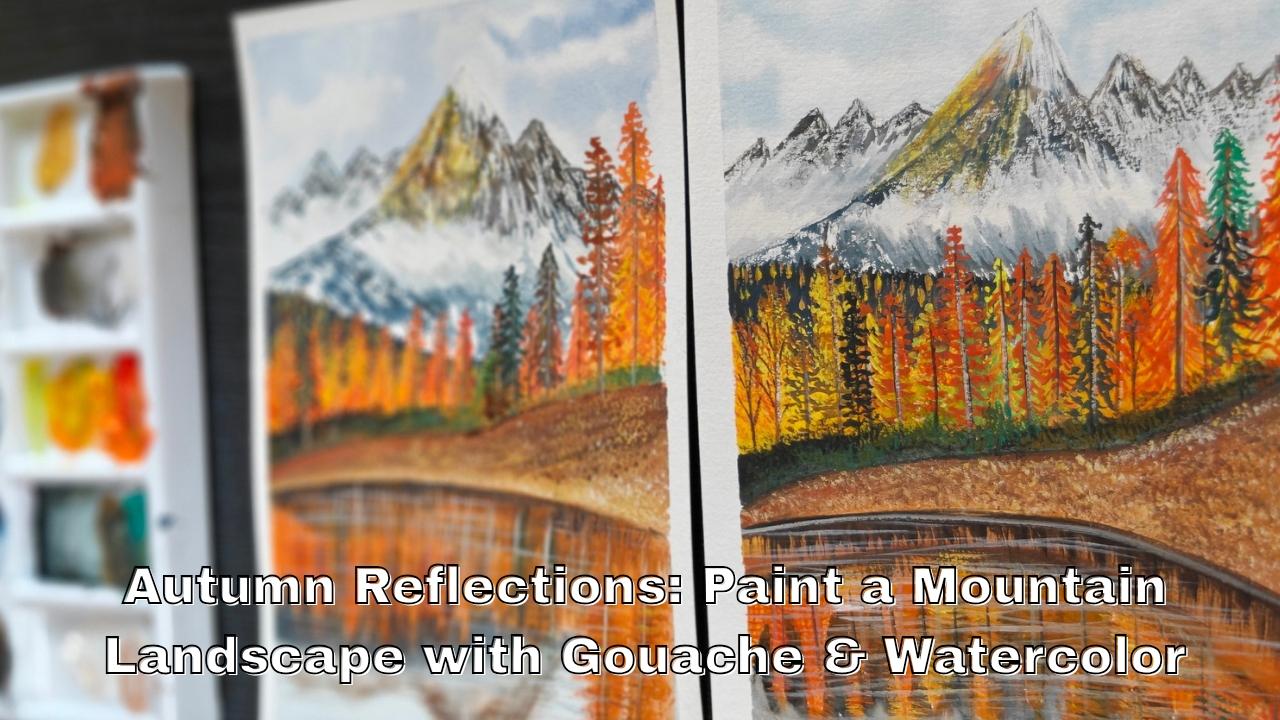
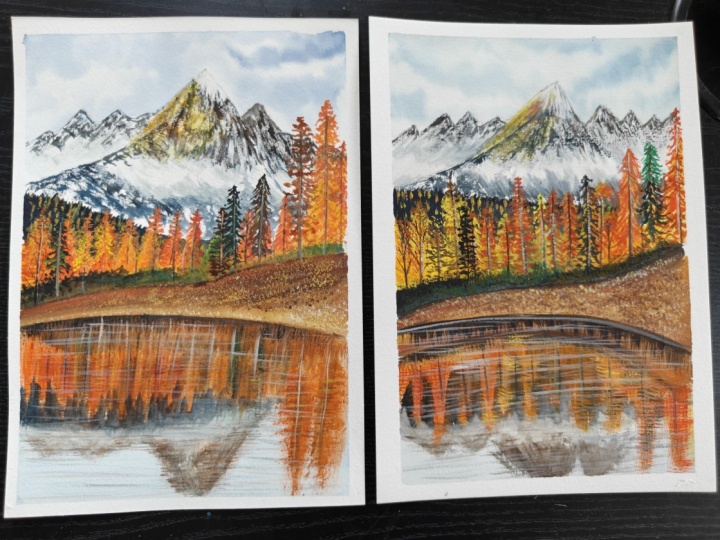
learn how to paint a beautiful autumn landscape featuring majestic snow
covered mountains, vibrant orange and golden trees. An earthy forest floor and a peaceful lake reflecting
the colors of the season. We will explore the versatility of gauze with a
touch of watercolor, combining gauche richness, opaque colors with the
softness, transparency, and flowing effect of water to create depth and atmosphere
in our painting. So gather your art supplies, embrace the colours of autumn, and let's paint together.
2. Materials Required: Welcome back. So let's
discuss about the materials. So first, let's discuss
about the colors brand. So these brands I will be using. This is from the Bristo and another brand that
is the talons brand. So these are all brands
I will be using. And then comes the brushes. So first is this mop brush, which is of size too, then this fan brush. This is a Bristol fan brush,
which I'm using here. Then comes the com brush. It is of size, two, and it is of rosemary, and this is, again,
a liner brush. So all these brush we will be needing for our
complete painting. So you can use different different brand
brushes and colors. It's totally up to you
what you want to use. So these are very
beautiful brushes, and this is the palette
which I'm using here. Then comes the tissue. You will be needing tissue
or cloth you can use. Then comes the water container, at least two jars of container
for cleaning the brushes, and then the painting. So this is the palette
which I will be using here, and this is the painting
which we will be doing so this is the paper
which I'm using here. It is A five size paper, 300 GSM cold press from Minera, and this is the scotch tape
which I will be using for the corners and the
technical pen for drawing. So let's start with this
beautiful painting. And I'm sure you're
gonna love this.
3. Colors & Techniques: Welcome back. So
let's discuss about the colors and some techniques. So first, we will talk about
the watercolors and gauge. So the first watercolor which I will be using here
is for the sky. As you can see, the sky is
mostly with watercolors. So I will be using this
tritian blue with a mix of black and a very thin layer
of color I will add first. And on top of that,
I will just add some bluish and grayish bluish grayish sky clouds like this. So now comes the other
part that is the part, which is, this is a blue color which I'm using
here, Priscian blue. You can use any blue,
whichever blue you want. Then this is the black color. So these both the colors I will be using for the
sky and the clouds. Then comes the trees,
which you can see here. It is a mix of the watercolors. First, we will do the
blocking with watercolors. That is with the cadmium yellow. Then cadmium orange
and lemon yellow. So these three colors
we will be using, we'll use some of
the burn sienna as well for the upper part. But all these three
colors and a bit of green also we will
use for this here. And you can see here it is
a mix of gauche colors, which is the burn sienna, burned tumbo and
raw yellow ochre. So this all color
we will be using. So first is the Burnsiena then the upper part
is the burn tumber, burn sienna, and yellow ochre. So this is what the path
is the middle ground. Now comes the mountains. So for the mountains, again, we will use the same color that is the bluish
grayish color. But for the details that is
a highlight, which is there, we will be using
this yellow color, which is the lemon yellow. And also a little bit of red, that is the cadmium red, which we will be
using for the trees. Then comes the orange. So all these colors we will
be using for the trees. We will also use burn
Siena a little bit. Then this is a radiant green which we will be
using for the trees. So all these colors
we will be using for basically the
trees which are there. Then comes Prussian blue, which is, again, a gauche color, that is the Prussian blue here. So here you can
see the dark part. It is a mix of Prussian
blue and black. Then I will also use
gauche white color. So this is the white color
which we will be using. So all these colors we will
be using for our painting. Now, let's start with some certain details which
we will be using here. So these two are the paintings which we will be
doing one of them. So this one we will be doing. So let's first discuss about how we will
create the small, small trees and the
mountains and everything. So a little bit of color
difference can be there. You can use different blue. You can use different red. It is perfectly fine. So now let's see how to
make the mountains first. So you have seen
I've just removed all the water from my
brush and I'm using a damp brush with a color
that is a gauche color, and this is the dry
effect which will come if you will use the dry brush. Whenever we have to
create the dry effect, we have to use a damp brush, and we will be using
a mop brush for that. Then comes the you can
see how dry the area is. Now comes the trees
which are there. So for the trees, you
can use your mop brush, also, you can use your
liner brush, also. Whichever brush you feel like
is comfortable you can use. So for the tree, so I'll just use a nice
thin color, and then first, we'll draw a line in the
center and then one type of pine tree is this
one where we are making just side lines, diagonal lines, as you can see, the other one is we will
make some of the lines which some of the textures which are in the straight form. So these are different
different pine trees which we will be
using for the trees. Then comes another
one where there will be branches
and sub branches, and then we'll create some
tree textures on the top. All these trees
we will be using, and this is a comb brush
which we will be using. And with this brush, we will be creating
some tree textures. But if you don't
have this brush, you can use fan brush or
you can use a flat brush. That is a dry flat brush for
creating all these things. Then comes the shadow, how you have to create
the shadow of the things. You can see there's
a lot of shadow and the textures of the
middle ground which is there. So for the middle
ground, I will be using, again, a damp brush, that is the fan brush, and then we will just add the textures with
the tip of my brush, I'm adding these textures. So again, the damp brush. Everywhere you have to
use damp brush only. Now comes the texture
part, the little part, which is there, you can see it is mostly with watercolors. And then on top of that,
it is the gauche colors. So let's see first, we
will do the watery part, and this is the area
where the mountain is. So this is a mountain which
is there in the shadow part. And then we'll just add a
little bit of strokes in the upward direction by mixing the colors which are same as
that of the upper mountain. And slowly, slowly, we'll just move the brush in
the above direction. And just slightly
with a damp brush, we'll just fill this area. And then just mix of this upper and we'll just smudge the
colors so that it mix properly. So here it is not mixing because I'm using
a different paper. So when you will
use a watercolor, it will smudge nicely. And with the tip
of my mop brush, I'll just create some lines, some watery lines, and
the color has to be thin. I should not has to be thick. So this is how we have to
create the watery lines. We will be doing step by step, so don't worry about it. So all these techniques we
will be using in our painting. So let's paint together
this beautiful painting, and let's start with it.
4. Sketch & Clouds Painting: Welcome back. So
let's start with first the sketching and then
we'll do the sky painting. This is the painting
which we will be doing. So first, we'll start
with the sketching. Let's first do the sketching and then we'll start
with the painting. So this is 300 GSM
watercolor cold press paper. It's a five size,
which I'm using here. And first, I will put the
masking tape all around. So just take any of
your masking tape which you have and put it all
around your painting. You can keep something
as a base if you want. So here, mostly we will
be using gauche colors, but for some of the areas, we will be using
the watercolors. So it is a mix of watercolor
and gauche colors. So I'm just putting
the tape all around. Do it nicely, tape it
down properly so that the colors should not go
inside that borderline. So try to press it nicely. So just doing all the sides
with equal proportion left So try to press it nicely so that it is taped
down properly. So now we'll start
with the drawing. So there's not a straight
line in the horizon line. There's a bit of slanting
line, as you can see, and it is a bit lower
from the center line. So I'll just create a
nice curvy line first. The whole sketch, you can
see in the resort section, but you can draw with me also
if you want, step by step. So first, the base, which is the land area, then comes the upper part
where the trees are. So there are small
small trees which are there and there's
grass which is there. So this is a grassy
area which is there. Then comes the trees. I'll just give a little
rough sketch of the trees. Some zigzag lines,
some small, some big. Just randomly, I'm
creating these. After that, there are mountains. There is one dark mountain, then there is one
lighter mountain. So first, let's draw the bigger mountain
which is on the top. Then we'll slowly move
towards the smaller ones. So it's like going towards the end and another one
towards the other end. So just adding the
first mountain and giving some lines
and dividing it. There's also a mountain which
is near to these trees. So that's a very dark
mountain which is there, so that also I'm just
trying to draw it here. And this bigger mountain, I will extend a little bit
more towards the corner. So this is the whole
center mountain. Then there are smaller mountains
which are to the sides. So just adding those also. So similarly, I
will be adding to the other side as
well, the mountains. So they are three, four
layers, as you can see. Now comes the shadow part. The shadow part
will also be same. First, the base, that
is the land part, then the upper part, which is the tree areas, then the mountains, all
we will be drawing here. This is the tree
part which is there. So in this case, the
whole mountain will not be there in the water part because there's a
very less area. So we'll show little mountain. So a little bit area
of that dark portion. Then comes the mountains
which are there. Try to draw with a
very light pencil when you are drawing
all these things. If you're drawing with
a very hard pencil, then just try to rub it
with a needed eraser. So just draw on the mountains, and now we will start
with the painting. So first, we will do the sky. For the sky, we will
be using watercolors. So here, my watercolor
is there are two colors which I will be
using Prussian blue and black. So both the colors
I will mix and I will make it like a
grayish blue color. So first, I will apply water on top of it with my mop brush. So this is my mop brush, which it's of two or two number. So I'm just applying water on just the sky area
which is there. Do it carefully
so that the color should not go inside
your mountains. Even if little bit goes,
it doesn't matter. We'll fix that. So just try to do the upper
part loaded with water. It should look like
a shiny thing. Then just taking this blue. This is Prussian blue
which I'm taking and a little bit of black. So I want it very
dark bluish color. So just making it watery and
very light color I want. It is a grayish blue color, so very watery color, and just my base is also wet. My brush has been loaded
with lots of liquid colors. So first, I'm just making a line and then
just adding small, small clouds, leaving
some gaps also. So first, I've just filled
it with this light color. You can see the entire thing, I have just filled
it with light color. Now I'm taking a little
thicker color and applying it on the top with
small small clouds. So this time, it is a
little bluish color. So as you can see, if
there's lots of water, then just tap it with
your cloth and tissue and just create some beautiful
clouds of random shapes. So just adding few clouds
here and there and leaving a grayish
gap also in between. So this is how we have to
create the clouds on the top. Very few blue clouds leaving
lots of white space, and our cloud part is done. So now we'll start
with the lower part.
5. Mountain Painting: Welcome back. Now let's start
with the mountain painting. So first, we will
do the base here, which is left out
with the same color. So this is a watery, again, bluish grayish color. So just I'm applying it over here where
the area is empty. So just applying
it onto the area where there is a empty space, and others, we will
do it step by step. So I have applied
the same color as that of the sky because
it was already mixed. Now we will be using our colors. That is the first, I will add here the
lighter colors. So now we will be using
mostly gauche colors. So I'll just add
some layer of first, the watercolor, which is the
same color I'm using here, which is the blue and black mix. Very watery colores,
very watery. So just applying a layer
of this just on the top, to all the mountains. Just on the top, I'm applying
this layer of color. Try to make it as
watery as possible. Now I'm using here
Prussian blue. There's burn sienna,
then lemon yellow. So first, I will
use Prussian blue, that is the gauche color, which here I will be using. So here, the same color it is, but it is the gauche colors. So I've also taken
white with me. Now let's mix the colors. So first is the color
which is the burnt umber. Then I'll mix a little bit
of black just to make it a little bit more
dark brownish color. So removing all the now, this is a little bit wet, so I have to wait for
this to dry a little bit. So then only I can
add the textures. So that side it has dried, and I'll just remove excess
of color from my brush. And using my same brush,
that is a more brush, I'll just drag some
thicker colors, that is some dry colors. My brush is damp. It doesn't have much water. So we have to use a dry
brush effect here just to create some nice textures
of the mountains. So this is a color
which is mixed with burnt umber and a
little bit of black mix. So I'm just applying a
very rough textures, very dry texture on the top. Also some textures on the line which
divides the mountain, this darker color, a little bit more dry
textures on the top. This is actually brownish color with a mix of black to it. You can use any brown,
whichever brown you have. But here I'm using burnt umber, but you can use any brown. So just applying very few, taking a little bit of
this Prussian blue, that is a gauche
Prussian blue and making it more darker
and more bluish. A little bit black mixed to it. So again, dry brush, my brush has not much of water. It is completely dry, and I'm just taking
the color and I'm just dragging the color and creating some
textures randomly. So this is how we create the
textures on the mountains. So for the other mountains also, I will add some textures. You can see the textures, which I'm adding it
is diagonal in shape. So try to make it diagonal only. So this is how we have
to add the textures. Now I will just take
a little bit more of this Prussian blue and I will add a little bit
darker textures. Making that line more visible. Then a little bit
of textures below. So this little textures
I'm adding just below, leaving a little gap in between. That is a white snow
area which is there. So that part I'm just leaving. And again, a little
bit of dry textures, moving the brush in diagonals, adding some more textures
on these smaller mountains. So this is how we have to add
the textures and we have to make the mountains
with these colors, these brownish and
bluish colors, making some lines and creating a little more sharp depth to it so that the mountains
are visible properly. So I'm using the same mop brush and I'm doing all these details. I haven't changed my brush. It is a size two mop brush
which I'm using here, a little bit of dark color
here also below section. Oh now we will use the white colour to
create some more effect. So just taking white colour, thick white colour and
applying some on the top. So you can see I'm not mixing any water because I need
a thick white color. A little bit of water
is there on my brush. It is a damp brush, so not too much water
is needed here. Just adding some white, snowy textures on the top. Little bit snowy textures
on other mountains as well, and a little bit to the base. So a little bit of
bluish color I'm just adding below a little bit, just to crave a
nice shade to it. Similarly, I will do for
this bigger one also. So just taking some white
and applying it in between and pushing it towards put the sections
to the upper part, also a little bit and
to the lower part. When we mix this, we
get a little bit of bluish texture in
between. So don't worry. I will mix and it will
create some nice mixture of this white and
bluish texture. So I'm adding a little bit
more blue and creating some nice mix of white
and this blue mix. So just to give a
little bit more look of the mountain, a
little bit here. Also, I'm just adding So this is how we have
to do the mountains. So our mountain is mostly done. We'll just have to add a
yellowish top on that, and then we are done
with the upper mountain.
6. Final Mountain Details: Welcome back. So
let's start further with the final mountain details. So we have done most
of the detailing, so a little bit
of the lower part is left of the mountains. So we have to use a very
dark color that is a mix of black and this Priscian blue, which is a gauche color. And I'm just filling
out this area, which is the lower mountain, which is very dark in color. So taking a black and mix
of this Triscim blue, again, the gauche color and just applying
it in this area. And giving a little
texture on the top first, and then I will fill the entire
area with the same color. So I have done the upper part, and just taking this
blue and black mix, it's a very dark color. So I'll just fill it entirely this section,
leaving the tree part. Make your color a little milky
and try to fill it up with your mop brush or round brush, any brush you can use here. I have just taken one brush, so I'm just using this
brush for filling it up. So try to leave the areas
which are for trees and then fill the entire thing
with this dark color. Slowly, slowly, you can see
that the shape is coming up. So this is the lower
mountain which is there behind the trees. Now we will do the upper
part with the yellow color. So this is also a gauge
color which I've taken. I'm just taking a very thin
yellow color and I'll just apply it on top of it
just to the side of it, just showing that there is some yellow light which is
coming on this mountain. Do it very carefully and with very light pressure.
Don't press it. Otherwise, the background
color will start to activate and do it in one go. Don't repeat it again and again. Otherwise, that background
color will start coming up. So just adding some
more whites on the top. So whenever you do glazing like this with yellow or
with any other color, we have to do with
very thin color and with very light pressure. If you will press your brush, the background color
will start coming up. So now we will do the
upper part is done. Now we will do the Blower
which is the middle area. That is the area where there is grasses there are brown
grasses which are there. So first, we will color
it up with three colors. All these are brown colors, mostly yellow ochre and
Burnsiena and burnt umber. So all these three
colors we will be using for painting this area,
which is the path. So burn Sienna is a little bit towards the reddish side,
as you can see here. So this is the darkest one. This is burned amber,
then burn Sienna, and then yellow ochre. So like this, we will be using the color from dark
to light transition. So you can see I've just
added first the dark color, then this burn Siena, and then yellow ochre. So this is how we have to blend the colors simultaneously
from dark to light. And then comes the yellow ochre, which is very light color. So just blending it
with the burn sienna. So it will give a
very nice transition from dark to light
brownish color. Try to use milky color and try to blend the colors nicely. So this is the path
which is there, and there is also
a reflection of this path that also
we will paint. But first, we will
add the darker color to the division where the upper part and the
water part is dividing, and then we will add
the lighter color first and then the mid color
and then the dark color. Whenever we do any reflection, always the color is opposite of the above color because
reflection is the mirror image. So first, we have to
start with dark color, then lighter color and
then more lighter color. So this is the mid path
which we are coloring. So this here I'm using
the gauche colors. So only where we will be doing water and all there we
will be using watercolors, but mostly we are using
the gauche colors. You can see how nicely
it has blended up. Now, just taking a little
bit more of burn sienna and just adding a little bit on the top, removing extra color, and just adding a little
bit of this burn sienna, a little bit of
reddish brown color like that on top of it, just to add more depth
to our painting. Now I'm just taking this again, this blue color with a mix of black and just
highlighting more of this darker color
and just taking a little bit more dark color and adding some more textures, just for the final look because this area is
a quite darker area. Also adding some
more dark lines. So this is it for the mountains, you can see how
beautiful the upper part is looking once
it has been done. Now, I'll just take
some lighter color, which was this light, watery color and just
adding some more textures. Giving a little shape
to the upper part, taking a little white and just adding some white on top of it. So this is how we have
to do the mountains. Do it very slowly, very
carefully one by one. Try not to do it in a hurry. Take your time and try to do it. So mixing this black and a
little bit of this brown, I'll just add some more on top of it where there
are darker grasses. So just the above
area which is there, I'll just fill it up
with that dark color.
7. Middle Ground Details & Trees Blocking: Welcome back. So let's
start first with the middle ground
details and then we'll go with the tree blocking. I'll just outlined
the area which is just above the ground part. First, you will add textures to this middle ground
with my fan brush. Now here also, I will be
using a damp brush and using my gauge colors with a very light color that is
the yellow ocurren white mix, and I'm just using the tip of my brush to create
these textures. So you don't have to
press the brush too much. Just use the tip of your brush, and with a very light
and gentle pressure, you have to add these
textures slowly, just on the upper part of it. So these will look like
the grasses which are like brownish in color and
they're starting to dry. So it's autumn season, so it has started to fall
and it started to dry. And some leave the tree part has also the tree leaves
have also fallen on this. So that's why I'm just adding these textures everywhere
on the upper part of it. So just taking a little bit of darker color of brown and
this brown and just adding more textures around just to give a little mix of
dark and light textures. Similarly, I'll just take this burn sienna and I will add a little
bit more textures. So this is how it will look when you will add
these textures. Very beautiful grassy
texture it gives, especially the fan brush. So now we will do the area, which is the top area, that is we'll fill the trees
first with our watercolors. So filling of the color
I will be doing with watercolor because watercolors are very transparent color. So that's why I'm using it
mostly for blocking the area. So just taking this orange first and applying it on the top. So just taking more of water because we want a
very transparent color. We don't want very thick color. So here I've just
taken gauge with a mix of little bit
of this orange, and I'm just applying
it on this area. So gauge and watercolors
are basically similar. It's just that the color
thickness matters. The color transparency
matters here. So whether you want
the thick color or a transparent color, accordingly, you have
to use the colors. So I've just taken
this cadmium yellow as well and little bit
of orange and red. So all these colors we will be needing for just adding
the entire thing. So just a mix of this orange and
cadmium cadmium orange and the cadmium yellow
mix and just applying and filling this area because this is the area where
the trees will be. So you can see how
transparent the color is when we use the watercolors. So just filling it
with my same brush, that is the mop brush. There's lots of water in
there in my mop brush, and I'm using the
color directly. So already, there's lots
of water in my brush, so I don't need any
extra water on my sheet. So mop brush holds
a lot of water, so you can easily fill the
colors thin colors over there. So just filling it with
some orange, some yellow, and a little bit of blue I'm adding just
to make it green, but I think that
green is not forming, so I'll just apply the
extra green which is there. So I'll just take a
little bit of green also. It becomes like olive
color, which is also fine. But we'll take some green also, and we'll apply some
green trees as well. So this is viridant green
which I'm using here. This is, again, a watercolor. So you can see, I've taken a very little amount
of this color. And I'm just adding
in between this, my color is wet, so it is
spreading a little bit. Oh so just filling it
with random greens, orange, yellow,
all these colors. So randomly, I'm
just filling it up. So just mixing a
little bit yellow and this orange and green
and see how it looks, what color is being formed. Just experiment the colors and see what all colors
are being formed. When you mix this, it becomes a little bit brownish color. So that also looks quite good. So just adding the
colors slowly, slowly and building the
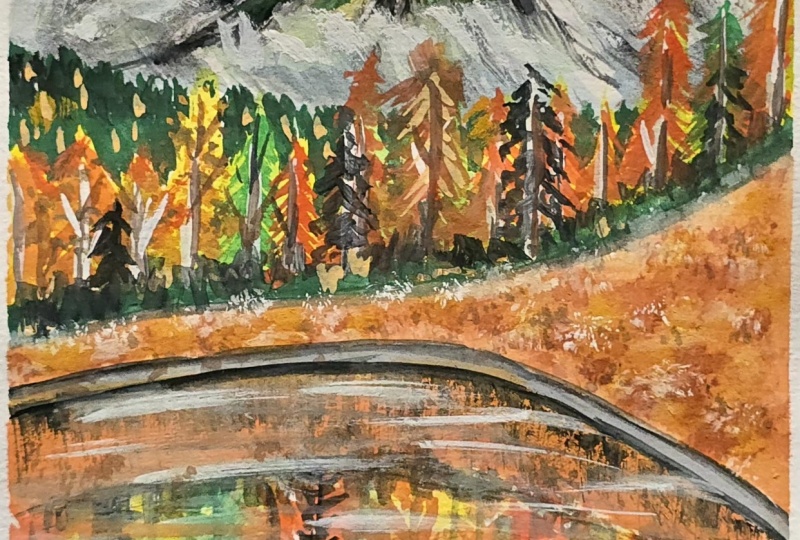
shape of the trees. So you can see this is how we will create the trees first, first adding with watercolor, and then the details
we will be using are gauche colors because gauche colors are opaque colors, so they will be easily visible. So now the upper blocking
of the trees is done. The below part is left, so I'll just mix
this color which is already there was
blue and the black and little bit green
and just apply it below the area
which is there. Even if my upper part is wet, it doesn't matter because little bit colors will
expand and it will create a nice texture below
the background below. So it's fine if a
little bit of colors this dark color is going
inside this yellowish part. So just adding this whole
area with darker color, and then we'll start creating the trees once my
background dries. So you can see how the
color is moving towards the yellowish and
the orange color. So it's perfectly fine. So now we will be doing
the lower part also. So for the lower part also, you have to use the same color and the same thing
we have to use. So first, I will just take this greenish color and I will apply it here because you
can see it is a reflection. So we want this area to be same as that upper area
is the darker one. So I'm just applying
this color here, just a very thin color, not a very dark color it is. So just taking more of
black and just applying a little bit more color
across this area. Oh and then taking the same color which
I have used above and just filling the
trees over here also. So in similar manner, we have to fill the trees
like we have done on the top. And then once our base dries, then we will start
creating the textures, the details, and all these
things with our gauche color. So currently we are
just filling and blocking the space
where the trees are so just enjoy the process of blocking and
do it slowly, take your time. Don't do it in a hurry. You can take breaks and
then do where you can see whole painting I have just
done with one or two brushes. You don't need many brushes. You just need few brushes, and you can do entirely
the whole painting. So it depends on
how much pressure you are applying on the brushes, how you are using the brushes, whether you are using the tip of your brush or the
side of your brush. So if you will use the tip, it will create nice
tip painting, nice, um but if you will use
the side of the brush, you can easily fill and
block in the entire area. So just I made it
dark, the line, which divides both the area, the foreground and
the background. So now we will start
with the details.
8. Tree Details: Welcome back. So let's start
with the tree details. So first, we will
add the details in the mountains.
So all details. This is the B mountain, which you can see
it in the dark. So first, you will add
the details there. So here we will be making small small trees which are visible in the back
mountains with the same similar color
like orange and the mix of orange and this little
bit of burnt sienna. And just using my
tip of my mop brush, I'll just create
some nice lines, some small small lines. I've added white also to it so that it is more
prominent and visible. So it will look
like that there are small trees which are
at a far distance. So just adding small small
lines in this black section, So this will appear
as there are trees which are of similar, like, similar color, and they
are at a very far distance. So try to use thick colour, not very thin color. Otherwise, this will
not be visible. So just taking a little bit of yellow and adding some
more yellow to it. Just to make it more visible, you have to use a little
lighter color also. So this is it. I've just added it on the top
as you can see. Just try to fill it
up with these lines. And now we will start with the tree details
which are there. We have already done
the blocking part. Now we will add
the tree details. So starting from
the corner tree, and then we will move slowly, slowly towards the other side. So first, we'll start with the
first tree which is there. So I'll just take a little
bit of red also in this. So with a mix of red, orange and yellow, we will
start making the trees. We can also add bird sienna
just to make it more darker. So first, I'm just taking orange and using my rigor brush that is long liner brush and
just making the color a little thin because we cannot make lines with thicker color. So just making a color a
little thin and drawing the lines first using a black and a little bit of red mix. So a little bit of black and
just first making the lines. You can mix the color
with black and red or you can simply add
black line to it. So now making
small, small trees, mixing this orange
and red color. So this is cadmium red, which I'm using here. So this is, again, the gauche colors
which I'm using here. Only for the base blocking, I have used watercolor. Rest is all these gauche colors. So making these small,
small pine trees, as you can see, So try to do it slowly and
care very carefully. Make your color a little fluid so that you
can move the colors. If you will use
very opaque color, you will not be able
to move the colors and create these textures. So try to make it a milky
color and use your liner brush or a rigor brush for creating
these nice textures. So I'm just making random
lines in shape and creating in a diagonal section that the
leaves are going downward. You can vary the colors. You can make green, then the
orange, and then the red. It's totally up to you how you
want to arrange your tree. You can arrange it in
different forms also. So this is how we have
to do one by one. Now, again, I'm drawing
the line first. So a little bit
white I'm adding to this line because it is
a white and black mix. So again, a little bit white, taking a little bit more black and drawing
again the line. So black and white line, we will be drawing first
black and a little bit of white onto the side area. So first, let's draw the lines where we want the trees to be. Just taking black color
and drawing the lines. Make sure the color is thin, then only you will be
able to draw thin lines. So this is very important when
you are drawing the trees, how tall and how short
the tree has to be, you can decide, and then you can give a little shape to it. So you can see I'm
making the lines a little bigger than the
shape which I have created. So try to make the
lines a little bigger. So just adding the lines, and then we will start creating more and more trees of
different different colors. So just adding one more
line, and this is it. Now we'll start
creating more trees. So one we have already
created on the side. So again, one more using
some white color first, I'll draw a line just
adjacent to this black line, just to make a little depth
through that tree trunk. Now taking a mix of green and just adding one more
tree with green color. So same textures and same
brushstrokes I'm using here. So try to use a little
darker green colour. Don't make your color
very thin and make it milky and then
draw all these lines. As we will go down, we
will add more and more black to it to make
the green darker, and then we'll start adding
more greenish color. So now I'm just
mixing a little bit of black to make
it a darker green, and again, I'm making
the lines below. So if you want to
learn this tree very nicely with full details, you can watch my class
that is for bigness, that is absolute acrylic
painting for bigness. You can see how this
tree is being done. So just adding some more
textures and details. So it is mostly darker
in the below part. Now we will go to the next tree. So next tree, we can
make it orange or red, any color, whichever color you feel like you
can just add it. So orange and a little bit
of burn sienna also you can add to make the color a
little bit more darker. So just adding burn sienna, and I'm just adding
some more darker colors to the tree which
is on the side. Now taking a little lighter
color with a mix of orange and white and
adding some more textures. So now I'm starting with another tree which is on the side. So every time you can see that I'm using different
different colors. Now, this time I'm making just a diagonal strokes
for creating the trees. You can make this tree darker by just adding burnt
sienna or burn dumber, that also you can do. Now, whenever we do any details in gauge or in
watercolors, first, we do the light color, and then on light colour, we use the darker
color on top of it. So like this, we do our
painting and details. So this is just adding
some more lines, just taking a little
bit of yellow and mix of yellow
and white and just adding some more textures
in between just to give a little vibrancy and different different leafy
colors to this tree because the tree is not
just have one color. It has different
different orange and yellow and yellowish
orange and greenish. So different different colours
you can just add in here. So our three trees are done. Now we are left with few
more, and we'll slowly, slowly do same for all of them, making it a little more clear the line and adding
a white line also. So just making some
lines with black, and let's start further
with the other trees. So for the next tree, is smaller in size,
as you can see. So very small size and
just adding some branches, and then we will create
some more textures. So just adding some branches, which is in the
upward direction.
9. More Tree Details: Welcome back. So let's start further with more tree details. So now we will be using
our different brush, that is the com brush here
for creating more details. So this is the com brush which I'm using from rosemary and just taking some thick colour and my brush is completely damp. So just adding some
nice textures. It gives a very nice texture, dotty textures for the trees. Now, if you don't
have this brush, you can use your flat brush also and use the tip of your brush
to create this texture. Try to use a damp
flat brush or you can use a dry flat brush also for creating
these textures. So just adding some textures
like dotty textures around just to create different different tree
forms that are there. Some yellow, we will also add there some yellow and white mix, or you can just add
yellow, anything, whatever you feel like you
can just add in the trees, any color, whichever
color you feel like. So this is how we have to add the trees one by one slowly. So I'm just taking a little bit more of this cadmium yellow. So cadmium yellow is a bit of
orange yellow, you can say. So just taking some
cadmium yellow and adding some more cadmium yellow to
this tree which is there. It's a small tree. So whenever we do any details on top of it, we always use a milky
color, not thin color. So now taking a little
bit of white and adding the lines so that
it is more visible. These are things, small, small details make your
painting look more realistic. So it's a very beautiful and
very lively atmospheric view which is there that
we all imagine, and we feel as if we
are there watching all these beautiful trees and mountains and
sky and everything. So just adding some
more greener trees, mixing black and
this green color, little bit of this
orange color also, you can add just
to make the color a little bit more
of the olive color. So just a little
bit red or orange, you can mix it and make a
different value of this color. So leaves are not
of just one color. There are so many colors
of leaves which we can which we cannot
imagine also. So it's a beautiful painting of autumn trees which are
there beside a lake, there is a lake and
there are mountains. There are small trees
which are at the back. So so many things are there
in just one painting. So just adding the textures. So I have always used Gauche, only gauche colors,
but this time, I thought of trying it with
gauche and watercolor mix. So it has come up with very nice result when
you mix both the colors, the watercolors, and the gauze because
both are watercolors. It's just the differences that gauche is more opaque color. So with the opaqueness
of this gauze, you can see how beautiful
that textures are coming up. So that's why I decided to mix
these two colors together. Just adding a little bit
of the yellowish tree beside the brownish
tree, you can say. A little bit more
reddish tree we can add. So a little bit more red
colors we can add there. Any experiment you can do just by adding
these all textures. So just adding the trees, few more trees, just taking some nice red color and making
some more reddish tree. Already, my background is green, so it will be a mix of
green and red together. So that also you can do. It's not like that you have
done the background green. You cannot apply red on
top of it. You can apply. We'll give a combination of
red and green, both of them. So let's move further with more details of the trees with different
different colour trees. So I'm just adding a little
bit of yellow to this tree. So yellow is sometimes
not visible, so you can just mix a
little bit of white in this yellow to make
it more visible. This is cadmium yellow, which I'm using here. So just taking some more orange
and adding on top of it. Just to make it more
vibrant and more colorful, try to add different
different variations of red and orange. You can mix burn sienna. You can mix yellow,
you can mix orange, different different
colors you can mix, and then you can make
all these trees. So just adding some of the tree, some with a straight line, some with a diagonal shape, some with a little more
like branchy shape. So different
different shapes you can create for these trees. So in this, I'm
using the red color. So slowly, slowly, we are
moving towards the trees, and you can see how
beautiful it is looking when you add the tree details. So just do it slowly
carefully one by one and try to create the
details with a milky color, not with a thick color. If you're comfortable
with round brush, you can do with
round brush also. But I'm comfortable with
the long liner brush, so I'm doing it with
long liner brush. You can use any brush. Some more yellow trees. So you can see more than
half we have covered, only few are left, and then we are done
with the tree parts. Some more reddish orange tree. Now, you can see the shape of
this is a little different. I'm just making it limes
in a diagonal form. So this is how you can make the changes in the
tree formation. Just adding a little bit of white into this color and making it more lighter, the textures. Then a little bit green color. So a little bit green
and orange mix. I've just added it, and I'm
trying to add the trees.
10. Tree Final Details: Welcome back. So
let's start with the trees final details. So a few more trees are left, and then we are done with
the foreground trees. Sorry, background trees. So let's start with the
color mixing yellow and orange and creating some more that textures of warm colors. So there are different
different warm colors which you can create just by
mixing the yellow. There are so many
yellows which we can make and we can create it. So some of the greenish
and orange color I'm just mixing and creating
the trees which is below. So you can add so many
color variations here, which you can just add
it and you can just make different different
tree color variations. So just adding few more
that is orange color. So again, adding few more
this orange color trees. Just first adding the
textures from the side, and then we will
do the inside one. This one is a little
different form. So just taking a little
bit of white and drawing the line in between where
we have done black lines. While doing this process, some of the black
lines also are gone. So I'm just repeating
again the same process in drawing the lines
with black color. Now we will add
the trees which is left the two trees
which are left there. So again, taking my cambra and we'll add some
textures on the side, like a diagonal form. I'm just adding the texture. So it will look like
there are small, small tree textures
which are going outside. Similarly, I am doing
for the other as well. So just a damp brush and
small amount of color, and I'm just using the tip of my brush to create
all these textures. So a little bit more textures on this side tree
which is there. So this is how we have to fill the trees and just
make some variations. So any form of tree you can add, there is no rules
like how I have done. You have to do the same way. You can add all the
trees with same color. You can add all the
trees with green colour. Anything you can just add to it. So this is how the whole upper
part of the tree is done. Now, we will do the lower part, which is a greener area, the dark green area
which was left. So you can see how beautiful
this tree line is looking. Now, taking my rigor brush, I'm just making again the lines. So tree branches. All these small, small intricate details will make your
painting look more realistic. Adding some white lines some more white lines
to the other trees. So this is how the whole
tree structure is looking. Now, I'm just adding small, small darker textures
on this area, which is the area below
that is with black. Just adding some
black textures here. Small, small textures with my com brush just to make
it look more uniform. You can push a little bit of black textures or a
little bit above. So taking a little
bit more of green. So this is gradient green, which I'm taking with a mix
of orange and just adding some more orangy
mix of green into this area just to show that there are some
leaves which are fallen there. Just small small textures. These textures you
can also add with your fan brush if you
don't have com brush. So this is it with
the upper part.
11. Reflection Details: Welcome back. So let's start further with
the reflection part. So you can see we
have already done the above part now the
below part is left. So first, we'll start filling
the areas which are left. So the darker area which
you can see that is left is the area which is below. So I'm just taking black
and a mix of green, and I'm just adding
some one texture, some more trees that is a dark tree on top
of this orange tree. So just to add a little
bit more depth so that it will look
like this tree is in front and those
trees are back. So this is how we
make the difference, first we can create
the lighter trees. Then in front, we can create
a little darker ones. So now just taking the fan brush and creating
some reflections. So again, a damp brush and with the color black and green
mix, adding some lines. Try to use a damp brush, not a wet brush. So I will just mix a little
bit of this burned umber, burn sienna, and a
little bit of black mix. And together, it will
form a very dark color. So I'll just add some
textures first on the top. This is the line which divides the horizon line and the fog ground, which
is the reflection. So I'm just making some
lines like this just to create that effect
of the textures. Also some more lines over here, just to add some
more darker textures which are on the top. Adding more textures below. Now I will fill the area which is near the trees
which are there. Already, we have blocken the
trees with the watercolors. Now a little few areas are left. That is the mountains, and there are a few back mountains, which is a darker
mountain that is left. So let's take all the colors, the orange and the red. All these are gauche colors. So again, using my brush, that is the com brush. I'm just adding the textures. But before adding the textures, let's first fill the area which is in between
with the darker color. Then we will add the texture, then it will be visible more. So I'm just using my
more brush and a mix of this Prussian blue and a
little bit of black mix, and I'm just covering
this part which is there. That is the darker part
which is behind the tree. Again, here I am using my
mob brush for filling it up. Now, this time I'm
using my gauche color, but here you can use the
Prussian blue watercolor also. But since the gauche color
is a little bit more opaque, so I'm just using the gauche colours to fill up this area. Then we'll add the
watery textures. So I'm just taking some
water a little light color, and I'm just smudging
those lines, sharp lines which are there. So just smudging it up. And then I will just
do the mountains. I'll just fill the
mountains with the same color that is
the very thin color of this brown and little
bit of black mix. So just covering that area, which is the mountain part
with a very thin color of this making it a
very watery color. So a little bit, it is not visible because
my camera was there, but the same way
how I have shown you above in the main example. So we'll just push
the camera a little bit towards the side
so that it is visible. We just have to
fill the same color that we have used on the top. That is the brown
and the blue color, which we have to use
very thin color, and we have to apply
it in the bottom. So just pushing it a little bit above so
that you can see it. So this is the area,
which is a brown area. I'm just filling it up
with my same brush, that is a more brush
in its direction like the mountains and just
filling up this area. And with a very thin
color of brown, that is a burnt sienna
and burnt umber mix. And my brush is damp. I'm not using too much water. Also creating some lines like the watery
lines to the sides. So little bit lines to
all these mountains. Try to use very light color, very light brown color to
cover all these mountains.
12. Reflection Final Details: Welcome back. So
let's start with the last part of the
reflection painting. So now we have just done
the blocking of everything. Now we'll start
adding the details. So first, we will
do the tree part. So using my com brush. Now, if you don't
have Com brush, you can use your fan brush also for doing all these details. So just applying,
again, a damp brush, taking a very little color on my brush and
my brush is damp, so it will create a nice
texture with my brushes. So since it is a Com brush, you can see a com type
textures, it will come. So just adding some
yellow, some red, some orange texture
onto this area where we have done blocking
with the watercolors. So it's some green. So
different different colors you can add just by looking
at the above trees. So this is how I'm
just filling it up with my brush and giving
a nice texture to it. So try to use dam brush. There should not be too
much water on your brush. So just filling it randomly with different different colors, some yellow, some
orange, some red. So very simple way of
doing the water part. I'm not making it
very complicated. So just making it
very simple and now I'm drawing the
horizontal lines. So when you do it
with com brush, you get a very nice clean lines. So you don't have to
create one by one. But if you don't
have this brush, you can do it with
your liner brush, rigor brush, or even you
can use your fan brushes. So now I'm creating
horizontal lines just across the areas where I have made these
like peaks which are there. So just making some lines, horizontal lines
across this area. So with yellow color, some with red color, some with orange color. So different
different colors you can use to make all these lines. So where you have used orange, you can use yellow, where you have used red, you
can use orange. So different different
variations, you can try it out. You can also use green
in some of the areas. So the easiest way to
create these lines, like the water lines
which are there because the water reflection
is never very neat. So we want some
lines to be there, some water ripples which
are there, the lining part. So that's what here
I'm trying to create. So some of the lines I will also create
in the water part, which is the sky, you can see the sky
beside the mountains. Now, now this time, I will be using again, my mob brush with a mix of this blue and black mix
and a very thin color. And just I will move the brush
in to and fro directions. Make sure your brush
is not too watery. It should be a damp brush
and just move your brush in a to and fro motion and
just fill this entire area. So this color is mostly a
grayish color, as you can see. So just adding the lines, very thin lines across this. So this is the easiest and
the best way to create the water reflections with
the watery lines on the top. Some lines on the
mountains in the areas, which is the sky area. So this is how we do the
reflections and the lines. So do it with your mop
brush or liner brush, whichever brush you feel like, whichever brush you are
comfortable with and try to draw it in a to and fro motion
and take very less color. Also drawing some lines
which are like vertical, the lines of the trees. So you can see how beautiful the whole painting
is looking with a mix of both warm
and cool colors. So when both warm and cool
colors come together, you will see the magic itself
happens in the nature. That's why here, we see it so
beautiful and so vibrant it is because it has both the warm colors as
well as the cool colors. Cool color is the sky
and the mountains, and the warm color is the
trees and the ground area. So try this painting out. I'm sure you will love doing
this painting because it is a very beautiful painting of
a scenery with mountains. Like, this painting is
actually depicting that the autumn has started and
the winter is also nearby. So just making a line a
little bit more dark and just making one white line there
just to show the watery line. Try out this painting, and you can share
your project works. You can tag me on my Instagram
on Mohini Art Gallery, and I will love to reshare
your work in my story. If you have any questions, you can always ask me. You can always DM me. So this is how the whole
painting will look. Now, let's take out
the tape slowly. So this is the best part of
the painting when we take out the tape and the nice
border comes up. So just a little bit
of lines I'm just drawing across the mountains. So that's it. And let's
take out the tape slowly. So whenever you are
taking the tape out, try to take it out
at an angle so that your page is
not tearing up. So take out at an
angle and slowly, and this is the whole painting. So this is how it looks. So these are the two
paintings which I have done. I will share both the paintings with you and do try it out. Both are similar,
fountains are different. So thank you so
much for watching.
 Mohini Sinha, Acrylic and Gouache Artist- Nature Lover