Transcripts
1. Intro: Bring a little creativity
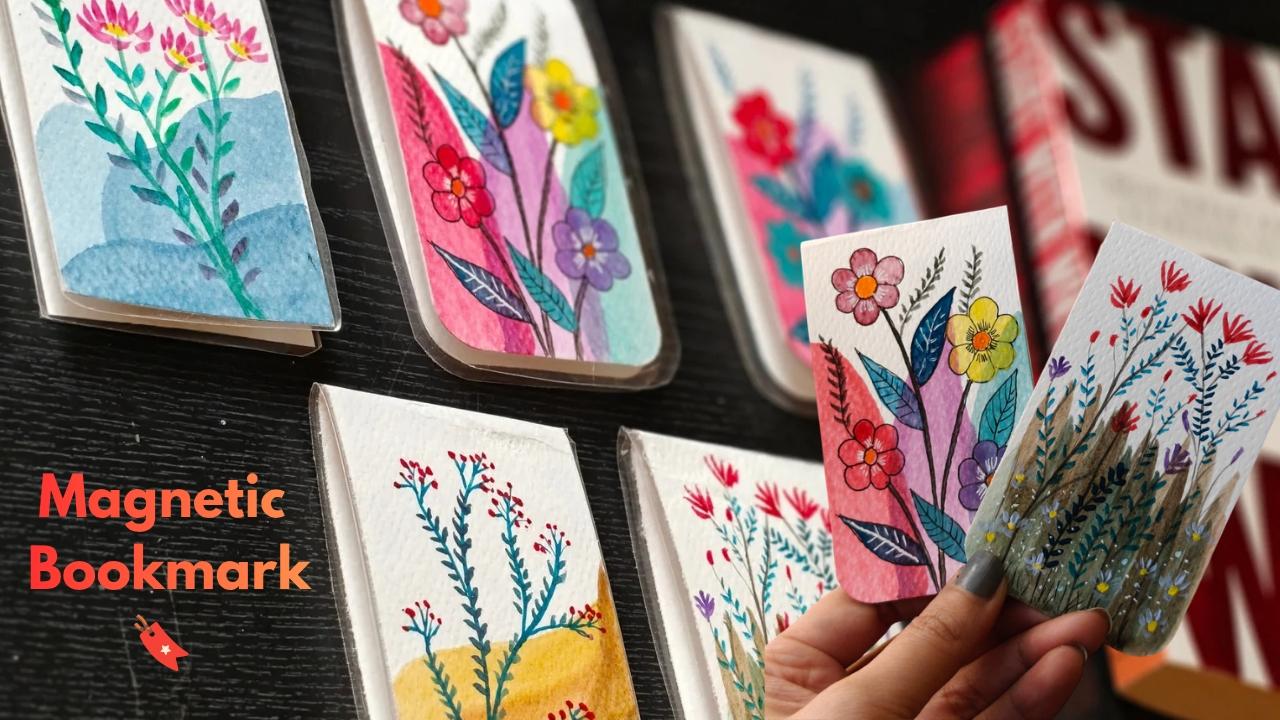
to your reading time. In this fun and relaxing class, we will create seven beautiful handmade
magnetic bookmarks using gauche and watercolor. We will explore
colors, textures, simple painting techniques
and tiny details to transform ordinary bookmarks
into little pieces of art. Whether you love
painting flowers, nature, landscapes
or playful pattern, this class will help
you to experiment with different styles while creating something useful and beautiful. So here we will also
learn how to laminate and create some nice
magnetic bookmarks, and you can put it in your book. The best part, you don't
need to be an expert artist. These projects are
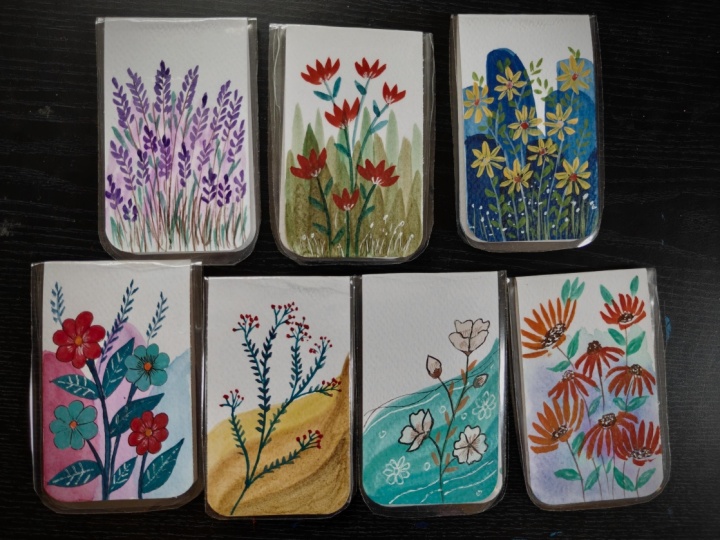
designed to be simple, enjoyable, and bigner friendly. By the end of the class, you will have seven
unique magnetic bookmarks handmade with love
and creativity. So let's start with
our bookmark painting.
2. Materials Required: Welcome back. So let's discuss
about the materials first. So this is the paper
which I will be using. This is a coach paper, and it is 300 GSM paper, and it comes in a 24 sheets. So this is the
sheet which I will be using for my seven bookmarks. And then comes T colors. These are the
gauche colors which I will be using of
different different brands. One is camel, one is of talons. Then comes the Mm watercolors. These all are watercolors of different different brands
which are there on my pan, as you can see, then comes the palette for
the coach colors. This is a palette
which I will be using. Then comes the cutter, which will cut the
sides of the bookmark, just to make it
nice round shape. Then the pens, the
technical pen, and this is the white gel pen, which I will be using here. Then these are the
two mop brushes of size zero and size two. And also the rigor brush
of size three by zero, and one more brush that is a
synthetic brush of size two. The tissue paper and water at least two jars
of water we will be ding. So all these materials
we will be ding. So let's start with these
beautiful bookmarks.
3. Bookmark One: Welcome back. So let's start
with the first bookmark. So this is the 300 GSM paper, cold press paper,
which I am using here. You can use any size bookmark. It all depends upon you. You can use six by 2 ", any sizes you can use. So this is a bookmark which
is glued from one side, so I'm just taking it out. And you can see
it is cut nicely. If you don't have these
types of bookmark, you can easily cut
with a paper and you can create a
nice bookmark shape. Now, after this,
I'll cut the edges to a little bit round shape
with using this cutter. Now, this is not required.
This is optional. You can cut it or
you can leave it. You can also cut it with
the scissors, as well. So here I'm using a ten MM size, and I'm just cutting it all around to give a nice
round look to it, nice curve look to it. So this is how I have just cut the entire edge with a nice
round shape, as you can see. So now let's fold it first, and then we'll start
with the painting. Just taking the end of both
the ends and just joining it, and then I'll just
press it in the center. So this is how you will get
the center of the page. So now we'll start painting
the first bookmark. So similarly, we have to
do for all the bookmarks. So this is a magnetic bookmark, so we have to make
it like that so that it sticks together
to each other. So it's very simple painting. Now, first, I'm using
the watercolors. You can see there
are so many colors. You can use any color. Again, the mop brush
of size two I have. So first, I will do it one side. So just wetting my brush,
and just randomly, I'm just using some of the nice warm and
some cool colors. So first, I'll take
this rose color, which is a very beautiful
color, and you can see here. So I'll just apply it and
give a nice curve shape. So background, I will mostly be painting with these watercolors. So just a very thin color,
not very thick color. You can see it's a very
transparent color. So I'll just apply it first
like this, the shape. Then on the other side, I'll apply the second. Similarly, I will be doing
the other side as well. So first I'm doing
just the one side. So just have applied one color. Now the second color,
you can use any color, whichever color you want. So you can use blue,
you can use purple. So I'll be using some
nice blue color. So this is the blue
which I will use. So just taking some of the colors or you can use
this ilium blue also. So I'm just taking
this ilium blue or mix of both and
just applying it on the other side and just filling it with this nice
transparent, translucent color. So if you're not use
very watery color, it will dry very fast. So it's not a very
watery colour, very less water. I have applied. Now, I will apply
it in the center with my this violet color. So just applying any curvy
shapes in the center. So overlapping on both the sides and just filling it
with this color. So same thing I will be doing
on the other side as well. So I'll just turn my page to the other side so that we can
paint the other side also. Till then this part
will dry a little bit. So here you can see a little
bit color has come up, so I'll just add one
more coat on top of it. So just adding one
more coat on this just to make it look more
like a perfect shape. So now we will do the
other side, same shapes. You can change the
color. You can first use the pink color and then the
other side, blue color. So like that, you can use it. You can use any color, whichever color you feel like, there is no color boundation
and this painting can be done by any age group. There's no age group for this. Anyone can try this out, and it is a very
simple painting, and even the big nurs
who have never painted, they can paint it very easily. So you can see I've just
applied it on one side. Now the other side also, I will apply the same color
that is the blue color. So just applying a
nice coat of blue, then violet So just enjoy the process. And this type of painting, you can just do in
like 15 to 20 minutes. You don't need more
time, and you can gift someone this
beautiful bookmarks. It's very simple
and easy painting. So you can see I've
applied it in the center, the same color which I have
used in the above part. So this is how both
the sides will look. Now, the first
which we have done, it has almost dried up. So you can see this is the
two sides how it is looking. So late this side
has almost dried up. So here we'll start
with the drawing. So for the drawing,
I will be using the technical pen
pen of size 0.01. So very thin pen is can see
the nib. It is very thin. So starting to draw a small
flower on the top first. So this is a micron pen. You can use any technical
pen whichever pen you have. Or if you don't have pen, you can directly draw
with the brushes, but use liner brush for drawing. So I just made a
nice lines across, and then I'm just
creating a nice curve like U shape to
create a nice flower. Very simple and
easy flower which we used to draw
when we were small. So just adding some
more flowers, two, three flowers we will add, at least four flowers
we will add here. But you can add any amount of flowers that is your choice. So same flowers, it can
be big. It can be small. It can be any size. Similarly, on the blue
side also I will add one. Now one more I will
add on the top. So this is how you can see
the flowers are added. So now we will start adding
the stems and the leaves. So first, I have just
drawn the flowers and now the stems very thin
stems I will add here. For all the flowers which are
connecting to one another, So this is how the
stems look like. Then the leaves like a nice pig leaves I'm
adding here as you can see. In different different angles, I'm just trying to
add the leaves. Some overlapping the stems. So for coloring
all these things, I will be using gauche colors because we need a
little thicker color. You can use watercolor
like a thick colour, but it's better to use gauche because they are
quite opaque colors. So this is how I have
just drawn the flowers. Now we will start with the coloring so I've taken all these colors
which are gauche colors, some green, some blue, some orange, and some red. So first, I will
take some red color. So again, this is a rose color, or you can take crimson,
anything, ermelion, any color you can
take, and just take a nice thick colour and
apply it on the top first. So every time whenever you
are using, use milky color, and this time I'm using a synthetic brush,
as you can see, it is a round brush, but
it is a synthetic one. So depending upon the
size of the flower, you have to choose the
size of your brush. If your flower is a little big, you can use a little bigger size like two or three number. So you can see I'm using just the edge of
my brush to paint. It's a quite thick opaque
color which in one go, it can easily cover
the entire thing. So this is how the
first flower is done. I'll do one more with
this same color.
4. Bookmark One Final Details: Welcome back. So
let's start further. So we are just coloring
this with red, another one. So two, we will color
with this nice red color, and the other two, we'll
color with the different one. So do it very slowly. Try to fill it very carefully. It should not go
outside the lines. Now, here you can
use gauche colors. You can use acrylic colors, you can use watercolor. Whichever color you
feel like you can use, there is no boundation
in using any medium. You can also use
sketchpen and brush pens for filling this out. So whichever things you feel that they are
easy, you can use it. Now, this is a very nice blue. You can see it is a slim
blue which I'm using here, and it's very bright
and beautiful color. And just applying
it on top of this, it is a mix of teal. As I think it is in there. So very nice greenish
bluish color it is. But yes, you can use any color. You can use your
purple color also. But try to use a different color what you have used
for the background. So just adding again with the same colors
and doing it very slowly so that the
color should not go outside the borderline. So one by one, I'm just
coloring the petals. So try to do it very
carefully and very patiently. Even if it is a very
simple and easy painting, this will help you to do
the painting with, like, very slow process, and you will enjoy filling each
and every petals. So do it very slowly. So one by one, I'm just
filling the petals. Again, water is there on my
brush and my color is milky, not very thick, not very
thin. It is in between. So when I'm filling it, you can see it is
how thick it is so that my color which is below, it is not visible. That's why I have used
your gauche colors. But yes, you can use any color, whichever color you feel like. Now we have done the
whole flower thing. Now it's time to do the leaves. So here I've used a very
nice tallow green color, and it's a very nice
bright, thick color. And I'm just applying the
same with my round brush. I'm mixing a little bit of
this bluish colors as to make the color a little
different mix of green and blue, so it will create another
different version of color. So mixing always makes
your color more beautiful. So you can just use
this Tallow green also just for covering
the entire thing, any color you can use, but try to use a little
darker green and just filling the entire leaves which we
have created with this color. Mixing this blue and a little bit of this
green to create a nice, beautiful version of green. So we have almost
done the leaves. Just one more leaf is left
and we are done with it. You can see how simple
and easy, but yes, simple doesn't mean that
you have to do it very fastly take time and do
it with full patience. The lines should
not come outside. That's what we have to
create here with patients, we have to do it slowly
and carefully and fill the leaves and the
flower petals one by one. So this I have kept
it a little darker. So this is how we have
to do the leaves, just mixing a little red in this green and adding the stems. So when we add a little
bit red to this green, it becomes a little more darker. Now we'll add the center part. You can see the center part. So for the center
part, I'm using here, cadmium orange, just a
little bit in the center. So some beautiful
orange you can see, I have just added
it in the center. So now we'll give
a little bit of lines and some more
leaves on the top. And also, we'll add some
lines with my white gelpin. So make sure that your
background has dried. If it has not dried, this pen will not work on the wet one. So it makes sure that your
color has dried up completely, and I'm just drawing some nice veins and
lines for these leaves. So mine is a little
wet, I guess. So just the one which has already dried up,
I'm just adding on them. So this is how it looks. Now, a little bit of lines also, I will add to these flowers. With my black color, I'm just creating the lines because when we were
filling the colors, the lines which were in center, it has almost gone. So I'm just creating
more lines and just adding some smaller
lines in the center. Just like a shade, you can say. So similarly, I will be
doing for all of them. Just do it very
carefully and slowly. Make sure that your background
has dried completely. Sometimes the colors will also stick to your
technical pen, so just remove those colors
and then again start. So this happens when we use the technical pen on
top of the colors. Now, on this red one, I'm using this white
gel pen to create some nice lines
across the petals. So again, this is a little wet. So a little bit more lines. So you can see a little
bit how it is looking. So for the back part, I
will make the colors. So I'll just add a
little bit more lines with my mob brush. So I'll just add some more lines and some more smaller leaves. And this is a mob brush
which I'm using here. Again, the same green color. And with little mix of this red, and I'm just adding
some small leaves, just pressing the
tip of my brush and creating some very small
small leaves on the top. Just to add some
fillers. So try it out. It is a very simple
and easy bookmark which you can just gift it to your loved ones,
and this is it. So this is the first bookmark
which I have created.
5. Final Touch: Welcome back. So let's give the final touch to our bookmark. So this is the lamination pouch which comes with
number of sheets. It is A four size. It is of polychrome
and this sheet I will be using for my lamination. So I'll just take out one sheet. You will see in this one
sheet one end is closed. So I'll just open the
end which is open, so I'll just open
it, and then I'll start putting at
least four bookmarks. This is A four size. So I'll just put all
these bookmarks, either four or three, you
can put in straight form. And one by one,
I'll start putting all these bookmarks in a row. And then I will, uh all these bookmarks,
I'm just putting it. So all these process you have to use once you have
done the bookmarks, or you can just do it
from the nearby shop also so it doesn't
require that you have to also do the same thing
you have to purchase. You can just do the
lamination part by going to any shop nearby and you can just laminate
your bookmarks. And so there's a minimum charge which they take for
the lamination, and you can do it easily. You don't need to buy
all these stuffs. This is the extra
video which I'm showing if you want to
try it by your own. So I'm just pressing it nicely, and then I will put
it in the machine, which I have I have a
very small machine which can take A four and A
three size lamination. So this is a machine
which I'm using here. So I'll just put inside this machine that
paper which has end, the end which is closed, that end, I will put it first, and then I will just
uh take out the paper. That is the sheet
from the other side. So this is how you
have to put in, and it will slowly move inside, and from the other
side, it will come out. So this is how we do lamination. But if you don't want to
do lamination by yourself, so you can just go in
to the nearby shop and you can just do. So this will slowly
come out from the other end and
it's nicely pressed. And all these bookmarks, we cut it into a nice shape, and then we will make
the perfect bookmark. So this is how you
can see slowly it is coming out
from the other end. So this is how we can use the lamination at home if
you have this small machine. And if you don't
have, you can always do it from the nearby shop. So once the lamination is done, I've just cut this bookmark. You can see into a proper shape and where the fold
I have marked, I'll just fold it and you'll see a nice bookmark itself is ready. Now we just have to
put the magnets. So here I will be
using magnetic sheet. I've cut this into small pieces, and I will be using two pieces
of magnets which are of opposite pole so that they
can stick together to each other and your
bookmark is ready. So I'll just cut
one piece first, and just according
to the same size, I'll cut the second one. So you can see in
the other side, it can stick easily. So I'll just cut it on the
other side of the same size, and I'll just take the
quick fairy quick and I'll just place it on both the ends and your bookmark is ready. So this is the um process which you have to use while
creating these bookmarks. This is the *** which I'm using. It is B 700, and it sticks very fast. So that's why I'm using this. So I've just put it
on both the side and I've just put
it in the center, and then I'll just close
the upper part of it, and I'll put something
heavy on top of it so that it sticks nicely. So I'll just put this
small scissor on top of it and just press it nicely and just put a little
heavy thing on top of it. In one or 2 minutes,
it will stick. So this is how it has tick, and you can see it
can stick to one another and it's
looking perfect. Magnetic bookmark is ready. I'll show you how to put
it in the book also. So this is one of the book, and you can just put it where you have just
ended reading. So from there, you
can start again. So this is how you can
just place your bookmark and so this is it. You bookmark is ready. So this is how we have to do the lamination and
putting off the magnets. But yes, lamination, of course, you can do it from
the close by market.
6. Bookmark Two: Welcome back. So let's start
with our bookmark, too. So this bookmark, I have already
cut down and pressed it. So let's start
with the painting. So it's again, a very
simple painting, which you can do it within
nine to 10 minutes. So let's start with the colors. So the colors which here we will be using is the earth colors, mostly yellow
ocher, burn sienna, and sepia and burn tumbo. So the first color is burn
sienna, the lightest one. Sorry, yellow ochre,
not burn sienna. So lightest color, which is
yellow ocher here I'm using. So first, I'll just
create a nice wavy line. So some overlapping
shapes you will see. It's like a S, and I'll
just fill it up with my again, MpushV thin color. It is not a very thick color. So just taking some more
colors and just filling it up with the same yellow cher. After that, I will use a
little darker version of this, that is the Burnsiena. So slowly, slowly, I
will start increasing the values of the colors. So starting from light and ending towards
the darker color. So again, I will just
wait for it to a little dry or a little
bit colors gets absorbed. And then again, I will apply that burn sienna
using the same brush. There's not lots of
water on my brush. That is, like, limited amount, taking some colors and
again, applying it. If you'll take a lot of water, it will take a lot
of time to dry. So take a limited amount
of water, not too much, not very less also
and just apply it. So your color will
not spread too much. And the colors will
also dry very fast. So once your base color
has dried a little bit, then you can apply the third
color that is burnt sienna. So first is this is raw sienna. So raw sienna is a little darker color
than the burnt sienna. So I'm just applying
a little raw sienna and then sepia and then black. So just adding one more light. If you don't have
these all browns, you can just use one brown and start adding
little black to it, and you will automatically see the colors will become
darker and darker. So no need to take so
many brown colors. You can just take one
color and you can just mix little black, and you will see the
variations of brown. So now lastly, I'm just taking sepia and I'm just
applying another layer. And this time, you
can use a little bit of black also at this part. So similarly, I will be
doing on the other side. So you can see how beautiful the color is looking
from light to dark. This is how we have
to create, like, a nice curve shapes
of different colors. And similarly, we will be
doing on the other side. Make sure that all the
ends are covered properly, then only it will look nice. Now, we will wait
for this to dry, and then we'll take
our gauche colors, and then we'll start
with the drawing. The drawing is very simple,
not very complicated. I'm just using the same
colors which we used earlier in this earlier
painting, the first painting. So just starting with, again, the darker color, here we
will not be drawing much. We will directly use the colors, and then we will just paint
the flowers and the leaves. So wait for this part, the background to dry, then only start
with the painting. It should not be wet. Then taking again the same brush that is the mob
brush of size zero, I'll just create with
my Taloturquoise, just some stems and a
little bit of small, small substems and
starting from below, I'll just move
above and just like S and just try to use
the tip of your brush, then you'll get a
nice thin line. So again, when you are
creating these lines, use a thin color of
course, not a thick color. Otherwise, you will end up
creating thicker lines. So just some lines and some more lines I will
add on the top. So slowly, slowly, I'm just
creating some more sub stems. And small small twigs
which are coming out, and then I'll create
small flowers in there, like bunch of flowers. You can use your liner
brush also over here. If you have a rigor brush of
size zero or three by zero, you can use that brush to create some nice twigs here and there, and then we'll add the flowers. This thing you can also
do with your sketch pen. You can do it with
your brush pens. You can do it with
your acrylic pens, which has a nice
fine tip you can use your technical
pens for doing this. So I thought of using
directly the brushes. So you can use anything,
whatever you feel like. There is no boundation here. So you can use anything. It's just that you have to
enjoy what you're painting. So just taking again this nice red color and just
creating some nice, small, small dots on these twigs, you can make multiple
dots or over, small, small round dots. So this is how we
have to create small, small dots like flowers
in all like a group. Very simple and easy. Just use the tip of your brush. And this I'm doing with
my synthetic brush, as you can see over here. Using the tip of my brush
and just creating some nice, small, small bunches of
small red colored dots. And this dots, you can
use it with any color, whichever color you feel
like you can use that. Now taking some orange with a mix of this tallow turquoise, and you can use green
also if you want, making something
different color. So just taking some
nice thick milky color, and we'll create some again, little bit of blue also
you can take and just creating some nice leaves, using the tip of my
brush and creating very small, small
leaves, as you can see, using the tip and the
direction is in the upward, and you can see that the brush
is always from out to in, not from inside to out. So that you have to take care, it's always from out to in. This is how we have
to create the leaves. So I will add very
small small leaves in all these stems
which are there. So if you don't
know how to do it, first write on a
rough page and then write on your bookmark, so that it will be
easy for you to do it. You just have to use the tip of your brush and move
from out to in, not from into out, so that
gives a nice pointed shape. So this is how it looks
when we have done with the leaves and the
small small flowers and and now we have to do the other side
of the painting as well. So let's turn it up and
do the other side as well with the similar color which we have used
with watercolor. So I'll just remove
the gouache colors and I'll take these, again, the watercolors, and I'll start with a yellow ocher. Same background like we did for the above one, a similar way. Here, we will not draw anything. We'll just keep the background. So just first filling
with yellow ochre. This time, you can use
a little thicker color because here we are
not drawing anything. So you can use a little
thick color so that it looks more vibrant and clear. And here I'm using, again, my synthetic brush, but here you can use any brush
synthetic or more brush, whichever brush you feel like. It's just that when you
use synthetic brush, it doesn't absorb
a lot of water, so you can easily add a
very thick layer of color. Now Dburnsiena So then we'll use
raw sienna sepia with a mix of little
black also you can use. So this is how we have to
do the second bookmark. It's very simple and easy
to try it out and you will see very beautiful
bookmark will come out. And within ten to 15 minutes, you can just make
the entire bookmark. So you can see how beautiful
the background is looking with multiple
variations of brown. So I'm just you can
see how it is looking. So this is it for
the second bookmark, you can see both the sides, this side, and the other
side. So this is done.
 Mohini Sinha, Acrylic and Gouache Artist- Nature Lover