Transcripts
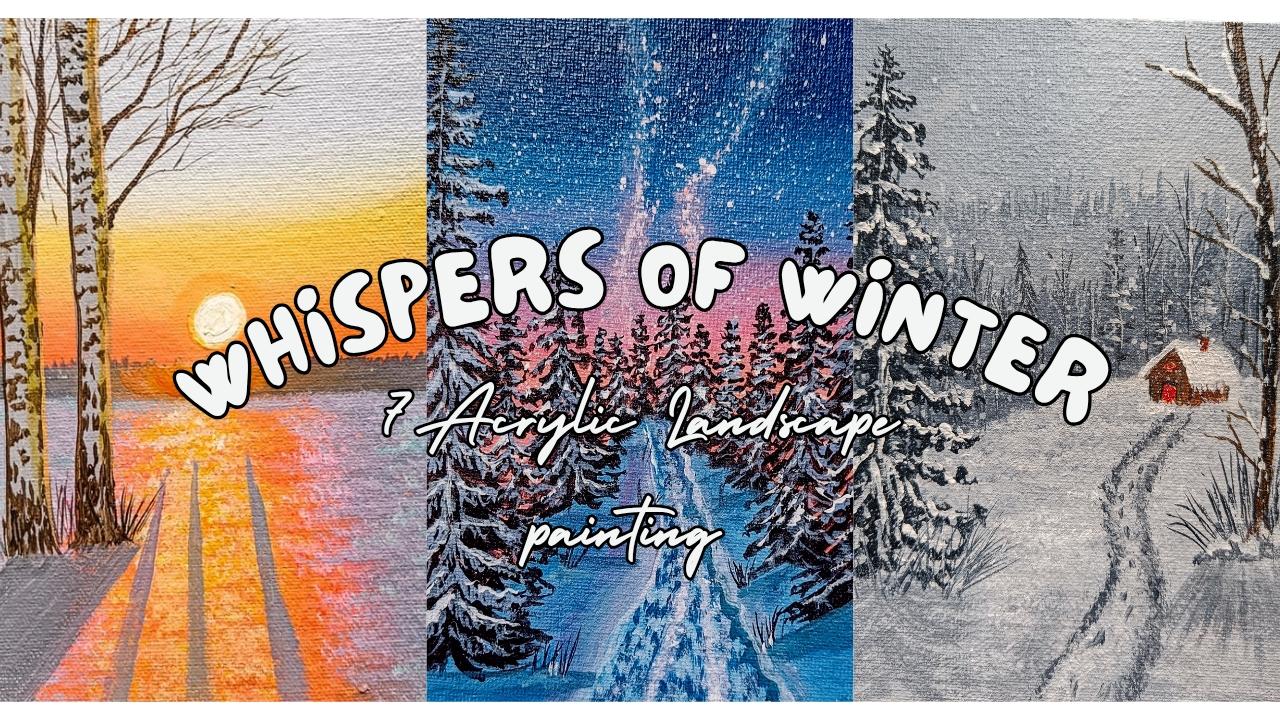
1. Intro: Whispers Of Winter speaks in soft tones and
gentle silence. It captures the calm almost secretive
beauty of the season. When nature rests wrapped in
pale light and cool color, the landscape feels still
yet alive as if the trees, sky and the Earth are quietly sharing stories
only Winter can tell. Painted in acrylics, this
winter landscape captures the soft hush of the season
where time seems slow down. Hello all. My name
is Mohini Sinha, and I am an art educator, and most of you know me as Mohini Art Gallery from
my Instagram account. So I mostly paint nature related landscapes,
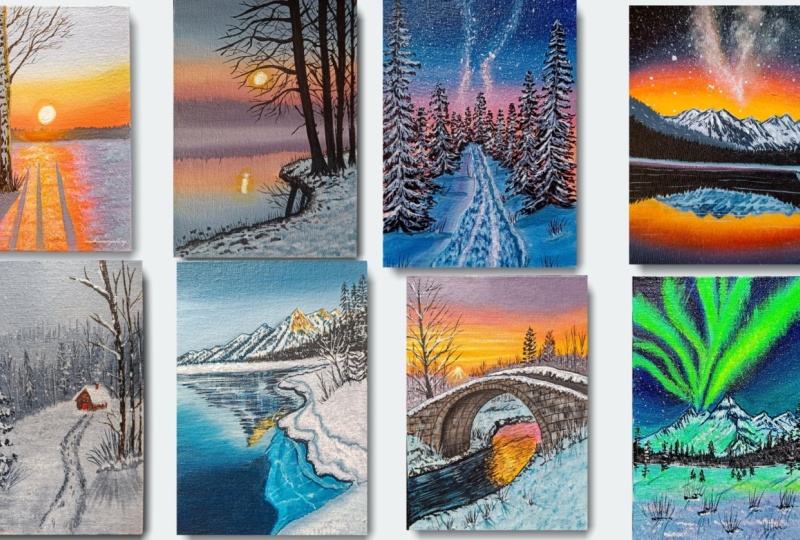
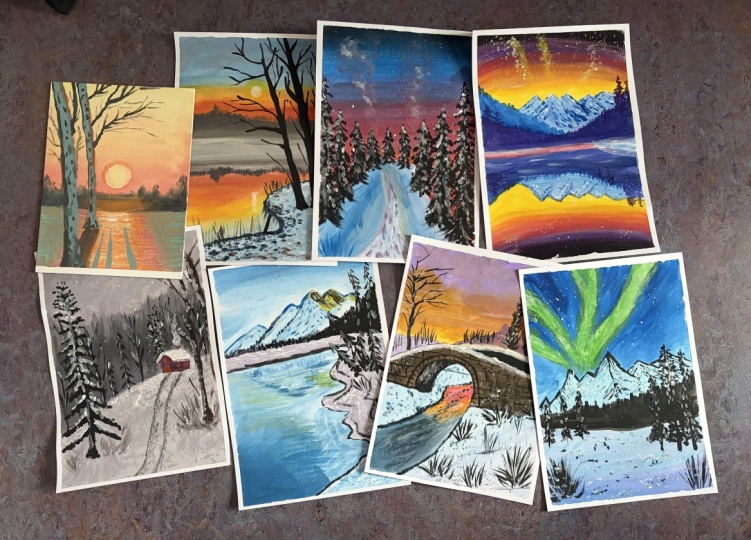
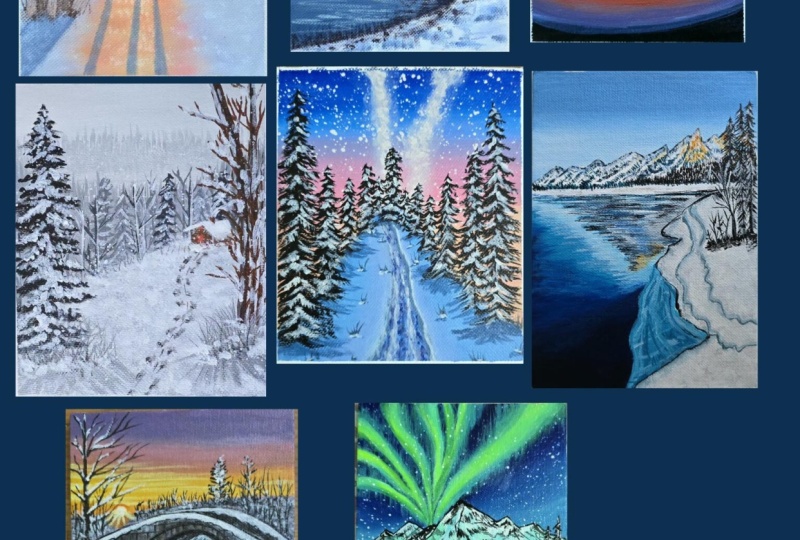
birds, animals. So this time also, we will be painting nature related beauty. So we will be learning seven different
winter landscape. Oh. Starting from easy and ending towards the
intermediate level. So we'll start with
the materials, what materials we
will be needing, then to the color mixing part, how we will mix and make a
perfect color variations. Also, the blocking
of the background, each and every details we
will be learning in details, how to blend the colors, how to create textures, how to add more light
to your painting, how to create the tree
texture, everything, each and every details
we will be going through in this series of seven
winterscape painting. So let's begin with
our first painting. I'm sure you are
going to love it.
2. Materials Required: Welcome back. So let's discuss
about the materials first. So first, we need the base. The base which I am using
here is the canvas, which is five is two 7 ". So it is a canvas board which I have primed at least
two, three times. You can use anything, canvas or an MDF board
or paper, anything. But if you're using
canvas, try to prime it. If you're using paper, priming is not required. This is the glass palette
which I will use. Then let's talk about the
colors, which I will be using. These are the
brands which I will be using, Windsor and Newton, Golia, then Mont Marte,
then Campbell, Liquitex. All these brands I will
be using for Phoebe. These are the brands which I use mostly for acrylic painting. So there are different
different brands. You can use any of them,
whichever you have. Now let's talk
about the brushes. First is the flat brush
for background blocking. Then is the smaller
size flat brush for even smaller
blocking we need. Then comes the
different sizes of round brush like
two, four, eight. So different sizes of round
brush we will be needing. Then comes the fan brush. This is a Bristol
fan brush which I will use and the blender brush. So all these brushes
we will be using for the upcoming paintings
which we will be doing. Now, let's talk about
the rigor brush. You can use rigger brush also or liner brush and
the palette knife. Apart from that, pencil, eraser, scale, all these stationary
items we will be king. And this is the masking
tape which I will be using, then the cloth for
cleaning the brushes, then the water container, at least two jars of
container we will be kding. So these are the materials
which we will be needing. So let's start with
the first painting that is the birch painting, birch tree painting,
and we'll follow with more difficult level afterwards. First, we'll start
with the easier one, and then we will go onwards
with the difficult one.
3. Birch Tree: Welcome back. Let's start with our first painting
that is birch tree. This is a canvas
which I'm using. It is completely primed. I have done priming two, three times on
this canvas board, and it is of size
five is to seven, as you can see over here. I have my palette,
my glass palette which I will be using
for all the colors. I will just divide it into half using my thin masking tape. So if you don't
have masking tape, you can use the pencil
and just draw a line. That is also fine. But when you put masking tape and
when you paint it, a perfect line comes up. That's why it's good to use masking tape,
especially on canvas. So you can see I have just taped the canvas with the masking
tape and I've taped it in the center and I have attached the masking tape
also on the tape so that my painting does not move. Now we'll start
with the painting. So a little bit of drawing and or we can draw it directly
by using the colors. No need to draw anything,
we'll do directly. Let's discuss about the colors which we will be
using over here. These are the colors as
you can see, light blue, titanium white, cadmium orange, cadmium yellow, and
fluorescent pink. These are colors we will be
using for our first painting. And also black color
we will be needing. These all colors, which will be required for
the complete painting. We'll go starting
from easy and then we'll go on with harder
and harder painting. So it's like that. I'm using my palette
knife to mix the colors. You can use your brush also. The benefit of using
palette knife is that the colors don't
stick onto your uh, brushes because when
you do with brushes, it hampers the brushes end
all it sticks to it and your brush becomes hard after
a certain period of time. So it's better to use
palette instead of palette knife instead of the
brushes to mix the colors. So you can see I mix
fluorescent, blue, white, and a little bit of black to
make it a purplish color, not totally purplish,
but it should be a purplish gray color which I want my background to be and it should be
a very light color. So I'm trying to make
the color as light as possible because since
this is the winter scene, so I don't want the
colors to be very sharp and very harsh
and it is a day scene. It's not a night scene, so that's why I
want the colors to be a little pastel shade. I'm just mixing, again, the colors and making a
little purplish gray color. Now you can see here it
is more of a pink side. I will add a little
more of blue into it and a little
bit of black also, you can add just to
mute the colors. It depends upon how you
are mixing the colors. Everyone has different
way of mixing it. Just check it on the paper whether the color
has come right or not so that you'll get an idea that what color we are mixing. Let's see what
color it is there. It is dark or it is light, it's better to check
it on the paper. Taking my flat brush and I'm
just checking the color. This is the color
which has come up, it's a bit dark, I feel. I will make this
color a little bit more lighter so that
it becomes more light. I don't want it to
be very dark color. Let's take the colors and
mix a little bit more of white into this because the color has
to be very light. You can see I've taken
all the white and I'm just mixing a little bit
amount of that mix of color, which I have made it earlier. Now you will see
how the color is. It's very light. Can see the difference. This is the color which we want
for the background. So just use this color
for the background, and we will be needing two to three light
pastel shade colors. One is this, then
the orange also, which is the mix of white and orange color and also the yellowish color
we will be needing. Let's start first
with this color. I'm just blocking the
upper part first. The colors are actually divided into three parts you
will see over here. So I'm just adding the first
color which we have mixed, the lighter one, the
lighter pastel shade of grayish, purplish color. This is the image,
as you can see, accordingly, we will
go with the colors. After that, I will just
add a little bit more of white below because when you mix the
yellow and this color, it becomes a little muddy
color which I don't want. That's why I've applied a
little lighter color below so that when we will blend
the color with this color, it should not come muddy. After that, we'll
first start with the orange color that is mix
of this fluorescent and a little bit of white also
and a little bit of blue color in this just to make the below part a little bit more purplish, as you can say. Let's add first this color, and it's not purplish also. It is more of a pinkish. I've kept it pinkish color only. It's not perfectly
the purplish color. So taking more of white and
just adding more of white to it and a little bit of
orange color in this. Since I'm just mixing these two colors together with a little bit of
orange and white. Try to mix the colors
properly so that a light pastel shade of orange will come
up as you can see, so very light color which
is there a little bit of this fluorescent
pink just to make the color a little
more bright and shiny. So when you add a little
bit of fluorescent, the colors itself
becomes more shiny. Taking yellow and more amount of this white and making again, a pastel yellow color. So these are colors we will
be using for the background. When you are doing
this painting, try to mix these
colors beforehand because then you mix the colors, it will start drying
off the first layer, so it's better to
mix it beforehand before doing all
these coloring part. So it's a fluorescent
orange which I have used and I will be using the pastel orange
which I have mixed. Just applying this again
on above and trying to blend with the below
fluorescent pink and orange mixed color. Then as I will go above, it will be more towards
the yellowish side. Whenever you are taking
the yellow color, now currently I'm taking I'm
not washing off my brush, but when I'll move above, I'll start using
a fresh brush and take yellow because
when you will mix yellow with
this orange, again, that color will
turn into orange, which I want to
be yellow itself, which should not
turn into orange. I'm just trying to blend
the colors and again, washing off my brush. Again, I will take this color the color which is in between. Now my above color
has already dried, so I'm applying
just one layer on the below part so that I can
easily mix both the colors, taking a little bit of white and trying to blend
both the colors together so that both the colors does not make any dy color. That's why I have taken here
white color, as you can see. This is the first blocking. We will be doing
second coat also. Whenever you are
using any canvas, try to do at least
two coats of it. Once the first coat has dried. Once this first coat will dry, I will again add
the second coat. The colors which we have used over here is this light color. Then comes the pinkish
orange color which is there with the background,
very light, pinkish. You can see how fluorescent
orange it has come up. This color, then comes
the pastel orange, which we have mixed lots of white and less amount
of cadmium orange. Then the last color which is
there is the yellow color. Again, the pastel yellow
mixing white in this. All these colors will be needed for doing the background part. I think it's clear the colors. Let's start with
the further part. So let's start with
the lower part. So lower part also
similar colors we will be using as we have used on the background
because it will reflect some light on
the ground part also. So same color using cadmium
orange and white mix. So starting from the center, I'll start with the
edge of the brush, and I'll just move the brush
in the to and fro direction. And it is like a V section. So like a V, I'm just creating
the orange part, and rest of the
part will be mostly towards the purplish,
bluish side. And slowly, you'll
see how we will mix those two colors by creating
some layers of textures. So you can see I've
just filled it with the pastel orange color. So now come the side. The sides, I'm just using the pink and white mix and just adding some colors
to the sides as well, using my same flat brush and just adding this of fluorescent
pink towards the side. Then I'll take the
purplish grayish color which I have mixed earlier, a little bit more
blue I'll add to that and just adding onto
the side, this color. Currently, I'm not
blending any color. I'm just putting the colors
on through the sides. Later on, we will be
blending this part. Similarly, I'll put the colors on the other sides as well. So try to take
little little color, and water is only
there on my brush. Rest directly, I'm using thick color and putting
it to the sides. And later on with
the damp brush, I'll try to blend the colors
because all the colors are wet so you can
easily blend the colors. Little little blending I
am doing with this brush. Little blue color is
there on my brush, but slowly we'll
blend more of this. So we'll wait for this to dry, then we'll add the
second layer to it. So the colors which
we have used for the below part is the bluish, purplish color which
is on the sides, then the pinkish color, that is the pink and white mix and also the orange
and white mix. These all colors we will be
using for the foreground. This is the pink and white mix.
4. Birch Tree Background Blocking: Welcome back. So
let's start further. So we will now do the
second layer of blocking. Now my painting has
completely dried. Just touch and see if your
painting has dried or not. Then only apply second coat. Otherwise, if you will
apply on wet painting, the colors will start coming up. So we'll do second coat
on the background first. I'm just staying a little bit
more of white over here so that I can properly
blend the colors. Same colors, I will be
using similar colors. It's just that little
variations will be there because when
you do second coat, sometimes the exact
color does not come up, so it's better when you
are doing the first coat, mix lots of colors so that the color doesn't finish
in between because sometimes it is very
difficult to create the same color which
you have used for the background if you
don't have practice. Little bit of variations will be there when you will
apply second coats, but that is perfectly fine. We just need a pastel
shade of color, very light color,
as you can see. Now I'm just applying
the second coat on this. Now, the second coat can
be a little thin color. Again, my brush is wet. I haven't put any color
water on my colors. So your color is like creamy color and water is
only there on my brush. So same color I'm using and I'm just
applying a second coat. So why we need to apply second coat is when
you apply second coat, yourself will see the difference which makes the painting
look more real, more neat and more smooth, especially the blendings
and everything. So this is the time when
you can correct the colors. If you feel that the color is very light, you
can correct it. So this is the time
when you can fix the color combinations as well. So you can see this
orange is a little curvy, so that's what we want here. So this is the time when
I can fix this curviness. So you can see at the sides, it is more curved
than in the center. So it's more at height
and the corners and a little bit more
below in the center part. So that's what I'm trying
to create over here. Now, I'm just taking yellow and trying to blend
these colors together. Slowly, slowly, I'm just
trying to blend the colors. Same color you have to use, same pastel colors and try to do it as smoothly as possible. Take thick colors,
thick amount of colors, and try to blend the
colors simultaneously. Now I'm just taking
white a little bit, and with this white, I will try to blend
this yellow and that grayish purplish shade. So once I have done
the first second coat, again, we have to wait for
the first code to dry. Now we will do the lower part. And again, the second code, you can see in the first code, there are lots of brush marks and the blending is
also not proper. So in the second coat, we will focus more on the blending part. Now,
you can see this part. It is like a U shape that we have to create with
the orange color. So when your color is wet, you can easily blend the colors. But if any of the colors dry, just add that color
and try to blend. So it depends upon the
atmosphere also where you live. If you live in the cold
area or very hot area, it depends upon that also. So currently, it's
very cold over here, so my colors are not
drying very fast, so that is a good sign for me. So I'm just mixing a
little bit more of white and just adding this nice fluorescent
orangy color in between. So one of the advantage of winters is that
your acrylic colors will not dry very fast, and you can easily
blend the colors. So just adding, again, the same colors to the sides, same light pinkish color. And you can see I'm just
blending also a little bit. This pinkish with
this Nice blending I'm trying to do over here. Now I will take the colors, that is the violet color mixing a little bit of
pink, little bit of blue, and a little bit of white also you can mix if you feel
that your color is dark and just applying it to the sides and also to
the other side as well. After that, I will just
wash off my brush, and then I will try to blend the colors
with my damp brush. So just washing off my brush, removing excess of water and just moving the brush into and fro direction
very lightly, and this is how you
blend the colors. Now, this blending will only happen when your color is wet. If it is not wet, this blending will not happen. So you have to be careful
that your color should be wet only then only the
blending will take place. So this is how we do the
blending of acrylics. If you want to learn
more about blending, you can check out my class, which is there on scale share about the big
nerve friendly class. It's completely big nu friendly, and you can try
out that as well. So just after that, once it dries, we'll
remove that center tape. But first, we will
draw the line and then we will remove
that center tape. So I'll just take my flat
brush and the same color, which is the grayish,
purplish shade. A little bit of blue
and black also, I will mix just to make
it a little darker color, and I'll make a straight
line with my flat brush. Small size flat brush it is, and just trying
to draw the line. And then once you
have drawn the line, you can then remove
the tape easily. Now I will slowly
remove the tape. Now you can see where
I put the tape, there are no colors. So here we will create some nice background
distance trees where there are lots of trees, but in a very, like, a very blur, you can say. So with that color
which we will use is similar to the
purplish, grayish color. So that color we are
going to use over here. So very light and
grayish purplish color. So you can see I've just added a little bit more
of black to it, and I'm just creating
the B trees, very small, small textures first
with my round brush, you can use any size round
brush size two or size four, or even you can use your lineup brush for
giving those textures. So you can see the
point is above, and I'm just creating
for the textures, and then I will fill the colors. So try to first create
the textures above, and then you can just
fill the colors out. So just adding a little bit
more blue and black mix and just filling the colors. The center part is
a little orange. So first, I'll start
from the corners, and then we'll move
towards the center part. Try to use the smaller size
round brush over here. Don't use very bigger
size round brush. Otherwise, it will be
very difficult for you to paint this.
Now, same color. That is the fluorescent
orange color I'm using and I'm
putting it in between where I will put
the sun as well. So just applying it over here. You can see I haven't
washed off my brush. I'm directly using that brush. So that little bit of grayish purplish shade also comes there. And again, taking
that grayish color and applying to the
rest of the area. So this is how we are slowly
building up the shape. So now we will draw the center, which is the sun and just
making it a little bit more of this orange over
here because here is the thing where the
sun lies will fall. So that's why this
part is a little bit orange and a little bit
curvy also, like a U shape. So slowly, slowly, we'll do the layering once
I've just filled the color. And then the above is the
sun, which is setting, just taking yellow
and white mix, and just adding in the
center, big circle. And just coloring it with the same cadmium
yellow and white mix. So it's a bit light color, so we'll add more white to
it to make it more vibrant. But first, try to make the circle and then we
can add the white colour. So we have to move slowly, slowly towards the textures. Now I'm just adding white
in between and making a circle just to make
this sun more bright. Now my yellow is wet, so it will mix with this white to make it a little
lighter color. But again, we will add
once this base dries, since my base is wet, so it is blending it
with the yellow color. Little bit of orange again, I'm adding once it has
dried a little bit. H.
5. Birch Tree Foreground Details: Welcome back. So
let's start further. So now we will do the
foreground detailing first. So now the whole
thing has dried now. Now with my fan brush, I'll start creating
some textures. So first, without
wetting my brush, it should be a dry
brush or a damp brush. It should not be a wet brush. So just taking a little
bit of fluorescent yellow. And the color should be
a little more lighter than the color which you
have used in the background. Just check the color if
it is visible or not, and then you can just
guess a little bit of light color than
the color which you have used in the background. It should not be darker than the color which you have
used for the background. Just with my fan brush and
with the tip of the fan brush, you have to create
these textures on the center part first. And then we'll go to the sides. So very light pressure and just the tip of the
brush you have to use. Don't take too much
color on your brush. Just taking a little
bit of color. If you feel that there is a
lot of color on your brush, just wash off your brush and
then use your brush again. Because sometimes
it happens when we mix the colors with
the same brush, lots of colors stick
on our brushes. So sometimes this happen and this texture does not
comes up as expected. So just adding the
same texture to all the sides and the
corners of this whole thing, just adding a little bit of more pinkish towards
the sides and more this light orange
color to the center. So the color has to be
lighter than the color which you have used as the base. So this is the texture which will come when you will
apply it on the canvas. Whether you are
using canvas, paper, anything you can
use as the base, it is not only required that
you have to use canvas only. But whenever you are using
canvas, try to gesso it. And if you are using
paper or anything, no gesso is required. You can directly use the paper. But used thick paper, don't use thin paper. So you can see the textures. I'm applying it all
over this orange area. So the color has
to be lighter than the background color
which you have used. So now we will start with
the sides of the sides area, which is a little darker. So this color has to be a little lighter than the color which
we have used for the base. So I'm just mixing that color and making
that light color. So let's mix it with
the same brush or you can use a
different brush for mixing and applying
it to the sides, you can see the
light color it is. So we'll apply to
the sides also. And a little bit, we'll move
towards inside also so that this color blends with
the orange color as well. So slowly, slowly try to fill
the textures, you can see, I'm just mixing some areas
inside this orange part also, so that doesn't
look the separate. It looks like this color is getting mixed with this
orange part as well. So in all the areas, I will be applying
this both the sides, I will be applying this texture. So just enjoy the process and do it very
slowly and calmly. Don't try to press
the brush with very gentle hand and with putting your
brush at 90 degree, and you have to
just use the tip of your brush to create
this texture. So all these textures
will be both the sides. Similarly, I will be creating
on the other sides also. So one side is the other side, I'm trying to create it. Some of them I'm also taking inside this orange part also. So all these little bit of
detailed painting takes time, but the more you give
time to your painting, the more beautiful your
painting will come up. So be patient, take breaks, and then start
with the painting. Don't be in a hurry to
complete this in one go. Just enjoy the process, each and every
process of blocking of giving textures.
Do it in breaks. Don't do it in a hurry. Now you can see I'm just
adding a mix of little bit of orange and yellow and white just to make this area
which is in the center a little bit more light
and more vibrant. So it should be a
light yellowish color, which I'm putting in the center, just to show that this rays of the sun is falling on this part. So the first was blocking, second was the layers
which we have put. The second layer which we
have put is this light color. Now we will add the third layer, which is the yellow
color and more yellow and less of white in the center to make
it more brighter. You can see I'm just
adding to the sides of this lighter color just to
make this part more brighter. Again, taking white and this yellow and putting
it in the center, just to make it more
bright and more shiny. So this is how we have to move and create all the
textures over here. The more you will
add these textures, the more beautiful it will look. Now I'm just adding a
light bluish texture over here to the sides, just to give a little
bit more snowy effect to this area just to the sides. Similarly to the
other side, also, I will add This is how we make the whole area, which is the foreground area, and then we will move towards
more detailing of this. As you can see, there
are reflections also in this painting, so we'll be creating
reflections as well.
6. Birch Tree Shadow Details: Welcome back. So
let's start with the details of the shadow and
also the shadow of the sun. So first, again, I'm taking
this, same fan brush, mixing a little bit of white and the pink color and creating to the sides first and then we'll start with
the shadow part. So this part was left. So just adding a little bit of the pinkish color
towards the sides. See, similar color we
are using over here what we used as the blocking,
similar color, but the colors are a little bit lighter
than the ones which we have used for the
background base. So now we will be doing a
little bit of details of the sun because you can see
the sun is not very bright. So a little bit of yellow, I'm just adding in the
center just to make it more brighter because this is more
yellowish, the center part. So let's now begin with the one, which is the center circle
and also the shadow which is falling on
the background trees. So you can see my color
has already dried up, so I'm just applying
the second coat of it. So wait for the first coat to dry whenever you are
doing the second coat, then that proper
colors will reflect. So I'm just making it a
little round and shape, the area which is
near to the sun part. The more you will
repeat this process, the more bright this
area will look. So just adding a little
more of yellow than pink and trying to make this area look more
vibrant and more orange. Little bit of blending you can do with the
side colors also, a little bit of blending so that it doesn't look like
this is a separate thing. Just with my dam brush, I'm just trying to
blend this color with the side part of
this darker color. Now we will add a little bit of white also in the
center because it is a little bit
little dull, white. So just to make it more shiny, we will be adding a
little white, also. Again, you can see
I'm adding white just to make the colors
look more vibrant. So slowly, slowly, we have
to build up that color. The more we will overdo it,
the more we will repeat. The more we will
layer the colors, the more brightness we will get. So a little bit orange
also I've mixed over here just to make
it more brighter. This center area has to be
very bright because the sun is very bright and
very like orange. So that's why this center area has to be very bright in color. Also, we will just add
more white and yellow to the sun part because it
is very light in color, and a little bit of the shadow
we will be adding below. You can see the shadow
which is coming up. So those shadows also
we will be adding. Just adding a little bit more to the textures to this part. These all are final
touch up which I'm doing before
creating the trees. So when I'll start creating the trees, we cannot do these. So that's why I'm
doing this beforehand. Taking this light
orange color and making the circle around
this yellowish part. Here you can use
your round brush or you can use your liner brush. It's totally up to you which brush you are comfortable with. Now the yellow color and
a little bit of white. And I'm just trying to
blend this yellow with white color just to make
this area more brighter. Sometimes you have to add
lots of white repeatedly. Once the first coat
dries, then again, you have to add second coat to make it more brighter
and brighter. Whenever you are adding
white over here, try to use thick colour. Don't use any water or anything. Try to use thick colour and damp brush and try to
make the circle. Then only that brightness
will come up see again. I'm adding one more
layer just to make this more brighter
and more yellowish. Now, we'll also create the
reflection which is there. This is the reflection
of another tree. It's not of the same tree. Something is there where
the reflection is falling. So that is the reflection of. So it's the same color,
but in this color, we will be making it a little bit more darker just by adding black and blue just
to make it a grayish, purplish shade, and
we will be creating this nice reflection which is falling on this glowing part. So just making it like
a triangle shape, or you can use your round brush and just use the
tip of the brush, and as you go down, make the brush press some
brush more and more. So it will create a
nice shape of the tree. Like a triangle shape,
as you can see. So three reflections I'm
adding just over here. Just to make this
landscape painting look more real and more vibrant. You can also skip
this reflection part. It's totally up to you. But I feel that
this reflection is adding beauty to
this whole painting. So that's why I created this. Oh, this is the reflection part, and let's begin further.
7. Birch Tree Tree Details: Welcome back. So let's start
with our tree details. So for the tree details, I will be using my rigor brush, same color, that grayish
color of purplish color, dark grayish, purplish color. And I'm just first creating the tree line where we have
to create these two trees. So use this color and first
create a single line, and then you can make
the lines thick. So this way, you will not make any mistakes and you can
easily draw a single line. After that, just drawing how much thick you want
the tree to be. These are mostly
very thick trees, not very thick, but yes, it is like a straight tree with textures of white
and brownish textures. So just trying to make
it a nice fine line, and then I will just
block in that area. So if you're facing
difficulty in creating the trees
directly with the color, you can use some chalk or
something to draw the line, or you can use the white watercolor pencils
to draw the lines. This is one of the
technique which you can use for acrylics. So try not to use
pencil for drawing because pencil you
cannot rub after that. So just blocking this
part with my round brush. So just blocking it nicely. If you feel that the
color is getting a little mixed up with this
background color, don't worry about that. When we add the textures, this will be gone. So just try to first fill
in this whole tree line. Similarly, I will be filling
up the other one as well. You can use any
size round brush, but try to use a smaller
size like two or four, not bigger than that to fill the color so that
you have control on your brush because that is the most important
thing when you are doing any detailed painting. Try to use smaller size brush
so that you can control it. If you will follow
each and every process which I have
explained over here, you can easily paint this. Even a beginner can paint
this painting if they follow each and every
process of mine. So as you can see, I've just blocken this, and after that, we will
start creating the details. But again, you have to wait
for this background colour to dry a little bit so that
when we do the detailing, this color should not mix
up with the darker color. So now taking this orange color, mixing it with a
little bit of black to make it a nice
burn sienna color. So if you have burned sienna, you can use directly since I was having this orange leftover. So I've just mixed this
orange with the black, and a nice dark brownish
color will come up. So just drawing the
tree line first, so you can see how
crooked lines are these. So try not to draw
with wavy lines. Try to draw crooked
lines in between. Then only that tree lines and the tree branches
look little real. So this is one of
the easiest way whenever the branches are grown, the area where it
joins is little thick, and as it goats outward,
it becomes thin. So remember that in mind and try to create the tree lines slowly. And all these detailed textures makes your painting
look different. If you will create how you
are creating the tree lines, how you are creating the
tree textures matters a lot. So try to do it very
slowly and very carefully. Now, these tree lines also, you can draw it with your watercolor pencils or something, and then you can outline it. If you don't feel that confident that you
can do it directly. It's totally up to you how
you want to create it. Oh, creating a single outlining this area with the same
color which I have used. Just outlining with
a very thin line. Thin line means add
a little bit of water and make your color
thin and then draw the line. Don't use thick
color when you are creating any lines
or any branches. Try to use thin color. Now, I'll start creating some
details which are there. Small, small details
are there like random details on
this whole tree line. So that's what I'm trying
to create over here. So try to do it as
slowly, very small, small textures on the side, some textures on the center. So we have to make the textures. So, let's first
add the textures, and then we can do the
highlighting of the lighter color. So just adding some textures on both the sides of the tree. So it's not like what I
have created the texture, same textures you
have to create, but similar to that, you
can just add on your own. But again, the color should
not be very thin over here. Whenever you are
drawing any lines, the color has to be thin so that you have control
on the thin lines. But when you're doing
some texture part, you can make the
color a little thick. Now, you can see there are
lots of lines in this part. So I'm just trying to create
in the lower part also. Slowly, slowly, I'm just
trying to build the shape and the whole textures
from bottom to up. This whole texture thing will add the beauty to this painting. So try to do it as
slowly as possible. And with full patience, don't do it in a hurry. Otherwise, there are
chances that you can spoil this tree part. So try to do it very
slowly, very calmly, gently and take time
to complete this. Whenever you are
painting anything, full focus should be
on your painting. You should not have any
distractions here and there. Just focus on your painting. If you feel distracted, just take a break and
then start again. So this texture part I
have just completed, and now I will add some
more tree branches, some thin branches all over. Little bit of grasses also we will add at
the bottom part. So simple thin grasses
also we will add, but let's first create
some more thin branches. Again, thin branches
means thin colors. So try to use thin colors. Thin color means
add little water to your color and then add
these thin branches. So we have almost done one tree, one more tree is left, and then we are done
with this painting. So just a little
bit more part is left and then we're almost
done with this painting. So I hope you are
enjoying this part, and so many paintings are there, which I will be sharing
in this whole series, almost, so I'm sure you will love to make
the winter series. And if you are trying it out, do tag me on my Instagram
that is Mohini Art Gallery.
8. Birch Tree Final Details: Welcome back. So let's start
with the final details. So the final tree is left. So one tree we have done. Let's do another tree. So similar way, we have to do similar thing we have to
do over here as well. Well, so same way how we
have done the other tree. Same way I'm doing over here. First I creating the
outline in the one side. I'm not creating outline both
the side, just one side, just to make that area look more darker because it is
away from the sun. So just making that part
with a darker line. And then with the
same technique, I will be creating the textures
and the tree branches. So you can see I've just created the branches
in one side. You can create in
both the sides. It's just that I want this tree branch to be
thick and first created. That's why I have left
the other side of the branch of the first
tree which we have done. So just making this
a little thicker, the branch and trying to
create some more thin lines. But yes, you can change the branch directions,
the branch shapes. It's totally up to
you how you want to create your own uh
magical perch tree. So it's totally your choice. I felt like this, so I have created it like that. So it's totally up
to you how you want to change the
directions. So yes. Similarly, I will be adding
some more branches to the other side of this tree. And then the textures
also will be there, which I will be
creating over here, like I created on
the first tree, same textures, similar way. Just try to do it in
a very slow process, slow space and take time to do this because all these paintings require a little bit of time. You cannot do it in a hurry. So take your time, take your free time and
then try it out. I would suggest you to follow
if you are a beginner, follow each and every
process of this painting, and I'm sure you will
get to this output. Even if you don't have
the similar colors, try to take only the primary
colors and mix the colors. If you don't have
this porcent pink, use normal orange color
and try to make it. If you don't have orange also, you can make with red
and yellow color mix to create some orange color. So if you want to learn how
the mixing of the colors is, there is a class in my section, so you can check it out and see how the color
mixing part take place. There's a special class
for Big Nu friendly. You can check it out for
color mixing process as well. So I will share that link in my description so that you
can check that out as well. So you can see I'm just
adding the textures. And my tree is also not white. It's like a grayish
and purplish shade. So I've kept it like that. So I don't want my tree to be
completely white in color. So that's why it's like an
off color grayish color, very light, grayish and
purplish shade, it is. So just adding some more
textures, both the sides. Using my same liner brush, you can use your size zero
round brush for this, but try to use the
smaller size brush. Don't use bigger size. So this is it. I
will also create some reflections of this
trees, which is in below. Now the reflection
you can create with your flat brush also with
your round brush also. I totally depends upon
you how you want to create the reflection and with which brush you
are comfortable with. But first, I will add a
little bit more white to this because this
color has dried up. Now I can add one more
layer of white to this. So you can see I've
added so many layers of white in this to make it
a more brighter color. So this is how we get
colors in acrylic. We have to layer the colors. So just the reflection part is left and we almost
done with this painting, and a little bit
of reflections I will add on the tree part also. So let's first create
the reflection below of these two trees
with my flat brush. So this is, I feel a
little lighter color, so I'll just make it more dark, but just by adding white
to this grayish mix, black to this grayish
mix and just adding a nice ray which is
falling below the shadow. And you can join the shadow
as well if you want, because the shadow which is coming it is in
a slanting line, which is a diagonal line. So you can join both of them. I feel like I'll
join both of them and I'll create the shadow. So just taking a
little bit more of this lighter color and I'm
just joining this shadow, both the shadows
together and just making it a nice
shadow part below. So just filling the
colors on above, also creating a nice sharp edge because the shadows
are very sharp, so just creating a nice
sharp edge over here, and this is the shadow
of both the trees which are combined together. Now I will also create
some light which is falling on the
tree part one side. So with my yellowish
and this orange color. But before that, you have to wait for this background to dry, the only we can add this. Let's add some more yellowish
to this part just to make it more yellowish
and more glowing. See, these are all
final parts which you can skip also,
which you can add also. So I really enjoy doing
the last part of it, just adding some more
details here and there. But it's okay if it's
perfect for you, you can leave it like that. And if you are trying
this painting, do tag me on my Instagram. That is Mohni Art Gallery. I will love to see the projects. And just adding some nice light, which is falling on
one side of the tree. So taking my round brush, making the color very thin, you can see just adding water, and I'll start from the top. So I'm just adding now
you can see my color is, I think, still a little bit wet. That's why this color is mixing. So I'll wait for this first to dry and then only
we can add this. So you can dry it with the blower or you can
directly use this. But you have to wait
for the colors to dry. After that, we can
create that part now. This has dried now again. We will repeat the same process. So I just dried it with my dryer so that we
can do it quickly. So just adding again the same technique which
I was doing earlier, now this time I'm using
my small size flat brush, making the color thin and
starting from the top, I will just make it
straight to the town. Very thin color.
Don't try to make it very thick because this
is a light which is falling, and I want that
glazing effect to come so that the below
color is also reflected. Glazing effect is nothing
that if you add any color, the lower part also should
reflect that color. The upper part is also
reflecting that color, and the lower part
is also visible. So that is called as glazing. So I'll just add one more
thin line on this side, just to make that area look more glowy with my rigor brush. Just adding a simple line
of this just to make it more glowy because
the sun is this side, so that's why I'm making
the glowing part this side. These are small,
small things which actually make your painting
look more beautiful. You can add some birds also
in this painting if you want. It's completely your choice. What do you want? You
can add some birds. You can add some more grasses below yeah it's
totally your choice, how you want to add the details. I feel it is done, but, yes, you can do
your own creativity. And I would love to
see your project work, and I'm sure you are
going to like this, too, as I really enjoy doing this painting, and
there are more to go. So this is done finally, and just a little bit of the
one which the color got mix. So I'm just adding a
little bit of over here. A little more lighter
color of yellow, just to make it more glowing. So this is it. I hope you
enjoyed this first class, and we'll see you
in our next class.
9. Snowy Landscape: Hello, all. Welcome back. So let's start with
our new painting. So let's first do a
little rough drawing and then we'll start
with the painting. So first, I'm just
drawing the horizon line, which is a little bit
on the lower side. So you can see it is a bit going down little curve
lines I'm creating. Then on top of it are the
background trees which are very hazy type. So that's also I'm just
drawing a little rough sketch, and then we will directly
do the coloring part. And a small hut which is there that also we will
draw, and that's it. This much is the drawing part. So you can see I'm drawing above the horizon
line which is there, and I'm just trying to create a little small hut
which is there. Very simple and easy
way of drawing it, very simple hut I have kept. I haven't made it
very complicated. So very simple and
easy drawing it is. So after this, we will just
add some windows and doors, and then we are done
with the drawing. So I want to keep it very
small so that it looks like that it is at
a far distance. So that's why I've kept
it very small in size. Now let's discuss about the colors which
we will be using. So there are two colors which
is pains gray and white. So these two colors we
will be using over here. If you don't have Pains gray, you can use Priscian blue and mix a little bit of
black into that. That will turn out to be a little bit of
pains gray color. Pains gray is actually
grayish blue color, and a little bit of
purplish also added to it. So you can use Priscian blue for that and a little bit
of black you can mix. So I'm just mixing the color, and I want the background
color to be very light. So let's check the color value, how it has come up because you can see it's mostly
white in color. So this is the color which
has come up when I mix very little amount
of the Pains gray. I'm mixing a little bit more
amount of Paine's gray, so this is the second color
which I will be using. So like this, we have to make the variations of
colors as we will be moving on the background
as well as on the foreground. So let's start with
the painting first, and then you will get to know
what all colors are there. So back to my canvas. So just taking the colors, I will be using round brush. You can use round brush, also. You can use flat brush, also. You can use filbert brush also. Whichever brush is
comfortable, you can use that. So we have to move the brush in the circular motion
as you can see. So this side, it is a
little bit lighter color. And as it goes towards
the tree part, which is the main tree part, it will become a little darker. So like that background, I want the background to
be from light to dark. So I'm moving the brush
in circle so that it feels like there are lots
of clouds which are there, which is a very gloomy look. You can the hazy look it is. So that's what I want
to create over here. So that's why I'm just
blending the colors, taking the lighter
color and trying to blend with a darker color,
as you can see over here. We will be doing second code, so don't worry about
the first code if the blending is not proper. We will always do at least
two codes on the background, then only the whole
painting will be complete. So I'm trying to keep it
as simple as possible. If you have any doubts
over here, any confusions, any color confusions, you can ask me in the
discussion section. You can DME on my Instagram
that is Mohini Art Gallery, anything you can
ask me anywhere. So, um, just the below part, which is the tree part, that is the backside tree part, which is very hazy type. So that color which
I'm making here is a little darker color
than the background. It should not be very dark. It should be a little
darker than the background. So this is the color
which has come up. So that color I will be using here for this background trees. So with my round rush, I'm just giving it
a little shape, as you can see, and I'll just fill in the whole
area over here. So take your time, do it slowly. No not to do it in a hurry. If you feel there is a confusion
in between the colors, try first testing it on the
paper and then do this. So you can see I'm just blocking
it with my round brush. You can do it with
your flat brush also. So with your flat brush, you can easily block in these colors in a little
bit faster manner. So that's why I've switched
to this flat brush, and I'm just blocking in
the vertical directions. So no need to here blend
the colors because we want textures to be there so that
the textures are there, then only that background
feel will come. So this is completely
different painting which here I'm doing. First painting was very vibrant and very,
like, warm colors. And this is slightly a
bit of the gloomy color, as you can say, very, like different colors of winters
are there actually. So I thought of using different different
winter colors which are there actually
when winter comes. So this is another winter color, which we see when there is lots of snowfall and
everything is there. So just blocking the upper part. Once we are done
with the blocking, we will also blocking
the lower part as well. We can only do the
above part second coat only when the first coat dries. So we have to wait
for the first coat to dry or the upper part, then only we will be able
to do the second coat. By the time that
first part is drying, I will be doing the lower
part with this light color. You can also use dryer
for drying it out. If you are not able to dry the colors very fast in winter, you can always use the dryer. So I'm just blocking
the lower part, and then we will do the second at of the background
and the middle ground. So just enjoy the
process of blocking. No, detailing, nothing
here we are doing. We are just blocking the colors. That's it. And
10. Snowy Landscape Background Blocking: Welcome back. Let's
start with the second at of the background, and a little bit more
details we will also add. Let's start first again with the background
with same color. Se whenever we mix any
color second time, there are chances
that little bit of variations will be there. So don't worry about that. Little bit variations are fine. So whenever you will mix, don't expect that the
same color will appear. A little bit up and
down, it will be there. So I'm just blocking
here first second coat. Now my first coat
has properly dried. So then only I'm applying
this second coat. So whenever you do second coat, you will see there will be more nene more neatness in
your background painting. So that's why second
coat is a little bit necessary when
you're using canvas. Just rotating my brush in a circular motion and trying
to block in the above part. So once I'm done
with the above part, now I will fix the part which is there you can see the line, which is the tree line,
the back tree line. That also I will create some textures over there
with my rigor brush. You can use your rigor
brush or liner brush, whichever brush you have, try to make similar color
which is there. And try to create
some nice lines, some tree lines which are there in the backside
of the tree, which is not visible
because of the snow. It's very light in color. That's why I have kept
this color very light, a little darker than
the background color, as you can see over here. So just adding some tree
line textures, that's it, and then we'll do another
tree line which will be below this tree line. Do it slowly, take your time. And whenever you're
doing these line parts, make your color a little thin. Then only you will be able
to make all these lines, give your painting enough time, do it slowly, and try to make the textures
at the background. Just enjoy each
and every process. It's not like in one go, you have to complete
this painting. I won't suggest that
you do in one go. Take breaks and then
do this painting, and then you will see the
magic which will come the magic of doing the
painting in breaks, actually. Because these paintings are not to be done on, like in one go. You can do in one go if you
are doing it every day. But if you are trying
it for the first time, take breaks and then try
to do all these paintings. So I'm just putting
some more ates below, and then I'll start with the second layer of the trees which will be there
just below that line. So you can see I've
just filled it with the same color and just applying the
colors with my brush. Even if the color is not thick in the second
coat, this will work. But in the first coat, your color has to be thick. It should not be
very watery color. So water is only
there on my brush. That's it. Rest are all colors. Now let's do the second
layer of the tree line, which will be a
little darker than the one which we have
used for the base. So just taking a little
bit more of white, and let's start with
another tree line, which is there at the back side, darker than the color which you have used at the background. So just taking a
little bit more of paints gray and just mixing it with a little darker color than the one which you have
done in the background. Now, here you can
also use gray color. If you have gray color and add a little bit
of blue to this, that also you can do if you're
painting this painting. That also will
come up very well. So just adding
similar textures and similar lines up and down
and just over there. Since my color was thin, so my color has dried. So whenever you use thick color, that color takes a
lot of time to dry. But when you use thin color, it will dry very fast when
you are using acrylic. So second coat I haven't
used very thick. That's why my color
has dried and I can easily create these lines. So I'm just creating the
upper textures and rest, I will just block in with my
round brush or flat brush. So try to do these
lines like some big, some small, different
different sizes. The more you give time
to your painting, the more it will
come up beautifully. Like, I have experienced that. The more I give time
to my painting, the more it comes wonders. Try to give time to your
painting, do it slowly, and enjoy the
process of creating all the lines and the textures and the
colors, everything. Now I will just use my flatbush and I will just
block in this below part. So you can see my
color is little light, but it's just making
it a little bit more darker and just trying
to blocken this part. It's okay if your
blend is not proper, it's fine because these
are all tree lines, so we don't want the
blend to be very proper. It's okay if there are
brush lines a little bit, so it's perfectly fine. Sometimes we actually
need brush lines also to just make your
painting look more real. Like, I really enjoy doing
these landscape paintings. And I have done
almost six years. It's now I'm doing the
landscape paintings, and I really enjoy
each and every landscape painting I do
apart from portrait, animal portrait,
and bird portrait. So now I'm using this fan
brush and white mix and just adding some textures of white and little grayish
textures to this whole pathway. This whole path. Just
use your dry brush and thick colors and try to create these textures like we did in our first painting
if you have done it. So similar way we have
to do it over here, just adding a bit of white and a little bit of gray is
there in my background. So that's why that gray is
also coming, so it's fine. Just add some textures
all over this area, which is your foreground area. This brush actually adds
magic to the snow effect. I really like this brush. This brush is from rosemary, and it is of size one, but it's a very,
very nice brush. It gives a very nice, fine textures of not even snow, but also of mountains. Even I use this brush for
the tree textures also. So it's a very nice brush. It's a bristol fan brush
which I am using over here. Just adding all the
textures all around.
11. Snowy Landscape Back Tree Details: Welcome back. So let's start
with the B trees detailing. So my whole painting
has tried now. Now I will start creating the
back trees which are there. The third tree line
which is there. So first tree line
was very blurry, then the second one,
then the third one. So the third tree line
I'm just trying to draw. I've just taken black color
on my side, as you can see, and a little bit of white also because lots of white
is needed over here. So every time my white
is getting finished. So just mixing
black, paints gray, and a little bit of
black and white, just to make the color
a little darker. It should be a dark
grayish color. So let's see what
color it has come up, and then we can decide
by drawing a line, we can see what color is that. So it's fine. It's not very dark and it's darker than the one, which is the base color
a little bit black, we can more add just to
make it a little bit more darker because I don't want it to be completely black tree. It should be like a
dark grayish color. So you can see the baseline I have created a little below to the edge also something some of them are
on the foreground, some of them are on
the middle ground. So different different
variations of trees. I'm just trying to
draw over here. Some are having different
different branches. So are like pine trees. So different pine
trees are also there. So just I'm trying
to give a little bit of mixture of different
pine trees, as you can say. So first, I'm just drawing the lines where I
want my trees to be here I'm just creating some nice
pine tree textures with my rigor brush. So here, actually we will be
doing a lot of pine trees. So I think winter and pine
trees they go hand in hand. So wherever there is winter, there will be pine trees. So yes, I will be creating a
lot of pine trees over here. So the more and more you will
practice the pine trees, and I'm sure by the end
of this whole class, you will learn how to do the pine trees very well
of different forms. Also different types of
trees and tree texture. Everything we will be
learning over years. Now, see, this is a
different type of pine tree has which has the leaves which are in the
downward direction. So you can just create varieties of trees
which are at the back. In fact, you can add your
own trees also at the bag. It's not like what I'm doing. You can have to create
the same trees. If you want just the
pine trees to be there, you can just create the pine
trees. That is also fine. If you don't want
the pine trees, you want these other pine trees, which has a tall lines and tall tree trunks and the
sub brranches and branches. That also you can do. So painting has no limit. You can change anything
and anything you want, anything can come up here
just by adding those details. So it's not like what you have seen the picture that
only you have to draw. You can just add your own
creativity over here. And whenever you are doing
all these tree lines, try to make the color a little fluid and then try
to draw the lines. Then you will get
a nice fine lines. Try not to use very thick color. Otherwise, you will end
up creating thick lines. So if you want very fine lines, try to make the color
a little fluid. Then only those fine
lines will come up. Once I have created
all the trees, now I will put some snowy
effect on them as well. Similar brush. Everything
will be similar. Just after the
creation of trees, we will be creating the snowy effect of all
these background trees also. So before creating
the bigger tree, let's first create the snow
part and then we'll start. So just taking white
and a little bit of this color and just creating
some snowy texture. Now for creating snowy texture, don't make your color thin, use thick color and
your damp brush. Then only that dry texture
effect will come up. Those dry effect actually create a very nice
snowy texture, especially on the
backside of the trees. So I'm just making some lines
and leaving some lines. Randomly, I'm just adding some white layers on
these tree lines. So anything you can do. So it's not that in
each and every tree, you have to put snow on each and every branches
you have to put snow. You can leave some
of them and you can add more on one
and less on other. So, likewise, you
can just change the snowy effect on the back trees
because we don't want a perfect detailing
on the back trees. We are mostly focused on the front trees and the
small hut which is there. So these are all the
background trees, so no need to give
very too much details on these background trees. Little bit of snow here and
there, you can just add it. Or you can just add one by one. It's totally up to you. I just wanted to create
this a little simple, so I haven't added each and every details
in the background trees. But when I do advanced
painting or realistic, I take care of each
and every tree, whether it is small or big, and I do the detailing, but I don't want this painting
to be very complicated. So that's why I have not done so much of detailing in
the background trees. I want this painting to
be tried by each and everyone who really wants
to learn acrylic in detail. So that's why I have
created this class. So just adding the
bigger tree now, the one which is in the side, just creating first the line. First, I will add the tree
textures with black color, and then on top of that, I will start creating
the snowy effect. So you can see I
made the color a little fluid so
that I can easily make the tree lines and the
tree textures and everything. Creating straight line and
now I'm starting to add the tree texture starting from the top and as we will go down, it will become
bigger and bigger. So if you want to learn
the tree perfectly, just watch my
bigner level class, which is there, which is
for Absolute bigners. You can easily learn how to
create these tree textures.
12. Snowy Landscape Pine Tree Details: Welcome back. Let's start
with the pine trees detailing and few other detailings also we
will be doing here. So moving further more on this, adding some tree details
first starting from the top. And as we will go down, we will start adding
more and more textures. So textures are just
random textures, which I am here, you can
see, I'm just adding. Let me zoom in a little so
that you can see it clearly. So first, make your
color a little fluid and then start creating
these random textures like the tree textures or the tree leaf textures and moving in the
downward directions. As you can see,
I'm just specking some some colors
of this black and just trying to create
these textures in the downward directions. And as I'm going down, I'm just increasing the
size of these textures little bigger and
bigger because I want it to be a little conical shape. Similarly, just
repeat the process till you go to the down part. Add some thick textures. Don't add thin lines. Otherwise, when you
will start adding snow, it will not look appropriate. So try to make thick
textures of this, as you can see, I'm mostly
making those thick textures. So try to make a
little thick textures. So just enjoy the process of creating this
beautiful pine tree, which is the main which
is actually in front, which is near to the foreground and the house which is there, it is very far away
from this tree. So it's like that. So
the tree which is here, the pine tree and another one, which is the other
side of the tree, those trees are actually very
close to the foreground. That's why they are
bigger in sizes. Rest of the trees
are very far away and at a very far distant. That's why they are
very small in size. So that's how I am trying to
create this whole painting. So all these small things add actually the depth
to your painting. So some is far, some is near. So this is actually adding a depth to your painting when you are creating
all these things. So here, only one big pine
tree I'm creating over here, but you can add two, also, one a little bit
near to this house. Anything you can do.
It's your painting, you can just make your
own creative way. It's just that I am teaching you the technique how to do it. Arrangements you can
do it in any way. So finally, we are almost
done with this tree painting, and then we will focus on the hut and the road
part which is there, which is coming along. We'll wait for
this black to dry, then only we can add the
snowy effect on this. So this is almost done. Now, let's start with
another section of it. So the house which we will
be painting over here, we will be using two colors. So one is the orange
color that is cadmium orange and another
color which is red color. So two colors we will be using over here for this painting. So this is vermilion red, which I'm using over here. You can use any red, whichever red you
have, you can use it. So there are two colors which
we will be using over here. So, mm two colors, as you can see, this is
the orange and one is red. So this is the red, and the
orange one is another one. Vermilion is similar
to orange in texture, as you can say, but
you can use any red. Whichever red you
have, you can use it. Let's start with painting
of the smaller size hut, use smaller size
brush of size zero or one to paint that
small size hut. So just mixing a little
bit of this orange, black and this white to
make it a brownish color. You can use directly
brown color. But since I'm using the
whole thing with this color, so this color, I'm just
using the inside part. The inside part of the
house is with this color. Rest of the doors and the windows I will be
using different colors. So this is for just
the whole house, which I will be painting
with this color. So try to do it very slowly, very patiently
because whenever we do a very small size painting, that takes a lot
of time, actually. Whenever you will do these
smaller size painting, it takes a lot of time. So take a half full patience
and do it very slowly. So you can see I've just
covered each and everything. I haven't left for the
doors and the windows. Later on, once the color
will dry, then on top of it, I will be creating those
doors and windows. Oh. So just covering the whole house with this color. So this color is actually
like a burned sienna color. You can say if you
have burned sienna, you can directly use that color and you can just paint it. But I wanted to show how to
mix and make that color. That's why I used this color. But yes, you can use
burn sienna directly, taking a little bit of white and putting it on top of this hut, which is the area that
is the rooftop area. I'm just covering it with
the light grayish color. So try to paint all
these smaller details with smaller size brush. Very minute details are these. So try to use smaller size
brush only for painting this. So now let's do the part, which is the pathway
which we have to create. So this pathway, first, we'll create the lines. So how it is moving
like a S shape. So here I will use my fan
brush and same color, which is little darker than the one which I've used
in the background, mixing this color with white
and just trying to create that shape of S
with my fan brush. Again, your brush
should be damp brush, I should not be wet. Then only you will be able
to create these textures. Always use the tip of your brush for creating
these textures, not the complete brush. So adding little white in
between, as you can see, little bit of darker colors in the sides to just to
create the pathway. Also little bit of
black dark spots we will add just to
create that there are some footsteps over there. That also we will
create in this pathway. So just taking some darker color and just trying to
create some nice, darker textures also to the sides and also
to the center part, also, I will add
some textures just to show that there are some
footsteps which are there.
13. Snowy Landscape Second Trees Details: Welcome back. So let's
start further with the second trees which
are in the bunches. So I'm just taking
orange and little bit of black mix just to make
a dark brownish color, and using my round brush, I will create 34 trees
which are there, the tree trunk and the branches. So if you're not comfortable drawing directly with colors, you can draw with your
watercolor pencils or chalk pencils, and then you can
easily draw the lines. Don't draw with pencil. Otherwise, you will not
be able to rub that line when you are using canvas
or any other paper as well. So try to draw with any chalk pencils or
your watercolor pencils, you can draw with them. So I'm just trying to create more and more
branches, some thick, some thin, different different sizes and some branches
which are coming out. So two, four branches, I will try to trees I will try to create over here.
So thick, some thin. So trees are not
all of same sizes. They are of different
different sizes. So you can just vary the sizes and the
length of the trees and the branches and
just the side trees which I'm creating
without any leaves, just the branches I will make. Whenever you are
making branches, use your rigor brush. And the point where
the branches join, it should be thick and when it goes away, it should be thin. So like that, we am just making all the
branches over here. So here it is
actually very cold, so my hand is a little
shaky here you can see. So it's very cold over here and very little sunlight
has come up today, so very difficult to
paint in this winter, but still I'm trying
it over here. So just trying to add some
more and more branches. So by looking at this painting
only I'm feeling cold. So yeah, so it's a very
beautiful painting. You can say it a
monochrome painting also. It's just adding some beautiful
branches here and there. And then we will add the
reflections and the grasses. Everything we will
add over here, not only just three lines. So slowly, slowly, we are coming towards the closer
of this painting. It's just adding a little
bit more darker lines and just more clear lines. So just taking some nice
grayish color paints gray and white mix and adding some textures with my
small size of a flat brush. And then I'll add some
grasses on the top as well. Now, whenever you're
adding grasses, make your colors thin, then only you will be able
to make those thin lines. Don't use thick colors. So just some grasses in
different directions. I'm trying to add it over here. So now let's add a little bit
details over this hut also. Just adding more of
white on top of it. Try to add thick colour of white this time when you are
adding it on the top. Also the doors and the windows also we
will add over here. So just adding some
nice thick lines. Now taking orange
and a little bit of white mix and creating the
doors and the windows. Try to use these
detail brush only for creating all these
small, small details. So just trying to add the
mix of orange and white. And why I've mixed white in this orange
because if you will directly use the darker
color like orange or red, that color will not
reflect on this because already the background
is very dark in color. So first, this color will
dry, then on top of it, I will add the
orange or red color. Also some more of
these small textures, and then some reflections, also, I will be
adding over here. So let's add some
reflections below, some more reflections
of these grasses, making a little lighter color but darker than the background. Just adding some
lines here and there, just to give the reflections
of these grasses. Also, I will add some
reflections of this tree, this pine tree, which is the bigger pine tree
which I've created. Those reflections, also, I
will be adding it below. Now, this time I'm
using my round brush, free hand lines are these. Just try to add it. So the reflection is done. Now we will start doing a little more of the
detailing of the trees, which is already left out. So a little bit more of the
lines and then it's done.
14. Snowy Landscape Final Details: Welcome back. So let's start
with our final details. So let's add some snow
on this pine tree, taking thick white color
and using my round brush. Try not to mix any
water in this, try to use quite thick colour. Then only that snowy
textures will come up. Try not covering the
entire black thing. Try to use the area
which is above and leave a little bit
of black area below so that tree also is visible. Otherwise, when you will cover this entire thing
with this white, snowy part, that tree
visibility will not be there. So leave a little
bit of black also. That's why I have changed my
brush to the rigor brush, and I'm just trying to create
some nice thick textures on top of these textures,
blacky textures. Just one by one slowly try to
create all these textures. So you can see already this painting is
looking very beautiful. Even the colors are very
simple and just grayish, but still that effect
and the snowy effect is adding the entire
beauty to this painting. Like, I'm loving this painting, and I'm sure when
you will try it out, you will also love
this painting, too. So if you will follow each
and every process of mine, I am sure that you'll be
able to do this painting. And if you have any questions, any doubt, don't
hesitate to ask me. If you are doing this project, you can share your
project works, and do tag me on my Instagram if you're
sharing on your social media. That is Mohini Art
Gallery. Do tag me. I will love to re share on my story your beautiful
project works. So just adding some textures, you can see I've added all these white textures
on this pine tree. Now I will add a little
bit more to this tree, which is the tree trunks
and the tree branches. So try to take thick colour. Don't use any water, and then you will see the magic of this whole snow effect. So you can see already the snow is adding whole beauty
to this painting. So snow itself add the whole changes everything
when you add snow to it. So once you are done with
this whole tree part, I think we are almost done, little bit few details
are left here and there, this tree line and then the
snowy textures which we will add by just using the splattered
technique with uprushes. So nice white textures also
I'm adding to these grasses. So a little little details
which are left and rest, we almost done with
this painting. A little more snow
effect I'm adding to the below area of this house, just to keep that
there are lots of snows around the house area. So all these very small details, but you can skip it. You can add it. It's
totally your choice. But I feel that these
all small details actually make your
painting look beautiful. Now, you see, I'm just
mixing this orange and red, and now I'm adding
this color inside once my background
color has dried. Now this color will pop up. If you have added it directly, that color would
haven't popped out. But when you will add this
after using this light color, this color will
start popping out. So that's what I
needed over here. That's why I have added first light color and then dark color. So a little bit of outlines also you can do or
you can skip it up. It's totally your choice. You can leave the outlining
and just keep it like this, or you can do the outlining. It's totally your choice, how you want to
do your painting. Little bit outlines to
the sides you can do. Otherwise, you can
leave it like that. So you can see how
beautiful that small little hut is looking. That is actually a
center of attraction. Whenever you will
see that painting, the focus will go
onto that small hut. There's a bit top out above
where that flake is coming. So I'm just adding one on
the top, that chimney. And then I'll just add some smoke which is
coming from there. Similar color I'm using, which I have used
that brown color. Just a triangle shape
I'm creating on the top. So just a little
bit of the snow. So not snow smoke, we will add on the top. There's so much snow snow so every time the snow is coming, make your color a little fluid
and then add this texture. Make sure that your
background has dried, then only add this effect, very thin color and just little smoke
which is coming out. After that, we will start
adding a little bit more of the sprinkles
which will fall on this, like the snow is falling that
scene we have to create. So that also we
will add over here. So just some final details. Taking my rigor brush and adding more grasses to this
near pine area, which is here, just some
thin lines here and there. This thing you can skip it also. You can add it also. It's
totally your choice. In fact, small small grasses you can add everywhere
if you want, but I felt like this is nice. So now we will add
some snow which is sprinkling on the
top of this painting. Now my painting has
dried completely. I've taken fresh colour of this white and paint gray a little
bit of paints gravel mix, not too much watery color. And I'll just try to
sprinkle it on top of this painting
using my flat brush. So you can see how
watery my color is. So you have to make color fluid, then only that
sprinkle will happen. Just spray it everywhere
wherever you feel like. First, I'm using a
little grayish color, then I will use completely
white color to spray around. So this is actually the
most satisfying process when you sprinkle lots of
white colors on top of it. So it's actually add a lot
of beauty to your painting. So it's a must, I
think, whenever you are creating
this snowy part. Now taking more of white, making it fluid, and just
sprinkling it all over. So I can see how beautiful
it is coming up. So just a little bit more
of white you can take. I can add just a little
bit more of white, and I will sprinkle more on
the top of this background. So take enough of
color on your brush, then only that sprinkle will happen and spray it everywhere. So this is the
complete painting. I hope you enjoyed doing
this and thank you so much, everyone for watching this, and we will meet in our
next painting class. Hm
15. Quiet Glow: Welcome back. So let's start
with our next painting. That is quite glow. Let's first do a little bit of drawing and then we'll
start with the painting. So very rough sketch
and most of the things we will be doing
directly through painting and just
a rough drawing. Again, this is a portrait
shape canvas which I'm using. All my paintings are done in
the portrait shape canvas. This is the center line, which I have just
drawn it roughly, and then comes the path, which is the foreground,
which is the snowy part. Here it will come and
just a nice shape to it. Rest of the area
is the water part. So something like that, we are going to
do this painting. So this is actually the time
when the sun starts setting, and it's very quiet and the birds have gone
to their nest. So this is the time
when the sun actually glows before sun setting. So this is the backside of the tree with the
reflection which we will be drawing and rest we will
directly do by the colors. So first, let's start
with the background. So these are the colors
which we will be using. So the first color is black, yellow, cadmium
yellow, lemon yellow, Azarin crimson, then gray, that is pains gray and white. So all these colors we
will be using over here. So let's start
first from the top. So for the top part, I will
be taking first the color. So first, pains gray, just taking my palette and
taking out some of the colors. First, we will mix
the colors because we need a very light
pastel shade color. We don't need very dark color. So I'll also take some amount
of blue as well over here. So just removing
excess of color from my palette with
the help of brush, and then we will be
taking some colors. So here we will be mixing
different different colors. Here, you will see how to
do the color mixing also. So I have just taken
here pains gray, mixing this white
into this pains gray. Pains gray is a bit
grayish bluish color. It has a little violet
touch to it also. So you can see here the
color which it has formed. And if you don't
have Pains gray, you can directly
use Priscian blue and a little bit of
black you can add to it. These are the two
colors as you can see, very light color. One I'm taking it more towards
the violety reddish side. That's what I'm
mixing over here. One is the paints
gray and white. So we'll also check the
colors which we have made. So let's first take a
little bit of blue also. That is the Windsor blue
which I'm taking over here. You can take any blue. You can take cobalt
blue also over here, or you can directly
use Prussian blue. It's totally your choice. So here I've taken Windsor blue. So a little bit of blue, also, I'm adding to this paints gray just to make it
more bluish side, like bluish grayish touch. Also a little bit of this
towards the violety side. When you add blue and red, it turns into a little
bit of violet shade. So that's what I'm trying to create over here, the colors. So let's check on the paper, so how the color has come up. So you can see this
is a color which is like a grayish blue color. The second one is a
little violety color with more white added to it. So these are the two colors
which ham I will be using. So let's start with the first the painting
of the background, and slowly, slowly, we will
do the foreground as well. Just adding a little
bit more white because I want a little
bit more lighter color. So just making it more light by mixing it
with my palette. Try to mix the colors
with your palette. It will be helpful because
your brush will not get damaged when you use directly
the palette for mixing. Sometimes I use in the flow
brushes because it is easy. Now we'll start with the
blocking using my flat brush, starting from above, taking
the first color first. That is the paints gray
with a little bit more of the same color mix
and a little bit of this Azarin to make
it more purplish color, starting from the top part. Little bit of bluish. Also now it has become
too much bluish. So again, I will
add more white to it and just a little
bit of pains gray. So you can see now I'm
mixing it with my brush. Starting from the top, which is the darkish color, as you can see, the
dark blue color and a little bit of paints gray. Again, I'm adding
a little bit more blue and a little bit more of this Azarin and white and just blocking the
above part first. And then as I will go down, I will be adding more of the
more of the whitish color. So this is the color which
is there, very dark color. And then as I will go down, the colors will become light, which we have mixed it earlier. So just blocking that and trying to blend with this dark
color, as you can see. So do it slowly carefully. It's okay in first coat. The blending is
not being proper. There are lots of brush marks
that is completely okay. But try to first
block in the colors. Rest of the blending we
can do later as well. But if your color is well, you can do the blending,
then try to do it. So just doing the blocking, I'm washing off my brush. Now, when you're using
the warm colors, wash off your brush very nicely. Now I'm making the
orange color which is there with cadmium yellow, and Azarin crimson and white. So you can see how
this orange has come up little different orange. It's not properly that orange, which is the cadmium orange. So a little bit of blue also, I will mix to it
just to make it a more different cachenut colors. I will add to the below part. Adding this color to the
part which is below, leaving the area which is the back trees area that
I'm just leaving it out and I'm trying to just
blocking up taking this yellow color with a
little white cadmium yellow, and just taking a
little bit more of Azarin and just trying to
blend it with this color. I haven't washed off
my brush over here. It's okay if there are a pink
or this cachet color there. And as I will go above, I will then wash off
my brush if required, and then I will do
the yellowish part. So slowly, slowly, I'm
just moving above, and I'll just wash off my brush, and then I will do
the above part. So just taking again, this yellow color
and white color mix, if you will directly
use that yellow color, there are chances that it will mix with this blue color and it will take your color to the muddy color,
which we don't want. So that's why I have
mixed here white in this so that the color
doesn't turn out to be muddy. So this is the whole blocking of the background which we
have done first coat. Second coat also
we will be doing. So you can see over here there are brush marks, but it's fine. We will do the second coat, and then that will be gone. So let's do the below part with the same since it
is a reflections, the colors will be
almost similar. So just try to block in
with the same colors. Since it is a reflection, so it will be opposite
of the background. So first will be the warm color, and then as it goes down, it will be the cool colors. So this is a very
beautiful painting. Once you've completed it, you will feel so happy the
outcome has turned up. It's very beautiful and
very carming painting, and I really loved doing this. If you have any doubts and
color mixing or anything, you can always ask me, I am there for you. Now, just taking
this bluish part, and then I will mix it
with the warm colour. Again, I will wash off my brush, then only I will
do that blending, using the colors, that
is the yellow white mix, and just slightly I am trying to blend the colors
which is in between. This is how we blend the
colors when there is the complimentary
colors actually. Let's now start with
the other blocking, which is the foreground
and the middle ground.
16. Quiet Glow Background Blocking: Welcome back. Let's
start further. Let's proceed further with the blocking of the middle
ground and foreground. Let's do first the foreground with the same lighter color a little bit more lighter than the one which is
in the water part. Just blocking this area
with my flat brush. Currently, we are
just focusing on what all colors we
need to block in. So we are blocking in, don't worry about the
brush marks and anything. We will be doing second
layer of coating. So in that time, we can fix the brush marks
or any blending issue. So don't worry about that. So just blocking this area. Then comes the middle part, which is the background trees which are in a very
foggy, manner. So just let's add that also. So actually the color is
actually the violety color, so more violet grayish color, which we will be
making by mixing all these primary and colors. So let's take first
talazarin crimson, then the pains gray mix. You can also mix blue to
get a nice purplish shade. So it is more towards the color, which is the reddish side. It is not more towards
the bluish side. Then only you will get
this type of color. So the same color and adding a little bit
of black to make it a little bit more
darker in shade. And I will just add this
color onto the top part. So try to make it more
towards the reddish side. And just with my
round brush, first, I will try to give a
little shape above just to show that there
are some trees which are there on the top, and then we will block in with either flat brush or with
same brush you can block in. It's totally your choice. You can use any number
of round brush. Try to use two or
four size brush, which has a nice pointed tip. Then only you'll get all
these textures on the top. Textures also we can use
later on by creating by using our filbert brush or
with a rigor brush. So first, let's block
in the entire thing. As I will go down, the colors will more fade. It will be more towards the whitish side because we have to show that there
is a foggy effect there. So this is the center line, which is the horizon line of the background and
the foreground. So just making fuzzy line. It's okay. The line
is not proper. Don't worry because we have
to make it actually foggy, so that line will be gone. Just to add that this
is the whole area where there which is the middle
ground of this portion, so that all I am just
trying to block in. For filling the colors
a little quickly, you can use your
flat brush also. It's totally your choice
which brush you want to use. So again, I'm telling
you can use any brush, flat brush or round brush, whichever you feel
like you can use it. Try to mix enough quantity
of colors so that the color variations
don't change because I know how to mix the
color in what proportions. If you're not sure
how much to mix, try to mix it in
one go and keep it. If you are living in
a very humid area, try to sprinkle some
water on the top of the colors so that it remains wet for a
longer period of time. Now I will start
doing the lower part. Now I'm just making the
color a little more whitish and just adding
the center part, the line which is
there and trying to blend with the upper color, which is the dark color. I don't want the lines
to be very sharp, just making it a little blurry. And then we will move
towards the lower part, which is the reflection
of the above area. So just trying to blend this
color with the top part. Now, I will just rotate my canvas to do the
lower texture part, and then we will be
filling the colors, same colors I'm using
over here also. So similar colors and just
filling it up nicely and just filling the area which
is on the below part. So try to use same color
which you are using. Even if you are not
comfortable doing it below, just rotate your canvas
and then fill the colors. That is also fine. You can rotate your canvas. Since I'm not doing
here any texture parts, so I'm not rotating
it over here. Once I will do the texture part, then I'll start rotating the
canvases a little bit more. I'm just trying to
blend this color with my lighter color just to make
a foggy effect in between. So this is the whole
blocking of the main canvas, and now we will start
doing the details. Wait for the first coat to dry, then only we'll do
the second coat.
17. Quiet Glow Second Layer Blocking: Welcome back. Let's start with the second layer of blocking. First layer has already
tried completely. Now we will start with
the second layer. Similar colors we will
be using here also. We have to just block in
the second coating of the background so that this background becomes
more smooth and more neat. As you must have seen in my
previous paintings, also, at least I do two layers
of blocking so that your background becomes
more smooth and more neat. So this time, you can
change the color a little bit if you feel that it should
be a little bit more dark. You can change it. If you
feel it is more light, you can change that also. So this is the time which can change the color
and fix the colors. So I'm just mixing the same color a little
bit more darker it is and just trying to block in the above part a little bit more towards the violety
side, you can say. And I'm just filling
the upper part first. And as I will go down, I will start adding
more white to it, the white which we
have mixed earlier, and just blending the color
with the above color. So this is how I will fill
the whole background part. So whenever you are filling
the background part, try to mix the color and blend
the color when it is wet. Only when both the
colors are wet, then only you will be
able to blend the colors. Just remember that when you are trying to blend the colors. So you can see I've just
taken more white and I'm just trying to
blend these two colors, which is from light to dark. If you feel there's
more light color, just add a little bit
more darker color. So this is how you have
to adjust the colors. Now the below part, which is
the part near to the line, which is the middle
line, it's more orangy. So I will just make
it a little bit more blue and a little
bit more white. I will also add and make it
a little more not orange, you can say, it is a bit
brownish and more orange. So just filling this part
above with this color and then just one layer I will add and a thick layer so that I can blend with the
lighter colors now. After that, I will
take just yellow color and a more white color, a little bit of this
crimson Azarin crimson, and I'll try to blend this color with this
darker color first. First, I'm just doing the
blending of this area. I haven't blended the
above part, you can see. So after washing my brush, again, I will take this
yellow and white mix, and then I'll start blending the colors which is
on the top part. Slowly, slowly, I will start
moving my brush on the top, and I will blend the colors. Since both the colors are wet, so you can easily
blend the colors. But if any of the one dries, you have to again
apply that color and then blend that color. Just remember that
both the color has to be wet to blend it perfectly. Then only that blending
will be perfect. Just adding a little
bit more of this color, which is the darker color. This is actually the sunset time where there's lots
of oranges there. So that's why I want
that area to be more orangy and more like
a reddish type. Here, also, I will add the similar colors which
I have added above. So 1 second layer
I have done for the background now I'm
doing for the water part, which is the reflection
of the background. Similar colors you have to use. Same colors, not much of
the differences there. Just try to do it slowly
and patiently when you're doing these
colors because color mixing is not
a very easy task. It takes time to learn also. So that's why I thought
to show you how to mix the colors and
make the colors so that you can get to know how to mix the colors when you
don't have those colors. So sometimes it is better to use just your primary colors and then mix and make those colors. You don't need so many colors to make different
different colors. Only primary colors will work for the whole landscape part. So if you are new to
this acrylic painting, you can also watch my absolute bigner level acrylic painting class, which is there. So if you are not aware of
or how to use the brush, how to use the colors, that is a very good
class which I have made, especially for absolute bigners. You can check that out here. And just now, again, second layer which I'm adding to this foreground,
which is the snowy part. So just making it
a little lighter color and filling up again with this similar
color which I have already done in the first one. So mostly I have used
the similar colors only. Only the bluish color have
changed a little bit. Rest of the colors are similar. Whenever you will
do second code, little bit up and down
the colors will be there. You cannot get the exact
color which you have mixed if you don't have done a lot of
practice of color mixing. So don't worry. If second color is little light, little dark, it's
perfectly fine. But you have to do the
two codes on above. It should be a
little bit similar, not too much difference, but a little bit up
and down is fine. So just mixing now this
purplish grayish color, which is more towards
the red side. So red portion should be
more than the blue one. So you have to remember that when you are mixing this color. So I'm using my rigor
brush over here to give some nice pointed shapes
to look like there are some background
trees which are there, just giving a shape to
it on the above part, and then I will
fill in the colors. So giving some nice tree
textures on the top, just the shape vertical lines, here, some big,
some small lines. So each and every winterscape
painting will be different. So this is also different. But each and every painting, you will learn something new. In this we are learning about the water reflections,
how we have to do it. So each and every painting, I have tried to show something
different so that you get how to do the
landscape painting. The selecting process
of the picture is the most difficult part of this whole class because
selecting the right picture that what you have to
teach and how you have to teach is a very
difficult part. So I have tried selecting
some good pictures. So all of these paintings are of some real pictures
which I have chosen. So let's do now the
blocking of this. I've already given the
textures on the top. Now I will use my smaller
size flatush just to block in the lower part
with a similar color. So if you're not sure about mixing the colors
again and again, just try to mix the color
in one go and then use it. Because sometimes it is very difficult to mix the
colors again and again. So try to mix a lot of colors and then do the painting
so that you will not have any issues in selecting the colors that
this color is not good. This color is
becoming different. So try to mix it in
one go and then do it. So I'm just rotating my canvas and doing the lower
side of this, which is the reflection
of this tree part. So using the same brush, that is the rigor
brush I'll create below also some textures. So same color I'm
using here also. So you can see I've just created the textures similar
to the above one. Now, once you have
done the texture part, fill the dark color
with the similar color. That is the dark color and then the lighter
color in the center. Same color I'm using here. This is the darkest color, and just center also I will be using with
a lighter color. Instead of taking any color, I'm just putting white in the center and just taking again that darker color and just trying to blend with
this darker color. This is how we create
the foggy effect very easy and just try to
blend both the colors. So this is how it looks
when you are done with this painting of
the middle ground. Just try to block
in this part so that it doesn't look like
a sharp line in between. Just blocking in with
some dark color. And again, here
also, you have to make sure that both
the colors are wet, then only that
blocking will be done, blending will be done. Try blending both the parts. And do it very patiently, very easily this part
because this part is actually the main part
where the color fades. So try to blend it
as much as possible. We can blend it with
your damp brush also if you don't
need any color, take your damp brush and
try to blend the colors. Just we have to remove the sharp lines that is
there by blending it.
18. Quiet Glow Foreground Details: Come back. So let's start with the foreground details now. So my paint has
already dried up. Now, first, we will add the sun, which is in the center and a
little refraction downward, and then we'll start creating some textures in the
foreground part, which is the snow part. So first, I'm using
my blender brush and just washing off my brush, removing excess of water, and just taking this
lemon yellow color. You can see it's a quite color which is very thin color
which I have taken. And I'll just create a
center circle over here, you can use here
round brush also if you don't have
this blender brush. But if you have
this blender brush, try using this brush. Make your colors very thin. Thin means you have
to take a less color. I should and the brush is
completely damp, it is not wet. Now I will start creating the center circle,
which is there, just taking more of
white as my white has finished up, titanium white. And with titanium white
and lemon yellow, I will try to make
a nice glowing sun in the center of
this yellow part. So taking this lemon
yellow and white mix. Very little amount
of lemon yellow you should take
when you are making this sun because more amount should be white and less
amount should be yellow. Small circle of this over here and a little bit
reflections down also, making it a nice circular shape and filling
it with this color. A little reflections,
just pillow. It's just small reflections I'm just creating
with the same color. So you can see every
time you don't have to do a lot of detailing
in your water part. Just a little reflection
of the sun makes your whole water part
looks like real. Now, just taking this darker
color which is over here, the dark grayish,
purplish shade, which just taking
this dark color can see and adding
a little bit of the just adding a little
bit more darker color and just adding some more
textures onto the sides. So every time you don't
need a round brush, you can use here a rigor
brush also for creating the details because we need some more
details in the sides. So it's better to take rigor brush rather than round brush because
a rigor brush, you can handle the brush easily, and you can create some
nice fine lines also. So first, I'm just outlining it and making some
irregular shapes. I'm just shaking my hand literally so that
the lines are not very smooth because we don't
want very smooth line. So just mixing some
more red and yellow, making it a little
brownish color. When you mix red,
yellow, and black, it turns out to be a
little brownish color. So each and every color
you should not need here, you can mix and make
different different colors just by mixing the
primary colors. This is how we learn
the color mixing part. When we do some
paintings like this, we just take your primary colors and the neutral colors
that is black and white, and you can just try
mixing the colors and make that color which is the
color of that ground. So this is a little
brownish color. So I'm adding here the textures
to give a little shape to this whole area and give a little depth
to that foreground. Try to do it very slowly
and very carefully because this line has to be not very
sharp, as you will see, a little bit of crooked here and there and giving
some nice textures, some dots, different different shapes you can give just to show that there are
some stones over there. So just giving a little bit
of shapes here and there. Actually have to play
with your brush and shake your brush and shake your hand so that that
texture comes up. So just a nice texture, and you can see the magic
happens when it gets created. It's already giving a
little depth where I have created some thick lines,
some thin patterns. So different different
patterns try to create just to show that
there are some stones, some pebbles here and there, which are here and there around. So just I'm adding some more
textures here and there. Just some random textures
you have to add some small, some big This actually adds more reality to your foreground and
it looks more real. So a little bit of these
shapes, as you can see. I'm just trying to add a little bit more blackish
part to the below of this whole thing just to give a little reflection
of this area, which is the land area. So slowly, slowly, you can
see the shape is coming up. This is just the lines which I have been
drawing textures we will do later on once
we are done with all these small details. Similar details I will be adding on the top
also a little bit. You can see already it is looking very beautiful and very, like, a snowy effect is coming. But we will also add some snowy textures over here to give a more real look to it
using our filbert brush. It's a very nice
and magical brush which has a nice round tip. Use the filbert brush, make the color a little darker
than your base color using more blue and a little
bit of this lazarin. And then create some
nice textures over the top using your
filbert brush. It will give a nice round
shape which will look like there are some snow clutters which are there here and there, some snowy reflections
it will create. So some nice textures
here and there, just try to add it up. So first layer we did blocking. The second layer we are doing is creating some nice
textures all over. So just adding here and there, leaving some space of
the light part also. Each and every brush
creates magic on its own. So try using different brushes.
19. Quiet Glow Trees Blocking: Welcome back. So let's start
with the trees blocking and a little bit of the detailing of the
foreground first. We'll do it. So first
layer we have done, now we will do the second layer, which is with much
lighter color just to balance the darker one and
just taking same brush, like flat brush here I'm using. Now, you can use this
with your flat brush also if you don't have
that filbert brush. Just with the flat brush, I'm adding the details
here and there. Using a damp flat brush without any water and just trying to add some
textures here and there. Now, this will add
a little more depth to your snowy part. Just adding some
nice raw thick color using my completely dry brush, that is a damp brush and just capturing that
colors that is this white and a little bit of grayish color and just
applying here and there, leaving that darker portion
and covering the other part. This is one of the
easiest method of creating some nice
snowy textures. Here in the black part, also, I'm adding some nice
light snowy textures. So just here and there,
try to add it up. And after that, we
will start creating the tree line with
our black color. So there are three to four
trees which we will be drawing with just the branches
without any leaves. So let's first draw
make this area, which is the sun area a
little bit more bright. My first coat has dried, so I'm just adding, again, the second coat just to
make it more brighter. So the more and more layer
of colors you will add, the more brighter
this sun will look. So this is how we make the
things more and more brighter, just adding a little
bit more white below, and you can see how bright it is looking now when I have
added the second coat. So maybe in the last coat also, we will try to add one more coat once this first coat dries. Now taking my same color, which is the brown color and
adding some here and there, the textures of
this grayish color. Which is the brownish
color, actually. It's a very dark brown
color which it has come up. You can say it is like a
burn sienna type of color. So just if you are
using burn sienna, you can use it
directly burn sienna. And now we will add
some tree lines which will be with the brush, adding here and there more
little bit of the textures of this dark color just to show that there are some more pebbles or stones here and there. And then we'll start creating the tree line
with black color. Make your color a little thin and first try
to draw a line. And then, um, use the color. Try to draw first
the single line where the trees will be, and then you can draw
the thick lines. So using my same brush, that is the rigor brush. I'm trying to draw a
nice straight line, which is a little slanting. Some are straight,
some are slanting. So the first line I have made
is with a little slanting, then a little straight. I have left a little gap because I have to
thicken that line. That's why I have
left a little gap. So at least three to
four lines I will draw, and then I will make those
lines a little thick. So once I know that these are the lines where
the trees will be, now, I will just make the lines a little
bit more thicker, adding one more line to it, and then I will fill the
whole thing with black color. So I'm just first trying
to draw the lines. Whenever you are drawing
the lines, use thin color. When you are filling
it, use thick color. So any lining part, anything, you have to
do it with thin color. And any blocking or anything, you have to do it
with thick colour. Any textures or anything, you have to do it with your
damp brush and thick color. So these are the things
which are mostly common in most of the paintings. So I'm just filling it with black and making
the lines thick. Similarly, I will be doing for
other three lines as well. If you're not
comfortable directly creating the lines
with black color, first create the lines with chalk pencils or something
like that so that you can rub it and then draw
it with your black color. So this is how we can draw
it on a painted canvas. So try not to draw
it with pencil. Try to draw it with chalk
pencil or watercolor pencils, and then you can then use your black color to
fill in the lines. So similarly, I'm
doing the rest of the trees and blocking
it with black color. So here I've just drawn three to four trees,
but you can draw many. It's totally up to you how
many trees you want to draw. You can experiment and draw a little bit more
trees, like in bunches. But here I felt that that
four trees are more than enough so that you can see the branches and sub
brranches clearly. So that's why I
didn't complicated this painting much by
creating so many tree lines. Oh, also, whenever you
are drawing anything, make sure that your background
has completely dried. It should not be wet when you are drawing
all these things. Every time whenever you are
drawing on top of the paint, the first layer has to dry then only draw anything
on top of that. So anything you are painting, first layer should be
dried completely and then try to draw
the next object. Like here tree is my object
which I'm drawing over here. So my whole
background has dried, then only I'm adding
these tree lines. So for the last one and then
we'll go with the branches.
20. Quiet Glow Trees Branches: Welcome back. So let's
draw the tree lines, the last tree line, and
then the tree branches. So moving onwards, just taking my black color and
drawing the last line, which is a little
thin tree tree line. I'm not making it very thick. You can see there are
different different sizes. One is thick, one is
thin, one is medium. So try to draw it
like this because all the trees are
not of same size. So just trying to
draw it like that. So slowly, slowly,
we are just moving towards the end of the painting, just the tree and tree lines and a little bit of reflections, and then we are done
with this painting. But yes, the main part
here is the branches. There are lots of
branches in these trees, which we have to draw
it and try to draw it as slowly as possible, starting with the first tree, and I'm using my same brush, that is the rigor brush
which I will be using for drawing the tree lines
and the tree branches. Make your color a little fluid so that you
can easily move your brushes and brushes and try to create some
nice crooked lines. It should not be a wavy lines. Try to make some crooked
lines in a zigzag form. So that will look a little bit more real when you will
start drawing the lines. So when I'm drawing the
lines in the directions, it is a little
difficult when you draw the lines in
this direction. So one thing you can
do is you can turn your canvas towards your side, and then you can
draw the branches. So which I will be
doing later bu first, I'm just outlining the
branches which are there. Just focusing upon the
branches here and there, some are down, some are up. So in different
different directions, try to add the branches
because this is the main part which
will actually make your painting
look more realistic. So try to draw it very
slowly and very nicely. Whenever you are
drawing the branches, the branches which
are at the end, it is thin, and as it goes towards the edge,
it becomes thick. So try to make those
branches like that. So just making the shapes
of the trees proper. Again, taking the same color, make your color fluid, and I'm just trying to rotate, making the lines and a little
bit more sub branches. So there are sub
branches and branches, and some are very thin,
some are very thick. So depending upon the branches, I'm just trying to draw it. So just in any
directions you can draw. Mostly in this direction, it is down, and in
the other direction, it is a little bit up. So like that, I have
drawn the branches. So some are thin and
some are very thin. If you're wanting to
draw a very thin line, make your color more fluid and then try to draw the lines. So this is the best way
to draw the thin line. If you will use thick color, you will not be able
to draw the lines. So I've just rotated my canvas and now I will
draw the branches. Now, this is a little
bit easy for me to draw because doing the side
which is in the other side, it is a little bit
difficult for me. So I've just turned down
the canvas towards my side, and I'm just trying to draw these branches in the
downward direction. So just enjoy the process
and follow each and every step and try to
draw the branches. It's not like that what I
am drawing the branches, similar type, you have to draw. But yes, a little bit here
and there can be done. The changes can be done, but I wanted to show you how to draw the branches so that when you are drawing
the branches, it should not look
like a wavy line. So never try to draw the
branches like a wavy line. It should be a zigzag line. Then it looks a
little bit more real. The point where it starts,
it should be thick, and as it's going out, it should be thin. So like that, you have to
draw each and every branches. Eaving the space in
between the sun, I'm just trying to draw the
branches here and there. So thin lines also,
some thick lines. So try to draw some thin lines, some thick branches
so that it will look a little bit more dense because we
have to make this dense with lots,
lots of branches. So first, I'm just doing the first one where the
branches are coming out, starting from thick lines and ending towards
the thin lines. So just drawing more and more
branches here and there, and now I can just
rotate it because other side drawing is much more easier than drawing
towards this side. So this side, I'm almost
done with the branches. Later on, I will
add a little bit more of these sub branches. So take more of this color. If you are drawing thin
lines, take thin color. If you're drawing thick lines, then take a little
bit of milky color. So this is how you have to make your lines
here and there. So try to make the lines, little bit lines which are
coming out here in the center. So you can see, I'm just adding some edges in the areas just to show that there are
some more branches which have started growing
or some are broken. So like that, you can just
add some textures like that. All these small, small things literally add beauty to
your whole tree line. So try to do it very
carefully, very slowly. Give time to your painting. Don't do it in a
hurry and make small, small branches here and there, just to make it more dense, try to add more
and more branches. If you are facing difficulty
directly doing the branches, what you can do is
you can just add some nice lines with your
chalk pencils or something, and then you can draw
these whole lines. If you're not comfortable
directly drawing the lines. Just here and there, I'm
just adding the lines. So you have to actually fill the entire thing with just
random lines here and there just to look like
there is a lot of dense lines which are
criss crossing each other. I can see, I'm just adding here and there some
nice thin lines also. The more and more branches
and thin lines you will add, the more real your
painting will look. So that's what here I am doing. So thick, some thin, some very thin in different
different directions. Mostly they are in up up
directions, which I'm drawing. Some are in downward
directions also. So you can see how these
branches are adding the depth to your painting. So these lines are
actually these trees are actually giving life
to your painting. So just adding the
lines here and there, some more thin lines. Since this is a
repetitive process, so do it very slowly, very calmly, take
breaks and then do it. Don't do it in a hurry
and take your time, make your color fluid, and
then only add these branches. Don't use thick color
to add these branches. Use thin colour. Thin color will create nice
and very thin thin branches, especially for the thinner
branches which are there. Some more thin lines. I'm just adding it here below. So we are almost done
with the branches, and now we will do the little
reflection of this tree, and then we are done
with this painting. You can add more
branches if you want. It's totally your choice. But I think it's done. I don't want to complicate
more of this painting. Otherwise, it will
look quite messy. So here, I'll give it a stop, and then I will just
draw a little bit of the grasses and a little bit of the reflections
in the water part, and then we are done
with this painting. It's a little bit
of the reflections which will be here
in this below part. So just adding line and just coloring it with
the black color. And I will not show
all the trees, maybe one or two trees I
will show as the reflection.
21. Quiet Glow Final Details: Welcome back to
the final details. So just the reflection and a little bit of
grasses are left, and we are done
with this painting. So you can see how
these tree branches are adding actual beauty
to this painting. So more rocks here and there. I'm just adding a
little bit of grasses. Also, I will add here and there, just to add a little bit
more rear look to the water. Just adding some thin
grasses with my rigor brush. Try to use a very thin color when you are doing
these grasses, don't use thick color. Otherwise, you will end up
creating very thick grasses. So make your color fluid and then create these
very thin grasses. So on the edges, I'm
just adding the grasses. You can also add near the trees. Anywhere you can add it's
totally your choice, how you want to add your painting and how you
want to arrange the grasses. Some of the grasses,
reflections, I'm just adding
below just to show that there are some reflections of the grasses, some above. So this is how you can just add some of the grasses
at the edges. So I am really loving this whole outcome
of this painting, and I'm sure you will also
do love this painting. And if you are trying out
to tag me on my Instagram, that is Moni Art Gallery. I will love to see
your project works. So it's not an easy
painting, I'll say, but yes, if you will follow each
and every step of mine, you will be able to do it. So try it out and you will see how your painting
is growing day by day. If you do all these
seven paintings, and I'm sure you
will learn a lot in the whole series of seven
windowscape painting. So now the reflections
which I'm adding, I will not add too much
of these branches, just few of them, and
then we are done with it. So you can see how just use your rigor brush everywhere wherever there are
details and thin lines, try to use your rigor brush. Just here and there, I'm
trying to add the branches. Not much branch I will add
just because the whole tree is in backside and little bit of the branch
details is visible. So just adding few of
them, and that's it. And this is the whole painting. You can add some grasses on the snowy part also if you want, or you can just
leave it like that. It's totally your choice, how you want to add the details. Little bit white, I will
add in the center of the sun just to make it
more white and more bright. So here also in between
and below also, just to add more brightness
and a little bit of yellowish textures with
this camium yellow, thin cadmium yellow,
I will add on both the side of
this reflection, as well as on the top, also, I will add in a circle
this nice yellowish color, and make sure that
your black has dried. Otherwise, it will
mix with your black, and it will turn the color
into a dirty green color. So make sure that your
black has dried and only use this cadmium
thin yellow on top of it. So this is almost done, and I'm sure you will
love doing this, and it's a very beautiful and very calming silent painting, which I have tried it for
the first time for you guys. So I'm sure you will
also be going to love this whole series of
winter scape painting. Try it out and share
your project works. So thank you so much for watching and see you
in the next lesson.
22. Alpine Twilight: Welcome back. So
let's start with a new painting that
is alpine Twilight. Let's first do a little bit
of drawing of the mountains and its reflections and then we'll start
with the painting. So first, we will draw
a little rough sketch, and then we'll start with
the entire painting, starting from the background, then the foreground and
then the middle ground. Let's first make a line, which is the center line a
little below than the center, and just drawing a
very rough line. Try not to do it with
a very harsh pencil. Try to draw it very lightly so that there are no
pencil marks there. And if you have chalk pencils
and try to draw with that. So just drawing some mountains which are on the
backside and there are some trees which are
there that also we will draw. So this is the tree line
which will be here. And above that, there will be the whole mountain range above. So just drawing it like that. So there are two trees, as you can see the
parts which are there, and the above is
the mountain range. So similarly, we will be drawing the reflection
part as well. Same mountain shapes for
the reflections also. So just drawing some nice
mountain range above. Try to draw it with
very light pencil. Now I will draw the lower part, similar to the upper part, like how I have drawn
the upper part. So it's a very
beautiful painting, very bright and very,
uh sparkly painting. So lots of bright colors we will be using
here since it is a nighttime before the night
starts, that is the dawn. And just before the night become begins when there is the
clouds are very dark. So this is a time when
lots of stars are there. So like that type of painting, we are going to do this one. Where there are lots of stars
and milky ways, everything. So just drawing a rough sketch, it should not be exact,
but a little bit, try to make it exact,
and that's it. And then we'll start
with the painting. So let's first discuss
about the colors which we will be using
over this entire painting. So there are a few
warm and cool colors. So let's start with
the first color that is the Prussian blue, then black, cadmium yellow, alzarin crimson, and white. So these are colors we will be needing for the entire painting. So let's start with the
first painting that is with the background
using my flat brush. Try to use big size flat brush, and we'll start from
the pillow part, and then we'll move above. So starting from
below and moving above in a half circle manner. So I wet my brush grabbing
this medium color that is the cadmium yellow and applying
it just above the mountain. Using my flat brush. Here you can use
your round brush if you're not comfortable doing with the part which is
just above the mountains. Any brush you can use, it all depends upon how much comfortable you are
with which brush. So I'm comfortable
with this flat brush, so I'm using this flat brush, applying a nice thick layer
of the cadmium yellow, and just filling it up slowly and moving it in
the upward directions. So you can see, it's a very bright and
beautiful painting, as you can see in the image, and I'm sure you will love
it when you will paint this beautiful scenic nature. So there are so many colors of nature with just
winters you can see. So now I'm making orange
and just adding above. If you mix this Alzarin
crimson and yellow, you'll get a nice
bright orangy color. So you can see how nicely
the orange has come up. And after that, I
will blend this color with the lighter
color. That is yellow. So whenever you are
blending any color, always take the lighter color
and then push it above. Don't push the bright color, that is the dark color
towards the light color. Otherwise, everything will
turn out to be orange. Now I'm taking this Aserin
and this blue mix to make a little purplish color mixing little white
also to this. So you can see this is a
little purplish color. So just adding above this color. Taking a thick layer of this
color and applying it above. So currently, I'm not blending the colors because when you
will blend purple and orange, it will create a muddy color. So that we don't want. So what I will do is I will take a separate Alazarin
crimson and white mix, and then I will try to
blend these two colors. So this is how we
blend the colors when there are two
complimentary colors. So try not to blend directly, otherwise, you will end up
creating a muddy color. So let's start further above. So now I have blended this part, so I'll move above, making it a little more
towards the bluish side. And as I will go above, it will be more towards
the black also. A little bit black, also, I
will mix and making it a very dark blue color because I want this area to
be a very dark color. So that's why I'm applying a very dark color of this blue. So you can see
already this area, which is the orange
area it's glowing. So it is a time when the sun has set and the
darkness has started. So this is a time when
it appears like this, especially when there is mountains just just
below the mountains. You will see the reflections
also with similar colors. So we will be using
similar colors for creating the
reflections now. Again, taking this
pink color and just trying to blend this
color a little bit more. You can do the blending
in the second coat also. But if in first coat, it is done properly,
then in second coat, it is a little bit easier for
you to do the second coat. So just applying the first
coat on this upper part, which is the background. Now we will do the
below part that is the reflection of the mountains and the reflection
of the background, which will be opposite
to the background color. So just opposite colors.
So we have started. We'll start first from yellow, and then we'll go down
towards the darker color. So it's just the reflection, so it is a mirror image, so it will be opposite
colors to the sky color, starting with lighter and
ending with darker color. Similar colors I'm
using here also. Try to take colors as
colors as possible. Water should only be
there on your brush. Not too much water is required. Water is only required just to move the colors and
blend the colors. That's it. Apart from that, water is not required. We mostly use thick colors
so that the consistency of the colors are maintained and they look bright
and beautiful. So try not to make it
like a watercolor. So just taking a pink color blending these two
colors together. Same thing I'm doing what
I did for my background. Same thing I am doing
for the foreground. Do it slowly. Take
your time because blending takes time if
you don't have practice. So since I have practice, so I can do the blending easily, but if you don't have practice, so do it slowly, carefully. And if you are a bigner acrylic, you can try out my absolute
bigner class of acrylic. So that also you can try it out first and then
try this painting. Then you will find it easy
to paint all these things. So just applying a darker color, and then I will just blend
it with this purplish color. So you can see how bright this yellow and
orange is looking. So it's like a very bright
sunset which has happened, like a glowing
light, you can say, that glow which has come up, so that glow we want
over here, actually. So now we will wait
for this to dry. Then we'll apply the
second coat on this. You can see the brightness. It's already looking so
bright and beautiful. Rotating again, my canvas, and this is how it is looking. So we will also apply the second coat once
the first coat dries.
23. Alpine Twilight Background and Stars Addition: Welcome back. Let's start with the second layer of blocking. My first layer has
completely dried. Now I will apply second layer
first to the background, and then we'll do
for the foreground. Make sure that your first
layer is completely dry, then only apply the second coat. Otherwise, the colors will start sticking out and your
background color will start coming out. So wait for it to dry, then only apply the second coat. Now in second coat, a similar color I'm using here, you can fix the colors
if you feel that there is too much of
this yellowish color, you can change it to a
little bit of orange. So anything, whatever you feel like you can change it here. So first, I'm
applying yellow then orange and just trying to
blend these two colors, washing off again my brush, and then I'll take the colors, which is the white
and pink color. And again, a little bit of this Prussian blue to make
it a light purplish color. So just making the color a
little light here you can see, I've just made a
color a little more towards the reddish side. So reddish purplish,
you can say. And then washing off my brush, removing excess of water, and just try to blend
with your damp brush. Very with a very light
and gentle hand. Try to blend the colors. So this is how you
can blend the colors. So again, I will just move first above and taking again
this darker color, which is the Prussian blue
and black mix, and first, I will apply above one coat and just blending the colors and putting it in a
half circle form. And as I will go down, I will take more
blue, and again, I will cover this area, and I'll try to blend this
color with this purple color. So this is how we have to do the blending or any
color blocking. So this we have done
in a half circle form. So like that, we have
to do this blending. Moving the brush
in half circles, taking my damp brush and just
trying to blend the colors. Colors will only blend
if your color is wet. If both the colors are wet, then only it will blend. Otherwise, it will not blend. So just keep in mind that whenever you are
blending the colors, the colors will only blend
if both the colors are wet. Just applying more of the
starch, and after that, I will sprinkle some of
the stars on the top, just using the same flat brush and also some stars
to below also. But first, we will do the background of
the below part also, then we will sprinkle
the below stars. So let's first take white color. Wetting my brush, take
liquid, white color. Don't take thick color. Otherwise, you will
not be able to spray those sprinkles on top of it. You can use your flat brush. You can use your fan brush for spraying the sprinkling
the above part with white. So just taking a nice
white and little bit of purplish shade and
making it a little wet. Just try to make it a little
wet and then sprinkle it. Then whole sprinkle will
come out very well. So taking my brush and just sprinkling it all
over above the skies. So it will create
very nice, small, small stars, as you
can see over here. Actually, this type of sprinkle creates magic in the stars. It feels like there
are real stars. So just sprinkle it all
over on the lighter part, on the upper part, everywhere. And it's okay if some of the sprinkles are going in
between here and there. That is perfectly fine.
Don't worry about this. We will apply colors on the
mountains. It will be gone. So don't worry about if it is coming on these
mountain parts also. So you can see how beautiful
this sky is looking. Now we will also do
it on the lower part, but first we will
do the blocking and the second layer blocking, and then we'll start with
the sprinkling of the stars. But we'll not sprinkle too much too many stars
on this reflection part. Little bit of stars we
will show over here. So similar colors I'm using here also and just applying
the same colors, just moving the brush in a half circle form
and blocking it. You can see in this part, I have increased a little
bit of orange part because I want to show it a bright
yellow, orange color. That's why I have increased
here the orange part. And just taking this light
purplish shade color, which is more towards
the bluish side and trying to blend this with
the Prussian blue color. And as I will move above, it will be more Prussian
blue and black mix. Since the reflection
is very clear, so we don't have to make any, like, ripples or
anything over here. So just applying
the same colors and just sprinkle similar way
like we did in the skies. Similar way, we will
sprinkle it over here also. So just trying to
blend the colors, making it more dark and more sharp and taking
yellow and trying to blend again with
this nice color, making it more orange. So just blending it, blending it till I
feel satisfied that my blending has been
done perfectly. So now the blending
has been done. Now I will just add
some more sprinkles over here like we
did on the sky. Similar way, I will do
for this part also, but not too many stars, only few we will add. Same technique and little bit
of stars I will add here. So this is the whole background
and foreground painting, and a little bit more stars
I will add on the top. And now we will start doing the middle part which is there and the reflection
part of the mountains.
24. Alpine Twilight Mountain Blocking: Welcome back. So
let's start with the middle ground that is
the mountain blocking. So here we will be using our round brush for
blocking this entire thing. Let's start first using my rigor brush for
creating the outlines, and then we'll start
with the blocking. It will be easy for us to do the blocking
of the mountains. Taking my rigor brush and making a color
a little bit light, that is a mix of this
Prussian blue and white mix. So you can see how
light this color is. So there's much light
color I have made. And then I will use
this same color for creating the above the mountains which are above so whenever
you use smaller size brush, it is easy to
handle and you can, because this is the main
part of the painting, so you have to make it very clear and crisp the
lines and everything. So first, I'm just trying
to make the lines, and then I'll start
the blocking part. So you can see how I'm just
trying to fill in the colors. First, making the lines. The lines are thick.
It's not thin. It's fine because this is not the main line which
we have to draw. It's just the reference
line where we have to do the coloring and
the blocking part. So the lines which I'm
drawing over here. After that, I will do
the blocking part, outlining these areas which
are dividing this tree part, which is the tree
range below and above are the mountains. Now you can see you can get
the idea that above are the mountains and the rest of the areas are the tree lines. So just taking my round brush now and making the color a little lighter and
trying to fill it up, try to make the color
as light as possible. You can see it a little touch
of purple is also there. It is not completely
bluish in color. So try to add a little
purplish touch also to it. Since I have taken
my round brush, so it is easy for me to
fill the colors fastly. Try to use a thick color. Don't mix any water
in your color, and water should only
be there on your brush. So blocking the above part, and then we will
do the lower part, which is the tree line area. So let's do that as well. So you can see both the tree lines areas
are a little bit darker. So first is a little
bit more darker than the one which is the mountain. So you can see I'm just
mixing the colors and making it a little dark bluish color, which has a black also
in it and just adding some nice vertical lines
to show that these are tree lines which
are visible on the top, and then I'll start filling
the same color inside. So this is how we create the
tree lines when we are doing very far trees which are
there, which are in a bunch. So like this we created, you can use any size round
brush of size one or size two, but try to use a smaller
size round brush, and then only that sharp
lines will be created. Here you can also use your rigor brush for
creating the above lines. But if you have round
brush of smaller size, you can use the smaller
size round brush also. Now you can see I've just made the lines and now
I'm just filling it and first creating
the above texture, and then I'm slowly
filling the colors. So let me zoom in a
little so that you can see it clearly how these
lines are coming up. So you can see there
are pointed lines which will show that there
are some trees which are in the backside, and I'm just filling this
with this dark bluish color. So you know how to
make dark bluish, just mix little bit black
and little bit white to make this type of color and
little bit of Prussian blue. Now we will use the
takest color for the lower horizon line
tree line which is there, making black and just adding, again, the same textures like we did for the first tree line. So this is how we are going to create the entire
tree lines over here, and similar manner, I will be doing for the lower
part as well. So try drawing it
slowly, create some big, some small lines so that to
give a little variety of lines just to show
that there are some bigger trees,
some small trees. So just random, big, small sizes of the lines. And then I'll just block in this entire thing once I'm
done with the textures above. All these smaller
details takes time, so don't worry about that. Keep be patient and
do it very slowly. It's not like you have
to do it in one go. The entire painting,
you can take breaks, and then you can complete
this entire painting. So each and every painting
is unique in their own way. So I have picked up
such paintings that are a little bit different so that you can learn from them. You can learn the techniques. And when you are doing
some other paintings, you will not face
any difficulties because you will learn so
many techniques over here. So this is the fourth
painting which we are doing, and I'm just enjoying
how the whole process of the entire painting. So just follow the process and just do it like that if
you're not sure what to do. Each and every step
is crisp and clear. If you don't know if you don't understand
any color mixing part, you can always ask me. You can always DM
on my Instagram. That is Moheni Art Gallery. So I'm always ready to help filling this middle ground
part which is there, and then we will do the
part which is below also. So you can see already this painting is looking
so beautiful and so vibrant because I really
loved the entire sky part. So we almost done
with the upper part. The lower part is left.
25. Alpine Twilight Mountain Details: Welcome back. So let's start
with the mountain details. So you can see my
colors have dried. Now I will just
add the details of the mountains with a
little darker color that is the Prussian blue
and a little bit of black mix and a little bit of white just to tone
down a little bit. But it will be a dark color. It should not be a
very light color. Otherwise, those details
will not be visible. So taking my rigor brush and
making a color little fluid, and I'll start creating some textures with
my rigor brush, creating the lines and a little bit lines of the
textures here and there. So were lots of textures, some were less textures. So like that, I
will try to fill in the whole mountain part, leaving some white areas also. I will not cover each and every
area with these textures. I'll just try to give
a little shape to it. So let me zoom in a little bit so that you can see
it more clearly. So you can see little
vertical textures. I'm just applying
in some diagonals, so to create the shape of the mountains because
there is a mountain range which there are four
to five mountains which are overlapping each
other as you can see. So you can see I'm just adding some textures
here and there, leaving the gaps of white also. That is the light
color which is there. So these are the textures, and I'm also trying to give
the shape of the mountains. So according to the shape, I am adding the textures
as you can see. So very small, small lines are these and also
adding the shapes. So this is how we
do the outlining. We don't have to do
it in particular, but by creating
all these shapes, you will see the
outlines on its own. So we'll not draw
a outline of it. So you can see just
creating shapes, and I'm trying to draw these
outlines and everything. So make sure your color
is not very thick, otherwise you will not be able
to create these textures. Try to make a color a
little fluid when you are drawing all these textures
with your rigor brush. Use rigor brush or liner
brush of size zero or two by zero to create
all these type of textures. So as the mountain is,
the slopes are there, similarly, the textures
are also moving like that. So I'm just trying to create the textures also
in a similar way, just like slanting lines. So this is how we
add the textures in the mountains so that
it looks like snowy also, and it looks like
there are some trees or some black rocks
which are there. So slowly, slowly, I'm just covering each and
every mountain with a similar texture a
little less textures to the side mountains because
I want it to be more snowy. So you can see how
beautiful it is looking when these
textures are added. Now we will add a little bit of white textures also in between, just to add some snow effect. So you don't have to cover
each and every white space. You can leave a little bit of these light bluish space and cover a little bit of
areas with the white textures. So to it very slowly, take your time and try
to add these textures. So we are almost done with the upper part of the mountains. Now we will add some trees and then we'll do
the lower part. Little bit of white textures, I'm adding to this part
also just to show that there are some snow in the
tree line area as well. So this is completely optional. You can leave it and just some more tree lines we
will add here in the sides, just to the sides
and then we are done with the upper part
of the middle ground. Just taking the black color
and drawing some tree to the sides. So pine trees.
26. Alpine Twilight Reflection Blocking: Welcome back. So
let's start further. So first, we will add the background trees
which are there, and then I'll start creating and blocking the
reflection which is there, two to three trees I will
add just to show that there are some trees which are
big and tall and visible. So similar pine trees I will
just add here and there, and rest of the trees, I will just keep it like
pointed lines which are there. So no need to show
all the trees, just the side trees we can show, and just small pine
trees which are there. Similar pine trees like we did in our previous
paintings as well. So similar pine trees
I'm adding here also. And then we'll start
with the blocking of the lower part
with a similar color, a little bit more
darker mountains because this is a reflection, so we'll not make it very sharp, but, yes, we will block
in in the similar manner. First, I'm just taking the
mountain color which was there and creating a
line in between with my round brush and also adding area which
is the land area, a small land area
which is there where these trees are just
a small land area. So this is a small
area where there is a snow covered land is there. Try to use the light bluish
color and fill the area here. And then after that, we will draw and
create the textures. Now we will start blocking the lower reflection
part, which is there. You can rotate your canvas towards your side so that it will be easy for you to paint. So I'm just rotating it, and I'll start first with the mountains and
then the tree lines. So we'll first block
in everything. Taking similar colors,
I will start first with the black color
which is there, which is the area. This is the mountain area. I'm just outlining it. I will not do it in
a very crisp manner like I did in the upper part. It will be a reflection,
so it will be like that, very hazy lines will be visible, so it will not be very
clear the textures. So like that, I will try
to paint the above part. So just adding the similar
colors which we did in the upper part a little darker than the one which we have applied
in the above part. So you can see just
I'm applying it. And after that, the part
which is the tree line, I'll just make it
dark, just black. I will not make
that bluish color. I'll just completely add the blackish color just to show that these all are looking
like a black color. So taking my round brush and just creating the entire area, which is the tree line
area and just covering it with this round brush. Same way we have to do like
we did in the upper part. Try to take thick colors
and cover this area so that in one go this blocking is done, you don't have to
repeat the second code. If you will take thick colors, in one go, that whole
part will be done. Covering the entire
area with black. So if you will follow each
and every process of mine, I'm sure you will be able
to do this painting. So try to follow
each and every step and do it very slowly,
very patiently. Don't be in a hurry to paint it in one go the paintings because these paintings will take time and if you want to
do it like neatly, so give time, you can take a week also to complete
this painting. It's completely fine, but
try to not do it in a hurry. When you do such
type of paintings, it not only create the
patient's level also because it develops actually
the patient's level in you when you do these
types of painting, especially the detailed one because it requires
a lot of patience and a lot of time
and dedications, everything and a lot
of discipline as well to create such paintings. So all these, if you
will do it regularly, you will develop
all these habits like the patients and the
discipline, everything. So try to do it very patiently. Take your time, take
breaks, take tea breaks, and I'm sure you will
love doing this. When I started painting, I also was not aware of what is the
patient's level needed. So I used to get
very distracted when the painting takes a lot of time and I used to
do it in a hurry. But slowly, slowly,
when I practiced it, when I did daily,
then slowly, slowly, I came to know that yes, it not only develops
your patient's level, but also the discipline. So try to do it
slowly, carefully. So you can see the whole
blackish line I have done. Now I will do the area which is the mountain area, the details. I will not do exactly the details which
I have done above. Just some lines here and there, I will add just to show that
there are some textures. Now here, you can
see I'm not using the detailer brush,
which is a rigor brush. I'm just using my round brush and trying to create the
textures here and there. We don't want very
clear textures, some thick lines here and there. You can just add just to create the texture which is
there on the top. And then we'll add some lines of water so that it will
look like these are the water reflections which are there and which
are very hazy lines. They are not clear.
So that's why I'm not creating any very clear
lines you can see over here. So we're almost done with
the reflections also. Now we will add some more
details of the center line, which is the horizon line and some lines to
the water part also.
27. Alpine Twilight Final Details: Welcome back. So let's start
with the final details. So let's add some more details to the middle ground
which is there, which is the part which
is the snow part. So we'll add some more
details over there. So taking my flat brush and just adding one more line over there with this flat brush. And same color I'm
using here and giving little textures
above just to show that there is a snow
area which is there. And again, taking
some pinkish color and a little bit of white, and just adding one
more line below, just to add some more
lighter details, some pinkish details over there. After that, using my brush, which is the rigor brush, I will start creating some
more details over there, adding some shapes, which is this area that is the
land area, some shapes, giving some shapes like we
did in our previous painting, just a little shapes to it, just to show that there
is snow which is there. Adding some snowy
textures and the lines, I'm just extending a
little bit down so that it will look like there are
the trees which are there, also the lines which are
there, the tree trunks, adding some snow
with white color, just some snow below, just to show that there
is a reflection which is being formed because
of this land area. So very small details which
will make your painting look more beautiful
and more realistic. Just adding some more details, which is the reflection
of this land area, just adding some
reflections below, keeping the black
line in the center. These are very
small details which try to do it very
carefully and very slowly. So you can see the reflection
is being formed of this land area also,
which is below. So this is how we all can
create the reflections. Now I'm just adding one more layer of black because I feel
that a little bit of areas are less, not very thick. So just adding a simple
black color over there. And now we will add some
lines to the water as well, some watery lines
which are there. So using my rigor brush that
I will create some lines. Just taking some
thin color of white. Don't take thick color
and try to create very thin lines using
the tip of your brush. Try to create as
thin as possible. Just to show the water effect
of area which is here, also adds some on the top
of this mountain part, which is the reflection
of the mountain. So now you can see how this water is looking a
little bit more realistic. So this is how we have to add waters on top of
these mountains. And this is it. No no need to go
down just above, we will add. That's it. And we will add some milky
ways on the top, also. So just taking my Brush, which is the blender brush, I will add some textures, some very thin textures. So this is completely
a damp brush, it is wet, but water is removed. And just taking this
yellow and white mix, I'll try to add
some nice textures like foggy textures on the top, just to create milky way. So first, doing
with yellow color, do it with very light pressure. And if you don't have
this blender brush, use your round brush and dry damp round brush and
then create these textures. Don't use very thick colors. Otherwise, because you can see how transparent
this color is, the transparency of the
color you can see over here, you can see the
back portion also, make your color very
transparent and it's not thin. Remove extra colors and just try to rotate the
brush in circles, the damp brush, and
then you will be able to create these
type of textures. If you are facing difficulties
in creating this, you can leave this texture form and you can just leave
the painting like this. Then also it will
look very beautiful. This is the extra part which
I have added over here, but it is completely your choice if you want to add it or not. Again, I'm adding
white a little bit, just to make it more look like some effect and then a little
bit more round textures. These are just like clouds, or you can see they are
very small, small, tiny, tiny stars which are there. So just like that
we have to create. So don't worry if
you're not able to do this and if you
don't want to do this, you can leave this part and you can leave the painting like this because like this also this painting is
looking very beautiful. Adding some more round textures. Now, this time I'm adding
it with my round brush, you can use your
round brush also for creating such textures. Just adding some nice
textures on this part. So if you're trying
this painting, do tag me on my Instagram
that is Mohini Art Gallery. I will love to see your
project work and reshare it. Taking some more white and just spraying it
again on the top, I will cover this area
which is the below area, and then I will sprinkle
it because I don't want the sprinkle to fall on this
area which we have done. So just covering
that area and make sure that part has dried,
then only cover it. Otherwise, everything will
turn out to be a bad. So make sure that
your painting is dry, then only sprinkle these
white sprays on everywhere. The more and more stars you will create the more
beautiful it will look because it is like a twilight where there are lots
of stars there. So you can see this it
is filled with stars. You can also create some
shooting stars there. That also will look very nice. So again, with my fan brush, just adding some more
textures of white. Take less less color when
you are adding such details. Don't take too much colors. Otherwise, you will end up
creating thick patches. So take very less color
and then only create this milky way. So this is it. So this is a complete painting, and I hope you
liked it as I did, and then we'll meet
in our next painting.
28. Midnight Pines: Welcome back. Let's start with our first painting that
is Midnight Pines. So let's talk about
the colors first, which we will be using here. So the first color
is Prussian blue with a mix of a little
bit of white to it. Just to tone down
the color a bit, we have used this white. So this is the first color. The second color is the
mix of Prussian blue, a little more white,
and this rose color. So mixing all these colors to make a nice
purplish, bluish color. So you can see the second color, a bit lighter than
the first one. Then the third one is
pink and white mix. The rose, this is
a nice rose color, which is a little towards
the pinkish side. Instead of this rose color,
if you don't have it, you can use Alzarin
also crimson. Just mixed a little more
of this cadmium yellow, and you can see a nice orange
color which is formed. It's more towards the
pinkish orange side. So now let's talk about the snow part which we will be using mixing
this rose color, Prussian blue and
more white because we want the snow color
to be lighter, much lighter than the
background color. So this will be the
background of the snow part. So all these colors we will
be using for the painting. So let's see how we have
to blend the colors. So the first color
is the darker color, which we will be using. So let's first mix that
color and start Again, flat brush we will
be using here also. So first color is the darker color which
I've applied over here. Then comes the lighter color, which is a little
lighter version of blue. So that I haven't
shown over here, but it is a lighter
version of blue, and just trying to blend this lighter color
with the darker color. Then as I will go down a
little bit of this rose color, I will try to add to this blue to make it
a little purplish, and after applying, blend the
colors and then move down, then comes the pink color. So wash off your brush
nicely before taking pink. The pink is white mix, the same color rose color
with a mix of white, and just applying it
down and trying to mix the color with that
bluish purplish color. Then comes the orange color. So you can see a little
bit of blue has come up. So try to wash off
your brush nicely before using any yellow color. Otherwise, yellow will turn into green when it
reacts with blue. So this is how the
blending will be done. So let's start with
the main painting, which we will be doing
it on the canvas. Simple same canvas I
will be using here also. Same five is to seven
inch canvas it is, and it is a canvas wood, which I have already primed, as you can see, it's a nice canvas board
which I'm using here. So let's first do
a rough sketch, and then we'll start
with the painting. A little rough sketch of
first with the foreground, where a little below from the horizon line,
I have started. So either you can put it in the center or you
can put it a little below. So just adding some nice
lines, both the sides, just to add here the area, which will be the
foreground part, and rest of the
above area will be the where the trees will be. So this is the pathway,
something like that, and then rest trees we will be adding directly
by using the colors. So this much drawing is needed
over here, not too much. So let's start with
the painting first. So I've just taken out all
the colors as you can see. These are the colors which
we will be using white, Prussian blue, this rose color, cadmium yellow and black. So let's start first
with the background. So for the background, first, I will mix the colors, and I will be using flat brush. Take bigger size flat brush because we have to do the
blocking of the background. So let's start with the blocking
of the background first. Try to use bigger size
flat brush for blocking, and I've just wet my brush, and I will first pick the color, which is the Prussian blue. If you don't have Prussian blue, you can use any blue
and just add black to it so that the colors
become a little darker. So this is the image
of my painting, which we will be doing, starting from the darker color. And as we go down, it turns out to be more
pinkish and orangy color. So let's start first
with the background. It's fine if in the
first background, the colors are not smooth. Brush marks are there,
that is completely fine. I'm just focusing about the blocking of the
colors. That's it. Even if you are not doing
the blending properly, that is perfectly fine. We'll do the blending
the second goat. But if your color is wet, you can do the blending. You can see I haven't mixed
any water in these colors. So use directly the color. Water should only be there
on your brush. That's it. That much amount
of water is only required when we are
doing acrylic painting. So just trying to take more
of this dark color and trying to blend with
this lighter color. Sometimes with damp brush, also, you can just do the blending
if it doesn't look proper. So just taking white,
this rose color, and a little bit of
this Prussian blue and mixing it to
make a light color. So just enjoy the
process of color mixing. Here, you will learn lots of color mixing things because I try to mix the colors
and make so that you guys also learn
the color mixing part. So you can see it comes out to be a
little purplish color. So I'm just trying to
first blocken it up. Then using this
direct rose color and I'm applying it over here, you can add white also if we
don't want very dark color. So just taking again white
and this rose color. Then again, applying it on
top of it and trying to blend the colors with
the purplish color. That is the purplish blue color. After that, I will add a little
bit of yellowish texture, yellowish color also in
this, not too much yellow, a little bit of yellow to
make it a nice orangy pinkish color and just applying it and filling the rest of the areas which
are in the sides. So just trying to fill
leaving the foreground, I'm just trying to fill
the rest of the areas. It's okay if little bit colors
go inside the line because when we will be coloring the foreground,
this will be gone. So don't worry about that if little bit colors go
inside this pathway also. So this is the first
coat which we are doing. We will do second coat
once the first coat dries. So the first upper part is done. Now we will do the lower
part which is there. So for the lower part,
we will be using a little bluish light color. As you can see, I'm
adding more white to this color and a little
bit more of blue. It should be more
towards bluish. So just making it a
little more towards the bluish side and just
filling it with this color. It's completely
fine if there are brush marks on this foreground because we will be
adding details, so brush marks doesn't
matter over here. Adding a little light color in the middle part and a little
darker color to the sides. If you're facing difficulty directly doing the
with flat brush, you can use round brush also for filling this foreground area. So just fill it nicely
using thick colour and just adding this whole area with
a nice bluish texture. So finally, a blocking is almost done just making
this center part a little more light just by adding white so that it is
properly visible. And this is done. After that, we'll start with
the second coat, which is the second
background coloring. So this is almost done. So we'll wait for this to dry.
29. Midnight Pines Second Blocking: Welcome back. So let's start
with the second blocking. So first part has
dried completely, as I can touch and it
has completely dried. It should not be wet if you're
using for the second coat. It should completely dry. Now we'll use the same colors
for blending it again. But this time we will try to blend it as much as possible. So using the same colors, first, the Priscian blue makes a nice color and just
adding on the top first. Now, this time, I haven't
added any white to it. I'm directly using Prussian blue because I want a
little darker color. So you can fix the colors
also when you are using this. Now again, I'm
making it the second color and just blending
it with the darker color. Just push don't push it too much the lighter color that the entire dark color becomes light. Try to blend where the
lines two lines meet. Then comes the third color, which is this mix of this rose and little bit of
this purplish color. So just adding it on just below this blue color and trying to blend this with
the blue color. So this is how you have
to go on blending. Try to make sure that there
are no proper lines visible. You have to just keep in mind that there are
no sharp lines. A should be a blurry line, especially the two colors
which are like, suppose here, I'm just adding this pink color, and I will just try to
blend the colors with the upper color so that
the lines are blurry. So this is how blending is done. Now I will take this
yellow pink mix and a little bit of
white to make it a nice pinkish orange color and just try to blend
this with the pink color. So I've kept this orange color more so that when we
will create the trees, this will not be
visible too much. So that's why it has more
parts and less part is blue. So as you can see the picture when we will create the trees, this color will be gone. So that's why I have
created more this part. So the first part, we
have done the blending. Now we will do the
lower part, and first, we will spray here, sprinkle some stars on the top, and then we'll start
with the lower part. So just take any brush, you can use your fan brush. You can use your flat
brush, any brush, whichever brush you have you can use and just sprinkle some white and this nice
light color on the top, make it watery and
then sprinkle it. So sprinkling this color
all over the upper part. You can use any brush. You can use this flat brush. You can use the fan brush for sprinkling these tiny stars, and it looks very beautiful. So you can see I'm spreading
it all over the sky. Like we did in our
previous painting, also, we have created
so many stars in there. Similar manner here also, I'm just trying to do it. So let's start creating the upper milky way which is
there with my round brush. I'm just mixing this rose
and just pinkish color, very light pinkish color. And using my round brush, I'll just try to create some
round circular textures. Now this is another way of
creating the milky way. This also looks very beautiful. So just adding some nice
round it's a very thin color. It's not very thick color. My brush is also damp, it is not completely wet. And I'm just moving
in in circulars and creating this texture. Make sure that your
background has dried again whenever you are
creating this pattern. And after that, again,
I will sprinkle some more stars on top of it, just to look more dense, adding some round
circular textures. So this is how we
create a milky way. This is another form that was
another form of creating, which we did in our
previous painting. So different different ways are there to create these textures. Now I'm using this blender
brush and just making again some more circular shapes. Try to make it a little
translucent color. Don't make it a
very thick color. So just adding some
more circular textures, and also I will add some
more stars on top of it. Now I will use this
fan brush, and again, white and this rose color
mix and just adding some more textures
into the same pattern as I have created the lines. So just creating some
very now here textures, which I'm creating with fan
brush, it's completely dry. It's completely dry brush. So directly grab the color and try to create
these textures. Don't use any water over here when you are
creating the textures. So now, again, I will
add some more stars, taking some pinkish color
and making it watery, and I'll just sprinkle
these everywhere, mostly in the middle part and
where there are milky ways, so I want to make it a
little dense over here. So this is how you
can create some nice, beautiful stars all over. This process is so satisfying that whenever you
will create this pattern, these stars, your painting
will look amazing. So in two paintings, I have created these stars, as you can see, and
they are looking so beautiful now the
sky, especially. And yes. So now we will start
with the trees here. First, we will be creating the shapes of the trees
with black color, and then we'll start with
the detailing of the snow. So this is how we are going
to do the tree parts. So the lower part, a little bit of the
sparkles have come up, but don't worry about that. We will be doing the
layers over here also. So all these things
will be gone. That's why I have
created the stars first and then we will create the trees and then
the background. So let's first add the trees. So taking my rigor brush, starting from the center, as you can see, the
center part has the smaller trees and the side parts have
the bigger trees. It means the center part is very far and the side parts
are little close. So likewise, we will be
creating all these pine trees. So there are a number of pine trees we will
create over here, so enjoy this
process of creating the pine trees because once you practice
so many pine trees, I'm sure you will be able
to do pine trees like in such a easy manner because we are doing
here so many pine trees. All requires practice. The more you will practice, the more neatness in
the painting comes up. So first, you can see
I'm just creating the lines and then we'll
create the textures. The smaller lines in the center, and as I'm going towards the foreground towards my
side, it is increasing. The size of the trees
are increasing. So just creating
first the lines. I haven't created any
thick lines or anything. Am focusing about the lines where I will make
all these trees. So just taking the
rigor brush and try to create first the lines. Now, just the lower
part of the pine tree, I'm adding the details. Now this is another form
of creating the trees, adding the lower part first, and then we will do the upper
part with our rigor brush. So this brush which I'm using over here is the round brush. So same techniques I will be using for the
rest of the trees, the below half part you have to create with your round brush. Make your color a
little fluid so that you can easily
move the brushes. Don't use very thick color when you are creating
such textures. Some of the trees
will be overlapping, so don't worry about that. It's perfectly fine. We want some trees to be
overlapping each other. So like this, we have to move
and create all the trees. So I will just speed up
a process a little bit so that a you can get it. So this is how we have
to do the entire trees, whether it is big or
small, the lower part. Just try to do it
slowly and take your time to complete
this entire tree part, the below part you have to do, leaving the above part because above part requires
more detailing. So we will be using rigor
brush for that for creating the details and some
nice tree textures. And after that, we will
do the upper part. So you can see already
the background is looking so vibrant
and beautiful. It's just the time when
the midnight happens. So this is how we have to do
the entire tree structure. It's full of trees, full of pine trees. So as you can see, just
adding more of the lines. Now, this is the biggest tree, so I'm making a bigger lines. As you go down, the line
size also increases. These are all slanting
lines, as you can see, and just applying it
and filling the colors. So just enjoy and fill
the entire thing. The biggest tree is this
one and the other side one. Rest all the trees are
mostly smaller in size. So just filling it,
and this is done. Now we will do the
upper part of the tree, which is with the rigor brush.
30. Midnight Pines Adding Trees: Welcome back. Let's start
with the trees detailing. So same rigor brush and make your color a little
thin when you are adding details and starting
from the corner trees, just taking a little
bit more longer line and make your color
a little fluid, then only the textures will be formed and adding the textures and going in the
downward directions. So same technique I'm
using like we did in the previous tree structure. So very simple and
easy technique it is to draw the trees just
with toads and textures. And as you go down the size of these
leaves will increase. So this is how we have to
make all these tree lines. So let me zoom in a little so that you
can see it clearly. So you can see how I'm
adding the textures, some dots and some
random textures, and I'm increasing the
lines in a slanting way, as you can see over here. So when we create these
type of textures, the trees look more realistic. So just adding the
textures and making the size a little bit more
bigger as I am going down. So make sure that
your color is fluid. Try not to use very thick color. Otherwise, you will not be
able to create such textures. So you can see how beautiful that upper part is looking when you are creating the textures. And as I'm going down, I'm also increasing
the size of the lines. That is the slanting lines
which are there and filling the gaps in between as well so that it looks a
little bit more dense. And a little bit
more textures I'm adding below also
where we have created these lines with the
round brush just to make it more smooth
and, like in uniform. Just adding some more lines
and textures to the sides. So this is how we add the
trees and the lines and the tree textures of the trees. I will just increase the
length of the lower part a little bit more so that
it looks more uniform. In the similar manner, we will be doing the rest
of the trees also. So just adding some textures to the side parts so that it looks like a nice leafy texture. So a little bit more I'm
adding to the sides. So this way, one
tree is created. Similar way, we have to do
the rest of the trees here. So you can see there
is a lot of practice and a lot of repetition thing you have to do it over here. So try to do it
very patiently and very calmly because when
there is a repetition, we want to finish the
things very fastly and we end up messing
up the painting. So try to do it very slowly, take breaks if you feel
that it is getting a little bit more u repetitive
and then start doing it. Taking breaks is perfectly fine. You don't have to
paint in one go. You can always take breaks in between whenever
you feel like, never try to complete
the painting in one go, especially these type of
painting when you are doing. So when you do all these
types of painting, a lot of patience and discipline is developed when you do these types of painting. Like, I have developed a
lot, like I can feel it. So similar way, you
can also do it, have patience and
do it very slowly. Put some music on or something, and then you can just
paint it as I'm doing it. Just don't think that you are a beginner and you're
not able to do it. You can see the painting
and it's very tough. Don't think like that. If you will follow each
and every process of mine, I'm sure you will be able to
do this type of painting. So just add these textures. And if you're still not
able to do these trees, check out my class
which is there, that is for Absolute bigners. Check out that class. There's a separate lesson where I have taught this
type of tree textures. Three to four types of pine
trees I have taught there, so you can try out that. So just adding the trees
one by one and you can see how beautiful
these are coming up. And when we will add snow, it will look like more beautiful
after adding the snows. So just try to do it slowly, especially the smaller trees. You have to do it
very slowly and very carefully because these
trees are very small in sizes and try to do it as slowly and
patiently as possible. And make sure that your
color is not very thick. It should be a thin color. Otherwise, again, these textures will not
come up, like, very fine. So try to use not very thin, but yes, milky color. So just adding,
again, the trees. You can extend the
lines if you want a little bit to make some big and some small
sizes trees so that every size doesn't look
like the same size. So you can extend
the lines also. So this whole series is a complete set of
winter painting. So I have tried to cover each and every part of
the winter painting. You will see in the
next two classes also when we'll do the
next two paintings. So those are also quite
different and you will see it. So just do it slowly and take your
time, take your own time. It's not like what I
have done with my speed, you have to do with
your own speed. Everyone has their own way
and own speed of doing it. So take your time.
Since it is a video, you can pause it, you can rewind it, anything
you can do it. So it's totally up to you how you watch the videos.
Video is always there. You can pause it and then complete it and then
start it again. So this is how you have
to do the tree parts. So once we are done
with the trees, we will be adding the snow part. You can see I'm adding
small small trees in between also where I feel
that there is a gap. I think in between these two
trees also there is a gap. I can add one more over here. So one more tree I will
be adding over here. But first, I will
do the upper tree, which I'll not show full trees, only you can show half of it. And just small textures of
this leaves, I'll just add. So just one more tree is left, that is the bigger one, and then we are done with the tree part. After that, once this
black paint dries, then we will add the snow. Now, these acrylic
colors dry very fast if you live in
a humid or hot area. Even if it is winter
or something, still the colors dry, I think, within three to 5 minutes, so you don't have to wait
too much for the colors to be to dry. So it dries quite
fastly. So yes. So by the time I will
do all the trees, the other trees will be dried. So I don't have to wait
much time over here. So the last tree which is left, which I will do it similar way, like I did the other trees also, just extending a little
bit more taller, just starting from the above and ending towards
the lower part. So same way I'm repeating
the process and just adding the trees like I leaves like
I did for the other trees. So I hope you are
enjoying the series because each and every painting
has uniqueness in them. So each and every painting
adds so much beauty. You can see so much beauty in the nature, which
is still there. And I'm just doing it
through the painting, and I'm still enjoying it. And I'm just feeling
like I am there. So, yes, so beautiful landscapes
are these very magical. And this is it. So we're almost done
with the tree part. Now we will do the snow part.
31. Midnight Pines Snow Details: Welcome back. Snow,
let's start with the snow details on the trees. So I've taken a fresh colors and because all the
colors were mixed up, so I've just taken a fresh color over here as you can see, all the colors which we were using previously
same colors except the cadmium yellow because we don't need
cadmium yellow now. So now let's start with the um mixing of colors for the snow and then we'll start
with the painting. So I'm just taking
this nice rose color, then this Prussian blue and white mix because
you have to create snow, so the color should
be very light. And so this is the color
which will be there, and starting from the top, I'll start creating
some textures, making it a little fluid, the color and starting from
the top part of the tree, and we'll start
creating the textures. So try to make it fluid and take very little colors
when you are creating the textures because all these
textures take lot of time. So starting from the Top part, add these textures on top
part of the black portion. Don't completely fill
the black portion. Otherwise, everything
will look messed up. So try to use just on the
top part, the colors, on the top part and leaving a little black
below so that it will give a little depth to it and just adding some lines
in the center to give there are some snows
in the center part also and just adding
some more textures. So like this, we have
to create the textures. So try to do it as slowly
as possible because all these steps take a lot of time and try not to fill
the entire black portion. Just on top of it, you have to add these colors. And one side I have just added, and here also in the below part, I'm giving the little
shape to it of the snowy texture
as I'm going down, adding lines and creating
some nice shapes of the leaves on
this black portion. Adding some in the center,
some at the sides. So like this, you have to
fill this whole tree part. So just do it as
slowly as possible. It's a little time consuming, but the results are
very beautiful. So just try to cover the
whole area above also slowly. Just cover the above part. Don't cover the entire
black sections. There should be black visible. You don't have to cover
the entire black section. Then only it will give
a little edge and outline to the snowy part. Below part, you can
add the details with this same color because already we have filled
this with black, so you can add the textures of the leaves using
this lighter color. When we use this
type of technique, it actually adds the reality. The tree looks a little real when you will
add these details. So in acrylic, every time
whenever we do any painting, we try to add the
darker color first and then the lighter colors on top of it when we do
the layering part. So this is how we
do the laying of the snow or anything wherever you want to
keep the snow first, the darker color and
then on top of it, the lighter color goes. So slowly, slowly, I'm just
following the process and I'm trying to build
the tree textures. So in the similar manner, you have to create the
rest of the trees as well. So this is the biggest one
which I have done first. And similarly, we will be
doing the rest of the things. So again, it is a very
time consuming process. Take your time and do
it very slowly because this is the main
thing which will add beauty to your tree part. So do it very slowly
and very carefully. Don't fill the complete
black portion, leave the black
portion and just try to add these textures
just on top of it. Just to show that there is
a snow is falling on top. You can see how much
color I'm picking up, very little color I'm picking
up and the color is fluids. That's why it is not getting
very thick textures. Try to use a little fluid
color and create the shapes, and I'm sure you will
be able to do it. Once we are done with this, then we'll go with
the foreground part. Do it slowly and create
the textures all over with a similar color. Now, one thing you
have to keep in mind that whenever you are
using the fluid colors, sometimes your brush becomes sticky after doing so much
of trees, so many trees. So wash off your brush
if you feel that your brush is not coming up
where it is becoming sticky, then try to wash it
off and then again, use the colors because
these acrylic colors dry also on the brushes, sometimes when you're using it for a longer period of time. So try to wash it off
often and then again, take a fresh color
and then use it. Play some music and do this
beautiful texture technique, and you will see the
magic which will happen after you are done
with this texture part. You can see almost I'm done
with this texture part. For most of the trees, two more is left, and then we are done with the
tree texture part. So do it slowly
carefully one by one, taking one leaf at a time and
try to create the textures. Same thing we have to do
for the last tree as well, and then we are done with the
trees and the background, and just the foreground
will be left. So just the last tree is left and then we
are done with it. So you can see how much color I have taken here when I'm
doing this painting. Very less color you need when you do such
type of details. You don't need too
much of color. So whenever you are doing
these type of details, don't take too much color and fill your brush with colors. Take little little color and
create the textures and use rigor brush because
Riga brush holds a lot of color when you are doing
such type of textures. So do it slowly and patiently and we're almost
done with the tree part. Just a few details are left. So just almost done, and now we will start
with the foreground.
32. Midnight Pines Foreground Details: Welcome back. So let's
start with the first, the more textures on the tree and then we'll do the
foreground details. So I'm just taking white
color, thick white color, and I'll try to add some more white on top of
these light color. So a little bit of
white textures, which will add more
depth to the snow. So a little little white, I'm just adding here and there, not everywhere I'm putting it, little little here and there. I'm just trying to put
it on these trees. So try to take
thick color and add some textures Don't cover the entire thing of the light
color just here and there. We need to add these
white color just to add more depth
to the snow part. Similar manner, I will be
doing the other trees as well. So little textures
here and there. So you can see I've not
covered the entire things. Only here and there, I'm trying to add
these white textures. So try to add these white
textures, use your brush. Don't use very watery brush and just adding some textures
using thick color of white. You can see the
difference in the trees, the first tree which I have not done and the last tree
which I have already done it adds a little more
depth to that snow part. So small, small textures
in these smaller trees also so once we are
done with this, we are finally done
with the tree part, and then we'll do
the foreground part. So little small, small textures
using your rigor brush. Always use your rigor brush
for these type of textures, rigor or liner brush or
size zero round brush. Try not to use
bigger size brushes for creating the details. So here and there, just adding some white textures. Just adding some I'm
literally shaking my hand so that it gives a nice texture
details to this area. Sometimes the shaky
hands creates a very beautiful
textures of the snow. Slowly, slowly just moving
it in the upward direction. So it's actually very cold here, and my hand is also freezing. So just adding some textures above and then we are
almost done with it. After that, we will add the foreground part which
is there in the below. So a little bit of foreground
details we will be adding. So just taking this color and mixing blue colour
and this rose color. And taking a little darker color than the one which I have created and adding some textures first in the sides of this path. This is actually a pathway
which is being formed. I'm just trying to create some textures on both the
sides of this pathway. Just taking some
nice darker color than the base color,
it should be. Just adding textures to the sides and similarly
to the other side also. Just adding first
this outline with white and then I will start
adding these textures. Just adding the shape first, and then I will start
creating the textures, the similar manner like
I did the other one. Here also I'm adding
some white lines, some shaky lines
which are there. Not very smooth lines are these. So just have added
both the sides and also I will add
these textures. So taking again this brush, which is the smaller size
flat brush and mixing black, blue and white and
a little bit of this rose color and adding
some textures in the center. In the center some textures, just some random
textures with my brush. I'm using a dry brush,
not a wet brush. So try using a dry brush
without any water. Then only these
textures will come up. Try not to use a
very watery brush. It should be a dry brush for creating some nice dry textures. So once we are done
with this middle part, then we'll add some
details to the sides as well just to give a
little more depth, and there are some shadows also. Just using my fan brush, mixing the color lighter color and adding some
textures to the sides. Just to show some snowy effect and taking some more color. Try to use again here dry brush. Don't make it wet, completely dry brush and just adding some
textures in between, making the color a little
bit more lighter and adding some more
textures in this part. The color should be lighter than your color which you have
used for the background. It should not be very dark. Otherwise, that texture
will not be visible. So you can see, I've taken
first this pink and white, and then again, I'm
adding this texture, giving a little
pathway to this area, adding some more textures
here and there in the center to give a more
textary look to this path. So this is now taking the rigor brush and
just mixing the colors, similar colors and just adding
some lines to the sides. Just taking more of this black little bit because I want a
little darker color. So just adding to
the sides just to give a nice edge
to this pathway. Now again, I will take
this lighter color, and I'll just create
again the lines to the outside because my outside
line is not visible much, so I'm just outlining it again. Similarly, I will do
the other side also, just make it a little
more vibrant and more prominent the lines and
just make it shaky. It should not be a
very straight line. So try to make it as
shaky as possible. Sometimes these effects make your painting look
more realistic. So you can see the
middle part is done. Now again, I'm taking
this smaller size brush, which is the flat brush and covering the side parts
with a lighter color. Just taking a nice
thin color and just trying to blend
with the other color. Sometimes you don't
need the blend to be done with a even
if your color is dry, you're using thin color. I will automatically blend
with the background color. So try to use thin color
over here, not thick color. You are actually doing the
glazing thing over here. Glazing means the
background is still visible and we are applying
a thin layer on top of it. So it's like that. Just applying some more colors of
this here and there, just to add a depth
to this whole thing. So you can see already this area is looking
quite beautiful. We'll add more
details to it also.
33. Midnight Pines Final Details: Welcome back to
the final details. Let's start now with further
details of this foreground. Just mixing some
nice snowy colors and adding some nice
textures in between. Just make the color
a little bit more darker than the one
which you have used. Just adding some more
layers on top of it, just to give more textures and more lines which are
there in the snow part. So this is actually the
pathway which has been created in the snow.
It's like that. So just adding some
textures here and there with my round brush. Take a smaller size
round brush of size one or two to create these textures and just adding some nice
edge to the sides. I have not drawn the edge to the other side
because other side is not visible and the
other side is visible. That's why I have added
just one side, the edges. Just shake your hand and
try to draw these lines, the shaky lines, not
very smooth lines. After that, we will
add some more details, some shadows and more
details to the center part. Similar manner, like we
added the darker textures, I'm adding some
lighter textures, mixing this white
and this rose color. A little bit of the textures, very small small
textures I'm adding just to make it more vibrant
and more clear. All these small,
small details will add more beauty to
your entire painting. So the center part is Adan will add some more shadows
with my flat brush, just taking some nice dark color and just adding some
shadow details over here. Taking some nice shadow
textures using my flat brush, some lines for the trees which are there just to
show the shadow part. So not too much details on these shadow el
doul just a little bit and little bit of grasses also we'll
add here and there, just to make more depth
to this painting, just to make it more attractive. Now, this grass pad you can skip and you
can leave it like this. And if you want to
draw some grasses, please go ahead and
draw some grasses, taking some thin colors. Just taking my black color and drawing some grasses
here and there. So if you're trying
out this painting to tag me on my Instagram, I will reshare your artwork
on Mohini Art Gallery. So just some grasses
here and there. I'm trying to add you can also add some
stones, some rocks. It's totally your painting, how you want to decorate it, how you want to add
these textures. It's totally up to you. You can also add some small, small stones here and there, just to show that there are
some small stones as well. It's totally your choice, how you want to
add the textures. You can completely leave the grasses and
leave it like this. That is also perfectly fine. So the more since it
is your painting, and I have given you techniques and you can create
in your own way. So this is how it goes. So just adding some
more lighter color to this where I have
created these grasses, just some light colors. And here and there. So we are almost done
with this painting, just a few more details, and we are good to go. Adding some more textures, mixing lighter textures
to the center part, which is the road pathway
which I've created with my fan brush just to make
this edge more clear. So these are all parts
which are done in the end and when you feel
that something is missing, so this is a never ending task, as I said earlier also. So the more and more
you will add details, the more you will feel, okay, this is missing,
this is missing. So you have to keep
it at some point, end that task, that,
Okay, this is done. So finally, I'm almost
done with this painting. And if you are liking this, please do try it out. I would love to see
your project works because it is a very beautiful
and very vibrant painting, and I really loved doing
this entire painting, especially this entire
painting series, which we are doing. So this is our painting, which is one of them. And it has come up really well. I'm really happy with the whole outcome that
how it has come up. Just adding a little
bit more lines, lighter lines to the edge to give a little
more depth to it. Just adding some nice dark lines again to this depth part. So I hope you are enjoying
this series of painting. So there is two more to go, and then we are done with this whole whispers
of winter painting. So this is it, and I
hope you enjoyed it. And a little bit
of here and there, textures will always be there. So a little bit of textures
I'm adding in the center to make it more white
and more clear. Just some with my rigor
brush, and this is it. So do share your project works. I will love to see them, and we'll meet in
our next class, which is a different
entirely different painting, and I'm sure you will love that, too, because I really
liked that one, too. So see you in the next class.
34. Silent Blue Winter: Welcome back. Let's start with a new painting that is
Silent Blue Winter. Let's first do a
little bit of drawing and then we'll start
with the painting. So taking my pencil and we'll start first with the
drawing of the foreground, that how we will divide the
background and foreground. So starting from
the centers oppose, this is the center line a little above little below and
then just a pathway. Just a nice pathway
because this is a water part and the other
part is the land part. So this area will be
the whole land area, and the rest will
be the water part. So a little above the center
line, I have drawn this. So the whole thing will
be the water area, and then the tree line, which will be above
entire tree line, which we will be
drawing directly. And there is one ice which is under the
water which is there. So that also we will paint. So this is the ice which
is inside the water. So that also we will paint
with different technique. So again, this is the area where the mountains are with a
reflection of the mountain. And above also we'll draw the
mountains which are there. So mixture of small
and bigger mountains. Simple shape I'm
trying to create. One will be the bigger one and rest a little smaller
than the bigger one. So this is how we have to draw the entire mountain series. And this is the
entire painting here. The reflection, I have not
shown the entire mountain, and this is the area where the tree line will be the
whole pine tree line. A very simple and rough sketch you have to draw
not more than that. And rest of the detailing
we will be doing directly by using the colors. Correcting a little
bit of shape, and this is thin. So these are the colors
which we will be using here. So the first color is black, tallow blue, white, crimson
red, and Prussian blue. So these are colors we will
be using for this painting. Let's start from above.
That is the background. So for the background, we will be needing
two colors that is so the first will
be Tallow blue, and a little bit of first, I will take this Prussian
blue first, then black, mixing these two colors and making a little
grayish blue color, then white and just
mixing it nicely. So a nice light bluish
color will be formed, and we'll start painting the above sky first and a
little bit of Tallow blue also, I will add into this to make a different version
of blue, as you can see. So just mixing this
color with my palette, and then we'll first start
with the background. So try to do it slowly, take your time, and you can see the color which
is being formed here. So this is the color which we
will be using for the sky. So let's start
first with painting the sky with my flat brush. I have wet my brush
and just have taken this mix of colors and
starting from the top part. And as we will go down, the transition of the colors
will be from dark to light. So we will add more and more white as we will move downwards. Simultaneously, we'll try
to blend the colors also. So we will be doing
two coats of it, but if in one code only your blending is
being done perfectly. So in second coat, it'll be more perfect. So if your colors are
blending, then it's good. And if you're not able to blend, then try to do it
in the second coat. So now just grabbing that white color and applying it already blue is
there on my brush, so I don't need extra blue, so that's why I have
just taken white, and I'm just applying it above
just above the mountain. You can use a smaller size flat brush also
for doing this. Any size brush, depending upon the size of your
paper or canvas, whatever you are using,
try to use the brush. If you are using a
very big size canvas, then of course, bigger
brush is required. So brush depends upon
the size of your base, what base you are using. So I've just done
the above part. Now we'll start with
the lower part also. So just adding
more of this white here to the lower just where the mountain is touching the sky and just making it
a little bit more lighter. So this is how we have to do the entire painting
of the background, adding more of this blue and trying to blend with
the lighter color. Sometimes you can
also blend with your damp brush
without any colors, and you can see how nicely
it blends damp brush. You have to remove
all the extra waters and then try to use it. So see how beautiful that
blending has come up. So now we will do
the foreground, which is there,
which is the path. So just making it more lighter, the colors and adding a little
bit of crimson to make it a little purplish color
and a little more blue. And because this
is a snow paths, that's why we need
a very light color. So I'm just trying to
make it very light and just apply it in the area
where this is the pathway, the land area which touches the water. So this is the area. So this is how we have to
just fill in the colors. So this is actually whole snow
land area which is there. So slowly, slowly we'll
come to the shapes also and how to currently, I'm just focusing about the
blocking of the colors. So entire thing is now done, the foreground, the
pathway and the sky. We'll do the rest in
the next section, starting with the
mountain and then this
35. Silent Blue Winter Water Blocking: Welcome back. So let's start further with the water blocking. Using my same brush, I will just take first the
thalo blue and just making it a little more darker and a little more because we have
to do a little darker below, and as we go up, it should
be a little light in color. So just mixing all the
colors and making it a ice dark color and starting
with the lower part, then we'll slowly move above. So I'm just a showing you
what color is being formed. So this is a dark bluish color. So when you add hallow blue, the color changes a little bit to turns into a more bluish, like watery aqua bluish type. So just blocking the part, which is the corner part. And as I'm going above, I will blend this color
with the lighter color. So just taking more
of this hallow and black and making it
a little more darker. Because this color has to
be very dark at the bottom, and then as it goes above, it should be a little lighter because whenever
we see something closely, it is a little dark and when
we see it from very far, it is light in color. So this is how it goes. So let's take another
brush, which is, um the smaller size flat
brush I have taken, and I'm just blocking it
with more white added to it, blocking this part, leaving the area which is
the mountain area. I'm just trying to block in this and also trying to
blend this dark color with the light color
just by moving the brush in to
and fro direction. Also leaving the one which
is the snow which is underwater snow that
also I will leave and I'll just block in the parts. So slowly, slowly just
filling the entire color with this and just blocking in trying to blend the colors
with dark color as well. So in first code, that perfect
finish will not come up, so don't worry about that. We will be doing second code. Then only that proper finish
of the color will come up. So don't worry. So now I'm just taking my
round brush and adding more of this hallow blue
and a little bit of black and just covering
again the part which is near to the mountains
just filling this up, making it more light in color. So the color should actually
grow from dark to light. So that's what I want
over in my waters also. So just covering
the part which is the water part with this color from dark
to light transition, starting from the corner
of the canvas and moving it towards the mountain. So just making an
outline of this mountain and I'm just covering the
area with the lighter color. So this is how we have
to do the blocking. Once the first coat dries, then we will add
second coat to it. And this is the mountain
part which is here, and this is the whole snow
part, which is underground. So mixing thishow
blue and white mix and just mixing it nicely, a little bit darker
color and just covering the part
which is below. Just first outlining it, and then I will just fill
it the entire thing with the colors using the
same round brush. It's a very beautiful
painting, but, yes, it is a little time
consuming painting, so you have to focus and do
each and every step by step, these paintings because I have started with
a little easy one, and as I am going
forward and forward, it is becoming more at
an intermediate level. So I will not tell that
it is very easy painting. But yes, if you will try from the first painting
to this painting, and I'm sure you will be
able to do it because I have started like that from easy
one to the tougher ones. So just adding more
of this thalo blue and just covering
this whole area, which is the snow area that
is frozen, that is pillow. Adding some more darker
version of this thalo blue. Just take thalo blue, don't mix any color, and this is how it will
come rotating my brush in circles and trying to blend with the darker and lighter colors. So blending is always done in circles when it comes
to round brush. This is how we have
to do the blending. So now we will do
the upper part, which is the mountain part. So for the mountains, again, first we will do this part, which is the tree
part over here, just with black color. So just using black color, I will be covering the part, which is the tree line area, the entire tree line area. Now, here I have
taken my rigor brush. First, I will make the
textures on the top, and then I will
fill it with black. Like we did in one of
our previous paintings. Same thing we have
to do it here, create some nice tree lines, and then you'll just fill
it with black color. When you will use
these rigor brushes, it will show nicely the edges
and everything is coming out and it will
look like there are very small trees which are
at a very far distance. And so these textures are important when it comes
to smaller trees part. After creating those textures, we can cover the entire area
with a bigger size brush. So each and every painting
is unique on its own. So if you're trying out, try from the first one, and I'm sure as
you will go along, you will find it
more and more easy. Created the shapes on the
top, making the line, and after that, I
will just block in this up with black color. After that, we'll start with the mountain details and
then the reflections. Use thick color so
that in one go, you can fill the entire thing. So be careful at the line, which is the horizon line and try to fill
it up with thick, milky color, not
very thin colour. Otherwise, this black will
turn into grayish color. So cover it slowly.
36. Silent Blue Winter Mountain Blocking: Welcome back. Let's start further with blocking
of the mountains. I have also taken
here cadmium yellow. We will be using
for the mountains. First, let's mix a
lighter color of blue, the blue which I have
used earlier for the sky, same blue I'm
taking and I'm just mixing some more white to it, making it more lighter in color. And I will first block in the above part and
then the below part. So taking a nice
thick, milky color, and I'm just blocking
the above mountains. So don't worry about any
outlining till here. We'll just first block
in the entire thing, and then we will be
doing the details. So just blocking this up. Very light, bluish color. Use your round brush only for
blocking this because it's a very small area and try not
to use bigger size brush. Very slowly, slowly try to
block in the mountains. You can see the color difference between the sky and this. The mountains are more
lighter than the skies, try to make it like that. Filling the mountains
one by one. Once we are done with
this whole mountain, we'll also block in the
blower part which is there. Then a complete blocking of the entire image will be done. After that, we'll start
with the detailings. So you can see the
blocking also takes a lot of time when you do
such type of paintings. So each and every painting requires the first
layer is the blocking. Then comes the detailing. Then comes the second detailing, then the final details. So like this, we move
on with the painting. So the first thing is
to decide the color, which color you are using. What base you are using, whether you are using canvas or whether you are
using paper, first, you have to decide the
base, then the colors, then how you have to
draw the structure, either using grid method or you want a free hand
drawing, so anything. So all these things
should be decided prior when you are doing
such kind of painting. Mostly in landscapes, I
do a freehand drawing, but whenever I'm drawing
any portrait or anything, I use grid method for
drawing the whole thing. So just blocking the
lower part also. So finally, our whole
blocking thing is now done after doing
this reflection part. Now we will start
with the details of the mountains by using
our rigor brush. So I will just check if this
background has dried or not. If it has dried, you can apply
the second layer onto it, and then you can go ahead with the detailing of the mountains. So just one more layer I'm
adding of this same color. Now, this time is a time
when you can either increase the darker portion and
decrease the darker portion. So it depends on how you
want the painting to be. So just I'm taking the
colors, similar colors, and I'm just trying to
blend the entire thing. So try to do at least two
coats of blocking off the sky when you are
doing the painting, especially on canvas or paper. Sometimes on canvas, you require three coatings if one
coating is not proper. So all these things
require time and patience. You have to see the image
whether it is okay or not. If you feel that the blending has been
perfect, then leave it. But if you feel that some
brush marks are there, then try to do at least one
more coat on the background. Don't do any
painting in a hurry. All these paintings
require a lot of patients, lots of patients, and it also develops patience
and discipline. You will see when you will
do all these paintings. So let's now do the
detailings of the mountains. So for these detailings, we will be using
a liner brush or a rigor brush for this
using our rigor brush, making the color bluish only, but a little darker
version of bluish. So I'm adding Prussian blue, a little bit of black to it, and also a little bit of
tallow blue is there. So just making it a
little quite dark colour, dark bluish color, and make
your color a little thin. Don't make it very thick. When you will use thin color, then you can easily do the detailings with a
very nice, fine details. So first, I will add the lines. Now here you can see how I will add the lines by
creating the textures. I will not add the
lines directly. I'm just creating
the textures using the vertical line
technique just to show that these are some trees which are there
in the mountains. Let me zoom a little so that
you can see it clearly. So you can see I'm just
creating some small, small lines and textures. And these textures,
which actually acts like the small trees which are
there on the mountains. So very small small
textures and try to make your color thin and then create these
vertical lines. Don't take thick color. Otherwise, you will
end up missing it. Now, one side, which has
a light on the mountain, so I'm just making it a
little brownish color. So first make the color a
little orange and then add some black color to it to
make it a brown color. Or you can directly use
brown color on top of it. So it's totally your choice,
how you want to do it. And just adding sides portion of it with this
color just to show that there is some
sunlight which is being reflected on that mountain
and in that part. So again, just extending
these dots and making the lines also and just making a very thin
line with the same color. And again, I will create
some more textures. But first, I will
create the lines so that I can see where
the mountains are. So these are the mountains
which are there. So I just adding some lines so that I'm clear where
all the mountains are. As you can see, both the
colors are almost similar. That's why outlining
here is important.
37. Silent Blue Winter Mountain Details: Welcome back. So let's start
with the mountain details. Using my smaller size
size zero round brush, I'm just taking the color which is this brownish color
which I have made earlier. That is why mixing red, yellow, and black, just adding some
textures on top of it. Just on one side, I will be adding these textures. Rest all the areas
will be mostly bluish. This area, I will make
it a little more towards the sunny area where the
sun is being reflected. So that's why first time adding this with the brownish texture. And because of the sunlight, the trees which are there on the mountains is becoming
like glowing red or brownish. So that's what I'm trying
to show over here. So now the rest of the areas
will be with same color, that is the dark bluish color. So just adding some
more tree lines and tree textures all over. So let me zoom in a little
so that you can see it clearly what textures
I'm making over here. So same color, similar
color I'm using, which I used in those tree lines and just adding some
textures here and there, just to show that there are some darker pathways
or some darker lines, some random textures I'm adding. So always take very
little little color when you are doing
this type of thing. And don't take very thick
color, take thin color. And if you feel that there are lots of
color on your brush, just remove the extra
color and then use the your round brush or rigor brush for
creating these textures. Try to do it very slowly
and take time doing this because this is one thing which can mess up
your paintings. So give a lot of time when you are doing
all these details. So you can see I'm giving
a nice triangle shapes also somewhere just to show that these are all
areas which are filled with some trees or some
rocks or something. So just adding the textures onto the other
mountains as well. So you can see how I'm
removing the colors. If I feel that there
are so many colors, stick to my brush
because sometimes when you mix the color
with your brush, lots of colors get
stuck to your brush, and sometimes this can
damage your paintings. So try not to mix the
colors with your brush, try to use directly any palette knife or use a separate brush for
mixing the colors. So to the areas where the mountain starts,
I'm adding, again, the vertical lines and then in some textures in the center. So this is how I am trying to do the entire structure of
the mountain, the details. So you will see it
will look so real and so beautiful when it is done. So just here and there,
I'm adding dot and textures just to show that
there are some rocks, trees, all these things. So after that, we will
create the reflections below once we have done
with the upper part. Now we will add one more
layer to the mountains. So one layer is done. One layer was the blocking, second was the detailing, then again, more
detailing to this. Now again, I'm switching
to my rigor brush, and I'm just adding
some white textures in between here and
there just to show that there are some snow which
are heavy snow which are there on the top and
somewhere below as well. So this is how we do
layering of textures. So one layer with dark then
another layer with light, and another layer maybe
a little bit of glazing. So like that, we do the
textures on anything, whether it is mountain or
houses or trees, anything. We do the textures
in a similar way. So you can see just by adding
a little bit of white, this area has become so
glowing and white in color. So same thing I will be doing for the rest of the
mountains here and there. I'm just adding some
white thick textures. In this color, I'm
not making it thin. I'm just using
directly thick colour. So try to use thick
colour, not thin colour. Otherwise, that color
will become transparent. So you can see all
these areas are completely filled with snow. So that's why
directly I'm taking thick white snow and I'm
directly applying it everywhere. So slowly, slowly, the
structure is getting build up. And once this whole
part is done, we will do the lower
reflection part also. Try to do this part
very slowly and patiently because
all these textures, if you will do it in a very, like, quick manner,
it might be chances that all of that get
smudged up and mixed up. So try not to do it
in, like, hurry, give this part, at
least this part, the main part, which is the
mountain part a lot of time. Now I'm just taking
white and a little bit of this yellow that is cadmium yellow
and applying on this area where
I've kept the one, which is the highlighted area where the sun is
hitting the sun. Sorry, the mountain. The sun is hitting the mountain. So this is how we have to show that the glowing mountain where the sun is hitting the mountain. That's why this area is yellow. Similarly, we will also be
doing the reflection part. We'll create that area. So now just taking again this darker color and just
adding some more textures. So we are almost done with
the mountain detailings. Then we'll start with
the next part of it. Just a little bit of then we'll start this tree
line which we have made. We have not made
the bigger trees. So the bigger trees also
we will add over here. So you can see how
beautiful this mountain is looking when we have
added so many textures. So, likewise, you have
to add the textures. Very small, small
dots and lines, random dots and lines
are these. That's it. So just adding more
lines to this area, which is the area where
all the tree lines, and we'll also create one or two big trees
which are at the side. So just adding and extending it with a little
more bluish color and extending the whole
line which is there. After that, we'll add some more trees in one
side, little bigger trees.
38. Silent Blue Winter Snow Details: Welcome back. So let's
first start with the trees and then we'll
create the snow details. So I'm using my same brush, that is the flat brush of smaller size and just
making a nice color of this snow mixing a little bit of this
violet touch to it. So just taking more of white, it should be a very light color with a violet touch to it. So mostly blue and crimson
and White I have added. Just remove excess
of color if you feel that because when we mix
the colors with our brush, lots of colors get stick to it. Try to remove excess of
colors and then again, block in this whole part, the second layer, and
then we will add details. Just this pathway
which is to the sides, which we are just blocking
in one more time, and then I'll just
add the textures. So you can use any brush
over here, small size, flat brush or round
brush because we don't need a very
finishing touch over here, since it is a snow part, so we don't require a very finished painting
to be done over here, some one more layer of blocking. And then we'll start
creating the textures. And this is the area where
the whole snow will be there. This is the reflection. Then there will be trees
on the above part first. The bigger trees, I will just add two to three
trees on the sides, same type of pime tree which we did in the previous
paintings also. So just adding some
lines, bigger lines, and then I will just
add some pine trees. So we have done pine trees so
many times in the painting. So now, if you have done
the previous painting, so you know how to
do these pine trees. I will not do it in a
very detailed form, a few textures of leaves, and then we are done some
small, some big trees. So just creating some
nice tree textures with my rigor brush. So no need to create the
entire pathway to the sides. I'm just adding all
these tree structure. So always use your rigor brush when you are doing all
these tree textures. So you can see how
beautiful it is looking, starting from a bigger tree and ending towards the smaller ones. Also, I'm extending some lines below just to show
that these lines are extended from the area which is the snow
area which is below. So a little area of lines
I'm just extending. We'll also add some
snowy textures to this black area as well. So using my fan brush, just making the color more
lighter than the base color, and just adding
some nice textures of snow here and there, some vertical, some horizontal. Always use dry brush
when you're creating these textures and
thick colour of white. Try not to wet your brush, use completely dry brush, then only those textures
will come up very perfectly. So just make your uh this
brush in 90 degree angle, and just use the tip of your brush to
create these textures. You will see magic happens when you create these textures, especially the dry
brush texture. It's a very amazing way of creating some
beautiful snow textures. So you can see I'm just
filling this area with a lighter color of this and just filling it up the
pathways so slowly, slowly just adding the
lighter textures all over. So again, we will add
some more textures below. Now we will use our rigor brush, the same liner brush, and use that darker bluish color and make it a little fluid, just making it a
little more fluid, and I'll first outline it. With my rigor brush. So first, I will just do the outlining where the
horizon line starts. So this is my horizon line, and above, there is snow. So try to use very thin color, then only that this
thin line will come up. If you will use thick color, then thick line will come up. So try to use a
little watery color, then only those thin
lines will come up. So some textures, also, I'm adding some lines and
giving shape to this path area. Also, I'm shaking
my brush so that it doesn't become very,
like, sharp lines. I should be like
a crooked lines. So try to make it not very
clean, smooth, circular lines. So slowly, slowly,
I'm just building up the shape of this path, and you can see when
you shake your hand, literally, you will see how these beautiful
shapes are coming up. So try to shake your hand
a little bit and then try this texture,
this outlining. So we don't need a very
perfect outline of this. Somewhere I'm adding
the edges also. So this is the side
pathway which is there. Some edges also
I'm trying to add. So you can see already
the shape is coming up of this whole snowy
area which is there. Also adding some
more lines below. S so now we will add some more snow since there's a layered
snow over here, so we will be adding a layer
snow technique here as well. So taking a lighter
color of this blue and a little bit
more of this crimson. And I'll just create the line. I don't want a very dark line. So I'm just creating a very
light line just to show that there is a layer of snow
which is there on this, making it a little more darker because we want this
to be visible clearly. So just adding some
black and making it more darker and just adding the same technique of structure as it is
of the outside one. And this will show that there
is a layer of snow which is there on top of it. Similarly, one more layer, layer by layer,
this snow is there. So this is how we can create
the layering of snow. After that, we'll add
some more details to it. I've just created the lines, taking some nice white, thick color and mixing
it with this red and a little bit of this blue and just adding some
textures in between. Just adding some textures with the corner of my fan brush. Again, your brush should be dry, not wet when you're
creating these textures. So try to use the side corner of this fan brush and create the nice and
beautiful textures. Also adding some textures
to the main ground. So very easy way of
creating layered snow. So again, a little bit
more lighter color on top. So you can see how beautiful this layered snow is looking. I really liked the effect. Also adding some thin
color and just adding some thin bluish color and just making it once more
with my round brush. When you add thin
layer of this color, it looks like a glazing effect. So that's why I'm adding a
very thin layer of this color. So again, a little bit of white and this color and just
adding into the main area, which is the area which
is touching the water. After that, we'll create
the water details because water details are also left out and the mountain
reflections. So all these things, little bit of snow above, thick color. Try to use thick color. So you can see how beautiful this whole above area is looking once it is almost
done above part, we have to do the water part and a little bit
of this snow part, giving a little
highlight of bluish to this edge and also some
white addition to it. Slowly, slowly, all
these steps take time, but, again, a little bit
more of why I'm adding. So the more and more you
layer to the techniques, the more beautiful it looks.
39. Silent Blue Winter Water Details: Welcome back. So let's start
with the water details. So first, we will draw the tree lines and then we'll draw the reflection
of the mountains. So let's first draw
some trees which are there on this ground. So some pine trees and
some normal trees which I will be drawing on the
part which is here. So some big pine trees. Now, this is you want you can draw it or
you can leave it. But all these trees
and lines add actually more realistic to your painting, so more reality
to your painting. So that's why I'm adding a little bit more
trees over here, some trees which are there
on this ground part. So some random tree shapes. I'm just adding same pine
trees, similar pine trees. Just here and there,
I'm just taking out the leaves just to
show that there are lots of pine trees which are all overlapped
one on top of the other. Some more tree lines to the
sides also, I will be adding. Make your color
thin and fluid when you are trying to draw any
tree lines or anything. Try not to use very thick color. Otherwise, everything
will turn out to be very thick and very messy lines. So try only thin colours,
not thick colours. So some more lines and some more tree stems and
coming out here and there. You can also add some
grasses here and there. So some more tree small small
tree and tree branches. I'm just adding some
small small grasses. So this is how you have to
just add the whole tree lines. Also, I will add some
snow on top of it. So just adding some
snow over here. So even if you're adding
snow and everything, try to use thick color. Very thick and milky
color for the snowy part. Don't use thin color. Just adding few snow on top of the black lines and some on these smaller
smaller tree lines. Small small thick snow. So you can see how beautiful this is looking when we
have added trees and some snowy tree lines and everything and some stems
which are covered with snow. So take thick white
color and then only add these all snowy textures. So now let's add some water reflections
on this mountain part. Already, we have drawn
the upper mountains or reflection part is left. So we will add some
reflections also. First, outlining
this with black. The outer outline, which I'm doing is completely with black, just to show some depth to this whole land area,
some thick lines. So just some thick lines
which I'm adding over here. So you can see when we have
added the thick lines, now the depth of
this is looking. It is looking like there is
a depth in this painting, there's a depth in
this snow part also. So that's why sometimes we
require to add two lines. One is with the light color and one is with
the darker color. So now we will add some textures of the reflections
using my flat brush, small size flat brush, mixing this color with white and similar
color I will use, which I have used on the top. And I will just create
some nice reflections. Just first taking my dry
brush and pushing it down. Always use dry brush when you are creating
these textures. So drybush technique and just
pulling that color down. Using my tip of my brush, and don't take too much color on your brush when you are
using this technique. Again, taking some more
darker color and pushing it down just to show the
blackish area which is there. So more lines, which I'm
pushing it down here and there, just to show them the textures which are there on the top. This is how we create
the snowy area. Now, this area is
actually yellowish area, so I will make it
more yellowish. So first, I will
leave this area. And first here I'm making the horizontal lines just
using the tip of my brush. This will create a nice shape of this whole mountain and also the tree lines because the reflection
is not very smooth. It is always zig zag type line. So that's what I'm
trying over here also. So more lines on this area. So very interesting technique
to create the reflections. Because of this reflection, this painting is
looking so real. So yes, do it slowly. Don't use very watery brush. Use a damp brush and
create all these textures. So all these blackish textures
also over to the sides. So here I will add
the yellowish texture which is there because
the above part, which is on the top
is more yellowish. So I will add yellow
color on top of that. So taking yellow and
adding here the again, horizontal direction,
some textures of yellow. I will also make a little tip more like a pointed mountain because it is looking like flat. So I will add some
more lines here. Just taking some again, white color and a
little lighter color and adding some more
textures to the sides. So this is how we have to blend the colors and mix the colors by creating
these lines and textures. So this is how I'm just trying to add the lines and the
textures, lighter color. So just giving a little shape. So this is the area where
this is the snow area, which is below the water that is also taking the same color. It is darker color
and just creating, again, same textures like that. So this is how I'm just filling the color along
with the textures, adding more blue and
little bit of black and also blending this
with the lighter color. Filling it up in
a similar manner, moving the brush in
horizontal direction. Now below, I will add a little bit more
darker version of it. You can use bigger size
brush also to fill up the below part because below part is a little darker
and above as it goes over, it is more lighter. Just filling it up
with the darker color. So try to use either a
smaller size flat brush or round brush for
filling it up. Don't use very big size brush. Otherwise, it will be difficult
for you to handle it. Always use a smaller size brush which you can handle where
you can handle the paints. So try to use a
smaller size brush and a little bit more
here white color, the lighter color, and some
more darker colors below. So you can see how beautiful this water is looking
once we have added. Now, with my damp brush, I'm just mixing and
blending the colors slowly. So I don't have any
colors in my brush. I'm just blending it
with my damp brush. So this is how you can blend the colors before
the color dries. So if the color dries, you will not be able to blend.
40. Silent Blue Winter Final Details: Welcome back. So
let's start with the final part of this painting. So the underground
snow which is there. So let's draw that first. A little bit of pointed, mountain I'm just trying
to draw over here. So just extending
that darker lines and also this yellow
color which is here, just extending it and
making it more pointed because one which is the bigger mountain
is quite pointed. So just making a little pointed. And now I will just add more
snow lines, which is nice, thin lines of white
color here and there, just to add some snowy textures that the water is getting, like, dry or something. So just adding some
nice thin lines of white just to show that these all are freezing
and everything is getting like just some white lines. So now we will do the
part which is here, the snow part which is
frozen inside the water. So let's do the
first, the outlining. Simple with blue color. I'm just trying to outline this. And there are some lines inside this snow which has a crack or something like a
line which is there. So that also we'll draw. But first, I'll just block in once more this entire
thing with the same color. So just giving a little
texture type blocking, not very smooth blocking
over here because I want some textures to be there brush textures
to be there. So that's why I'm not doing very smooth blocking over here, adding some morehlow blue
to the area which is there. So you can see now the textures. So it's not very
smooth blocking. So this is how we create
some textures inside this. After that, I will
just draw some lines with the darker as well as
with the lighter colors. Again, taking my rigor brush and just creating some
more lines or we can use a round brush of size one or zero and just creating
some nice highlight, very thin color, and just creating a nice highlight
of blue to the area, which joins the water
part, the darker area. Then comes the lines which are very thin lines
which we will be drawing. So again, taking
blue and black mix and making the color
not very thick. It should be thin
color and just drawing some lines the layers which are above layers
are also below. So just I'm just trying to
draw some layers over here. So you can see wherever
there is water, water also if snow is above, water also freezes below.
So it's like that. So some more lines
of darker lines of this so just taking some more lighter color and
just blocking this part. This part is actually
the reflection of the above which is above snow the above pathway
which is there. So just covering it with
a little lighter color. So just adding some more lines, taking some white colour, thin white color and
adding some lines over here also just to show
the reflection of this snow. All these small, small details actually add the realism
to the painting. So if you want to draw
something realistic, give a little shadow and
a little depth to it. Just adding some white textures here and there in this part. So since my thing is
wet a little bit, so it is mixing and it is turning into a
little bluish color. So now I will just take again
my rigor brush and create some white lines over here just to show some
cracks or something. So here I'm taking
very thin lines. Try to draw as thin lines as possible in different
different shapes. So straight, some slanting, so different at a different
different angles. So this will show
actually the cracks which are there inside
the spotter part. So try to draw it very
slowly and very thin lines. Try to draw as thin
lines as possible. If you feel that the
line is very dark because I think there are some of the lines
which has become thick, and I will make the
lines a little bit more thinner by just
applying a layer of again, one more color to it, one more thin layer
of blue colour to it. So this way, you can just make your white color a
little more tuned down. So just adding some thin
lines here and there. So thin lines to the edges also. So we can see not to
this part because this part is a reflection
of the one which is above. So the line should
be till that part. So if you're trying
out this painting, do tag me on my Instagram. That is Mohini Art Gallery. I will love to see
your artworks. So try to do it as
much as possible. I'm not telling you to do
it exactly what I am doing because it is not a
very easy painting. But yes, if you will follow
each and every step of mine, I'm sure you will
be able to do it. So try to just add
few more details, and then we are done
with this painting. So just a few more details
are left, final details. So white textures, again, I'm adding on top just to
make it more highlighted. This white area, which
is the snowy area, some more white textures like
a straight line like this, adding the textures
to the snowy part. A little bit more snow to
the areas where there is, just to make it more snowy,
adding thick colors. Now again, taking this yellow
color and mixing it with a little bit of white and
making this more prominent. Just when you add white, the yellow color becomes
more, prominent. So just adding it again. See, the more and more
you layers the color, the more realistic
your painting looks, especially in acrylics. So this is how it has come up. So I feel that this line is
very thick and here also, I will just add a little layer of yellow, very thin color, and just a thin layer of
yellow I will add over here, just a glazing effect, which will create a
nice yellowish light on that and some more yellow
and white over here below. So you can see, just making all these colors a
little bit more lighter, taking a thin layer
of either blue. If your color is wet, you can just add one layer of damp brush and it will be done. But if your color is not wet, then you have to apply
one thin layer of blue, just making it a little bit
more darker, this area. Adding a little shape to this. The last part is left
and we are almost done. So you can see how
beautiful it is looking. I really liked this
painting a lot, especially the snow part. I really liked it the snow
and the reflection part. So just taking blue colour, make it thin and just
apply it on top of it. Just to make this white
color a little more fainted, should not be very bright. So just adding a
thin layer of blue. That's it. And so you can see
this white has tone down. So this is how you can
tone down the colors also. So this is one of the technique
of lowering the colors, making this line
a little bit more prominent the reflection
of the above area. So, finally, this is done, and I'm sure you will
love doing this painting, and you will really enjoy
doing this painting. But try to do it with full
patience and discipline. Don't do it in a
hurry, take your time, take breaks, and then do it. Don't try to do it in one go. So take breaks and
do it slowly and enjoy each and every process
of small, small details. So now we will meet in our next class with a next beautiful painting that is more
beautiful than this. And I'm sure you
will love that too. So let's begin with
our next painting. This is done. And thank you so much
for watching it.
41. Golden Sunset: Welcome back. So
let's start with a new painting that
is golden sunset. So let's first draw
a little sketch, and then we will
do the painting. So a little bit more
sketching is here. So since we have to draw
the bridge and everything. So this is the path
which is below, and then comes the above part
where there is a bridge. You can use like half
semicircle thing, or you can just
draw it directly. It's totally up to you
how you want to draw it, or you can use something like half to draw a half circle
or something like that. You can use a compass also
for drawing that half circle. Anything you can use any
circular thing and just drawing a nice round
circle below first, which is the underground area, which is below the bridge part. This is actually the
part which is below the bridge and above
is the bridge. So just drawing it
with the circle so that it is uniform and clear. So you can use any circular
thing to draw this. Try to use same size
or a little bit of, like, a bangle size
or something like that or a bracelet
size you can use. And just drawing one more half circle like
this of a tunnel. So it's a tunnel
below and above is the bridge where the
water is flowing. So a little bit of the stones and rocks which
are below the bridge. So just drawing that I won't be drawing each
and every details, just a rough sketch. And later on, while painting, we will draw each
and everything. So just a rough sketch
I'm drawing over here. So a little bit of Now, the above is the bridge which
is moving like half circle. So above is the bridge part, below is the foreground, middle is the water part, and then comes the trees
which will be above, which we will be directly
drawing with our colors. So this is the sketch
which we will be doing and little bit of the
snow which will be there. So sketch the bridge
which has two ways. So above way, also,
I'm just drawing it. So this is the bridge part, rest, little bit of mountains, build up behind, and
then comes the trees, which we will be drawing
directly by using colors. And there is a little
foreground area which is behind the bridge tunnel. Which is there. So that also I'm just
drawing a sketch. So let's discuss about the
colors which we will be using. So the first color
which we will be using, these are the colors
which we will be using. So let's discuss
about the colors. So first, we'll start with
the background, then middle, and then the foreground.
So, likewise, we will go. So first, color, which
is black, then white, AlzarinGrimson, cadmium
yellow, then pains gray, windsor blue, and lemon yellow. So these are colors
we will be needing. So let's start first with
the upper part of the sky, which is the kind
of purplish color. So you can directly use
purple color or you can make it by mixing
Azarin and blue color together and a little
bit of white because I don't want a very
dark violety color. I want a little subtle color, which is by mixing
white, you can get it. So it's like the little
bit more of red, more of white to get a
nice lavender type color. This color we will be using for the top part of the
sky which is there. So just moving the
brush in circles. Now, this painting we
will be doing just by moving the brush in
circular motion, and totally we will
cover the above part. And then as we will go down, it will be more towards
the warm color. So like this with
my round brush, take big size round
brush and try to move the brush in circles and
cover this entire above part. And as I'm going down, I'm making a color
a little lighter. Especially to the other side, and I'm just moving
it in circles. Now, the above part I have
done with this color. Now we will proceed
with the below part, which is a little
bit of orangy color. And I will first mix this
Azarin and white first and just try to blend this color
with this purplish color. If your color has dried, again, apply it and try to blend this color with that
light pinkish color. So just taking a little bit more of white and
making this side a little light and just
moving the brush in circles. And as I will go down, it will be more towards
the orange side color. So first, I will just wash off
my brush and then I'll mix some orange color with the Alizarin and this
cadmium yellow mix, a little more orange color and a little bit of white to
just tone down the color, as you can see in the
picture, how it is. So just moving the
brush in circles and trying to blend this color
with the above color. I will not push this color more towards the white color because this color will react with this violet and it will turn
into a little muddy color, so I'll not turn the color
towards the whole vilet color. I'm just blending it. So you can see my above
color has already dried up, so it's difficult to blend
when your color dries up. So it's fine. You can leave it just like that
in the first coat. In the second coat, we will
do by layering it again. So just moving in circles and trying to cover
the above part. And as we will go down, it will be more towards
the yellowish side and, again, the orange side. So like that, we have to
move our whole painting. So it's a very bright
and beautiful painting, as you can see in the image. So I have tried to cover each and every part here
so that you will get it, how to blend the colors, how to move the
brush in circles, and how to make the nice, beautiful, uh clouds
and everything. So just use your bigger size round
brush for doing the sky. Don't use a smaller size brush for moving the brush in circles. So you can see,
I'm just covering this whole entire thing
with yellow color. So this is lemon yellow, which I am using here. Sorry, cadmium yellow, which I'm using here,
not lemon yellow. So again, I'm taking this mix of this orange
color, and again, I'll apply it above and
just try to blending the color with this yellow color and a little bit above also. So this is the first
coat which I have done. I'll wait for the
first coat to dry. Then I will start
doing the second coat. First, wait for the
first coat to dry, then only apply a second
coat on this color. Otherwise, the colors
will start lifting up. Because when the acrylic dries, it becomes sticky
and your colors will start lifting up if you
apply again one more color. So I'm just applying here
below a little bit more like a tomato color and just a
little bit to the horizon line, which is there just
to show that there is a sunset which is going on, and that area is
completely orange. So after that, we will be just blending this color with this yellow color so that
there are no sharp lines. So this is all we have to do it once more
because you can see there are lots of
brush marks and the color is also
not very thick, so I'll apply second coat so that the blending
becomes perfect. And then the bridge part, the below is the mountain
part, which is there. The mountain part, again, is a similar color, but a lighter version
of this violety color. So I'll just mix a
little bit of white, and I'm applying
it over the area which is just above the bridge. So just adding more white
and with my same brush, I'll just apply it above Try to use only round brrush when you
are blocking such things. You can use a smaller size
round brush also if you want, but try to use roundush only for blocking all these things because they
are very small, small things which are there. Now I am doing on a five
is to seven inch canvas. You can use any canvases, any bigger size
canvases you can use. But again, if you're
using bigger size canvas, try to use a bigger size brush, especially for
blocking the colors. Now I'm just taking this Windsor blue
and mix of white and also a little bit of this
paints gray I will be mixing. And just this color, which I will apply it
on the below part, which is the foreground
part where the snow part. So just covering this whole
snow part with this color. If you don't have windsor blue, you can use Prussian blue and
a little bit of black mix. You'll get the similar
kind of color. Add the entire area with
this similar color, making it a little
bit more gray, adding gray and
then white and just covering the entire thing
with this same color. Don't worry about the brush
marks over here because these are the snowy area where we
will be adding textures. So all these brush marks will be gone when we will
add the textures. So again, a little bit of snowy area is over
the bridge also. So slowly, slowly,
we will move on to the blocking of the details. So first, we have
done the upper part, and then the lower part,
middle part is still left. So we are just covering all the snowy area
which is there.
42. Golden Sunset Background Blocking: Welcome back. So
let's start further. So now let's start blocking
the bridge which is there. You can see it's a
very dark color. Now we will make that dark color by mixing all the colors. So let's make a
nice brown color. If you have brown
color or burn Sienna, you can use it directly, but if you don't have it, and we will learn how to mix that color and
make that color. So first, we will make a nice
yellow and orange color. And after that, we will add just a little bit of
black to it to make a nice dark brown color and a little bit of white
also you can add. So this is a little
lighter color, which you can see over here, but I want a little
darker colors. So I'll just add
more black to it and a little bit of just
check which color it is, and then we can just I think this color is
a little light color. So I will just mix a the
entire thing with this color. Just applying it all over, especially the area which
is the bridge area. So make the color little
milky so that you will easily be able to
apply these colors. So I'm using my smaller
size round brush for filling this up because
this area is very small, and if you will take
a bigger size brush, there are chances
that colors might go out, which I don't want. So that's why I'm using a
smaller size of round brush, and slowly, I'm just filling
up this whole entire bridge. Try to paint it very carefully within the
lines so that you don't have to do the things again and again and you don't have to correct
the mistakes. So first outline the shapes and then try to fill the colors. Any color you can make just
by mixing the primary colors. So this is you can
see how we have made by just mixing the colors. So try to use the primary colors and mix the colors
so that you will learn also how to
do the color mixing part because color mixing
is very important. We don't have each and
every colors every time. We should know how to
mix and make the colors. To know more about color mixing, you can check out my class, which is the class for
complete bigness for acrylic. You can check out that
class and you will see how to do the color
mixing thing. Just making more colors, just making it a little
darker and a little white. Whenever you're
mixing the colors, try to mix the colors in one go because sometimes it happens
that again and again, you will mix the colors, different type version of
that shade will appear. So it's better to mix
the colors in one go and then do the
filling of the colors. So it takes time because you can see this side color is
a little bit darker, but it's fine since
it is a bridge. So I want this side color
to be a little darker. So that's why I'm using that. But if you're mixing the colors, try to mix it in one go. Don't try to mix it again and again because colors may vary. Now I will just fill
the above part, which is above part
and the below part. Below part is a
little bit darker. So first, I'm just using a
dark color of brown and just applying first the
lower tunnel part which is there and
covering it up. And just doing it very slowly. I'm not disturbing
the shape of it, trying to fill inside the shape only so that my colors
should not go out. And whenever you have to
draw any lines or something, try to use a little fluid
color so that you don't do any mistakes and just outline it and then
fill the colors. Then your colors
will not go out. So this is how we should
do when we are doing any painting so that our colors should not go outside
the boundary line. So just filling it
up with this nice, dark, brownish color, which
has more black in it. After that, we will
do the leg part also once we have
done the bridge part. We are focusing here of just filling the
colors. That's it. Just filling the
colors and giving a nice dark color to it. Above also, I am just
first outlining it, and then I will fill the colors. Whenever you do such
type of paintings, don't do it in one go. Try to take breaks and then do all these
types of paintings because these are all quite detailed paintings and try not to finish it in one go. You have your
recordings available. You can watch it anytime. Watch it in bit by bit
and do it bit by bit. Then you will see the result of your painting that will
come out very well. So don't try to do it in one go, take breaks and then do it. Now we will do the lower part. You can see the part which
is near to the tunnel is more like glowing and the part which is
far, it is more dark. So first, we will make a nice pinkish color with a little bit of this violet added to it and just cover
that part first. So slowly, slowly
as we will move towards the foreground side, it will be more darker colors. So first, I'm just focusing
on the filling of colors, the blocking of colors, and slowly, slowly, I'm
just filling it up. Then I'm just taking this
lemon Sorry, cadmium yellow, and just applying over this pink when you take I
haven't washed off my brush, so already pink is
there on my brush. So that's why that color is turning into a little
bit of orange. So I'll just wash
off my brush and mix a little bit of
lemon yellow also to it to give a little
more brightness because that rays
will fall on this, so this will become
more yellowish. So that's why I have
added a little bit of lemon yellow also to
this cadmium yellow. So just applying here a little
bit more yellowish color, and the rest of the colors, we will be making it a
little bit more darker. So for the darker colors, we will be using this
Windsor blue and black mix, and we will cover
the entire thing with this dark blue color. So if you're using Prussian
blue or any other blue, try to add black into it and you will get this type of color. So we'll just fill this
entire water area, which is the river area
with this dark color first. Currently, we are not focusing about any details or anything. We are just focusing about
how to block in the colors. So I'm just thinking about how we have to
block in the colors, what colors we need to block in. So that's all we have
to do in this part. Once this is done, we'll do the second
code of blocking, and then we will start
with the detailing. So you can see
blocking is also very important when you start
painting anything. Because this is the time when we decide which
color to use where, and after that, slowly, slowly, we go on towards
the detailing part. So if you follow each
and every process of mine over here, I'm sure you will be able
to do this painting. This painting is very beautiful. But yes, you have to give a full focus and concentration
on this painting. Then only you will
come to that result because these all paintings teaches you a lot of patience
and a lot of discipline. And a little bit discipline goes here and there
and your painting will be ruined. So yes. So try to do it very
slowly, very patiently. So you can see we have done
all the blocking here. Now we will start
with the detailing.
43. Golden Sunset Sky and Snow Details: Welcome back. So
let's start further. Now we will start
again with the sky. Now my upper part has
completely dried. Now I can apply the second
coat on it using my brush, which is the Philbert brush, I'm just making
the similar color which we have used earlier. That is the lavender color. So just making a
nice lavender color. And again, I'll
start from the top. You can use your round brush. I'm using your Filbert brush. You can use any round brush or Filbert brush of your choice. It's not like you have to
just use round brush only. Filbert brush also
has a round tip, so you can use Filbert
brush also here. So just making the motion in circles and just filling
the above part first. Try to use thick colors because thick colors
don't dry very fast, and you will be able to
blend the colors with the second colors because you'll get a time to
blend the colors. If you will use thin colors, the colors will dry in seconds, and you will not be able
to blend the colors. So just trying to first
apply the first color, then we will apply
the second color, which is the orange color, as you can see over here. But first, we'll make a
little pinkish color, more pinkish towards
the sky part. Which is the horizon
line over here. So just making it a little bit
more pinkish orange color, which is the horizon part
of it and just trying to first make this more orange because this is the
area where sunset will happen. So just again, adding
this cadmium yellow and trying to blend with
this nice orange color. So just washed off my brush and taking this lemon yellow and this cadmium yellow mix and trying to blend this color with this nice orange color. So again, taking lemon
yellow and a little bit of this cadmium yellow mix and just trying to blend the colors. And as I'm moving above, I will make the
color more orange. So just applying a little more
orange color with a mix of white to it and just covering
the above part also. So this is how we
blend the colors. Again, try to use thick colors, don't use thin colors. Sometimes with damp brush, also, you can just
blend the colors. No need to use the
colors again and again. I'm just blending the
colors with my damp brush. So just blending it nicely. And as I'm going above, I will take this pinkish
color and I'll just try to blend it with
this purplish color. Now, my purple color
is not completely wet, but let's see if it
can blend or not. Mixing it with this
nice pinkish color and trying to blend it
with this purplish color. Now, when I'm using
this pink color, when it goes into
this purple color, that is the lavender color, it will automatically blend because when it reacts with it, it will turn into more
of a lavender color. So this is how we have
to do the blending. Now we will add some
skies and clouds also a little bit over the above area where we
will be making clouds, but we have to wait for the
colors to dry a little bit, and then we can make nice clouds with the lemon yellow color. So I'm using my flat brush over here and just taking a dry brush and just adding some
nice thick colors over here where there
is a straight clouds, these are these are not
very detailed clouds, very straight form of clouds and try to use a very damp brush. Don't use wet brush and just add some thick colors of this
lemon yellow onto the top. Which will create a very nice, beautiful clouds over here. So as you can see, try
to use thick colors. And just try to smudge the
colors here and there, just adding a little bit
of white to make it more vibrant and more glowing,
this yellow color. This lemon yellow gives a very nice thick
vibrant color effect when you use it as a cloud, just taking more of white and just mixing it
with lemon yellow. And again, adding some more
clouds here and there. Very easy way of creating clouds just by using
your dry brush. Don't wet your brush, use completely dry
brush over here. So this way, we can easily add any clouds by using just
the dry brush technique. Now I will just add the
sun which is there, but we will first do
more detailings of the foreground and then we'll start adding the
sun because we have to wait for the part to dry. So let's add first the
textures in this part, which is the foreground part. You don't have to do
the filling again. You can directly add textures because when we add textures, automatically, this entire
thing will be filled up. So just making a
little lighter color. And just adding some
textures with my fan brush. Again, when you're
using fan brush, use dry brush and
thick colors and just try to use the tip of your brush to create
these textures. Try not to use wet brush. This all things
should be done with a dry brush technique without
adding any water to it. Just the colors and
the tip of the brush with a very light pressure
of brush onto it. And you will see very
beautiful snowy effect on the ground will be created
with very nice textures. So you can see slowly, slowly, I'm just adding some
textures here and there. There is no pattern in here. You just have to fill
the entire thing in different
different directions. Similarly, I'm just adding
it on the above part also. This is how we add
textures to the snow area. Now we will add again, I'm taking my filbert
brush and just making a little more
darker color this time. You can see a little bit
more darker color and adding textures here and
there with my filbert brush. Now, when you're
using filbert brush, try to use the smallest size
brush of size one or two. And again, dry brush technique, don't wet your brush and use it little color and try to
give textures like this. This will create a
nice more effect, more layering
effect to the snow. You can see it will look
a little bit more real. So this is how we have to
add with our filbert brush. Similarly, I will do for
the above part also. So a little little textures, very little color, not too much. So once my sky rise, we'll create the sun. And let's first add
some details to the snow part with my rigor
brush using black color, making this color a
little bit thin to create the nice and thin lines. So just using my rigor brush and creating some
nice thin lines. So let's add some nice lines
and some edges to this part, which is the part, which is the snow part. So see my color has become
a little more fluid. So we can just avoid
just by removing this color a little bit with my water because
my color is wet, so you can easily remove
the colors with just water. Later on, we'll fix this part. So let's remove extra water from my brush and
directly use the color. Otherwise, again,
your colors will spread if you use too
much water in it. So you have to be careful when you're using such
a liquid color. So again, I'm just removing all my water from
my brush and again, making a little color a little
more thick than watery. It should not be watery. It should be fluid,
and just creating some nice edge of
this whole snow area, which joins the water part also. A little bit of
paints gray also I'm adding to it and just
giving a little edge to this area by adding
some random shapes. Just giving a little
more edge and depth to this whole land area. Just some random shapes and
textures here and there. This will look like there
are some parts which are not covered with snow or
some rocks are there. Similarly, I will add some textures on the
other side also. All these things add a little
depth to the painting. Just some outlines, and
it's not a proper outline. It is like a zig zag outline
and a little bit of lines. We will also add this side also. If you have seen my
previous painting, I have added these types of textures in the
previous painting also. So similarly, we have
to do this also.
44. Golden Sunset Bridge Details: Welcome back. So
let's start further. So now let's do some
detailings of the bridge. So let's start with a little detailing using my rigor brush. Wherever we need details, we will be using rigor
brush or liner brush. So let's start further
with the bridge details, and then we'll do the
mountains, backside trees. So taking again, black color, making it a little fluid. And first, we will do
a little outlining of this whole bridge and little bit of details of the
stone shaped details. So let's start with the
first with the outlining. So a little bit outline was
left in this river part. So I'm just outlining it first, and then we will
outline the bridge. So just making a thick
outline with black. Now we will start outlining this bridge
part which is there. So take fluid color,
take a thin color. Don't take thick color.
Otherwise, you'll not be able to draw thin lines, and be very careful
while drawing all these lines because all these lines
should be very thin. Also, just outlining the part which is the half circle part. And then the base part, also, I'm just outlining it and giving a little
texture also to this. Also, we will make
some rock shape or stone shape which is there like horizontal
and vertical lines which we will be drawing here. So outlining it. So first, I'm just making a nice oval shape with
same black color, and then we will
create the lines. And. Do it very carefully and slowly
when you are doing it, make your color fluid, and then only draw
all these details. If you have any mistakes, if you have done any mistakes
while drawing the lines, you can always
cover that mistakes by using the same
background color. So in acrylic, there is an
advantage that you can cover the mistakes by coloring with
the same background color. Little bit more textures, I'm just adding to the sides and just creating some lines. Mm. So try to add the lines slowly. All these things take time, take your time and draw
very slowly the lines. In the entire bridge, we will be drawing the lines, horizontal and vertical lines. So first, I'm just drawing first with the lines
which are here. If you have excess
color on your brush, remove it and then
draw the lines. Try not to use too much
color on your brush. It should be a thin color but not too much color should
be there on your brush. So just drawing some
nice vertical lines all over this whole
half circle area. We will also be drawing some lines on the
bridge part also. Again, taking some
more black color and drawing some lines on
the side of the snow area, which is there just to create some pathway which is there, just creating some lines
and some textures. So these are very small, small details which
we need to take care. And now we will be adding
some more white textures to this snow part
using my fan brush, which will be completely
dry fan brush. Try to use a dry brush whenever there is
any texture part. So completely dry
brush and taking very little little white color
into the side of my brush, and I will apply it all
over this snow area. Try not to press your brush. Do it with very light pressure. This brush creates a wonderful texture effect
when used perfectly. So try to use it when
it is dry, not wet. Whenever we create any textures, try to make it with
complete dry brush. Little bit of dark
texture we will be applying onto this bridge area. So just taking black and applying the textures all
over this bridge part. Oh So slowly, slowly, we are building the
shape of this bridge, and we will be moving on
towards the details also. So again, taking
my fan brush and applying more of this area, which is the brownish color, which is a light brownish
color which is there, applying with the
same fan brush, some more textures, just
some horizontal textures, just to give a little
highlight and the rusty look to this bridge. So this is one of the
technique of applying some textures to the
bridge or to any area which is there just to make
it look more realistic. Now, again, taking
my rigor brush and creating some more details. But first, we'll add some
more textures to this area, which is the snow area, adding some more
lighter highlights to this area, which
is the snow part. So the snow part is done, or we will start doing further.
45. Golden Sunset Sun Details: Welcome back. So
let's start further. So now we will be adding some more cloud
details and the sun, which is setting down
and also the trees, a little bit of details we
will add over there also. So let's first create
some more clouds. You can see that clouds
which we created earlier has been merged into this,
so whole background. So I'm just adding more
by just mixing white and lemon yellow and creating
it with my rigor brush. It's a completely thick color. Don't use any water when you are creating such
thick textures. Just take thick color and try
to create some nice lines, thick lines and just spread
it all over to one side, just to show that there
is a few clouds which are there with glowing clouds. So very easy way to create
with the rigor brush. Also using my round brush, I will just smudge this
color a little bit, using my round brush. Again, this is also a
completely damp brush, so I haven't added
any water to it, adding some more cadmium
yellow in between, just to blend the
colors a little bit so that these lines does not
look like a sharp lines. So now we'll just
add a little bit of textures to this back area, which is the mountain
area which is there. There we will add some more
textures, taking again, my fan brush and taking
some nice grayish color, adding some more textures
over here, again, dry brush. Just add some textures
very lightly, and then some more
snowy textures with a light white color. So just to make it more
look like that these are very small small trees which are there and there is snow
which is covered over there. So just adding some more
textures with white. Try to just use the
tip of your brush, little bit of the
purplish texture above, very small textures are these, just to look like that there are snowy areas
which are behind. And then we will add some
areas of like pine trees, which are very small pine trees over there, that
also we will add. But first, let's add one
very small tiny sun, which is setting down
just a circle and some more colors and some
more rays we will be adding just with a little bit
of the orange color. First, I'm just making a
circle with this orange color, and then I'll just spread
the lighter color all over just to show that the rays are falling in all the direction. So you can see how small it is. So now I'm adding some
rays with my round brush, not very big rays. I will add just small. And that's it. Just taking a little bit more of white and adding
it in the center. So adding some more details
of this orange color below, just to show that there are some orange rays which
are falling below. So just adding that all
these small details make your painting look
more and more beautiful. So try to do it as slowly
and patiently as possible. Don't do it in a hurry. Now I'm just making a
little darker color and creating some back trees, just creating some
lines in the backside, just to show that there are
some trees which are behind, making it a little more like
a darker violety color. And now we will start
detailing of this bridge. First, I will add the snow part which is there on the top, and then we'll start
doing the details. So just using my again, round brush and mixing
it with this blue and white and a little bit of this Azarin to make it a
little lighter or grayish, or lighter, like, snowy color. And I'll just fill
the above part first just to give a
shape of the snow. Just to add some snowy textures on top of which is the
railing area of it. So I think this color
is a little bit dark, so I'm just making it a
little bit more light in color because I don't want
the colors to be very dark. So just adding on top
of it, this snowy area, just adding a little
bit more of blue, and just adding the top
area which is there. It should not be a
very straight line, like a little bit
of here and there, you can make the textures
just to show that there's a thick snow which
is on the railing. So first I'm creating with
the little bluish color, which is the color of the
snow and also I will add some snow on the other
railing part also. Also, I'm giving
a little shape of the snow which is
falling a little bit. A little bit of
falling off the snows. I'm just giving a
little textures, and now I will also do for
the other bridge as well. Also, I will be adding
the snowy textures on the other railing which is there in a similar manner like we did for the first one. Now, this first at is done. Now we will do the
second layer of it. First, we will add the details, and then only we'll start
with the detailing. But you can see there is a
back trees which are there, so we will add some
more violety color which is there on the
back side as well. First, let's add the back part, which is the tree part there. So first, I will
add a little bit of shapes at the back side. Making a color a
little more violety like dark violety color. And I'll just cover
the back area. So just creating some shapes and then I'll just
cover this part. First, I'm just outlining that bridge line which is there. After that, I will just
cover the back area just giving some shape
of the trees just randomly and then we'll start doing the part which
is the bridge part. After creating the shape, I'm just covering it
with the same color. Now we will add some details to this bridge snow
area which is there. First, I will outline
this entire area with black color and
then a little bit of snow with a more
lighter color. So first, just taking white and a little
bit of bluish color. First, I will add a little bit
of lighter color on top of it just to give a little more
depth to this snow part. And then we will add the black outlines to
this all snowy thing. So just taking a
little bit more of white because my white is over. So in this painting,
a lot of white is used over here because
this is a snow painting, so obviously white
will be used a lot. So first, I will just
outline the snow area, which is below just by
using a thin black color. Outlining gives a little depth to the snow part, actually, and it
looks more real. You can see how it is looking like a thick snow
which is there, so it gives a little
depth to the snow part. Similarly, I will be outlining the above part also
above bridge part also. Same way like we did
the other bridge part. Similarly, we will
be doing this, giving a little shape to it.
46. Golden Sunset Back Trees Details: Welcome back. So let's start
further with the detailing. So now we will add a little bit of the outline
to this bridge area, which is the lower area, the tunnel area, just giving
some lines and shape to it, adding some brick
lines which are there. So just taking a thin
color of black and my rigor brush and
first outlining the edge and then
creating some brick line. So just adding some brick
line details to it, creating some nice lines along
the line of the curve and creating some horizontal lines just to show that there are
bricks which are there. Now we will add some
snow details to the top. First, we have added
the dark color, then we have
outlined with black, and now we will add
a thick white color on top of this snow to give a little more snowy
effect to it. So you can see small, small details if
you add in layers, it adds more depth
to your painting. So this is how we do
the depth painting, especially the real
painting which comes. So just adding a thick
colour of white with my rigor brush to all this whole brigline
area, which is there, the railing part,
thick, snowy colors, leaving some spaces of
this dark color also, just to give little
variations of snow. So try to use thick colour. Don't mix any water in
this and try to use thick texture of white to create some nice, beautiful,
snowy effect. So this is our seventh painting. So it's not an easy painting, so try to do it
with full patience. So we have started with
a little easy painting, and as we have moved further, it has become more and more
depth and detailed one. So I wanted to teach each and every technique
which are there in landscape, especially the
winter landscapes, where there are so many
details of the snow. There are different
different types of snows which are some freeze, some are snowfall, something different different types of snowy landscape we have seen, and this is one of them. So just have added a thick
layer of white on top of it. Now we will create some details of the back trees
which are there. First, we will add some textures with black, taking again, dry brush and creating
some textures with black with this fan brush, and then we'll start
creating the details, adding some snowy textures like we did earlier
for this part. The other part, similarly, I'm doing it for this part also. Just use the side of your fan brush and
create these details. Now we will add the
tree lines which are very thin trees and some are pine trees which we will
be drawing on the back side. Like in these paintings, we have drawn so many
times pine trees, and now I'm sure you
will be able to draw even a smaller size
pine trees also. So whenever there
is no pine trees, should always be there and some tree lines
which has no leaves. So just taking
some thin color of black and drawing
some nice tree lines. So just enjoy the process
and do it very slowly. Try to create as thin
lines as possible. So different tree structures, some thin, some thick, some tall, some short. So like that, we have
to create in a mixture. So then only it will look like a trees back side which
are filled with trees. So whenever we do this
type of painting, it teaches us a lot of
patience and a lot of, like, we have to give a
lot of focus to this. So it also develops like
a focusing power to it. So we are, like,
into that painting, and we are just we
don't think much about anything else when we are doing such
type of paintings. So it's like a
meditation itself when you do such type of paintings. You don't think of
here and there and you are just going with the
flow of this painting. So you can see I'm just creating some pine trees also where
I've created a little height. So there only I'm
creating that pine tree. So just small size pine tree I'm creating and also I'll add
some snowy effect to it also. So do all these details very carefully and very slowly
because these are very small, small details, and
this will make your painting look more
beautiful and more real. You can see I'm just creating a path below just to
show that there are some trees and the tree branches and the tree trunks
which are there also. So just adding it there. And again, adding
some more pine trees. So do it very slowly,
very carefully. Use your liner brush or
a rigger brush of size zero or two by zero to do
all these small details. Don't use bigger size brush
for all these small details. Whenever you are doing
any such details, always use your rigor brush or liner brush and a thin color, not a thick color. Thin color doesn't mean it
should be a watery color. The color consistency
should not fall. It should not turn into gray, should be black only. So that much amount of water you need to make the color thin. Now I'm just making
it a little more like a pinkish color because it
is moving towards the sun, so I'm making it a
little more light color. And just little little
small trees and lines here and there.
I'm trying to add. Very thin tree
lines you can add, or you can leave it like this. It's your choice, how you want to do the entire tree line part. But try to do it
with full patience. And here also, there is a tree line in the
other side also, which we will be drawing. That is quite a big tree
line, as you can see. The other side, it is smaller, and the one which is
on the other side, it is a little bigger one. That means that tree is a little near and those trees
are a little far away. Some more tree lines, very thin colour and thin lines don't use thick colour when
you are drawing these lines. Try to use as thin
colour as possible. All these are all backside
trees which are there. So these are just
the tree lines. There are no leaves, nothing, just the tree branches and
tree stems I'm just drawing. After that, I will
draw the bigger tree. So again, taking a
nice black color and just taking a little
bit of blue also and just outlining the top part of it of the snow which is there. Outlining should be
as thin as possible. Don't use thick outlines. Similarly, I will outline
the above part also. A little bit of white. I'm adding because when
I was drawing the trees, a little bit of black
has come up there. So just adding some more white.
47. Golden Sunset Bridge Final Details: Welcome back. So let's start further with the bridge details. So now I'm just taking my small size flat brush
and just taking white and a little bit of black mix and just adding some
textures into this area, which is the area of just adding some nice shape of
square shapes over here, just adding some shapes. Just to give a little texture to this bridge part where there
are some light colors also. So just adding these shapes randomly and adding little
shapes to this area, which is the edge
area of this part. So again, dry brush, take less color and then
only try this dry texture. Try not to use wet brush when you are creating
such details. Now taking a little
darker color and adding some more textures with
darker grayish color. There is white in it, so a little bit of textures
here and there, with my flat brush
of small size. So all these details will create a little more rustic
look to this bridge. So that's why I'm adding
these details randomly. And then on top of it, we will create some brick
details which are there. Again, the detailing
we will be doing with our rigor brush. So just taking the rigor brush and creating some nice brick
details which are here. So first, adding
the textures below, which is the pillar
which is there, just taking some
thin black color and trying to add the lines. Adding some horizontal lines, and then we'll add some
vertical lines as well. Similarly on the other side also and then some
horizontal lines. So here and there, I'm just adding some
horizontal lines just to give the brick shape to this bridge. So you can see how beautiful and rustic it is
looking that bridge, just by adding some
textures to it. So this is how you
can create some nice, realistic bridge textures and bridge details and just highlighting it with
a little darker color of black just to
show the depth of this tunnel that this
area is more darker. So just adding a little bit
of black here and there. So more textures to this snow
part with this black color. Just to show that there are some areas which are
not covered with snow and there are some rocks or some plants are
there just like that. Some more grasses also we will add on this part because I feel that this
is looking very empty. So just adding some more grasses here and there with
my rigor brush. So just adding some
more grasses here and there just to make this
area look a little filled. So you can leave also or you can add some
trees also over here. It's totally your painting, so you can do anything, any creativity on
these landscapes. So just adding the grasses
here and there and also I will add some snowy textures
on the grasses also. Taking this nice
color and giving a little adding some highlights or some shadow
effect to this area, which is the grasses. So just shadow area, just a little bit. So you can see how that depth is created and how
beautiful it is looking when you
add the reflections and you add the shadow effect. And now we will add some more white textures
just to show that there is more snow over there and also some snowy textures on the grasses also
we will be adding. But whenever you are
adding light textures, make sure that your paint
has completely dried. Then only add the
lighter textures. Now, there is a big tree which is there we
will be adding, and it has a complete just
tree structure is there. There's no leaves or nothing, the tree trunk and the
tree branches. That's it. And some snow which is
covering all these branches. So simply drawing
a nice straight, thick line and drawing
some branches, which is all moving towards
the upward direction. So if you don't feel like drawing directly
with black color, what you can do is draw it with chalk pencil or
something and then do the coloring of it with black color because
sometimes it happens, we feel a little scared by just drawing
directly with black color. So it's completely fine. You can first draw
with charcoal pencil or white charcoal pencil or
white watercolor pencil, and then you can just draw
the outline with black. So just drawing some nice lines, which is moving upward direction and some thin sub branches. And also, I will be adding some snowy textures
also on these branches. Try not to create wavy lines, create some nice zigzag
lines, not wavy lines. Some more thin
branches we will add. Similarly, we will be doing
on the other side also. Again, when you are
drawing all these lines, make your color fluid and then
only draw all these lines. Don't use thick color. Otherwise, you will end up
creating very thick lines. So you can see
already this painting is looking very beautiful. And when you add all these tree structures
and everything, it looks more and
more beautiful. So all these trees
and back trees add more beauty
to your painting. So this big tree
is actually adding the whole beauty to this
painting, as you can see. So just adding some
more tree lines. And also on top of it, we will be adding snow, adding some more
grasses over here, which is the area
behind the tunnel. So just some grasses. Also some snowy textures on these trees and some small
trees also very thin thin, snowy textures, not covering the entire part of
that black color. Just little bit of textures, I'm adding thick color of white. Also on this bigger
tree as well. Just some thick white
color on top of black. Um so this tree is almost done, the water part is
left and we are done with this whole painting, which is very vibrant,
very beautiful. I really liked it. And I'm sure that you will love this painting
when you will do this. So we almost done
just a few details, and we are done with
the above part, the water part is left. Little bit of snowy
textures to these grasses. Always use thick colour when you're creating grass texture. So almost done with it. And now we will do
the water part, which is left here.
48. Golden Sunset Final Details: Welcome back. Let's start
with our final details. So this river part is left. So I'm just using my small size flat brush and
taking the color that is blue and white mix
and just adding some nice thin
layers of the lines, some of the water, just thin lines
with my flat brush. Just adding some
lines here and there, just to create some
water ripple texture with my light bluish color. Okay. So just taking again a little bit more of blue and adding some more lines. It's just adding here and
there some similar lines. After that, I'll just use my rigor brush and create some more lines
with my rigor brush, adding a little bit
of black to it, especially the lines which are there on the side
of the warm colors. So just adding
some more lines of these water ripples which are there so these lines
are not straight lines, just adding some nice
watery textures, some nice thin textures
which I am trying to add, just to merge this color
with the warm color. Just adding some nice
horizontal lines and textures. Just I'm trying to merge this
color with the warm color. So whenever we create
any water details, we actually merge
the colors like this by creating textures. Every time we merging
doesn't mean that you have to add colors
and blend the colors. Sometimes with textures, also, you can just blend
and blend the colors. So you can see I've
just filled up this entire thing with
these textures of blue. And then I will also
add some textures of this warm color to
the darker area. So just adding some
thin textures. After that, I will take more of blue and a little
bit more textures. Just small lines are these, not straight lines,
some wavy lines. Now I will just mix a
little bit of orange color, and I will add more textures towards this darker
portion which is there, adding some white also because this yellow is a little
bit transparent. When you add white, the colors
become a little opaque. Now this is how I'm
just trying to merge this lighter color
with the darker color. So just adding some
merging points here, this is the area where
the sun rays are falling. So just making it a
little more bright, just by adding first white, and then I will add a
yellow also on top of it. Just adding some more lines. So try to use little little color when you
are creating such details. Don't use very thick
color and just adding some more textures
of this lemon yellow here just to show that these sun rays are
falling on this part, just to make it more bright. Also, a little bit
more textures we will add to the darker area as well. Again, taking my flat brush and creating some more textures, just dabbing my brush and creating some more
textures of water. Some more textures
in this darker area. It's a little bit
lighter colors. So you can see this way, if you will add the textures, you can easily create the water effect and you
can see how we have blended the warm and the dark colors together just by
adding the textures. This is how we have to do when we are doing
the blending with especially during the
warm and the dark colors. Just adding more
depth to this area, which is the land area, just by adding some black lines. No. So we are almost
done with this painting, few more details
and we are done. And if you're trying it out, do tag me on my Instagram
that is Mohini Art Gallery. I will love to
reshare your artwork. And I really loved doing all these series of painting that are seven
paintings in this. So I'm sure you will
also like it, too. Like, each and every details, I have tried to capture it
and tried to explain it. And if you will follow each
and every step of mine, I'm sure you will
be able to do it. So white textures I'm
adding, watery textures. Take very little little color when you are adding
these textures, and you will be able to do it. So I hope you enjoyed this series and just
follow each and every process and you
will be able to do it. So this is the entire painting, little bit of more
yellow I'm just adding. Here in there. Now,
final detailing is a never ending task. You have to end it somewhere. So whenever you feel
that you are done, so this is the entire painting, and do try it out, and I'm sure you will
love this entire series, and you will learn a lot of
detailed painting in this, especially with your acrylics. And thank you so much
for all your support. And do check out all these tutorials and
do share your artworks. Last final details. And thank you so
much for watching.
49. AuroraLight: Welcome back. So let's
start with Aurora Lights. So Winter painting is incomplete without
these Aurora lights. So let's first do a
little bit of sketching, and then we'll
start with painting this beautiful Aurora lights. So let's start first
with a little bit of sketching using our pencil. It's a very simple sketch where we have to just draw
the mountains and a little bit of light
patterns. That's it. A very simple sketch it is. So a little curvy lines
below the center line. It is not exactly in the
center, as you can see, because I want the maximum to be the sky and less to
be the foreground. So a little bit of tree lines which is there and
then the mountains, the whole mountain range,
which will be above. So starting from the
center mountain and as we'll go towards both the sides, it will be a smaller
size mountains. A very simple sketch
of these mountains, which is a mountain range. Also some light patterns which
I will be drawing above. Simple light patterns. I'm just drawing with pencil so that when I will color it, I know where to put the colors. So this much is a drawing. Now we will focus on the colors which
will be needed here. So let's discuss about
the colors first. So lots of colors here. First color is the teal color,
then fluorescent yellow, white, serium blue, then violet, Prussian blue and black. So all these colors we will be needing for this
complete painting. Let's start first
with the background. So first, I will do these
lights which are there, and then I'll start
filling it up with the darker color that is
Trician blue and sum blue. Using my flat brush, I'll first take this color
which is steel color with a mix of little bit of
fluorescent yellow to it. Starting from the center
we'll go towards the above, and as we are going
towards the above, it is becoming a little thicker. You can see when you
add fluorescent color, it becomes so bright. Now, if you don't have
fluorescent color, you can use cadmium
yellow also here. Currently, my focus is just on the blocking of
colors. That's it. So first, I will block in all these light colors
which are there, and then we'll start with the blending and
all these things. Similarly, others, also, I will be filling it up
with the same color. So currently, my focus is
to draw the patterns which are there in the
sky and then we'll start filling up with
the darker colors. And M Now using this Prussian blue and starting to fill up
the center part first. So slowly, I'm just
moving the brush and filling this darker color and to the sides
this serum blue. And slowly I'll start blending
both the colors together. Now for blending, you can
use round brush also. You can use blender brush
also for blending the colors. You can use round brush, but you have to use a thick
round brush and a damp brush. It should not be wet,
it should be damp. Then only you'll be able
to blend the colors. My teal color is a
little bit wet so it can easily blend with
this blue color. If it is not wet, your color, you have to reapply that color and then again,
blend the colors. So this is how we blend. Both the color has to be wet
when you blend the colors. Similarly, we'll be
doing other parts also. I to use the side
tip of your brush. Here you can use the
round brush also. It's totally up to you which
brush you want to use. You can use round brush, you can use Filbert brush, you can use flat brush. Whichever brush you are
comfortable with, you can use. So taking again urium
blue to the sides and blending the color
with the teal color. I've just applied, but blending, I do with the blender brush. Similarly, I will be
applying to the others also, other side also, and just applying another coat on
the sides of this part. Both the sides. And taking a little bit of white mix
and going down because down, it is a little bit
lighter version of blue. It's a night scene, but
because of these lights, the version of blue, which is near the mountain is
a little lighter in color. So that's why I've used
your serraeum blue. Similarly, I will be doing
the other side also. Since this is a first coat
of the background painting, it's fine if the colors are not blending because
currently we are only focusing on the colors which will be needed
for the background. So don't worry if it is
not blending properly. If there are lots
of brush marks, it is completely fine. When we will do the second coat, then we'll fix those issues. See with my round brush, I'm trying to fill this part
with teal color and a mix of blue because this part is
a little lighter in color, and there are mountains
also which are there below. So try to use the round
brush for filling this area. Early, we will be doing
the other side also. Try to use thick colors. Tick colors will
not dry very fast. You can see how much
water I'm using. Water is only there on my brush. That's it. Similarly blocking
the other side also. So our background
blocking is almost done. Now we will do the
foreground blocking and the mountain blocking.
50. Aurora Lights Background Blocking: Welcome back. So let's start further with the
background blocking. Still, the foreground is left
and the mountains are left. So let's first block
in the foreground. Now, the foreground
which I will first make is with a light
color that is mixing all these colors
with a little bit of fluorescent yellow also and
just applying it above. And as I will go down, it will be more towards
the bluish side. So just making it a little bit of because of this
light, it is glowing. That's why I made that color. And as we go down, we'll add more lighter color. That is mixing of this
violet and the little bit of blue and making a
little lighter color. And making it more
violety and more bluish like lavender color. So I'm just covering it below, just making a snow
color and just covering it below
with my flat brush. Simply blocking the foreground. After that, we'll do the
blocking of the mountains and the path which is the tree
line with the black color. Simply coat, one layer of
blocking we have done. Now we will start blocking
the mountains and the area, which is the tree line area. So for the mountains, also, we will be needing a
very light color that is a mix of serleem
blue and white mix, and I'll just cover the above
part with my round brush, and the whole mountain series we will cover with
this color only. So slowly slowly, I'm just covering the
entire mountain part. And then we'll start
with the detailing. So whenever you do these
types of painting, give a lot of time to it
and do it very slowly, patiently and you will see
very magical result out of it. If you will follow each
and every step of mine, even if you don't know how
to do acrylic painting, if you will follow
each and every steps, you will be able to do it. Covering the entire part. Mostly the blocking
is done just the part which is the tree line area which is there that
we have to paint, that we will be doing with the brush that is the
small size round brush. First, we will make the
edges and then we'll color with black and a
little bit of blue mix. So whenever you do such
type of tree lines, first do the edges and then start with the blocking
of the colors. For making these edges, you can also use
your rigor brush that will give a very
sharp edge line to it. So once I've created this, I'll just fill it the entire
thing with black color. Finally, our blocking is done. Now we'll start with
more of the detailing. First, we'll start with the sky and then we'll start
with the other details. Before applying any coat, you have to wait for the
first coat to dry then only we have to apply the
second coat onto it.
51. Aurora Lights Sky Details: Come back. So let's start
with the sky details. So my sky has
perfectly dried out. Now we can apply the
second coat on it. So before applying second goat, you have to wait for
the first coat to dry. Similar colors we will
be using here again. Again, we will be
taking the teal color, fluorescent and a little
bit of white also, and thick layer of color I will be applying
onto the area, which is the lines
which are the lights which are in the sky. So try to use thick color so that at the time of blending, the color will not
dry very fast. So here I'm using my round
brush for filling it up. You can use any brush
of your choice. Now I'm taking my darker color, that is the Prussian blue and
applying it in the center. And to the sides, I will
apply this violety color, which is the violet
color onto the sides, violet or you can say
purple color, any color. And after that, I will do
the blending of colors. Once I have applied the colors, then with my blender brush, I will try to blend the colors. So whenever you are
blending the colors, make sure that the color is wet. Now taking my flat
brush and giving a little shape of the
light which is there, which is moving above
as well as down. Now when you will
do this, little bit of colors will go inside this darker color will go inside this lighter color.
Don't worry about that. Just wash off your brush, take the color again, the same color and
apply it on to it. When it is wet, you can easily
overdo on top of it. This is one of the benefit
when you're using acrylics. So when you use such
type of paintings, you have to do a lot
on a lot of laying. It's not just one
and two layers, and we are done with it. The more layering you do, the more beautiful
your painting looks. So to create a little
realistic painting, you need to do a lot of laying. So here you can
see I'm just using my blender brush
and trying to blend the colors and also pushing the color little
above, the lighter color. Now taking the same
brush and again, applying this lighter color in the center and pushing it above a little bit so that
it looks like it is blended in this darker color. Also, we'll apply the
darker color below. So here you can see I'm using
the same blender brush. You can use any brush
for applying the colors. It is totally up to your choice, whether you want
to use flat brush, round brush, blender
brush, any brush, it's just that you
know how to use it. Now, the lighter color, which is near the mountains by mixing the lighter blues and
a little bit of teal to it. Now again, taking this
lighter color and putting it in the center and
pushing the color upward. Also, I'll push the color a
little bit downward as well. Now again, when I'm
pushing it downward, again, this color has come up. Again, I will apply
that same color which is there just
to remove that line. Slowly, slowly, we have to
proceed like this one by one. One side we have done. Now we will do the
other sides also, which are there in
a similar manner. So again, applying
the lighter color. Try to apply thick color. So again, when you
apply thick colors, colors will not dry very fast, and you can easily blend the
colors with your damp brush. Whenever you are
blending any two colors, try not to use wet brush. Never. You should
never use wet brush, otherwise, your color
will start lifting up. So try to use damp
brush and then slowly blend the colors with a very light pressure
of your hand. So you can see slowly, slowly, I'm just moving to one
block, then another block. So like this, we have
to do the painting of the sky when we are
using acrylics. So just trying to
blend the colors more Now we will do the rest of the
parts which are there. I'm taking a little bit more of teal because my
teal has been over, you can see a lot of
teal is used over here. Now let's move further. Again, I'm repeating the same process in
the second block, first applying the darker color, then the lighter color
and then simultaneously, I will blend the colors. Blending it first over here. You can see you can blend
with your flat brush also. So it's not like only the blender brush works
for blending. You can use any
brush for blending the colors and do it with
very light pressure. So trying to give
it a little shape. A little bit more
of darker lines. Similarly, we will be doing
the other parts also. Slowly, slowly the
shape is coming up, try to do it very patiently when you are doing such things because all these things
requires a lot of patience. So every time you have to wash off your brush when
you're using a darker color. So lighter color
I'm just applying, that is the violet
color which is there. So you can see this
part is almost done. Now we will do the
other side of it. Similarly, I'm just applying
this nice thick color. And then we'll blend it
with the darker color. So whenever you are
blending the colors, never try to push the color
towards the lighter color. Otherwise, everything
will turn out to be blue. Try to blend where the two
lines are intersecting. That's where you
have to blend it. Don't try to push the color
towards the lighter side. So this is the second
coat which we are doing. After that, we'll
do a few more coats to give a nice
glowing look to it, as you can see in the picture. Blending it with
a lighter color. Giving a little more
shape to this light. Also with my blender brush, I'll just try to blend all the colors which
are on the other side. So try to blend it
very carefully.
52. Aurora Lights Stars And Mountains Detail: Welcome back. So
let's start further. So now we'll start adding
the stars on top of it. So let's add first these stars. By making a little liquid
color we have to make. I have added a
little blue to it, which was there on my palette. So just making a
color which is thin, whitish, bluish color, and just spraying
it all over above. This we have to do
it before doing the details of the foreground
and the middle ground. Otherwise, here also some
sparkles will come up. First, do the upper
part, and then again, we will add the lights which are there and then we
will move further. But first, we have to wait for this whole sparkles to dry out, and then only we can
add the details more. So a little bit of the
shape we can give before doing the just adding a
little bit of this again, fluorescent color
and applying in the center because in the lights we don't
need the sparkle, so we can apply that color. Taking a little more
amount of white because we will be
needing white more. When we add a little amount
of white to the color, it becomes more bright
and more vibrant. Just applying it with my blender brush and
pushing the color above. Similarly, little bit downward. Now my base has dried, so that's why this color is not mixing up with the darker color. Just applying these
nice layer of colors. Also, I will apply to the
other lights as well. Use damp brush, don't use wet brush when you are
doing such details. So whenever we do any type of details where there is
water is not needed, we have to use a damp brush for creating all such textures. Again, with my fan brush, I'm using the same fan brush, a damp fan brush, taking the colors and
applying the textures in the upward direction so that my colors become more and
more thick and layered, applying some more layers
in these areas as well. He. So it should
not be a dry brush, but it should be a damp brush. Applying to the
others lights also, I want to add one more
light in between. I'll just add one more
layer of this texture here, just pushing this slide above Larly I will add one more light
textures in between. And also to the
above part as well. Later on, I will make it
a little more thicker, just I'm giving a little shape
to it with my fan brush. You can see there are so
many lights which are there, which are moving above in
upward direction, actually. Currently, it is a thin color, but when we'll do the
layering of colors, it will become nice,
quite glowing light. Now let's do the detailing
of this mountain first. With my rigor brush, similar way like we did in
the previous paintings, the mountains here also we
will be doing a similar way. Using my rigor brush, I'll create the details. Just making the color thin, mixing black and this
blue color together, and making it thin and
using my rigor brush, and we'll create some nice
textures on these mountains. So if you have done my
previous paintings, you must have got an idea that how to create
these textures. We have used in lots and lots of paintings which we have done especially for the mountains. This is the technique where we use where we create
textures one by one. So first I'm creating
a outline of it, and then I will just add the textures with
my rigor brush. The more and more you will practice such
type of painting, the more clarity you
will get that how to create the details. I have just shown some
of the techniques which you can use in your own
paintings while doing it. If you have done all these
seven to eight paintings, I'm sure you will be
able to do more and more by your own with such
type of details. So similar details
I'm adding over here. Now, these details are not
totally black in color. It is a mix of black
and Prussian blue. So some details on the
side mountains also. So I'm outlining this. As I'm adding the details to it. So outlining also, you have
to do with the similar color. A small textures here and there, you have to add just to show
that there are some rocks where the snow is not there and where there
are some small trees, just to show with
these textures. Similarly, on the other side
also, we will be adding Try to do it slowly, carefully one by one. So once we are done
with the textures, we will do these front
trees which are there, the small tree area where
we have painted black and some bigger trees also will be there on this foreground part. The texture detailing we
have done for the mountains, now we will add
some highlights of this light which is
falling on this mountain. But first, we have to wait
for this background to dry. Just adding some
lines for the trees. So big, some small trees of
different sizes are there. Some are also on the ground. Some back trees of
different sizes.
53. Aurora Lights Adding Details: Welcome back. Let's start
adding more details to it. Now my sky has again dried. Now again, I'm applying a little more layer
of lighter color. That is the fluorescent
color which is there. Mixing this nice color, which is the tea and fluorescent yellow and just making it more
brighter and brighter. Just taking again
this fluorescent yellow and applying it
in the center to make it more glowing because
this fluorescent color adds color to your painting. The glowing effect
comes from this. Just adding some more
glowing effect to the other areas of the
lights which are there. Using my fan brush. Now here also, fan brush
should be a damp brush. It should not be a wet brush, applying the nice glowing
color and repeating it. As we repeat and repeat
the colors because mostly fluorescent colors
are transparent in nature. You have to apply
three to four layers to it to make it more
brighter and brighter. Just adding more layers to this one also to
make it more bright. This fan brush is used
in so many things, as you can see for
making textures, for creating this feathery
effect to the sky. Many things you can
use this fan brush. This fan brush is actually very important brush when you
do such type of paintings. Just taking a mix of white
and fluorescent and again, adding some more textures
in the center part to make this area a
little bit more flowing. Oh you can see so many layers you have to apply when you are doing
such type of painting. The more the layers
you will apply, the more beautiful it will look. So now we will do the details
of the below part also for the grown part and for
the trees and the mountains. This just adding some
more glowing effect. Try to add more and more layers until unless you are satisfied. Always try to use
your damp brush for putting the color in
the upward direction. Now, again, taking a little bit of color and just applying it in the center part a little bit more yellow and
pushing it downward. Again, applying a little
bit in the center. Now you can see that
glowing effect has started coming up when I'm adding
more and more layers to it. Now let's take the
fan brush and add some more glowing effect
to the area which is the mountain
area, which is here, a little bit of textures in the down part of the mountain, just to show that some lights are falling on the mountain. You can see how glowing it is looking when you have
added these details. Just to show that these
lights are falling on the mountains as well as on
the ground part as well. Similar way I'm doing
here also like I did in my previous
painting some textures of this nice teal and
yellowish color, then a little bit more of
whitish color below and a little bit more purplish
dark color below. All these textures just to
create some nice effect of the snow a little bit of more light
textures with white. A little bit onto the mountains and to this
black area which is there. Everywhere where I'm
using the textures, I'm using a dry brush. Try to use dryush or damp brush. Don't use wet brush by
creating these textures. Now I'm just adding a little
bit more whitish textures on these mountains just to show some snow area
which is there. Now, once we are done with
the mountain details, now we will start adding details to the tree
lines which are there. Everywhere where
detailing is there, you have to use
your rigger brush, wherever you have to
create fine details, you have to use a liquid color like here I'm using
the black color, which is a little liquid form. If you will use dark color, you will not be able to
create such textures. So try to use liquid color whenever you want
to create details. So bigger trees,
some small trees. Trees also we have done so many times in this
winter scape painting. By this time, I'm
sure you must have got an idea that how to
create these textures. A So everywhere I'm just
adding these trees, small, big size, different
different sizes. So whenever you are starting
this painting series, try to start from the first
because the first one is the easiest and the last one is the toughest,
it goes like that. As you will go one by one, you will feel that
it is becoming more and more easy
for you because I've started with
easy one and then I'm ending up with
a difficult one. Some more smaller trees. Now, trees actually
are very important, especially the pine trees
when you create winters. This actually adds
beauty to your painting, the trees and the snow part. That is the real
beauty of the winter. So very small small
trees are these. Try to do the detailing very
carefully and one by one.
54. Aurora Lights FinalDetails: Welcome back to
the final details. Let's start first with the tree lines which
we were doing. Let's complete that first. All these small small trees. Just adding the textures
with my rigor brush, similar way like we did in our previous paintings like the pine tree series where
we added all the pine trees, some big, some small. We have done so many pine trees, so now you can just
close your eyes and you can do the pine
trees by yourself. So here is the thing that
the more and more you practice and the more and more you do such type of paintings, the more habitual and more
muscular exercise you have. Especially when you
hold the brushes. The more practice you do, the more you get it. It's just as that simple. Try to do more and more practice at least for 30
minutes every day, and you will see in next six months something
magic will happen. You need consistency and
practice. That's it. So little small small
trees here and there, I'm just trying to create. Very small trees in size. Small doesn't mean that the
trees are of smaller size. It means they are very far away. Just to give the depth
of the painting, I'm adding these bunch of trees. You can add your trees
in your own way, some in bunches in groups. I totally your painting, so you have to decide
how you want to arrange your entire trees
and everything. Little bit of areas where
there are stones or some black pebbles
or something are there and creating these
textures with the same color. Also, I will be adding some
grasses here and there. But first, I will just
add a little bit of snow to these trees
which are bigger trees. Tick colour of white and your damp brush and just
try to add some snow. Now this is our last
painting of this series, which is the Winter scape. I hope you enjoyed doing all these paintings I
really enjoyed doing this and I was very
happy with the results that came up very beautiful
and very vibrant. I didn't thought of such
beautiful paintings, but slowly slowly
when I started, it started coming to my mind and the last
painting, of course, is the Aurora Lights, which is the most beautiful painting
of this winter series. Uh so just adding some details and a little bit of the shadow which will
be there for the trees. Just adding some grayish, bluish color and just
adding some shadow with my flatbush again, shadow makes your
painting look more real, as you can see a little bit of snowy textures on the
baseline of this middle area. Oh, so just final textures are left and some grasses also we will add to
this ground part. Now to this painting, you
can add one big tree also. It's totally your choice. Like I'm just giving you an idea that you can add one big tree, one big stone, one big rock, which is there, then
there is a tree, which is a big pine
tree which is there, which is filled with snow. Some grasses here and there. Again, thin color. When you are creating
the grasses, try not to use thick color. You can see how thin the line
is when you use thin color. Just adding some shadow
of these grasses. Just adding some shadow effect. Also more glowing light on top, taking some more yellow and adding it to the center
to make it more glowing. This is the last part of the
layering which we are doing. You can see that we have
done so many layers of this color to create a nice
glowing effect of this light. Now you can see it is starting
to glow up more and more. These fluorescent colors
are actually very beautiful when it actually
adds beauty to your painting, especially the northern
lights which are there. Also, I will add
some glazing effect on this top area of the sky just to add some
more glazing effect of this yellow color
which is there. Make sure that your
complete painting is dry, it should not be wet. Make your color thin and just add some glazing
effect on top of it. Glazing is nothing
but a thin layer of color which is applied
on top of any object, and your background
color is also being reflected and your top color
is also being reflected. You can see how thin
color I'm using here. Thin color you have to use and very thin watery color to make it more like
a glazing effect. You can see how the colors are changing a little
bit when I'm adding this nice yellowish color just to add some
glazing effect to it. Whenever you are
doing this technique, make sure that your
whole background is dry, should not be wet. Not even a single bit
of thing should be wet. Again, taking my fan
brush and adding some more highlights of yellow. Giving a final touch
to my painting. I'm sure you will
also love doing this. It's a very beautiful and
very vibrant painting, which if you will do each
and every step of mine, I'm sure you will
be able to do it. If you're trying out
all these projects, do tag me on my Instagram. That is Mohini Art Gallery. I will love to re
share on my story. And this is our eighth
painting of this series, which is the bonus painting. I hope you loved the
surprise which came up. Adding some more highlights. As a little more darker
color in between. I hope you enjoyed
the whole series of winterscape where I have taught each and
every part of it, I have tried to teach each
and every part of it. Till then we'll meet
in our next lesson. Try out these paintings and two tag me on my Instagram that
is Mohini Art Gallery. Again, one last layer of yellow, and then we are done with it. Thank you so much everyone. We'll meet in our next class, which will come very soon.
 Mohini Sinha, Acrylic and Gouache Artist- Nature Lover