Transcripts
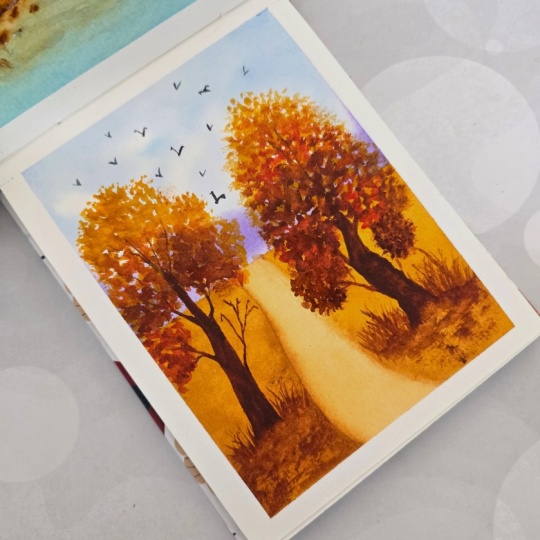
1. Introduction: Autumn is a beautiful season, a time when nature
slows down and paints the world with
warm golden hues. The fallen leaves,
the misty mornings, and the soft glow of sunlight create such a
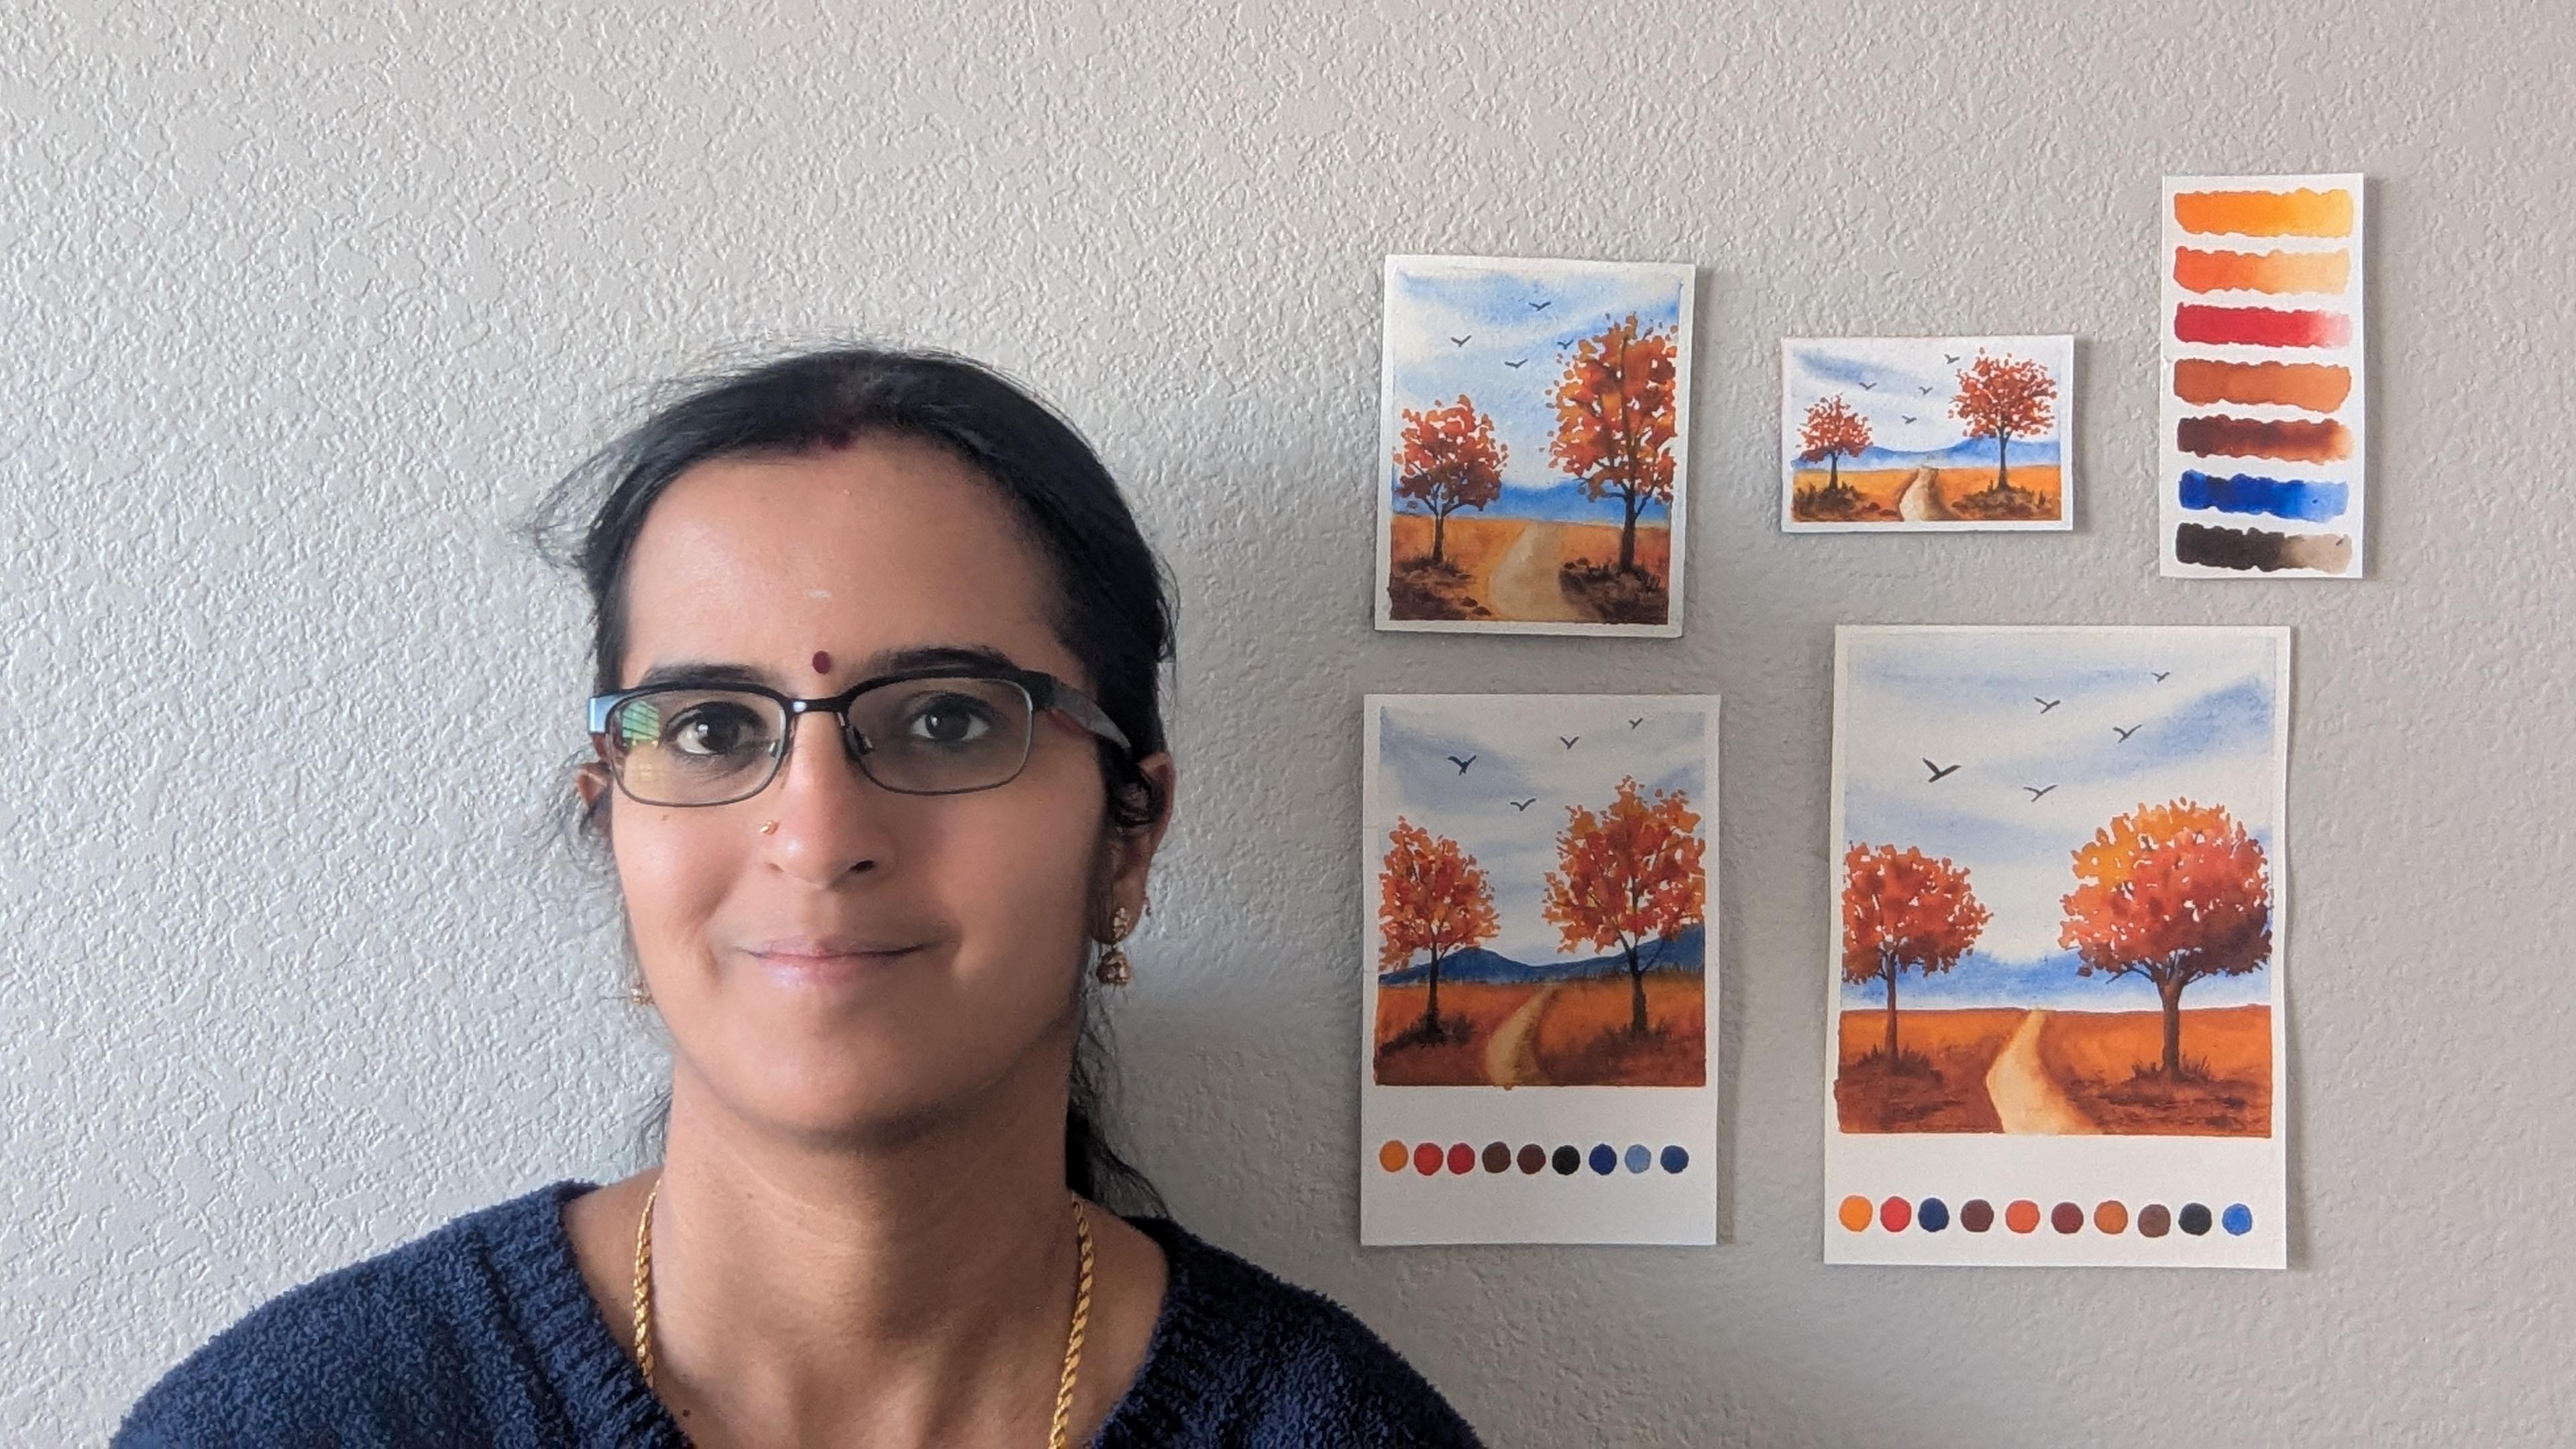
peaceful atmosphere. Hi, I'm Soma Karthik, a passionate artist, and a mom, and welcome to my
class Autumn Pathway, paint a misty waterglo landscape
with a limited palette. In this class, we'll be painting a calm beauty using gentle
watercolor strokes. Using a limited palette, we'll paint a beautiful,
peaceful Autumn Pathway, surrounded by soft misty
mountain warm tone of autumn foliage and
few free flying birds, which is perfect for beginners who want to explore
seasonal landscape. So by the end of this class, you'll see how
much magic you can create with a limited palette
and few easy techniques. So take a deep breath, relax, and let's paint
this autumn beauty together one stroke at a time. See you next section.
2. Class Materials: Hi, guys. Welcome back. Thank you so much for
joining me in this class. In this section, we'll talk
about the materials we'll be using for our class
project Autumn Pathway, paint a misty
watercolor landscape with a limited color palette. This is a class project. We'll be using only
these four colors. First, I'll talk
about the paper. I'm going to use 100%
cotton paper that is 300 JSM 140 LB and this is
fabriano, 100% cotton paper. You can see the size.
It's A 57 by five size, and 300 GSM and 140
LB and you can use either the loose sheets or
you can use blocks like this. This is arches watercolor paper. This is also the same
300 GSM, 140 LB. You can paint in this and
after you finish the painting, you can take it out
with a palette knife. So you can use 100% cotton paper because that is the most important
thing in watercolors. You had to have
100% cotton paper that gives a better
and great result. If you have cellulose
paper, that's okay, but you had to upgrade
after a few tries to get a better result or at least you can
use 25% cotton paper. That's my suggestion. Next, I'll talk about the colors we'll
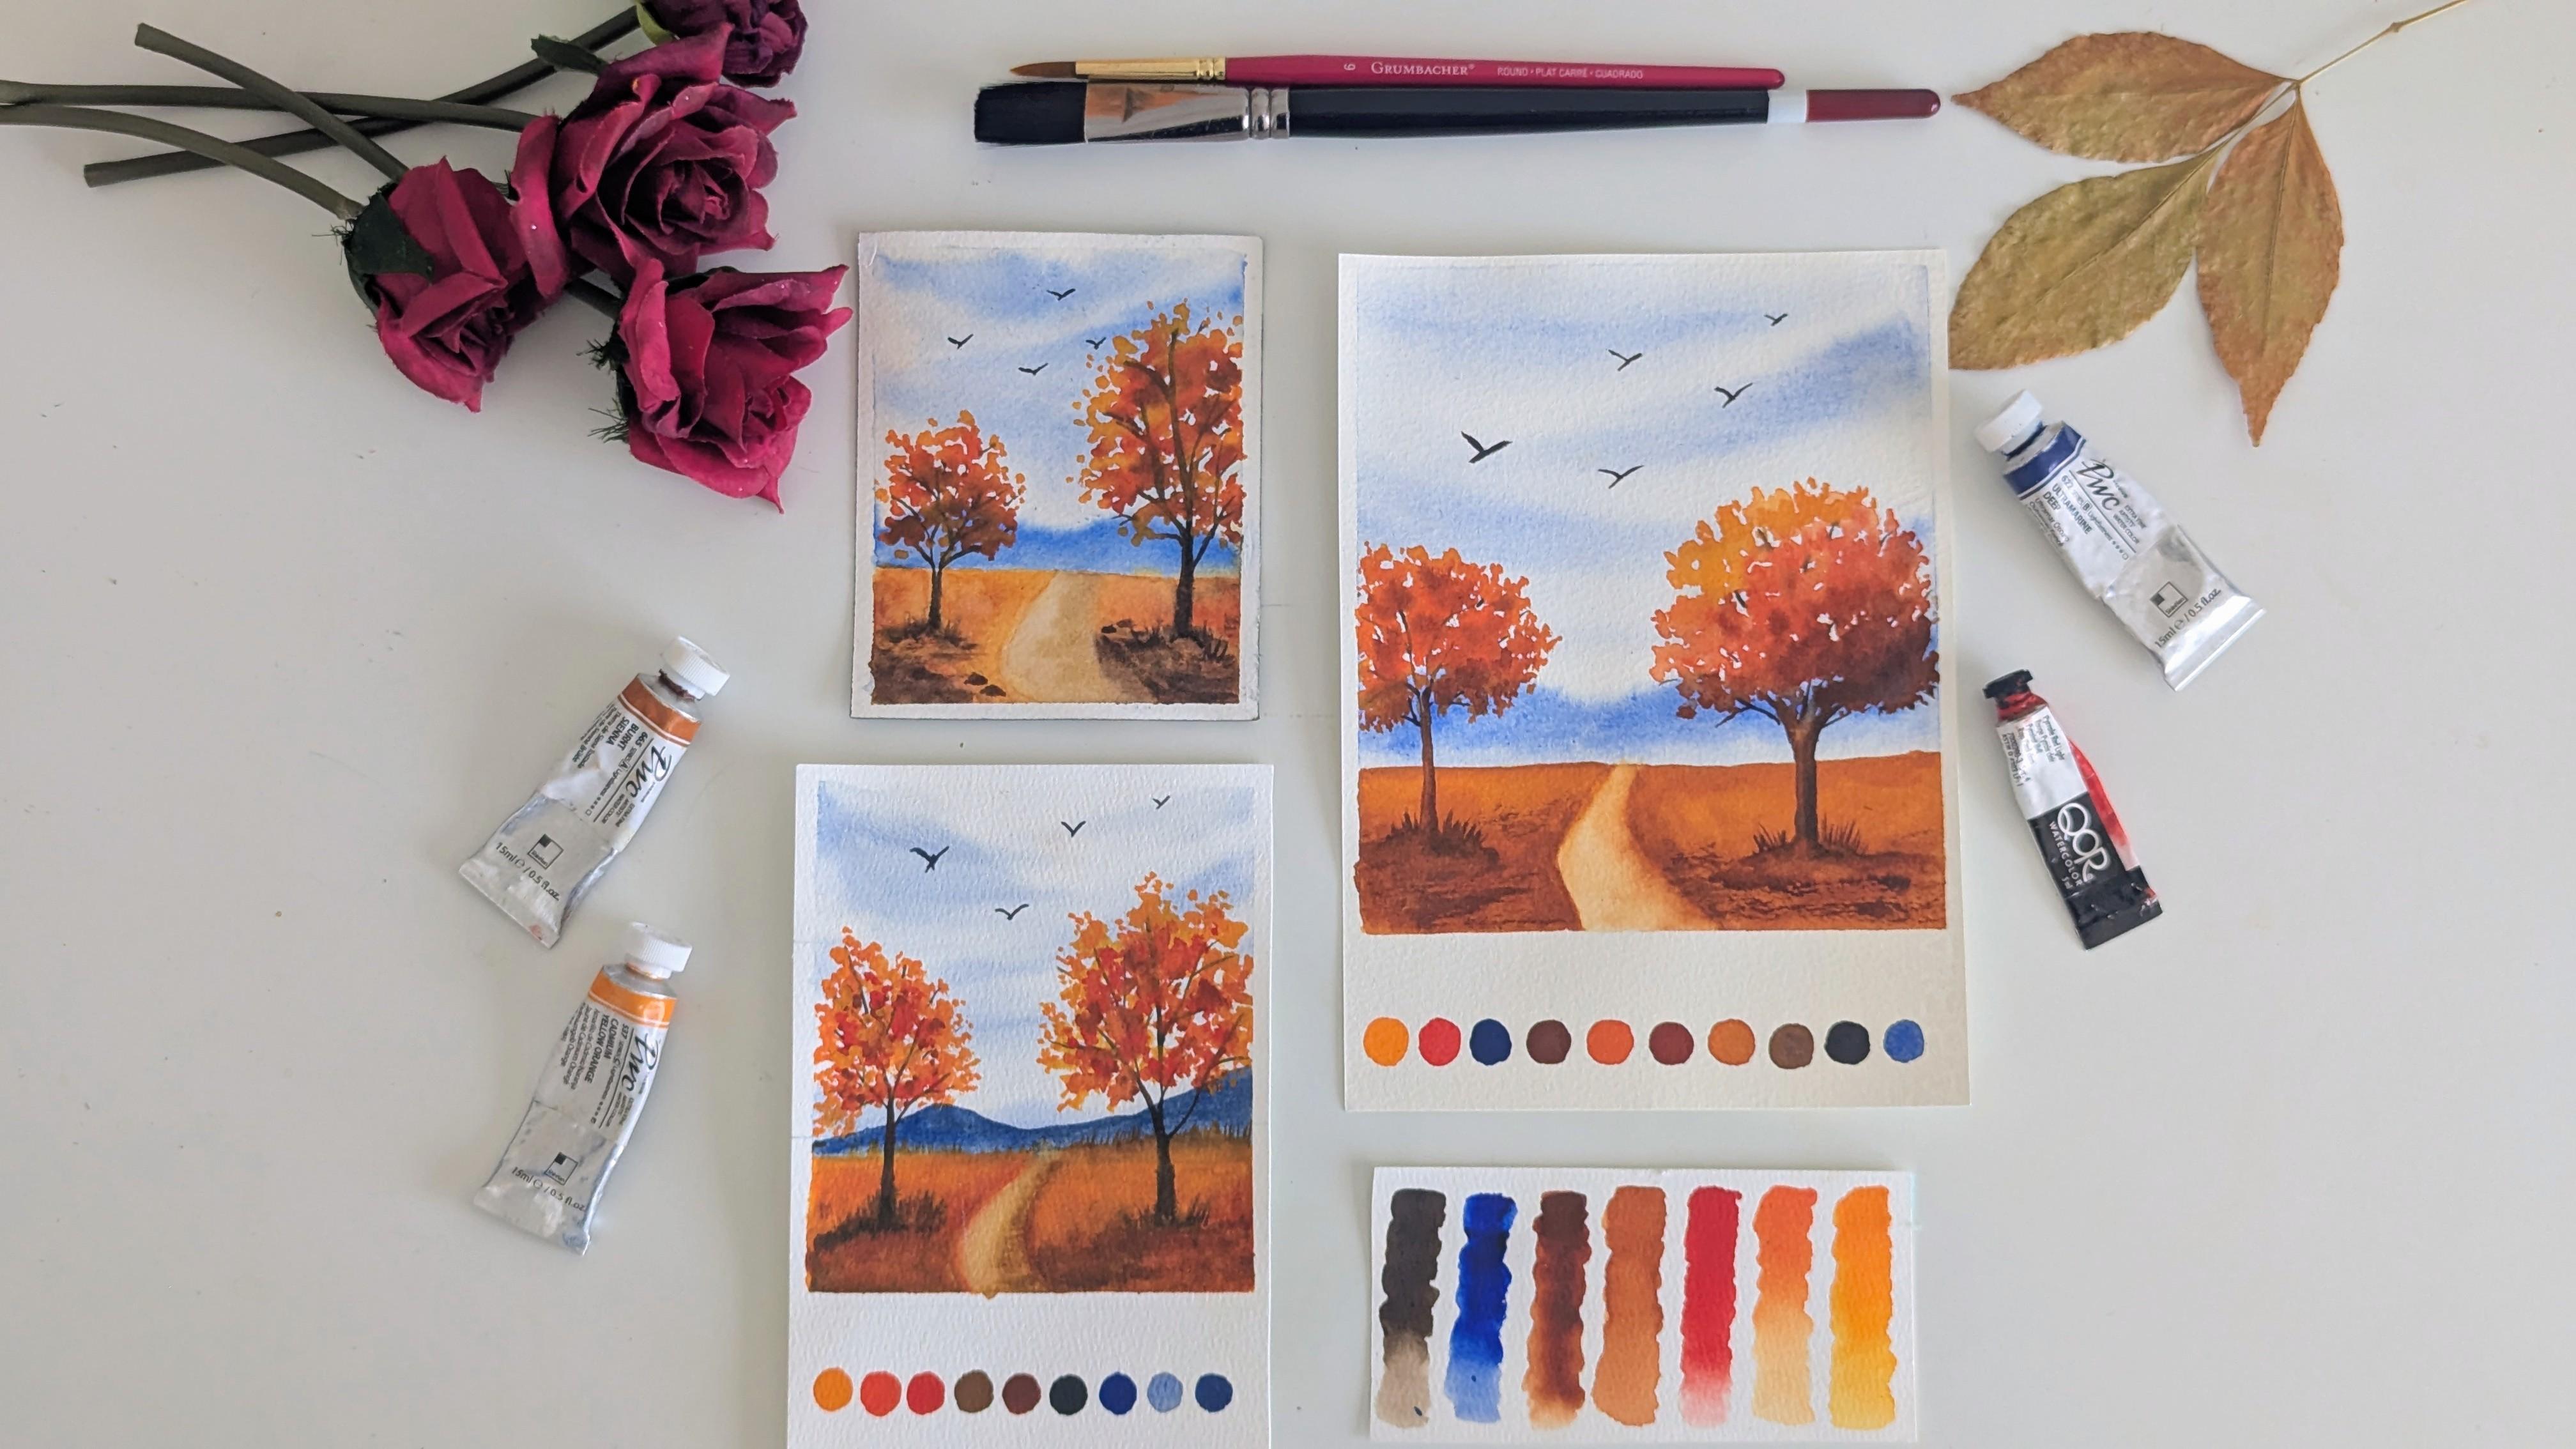
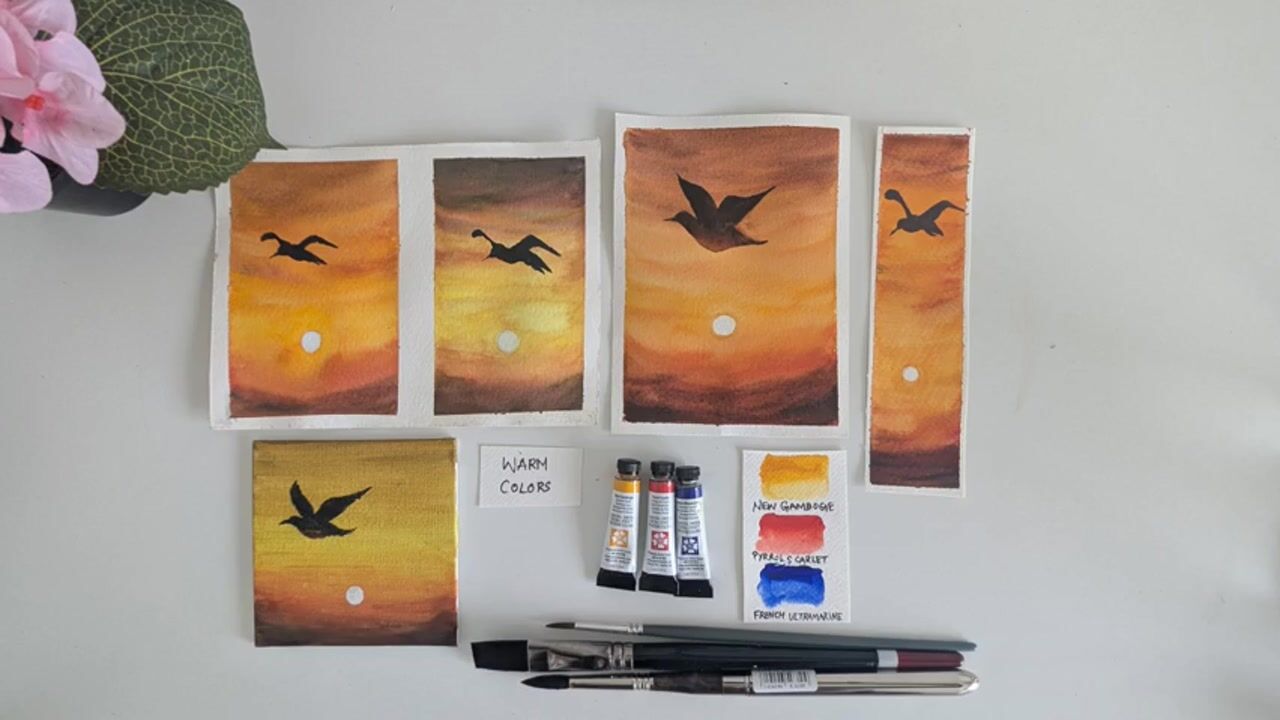
be using for this class. We'll be using Pyrrol Scarlet. And cadmium mellow orange, Burnt Sienna and
ultramarine Deep. These three are from PWC and
this one is from QR brand. All these are warm warm colors. These are all only four
colors we're using. I swatch colors. This is cadmium,
this is scarlet. This is Burnt Sienna and
this is ultramarine Deep. I got the other colors
by mixing these colors. Next, we'll talk
about the brushes. So I'm going to use
this flat brush. This is from then Nut supplies. It's a three by four inch
flat brush, and next, I'll be using this round brush from Graham BacherT is size six. These are the two brushes we'll be using for the entire class. Even for the technique section, we'll be using only
these two brushes, and you need a pencil and eraser to mark the horizon line, and it's not needed to draw your trees because we are
going to directly paint. If you're not comfortable,
you can draw it for your reference and you
need two jars of water, one to wipe off your primes and wet the paper
at the beginning. You need a tissue paper
to wipe off your paints or you can use a cotton cloth,
whichever works for you. I'm going to use this
plastic palette for my technique section and also the class project
because I need a bigger palette so
that I don't want to run off for paints
when I paint in between. You'll also need a masking
tape to keep your edges clean, and I'll be using this
glass board to tape my watercolor paper during a class project and also
during our technique section. Grab your supplies and
let's get started.
3. Color Swatches: Hi, guys, welcome back. In this section, we'll swatch the colors that we are going to use for
our class project. Here I'll spot the colors
we're going to use in a glass and here the
substitute colors so that you can see the paints we
have with you and then go practice it and paint a
class project. Let's watch. First, I'm going to swatch
Cadmium Yellow Orange. This is a warm orange. So this is a warm
orange autumn orange. This will be beautiful
for painting skies and autumn trees. So I'll mix a little
bit of water. As watercolor lights very light. After you paint, you
should always paint it darker so that after
you finish your project, you don't want to
think, you should have used a better,
darker color. Next, for this one, you can substitute it with Daniel Smith Gamboge or you can use Indian Yellow
too if you have it. These are the
substutes I'm going to watch Daniel Smith new Gamboge. Straight from the tube. So this is the color closer to it. See? These are all warm colors. So you don't need any cool
palette in your palette. So this is cadmium. This is substitute for
cadmium me orange Gampog. Next, I'll watch spiral scarlet. This is a fiery bright red. That is perfect for
our autumn palate, especially the foiage. You can substitute with cadmium red or vermilion,
if you have it. It's a dark warm color, guys. Next, I think, this is cadmium red or you
can use vermilion. This I have pants, you can use the tube pans,
whatever works for you. Next, I'll watch
ultramarine deep. This is a common color. This is a warm blue
and you'll have in all the basic watercolor set, artists grade and even
students grade sets. I request you to
use artist grade set because that will
be more pigmented, vibrant, and it'll look very pleasing to your
eyes too when you paint. For this, you can
substitute with Coval blue. I'll first watch the vermilion
I was telling about. Instead of spiral scarlet, you can use vermilion. See? It's a closer one. And next, I'll watch the
cobalt blue for you guys. So this is cobalt blue. This is also a warm color
that is close to ultramelin. If we have cobol blue, you can use it instead
of ultra mealin, but this is a granulating color. Cobalt blue is not
a granulating one. So that's the next color. Next, finally, I'll
watch Burnt Sienna. So this is a warm, earthy color. Perfect for painting branches. And and also for
painting shadows too, this ultramarin can see, it's perfect for
painting sky guys. This is the swatch
of the Benciana. For this, you can mix
all the three primaries. I'm going to mix all these
colors and get a brown, these two, and a little bit of ultramarine to get a brown. See, I mixed all these colors, and I got this one
closer to bunsena. You don't want to
buy too many colors. Warm primaries will be enough. In this gas we'll be only
using again warm colors. And also for getting
this orange, we'll mix cadmel orange and Pyrrol Scarlet to get this orange. I'll
watch and show you. Make sure your pigments
are very dark, see, you can get this orange. And you can mix Pyrrol Scarlet
and new gambooch to get this orange if you don't have the subdued colors to get
this dark yellow color, you can mix burn sienna
and a little bit of red to get yellow ochre color. I'm going to mix born
sienna and a little bit of red Burnt Sienna
and a little bit of red and a little bit of orange
to get yellow ochre color. Oh see for the pathway, we'll be using for the pathway, we'll be using this
lolocre color. That's a mix of scarlet, Bnciana and a little
bit of camiumOange. And finally, to get
this burn tumba color, we'll be using these two
colors ultramdn and Bnciana. You can mix more blue to get a black color to paint
the birds and you can mix more Bnciana to get this
dark burn temple color, which is also closer to sepia to paint the branches and
the final details. For the birds, you can mix
more ultramarin with the burn Siena to get a dark black
color for painting her birds. Those are the color, guys, grab your supplies and
let's get started.
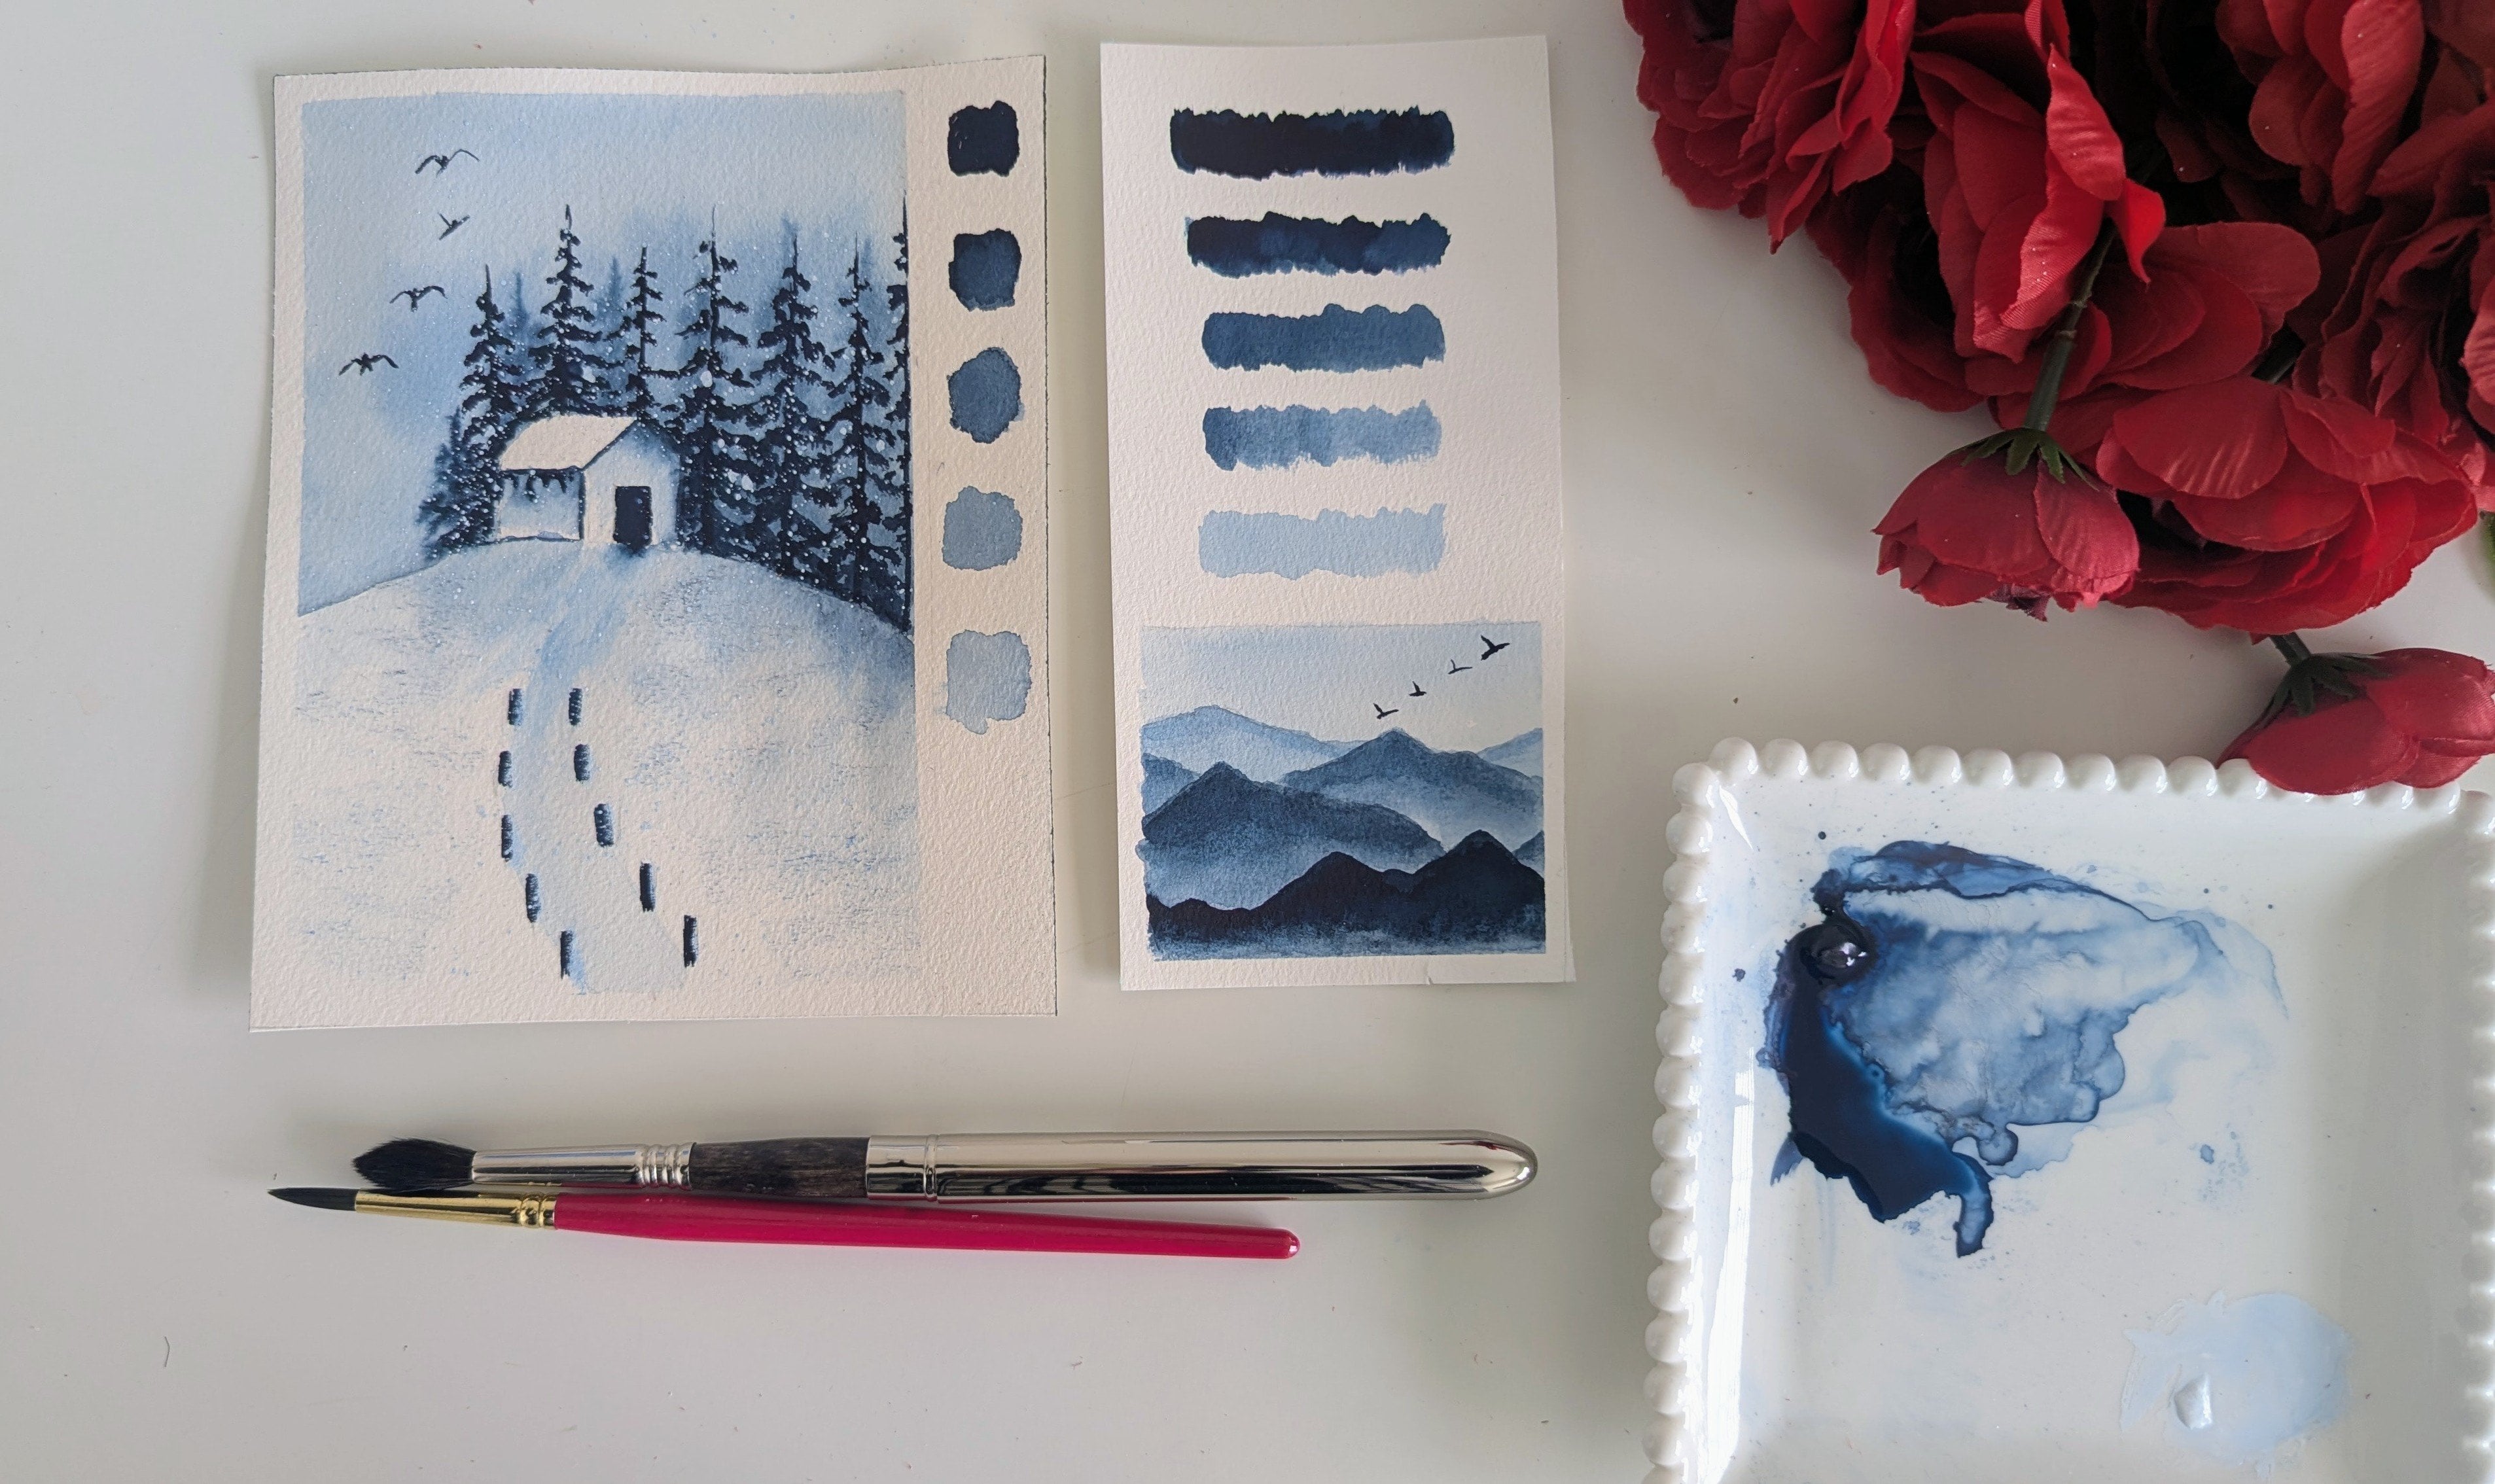
4. Techniques Part 1: Guys, welcome back.
In this section, we'll practice the techniques we are going to practice
for class project. First, we'll paint this
misty mountain and then we'll practice the
grassland and finally, we'll be practicing the foilage. You can try both
wet-on-wet technique and wet on dry technique. That's your choice.
We'll practice this. First, the sky and
the mountains, then the grassland and pathway, then the trees for the foliage, the main hero of project
for our Autumn project. We'll practice this. Make
sure you get your Paints ready before you
start so that you don't run out of paints in the middle of
your painting or practice. Make sure you keep
your supplies ready, especially the paints
and the brushes. Let's start. For the mountains, we'll be using
wet-on-wet technique. I'm applying an even coat
of water for my sky, not a puddle, even
layer of water, so that your clouds will not run out and your sky looks
soft and beautiful. Apply an even coat of
water first for your sky. I'll show you first. Apply C. There's a little
shrine in your paper. That's how you can also apply fully or if
you want hard edges, you can apply
randomly your water. So first, I'll take my round brush and I'm
going to apply the sky. I'm going to use
wet-on-wet techniques that applying wet paint
on a wet surface. So random wispy strokes
to get a soft edge. There's no thin tool to paint your sky, some wispy strokes. Make sure you have even at of water before
you start your sky. Or if you want hard edges, that looks natural,
that's a good option. But I think today, I'm painting with both
hard and soft edges. First, small wispy
strokes for your sky. For this, I've mixed ultramarine and a
little bit of sana, to get this dark gog shade, actually, Mia Modi Buffet. So that's it, I stop with this. It it dry. Next I'm going to
paint a mountains. So I just draw a rough
off of the mountains. So I start with ultravgonbG over the shape
I drew the mountains. My pie has dried a
little bit, not for me. I just started mixture. There's a soft tech. So so I just painted
over the mountains. Now I'm going to
wash my brush brush, and then I'm going to soften
the edges here to get a misty effect. That's it. I'm just washing my brush
and cleaning the edges to get a soft edge effect for our background for
the mountains. So I'm using this is wet on dry. I'm using paint.
See, you can see some lifuic that's
okay. I'm okay with it. So make sure you apply paint evenly before wetting your paper to soften the edges. So I'm adding more paints
to make it look natural. So that's it. A
mountain is ready. We are going to paint the
grassland till it gets dry. The mountain gets
dry. So I'm applying an even coat of water
to the pathway. I just drawn rough
catch to practice. I'm applying even coat of
water on the edge sides, both right and left side. So I'm applying
even coat of water. Remember that? No hard edges.
Otherwise, your paint will get dry and your
effect will not be good. Make sure you apply even coat of water on both sides,
not a puddle. I just apply it next. I'm going to take
my lighter color because this will be the
horizon lay near the mountain. I want a lighter
color over there. I start with Cadmium orange for my base layer of this
grassland, I mean. First, I start with
Cadmium Mel orange. I'm just applying the
pins or the wet surface. This is on technique two. Next I'm going to this
is a mix of these two, scarlet pile scarlet
and cadmium low. I'm just applying that, see a little bit more
water, I think. That's why it's spreading
a lot. That's okay. Happy accidents. So next I'm taking a little bit of burnt sienna and
applying it here. See? That's okay. Unless you apply it
or blend it together, your results won't look messy. I'm going to apply Burnt Sienna towards towards the
bottom, actually, near us. So I'm going to take even more Burnt Sienna
because the pathway, as it gets nearer to us, the details will be dark
and even more highlighted. So I want to apply more paints, born Sienna here or here, I'll wash a little bit
and apply this orange here and a little bit
of red too if you want. So it's a autumn landscape. I want to keep all
the warm colors and make a beautiful
blend of the grassland and look it more vibrant
and pleasing to your eyes. So I applied I think I
need to shape the Pathway. So my paints cut over here. That's okay. I'm using my
wet brush, wet damp brush. Take the paint over
and wipe it off. See? It's okay. Anyway, we are going
to add a color like yellow ochre. F there. I think here the
surface is dried. I'm wetting my surface again. Not a puddle, even
layer of water. Next, I'll apply the same
colors before we applied here. First, cadmium orange. Before we paint the pathway, this layer had to be dry. Otherwise, the
paints may spread. I think my paints are
spreading here. It's okay. Just take the ces and damp
it in a paper, wipe it off. I'm going to apply
cadmium yellow orange first towards the horizon. Next, a dark orange. And then a little bit
red and burn Sienna. So apply an even layer of paints too so that
it won't spread much. Your pathway should be look beautiful and also
pleasing to your eyes. Grassland should be good. Make sure you apply even coat of paints all
through the gas line. So make sure you blend it properly after applying
the pins to the grassland. So I think the paint
has spread again, so I'm going to wipe it off, take a dam brush,
clean the pathway. Pet your brush, damp. Make sure you take the excess
water from your brush, and then using a damp
brush, clean it. See? As you are using
100 presen cotton paper, you can see the white
of the paper again. If it's a elisse paper or any other paper
that has less GSM, you'll not get this. You
can't take this out. The paints if it's spread,
then you can't take it out. So I'm going to blend
it even more to make sure the layers
are clean and neat. So see here, I
apply darker color towards the end of the pathway, which is near us and
a lighter color near the horizon because when
you see the perspective, as the objects go
far away from us, the details get lesser, the colors are a
little bit light. When we get nearer,
the colors are dark. That's the concept
I'm going to say. Finally, we are going
to paint the pathway, so a lighter version. Of the pathway. I'm taking lighter
version of yellow ocher, which is a mix of
cadmium mellow and burn Sienna. I'm using wet on dry. You can also use
wet-on-wet method if you want. Either worn works. I'm applying I'm using
started with a Btonry method. I think as the layers
are wet on both sides, getting in, so I'm going to
do wet-on-wet technique. First, I apply even
quarter for the pathway. Next, this one mix. As you can see, this is
ultramdn and this is ochre, mix of burn Canon camium. So the sun is coming
from this side. The rays are coming
from this side. This side will be darker and
this side will be lighter. I'm going to take the loca
mix and our details here. You can see small lines because wet-on-wet technique
layer gets soft edges, that's what we need today. I'm just applying small lines towards the end of the
pathway on the right side. Make sure paints are
thick, not very watery, so that the paint stays in the paper and
gives a desired effect. So just soft lines and you can even apply
water from here, this side to make it blend
evenly and give soft edges. That's simple your bottom pathway because you just used all the warm colors
to create the scene. So practice these two. And finally, we need
to add the birds. So I'm going to use a mix of burn sianon and ultramarin
to get a rich black. This black or bon timber
colour to paint the birds. So make sure your lace
is completely dry. Otherwise, you can
smudge with your hand. You can check with your
fingers if the ray is dry. Yes, all the layers are dry. But this layer is not dry, so make sure you
paint it carefully. So we are going to
paint these birds, simple birds like we shade
birds towards the sky. So O line, a head, and another stroke. It's that simple.
So make sure you practice or you can
draw like a child to see a curve and
another curve. You can add detail if
you need to like a head. I added here and one more here. So make sure you practice this. Next, we'll also practice the tree foliage using wet-on-wet and wet on dry method before we start a
cluster project. I'll be easy for you if
you practice this. Let's
5. Techniques Part 2: Hi, guys. Welcome back. In this section,
we'll start to paint our three foilages that we're going to add in
our class project. So I'll teach you
two techniques, both wet on dry and
wet-on-wet technique. Wet-on-wet is
nothing but painting on a dry surface
using a wet paint, and wet-on-wet is nothing but painting on a wet surface
with a wet paint, and it gives this
beautiful blends. It's your choice. You can use this technique or this technique to pray in the class project, the three foolage after you practice this, so let's start. So I'm going to use the same. You can also use a
pencil to sketch your trees or you can go directly with the tree foliages with the pane directly. You can use a circle
shape a rough sketch. But I'm going to draw it directly for the wet on
dry for the wet-on-wet. For your guidance, I have drawn a small circle,
need not be perfect. So I'm going to use
my same gram patcher, size number six round brush to start painting the foliage. I'm going to apply wet water all over
my watercolor paper. Make sure you use practice
good watercolor paper, 100% or 25% cotton paper because once you
practice in cheap paper, you can't get the same
result value paint a class project, make
sure you remember that. I'm just dabbing the
water on the paper, making it wet, making it damp, actually, not too damp. Make sure you lose some white spaces to add the trunks, three
branches, I mean. So now let's go with the paint. I'm going to take the
light color first. So first, because
my light source is from this side, left side. So here on the right
side, it'll be dark. On the left side,
it'll be light. I'm going to start on the
top side of the tree. You can go with any tree shape. This is just for your guidance. You can go with any tree shape. Make sure your paint is thick. Otherwise, dab it in a paper before you put it on the paper so that
it doesn't spread too much. See? Just going over
the wet paint again. Next, I'm going to take the mix of these two cadmium melow and scarlet to get a darker
orange. I'm going to blend. See, I think it's too wet, so I'm going to take the water out of my brush and then take a thick
constituency of paint, dab the excess paint
from the brush. Excess water, I mean, then just dab it. Don't worry if it
bleeds too much. It creates beautiful
texture after it gets dry. Make sure you have
a thick consistency of paint and less water. So the dissllin spread. So see I'm going
over the tree shape. I'm not going do that because I want to make sure it is in a tree
shape and looks organic. You can go with
lead tree shapes, anything mixed with
the born Sienna mix, the dark locre and red mix, I'm going to add I
think I won bon sienna. I think it's too brown, so I'm going to wash it, take a consistency of
a little more red, and then because we need all the beautiful
autumn colors yellow, orange, brown, red,
even green is okay, but this is a
different autumn tree. What we're painting is a
different autumn tree. So we're using only warm colors. Next, I'm going to
take Burnt Sienna. Then finally, dab it off. Wet paint on a wet surface. If you don't like your blending, then you can take it off with the lifting
technique and blend it. If you don't like the shapes, you can alter it
when it's still wet so that when it gets
dry, it looks good. So I think I'll stop
with that. Let's wait. Let's go to the branches. I'm going to take a
thicker consistency of ultramarine and burnt sienna. And then start with
the tree trunk. Make sure you take the excess
water from your brush. You should have more
faint and less water. This one, I'm going to
use the tree trunk, I'm using only wet
on dry technique, starting for the branches. Then as the sun comes
from the lip side, I'm going to make it warmer, so I'm going to blend
the layer like this. Make sure your tree shape
looks good and organic. It doesn't look
out of proportion. So I'm adjusting my tree trunk. Next, I'm going to even take a darker consistency and put it on the right
side because to give shadow of the trees
and also you can use the same darker mix for the trees too like
this while it's still wet. You can take the
orange and yellow mix. And blend it like this. So it gives a beautiful
texture, guys. Make sure you do it while the layers are still wet
to get a beautiful effect. You don't want to have
the same outcome like me. Try practicing and you'll
be like to paint a tree. It's just simple. Just practice it
before you start your class project so that
you'll be confident. See? Next, I'm going to blend
the layers below the trees, the same orange red and
Burnt Sienna mix, like this. Then drop in the colors of the autumn leaves, all the colors. Then make sure I make it
darker on the right side. See, I think I
added more ultramn so it gives me a
rich black color. I'm going to blend it with Ponsiena you can add even
more while it's still wet, you can add it
blends beautifully. Then also, you can add the tee
trunk with the same brush. So make sure I dampen my brush and add my
tree trunks while it's still wet because this one
we are painting wet-on-wet. So all the tree trunks, I left white spaces. For these tree
branches to be added. So make sure your layer is still wet while
you do this step. I think I'll add even
more layer here. I want to add a
different foliage, a little more foliage to make the tree bigger,
little bigger. So I'll add the
colors which we used. This is a better on
re technique, guys. That's okay. I think I'll wait and then add the final layer for
the tree trunk. Let me try not bleed, make sure it not bleed it looks it's a light
colour on the left side, make sure you add a light
colour on the left side. Don't darken it. Just a few two
branches peaking out. I think it look good. Finally, I'll blend this
layer to get a smooth edge, and also you can add some
grasses, glass plates. For a few details like this,
or you can just leave it. That's your choice. I'll start with
that. Next, let's practice the ton technique.
6. Techniques Part 3: Next, we are going to try
the wet on dry techniques. I'm not going to apply water. I'm just going to
take my paints. As my light source is
from the red side again, I know sketch cues so I'm
going to do it directly. A dry paper and wet paint. I'm starting with
a lighter color. If you're not sure, you can draw a circle
and then start your trees because wet
on dry technique gives a sharp crisp patches to
your trees and foliage. Whereas in dry technique, you get a smooth blend like
this as it blends together, the layers blends together. I started with a light color. I'll show it even
more closer for you. I started with a lighter color. Next, it's a mix
of red and yellow. I think it's mixed with a
little brown, so it's okay. I'll start with the red, just dabbing it. Nothing fancy. So you can also apply
it on the layer before. Make sure your shape
looks organic and nice. Next, I'm going to take the burn Sienna mix after
the red one is done. Next, I'm going to take
the burn Sienna mix directly with a mix of red. This is a sharp pointed brush, so it's easy for me to dab. If you use a bigger smaller
brush, it'll take time. Make sure you use a round
be that has pointed tip and also you can make these foilages which is
pretty easy for you guys, you don't want to keep
changing your brushes. Next, I'm going to take
Burnt Sienna directly. Make sure you leave
some gaps in between the fooliages so that we can
add the tree tunks finally. For this, I'll add
it after this one is done because it's
okay wet on dry. We can also because
wet-on-wet will bleed. I don't want to
add the tree tunk in wet-on-wet technique. I'm using wet on dry
technique, that's it. This is simple, one
more final touch with the light colors. If you're satisfied,
you can stop it. We can go with the tree trunk. I'm going to use the
same Burnt Sienna and ultramarin mix. I'll start with the
tree trunk like this, curve, and then draw
your shape first. Then you can fill in the colors. I'm using a brown mix at the right side and
a lighter mix at the left side to keep
the perspective. I'm using a darker color here. And then adding the tree trunk. Make sure use a thick
consistency of paint and not watery consistency of paint while you do this process so
that it doesn't bleed over. Next, I'll take burn
Sienna and then add this then the below details of the
that is below the Autumn, autumn tree, add these colors
orange, red, and brown. You just have the colors and just have fun trying
these techniques guys. It will be so useful when you do your own landscape.
I'll help you. Just practice it,
explore the techniques, then you can paint
any landscape. So I'm painting the bottom of
the tree using wet on dry. Next, I'm going to paint
the tree branches. For that, I'm mixing a darker consistency like burn timber. Then I'm going to add the tree trunks in between
that's peaking out. If you want to add more foliage, you can go with this for the final touches because as light is coming
from this side, you can extend the
tree if you want. Or just dabbing right and adding my final touches
before I finish it off. Make sure you paint it fast because you can add the tree trunk
and finish it off. So I think I'll add a more darker constancy to
give some depth to a tree. I don't want to look it flat. I look flat. Let on dry. So the layers are already dry. I'm just adding a few filage. So finally, I'm going to add
the tree trunk for both. So here, and then few more here. Then I'll take this
tacker consistency. Make sure you have a
sharp pointed brush. Otherwise, take a different one that has fine pointed tip. Just few branches
that are peeking out. It's simple guys. I think
I don't want to overdo it. I just want to create some few blends, and
then I will stop. Make sure you can add
the other details like the grasses near the tree like this. Also, if you need
a darker color, make sure you add it and
blend it with the color. So that your tree looks organic and more will
touch, then I'll stop. Make sure you practice this before we start
our class project. My layers here are dry. I'll stop with that.
One more final touch. Then we'll One more technique. That's a dry brush
technique we are going to see before
starting our glass project. So you can see the
patchy texture that gives a nice effect. Tree trunks. So
let's practice it. First, take your round brush. I'm taking my number
six tbreundbush. So dip it in water. Then load your paint
with your brush. Next, take the
tissue or a cloth. Then see, there should
be more paint and less water because dry
brushing is nothing but dry paint on a dry surface. So you should take the excess moisture first from your brush, and you should have more
paint on your brush. These are cold press papers, but this one is a cold press
paper, 100% cotton paper, but it has a smooth
effect, smooth texture, but this one is a little bit rough texture, cold press paper. So let's try. I'll show you. So when you start, first, take your brush. Unlike other techniques
like wet on dry, you move a little bit
fast with your brush. But when you're using rye brush, you can hold it at an angle, then keep your brush on
a paper, then flick it. The paper doesn't get sink in, like wet on dry or wet-on-wet. It doesn't bleed into it. But see I'll make sure I'll take the excess
moisture from my brush, so dry paint on dry paper. So these are dry
brushes are very, very great for adding
textures to woods. See, but this one, I think
there is more water. So I'll make sure I take the excess from my brush,
moisture from my brush. Now I'll show it, fold
it and show it to you. See. Just keep your
brush and flick it. So just like that. You can use either
wangle and also you can explore this technique with different brushes
before you try it. But for our class project, you just need one
round brush to do it. Be different brushes to
give different effects, just keep it and flip it over. Or you can take at an angle, keep your brush at an angle
and flip it over like this. Same thing we can
do in this side. But this one has a
rough structure. You can see the effect. But this one, see, it is a smooth paper, but 100% cotton paper, but it has a smooth texture. So you had to even
more keep your brush, little harder to
do this process. See? You can even paint a see with this
dry brushing technique. And then paint a boat
in the center of it. It is great for
adding reflections, woods and scrambled leaves. This is a very good technique to add textures and patchy
textures, you can see. Make sure you practice
this before we start our class project,
see you next section.
7. Class Project - Sky and Mountains: Hi, guys. Welcome back. In this section, we'll
start a class project. We'll paint this beautiful
autumn landscape with the limited palette, four colors I mentioned already, cadmium, scarlet, Bnciena
and ultimiu deep. We'll start with the first sky, then move to mountains, then paint the pathway, sorry, the grassland
and pathway. Finally, we'll paint the
foliage of the trees, autumn trees and then
for a final nice touch, we'll add the
birds. Let's start. We are going to do wet-on-wet
techniques for the calm, beautiful, peaceful autumn sky. Ultramarin with a little bit of Burnt Sienna or ultramarlon.
That's your choice. I'm going to use my wash brush, three by four inch
wash brush and wet my sky. This is
the horizon line. I'm going to wet
only the top part of the sky, not the grassland. Let's start. Make sure you apply even coat
and not a puddle. So that you get even shine and then also when you
apply your paints, it will not just run
off or spread too much. Even coat of water is very important when you
paint wet-on-wet sky. This is a simple sky just with few horizontal strokes with the altamarn and burn Ciera mix, and then a misty mountain
using the same mix. So make sure you keep your
paints ready before you start. It'll help you in a good way and you don't want to run out of paints in the
middle of your painting. Let's start. Before that, I'll show you the shrine. See? A little shrine, you can sheen
there's a puddle in you, edges, make sure you wipe
the excess water like this so that you
get a clean edge. Let's start. I'm going to use my number six brush rum
baatcher to paint my sky. So as I have liquid mix here, it should not be too watery, a lighter colour,
not less water, 50% water and 50% paint. Say soft strokes like this, soft stroke like this.
Nothing nothing fancy. So I think I got a
darker mix. It's okay. I'm going to directly
take from ultramarine. And then paint it. Make sure your water
is your brush is damp, not too watery, so that your
paints will not run away. So so I think you get a soft edge,
clean soft edge. So make sure your layer is
wet, your paper is wet. Otherwise, it will
give hard edges. We don't want a soft we want a soft edge sky
and we don't want any hard edges in our
sky. That's right. Make sure you wet
your paper again with fresh so that it
does not give hard edges. I'm going to paint a wet-on-wet
sky with the same mix. So ultramarine, and I think
I got a water on my paper, so I'm going to wipe it off. Next, dab the excess spines and then start with a thicker mix of paint
for your mountains. So just a way we motion. It's easy guys. Just a wavy
motion, not too much water. Make sure you wipe your excess water from your
brush before doing this step. More paint and less water. Make sure you keep a tissue
or tissue paper near you, with paper or cotton
cloth near you, so we can wipe it off. Next, I want a smooth blend at the bottom of the mountain
to create that misty effect. So Make sure you paint within the horizon
line and not below that, so that your painting will
not look out of proportion. Make sure you apply your
paints how muchever you want before the layer gets dry because once it gets
dry, it gets lighter. See, a soft misty mountain. So I'm happy with that,
we'll stop with that. Let's wait. Let it dry. Alan first, then the pathway. I created this mix with a
little bit of cadmium mellow, orange and scarlet red to
get this beautiful orange, warm orange, and also
another mix like this one with scarlet and bunsenia because when we
paint the pathway, we are going to in the top part lighter as it
gradually comes down near us, it gets charcer because in
the landscape you see always the details near us
are darker and more detailed and more brighter
and as it goes away, it face and it becomes lighter. Seeing that perspective, we
are going to paint like that. Star I'll start with the orange. We are going to paint
wet on dry method for this technique as we already practiced in technique sections, so dry paper, white
paint. Let's start. Make sure your layers are dry before you
start this process. Otherwise, the colors will blend because it's
yellow orange, cadmium yellow orange, if you mix with ultramarine
it give a green. So you don't want
to get a green. So we want to paint autumn beautiful
autumn grassland that looks vibrant and
pleasing to your eyes. It's a very beautiful orange
color, warm orange color. So first, you're going to paint the left side and
then move on to right side, then
with the grassland. So make sure you have more
paint and less water. Otherwise, your
paints will not stay in place and it
gives califlereffet. I'll stop here. Next,
I'm going to take this Jaco mix and mix it here. See? If you blend it, it gives a beautiful outcome. My paint consistency
is correct here, so I don't get any
cauliflower effects. Make sure you dab the excess water before
you take another color. It's like variegated wash guys. Two colors, but
you need to blend it evenly to make it
soft and pleasing. Down at the bottom, I make
it darker to give depth. As it's near us, it's darker, one more touch and then we'll move
on to right side. Next, I'm going to
mix the same mix, orange and scalt to
get lighter color, start from there. Top. Make sure you have a
fine point like this when you add this layer or take a brush smaller
brush, and do this step. If you're not contnt
with a bigger brush, so lighter colour at the top, darker colour at the bottom. Make sure you just apply it
evenly within the layer. Next, I'm going to
take the darker brown mix that is mixed with scarlet and Burnt Sienna then add the details after
finishing this layer. Darker at the bottom,
lighter at the top. So make sure you wipe off the excess sponge and
do this process to blend this lay that
comes in between evenly. So it doesn't look flat
or out of proportion. So it should be a smooth. This is all done
in on dry method. You can also go with on wet method, if you're
convenient with that. Make sure you keep
your paints ready. I want to apply the
layer for the pathway, but I'll wait for
this layer to dry, then move on to the pathway. I don't want to get the paint bleed into the pathway.
So let's wait.
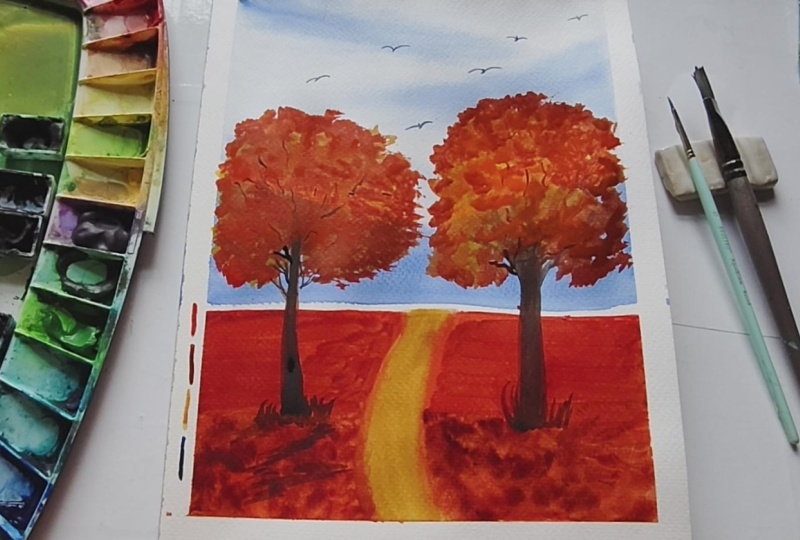
8. Class Project - Tree Foliages: So Hi, guys. Welcome back. In this section, we'll
start to paint our trees and finally finish the painting
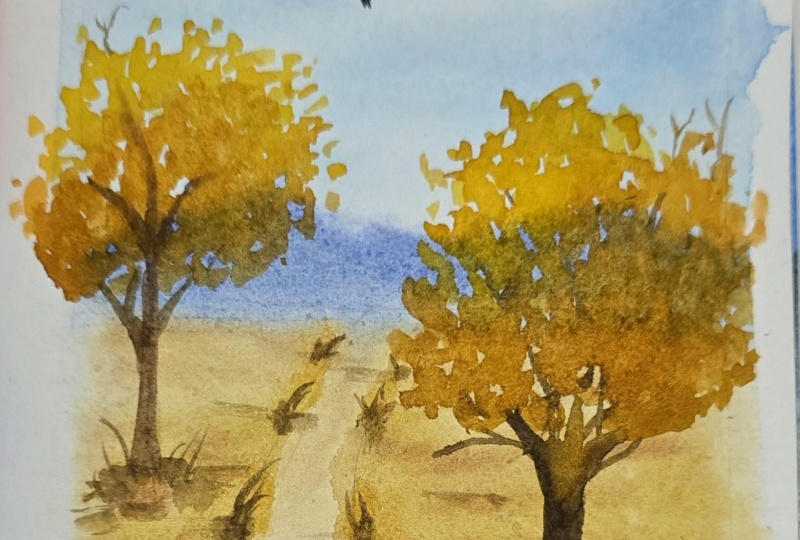
by painting the birds. First, we are going to paint a tree on the right side
one and the left side one, we practiced in the
technique section. So for this, I used wet-on-wet
and wet on rye method. I'm going to use the same method and
show you how to paint one tree here with Btonet method and the other tree here with wet on rye method, and finish off by
painting bird finally. Let's begin. Here are my paints. So first, for this proportion, I'm thinking that my sum comes from this side left
side of the pending. So the foilage will be darker on the right side
and lighter on the left side. So first, I'll use the lighter colors and
then go to darker colors. So first orange, red, and then brown to add
depth to our foilage. So first, I'm going to use this brush size six Grumbacher, same brush. So I'm
starting here. Make sure you paint your tree
in proportion and not too big so the painting doesn't look out of proportion
and not nice. So let's start. First, I'm dabbing few water
to start my ton technique. First, I'm going to paint the folage then add my branches. You can go vice versa. You can add the branches first. Wearing this tree, I'll show you I'm going to add
the branches first, wet on rye and then a paints. So I'm putting some clean water in a tree shape for a foiage. So now I'm going to take my lightest color with a little bit of red and
start putting it here. Just dabbing it. I left space, few wide spaces while I put water,
dabbing some water. Same way, you need to just dab it along with the water you added.
Lighter at the top. Then gradually,
while you go down to the filage on the right
side, it becomes harker. I'll add few more reds too. So it's just simple guys, few dabs wet-on-wet and then we can finally add the
details of the foliage. Next, I'm going to add
brown to the right side. First, few reds and
browns in the tree shape. Finally, we can add few
strokes at the end. Few dabs. In the shape, don't take too much paint or when you're wetting the
tree in a tree shape, don't apply too much water, then it will not look good. I'm adding few reds here. Autumn is full of colors
you already know, red, yellow, brown
and dark brown. You can use all the
colors you see your tree. I think here I put
too much water, so I'll take it off, I'll wipe it off with my
brush and then add it. So So now I'm going to add few more
water wraps for the tree. So next for the final touch, I'll add to red and
brown ish brown color for the right right hand side to create depth to our foliage. So I'll stop with that. Please don't or it. I'll stop with it.
Let it dry till that. We can work on the
left side tree, a little smaller
tree than this one. And let's pattll it gets dry. Next, we're going
to add this tree, a little smaller than this one. So let's paint. I'm going to add
the branches first, then add the foliage over it. This is as you can see, my palette, this is
a dark brown color. Annexed Bonsiana
and a little bit of ultramarin to get
this dark brown color. So first, I'll take
my lighter version. This is lighter version,
burn Sienna and little cadmium yellow and a tiny bit of red to get this
yellow ochre color we practiced painted the
pathway before, see? This is a burned Sienna color. This lighter version, and
this is the darker version. As the sand comes
from this side, we are going to paint the
left side of the tree with this color and the right side of the tree
with the dark color, closer to burn timber or sepia. H so no excess water,
little bit water. So first, I'll add
my dream tank. First, a single line and make it wider
at the bottom. See? First, I added the lighter
color, then the darker color. This we can say
wet-on-wet technique too. But it's all dry paper, so it's met on dry technique. So that's nice. So I don't want to make
it even more darker. So I'll add other trees,
trunks like this. Just sees this has
a very sharp point, I'm able to paint a thin
strokes trunk like this. So just follow along with me. And then we can
finish it off soon. If your brush is very thick, go to smaller size brush and paint your
trunk, tree trunks. That's nice, actually. I
don't want to order it. Let's start to paint our
foiliages see so simple. If you want a lighter color, I'm going to add that yellow ochre lighter Burnt
Sienna color here. So next, we're going
to add the foliage, so I'll take my orange, dab it on the right hand side. So this is wet on
dry. So just dab like this one we did during our practice session.
I'm going to toe this. This is wet-on-wet
and return dry, so we are going to do this way. So just de paints,
lighter colour. Start always with light color when you paint your fooliage. Then go to a darker one. It can be a little
bushy, not too thick. Next, I'll add red. I think it's not very dark. I need a medium tone. This is a lighter tone,
medium tone, and darter tone. So just few dabs. Or you can use the
same orange color fully. This is another method. You can we dry method, but I'm applying the same
white light color all over my foliage and then go
for the darker one. See? Just adding few for the shadows of the
trees. That simple. So and then add your red to give
because it's still wet, you can add more layers. And then finally burn Sienna
with a little bit of red, which gives a reddish brown. So here, it at the end, it'll be darker, few dabs. Darker motion just
add your shadows. It's that simple, guys. So Make sure your paint is wet so that you
get a soft effect. But wet on dry, you can paint on a dry surface
or use this technique. I'm waiting for it
to dry because I don't want to paint
the branches, will bleed into all the layers
of the foliage everywhere. So lighter color, I'm adding the final
lighter color at the end, few dots to add extra
details to my foliage. At the end, few dots so that the foliage looks in proportion and
pleasing to your eyes. So I'll stop with it.
I'm happy with it. Also, I want to add a few more details in my
wet-on-wet technique. I'm not satisfied, so I'm
going to add a few more reds. If you're satisfied, don't do
the steps, skip this step. I don't I'm not satisfied because I want
a vibrant autumn tree, so I'm going over it again. If you are satisfied, please
skip this step, guys. But here I'm doing it on dry because my paints
I already got dry. This is like it on dry here. So I'm okay. So I'll stop with
it. Let's paint the trunk and then
finish off with bodies. Let's paint a trunk. So I'm just charting
from here underneath. I'm adding more blue to make
it darker on the right side. Just painting my trunk from the foliage.
This is wet on dry. So I add the lighter color
like we mixed one with Bnciena and Cadmium
melo a little bit red on the right side because
this side is lighter. And this one this is darker on the right
side, just few water. I need more darker colour, more dark brown like sepia on the right side to give
depth to arteries. So I'll add the branches, see. It's a brown. I'll add the tree
trunks like this, see, I'm extending it, adding the final touches
for our foliage. See, the white color we
left while painting with tonbt adding the few
trunks in the gaps. So it looks good. It's still wet, so it might
bleed sometimes. Be careful. Make sure you use
round brush which has a sharp tip like this or a
rigor brush if you have. But for the whole
painting folage, I use only one single brush. It all depends on the
brushes you used, you use and the strokes. Next, I'm going
to blend it here. Take a darker brown color and also the orange
color we had bile mixing because it's
the extra details we are adding for the foliage. Like grasses and few strokes. Finally, I'm adding ultramarine
blue and a little bit of burnt sienna and make
sure your brush is dry. So dab the excess paint and take more paints
in your brush, dab the excess water, and like this extra detail. A few grasses popping out of it, you can either go with textures like this and also add some stones
or just leave it simple. I'm going to add some
textures and grasses, both. A autumn landscape
will come to life with few brush rookes so
make sure you do it. And here too, the same
thing you're going to do. This one, I'm going
to make it darker and make it lighter with the
paint I got. The loca paint. Next, the darker one, Burnt Sienna this is too dark,
so I'll make it lighter. So next, I'll add some
grasses grass blades. Just a flick with
your strap point. Make sure you have more
paint and less water. Otherwise, the strokes
will not look nice. So you can use even your liner brush. Riga brush to do this step. If you're not confident
in doing the round brush. So just adding some few
textures, final touches. And here, too, I'm going to add some few strokes
using dry brush. So take your paints, dab it off, and then
just flick like this. Side of your brush, you
just flicking it through. See, flicking it through. So do it lightly guys. Don't give some pressure. I
like the outcome of this, so I'll stop with this. Next, we can paint
the bodies and finish off for painting.
Se next section.
9. Class Project - Birdies: Hi, guys. Welcome
back. In this section, we'll paint birds for a beautiful Autumn landscape and also the final few touches before finishing our painting. Let's begin. First, I'll
add a few more dry strokes and a few more branches for the left side tree
because I thought it'll be it'll make more sense
if I add few branches. It looks empty, dark color. You get this dark
color by mixing these two and use a rigor brush or
a fine point round brush. Just few strokes. That's enough, guys. Don't or it just few strokes
and you're done. So for the birds, I'm going to use
the same mixture, but I'll add more blue born ultramarine blue
to make it rich black. I'll show you. I'll
watch it and show you. See, this is the darker black. You get rich dark black by mixing ultramarine
more ultramarine, like 75% ultramarine
and 25% Pansiana. So you'll add the bodies
with this rich black color. So you just need to use strokes or whichever or M
shape two will be work. See here, I added just
V shapes, not shapes. You can go with this or the one I showed in
techniques like this. This one is a little bit
detailed, as you can see. You can go with this
V shape or this one detailed or even shape. Like this, shaped like this one. Whichever works for you. Practice it and then
paint the body skis. Make sure your legs are
dry before you start. Practice this like this. Simple, thin one or shaped one, I'm giving a head
detail one, two wings. Like this. Whichever you
like, you can go ahead. I think for class project, I'll go with this and
few shaped words, both, like the one in
this one I practiced. We'll go simple V shapes. You can do it guys. Make sure paints are dry before you start. So one on the left
side of the painting. One, two. So I got an another line, so I'm going to make
it bigger. Okay. So make sure you
have a thick paint, dab the excess water, and then paint your bids. It's that simple. Wrat this on a sheet
of paper before you paint it on your landscape. And one more on the top. Maybe one more here. As it goes far away, your bird will
look small, right. So one more final
touch, then I'll stop. As soon as a bird
that is closer, so you can add
details if you want, but I'll leave it simple. And this one little bigger. So that's it, guys. I think I'll stop with this. Hope you painted your birds. If it's not like mine, don't worry, practice it. It's very simple. See
you next section.
10. Tape Peeling: Hi, guys. I think our
painting has trained fully. Let's peel off the masking tape and see our final outcome. Always, when you peel
off the masking tape, peel it at an angle
so that you get a clean crispech also when you take off
your masking tape, remove it at an angle like this. So I your painting isn't
like me, don't worry. Practice makes you
perfect, guys. So keep practicing and you'll
get the desired outcome. Practice makes you
perfect, right. So this is a final outcome. And also Just make sure your lays are
all dry before you do the step so that the
paints won't get in your hand and make your
painting a little bit messy. So here's a final outcome, guys. There you have it. Congratulations. See, I haven't
watched my palette here. These are the four
colors we used, and these are the colors we got. So there you go.
See next section.
11. Conclusion: And there we have it a
beautiful autumn landscape created with just four colors. I hope you enjoyed exploring
how a limited palette can still create warm depth and
harmony in a landscape. Congratulations, guys. Remember, painting
isn't about perfection. It's just letting
your creativity flow and enjoying the process. Thank you so much
for joining me Pure. If you like my class, I
request you to leave a review. It helps me as an instructor and artists like
you can join in. And also don't forget to share your projects in the projects
and associate lives. I love to see it and
give my feedback. So until then, keep practicing, keep painting, and I'll
see you in my next class.
 Sowmya Karthik, Artist and Educator