Transcripts
1. Introduction: Hi, my name is Nick. Welcome to this comprehensive
course on how to publish a picture book
today using Canva and kVp. And the publisher
of 21 books, 11, which I've published in
the last six months, utilizing the exact same methods I'll be teaching you today. It's fun, it's fast,
and it's addicting. By the end of this course, you will learn how to create a beautiful POD picture
book that you'll be able to publish on
the Amazon bookstore. We'll go step-by-step. You can follow along or you can watch the presentation
at your own. Will. I give you all the
techniques, all the tools, and all the websites
to utilize in order to make this process
easy as possible. What I wanna do
now is run through this sections of the class
to help you get started. In the first section,
I'll teach you about the structure of the book. We'll go over terminology, overall book design and layout. We'll then talk about why the cover is so important
to the sales of your book. Then I'll show you how to
use your original artwork. Or if you're just starting
in your art career, utilize the artwork
found in Canva or some other free
download sites. Finally, we'll do
a deep dive into the kVp software and show
you step-by-step how to navigate the KT P
site to print and ultimately sell your book
on the Amazon bookstore. Then for our class project, we'll be discussing
all the things needed for a great cover design. And then you'll
be able to choose your artwork or photographs
and typography to create a stunning book
cover that we can all admire and comment on. Can't wait for you
to get started. Let's jump in.
2. Write a Story Using AI with Canva! "Just Added!": Hi everybody, This is
Nick again and I got some really exciting
news to share with you about a new feature
that's still in Beta. But Canada is letting
us try it out. And it's in the docs button, which is right here. And we're going
to click on that. Actually, we don't
even need to click on it because right
now we have ducks. But if you haven't
clicked on it yet, click on docs and
bring up docks here. And basically like word
built into Canvas. But it's got this really
cool little feature called magic rate. The way we access magic rate
is we click on this plus and we click on magic rate and gives you this little box
called magic rate. Now what magic grade is, is it's an AI form of
helping you create your own story or passage
or paragraph to get it, to kind of give you a, an inspiration to write
better or to write more. Sometimes we get stuck, right? That's inevitable. If you become a writer, you're going to be stuck sometimes. And so what I'd like to do
here is just say right, a funny story about
a teddy bear ups. On his way on his way to school. He has lost his owner and
is looking for her, right? Simple stuff. The more description you add, obviously the more
personalize your story will. And then you just hit Enter. And with a matter of seconds, it will create a little
story about your teddy bear. This, I recommend this
strongly if you're helping a child to write and they
don't know where to start. And it's just a great place, great thing for them. Now. Now, saying all that
I do love to write and I do encourage you to
write your own stories, but this is a great way to
maybe inspire you to do more, to do a better job of the
way you lay things out. It's very organized. And I've done this
a few times now. And it's really, really cool. And with the free
version, you're, I think you're limited
to 25 stories, but if you have a pro version
or an educational version, you can have unlimited
use of that. And the only caveat is with memory with the
educational account, you can't do anything
commercial with that. I think the reason for the
education is just to get kids and even students
up to college, I believe, get a free
account to get used to doing other things
you could do in Canva. So this is a great thing, a great feature and
benefit of Canva. That's going to make a
lot of people happy, especially people who are stuck. So enjoy.
3. Quick Guide to Templates: One thing we haven't just
talked about is book covers. We'll cover is your first
impression on your reader. What is the book about? Will it grab their attention? One of the greatest things
about Canada is its extensive. I mean, we're talking
hundreds of thousands of templates in Canva. And they also do book covers. And they also have
book layouts as well. So if you're unsure, if you are wanting to
do a children's book, you're not really sure
how to set it up? I have a whole thing. I'm gonna show you in a
second on how to do that. But let's look at
book covers first. Here we just type in book
covers in the design area. That's the search
engine up here, we just type in book covers
and see what it shows us. They have book,
kid's book cover, Book Creator cover and never
really played with that. Let's see what this shows us. Pretty cool. They give you all these
possibilities for book covers. If there's something
in here that you like, you just choose one of them. This is a horizontal book. And there's some
other similar styles of books that you could do. All you do is click
out, change your title. If you'd like this, if not, you can keep looking. Another thing I'd like
to do is if I go into, back into the
search engine here. This is only if I'm
doing a children's book. I type in storybook. Storybook is going to give
us a ton of templates. You can see here you can
take any one of these. And if it has a crown, that means it's pro if it
doesn't show on your screen, if you're looking at
it right now with me. It might not show, you might
just show you the free ones. Apply all pages. You can look at this. You can change the
expressions on the faces. You can change out
the people that kids, they have a different poses, boys and girls, different
items that are in the book. Then you can change
out what you want. Remember, it's very
easy to do that. You just go to your elements. And if you're doing something on turtles graphics, remember this. You couldn't even
do static only. And then you have your turtles and you can replace them here. By looking at the artwork
and changing the text. You can also change the font. We talked about that. Click on that and that's that. Let's go back to the home
button and type in book cover. And if you're doing a fiction, some really nice covers. A cool one, The yourself. Some of them I wouldn't consider great design like a book
of agriculture is weak. But the be yourself
one is a great cover. Remember all of the graphics, if you have the pro
account can be used. This person that can be used in your cover just
changed the title, your name, and that's
your book title. It's fantastic. I mean, some of these
book covers are really, really good book covers. All right, thanks. I'll see you in the next video.
4. Production and Layout: One of the first
things I always do, and I make sure that
this is selected. I go to my file. I want to make sure
that show rulers and guides available to me. I have that checkmarked
show margins which had just talked about in the last
video and show pretty bleed, which I think it's important to show that because
if I didn't show that, you can see how it's changed
now just 8.5 by 8.5. I did this little
part right here. This was not this artwork
was done in Procreate. And then it's important. When you're doing, you can choose all of your artwork here. We talked about this before. You can type in, let's
say type in cake. And you have all these
different cakes. I want to make sure
there's no animations where I do a go-to this and I select Static
only play my filters. And now you won't have
any of those animations. Which if you're doing video, that's okay, but not when
you're doing a print book. If I bring something in, Let's pick this one. And if I zoom in
on this picture, you can see how good
how crisp lines are. You never have to worry
about resolution with Canva. I've never had an issue
with the resolution. It's always high-res
images, which I love. And it's, you can either
use the graphics is, is, what I would suggest is just modifying it a little
bit to your own use. Because remember, Canada is, there's millions of
users and if somebody is using the same cake or
the same character, your book is going to look
like someone else's book. So my advice to you is to use original artwork
when you can hybrid, when you can mix
the two together, or you can also use their
graphics without modifying it. Now the thing that they, one other licensing
stipulations is that you can't take like you can't
take this graphic and resell it as your own
because it's not yours. You have commercial usage of it to put it in your book with, along with some other
images to make it your own. But don't just put that in
there and say This is mine. And I never, whenever
I write a book, I never say illustrated that
I'm using Canva artwork, just straight Canva artwork
and never say illustrated by nickname Belsky because
I didn't illustrate it. I just say a book by
negative Belsky that way. This one is hybrid book. There are other books that
I have that are not hybrid. But if you look at the graphics, very simple book for kids, I just combined
like this one has 1234566 elements in
it plus the text. This one same thing, but
this guy is the backgrounds. One thing grounds, one
thing that trucks, one thing that ones. There's like five
or six elements. And it's mostly a Canva artwork. But it's combined of combining illustrations
from other areas. And some of the artwork
might be from Pixabay. I use Pixabay and we'll talk about that in
the next video. I use Pixabay is one
of my free sites of where to get
some other artwork. That's essentially without going into too much detail here. That's essentially how
my book is laid out. When I go to print it, I need to have a
high-quality print PDF. I go to my share button. This is a new latest version, will have this
giant share button. It's a lot less
confusing than it was before you just hit share. And then you want to make
sure that you go to Download. And you want to make
sure that this, even though it says
suggested that's wrong, I want to go to PDF print. I usually choose
CMYK for my print. Then I go to here with kVp. When you're doing a book, do not include the title page, title page, the cover, because the cover is
actually a separate image, a separate file that
we need to upload. And I'll show you
that in a second. I would do select all
except for the cover. Then I hit Done and it
saves me a high-res PDF. Then we take that PDF into GDP, which is in the next section.
5. Royalty Free Art Choices: Everybody, welcome back. We're gonna be talking
about artwork now this is the fun part, right? Where we get to add
our own artwork. We can upload our own
artwork using the Upload, going to uploads and
choosing your own artwork. Or we can use elements. We talked about elements before, we just type in a
keyword like dogs. We can find either all of the different photographs
or graphics for dogs. And they're broken down into
the photos and graphics. And here's a cool little trick. Appear in the search box. Next to dogs. There's a little X
and then after x, there is some parameters for searching for the
files that you want. You can remove the
animated ones, which can take up
a lot of space. You might want horizontal
versus vertical. Pro versions versus free. I just like to click
on free because both, because I don't think
either one is limiting. So you want to include
as much as you can. I've never done
the color before, so let's say I just wanted to yellow images and
see what happens. That's pretty cool. Not that I would never do that, but that is something
that's pretty cool. It seems like you could
add your own colors. Let's say you only wanted
brown or black or white. And then you could
do that as well. So those are the different
parameters for searching. And that's Canva. Canva just gives you, especially if you're a paid version, a paid account holder. It just gives you unlimited
graphics and photographs. Now, Canada works
with a lot of apps. One of the ones that are
built-in to this as Pixabay. Pixabay is an app that
gives you a royalty free and free usage for commercial use of high-quality,
high DPI graphics. And you're not limited
to photographs now the ones that are included
in the Canada program, I'm going to see these are
looking at unlimited as far as what they give you. You're much better off
going to the actual site. Now if I go to pixabay and I start there and I just type
in something like dogs. It's going to give you, the first part here
is just sponsored. But here it's gonna
give you illustrations, photos, Vector Graphics,
which is like Illustrator. Illustrations, videos,
music, sound effects. Some pretty amazing
what they give you. I found a lot of great
graphics here and some of the graphics or even grouped
by different characters. So for instance, this one has a bunch of different animals
all grouped together. You can use this as one
image if you'd like those, and you want to incorporate
those into your artwork, which they're really cute. And what I usually do is when
I grab something like this, I'll modify minds so that let's say I have this and
then somebody else, ten other people
download the same file. You're going to have the
same kind of characters, but they are very cute. So you can download that and you just click on Free Download. It's a donation. You can
just donate what you want and you don't have to. It's totally up to you.
And the great thing is you don't have to provide
attribution is at all. But if you want to do that,
that is up to you regardless. So that's Pixabay. The other one that
I use is Pexels. Pexels is another site.
It's getting bigger. It's pretty much a sister
city. Sister city. It's a sister site of Pixabay. And it's just gives
you more alternatives, more and more variety. And the same type
of thing where you can put you can type in dogs and that type of thing. Unsplash is another site. I think besides including
these three plus Canada, you're going to have
an abundance of graphics that's used from
all royalty-free or free. If you can't draw
this as a perfect, perfect avenue for you. If you can draw and you want to incorporate some of
these ideas into your own, that's another
great way to do it. I sometimes will do a hybrid of the Canada drawings and my drawings to make
it more personal. And so those are just some of the artwork opportunities
for you, for your books. I'll see you in the next video.
6. Hiring Illustrators: Alright, I'm back. I wanted to talk a little bit
about buying illustrations. And there that can range
from anywhere from $25 a page to a $100 a page. It could be per project, it could be partial book. Concepts are all
kinds of things. For I've always illustrated my own books and I felt
like I have a little bit of talent and I will just utilize that talent and do what I can
with the books that I have, the illustrations that I have. But for this book, and this is the Chinese version. But for this book, I did hire two
different illustrators. One to help me
with some concept, that concept art, making sure that my artwork was consistent. And I spent a little
bit of money. I found him through
a friend and he did a very inexpensive spend about an hour with
me and helped me to refine my character to
make it more uniform. Then I actually went to fiber. I was going to hire tremendous illustrator
through Fiverr. And I just couldn't afford him. And I was thinking about
doing a Kickstarter, which I don't really talk
about in this class, but it's a raise money
for one of your books. But I decided not to do that. But I did hire him for some background art and this is some of his work back here. This is from him. Is he a nice
watercolor Technique? And he actually did
two pages for me. And there's another one. I mean, his artwork is just, I would love to have
a book done by him. He's, he's an amazing artist. And through fiber,
What's great about places like Fiverr Upwork. But these types of places, and also you can find them, find illustrators through
Facebook as well. There's groups of you can contact them and they usually
have a standard contract. What I like about going
into places like Fiverr and Upwork this they have
a standard contract that you can examine and
they're pretty much all the same the way it works
with those types of Ed. Most illustrators, not
all illustrators do this, but most illustrators do
like a work for hire. So you contract with them for either per book or per page. That's a lot of artwork. For instance, I
have a friend who's a 300 page graphic novel and he was able to negotiate a price for twenty-five
dollars a page. So he showed me his contract. It's a basic work for
hire or contract, which means that the artists will do all of the work and
as soon as he gets paid, he will release the
original files. And these are
usually PSD files or high res images to the author. And then they can do whatever
they want with those books, meaning that they
can take them then and use it on the e-book, a hardcover posters and
that type of thing. They basically own the artwork and the artists just
gives away the copyright. Now, not everyone does that. They don't like to give
away their artwork. They might ask that in
exchange for doing this, they would like their
name on the book, and most authors will do that. So they're getting paid and
then they get some notoriety. And why did they do
that? Well, it's saying that this is
the person who did it. And then maybe that might garner some more work for
them down the road. And that's really
built in the contract. You have to negotiate that
with your illustrator. And I think it's a
fair thing to do as an illustrator myself. It's a lot of work. I know for a fact that this took me over two years to illustrate
getting everything right, making sure that it was
up to a place right, wanted and felt
comfortable releasing it. Well, in the past
video I showed you about the other
sites you can use. The other problem with those,
of course, is cohesion. Finding characters of the same. We found that one graphic, the head, all the same animals, but that's only one pose. And so that's something
you have to think about. What's important to you, how distinct, distinct Do
you want your book to be? So this, each Illustrator
has their own style. And so anyways, that's
pretty much how that is now the high-end artists typically won't work with new authors. They usually work
with a publisher. They get, they get
contracted out. For a book. They might get $10 thousand
at $15 thousand for a book. And then some get percentages
of royalties, some don't. And that's just based on the contract and what
the illustrator wants. You can go online, you can go on and see what you can get. Twenty-five dollars to
$100 is pretty much the average going rate that's
hiring an illustrator.
7. Book cover designs: Alright, let's talk
about book covers. The best way to use Canva for your book covers is to take
advantage of their templates. They have an extensive
list of templates and copies of books that you can use as basically as a template
not you want to use the exact book cover
because they're remember there are millions of
users and they might come up with the
exact same cover. But here's a list of vertical covers on her
children's book covers. And you can see that
there's a bunch of really great designs here. You can use this as a
foundation for your book cover. Let's say we're going
to take this one. Good, Mr. White. Now, something that's very
important that we have to do, remember this is the cover, but we still need a back cover. So when we're preparing
that file for print, we need to have a
front and back. But this is a great
place to start to get it kinda get a feel
for what's out there. This is a very simple design. 12347, or eight different elements here.
It's a great font. It's a fun font. You
can put your name, you can go over here and go to effect so trivially like and you can change the curve on this. Now you can actually make your curve rounded more or down like this almost
incomplete circle. That's one of the effects of the text, which is really nice. You can also add a background
if you want to do that. You can also do that here. The, a lot of things you can
do to play around with this and you can change
out the elements. If you don't think that snowman, you can change out the elements, create your own snowman, but it's a great place to start. Let's take a look
at the re-size. It see what size this is now. This is 14 by 23. It kinda makes me feel like
this might be a poster, not a book cover. But what we wanna do is
take this and we could even do a copy of everything. Let's do just do that. Let's do a copy.
Let's go back home. And let's create a
design custom size. And we might want to make
sure this is inches. And we want with SB want 17. Remember, this is
based on my book size. You can have any
book size you want. And then create a new design. There's the background and there's some snow
there built into it. Or we added some snow
and then you can just go ahead and put a
little blurb down here. So let's just do that
for the heck of it. This is my book. And some more
pictures, possibly, maybe a picture of you
and a little bio view. And remember we need to have, go back to elements. And that's it. That's
how we would start a fresh new design. Now you can take all this stuff out and you can
start on your own. You have plenty of choices here. You could do something with one of these pre designed
things that pop out. This could be, this could be a headline for you,
something like that. You can change it out.
It's very easy to change out all of the text. And you have everything
available to you. Remember just to do those, to go up to the
file and make sure all those all three things are checked so that you can have
a great place to start. And that is book covers.
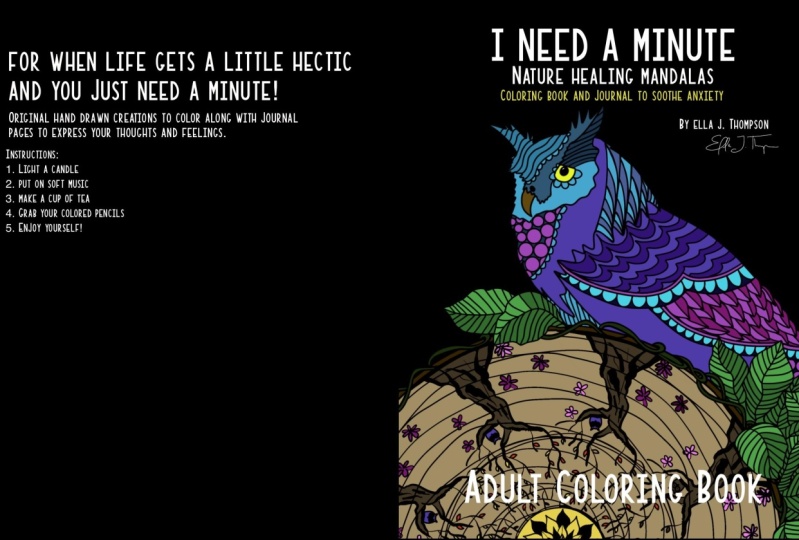
8. Book Terminology: Welcome to the first
section of book design. I want to show you
a couple of books, probably a few books that will demonstrate to you what
a paperback looks like. This is actually a paperback van has really not much
inside at all. It's called a ruled notebook. I really did it as a test. I wanted to see how
well they came out. This is a matte finish
and you can tell the difference between
a matte finish and a glossy by seeing how this
one has a lot of sheen, a lot of gloss on it. And this one doesn't
have anything. The mat is really nice. It's got a nice feel to it. Nice texture. I think you can just make
that decision when you would probably want to try it yourself to see
the way they feel. I like this one as well as
the glossy, the glossy. What I liked about the glossy
is the colors really pop. But let's talk about parts
of a book that you'll need to know when we're
talking about color, especially there is one term that's used which probably doesn't make a lot
of sense to you, but it's called bleed. Bleed is when the color
goes off the page. This book is a full color bleed. The color goes on
all four corners, meaning that it goes
off of the page. There's no white area at all. So when the printer goes
to print this into cut it, they want a little bit extra
and what the file size to be a little bit larger
than the book size. This book size is
probably a nine by six, maybe a little bit
smaller than that. But the printer will cut
here on the edge and we want the red to be
on all of the edges. I chose to have a
green on the spine. This is called the spine,
this part right here. And this is also
called perfect bound. Perfect bound means that it is kinda like a 90 degree angle. You see how that
looks. Also because it's FEC writing is
allowed on the spine. So let's say you're doing
a bunch of these and you wanted to stack
them side-by-side. You will be able to do that and you can find
your book that way. The thicker the book, the better chance you will have to have writing
on the edge. Now there are a couple
of cases that well, printers will try
to make it work. This is one printer. I don't know how they
did it, but you can see how small that is. It's almost probably
a four-point text. It's tiny. And they were able to put
printing on the edge. This is not if you can see
that it's not perfect bound. It is glued. All of the books today, especially from
kVp, are all glued. And so that's just the
way they're put together. You're not gonna see whenever, if you ever see a
book that's got that has three staples on the edge? You might see that with a
really super thin books that's called saddle stitch. Although this is
not perfectly flat, perfectly square, it's hard
to show you in the camera. Anyways, this is the
glossy, this is the mat. Some other things we
need to know about the book is we talked
about the bleed. This is called the trim. Wherever we cut, the
printer would cut the edge would be
the trim, the spine. When you open the
book in the middle, this middle part is
called the gutter. The gutter is important because most books are not printed flat. They roll up like
this and like this. And so it's very important, not so much in this case, but in another one I'll
show you in a second. You don't want the the pictures or the text to run too
close to the gutter. Because when it's
curved like this, people won't be able to, kids
won't be able to see it. Or whoever is reading your
book won't be able to see it. We also have an area outside and the edge right next to the trim. We call this area,
this white area. The margin. Now this margin is about, I would say it's about
a half of an inch. When we go to the actual book
production part in Canva, you can see Canada actually gives you a
pretty healthy margin. And we're going to show you more about that a little
bit later on. So why would we have a
margin around our area here? This is called this area
here is the live area. Let me get let me get the other book to
show you what I mean. This is another book. And do you see how the artwork goes into the
central part here, the gutter? This is okay because
this artwork is just a continuation of the grass that goes
across the page. But I purposely made sure
that my text did not go into the gutter and then
give it plenty of room here. And here as well. You want to keep your main
artwork close to the middle, which is considered
your live area. And I'll I'll demonstrate
this in Canva. I believe it's the next video. Now this book was actually
not produced by kVp, this was produced by
lightning source. Which is owned by Ingram Spark. And it's night and
day differences. The quality of the printing. It's almost like
it's not glossy. It's a very thin paper. The colors, although
it's very vibrant here, when I'm looking at it, you can actually see some of
the gradations of the paper. And so it's just not as good. Let me pick a newer book so I can show you what
I'm talking about. Here's a book that has, it's almost like a semi gloss. It's kind of like
either call it semi gloss or a satin finish, where it's kind of like a half
gloss is not super glossy, but the color, the paper quality is much better than
the other one. It's got a little bit
of a shine to it. And by the way, this is Canva artwork. This picture right here,
which is really cool. I made a combination of about, I believe I have
about one to three, maybe four different images
to create this page. Again, I'm trying to keep
artwork away from the middle. Most of it will
be on the inside. And if you look at that,
I am able to do that. I have the main focus
in the live area. Live area. And the Texas specially
is right in the middle. That's important to me. And that I don't do
page page numbers. You could do that if you'd like. This is a book that
has more artwork. This one actually on this page. I don't know if I did
this for all of them. I think this is a Chinese
version of my book. I think this version has, it looks like maybe a quarter of an inch margin all
the way around. And so sometimes I do that. Sometimes they don't. But you can see where the
live area is. Live area. Also, let's talk
about the back cover. Now when you go to submit
your page, your book, you will have a
manuscript which is the inside part of the book. And then you'll have a cover, which is a second file. And the cover will
be flat like this, so it'd be double the size. If this is an 8.5 by 8.5, then your cover
will be 17 by 8.5. But on the back,
you need to keep, not only will you
need to keep area for the artwork to
have a margin here. You also need to keep this area relatively
free of artwork. Now this worked out, okay. The dog is over here, and this is where amazon or
kVp will insert your ISBN. If you so decide to go with
Amazon to get a free ISBN, ISBN and barcode for the price. It also tells you who
the publisher is. I think there's some other
information there as well. That's parts of a book. I know there's a lot to it, but I want you to be
as intelligent about this as possible so that when you're talking
with somebody else, you're sounding like, you know
what you're talking about. This is the hardcover. I wanted to see what the construction quality
of the hardcover. This is in Beta right now. They're not really, Is
not up and running. I think only a few
people get to do this. But the quality is outstanding. It's a really
high-quality construction of this book. It
looks really good. This is the same thing. It's just a rule book. I think it's 120 pages. Anyways, I wanted to look
at the construction. I really liked this a lot. The only downside to the hardcover on Kitty P is
they're really expensive. And so if you're doing a large quantity
or if you're doing a Kickstarter or
something like that, you'll probably want to get a larger quantity either here
domestically or overseas. One more thing, this part of
the book and a hardcover, these are called end pages. You can, when you're going to print an, a traditional printer, you can get the
end pages printed. You might see this
on some books. They'll print some time
design and the n covers, it is an extra charge. And also, in addition to that, with a hardcover, you can
also get a dust cover. Kvp does not provide
dust covers. That's it for book terminology. See you in the next video.
9. Preparing Your Book Covers for Print: All right, welcome back.
This is the cover. Now the covers a separate
file that you will need to upload into the KTB software. You'll have your manuscript, which is the file we just
saved in the last video. And you'll have your cover page. You want to make sure that the cover of your
page, of course, is on the right-hand
side and the back will be your little blurb
about your books. And I like to include
more of my books. If they liked my book, they have access to my other
two books as well. You want to leave an area of about two inches
by one inch here. For the ISBN, ISBN will be incorporated
into the book by kVp. If you decide to go
with a free ISBN, if you have your own ISBN, you'll need to include the
artwork into this artwork. And you will get that biochar, which is my identifier is
let me type that in for you. My identifies.com at biochar
and it's a great site. Even if you don't buy
your ISBN through them, they give you a lot
of information. I think you can even register your copyright directly
on that page as well. That website. I have actually bought
ten back in the day. I think there were $25 each. When you buy lots of ten, you can buy all the
way up to 5 thousand. And they really
come down in price, but when you're buying
only one, it's about $125. But the good part of it is you could sell your book
either on Amazon or iBooks or Barnes and Noble or other, pretty
much everywhere. You can use that as
a universal ISBN, the ISP, and that comes
with the kVp software. You're limited to
Amazon, but it's free. If you really want
to publish a book and use the least
amount of money, get the free version of Canva. Print on kVp, which is free, get a free ISBN. You have a free artwork, you can pretty much
produce a book for free. A lot of people
are doing it this way because there's
no upfront costs. It's considered
print on-demand and it's a lot easier to manage.
This is the way I went. I started with
Ingram distribution. I'd had my books and Costco. Lot of headaches, a lot of
little fees I had to pay which cannot came unexpectedly and it was a more
of a hassle for me. And now that I'm getting older, it's just makes sense
to do it this way. I don't have to worry
about inventory. I don't have to worry
about anything. All my artwork is located
in Canada, which is nice. And it's just a nice system. This is the same at
the same rules apply, I have everything checkmarked. Obviously. It's a little different
because I'm setting up as one big page not to Pages. And let's just the way I do it. And then you just find
the halfway point. Best way to do it is this one is because it's 8.8751 page. That's my middle point. If it was 8.5 by 8.5 inch book, obviously it would be 8.5. So that's that. And then it same thing, share. Make sure that it's
a print quality PDF. And then go into the next video and you'll
see in kVp how that all works and how we
need to upload that and how that works together. All right, so I'll see
you in the next section.
10. Class Assignment: For today's assignment and
for the class assignment, I'm gonna have you make
a cover using Canva. Now the previous video, a little bit of some of
the covers that I did. Here's some more. This is
the little blue marker. I want you to use Canvas. It doesn't have to be a
book that you're doing. In fact, I prefer that
you don't do a book you'd be doing because
it's not copywritten yet. Unless it's been copywritten,
then that's okay. You can use the large text, you can center the text, you can add graphics to it. You can use a background
just like this one. This is we use a background and you can use a background
from the elements as well. You can take artwork from any of those places that
we've talked about, any of the free sites. Mostly I want you to
do it from Canva. I want you to grab
something from Canva, especially using some of the artwork that we
showed you earlier. I want you to
create by combining graphics into some
kind of recover. Now you have a choice. You can either do it
where you're doing, just the cover or if you want to get bold and
do both of them, we can do that as well. And that's, that's the,
that's the assignment. You can do any size you want. The picture book that I've
been doing is 8.5 by 8.5. But again, you can do
any picture you want. You could do full bleed, which is when the color
goes off of the page. This is a full bleed. Something like a half
a bleed would be this is a book that is probably
considered a half bleed. Bleed on the bottom and
it's bleed on the side. And the rest of it is white. Fight. This whole
book has 0 bleed. There's a wide margin. You never go off of the page. You could do that as well. Your book cover. But get creative and I hope
you have fun using Canva. And if you want to
use original art, but just be careful, make sure you Copyright
your work when you post it. And also, just have fun. And I'm looking for a cover then please posted below,
share your work. I like to see what
you come up with.
11. Printing Details on KDP: Okay, we've finished
our artwork, we finished our production. Now we're going to talk about
printing and distribution. I use Kindle Direct Publishing,
which is kVp.amazon.com. It is an Amazon company. I used to use create space, but greed space was
purchased by Amazon. Now, kVp does a pretty
good job of printing. I've had some issues
with them most recently. But overall, I would say 90% of my titles or
maybe even 95% of my titles of 0 issues
when you get an account. But I strongly
suggest is getting a separate account from
your personal account. That way, you can set this
up, can look at business. You have your account, and you can set mindset up as an LLC because I have
original artwork. Then I have to give
them my EIN number and my banking information so that they know where
to send me money. And that happens
every month I going to get a check from not check against direct
deposit from Amazon or kVp. And I get royalties
from the different, different sites that I sell. Two can have your could open up some more markets and you will get a royalty from each
one of those markets. So I get one from.com, which is mostly
associated with the US. I get some royalties
from Italy, UK. This is your dashboard into kVp. The bookshelf is
where I am right now. You can create a new book here. You just go to create
the kind of updated this recently to show you how
to create the eBook, we'll actually cover
that a little bit later. Paperback, hardcover. I've, I think I've already showed you a copy of what
the cover looks like. It's really, really well-made. It's in beta right now. But it's probably gonna
do some more of those. It is kind of expensive. I hope they bring
that down in price. Otherwise it's prohibitive. Series is a brand new thing. Two of my books are in a series, actually three of my
books are in a series. I did a little angry marker. That's the emotion series. I have the marker
colored markers series. And I think I have one more. I can't remember what it is. And then Vela is a
new, it wasn't beta. Think it's fully
operational nodes. Serialized stories are basically chapter stories where you get one episode of that time and then they have a
cliffhanger and then they buy the chapter. I think
that's how it works. I haven't done that at all. I really haven't
done the hardcover. I did a test and the
hardcover and we're gonna, I'm gonna show you that
little angry marker. I decided that I'm going to
change the cover because I think the cover artwork looks
too much like a crayon. Want to change that to a marker? I came up with a new cover. We're going to change that
then allows me to get into the into it and edit it. Right now you can see I have Kindle e-book on top and I have paperback below that these
two are linked together. It gives you an opportunity if you look at these three dots, you can edit the book, e-book details at
an e-book content and the e-book pricing,
blah-blah-blah. And you can unlink your book so there's
no reason to do that. You want to make sure that
they're linked to them. There's a reason why
they should be linked. When you publish your book. This is what most people do. They published a book and they
also published an e-book. And then when we talk, when we do e-books, we'll talk
more about this in detail. But you have I think
it's per quarter. I think you're allowed five
free days to offer your book for free and use that as
a promotional periods. So please download my book, let me know if you'd like it. Review of feed like this
gives them a chance of reader is considered a verified purchase because
they're downloading it even though it is free. Hopefully they'll write
her a nice review for you because they are linked. The paperback is
considered a part of that. So anything that
you're looking for, a paperback and not an e-book. The paperback will show
the number of reviews. And I'll talk about this
a little bit more later. I'm going to go in here
into the print part and we're going to look
at the first screen. And this is pretty
straightforward. It's just a form, you
just fill this out. You fill out your what
language you're doing, the name of your book, subtitle. If you want. By the way, once it's published, you can't change your
title of your book. Once. While you're
working on it, you can change it to
your heart's content, but once it's published, you've submitted it and
they've accepted it, then you can't go
back and change it. This is part of the little
marker emotion series. I have one book in there now, which is this book, and I
have another one on its way. This is for the additions. If you make major
changes to your book, you can, you've got to
create a new edition. There's a lot of, there's
a fine line there of what is acceptable as far
as changes in a book. You'll probably have to
bring that up with Amazon. I think it's a case
per case basis. I've never done it.
A second edition. I don't think primary author is yourself or your pen name. If you have, you can
do contributors. You can have Illustrator, editor forward all
this other stuff. You can add them. If you're somebody that didn't
wrote a forward for you, this is a great
opportunity to see Stephen King did afford for you. Definitely want to
put him in there. And then any credit,
contributions, etc, can go there. This is the description I show you a little bit
later on in this course, how to write a really
good the description. If you do own the copyright, definitely want to click that. If it's public domain, which means that the information that you found is public domain. You would click that. Then here you have
your keywords and there's some great graphics, great videos later on and I'll share with you on how to do your keywords and
keyword strings. Then we also have
our categories. Categories are limited
in the kVp site, there's some tricks and tips
that I'll share with you later on how to expand this. Because right now you're
only limited to your limited to two, which is a real bummer. Categories like look
at this as very limited what you can do. So I'm not going to
go too much into detail now we'll talk about
that a little bit later. This, because this is
a large print book. I went ahead and click that. And then this talks
about adult content because this is
written for children. There is no adult content. I'll save and continue and
then go on to the next part.
12. Writing Great Descriptions and Keywords: A better description. These are just some simple
ideas on how to get your description read by
your target audience. And that is the first
we want to make. Who is the book for? If I'm doing a book on bullying, I don't want to say people who are, who have been bullied. I wanted to say parents who are dealing with
bullying in school, how to talk to your
child of a bullying. These are the types of
more specific things that you want to write about. Then what are the
benefits and then list them, have bullet points. I'll show you an example
of that in just a second. Then. Use bold and underlines
when you want to get the reader to come in
and look at something that get their attention. But be careful,
Amazon sometimes will flag you if it's over the top, so you want to be
careful with that. Then finally we have
a call to action. I would say, I would say 80%
of the people don't do this. If you look at most of the
descriptions in a book, even I don't do this
and I should do it. Pick up your copy
today by clicking the Buy Now button at
the top of this page. It's a simple call to action, or make a difference in your child's life by
buying the book today, you'll see you'll get instant satisfaction or
whatever the CTA could be. It could be that respect. Let's look at an
example really quickly. I pulled this book,
the happier human. You can see he's got
a nice headline. Really big. He's got 53 habits,
which is pretty cool. Then what does he do? He has some bold text
at the top here. Then here where he's
got the benefits, he list there's quite
a few benefits, but he's got this bullet point. But not only that, but because
he's got so many benefits, he does this grilling
great design Technique is you do every
other line in bold. You might see this.
Sometimes people do it. If you're looking
at an infographic, you'll see that one colors like yellow and then blue and
then yellow and then blue. It helps the reader to just better on the
eyes to read it. It's easier to read and
you don't get lost. So that's a great technique. He goes even further. He has down here he has editorial
reviews which is great. And the middle a little blurb
about is about himself. Well, at times there will be. See if he's got this has
got above the author. You could click on his name and there'll be some more
information about him, but also something
that he didn't do. Well, maybe he did not sure. Is that you can do
something called, remember we talked
about this before. A plus content. Content is going to enhance
your book description area. Here's some examples of
some things you can do. You can add pictures and
pictures about who you are. It's a great way to enhance
your book and really showcase some of the
things you have, maybe some other books you have. And these are all considered
modules that you can add to in your description. So it's really nice, it really grabs their attention. But I think you have to do is
you have to apply for this. I don't think you
can just do it. I may be wrong on that. I have to double-check, but I
think that is a no-brainer. I think everybody should
do this. That's that. Let's go back real quickly
to the happier one. I want to talk briefly
about categories. We've talked about categories a little bit in the kVp section. If you remember correctly, the categories you're limiting and you're only allowed
to use two categories. I'm Katie people,
that's really not true. It is true in the GDP software, but in reality, you can
actually have ten categories. If you look at these categories, these categories are definitely not in that list that we saw in kidney P. So these
were added by the author. What he did was
he contacted kVp. And the way we do that is we
just go to the KT P site. And the very bottom
it says contact us. You can contact them by email. And you can list all of the sections are the categories that you want to
add to your book. Now, you won't always
get what you want, but it gives you an advantage over somebody
who's just doing straight. The categories that are
found in the Amazon. And it's probably
going to help you rank a little bit higher
in your category. And if you get a high-ranking, you have a better chance
of selling more books. Keywords on the front
of the best keywords. This is what we're going to
let Amazon do the hard work, hard lifting for us, heavy lifting for us. It's a really simple way. All we do is we go
to the book and Amazon Books and we
type in bullying. And then it's going
to populate with the most popular search keywords or strings that people are
using to look for bullying. You just copy and paste. You just use these right
here for your keywords. It's a really simple
way to do it. And Amazon won't let you
down because they have an extensive search that
they keep track of. So those are some
little tips about categories, descriptions,
and keywords.
13. Printing Content on KDP: Okay, welcome back.
We're back in it. Kindle Direct Publishing. This is the bookshelf interface. This is the area we
talked about, ISBN. Isbn is in the back of the book. Every book in
existence has an ISBN. This will assign you
a free ISBN number. The only caveat is that
you have to use it. You can only sell it on Amazon
if you have your own ISBN, which we talked about
in a previous video, you would just click down here, use my own ISBN. And what's the reason
why you need to do this is because they'll automatically generate an ISBN and barcode and placed in
the back of your book. If you use your own, then you'll need to input that that artwork
onto your page, onto your cover page so that when it goes to print
it has a valid ISBN. Now that's, it
takes a little bit more in that because you have to go to my
identifier's dot com and insert all of your
information and how much you want to charge for the book and
then all that is created. I think a barcode
is created for you. Then you can download that from the bulk or site
publication date. I always put just the
date that it comes out. However, if I published
this earlier than that, I would put an earlier date. Just be careful that you're not putting any false
information in there. You have four choices of paper. There's some optimal page sizes that will reach more markets. And I don't know why I choose. I think it's the standard for picture books
and a half by 8.5. A lot of my peers
do this as well. And it suits me fine. I like the feel of it. It's nice and big,
and that's my size. It is full-color in the inside. Kvp does a great
job with printing. It looks really good. There's only occasionally at some times where I've
had some issues. But overall, it's really good. This does have a bleed. We talked about that earlier
and I choose glossy for all of my picture books because
the colors really pop. For my nonfiction if it's just plain white
text, I use a map, the finished for that,
this is where you would upload your paperback
manuscript. Here it is. It's a big
long, crazy number. As long as you're not
changing the title, you can change the cover. This is the best part. You can launch your viewer. This is a nice little
preview here and you can see where there is trim and the bleed on the here on the left has a quality check
if anything is in red, then as that is an error
that you need to fix. A lot of times
it's simple things like the text is too
close to the trim. Or maybe it's a low-res
image and they'll flag you. Just have to go through that. Here's what I was
telling me about the me see if I can
make this larger. There is the ISBN
that is given to you. So you don't need to
keep that space open. It's like two inches
wide by one inch tall. Alright, so this is the cover. Remember this is a second,
this is a second file. Second file that you upload. I'll text must be completely
inside the guise of content. Image is supposed to extend
the edge of the page, makes sure there
are no white gaps. So that's very important. In the next video,
we're going to show you the price, how much it costs.
14. Determining Your Rights & Pricing: All right, This is the
third and final part of the KT P site. This is printing
a paperback book on this third part of it, which is the paperback
rates in pricing. I always click all
territories worldwide rights. Because why not the
most amount of money? Now let's say you,
let's say you created a book and it's
translated in Spanish, or it's translated into
Portuguese or whatever. And that's intended for
the Portuguese market. This is when you'd go here, you'd go to ES for
Spain or France, Germany and so on. And that would be the
primary marketplace. I actually have a book that
I'm contemplating making. The UK. It is a
book that I'm doing that's written with
British slang. We'll see how that works. I think I might do it. It's not going to hurt me. And I think it'll be
a really big hit. I'm gonna do that. Then here's Amazon.com,
suede shoes. This is what the breakout of
the pricing, the printing. As long as the printing is
between 24 pages in 40 pages, it will be 365 and they
take 40%, but still, you're just seems
like 30 get paid for the printing and they're getting paid for their getting a
royalty payment as well. I have my royalty based on 899 is still
kind of expensive, but the minimum I
can charge a 608. I also sell my book
in other countries. And here I don't even touch this because this has
generated automatically. If I want to charge more
money, I can do that. But I don't really mess
around with this at all. That's the pricing. Then you have 72 hours
for which the turnaround, which is sometimes it's a day, sometimes it's an hour. I've seen really depends
on how busy they are. Here's where you can
request, request proofs. You will get a book with proof, proof, proof all over it. You can't sell it. Then you publish and you
wait for your response. And that's pretty much it. It's really nice.
15. Go Publish Your Own Book!: Hello everyone, This
is Nick and this is the conclusion of
this Greek course. I covered a lot. I hope you've found a
lot of value in it. And it's something
that you will be able to go out and publish
your own book. Now, you have all the
tools in which to do this. And if you follow the
guide step-by-step, you remember you can always come back and look at it again. I can't wait to see
your cover designs in the class assignment. And also, I would love
to see your book. Please let me know if you
publish a book using my system. I would love to know about it and share it in the community. And maybe we can
support each other. Maybe we can look at
each other's stuff and give each other pointers. And that's the idea of this
community has just helping each other and happy to be here. Thank you so much for taking
my class. See you next time.
16. Bonus: New Tool In Chat GPT for Writers: Hey, everybody. Welcome
back to the class. This is a bonus section
for Chat GPT 40, and we'll be introducing
a new tool called Canvas. And I hope this
will help you with your writing much better than the actual free version
of what is available to you in just the
regular hat GPT, both in the four oh version and also the plus and 3.5 version. But now in four oh, we are able to use this
new tool called Canvas, and I will be showing that to
you in just a few seconds. So here is our
typical page as far as what is available to us
when we open up Chat GPT. This is, like I said,
a free version, but it is the most recent
latest version called 40. And so with this free version, you can see I already
have a thread going on my left
hand side over here, and you can see that
this is actually a very, very long thread, but there are some personal things here
that I want to keep personal, and so I'm not going to
show you my entire thread, but it is about 50 or
60 articles and chats. And so what's great about
the thread is it kind of keeps a memory of what
you've already done. So if I were to just say,
I'm not going to do it, but if I were to say, write a British mystery novel for me or write a British
mystery summary. I wouldn't even have to tell you my title because
it would go back to the thread and kind of pick
up where it started in the past and just
take that information and go through and
give me my summary. So that's a really cool
feature. I love the thread. I don't believe the free
version of Grock does that, and I don't know of any of
the other AIs that do that, which is a great feature. But the reason
we're talking today is it's a little bit more
advanced, and down here, you can see that there are
some things you can do, you can attach files, which are other
information that you can present to CHAT EPT
to take a look at. You can search the web or
you can view the tools. Now, the tools, I'm not going to talk about
this one or this one, but we're going to
talk about Canvas. And that's specifically for
about writing and code, and we're going to
use it for writing. So if I click on Canvas, all I have to do is
just click on this, and you see the word
now it's highlighted. And you know what,
I'm colorblind, so I don't know if
that's blue or purple, but just bear with me. But so now the
tool is activated, and we won't see the tool fully shown to us until
we type something. So if you want to just type, and I don't worry about
prompts really anymore. I just go ahead and talk to it as if I'm talking
to you right now. I kind of create a
conversation with Chat ChiPT and I find that
just more it's easier, first of all, for me,
and I don't have to worry about prompting structure. I don't have to worry about what should I say the
right way to say? I just talk to it as
if I'm talking to my friends or writing partners. Down here at the bottom,
it kind of gives you kind of a I wouldn't
say they're prompts, but they're just
basically starters. And you can sometimes
it will say, you know, help me write
or summarize this. But you can see here, if I say surprised me, it writes that, but
we want to get now, we're going to say
something really simple. Tell me about water
in a brief paragraph. I mean, I'm going to make
this really super simple. And then I just
Enter. Now, watch the dashboards going
to change slightly. All this on the
left will go away, and my threads are gone, but now it's telling me,
on the left hand side what basically what
I asked it to do. And the right hand side, again, it's a very simple paragraph. But here are some of the
great things we can do now. We can go in now and we can
select words or pardon me. We can select a word. We can make it bold or italicized or let's say we wanted to go back,
let's undo that. Just hit I tell usize
again or hit Undo. I and let's say
this is our title. Now I want to make that bigger. I can go in and go to AA. I can give it a bigger heading. And I'll change this. Of course, something
you couldn't do before. You can actually make
corrections and copy and paste. I can now write
directly into this. Again, it's a very simplistic, I wouldn't even say
a word processor, but it does give you
that same type of feel. It's I mean, obviously, word and other types of word
processors are going to give you much more healthy and
abundant set of tools. But this is so much nicer. So now we can go
in and, you know, very simple stuff here. I say, I don't like this. I want to make this
another paragraph. I can make a paragraph. Let's say I don't like
this whole sentence, I can just remove it
together and delete it. And so it gives me a little more control over what Chat EPT
is going to give me. So sometimes, you
know, you can ask for, give me a 30 page summary
of what water is. And it'll give this huge thing you have to scroll through
and dig through everything. Now, here we're
doing kind of think of it in bite size information. I can even go in here and
say, you know, I love water. In all its form, all its forms, right? So now I'm adding to it,
now I can take that. You know, so don't always
take what they give you. You can go in. You have more control
over what they give you. You can take this
now and go back and ask. Now I can
take this back. I can copy it and paste it here and just say, make this funnier. You know, and then it's
gonna do the same thing. It's gonna come back
here, and it's going to give me a more funny rendition, of course, of what
it just gave me.
 Nick Nebelsky, Writer/Director/Author/Illustrator/AI Enthusiast