Transcripts
1. Introduction and Supplies You Will Need: Hi, friends. How are you? I hope you're having
a great day today. I'm excited about sharing
this project with you. This is a drawing and
watercolor painting project that I designed,
especially for kids. Students do not need to have any drawing or
painting experience at all to be successful
with this project. I will guide students step by step through all the steps
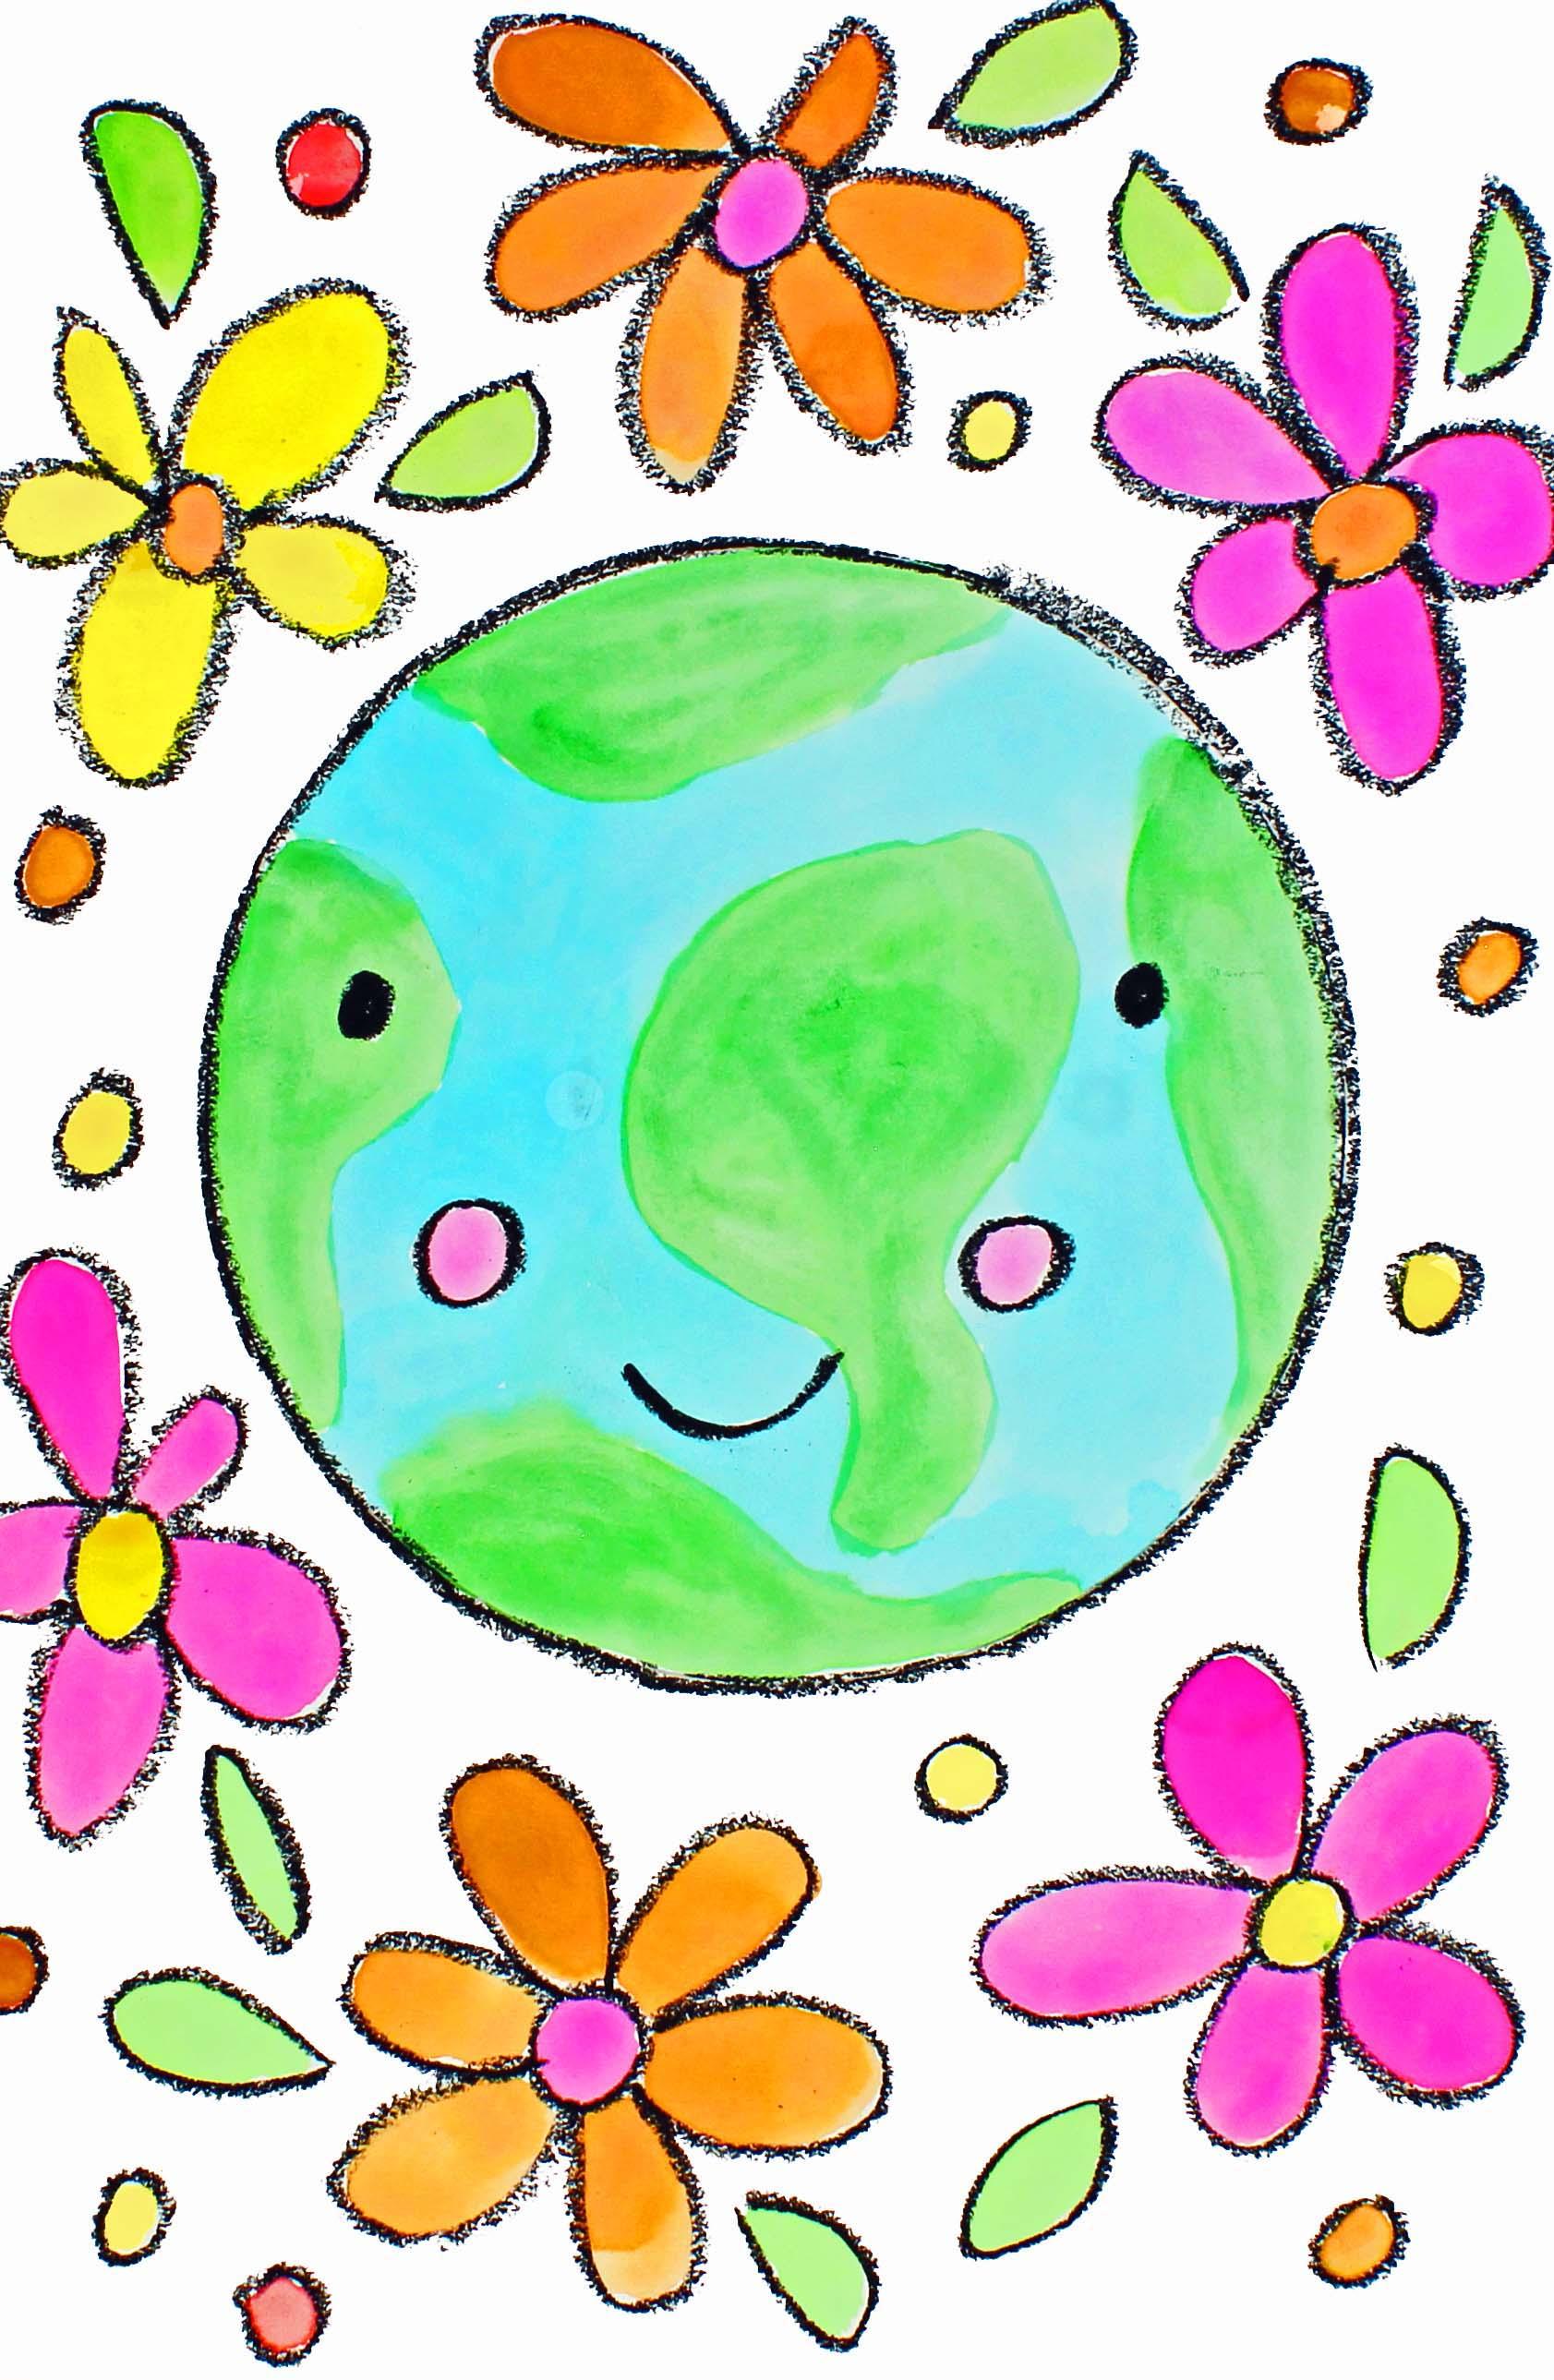
that they need to take. Today, we are going
to be creating this Earth that is
surrounded by flowers. I hope that you have a lot
of fun with this project. Let's get started. Let's talk about
the supplies and the materials that you will
need for this project. The first thing
that you'll need is a sheet of watercolor paper. You will need a set of watercolor paints
and a paint brush. I'm going to use this
size paint brush. But you can use any
size paint brush that you have available to you. You will need a or a
bowl with clean water. You will need a
pencil with an era. And a paper towel and a set
of oil pastels or crayons, including the color black, and you will also need
a circle template. A circle template will help
us to make sure that we have a really nice round
circle for our Earth. You don't have to use
a plate like I am, but you can use
anything that you can trace around to create
a nice round circle. Go ahead and gather all
of your supplies and materials and I'll see you
back here in the next video.
2. Step 1: Draw a Circle: In this step, we are going to
draw our earth day design. So let's get started. What we're going to
do first is we are going to pick up our
circle template. I'm going to be using a plate, but you might be using something different for your
circle template. I'm going to turn my
plate upside down in approximately the middle
of my sheet of paper. So that would be
about right here. See how there's
space here and here, and they're roughly
even evenly spaced, and then I have a space at the top and a space
at the bottom. So what we're going to do
is we're going to take our pencil with our hand
that we normally write with, and with our other hand, we're going to hold
our template down firmly so that it doesn't
slip around, okay? So we're going to
take our pencil. We're going to hold it
straight up and down, and we're going to put it on
the piece of paper and push just a little bit towards
that circle template. And go right around like this. We're going slowly and carefully so that we
do our best work. We need to move and adjust
my hand, jump over it, and then continue
to go all the way around until I meet with
the beginning of my line. There we go. So then what you can do is pick up your
template and take a look to make
sure that you have a complete circle, right? So that is the first
step in our project.
3. Step 2: Draw an Earth Day Design: In this step, we are going
to outline our circle, and then we are going to add some designs around the circle
and inside of the circle. Okay? Sound good. All right. I'm going to pick up
my black oil pastel. My black oil pastel is pretty small because it broke,
but that's okay. Oil pastels break very easily. So sometimes you have to use just a small piece as
I'm doing right now. If your oil pastel breaks, that's okay. That's normal. Just put an extra
piece back into your box and continue on. What I'm going to do first
is I am going to start tracing my circle
with my oil pastel. Notice that I'm going
slowly and carefully so I can do my best work going
all the way around. There we go. Now that
we have our circle, what we're going to do is
we're going to put a face inside the circle for
our Earth, a happy face. Let's start out with the eyes. I'm going to just make some circle eyes and
fill those in like this. I like to make my eyes
pretty wide spaced, meaning that they're not too close together on
the piece of paper. I do try to make the eyes
roughly the same size, but it's hard to get them
exactly the same size. I'm just going to
be happy with that. There we go. Now, what we're going to do is we're going
to make a little smile. I'm just going to
make a little smile down here like this. Then I'm going to make
some cheeks right here. You don't have to
make the cheeks, but you can if you want. I just like the way
that that looks. I like to add that
little extra detail. I do have a little bit
of a smudge right here, but that's going to be covered
up with paint later on. Remember, when you're using oil pestel especially
the black oil pestel, it can get very, very smudgy
and smeary if you touch it, and that's what I
did by accident. I touched it, but
that's okay because I know that it will get covered up with the
paint later on. Now, what we're going to
do is we're going to think about some things that we
can surround our Earth with. So remember, Our
Earth is our home, and our Earth is
also the home for all the animals and all the
plants and all the rocks. It's a really, really
important place, and we must take care of it. It's really important
that we all do our part to take
care of our Earth. Let's think about some
things that are in nature, and let's draw those
things and surround our Earth with some
nature inspired artwork. I think I am going to
use flowers because I love flowers and when I think of the Earth,
that's what I think of. But you can do
whatever you'd like. This is your artwork. Think about something
from nature. It can be different plants, or if you'd like to draw some butterflies or
different types of insects, that would be fine as well. I'm going to draw flowers. I like to draw daisies the best. I'm going to start by drawing a circle and then just
making some petals. For my daisies. Then I'm just going to fill
in the space around the Earth and If I need to fill in space and I don't
know what to fill it up with, I usually just add a
little extra circle. I'll show you what I mean. At the end if I have
any extra space. I'm just going to take some time to draw some daisies
around my Earth. I'm not going into
my Earth because I'm going to be painting a
design inside my Earth. I'm just going to be
drawing flowers and maybe some leaves and maybe some circles if I have
a little bit of extra space. All right. Now I have my
flowers and my leaves, and I do see a little
bit of extra space. I think what I'm going to do is add some circles like
this, small circles. I'm just going to fill in those extra spaces with
some small circles. All right. Now I'm going to take a look at my design and I'm going to look to see
if there's anything else that I would like to add. I think that I'm happy with that because I can see
that I have filled up most of my little spaces that I had available
with some circles. I'm going to go ahead and
put my oil pastel down. Then in the next step, we will start painting
our Earth design.
4. Step 3: Paint the Earth Green: Okay. In this step, we are going to start
painting our Earth design. Let's get started. The first thing
that we're going to do is we're going to add one or two drops into each
of our pans of paint. What this will do is it will
soften up our paint a little bit so that it is
easier for us to use. I do encourage my students to take that step because
it really does help. Let me get a drop inside
each pan. There we go. Now that our paints
are softening up, let's turn our attention
to our design. So we are going to focus on painting the color
green on our Earth. In the next step, we are going to be painting
the background, but in this step,
we're just going to be painting the Earth green. We're not going to paint the
whole entire Earth green. We are only going to paint
part of it green, okay? The rest of it, we're
going to be painting blue. The green is going to
represent the land, and the blue is going to
represent the sea or ocean. All right. So what
we're going to do, is take our larger paint brush if you have two paint brushes. I have two, but you
might only have one. What you're going to do is take a little bit of green paint, and then you're going to start painting some blobs of paint. Now, this is not a
realistic painting, so it doesn't have to look
exactly like the Earth. We are just going to
put some blobs of paint on our piece of paper like this. So I'm going to put
one here and here. Just going to re dip that
paint brush as needed. Maybe one right here. Notice, they're not circles, they're not squares
or triangles. They're just different shapes, and I am not going
to be painting over those cheeks because I want
to paint those cheeks pink. Now, your land masses might
be different from mine. The shapes might be
different, and it's okay. It doesn't have to look
exactly like mine, mine is not a true
representation of the Earth. All right. Here we go. Just going with the flow to
see what I think looks good. If I feel like an area needs to have a little
bit of a darker green, then I add a little
bit more paint, and I I'd like a lighter area, I add a little bit more
water to my paint. I think I want this to
be a little bit bigger, so I'm going to make it a little bit bigger
here at the top. There we go. All right. I think I'd like this to
be a little bit darker. I think I'm pretty
happy with that. All right, friends,
so we're finished painting the green on our Earth. In the next step, we
are going to start painting the background. Okay
5. Step 4: Paint the Background: In this step, we are going to start painting our background. Your background might be a little bit
different from mine. I have some flowers and
leaves and circles, but you might have
something different. What we're going to do is
we're just going to focus on painting whatever we
have in the background. You might be wondering, well, why aren't we painting
the rest of the earth. The reason why is we
want our green to dry a little bit
before we add our blue because what will happen if we start painting right now with our blue is our blue
will run into our green, which is fine, but this lets our green
settle a little bit. It lets it set and
dry just a little bit before we add
that blue. Okay. So let's start adding some paint to our
background shapes. I think I'm going to
use the colors pink, which I'm going to put here. In one of my wells
and add some water. And then I'm going to maybe
use some orange and yellow, maybe a little bit of red. I'm going to speed up the video, and I'm going to show
you how I paint. You can watch me,
and then you can get started on your own
painting of the background. All right, friends.
Now, I'm finished painting most of the flower
design in the background. I still need to paint
the leaves green. And then I'm also going
to paint these cheeks right here pink so that's what
I'm going to do right now. All right, friends, I'm finished painting the background design. I finish painting my flowers and my leaves and
my little circles. So when we come back
in the next step, we will start painting
the blue part, the ocean part in
our Earth design.
6. Step 5: Paint the Earth Blue: In this step, we are going to
be using our blue paint to paint this area of
our Earth design, and that will represent water. By now, our green has
dried a little bit, maybe not all the way,
but a little bit. And so the colors will not blend and spread
together as much, maybe a little bit,
but that's okay. That's what watercolor
paints love to do. They love to spread around. I'm going to Just create a
little bit of blue here, lighter blue paint by mixing
some water and some paint. Then I'm just going
to start painting, if I touch the green and it
starts traveling together, if it starts blending together
a little bit, that's okay. That's no problem at all. I'm going to go ahead
and take my time in doing this and I will see you
back here in just a moment. Okay. All righty, friends, I'm finished painting with
my blue paint, and again, the blue represents the
ocean on my Earth design. So I hope that you had a lot
of fun with this project, and I will see you next time.
 Em Winn, Teacher, Art Instructor, Artist