Transcripts
1. Hello !: Hello guys, welcome to my class. This class is all about picking up where we left off in part one of lakes and reflections. You haven't watched part one. Please do. Since most of the things we are discussing today are based on part one. We're going to talk everything under the sun about lakes and reflections. And how to paint sky and lakes and lose reflections. And as you can see, there are free floating ice flows here. We're going to talk about data as well. And one of the most hardest part of watercolors is riveting. And I made a small class with two beautiful you guys to watch this class. So let's get started.
2. Good art supplies - Importance: So a small change. I will talk about art supplies I have used here in this video. With that, I will also tell you why it is important to use the art supplies that I'm using today. So let's get started. So for today's class, I have used a 100% cotton paper. Which paper? I will tell you at the end of this video. So first I want to talk about the difference between the a 100% cotton paper and a cellulose people. So the green one here is a painted with taka is green. And I have painted this as a class project for this class. And so I have painted in this year, that means 2020. So I want to talk about the difference between both of these paintings. This one I have painted in 2018 and I have been did on a cellulose paper. And you can see that there is absolutely no blending going on in this painting compared to the one I have painted here today. So in the next video we'll talk about the first wash that is how to paint the sky and the lake. But if you see here on the cellulose paper, I absolutely failed to paint the sky as well as the lake. You can see that the blending did not go well, and I'm left with these stains on the paper. It's because the paper has dried way too quickly for me to walk on it. If you observe these washes with the today's painting, which I have done on a 100% cotton paper. The sky and the lake is perfectly blended, including the ripples have happening today. And, and yeah, you can clearly see the difference between both of these paintings. As also combat the texture of cellulose paper with a 100% cotton paper that I have here. So it's clearly has more texture and a 100% cotton paper, I mean, and which helps in holding the water and holding it for a long time. So why I'm telling you guys this is because most of the times we think that this is our failure. But in contrary, it might be something to do with the supply set we are using. And if you are a beginner, it's okay to use the cellulose paper. But if you want to take you to the next level, you need the right supplies. And today I'm using Fabriano, a 100% garden, 300 GSM paper. Now, second important art supply that you need to have is brushes. So I get a lot of questions asking about what precious to choose and what brushes I usually use. So I only have three brushes. I mean, I have a lot, but I use only three restaurant and perform our brush for the first washes. And sometimes I will use it for in order to paint subjects as well. And number two, Zeitung brush to paint the trees and certain small aspects of the landscape. Number one, for splattering the stars and Dupain about. I will talk about brushes while we are painting. Other class projects and other important art supply you need for this particular class is tissue peppers. And you need a lot of them. A masking tape and a good palate. I'm using a ceramic palette, you can use plastic. And finally, I used indigo from Daniel Smith and whitewash. And if you ask me which are more important between paper, brush and banes, I would say purchase a good paper and then brush. And then finally, you can purchase are discrete banes. But if you can't afford it, you can always use touring great pains. Now, I'm gonna tell you one more use of using a 100% cotton paper. Let's say if you waste a paper and if there is a painting that didn't turn out as you want it, you can always paint on the other side. Today. All of the paintings that I have been there, except the class projects, are done on the backside of my old paintings. So you can see how much of a water holding capacity a 100% cotton. And that's all I want to talk about. I hope you find this video helpful. Let's move onto the next one. Thank you for watching.
3. Sky and Lake - First Wash: Let me show you guys how I have painted sky and Lake. This is also called as fast to arche, because when you take down your paper and add some water, The first thing you are going to do is paint the sky and Lake in one go. And if my paintings from previous CLASS1 as well, they all have something in common. The previous class, paintings and tourists to paintings. So whatever the color I have used, the sky area and the lake area, that is the top and bottom of the People are always dark in color. And the middle part is light, are white in color. There is a reason for this. And that is, if you observe a photograph, you can see that the horizon point is always light in color. So these are small things, but you need to incorporate them in your paintings to make them look more realistic. So today I'm going to show how to paint that flashed wash. And let's get started. I'm gonna paint Glasgow project as an example today. Start by reading the paper with clean water. Remember the paint has to be in that color, both on the top and bottom of the paper. But middle part should be white, light, lightest color possible. Using a mixture of tacos. And indigo. And I am applying the paint both on top and bottom of the paper, but I am leaving the model without the paint. Now comes the important part, partially or brush. And it should not have any paint over it. Just a wet brush and drag the paint below. Don't add any extra pain. Just drag whatever is there and kind of blend both the top and bottom parts of the paper very lightly. And you should do it while the paper is still wet as well. That's an important aspect. Now this is enough to wash. I will take some more paint on the same branch and I will add a few ripples. Remember, ripple should be added when the paper is skill that we're gonna talk about. Ripples in depth in the coming video. For now, this is enough. This is how you have to proceed with your landscape, especially this one, lakes and reflections. Now I think you guys got an idea on how to paint the first step of this landscape. I'm doing another practice run. This time I'm taking finds. It's not related to any of the two class projects we're gonna paint today is just a random color I picked out. I hope you guys are practicing these fast washes with me. We had discussed before. First step would be adding the paint on top and bottom of the paper and just blending both of them to get up without adding any color in the middle. Since we are painting the lake that are bound to be ripples. Adding repulsed by practicing this fast wash for the first time, you don't need to add repulse. That's it about the fast wash and how to proceed initially with Sky and Lake? I hope you guys found this video. Please practice before you start your class project. And thank you for watching.
4. Loose Reflections - How ? : Sine of lakes and deflections class. We have discussed three types of refractions, semi detail, detail, and lose reflections. In this class, if you observe, there is only one type of reflection that is lose reflections. So I want to talk more about it in this video. Last step is always getting the paper with clean water. To make the process easier, I will lift the paper up with my hands. And fainter reflections in a downward motion, just like I'm doing right here. Now, you can keep it down or if you want to keep it in your hands and keep it upward, it's ok to remove the water from the brush. And blending is reflections together. Just like I'm doing right here. If you don't know how to add the reverse, don't add it. I'm just adding them out of habit. And because my paper is still in the next video, we'll discuss how to add ribose. And this is how you need to paint the loose reflections. For practicing purposes, I'm going to show you one more time how to paint this loose reflections. Now I'm going to show it in green color. So I'm taking takeaways green. First step would be vetting the paper with clean water. In downward motion. Well, all the water from the brush using the tissue paper and blended reflections together. So this is how I have been dead, the loser reflections in my class projects. And I have showed you guys to practice runs and please follow them. Please practice before you start your class projects, it'll be much easier. So I hope you liked this video, will move to the next one.
5. Ripples - How ?: In this video, I'm gonna talk about a repulse in the previous class that is part one. Only with the white color. Which is like a beginner friendly matter. It's not wrong. But in this video, I'm gonna show you how to step up and paint the ripples as realistic as possible. Like how it is in this landscape that I'm showing you right here. The only thing that is very, very important is that your paper needs to be valid or adding the ripples. So just to show you what happens when you add them all up at the top of the paper. Now, I will show you how to paint the ripples in the right way. So as I'll start with reading the paper. As you can see that that means it's not a good batch of paper. It happens sometimes when the paper is kept it for a long time in places or something like that. So yeah, I will start here. I will read the paper once again with the screen. And I'm going to lay down. Keep it down. Don't just keep it down. Take the paint. Just a few lines. And we have to keep it that way. I guess that's it for. Now. I'm going to show you what happens if you add the ripple has already died. And paint from the brush, keep it down like we had done before. I'll add the ripples on a dried-up paper. You can see which one looks more realistic and which one is looking kind of not good. So this is how I usually paint repulsion all of my paintings. So what you need is a good paper. The paper which days Redford, quite some time until you finish up your repulsed. So take kinder person cotton paper. And I'm going to show you one more time, just like a practice run. Here. I'm going to show the entire painting as opposed to only repulsed section that is from sky to Lake and repulse. I'm taking indigo and I will start with the sky section. And I will take that bind to the lake section as well, like we have discussed in sky and Lake fast to our section. Now remove excess water and pain from your brush and just blend sky and Lake area together. And now take the pain. Keeping a shot at the repulse while the paper is still rat. That is how the ripples. I hope you found this video helpful. Thank you for watching. Let's move on to the next one.
7. Rewetting - How ?: Let's discuss riveting. When you paint a watercolor landscape, you need to usually paint layers. You need to read the paper. So that's basically the concept of riveting. As far this landscape right here, I have used a riveting technique. First, I have painted the sky and Lake area. And the middle part, you are seeing here background, trees in a mist. And then once it's completely dried, I have added this layer right here, that is the line and reflections. What do you guys should know is this, this is quite advanced than what I had before. And like this is the most ultimate thing you'll ever learn in watercolor. Once you perfect this, you can paint any landscape you wish. But if you are still a beginner, you can skip this video. And you can skip this class project as well. Because I don't want to overwhelm you with this, you know, advanced techniques. But I will say this to you guys to watch. And it's always good to know the techniques, right? It's always good to know what's going on, what to do when you know, even when you think you are ready to go. So let me start. Now. I'm gonna show you only the lake reflections and riveting Park. Already have indigo and my palette. So I'm going to take taka is green. And this is how it goes. First, I'll paint a layer of lake with repulse likely entered in sky and Lake fast wash video. And then lunch it's completely dried. I'm gonna add this piece of land with reflections as well as repurse once again. So let me start by writing the paper with clean water, taking taco ice cream and I'm laying my faster wash. I'm going to add the reverse. Now. I'm gonna keep this for drying. Let's add this land park with reflections and the second mirror of ripples as valid. But before that, make sure that the first layer is completely and perfectly dried. If not, don't even attempt painting the second layer, it's very important. If you are reverting the paper, make sure the first layer is completely dried. So minus completely dried. I am make sure by taking it with my hand as well. Now I'm taking indigo and I will draw the piece of land. Now wet the brush with clean water. Make sure there is water on your brush. And it's an it should not be damned are dry. It should be wet and just drag the paint down. Well, we had talked about painting the loose reflections in one of the previous videos. That is loose reflections in depth. So repeat the same process. So when you read it and the paper, you can see these are lines forming on both sides of the line. So we need to remove them. I will just take my tissue and dab on those both lines. It'll do the trick. Now. I'm adding the ripples while the paper is still red, like we have discussed in loose reflections video. Okay, this is how we need to revert the paper. And it's very important that before adding another layer, make sure the previous layer is completely dried. And that's only trickier. And please practice before you move on with the class projects. And thank you for watching.
8. Class Project 1 - Wintry lake : We have learned a whole lot in the previous techniques and tips video. Now it's time to show it in action using two colors, indigo and why it gosh, I'm using an old painting as a reference. And if I have painted this when making the good use of gravity. And yes, you heard it right? Gravity plays a major role in painting soft landscapes. For that, I'm going to keep this old painting here for reference as well. And now I'm gonna take this masking tape. We are all having it. So if you don't have it, you can use a box. Are any of this size and you have to keep it under the board. Just like this. So now the paint can easily flow down while you paint. This gives the landscape that soft and gentle look. And just try it. You're going to allow this effect. Now, I'm going to start by writing the paper with clean water and I'm using my number four and most trusty brush. We have already talked about how important it is to add the right amount of water for your landscapes. So I am just checking that and in equal parts of water and river. Now let's begin with indigo. And I'm using the same number for my brush. And I will start by painting the sky. Don't cover the entire paper with the pain. Just adopt bad. Now I'm going to remove all the paint on the brush and I will start blending the sky area. Now, Asperger friends, we're gonna have to paint a mountain next. So we'll just do that. The paper is somewhere between that is done. Always make sure your paper has the right amount of water. Primo paint from your brush, tissue paper, and just blend them on den area with rest of the paper, just like we have done with the sky area. Now, I'm gonna take my another favorite brush, number two round. And I will start adding some binaries. Notice the paper is still wet and I want the pine trees to be loose and not so detailed. So the paper has to be read. Now let's switch the brushes. I'm using my number four and I will start to blend. As you see the brushes damp. That is, it does not even have water on it. And I will just start blending there, just like we have discussed in tips video. Once you're done blending the edges, just drag the paint downward to create the reflections. This is called Loose reflections, like we had discussed before as well. And notice my paper is still red. Clean your brush and remove the excess water. Keep the brush in a dam state and just blend these reflections together like I'm doing here. Let's add many tapes to give in watercolor. But one day you all need to hear and follow is this. Trust your heart while painting? Keep adjusting until it feels right. You might need a bit of practice. Trust yourself, your work and your skill. You'll get there eventually. For every painting I trust myself, I bend until I feel it's right. So this is the tip I would give to anybody. I'm feeling very good about this. And so I will stop right here. Keep this one drying. You know, guys, it's been so long since we have started painting this. But as you can see, the paper is still wet. So, right, people is very important. We are going to need our people to be completely dried. So check with your hand if it straight out, not if necessary. Now, I'm gonna take my number one round brush. It's slightly smaller than the number two round. And I will take indigo. And I will just add a few pine trees. At a few places. You guys know how to paint pine trees. Draw a straight line. Now that we're done painting the pine trees, I'm going to take my number 40 brush and I will start blending the edges of the bind just lightly. You don't have to overdo it. And my brushes dam, by the way. That's it for the blending. Now keep this for drying. Now comes the favorite part. Take white Gosh. And if you don't have white gosh, you can take normal whitewater as well. And with my number one round brush, I'm gonna start adding the frozen trees. But before adding the white frozen trees, make sure the choosy, how painter in the background with indigo are completely dried out. Both colors blend together. Notice I'm taking a lot of paint on my brush rather than a light court. It's because I want this white color to be equally highlighted with the dark indigo in the background. Now, blend this pine trees, just like we have done with indigo pine trees. And just sort of create a line that is a frozen line. Now at this rough white lines, just under the line, I believe adding these rough lines give a sort of natural look for the frozen line. In my friend's picture, I have been a lot of free floating ice pieces on the lake surface. So now I'm gonna paint on this landscape as well. Like we have drawn those rough lines before. Draw them again. So it looks more natural. Now wash away the light pain from your brush and take indigo. And very likely below these ice cubes and the frozen land as well. It gives a kind of shadow look and makes it look more natural and realistic. A few indigo and white lines to indicate an impulse. Take the same brush and white Gosh, and splatter some snow over the paper. And I believe we are done here. Thank you for watching. Let's move on to the next video.
9. Class Project 2 - Blue lake : This is level two of advanced landscape. And to make it easy, we're going to use only two colors, dark wise and indigo. And I have kept the masking tape under the bold like in previous landscape as well. But the sky and lake, I'm gonna mix a little bit dark eyes and a little indigo and make some sort of greenish blue color like you are seeing here. And I'm gonna use this to paint the sky and Lake as well. Like Always, start your landscape by reading the paper. Clean water. And I'm using my number 40 brush as always. So remember, reading the paper is also an important part while painting a landscape. I'm gonna take the dark eyes and indigo mixture. It's more on the greener side than on the blue side. Since I have kept up masking tape and aboard, the paint can easily flow down. And also remember how to paint the sky and Lake in the same color values like we had discussed in Techniques video. Now take the damn brush and blend the sky to the lake area. Like we had discussed, the middle part should be left in a lighter shade. Take indigo. And while the paper is still at the repulse, we're gonna have to paint another layer. So this is not the final output. Now very quickly, take the lightest shade of indigo and paint the middle part. Here, I'm showing the trees in the background. Since that they should be in, like I said quickly, because you have to do all this. Now, keep this one for drying. We have discussed about riveting other techniques video. So make sure your paper is completely dry before you start riveting. For now, I'm taking indigo and I'll just add a piece of land. So I'm using masking tape again to keep this under the board so that the paint can flow down easily. Now I'm washing away the paint from the brush and I'm using a wet brush without any paint on it. And I will just drag it down below. And I will revert the paper again like we had discussed in riveting technique video before. Make sure you're completely confident enough to try this out. Practice a few times. And you will definitely get it. Take indigo and takeaways column Moksha and paint lose reflections, like we have discussed in loose reflections technique video. And simultaneously at the ripples as well, while the paper is still red. I ran out of indigo color on my palate, so I just added some. So before adding the repulse, I have two things to do. One is I will add another coat off. Reflections. Reflections are already in Docker shared. You don't need to do that. Now, I want to remove these lines present on either side of the land area. First, use your brush and then immediately remove excess water and excess paint with the tissue paper. Now with the same damn brush, I'm gonna add ripples. And working very fast because the paper does not stay wet longer time. So you need to walk faster. I think that is enough with the repos. Now, there is one more correction. I want to remove this excess paint besides the land. And so I'm taking a tissue paper and brush and I will demote once again like before. It's powerful. So with a smaller number brush, I will start to add trace on the piece of land. The fluxions would have painted out of these trees. So first we have worked with reflections, and then we painted the trays here. And I have also finished adding trees and branches with a synthetic brush. I think that's enough with the trace on this land. I will spark some white paint, you know, just to give that dreamy effect. I will do this for all my landscapes. Now the final step would be adding the boats. I hope you like this video and thank you for watching.
10. Final Thoughts: Guys, that is it for today's class. We had talked everything related to lakes and reflections. We have talked a lot of techniques as well, which you can use for any of your landscapes. And we have also talked about very complicated technique in watercolor that is reverting. And we had talked about a few important techniques like ruse reflections, ripples, and fast washes, and how to successfully paint them. And then we have talked about good art supplies and why it is important that you have to use a 100% cotton paper and good brushes. I think that is it. My only advice is to practice, practice, practice, practice a lot until you get the desert. Have been doing this since three years. So practices the only way. And see you in the next class. Thank you so much for watching.
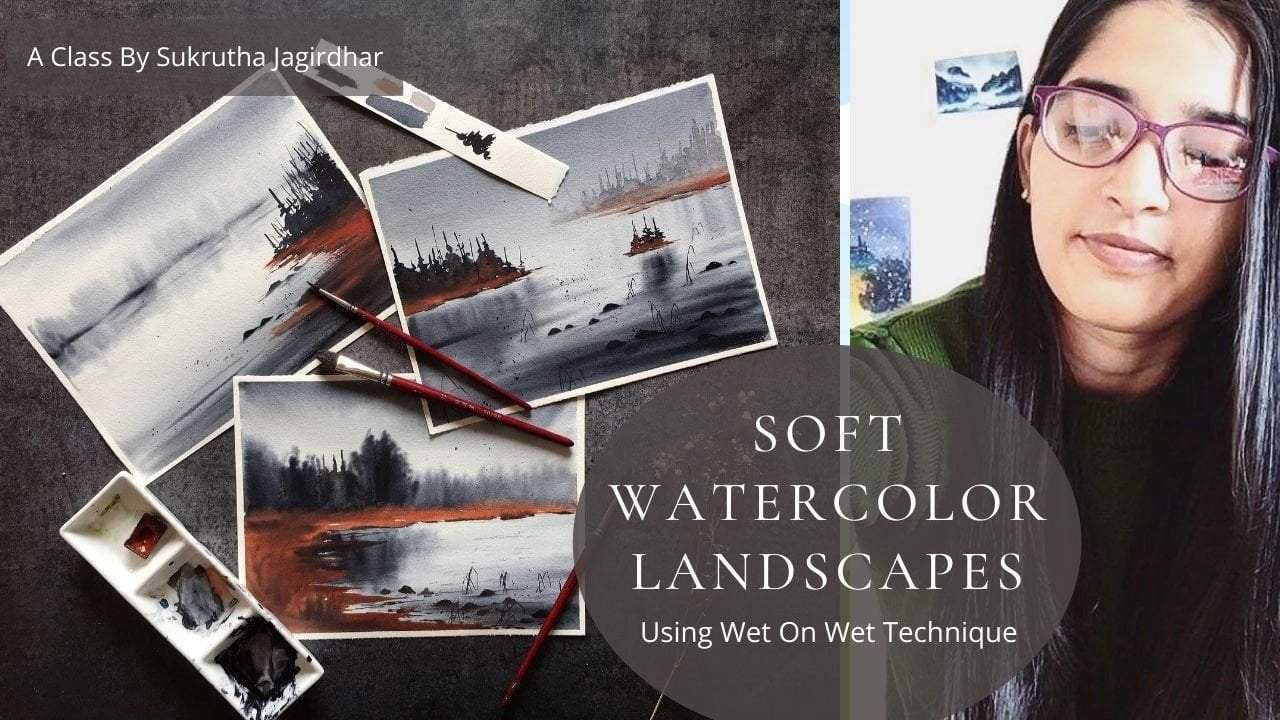
 Sukrutha Jagirdhar, Watercolor Artist I Creative Entrepreneur