Transcripts
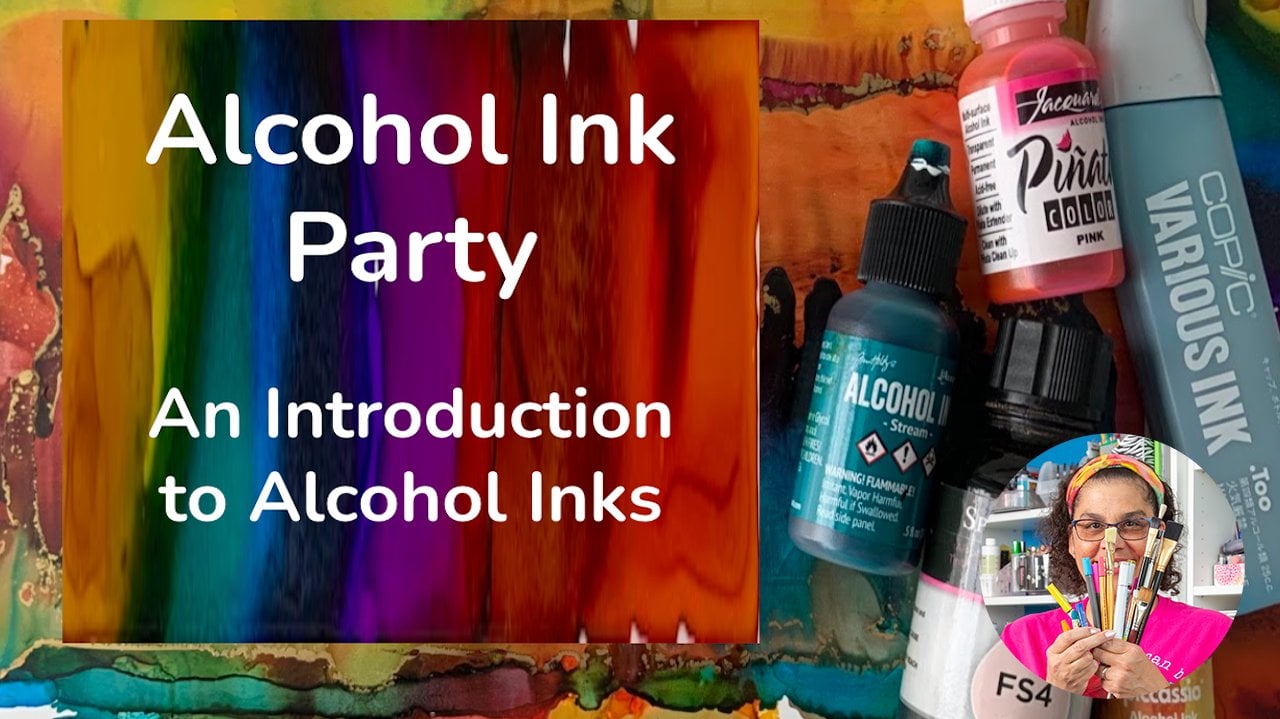
1. Intro: [MUSIC] In this class, you will learn an
easy way to create vivid colorful abstract ceramic
tiles with alcohol inks, I will share the
steps and some tips that will help you add
color to your tiles. Hello beautiful people, my name is Trena
Brannon and I have a passion for color and a
passion for helping others, that's why I'm excited to be here teaching on
Skillshare with you. I have many identities
among them, I am a children's
book illustrator, a surface design, a
mixed media artist, I'm also a founding
contributor for the Alcohol Ink Art Community. I just love coloring, my favorite art supplies
is whatever I have in my hand and in
this class I have alcohol ink and I'm
going to be showing you how to make a
beautiful ceramic tile. This after party is targeted towards those
of you who really like vivid colors and want to create something to add joy points
to your environment. If you've never used
alcohol inks before, I recommend that you watch
the alcohol ink party intro to alcohol ink
class here on Skillshare. But you don't have to, you could come to
the after party, you don't have to go
to the party first, I'll show some basics about
how to use alcohol inks as well as some safety things
for you to be aware of. In this class, I will
cover safety and supplies, preparing the tiles to
receive alcohol inks, a simple fun technique for adding color to your
tiles and finally, how to steal your tiles. You'll also get a
student handout with a summary of the steps, a list of supplies
that include links and also additional
alcohol ink resources. For the class project, you will create coasters. The great benefit of using alcohol inks on the tiles
is that you can wipe the ink off and recreate a design until you find
one that you want to keep. You can use the tile over
and over to practice. Using this technique
you'll learn in the class, a small tile gives you
the opportunity to get to know the technique
on a smaller scale, which you can then apply
to a larger scale. The techniques I'm showing
you on the tiles can be used on other surfaces
that play well with inks. When you participate
in the class, you'll see the features and the beautiful blending
that the inks create and each piece
will be unique. It will be fun to see
what everyone is making, so let's get started, I'll see you at the
alcohol ink after party. [MUSIC]
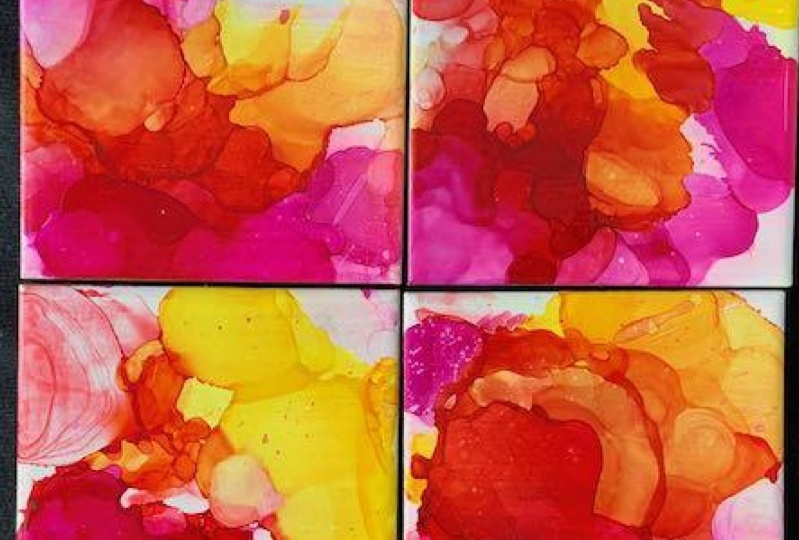
2. Your Project: Hello, I'm glad you're here. In this video, I'll tell you the steps for making
coasters as your projects. You'll create a colorful
tiles similar to this, using the inks and the technique that I
show you during class. I'll show you a couple of ways
to add a nice trim around your coasters and also add little felt pieces
to protect your table. I'll step through
the complete list of supplies in the next video. Please take photos of
your tiles and share them in the class
project gallery. If you have any questions, please post them in
the discussion area. I'll be checking
it often as well as one of your classmates
may know the answer. This is a sharing and
supportive community, one of the many things that
I love about Skillshare. Let's get started
with our lessons. Supplies and safety is
next. See you there.
3. Supplies and Safety: Hello and welcome back. In this lesson, I
will be explaining the supplies used in class
and safety practices. The supplies and
products that I will be using in class are listed in the student handout
located in class resources. The smell of alcohol can
sometimes be strong. Work in a well ventilated area, open a window, or have
a fan in the room. The inks are very
pigmented and will stain. You'll want to wear old
clothes or an apron, and definitely use
gloves to cover your hands or use
a barrier cream. Cover your work surface. I use a reusable craft mat with an inexpensive
plastic tablecloth underneath which I can reuse. Never ever put the alcohol
inks into a spray bottle. There is resin in the inks that you don't want
in your lungs. They should never be airborne. Do not use them with
things that come into direct contact with
food and beverages. Also, the ink is flammable, so please be mindful of
the safety precautions. When it's warm enough outside. I set up a table in the garage and leave the garage door open. I learned that tip from
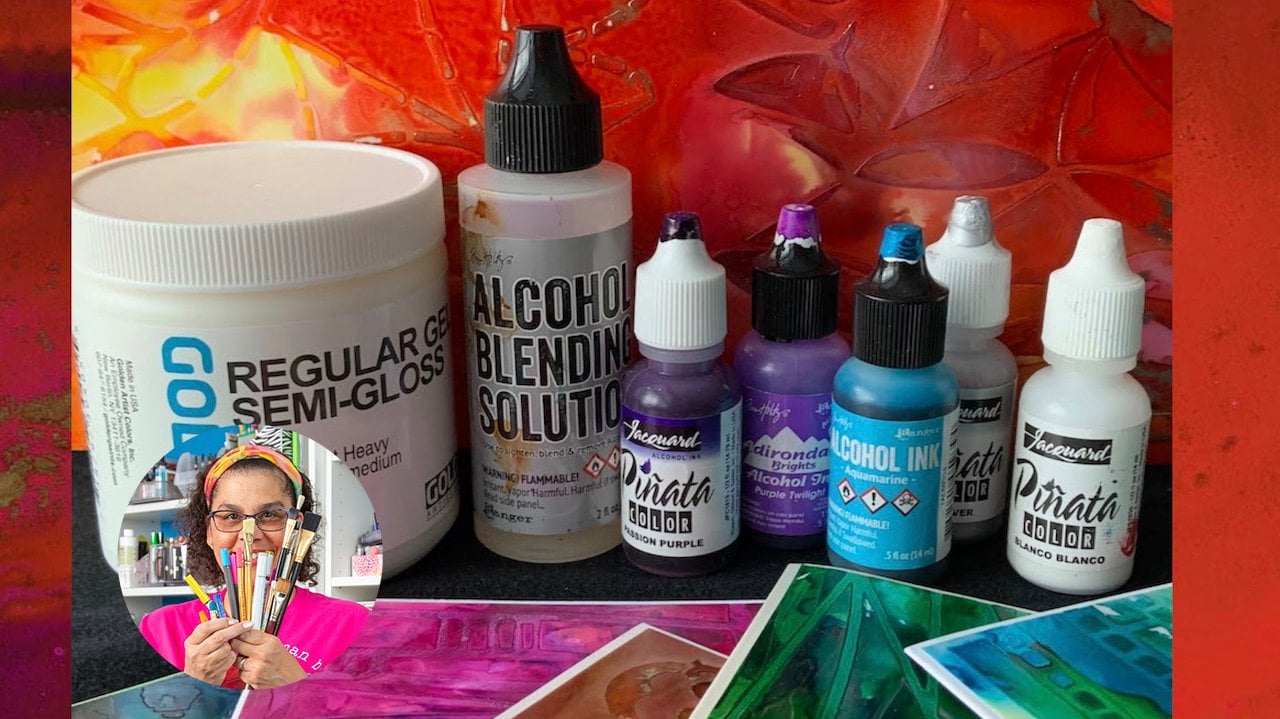
my neighbor, Nita. We have ink play dates together. You will need alcohol inks. There are many brands I'll
be using, Pinata and Ranger. You can use whatever you have. If you want to know more
about the different brands, please check out my alcohol
ink party intro class here on Skillshare. I'll be using isopropyl
rubbing alcohol. It comes in different
percentages. I'm using 99%. For the techniques I'm showing, they work best with
rubbing alcohol over 90%. But if you do not have the
same percentage, that's okay. Of course you can
use what you have. Just be mindful that the
ink effects may have a different results than what you are seeing
in the class. Also, if you want to put the rubbing alcohol
in a spray bottle to try different
techniques, that is okay. The alcohol makes the inks more transparent and it
helps them to flow. I like to pour the alcohol in a smaller bottle
for ease of use. You may also want to use
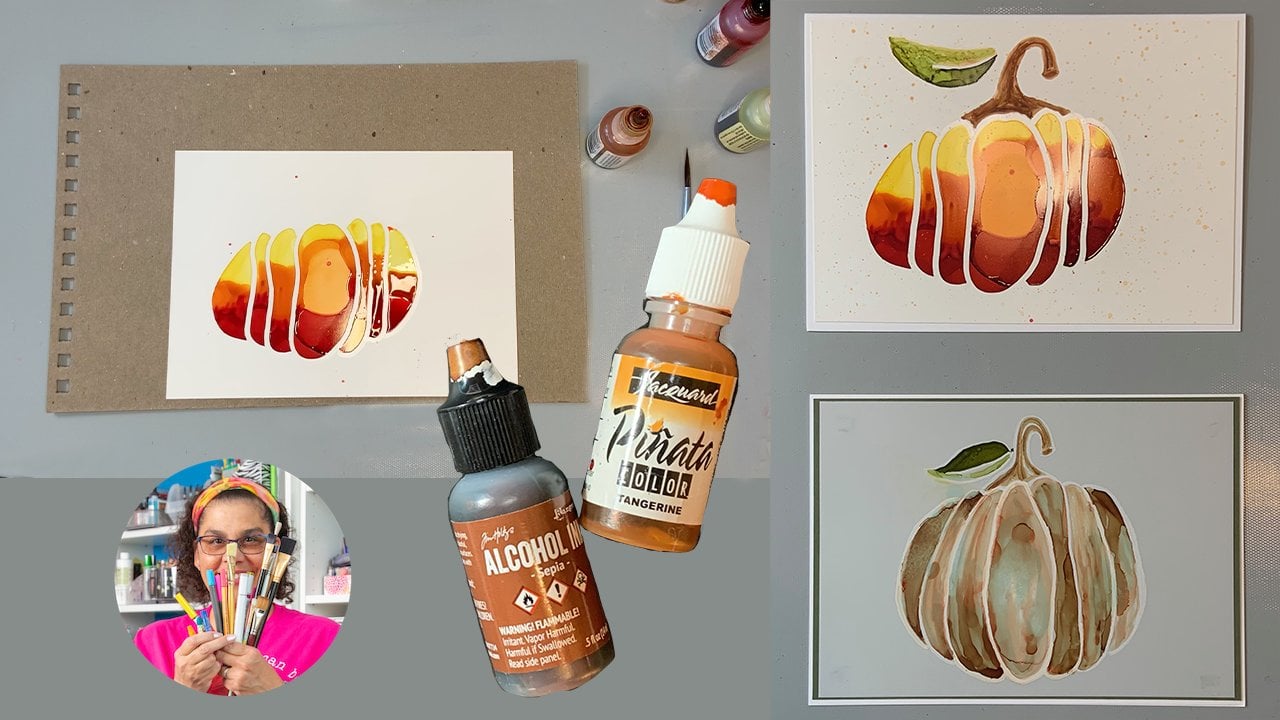
metallics in your design. A tip on the metallic inks, they are quite thick. Depending on the
techniques that I'm doing, I will use it straight
from the bottle or use a diluted mixture for
a more subtle look. I start with a ratio of
two-thirds bottle of rubbing alcohol and five drops of metallic ink in a 14
milliliter bottle. You can test to see
what ratio you like. You can easily add more drops of ink if you want or more alcohol. I also use the
alcohol for cleanup. You'll need tiles. Tiles come in different
sizes and different shapes. I'll be using square
tiles for my coasters. They have a slight
gloss finish to them, which adds to the
vibrancy of the inks. I bought my tiles at my
local hardware store, and they are very inexpensive. One advantage of alcohol inks on tiles is that
you can clean off the ink with alcohol and redesign until you
get something you like. Next, you'll need
some type of blower, Ranger ink blower
tool or equivalent. For safety purposes,
the recommendation is not to use a straw for blowing. You can also use an
air compressor where the small tip to blow the inks. Another tool that I use when I'm creating is the color wheel. The inks will blend to the
color wheel so it's great to have it handy when you
are choosing your colors. If you are not familiar with
color wheel or color theory, there are many great intro
classes here on Skillshare. You'll need paper towels
or rag for cleanup. Here's a tip. Save
your paper towels for collage or backgrounds
for other artwork. You'll find that
after cleaning up or wiping down your tiles
with your paper towel, you'll have a beautiful
blend of colors. To seal your artwork, use a water-based sealer. There are many different types. I use Liquitex Gloss
Medium Varnish, and also I will use a spray sealer depending on
the finished that I want. For my tiles, I
will use Liquitex. To apply the sealer, I'll use a foam brush. You need a strong glue and some type of felt for the
bottom of your tiles. To trim the edges
of your coaster, you'll also need a marker or small pink brush and then an ink that
compliments your design. I'll be used in a gold pin. You may also find it
helpful to have a piece of scrap cardboard or something
flat to hold your tiles. Just make sure that
it is thick enough to hold your tiles flat
when you pick it up. To get started, you don't
need all the colors, although I'll tell you, once you start dripping color, you might find a lot of
joy in creating with the inks and feel you
need to get all of them. Here's a list of
supplies as well as you have your student
handout with links. If you have any questions, please post them in
the class discussion. In the next video, I'll show you how to prepare
the tiles to receive the alcohol ink and also share some basic adding
color techniques. See you in the next video. [MUSIC]
4. Prep the Tiles and Ink Basics: [MUSIC] Hello and welcome back. In this lesson, I will be explaining how to
prepare the tiles to accept the alcohol ink and some basics for
dripping color. In order for the alcohol inks to adhere well to the tiles, the tiles need to
be free from dirt, dust, and fingerprints. To clean the tile, drip a few drops of alcohol ink onto the
tile and then wipe it clean with a paper towel or lint free cloth all the
way to the edge. That's it. Now it's ready for
ink. Let's drip some ink. I have my gloves on, my surface and clothes
are protected, my window is open, and I'm ready to drip some ink. On this single tile, I'll demonstrate how to
add and blend color. If you took the alcohol
ink party intro class, this will look familiar. If you did not, that's okay, I'm starting from the beginning. This is the tile I prepared. As you will see, you do not need much color to
cover the tile. I'm using ranger indigo
and pinata lime green. They are close to each other on the color wheel and
will blend beautifully. I also have my rubbing alcohol
in this little bottle. The goal is to create a
design that I really like. I pick up my board to make it easy to tilt the
tile to move color. The inks are highly pigmented and this
is a small surface, so I don't need much ink. I'll start with adding a
little rubbing alcohol and then add a couple of drops of
green and one drop of blue. As you can see, the color is very intense and starts to move. I tilt the board to
encourage that movement. I'll add more alcohol and continue to tilt the board to help that color
move even more. I repeat these steps as
needed to get a nice blend. [MUSIC] You can also use a cotton swab or little
stick to move color, like this little area here. I thought I might need a little alcohol to
help move the ink, but there was enough wet
eat to fill that space. You can add more
alcohol to push some of the color away
to create fades. Next, I'll add some more
alcohol and start tilting the tile to help move color in the direction I want
to form a design. The inks naturally blend
together and you can see there's some dark
areas and light areas. I really like that contrast. That's something that I
strive for in my designs. To make the light
areas I can just add a little more alcohol. I also like to add a
metallic to my designs. I have some pinata rich gold. The metallics are quite thick, always be sure to shake them. I'm adding alcohol to
help the metallics move. If you find it's too
thick for your taste, you can use the diluted recipe rather than full strength
of the metallic ink. Here's a tip, if you
have too much color, use a second tile or some
mupole paper to catch the ink. This can be the start
of your next project. You can add alcohol or add more ink to
create a new design. A benefit of using
the tiles with alcohol inks is that you
can wipe the tile clean. You may want to do
this if you don't like the design or if you just want
to practice with the inks. Use a paper towel or lint free cloth to wipe
away any wet ink. For dried ink and to wipe
the tile completely clean, drip alcohol on the tile and
use a clean paper towel. Be sure to use the clean
part of the paper towel, otherwise you just wiped
that ink right back on there. Here's a tip. Save the paper towel for collage and the lint free cloth
for other projects. You will see that you have a beautiful colorful piece once you have used
them for cleanup. In the next video, we'll jump right into adding
color by blowing the inks. See you there. [MUSIC]
5. Add Color with Air: [MUSIC] Hi and welcome back. In this lesson, I'll demo
a technique to add color with air for different
type of abstract design. To create this set of coasters, I want them to have
a similar look. I set them up two-by-two on
scrap cardboard so I can drip color in a similar place on each tile and then move
the color with air. I have to tell you for
full transparency, this is my second
take on filming. I did not like the first design. I wiped the tiles clean
and I'm starting over. But look how pretty
this paper tile is. All is not lost. I'll use it for a collage
on another project. I use the color wheel
to pick up my colors. I decided on warm colors, red and yellow to start with, knowing that they will blend
into different oranges. I picked a red-violet, which is next to read. By looking at the color wheel, I can tell all these
colors will blend nicely. I start by dropping a few
drops of alcohol on each tile. This time I'm starting
with one color of ink, ranger watermelon, in
a corner of each tile. I'll then use the blower
tool to move color around, trying to put the blower in a similar position
for each tile. Understanding the
design will be abstract because of the
features of the ink no two will be exactly alike, one of the things that I love
about the inks, by the way. By doing the same
steps for each tile, they will be similar enough that you can tell
that they are a set. You can see it creates a different
effect than the tilting. Both techniques
beautifully blend. It's nice to have variety. There are a few splatters
that blow across the tiles. I see that as adding more interest to the
design and I like it. Next, I add pinata some bright yellow in a similar
spot on each tile. Again, understanding that I
cannot control the outcome, I'm just looking to make interesting blends and
textures that are similar. Next, I add a little alcohol in a different area and
add ranger white plum, and then blow the color. I'm not trying to create
a specific design. I'm looking to create interesting blends that
make my heart smile. That's how I know I'm
digging the design. I continue to fill up
the tile with color while leaving some white
space to provide contrast. Notice that I'm using only
a small amount of ink. It dries fast and so I continue to drop alcohol to
encourage the inks to move. Blowing the air creates
these beautiful borders and also creates these organic
shapes and textures. You can hold the blower at
an angle or straight up and down and see that it creates a little bit
different results. I'll take a moment
to pause and look at the design to see
if there are places where I want to add more ink or more alcohol or even
perhaps another color. I encourage you to just
have fun with the process. Of course, I'm going to add
some gold just because I'm a metallic enthusiast and
need some in my design. This time, I will use the diluted pinata
rich in gold alcohol. Since there's quite a bit
of alcohol in the recipe, it will push the
colors to move a bit. See how it pushed
that color away. There will be a subtle presence of gold in the overall design, which is really pretty. I continue to add
gold and blow air. [MUSIC]. I think more yellow is
needed in this area, so I'll add it. It's just a matter
of adding inks and or alcohol to create an
abstract design that you liked. [MUSIC]. I need more red-violet. [MUSIC]. I'm taking another moment
to look at the design. I'm loving these little
organic borders that are forming as the ink
dries and pulls. I'm also digging the
interesting overall look. The hardest part of
creating abstracts is deciding when to stop or
when to add something more. I do feel like I need a
pop of color, some pink. So I'm going to add
Pinata Senorita Magenta. I start in the corner and blow. [MUSIC]. Then add a little gold. I did that. I repeat
for each corner. By adding that diluted gold, I'm also adding more
alcohol to help it move. I don't need to add more
alcohol from my little bottle. It's in there with the gold. [MUSIC]. I really like the splatter that happened when I blew
the diluted gold, so I try to get that
on all the tiles. I also want to add more yellow
in some corners to balance out the colors for a
similar look on each tile. At this point, I'm just
trying to balance colors. It is important to
know when to say when and just stop. So I did. When you are dripping
and blowing, I want to encourage
you to embrace the process and get
to know the inks. Remember if you are
unhappy with the outcome, you can always
wipe off the tile. Please upload your tiles
so we can all see them. If you have any questions, please note them in the
discussion section. I promised to respond. Other students may have the same question or may know
the answer and can respond. We are all one big
helpful community. In the next video, I'll
show you how to seal your beautiful artwork and
make the tiles into coasters.
6. Seal Your Artwork and Detail: Hi and welcome back. In this lesson, I
will show you how I seal my tiles and also how to add some
finishing details to turn your tiles into coasters. To seal your inked artwork, you'll want to use a
water-based sealer, I use Liquitex, gloss, and varnish, or a spray
depending on the artwork. The reason I like
Liquitex is that it increases the vibrancy
and dries clear. I will use Liquitex
on the tiles. To apply, I use a foam brush, I pour a small amount along the tip of the
brush, not too thick. Also a tip, it's a good idea not to pour over
your art painting. I lightly brush across
from edge to edge, and then I check to make
sure there are no bubbles. If there are no
bubbles, I'm good. If I see any bubbles, I smooth them out
with the foam brush. You can see the brush strokes
slightly when you tilt it, but I'm okay with that, I think it adds
texture to show it's an original piece and
it was hand painted. For a larger piece of art or a painting where I do
not want a brushstroke, I will use a spray varnish. I always spray outside. I set my painting upright so
the spray does not pull in any one area and then I spray three coats allowing
them to dry in-between. Whatever finishing
method you decide, be sure to read your
product information. I used the Liquitex on all four tiles already so they could be dry and I
can show you the next step, which is to turn these
tiles into coasters. To add a finishing
touch around the edges, I used a permanent
goal leafing marker. You can also use a sharpie or some brand
that's permanent, or you can use a paintbrush and the complimentary color
ink to paint the trim. As an example, you can pour out a little ink holding
the tile between your fingers so the
edges are exposed, and paint along the edge, you may need to do two coats. [MUSIC] I like to use the leafing
pen because it just requires one coat and
it's easy to apply. When using a metallic pen,
you need to shake it. I highly recommend that you make sure that the top is on
tightly before you shake, and then when you
take the top off, take the top off
away from your art, otherwise you might
get a little bit of splatter that you don't want. Holding the tile between my fingers so the
side areas are clear, I pump the leafing pen to get it started and then paint
around the edges. I take my time so
that the marker tip will not slip onto my artwork. Now if that does happen, immediately take a paper
towel and wipe it off. If it does not come off easily, add a little bit of alcohol to your paper towel and
gently wipe away. This is why I seal my artwork
first to protect it just in case I have a little
accident while I'm doing the trim and
I have to clean it. I have already added
trim to the other tiles. The last step for
the coasters is to put little pieces
of felt on the bottom, this will make a cushion for the coasters when they
sit on your table. I'm using a strong glue to
make sure they stick well. Oh no, the whole of
my glue is clogged, I'll use a straight
pin to get it flowing. This is also a good tip for your inks if ever
they are clogged, just use a straight pin to open that little hole
backup and get a flow. I added the little felt to all
four corners of each tile. [MUSIC] Now they are ready. Up next is a summary
video, I'll see you there.
7. Summary: [MUSIC] Congratulations, you
have finished the class. I hope you enjoyed the
techniques and had fun. We covered safety using alcohol inks and
supplies for coasters, preparing the tiles
by cleaning them with alcohol to
receive the inks, a simple and fun
technique for adding blooms of color to your
tiles with the blower, and finally how to seal
your tiles and detail them. Be sure to print the handout with the
summary of the steps, the list of supplies with links, and additional alcohol
ink resources. If you take away one
thing from the class, I hope that it's
seeing how easy it is to work with the
inks and blower to create vivid pieces of art that are functional
and beautiful. If you liked this class kindly
leave a review and follow me here on Skillshare
that you'll hear about my upcoming classes. It is truly been my pleasure
having you in class, take care and stay positive. [MUSIC]
 Trena Brannon, advocates kindness inclusion positivity