Transcripts
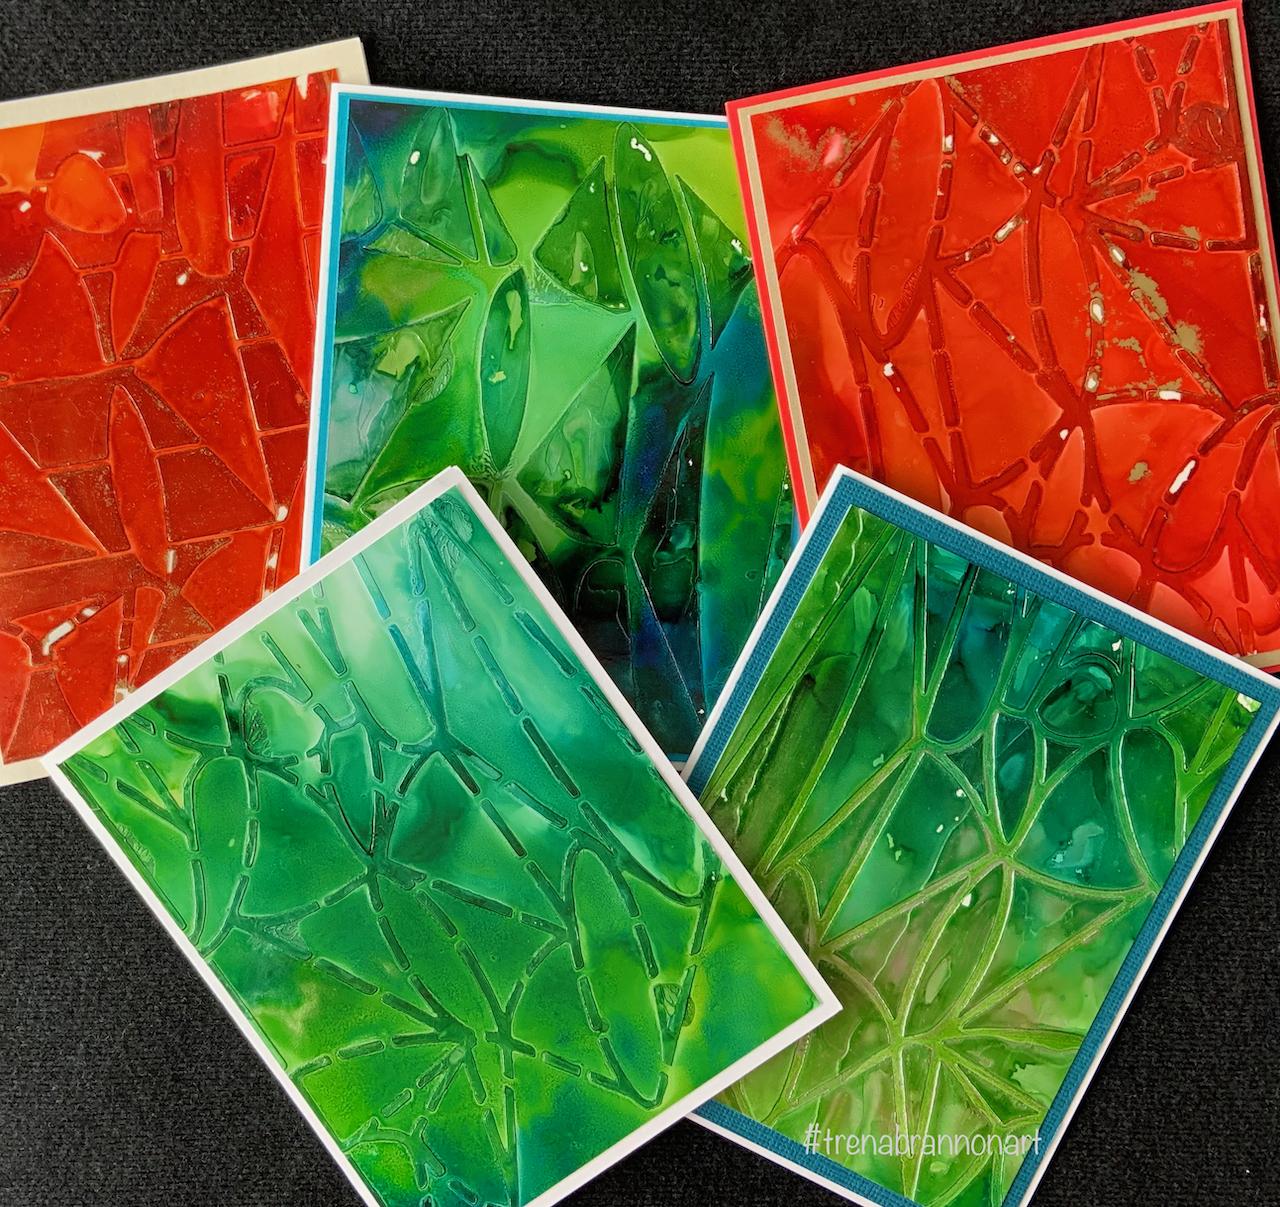
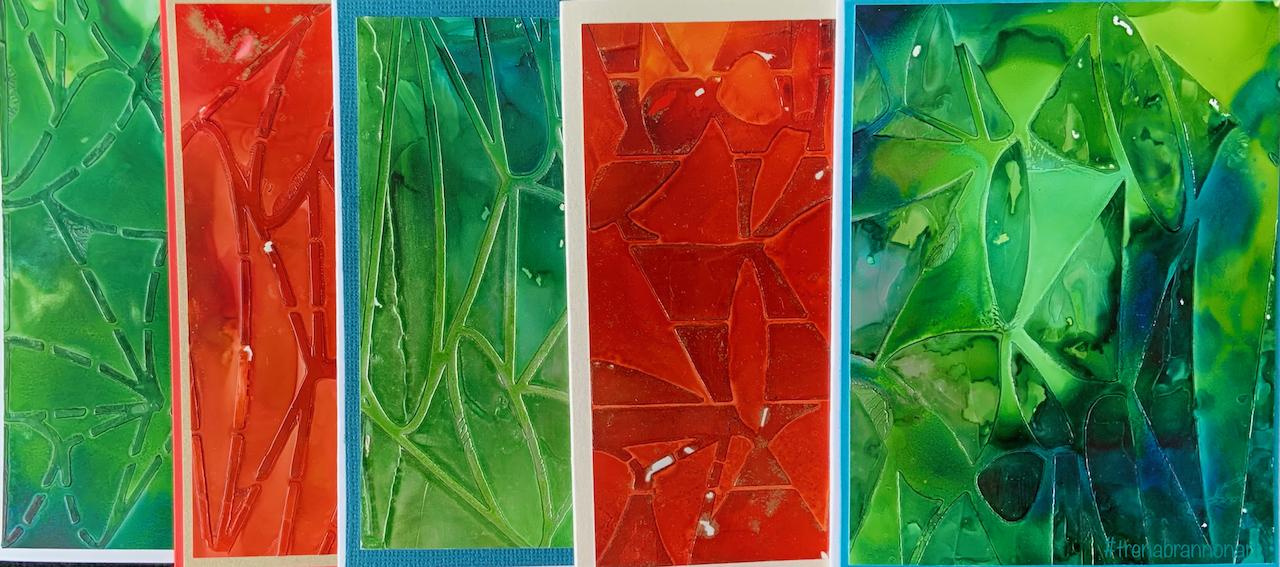
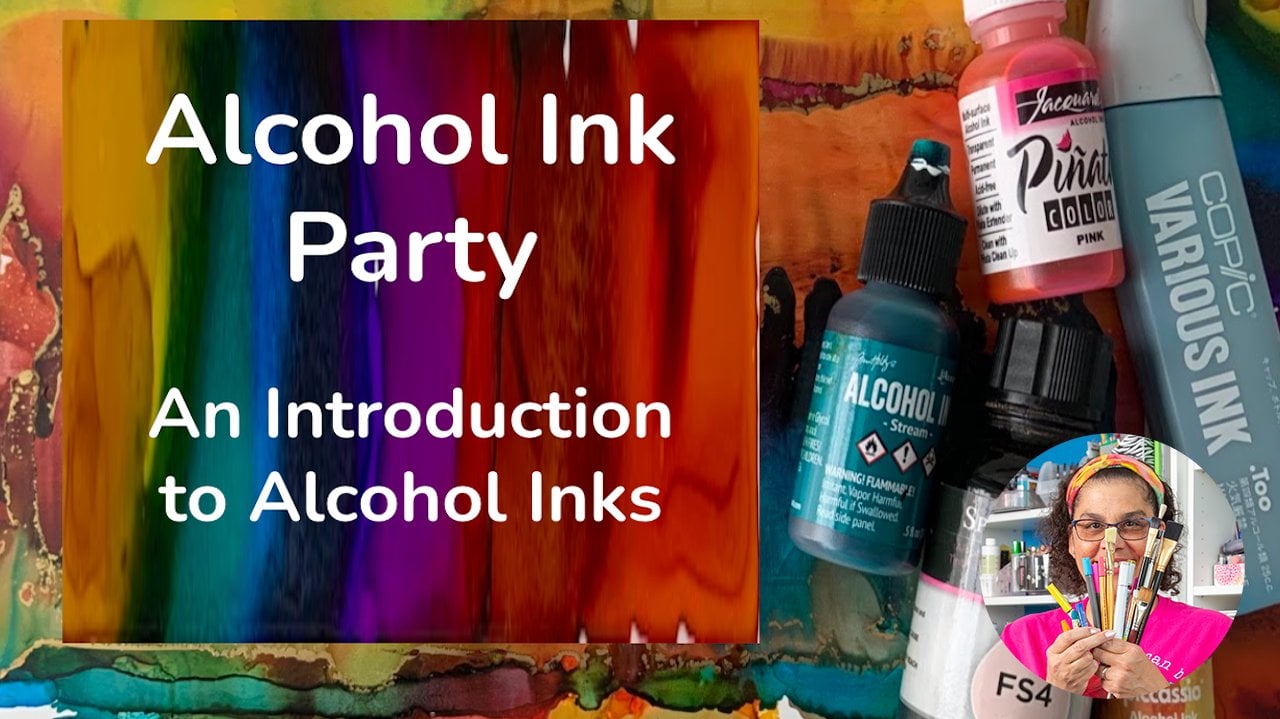
1. Introduction-Alcohol Ink After Party: In this class, you will learn an easy way to incorporate texture and depth into your alcohol. Eat art using a stencil and gel medium. I will share tips and steps that will help you get the results that you want. Hello beautiful people. My name is Trina brand and I have a passion for color and a passion for helping others. That's why I'm excited to be teaching here on skill share with you. I have many identities. Among them, I am a children's book Illustrator, a service designer, a mixed media artist. I just love coloring. Whatever I have in my hand is my favorite art supplies in this class. I hand stencils and alcohol. This class is targeted towards those of you who did vivid color and texture. If you have never used alcohol inks before, I recommend you watch the alcohol, eat party, intro to alcohol inks class here on Skillshare, but you don't have to take it first. In this class. I'll cover safety and supplies, a quick description of stencils and what to consider when choosing one for this technique. How to set up your stencil and apply gel medium to add texture. And of course, I'll cover coloring with alcohol. You'll also get a student handout with a summary of the steps, a list of supplies and more alcohol ink resources for the project. In this class, you will create a greeting card. The reason that I love to recommend reading cards for projects is that it will give you an opportunity to get to know the technique on a smaller scale, which you can apply to a larger scale. With the technique to learn in this class, you can apply them to a variety of size art projects. When you participate in class, you will see the features of the beautiful blending of the ink. Each piece will be unique. It will be fun to see what everyone is making. So let's get started. I'll see you in the alcohol EQ after party.
2. Your Project: I am glad you're here. In this project video, I'll tell you the steps to make a greeting card for your project. A greeting card is something that is functional and beautiful. A greeting card is a way to let someone know that you care or you can display it as a piece of art to bring joy points in your space. You'll need some glue or tape, scissors or a trimer and a piece of card stock. I do have a bonus video in the alcohol ink art party here on Skillshare, where I demonstrate how I assemble a greeting card and add little details to give a custom touch. As well as I share several tips on assembling a greeting card. Also in that video, I share how I organize my alcohol. You can check my profile for the class, or you can click on the link in the student handout located in the projects and resources section of class. Please take photos or scan your card and upload it to the class project gallery for your information. The cards that I share in the project gallery, I have listed the color combinations in the student handout. Please take photos or scan your creations along the way and share them in class. Also, if you have any questions, please post in the discussion here. I'll be checking it often, as well as one of our classmates might be able to answer the question, this is a sharing community. So let's get started with our lessons. Supplies and safety is up next. See you there.
3. Supplies & Safety: Hello and welcome back. In this lesson, I will be explaining the supplies used in the class and safety practices. The supplies and products that I'll be using in the class are listed in the student handout in class resources. The smell of alcohol can sometimes be strong. Work in a well ventilated area, open a window, have a fan in the room to help circulate the air. The inks are very pigment it and we'll state, you'll want to wear old clothes and definitely gloves or cover your hands with a barrier cream. Cover your work surface. I use a reusable craft met with an inexpensive plastic tablecloth or paper underneath, which I can reuse. Never put the inks are blending solution into a spray bottle. There is resin in the inks that you don't want in your lungs. It should never be airborne. You can also use isopropyl rubbing alcohol as opposed to a blending solution. And it's okay to put that in the spray bottle. Be mindful of these safety precautions. There are many brands of alcohol. I'll be using pin yada and Ranger. You can use whatever you have. If you want to know more about the different brands, please check out my alcohol, eat party, intro class here on Skillshare. I'll be using two types of mediums in this class. One is an EQ medium. I'll be using the blender solution from Ranger. You can also use isopropyl rubbing alcohol. They both lightened areas and help the ink flow each forgive a little bit different result. The mediums are also good for clean up. A tip is I use rubbing alcohol, which is less expensive for cleanup and save my blending solution to use with the ink. The other medium I'll be using in class is a gel medium, a water-based medium. This technique works with any type of medium, texture, pace, or even just so the mediums act as a resistor. So the results you get will depend on if you have a matte medium or a glossy medium. You'll see in my examples that there's a glossy result. The paper that I'll be using in class is you bulb watercolor paper. It's a popular type surface for the inks. You can use the front and the back. It's in the paper section at your local art store, but it's actually a plastic. This is my favorite service because it's very forgiving with the EQ. The blending is lovely. It comes in different sizes. More popular are the nine by 12 inch, five by seven. And Ranger also makes an 8 by 10. You'll also need some type of pencil. I'll be using a nine by 12 stents, which works perfectly on the nine by 12 you Bo paper. You also need a pallet knife. If you don't have a palette knife. You can also use an old gift card or credit card or some type of stiff cardboard to spread the gel medium. And some low tech sticky tape. If you don't have low tech tape, one tip is to just apply it to your code a few times and that lessens the tech enough of the tape so it does not tear your paper. You also need some paper towels or a rag for clean up. A tip, save your paper towels for collage or backgrounds. In other artwork. For your greeting card, you'll need some card stack, glue or double-sided tape and a trimmer or scissors. To get started, you don't need all the colors, although I will tell you might find it a lot of joy in creating with the feel that you need more colors. That was my experience. If you do not have inks in your supply, I recommend getting just a few to start with. You can create beautiful paintings with just a few inks. With blending solution or rubbing alcohol. You need a recommendation for color. I recommend the ranger three packs as they have colors that compliment each other or blend together nicely. Nature walk and dark side picnic basically have primary colors which allow you to make any color on the color wheel. In the next video lesson, I'll talk about stencils and how to prepare your surface, getting ready to apply the gel medium. See you in the next video.
4. The Stencil and the Set Up: Hello and welcome back. In this lesson, I'll be explaining a few things to look for when picking out your stem cell based on what you like. There are different types stencils to print designs the stencils. I'll also talk about how to set your stencil off to apply the gel medium. There are many designs, many brands of stencils. You can make your own. You can find them at an arts and crafts store, office stores, as well as online. The brand of stencils that I'm using in this class are from stencil girl product. There are links in the student handout for the ones that I'm sharing in the video lessons. They are made to use over and over. They will withstand normal painting, wear and tear. Full disclosure just to let you know that I am a contributing artist sets tensile girl. Before being an artist, I was a customer for many years and I just loved their centrals because of the variety of designs and also the really great quality. You can use the stencils on fabric, canvas, paper, walls. You can use them with alcohol, inks, with Paint, Texture mediums, wax, pencil, marker, a threat. They can either be used for encaustic painting. When you look at a stem. So you'll see that the design has a positive part, which is called a mask, and a negative part, also called an opening, which creates the stencil design. The paint will go through the negative part onto the surface. The positive part acts as a mask to keep the paint from going through resulting in that design. You can use the whole stencil in your artwork or portions of it. This stencil design is divided into four sections with a different design in each section. Some of the designs are an all over pattern. When you cut it into size for a greeting card, the design goes off the edge. This one creates a lovely texture. Here's another example of four different designs, each unique with the openings and mass that you can leave as one piece or easily cut out for a greeting card or other US Census come in smaller sizes. You can also use them in this technique. You can cut the paper to match the size of your stencil, or use a larger piece of paper and place the small stencils around. To set up your stencil for the gel medium, you'll need a non-stick surface. For paper you plan to discard. I have a nine by 12 piece of UCO paper. I'm using low tech tape, such as the washi tape, placing the tape in the corners to hold the paper in place so it will not interfere with the design. Next, I placed my stencil over the paper, lining it up with a paper towel. Then please tape in the corners at the top of this tensile to create a hinge. Oops, sometime it take me to get away from you. I'm making sure it does not cover the opening of the design. The advantage of doing this is that your stance remains in the same spot. Open the paper. You'll see in the next lesson why this is important. I chose this tensile because it has four different designs to make four different greeting cards. Full disclosure, I designed a stencil for stencil girl products. The design was inspired by the beautiful lattice design on the outside of the Smithsonian National Museum of African-American History and Culture in Washington DC. In the next video, I'll show you how to apply the gel medium through the stencil. I'll meet you there.
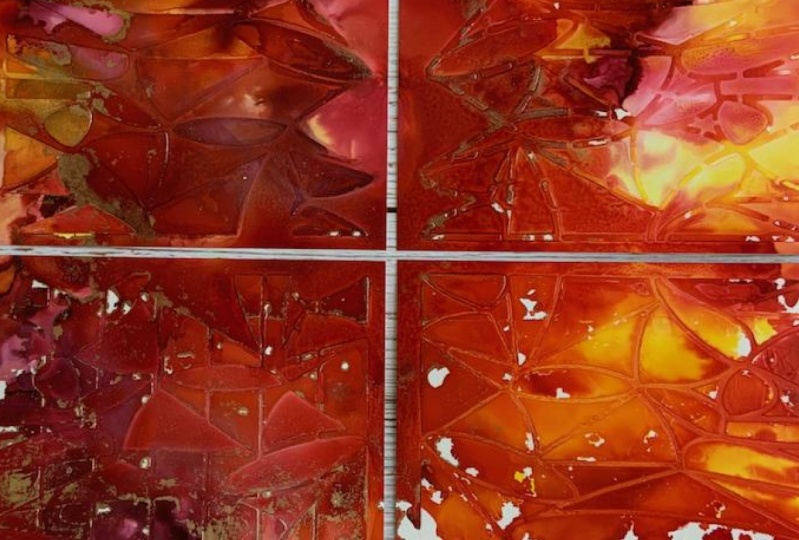
5. The Spreading of the Gel Medium: Hi and welcome back. In this video, I'll be demonstrating how to apply the gel medium through the stencil. I'm using a gel medium which is clear and a bit glossy, which helps to give a beautiful, glossy and vibrant finish. My goal is to spread the gel only through the open spaces. I do not want the gel to go under the stencil or wear the mask part is. The nice thing about this technique is you only need a small amount of gel. You can put the gel you don't use back in the container. I'm holding the palette knife at a bit of an angle about 45 degrees. With my opposite hand, I'm holding down the stencil so it stays flat on the paper and I don't get gel under the stencil. Spreading the child reminds me of icing a cake for those of you who have done that. Here's a tip. I spread in sections and tried to spread evenly in one area. It really does not matter which direction you spread as long as you hold the stencil flat. The benefit of having that hinge on your stencil is that you can check that you've covered the area that you want. It may be hard for you to tell on camera in person. I can see areas that I have missed. I can lay the stencil back in place and continue. I'll pull it up again to make sure I get coverage. I fixed one area. In the lower left. There are some little crinkles that I actually liked and I will leave them in for an interests in the design. You'll see in the next lesson how the alcohol inks will drop down in the creek goals and create some depth. You can spread the gel for overall smooth coverage or even make it critical throughout the design on purpose for a different look. Here's some important things to do. After you use your stencil and pallet knife with any type of mediums, put them in water to clean the medium. The medium will harden on your tools. Allow the gel on the pupil paper to dry completely. Read the information on whatever medium you are using to let you know how long it should dry? I usually just let it dry overnight to make sure it's completely dry. A suggestion is to do several pieces in one session while you have your supplies out. That way, you will save time on cleaning up. When you are ready to add color. You will not have to wait. In the next lesson, we'll add color. See you there.
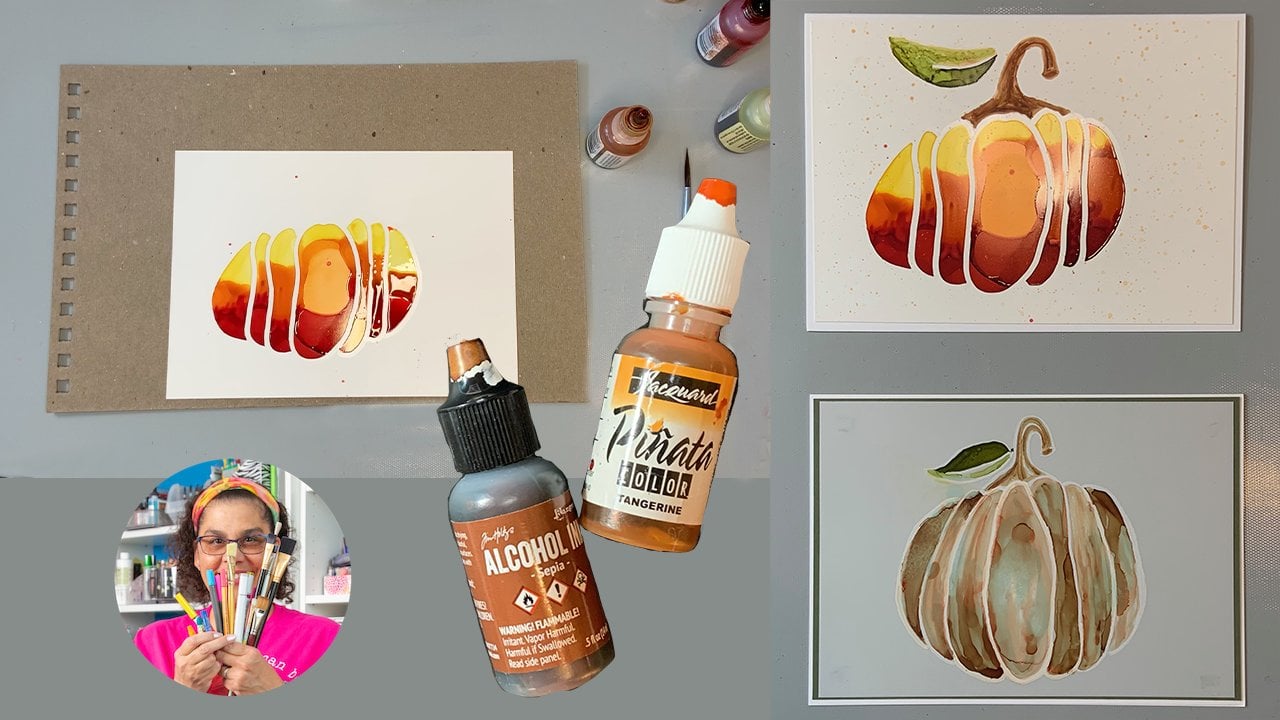
6. Adding Color!: Hi and welcome back. In this lesson, you will be learning how to drip color on the gel medium for different effects. Now you get to see the design come through. My surface and clothes are protected. My window is open and my gloves are on, I'm ready to get started. The medium will act as a resist, resulting in rich color variations depending on where the ink settles. One of the features that I love about the inks is how beautiful they blend and respond to each other. No two pieces are alike. Each piece will be uniquely beautiful. I've allowed the gel to dry completely. I've picked out some warm colors. I'm going to start with some blending solution to help the inks flow our work in one area. This is ranger dandelion. I'll drip some color and tilt my paper back and forth, allowing the ink to flow around the design. I'll add some more blending solution. And Ranger watermelon continuing to tilt and encouraged the colors to naturally blend together. Adding more blending solution and some dark ranger cranberry into the mix for contrast. And then also adding some pin yada white. I also really dig metallics in my ink paintings, adding some drips of periodic brass continuing to tilt. I've started in one section to show you that you can work in one section at a time. You can also work on the whole piece at one time, adding, blending, solution and color all around the UFO paper. You'll start to see the design come through resisting areas where the gel medium is and hugging the design on the part where the stencil covered the paper. That was the masking part where it was masking the job. If there are areas that resist colors, like leave a white space, you can use your finger to help move ink into any area that you want. I continue dripping and tilting my paper around to allow colors to mingle. Adding drips where I want. I'm thinking that I want each section to have a big color variation. So I will use darker colors in some areas, add more metallic to other areas and leave some whitespace. For areas where I'm not getting any color. I just add more ink like around the edges. Okay. So okay. If I find I have a lot of ink on my paper and there's no place for it to go. I will place paper towels or even you bowl paper underneath to catch the ink. I can use those paper towels for a collage or use the EQ on full paper for my next project. It's a great starter piece. I take my time and look over the piece to identify what areas I really like and where I may want to add color. I liked the white spots over here and I like the brightness in this section. And then those big splashes, a metallic look good over here. I like the darker colors near the top, by color preference is to have a lot of contrast in my pieces. I encourage you to play with your favorite colors and find what you like, make it your style. I can play with color all day. I should stop, but I can't help myself. So I'll play with them a little bit more. Okay? Okay. Okay. Okay. Now I'm really going to stop. I'm going to stop. I will let the inks dry completely before trimming my card. If you have never made a greeting card before, I would just like to see some tips on how I make my greeting cards. Please visit the lesson in my alcohol eat party intro class that describes how I make a greeting card. You can search for the class in Skillshare or you can just click the link in the student handouts, take you directly to the card making lesson. Be sure to upload your full art piece or your greeting card or both so we can all see it. If you have any questions, please note it in the discussion. I promised to respond. Students may have the same question or may know the answer and can respond. We are all one big helpful community. That's one of the many things I appreciate about Skillshare. Up next, I'll summarize the class. See you there.
7. Summary: Congratulations, you have finished the class. I hope you enjoyed the techniques and had fun. We covered the features of a stencil for the technique setting up your stencils, spreading gel medium and of course, dripping color, my favorite part. If there's one thing I hope you take away from the class, it's saying how easy it is to create texture with a stencil gel medium and dripping alcohol. Eat. If you'd like this class, kindly leave me a review and follow me here on Skillshare so you'll hear about my upcoming classes. See you next time. Take care, be safe and stay positive.
 Trena Brannon, advocates kindness inclusion positivity