Transcripts
1. Introduction: In this class, you
will learn how to paint a snowman
with alcohol inks. I'll share lessons, demos, and tips to help you create
your own special snowman. Hello, Beautiful, My
name is Trina Brandon. I have a passion for color and a passion for people,
for helping others. That's why I'm excited to be teaching here on
skill share with you. I have many identities. Among them, I am a
children's book illustrator, a surface designer. I license my artwork. I'm a multifaceted artist. I did traditional and digital creating all
the art supplies. I am also a founding contributor to the Alcohol Ink Art Society. I just love coloring. My favorite art supplies is
whatever I have in my hand. And in this class I'll have alcohol inks as well
as a few other tools. This after party is targeted
towards those of you who like vivid colors and who
want to create a snowman. If you have never used
the alcohol inks before, I recommend you
watch the alcohol in Party Intro to Alcohol Inks
class here on skill share, but you don't have to
go to the party first. You can come straight
to the after party. I will cover the basics
of alcohol inks. In this class, I will
cover safety and supplies, how to use the inks, and what to be aware
of a couple of ways to create a background
of a beautiful sky. How to paint layers of snow. And of course, how
to paint a snowman. I'll also show you how I find references for my
illustrations and artwork. Creating vibrant and
interesting artwork with alcohol inks
is easy and fun. For the class project, you will create a greeting card if you've taken
any of my classes, you know I recommend greeting cards as projects
because of a few reasons. It's a great size to
test out new techniques. Practicing the techniques
you learn in class on a smaller scale gives you the opportunity to get
to know the technique, which you can then apply
to a larger scale. The techniques that
I'm showing you can be used on other surfaces that
play well with the inks, like metal and glass. You can use your new skills to create lovely artwork
to hang in your home, give to others, or sell as
art pieces for extra cash. Art is also a way of
self care to help you relax your mind
and bring you joy. When you participate in class, you'll see how easy it is to create a lovely snowman
scene with the inks. You'll get to experience how the inks blend and
dance around together. And each snowman will be unique. It will be fun and
exciting to see what everyone is making.
Let's get started. I'll see you in the
alcohol ink after party. Up next, I'll talk
about your project.
2. Your Project: Hello. I'm glad you're here. In this project video, I'll tell you the
steps to making a greeting card
for your project, and also why I chose
this for a project. I chose a greeting card
for this project because it is something that is
functional and beautiful. A greeting card is a way to let someone
know that you care or display it as a
piece of artwork in your own space to create joy. If this is the first time you are trying to
use this technique, the benefit of trying out on the size of a piece
of the size of a greeting card is that you can practice the technique
on a smaller scale, which can easily then be
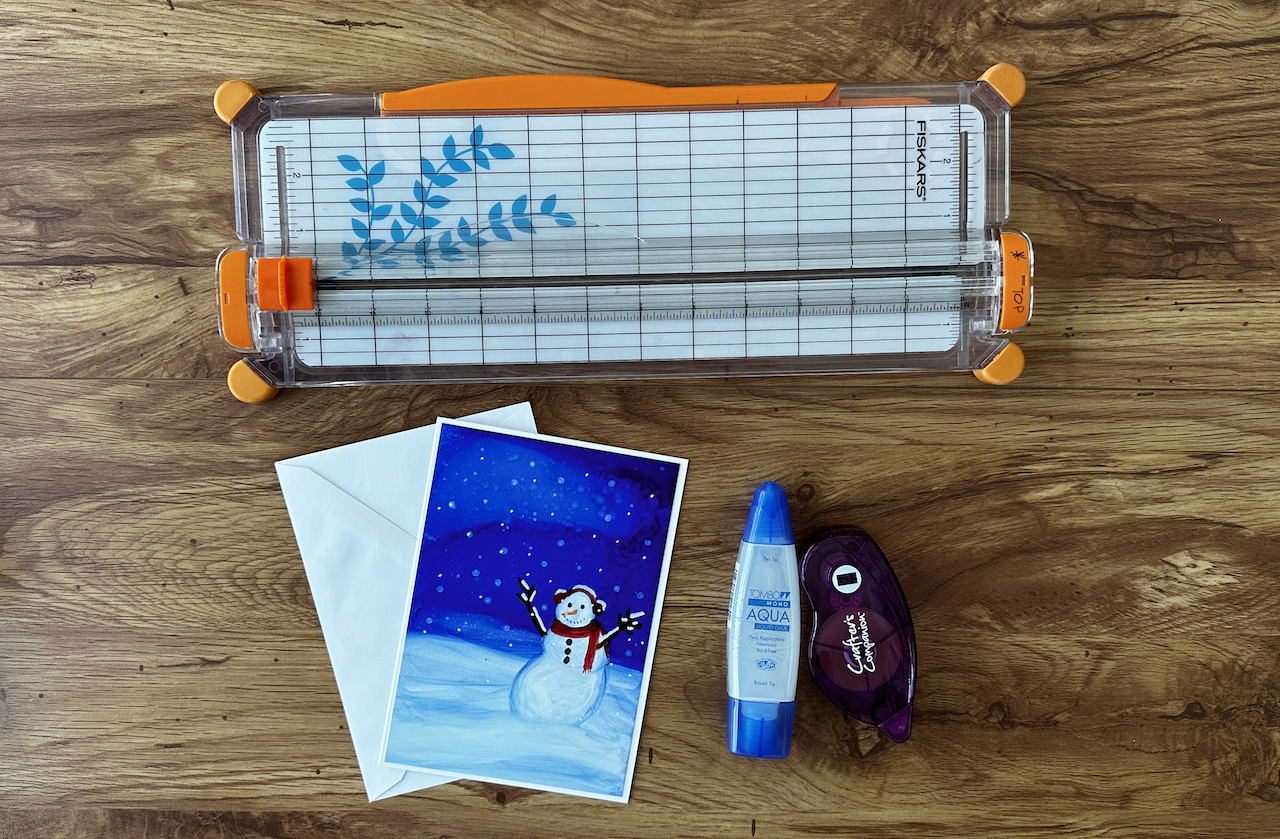
applied to a larger scale. You'll need acid free
glue or tape scissors or a paper trimmer and
a piece of card stock cut to the size
of your base card. Your art piece will fit
on top of your base card. I used a five by seven inch
size for my art piece, which is a common size for
greeting cards in the USA. If you want to layer your card, you'll need a complimentary
color card stock. Once you finish your art piece, you'll trim it to fit
your base card and adhere it with the glue
or the double sided tape. If you are giving it away, you can write a message inside. I do have a bonus
video included in the alcohol ink art party
class here on skill share, where I demonstrate
how I assemble my greeting cards and add a little details to
give a custom touch. As well as I share several tips on assembling
a greeting card. You can check out my
skill share profile for the link and there's also a direct link in the
student handout. Also, in that bonus lesson, I share how I organize
my alcohol Gs. Please take photos or scans of your creations and share them in the class
project gallery. If you have any questions, please post them in
the discussion area. I'll be checking
it often as well as one of your classmates
may have the answer. Let's get started
with our lessons. Safety and supplies is
up next. See you there.
3. Safety and Supplies: Hello and welcome back. In this video, I
will be explaining the supplies used in class
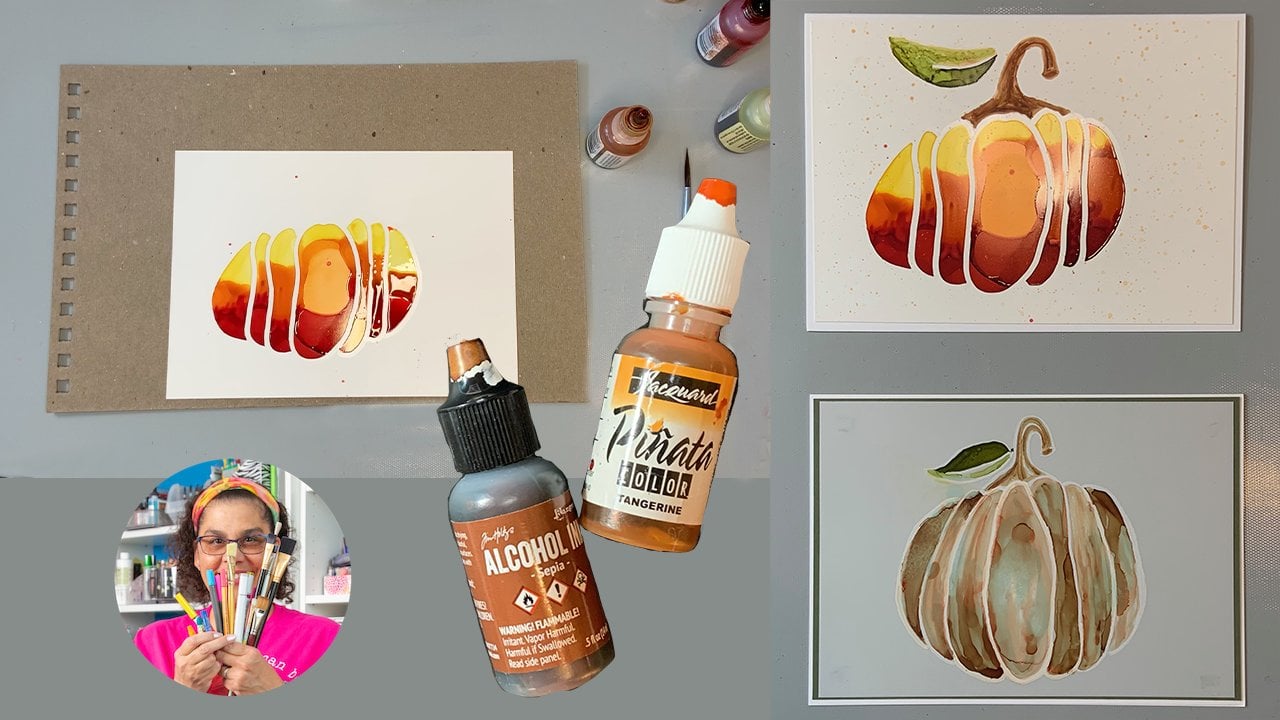
and safety practices. The supplies and products that
I'll be using in class are listed in the student handout
in the class resources. The smell of alcohol
can sometimes be strong work in a well
ventilated area, open a window, or have
a fan in the room. The inks are very
pigmented and will stain. You will want to wear old
clothes and also gloves. Or cover your hands
with a barrier. Cream cover your work surface. I have a reusable
craft mat on my table. Never put the inks
into a spray bottle. There is resin in the inks that you don't want
in your lungs. Do not use the inks
with things that come into direct contact with
food and beverages. The ink is also flammable. Please be mindful of
these safety precautions. When it's warm outside, I set up a table in my
garage with the door open. The first supply
is alcohol inks. There are many brands
of alcohol inks. I'll be using Ranger. You can use whatever
brand you have. If you want to know more
about the different brands, please check out my
alcohol ink Party. Intro class here on skill share. I'll be using blues and
pink for the background, for the details, I'll
use Copic markers, a Sharpie and a Posca paint pin. You can also use any
brand of permanent pin, any brand of paint
marker or even gel pins. You can also use a paint
brush to add all the details. I'll use both in the demo. And you can use what you
have or what you like. The alcohol inks
dry pretty quickly. The more ink you use in an area, the longer it takes
to dry When you're not using a color for
a long period of time, I recommend you close the top. I usually close them after I finish working with
a certain color. If they do get clogged, you can poke a pin in the
top to clear the nib. Here's a tip that
I use Color code your tops so that you don't
contaminate your colors. Like putting a black
lid on a yellow color. I'll be using a plastic
palette to drip inks onto. I'll show you how to
reactivate your ink, so none of that color is wasted. You can also use a piece of plastic inks and let them dry. You'll need isopropyl
rubbing alcohol. This is commonly found in drug
stores and grocery stores. The rubbing alcohol comes
in different percentages. I'll be using 99% You can use whatever you have or whatsever
available in your area. The rubbing alcohol helps to reactivate ink and helps
the colors flow and blend. It can also be
used for clean up. I use a lower percentage
to do clean up. I pour the alcohol into a smaller bottle with a
small tip for ease of use. As well as I have a small container for
dipping my paintbrush. I have the container with a tightly fitting top to
save the rubbing alcohol. I'll be using a size one paint
brush for the details of my snowman in class. I will also be using
Upo watercolor paper. It is a popular
surface for the inks. It comes in different
sizes and weights. I'll be using the white paper. I'll use a four by six
inch piece of Upo paper, a common greeting size
card in the United States. You can buy the paper in a larger size and cut it down
to the size that you need. You'll need paper towels to use for techniques
and for cleanup. Here's a tip. Save
your paper towels for collage or backgrounds
for other work. Other items I'll use for
adding details to make snow. If you don't have a paint pin, you can use a small
embossing stylus tool, cotton swab tips, or toothpicks. I'll also be using cotton
swabs to remove color. It may also be helpful
to have a piece of scrap cardboard slightly
larger than your art piece. I save the back of my paper
pads To seal your artwork, I use a water based sealer. There are different types
for I'll use a spray sealer. If you have another type of water based sealer that
could work as well, you should always test on a scrap paper before
using it on your artwork. I'm including a slide
with a complete list of supplies as well as you can download the student
handout with links. I've also included a close up
photo of the colors I use. You can take a
snapshot if you want. I also used a dark
brown color that had dried on my palette that's not captured in the photographs. Remember that if you
have any questions, please post them in the
classroom discussion. I'll check it often. The
next video is a lesson. I'll show you how I find
and use reference photos. See you in the next video.
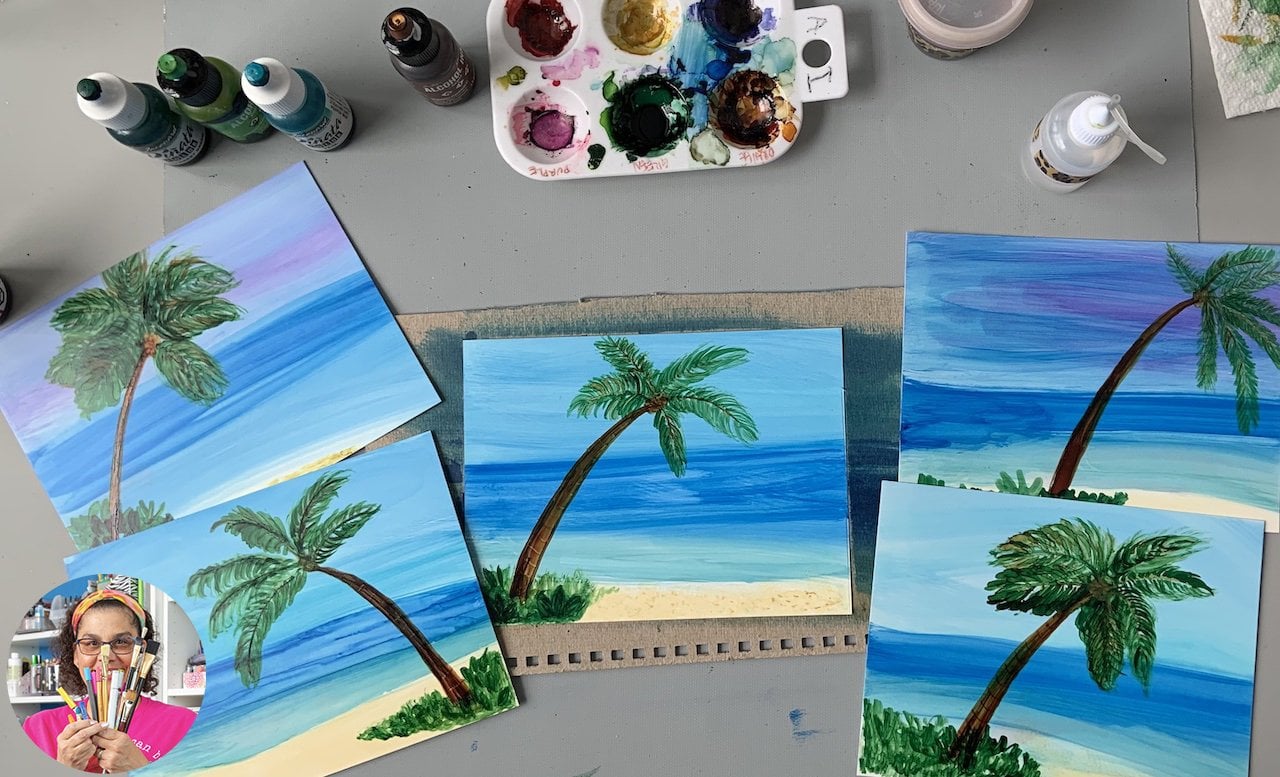
4. References and Inspiration: In this lesson, I'll talk
about the difference between using references for
inspiration and copying. Why I like to use references, how I use a reference, and where I find my references. When I draw or paint
something new, I like to use a reference. It helps me to get to know the subject and for color ideas, I will do several drawings to get the flow of the subject. It's okay to copy someone's work for
learning purposes only, but never, okay to profit
from the work that you copy, that's someone else's work. I encourage you to look
at several references of a subject and then note the things that you
like about the references, like the lines, the colors. Is it life like, is it stylized? What are the things that really draw you to that reference? It's good practice to look at several references
to get inspired. That way you are not too
influenced by one artist. I do have a plug for a book that may help you in this area. It's called Feel Like an Artist
and it's by Austin Cleon. I put a link in the student
handout to the book. This is one of my
favorite books. I read it once a year. One of my go to sites to find references is called unsplash. All images can be
downloaded and used for personal or
commercial projects. I added a link in the student handout to
create your snowman. You can use your imagination. You can use the drawings
that I provided, or you can research it yourself to find a unique
style that you like. In the next video lesson, I'll show you how I paint a
sky for your snowy scene. See you in the next video.
5. Paint the Background: Hello, and welcome back. In this lesson, I'll demonstrate two methods for painting
a sky background. I have my window
open, my gloves on, my clothes and table are
protected to start with. I'll clean off the
surface with rubbing alcohol to free it from dust,
dirt, and fingerprints. Oops, I got a low color off
my gloves, but that's okay. It will blend in. I've picked out colors for the background, a light blue, a dark
blue, and a pink. I removed all the
tops so I could move freely without stopping
to take them off. A general tip, When you are
working on smaller artwork, if you find it easy to paint
from a certain direction, try to move your paper around
to make it easier for you. For method one, I'll use a paper towel to move the
ink across the paper. First, I add rubbing
alcohol to the paper. This will help soften
the inks and help them blend on a clean paper towel. I'll add the colors. I put the pink in
between the blues for interest. I'm right handed. My plan is to pull the colors
starting off the edge, starting from the left
side of the paper. I return and do it again. Moving from top to bottom, I find it easier and smoother to pull the
ink across the page. I'm also pressing down as I move the paper towel to
help the colors blend, I turn the paper towel over to use the ink from the other side and
repeat the process. My goal here is to create a
colorful and interesting sky. My lines do not have to
be perfectly straight. I turn my paper to pull
the color towards me. I like the colors in the sky and the fact that they
are not straight, it has some movement in it. I'm happy with my sky.
So I'll stop here. Don't worry about
the bottom color. We'll address that
in the next section. For method two, I'm
going to drip color directly on the surface
and tilt the color around. First drips of rubbing alcohol
to clean off the surface. Oops, I got a little color
on there. That's okay. It will be filled in. I'll flood the card with rubbing alcohol and drip all three colors
at the same time. I tilt my paper around letting the colors
blend and mingle. I'll add a little more rubbing alcohol to help the
colors move and blend. Okay, I'm adding light blue and rubbing alcohol to make
it brighter in one area. I have added a lot of ink
and want to take some off. I let it all run to one corner and collect
it with my paper towel. Here's a tip. You can also
use another piece of to catch all that color and that could be the start of
your next art piece. I'll dab some off
with my paper towel. Since this ink is very fluid, it will fill in the color
will fill in that area. Now I have two lovely skies. I'll set them aside
to dry completely. In the next lesson, I will show you how to remove color to create a snow base for your
snowman. See you there.
6. Add Snow Layers: Hi, and welcome back.
In this lesson, I'll show you how to remove
color for the layers of snow. Another benefit of the inks is that they create
a natural texture and blend so you
don't have to work too hard to create a
lovely background. I have chosen the dripped
background to work with. I need to decide which
area I want for the sky. I turn my paper around to view it from different
perspectives. I like it this way. I really dig the blending in the upper right corner and I
want to save that, you may, some imperfections
in the piece, I choose to leave those in. Personally, I think it
adds to the outdoor scene. The technique for
moving color for the snow layers works
for either background. This step is similar to what
I showed you for method one for creating the
background fold, a clean paper towel, add a small amount of
rubbing alcohol to the fold. Be sure to drip away from your art piece to avoid it
splashing on your background. When you look across
a snow field, you'll see shadows
and highlights. It's a beautiful texture. I'm going to pull
the paper towel down at the bottom of the
scene to remove color. I turned my paper at the bottom of the
scene to remove color. I am pressing to pick up color. You can do this several times
to get the lightness you want and add more
rubbing alcohol. If you need to pull
out more color, be sure to use a clean
area of your paper towel. Otherwise, you are
adding color back in. The swiping of the paper towel
creates natural shadows, like you would see in the snow. To add more layers in the snow, use a paintbrush
dipped in rubbing alcohol and dabbed
on a paper towel. Just as with the paper towel, the paint brush will move
color and remove some color. I am pressing the paint brush down to flatten the bristles, which causes the nice thick
look of layers in the snow. You can repeat these steps and play with it until
you are happy. Notice that because I use that pink in the
original drippings, it comes through in the
snow and adds interest. You can see I caused a spot
in my scene with my glove. That's because I had a little
rubbing alcohol on it. Be mindful of that possibility. I'll just trim that
off with my card. You can also dip
your paint brush in blue ink and fill that in. In the next lesson,
I'll show you how to create the snowman
shape. See you there.
7. Remove Color for Snowman: Hello and welcome back. In this lesson, I will
be explaining how I remove color to create
the snowman shape. I'll refer to my reference
photos as a guide. My goal is not to
even try the exact. Sometimes I get a little
carried away and paint too big. Having a reference photo
helps me stay in frame. I will use a control method to remove color to create my shape. I have a size number
one paint brush, my little container
of rubbing alcohol, cotton swabs, and paper towels. Starting with my paint brush, I dip it in rubbing alcohol and blot it off on
my paper towel. I have a little color in there and I want to get that off. I'm being mindful not to
have my brush too wet. The rubbing alcohol will
move farther than I wanted to go using
the paint brush. I draw the snowman
with a light touch, three circle outlines
is what I'm going for next. I want to pull color
out from inside the lines. Dipping in my rubbing alcohol
with the paint brush, dabbing off on a paper
towel and brushing in the shapes of circles,
I pull out color. As I repeat these steps, I pull out more color. Next, I'll use cotton swabs
to pull out even more color. Dabbing off some
rubbing alcohol, following the natural
shapes for a snowman note, I am pressing down firmly
to help pull the color out. When a cotton swab becomes
saturated with color, or I see it's not
pulling out color, I will get a clean one. I'm not trying to pull
out all the color. This method creates natural
shadows and highlights, as you would see
in a real snowman. Here's a tip. Make
sure your gloves are tight so they don't
get in the way. I encourage you to just
play with this technique, removing color and creating
the shapes that you want. Observe how the rubbing
alcohol moves the ink. Don't worry about the
bottom of your snowman. We are going to
cover that up with a layer of snow in a next step. Once I'm happy with
my shapes, I stop. Which is always the most
challenging part, right? No win to say when. Let us not fiddle forever. In the next lesson,
I'll show you how to add details to your
snowman. See you there.
8. Add Details to Your Snowman: Hello and welcome back. In this lesson, I
will show you how to add your snowman's hat, scarf, face and buttons, and of course, branch arms. Okay, we are ready to make this little
snowman come alive. I took my gloves off because I don't need them
for this technique. Paint brush and markers are
going to do all the work. I'll refer back to
my reference and drawings to see what
he wants to wear. He wants to wear a knit hat and pretend he's
directing traffic. I'll use a paint brush
to paint in his hat. I'm using the controlled
method of applying the ink. You put a couple of drops into your palette and let
it sit for a few minutes. I have some dried ink of the color I want and add a drop of rubbing alcohol
to reactivate it. Dab some color off
so it's not too wet. I draw in the outline
of his hat with a light touch and then
fill it in with color, picking up color as I need it. My ink is starting to dry, so I'll add a tiny bit
more rubbing alcohol. I repeat these steps
for the scarf, remembering not to
add too much at one time as the ink will spread. I encourage you to
take your time and enjoy this process
of adding details. If you do add too much ink, you can take away the
color as you did for the snowman with rubbing alcohol and a paintbrush
or cotton swab. Just be mindful not to put too much rubbing
alcohol on there, or it will spread beyond that. Next, I will add his
cute little face. I start with a Sharpie marker
for his eyes and smile. I colored in a little button
nose with a Copic marker. I'll use a paint brush
for his rosy cheeks, Picking up a tiny bit of color. Oh, that was too tiny, I cannot even see it. So I'll pick up some real color. I want his hat to
be a little more smoother so I'm adding
some more color. Oops, I added too much rubbing
alcohol and removed color. I can easily fix that
by adding more color, or if that happens, you
could use it as a highlight. Sometimes a boo boo can
also be a technique. Actually, that's how I learned
a lot of my techniques. I fiddle with coloring
a little bit more to create some texture by
overlapping breast strokes. My snowman needs some buttons. I refer to my reference, I think he wants some
hearts using a Sharpie. I draw in heart buttons. Time for his arms. I will use the brown that's
already in my palette, adding a drop of
rubbing alcohol. He's going to be
directing traffic. So one arm will be up
and one arm will be out. Using a paint brush
and a light touch. I draw his arms now to add a little snow layer
in front of the snowman, so it looks like he's
sitting right in the snow, just as I did when I
created the snow layers. I'll use a paint brush dipped in rubbing alcohol and dabbed
off on the paper towel I pressed down firmly
on my brush to flatten those bristles and just paint along the bottom
in front of him. This makes him look like
he's sitting in the snow. Repeat this until you're
happy with the look.
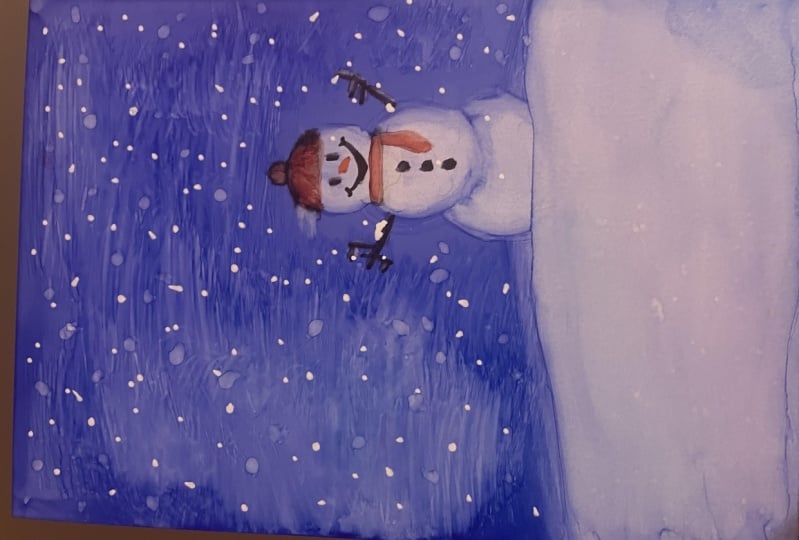
9. Add Falling Snow: If you want some falling snow, you can use a variety of tools. A paint pin, a gel
pin, a paintbrush. Or try an embossing tool
dipped in rubbing alcohol. An embossing tool
or a toothpick. The goal is to be random with your snow flakes,
your snow dots. First, I'll try
an embossing tool dipped in rubbing alcohol. The dots are not showing up, so I'll use a paint pin. The embossed tool with a rubbing alcohol will work better on a darker background. I put in snowflakes
randomly, snow dots. I look at him for a moment to see if he needs anything else. I'm going to use a gel
pin to add a highlight in his eyes to bring out
his full personality. Okay. There he is. I think he is directing
neighborhood bird traffic. Up next, I will show you some other snowman I painted with the
inks. See you there.
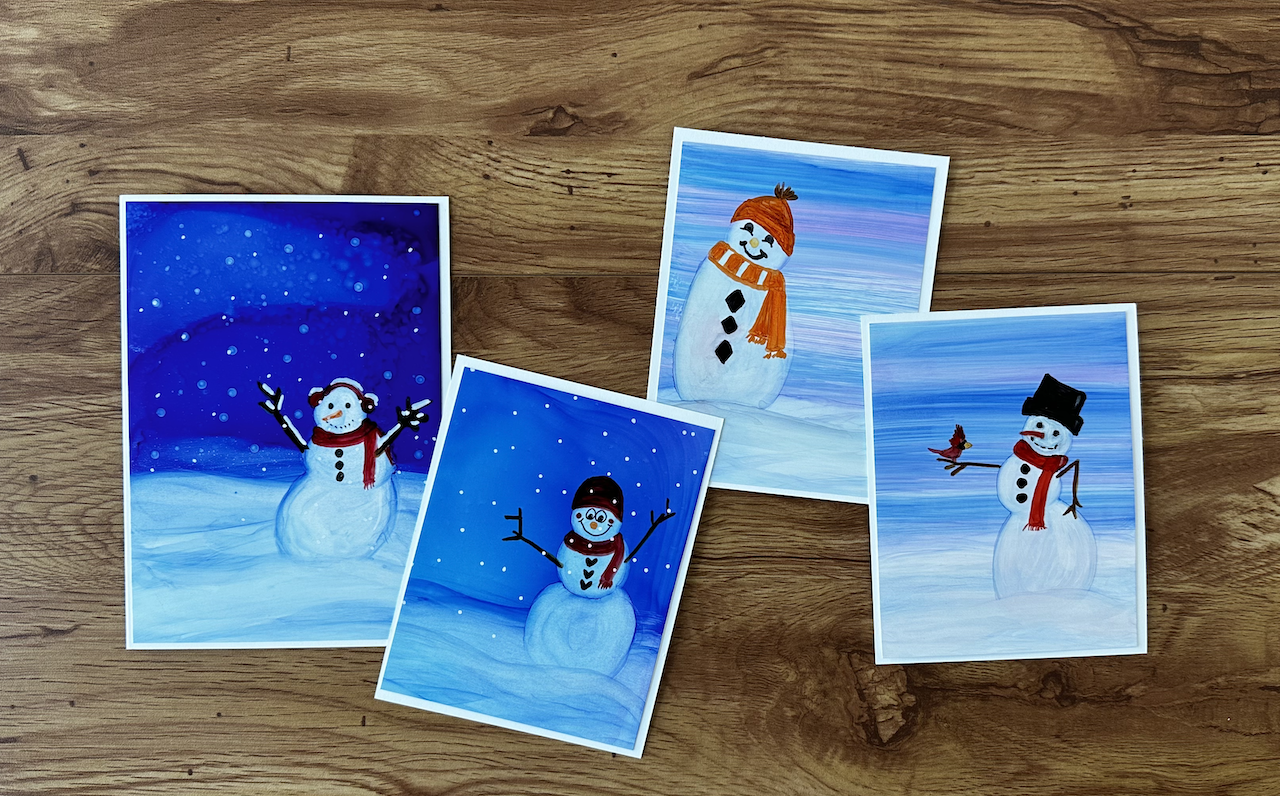
10. Examples of Other Snowmen: This snowman scene
was painted on a five by seven inch
piece of U Pop. I used the method of
dripping dark colors in the background to
create a nighttime scene. I used a clean
paper towel to wipe the bottom and a paint brush
to create layers of snow. Just like we did in class, I used a Sharpie for
his eyes and mouth. His branches are
painted with a brush. Just like in class,
I decided to put earmuffs on him
and put a layer of falling snow on his head and
branches with a paint pen. I used an embossing
stylus dipped in rubbing alcohol for
the snow in the sky. Here you can see it shows up better because the sky is dark. I came back in with
a white paint marker to add some more
dots in the snow. I also used a paint
marker to add a high light to the
snowman on the right. For this little cute
snowman with attitude, I use a paint brush to paint everything except for
the little bird's beak. That was a copic marker,
it was a cover up. I created a little
blob because I had too much rubbing
alcohol on my brush. I use the marker to fill
in the shape of the blob. I really like how he turns out it looks like he's
having a bad hair day. But he is just living the life, sitting there talking to
his little snowman friend. For this one, I use cotton swabs to directly remove color
rather than the paint brush. First, I use Copic markers
for all the details. The one thing I want to
point out about using Copic markers on Pol paper
is the strokes and texture. The upo paper allows
the look of layering. Whatever your Laugh stroke
is shows up on top. You can see the
overlap on the scarf. I add a little extra color to show the area where
the scarf is tied. I really like working
with the markers on Upo. I hope showing you
these options for painting your snowman
gave you some more ideas. It's easy to get
caught up in painting several cards because they
are so much fun to make. Please upload all your
snowman in the gallery. Up next, I'll show you how I seal my artwork. See you there.
11. Seal your Artwork: Hi and welcome back.
In this lesson, I will be showing you
how I seal my artwork. To seal ink artwork, you want to use a
water based sealer. Spraying varnish is a great
way to produce even results. Be sure to spray outside. You want to read the directions on the
can and follow them. You can set your painting
upright or flat, and spray three light coats. The reason you want to spray light coats is to reduce
the chance poling. Starting off the piece
I spy, let it dry. Spray, Let it dry. And one more time,
spray and let it dry. I also included a
link to a video in the student handout for
how to seal your artwork. Be sure to let it dry completely
before you handle it. Up next is the summary video.
12. Summary: Congratulations, you
have finished the class. I hope you learned some new techniques and enjoyed painting your snowman as well as
had fun In this class, we covered safety and supplies
reference and inspiration. I also recommended the
book Steel Like an Artist. This will help in that area. We painted a background sky, then added a snow base. We removed color for
the focal point, the snowman, You added
details to your snowman, gave them some personality. I showed you how to seal your
artwork if you choose to be sure to save the student handout with
a summary of steps, list of supplies, links, and additional alcohol
ink resources. If there's one thing I
hope you take away is how easy and fun it is
to paint with the inks. Kindly leave me a review. I appreciate knowing
what you thought about the class as well as it lets
others know what to expect. Also, please follow me
here on skill share, so you'll hear about
my upcoming classes. If you post your artwork on
social media, please tag me. I'd love to share your
artwork with my followers. Thank you for joining me. I'll see you next time. Take care and stay positive.
 Trena Brannon, advocates kindness inclusion positivity