Transcripts
1. WELCOME: Turn your Pencil or
digital illustrations into scalable vector artwork. Hello and welcome to my class. Unleash the power of the vector flood tool and the shape builder tool
in Affinity Designer. This class is all about
Vector Art on iPad. I'll show you how you
can trace a sketch. Turn that into scalable vector Using the shape builder tool and the vector flood fill tool, it was never easier to do that. And while we're at it, let's also check out how the eyedropper tool can help for consistency in this class. My name is Els Ruiters. I'm a graphic designer,
illustrator, photographer and I'm Skillshare teacher
from The Netherlands. I have been working with vector software my entire
professional life. I love to share my experience
and my knowledge with you. You might have seen
previous classes I made. If you haven't done
any vector before and you feel like this
might be a bit beyond you, check out those classes first. You might be interested
in Drawing vector plants in Affinity Designer for
iPad to get you started. It deals with working with the pen tool and
shapes and colors. For who is this class? Well, for everyone who wants to draw using a vector
app, simple as that. It's convenient if you do know at least the basics of some kind of vector software albeit on your iPad or on your
desktop computer. I know from experience
that it takes a little gentle
nudging to get you in the right direction
because you can look in all the
wrong ways sometimes. So let's jump in
2. ABOUT AFFINITY DESIGNER: About Affinity Designer. Well, first things first, this class is for Affinity
Designer Version two. If you've got an older version, you won't find the
shape builder tool or the vector flood
fill tool because those are part of
the paid upgrade. Affinity Designer doesn't work
with a subscription model. You buy it once and
you're good to go. And the good news is, it's
not very expensive either. You do get your money's worth. There's also a
version for desktop, for both Mac as well as Windows. So if you like to see
Affinity Designer on your big screen and you want to edit your
artwork on your desktop, you can check out the Affinity.serif website to find the correct
current price. They do offer special package
prices from time-to-time. So really that's one to watch. The second great thing about Affinity Designer
is that it's not really very hard to learn and
it has great flexibility. There are many import
and export options and it's easily interchangeable
with other vector app. Well, the great thing number three is the built-in
pixel persona. Once you've got your
vector artwork ready, it's easy to add textures to bring more life and
dynamics to your art. You can, but you don't need
to, import text using PNG. The Pixel persona offers a lot of
brushes and options to help you add that special look
and feel to your artwork. Well, okay, another one
and then we'll move on. Adding gradients and
transparencies is a piece of cake. Well, and of course about
vectors in general: They're super crisp, sharp and
they're endlessly scalable, both up and down, up and down without
any quality loss. You want your artwork on a stamp or an
apartment building? Well, vectors are what you need! So let's move on.
3. INTERFACE AND START: So this is the interface
and that has changed a little if you compare it
to the previous version. Live docs are the documents
that you have open currently. You can close your documents and they'll be out somewhere on your computer or somewhere in the Cloud and they
won't show up here. But these are the ones that are being made and that you're
currently working on. An [M] between brackets means that the
document is modified. So you can change things and
then save it afterwards. Think properly about the name. You can't rename the document
very easily as of yet. That used to be a lot easier in Affinity Designer's
previous version, but that's what it is. If you swipe to the left, you get three icons:
copy, save to document and save as. They speak for themselves, but they're pretty unnoticable
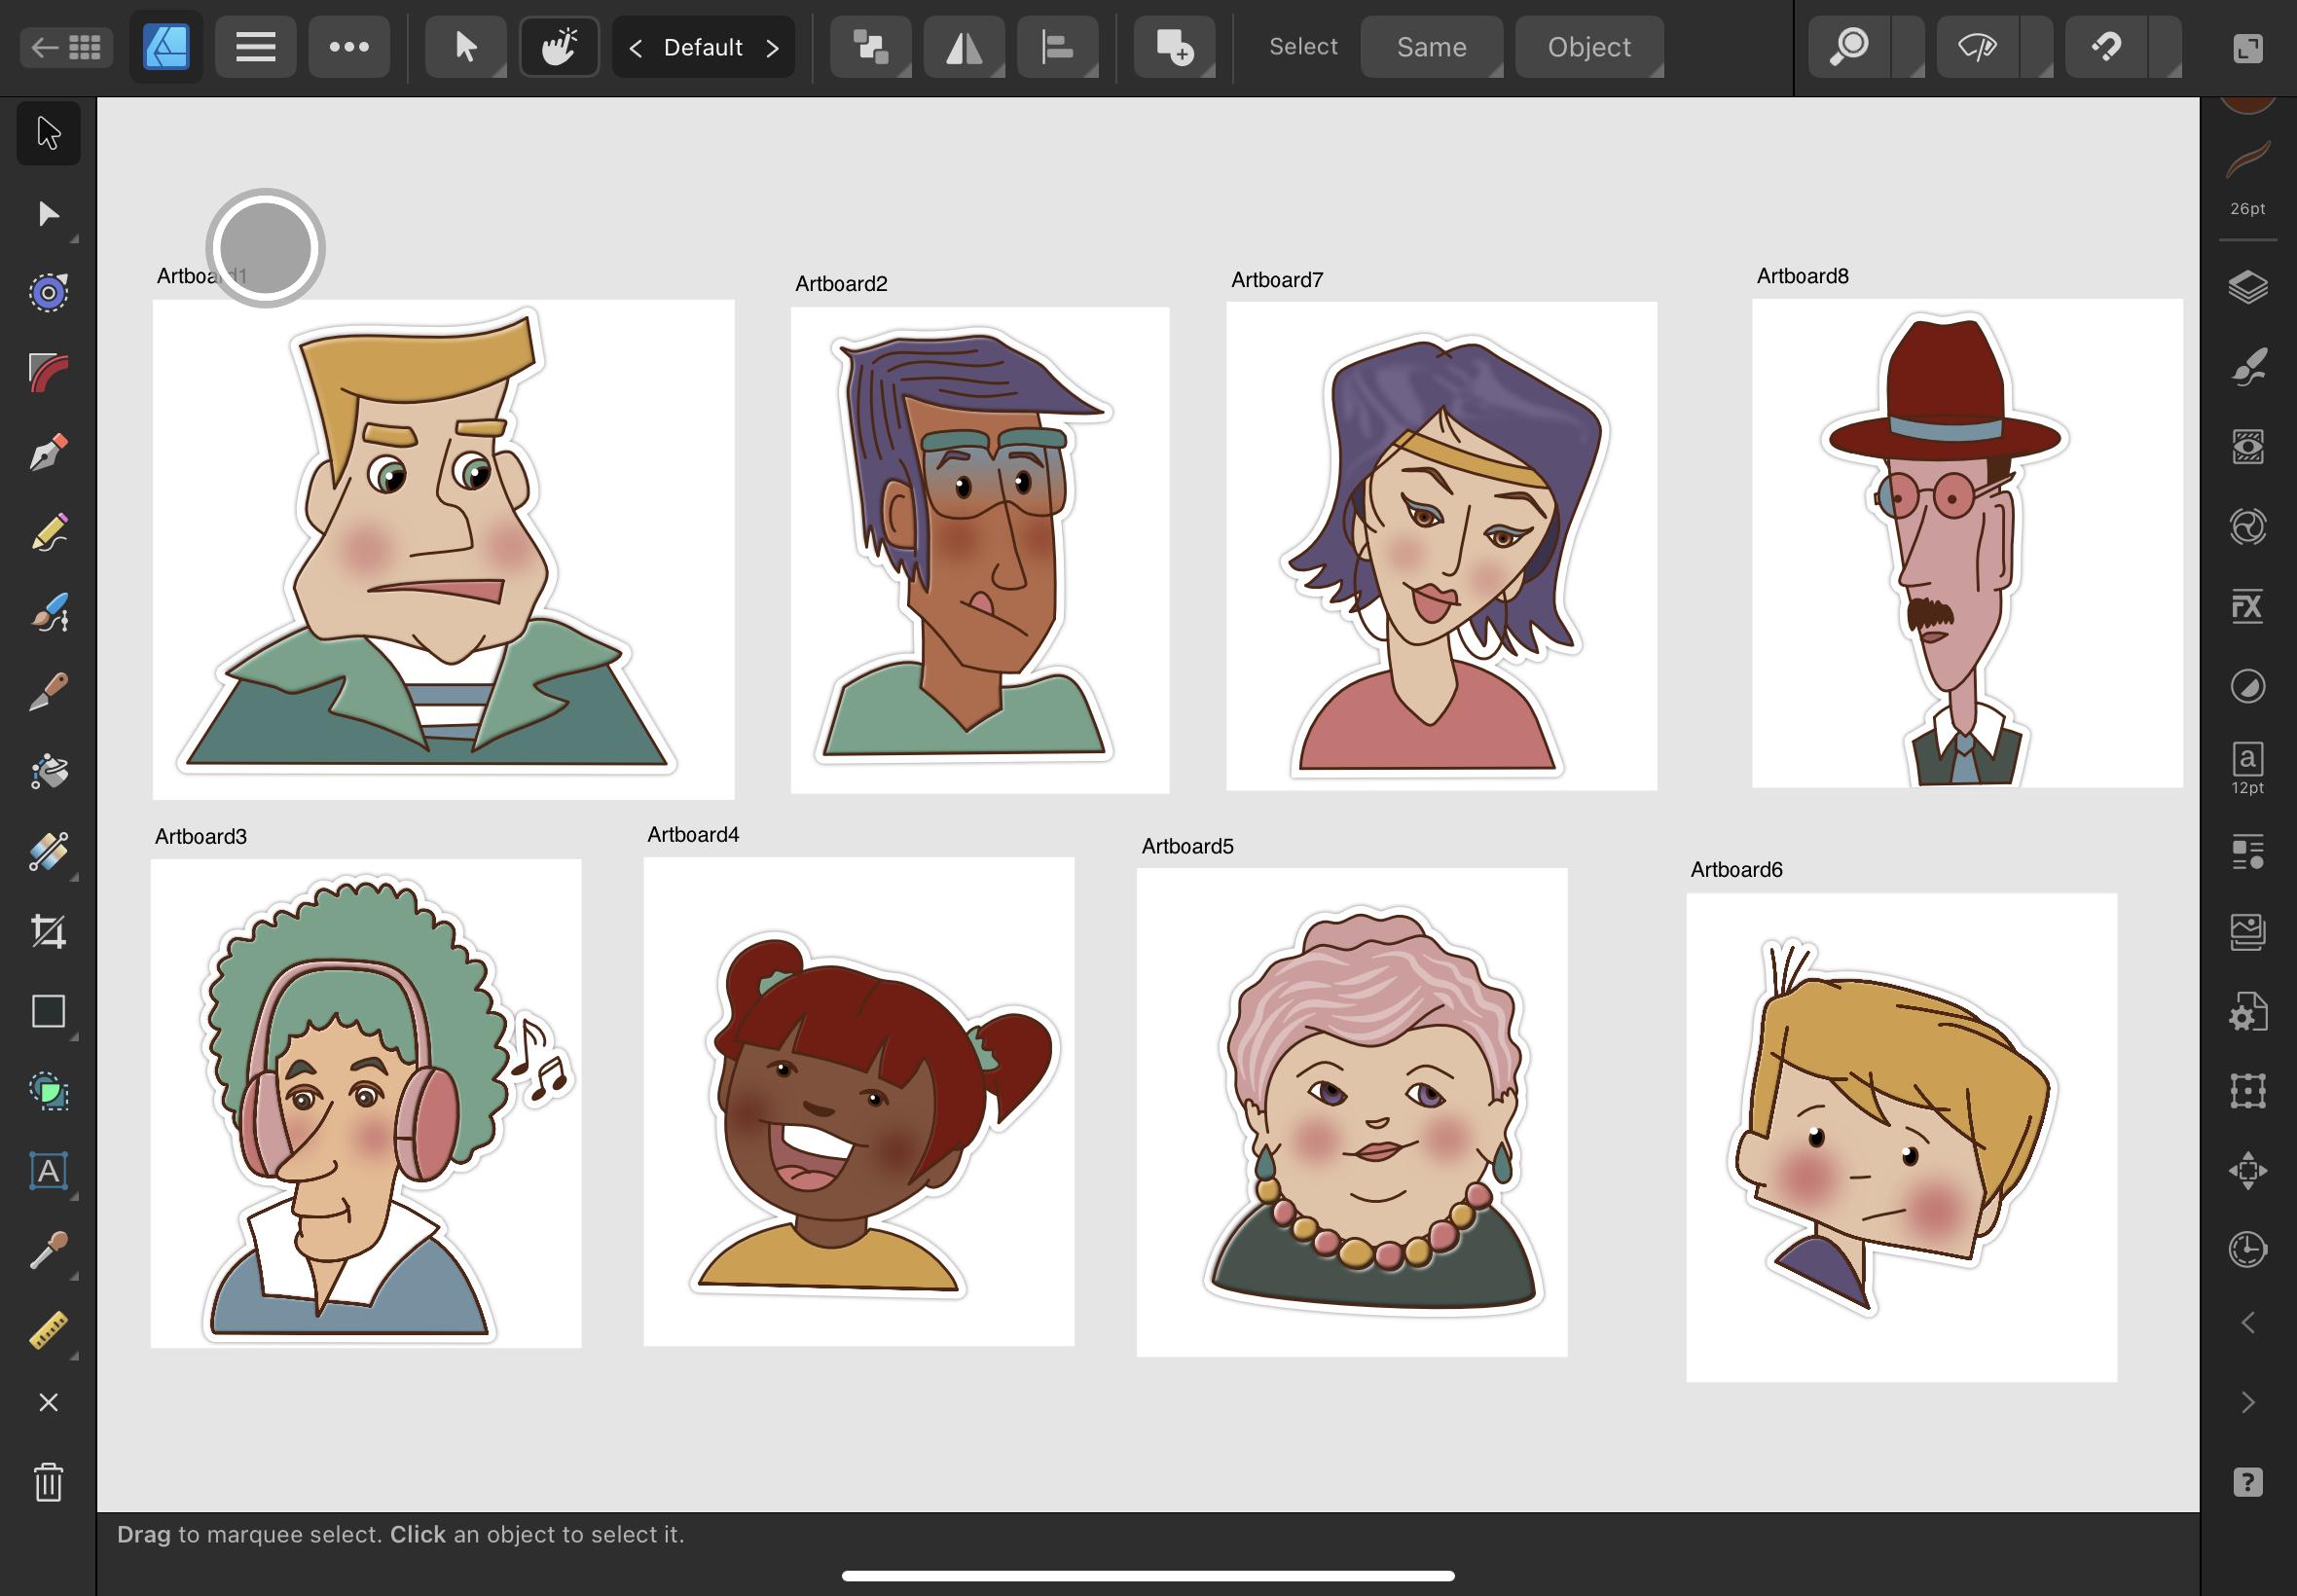
unless you swipe. You can also make projects. In new. Projects can hold
various things. I've called this Diversen,
which means various. And then you can
just drag things into that specific project. Let's see. Here are all kinds of
faces that I've put in a folder called
"Faces, all kinds". It is possible to
open documents, to import documents and input
from photos. And you have a photo directly in your
in your new document. Don't forget that there's also a very extensive
Help feature here. So if you are lost at something, take a look at the Help feature, that'll probably will help
you pretty good. Now I'm going to start
with new, new document. And this tool has changed a bit. There are a lot of presets now, either portrait or landscape. And I'm using, Let's see, my device, which is an
iPad, ten and a half inch. And I want it to be 300 DPI. Now, 300 DPI only
gets interesting when you start working
in the pixel persona, which is a bit like
Procreate and Photoshop, where you're working
with pixels. If not, then you don't
really need to bother. But if you're exporting things, it might be interesting. So just for the safe
side, leave it at 300. And I have 'create Art board'
turned on, and just tap. Okay. The first thing that I'm going
to do is import my image
4. IMPORTING IMAGE AND COLOUR: My image lives somewhere
in my photos folder. There is an image that
you can use which is available in the
resources section. So download it and just
follow it as I do. Instead of import,
you chose 'Place' which lives under the document
version right there. ...Place... Now go to your
specified location. And mine is in the photos. So I'll just tap it. It says Show Selection
and then add. Just add. And I can either drag
or just tap once. Boink, and now it's there. Just let me make this
a little smaller. And now I'm going to
enlarge this specific drawing by dragging the corner until I
have the dude's face this cool guy here. Pretty much in sight. It doesn't matter
that the guy is only visible in the
rest falls off. They're still there,
they're just hidden. They fall outside the art board. In the layers section, I tap the photo, I bring down the opacity
up to about there. I lock the layer and I
add a new vector layer. You can't draw on
a locked layer, so you need to add a new one. Now the first thing I'm
going to do is draw this with my pencil tool. And let's take a moment
to look at the settings. I can tap here and for
cinematic purposes, I will use a four-point stroke, but you can make it
a little bigger or a little smaller just as you like. This is the sculpt function. And I turn that off and on as I go because sculpting
means that you can continue from where you left
off or smoothen out lines. That'll show there is no fill and I don't want the
auto close on just yet. I can tap that on and off. The colour is, you can see it there as well, the color is pink. But I'm moving to
my swatches panel. And I have my Skillshare
comics there. If you haven't got those, it's time to import them. Let's see how that works. Go to the swatches panel, tap the hamburger menu, go to import palette. And now there are two options
you can either import as an application palette
or as a document palette. An application palette will
be available for future uses. You can use it always when you are using Affinity Designer. A document palette only is applicable to this
specific document. Logical, right? So let's say as
application palette, and then navigate to
the place where you left or where you put
your color palette. I think mine is
somewhere in recents, I have something here
called a fruit and vegetables and skillshare comics. If I tap that, it will
be added and look, there's a (2) because
I already had one. Now I don't like to draw
with pink or with black. I like to draw in this
case with dark brown. So that's the colour
I'm choosing. By the way, you don't
need to use these colors. Of course, if you have another color scheme that
you like better than, well, it's all up to you. There's a number of skin tones here that you
can use and there are some other colors that suitable
for clothing and hair, and they fit well together. But if you want something
else, please do
5. DRAWING PENCIL TOOL: So I have my stroke
selected, which is brown. And I'm going to the brush tool So let's take that
out of the way. And the settings
I've just explained. ... And then I have the
rope stabilizer on. That too, is a bit personal. And here's the way that the line is set up
and I've chosen none. This will ensure
that all strokes, all lines are equal width. Okay, just let me get
this a bit bigger. Now I'm going to draw, and I will draw, my lines while intersecting
with others. I'll show you. I'll give him a firm chin. And let's draw the eyebrows. And in this case, I'm going to turn on the auto-close because it's a closed
shape that I want. And it's closed. For the collar I'm going to do the same. I have my pecnil, so I leave the auto-close on and I'll
just start right there. And it's closed. Same on the other side. For his corpse or the torso. I'm going to use the pen tool
and I'll just tap, hold my finger on the screen while
tapping to get a straight line and
tap again. Okay. Right, now I'll make sure that I
haven't got anything selected and I'll repeat this
to get some stripes. He looks like some kind
of saylor like this. Okay. Now I have two
more things to do. One is the mouth, and I can do that
with the pencil tool. And I will use Sculpt. I'll start there. Let go. It's still on auto-close and that's
what I don't want. So I'll just leave the auto-
close off, right there. Now just let me drag over
it and I have a mouth. Well, he doesn't look too happy, but that's what it
should be right? Now let's make an eye, I am
going to the Ellipse tool. just hold down, a finger on the
screen to get a perfect circle. And I'll repeat this process. I think something
like that will do. Now select all three
by dragging over it. And I'll pick that up move it to the position
of the other eye and I'll place three fingers on
the screen and let go. No, I can just position
it a bit better. Doesn't look bad. It looks strange, yes! But it doesn't look bad. Let's go to the Layers panel. And I'll turn off the photo. Well, as far as I can tell, all the lines are crossing,
are intersecting. And when we are going to use the vector flood fill tool
it will all become clear. But first let's clean this up
6. SHAPE BUILDER TOOL: We need to combine all these
curves and I'm going to swipe with three fingers down
and choose, Select All. Well, there are many
ways to do that. And then go to Geometry tool
and select Merge curves. The next thing - just let
me get as a bit bigger - There's now one curves layer. And I'm going to
give that a name. Just tap on the three dots
and then tap, call him Guy. It's even possible to give that layer a
colour so that you can see that a little
better and sometimes that will help to get things organized. Alright, now, with
Guy selected I'm not moving off to
the shape builder tool. And the shape builder
tool is really fantastic. There's so much possible
there. It's really worthwhile. Let's take a look
at my settings. I have free hand
turned on, no clean-up. And I'm using the minus. We're going to delete
well, I'm going to delete everything that overlaps
and that I don't need. Like, the hair. Just by
carefully tapping on it, I can get rid of all the
things that I don't want. Let's see how that looks. Okay. Maybe this one, do we want that? No, that's the wrong one. This one. Okay, Now we get the eyes which do look a
bit strange like that. So I'm only taking out that which sticks out
of the largest circle. Now you can see that it's
beginning to look like an eye. All the places where I
have excessive lines, lines that don't match up or
that don't belong somewhere, I'm taking them out. Let's see. His chin is a
big chin, so that can stay. That can go, that can stay. If you take away too much, if you tap the wrong
way you take out lines, you see afterwards just tap Backwards, Backwards,
Backwards, undo. And then you can start
that last part again. Now, my guy is looking
more like a guy. The only thing I need
to do is take a look if I have to change anything. And I would like his eyebrows to be a bit wider on this side. Brushy like that, right? There are quite a few
things that you can still change afterwards. So that's alright. And if something
doesn't really close, well and take care and change it because you will get overlapping parts that fill
more than the desired area. Okay. Now, my guy seems alright
just his eyebrows. Select all again, use the shape builder tool and take
out the excessive parts. And I think this
looks good. Alright. I just check to see if everything
is properly aligned. Well, this looks good. So it's time to move over to
the vector flood fill tool
7. VECTOR FLOOD FILL TOOL: Okay. We're going to defector flood fill
tool. That's this one. And defector flotfill tool is remarkable and it is
different than a normal shape because it can fill shapes that appear through
intersecting lines. It sounds a bit abstract, but I'll show you what happens. Normally, you would not be able to fill this shape like the face because it would be some kind of weird form outside your
black or your dark lines. But with the vector
flood fill tool, it does, and I'll show you. Just the vector flood fill tool, go to the panel here. You can see there is no stroke. Well, that's logical
because it's a tool, not a stroke tool. Now let's go to the swatches, and I'm going to use a
light color for the skin. And I'll just tap once
and tada I have the face. And I'll tap again
and I have the air. That looks go. Now,
let's take another one. Let's choose yellow for
the hair and the eyebrows. And I want this light blue for the shirt as if he
was a sailor, right? And this dark green
for the shirt, and maybe maybe this light green for the
color, like that. That's not bad. That's
not bad at all. Now we're going to do the eyes, and I'll use this
light green as well. I'll pick black. For the pupils. As you can see,
it's just a matter of tapping and you
get your fill. Don't forget to fill
the eyes as well, and teeth if you have
them, come, right? I'll do the shirts
and I want the inside of the mouth to be
this light pink. Well, do is almost ready, and that was very
easy, wasn't it?
8. EFFECTS: So now I like to add some
cheeks to my characters. This sturdy guy will look somewhat friendlier here
with rosy cheeks. So here's how we'll do it. I've drawn a circle, an ellipse, and I give this
the pinkish color. Now I'm going to the effects studio and
I'll tap gaussian blur. And then I can
just drag this up, move this slider up until I think there is
enough blur there. And I want to, bring down
the opacity of result. I think that's enough. Alright, now I'll
grab the Move tool. I'll move it to another
place on the other cheek. And then again, I'll just put three fingers on the
screen and I let go. If needs be, I can just move
that up little like that. In the layer studio, I'll select both ellipses, go to the geometry tool
and I'll merge the curves. And so they become one and
they will act the same way. I still think they are
a little too bright, so I will just move the opacity slider down
and just tap the opacity slider and move down so you can see the number here getting smaller. Okay, so far, so good. Now what I want to
do is, let me see. I'm going to add the curve or put the curve
insight the face. But first I'm going to
clean up this layer. Let's bring it
down a little... If I look in the layer studio, I can see that here's
the big face curve. Let's turn off guy so we can
see it a little bit better. Then I also have an ear. I select the curve of the head
and the curve of the ear. In a geometry tool, I'll merge these curves or I'll add them, that is this same. Here are stripes
and I don't want the stripes to be the
same curve as well. I'm doing this because
it's easier to apply a lot of colours at the same time or some effects if
you have the curves, well, as one curve instead
of separate things. Of course, it needs to
be somewhat logical. But like the collar, you can easily put the collar and the collar together
to make one color, not a colour, but a collar, right? Okay, merge curves like that. The eyes... And I will merge the curves. Here's one white, where's the other
one, there's no other white. Oh, I probably forgot
the other one. And I've got the shirt here. I can see if the eyes and other spaces that are white,
are filled with white or still transparent by adding a background
color to it. So I'll move this
all the way to the back. I can see that my eye
is still unfilled, so I'll go to my layer. I'll select my guy. And I'll use the flood
fill tool again. I'll select white and
I'll add it right there. And now everything is filled. the mouth should be this colour, So that's okay. Take
up the background. That's right. Let's see. These
eyes can be merged. And I have eyebrows and
they can be merged. I think, well, is that
that seems alright. Now... ... the cheeks are
going in the face. Just move it on there and
it won't stick out anymore. Now it stays inside because
it's a clipping mask. There's a little thing that I think I should do and that is add some highlight
white to the eye. So I'll select an ellipse. I'll give that a white fill. Maybe a little smaller, and needs to be there. And then I'll add another one. Now if my eye, my guy
has a nice eyes, right? So in fact, well, we're done right now. What I should do is -
merge these again - is select the entire
layer and group it. Now it's a group and I can
freely move it around. Now that our guy is ready. We can do things with it like change the color of the stroke or the
width of the stroke. Just go to stroke Select the guy, you can change that. But I like for, but there's also a possibility
to use pressure to get a more hand-drawn look and
feel. Thi is the start of a line. This is the end of a line. And you can do so much
as you can really simulate that you're putting
pressure on your pen. But I'm going to reset
pressure because I want, my pressure like
before and I liked what
I did like this. Now if you want, you
can add some details, but in fact, this is what
you should have done by now. Now, there are a few
things that you can do. You can offset
this guy a little. Just a tiny little bit In that case, I should
turn off the magnet to get that look as if there
was something in the prints and like an
old-fashioned type of print, be careful with the
way that you do this. Too much will not do the trick, but you do it very little. Or maybe sometimes
just a little colour can be exactly what a
drawing like that needs. That's one. Let's bring it back. Another thing which is
quite fun to do is adding a shadow and a white line
to it as if it is a pin. Now, with this guy selected, I want this brown
line to turn white, but first, otherwise we
won't be able to see it. I'll make it a little thicker. Let's just type in 25. You can type in a
number really tapping on
it and you'll get the menu to type your numbers. I think that if I turn on
the layer with the guy now, that looks good, can even be
little bigger if I want to. This is good, this looks good. Now, let's hide our initial
guy and have these lines. Then I go to the Edit menu
and I'll say Expand Stroke. Now... Now comes the magic with
the curves still selected. I'm going to the geometry tool. I'll see separate curves. And then again geometry
tool and I'll say Add. Now I have one solid shape. This shape should be the white pin. Let's add a shadow to the
still brown edge, right? Let's say Outer shadow. And the effects rack. And let's bring that up. You see appearing alright, a bit blur
perhaps like that? And now back to
the Layers panel. Check the curves and
change the color to white. Now, if you want to see this
in a transparent background, you can go to the document menu, to Canvas, and then
Transparent Canvas. And now you see all
these little squares. This means that Canvas
is transparent. Now that we've got
our guy ready, we can add some effects to, for example, his
clothes or his hair. Using the effects panel. Let's say I want his collar
to have special effect. I'm going in the Layers panel open if if if it was locked, unlock it, and then
go to select that. Right? It's selected. I'll go to the effects
and go to the bevel and emboss and bring
that up a little. You might not see it instantly, but look, here it clearly comes. And it's really like it's on something like a
metalish effect. Same goes for the hair. If I tap the hair, if you have already
added an effect, you will see it by effects. And then you can just
add more effect, make it more visible. And the fun thing is that this actually gives the feeling of an actual pin
even stronger. So let's take the face. And I want that effect as well. Just a bit smaller. Alright. Well, I think
that we are done. Now to wrap it up. If you want to export
this to use as a PNG, for example, in your, in your Instagram account
or on TikTok or whatever. Just make sure that
the background is transparent as I showed you. And then select everything. I can do it by, swipe by three fingers, swipe down, select all, or use the layers palette, and then go to the
hamburger menu of the document and say Export. You will get this and choose PNG file name, give
it a filename. And now I have the
selection only. And I liked that
much because you will lose everything that is around the image
and you won't be bothered with too much
white around your image. No, that's okay. You can give it a
name as I said, and be sure that this
is not turned on. Otherwise, you'll have a white
or a colored background. Okay? I'll do, okay. And just save it to PNG exports in my case, now our image is ready. Well, that's it. Now it's up to you. Thank you. Let's wrap this up.
9. STYLE PICKER TOOL: Now one last thing. If I want to add the same settings to
another cartoon figure, I'll tap on the eyedropper tool. I hold and select the style
picker, which is right here. As you can see, the same icon
appears at the top where I can specify which
settings I want to pick. Now with the tool selected, I'll tap on the shape. And the eyedropper
tool has picked up the stroke information,
it's loaded. Then you can tell that from
this green dot over here. Now, if I drop this onto
the shape I want to change. I simply tap it once with a loaded style picker
tool. Tadaaaa! The information I
picked will stay loaded until I tap the bin
next to the style picker. And I can pick new settings
or I can leave it altogether. This is an easy way to achieve a consistent look
in all your artwork
10. WRAP IT UP: Time to export your artwork and share it in the
projects gallery, social media, etc. Together, transparent
background. You need to change the setting
in your canvas background, which is in the document
studio right here. The checkerboard
background means that the background
is transparent. Now you can export
your selection or the entire board as a PNG by
using the export feature. Well, that wraps it up. By now, you know a good
deal about some of the amazing features that
affinity designer has to offer. And you're ready
to start drawing your own cartoon
characters infected. Ready to re-size endlessly
Up and downscale them. Easy peasy, lemon squeezy. Hopefully, you've gotten through two here and you've gotten enthusiastic about
vector drawing as well. And as always, if
you have questions, don't hesitate to
leave a comment below. I would very much appreciate
feedback as well, and maybe a shout-out to my
class if you're on Instagram. Thank you, and I'll see
you in the next class. Bye
 Els Ruiters, Graphic Designer from The Netherlands