Transcripts
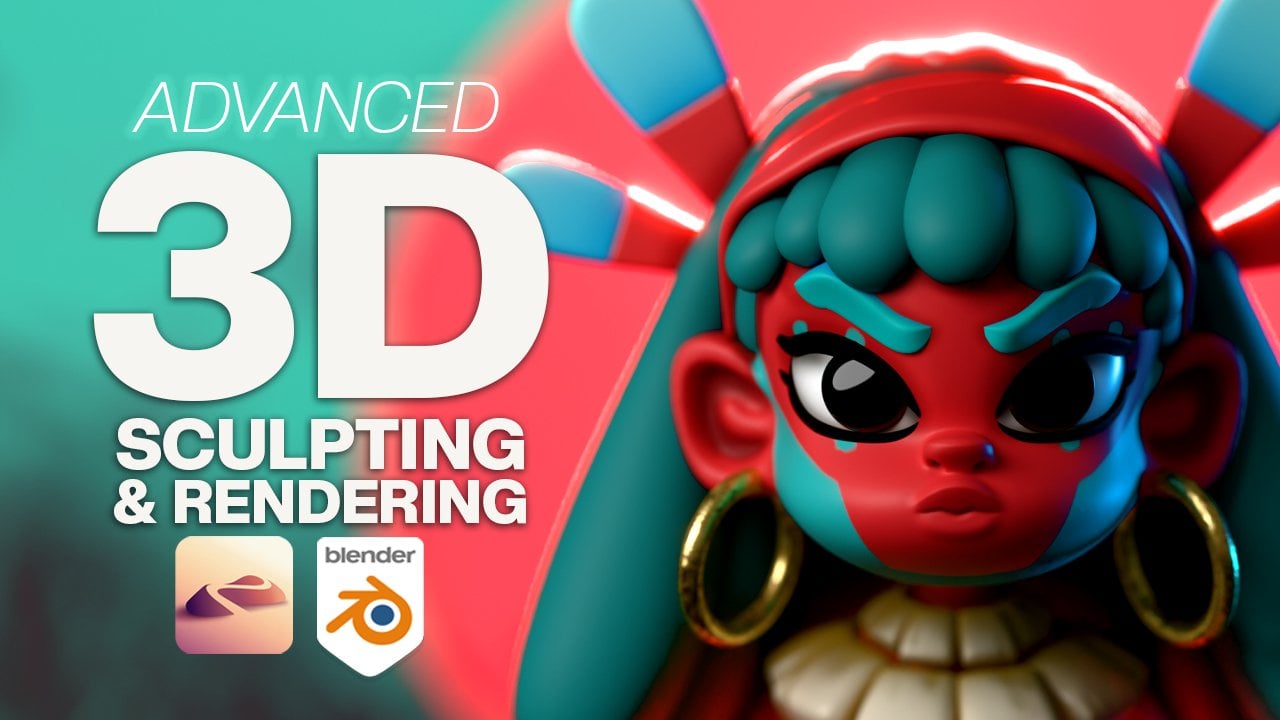
1. Advanced Stylized Character Sculpting in Nomad Sculpt: I get so many requests
for The D Girl, so let's just do a Three D Girl. If you're hearing, you know
your way around nomad sculpt. You know the basics. But now it's time to do some
of the harder stuff. So we're gonna build her from the ground up,
creating the head, face, body, clothing,
accessories, everything that gives her
life and personality. But this class isn't just follow along and make my character. I want you to learn how
to figure things out. I never know what issues and complications I'm gonna run into when I'm making a project. I'm constantly experimenting,
making changes, but I always find a way to get
to what I need in the end. And that's where
the real lesson is. Problem solving is one of the most important skills you
can develop as an artist, and sometimes you accidentally end up with something better. So if you're ready
to start making stylized human characters
and nomad sculpt, then I think we're both
in the right place. Alright, keep drawing,
keep sculpting, and I look forward
to seeing you in class. You're on Skillshare. Be sure to check
out all the glasses I have at trogfredave.com.
2. Class Project : Okay, so for today's
class project, we're going to make a
three D stylized girl. So mine is like a golf girl, but it really doesn't matter.
You can change the colors. Mine is black and white. You can add colors. You can
add whatever you want. I really want you
to run with it. That's where the magic is.
That's where you learn. I'm going to show you my
workflow, my formulas, and just the way that
I think to get to a character that I like that I think is fun and that
can keep me going. So at any point in
time, feel free to experiment, change something. You can change her
into a superhero. You can change her
into a monster. Doesn't really matter,
have fun with it. I think that's where we do our best learning is when
we have a nice foundation. We have a good
outline, but then you feel comfortable enough to
do what you want to do, 'cause this is your art
at the end of the day. Alright, let's jump to the
next video getting started.
3. Getting Started: So let's get started
in Nomad Sculpt. So let's go to the
little camera icon and switch from perspective
to orthographic. Let's hit front
on the Snap cube. Let's go down to the grid and just tap that to
turn the grid off. So next, let's tap
this little Sun icon and switch from it PBR to MTCAT. I'm using PXG Clay. If yours is different, just tap here and then find PXG clay. Next, let's bring in our
image as a reference. So we want to tap this
little picture icon. Go down to reference Image. Tap that. Import from photos, I save mine as a photo. Tap here. Okay, we can X
this and now hit Transform, and you can take two fingers to position it where you'd like. I think I'll put it right here. And then tap with one finger to go back to sculpting mode. So let's go ahead and
save the project, so we'll tap the little folder. Save. And I'm just gonna
name mine Goth girl. As you sculpt, you should
save as much as possible. So that's pretty much all
the setup that we need. Let's jump right into sculpting. We're gonna start
with the head shape. I think the face is probably the most important and
most difficult piece. So let's tackle that first.
4. Head & Face Shape: Alright, let's start
with the head shape. So we're going to use move, make sure that symmetry is on, and you want to make
the move radius. A bit big. So what we're going
to do is kind of make this slight angle
towards the bottom. So you just want
to slide that in. Actually, let me make the move
tool a little bit bigger. There we go. See how
it just slides in? We don't even need that much of an angle. That's pretty good. We can use Gizmo to kind
of make the face wider. Okay. And let's use move
just to raise top part. Okay, so you pretty much
want something like this, very simple for the
front of the face shape. So when I turn it to the right, so I'm looking at the left side. So now we just have to work
on the back of the head. So the back of the head is
going to go straight like this and then come around. I manipulate this. You notice this part? I'm
dragging up like this, and I want the front of the face to be
fairly flat as well. So I'm bringing that
forward a little bit, making the top of the
head fairly flat. Nice and round on the backside. Now the bottom here, I'm going to move this
slightly forward, which again is going to
flatten up this front part. Okay. So for the side, I
think that looks pretty good. Front part is kind of flat, flat ish top and then
round in the back. So you want to put
it to the front, make sure the front silhouette still looks about the same. And let's also tilt it this way so we can make this round. So just continuing to use the move tool and just
making that nice and round. Okay, I think that
looks pretty good. Check out the front.
Front looks good. Side still looks pretty good. So now let's add some ears. So we're going to use cylinders. So we'll tap here, add cylinder. I'll use the gizmo, shrink it, move it forward just
so we can see it. Actually, it doesn't
need to be that small. So I'm going to hit
mirror, move it over. And it doesn't have
to be on a line. I can take it off of a line. So I'm going to move it back. Now I'm going to use this
stretch just to make it closer to the
width that I want it. And again, this is a styli
so I like nice thick ears, and then I'll
rotate it this way. Okay. So that looks pretty good. You want to rotate it like this. Okay, that looks pretty good as well so I'm going to stretch it and then rotate it like so. We look at the front.
Looks pretty good. I'm going to hit a line
now because I like the positioning and
the angle of the ears, but I just might
want to move them a little bit further out, up or down, maybe up
a little bit more. So I'm just looking
at the reference and just trying to match
what feels right. So I think that
feels pretty good. And we will have to it looks like we'll have
to just use move and raise the head up more
because if you can see the ear is a little bit
lower than the eye. But then there's a lot
of forehead up here. So if that was the same, the eye would be here
and there's no forehead. So we just need to make
the top a bit wider. And higher. Okay,
that looks good. So again, I'm just going
to turn it to the top and make sure that with
the new shape, everything sort of feels
natural for that new shape. I want to make sure that the top is fairly flat. There we go. And it's still nice
and round. Okay, so it looks good from the front, looks good from the
side and the top. You got to check the top or else it'll be like a cone
head, it won't look good. Let's take the gizmo and
move the ears straight back a little bit. Okay. That looks good. That way we can see that
cheekbone in front of the ear. So it kind of
completes the shape. Once you're happy with the
shape and position of the ear, let's just go we'll tap the three dots and bring
the post subdivision. Let's do up two, just because we're going
to do some details on the years later and we just
want to raise the resolution. So I'm just going to go
ahead and validate those. And now for the head. So now let's draw the shape of the eyes with the Crease tool. So here's my I just
want to show you my crease settings just in
case you want to match those. Okay, I think that's it. Yeah. So with crease, we're just
going to match this shape. So what's really important is not putting the eyes
too close together. You want some space in between. So make sure you
have symmetry on. And let's just start with a
curve, maybe around here. See, it's a little
too close for me. I want it a little further away. So we'll go up and
stop around there. So that'll be the first one. Now let's go down.
And then like this. Okay, I think that
looks pretty good. So now what we want to
do is use clay and sub, and we just want to get rid
of some clay inside the eye. So essentially, we're just
making the eye socket. Okay, I think that
looks pretty good. So now we can go to
our smooth tool. Make mine a little bit
bigger and just smooth this. Okay. That looks pretty good. So I like to take flatten and I'll make the flatten
tool a little bit bigger. I just want to flatten this out. I'm going to start
around the middle of the nose area and just
flatten that out. Okay, smooth it again. Okay, that looks pretty
good. I like it. So although this
looks pretty good, there are some
things that I notice that I want to adjust. So see how this kind of is
an angle almost right here. It's very subtle, but I want that to be a little
bit more rounded. And I want to pull up
here on this eye socket. And I'll pull down here, this is a little
bit more rounded. The bottom part of the eye, which isn't very clear right
now, this bottom ridge, I'm just going to move up with the move tool just
to kind give that a little bit more how it
is in the picture. So It's it's pretty straight
here and then it curves up. So I'm just kind of working on this shape a little
bit with the move tool. Okay, that looks
good. Let's save. Okay, so we have
the eye sockets, and as I'm looking
at the eye sockets, there's still not enough
space for the forehead area, so I'm just going to use move and just raise this
up a little bit. Okay, so there's
enough of a forehead. Speaking of forehead, I
need to bring the forehead forward or else it will not
look right. There we go. So the forehead should
be, sort of in line. The top of the head
will just adjust. Make sure the move tool is big. That way you get nice
big smooth movements. See, the head is a bit
lumpy and it's a bit sharp. So you just want to make
sure that you kind of smooth everything out,
make everything round. I'm going to go to smooth,
and I'm just going to do a rough smooth back here just because we've been
manipulating it a lot, and I want everything to be nice and clean and smooth and round. Okay. So now let's
add two spheres. We're gonna use those
for the eye whites. So we'll go to a scene. We'll add quad sphere. I don't know why
my quad sphere is different color.
That's so strange. We'll add a quad sphere, and we'll just move it into
position and make it smaller. And hip mirror. Okay, so really what I'm
referencing is how high the eye is in
the image to the ear. So it's right above the ear. So now I'm just going to
move it straight into the skull and flatten it. And I can take it off of a line. That way we can rotate it so the positioning
will be correct. It looks pretty good. And if you like the positioning, you can always hit a line
if you just want to move it straight into each
other or forward. Just use a line
because if it's off, then it's going to be
a line to the shape, and it might get into trouble. Okay, I think that
looks pretty good. I think I want to make
them a little bit bigger. Okay, I think that looks good. We can go ahead and
validate these spheres, and let's start naming a
few of these items up here. So this quad sphere is the head. This mirror, whites. You can name it whatever.
It's just I usually do P one for pupils and
P two for eye whites. But as long as you
know what it is, it's fine. So these
are the ears. Okay. Let's save. Okay, let's do some
quick adjustments on the eye kind of upper brow area. So when I'm looking at
this, the shape really is a little bit different
than what I'm seeing here. So first, I want to go to
the head and just move this part up on both of them. So the eyes, I
think I want to put deeper into the head.
Okay, I like that. And then with move, I'm
gonna make it pretty big. I think I might need to push this Oops make sure
you're on the head. Push that in a little bit. I just want to see
a little bit of the roundness on the bottom. Oh, actually, you know
what it might be? I might have to pull this out. More. There we go. So really, it was pulling
this part out a little bit to get that flatter shape there. So I like that. Of course, you can make it a little
bit bigger if you desire. I think I like that. And I might even take the
eyeball and just move it. A little bit like
that. Just for fun. Just for fun. I like
that. I like the shape. So you might have to
work it a little bit, but essentially, you know, you want to just make
sure that the eyes match the shape of the reference.
So something like this. So these are the eye whites. Let's go ahead and add
another quad sphere, and let's make
sure to long press it and take it out
of this mirror. And let's rename it Is P one. And these are B pupils.
So we'll hit Gizmo. Put it in front so we
can see it. Y a mirror. Okay. Then we'll shrink it. We want these to
be nice and round. But we do have to
flatten them because we don't want them to
poke out too much. So we do need to flatten them, and then we need to
rotate them so that they sit nice and smoothly
on the eyeball. So it can be a little tricky. And you want them
to be Here we go. You want them to be a little
bit inward on the eye. You don't want them to be
in the middle of the eye, you want them to be more
towards the center. But I think that
looks pretty good. They still look a little
bit not as round as I want. So I have to figure out what's causing
it to look that way. Usually, it's just a rotation
one way or the other. Okay, I think that
looks pretty good. Also, it could be the
surface of the eye white. So you just want to, you know, kind of butts around with that until you get what you like. Okay. And I think I want to
do a few things that are that are not symmetrical. So I like the eyebrow area. I think I want one raised
higher than the other. So that'll be pretty fun. That way, it's not so even though the character
is not symmetrical, it'll be fun to have
a few things on the face that are not
symmetrical, as well. So let's move this
part up a little bit. Yeah, that looks good. Now, when I turn this way, it's really important that
this part needs to go inwards. So that needs to
push in, like so. And since I did that, you can see that it kind of changed
the way the eyes are. So, you know, if
that's the case, then I'll just move
the pupils further in. I think that looks pretty good. So let's throw in the nose, so we'll go to a scene.
Actually, is that scene? Yeah, that scene. We'll
add a Look at this. It's like freaking
out. We'll add a cone. Tap the gizmo. We'll
bring it forward and up. We'll shrink it.
We'll bring it down. It looks like it's about here. Ish. We'll bring it into the head and
then we'll rotate it. I like that rotation, but
I want it to be longer. I'm going to take I already
had it on the line. If you don't make sure
you have it on a line. Now just stretch it upwards. See if that was enough.
That was pretty good. I'm going to take a look at the side profile and this will help me nail where the
nose should be. Probably should be a little
bit further out, too. But I think that's
pretty good for now. And by a little bit further out, what I mean is, let's um
let's just validate it. So I think I want to
take this part of the head and actually just
whoops, pull it out some. So you might have to make the move tool a
little bit smaller. Okay, that looks pretty good. I want to make sure
that this is going in. And then I want to
tap on the nose. I may make sure I didn't
put it in a mirror. You can see that I accidentally
put it in a mirror. And the way I could
tell is because I tap on it and it looks messy. See how these look clean,
but then that looks messy. So let's tap the
cone, bring it out, and just label it nose. It's not too bad. Oops. I want it to be on the nose, just to adjust it a little bit. They don't want to take move and just curve it into the
face a little bit more. You can even take the middle
and just pull it down a bit. We can tap the little flask
up here and we can smooth it. There we go. Nice. And then you can adjust
it again if you need. Because when you
smooth, sometimes it loses a little bit of shape. But I like that. So the nose is quite small in
the reference image. So it looks like it's about
there and very small. Nose size is very,
very important. I always make my
noses way too big. I just want a little
bit of a lift here. If I can get it to lift. Sometimes you might
have to just flatten it to get a little
bit of that lift. Okay, very cute. You'll notice I do a lot of
adjusting experimenting. It's very, very important. Okay, so let's do a quick save.
5. Lashes, Nose, & Lips: H. So as I was saying before, I want to make the
head asymmetrical, some of the details of the head. So let's just take the
head and clone it. Okay. And the reason I'm
cloning it is because I might use it for the
hair in some capacity. So I want to make sure I just
have this nice round head. Okay, so we'll go
to the normal head. Let's just take move, and
let's move this eyebrow. Let's take symmetry off and then move this eyebrow up
a little bit higher. Okay. And sometimes when I
put that one up higher, I might put this
one a little bit lower to just accentuate it. I don't want her
to look too angry, though, so you do have
to be careful of that. I think that looks pretty good. Again, I just want this
to be fairly round. I think that's all right. Okay, so for the head,
I want to do an eye lid before I do the eyelash. Let's take clay and we'll
keep symmetry off for now. Let's make sure that
we're not in sub, so we don't want sub. Now for the clay, I just want
to make an arch like this. Notice I have the
clay to very small. Like that. I'll take smooth
and just smooth that out. So we'll go to clay again, and we'll do the same
thing on this side, but it can be less pronounced. Okay, we'll go ahead and
smooth this. All right, nice. So now that we have
that, let's go ahead and make these beautiful eyelashes. So we use tube. Path.
We want to hit Snap. Where is it? So we
want to tap Snap. And with the tube tool, we're going to start here, tap down on the screen,
bring it over to here. But I guess this is
an advanced tutorial, so I'm sure you know how
to use this tube tool. Okay, so let's add some
nodes to these lines. I always wind up putting
an extra one here, so why don't I just do it now? Okay, there we go.
It looks perfect. Tap that. Then we can tap the radius twice so that we have all
of them selected, and we can go ahead and adjust this Something like that. So I'm going to undo SNAP because this part of it actually looks in a
pretty good position, but you want to make sure
that this is going into the eye right at that line
where it meets the eye whites. I think that looks
good. Okay. Now, let's see if we hit mirror. I want to see how
all looks pretty good. I think we can use that. When you do the shape
is asymmetrical, sometimes one side
won't look right, so you just have to
be careful of that. But these look okay. Okay. I like to do my
eyelashes flattened, so we'll use profile. And I think I can make
them even more flat, but just way that's
not the one, is it? It Sometimes it's oh, there we go. I think that's what
I was going for. Sometimes it's a
little bit tricky to figure out which direction, but I think this smaller
rectangle is what we want. I'll just hit Twist, and
then you can twist it. Maybe something like that. Looks pretty good. I want
to make these smaller, actually. Okay. Those nice and flush. I think that looks great. I think that'll work. Let's
add another tube tool to the bottom and we'll do exactly the same thing with path, make sure Snap is on, and we'll start about here to here make the whole thing a bit smaller. Then I'll use all
the radius to make the ends nice and
sharp or tapered, I should say. Okay. Okay, I think that
looks pretty good. So now I'm going
to take snap off. That way I can do the same
thing like I did before and buy this into that crevas crevas and do the
same thing with this end. Okay, we can go ahead
and mirror that. So now we have the
bottom one as well. And maybe we can do profile. I kind of like that
better. That's beautiful. So that was easy. I just
used profile and just made that small rectangle,
and it works really well. If it doesn't look like
mine, you might have to hit twist and then
twist it a certain way so that it matches or
look that it looks normal. But I love the way that looks. So I'm going to go ahead and
do I want to validate it, or do I want to see if
I can You know what? I'm just gonna validate it.
I'm going to take these and validate and just make sure that both of these are labeled. Nice. Okay. Let's save. Okay, so let's do a little
bit editing the ears. I like to jump around a
different spots, apparently. So the only thing
that I wanted to do was make this part a little bit more round and this part a little
narrow at the bottom. I like that. I'll look at that. I like
the way that it looks. Now I'm just going
to take the flask and just smooth
them a little bit. They're a little bit
more round. I like that. So that looks good. So for this nose, see this
little piece right there, I'm just going to trim
that with rectangle. I'm still not sure how how small I want the
nose because it is a little big in comparison
to the reference. It's a little big
and a little low. Okay, there we go. I think
that stretch might help. I might take a cheeky
drag and just drag out the drag that out. Sometimes I like to take flatten and flatten the
bridge a little bit. But, you know, just little
fun little details. Okay, so for these eyebrows, we might as well do them. I'm going to do
them the same way I did the eyelashes,
so I'll use a path. The first one is up
here around there, so maybe something like this. Okay. Make sure snap
to validate these. Definitely going to be
profile in profile settings, can I make that smaller. What I'm actually trying
to do is make it taller. I can cheat and use the gizmo. I could do that. Let's do it. Let's see what happens. So that's about the thickness
that I actually want. So I'm going to use
all the radius, go back to a little squiggly
line and just adjust this. Let's see what it looks like
if I make it a hard angle. It's actually not too
bad. I kind of like it. Let me add another
one here and see if I can just add a little something. I like the way that looks. I think it came out pretty good. So I'm going to go ahead and Mm, I was going to validate
it, but I want to add a little bit
more resolution. So I'm going to press the
three dots and at least bring this up to one and
then validate. And then we'll add another
one on the other side. This one can be lower. Okay. I'll make it thicker there,
and then I'll do profile. Whoops. Then I'll
do radius and just make this much smaller here. Okay, they look pretty good. I can't tell if they're
too big or too bushy, but I don't even know
if I care that much. So I'm gonna validate.
I like them. I like that they're
not symmetrical. I'm feeling it. Okay. And you can always adjust
these a little bit, too, if you want to kind of fart around with
them and see if, you know, you like a
different position better. I think that looks pretty good. I'm gonna move these in so they're not sticking out so far. There we go. That's much better. Make them look a little
bit more subtle. They don't need to be out
an inch from the face. Let's save. Okay, let's make
sure that we have these named, these eyebrows. So here's one down here.
I'll bring it up here. We can connect them, I guess. So this would be let's see. Brow up. And this will be
brow. Okay, save. Okay, so for the lips, I think I want to
use another cone. So we'll add a cone Gizmo, we'll move it forward
up shrink Okay, now I want to rotate like so because usually you can see the underp of
a lip from the front. I think that looks pretty good. I'll just give it a quick
look. That looks okay. Now that we have it
tilted like this, let's hit a line and then
pull it a little bit more. Perfect. Let me go ahead and
it take it off of a line. I think I want to make it
a little bit wider here. Okay, I think that's
good. Now we can figure out where we want the mouth. Let's move it over,
rotate it a little bit. I'm going to hit a line so I can just bring it straight
back into the head. Now we can see it. I
want to move it up. That actually looks good. I think that looks pretty
good. And we could. Let's let's validate it. We'll use the flask
to smooth it a bit. And we can make any little
adjustments that we might want. But I
think that looks good. I might just use inflate for
the bottom part of the lip. I'm going to make
sure I'm on the head, make sure symmetry is off. Uh, Okay, so we'll just kind of match
match that a little bit. And then on the cone, I
think I want to just move. So symmetry is still on, so I want to go to
symmetry and hit Local. That way, we can still
use symmetry on the lip. Okay. Yeah, I think I like that. So I do want to experiment with this lip if I want to bring
this up a little bit. More of a lip shape. But yeah, I think that
looks pretty good. So the only thing that I'm
a little bit worried about is the smooth transition
from the lip to the face. But the profiles look pretty
good, to be honest with you. The front looks really good. So maybe I'm not too
concerned with it. Part of me would like
to She has a big, like, lower jaw now. So part of me wants to
see what this is like if I shrink it a little bit. Okay. I think I like that. Sometimes I like to take
flatten on the lip. Turn symmetry off. Okay, so what's happening
is I used inflate, but we need to there's not enough resolution for me to be able to adjust
this bottom lip. Let's voxel remesh it. So I'm just going
to pull up here. This is the same thing
as voxel remesh up here. It's just a little shortcut. I'm going to do like
250 for the head. So let's re mesh. And that's okay. We'll
just smooth this out. Yeah, that still
looks pretty good. I might box forms it a little higher and smooth it again
to get rid of those marks, which I think that worked. Well, it's not so bad. I might be able to use crease invert. Priest and invert
gets you a line, but you just want to
smooth it so it's not so it's more subtle. But I like that. I
think that looks pretty good. All right. Let's save.
6. Ears & Neck: So let's do a little
more details on the ear. We'll take crease.
Symmetry is okay. We want to make sure
that invert is off. We'll just do the
customary whoops, make sure we're on the ear. Customary crease like this. We can take clay with sub and we can just clay
some of this out. Maybe I'll do
another crease down here just to make
it interesting. But you really don't have to
I mean, it's very stylized, so it might actually even
be too much, to be honest. Sometimes it's
better to just maybe drag some of these parts
in and just call it a day. 'Cause it's easy to it's easy to get kind of lost
in the details, and I don't really want
that many details. So, you know, just
like I'm saying, I didn't really like that many I didn't really like what I had. So maybe just something a little bit more simple like this, not that much detail.
I think that works. It really doesn't hear. But once you start getting
too much detail, then you don't want to start
getting too realistic, you know, because
it is stylized. I think that looks good. And one thing that I usually
do for years on the back, I'm just going to use move
and just stretch this part. Into the head a little bit,
because that's what years do. Okay. That looks good. I'm really happy with it so far. The only thing that I might
want to do is take these, and you can do miscellaneous over here and decimate to get them smaller
because they're kind of big. Usually I do this at the end, but I don't want to have to go back and
do a lot of this stuff, so I'm just gonna
use quad remeasure. And see this, I'm
just gonna do half. Up. Wait a minute, did it? Like, not? I feel like
it didn't do anything. It's not really doing
much differently. This is seven oh seven.
Why is this one so big? Yeah, I'm not sure
what's up with that. Anyway, so it's smoother now, so I don't really
need to do the flask. This one I still need
to do the flask. I think that looks good. I'll
just bring a little bit of this out so it's not
underneath the skin. There we go. Beautiful. All right. Let's save. Okay, so
let's do a quick neck. So we'll add a cylinder. We'll go to the kismo
shrink, bring it down. So it's a little bit bigger at the bottom. Oops. So we want the neck to go to
be about there, probably. We can validate that. And I might want to take move and just kind
of make it a little bit Make it a little
bit wider on top, a little bit wider
on the bottom with a nice curve in the center.
I think that looks good. Okay. And then another thing
I usually do with neck is I'll use move, and I'll bring down the front. So I'm just stretching the
top so that it's a little more flush with the
body or with the head. So it's just a
little more natural. What did I do? Move. Okay. I think that looks pretty
good. It got a little lumpy. I'm not exactly sure
how it got lumpy, but it did. So I'm
just going to undo. I don't want it to be lumpy. So I move that down. Maybe the whole neck. I'll just give a
nice little curve. Okay, I think that's
a great spot for it. So I'm going to go
back and do what I did before opening these
parts up a bit. Nice. Okay. I want to make this a
little bit more straight. So one thing I'm finding
really difficult is keeping that straight. I'm not sure why. But usually, it just comes down to making the move
tool a bit bigger. Okay. I think I like that. I mean, it's a little tricky, but I think we got
there in the end. Yeah, I like the way that looks. I like the subtle
curve in it as well. Okay, so I think I
want a voxel remesh, the ears, the head, the lip, the nose, and the neck. So I want to put all those
things near each other. So the cone, I'm going
to move up, lip. And also, it's 4,684. I want to raise that
because the head is so big. I don't want to have something
so low, remeshed with it. So I just want to go to here Multi res, and I'm
going to do it twice. So the ears, where are they? So down here, we're
going to validate those, move them up. And it's pretty high resolution,
so I think that's fine. The nose we'll bring that up. And again, we'll just
go here, multi res. We'll do subdivide twice. So it was the head, the lip, the nose, the ears, and the neck. Cylinder. So I'll bring that up. And do that twice. I want to make sure that
I'm choosing the head last. I want to do a save
before I do this because sometimes
big voxel remeshes is when the program will crash. All right, so let's just do
a voxel remesh at like 275. Okay. Looks pretty good. The lip is not where I
would want it to be. So I think what I need
to do is take the lip, for example, and vax will
remesh it on its own. I'm going to do like 200 to
try and lock in that shape. The nose as well. I'm just
going to voxel remesh them. So let's see if that
makes a difference. Let's do 350 it this time. Very high resolution. And the reason I'm
doing it so high is because I want to lock
in those details. I think that looks pretty good. I'm going to turn smooth.
I'm going to turn symmetry back on
to smooth the neck and the ears the nose. And the lips, but I got
to be really careful. Let's turn symmetry off because the lips
are asymmetrical. So we'll turn symmetry off. We want to get this
nice and smooth. I'm going to flatten
this bridge. And then I'm going to use crease Yeah, I think that
looks pretty good. I can do a little
smooth if it needs it. I think that looks pretty good. All right, so we have
the head and the neck. I think this is great progress. I'm not sure if I want to
do the body and the hair, but great so far. I make sure that you
give it a nice save. One thing I've been
thinking about, the mouth seems a bit off, and I think I figured
out what it is. So usually when someone is doing this expression where their mouth is kind
of off to one side, the lip is sort of
pulling the mouth up. So I'm going to take drag. And just drag this lip up. I actually think even just
that makes it feel a lot more realistic because it feels like there's
a point where, you know, the lip is actually pulling the mouth
up to that side. So I don't know, just a little thing so
you can think about it, but I think it
looks much better.
7. Hair Shapes & Tubes: All right for the hair, let's add a sphere. And we can go ahead
and validate it. Let's just use the
Gizmo to move it up and then back a bit. Let's turn on X ray and let's just stretch it
a little bit like this. I'm really just thinking
about the hairline in front. Then if we look at
it straight on, I want to stretch it a
little bit like this. I think that looks pretty
good. Something like this. Now we can take select
mask with rectangle. We can select it
right about there. And then go to our gizmo
and just pull this down and then
stretch it that way. So like mask, we'll clear it. We can turn off Xray. So the next thing
I want to do is trim the hair like this. So we can just take trim, rectangle, then we can
just trim it like this. Like so. So now what I would do is make sure you're on the
hair, Box will remesh it. I'm going to do about 200. Okay. That looks good. If you want, you can use
the flask and smooth it a bit. All right. I'm going to do Xray again, and I'm just going to
trim this bit here. Let us use the lasso. Just trim that bit
there as well. I want to move the
front of this hair up. So I'm gonna use Move tool and just kind of scoop
this up a little bit. Keeping that top nice and
flat, just scoot that up. Beautiful. So now I want to
see how there's a break here. So it sort of
resembles a crease in the hair. So we're
going to make that. It's a little bit off center. Let's say the nose is center, so this is a little bit off. So I'm just going to match that. And I'll start right around
here with crease tool. Whoops. Turn symmetry off. Okay, and just do something
like that. Looks good. So let's make this little
area that sort of goes out. Let's use the move tool, and we want to
move it quite big, and we want to make sure
our symmetry is not on. So I'm just gonna
drag this over. Mainly focusing on keeping
this part nice and smooth. I'm even going to bring
this part out a little bit. Okay, so we kept that
nice and smooth. So next, I just want to trim this area because right here, you see how it's
curved like that, and this is sort of curved out. So all we need to
do is take trim, and we could maybe use ellipse
might be a little cleaner. Otherwise, we'll
just use the lasso. The problem is, I don't want to cut any of the other hair. I think this might work. And I think that works. And now for the other
parts of the hair, we're just going to use tubes. So I think I want a bigger tube here going over and kind of like curling to the sort
of sideburn area. And then we'll do this
little one in front. So let's start with
a path going here. Snap is on, that's good.
So this should snap. So I'm thinking
something like that. Make the whole thing bigger
and then use radius, all of the radius options
to make it a bit smaller. I'm going to turn snap
off so that I can easily move this
into that hair area. So it just sort of
disappears into the edge. So I think that looks
great. Now, with hair, I like to use angles
and, like, flat planes. So let's just try the profile, which usually looks pretty good, and I think
that looks awesome. Sometimes I like to you
can play around with this. For example,
something like that. There's You can add some other little planes. I feel like I want this
back part to come up. It's a little hard to find with this. Oh, I
think that's it. Focus. So I think something
like that looks pretty good. Okay, so the only thing
I might want to do is move it in to the
hair a little bit more. Okay, I think that's great. Quad sphere. So this is hair. We'll just name all these parts. This is, I guess
we don't have to name all of these
things. All these tubes. So I'm going to clone this one, and I'm going to
use this one for this little wisp that kind
of goes over the eyebrow. So I'll use the gizmo
just to move it. Maybe even make it
a little smaller. And now we can go into this tube options and just
adjust it as we want. So I'm just gonna move I'm just gonna move it so it kind of curves
in the opposite direction. And of course, we can
bring it out from inside the inside the head. It's actually quite
big, too big. So let's figure out how to first let's just
make a square. Figure out how to make
it thinner. There we go. So is this thinner? Okay, it looks like something like
that is more what we want. So the profile shape
is very important. Sometimes you just have to
play around with it until you get exactly what you need. I don't know if I want four
parts or if I want three. Sometimes sometimes
three is good, but we'll do four, but we'll do it
kind of like that. Again, we now it's just
matching that shape. Looking at it this way,
this part goes up. This part is like this. The whole thing is still
a little bit too big. Okay, so it looks decent. The positioning is a little off, so we'll just raise it up. Ooh, let's let's rotate it a little bit
and just make sure it's kind of in the hair.
So that looks good. Okay. I think we'll do
something like this. Oops. Okay, I think that
looks pretty good. So it can be a little confusing, a little hard to navigate. But, you know, it
just takes some time. You know, I really just
takes some time and getting used to using the tube tool. And having lots of these tubes and shapes kind
of stacked on each other. So that could be
a bit difficult. But, you know, just give yourself some time
and you'll get it. So one thing I noticed is this should kind of go
seamlessly to the crease. So I'm going to place it there. I like that. Okay, so that looks pretty good. We have this one that goes
back. That looks good. Eventually, maybe we can add another one like here
or something like that, but we'll see how we're doing. We could possibly use this
for this, but you know what? Sometimes it's easier
to just add a new tube and not continue
to copy and paste. So for this one, it seems
like it's about here. I add a little curve to it. It looks like it already
took the it took the attributes of the previous
tube, but that's okay. Alright, let's take
a look at this. So it looks like I have it
way too high, number one. I'll stretch it a
little bit that way. It looks decent. This
is a little bit weird. Let's see if we
make it a triangle. I think a triangle looks
a little bit better. Ooh, let me turn snap off. It's like a one of those wedge
steak fries or something. So I like this. This
is a little strange. It's like a little bit of a
strange situation happening. I'm not sure exactly why. It could just be the resolution. So let's try tapping these three dots and
raising the resolution. So we'll raise it
to one and see, I didn't really change too much. Hmm. Okay. No that it looks
terrible. I think we're gonna soften it up anyway. So I think that it could
possibly work and be fine. Okay, so I think we're just
going to accept that for now. We can always go back
later and adjust it. So I want to take another
tube, whoops with path, and I want to go from
here down behind the behind the ear. Whoops. I always forget
that you can't move those. Okay, so we'll do
something like this. I'm going to turn snap off and move that in,
add a new one there. So basically, we're just
following the hairline. Et's make the whole thing
a bit bigger and then use all the radius and make
the ends a bit smaller. Okay. That looks good. Tim I might actually tuck behind and then make it disappear. Okay. And some of these elements I can make
a little bit bigger. So I like that. Let's
check out profile. And let's see if we want
to just this at all. So, as you can see,
I don't really have it as an exact science. But, for example, adding a new
adding this new node here. So now I can see that it's adding another line going
down, and I really like that. So that's pretty
much what I want. The only problem is you have to make sure
that it's actually going behind the ear. So I think that looks
okay. Snap is off. I might need to bring some of these nodes a little
bit closer in. Okay, I think I like that. Yeah, I think that
looks pretty good. So I'm gonna validate that. So let's just continue
with the tube tool. I feel like I want to make
it the cheeks a little bit go in a little bit more. They feel a bit too
wide here. Okay. So like I said, I'm constantly making
changes to my characters. You got to constantly
just keep your eye out for things that you might want to make different.
Okay, so what is this? I'm seeing some parts here, but I'm not actually sure what
that Oh, that's the hair. I'm just going to use move and just move that
out of the way. Okay, so this hair
looks pretty good. I'm going to go ahead and
voxel remesh it at 200 or so. Let's try using a tube with path to make some hairs
going off this way. Let's turn snap off. Let's make the
whole thing bigger. Then we'll use radius
and make this smaller. Use profile. Again, I want
to add. Oh, I like that. You know, a lot of
it is just trial and error with these shapes. And I'll just kind of
play around with it until I get something
that looks nice. And, you know, that's
just the reality of it. But I think that looks great. I wish it wasn't as fat. So I could try and find If you can't find it doing
the profile, you know what? Maybe I should I believe it. If you're happy with it,
which before I do that, I'm just going to do
post subdivision to one and then validate. You can always use your gizmo
and flatten it this way. So it's not so thick. Maybe I'll use move and just give it a little bit more curve. But I think that
looks good. So I think this part is the hair. I'm just gonna use
move and get that out of the way, so we're
not seeing it. Yeah, I like that. I'm going to do the same
thing on this side with path. It's a little thick. I really want to thinner. Okay, I don't mind that. If you want, you could
even do this one down in front of the ear, so it's not tucked in. Oh, you almost not tucked in. You know what? Maybe let's
try if this one is like this. Kind of like that. Yeah, I'll take that. So I'm going to do the same
thing and just raise the post subdivision to
one and then validate. Then, of course, you
can just adjust it if you want to with
the regular tools. What is that? Oh,
that's the eyebrow. I was wondering what that was. So maybe I'll just push it in so it doesn't compete
with the eyebrow. Like so. Yeah. Okay. I like that. And this little bit of hair, I feel as though I need
to puff this out a bit. Yeah, these look pretty
good. Let's save.
8. Hair Details & Body: So for the rest of the hair, I would really just
keep it simple. So you can use crease with maybe invert and you can really just make some cool little Oops. Some cool little
lines like that, but not too many. Maybe I'll do one here and
maybe not even that hard, but it's really just to just to give the illusion
that there's some texture. I'm actually not going to
do too much more of that. Then these edges, I
might just flatten. It gives it that same sort of look that we've done
with these hairs, you know, there's
lots of flat planes. Maybe we can even
add some back there. But I think that
looks pretty good. And of course, if
you really want to add more details to the hair, you can do things like adding some little flyaways that
kind of go all the way back. We turn snap off. So I'm going to use profile
and I think I want. I think I want to triangle. You know, you can add
some details like, you know, little
hairs like that. If it was more realistic, I would add more
hairs like that, but I don't really
think she needs it. And plus, I want to
keep this a little bit more stylized and as
simple as possible. It's not really simple,
but you know what I mean? It's not simple at
all, actually, but, you know, This, I think
I want to smooth this. Oh, I have to validate it. And There we go. That
looks much better. You can also do
things like flatten on some of these edges, too. But I think that looks
good. Yeah, I like it. Safe. Sometimes I just like to go back over things that Increase invert. So I'm going to keep all
these little moments where I'm doing
small adjustments. I do them a lot, and it's
just part of my process, and I encourage all of my
students to constantly adjust, constantly be scanning
to see what can change, what needs to change,
and what can be better. I think this needs
to come out more. So I was just
playing around with my pinch tool settings
for the lips. And I realized that in
the stroke options, if you go down to silhouette, and I guess this
one is selected. So this was unselected. And once I did it,
it started acting the way that pinch should
work a little bit better. So just something to note, check this out,
'cause I was able to kind of get some details in the lips, which
I really like. Grease So anytime
I'm doing mouths, you want this crease to be
the deepest right here. You want that to be
the deepest crease. I've been wondering why Chris hasn't worked well for so long. Hopefully hopefully
that's the fix. Alright. So pretty happy with the head. Oh, you
know what? We need to do. Those little wing tips
on the eye lashes. So we might be able to use
drag if it's really small. Are these matched?
I can't remember. Just put symmetry on. So let's see if we
can do it with drag. Drag is a little
tricky because things can get very ugly, very quick, as you can see with the lines, but it's not too terrible.
Let's try and move. Now that we kind of
have the basic shape, we might be able to use move. It's not too bad. Either that or I was going
to use a tube tool and just tack it onto the edge,
but I think that looks okay. Let's save. Okay,
so for the body, let's start with a cylinder. I'm going to add a cylinder. I'm going to move
it all the way up. I guess it shouldn't
be that high up since all of
this is the head. I think the bottom is
actually the best place. T I'll just name it body.
We'll move it down. We'll light it up with the neck, although I might have
to move the neck. I might have made the neck
a little bit too far back. I might have been a
little overzealous. I'm just imagining how the
width of the body this way. I think that looks bright. The neck is a little long, so I think right about
there probably works. We'll make it a bit longer. I think something like
there is how long her torso is before her dress. We'll make it a little longer. I'm going to add another
cylinder and I'll drag this down we'll tap for the cylinder
options for her dress. So I think we'll just
do something like this. Not really thinking of the, um, the curve and the neck or the
spine or anything just yet. I just want to block
in everything. So usually for legs like this, do I want to use more cylinders? Hmm. I can either use
cylinders or tubes. I think I use
cylinders most often. So we'll just bring it down, and we'll make them
both match for now. So we'll just get them
roughly the same size. Can mirror them. Okay, something like that. Let's add a sphere
for the knees. Probably should use
another cylinder. I know that sounds weird, but let's give it a shot. Instead of that, getting always get sidetracked
name and stuff. A skirt. Let's add another cylinder only because
when using a cylinder, you get that nice plane which lends itself more to knee. Okay, so something like that. And then for the bottom
parts of the legs, I think maybe we'll use tube. Okay, so that's a
good starting point. I want to place it
behind the knee. You want to curve it like so. I want to curve it out
a little bit like this. Make them pretty
big for the calf. And then we can where is the Oh. And then we'll do
radius, and we can make the ends kind of smaller. We probably don't
need snap anymore. Okay. Not too bad. Okay, so for this body, we definitely want it to
be more round on top. So let's just let's validate, take the flask and
then smooth it. So that should
round the top out. And then we can just make it a little bit bigger we need to. So it kind of goes back
to that original size. And I kind of like this whole
that very smooth shape. So it's something that I
might try to match that. So let's say if I make
this a little bit bigger, then maybe I take this shape, the body shape and kind of match it so it flows a little
bit better into the skirt. Okay. Now, remember I
said about the neck. So I'm trying to think if I want to actually
trim the neck and move it up. I guess we'll give it a shot. So let's just do Xray
so I can see it. Lasso. And honestly, I
might just lasso it. I'm using split and not trim. So then with the
neck, I can move it up and see what I think. I think that might look a
little bit more natural. I think. Maybe a little
bit bigger, too. But honestly, that's
the reality of it. I do a ton of a ton of changes. And honestly, I don't know how to like if I'm doing a tutorial, I think sometimes
it's just better to show what I'm changing and why cause the reality is I'm always gonna I'm
always gonna have changes. So if I'm thinking of the neck, usually the necks
aren't straight. Um let's see if I can get some
curvature in the neck. Why the neck looks so Okay, so I think that looks okay. So now the body probably wind
up moving everything back. So the body is usually curved. So just using move,
just pushing the body. So we really want to
get a nice curve. So I think that
looks pretty good. We have the curve in the back,
which looks pretty good. Now, the top part of that, I'm just going to use move and just bring this
more into the neck. Especially back here. I'm going to pull that part up so that we get sort
of this nice curve. And the only problem is I still want her to have I still want her to be kind of flat where
the neck meets the body, so I don't want to
curve it too much. But I think that's
good. Let's do Xray, and I just want to
bring this back part. Pop a little bit. Okay. All right, so I think
that feels pretty good. We have a nice curve there. I think that works. I think I like the neck better
where it is now. The only problem is somehow
I mean it's so thick. I thought it looked right,
but it feels silly. Okay. But, you know,
those little adjustments, I don't think I need to go too crazy in this video,
but you get it. All right, good. Alright, so for the skirt, since we kind of have the body, let's sort of match the body. So let's smush it like this. That looks pretty
good. Looks like we need to make it
a little wider. Okay. And I think we let's add let's
add some resolution to it. So I'm going to do this to two, post subdivision to two, just so it has a little bit of a little bit more resolution. Looks like we need to make
it a little wider still. So I'm going to
validate the rest of the moves we can just
make with the move tool. So for example, I'm going to make it a little
bit more rounded in the back because even though
we can't really see it, we're assuming that she
has some sort of backside. So you want to account
for that a little bit. And then this I'm
just going to adjust. So it's closer to the skin. And I think the front I think we want I think we want the
front down a little bit. I think I like it
better like that. Let's just raise this
up a little bit higher. Okay. I think I like that. And honestly, before
we validated, I probably should have, I probably should have did the whole so it's hollow inside. But we can always
do it this way. If we clone this and
make it smaller. Let's do Xray. Make it smaller. Move it down. And then we can
just do boolean and boolean, it's the same thing. Before we forget,
let's just go ahead and vox or remesh it. Okay, good. Let's see.
9. Arms & Hierarchy: Okay, so for the arms, I think we want to do
let's do cylinders first. So I'm just going to fast
forward through this bit. I did try out the cylinders, but I really wanted
to use tubes because I wanted more versatility
in how I move the arms. Part of me is thinking maybe I should have used a tube tool. Well, I'll tell you
what. Let's hide this and let's try
with the tube tool. Only because there are some slight things
I want to adjust. Let me turn snap off. Actually, let's just make the whole thing bigger at first. This bigger down here.
Let's mirror it. With the tube, then you
are able to curve it in. That is helpful, to be honest. It is a she's
wearing this jacket, so that makes a bit more sense. We have the arm you can't really see the curve in the back, but I still think that's okay. Make this a little bit smaller. Now that I'm thinking
about the body, let's see. Let's give her a little
bit of a slimmer belly. Let's bring this down. And we can add the shirt. I want to add, if we want
to work on her chest, I think we can I think
with whatever this is, I'm not actually sure how
I want to do this yet, but we can deal with those
details when we get to them. I know it should be flat here. Okay, so something like that,
I think is pretty good. We don't really have
to go overboard, although you can if you want. Okay, so we have
something like that. I still feels a bit. Let me hide these for a
second and just take a look. Oh, it actually looks fine. It looks fine without the arms. The arm makes it look
a little bit funny. Okay. But that's
right because that means that the shape
is actually decent. So I'll just do this so you
can see the general shape again clear. All right. And I might need to just
move the arms up a bit. Maybe that'll help me out. Let's do a line so I can
just move them straight up. Okay, I like that. I think what I want to do is
take this mirror clone it. I'll hide one of them. So this way I can just
manipulate one side. Okay. So this is going to be this arm is actually more behind
her, I feel like. Okay. Yeah, so one arm can be down like this. I
think that looks fine. Okay, I think that
looks pretty good. And then we have
the little cuff. So I think for the cuff, let's just do Taus. I'm gonna take it out.
Actually, it doesn't matter. I'll just leave it in
the I'll take it out. We're going to put this
in a general position, take it off of a line, so you can maneuver it
a little bit easier. Get it nice and flush. Ish. Let's go to the tube options and just
make it a little bit thicker, then we can just stretch it. It Sometimes it's a little tricky to get
it, not looking silly. Okay, I think that
looks pretty good. I'm noticing there's a ridge
in the Yeah, there we go. I think I'd rather do that because we can smooth that out. But at least if we do
that, that ridge is there. Please excuse my stomach
making all kinds of noises. I think that looks pretty good. Okay, so I do like that. So this is the arm down. And I'm just going to,
let's go to the tube. So let's go to the arm and
let's raise the resolution. So let's go to two and validate. We can validate the mirror. The Taurus, I just want to
raise the subdivision to one. Actually, no, we
don't really need to do that. Let me undo that. So the Taurus, I'm not going to raise the subdivision because I think it's not going to be
directly connected to the arm. So now that we have these arms, let's just solo them, and let's trim one side. You don't want symmetry on or
else it'll trim both sides. Okay, so let's do a quick save. So now we have that arm,
let's bring back the other, let's see, arm down. Again, I always start
randomly labeling things. All right, so let's clean
this up a little bit. I think these are the old arms. So let's just delete those. We'll go to the other
arms that we saved. So this tube, which I think
we can keep that tube there, maybe even unmeror it. And then I think maybe we add another tube and just
connect those together. Let's see if we can get this
flattened a little bit. So I think that makes more
sense. So let's take path. We'll add another one here. Male person is here. Okay, so now let's get this in
the right position. So I'm just gonna
get rid of all these just to make it a little easier. Turn snap off that'll help Okay. Let's take a wide view and just take a look
and see what we need. So there's something like this. There's a little arch here. And of course, we need
that ridge again. We want to make
sure we have that. Let's bring this down. Et's make this part smaller. Okay, it's looking decent. Maybe we can even
use the same Taurus clone it and rename it. Up. Now I'm going to readjust this a little bit. And I want them to
be slightly bent forward so that when I'm
looking at the front view, everything is kind of bent
down forward because for the hand is going to be bent forward a
little bit as well. So let's take another look. Yeah, I kind of
like the way that looks. I make it look good. So just a little
bit of adjustments, it seems like for this, maybe I'll make this
a little smaller. Take this arm and make
this a little smaller. Okay. They don't have to
be exactly together. But apparently, I can't help it but to match
them up as much as possible. But I think that works. It'd be nice to get this cuff. Okay. I think that
looks pretty good. And what's nice is we use both the same taurus
so that we'll keep the hands and things regulated so one is
not such bigger size. Because even in the drawing, this arm is much
smaller than this arm. This hand is much
smaller than this hand, and they're not they
should be more they should be more the same size. They should be the same size. Okay, let's say. So one thing I notice
the proportions are off. So for example, if I make it roughly the same
size as the drawing, you can see that the
head is way too small. So it might be easier to make the head bigger or
the body smaller. And I think it might be easier
to make the body smaller. Skirt Because I think all
of these are just the body. So I'm trying to give
it a quick test. I think that did
work. The only thing I don't want to happen is I don't want things
to go off center. So I turn the grid on, and I'm just gonna shrink, and it seems like
it's not off center. Everything is staying on center. Although this is a little
off, it seems like. Not that that's a huge deal, but Okay, so now let's do a quick check. It looks like the head is
still a bit too small. So I'm gonna make the head
around the same size. Can probably just
match it like this. Oh, actually, actually,
that's that's not too bad. I actually seemed like it
was roughly the right size. I'll make the body
a tad bit smaller. Whoops. I think that's
a better ballpark. So that's just another
way to get some of these details down
before we go too far. I like the hair and the head. I want to start locking
some of this stuff down so eventually we can kind of move an adjuster. So
we have the neck. Oh, this is so let's
relabel the neck neck. This is the head split, which is just the head. Okay, so the neck, I'm going to put the head
nestled to the neck. And then the head,
we have the brow up. We have the hair. So
let's label these hair. These we can go ahead and validate. Okay. So we have the eye lashes. Those look good, so we can
validate those as well. Connect those to the head. The backup head, we
can delete the lashes. We did we already, let me see. Oh, those are the lower lashes. So we can validate those. So
those are the lower lashes. I think we can put those
with the eye lashes. The eye whites, we
can validate P one. We don't have to
validate that yet. So I'm gonna connect
those to the head. So now, if we wanted to, for example, move
everything, the neck, at least, everything's
connected to the neck. So we could always do
a pivot and move that down here so we can
tilt if we needed. Of course, the same
thing with the head. Auto pivot. Pivot,
auto, pivot. Whoops. So if we do pivot with the head, you want to move that
to where the neck is. It's just helpful when we want to kind of give her a pose. I want to make sure these
both are in the right spot. Pivot. Okay. Neck, pivot. I think I accidentally put
them in the wrong spot. Pivot. Good. Okay. All right. Good. Let's save.
10. Collar & Lapel: Okay, so for the
collar and the lapel, I think I want to try a cone for the collar or actually
maybe a cylinder. Cylinder might work. Let's try. Let's try a cylinder first
and see if we can get there. We'll make this part
smaller, this part bigger. I'm going to give it a
little more resolution. Just lower this.
Lower it to about 20, and then let's do whole. Let's see how that looks. I'm going to raise
division Y so it could be a little bit
more flat on top. This is division X is 20
and division Y is eight. I had to uncheck constant
density to do that. Okay, so let's move it down. Of course, we just
really need the back. The neck is super long, so I don't know if I want
to keep that long neck. But I don't really
want the collar eating too much into the hair. That's my current dilemma. If we want to bring
the body down, I think we might let's see. Let's make this collar. I'm going to move it above
the body because all of these things arm down, arm down, cuff, arm up,
where's the arm up? There's two arms arm up, B. Label these so that
they make sense. Arm up. Okay, so I nestled these. They're all nestled
under Wait a minute. Let's take arm up. I think this needs to be
nestled under the body. Same with this. Body, skirt is nestled, arm is nestled,
arm up is nestled. This mirror, I think
this is the knee, right? Knee, and then leg calf, just so I know that's
the lower leg. That can also be under the body. You know what? But this should probably
be nestled under the skirt so that if
we move the skirt, it moves the legs and the knee. So here's the legs upper thighs. So I'm going to nestle that
with the skirt, as well. So now we have the body here. We want to take pivot. We move it up to the
base of the neck. And then hit pivot. The
reason why we're doing the pivots is if we did want to move
something, it makes sense. I'll show you what that
means in a minute. So the skirt,
pivot, auto, pivot. Let's do pivot. Let's do a line. Let's move it up to the waist
area and then hit pivot. For the thighs, let's
do pivot again and we'll raise this up
to the hip joint. Maybe there is good. Pivot. Let's see thighs. Let's take leg thighs
and actually nestle that under this mirror. Then we'll take those
pivot auto pivot. Wait a minute. Oh, wait. Did I do something
wrong? Hold on. These are the thighs,
this should be above, and this is the lower parts. I'm going to nestle
that to the thighs. Of course, the pivot, again, is supposed
to be of high here. Pivot. The knee okay. And actually, the knee, if
we want to pivot the knee, let's move it
towards the middle. Pivot. And then this
part of the leg, Oh, is it in a double mirror? It might be in a double
mirror now. Hmm. It could be in a double mirror. Since I put a
mirror in a mirror, I think that's what
might be happening. Um Okay, so let's see
if we can just take these and add them into that cylinder and
get rid of this mirror. Okay, I think that's
better because I think it's not a
double mirror now. Everything is in
the same mirror. So leg calf, pivot, and I want to put the
pivot towards the back. Actually, let's just
leave it in the Actually, let's put it towards the front, lower part of the knee. So I think we want to put
the pivot in that area. Okay, so let's see
if this makes sense. So we have the body and everything moves below
it, so that's good. We have the skirt, everything below it should
move. That's good. Then we have the legs. This might be a little bit weird because yeah, because
of the mirror. But that works. Nice. Okay. So now I can take body and take some time if you need
to kind of work that out. Hopefully, you have
some experience with the whole nestling
and what's it called? I can't remember the
term. I always forget it. Nesting. I can't remember. Hierarchy. So basically
with hierarchy, anything that you put
under something else, you know, so the body
is the one on top. That means anything connected to the body is going to move
if you move the body. One step forward,
we have the skirt. Anything you put under the skirt will move if you move the skirt. And, you know, pretty much
that's pretty much all it is. Okay, so the reason why
I was doing all that is because if I wanted to take
the body and move it down, and then take the collar
and move that down, and just rock with
her long neck. We could do that. I'm going to angle
it back. I think that's pretty much what
we want for the collar. So I think I'm going
to go with that. I want to give it a little
bit more resolution. We'll validate and
then just trim it. So for trim, I think
I want to use line and I think I want to
trim right about oh Let me think about
this for a moment. I think I want to trim
right about there. It's not too bad. That's
not too bad for a collar. I'm gonna do pivot auto pivot, make it a little smaller. Maybe even shrink
it this way some. Now we need the other
part of the pill. I actually think that looks
really good for a collar. Now, we trimmed it, of course, I'm going to voxel remesh
it around 160 or so. And it's still a little
pixelated or a little messy, so I'm going to try 200,
see if that helps at all. I can go to the flask
and smooth it because I can't stand looking when it's
all edgy and bad looking. So we need to connect
another part. I don't know if I
want to use tube. Here's my original idea. So I think I want
to use a cylinder to make this part of the lapel. So we'll add a cylinder Oops. So we'll just flatten it, maybe make it a little bit
better tilt it towards us. So I'm thinking
something like that. Maybe a little thinner. Give it a good stretchy puh. Okay, so I think
this might work. I'm going to give
it a little more resolution like I always do. Much Oh, that's 44 K. This I think we can
rock with two for now. We'll validate it. I probably should have
just mirrored it. Validate. We'll take move. I want to slide this part down. Until it matches the drawing. So I think that
looks pretty good. We'll pull it up here. Okay. I kind of like that, but I feel like it got a
little weird on me. So I might need to use move
a little bit bigger just to get some nice smooth shapes. I really love the move tool. My favorite tool, um, but yeah. That looks pretty
good. I like it. So the only thing that
I'm struggling with now is how to connect them. Let's see what happens
if I pull this forward. If I pull it forward,
let's try drag. And let's just see if I can
drag either drag or move. If I can kind of
match these up a bit. So I might go in between drag
and move a little bit here. Oh, so it's pulling up from
the back, so that's not good. Okay, so now that I'm
thinking about this, I think there might
be an easier way to accomplish what
I'm trying to do. That head neck is really long. I could possibly
bring the hair up a little bit, but that's okay. I'll deal with that later. I was thinking, let's go
ahead and hide this collar. Jacket. Lapel. I don't
know how to spell Lapel. I'm just going to name both. So we hide that collar. If I add another cylinder, To post subdivision Gizmo. Let's put it generally in
this position we want it, which would be
something like this. Let's take it off of the line so I can make it
a little thinner. I want to try to match
up with the lapel. Okay, if I can just
do something like that and then just use the
move tool to manipulate it, that might be a lot easier
for what we're trying to do. So I'm just going to go
ahead and validate it. Sometimes you got to
live dangerously. And I want to make this
lapel or this collar shape. So first, let's just try Oh. I think that's
pretty good, right? Okay, so let me try pulling
down from the middle a bit. I think that looks pretty good. I'm going to take the whole
thing and move it up a bit, maybe even back a
little bit more. I'm going to take move, and I'm just going to move
this front part down. I would trim it,
but I want to use move so that if I do trim, it's just going to
be with Move tool, it's very easy to kind
of get it into position. And by position, I just
mean I want it to line up with The Lapel. Not too bad, to be honest. The only thing that
looks weird to me, I can't tell if
this issue is just because of the hair or what. I think the hair I think I might feel like the hair is
a little bit too long. Either that or it Or
I move the head back. Now, if I nestled everything
in the head correctly, that should be a simple fix. So if I move the head back, maybe even down a little bit, she doesn't have a
crazy long neck. That's why I nestled
those things together so we could easily make
those changes if needed. Okay, this looks good. The only thing I don't like is this line should go
straight to the collar, which it doesn't So I think
what I have to do is use the move tool on the collar and just
Oh, there we go. That works. So I'm just building
up the jacket. Yeah, that works well. Let's get rid of some of this neck
because I can see it. Yeah, that collar looks great. Looks great. So let's take this. And now we can do
Xray and we can just trim a lot of this
area that we're not seeing. So basically, all of this. So I'm pretty sure we
haven't lost anything. Yeah. Good. And if you want, you can make
them a little bit sharper, but I don't think I
mind that too much. I don't mind that it's not
as sharp as the reference. It doesn't really bother me. Okay, this one is
15, this one is 27. They're not too far off. Let's get rid of this
collar, the old one. Jacket Lapel, let's validate. Now they are far off. Let's
just vox remsh this cylinder. The apels's vox
remsh them as well. Do 160 or so. Now let's try a box where
miss them both together. This is so strange why
it's not letting me. There we go. Bugging me. So let's
go let's go 200. Just because I really
like the shape. I don't want I don't want
to lose any of the shape. So we'll keep it nice and
smooth. That looks good. Pretty happy with that. I might even just take this and
just brush this down. Brush that down. I think these are just the
arms, those are okay. We can always just
take clay or trim. We can always take trim
and just trim that part of the arm on both
sides and validate. Actually, before
I validate that, let's pump the post
subdivision up. We'll do, let's keep it at two. What's this one? This one is 26. This one is 23. This one,
let's also validate. I keep doing that. I constantly validate
and then I'm like, Oh, I want a little
bit more resolution. I could just voxel remash, but for some reason, I think it's faster to just
hit Undo and raise this. We'll do two there as
well because we're going to do a lot of details
on the arms most likely. Now I can go back to this, validate, and then
trim this piece. Nice. Okay. Still wish this was straight, but I'm not quite sure
how to make it straight. So I'm using drag
right now just to sort of just to kind of
move them around? I'm not really sure how I
can get this straighter. I mean, it looks
okay, but, you know, I'm always there's always some detail that I'm trying
to make it look perfect. I think it might be this. Okay. That's a little better. That's a little
better. So there's a cylinder going around
the neck as well. Let's add a cylinder. I'm going to bring that up to here. What is this cylinder? This is the collar. And then this cylinder
is the necklace. I can't really, I think
it is called a choker. Choker is what it actually is, but that's okay. So
we'll move it down. We'll just shrink it. And this is obviously really simple. It's just a cylinder
going around the neck. And then maybe bent forward. Okay, good. What's really
great about this is it's a natural breakpoint
for the neck and the body, so we don't need to oxo
mesh them together. Nice. Okay. All
right. Let's see.
11. Skirt & Shirt: Okay, so let's adjust the torso. We need to figure
out this little tube top thing she's wearing. But first, I want to make
sure the body makes sense. So the bottom of this, I
want to flare out a bit. Okay, so I think that
looks a bit better. I think I'm just
going to take this and body. Let's clone it. I'm going to bring it up.
Let's just call this top. Let's call it body top. And we can just trim. Okay, so let's trim
the top about there. Then let's trim the
bottom right about there. Okay, so we're
still on body top. So now we can vax remash this. Might do about 170. So I'll remash that. I'll use the Gizmo to make
it slightly bigger. Oh, you know what? Let's
do pivot, auto pivot. We'll make it slightly bigger. Okay. And I think I want to
use flask and smooth it. There we go, so
we can smooth it. Take a look. That looks great. Okay, so if you want to give a little shape to
her little tube top, I think I want to just use move. Make sure symmetry is on. You can pull it out. Et's
pull it on a little bit more, and then you can drag it
away from each other. So it looks a bit more natural. So you drag it away, and
then all you have to do is maybe make the
move tool a little smaller and pull the bits that are supposed to
be close to the body, just pull everything back in. Especially this top area. You just pull that back in. Okay, I think that
looks pretty good. It might need a little tweaking, but it's not too bad. You know, this part, I think we can press down a little
bit, the sternum. Let's press that down and
then likewise move this. I probably should have
did the sternum part first, but that's right. Okay. But yeah, a little
bit trial and error. Adjust and adjust and adjust until you have what you like. Let me try to smooth
this out a bit. I like to keep everything
nice and smooth. Even this, I might take
this and just smooth. Okay. Okay. I like that. Do a quick save. Okay, so I'm just going to
make some slight adjustments. They're little random things. Yours is going to be
different than mine, so I'm not gonna explain
every little thing I'm doing, but I want to include it
because I want to show you everything that I'm
doing to the sculpt. Alright, so I'm going
to validate this and then smooth it out. Move that down a bit. Maybe move that up a bit. This I feel like needs to
come back a little bit mops. Right? And this is a style thing, but I think I want to add
a flat plane to this edge. I could use pinch since
I think I've fixed it. It's actually not bad, but
I think I'd rather use flat slow and see what's going on back here. Okay. Okay. I think I like that. For the back of this jacket, it needs to have a back. I think I want to just use I
think a cylinder will work. And we'll kind of do it the
same way we did the skirt. So we'll make this
a little bigger, make this part smaller, make the whole thing smaller. Okay. Actually, I don't know how
long I want the jacket. I don't know if you
want to be able to see the top underneath. Not show. So I'm just
gonna make it thinner. So I think something like
that I can work with. It's mainly just the height
I need to figure out. I think that's a
pretty good height. Okay, so I'm going to do whole. I think that's a good size. I'm going to give
it some resolution, so I'll raise the
post subdivision and The only other thing I'm thinking of is if
I want to use tube and give the jacket like a trim. But I feel like this is fine. I'm just going to
validate it and the rest I'll work
out with trim. I'm going to use move,
and I want the jacket to kind of splay sew. That looks pretty good. I need
to squeeze these together. Bring the top back. Okay. I don't want to do it too much because then it can start
to look kind of crazy. But I think I like the way
that that looks so far. I'm gonna make it
a little thinner. I don't want it to look
too overbearing, either. I think I'll just
make it thinner. There you go. I
think that works. I think that works. So
what I want to do now is I'm going to use move, and I'm going to take it
off of symmetry because the arms aren't really
super symmetrical. It really just needs to be flat. Oops. I'm going to lock this because I
keep tapping off of it and it's really annoying.
So I'm going to lock it. Let's bring this part down. And actually, now that
I'm thinking about it, you don't even really
need to see the sides. But I think something like
that looks a little bit more natural as though
it goes up to this part. And you know what
else would look good? I'll take flatten and flatten
this plane right here. And then I'll just take move and maybe give this a little bit more a little bit of a push in. Okay, so that can be
her little jacket. I think that looks pretty good. I'm actually going to take
this Oh, I have it locked. I want to take this and
flatten this part of the lapel sleeve type thing.
Are they symmetrical? I think they are. Okay. All right. This arm, I'm going
to move in a bit more. What is all this? That's the body.
I'm going to take clay and sub and just
get rid of that. What is that? That's
the back of the top. I can just take move and just
move that out of the way. Just move that forward. Flatten this a bit more. Whatever this is,
we'll just move it out of the way. Move. Okay, 'cause honestly, I think, actually, I don't know if I box will remsh that together or not. Maybe not. I think I might just ox will
remesh this to the collar. I think that will
work. Alright, that's looking good. Let's save.
12. Legs & Boots: So one thing that we
should do first is add the feet or shoes. So we'll do that really simple. We'll just add a sphere. We'll foot. And it's already
in the same mir, so that's why we're
saying two of them. All right. So I think, I'm just going to validate
and I think I'll just use MOV to kind of
straighten them out. Okay. I think I like
something like that. So now I'm just going
to trim the bottom. I'm going to trim a
little bit below the leg. I think I like that. And I'll just adjust it so it's perfectly leading into the foot. Alright. I'm gonna rock, re mesh it. Like 150, clear up that bottom. Looks good. Okay, so if the cloneed foot is selected and I take select mask, I'm just going to
use rectangle and just kind of select
this like so, use gizmo, bring that down, and then just flatten it. So then we have
something like this. So now we'll take mask, clear it, trim with rectangle, and then just trim the bottom. Trip it a little higher. Then just do a little
voxel rematch. Probably 150 you'll do. That'll serve for at
the bottom of the foot. Obviously, we need to
make it a little bigger. We'll look at the bottom, and we'll just give it a nice
stretch. We can take move. And just give it a
nice little stretch. I think that looks good. Let me do pivot auto pivot. What did I accidentally? I don't know. Okay. Okay, so now we can
just adjust them all. I think with the
heel, I might want the round part a bit smaller. I think that feels a bit better. So I'm gonna go
back to the heel. I'm going to use flask
and just smooth it out. And then I'm just going to
adjust it again as needed. See, there's some
spots there that are not kind of coming
out from the foot enough. So I'll just pull
those spots out. Okay. And this part of the leg? I'm going to give it a
little bit more resolution. I'll raise the post
subdivision up to at least two for now. I think that looks pretty good. Kind of like that. Leave
this down a smidge. I like the wide bottom to it, so I think I'll just
leave it like that. Yeah, I think that looks fine. Okay, cool. So let's save. Okay, so now that
we made the shoes, they just need to be a part
of the whole leg system. So they're already
nestled under the legs. So we have the foot,
and we have the sole, so let's just go
ahead and name these. Foot sole. Okay, so the foot, we can nestle under the leg like the calf because we want that
to be connected. The sole, obviously, we want
that connected to the foot. So the foot pivot point, see if we go to the gizmo, the foot pivot point,
if we tap pivot, Oops. Obviously, the foot
is always going to pivot from the ankle type area. So kind of right around there. Then we hit pivot,
so that's locked. Now that we've done that,
if we move the foot, the sole should move as well. It's not perfect,
but it'll make it a little bit easier
to pose the legs. All right, so let's save. Okay, so now that
we've done that, we need to clone these legs. So let's just take this whole
legs setup and clone it. And let's name the second one. Let's just name it leg B. And let's name this one leg A. So leg A is going to
eventually be on this side. So we can just go ahead and
hide all of the other mirror. Okay, so back to
where we started, let's go ahead and
take the thigh, and you should be able
to rotate it out. And honestly, you can just
disregard the whole left side. Just think about it
as this one leg. So it's going to be
something like that. Ooh, another thing that
we should do is add a quick quad or just a box. It doesn't really need to
be nestled in anything. And this is just to
represent the floor. So let's just hit the
gizmo. We'll bring it down. It's always easier to
kind of do the feet, I think, if you have, like, a solid ground. Okay, so, something
like that is good, I'm gonna go ahead and turn off. Oh, my God, look at
this. It's insane. Oh, smooth shading. I'm gonna turn that off. Hopefully yours doesn't
look like that. I don't know what's
up in mind today. I wonder if it's,
uh, Is it the scale? No, even with the scale change. It's not really I have it really big so you can see
everything clearly, but maybe that's something to
do with the new nomdUdate. Anyway, so now that
we have the floor, we can figure out what, you know, how we want
to pose the leg. So I think I want I like the way everything
is looking now. I think I might tilt her hips maybe over to one
side, eventually. I don't know if I want to
do it now, but let's see. Okay. Sure if it's easier to just do it
now or do it later. I guess we can do it now. I guess we can live dangerously. I just want to give her a
little a little bit of a twist. So this leg, I want to
take this thigh part, and it seems like she has it angled a little
bit like this, maybe out a little bit. Then the foot, we can
rotate and maybe put down. And it looks like we need to let's rotate the whole
leg up a little bit, and then this part down. I might have gotten a
little overzealous. I think I like that. Alright, so let's
work on this foot. I really want the
foot to be solid. Okay, so I think that
looks pretty good. Sometimes when I
want the foot or something to look
solid, I'll take move. And if I like where
it's positioned, then I'll just take move
and just literally just move the foot or move the sole. There's no way to really I
shouldn't say there's no way, but, you know, the foot is some of the foot
is off the floor. So that's kind of what
I'm going for here. Okay. I like the
positioning of that leg. I like most of the details. I think everything looks good. I'm double thinking this
cylinder. But you know what? I'm going to validate
it. I'm going to use the flask and
I'll smooth it out. Okay, and then I'm going to
Oh it's taken everything. If that happens, so I just
want to move just the knee. Then you can go to where is it, go to group and go to object. And then you'll be able
to just move the knee. With these legs, obviously, they don't really look like
thighs and it's stylized, but I still want to put a little bit of a little
something something on them. I don't know why that's
showing one there. It's not showing Oh, here it is. It's just hidden. Okay, so let's bring this up to two and we'll just validate it. Maybe we'll try inflate to just inflate some
of this leg up a bit. Keeping it really simple, maybe a little bit
bigger on the front. Something like that. I don't
really want to go overboard. I just want to do
very, very minimal. So I think that
worked a little bit of inflate in the front going up and then a little bit in the back for,
like, the hamstring. But I think that's great. I think that's
really all you need. Try to smooth it, so we're not really seeing those muscles. It's not a really
muscly character, so we don't really want to see a lot of those shadows in there. But I think that looks great. So the next thing for this part, I want to do the same
thing in terms of adding a little more topology or a little more resolution. I think that looks good. So let's just go
ahead and validate. So now that we've validated, we can just use move
and kind of get this a little bit more nestled up
to the rest of the leg. Doesn't really need
much. Okay, so I think that looks pretty good. We have the little knee there, I can just rotate a little bit maybe bring it in a little bit. Maybe even smooth it
down some. Okay, nice. So now that we have that,
but this looks so good. It makes me want to just I think the smart thing to do, honestly, since we did all that
work for this is just take those old ones
that we had and delete them. That way, we don't
have to do that again. We can just take
this and clone it because all the work
is pretty much done. Sometimes I like to go back
and re adjust the points, but we already validated, but it's okay because we
can still alter the shapes. So I think that's fine. So now, for this leg, I got to think
about what we want to validate and if we want to vax will remsh the
whole leg together or not. So I'm thinking we
just do the shoe everything but the soul. So I think we do all of these. Well, the knee, let's go ahead and raise the
resolution of the knee. Let's just do here, multi res, subdivide, subdivide. So now let's take all
of these except for the soul and Vox will
remish them together. Maybe we'll do like 200. Let's just see how it looks.
I think it looks okay. So now we'll just
smooth smooth it out, and I think that looks
great. Smooth out the foot. Yeah, I think that
looks wonderful. So now that we've
done that, see if you hit solo, you're
only seeing one. So, honestly, we could probably just Actually, you know what? Let's Let's take the soul out and the foot
out of the mirror. Take both of these. Actually,
let's take one at a time. Symmetry. So we want
to stay on world, but we want to flip it with X. Soul world flip it X. Interesting that it's
not touching the floor. Annoying. That's okay. Let's go to Auto. Let's go to a line. And let's just bring this Oops. We'll bring these
down to the floor. Let's go pivot, auto pivot for now and just move this down to the floor
where it should be. Okay, so I think that should
be there. That's good. So the other leg So now
let's hide the previous leg. So we'll hide the previous leg and what happens if I bring this out of the
mirror? Oh, no, same thing. So now we can concentrate on the other leg. So
we can rotate it. This leg is down and maybe
turned a little bit inward. I wonder if this leg should be like back a little bit
more than the other leg. Oh, is that not nestled? Sole should be
nestled to the foot. There we go. Oh, I forgot
I forgot I did that. I forgot I had already
bent the heel. Whoopsi all right. Okay, so I kind of
like this position. It feels different
than the other one. Let's go ahead and
do the same thing. We'll take everything
except the sole. Vox Oh, no, I got to do
the knee thing again. So for the knee, let's just
voxel remesh it like 150. It's kind of overkill,
but oh, wait, did I accidentally
I accidentally vox remeshed a bunch of
stuff. Just the knee. Okay, that's better. Now we'll take all of
these and Vaux remesh. Come on. I cannot believe it's
not registering that I'm hitting voxel. Let's do 200. I think we did 200
on the other one. So now we so I'm going to
smooth lightly on the knee, mainly on the top
because I really want that shape on the
bottom. I love that. Let's move this foot a bit. Okay, so now we can just go ahead and take
this and actually, no. Let's pull them out. Perfect. We can get rid of this. I'm still going to nestle them, although this is
the whole leg now. This is now leg B. This is leg A. This is this hole. Perfect. We don't need this mirror anymore because
we have both of our legs. Now we can just look
at the their position. I mean, they're not bad. She's
a little wide legged here. So obviously, there's, you know, we can sort of play around
with this if we want. Or, again, we can rotate. Does that rotate
everything? Oh, it does. What if it's like that? It's so fun to experiment. Let me do a line
and move this up. And then with this leg, I'm going to do solo, hit pivot. To about there. I'm just gonna line it a
little bit better. So what if I rotate
this down now? I think that's kind of cute. This might be a little
I might have to go back to object and just move
the skirt a little bit. And now that I'm
looking at this pose, I feel as though I'm trying to think of
which leg would be Oh, this might be a little bit
turned a little bit too much. Is that a little too crazy? Let me rotate it a little bit. So the knees not so Oh, no. Well, let me get
it off of object. Bring it in a little bit more. This is not bad, but the thighs
thighs are a little low, I think on both,
especially on this one. The knees should
be level at least. Which means that I might
have to adjust this, which can be a little tricky, but I'm going to put my
move tool up really high. So that hopefully things
move nice and smoothly. We'll take this and we'll
just try to move it down. I want to make sure this is the heel is actually
supporting her heel. Se that's gonna be
very uncomfortable. I feel like I want
it to be flat. So it's gonna be a
little difficult, so I'm gonna delete it.
13. Leg Stretches: What you want to
do now for the leg that's going to be flat
against the floor, just take your move tool and drag the clay all the
way to the floor. This was before I
deleted the sole, but we're going to delete
it again in a minute. So this looks really bad,
so I'm going to delete it. I'm going to take the leg and I'm going to move it all
the way down to the floor, just like how I want it. So I want it like this. Now what I'll do is
just make a new one. I'm going to take this leg,
I'm going to clone it. This is going to be so. First thing I'm going to
do is trim the bottom. You know what? Let's hide. Let's hide leg A. So now
that the bottom is flat, let's take select mask. So we just want to
make a rectangle. I'm gonna do it
over the whole leg. And right about there,
I think is good. We'll just take the
mask and move that down. It's just to solo. I'll flatten it. Okay,
so like mask and clear, trim can trim all of this. Voxel remesh, maybe
around 150 or so. It's overkill, but you can
always use quad remeasure or decimate later to
kind of lower that. Okay, we'll uncheck solo. We'll bring the leg back to SLA. And you know what I
should have done? I probably should have, um, Let me think for a second. I'm going to do select
mask over the whole leg. So right about
there. And actually, let's see if I can
just bring this up. Well, there's sole A. Okay. This two pivot auto pivot. So now we're just
working with the sole. We can make it a
little bit bigger. Okay, I think that looks great. Let's go back to the
leg and clear all. Might have to boxel remash it again and just smooth
it, unfortunately. I'd rather not do
that, but it's fine. So this, I'm going to
take the flask and smooth it so it matches the other one. And I think that's better that that's flat on the
ground like that. So let's save. Tricky, tricky
tricky, but it looks good. All the details look
good. Her poor legs. Okay, so if we do
want to connect the body and the
legs, we can do that. Let's take the skirt
and just hide it. Sorry, girl, we got
you exposed here. But let's take select mask. And we can just select
mask the tap the leg. We'll just select mask the
top of it and then invert. And then we can take
the gizmo and we can kind of move it
up a little bit. So, I mean, it's not perfect, but, you know, it'll do. So this side, let's
actually clear this. We can do the same
thing on this side. We'll just select the top. I'm trying to select not too low because we like the way it
looks with the skirt on. All we really are doing
now is just kind of helping them connect to the
whatever anatomy she has. But why not, you know? Why not? So let's go to mask. We'll clear that. It looks good. And honestly, you
could probably, you could box remesh all the
body and stuff together. I don't know if I'm
gonna do that yet, but let's bring
this skirt back and just check make sure
everything looks good from, like, a turntables perspective. Yeah, I think it
looks fine. And if you want to do you can
add another quad sphere, bring it down, you can
kind of make hips. So you can kind of give
her a little bit of a middle area if that suits you. So something like this, I'll
go ahead and validate it, and then I'll go ahead
and work this up a bit. So then we have the backside, which I'm going to turn symmetry off because they're
not symmetrical. But, you know, if you want
to give her some anatomy, give her a little backside. A little bit of a
front. So, you know, so if the camera ever
does glimpse up there, you can just paint those black. And at least she has
something on, you know. So I think that looks fine. So I'm gonna take smooth and just kind of smooth
this a little bit. Even though we shouldn't
really see those. So bring the skirt back. Okay. Great. We'll do a quick save. All right. Let's
jump into the hands.
14. Hands & Fingers: Okay, so let's jump
into the hands. So what I like to do is
just do the hands separate. I don't place it and then
build the hand from there. So let us Wait, what is all this
stuff? Oh, is this? Oh, this is the older leg. Let's just get rid of this
since we don't need it. I'm gonna hide everything. That way, nothing is in our way. So let's add a box. I'm gonna go ahead and move
it all the way up to the top. And I'm gonna rename it palm. Okay, so we'll just make
it kind of palm sized. What is that? How is there
a soul that's not hidden? Okay. I'll make it a
little bit thinner. Sometimes I tend to make
the hands a little beefy. I don't think it'll really
work for this character. Okay, so let's stretch
it a little bit, and I think it looks fine. I'm going to validate
it. And let's just voxel remesh
it at like 150. And then take our flask
and just smooth it. Okay, so now we have something
like this. Looks great. So for the thumb, I usually do I probably just use the tube tool for
all of the fingers. So I'll use the path. I pretty much just
do it like this. One thing I always
do with fingers is I add another little node there to get that
curve in the thumb. I'll probably add
some more nodes, but something like that. We can take snap off since that messed us up a little
bit, but that's okay. Let's just see if we can use the Gizmo and rotate it
out a bit. There we go. Going into the settings, I'm going to add
another node here. Starting to look a
little bit better. We'll make the whole
thing a bit bigger, and then we can
work on our radis So I want to make
this part wider. And I want to lift this
a little bit away from the kind of chicken leg
shape of the thumb. There we go. So it should
look something like that. I'm going to rotate
it a little bit. I'm going to rotate
it out from the hand. Okay, so hopefully
that makes sense. The tube tool is a little tricky to kind of
get right sometimes, but, you know, it is
what it is, I guess. So now I'm going to make
this round. So hide this. I'm going to uncheck
constant density, and I think we can do post
subdivision up to two for now. And then I'm going to bring the division X down,
division Y down. I usually just do this
until it's round. Let's raise the post
subdivision up again. So I'm just trying to find
the right numbers, you know. Okay, so I think I like Okay, so post subdivision is four. Division X is six,
division is eight. Obviously, you know,
these might change. But you can kind of
see where I'm going. Even now, it looks way more
like a thumb than it did. So that's what we're that's what we're looking for. So I'm going to bring this. Obviously, this
goes into the palm. And even on the palm right here, we can just add some clay. Oops, let's turn symmetry off and just add some clay here. I'll just smooth it 'cause that's where the
thumb is coming from. I'm just going to trim
this little piece here. Oop, wrong piece. Oh, I'll leave it.
I'll trim it later. It'll be fine. Okay, so I think this looks pretty
good for the thumb. I'm pretty happy with it. So let's keep moving. So the rest of the fingers
should be a little bit easier. Not really, but fingers are always kind of
annoying and tricky. You know, even when
drawing, they're they're really tricky to manage. But we'll try our best. So it looks like I added it. Yeah, it looks like I
have it connected here. Let's label this thumb. Let's take this tube and delete it and just add another tube. I don't really want it to
be connected to anything. So what I'm going
to do is just add a shape I'm going to put
the shape right here. It doesn't really matter, and now I'm going
to do the line. The reason why I put the random
shape there is so I could add the line and
it won't go into another group or
anything like that. Now I added it, see it's
just underneath the sphere, I can go ahead and
delete the sphere. So we'll just name this
whatever finger A. You can turn snap off. So normally, let's see
if you're holding up your the P sign,
it's usually angled. Well, maybe it could
be angled back. I don't know if I want it
angled back or angled forward. I think angled
forward a little bit. Okay, so let's add
there's usually, three segments in a finger. So I usually do
something like that? You know, I love
to do that little that curve at the
end of the finger. So we'll see how it works. Let's take our gizmo and see if we can stretch it this way. Definitely more finger ish. Then let's see if we can
do the same type of thing. We'll uncheck constant density. We'll go into the settings, and let's see if we can skip the formalities and bring
this to four to begin with. Oh, no, it won't let
me. Interesting. Let's bring the division X
down and division Y down. Keep an eye on it. Let's see if I can
now. I can now. Let's bring these
down nice and low. I can't remember what
the other numbers were. The other numbers
were six and eight. So let's try six and eight. Okay, so we'll go back
into the finger settings, and let's make it thicker. And then we'll work
our radiis to see if we can squeeze it, so I'm squeezing the top
one a little bit closer. I'm skipping the one
that's giving us the curve and making that
one a little bit closer. And the rest of the finger
I feel like can be a little bit smaller or more
narrow, I should say. I feel like my favorite
three D animated things, that's what the fingers
kind of look like. I would like it to be a
little thicker this way. So I'll just use the gizmo. I think that works.
I think I like it. Of course, you can feel free to sort of maneuver
these around. If you want, you can try adding more of an
angle if you want, just by tapping the node. But I like it. I love fingers like that. Okay. The thickness
is pretty good. You know, it's a
feminine finger, so it shouldn't be too beefy. Let's see if I can bring
this a little bit closer. Okay, so let's do a
quick save just in case. I'd hate to do all that again. Let's clone this and let's
just name this B gizmo. We'll move it. Really,
I'd like to have the I'd like to have
the pivot at the base. So let's do pivot. I think right about there. I took it off of
a line because I feel like when it's on a line, it doesn't actually, I want the pivot to just be
what I'm setting it. I'm actually going to do
it. I'm going to point this arrow the way that
the fingers pointing. Okay. It's not necessarily
pointing straight up, so I don't want to line
because then that's not respecting just the
fingers orientation. So what am I trying to do? Oh, solo. Okay. All right. So as we can see, the palm is really not quite what we need right
now. Let's try flatten. Let's even do symmetry and let's just
flatten the edges of this to make this
a bit more round. And even Oops, so, I
guess that's fine. I guess we can flatten
that, as well. I'm gonna go ahead
and smooth our palm. And the palm might be
a little bit too long. What do we think? Is
the palm too long? Mmm. Let's go. So in symmetry, you can
go down and do show line. So maybe let's do local as well. So let's do local. If we do X and Z,
then we can easily just use move and kind of
bring this down a little bit. I think that looks good. I want to use my
flask and just smooth everything just to keep
it, nice and clean. Here we go. I like that. Okay, so now we just
have to, you know, I have to change the pivot for the original finger as well. So let's just solo it. We'll turn it to its side. Sometimes I don't do these,
like, little things, but it just makes it so much
easier just to get it done. You know, just
changing the pivots will make life so much easier, because then you can, you know, you can adjust it without
all the farting around. Okay, so this one, I think
we want to go like that. This finger is usually smaller than the
middle finger, right? Let me see. Yeah, the
middle finger is longer. And also, I think the finger
we look at the fingers. So if I'm doing the P sign, this one is, like,
straight in line. I need better
lighting. I'm sorry. Straight in line
with the finger. What that means I'm going to
bring this over a little bit more bring this over
a little bit more. Something like that. And how much space
is in between? Oh, so it really should
be a V. See the V? If you do the P
sign, it's like a V. So we want to make sure and's funny because
there's so many things that I just don't really
think too much about. I never really you kind
of draw and you sketch, but you're doing three D. Everything is just so Um, you just have to think
about every little thing. I guess you don't have
to, but I have to. Alright, let's clone.
And what comes after BC. Okay, so since we have all the we have everything worked
out on these fingers. Let's just bring this forward. I got to get some Broll of me moving these
fingers around. Okay, so I also want to look. Okay, so when I'm
looking at my fist, this is very rounded here, and it rounds off
right to the pinky. And these are kind of
pointed towards the thumb. So this wouldn't be right because it's pointed
straight down. So that's good to know. So we want to rotate
it towards the thumb, maybe even rotate it down more, rotate it a little bit this way. Okay, so that's pretty good. Then obviously, we
have to go into the settings and do
the annoying process. I wish I wish I could
set a hierarchy from this node and maybe
just bend everything, but that's unfortunately
not the way it works. I got to do it a long way. I really would prefer them not touching because I
think I'm going to voxel remesh the hands together or the fingers and
everything together. But I think I can work it out with this thumb now that
I'm thinking about it. Okay, so I think
that's pretty good. I just want to make sure that it's actually
pointing where it should be pointing. Okay. Okay. I think that's good. Let's clone this and we'll
move it over like that. I think I'm going
to keep that same. I think I'm going to keep
that angle because I think that feels probably
a little bit more natural. I'll rotate it a little
bit more this way. And this finger can be much smaller since this is the pinky. Let's make the whole
thing smaller. How are we looking? It's
not bad. Not too bad. So if we go to the palm and we go to move and
turn off symmetry, we can probably start bending
this a little bit forward. Oh, actually, let me go
back and turn off the blue. Oh, actually, we
turn symmetry off, so it doesn't make a
difference, but it's good that I turn that off
now because I'll forget. Alaa. I'll just forget that
I have that other symmetry, but it doesn't matter because I forgot that I turn symmetry off, so none of those
things are processing. Let me use drag because I just want it to
be nice and round. And only thing that
I don't like about move is sometimes it can cause these depressions
that are annoying. Let's do something
with the hand. Let's take the back of the hand. I'm going to turn
symmetry back on and I just want to pull
the back of the hand out. Yeah. Oops. Okay. I'm
going to push the top. Back in. Okay. I'm
going to take this. Because the hand is it's like, you know, the whole
thing is curved. So that's all I'm trying to that's what I'm
trying to do here. Yep, let me turn symmetry off. I try to bury those fingers again, but I think that works. So I can adjust
these. Maybe I'll even just move them
forward a bit. Okay, how's that looking? That doesn't look too
bad. Oh, you know what? It looks like these fingers these fingers are actually down. They're not really up, so
I'll just bring them down. Sometimes I find myself, I'll get a little frightened and I'm assuming that lots of other artists
feel that way. You kind of get to a
point where you're like, Oh, it looks okay. I don't want to do something
that could mess it up because it looks
like just okay now. So I physically have
to not think that way because that's
very limiting. You know, I would much rather I can acknowledge that
I think that way, but I don't I don't
usually do that. Like, usually, I'll continue
on with what I'm doing, whether I think I'll
mess it up or not. And granted, that
is the beauty of, uh, being able to redo, you know, undo and redo
and all that jazz. I feel like the thumb
is a little big, I kind of want to rotate it. I need to change the
pivot for the thumb. So I'm going to put it kind
of where the knuckle is. And you'll see why because I
want to angle it a certain way and it's just increasingly difficult with the
pivot where it is now. So I want to line it
up with this knuckle. It's a bit hard to make
sure that it's good. Oh, that's pretty good. Okay. So part of me wants to just angle
it out a little bit. No, I guess I should have
done it from the base. I'll start down here. I don't really want the
base moving too much, but I'll keep the
same kind of angle. Yeah, I think that
looks pretty good. Okay. So let's take this. So obviously, these
are going to be connected and they just kind
of flow into one another. So I'm just using drag
and just dragging this. Make sure you don't have
symmetry on, by the way. I.
15. More Hands: And just a fun fact. Anytime I clear my throat, I always stop the recording. So I don't have any clearing
throats in the final video. So if you hear one, it's definitely a mistake, and
it's one that I missed. Aside from, I might leave
this in just for fun, because, uh, it's an interesting part
about the recording. Setup, anything
that I mess up on, I always stop the recording so I don't have
to find it later. Okay, so I think
this is pretty good. So the only tricky thing is, there's a lot of these
spots that are touching, and that's very tricky. That's a very,
very tricky thing. And also, you know, I want
this to be more round. So symmetry is still off. Okay, that looks good. I think these two
fingers need to go up towards the front of the. And I think I'm going to use
flatten to sort of flatten this and just have a flatter palm. Okay. Looks pretty good.
Flatten this part. Hand looks so beefy right there. I don't really want any part
of the palm to be too beefy. That's one of those problems
that I've had in the past, so let's clone this because we have all of
our separate fingers. So let's clone it. This hopefully we'll make it very easy to do
the opposite hand. So we'll take all
of these clone. Oh, why does it do
that? Let me undo. Let me see if I put
all these together. And then clone.
That's much better. All right, so now we have this. So I want to kind of
explain my thinking. So one issue that
I have with nomad, I don't know if it's a nomad thing or just
a three D thing. I want to make these
parts touching, but I don't want
them fused together, like when you x remesh, and then they become connected. So you try to smooth, and then it just looks
like one piece. I don't want that. I
like the separation. So sometimes what I
have to do is vox or remesh everything separately so it's not touching
and then use mask and manually move
things in position. That way I'm not box remiss
and things together while they're touching.
So work with me. That's what we're going
to do with these. This first thumb,
let's just go ahead and validate and finish
off how it looks first. So it doesn't need much work, but obviously, thumbs
don't look like that. So I want to flatten the bottom. We can just hit solo. I want
to flatten the bottom of it. That should be
honestly all it needs. Okay, so flatten the
bottom looks good. Let's just go ahead
and smooth it. And that should look
much more like a thumb. Okay, I think that looks great. So now the thumb is good. And see it's touching
that a little bit. I wish it wasn't see if I can just actually smooth it and
make it a little smaller. I didn't really work. Okay, so I'm going to use I want to use gizmo and just
make it a little bit off it's really only this
part that is the issue. I think I'm actually
going to flatten it more and just make the
thumb smaller rather than rather than doing actually
what I'm talking about. Hopefully they won't box
or re mash together. Hopefully, they're far
enough away, and we'll see. But if so that's good. We can move the
thumb a little bit later. I would say that's good. The only thing that I
know we're going to have issues with is these
two fingers now. I'm just trying to think
of the easier thing to do. I think the easier thing
to do is take this finger, the gizmo and actually, let's see, maybe we
can rotate it out. If I can rotate it out, and then later, maybe
we can just rotate it back. I don't know. But let's try it. So
nothing else is touching. So we're actually doing
a really good job so far. Well, it's a little bit. I'm gonna move it
away a little bit and just rotate it away because
I don't want those, sometimes it reaches
venom. I don't want that. So let's just go for it. So this finger, I think we
said it should be smaller. So we want to make sure
that fingers smaller. I like the positioning. Um, I think that
everything looks good. So once you're happy
with all of that, then just vox will
remsh it together. So let's do a quick save. You always want to
save before you do big voxel remeshes. All right. So we vox will remsh this. I'm gonna do like 250. Boom. Now it's all one piece. Let's go ahead and actually, before we smooth,
let's see what we got. Let's not waste any time.
So let's go to mask. Let's go to select
mask. Let's see. Let's go to regular mask because we're not going to be
able to select mask it. Let's try to get the finger It's tricky because with mask, you don't want to hit any of the other parts or fingers or something like
that. So it's a little tricky. Can't even lie. But I guess you're
seeing that it's tricky. But you're also seeing
that it can be done. Well, actually, you
haven't seen that yet because I haven't
figured it out yet. All we have is It's probably
an easier way to do it. I probably should have
used select mask, but I feel like I've, I've committed thus far. How do we get? How do
we get that finger? How do we get all of it? No. Okay, so I think
what I'm learning is the easier thing to
do would have been to, I think, flip it up. Because if I flip it up, then I'll be able to
easily select it. So I think that's
a lesson learned from me. Does that make sense? Because right now
still since I've only rotated it and
I didn't flip it up, it's hard for me to select
underneath the finger. And if I flipped it up, I would be able to access it. I think that's a good
lesson learned for me. So now I might have to
undo this and redo it, but if so, I'm just going
to bring you with me. So you'll see, you
know, the issues. So it'll just make sense. I mean, 'cause,
believe it or not, as I'm doing a lot
of these, like, sculpts, you know,
a lot of times, a lot of times I'm
trying out new things, things that I've
never done before, trying out things different ways to see what's more efficient. Alright, let me make sure I
didn't touch any other parts. If I do the gizmo
and go like this up, see. See, C, C. So there is something
else selected here. Oh, you know what it is? There's parts that
aren't painted. That's what it is. I see
you now, you're stupid. Good. Okay, that's good. Okay, so now let's just invert this with mask, we'll invert. We'll take our gizmo and we want to put it at the
base of the finger. So we'll pivot Pretty much like that, what happened. Okay, so now we did all
that work just so we could rotate it
back how we had it. So really close to
that other finger. I'm just making it
a little smaller. Probably don't really need
to do that, but that's okay. So yeah, I think that's
great. So I'm gonna unmask. I'm going to take this thumb. Remember the thumb we
were dealing with. Okay, so I think
that looks great. And here's a great chance to just do any other little changes that you might want to make. You know, maybe the fingers sticking out too far or
something like that. Maybe you want to give the thumb a little
bit more of a bend. I can do all of that. I think I use let me see if I use drag, sometimes Oh, no, no,
it's the same. Okay. All right. I got
you. So now that we've done all that,
we can smooth. I'm actually going
to take some off this. This is way too beefy. So I'm going to use flatten
and I'm going to flatten this a little bit more. Okay. And then I'm
just going to smooth. Now, when we smooth, everything
should just look natural. The parts that are touching
should just touch. All this area, all
this thumb should just become one
nice fluid piece. Great. These parts of the fingers should just melt
together and look natural. And then people will see
your sculpting and be like, Oh, how did you get
those fingers to touch? Like, how did you voxel
remash that while they touch? And you'll know how. Yes.
I'm going to move this down. I still don't like you
see what I'm saying? I always make the
hands so plump. And I don't really know how
to get out of that habit. So you're looking at
it from the front, I don't really like,
Oh, you know what? Let's just use Let's use clay and sub get rid of some
of this clay here. Et's smooth that, and let's
just see how it looks. Okay, I think that looks better. I think it looks better. I mean, I think it should
work for her hand. This is a little beefy here. So let's see if I can
just, like, use move. Kind of tame that a little bit. It's just sticking out a
little too far for me. Alright? I like that better. Try to smooth this
out. Okay. So I'd say I'm pretty happy with that. Finger Are these
fingers too big? Are they too big? Oh, I
didn't even You know what? I didn't even do, the
whole flatten thing. Completely forgot about that. I just want to flatten
those fingers out at the end so they don't look like tubes. Nice. Okay. So let's just unsolo
Oh, no, nothing solo. I forgot we hit everything. Should we do the other hand now? Or should we just position this one? Let's
position this one. All right. So let's
just position this Madam, she just had really huge hands. Let me look. I know
that's correct, I think. Trying to make sure if she's facing if I have the fingers
right. No, they're right. I didn't really think
about that too much. Okay, that's pretty good. I think I like it. Okay, I like that. I think that works. So now
the easy thing we can do, let's just go ahead and
validate this cuff. And then we can
just use Move to, you know, we just move
it where we need it. Or plump it out
where we need it. I use a little bit drag
like I always say, drag is a little more accurate with the smaller pulling
details and stuff. Nice. Let's save. Okay, so and piece. I need to do, like a
demo for the hand. But this will be
just for video, so
16. Mace: Okay, so we finished one hand. I think it's best
if we do the mace. I think we're just going
to keep it simple for now. I'm not going to go
and look up maces. Okay, so I like
something like this, like wooden, a few little
truses down there. Yeah, I think that's pretty
easy. That's pretty simple. Okay, so let's just go ahead and hide everything
like we did before. I just find it easier. That's my one thing that
I wish Nomad had was a little tick box where you
could just hide everything. I think that'd be so useful. So let's add a cylinder to start and we'll just make this kind of handle
shaped or length. Okay. I think something
like that looks fine. There were some truses on it, so we might as well just go
ahead and make that as well. Let's just start calling this
what it is, Mace handle. And then we'll just add some Tauruses Okay, let's make it a little thicker. Something like that. We'll
clone it and move it down and make a bigger one. So, you know, obviously,
this kind of thing, can you can adjust it so it's, you know, however
you want it to be. Okay, that's good. Let's clonee it again
and put one up here. Maybe maybe we'll make
it a little thinner. To kind of switch it up a little bit. We'll do
something like that. Alright, so now
we'll add the end, so we'll just use a spear. Do we need another
one here? Let me clone and let's stretch one. I guess that doesn't really make it's not really
that helpful. Maybe if it's bigger and it's more on the
mace side of it. That's why I wind up
spending hours on projects. Sometimes I just get caught up in details that
don't really matter. But that's the journey. That's the journey. Okay,
now I'm trying to think if there's an easy way to
do what I'm going to do. I don't think that there is. I think I just
have to place them manually, which is annoying. But I think that's the
only way to do it. We'll add a cone I'll shrink it. Make it a little bit longer. I'm going to uncheck constant
density and just see if I can get it a little
bit more round. Since there's so many of
them, I want to bring the resolution down
as much as possible. I'm going to bring
it up to two just so it's nice and rounded. Don't actually want them sharp. I could get it to, like,
I think that works. Now, can I make this wider? Yeah. Perfect. I thought I had it below I
thought I had it below 1,000. Really want it below 1,000.
Okay, so that's good. And maybe a tad bit
smaller, tad bit longer. See how that looks. Yeah,
I think that works well. So I'm going to clone this. We're just gonna call
this mace spike. We'll do a quick save since so we don't have to
do all this again. And let's do X ray. Let's take pivot and let's move the pivot
down to the base. Let's make sure it's
in the middle. Okay. And I don't know if
there's an actual I'm sure there's a correct
way to do this, like a correct way that
they're organized, but, I mean, that's a lot. It's a lot. And it doesn't matter enough
to me to do all of that. Unless you make
maces for a living, no one is going to
be wondering like, Oh, why is this
mace not correct? Hmm. So yeah, we'll just clone. And this is, uh, you
know, this is easy. I'm probably not gonna talk too much while I'm doing this. But I'll just show you
the whole bole process. Let's take a look and make
sure that it looks right. Yeah, I think it looks good. Part of me wants to, like, just place them all and then
rotate them one by one. But then the other half
of me is like, no, like, do each individual on so you don't have
to come back to it. I'm always battling with
something in my own head. But I guess that's the
artist's condition. The only thing that I'm
really trying to make sure of is that it's just on the edge because otherwise they'll start getting a little bit too short. Let's see how it's looking.
It's looking good. And there's probably
some people that model different things that probably can do
this way faster than me. Like, there's
probably some sort of method, someone who just, like, sculpts maces all
day and be like, Oh, well, you could
have just done this. That's kind of the cool
thing about no Mat is you could really just figure those
things out, you know, sometimes there's been things that I've had to just figure out ways to do it because I may have watched a tutorial or watched someone
else do it and it just doesn't it doesn't click with the way with something that
makes sense for myself. You know, that's kind
of how I sometimes I need to figure out how
to do something myself. And sometimes it'll be a
way that no one else does, or no one else likes to do. But that's just how
the brain works. I mean, that's really why I
got into making tutorials, 'cause you know, some people teach different,
explain different. How are we looking? Okay. I feel like we're
making some good progress. Let's try the other way
that I was thinking. I just like place them
where I want them to go and then just
come back to them. I think now my fear is
that I'll forget one. I don't like these
little bald spots. I don't want any to look a
little too close together. Okay. Nice. So we'll do a quick save so I don't have
to do that again. And I don't think there's anything else
that I really want to too with this thing. May Spikes. So I'm just gonna
join these together. May Spikes Quadspee Okay. Validate that Taurus, Taurus, why is this one so These ones don't need to be that
detailed at all. So I'm just lowering
the resolution. You know what? Let's
just join them together. Mace Bar deeds. I sure but handle
Deeds, but that's okay. Mas ball Maze handle. Okay. So now the Maze handle. Is that just the cylinder?
Why is that so high? I'm just going to lower this to 25 just because it doesn't really
need to be that high. Now we have the maze
handle and of course, we want to invalidate it, change the pivot
to the base of it. Pivot. Okay, so now we can
first, let's save. Let's bring up the other hand. I guess we should take the
mace and just flip it. Let's do Snap 90 and
just flip it down. And then we'll take the hand. Let me see. Is everything
from the palm? Yeah. So we'll take the palm. Let's just set the pivot
to the bottom of the palm. Center ish. Well, we can turn snap off, and then we can just we'll just have to do the hand in the opposite way, and
then we'll just flip it. So this part is quite confusing. But essentially,
as long as we make the hand holding the
mace in a realistic way, we can always mirror it later. So we'll jump to that
in the next video. H.
17. Mace Hand: Okay, so let's just
work through this. So if this was being held, it would be in the hand. Pretty much like this. So that's pretty much how
it would be being held. We should be able
to at the end just mirror it and then flip
it to the other side. So I'm just going to
turn it it so it makes a little bit more sense
to me. All right. So I think that's pretty good. The only difference is obviously the thumb has to be
a bit different. So all these need
to be out more. But I think that's
pretty good, honestly. Let's see if you're
holding something, usually the thumb is
covering those fingers. We might have to these
actually look pretty good. I'm going to move them
down a little bit. I wonder if we should just clone these open so we don't have
to close these two fingers. If I delete these two, it might be easier to just
clone these two fingers. Does that make sense? Okay, so the hand
would be a little bit more I just want to make
sure that the grip. That's pretty close. I'm
looking at my own hand now. We're holding something,
the grip is pretty close. I just want to
make sure it's not the positioning of this
that's kind of messing me up. You know what else?
The hand would be a little more wrapped around. I'm just going to
do that editing. I'm going to pull the hand. I don't have symmetry on, but I just want to
pull the hand so that it's a bit more
wrapped around. Yeah there you go. So this area is a bit
more closed around it. That makes much more sense. Then I can take this finger, where's my gizmo and then
move it down and it doesn't feel like it's so far away from the handle
because it shouldn't be. This one I'm going to
move down as well. See, that feels way
more like a grip to me. We still are missing
another finger, let's make sure
that we clone this. This one move that down. This one, we need to make
sure that this is still going into the coming
out of the hand. It's a little tricky,
as you can see, but that's the nature of hands. They're just really tricky. S. Okay. Oops, so that looks pretty good. So the thumb, I'm
going to rotate in. I'm going to rotate it this
way and then back out. I want to keep the maybe it's
better to do it this way. I want to keep this in,
but I want the thumb to be kind of out like that. Okay. So the only tricky thing, again, the only problem
we're going to have is the same problem that we had before where I'm just going to use flatten and
flatten out some of this palm. So it's not so big. This piece, I'm just going to
drag back into that thumb. Okay, so the hard part is we still have to or
we still want to, I still want to have
these fingers close. So again, it's with
the remeshing. The remeshing is, you know, that's always going
to be an issue. So I like the fingers
how they are. I think I'm just
gonna x remsh them. That way, I don't
continue to edit them. Otherwise, I'll be
editing forever. I'll literally just be
working on them forever. So let's flatten out the thumb. Just start doing sometimes you just have to
start doing things systematically and
not thinking so much, which I love to do. And I think that's
one of the fun things about these advanced courses because even though still I explain a lot and I explain
everything I'm doing, hopefully, it just makes
sense on a different level because I'm more trying to show what I'm
after rather than, oh, like, this is
how you do this. Because you know, if you're doing a character
holding something, then eventually you're
gonna be like, Okay, well, how how do I make a hand holding something
that looks good? You know? And I like doing that, but it's, you know,
it's very difficult. It is quite difficult. Okay, so, um, So this
is gonna be tough, but I really like the
way that the hand looks. I kind of want to bring back the other hand and
check the size. Oh, the size looks decent. But I think it
looks close enough that I'm not gonna worry
too much about it. Oh, I think this finger
is just in very deep. All these fingers
are in so deep. Okay, I'm going to use move,
and I'm going to Oops. On the palm, I got to get rid of I got to get rid of,
like, all of this stuff. It looks really bad. I'm never on the right thing. Well, you know what?
Let's bring this out. We'll bring that out. We'll
flatten this back here. And smooth it. We'll flatten all this just to get that nice
and smooth again. We'll flatten this area. We're going to lose
a little bit of size, and that's okay. That's actually good
because the palm is way too way too big for her hand. I should say the size of
her palm is just too big. It doesn't look natural. I think it's just like
a lifetime of drawing, male, comic book characters
when I was little maybe. They always think like
the character has to have big hands, I guess. I don't know. So now I need to just remember
where everything is. And then I just need to
adjust things a little bit so that they're
not touching. Oh, the thumb, the thumb,
the thumb, the thumb. Maybe if I just rotate it out. I mean, I will say
that this is a difficult this is a difficult
part of this process. So you want to get them far enough so that
they're not touching. Oh, wait, is that touching here? Oh, it is. I'm going
to rotate this. I'm going to have to
rotate this up a bit more, I think, or away so that
I can rotate this away. And remember I was saying that I should probably rotate them up, which I kind of want to do, but that's still not
gonna make it easier, because there's just
so much more movement that I have to do to
get it back in place. That's the only thing
that I'm struggling with. So what is up with this finger? This finger looks wild. This pinky looks I don't know what happened
to this pinky. Anyway, so let's just go for it. So I'm going to take everything
except for the palm. Of course, actually
the palm as well. And like I said, you
always want to do a save before you do a
big Box remesh like this. So we'll just fox remesh, and let's do like
25260 or so, 270. The reason why I'm going so high is because I really want to hold on to the
details. So let mask. If I think about
it strategically, I probably should
bring this finger up, this finger down, and
then this finger down. I think that's the better
way. So let's try that. So I'm going to select,
of course, I'm on unmask. I'm gonna select the pinky. As much as I can, we hit solo. Probably should have just did
it that way to begin with. Let's unmask this bit. Then let's unmask the
whole rest of the palm. Yeah, select mask is a
lot easier, clearly. We'll invert and we'll move the pivot to the
base of the finger. Like, so. Now I should be able
to just rotate this. See, there's a little
bit of pulling. So I want to move the
pivot a little bit over this way. Just what pulls less. I don't mind that as much
because the reason I don't mind that is because the
skin is gonna fold a bit anyway, just
like naturally. So so that's fine. Okay, so I think that's good. Let's go back to wait, do I need to do anything
else with that? Take it off solo. Maybe just, like, rotate it a little bit. Okay, I think that looks good. Okay, so we'll take
mask, we'll clear. Now we need to go
after select mask. Solo. We need to go
after this finger. Let's see if there's
an easy way to get it. Not really. So let's try just selecting the whole finger so that the
whole finger is selected, and maybe it's easier
to unselect around it. Of course, I'm going to unmask. Let's see how many
times I can do that. Alright, so we got
the whole finger. So now let's just see if we can see the base
of the finger, then we can begin to, we can begin to
unmask everything. So I think that's an
easier way to do it. Okay, I'll just use regular mask to get the rest
of this, I think. Okay. I think that's fine. Probably doesn't need
to be that high up. Okay, I think we got most of it. Let me erase this a little bit. Okay, so now we'll invert,
we're going to go to Gizmo. And again, we need to move the pivot point so that we
can easily move this finger. I like the green arrow to be pointing the direction
of the finger. Or direction of, you
know, straight out. The direction of the
finger's origin. Does that make sense? It's kind of weird when
you have to, like, think about everything
you're saying so completely and, like,
comprehensively. It's a very interesting
and humbling thing. Pivot. Alright, so we'll move
this finger down. Let's go ahead and unsolo
so we can just see, and let's move it
down this way, too. We'll get it nice and tight. Do we need any rotation? Yeah, we'll make it nice
and tight, like that. Now we can go to the
mask. We can clear. Let me do a save just in case. Now we can do the same thing. Let's hit solo, select mask. Let's try to get this
other finger here. Okay, I think with this angle, see, I remember this time. I can select a lot of it. And with this angle, I can completely get the
finger. That sounded weird. Alright, so we'll do mask. Let just get the rest of this. Do I need that? Do I want that? I don't know. We'll
leave it off for now. Okay, so we'll invert it. Gizmo, pivot,
pivots to the back. We want to do a little
bit high so that it's not stretching
too much at the top. I feel like I should just
show you what I mean. If it's at the bottom and I
pivot and then I go to turn, you get this. That's
what I don't want. So that's why I'm moving the
pivot up towards the top. And hopefully it
should be towards the back because if
the pivot is there, then you have less pulling. You know, I can
move it if I need, but you don't get
that annoying pull, which really really
makes things look bad. Okay, so let's figure out
where this finger needs to go. Move it up a little bit.
That's actually really good. I think that's good. I
don't think I mind too much that it's like I
think I do need to. Let me do mask and invert. The only thing that I
feel as though I want to do is bend this a
little bit more there. So we'll take select mask, unmask, and we'll just
unmask a section of it here. So this section of finger. So then when we use the Oops, when we use the gizmo, oh, no, wait a minute,
wait a minute. I don't think that worked. Wait, let me figure
it out again. I just want to bend the finger. So if I invert, I think I need to
invert and then I need to select the rest
of the finger. Oops. There you
go. That's better. So go back to solo and just
make sure, there we go. Okay, so that's better because
now I can hit the Gizmo. I can set my pivot. I always set the green going towards out from
the origin I want. Straighten it out. Again, I don't want any
stretching on the top, so I'm going to put
it towards the top. That looks good. So now
I set my pivot there, and then I can rotate this down. Maybe pull it out a little bit. So it really looks like the
finger is gripping, grasping. And I'm going to move this down a little bit so we don't have that too much stretch there. But I think that's great.
So next, the thumb. Let's do, let's just do select mask and
select everything, and let's just unmask the thumb. Okay. So we have the thumb. So we'll go Gizmo, pivot, and I got to figure out
what I want to do actually. It's going to be
down by the base. Okay, so I think I want to
do something like that. We'll set the pivot,
and then all I want to do here is rotate this maybe even move it
slightly if I have to. Whoop. Rotate that so it's resting in the fingers.
That's perfect. I might be able to take
a little bit off of it. Maybe a little bit down. But I think that feels natural. You know, I want it
touching these fingers. I want it pretty
tight. Let's see if we can go to mask
and invert and just move this finger a little bit. Et me invert again. Oops. I'm just move this thumb. I think we can actually
I think we can smooth the thumb and that'll
make it a little bit more a little softer. I think that'll work. All right. I like it. I think
that looks great. So I'm going to
take mask, clear. And now all we have
to do is smooth this hand out and hope
that it looks good. So let's give it a quick save.
18. Hand Placement & Details: Alright, so let's see
what it looks like when we smooth this hand. Everything's connected. Everything's looking good.
Let me get rid of this. Yeah. That's a lot of work, but I don't know any
other way to do it. I don't know any
other way to do it. The only thing I
want to do is I also want to add some skin here, but it's tricky because sometimes
the if we just do clay, it can be tricky because
that kind of thing, it's hard to maybe I should
have done it beforehand. Or maybe maybe crease
is a little bit better. You know, just to show some skin show some skin. You
know what I mean? There's a little bit
of oddness here. But honestly, I think
I might be able to get this smoothed out or
there's a lot of oddness. So that's just one of the issues from that process,
unfortunately. So I'm just going to try
to smooth the heck out of it and hope that it comes back. Yeah, smooth is
great. That worked. It kind of pulled it out from the kind of you know,
I made that cavity. And of course, you
can't remsh after this, so there's no remeshing. The only thing that would
be heartbreaking is if for some reason it didn't
match up to this, that'd be the only
heartbreaking thing. But I don't see why it wouldn't I didn't really flatten
these fingers out. You know what? I'm not
too worried about them. Sometimes I just like to add
that little plane there. See if we can see if we can get some Some of these areas would be they would
get a little bit flat, you know, where
the finger bends. It's just tricky because let
me use selec mask and just protect the thumb protect
this other finger. See that? Clear it. I'll just smooth it a
little bit so that we still have that nice break
there, which I love. It'd be nice if I could just get some nice lines here with pinch. It's a small detail, but it's like I just kind of I just kind of makes the fingers a little
bit more believable, in my opinion, at least. But, yeah, I think that
looks pretty good. I'm going to select this finger to try and protect
it a little bit. And then I'm just
gonna take move and move that pinky up a bit. I want to smooth, but I don't
want it to open up really. Because if it starts to open up, then it can look a bit weird. So I might actually
just protect this. And then with move, just make sure that that's
nice and closed up. Close it up tight. That
way you don't give it a chance to kind of
look weird and open up. So I might have to
just go easy on the smoothing until I'm happy with it. Okay. Nice. Probably should have
bent this finger down, but that's right. This finger probably
could have gone down a little bit, but that's okay. All right. So let's just bring back everything
and just work this out. Oops, I didn't mean
to select all that. Just meant to unhide them. Okay. Let's just
do a quick save, and then we can figure out how to get this
on the right spot. Okay, so let's grab
handpiece palm. So this is the hand handmce. Okay, we'll bring it up here, and the mace we will
connect to that. So then we can take the hand, the gizmo Oh, is it? Oh, nice. I think the gizmo is actually,
let's just solo this. Well, the gizmos close, but we'll move it to
where it needs to be. I think something like this
would be a good spot for the Gizmo. We'll unsolo. Now we can move the
hand with the mace. Now, of course, it's not
going to work for this hand. But what I want to do is, I might have to take everything
separately and flip it. Let's do World. Let's change all of these to world
if they're not. World world. World World. Okay. So I'm going to flip
everything to the other side. Okay. Okay. Oh, I think
it's going to work. I was so worried. Sometimes it's like you think you know
what you're doing, but then you realize
that you don't. Okay, so this hand will
make it a little smaller. Let's rotate it down a little
bit. You can move it back. I think something like this. Right? Let's see how
the hands match up. Can make it a little smaller. Oh, actually, I shouldn't
have done that. Undo. Make it a little
smaller, check the size. Make it a little smaller, check the size. Okay. That seems like it's
about the size. Okay, so let's match this up to the Taurus
as much as we can. Well, that looks great.
That looks great. I don't know why
I'm obsessed with doing that Scottish accent. I think it's a layover
from when I used to watch Outlander, I think. All right, so this
yeah, this looks good. Let's go ahead and
validate this Taurus, and then we'll just adjust
this a little bit to the hand so that it makes sense. Symmetry off unhelpful. Sometimes symmetry is just
the most unhelpful thing, and sometimes it isn't. Okay. Good. Wait, what's
going on with this hand? Why does it look so I don't like those I don't like
all the shadows here. I want it to be smooth. Unfortunately, I can't really
I might be able to do quad remeasure and have it
not been together. Let's Let's save and see. I think you can do
quad remeasure, and let's see if I do half, I don't think it's
gonna mesh together. Did it mesh together? Let's
see. I don't think so. Yeah, I don't think it.
I don't think it like remeshesPut the parts together, but I'm still able to I'm still able to lower the
resolution of the hand. So that's very useful, especially when it comes
to, like, smoothing. See, now I can smooth
it a lot better. And get rid of
those shadows that were making the hand
look weird to me. I'm just going to be careful
that I'm not overdoing it. But I think that makes a lot
more sense for the hand. A lot smoother and
a lot cleaner. Alright. So yeah, I think
we're doing pretty well. Just got to see if there's
any details that I'm missing. What is that? Oh, that's the hair. So that's fine. Hair going into hair. I don't even know if I'm
gonna put the hair together. But the hair is pretty high. It doesn't really
need to be, so I might do quadri measure and just do half and just see how
much detail it still holds. Okay, not too bad. So now I'm just
looking at all of these little options and just seeing if there's
anything that I want to adjust or change. Like, for example,
the neck is 20 K, which is kind of crazy. And it doesn't really
match the head. The head is kind of I think the head should flow
a little bit better into it. Well, I feel like this is not smoothing. Oh, yeah,
it's smoothing. You know, I feel like it
should be more like that, but then obviously
this is the issue. It looks crazy. Crazy, Danged. Okay, so do I want to
vax remash the head? Again, I don't really, really don't let's say. But since we're here, let's see if we were to do the head, the neck, the neck and the head. Let's see if we vox
remesh at 3:50. Let's see how much
detail we lose. Okay. So we do lose some details in the
lips, unfortunately. Now, is that worth it that
the head is connected? I think I like the
head connected. I really wish I didn't lose
those details in the lips, but I think I like that
the head's connected. Hm. And it's really only the lips that are
giving me problems. Everything else has
been pretty cool. I just feel like the lips are
very important focal point. So they really should be as
clear as possible, you know? And like, unfortunately,
right now, they look a little
too messy for me. Let's see. So if I go
back, see that difference? I might be able to rework them, but is it worth it? Let's try Let's try
res and invert. Okay, that looks pretty good. Maybe I'll try that
up here as well. And then hopefully Chris without inverse will help me
get these lines back. They're not as smooth as I want, but it's actually
not too terrible. And again, this little dimple here should be the deepest part. So sometimes I'll even just use drag to bring that
little dimple. Because the lip is
coming over that, you know, that's just like
the anatomy of the lip. So making that deep
will make it feel, you know, way more natural. Okay. And the only other
detail that I want to do, I'm just going to pause. I'll just record it afterwards. I think I want to add
for these lower lashes, I think I want ones
that are thicker. I think. So I'm just going to do them and
then see what I think. Let me turn snap off. Okay. And let me do should
I do pivot now or later? Let me bring this into that
selection or that crevice. Like so we'll make it a
little smaller. The profile. Kind of like that, but now it looks a little too thick, huh? Okay. Okay, so
let's go ahead and. Let's see if we can take
a little bit of size off, a little bit of resolution off. I think I like them
a little a little bigger. I think that works. When pardon me wants to see, maybe I can take drag.
This is just for fun. Maybe I can take Oh, no. Is
this already in a mirror? It's already in a mirror,
so I don't need symmetry. Oh, I love it. It's such a small random
detail, but I like it. Not clean at all, either. But I'm okay with it.
So let's just validate. It's the importance of just
having fun. You can't Oh, no. What happened? Me. Let's bring this up here. We'll delete that. Name this lashes. Okay. She does have a
little skull there. I think I wanted
to give her, like, a little purse or something. But I think I'll
settle for just, like, a little skull piece. So let's do a quick save. Then we'll do a
little skull piece.
19. Little Skull Piece: So I don't think it needs to be, like exactly like a skull. I like it should be
like kind of cute. Like a little bit, like, different enough
to be interesting, but also is like some
sort of creature. Like it doesn't have to
be like a human skull. You know, like, what
kind of skull is this? I kind of like that. Okay, I
think that's simple enough. Alright, so let's do it. I think 2.9 is coming out soon. I hope it'll have
a button so I can just get rid of
everything if I need to. Please, cylinder. We'll do, let's see,
let's go to the Gizmo. Snap 90, so I'll just
snap it towards us. We'll make it a
little bigger just so it's easier to read. We'll make it flat like that. We want to give it
some Let's do 26, we'll put the post
subdivision to two, just to give it some you know, I'm going to make this
a little bit wider. Then I'm going to
take you know what? Before I do that?
Let me not be dumb. Let me take this
and bring it up. This is going to be skull, head. Let's clonee it, hide that. Okay, so now we can stretch
this one, validate it, trim. Let's just trim, like I said, probably around there,
I think is good. We'll box remsh. I always box remsh after
I trim to clean that up. Okay, that's good. Now we'll take this skull head. Let's go ahead and
clone it and hide one. And these are going to
be the skull teeth. Okay, so we'll move them down. I want to shrink them, but
I don't want to actually lose the thickness. That's okay. Um, Did that work?
Oh, it did work. So it makes it smaller, but
you don't lose the thickness. So I feel as though
they're about that big. We can mirror. So this can be a
little bit bigger. Okay, we'll put them here, maybe a little bit bigger. I probably should make
them bigger using this. Okay, so I think
that's pretty good. So what we want to
do is take symmetry. Oh, you know what I can't do
them. I'm going to validate. So we need symmetry local. Let's do show line. Okay, so we can see that line
there, which we don't want. So we don't want X, Y is
good. Why is what we want. Shrink it thinner and
then make the changes. Otherwise, then it gets
messed up in the middle because the mirror is not
quite hitting the middle. Make this a bit bigger. Okay, something like that, I did way too much. That's okay. It's an easy fix. Okay. I think that looks pretty good. Now, this, I need to
do the same thing. So let me make this smaller. We want left and
right, for sure. We also want Let's make sure it's local and let's
make sure it's show line. We also want front and back. So the only difference was, I don't really know how I would make that round like that. I guess I can make
the whole thing more round with smooth. Just vax will remesh it. Once it starts losing itself. Make it bigger. Okay,
that's a little bit better. Let's move this down. There we go. This
looking decent. Okay. So let's take let's take these and
thicken them back up. Let's take this and
thicken it back up. Oh, so this part goes down quite
far. That's right. So we'll just take move
and move this part down. I feel like I want to
stretch this a little bit. And these, I feel like
I want to stretch, too. Okay, I kind of like
it. It's kind of cool. So let's take this other
skull that we made or this other cylinder
and we'll shrink. We'll just do mirror and we'll do some eyes. So
we'll put those there. We'll put those there, and
then we'll clone and hide. I always clone and hide. Let's take these and validate. Let's take this part and
validate that, as well. So we have the skull head,
we have that mirror, and we have these things. So I'm going to select
those, hide those. And then I want to do oh o's see if I can just vax
remish them together. Like 200. I mean, same
thing as a boolean, but you know, box will use
this to make it smooth. Oh, look at that. I think the eyes might be a
little too close together. Oh, they're not
too bad. And then we did I save the skull
again or the spheres? I did. Good, good, good.
Let me clone this. I'm just going to
validate the cylinder, not the mirror,
but the cylinder. So now we have another one. I should have just
kept it in the middle, but I'm going to tap this
and then tap move origin, so it goes back to the middle. It's either move
origin or reset. So I think both of them
actually move to the center. Okay, so we want to do the nose, we want to do a
heart type thing. What we'll do is
we'll mirror it, move it out a little
bit, validate. It doesn't matter, really. We'll make sure symmetry is on. We'll do local. We
want front and back, and we don't want
left and right. We just want the front part and the back part, so
we're using the green. So doing that we
can just pull this. Let's turn symmetry off. Pull that together. I
guess you didn't gamble on or you didn't expect to
learn how to make a heart. But anyway. Okay, so I think
something like that is good. I'm gonna take this, validate vax do I need to voxel
remix this together? Probably not, but I'm
gonna do it anyway. And then I'll use my flask and just give it a quick smooth. Woops. Let's do pivot auto pivot and
then just stretch it out. Now that you have a
stretched out, you can add the boolean. So it would be this
with this, hide that. If you have trouble
hiding that, just go to Advance to make sure you uncheck these Because
sometimes if they're checked, then it'll give you a hard time. Boolean, boolean. Nice. I don't know if we
actually need these anymore. I like it. Yeah, let's Foxel
remesh it at like 250. Let's use our flask
and just smooth it a little bit since
we added that nose. So we'll just smooth
that a little bit. And I'm going to
take quad remeasure, turn off symmetry and just maybe bring it down to ten K.
It's a really small detail, so it doesn't really
need to be huge. Even that I think is
too big for this. But the details are gone. If I was really going for it, I would do the whole bake thing, but that's another video. Okay, so skull emblem. Bring everything back. It'd be cool if you made a bunch
of other emblems, as well. Pivot auto pivot. That way we can just move
this thing as we need to. Let me get rid of these. Take it off snap. Okay. So let's go
ahead and tilt this Okay, so that looks pretty good. I probably should
have cloned this, but yeah, let me just clone it and
hide it so I have a backup. This one I'll actually
do move origin. So then it should be
up here somewhere. Where is that one?
We just do a line. Is it up here?
Reset. There you go. So I'll hide that
one as a backup. I might use it for
something else later. So now back to this one. So it's on the skirt, and it actually looks good. But if you really want
to go the extra level, which, of course, I'm always looking for
something extra to do. What am I looking for? Oh, yeah, symmetry. Let's do local. And then let's take Move
tool, make it really big, and then push the back to give it more of a curve was taken off of a line that
matches the skirt. Okay. And you know what?
Maybe we'll push it in a little bit deeper. Oh, yeah, it looks
like the skirts not showing through,
so that's perfect. That clearing the
throat didn't count. Yeah, there we go. I think
it's a cute little detail. Alright. Okay, let's save.
20. Lighting & Extra Details: Alright, great job so
far. If you made it here. This has been a long ride. But so far, I'm really happy
with how she's looking. So let's make sure that
we take this skull emblem and we nestle it to the skirt. Okay, there we go. So, again, that way, if we want to
move the skirt, we can. Let's go ahead and tap
the little sun icon and switch from McCAp to it PBR. If you have an older iPad
Pro or if it's struggling, then you don't have to
turn on post process, but I like to turn
post process on at this point and put
the resolution up. I have an iPad Pro two, so it just depends
on your system. I'll use the DFD, and
that's basically just this. For now, I'll change this to a warmer color for the shadows. I always think
that looks better. Okay. And also in
the little Sun, let's just turn the
environment off. So what we're going to
do now is add lights. So in this little Sun icon,
just add a light here. And oh, you know
what I forgot to do. I usually do this before. But let's select everything. We can keep the light for now. We don't have to select it. We just want to change
the color of the model. We'll tap this little cube
here and then we'll paint. I like to use
something like this. Do I want to use a lighter
one or the darker one? I'll use the lighter one. So paint all. That gives you
a more accurate you know, kind of balanced color. Actually, maybe I
should use gray. I don't think I've ever used, I got to select
everything again. Can't win. To try not to mention
how much I want. I'll select all again. Maybe we'll do a warm gray. I don't usually
do it that color. I'm just going to
get rid of this box. Don't really need
that box anymore. Okay, so let's go
back to our light. We can name this one key and go to the little
options and tap camera. That's when we do the turn table so the light stays in place. If it's fixed, then
when the thing turns, the camera the light
is going to turn. I don't like that. Intensity
we'll do around 2.5 usually. And that looks pretty good. Maybe a hair brighter. But I think that
looks pretty good. That's the first light. We'll
copy that or clone that, and this one will be the edge. Just like I always
do, let's hit a line and let's move the
edge one over here and then rotate it so we can find
that nice beautiful edge. Yeah, that's looking
great. Let's set this to about five and
make it a little brighter. Let's go ahead to the key, and let's just move
that respectively, where the light will
be coming from. So we'll just move
it there. So edge. Actually, let's take,
yeah, let's clone Edge. We'll name this R two,
like I always do. We'll move it over
here. This can probably be 0.2 0.5 again. And then we'll just rotate
it so that we're getting a little bit more light on her. So it's not quite an edge, although it could be an edge. Now that I'm thinking
about it, usually I put a little more light. That's nice. So it's going a little bit up from the
bottom. That feels nice. Maybe we'll throw some
cool blue on there. Okay. And then for
the last light, let's add one. Let's
call it D two. And let's switch
this to spotlight. So let's move it up over So maybe somewhere up
here. There we go. Let's take it off of a line. Spotlight is better if
you're not using a line. We'll make it a little bigger, we'll raise the
intensity a little bit. That looks kind of cool. Yeah, I like that. Looks good. So now is the time where you could probably
fart around with this and just make sure that
it looks a little nicer. Okay, I'm going to go ahead and go to the little sun and turn the
environment back on, and I'm just going
to reset this. So the default is 2.6. Of course, this is my
eyelre environment. So you can just
import that here with the environments if you haven't and if you
want to use it. Of course, that's included in the downloads or the resources. Do I want to go a
little bit brighter? I've been trying to
get my sculpts much brighter because normally
they're always very dark. So I've been really
working on getting them to be brighter. Okay. So now that I have that,
I'm just going to check my lights and make
sure everything is, how bright I want it to be. Do everything looks pretty good. Kind of like a little
bit brighter on the key. I think that looks great.
Also, now that I've finished sculpting her is when I'll play around
with perspective. You know, maybe
something like this. Because you can see the
perspective in the drawing, her feet aren't flat. It's kind of more like this. Like, it's more See,
as I go like that, you're starting to see
more of the top of the foot like that. So Orthographic. I don't know if that's
zero or whatever, but this is a good time where you can kind of
play around with that. Okay, I really
love this framing, so I'm going to go to
this little camera, add view, and just name it one. Okay, we'll save. All right. I'm going
to turn the reference off and record a
quick turn table. So I'll just do a
screenshot and then record this turn table because I
think that looks pretty cool. Okay, let's go back to our
position and then just save. Okay, so we pretty
much finished her up. I'm going to do a few fixes and a few things
that I should have done. But really, it's
all just detail, so feel free to hang out and check out some of the things
that I'm going to do. But I'm not gonna
try to follow any more of a plan because everything now
is pretty much done. You know how to color, so you can color it
whatever you want to. But there's still some
things that I want to fix. So I'm going to start
fixing those now. And then I'll throw some
paint on her just so you can, you know, maybe get some ideas. Okay, so heel looks good. That looks better. Done. That looks okay. All these arms. Okay. So arm. Okay, so these need to be
let me just do a quick save. I can't remember if I saved it. Vox remash these like 200. And then smooth, let me
turn off post process. Whenever I'm working, there's no reason to have post process on when you're actually
working on it. It doesn't make any
sense. Okay, so now this is officially one. I actually really
like those lines. They look like they
look like creases. Speaking of creases, let's see if I can get
another crease here. I think I need to
change crease so that it's broader
where the top is. Let me see if I can do that
with any sort of quickness. Fall off. So right now
we're using Pow five. So what if we use, like, Oh, this is also P five. In out. Let's try
to remember this. I'm using Let's try in out. Oh, I didn't really work. It's the same. It's
not useful at all. Why are they all the same?
Anyway, maybe we'll try clay. Maybe we'll try clay
and crease together. Just to get a nice
little crease, you know? Like, I like that. I dig it. Of course, let's do clay around the Let's flatten
this a little bit. That's flattening, I was like, wonder why is that
flattening so huge? It's just so low, this.
Okay, we'll smooth this. And maybe we can try some clay. Es just to give the fabric a little, you know, just like
a little something, so it looks a little
bit more realistic, you know, 'cause this doesn't
really look too realistic. But once you add some, like, see, that straight line is
just, like, too straight. Doesn't really look realistic. But it's easy 'cause
you can just add some things like this. You can add some the old crease and clay that I like to do, just to give it some movement. I still don't know if I should
re mesh these together. I kind of don't want to, but I might eventually. I guess that still looks fine. I'm just trying to match up to both sides because it
doesn't look silly. The only time it
looks silly is if it doesn't match on both sides. If it looks too different, then it can look a bit silly. Smooth this out a little bit. Okay. See, with that, it looks a little
bit more together. So I don't really
mind that at all. Let's take some clay.
How big is this? 40 K. Let's take some
clay and just add some Why is the clay acting
all weird like that? That's so odd. It could
be because I do solo. Yeah, I think it's because it's pulling on the inside.
That's why that happens. So I think you can
fix it by just going to filter front
facing vertex only. I think you can then add and it won't do anything to
the opposite side. Okay. Okay, so that's
in where is it? The little where? Where is it? So that's in this option and filter front facing vertices. We'll do some crease action. And then we'll just do
some light smoothing. Just to give it some
movement. Even on these arms, again, it's like you
can put some here. I don't like that.
I don't like that. I can see through this. But I'm not sure the
best way to fight that. Where does this
go? Let's do Xray. Mm. That's not really gonna help me 'cause this is supposed
to be the jacket. It's supposed to be the coat. So I'm not actually
sure how I want to. I could try to do clay. And then just try
to build it up. Then hope it doesn't go through to the front. Let me just check. I think that could work. Let's check the other
side. The other side is good because the
sleeve is closer. I should have do this sleeve
closer on the other one. Let's do some more on here. Let's just do clay underneath. As though obviously
the collar is sitting. Should I voxel remash this? Is acting It's not
really acting like it's high resolution,
but that's okay. Let me stop freaking out. I know there are
some people they're going to want pleats. I would probably
just use clay and sub Never on the right, let me turn symmetry off. So clay and sub, maybe a little smaller. Smaller? So that would be like an easy way to do it. Even if they're really light. Okay, so yeah, I just made some really light strokes
down around and out. I'm gonna keep them. I think
it looks kind of cool. So I like it. This part is ticking out a
little bit too much. So I'll just move this in. It's really just the top. Check the other spots. It looks pretty good. I can probably bring the top
in on the back as well. Okay. Let me clear this mask. I just did some editing on
the chin kind of just using move and sort of moving
the face a little bit. Let me clear the mask. I think I have to re
smooth the neck area. But that's fine. Well, and I want
to re smooth any of these spots that I see. Maybe I should solo this. Look for any more spots. Anytime you move things, like if you use a
mask, then sometimes it'll leave that trail. Okay. All right.
I think that oh, we probably should give her
some earrings and such, huh? Maybe we'll do well, we can do an easy kind of
cartilage piercing or, like, upper whatever
it's called. I probably should look at some inspiration. Just make sure that it's
nice and thin so it doesn't look too weird. Okay. And I think they just
rest on your ear, right? I don't really know. I mean, she has really big ears, so I guess the earring would
have to be really big. Okay. Let's take a look. It looked kind of silly
'cause her ears are so big that it looks kind of silly unless the earring
is kind of big, too. I think I want to do some cones. Let's add a cone. And the ears are
in the same spot, so I believe we can just mirror. Let's stretch them. And let's, I'll just keep it like this. Let's just validate,
and then let's just use this to smooth
them out a little bit. And these also are
gonna be really small, so it's kind of silly that
they're such high resolution. Those are cool. They're kind of long now let me make them
a little shorter, I think. Yeah, I love that. I
think that's cool. Let's give her a ring. Alright, let's go ahead and
just validate these and call these earring barbs. Earring hoop. Okay, we can how big
is that earring hoop? We can validate it and drop
it down later if we want. Let's use a let's use a
cylinder for the ring. Do I still have
pulls process on? Of
21. Greyscale & Mouth Take II: Okay. I'm gonna go ahead and adjust the ring to her finger
because why not? I don't think I'm
gonna use whole. I could, but sometimes
that gets a little messy. Okay, so that's pretty good. We'll just go ahead
and validate that. We'll call that ring and ring. She'll probably name
these like face. So eventually, if
I bring them over to bring her over to blender, everything will be in order. So let's do a quick
black and white, kind of, like,
grayscale version. So the dress, we can go
with, like, a dark color. Maybe we'll raise the
roughness up a bit so that it's not so shiny. It wouldn't really be shiny. Okay, so that's as
black as it goes. Must be the environment
must be pretty bright. Let's paint that and then
check the environment. Oh, also, let's turn
on post process again. So maybe this is the same color. Maybe the jacket's a lighter a lighter gray and the sleeves. I don't know. Actually, I should have, I should have let's grab this color and just do
the little choker thing. I should have
established what color her skin is, to be honest. But I guess that can be
that would be up here. So let's do all of her skin. Of course, you can just join those
parts together if you want. I feel like the jacket
should just be black. I honestly feel like it should
just be the same color. Maybe even a little,
like, shinier. Be a little more
leathery for the jacket. And we'll make this
the same color. For now. I can't wait to see what colors you guys do for these things. It's gonna be so fun. We'll make the heels
the same color. Her hair. I feel like her hair has to be pretty
much black, too, right? Oops. What's her eyebrow. I guess her eyebrows are
probably going to be the same color anyway. Make sure I didn't miss any. These can be black and you
want no shine. Bottoms two. Oh, I want those to be black? I think I want them black
with some roughness or I mean with some glossiness. This can be in silver, I think. Just give me the same color. Got to figure out a better
color for the silver. It just looks a little too I feel like it's just hard
to master that silver. Okay. This is kind of like a Rando Well, it's right her eyes. Okay, make them white, but
not super, super white. That can be about there.
This can be maybe similar but more middlness All
these can be the same. Then I'll take this color. This is really supposed
to be a wood color. Maybe I'll make that a little bit darker. That's fun. Um, this is a little
excess, but you know what? I might just try re
meshing the head. Part of me just
wants to start over with the mouth, honestly. I mean, I probably
shouldn't, but honestly, that's what That's what
I kind of want to do. No mouth, then I can
just start over. I mean, it's an option. It's
a real it's a real option. Let's add. A cone. Let's just let's
make another mouth here. Oops. Close subdivision at two. Put the division X down to
get it a little bit more round just so I
can visualize it. I think that looks pretty good. I'm going to validate that. Let's try it with a cylinder. I haven't done lips
like this in a while, so I'm a little rusty. I can't remember a lot of the
little tricks I used to do. I like that. So let's take both of these. I want to see if we can position oops.
Wait, that's weird. Oh, you know what? It's
because it's a cone. I forgot it's this big shape, so that's why it's picking
that as the center. Um, so low. So I wonder if we were
to move it to the side. Oh, that's weird.
Did not expect that. So it's just an
optical illusion, making it look like it's
being real strange and odd. Kind of like it, but maybe
a little less tilted. Just a little less
off center overall. And then maybe make the
mouth do the heavy lifting. Let's say we were going
to go with this this lip. You know what? I'm going
to say this as test. So let's have you x
remesh this at like 200. Okay. Let's give it a
nice little smooth. Take the head. Let's
find this first. Let's bring all this up
to where the head is. This one, too, we'll
bring it up here. That and the head. Let's
fox remsh them at 3:50. I'm going to smooth the top. Poor nose is getting hit
with all this smooth I just flatten this a little bit since it's starting to
get a little weird on me. Now, if we want her to
look like she's smiling. Then we want
something like that. It's really important
that obviously this dibot is pretty deep. I'm going to go ahead and
try to flatten all the way. And this part, which
is just a cylinder. Let's see if we can
just turn symmetry off and bury that into the smile. I think I might have to
bury it a bit deeper. I think. Okay, it's not bad, but
we're just the only thing we're losing is
if I do a crease, like we're losing this part
of the mouth or the lip. Maybe we don't need that
much of it, though. Maybe it's better that
it's not so pronounced. Let's try it without
that being pronounced. Maybe maybe she doesn't need it. Maybe she just doesn't need it. Let's try a pinch. Maybe we should do
the nose again, too, while we're here. Because I feel like the nose
has just been subject to so much smoothing that
it's almost non existent. Let's Fox will remsh this lip? So just flattening off the side, and then let's try pinching. I think that looks so much
better, right? Is it just me? I think that looks
so much better. So I know this is
going to be an issue. So I'm going to take this
lip and move it down here. I don't like this, so I'm
going to try to smooth. You know what? Maybe
I'll select mask. A lot of these did that work? Oh, I'm on the wrong
piece. Symmetry. I want to look more smooth
going into the lip, you know. I think that was
really bugging me. Okay, so we'll clear that. Ip still looks good. There's a little divot here that kind of has kind
of been bugging me. See that little shadow there? Don't at that. Might be able to take clay and actually
give this a little humph. That's better, right? I mean,
I think it's way better. The only thing next is the nose.
22. Face & Leg Glow up: The only thing next is the nose. I guess we'll do
the cone for now. Okay, so with the line, I might try to stretch
the nose out, it smaller. Let's give it a
little resolution, although I can't see it. Let's soften it a bit. I'm going to bring
this to two and bring the division X down. I'll be nice if I can see it. I'll bring that
down. Validate it. Let's give it a
nice little bend. That looked fine. Let
me turn symmetry. It's got to be some sort
of nod to the face, the rest of the
mouth, I should say. Even if it's like this
is turned a little bit, and the whole thing is just a little bit
of a turn, maybe. Because it's all
really connected, you know? It's always connected. Give her some little nostrils, maybe not nostriltos.
I think that works. Okay, so if we think it works, then let's take the cone the cylinder, and the head. Let's voxel remash it. What if we go way high. Well, it's kind of interesting. Pinch is looking like
it clears up the seam. So let's see how
far we can take it. I'm trying to be real careful
with my smoothing here. Even though it cost me a lot, you know, the heads
like 1 million now. It's kind of nice that
it still retained a lot of the detail that
was very important to me. Even smoothing this is like, it's not too terrible,
to be honest. And it's way easier to rebuild. For example, now I can
use drag and I can just pull in on
those exact spots. What happened there? I feel like my
screen got darker. Maybe I'm just going crazy. Then here, it's
still pretty deep, but I can probably just drag
that in a little bit more. Smooth all that. Super cute. I like it. Let's add a
new layer, lipstick. And let's see what
we can do here. We'll bring it to black. It's actually real sharp. Her mouth is
actually Uber sharp. Now that I'm looking at it,
I don't really like it. But it could also be because of the dynamic topology, too. I wonder if pinch I
wonder if I can go in and with an Alpha, change the fall off. I wonder if this will work
better now. What if I do that? With a pinch. Oh, no, that's not helpful. Even like a circle
or something around, that's not helpful either. I guess I give up. The crease looks nice, but it's just too sharp. You see it from the side,
it just looks too bad. Smooth is not smoothing
that well, but that's okay. Let's see if now if we go to
paint and dynamic topology, let's see what we can do here. Okay, I'm gonna erase, but I'm gonna take
dynamic topology off because since we already
went covered this area, it should not need it. The erase will be super clean. Okay, so let's take it off
of eras. Are we on paint? Let's just paint the inside now. You know what? I wonder if
I can just use select mask. Okay, that's much better. Now what I want to do is
I want to use crease. I want to enable
stroke painting, put the roughness
all the way up. And now I just want
to make a crease. In the middle that's
going to take care of all that pesky light that's like bouncing
around in there. Making it look silly? Oh, no. It was looking so good, but
then it started pulling. All right. I think that looks good. Now we just need
some regular black. To make sure we got all of this. Because some of it looks like a lighter gray and
I don't know why. Okay. So I mean, I
kind of like that. Maybe I'll just
paint some of this. Okay, let's try something else. God. I really I really go for it
when I'm locked in. Oh, I feel so much better. So going beyond that
ridge helped a lot. Oh, what's it doing though? Yeah. Okay. I think I'm
cool with that. I'm actually gonna take Ooh. So for the base, maybe let me try to just smooth
this a little bit more. I don't like those shadows.
So much shadows there. Yeah. Okay, so what
I was thinking was take leg a clone it, trim maybe like I want her boots all the way down there? Trim the whole thing. That's better, right? I
mean, it's got to be better. It's better than the pain. Let's grab this color again. And honestly, let's just
do the same exact thing. So I want to try to
get this leg straight. We'll use trim clone leg B. It's probably around there, and then just trim
the whole leg. Did the whole leg
trim? Oh, it did. Then I'm going to paint it. And the easiest thing
to do, actually, let's box or re mesh
it before I forget. And the easiest thing to do
be to go to the original leg. And just smooth it. Actually. But I'm going to take move and get
it out of there. A cylinder. What are we doing? Get out of here. Let's make
it the same color as these. Oh, it'd be kind of cool if
there was maybe some spikes. Oh, maybe we'll take
this cylinder, clone it. So I'm just thinking of doing let's see if I can
do group vertex, validate symmetry local, then pull. I can
pull that apart. Perfect. Put this back to
auto, turn symmetry off. Fox will remesh this
maybe 150 or so, smooth it, and then push
on it from the bottom. Let's go back to symmetry. Symmetry looks good. Let's
push it up from the bottom. We kind of get what we
had going on there. Pivot auto pivot. Oops. Oh, I feel like I like that. I just want to make sure
it's in the right spot. Looks pretty good from the
top view. Let's clonee it. I love that. But you
know what it needs? Oh, this is going to be perfect. I think you're gonna like this. I think you're gonna like this. It's exactly what it needs. Most can validate, smooth it. It's kind of cool. It's
like a weird little detail, but I think it's really
cool. I like it. I want to paint. I
want to paint this. I would love to be
able to see a preview. Yeah, maybe I'll leave
it the color. It's fine. Okay, so let me validate that. Where's this cylinder at? That cylinder that cone. Alright, let's just
bring these out. So this cone, I'm just gonna
make this really small. Cylinder, I'll make that
really small, as well. Well, for now, we'll
just connect them. Maybe I can't connect them. Why is it not
letting There we go. Alright, so let's just clone and then move it
to the other side. Great. I think those look great. I think we wanted to give her a little black underwear, right? Keep her decent.
Let me save this. You can always put
cylinders around her legs. It's a little tricky, but now you just have to pull it, manipulate it so
that it comes out. It turns symmetry off. Doctor it a little bit, and you move it in where
it's ticking out too far. Let me just half it because it's really doesn't really need to
be high resolution. Now we'll clone and
then just move it over here and then
fit it to this leg. It should be fairly easy. Pretty good.
23. Final Paint & Details: And these legs, I'm just gonna join them
together, I think. I could probably quad
remesh them and do half Oh, the symmetry. Didn't really lose much. But leg what's this? Like, A, B, let's just
join them together. Legs. Okay, this boot, let's do quadri measure. Okay. So this one let's just
do the same thing, half. Half Okay, so let's just join
them together. Boots. So, bring that down to ten K which
is still too high. We'll keep it there.
This one's bring it down to ten K. Have Souls. I didn't even notice
I spelled that wrong. Okay, let's bump this
down. What is this? 29 K. You crazy? These like tiny details Cylinder one. Where's the other one? These two will just join. Boot Pad bar strap,
strap, makes sense. Bootstrap, boots, soles, still way too
high for the soles. Cylinder, cylinder. These two, let's
just join together. Quad remeasure, let's
just half them. Legs, skirt. What does that quadspere? Okay. Arm down, arm up. I don't want to
lose much detail, but that's just so
big for an arm. Let's see if we can do half. Let's see if we
can do half again. We lost a little detail there, so I'm just going to stick
with that. I'm up, I'm down. Let's just join them together. M cuff. That we can
definitely make smaller. Just join those. I save. Now I want to find I got to find what some of these things are 'cause
I just don't know. Oh, that's those.
That's that piece. Okay. Boot. Spike join those? Oh, no. Let's join those two. Join that. Spike. This is
actually the base, so I'm going to screwing
them at a base. Body top is 114 K
that's ridiculous. Necklace. Just do half. What is that the jacket? Oh, that's the
jacket. Jacket back. So we might lose a little
detail if I do half. Oh, we didn't lose too much. Collar. I think that's
the whole collar, right? Let's do half. No,
that's not too bad. Jacket back, collar. Ring on the hand. Half.
Hearing whoop, half. Hearing Barb, Barbs
is both of them good. Okay, that's the hair. Okay, so this is now arms. Underpants. Okay. Good. That can actually be half.
We're not even seeing. Maze spikes, 20 K. The
hand is pretty definitive. I don't know if I don't know
if I can get that down. But you know what? We'll
try. Let's do a quick save. What if we did hit half? Let's see what
details we'll lose. You would never
know. And peace half oh you never know. Skull emblem. We don't really need this in
this project. 1.85. I like to see how low
I can go sometimes, but honestly, I think I'm just done. I think this is fine. I might be able to get a
little bit more on this, but I might lose my detail. I really like those details. Yeah, I lose those details. So I'm going to rock with it. Yeah, I think she came
out really, really cool. So much fun with this sculpt. Let's make sure that
everything is set, how I like it.
Everything looks good. All the lighting looks good. Like to double check
all the lighting. She does look cool
when it's a little bit dark, not gonna lie. The edge should be maybe
a little bit warm, maybe a little bit rich. Mm, I don't know. Maybe
just keep it white. I don't know. I'm torn. Let's check our other lights. Even want this bright one there? I don't know if it needs it. I kind of like it without
it. I'm being honest. Oh, we lost a little bit when we when I have these
things. That's okay. I'll just bring them
out a little bit more. Get that shape back.
Lower red stuff always looks bad against
other lower rid stuff. Okay. Let's save.
Okay, let's hide this. Let's get her positioned. Save this as two cord. I'm gonna reposition her. No. Alright, thanks so much for
joining me on this journey. This was a long class. I hope that I wasn't too confusing. I hope that I didn't
go too crazy. It's hard because that's how I create R. I have
to experiment. I have to figure out what
not only looks the best, but what fits what I'm trying to do, what
I'm trying to make. So make sure to check
me out on YouTube, youtube.com slash DRG FreDave If you're on TikTok,
I'm on there, too. Instagram, of course,
at DRUG FreDave. Please post this to
the class projects. I can't wait to see what you
make. Also rate and review. I hope to get a lot of
ratings and reviewing. You just let me know
what you thought. Let me know what you
want to see next. You can just say hello. Also, be sure to check out the other artists' work
in the project gallery. I just think it's really fun
to kind of have a community. I hope that more people
will get involved. And sometimes I actually go over the project
reviews on my YouTube, so make sure you subscribe on YouTube because sometimes
I just have fun going through and checking out everyone's art and just talking about it and just kind of
making but I think that's it. I have a ton more three D
classes here with Nomad sculpt. I also have some blender
classes for beginners. Make sure you check out
that blender course. I'm going to bring this girl
into blender because I do all my renders in blender now because it's just
it's like night and day. So, you know, whenever you're
ready for that, it's there. Again, please be sure to rate and review,
even if it's quick. Keep drawing. Keep sculpting. I'll see you all
in the next video.