Transcripts
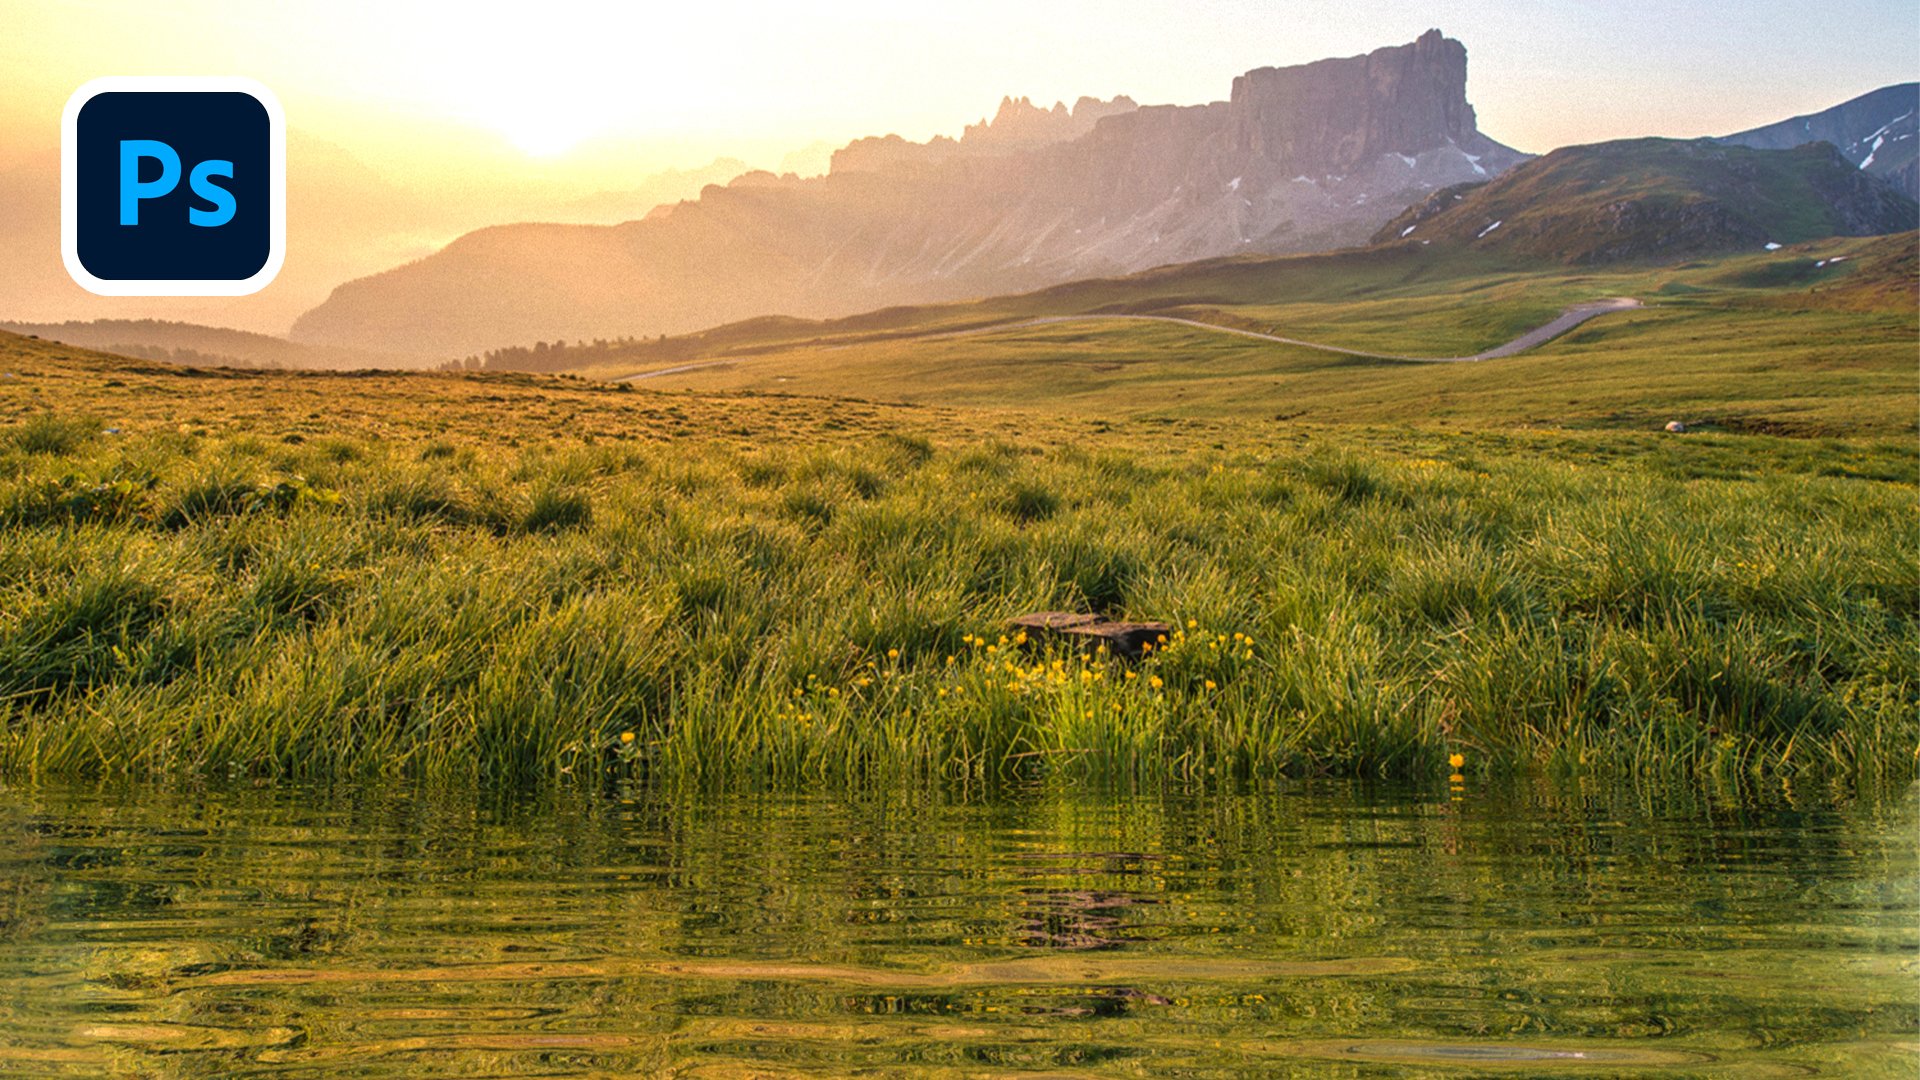
1. Introduction: Sometimes when you're out on a photo shoot conditions may not be ideal and might be overcast or not the time of day that you'd like to shoot in. My personal favorite is blue hour in the evening. Well, what do you do when you have the perfect shot but not the perfect sky to go with it, you have to replace the sky entirely. And today, that is exactly what I'll be showing you to do in today's course, Adobe Photoshop CC 2021, how to replace a sky in any image in Photoshop. My name is Tom Chi and I've been a photographer and graphic designer for almost 12 years now and from the United States and I traveled around shooting photos and designing for various clients and companies specializing in fashion lifestyle and commercial photography. To see my work, please head over to my website at www dot the real-time kind.com or look me up on Instagram at the real Tom Chi. I'm so excited to show you not just one, but three different methods of replacing the sky in Photoshop from a simple one-click, quick sky replacement to a more in-depth example. I will show you how to do it in the best way possible. Not only that, I will show you some tips and tricks that I wish I knew many years ago when I first started. I'm also not going to bore you with the things you don't need to know in the creative business time is money and I value your time. That is why I will be trying to fit in as much as possible into the most concise course possible. After this course, you won't need to learn anything else to replace skies. And this course is for anyone who wants to learn how to have more control over their images and to take it to the next level with proper editing and sky replacement. Because many times a stunning sky can absolutely make or break a photo. I'm super excited to share this course with you and I do truly hope that you decide to enroll. If you do, I'll be seeing you in the next video where we will dive straight into it.
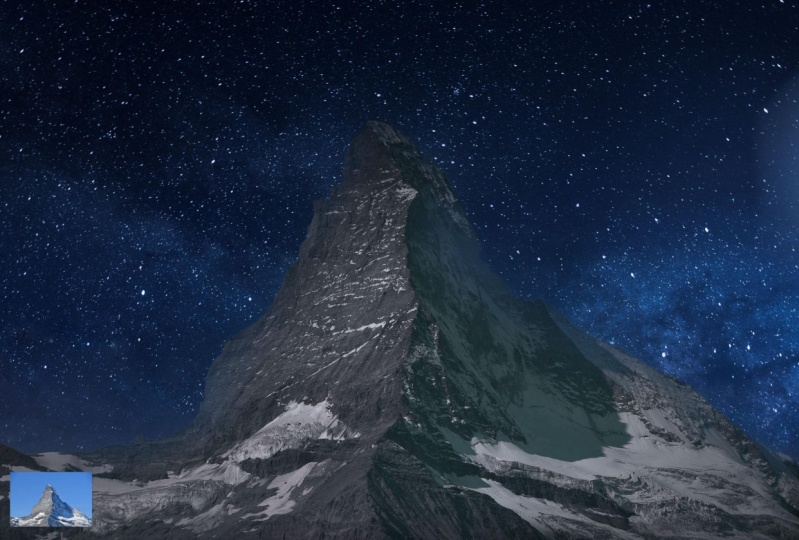
2. Find your Sky: So you've come back from a photo shoot and you found some photos where you really want to change the sky. It's not exactly how you wanted it to look like, but you don't exactly have images of skies just already taken to you. So where are you going to find these? Well, let me show you three of the places that I like to use to get completely free to use really high-quality and amazing images of skies. So let's quickly hop over into my web browser. Sold the first website that I use a lot is pixabay.com. You can get really good high-quality free images to use. And as you see, they have over 1.8 million high-quality images to use. I'm just scrolling through here. You can already see images that you can replace the sky off if you don't already have one to do so. And if you just do a really quick search for, let's just do sky. And there you go. You already have images of different skies, different clouds that you can use. So that's one of the websites that I used. Lets hop over to this tab here. And another website I used as pixels. For me, pixels is slightly higher quality. I really like it for that reason. And again, you have many, many different options for not just sky replacement, but as you see, you can have images like this one here to practice on. But again, you just type in sky, for example, I'm going to type in the night sky. And look, we have all these images of night skies that we can use in our practice images or in our actual images that we want to use. Now, let me show you my favorite website that I get all of my free images from. And that is on splash software I found on splash is probably the best website for me personally. I can get really high-quality images and there's a huge selection, a lot of different categories as well. So you can just scroll through C. They have a lot of different options and lots of different categories up here. But again, if you just search sky, you have all these options that come up different color tones. And one thing that I really like about on splash and other sites have this tomb and you can download and different file sizes. I can download the original file size. Or if for some reason I have to download a smaller file size, I can do that right from here. So make sure that you've gone ahead and downloaded both the images that we'll be using and the sky pack. Both of them are included in the download section for this course. So make sure you download both of those and get ready. Because in the next video we're gonna get right into the first method of replacing the sky and it's gonna be really fun. So let's keep going.
3. Method 1: And here we are in Photoshop. We're ready to get started with our first method to replace the sky and our image. So let's go ahead and load up our images. So make sure you have downloaded the images included in the download section for this course. And let's just go ahead and click Open. And for this first example, I'm going to use this image Greece. So make sure you open that. And there we go. And in the first method, this is the old method in the new version of Photoshop. This is Adobe Photoshop CC 2021. We haven't new AI powered sky replacement tool, but how did we use to do it and how can we still do it? Well, let's go ahead and get our sky image in here as well. Such gold File, Place Embedded. And we're just gonna go and navigate over to our Skype hack. And from the Skype, OK, we're going to pick an image that's going to match this the best as possible. So I'm gonna pick up this sky here by Julie AMI Galt here. So you can feel free to use the same image or experiment with another one. So let's place that in there, and that's going to place that as a smart object. That's why we place it. We want it to be a smart object. And now let's go ahead and unlock our background layer. And let's just make a copy of it just so we have it. Lets Control or Command J to create a copy there really quick, and let's hide the bottom layer. So how did we use to do this? Well, before the new AI powered sky replacement tool, we use to manually mask out the whole sky, everything you see in the back. So let's go ahead and do that. How would we do this? Well, there's many different ways you can actually do this. You can use one over the selection tools. For example, I can use the Quick Selection Tool and try my best to get a good edge around everything. So this was a fairly decent job. And again, if you want to get rid of a selection, you just hold down Alter option on your keyboard. So this was one of the methods that we've used back in the day and still do to get rid of certain parts of the selection. So let's go ahead and get a nicer selection here. There we go. So you could do this, for example, we can just mask the sound and before he mascot outlets do Control or Command Shift I, we want to invert that selection and actually see it unselected this part here. So let's go ahead and add back to the our selection. Very nice. So everything else was good. And now we can hit the mass and the sky is magically disappeared. And this is when we would get our sky image, would place the underneath and then we'd use controller command t to resize that. And I might end up flipping this horizontally. So let's just go to edit, transform, flip horizontal. And this is the point at which we would start to color match the two images. So for example, I might go ahead and throw on a V saturation layer on this, make it a little bit lighter to match our image. And then you'll be a lot of kind of trial and error where you go ahead and paint in different parts of the atmosphere. So let me sample some of the atmospheric color here. Let's get a nice big brush, fairly low-pass study. And then we can start to paint in some of that atmosphere in our background here. And then obviously we would try to color match this a little bit. So on to our actual main image would probably sample part of our sky. And then try to incorporate that into our image in some way, shape, or form. And as you see, it's not that bad of a job. But again, there was always some issues with this. You might not get a perfect edge. If we zoom in, you see it's not the perfect edge and you can't get a better edge if you use the pen tool, for example. So if I were to go ahead and let's say press a key on your keyboard to get the pen tool. I can get a really nice and clean edge along the top of this, this pot here. Now I'm just gonna do a little section of that. And then you can hit Control or Command Enter to turn that into a selection. And on our mask, we want to paint in black, capacity big and our brush smaller. And let's also do Control or Command shipped to invert that. And then we're going to be painting away. Let's be careful what we're painting away. Just a little pixelated edge enough. We'd be select with Control or Command D. That's a much nicer edge, so you can't get a really nice edge. If you use a pencil, pencil takes a lot longer. You can get nicer edges that way. So this is one of the methods in which you can actually go ahead and replace a sky in an image and doesn't take too long. But when, if you're images more complex, what if there's a person with hair and what if there is a tree with all the leaves? You'd have to use some Refine Edge tool to really make sure you get all the details between the hairs between the leaves. So again, this old method was effective in certain situations. And as you see, we can continue to add little more detail to this. For example, if I want to add more atmosphere to the top of this, can just make our brush bigger, get opacity down, and get some of the atmosphere in and around these mountains in the distance. So that is method one on how to replace the sky in the image. As you see, it's not perfect, it's not the best you can definitely take your time with this and do this more painstakingly, more detailed and get a better result. But we'll did you photoshop 2021? There's a far better way to do this. So in the next video, I'm gonna show you method2, which is going to be a very, very simple way to replace a Skype, is going to be a one click edit, where I'm just gonna click one button and it's going to replace this guy. It's going to do even more than I did in all of these layers with just one click. So let's keep going into our next video.
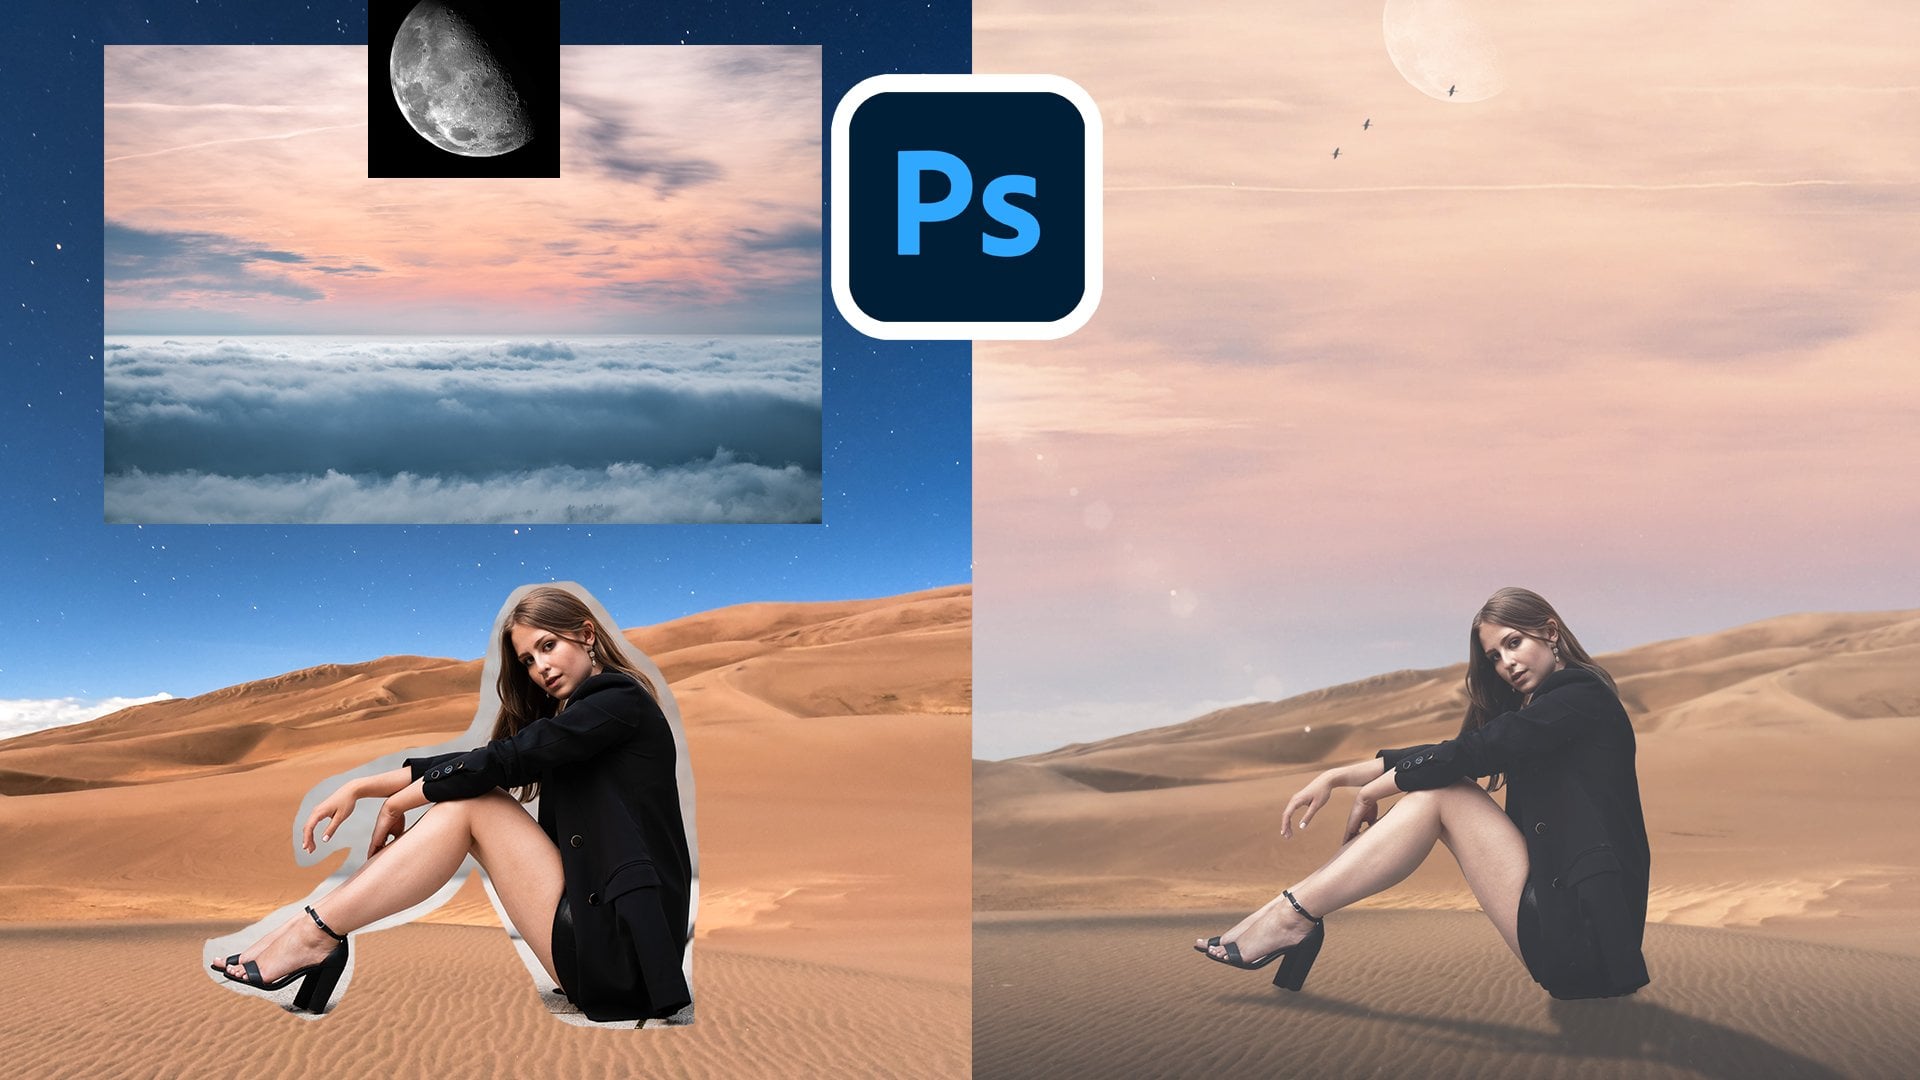
4. Method 2: And here we are. We're ready for method2 on how to replace the sky using Photoshop in any of your images. So last video I mentioned a one-click way to replace the sky in your image with a new Photoshop 2021 version. We now have a tool that we'll use artificial intelligence to replace the sky in your image. So we're gonna start out with this image is titled desert. So make sure you open this one and follow along. But now if you go to Edit sky replacement, it's gonna open up this dialog box. And it's gonna take a second to go ahead and replace the sky in your image. And it's already done the job. You can just click okay at this point and we can go ahead and just close all of these for now. But let's take a look at this dialogue box real quick and see everything that is in here. Okay? So you have two different sky options. You have the blue skies. These are the ones I come default with Adobe. Now one thing you do want to be mindful of is you want to make sure that the sky or placer image width matches the lighting and the situation in the image. For example, I'm not going to put a super overcast image because there's a lot of light coming from the right hand side. And I might not use up one of these blue skies because there's a lot of yellow light. So let's go ahead and let's close up the blue skies. Let's take a look at spectacular. I see some orange and this one and might fit a little bit better. And you can go ahead and play around with these, see what works the best for you. Because there are many options here. Let's take a look at the sunset images. I think one of these might end up working for me. And these work with varying degrees of success. So don't be too surprised if the image doesn't work right off the bat. So let's go ahead and let's go back to one of these other images that I think a fairly decent. Let's just look through these in cases. Another one that suits the image and better. But as you see, Adobe comes with a lot of preset options for you to look at and use. So let's do this one. There's more light coming from the right hand side. And then you just click OK, but make sure you output two new layers. So it's just click OK, and there we go. One-click sky replacement. How crazy is that? You have all of these edits simply put into a folder. Second, turn that off and on. Very nice. And everything that has been changed is in its own layer. We have the foreground color that's been changed ever so slightly. We have the foreground lighting that's been changed around the edge of our image. And then we have the sky and we see the masculine, all of these. So you can go ahead and edit all of these as much as you would like. But when it comes to just a one click Edit, This is a really good job and I'm personally very surprising, impressed that the new version of Photoshop at just how well it's able to do this as you see matches the color very well. Now let's hop over into an image that might be a little bit more difficult. Let's go over to this palm tree image. And I just see the color tone is a lot different in this image. Again, let's try and replace the sky then. So let's go to Edit sky replacement. And again, it's going to take 1 second for the AI to boot up and to create the initial mask. But this one doesn't look good. So let's go and find another Skype. Let's look at the blue skies. And we can go through, scroll through all of these. And as you see, we immediately got rid of the overcast sky that we had before. And it's a lot brighter now it's a lot bluer. But let's try and get a few clouds in there, shall we? This one does a fairly decent job. Let's go with this image. And again, I'm gonna output two new layers. And let's hit okay, on this image. Now if we zoom in, we can see that this actually masks in-between all the little parts of our palm leaves here. And that is really impressive. We can turn this off and on. And you can see just how good of a job does, does lending in the clouds in and amongst the leaves here. And it changes the image entirely. This version is a little bit boring. You know, the sky isn't that interesting. Adding a little bit more of that pop of blue. Adding some clouds in there really brings a little bit of extra touch to your images. And again, you can toggle everything on an off. You have the foreground color, which in this image it doesn't do too much with the foreground lighting, which does more around the palm leaves here of the tree. And we have our sky. And again, you can go ahead and change the mass of all of these. You see it's right there. You can click on the mass going with a brush tool. And for example, let's say I want more of this back-end on the bottom, I think painted away full using a brush with a lower capacity C of mine at 19%, about 20, I can go ahead and paint away part of the sky. So if I want more of the original to come through, let's say in this bottom area, have more of that haze in the background. I can do that on the mascot very easily. And then I can really customize this. What all it really takes is just one click and you can replace the sky. How cool is that? Now in the next video, I'm gonna go over method3, which is going to use this one-click method. But instead of just the one-click, we're gonna look at all those other options that we saw in that dialogue box. So let's keep going because method three is the best method for replacing skies and it's a total game-changer with the new version of Photoshop. So let's get going into our third and final method.
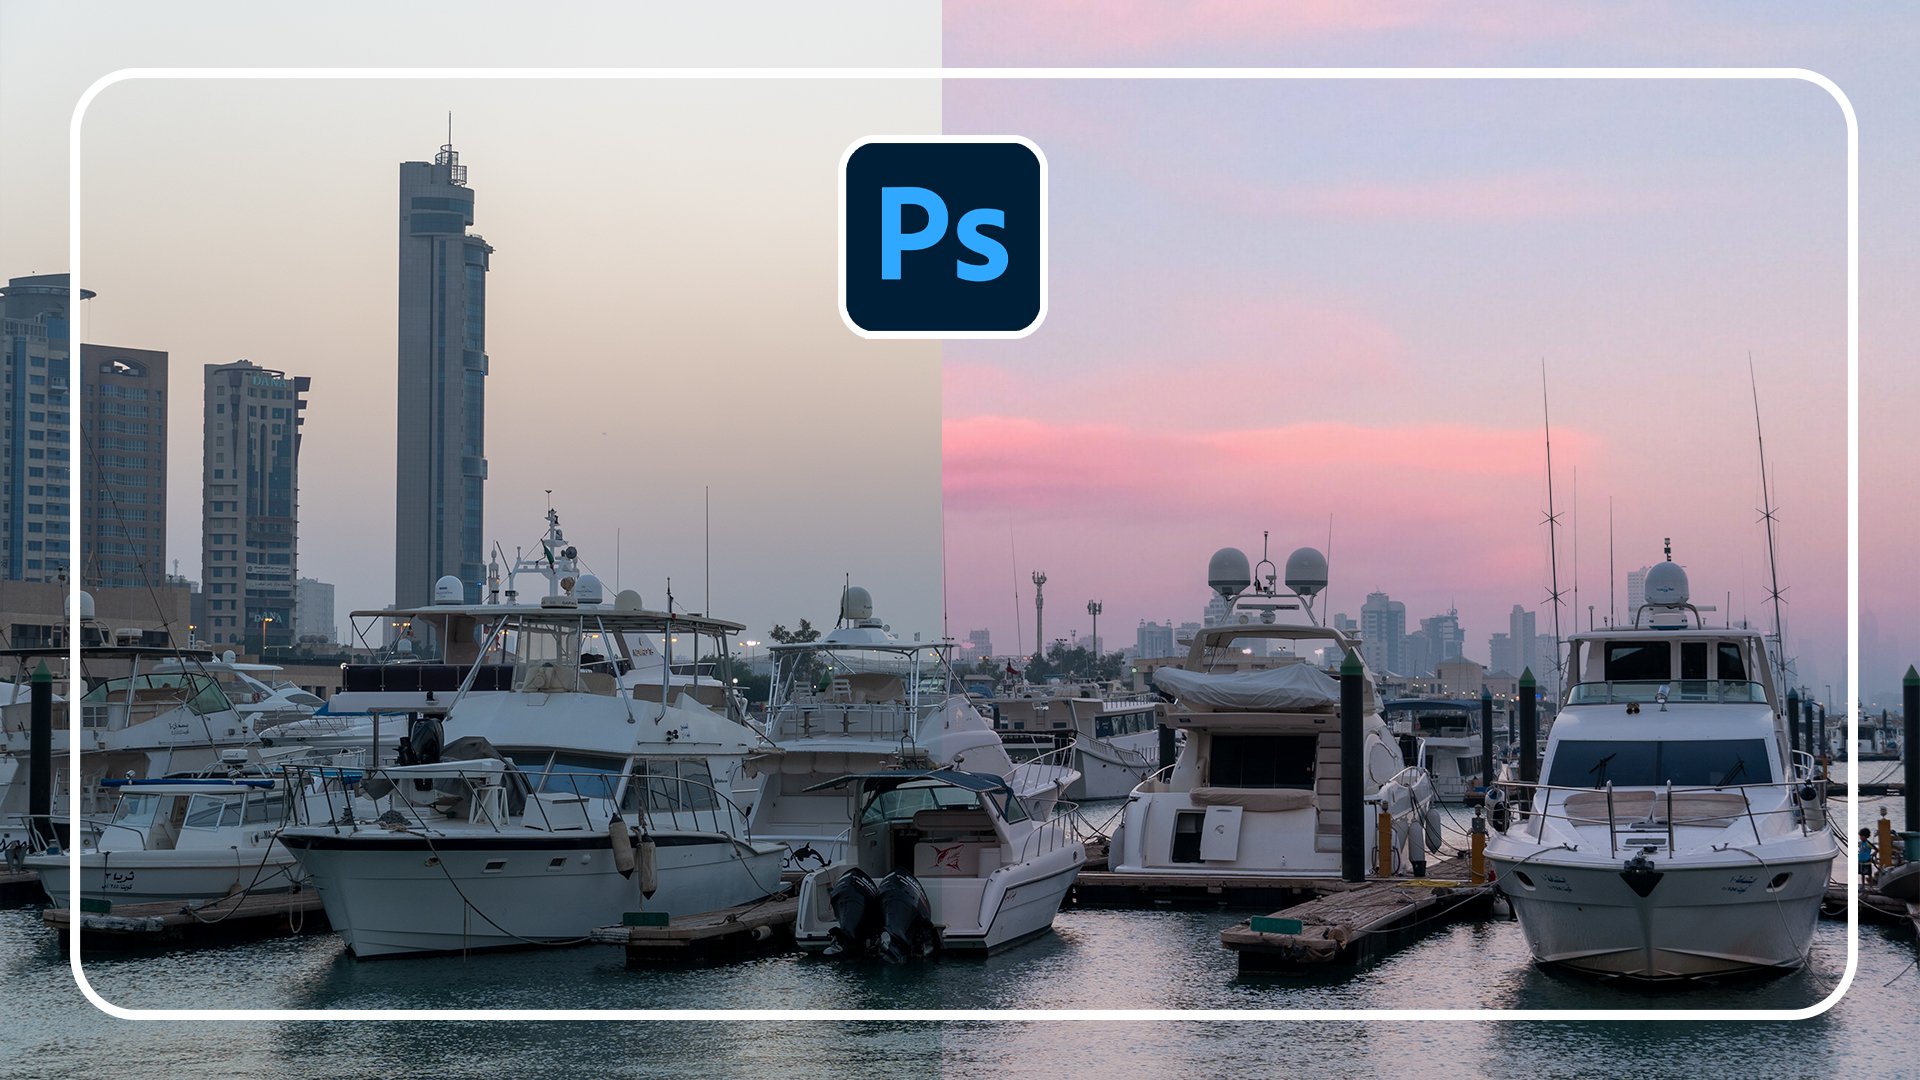
5. Method 3: And we finally come to method three, and that is my new favorite way to replace the sky and Photoshop. So let's hop right into it. Shall we? Let's go ahead and let's go to Edit. And we're gonna go to sky replacement. Again it make sure you have these images opened up. We're going to start working with the Venice. So make sure you have that opened up. And now we're actually going to talk about what all of these buttons and sliders do. Because when you have more timing, actually editing your images, you might have more time than just a one-click edit. So we're going to look at all of these and what they all mean for our image. So let's go ahead and find, first of all, an image that's going to look good with this image. So let's go and find a nice one. And it looks like it's midday. So we want an image that's going to reflect that. And I would like one that matches the color tone somewhat, but you can change the temperature of that later. So we'll be talking about that, uh, Michael with one of these cloud images and getting this one. So let's go with this image here. And now let's look at all our options here. First of all, in the top left we have these buttons here. The first button here, it just lets you move the sky around. So I can move this up and down. We have our sky there. Second, move that up a little bit, down a little bit, however I want. Next we have a refine sky brush so you can extend or reduce the sky area. So if I want to bring the sky further down, I can go ahead and do that. As you see, I'm painting the sky onto the roof of that. But let's just Control or Command Z to undo that. Because we don't really want to do that, but we might, if we want to, perhaps zoom in and like get more into the edges here, you might want to do that, but for the most part you don't really have to. But the option is that it's kind of like a Refine Edge tool, except for the sky. Next here we have the hand tool and the handle is very simple. It just lets you pan around your image. If you zoom, then it's not going to be super useful for us, but we do have our zoom tool. So let's zoom in here real quick. And let's take a look again at our brush tool. As you see there's a plus. If you hold on alter option, it's going to turn that into a minus and it's gonna paint away the sky. So let's say I want a little bit more of this to be shown. Sagging, just paint that back. You see it's painting away some of the sky on the roof of this building. And I got a little bit of that detail back. But what if I went too far? Well, I'm back to just the plus version. I took my finger off the Alt or Option key. And now I can paint that back. I might actually get rid of that spire part and just leave the statue. Next. What else do we have here? So let's do MT showing just a little bit. So we see what we're working with. Like some. Well next we have this area up here. I'm just going to close down this bottom part. It's just so we're not distracted. Next, we have our shift. So what is the shift edge going to do? You can hover over all of these and it's going to tell you exactly what it's going to do, what the Shift Edge does. It shifts the edge at where the sky is going to cut off. So let's go ahead and play with this. Let's bring that into 16. You see, it's going to bleed the sky into our image. We don't really want that Dewey, but we can also go the opposite way. And as you see, our original sky is showing through even more. So usually I keep this just at 0. I don't mess around with that one too much. But sometimes you might want it to go a little bit into your image. So I'm going to keep that just about the six. I, I kind of like that. I'll keep that. Next we have fade. So this is going to do, this is going to dictate the softness of the border of the blending of the sky into our original image. So it's, You can't really see it here, but our original sky is blending in to our previous image and we can dictate how much that edge is going to be faded. We have that by default up all the way at 100. But what if we turn that off? You see there is no fading from the original Skype. This has all been used sky everything that's been replaced by AI. Nothing is being faded and doesn't tend to look very nice, very good. You kind of want to mix the two together. So I usually keep the fade edge anywhere between 75 to a 100. But sometimes a 100 can be a little bit too much. And this image, it's not too much, but that is definitely something that you want to be mindful of. Next, let's look at the sky adjustments area here. So here you can change the brightness of the sky, the temperature of the sky, and the scale of the sky, and you can also flip it. So first of all, let's just zoom out a little bit so we see our full image. And first of all, you can change the brightness of your image. So this is like the brightness adjustment here. It's fantastic. So I can make this guy really bright, or I can make it really dark. So depending on the situation, you might want to darken or lightened the brightness of your image. For this one, I might actually bring the brightness up because this looks like it's very early in the day. Maybe just around noon, right afternoon maybe. And the sun is very harshly, Sky's gonna be pretty bright, so let's bring the brightness up like so. And for the temperature, we see there's a fairly warm tone in our image. A lot of oranges and a lot of signs, which is blue with a little bit of yellow in it. So we might want to bring the temperature of our sky More to be in line with that. Now, being mindful of the fact that little bit goes a long way, you can go all the way to the right. And as you see, that's a very yellow washed out right now, doesn't look too good. We can go all the way to the left and that's a very uncomfortably Deep Blue that doesn't really match this image. So for this one, let's go ahead and increase the temperature just a little bit. So that's matching the light coming from the sun. I tend to match the highlights on the clouds or of the highlights in the fading background to the highlights of my image here. So I'm going to add a little bit of yellow ring the temperature a little bit to the warmer side. And then we have scale. Scale is very self-explanatory. It's the scale of our sky. It's how big or how small it is. We can expand or contract that to be bigger or smaller. We have that by default at 100. But we can go ahead and bring that out. Let's go to 200. And that's made it twice as big. Now it might work out for you might want to mess around with this and see if it matches your image better. I've definitely had times when I've had to change the scale of my sky because sometimes, for example, if you have clouds that are too big, it looks a little bit unrealistic. So you might want to dial that back. And as you just saw there, I went below 100. That made the sky smaller. And it doesn't look too good if you want to crop your image and this is totally fine. You can just go ahead and crop it in where the sky isn't cutoff. But I'm just going to keep this at 100 for this image. I might actually make that a little bit bigger and let's go to about 120. That's a lot nicer and don't forget, you can move the sky around, which the Move tool. So I'm gonna move that ever so slightly. Very nice. And then we have flip the last section of our sky adjustments. And this is very simple. It will flip the sky horizontally. So what is left will be right, what is right will be left. So let's go ahead and flip that. And you see it's flipped. Sometimes you see on the clouds, son comes from a certain direction. For this one, it doesn't matter too much because coming from a more vertical point. So it doesn't matter too much, but there are some images. If you have a sunset, you want the sun to match the lighting on the clowns. So that's definitely something we want to be mindful of. Now, the last section we have in this sky replacement panel here is the foreground adjustments. So let's open that up. Now. This is what's going to happen to the foreground of our image. That doesn't mean just everything here, but that means everything that is not mass fell from the sky. So everything that is part of the original, that is considered the foreground. So these are adjustments that are made to that part of our image. So first of all, we have lighting mode, and it comes with two. You have multiply and you have screen. And that is essentially just gonna dictate the blending mode of the sky on the edge of your foreground. And depending on your image, screen might work or multiply Woolworth, I've had examples where both work. Examples where one works over the other. So for this one, I do think multiply works a lot better. So I'm going to keep that one. Next here we have a lighting adjustment. And this is essentially opacity of lighting that's applied to the foreground. What does that mean? Well, let's go ahead and turn that all the way up to 100. And as you've seen, the lighting just on the edge here has gotten a lot darker. So this is a lighting affecting the edge of the boundary between the sky. If we pull that all the way down, we see that's a brighten that up. So by default this was around 50 on my brain that ever so slightly to the left here. So we add a little bit more lightness to the edge of our image. And it kind of helps to blend the two together and that's exactly what we want to do. Next. We have color adjustment that is being applied to the foreground. So what is going to happen is the AI of the sky replacement tool is going to try and put a color adjustments to your foreground that matches the sky. So for example, let's say my sky has a pink pastel is huge and it's gonna try and attempt. To put a pink pastel tone over the foreground so you can adjust how much of that is happening. If you want it to be very much applied, then you can adjust that. If you don't want any color adjustment and you wanna do it yourself, you can turn that off completely. So let's go ahead and turn that all the way up so we see what happens. And as you seat, not much is happening in this particular image. Let's turn that all the way down. And as you see in this particular image, there is not much of a difference at all. There might be a little bit of difference around the edges. But for the most part, the color adjustment that doesn't have an effect on this particular image. We will go over a few examples where it does have an effect, but it's definitely something to keep in mind and it's a fantastic tool. It's really helpful. And we have this output section. You have a few different options here. You can output to a new layer or a duplicate layer, especially if you're working with just an image like this. If you have a raw image, you might have a few more options. Well, let's go ahead and output this twin new layer because we want to work non-destructively. That's the most important thing for me especially. And what I always recommend you to do when you're editing any image is to do it non-destructively because you can always come back to the original. So let's go ahead and hit okay on this one. And everything we just did in that panel is over here. We have the sky brightness and the sky temperature. We have the sky itself, the foreground lighting and the foreground color. And you can go ahead and turn all of these on and off. I can turn this guy off entirely. I can turn the temperature on and off and the brightness. So if I decide I don't like the sky brightness too much, I can turn that off. If I decide I want that to be less, I can turn the opacity down. And not only that, I can just double-click this and it brings up the properties of the adjustment layer here. And I can turn that down a little bit n, I'm good. And not only that as we saw in the previous method, having these masks allows you to edit the mask. So for example, for the sky, I can have my brush share with a low capacity and I can paint them black and paint in more of my original background. Or contrary to that, I can paint with white and paint this new Sky back in. So I went a little bit too far here, so I'm going to undo that a little bit. But you can really have a lot of customizability with your images and it makes it so simple to change the sky of an image. Let's look at the before and after of this one we went from this. It's a fairly boring sky. You wouldn't really think too much of it. You're just looking at these buildings here, maybe this boat, but now with this new sky, it brings new life to the image. It brightens it up, cheers it up. And that's essentially the goal that you want to do because you don't have control over the weather, over nature. So depending what the weather is like, what disguise like in your image gabled to actually change it to exactly what you want. Now what if you have a Sky image that you already have that you want to apply to another image, one of your own or another one that you get. You already have the Sky image. How can we use that using the same method? Well, let me show you. Let's hop over to our next image. So make sure you open up this image. It's called Island buildings. And we're gonna do essentially the same thing with a few different tweaks. So we're gonna go to edit. We're going to go to sky replacement. But this time we're gonna do something a little bit different. We don't want to use any of the default skies. We have our own. So if you haven't already, make sure you download the sky pack, which is just a pack of different skies that I found, which are completely free to use, free for you to have in use and practice with. So how do we import and use our own skies? So you're gonna do is click this arrow here, and then we're going to click the plus icon at the bottom. As you see every editor Skype before. So unless included here. But all you do is you click on one of the skies, make sure you've downloaded the Skype act. You click one of these guys, and then you click open. And it's going to add it down here. You can rename it. I'll keep it named and what it is. And I'm gonna go ahead really quickly and add in all of these guys. So I'm gonna cut back in just a second once I've added all of these. And there we go. I have all eight of the skies from the sky pack imported, but these aren't in any particular group. It's going to be a little bit difficult trying to scroll down through all of these. So let's select all of these skies. You're going to right-click and we're just going to do a new sky group. And let's just call it Skype hack. And now they're in a folder seeking collapse that, open that up, look at other ones. And now let's go ahead and find a sky that's going to work with this image. It's a very contrasts the, this, my image is not going to work. But let's see another one that might, this one looks promising. This one is very contrasty and it actually matches fairly well. So let's go ahead and use of this Skype from our Skype x. So this is very simple way that you can use an image that you already have, that you've taken or that you've downloaded and put that into your own image. So let's go ahead and let's accept that. Now for the Shift Edge, I might want to shift the edge a little bit. Might even want to move this up just a little bit. Like so. And as we see, the light is coming from the right in this image. So if we're looking at the clouds, we want to make sure that it's coming from the right side of our image and it looks like it is. So that is fantastic. Now it lets go ahead and let's do some of these adjustments that we just learned about. So I might go ahead and shift the edge. And you ship the edge. And maybe in the negative just by about ten. Just a little bit half the blending Be a little more subtle. And for the fade edge, I'm gonna keep that a 100. I wanted it to be very faded for this particular image. Now when it comes to the brightness, I might actually want to bring the brightness down or once because it looks like it's getting near a sunset time. So let's go ahead and bring the brightness down. Not too much, maybe just again, just by ten. And that's all we really need. And for the temperature, I might want to cool it down because our original image is a very cool toned image. So let's go ahead and let's bring that down. Again. Minus ten seems to be the Golden Number for this particular Skype. And for the scale. Let's bring that up. Let's keep the ten theme going and let's go to a 110 showing and they're gone. And I'm just gonna move this ever so slightly around to hide some of these clouds that are in the distance. I just wanna make sure they're slightly hidden. Very nice. And I want to flip this. I'm not going to flip this particular image. Now let's go to the foreground elements. This is going to be really important. Let me make sure this stays at 110. Now, let's do multiply or screen. And this particular image screen might actually work, but I'm gonna keep multiply for now. I don't want to lose the crisp edge that I have on our building here. As to the lining adjustment, let's go ahead and bring that down. Actually, let's go to 101 to have a little bit brighter of an edge here, focusing on blending the horizon line with our sky here. And for the color adjustment, Let's go all the way up. In this image, you can really see what color adjustment does. You see. It's pulling some of this red, this deep red, magenta orange color from the sky and applying it to our foreground here. Now this is way too much, but you can really see the effect of that. If I don't want any of that, I can turn that off completely and I have my original image. But I do want a little bit of that. So let's go to about let's go 45. That looks like a really good spot for that. And again, we're going to output this to new layer. So let's go ahead and click OK on that. And the one other thing that I'm going to do, which I wish was part of the sky replacement tool. I'm going to slightly the saturate my sky. So let's just click the saturation, clip it down to the folder of everything else in here. And we're going to bring the saturation down ever so slightly. So minus ten. Just to get a little bit of the edge off with when it comes to the saturation of the reds in this image. And look at that. We've entirely changed the sky in this image using one of our own images that we've imported. So let's look at the before and after we've even changed the time of day quite significantly. In fact, this looks like late afternoon. We can see the Sun is very much at an angle and see because of the sharp shadows. And we've turned that into a more of a sunset type of vibe. And this has a lot more interest to it in my opinion. And again, you can go ahead tweak everything as much as you'd like. You can double-click, For example, the saturation. If I want to bring that down even more, I can. And some very, very customizable like I've said before. Now let's hop over to our last image here called fancy building. What if we want to entirely changed the time of day? This is sunset in this image. But what if I want to make it nighttime, entirely nighttime and one at night sky in here. I don't want to go ahead and mascot all these little windows here and everything. I want to make it nighttime. So let's go ahead and do that. I'm gonna go to Edit, gonna go to sky replacement. And we're going to use one of the night images that comes with the sky pack, so make sure you have that. And again, the same sky we just used is doing a really good job in this image. Surprisingly. So let's go down and let's look at one of our nighttime images. And we here we can really see the feathering and just how good of an orbit of a job it does. And we're actually going to use the add and subtract sky feature to paint out part of our windows here. So let's find a nice nighttime sky. And let's see if we can actually color match this to look somewhat decent. I'm feeling more of this image down here, this last night sky I like the feta has from the bottom. So we're gonna go with that. Now, right off the bat, this does not look good, does it? Let's play around with these sliders and fix showing. First of all, I want to zoom in and I really want to get in what the details and paint away these windows here. I want to actually paint in the sky here. So let's go ahead and want to make sure our opacity is a 100%. And as you see, we're starting to paint in the part of our sky. And you don't want to make sure that your brushes in normal mode, otherwise that might not paint some of this away. So you can go ahead and you can still get some very unique edges to your images. Some very fine tunes, rushes, and you can go ahead and change different parts of your brush right up here, if you'd like. Might actually go ahead, go to general. And let's use one of the soft brushes that have a little bit of pressure to it. And we're gonna change the hardness to about 74%. And again, this goes really well. If you have a drawing tablet, it can get really into all the details, which is exactly what I'm doing right now. Let's go ahead and do this. Very nice. Luckily, it was not too much that needs to be masked out. And there we go. And we're going to fix like the halo that's going around the edge of our image in just a second. For now, we're just focusing on these little windows and arches that are in our image just to make sure those are Moscow as best as possible. And you can definitely take your time of this, get really zoomed in and get every pixel of the original sky removed. But sometimes being a little bit messier and what you're doing gets you more realistic looking edges. Not all the time, just sometimes. And i'll don't learn. Just they're very nice. And I believe this is going to be our last archway here, last Mundell, to replace the style. So let's do that real quick. Go. So let's go back to our zoom tool and zoom out. And yeah, it looks like we got all of the important parts here. But now we're still not done, ROE, let's try and make this look a lot better. So first of all, let's move our sky. I wanna get it as high as possible. And very nice. And now let's go ahead and do our shift edge. We want to bring that into the point that it doesn't go into our building, but goals and hugs the edge you very nicely. Somewhere around 0 is going to work well enough for this image. So let's go with one for this and asks for the fade edge. You see we can really pull that edge in as well with this. So I'm gonna go and it'll fairly low for this particular image. Let's go with 27. Fairly random number, but I'm trying to keep the weightage fairly low. And that's when the brightness, we're gonna bring the brightness. Let's run the brightness and down ever so slightly, and they'll go minus 20 and the temperature. Let's go ahead and bring the temperature down because nighttime is cool. So let's cool down our Skype even more and ask, we can make it a little bit bigger. And now we really want to deal with the foreground. So lighting mode, let's do screen really doesn't work well for this, as you can see, selects you multiply lighting adjustment. We want the lining adjustment to be fairly full-blown here actually. And that's from the color adjustment. We want that to be all the way 100. Just a color adjustment itself has done a lot for this image. And as you see, that's done quite a lot already and it's not perfect. And we're gonna do a few more little tweaks to this to make it look even better. So let's go ahead and let's hit okay, on this. Very nice. And now if I do want to adjust just the foreground here, I can. So I can go ahead and just duplicate the background. We have the original. But now let's say I want to adjust stuff just in the foreground here. That's very simple. I'm gonna go ahead and hit Control or Command and g just to make a group for the foreground. And I'm just going to name that F, G for Foreground. And let's go ahead. Let's just adjust the foreground. So I'm going to bring the brightness of the foreground down. So this is nighttime. And we're going to be saturated at nighttime because very little saturation that exists and what doesn't exist, I'm actually going to shift the tone to be more cooler. One to match the night sky as much as possible. And then we can bring lightness up a little bit, just a little bit saturation down even more. And just with that, we've kind of color matched the sky to our building. So now if we want to get the exact blue that's in the sky onto our image here. It's a very simple. Let's create a new layer. Let's use GR keyboards. So we have our paint bucket tool and we're going to sample one of the midtone Blues of our image. I'm going to fill that in. And then we're just gonna create a blending mode of overlay or soft light. Only one of these to work really well. I'm gonna choose soft light for this and bringing opacity all the way down. Let's do 32%. And as you seen that changes it from this almost Greeny, kind of bluesy little green in there too, that deep rich blue of the sky. And now you can really come in with another layer. And let's go ahead and find a color that's going to be my simulated moon color. And now if I paint, it's going to go on the edge of my image as kind of like a rim light. So let's go ahead and make the brush smaller with our brackets tool left and right brackets. And you can go ahead, paint that in. And if you wanted to, you can bring in a moon to your image. And you have a really good blending. And as you see what we did here, it looks fairly good with the masking out that we did. So let's go ahead and finish this image of with a nice little moonlight coming in from the left of our image. And again, as you see, I'm keeping in line with where the lighting is coming from, some original image, it's coming from the left. So I'm gonna make sure I carry that through. Very nice. And you can go on a layer above everything if you would like, and still do other adjustments. So if we go into our gradient tool here, I'm going to switch to the one, the second one out of these options here. And this is going to use our foreground color and go to transparent. So what I'm going to do is I'm going to sample the darkest color in my image. I'm gonna hold down shift to have a straight line. And I'm going to bring the capacity of that down. Going out a little bit of a vignette to our image. And I'm going to add another one for the top. I'm going to sample the darkest blue of our sky. Now I'm gonna go a little bit darker. And I'm not going to hold on shifted this time. So I want a more unique angle, something like this. And again, it doesn't look that good. Does a certain change the Blending Mode? I'm gonna go soft light and they'll pass. It is going to be just about, Let's go 16%. Such just a little bit of a vignette in the top. And if you'd like, you can bring in a radial vignette for where the moon might be. So how would we do that? We would go up here still on the gradient tool. We would choose this one here, it's a radial gradients. And what does this do? So for example, let's choose our moon color here are moon Highlight Color. And if you hold down, you're gonna hold down shift to get a straight line. But if you draw a line, it's gonna be a radial gradients. So let's hit Control Command Z to undo that. And I'm just going to have a slight one coming in from the left. So I can have this and just change the size of it. Have a becoming off the side here. You can toggle it on and off. And you see there's a little bit of a harsh edge there. So you can just go ahead and play around with that, get an eraser or the soft edge and just blend that in nicely. So you can really go ahead and get very customizable. And like having this and having this sky replacement tool is really good to have in your arsenal because I have had personally a project before in the past multilaterally. But one particularly comes to mind where the client wanted me to make an image be full-blown daytime into full-blown nighttime. And this is a fairly convincing edit here. You know, you can really get really good results with this. I can go ahead and add a moon coming in from the side here. You can find one on one of the websites I showed you. You can go ahead and it's going to brush. You can have a movie off on the sidebar for example. And you can get a really cool result. And there you have the last of the three methods of how to change the sky really easily and really effectively in Adobe Photoshop CC 2021, using artificial intelligence to replace the sky is a total game changer and it can save you so much time as we saw in method one, having to go around with a pencil, for example. For all of these edges here would have taken me at least an hour, half an hour to an hour to mass all of this out with a pen or with a good selection tool. It would have taken a long time. And this took me just a few minutes to go from start to finish. And that is why is fantastic that Adobe has added artificial intelligence guy replacement tool. Next, I'm going to really quickly show you how you can export your final finished the sky replaced, edit very quickly and very easily. Plus hop over and do that really quickly.
6. Exporting your photo: Alright, so I have hopped back to this image of the island building that we did just in the last video. I wanted to really quickly show you how you can explore in saver images in the best quality and best way possible. Because there are different places that you might want to say for image for, and different ways to do so. So first of all, you want to make sure that you're always, always saving your edits as a Photoshop file that we can always come back and do different tweaks, different edits, and get new versions of your edit. So that's very simple. You just do File Save As, and it's by default going to be Photoshop PSD file. And I'm just gonna call this, let's call this sunset sky placement. And I usually title what the file name is in the file name. So for example, I'll do sunset Skype replacement, PSD because just at a glance, I can see what it is. And then you just hit Enter. Hit OK, and they go, it's saved as a Photoshop file. What you're not going to go and post your Photoshop file onto Instagram or onto your website? Not at all. So how do I want to save for Instagram? For example? Personally, I always save as a PNG for my Instagram. So how do we do that? It's very simple. Let's go to File Save As. And in this drop down here, we have P and G. It is that simple. And I'm just gonna change the name of this to P and G nine all about this sunset sky replacement is a PNG version. So let's click save and you're going to have this dialog box come up. And I usually just save it as a large file size. So let's hit OK. Now we've got and you want to make sure, for example, if you're posting to Instagram, you want to make sure you have your image sharpened and edit it exactly the way you want, right? As you export, you don't want to use a sharpening tool in different filters that exist in Instagram. You can if you want, but it's not ideal when you're trying to push your own photography in this way. But what if you want to put your image into your website? I have my website. I'm sure you might have yours. Now when it comes to your website, you don't want images to be really large file sizes. If you have a website with a portfolio of, let's say, a 100 images, a 100 photos you've taken. And if each image is just ten megabytes, that's 311000 megabytes as one gigabytes of images that one needs to be hosted on your website via your website provider, whether it's Squarespace, Wix, whoever you're using. But not only that, it has to load one gigabytes worth of images. So if you're sending your portfolio to a client, it's going to take forever for those images to load and might not even load depending on their internet. So what do we do? This? We want to save this for Web. We want to save this as a small file size JPEG, which still keeps all of the resolution in detail in our image. You don't want to just do file save as a JPEG because those files can still be large. I've saved jpegs which are up to 20 to 40 megabytes large. And as you see, this image is a 55 inch image by over 65 inches, almost 70 inches. This is a massive image. You see this as a JPEG. It's going to be our huge file size. So what do we do? What we gotta file, we go to export and we're going to do save for web legacy. This is a specific function built into Photoshop that lets you save your images for the web. And let's go ahead and save this not as a gift, but as a JPEG. So you need to make sure you have that selected. And already we're down to two megabytes at it being a 100%. And you can go ahead and zoom out. We're not losing any of the quality in this. You can zoom in as much as you want. And we still have all the detail. Well, let's go ahead and make this just 50%. So I'll just hit enter on that. And already we're down to under one megabyte. That's a huge change that that's like a quarter of the size that we were just at. So at 726 kilobytes, I personally tend to keep my images around 500 kilobytes. Sometimes It's a little higher button, no more than one megabyte. So this is actually perfect file size. And as you can see, this isn't going to lose that much quality. It does look a little pixelated here, but on a website it's not going to look bad at all. So let's go ahead and just click Save. Where you're saving all your images. You're going to save this as not a PST, but I'm gonna do JPEG, JPEG. And I might even add for web in case I have two versions of the jpegs. And let's go ahead and let's hit save. And that is saved. But now one more way to save our image. What if you want to print this out? Let's say there's a really good print shop and they'll do prince for you want to print this out on a huge canvas or a huge poster. If it's your own images and able to sell them, you might want to print out large prints of these to go sell at a fair or somewhere. How are we going to do this? You'll probably end up going to a print shop. But you can't go to a print shop with a 700 kilobyte JPEG. They'll laugh at your face. They won't even print your image. What you're going to want to do is save as a TIF file. Tiffs. Tif files are the most common files used when it comes to printing images, and they're also one of the largest file sizes. So let's go ahead and save this image as a TIF file. So let's go to file. We're gonna go to Save As. And in our dropdown here, we're gonna go select TIF. It's all the way at the bottom. And let's just call this T F, F. And you're gonna hit save. And you're not going to want to do any compression. You're going to want to save all the layers. As you say. As you see this pop-up is going to come, is going to say including layers increase file size. You want to keep the layers because sometimes if you send to a print shop, they might need to tweak something in your image. So you want to make sure you give them that option with including all the layer. So let's just click OK. And I'm going to tell you just how big this tip file is. The tiff image I just saved is 155 megabytes. That's a massive file size. That's not one you're going to want to put onto your website because that's gonna take forever to load to sub one image. But this is a perfect fall type for printing. And they go, that is a few ways that you can save and export your images quickly and easily for whatever situation you want. In the next video, I'm going to give you your assignment.
7. Assignment: And we've gotten to the assignment for this course. For assignment is going to be fairly easy and fairly simple. But I really want you to do it. I want you to find an image, either one that you've taken or one from the website that I showed you in video number two and bring it into Photoshop and replace the sky. I would like you to replace it using one of the skies provided in the sky Pat. And I want you to go ahead and do what we did in method3. Pick out one of the skies and then tweak all of these sliders here to give you a nice Skype. So take your time with it. Don't rush. And just play around with all the different edges and different things that you can do. So you get a really cool edit because I want to see what you can do and what I wanna see that you've actually learned something. And I want to make sure that you can really apply this to your own work going forward, because that's what's the most important to me. And once you have done that, I want you to export it. And one of the ways that I showed you in the previous video, preferably as a JPEG or PNG that will work the best on here. And then just upload that. Let me see what you can do. Replace a sky and show me what you've got to have fun with this, be creative. In the next video, I'm going to go over some final thoughts.
8. Final Thoughts: And there you haven't, you've made it through my course, Adobe Photoshop CC 2021, how to replace the sky in any image in Photoshop. I hope that you've learned a lot today. I certainly had fun teaching you. I hope they learn you features, tips and tricks that you can apply to your own edits. I highly encourage you to create your own sky replacement edit using what I taught and dropped it down to the students submitted project section. Make sure you watched the last video where I go over your assignment in full detail. I'd looked to see what you've created with these features. I would like to mention that I'm selling Lightroom presets right now for a special introductory price over on my website. So head over to www dot the real-time kind.com forward slash presets to get your presets today. These are perfect to use in Lightroom to apply cool styles to your photography or edits that you do. These are perfect for the final color grading part or retouching of any edit that you make, including sky replacement edits. That's right. You can just throw your photo into Lightroom and apply one of my many presets to give it that final high-quality color graded look. If you've enjoyed this course, I encourage you to leave a review and rating as that helps me out a lot and feel free to check out my teacher page to see other Lightroom and Photoshop courses that I've made, ranging from beginner courses all the way to mastery level courses. And it's been a pleasure teaching you today and I hope to see you again in a future course. Take it easy.
 Tom Kai, Senior Graphic Designer & Art Director